For higher-ticket treatments, procedure packages, and memberships, patients often want to pay over time rather than all at once. Aesthetix CRM lets you split an invoice into a structured payment plan, collect a deposit upfront with partial payments, and even auto-charge each installment. This guide covers building installment schedules, collecting deposits, automating payments, and editing schedules after a patient has partially paid.
Tip: Aesthetix CRM offers AX Pay, our own payment processing with rates better than Stripe. For installment plans and auto-charged payments, we recommend AX Pay for the best rates. See AX Pay Overview and Setup Guide. Existing Stripe, Authorize.net, or NMI setups continue to work.
Aesthetix CRM gives you two related ways to break up an invoice:
Payment plans (installment schedules): You, the practice, define fixed installments (by percentage or amount), each with its own due date. The invoice is fully paid once all installments are paid. This is ideal for splitting a large treatment package into predictable monthly payments.
Partial payments (deposits): You set a minimum percentage, and the patient chooses how much to pay (at or above that minimum). This is ideal for collecting a deposit to reserve a procedure or reduce no-shows, with the balance collected later.
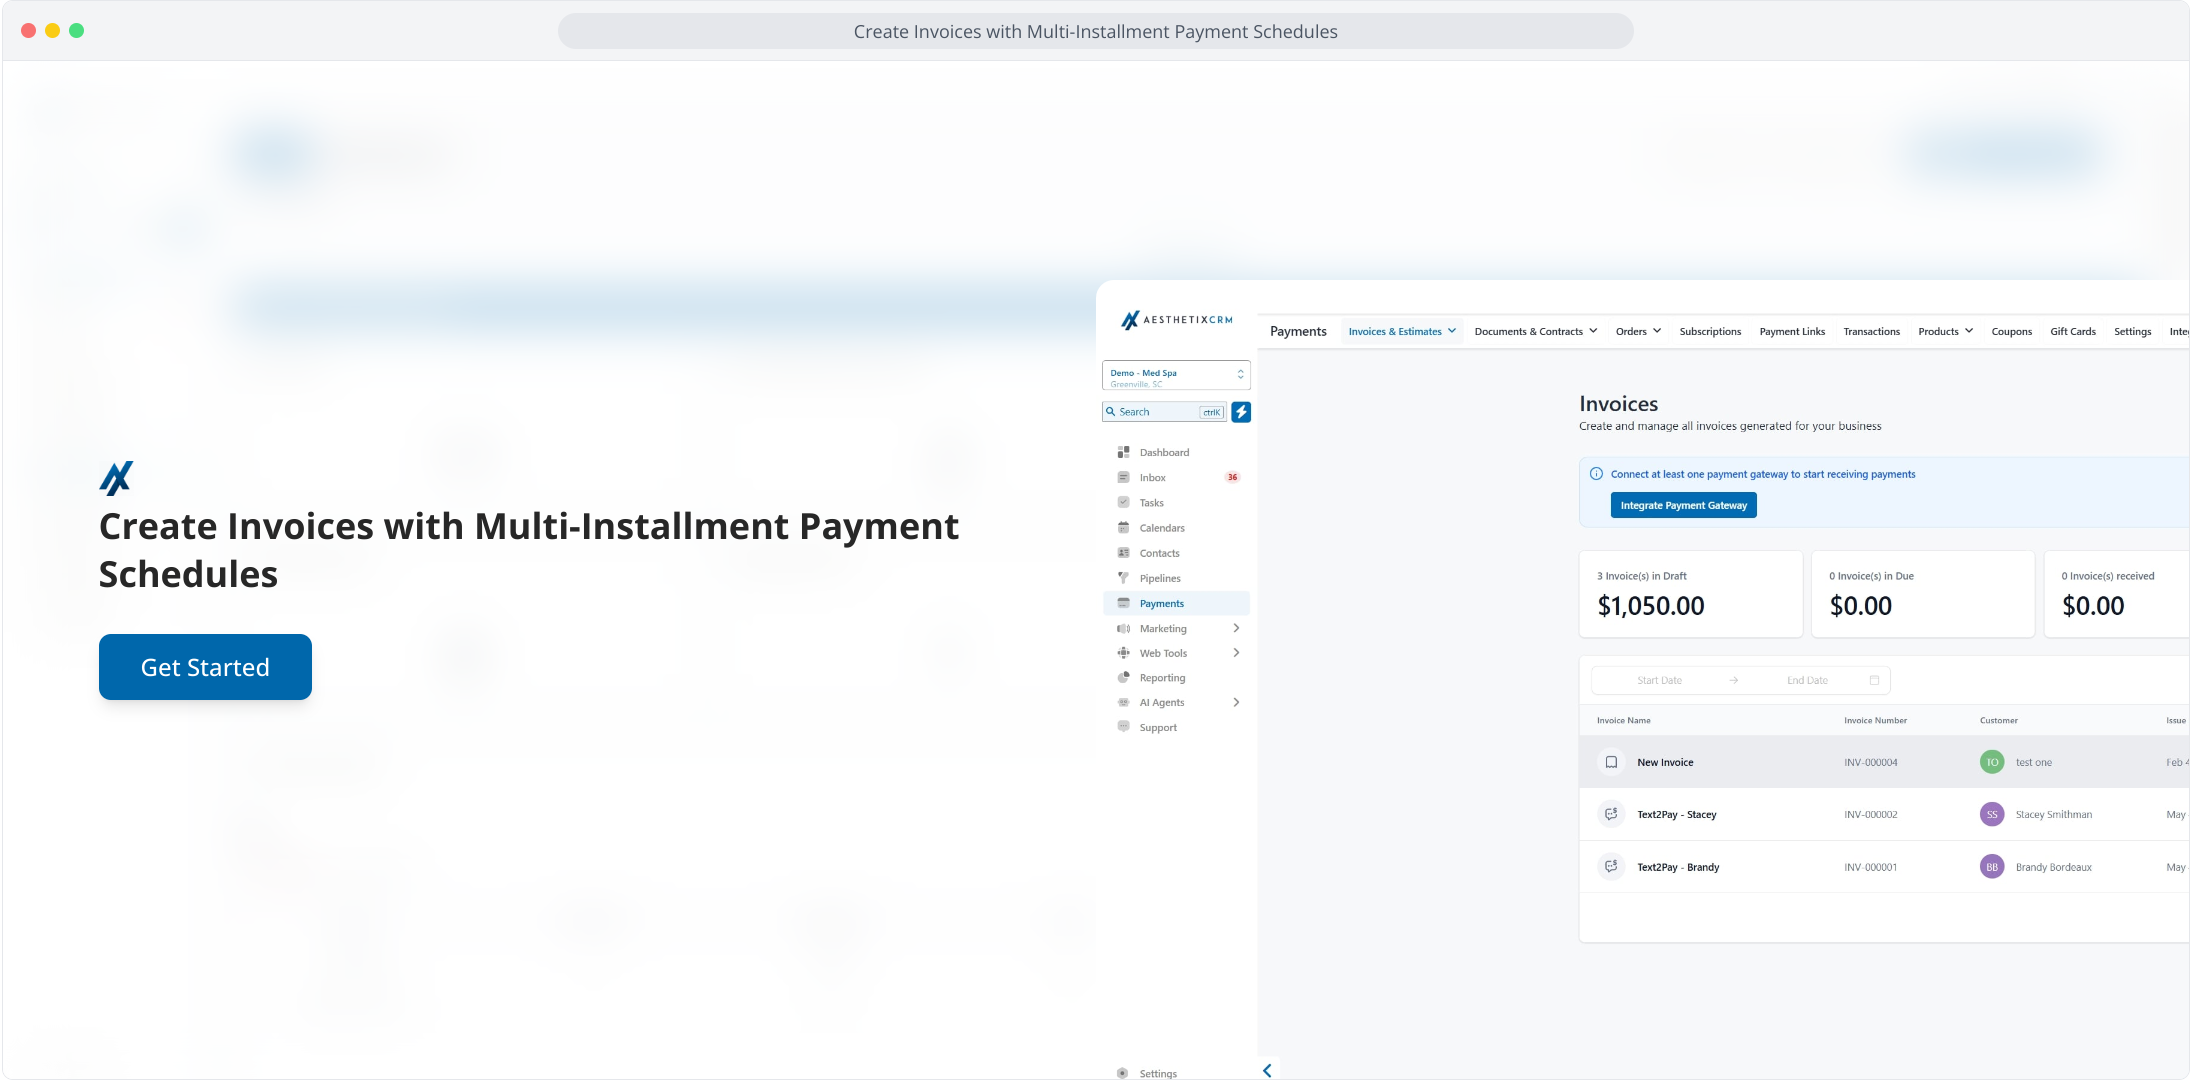
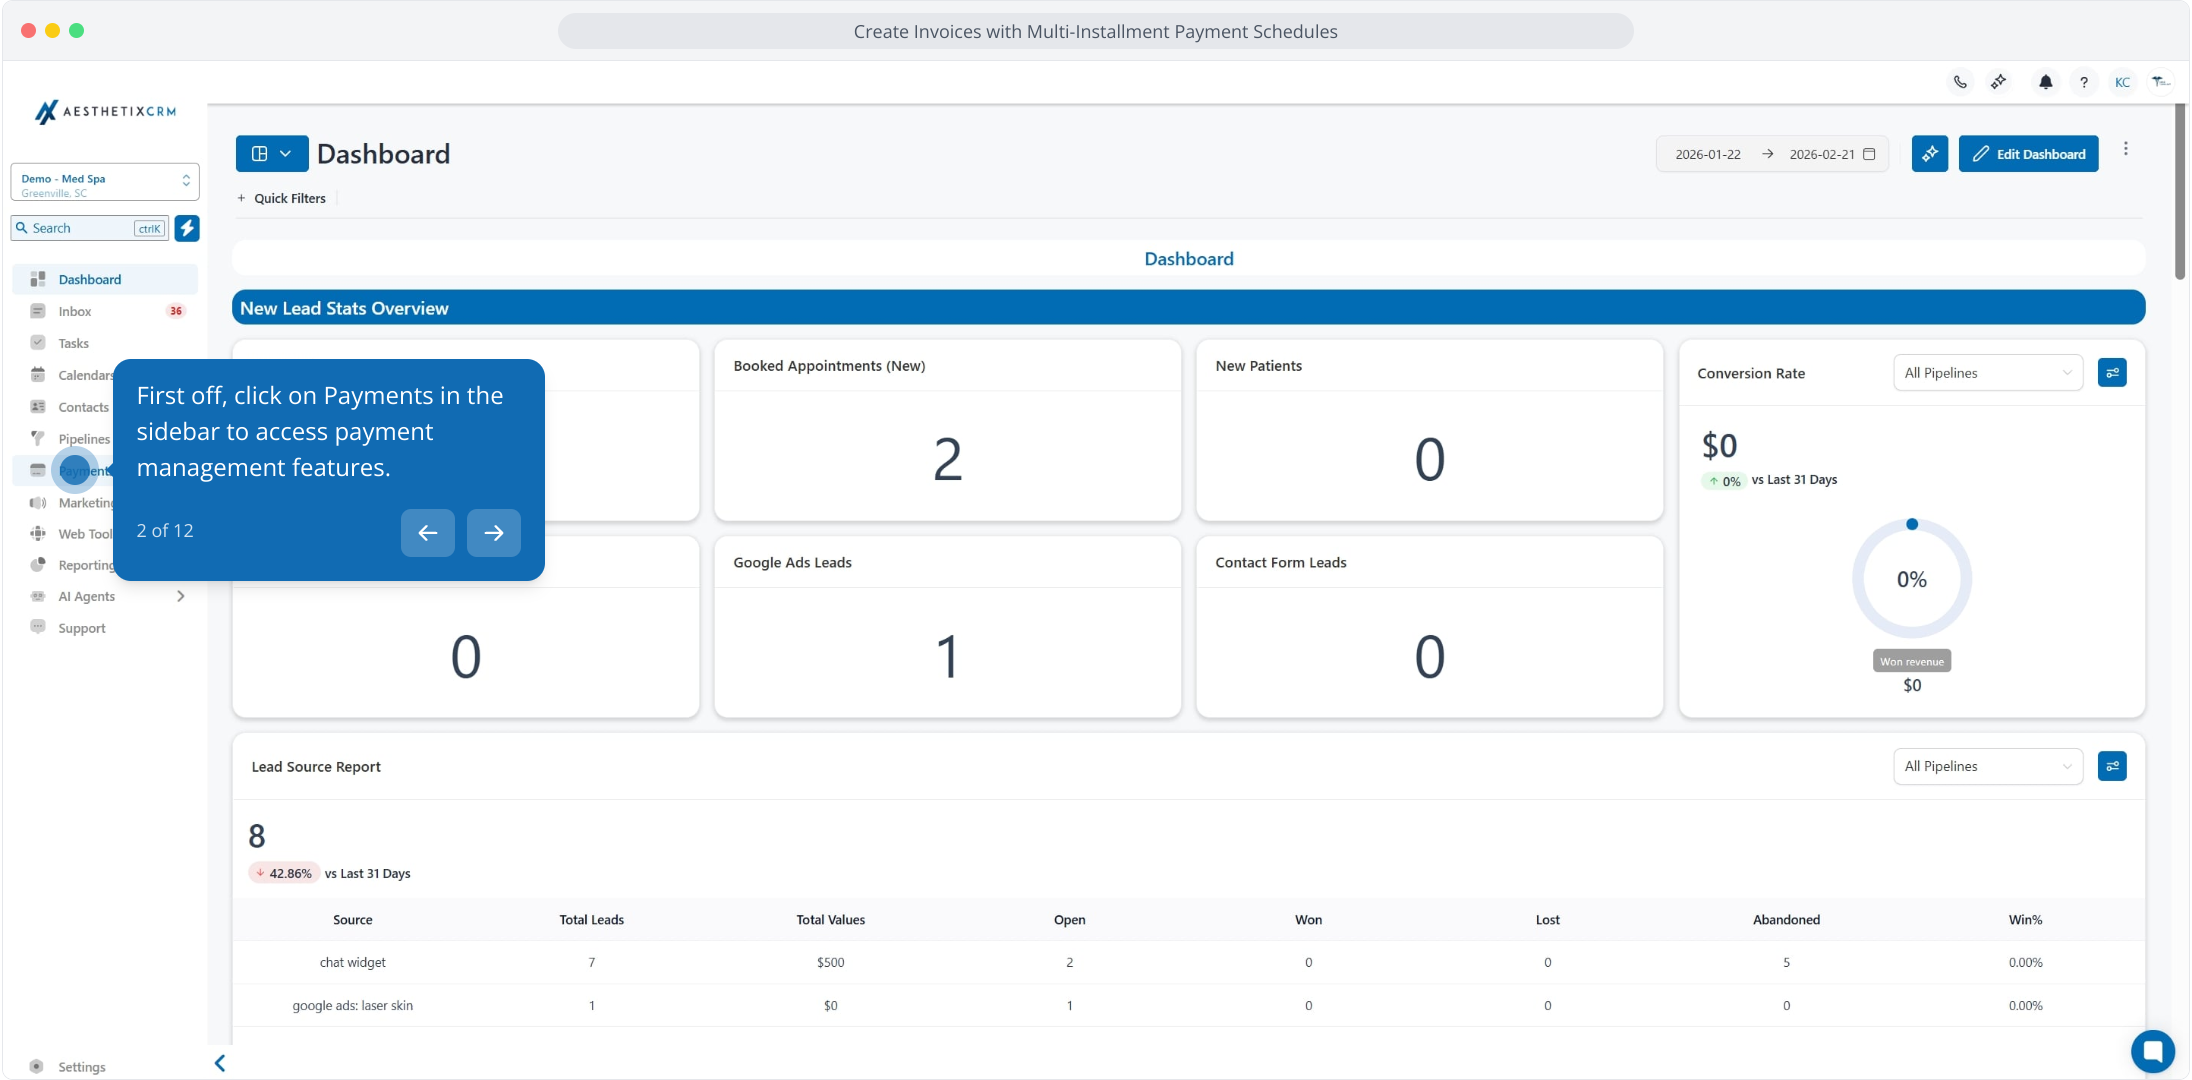
Click on Payments in the sidebar to access payment management features.
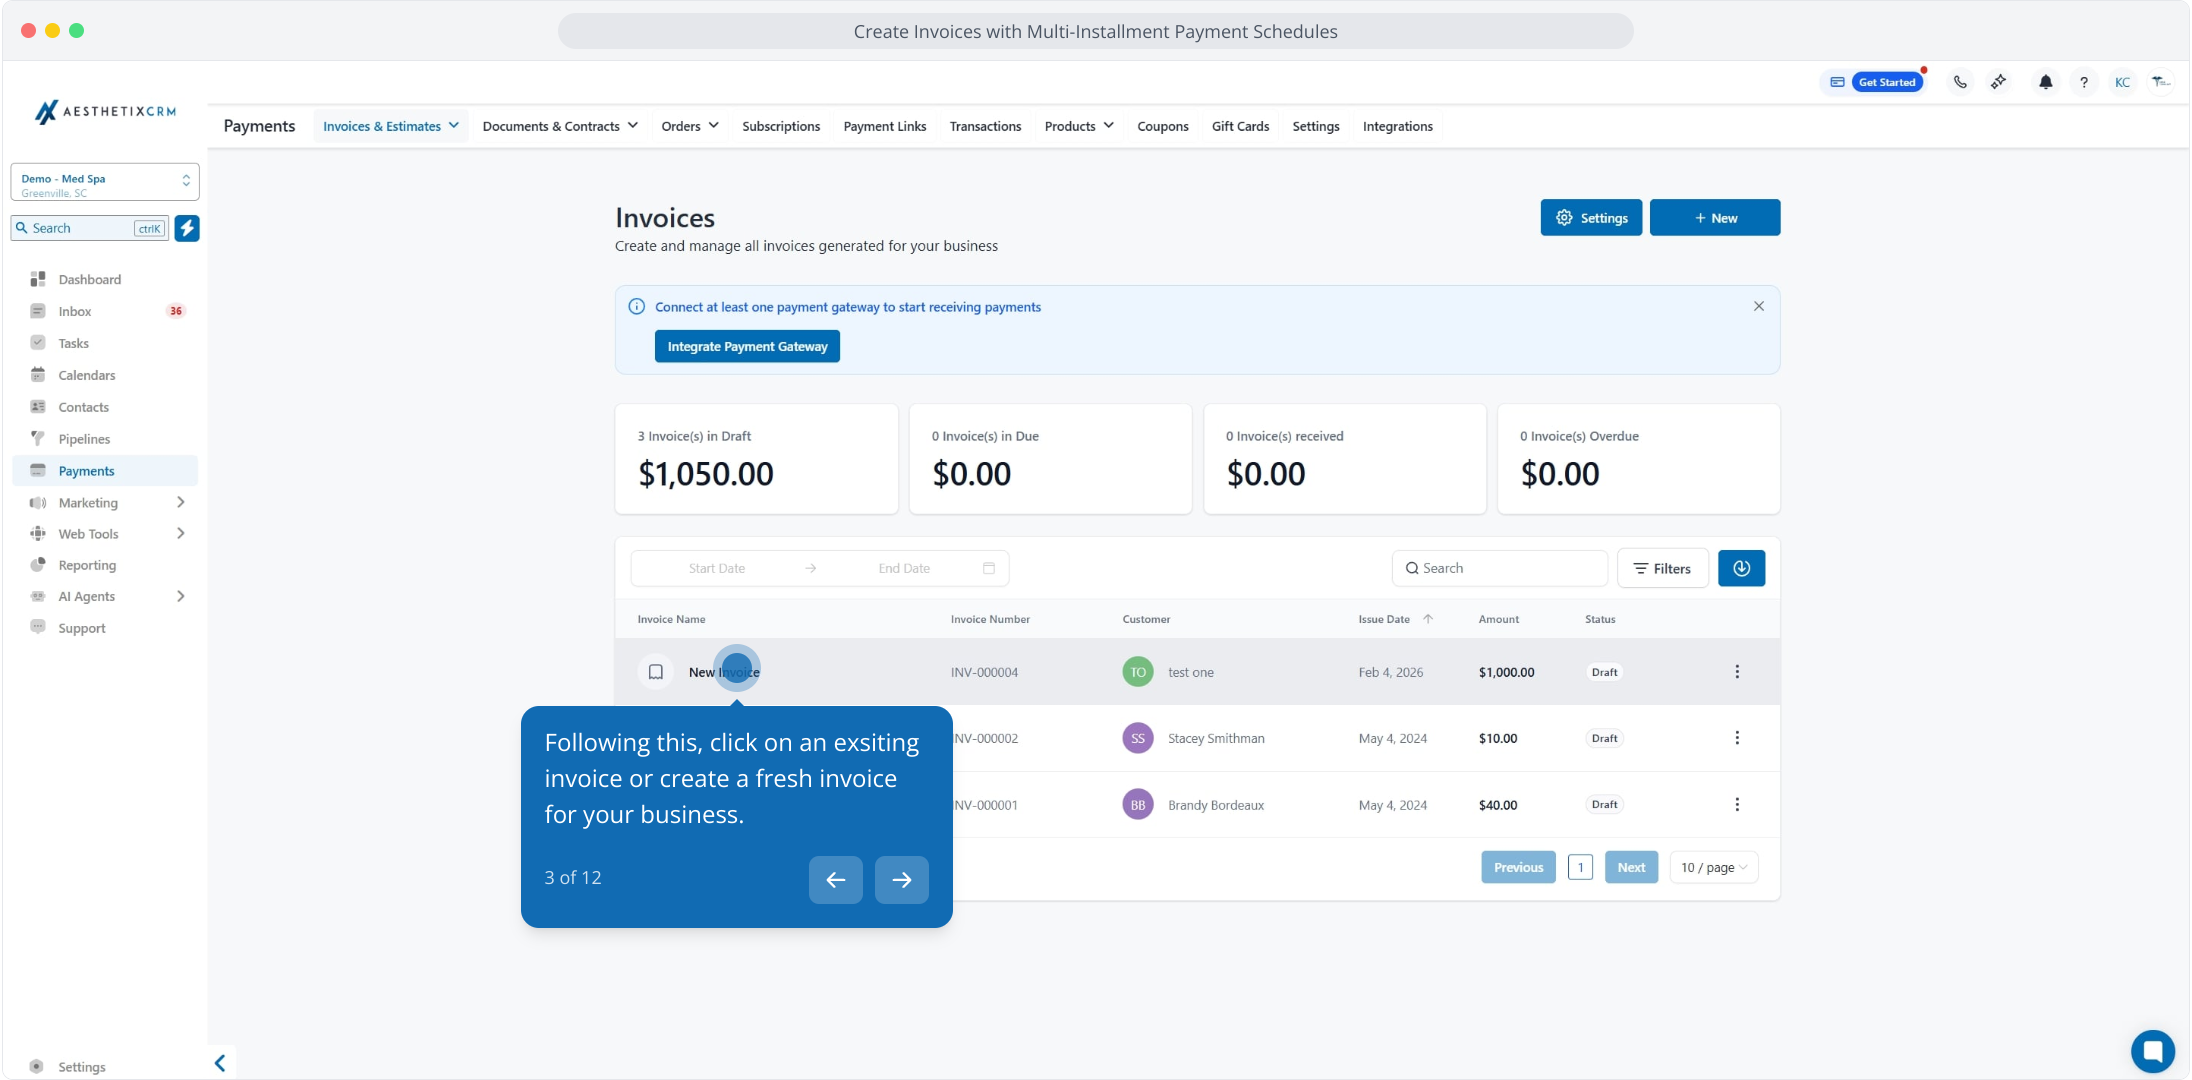
Click on an existing invoice or create a new invoice.
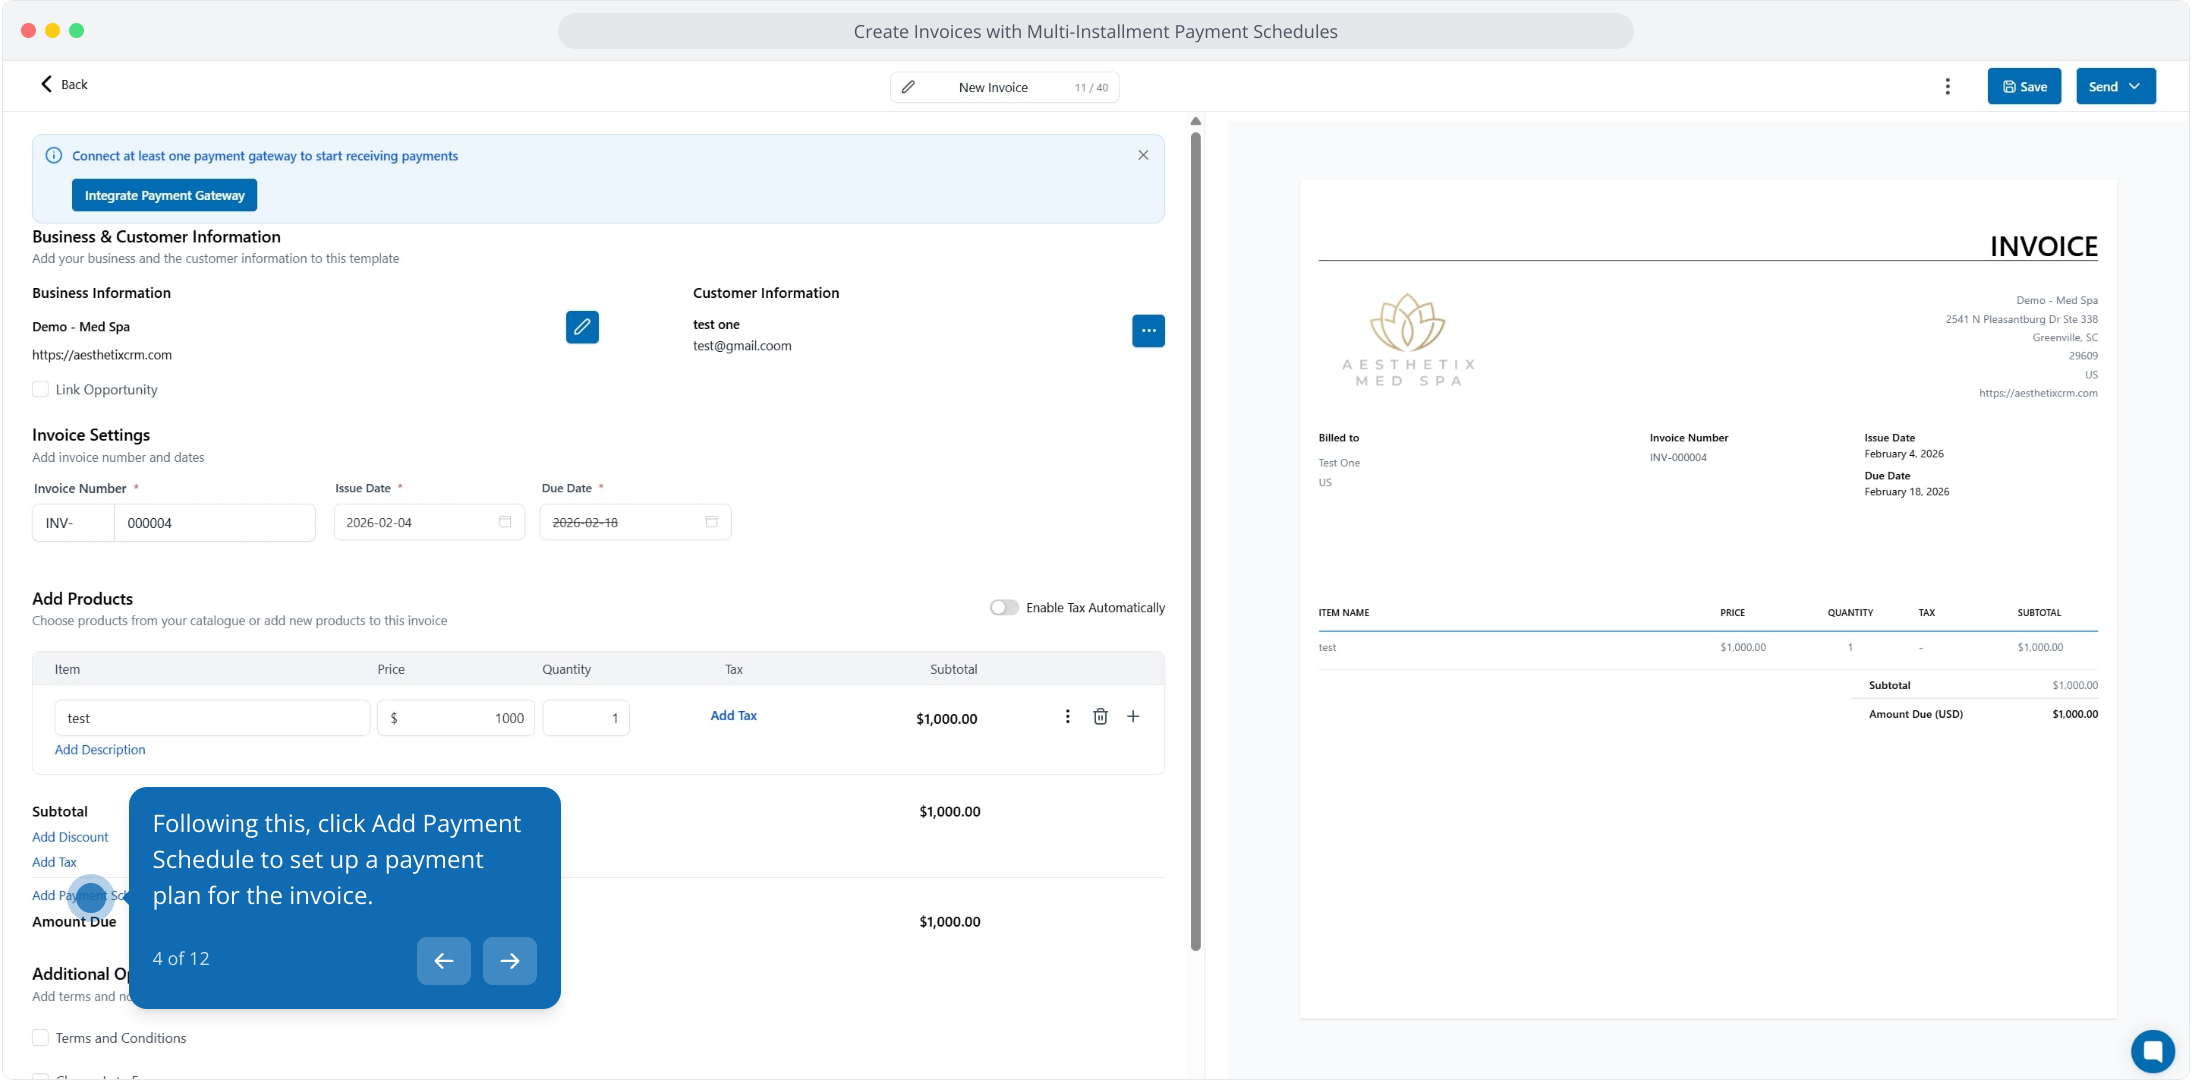
Click Add Payment Schedule to set up a payment plan for the invoice.
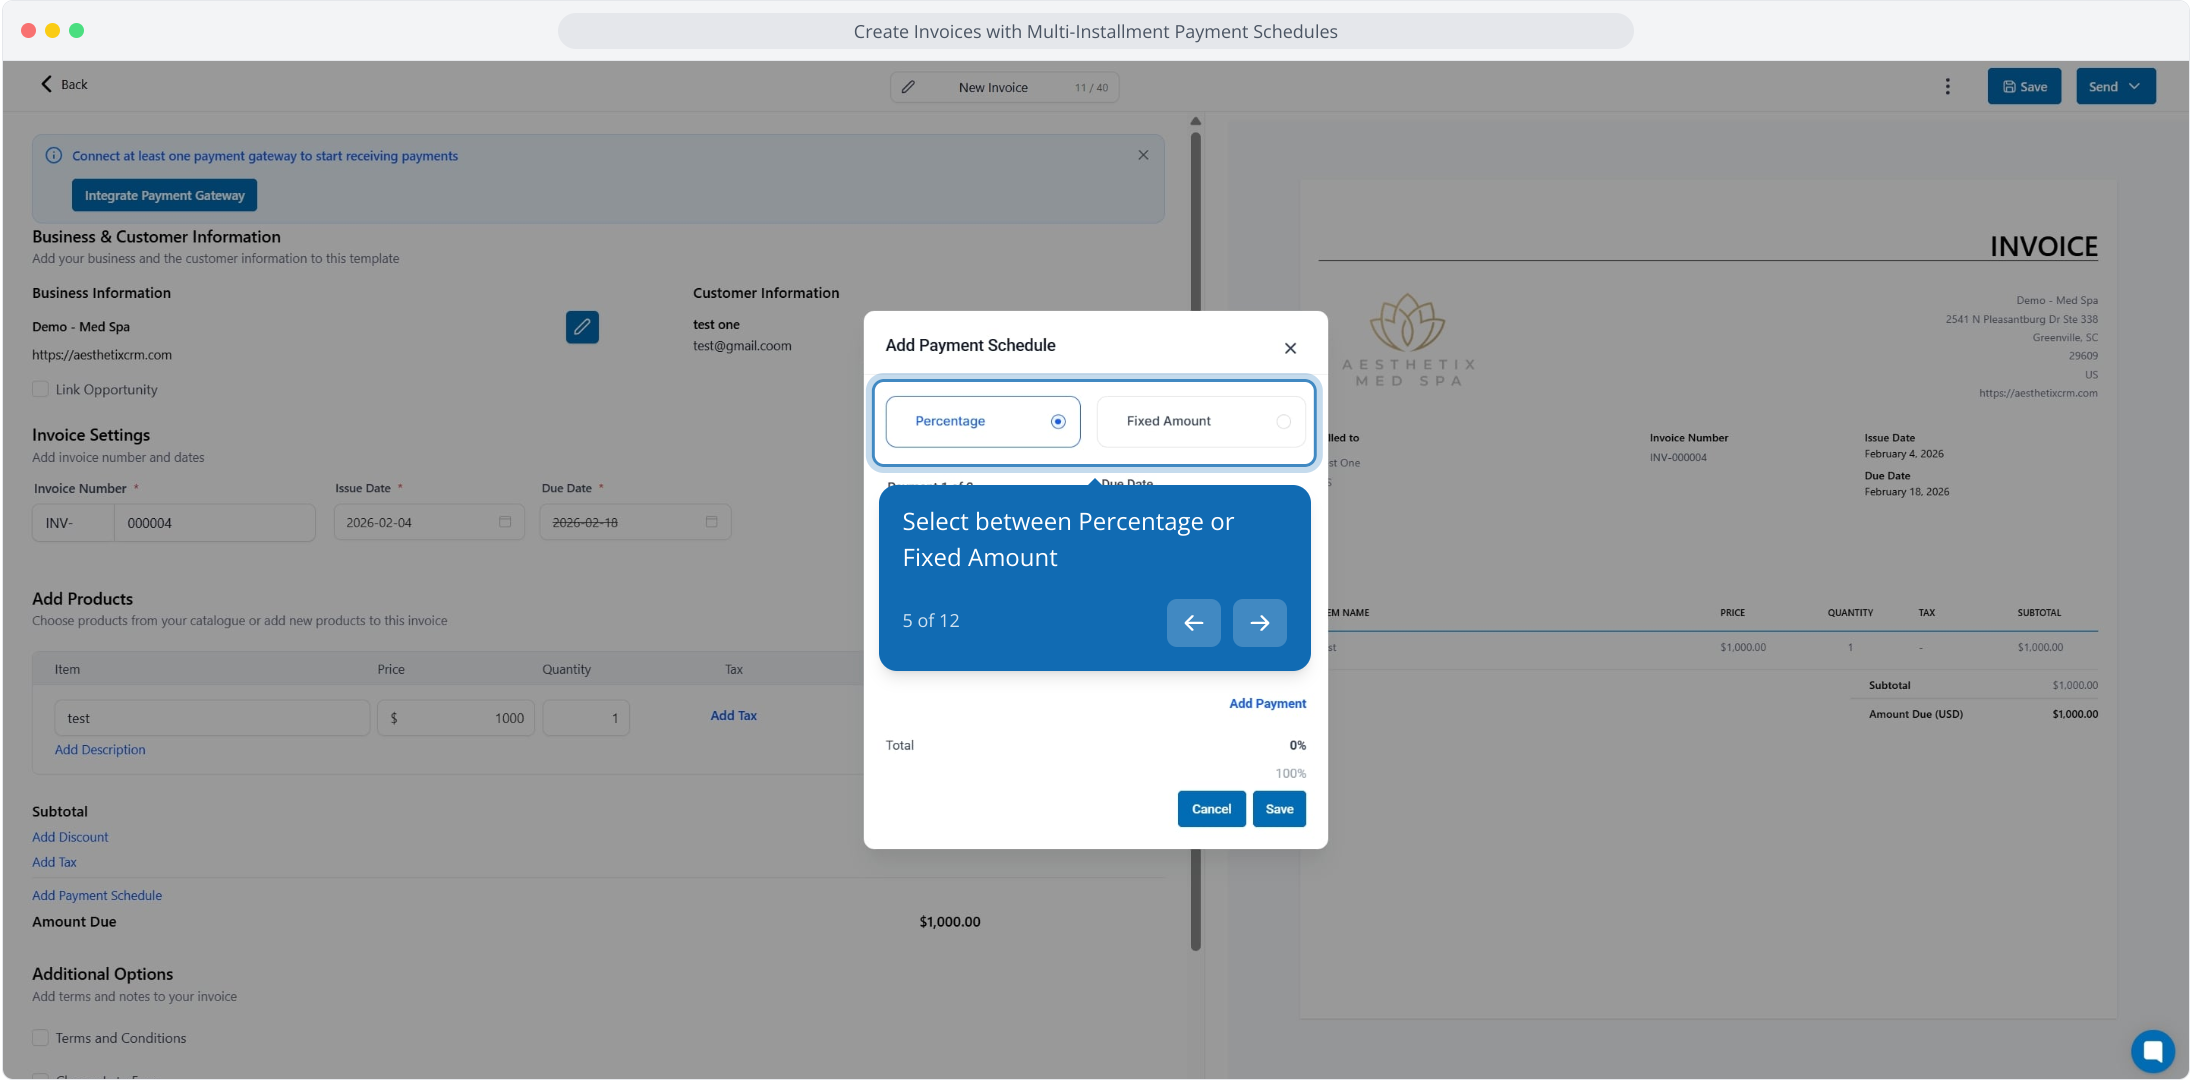
Select between Percentage or Fixed Amount.
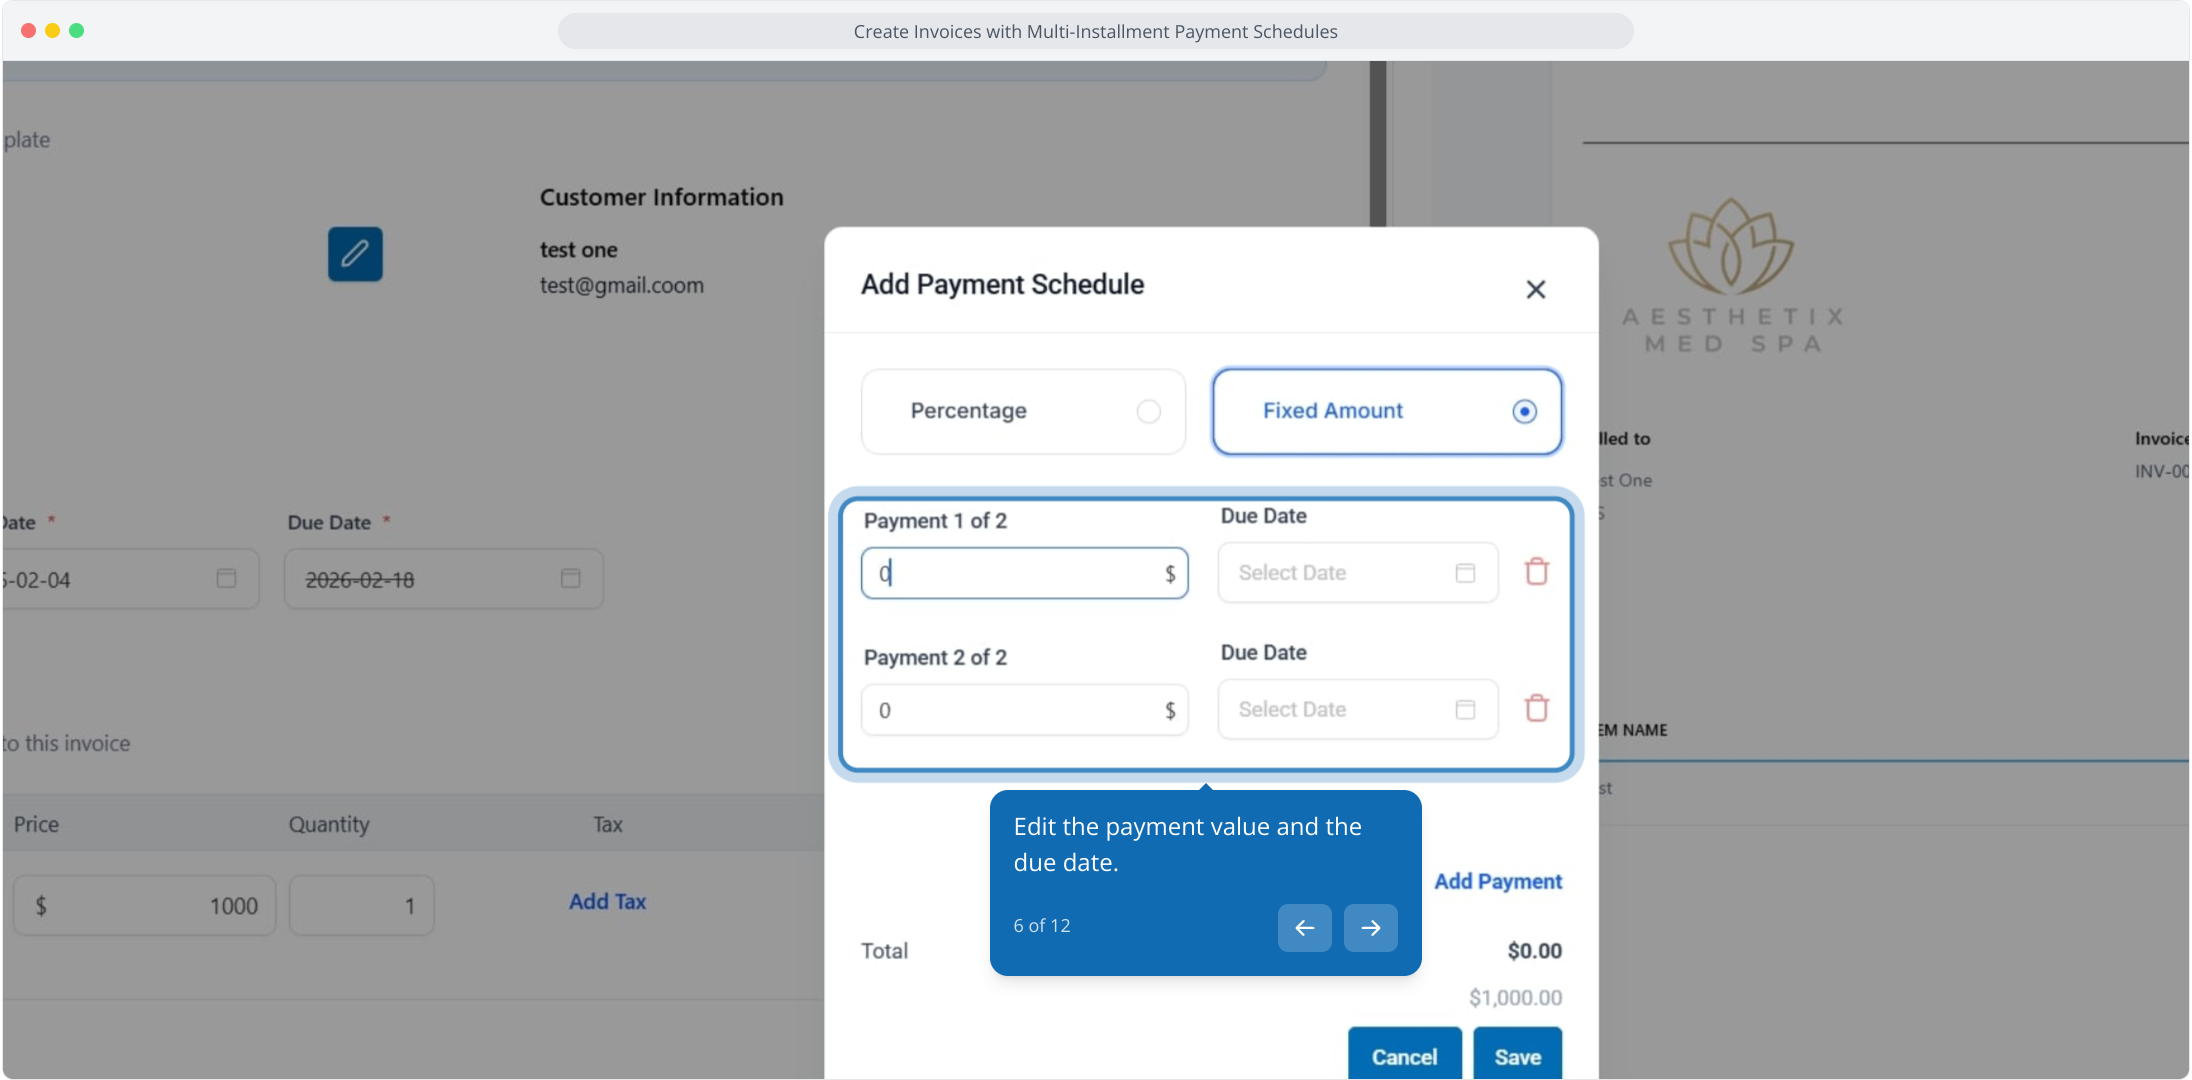
Edit the payment value and the due date.
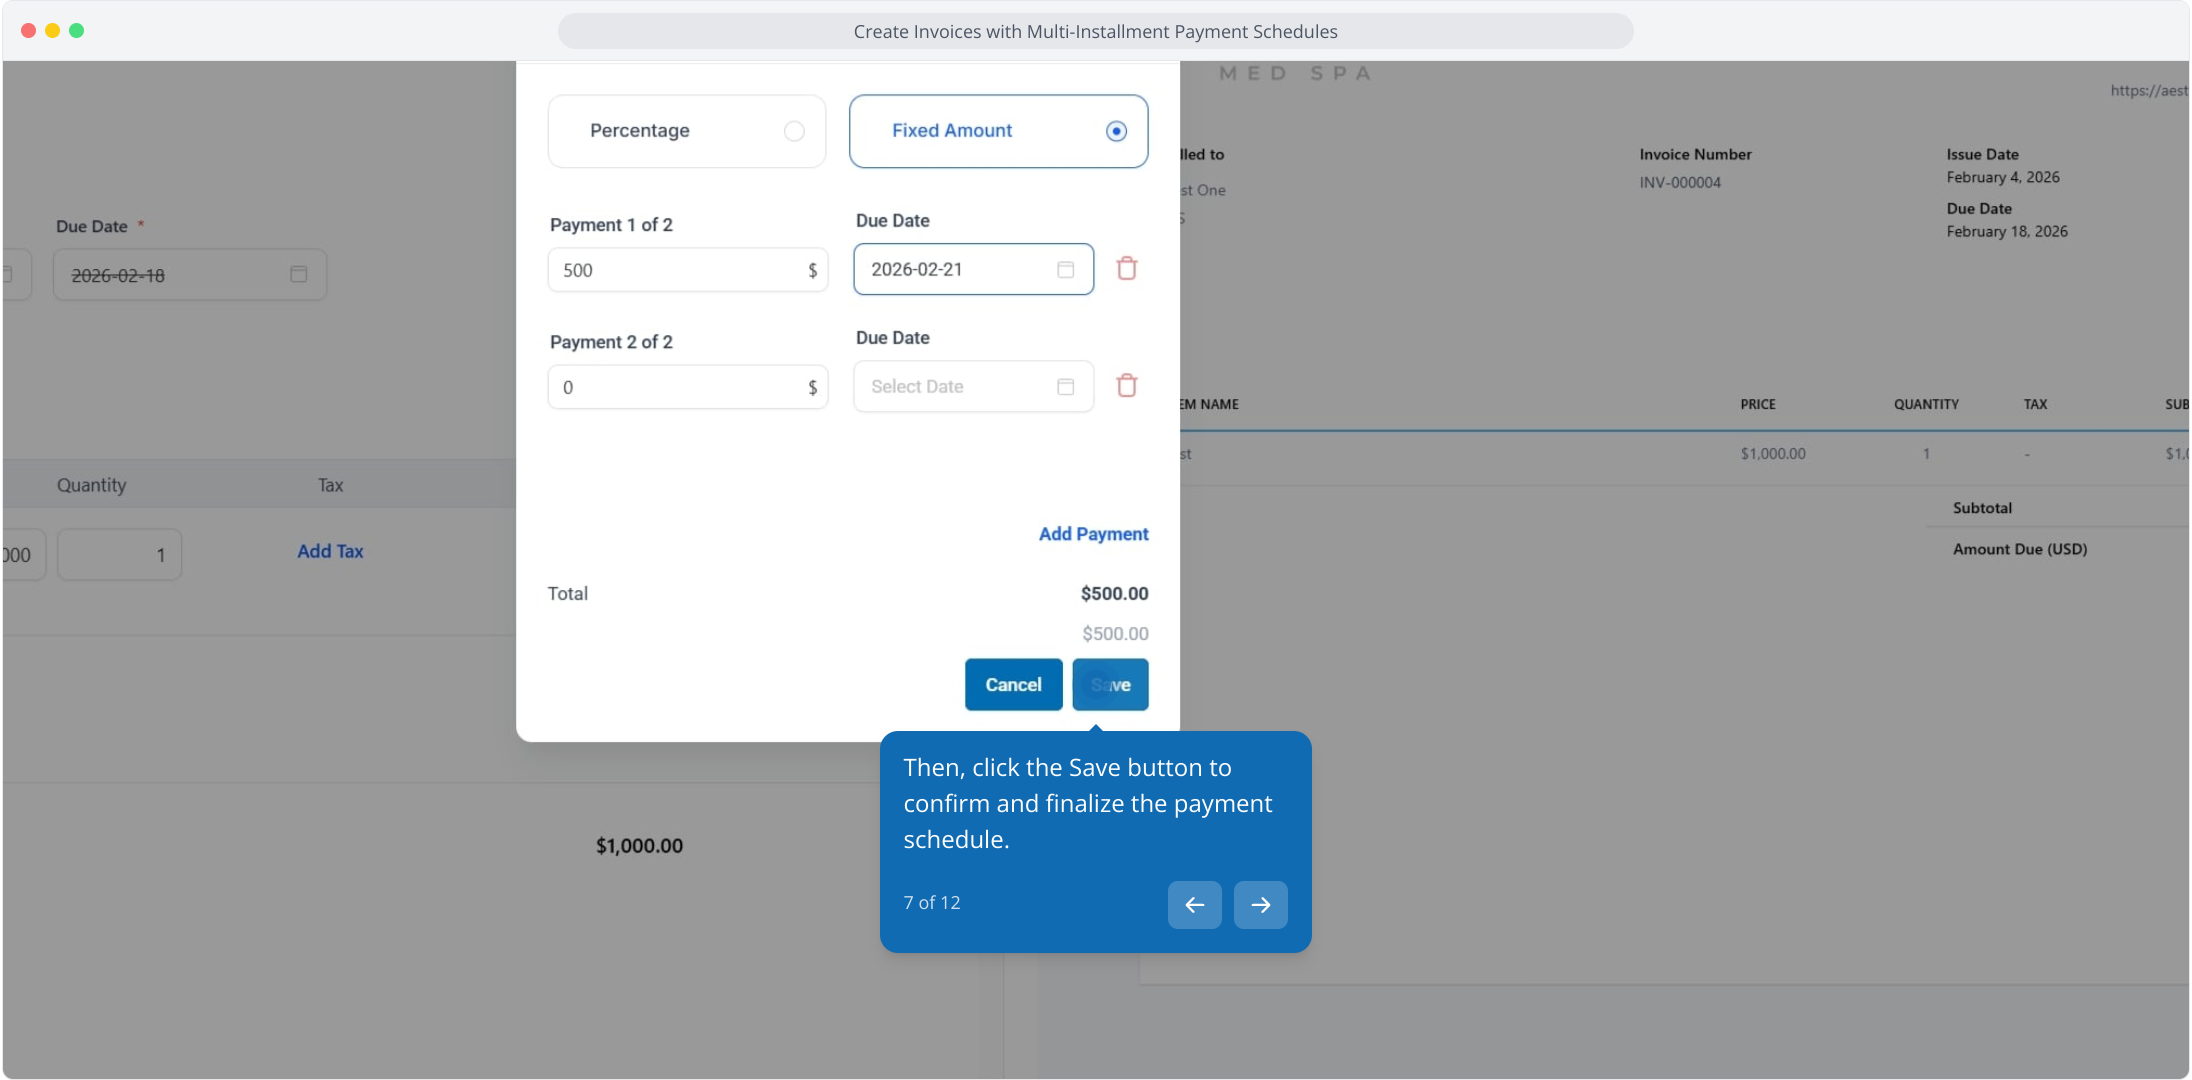
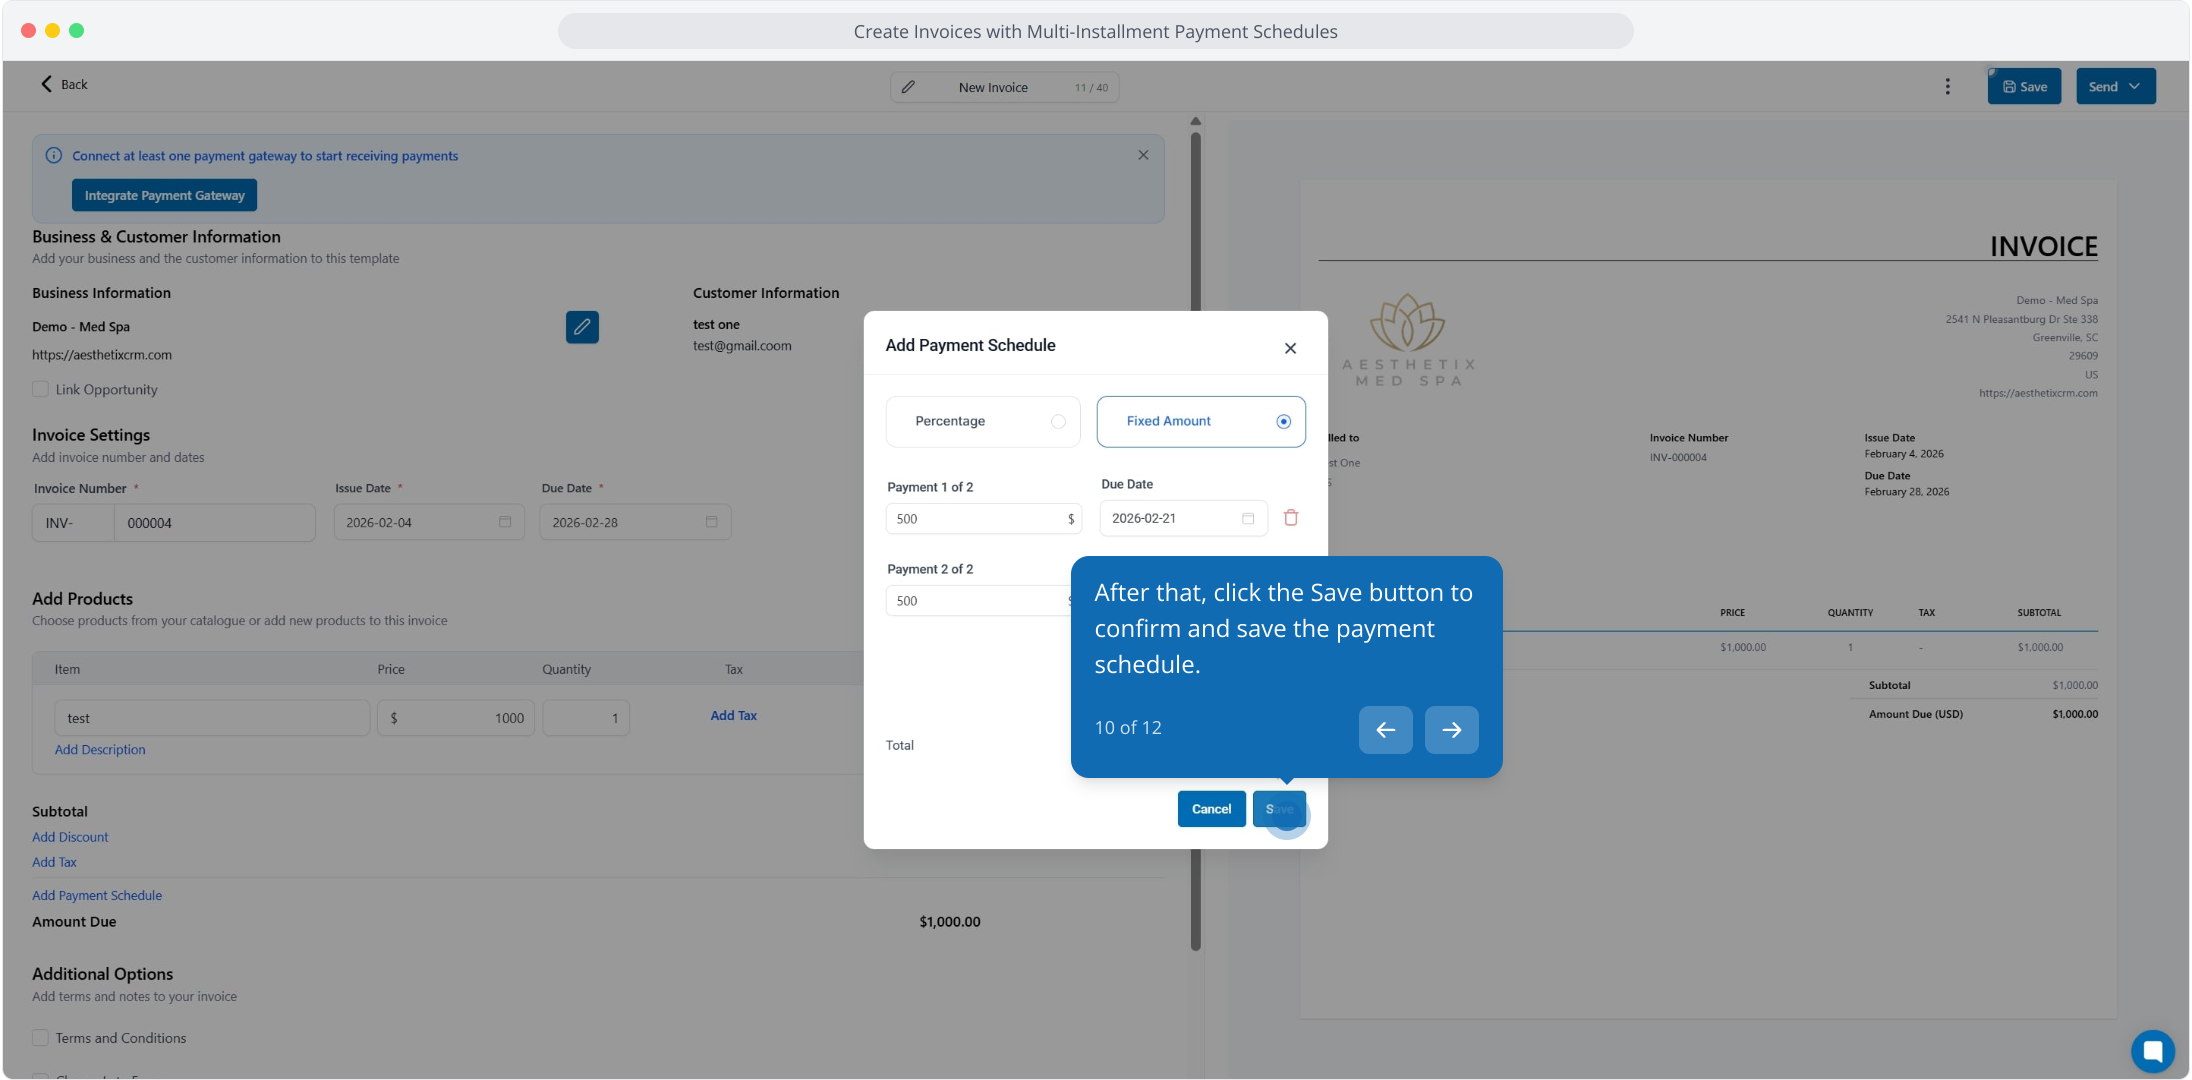
Click Save to confirm and finalize the payment schedule.
Click Add Payment to include additional installments.
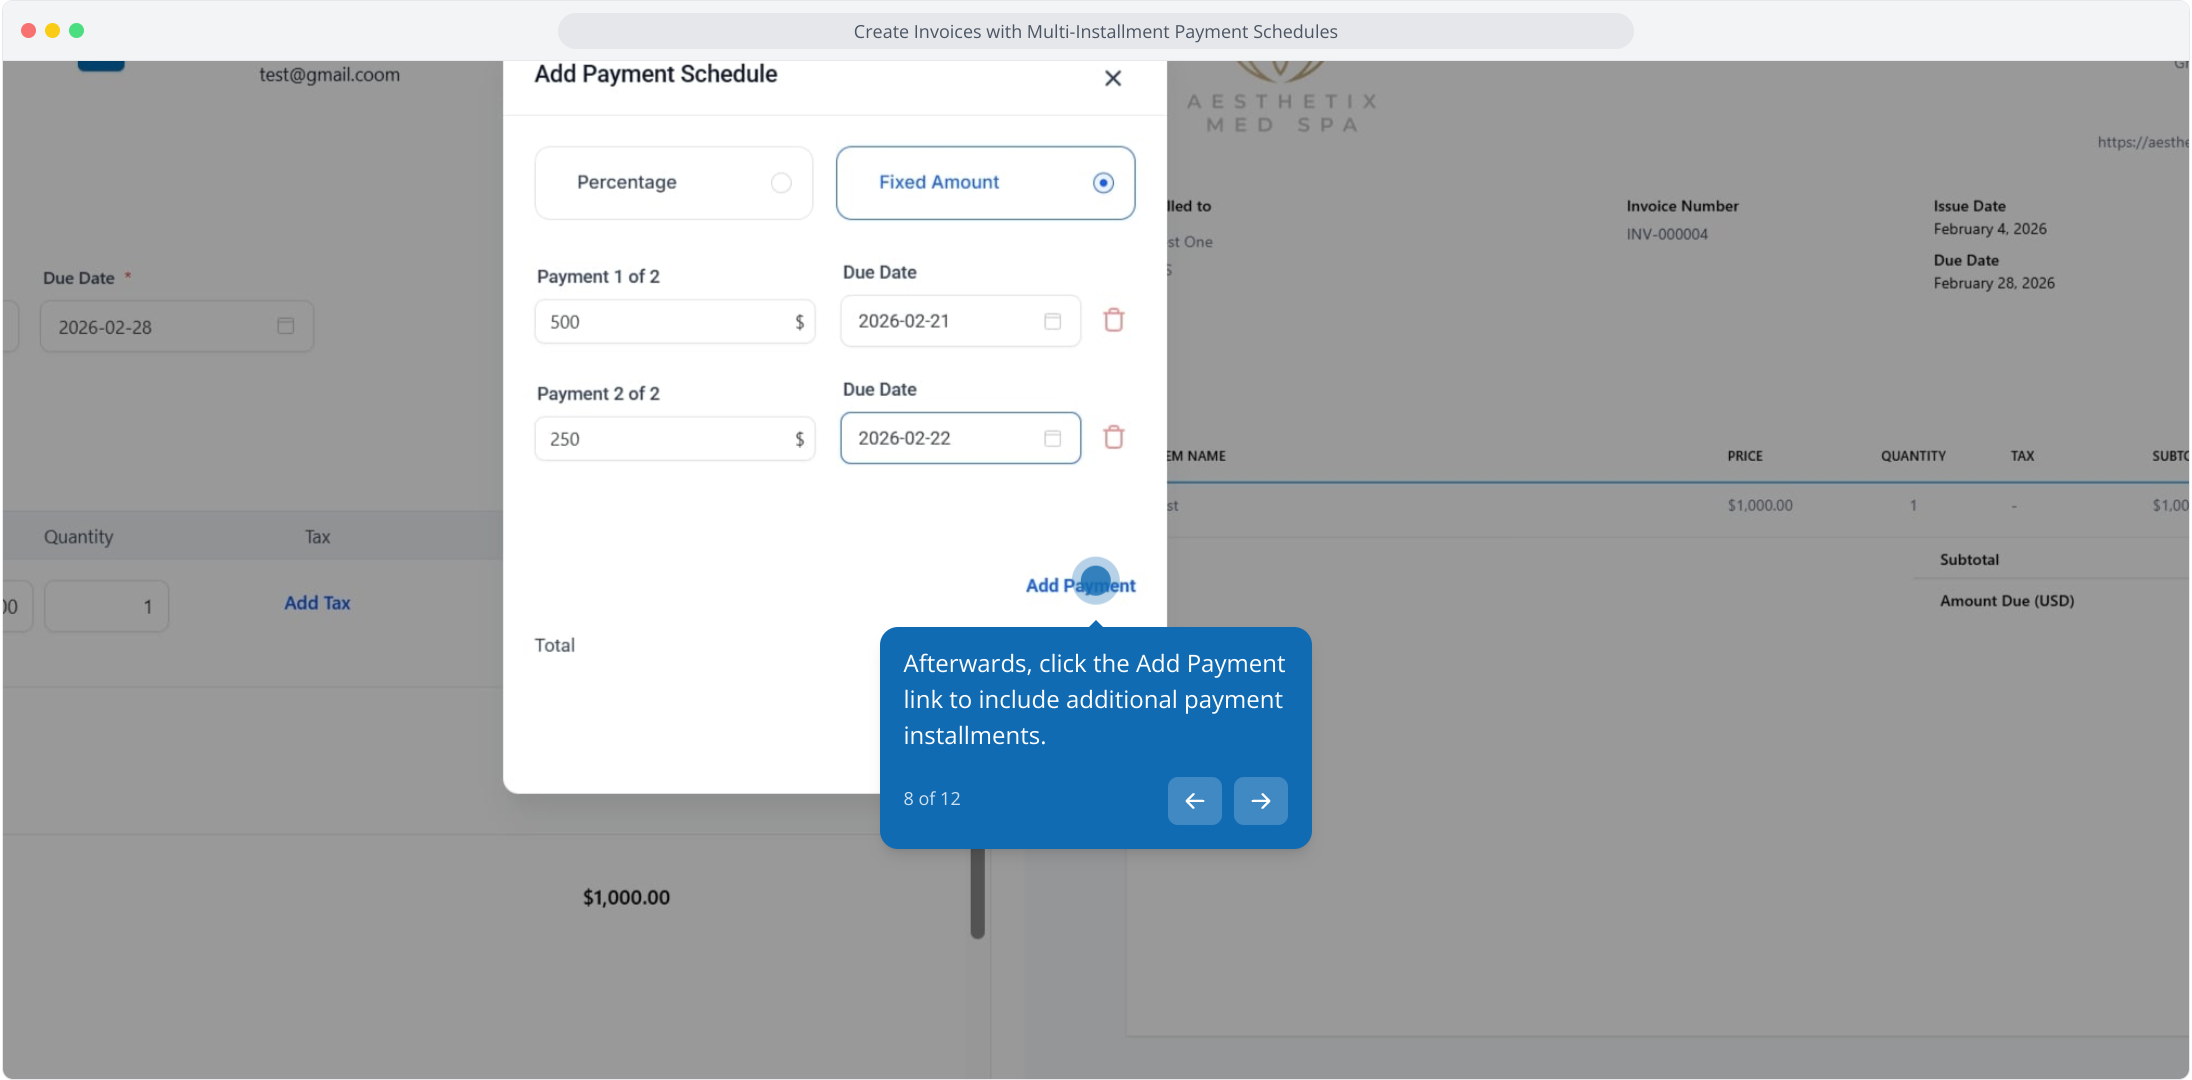
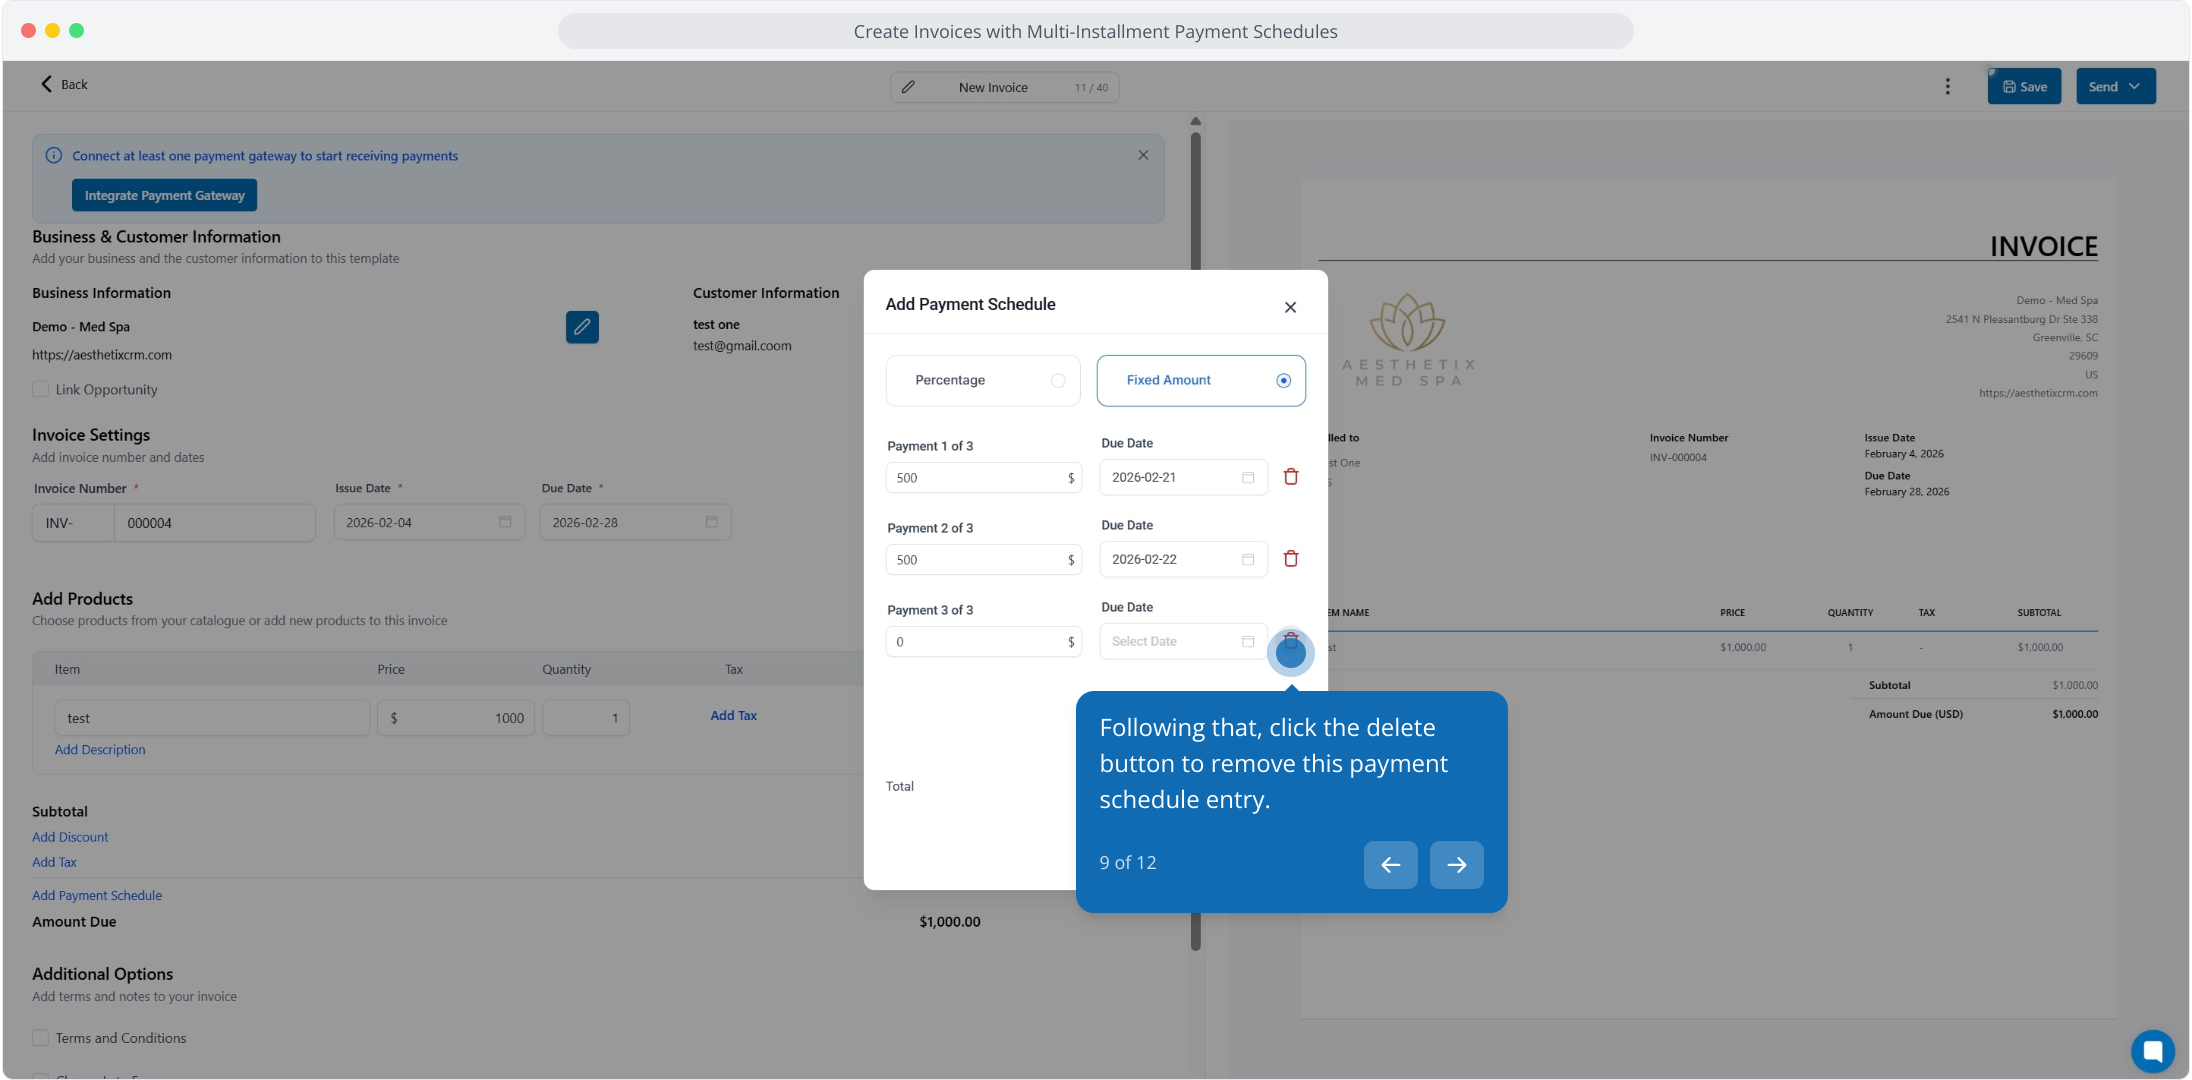
To remove a payment schedule entry, click the delete button next to it.
Click Save to confirm and save the payment schedule.
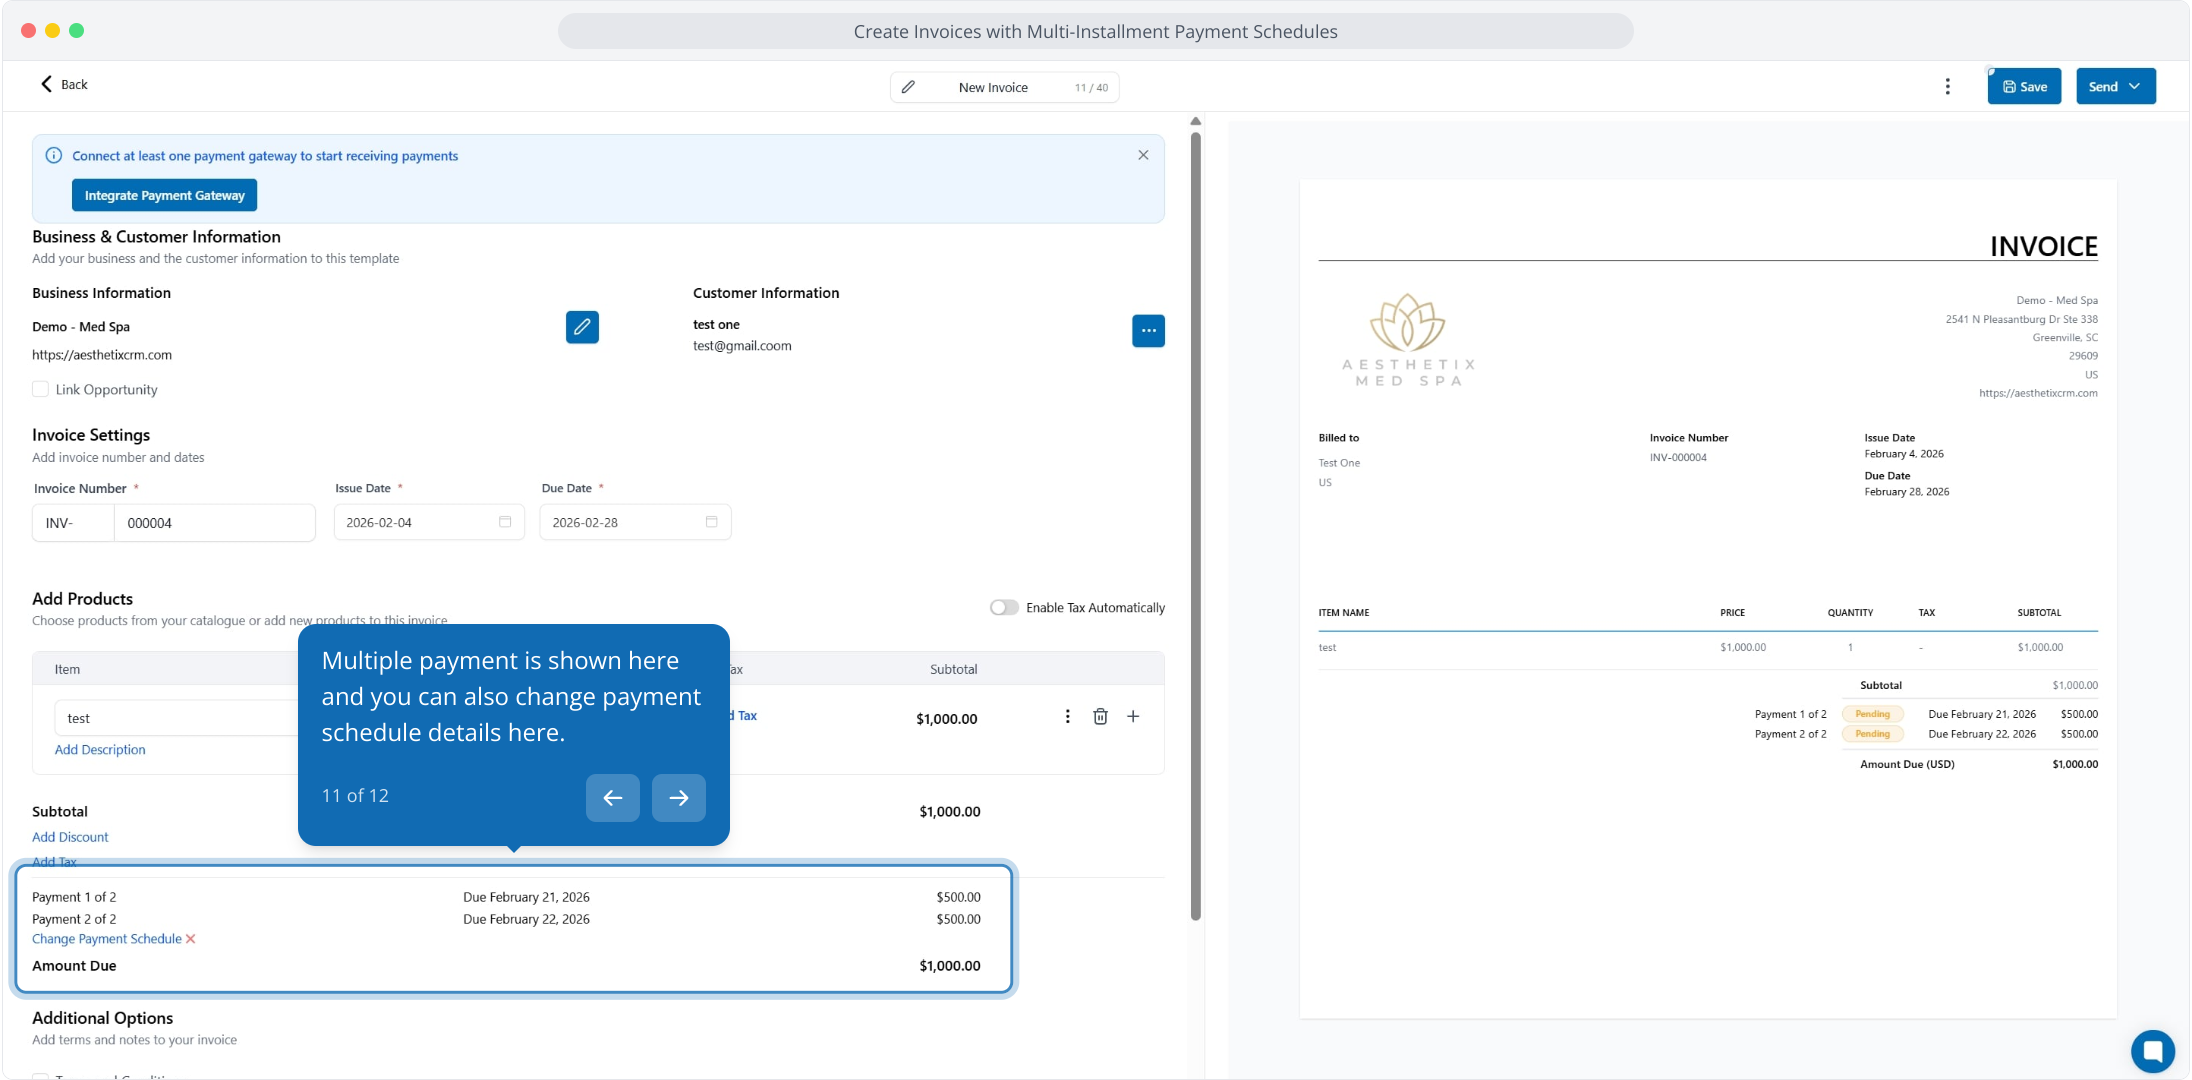
Your installments are shown here, and you can change payment schedule details from this view.
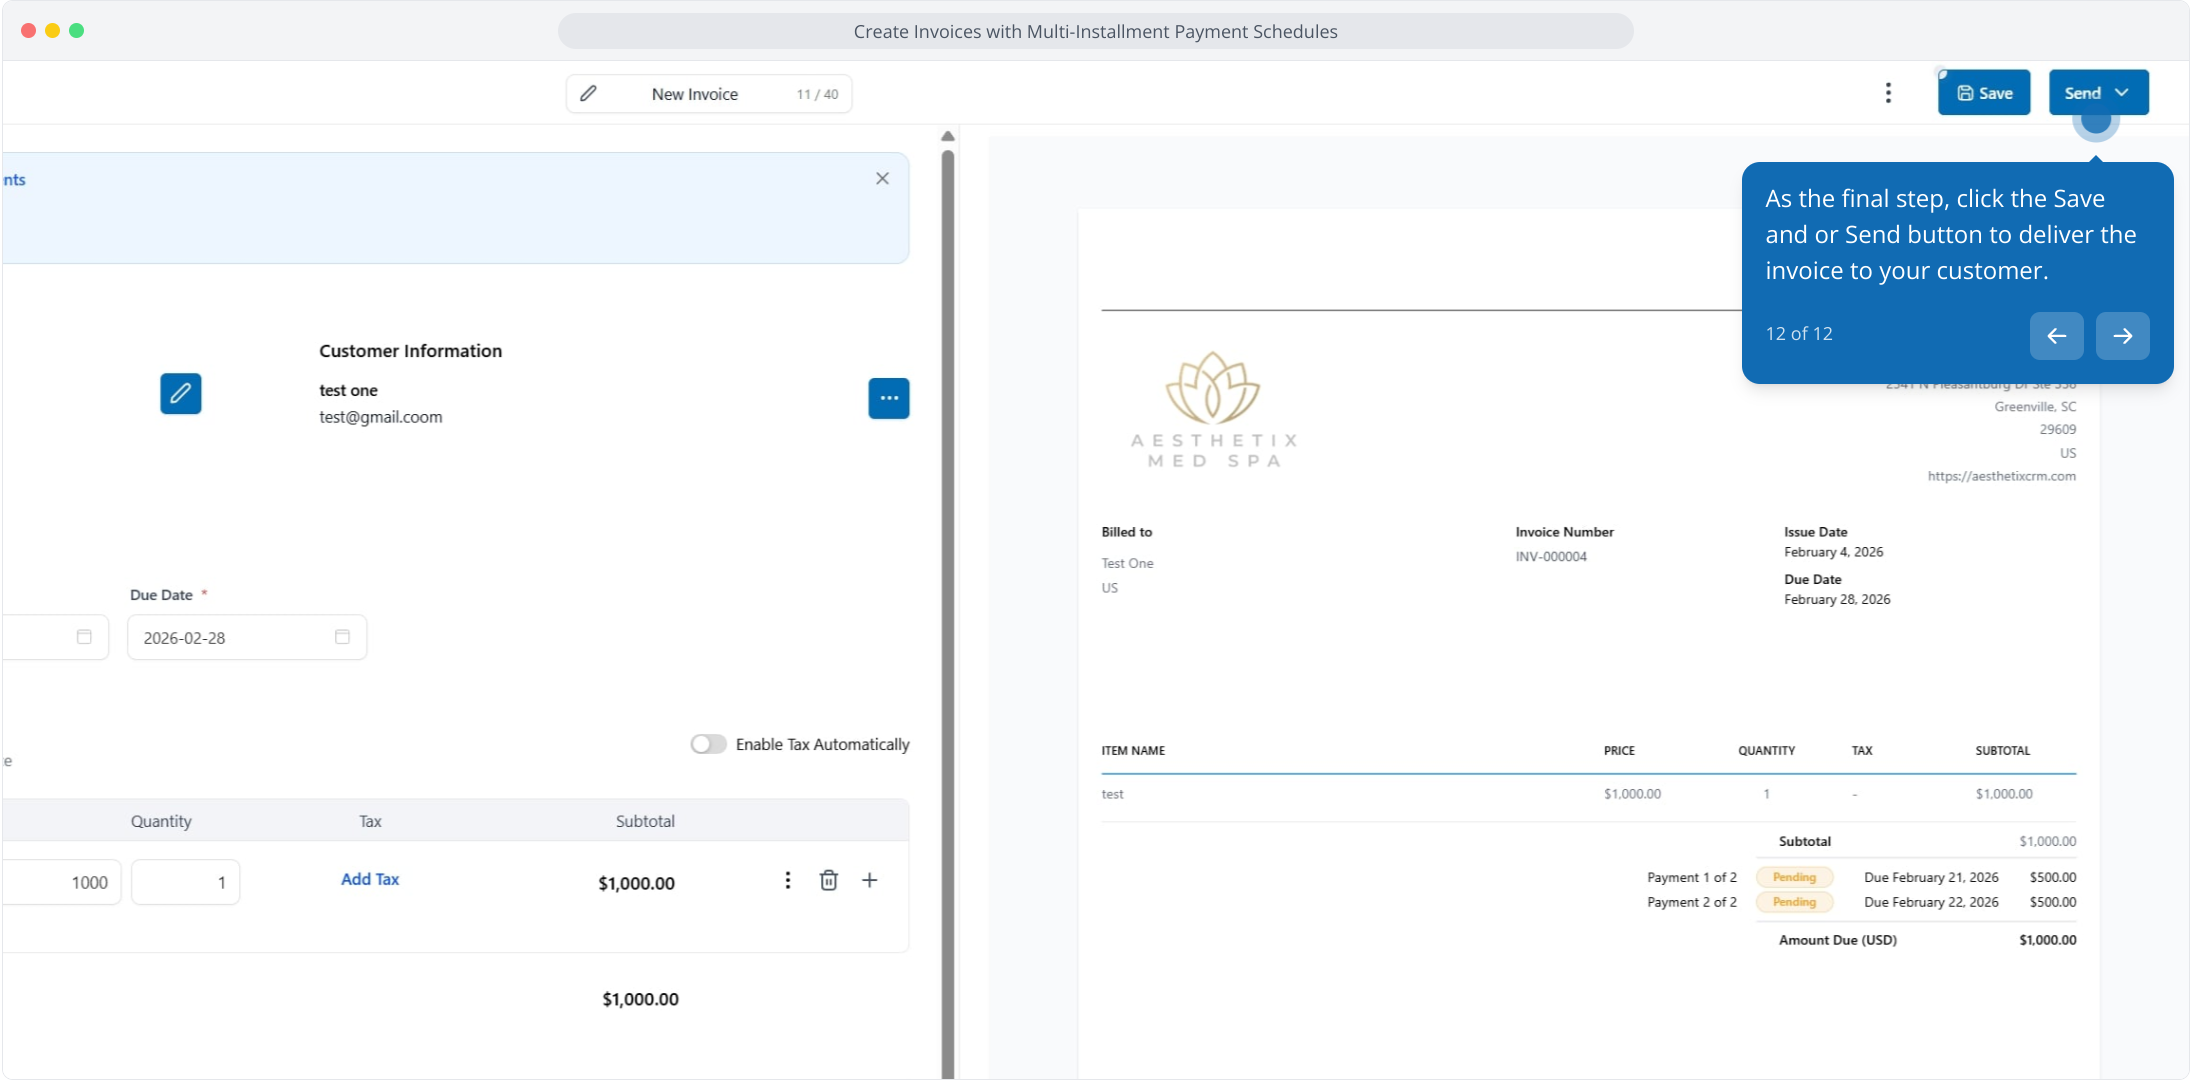
Click Save or Send to deliver the invoice to your patient.
Each installment carries its own due date and payment status. Notifications go out on an installment's due date reminding the patient to pay (if not paid already). Patients can pay one or more installments at a time, and the invoice is marked paid once all installments are paid.
When you add a payment schedule, the patient views the invoice with the plan visible.
The patient can pay the current installment or select additional installments to pay together by using a checkbox.
You can automate payments so installments are charged automatically on their due dates rather than waiting for the patient to act.
Click Add Payment Schedule on an invoice.
Set up the payment terms with a percentage or fixed amount and send it.
The patient views the invoice with the plan visible.
The patient can select a scheduled payment value or add other installments using a checkbox.
To enable auto-payments, click Send, then in the modal turn on the auto-payment toggle. You can use the patient's card (the card used for the first payment), a saved card, or a new card.
View details of auto-paid invoices under Transactions.
Partial payments let a patient secure a booking or reserve a procedure by paying a deposit upfront, with the balance collected later. You set a minimum percentage of the total, and the patient can pay any amount equal to or greater than that minimum. This is available for both one-time and recurring invoices.
Ensure a payment provider is connected (AX Pay, Stripe, Authorize.net, or NMI) under Payments → Integrations.
Go to Payments → Invoices & Estimates → Settings.
Open Payment Settings and enable the Partial Payments toggle.
Enter a percentage in the field (calculated from the invoice total).
Click Save.
The patient can then pay any amount equal to or greater than the specified percentage from the invoice.
Note: For recurring invoices, partial payment is available on invoices where auto-payment is disabled. If auto-payment is enabled with a customer card, partial payment is available for the first invoice only; subsequent invoices auto-draft the full amount.
When partial payment is collected during booking, two entries appear in Payments:
Transaction: The amount charged at booking (the deposit).
Invoice: The remaining balance (total minus deposit). This invoice stays in draft, and you collect the balance manually.
To collect the remaining balance, go to Payments → Invoices and send the drafted invoice. Partial payments can be enabled for all calendar types, and displaying the full cost while allowing a deposit-only payment helps reduce no-shows.
Once an invoice has received a payment, it enters the Partially Paid state. You can still update it, including the payment schedule, without voiding and reissuing.
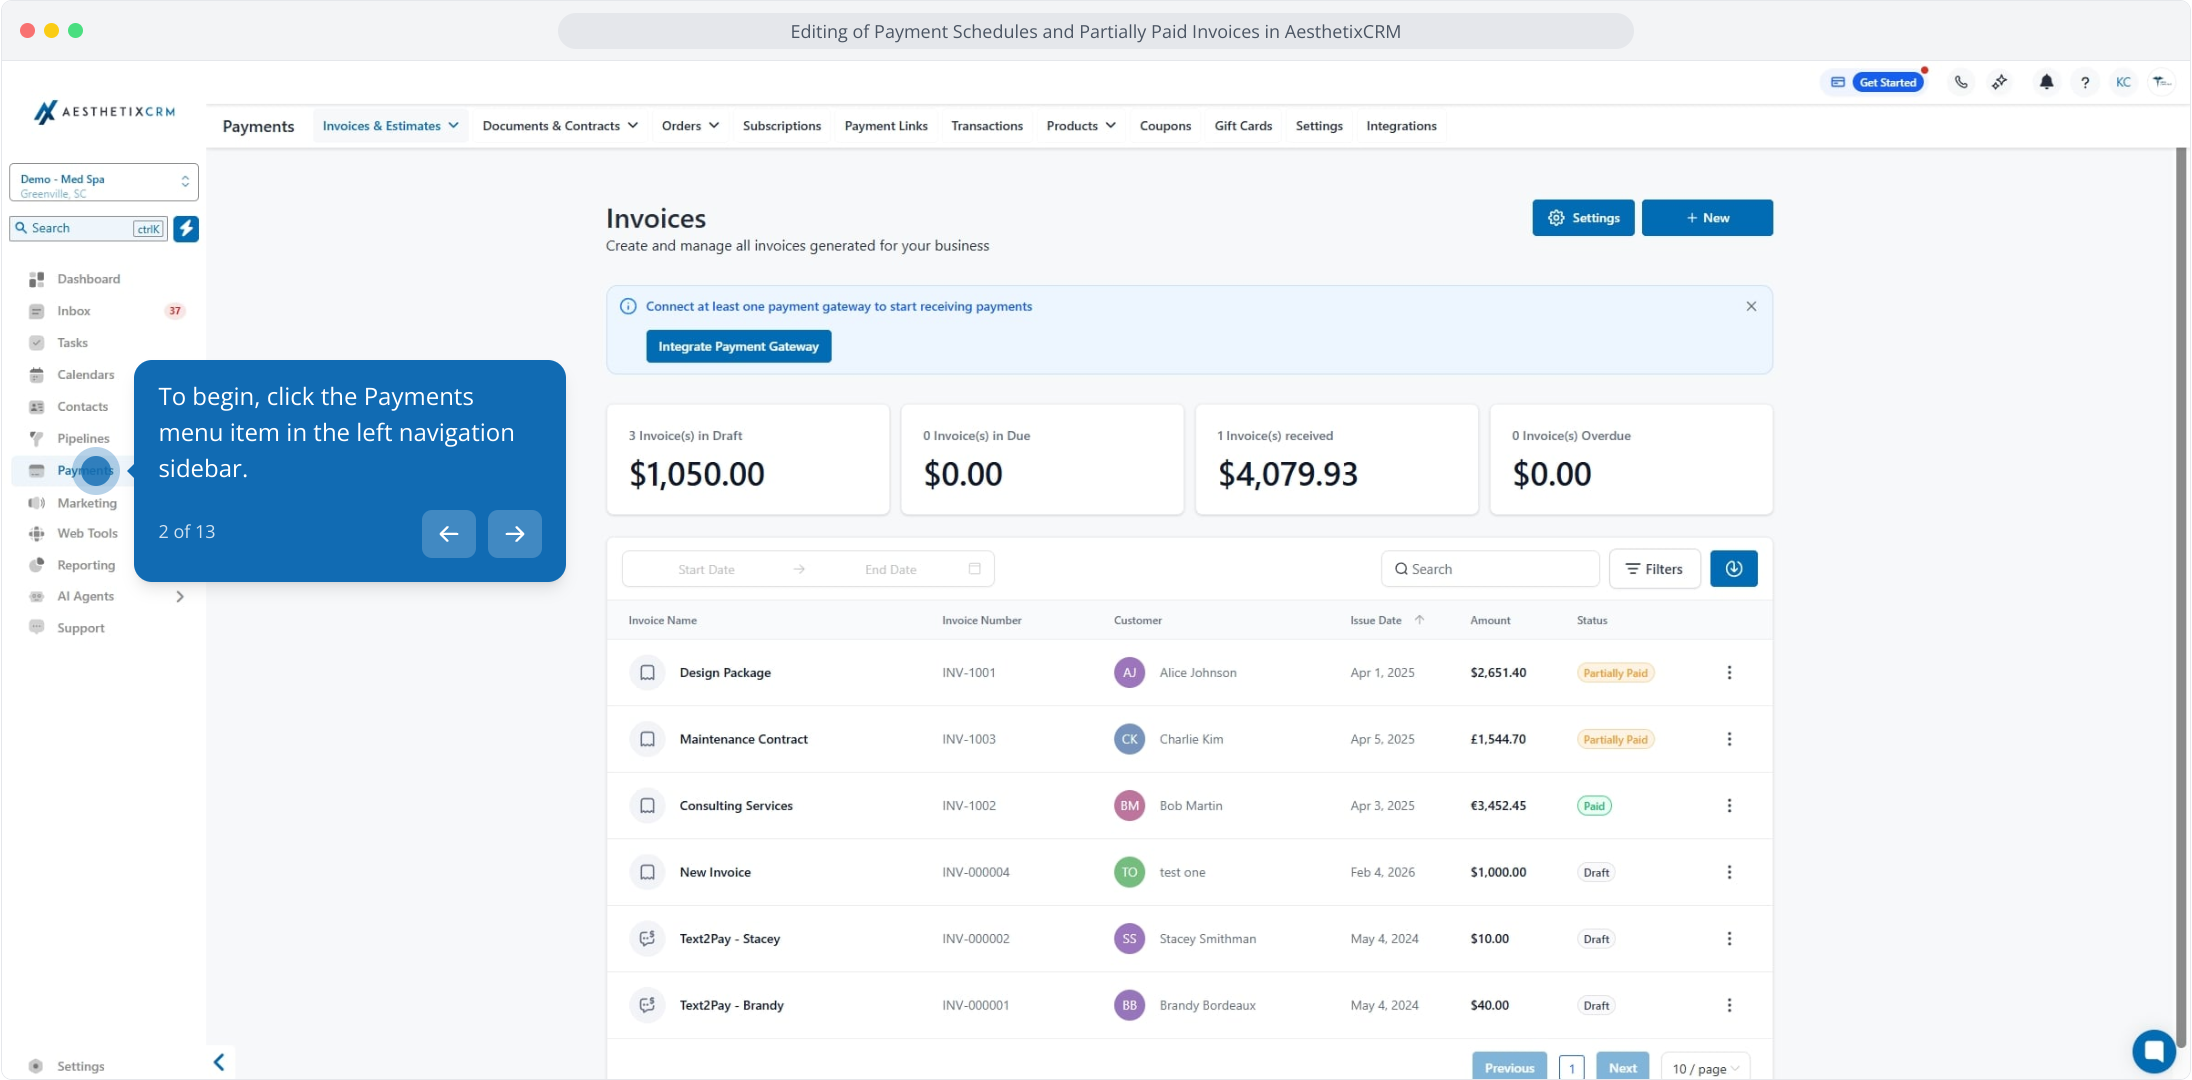
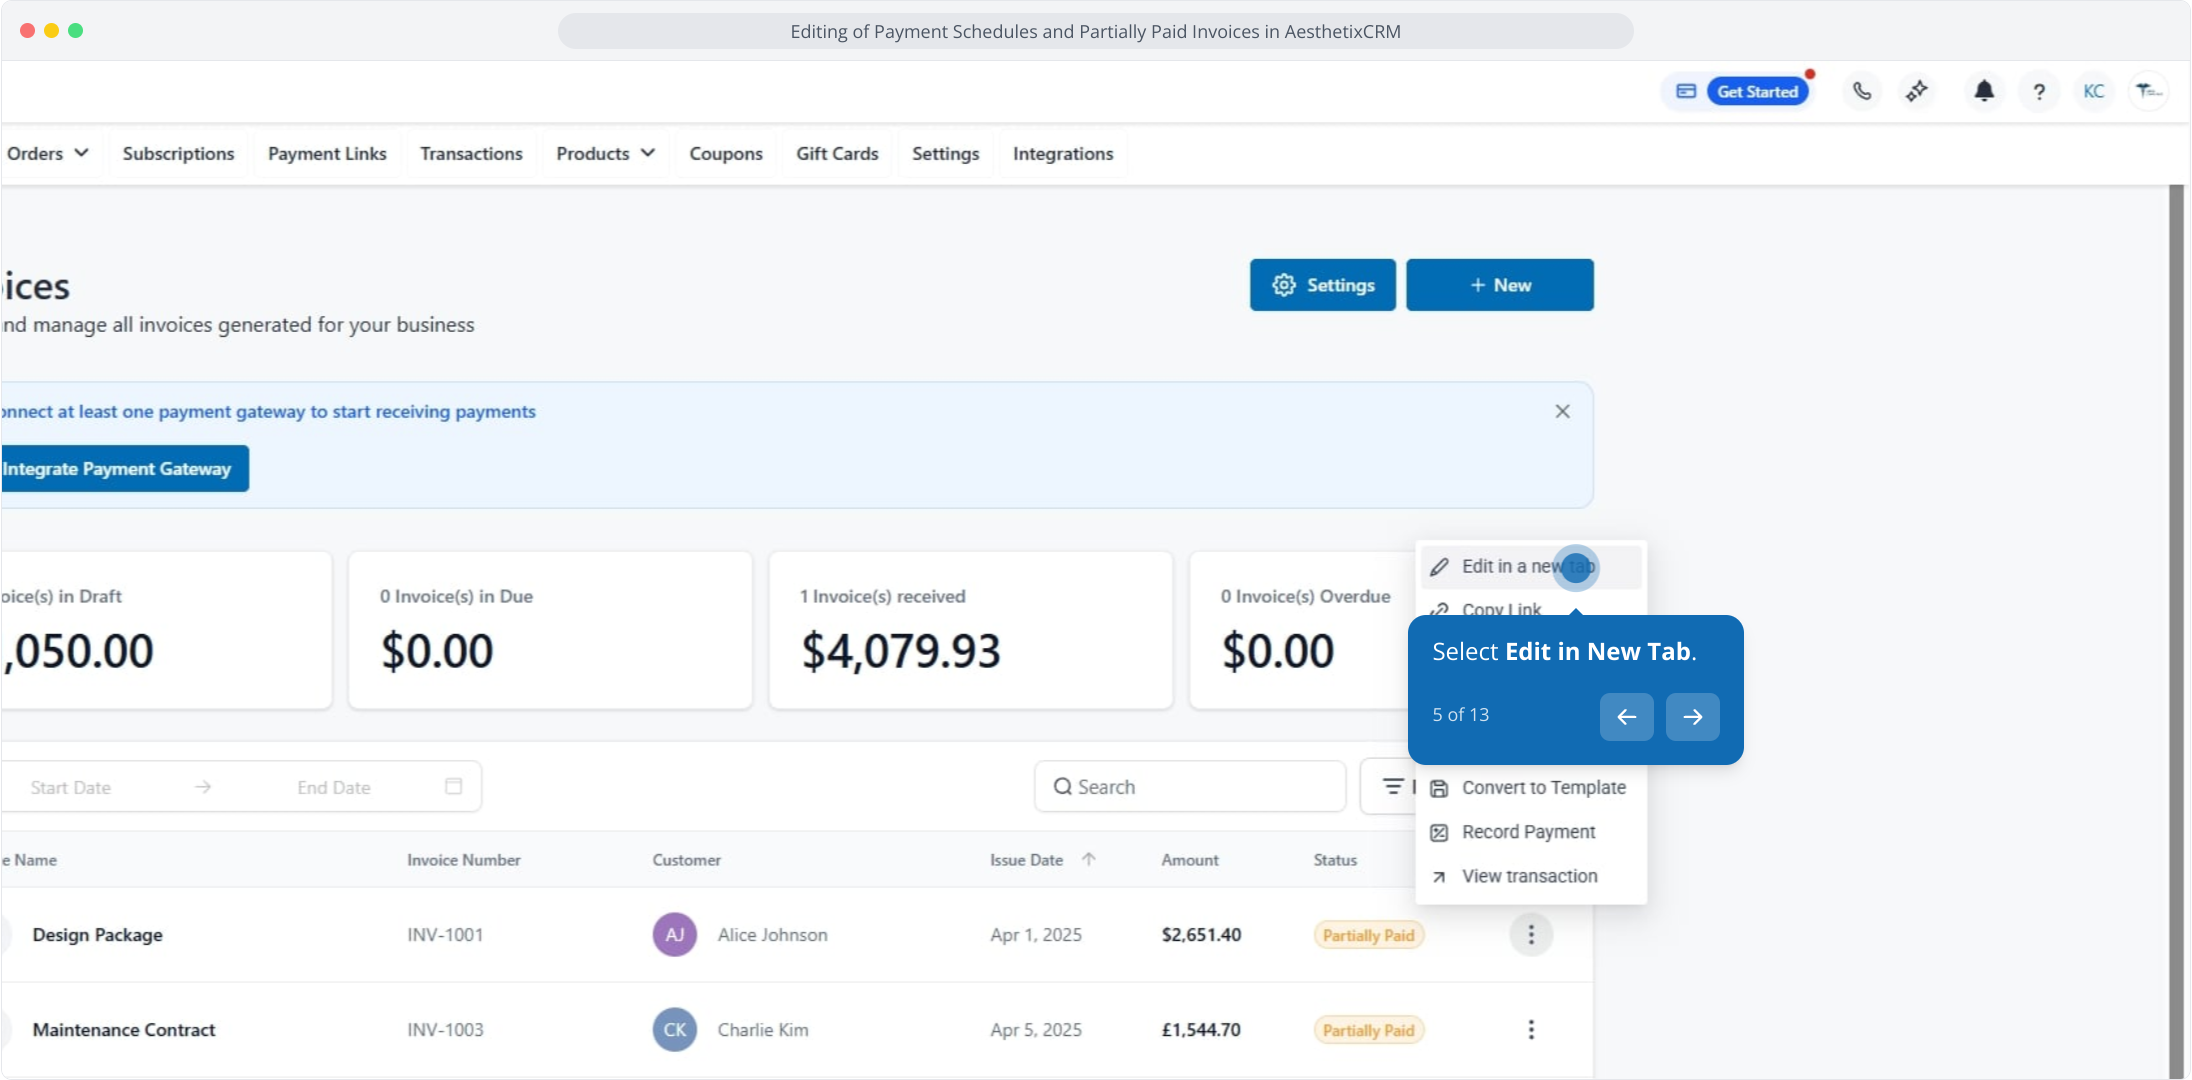
To begin, click the Payments menu item in the left sidebar.
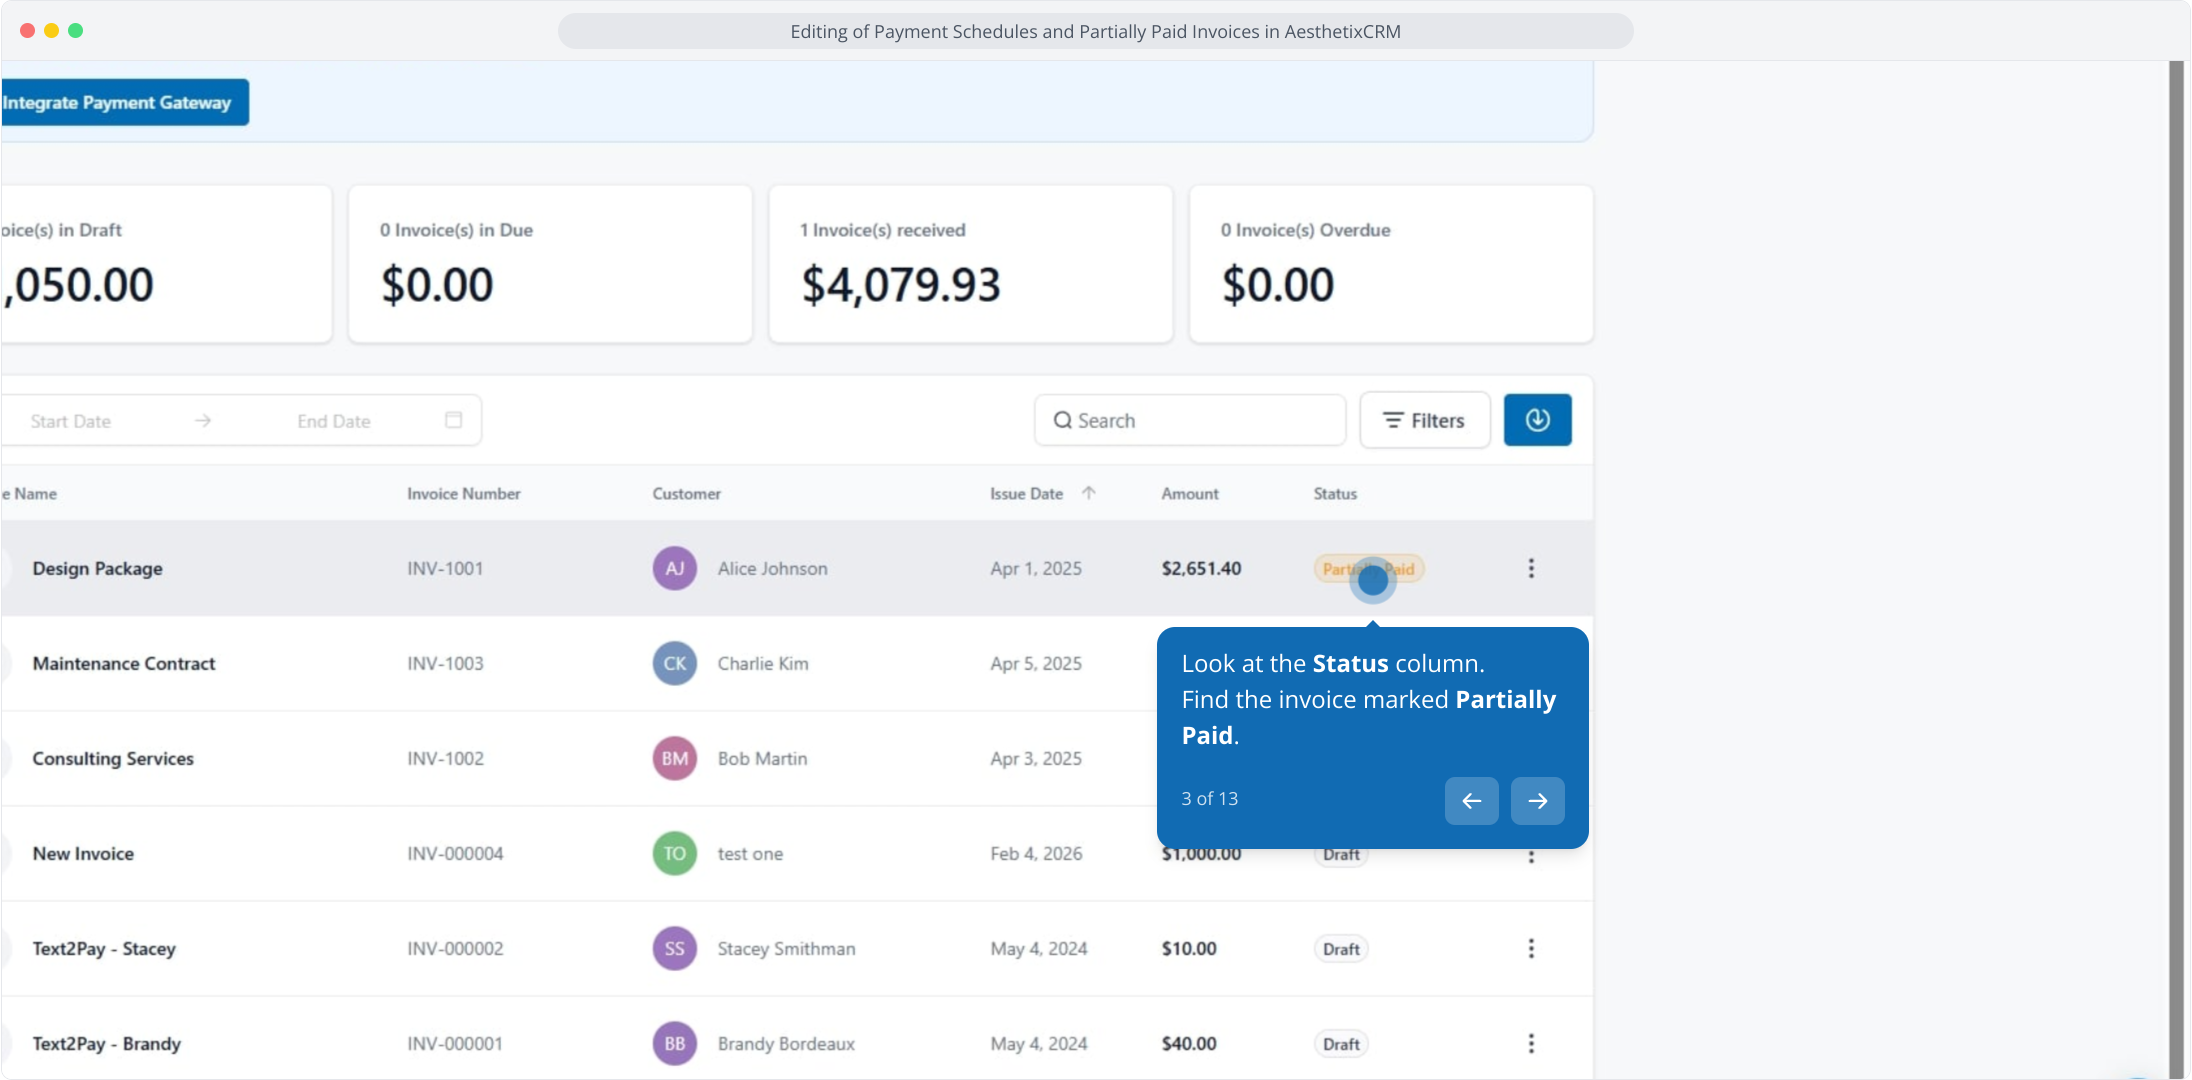
Look at the Status column and find the invoice marked Partially Paid.
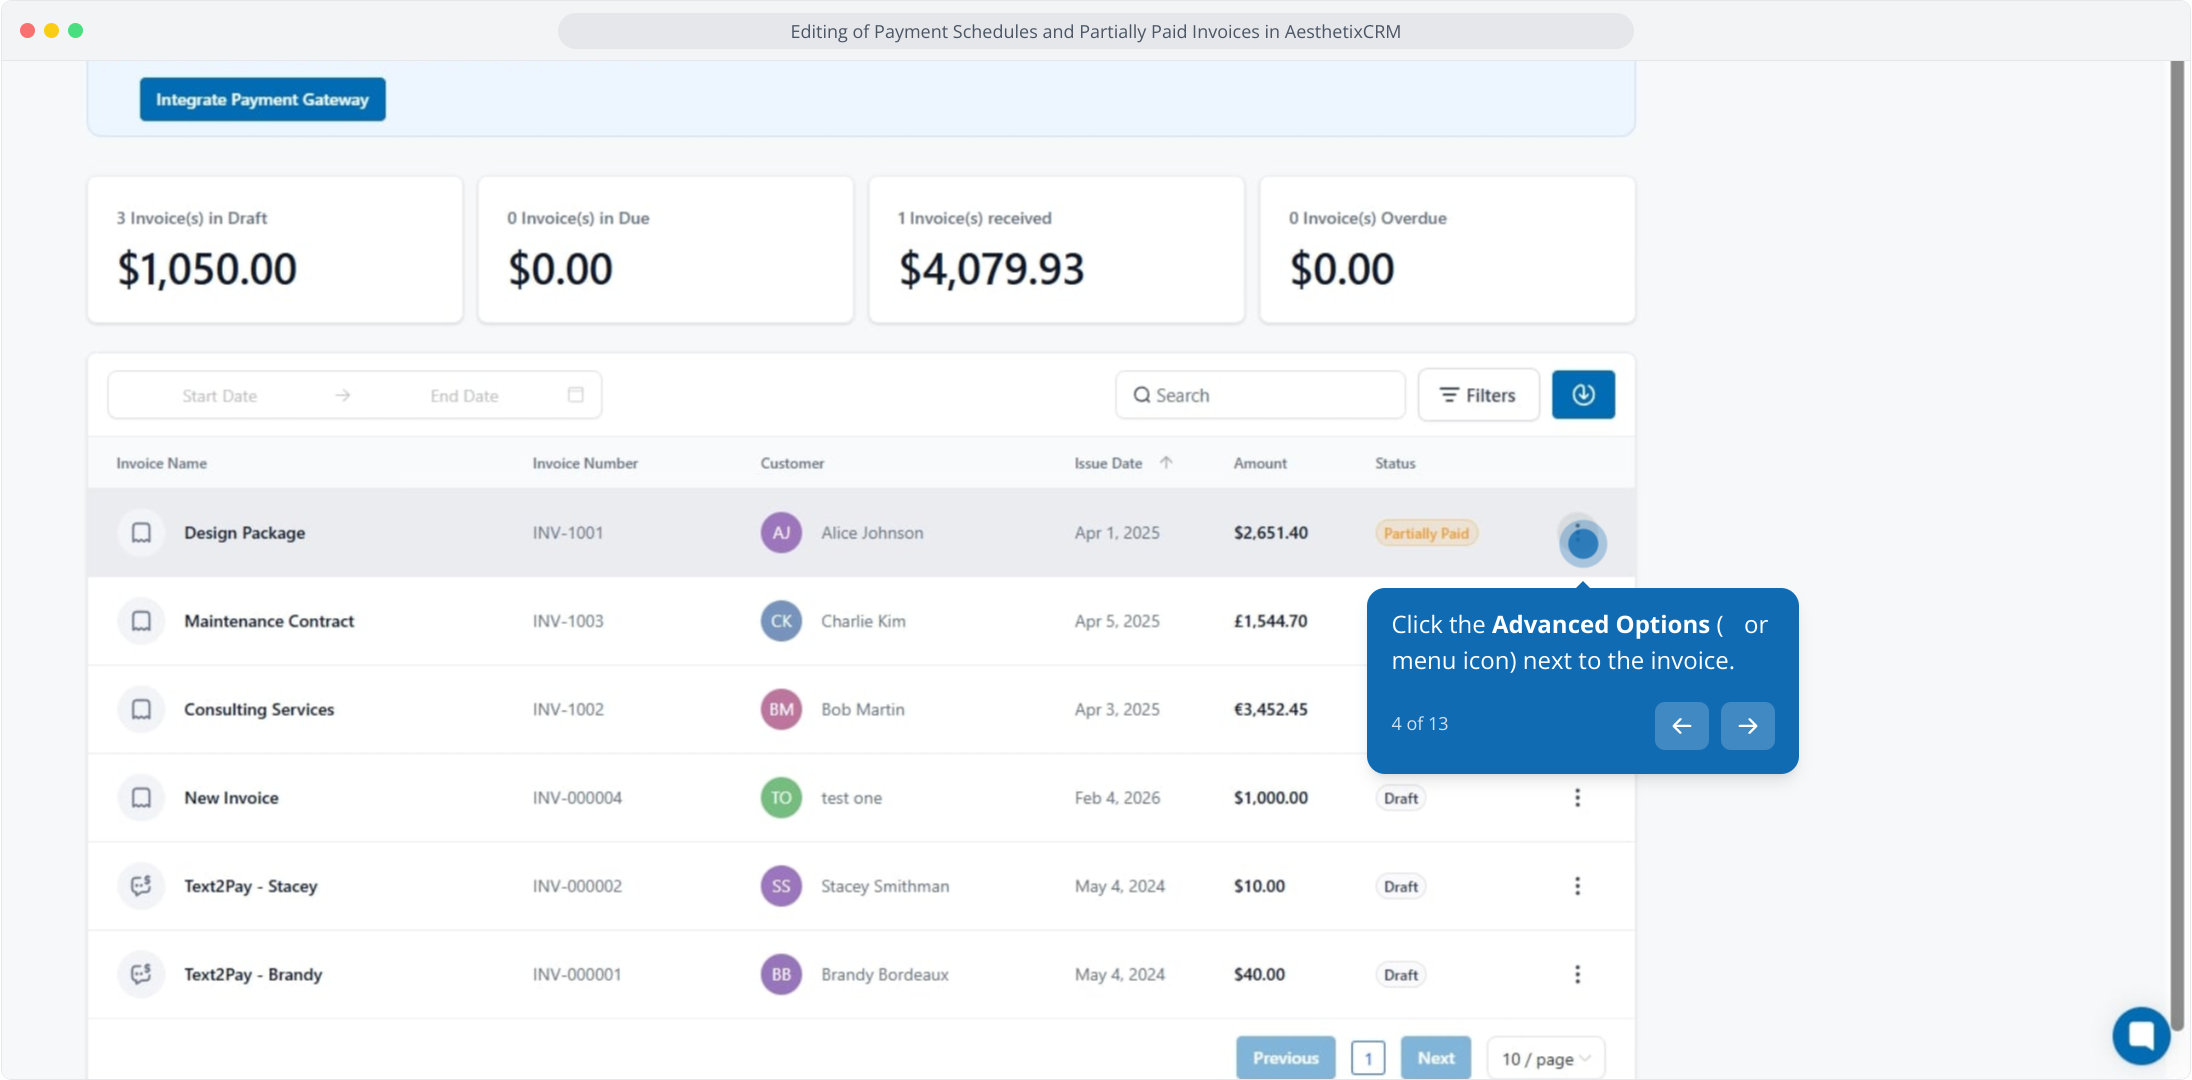
Click the Advanced Options (three-dot menu) next to the invoice.
Select Edit in New Tab.
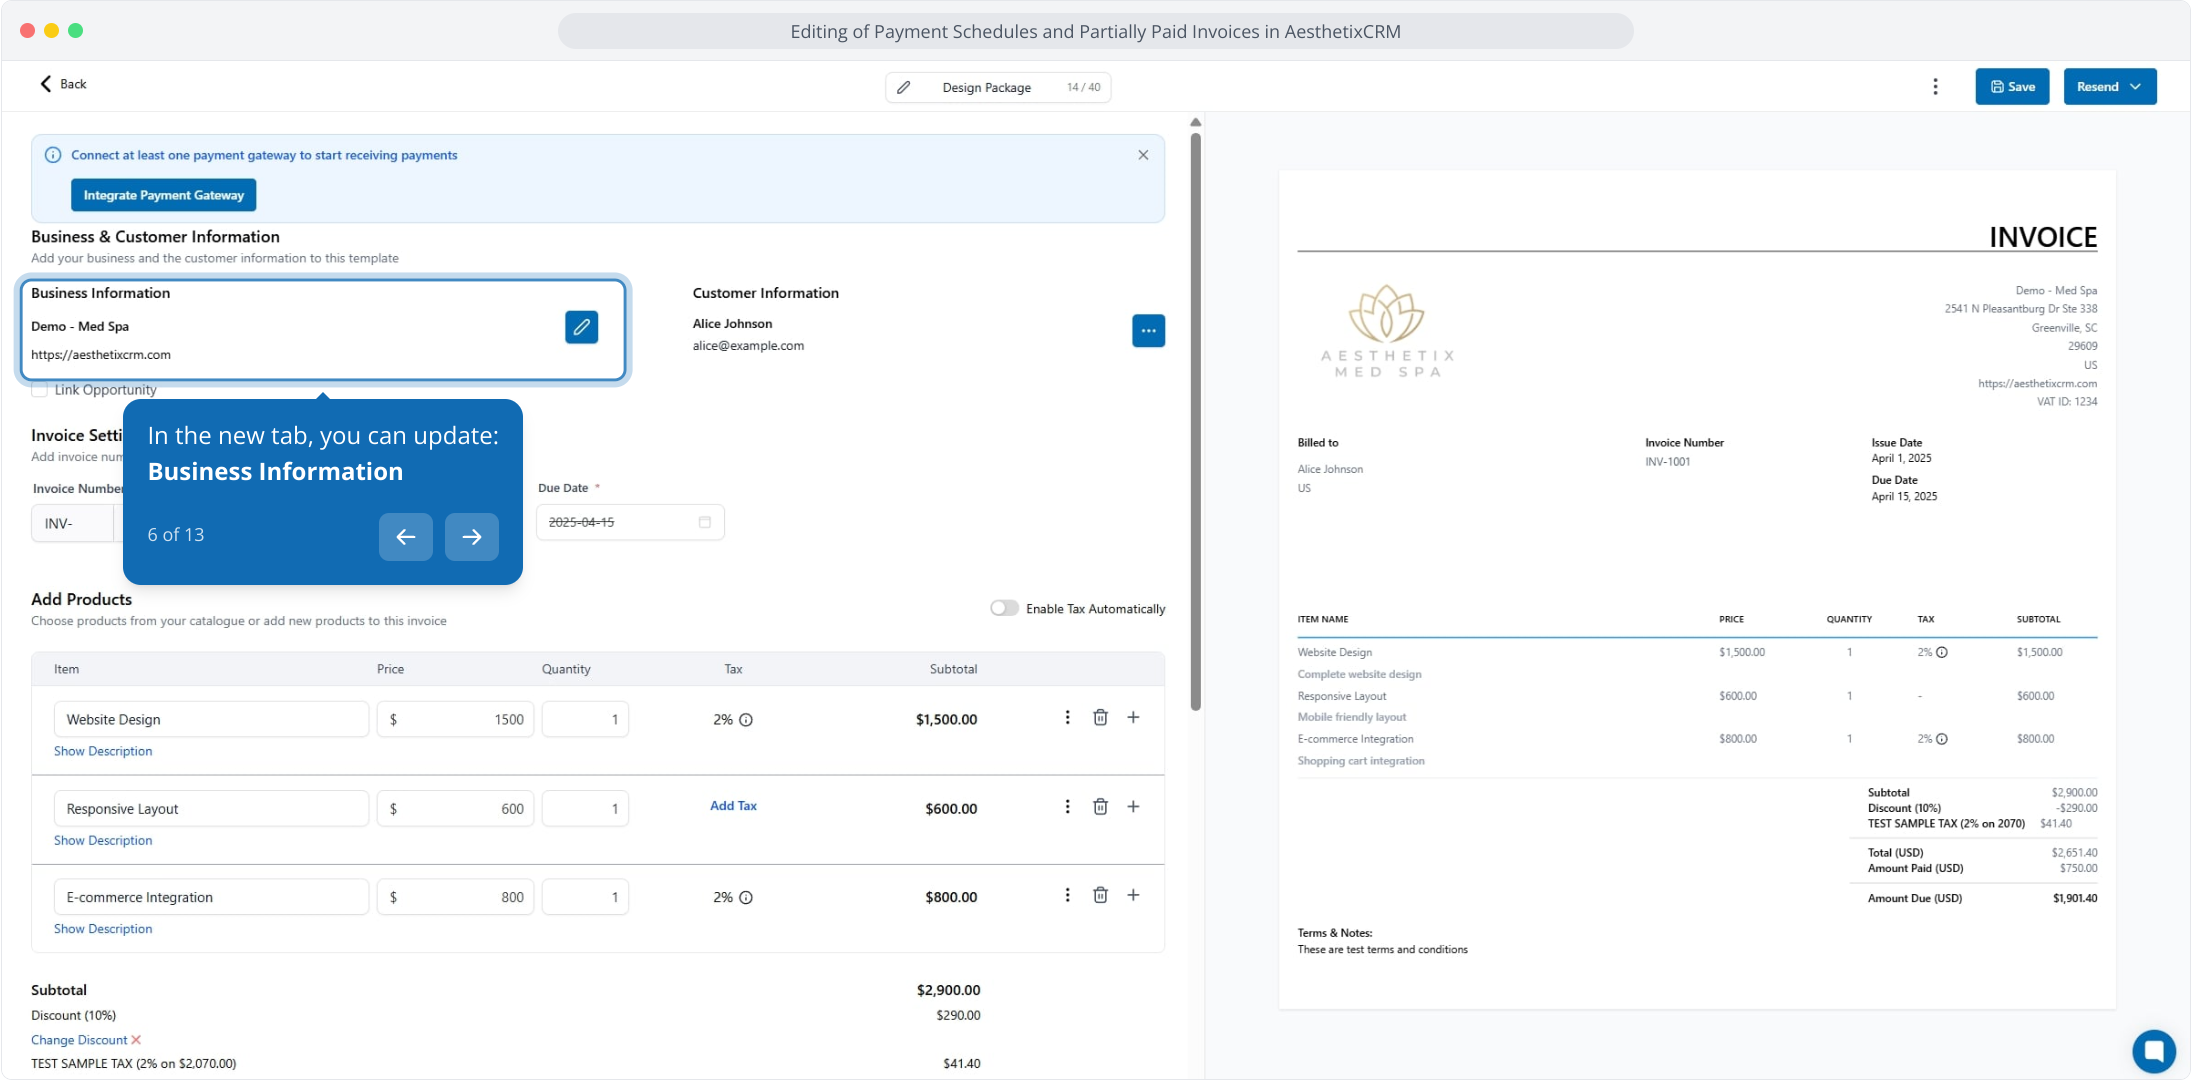
In the new tab, you can update the following sections:
Business Information
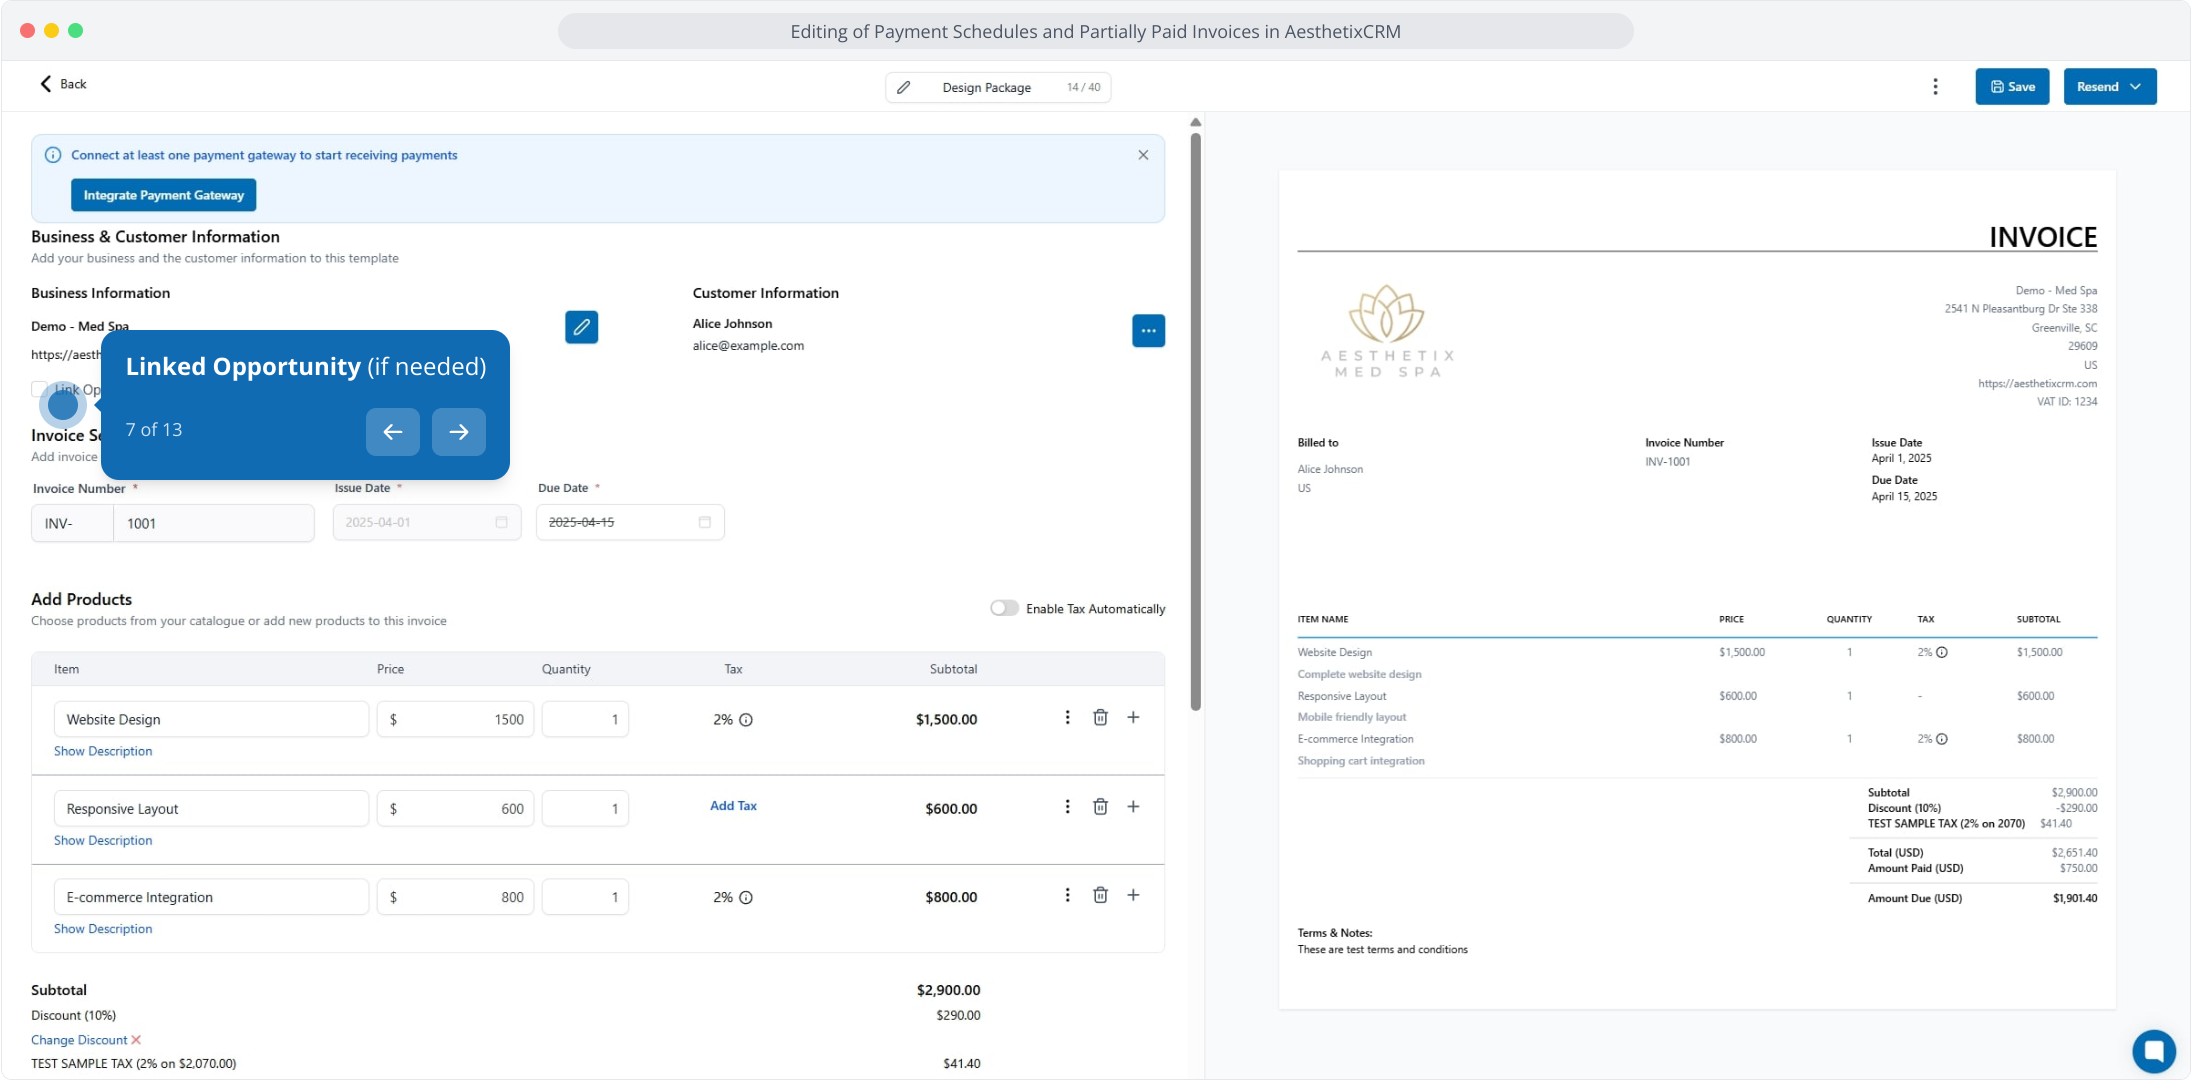
Linked Opportunity (if needed)
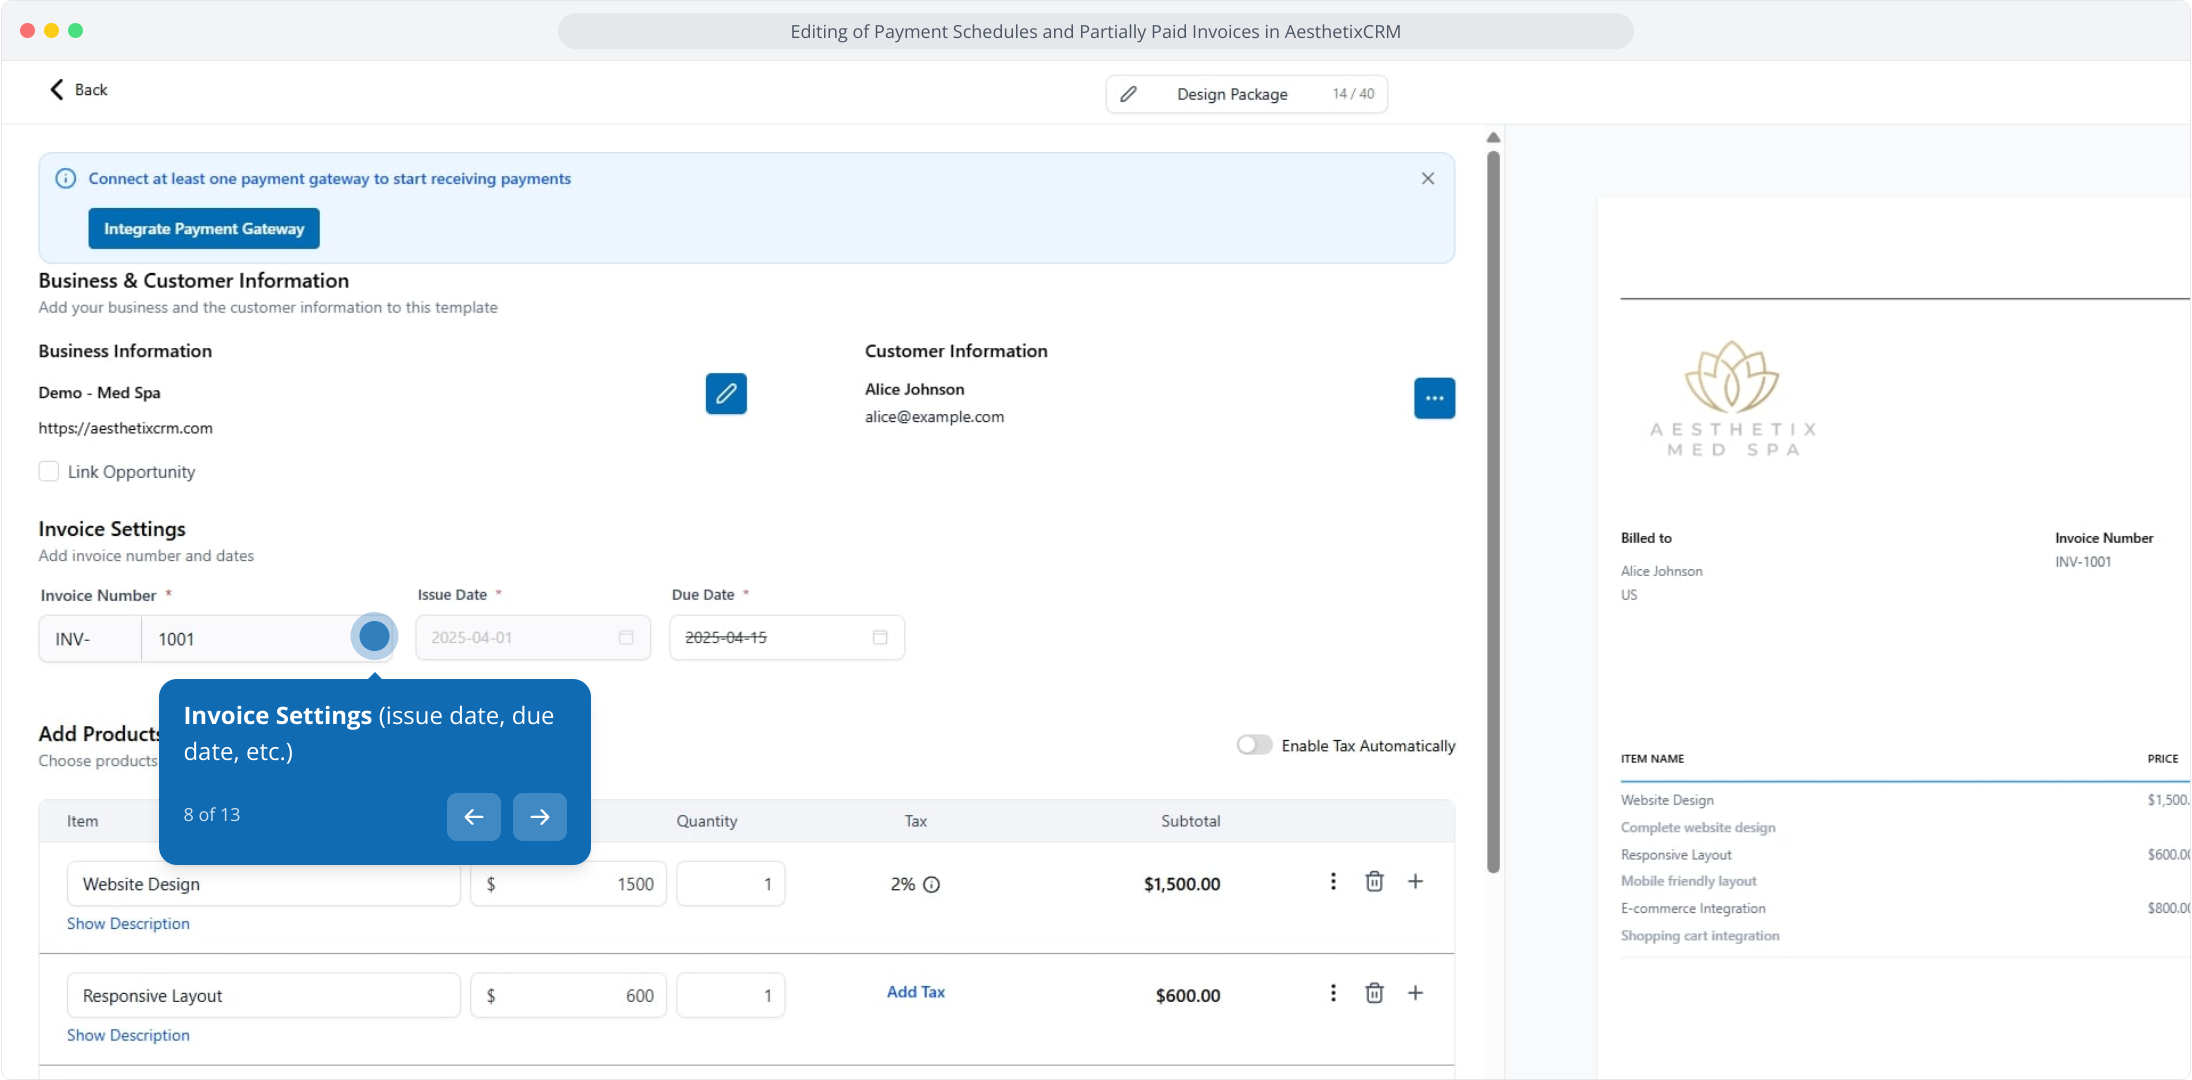
Invoice Settings (issue date, due date, and so on)
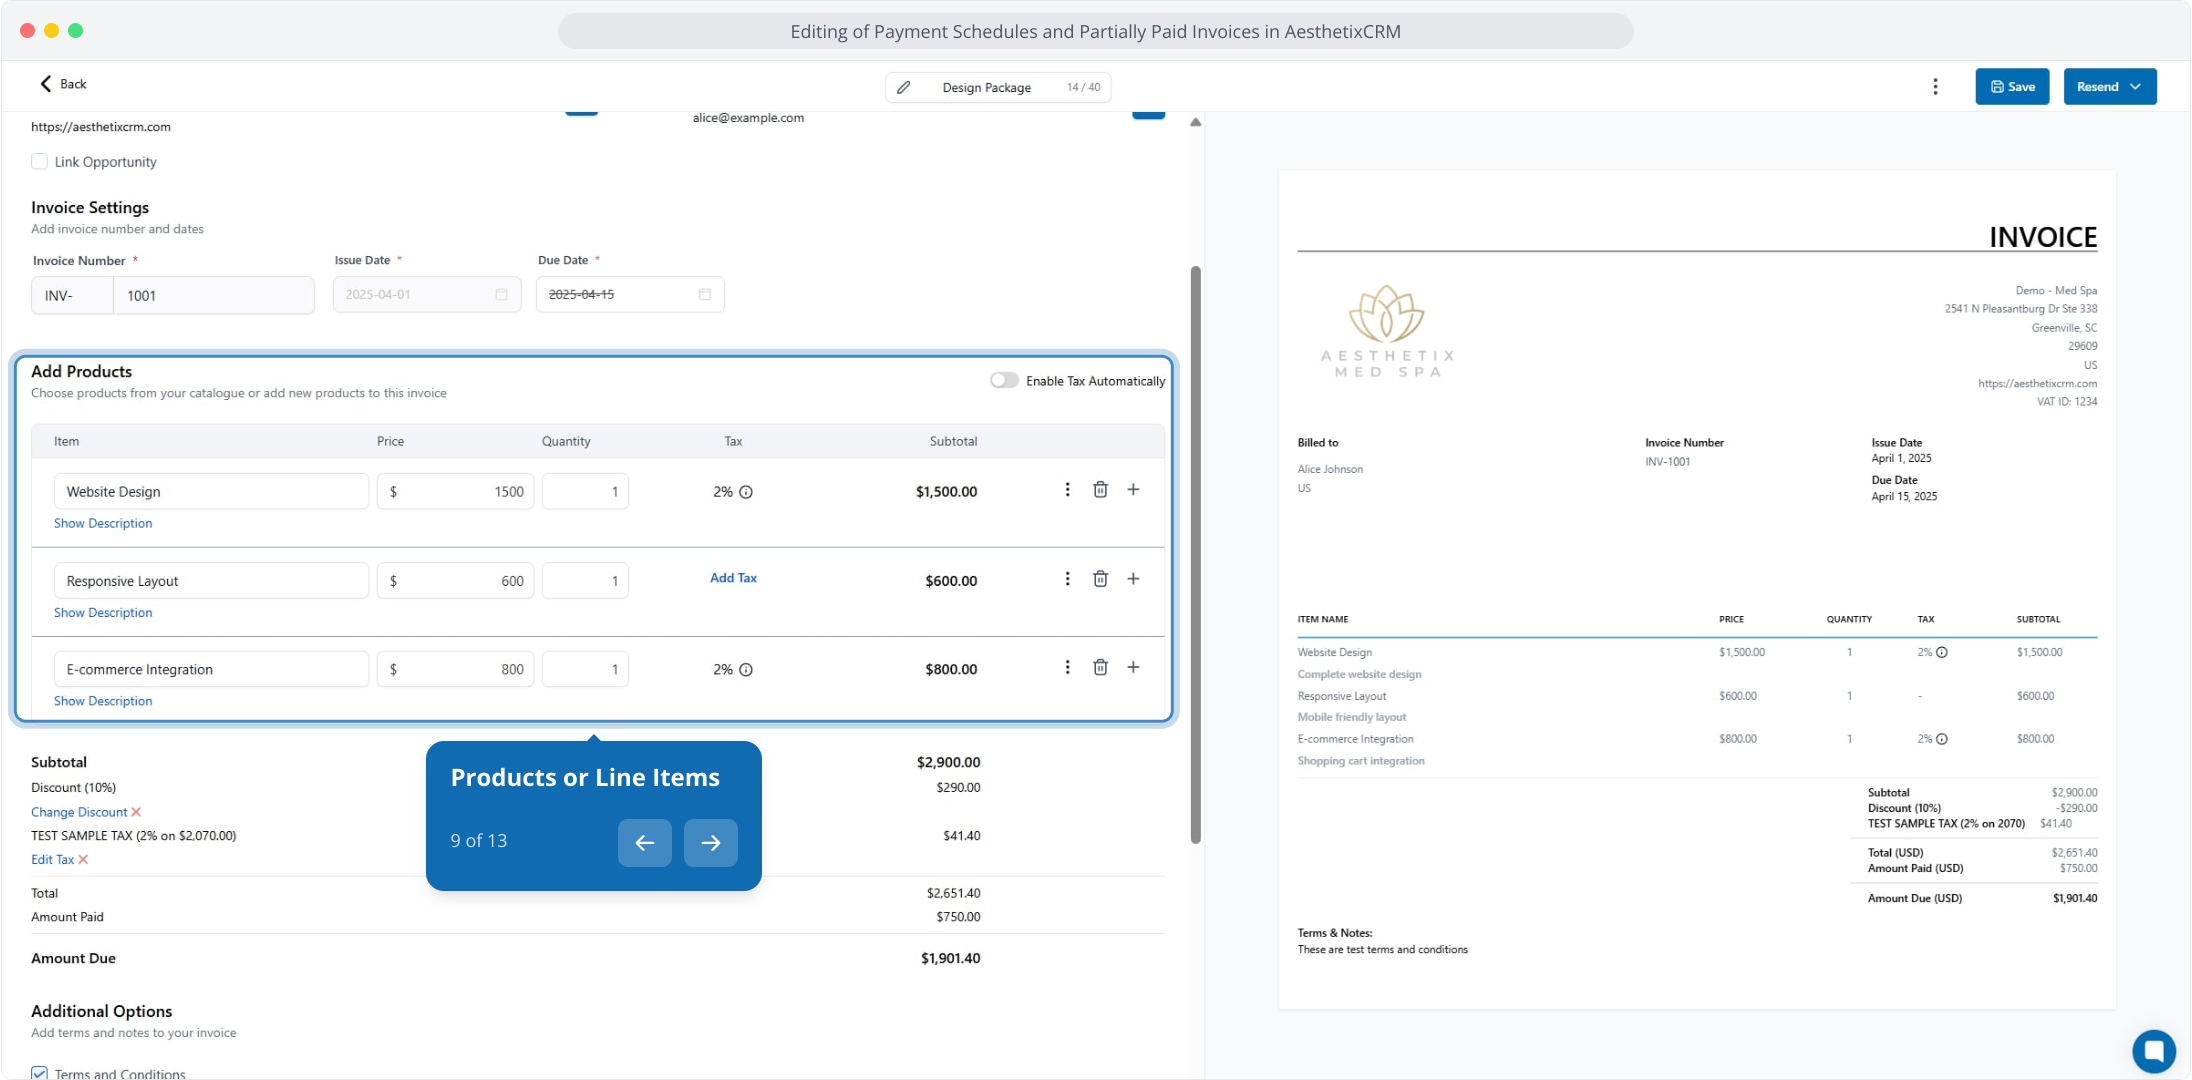
Products or Line Items
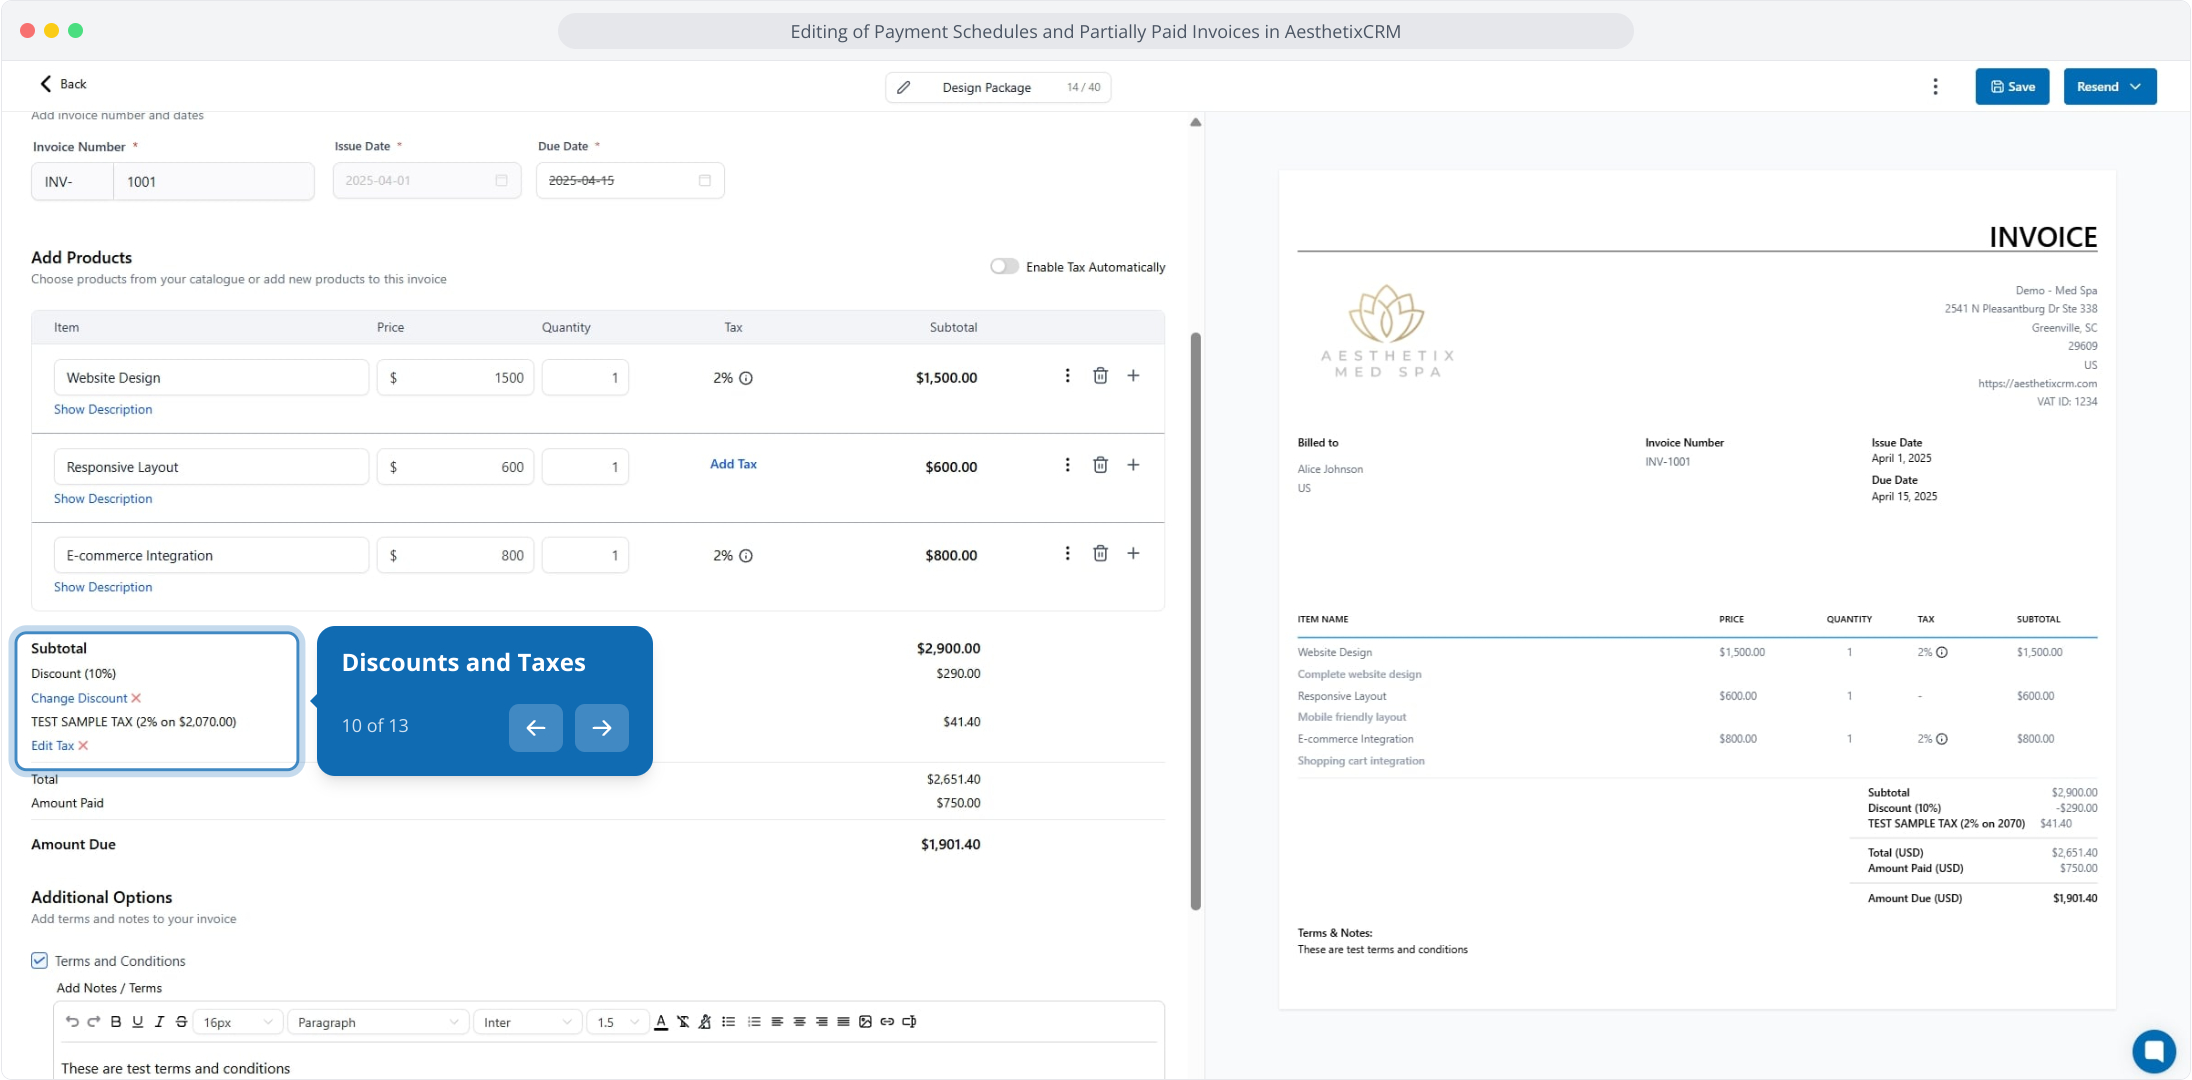
Discounts and Taxes
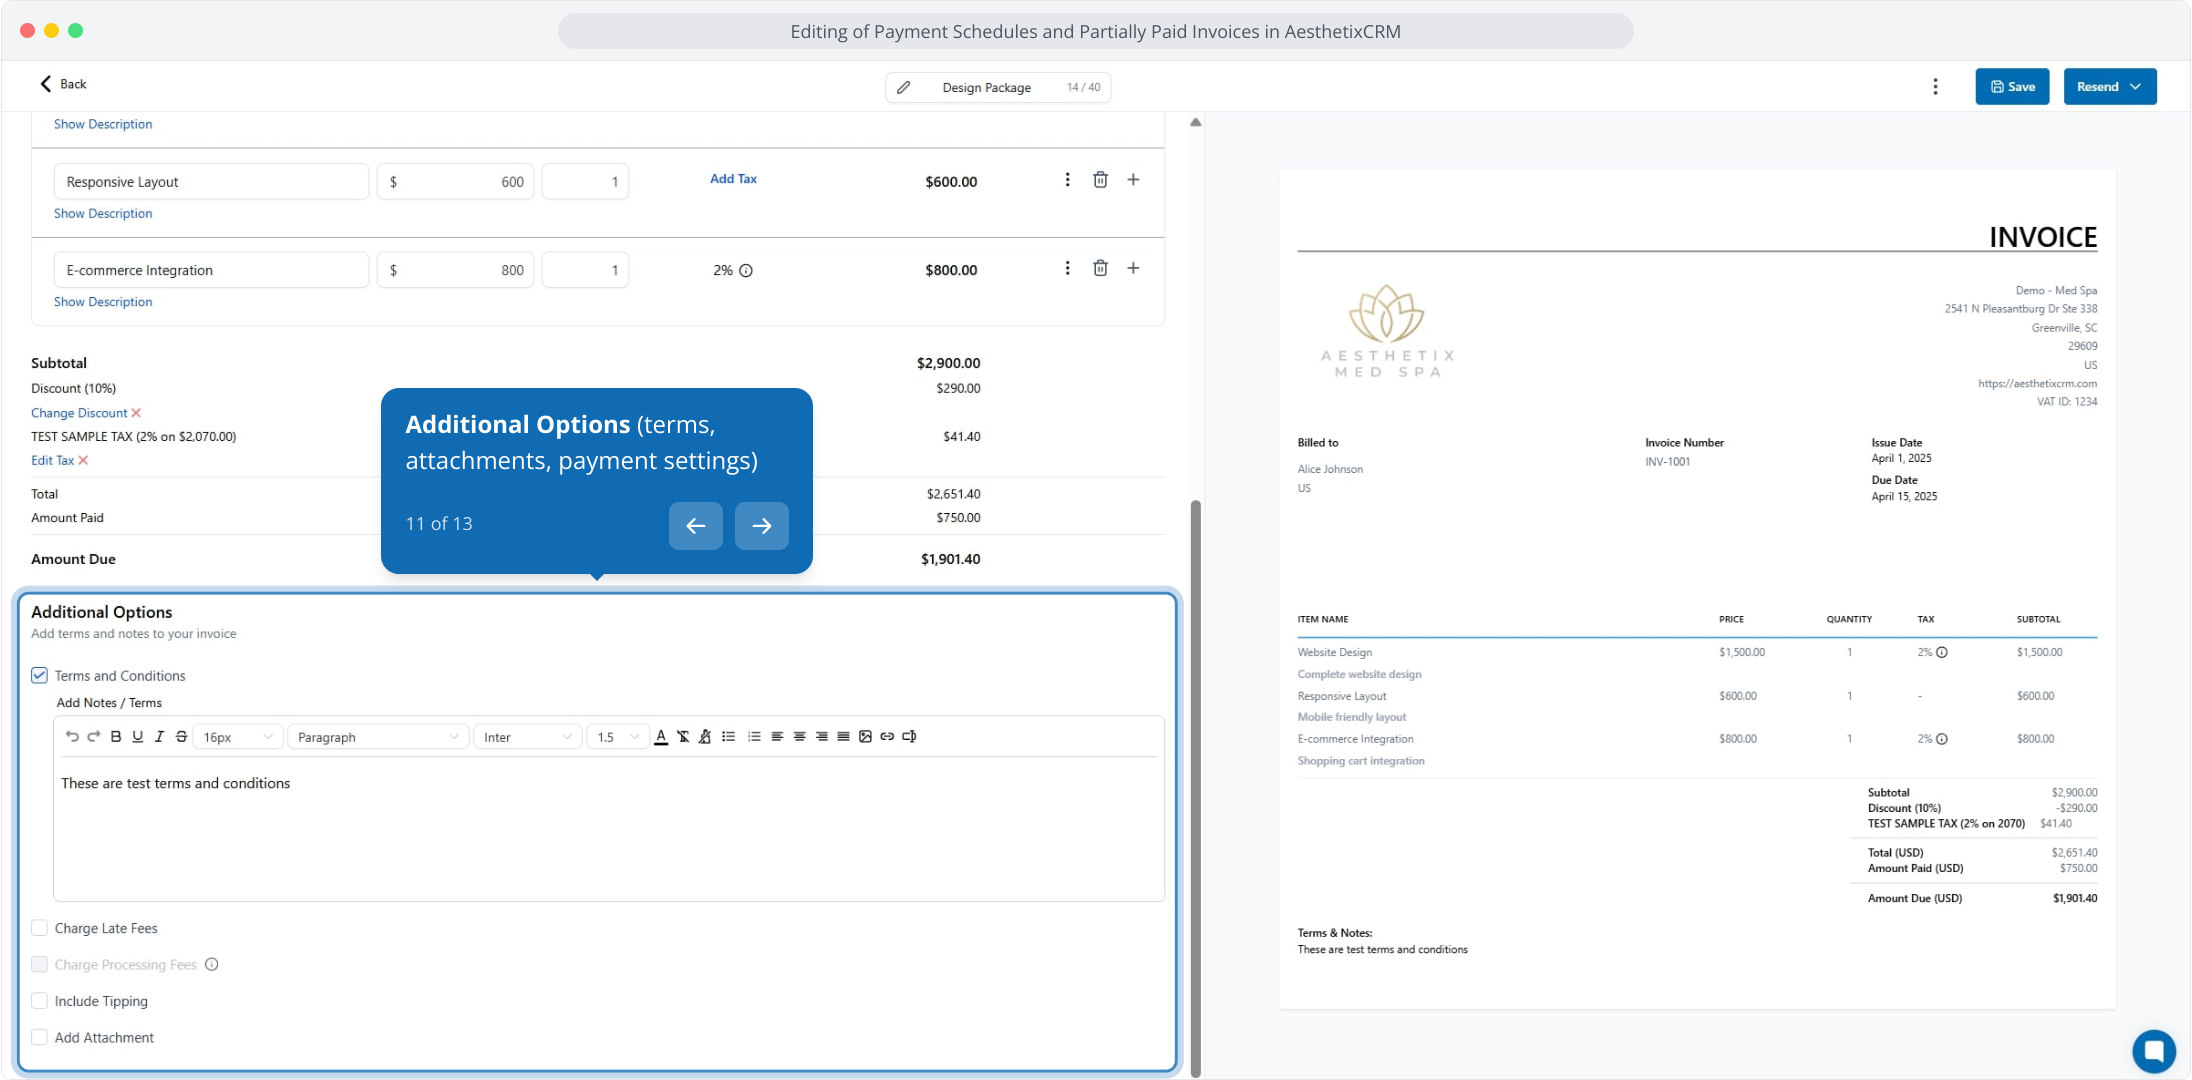
Additional Options (terms, attachments, payment settings)
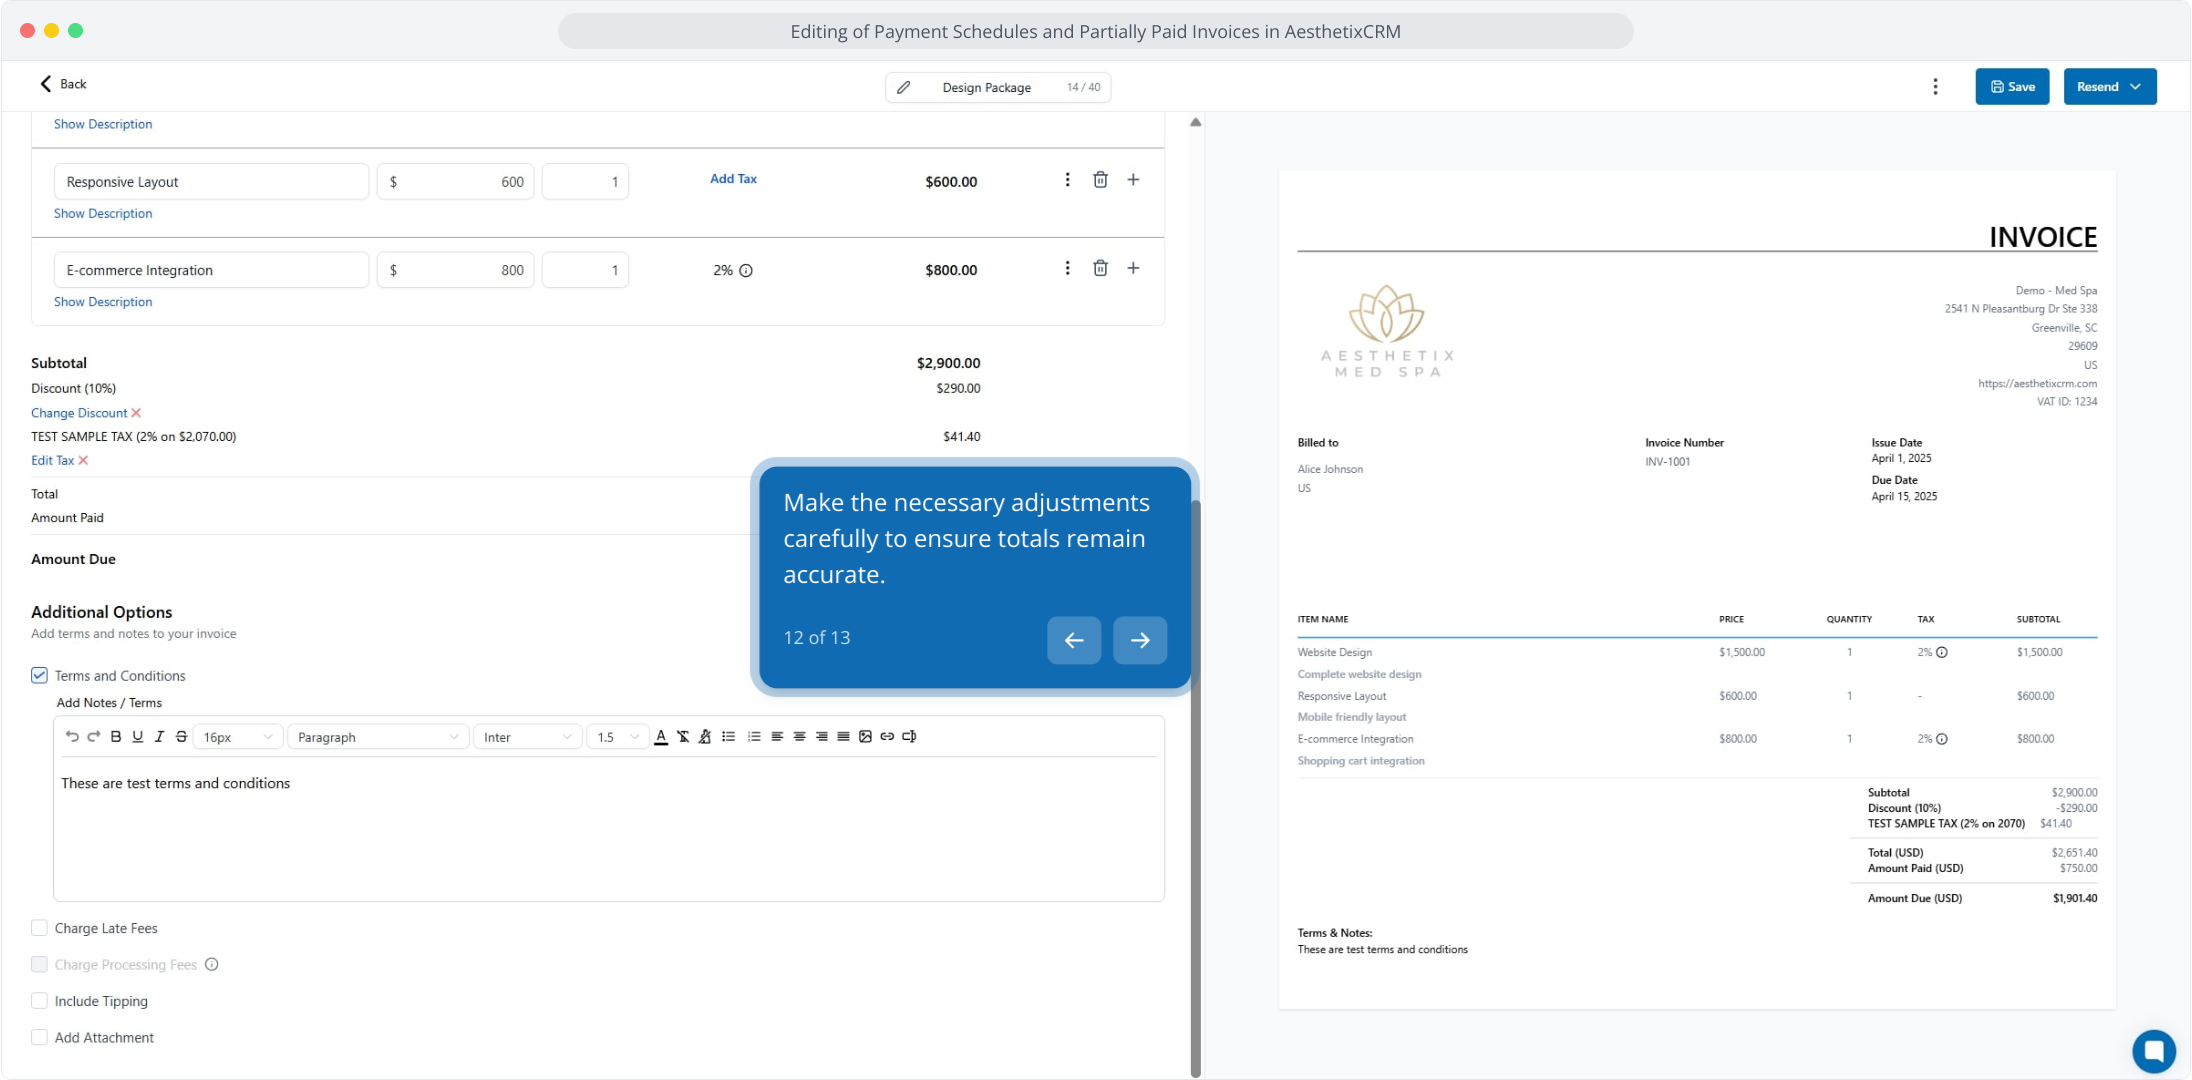
Make your adjustments carefully so the totals remain accurate.
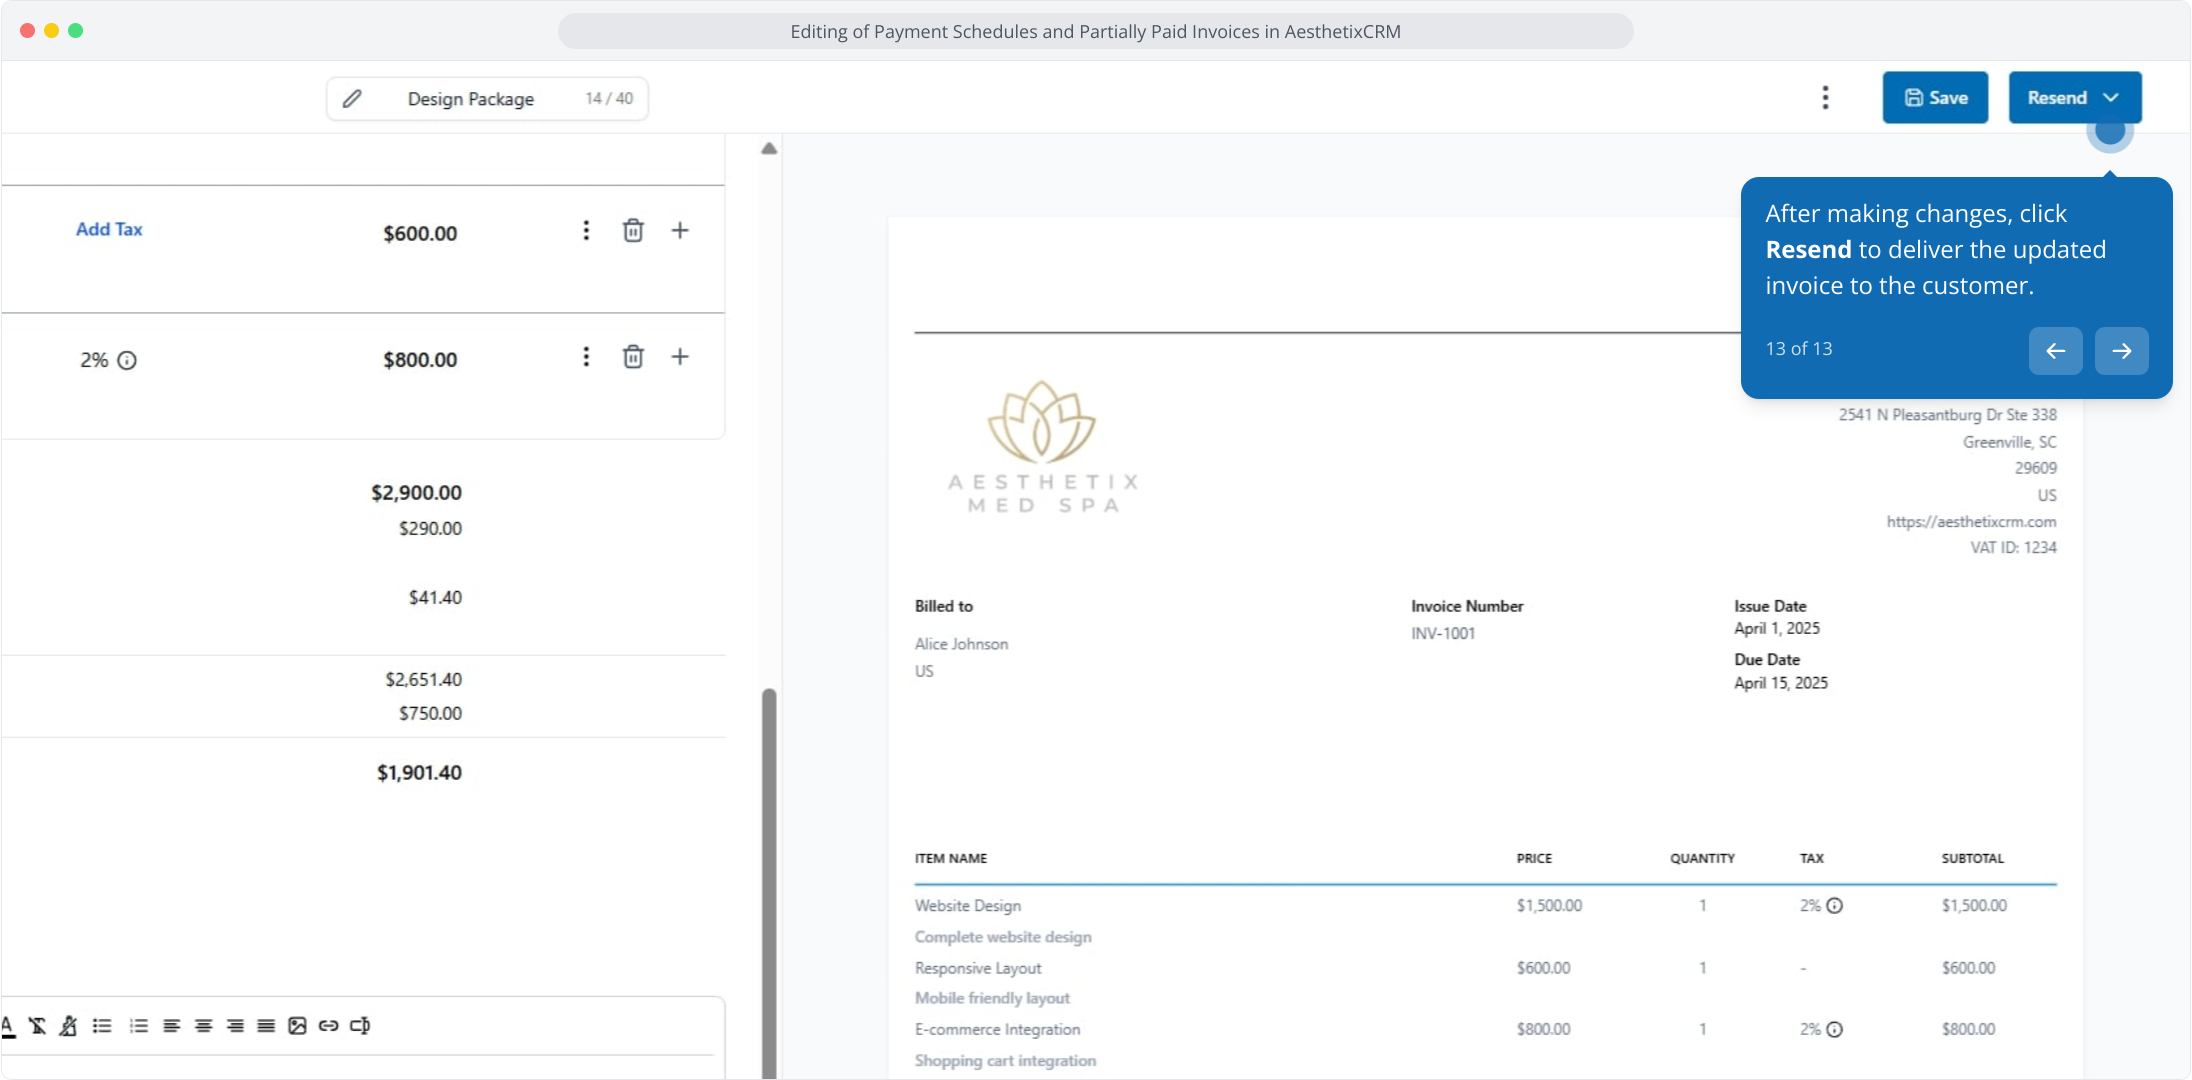
After making changes, click Resend to deliver the updated invoice to the patient.
Invoice details: name, due date, terms, and notes.
Products: add, remove, or update products, or create a new product on the fly.
Amounts and business info: adjust pricing, taxes, or business details.
Payment schedule: add, edit, or delete installments and modify due dates and amounts.
All updates reflect immediately, and previous payments remain intact. You can then resend the updated invoice without reissuing it.
What is the difference between a payment plan and a partial payment? A payment plan splits the invoice into fixed installments that you define, each with its own due date. A partial payment lets the patient pay a deposit of at least a minimum percentage you set, with the balance collected later.
Can I customize the reminder sent for scheduled installments? Yes. Go to Payments → Invoices & Estimates → Settings → Notifications → Customer Notifications, locate Payment Schedule Received, and edit the email or SMS template (or toggle it off).
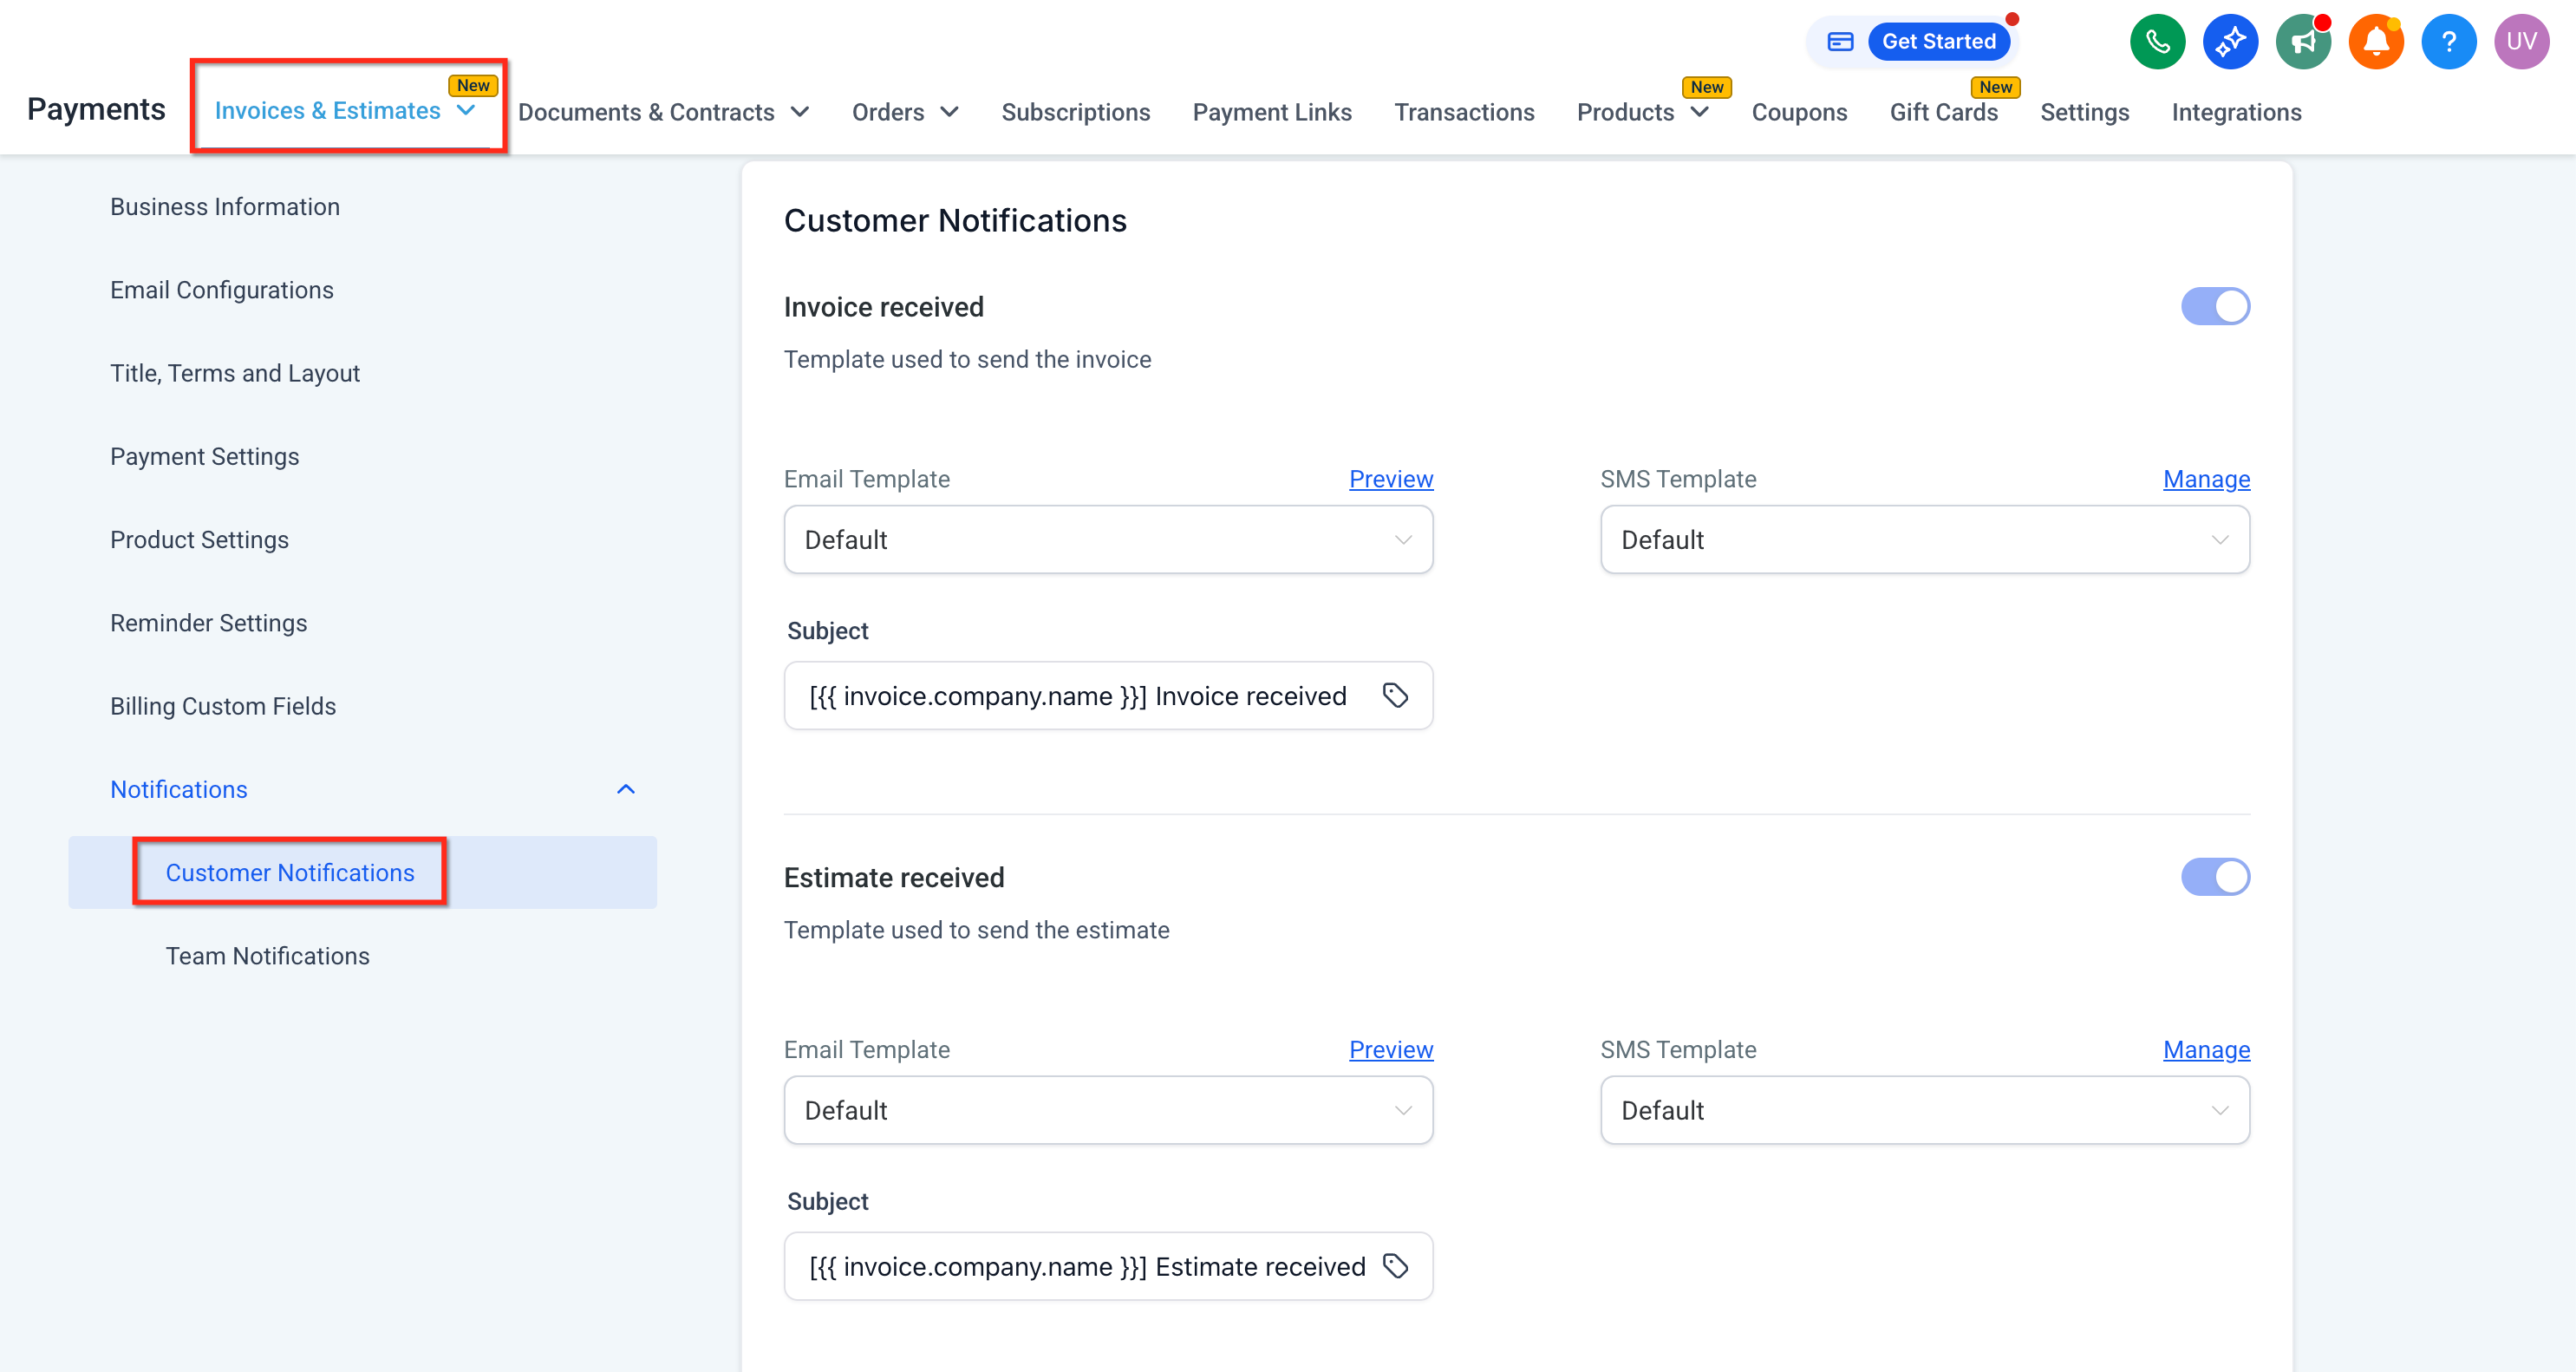
Note: Payment schedule merge fields render empty if the invoice does not include a payment schedule.
Can I auto-charge each installment? Yes. When sending the invoice, enable the auto-payment toggle and choose the patient's card, a saved card, or a new card. Installments then charge automatically on their due dates.
Can I edit an invoice after it is fully paid? No. Editing is only available for invoices in a Partially Paid status. Fully paid invoices cannot be edited.
Will editing a partially paid invoice affect payments already made? No. Previous payments remain intact and unchanged. Only the unpaid sections are updated.
Can I change the patient on a partially paid invoice? No. The associated contact cannot be changed once a payment has been made.
Why am I getting an error when setting installment due dates? Installment due dates must fall on or before the main invoice due date. Update the invoice's main due date first, then set the installment dates and save.
Will the patient be notified about a pending balance after a deposit? Patients are not automatically notified about the pending balance from a deposit. Your staff can view the pending amount under Payments → Invoices and send the drafted balance invoice when ready.
Which payment providers support deposits and installments? A connected provider is required. AX Pay is recommended for the best rates; Stripe and Authorize.net are also supported for calendar-based deposits, and Stripe, Authorize.net, and NMI are supported for invoice partial payments.
