Recurring invoices automatically generate and send invoices to your patients on a set schedule, so you do not have to bill manually each cycle. They are ideal for memberships, monthly treatment plans, subscription-style skincare programs, and installment-based billing. This guide covers creating a recurring invoice, managing frequency and status, adding setup fees, automating payments, and tracking everything with ease.
Tip: Aesthetix CRM offers AX Pay, our own payment processing with rates better than Stripe. For recurring billing and automatic charges, we recommend AX Pay for the best rates. See AX Pay Overview and Setup Guide. We recommend connecting a payment provider so charges process online; without one, payments must be recorded manually. Existing Stripe setups continue to work.
A recurring invoice is a pre-scheduled template that automatically sends to your patient based on the frequency you define. You set it up once and the system handles the rest, which saves time and gives patients consistent, predictable billing.
Key benefits:
Time savings: Automate repetitive billing and focus on your practice.
Accuracy: Reduce manual errors with a consistent template.
Predictable cash flow: Receive payments on a regular, dependable schedule.
Patient convenience: Provide clear, consistent billing cycles.
Note: Only one-time and recurring products qualify for recurring invoices. For recurring products, only the recurring price is applied and the frequency is set within the invoice frequency settings.
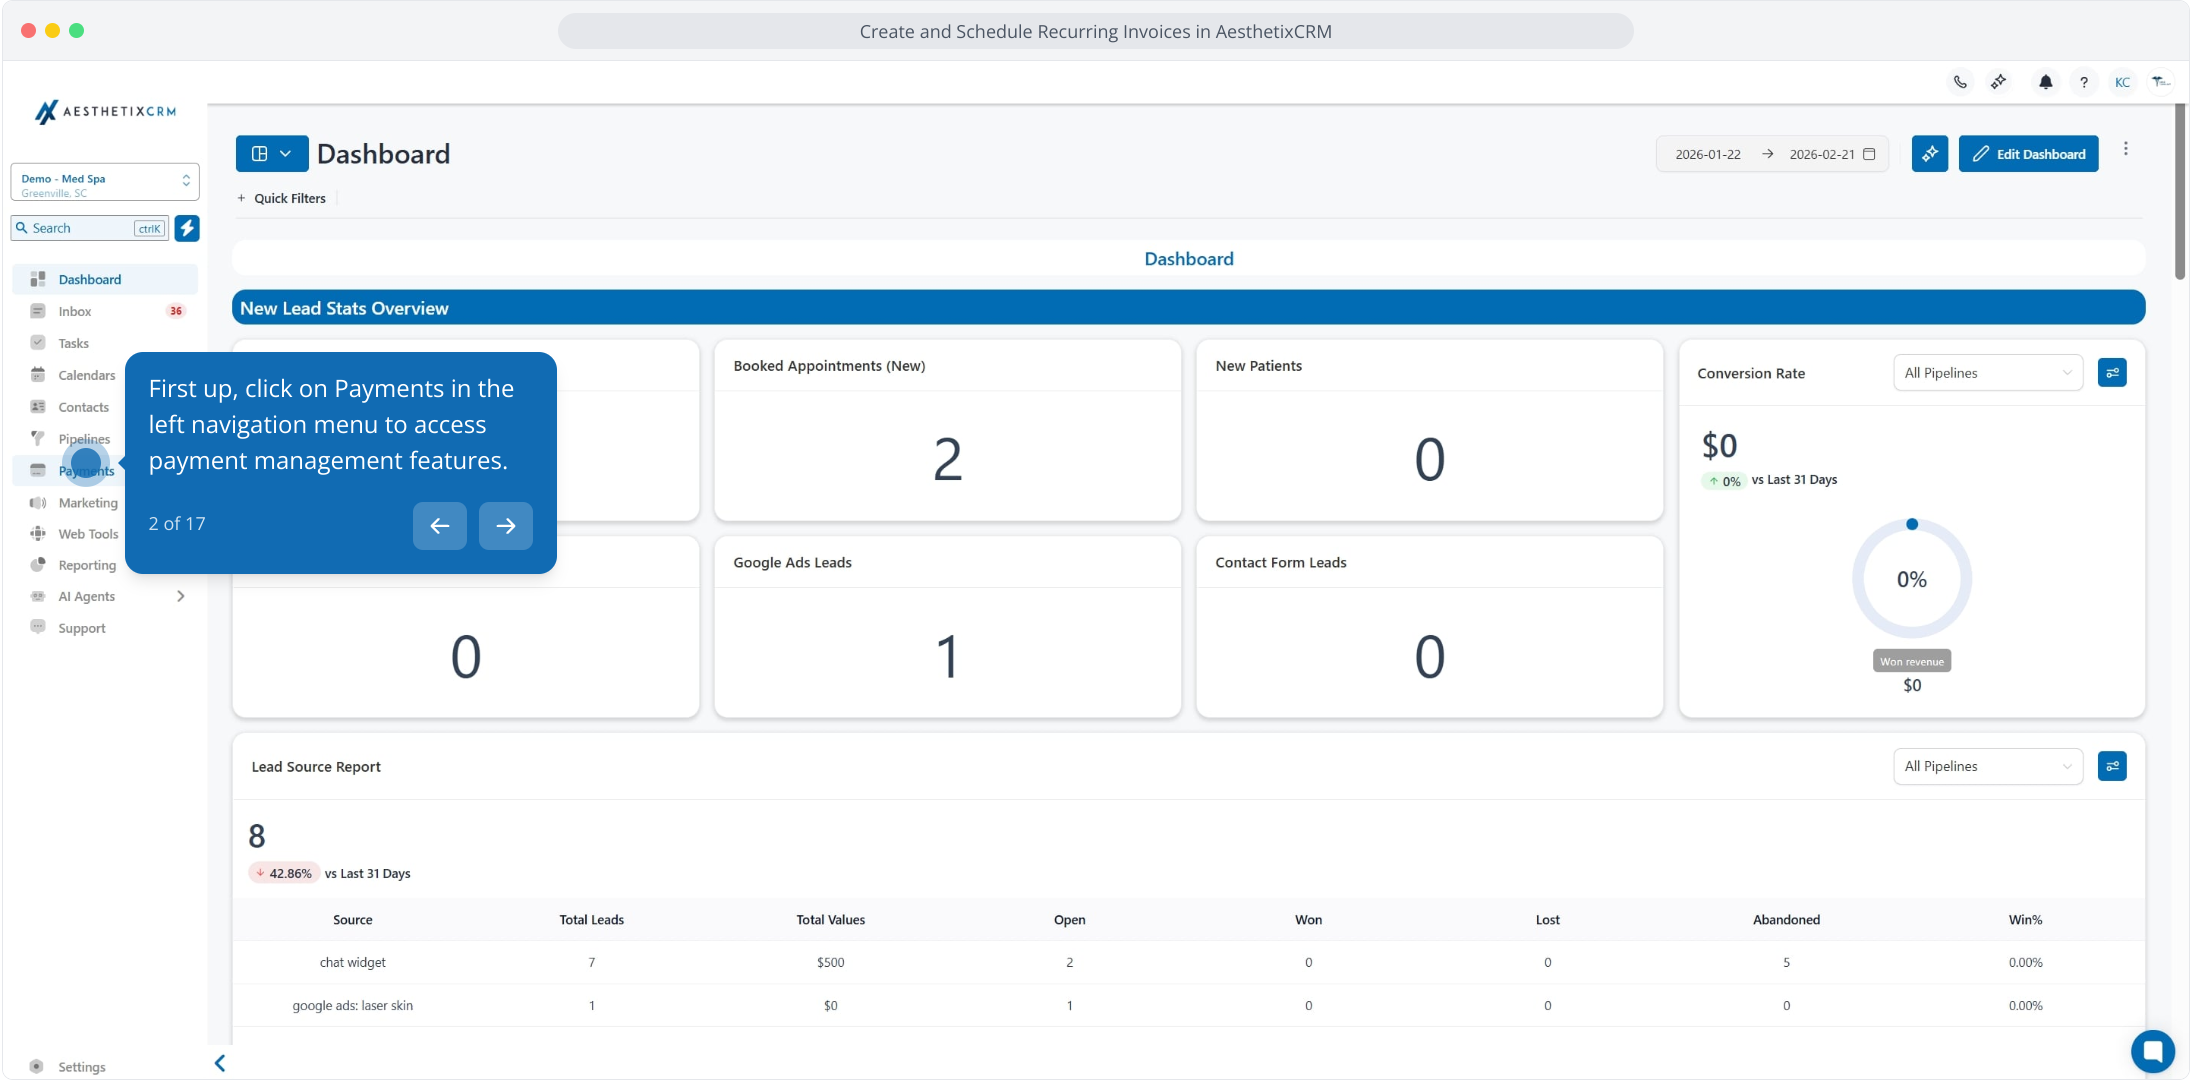
Click on Payments in the left navigation to access payment management.
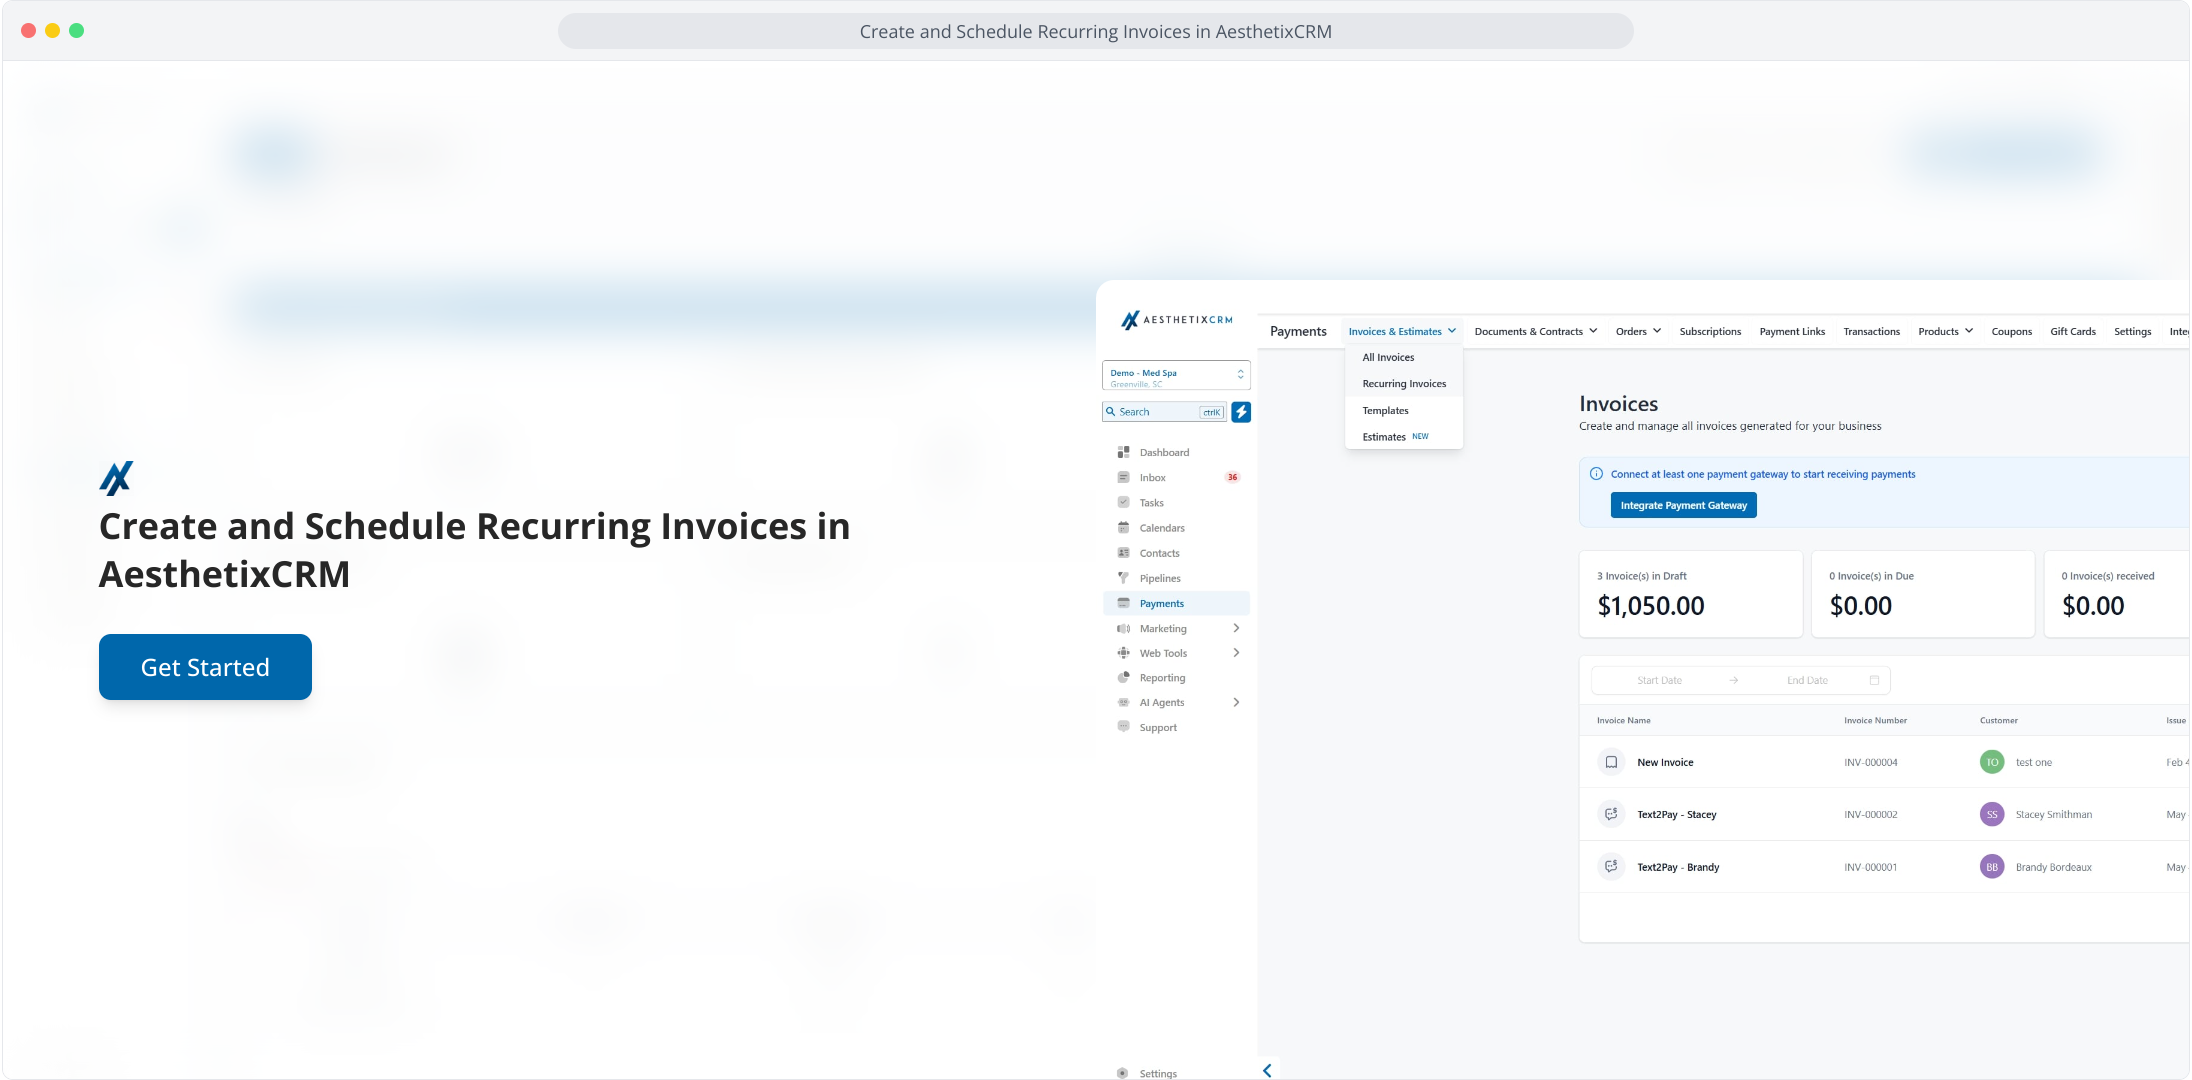
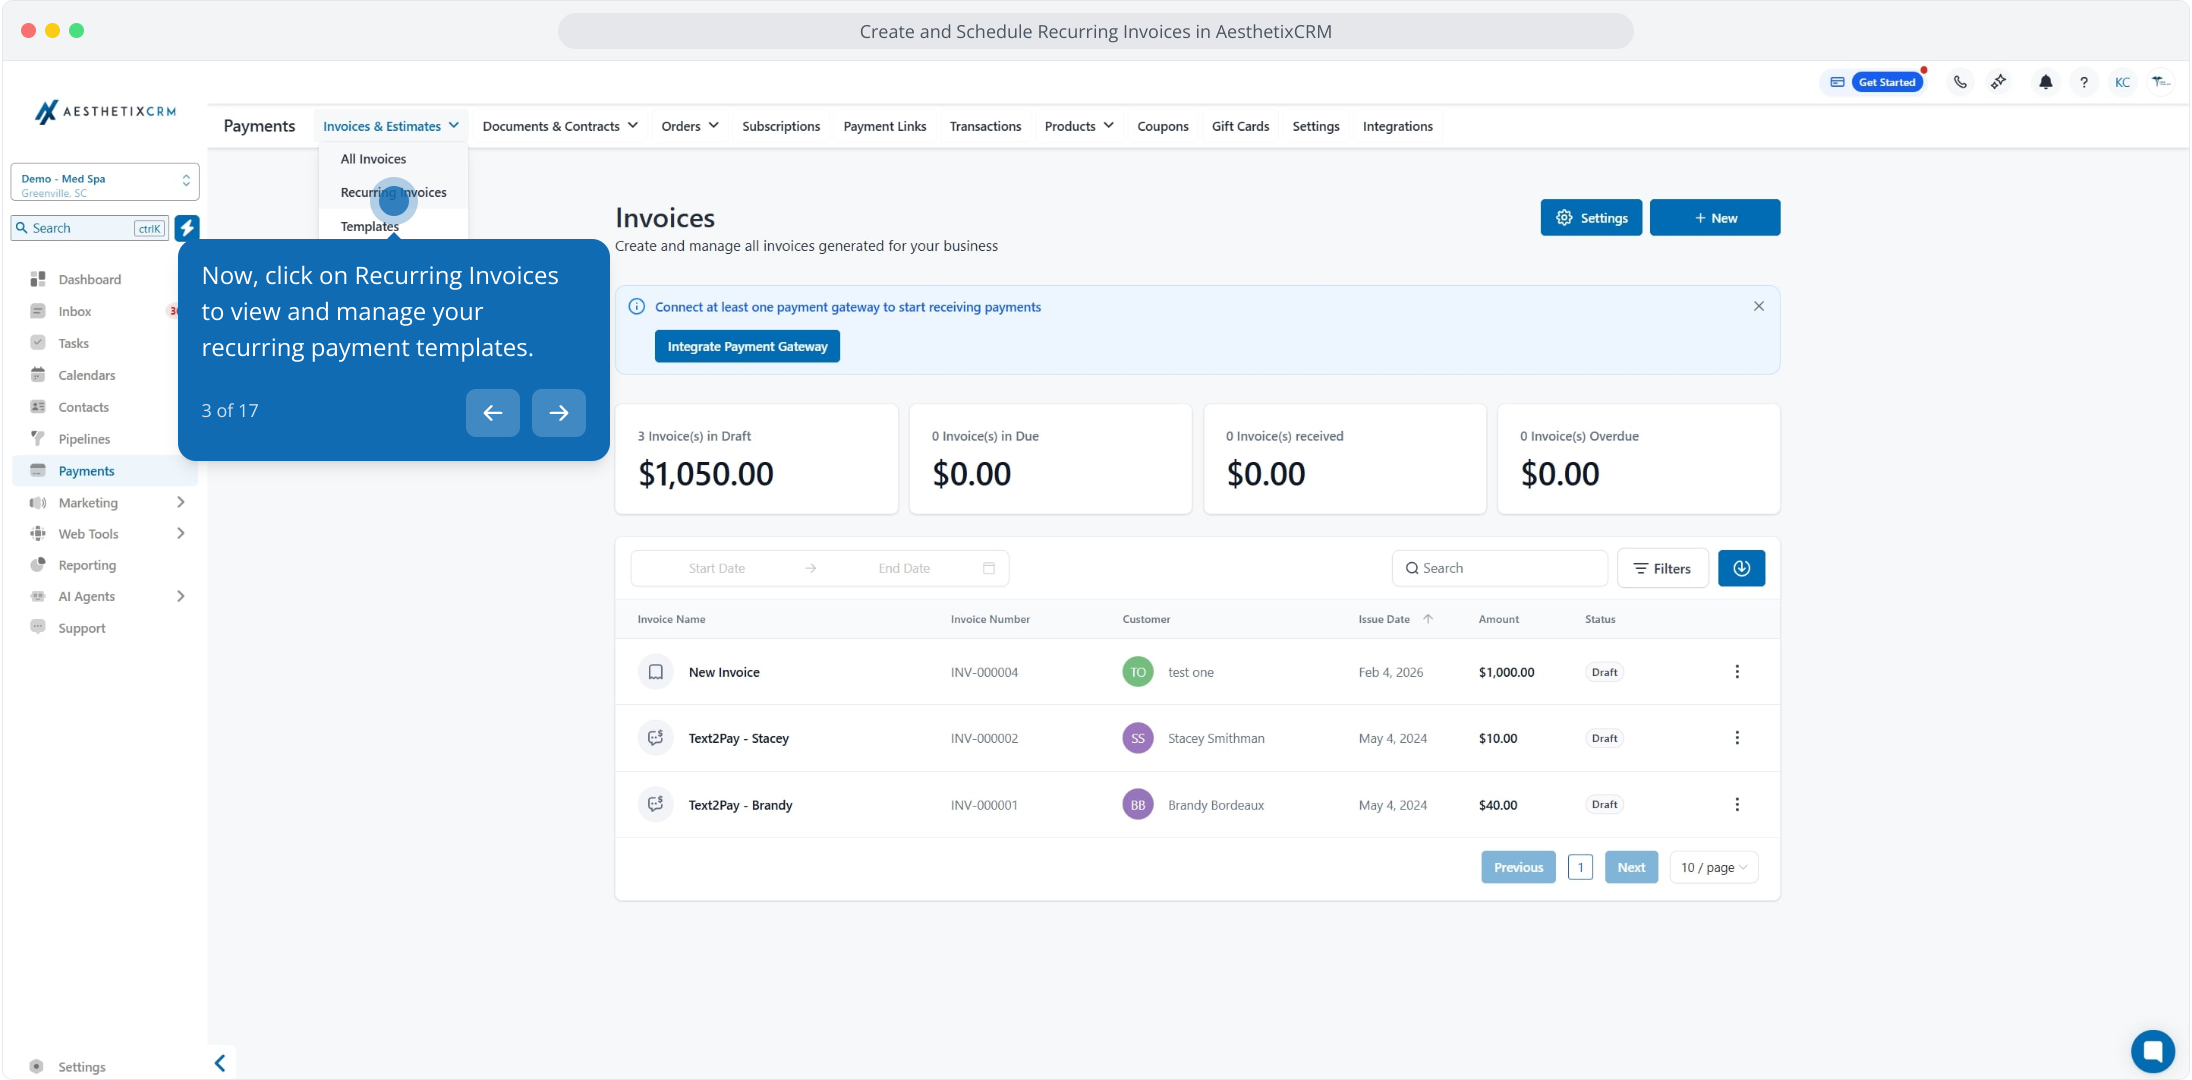
Click Recurring Invoices to view and manage your recurring templates.
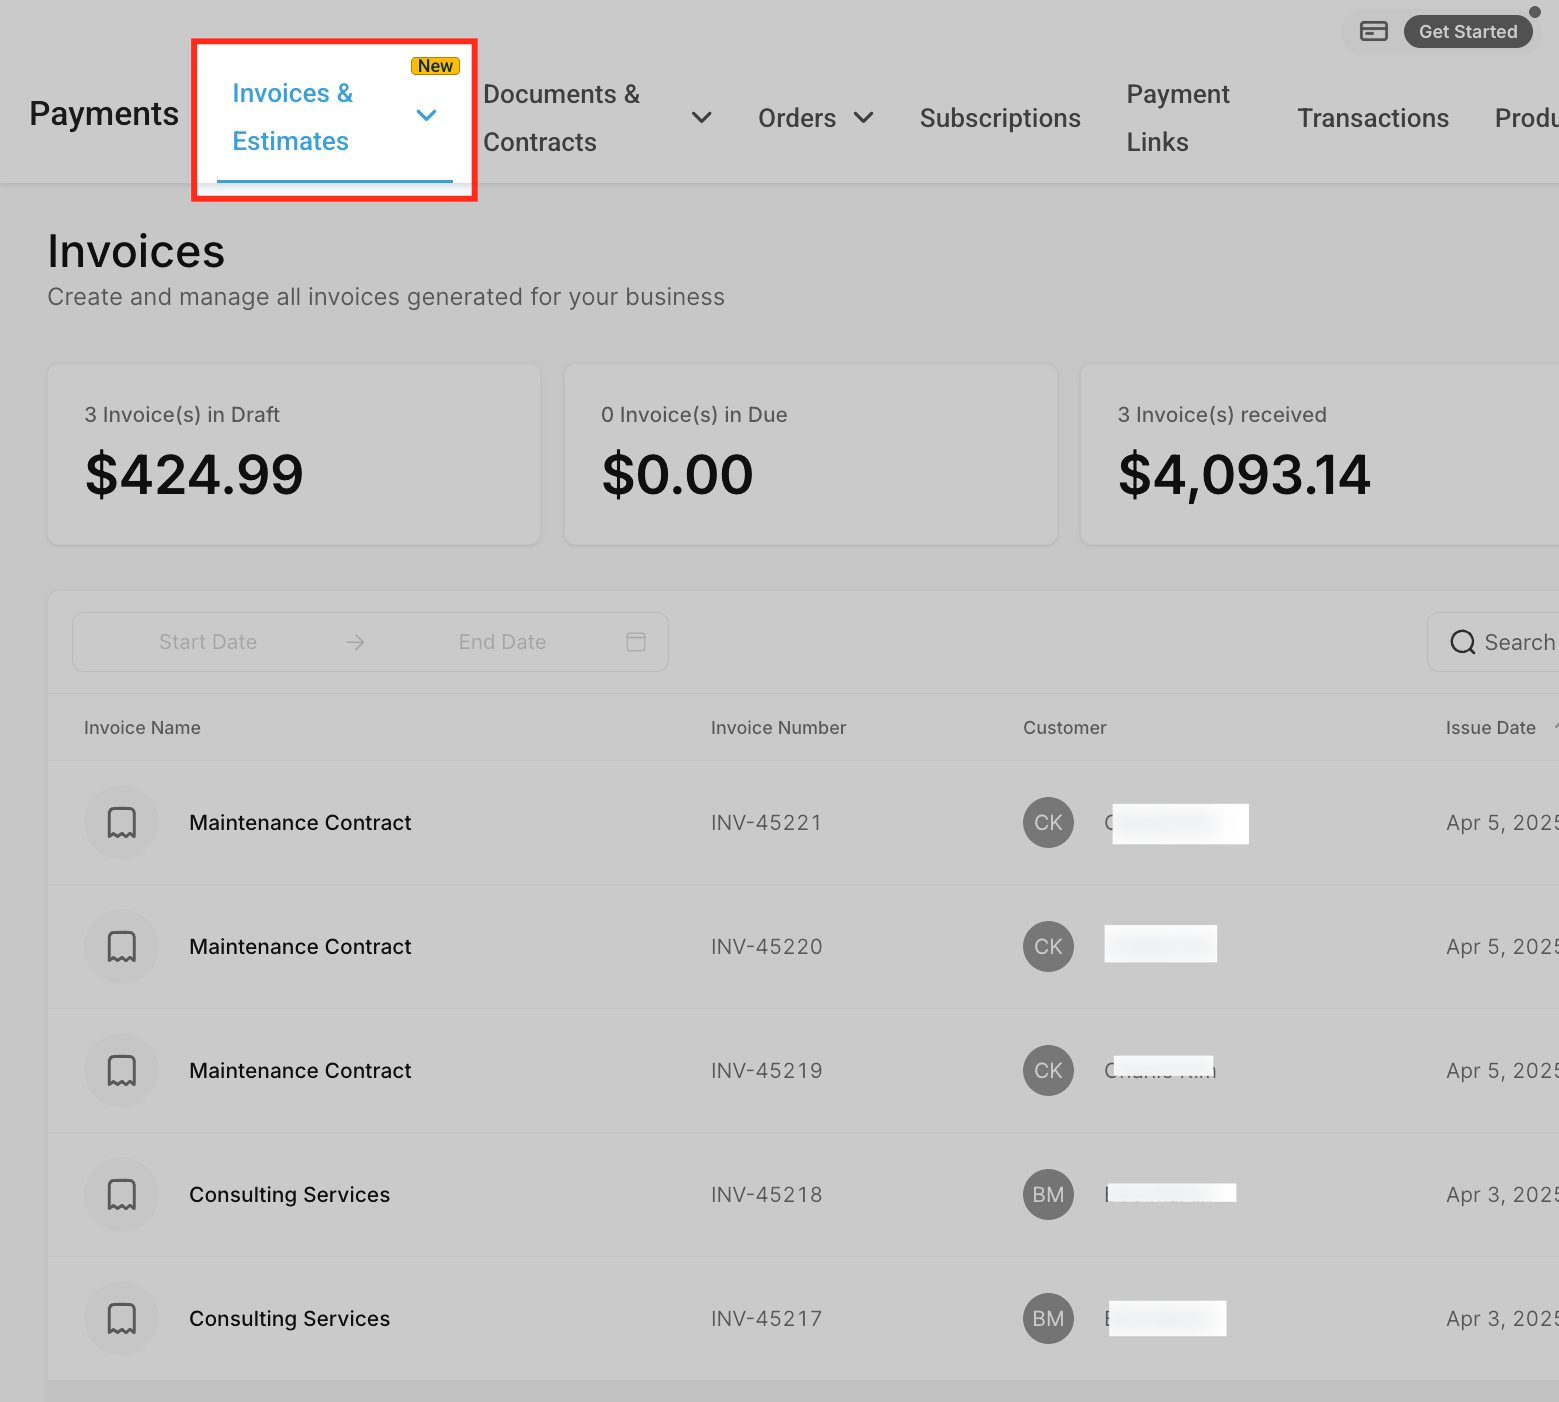
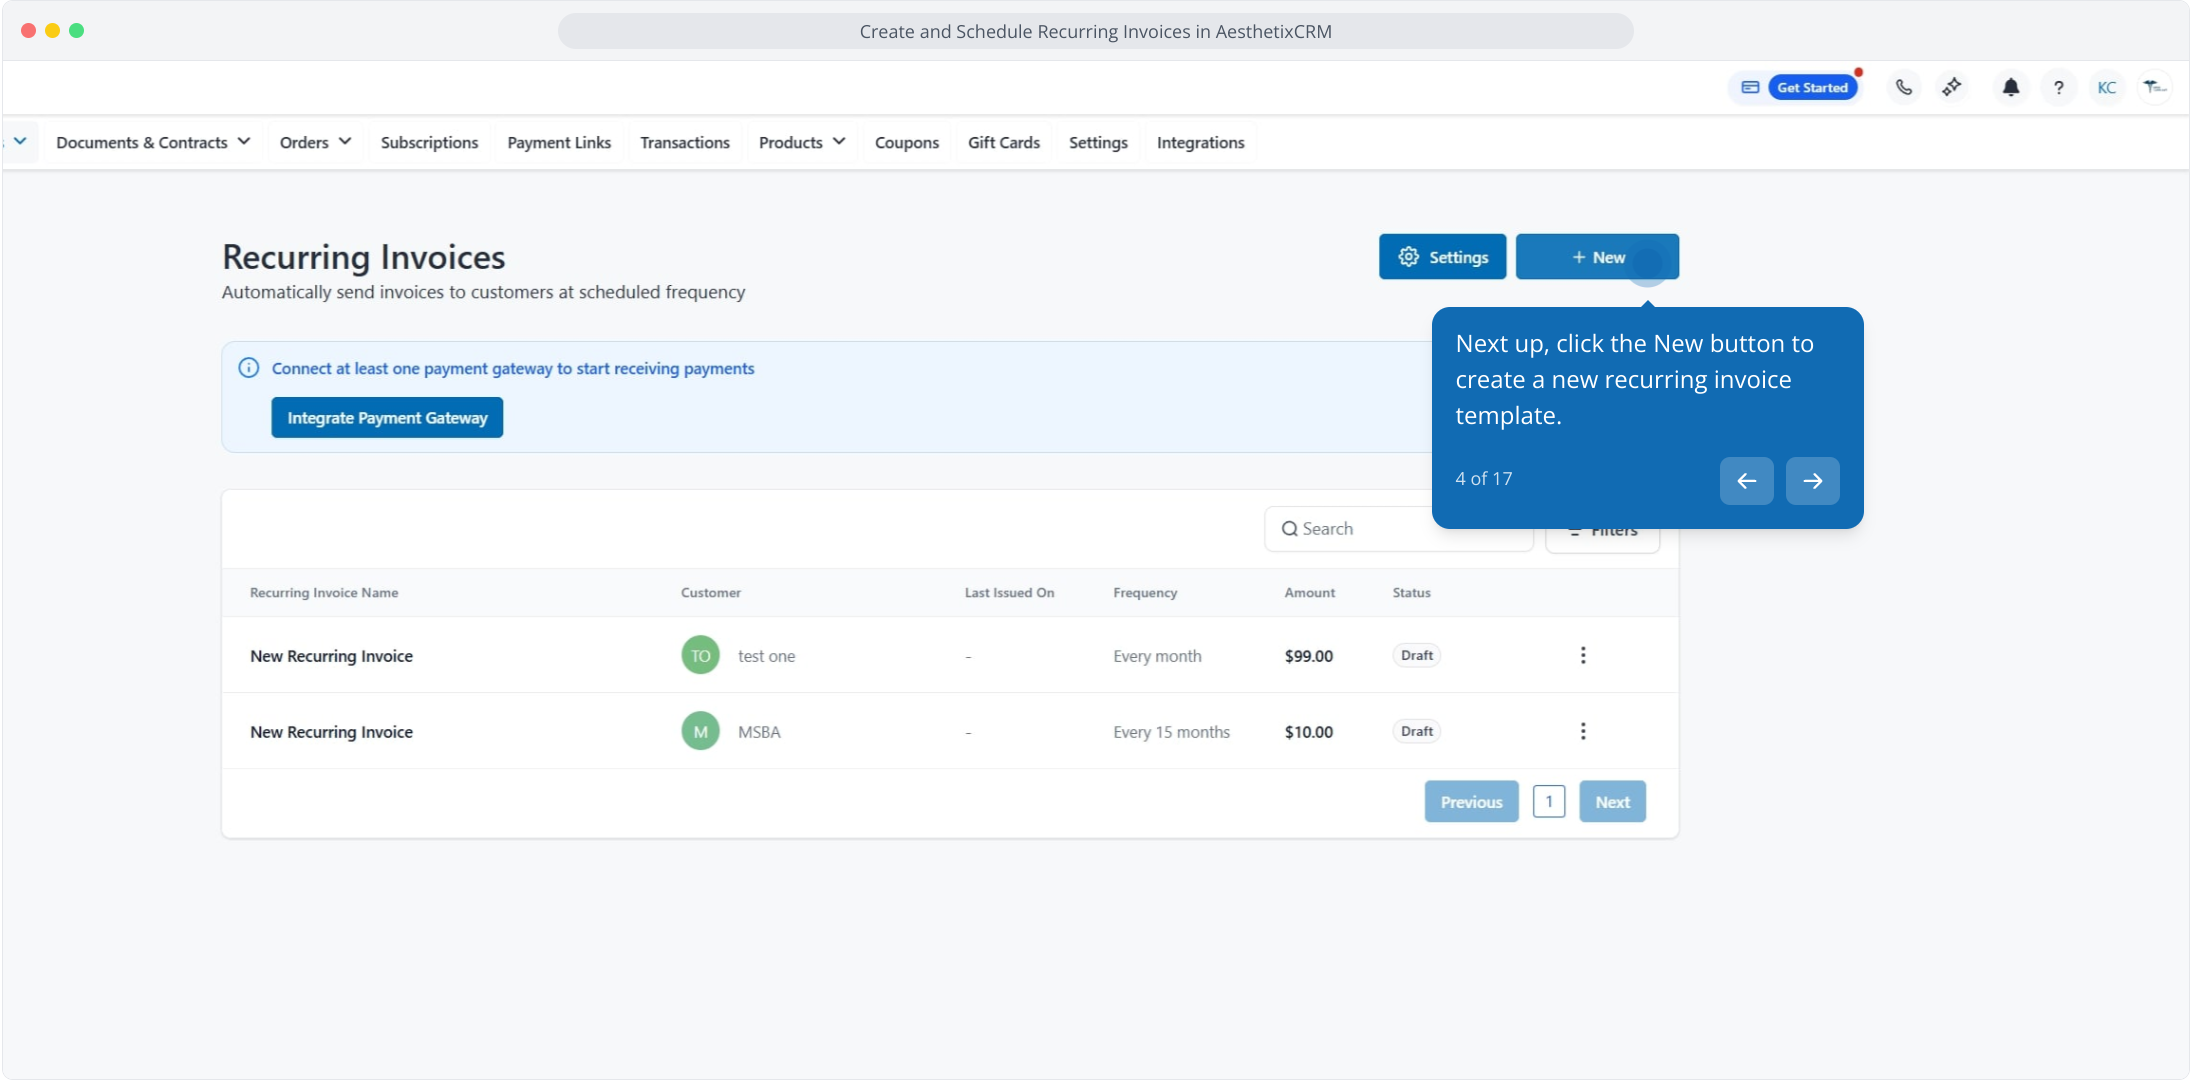
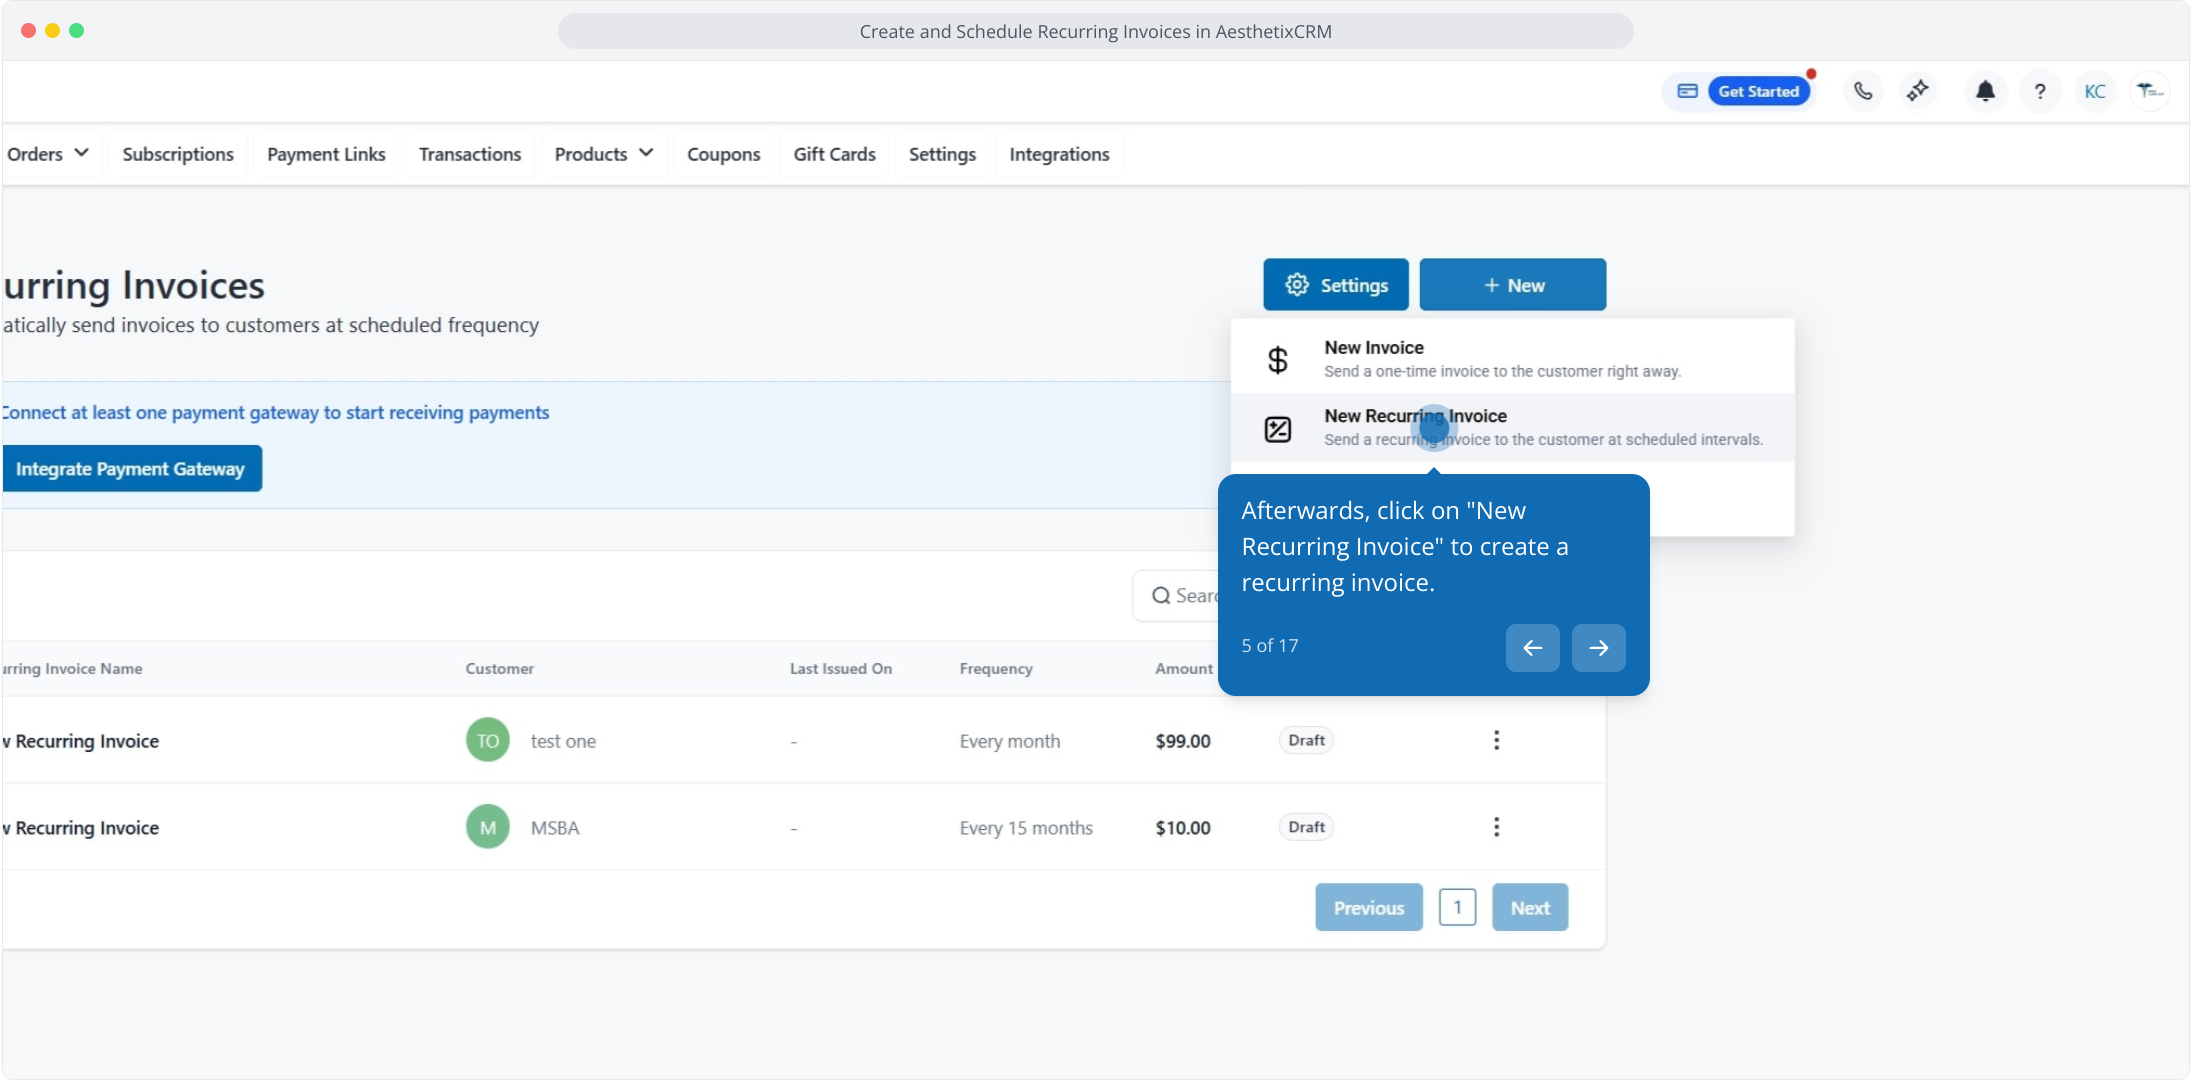
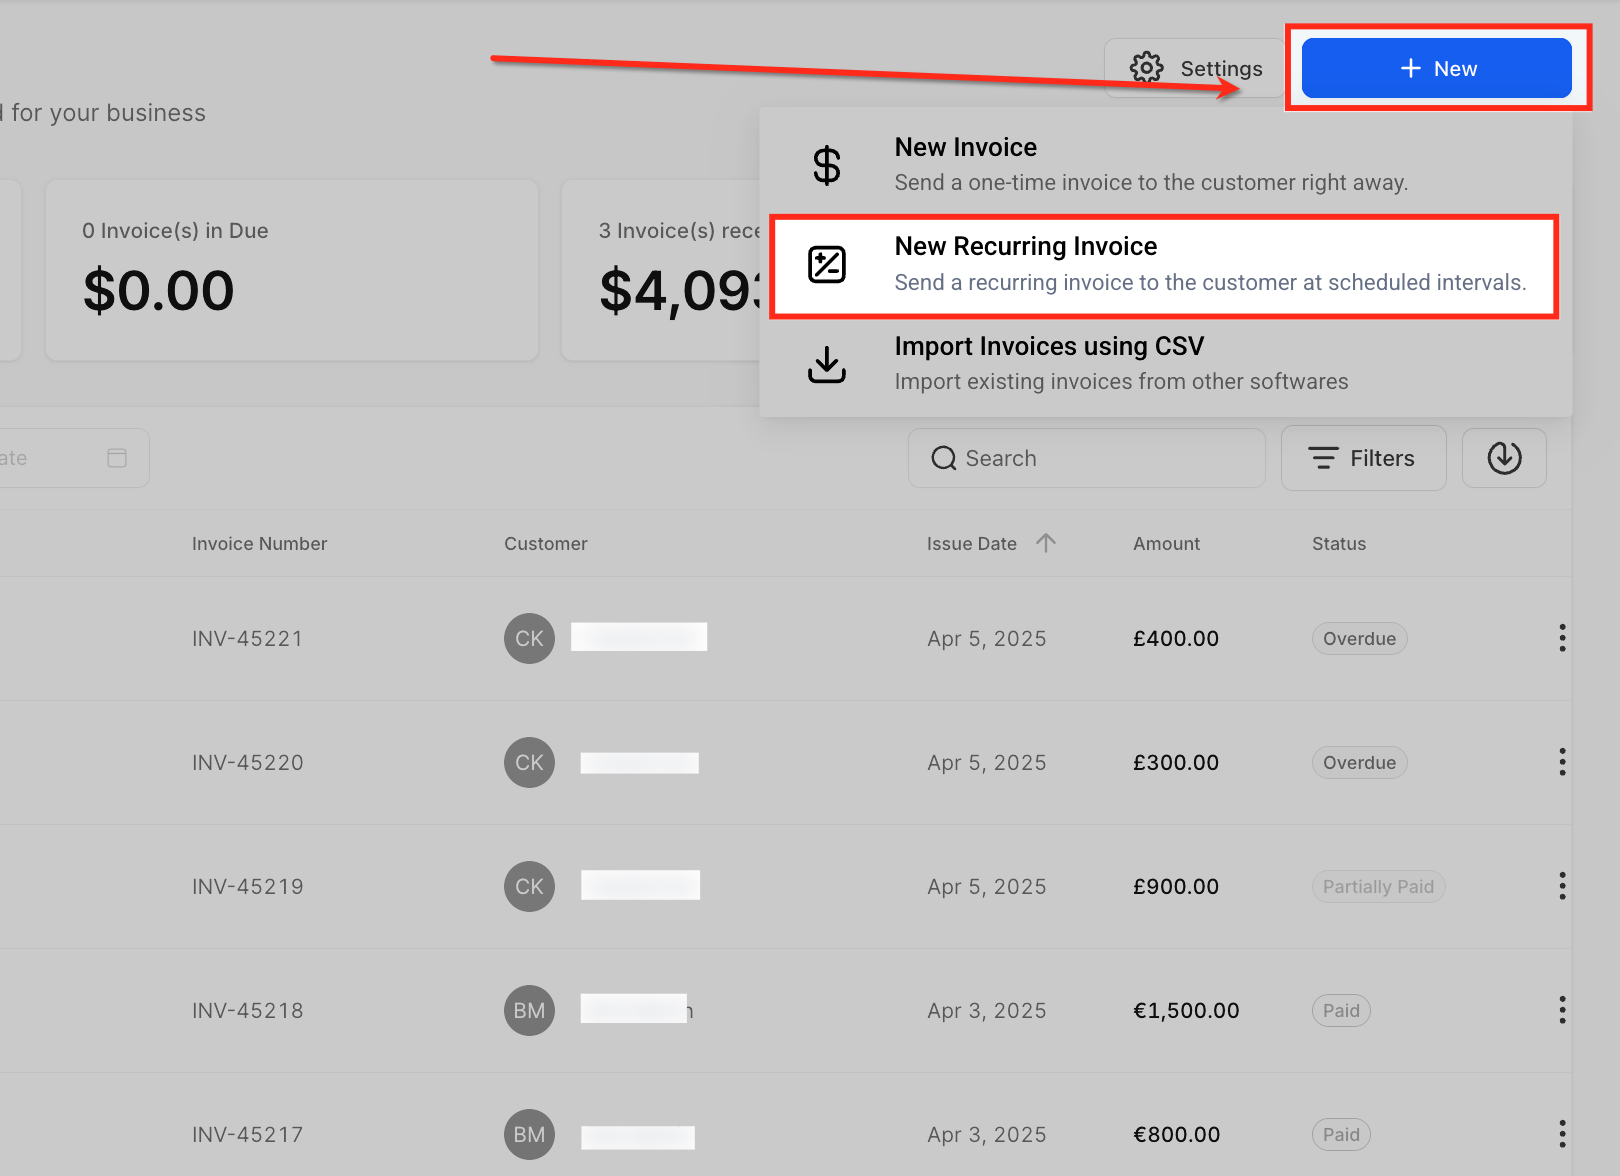
Click the New button, then select New Recurring Invoice.
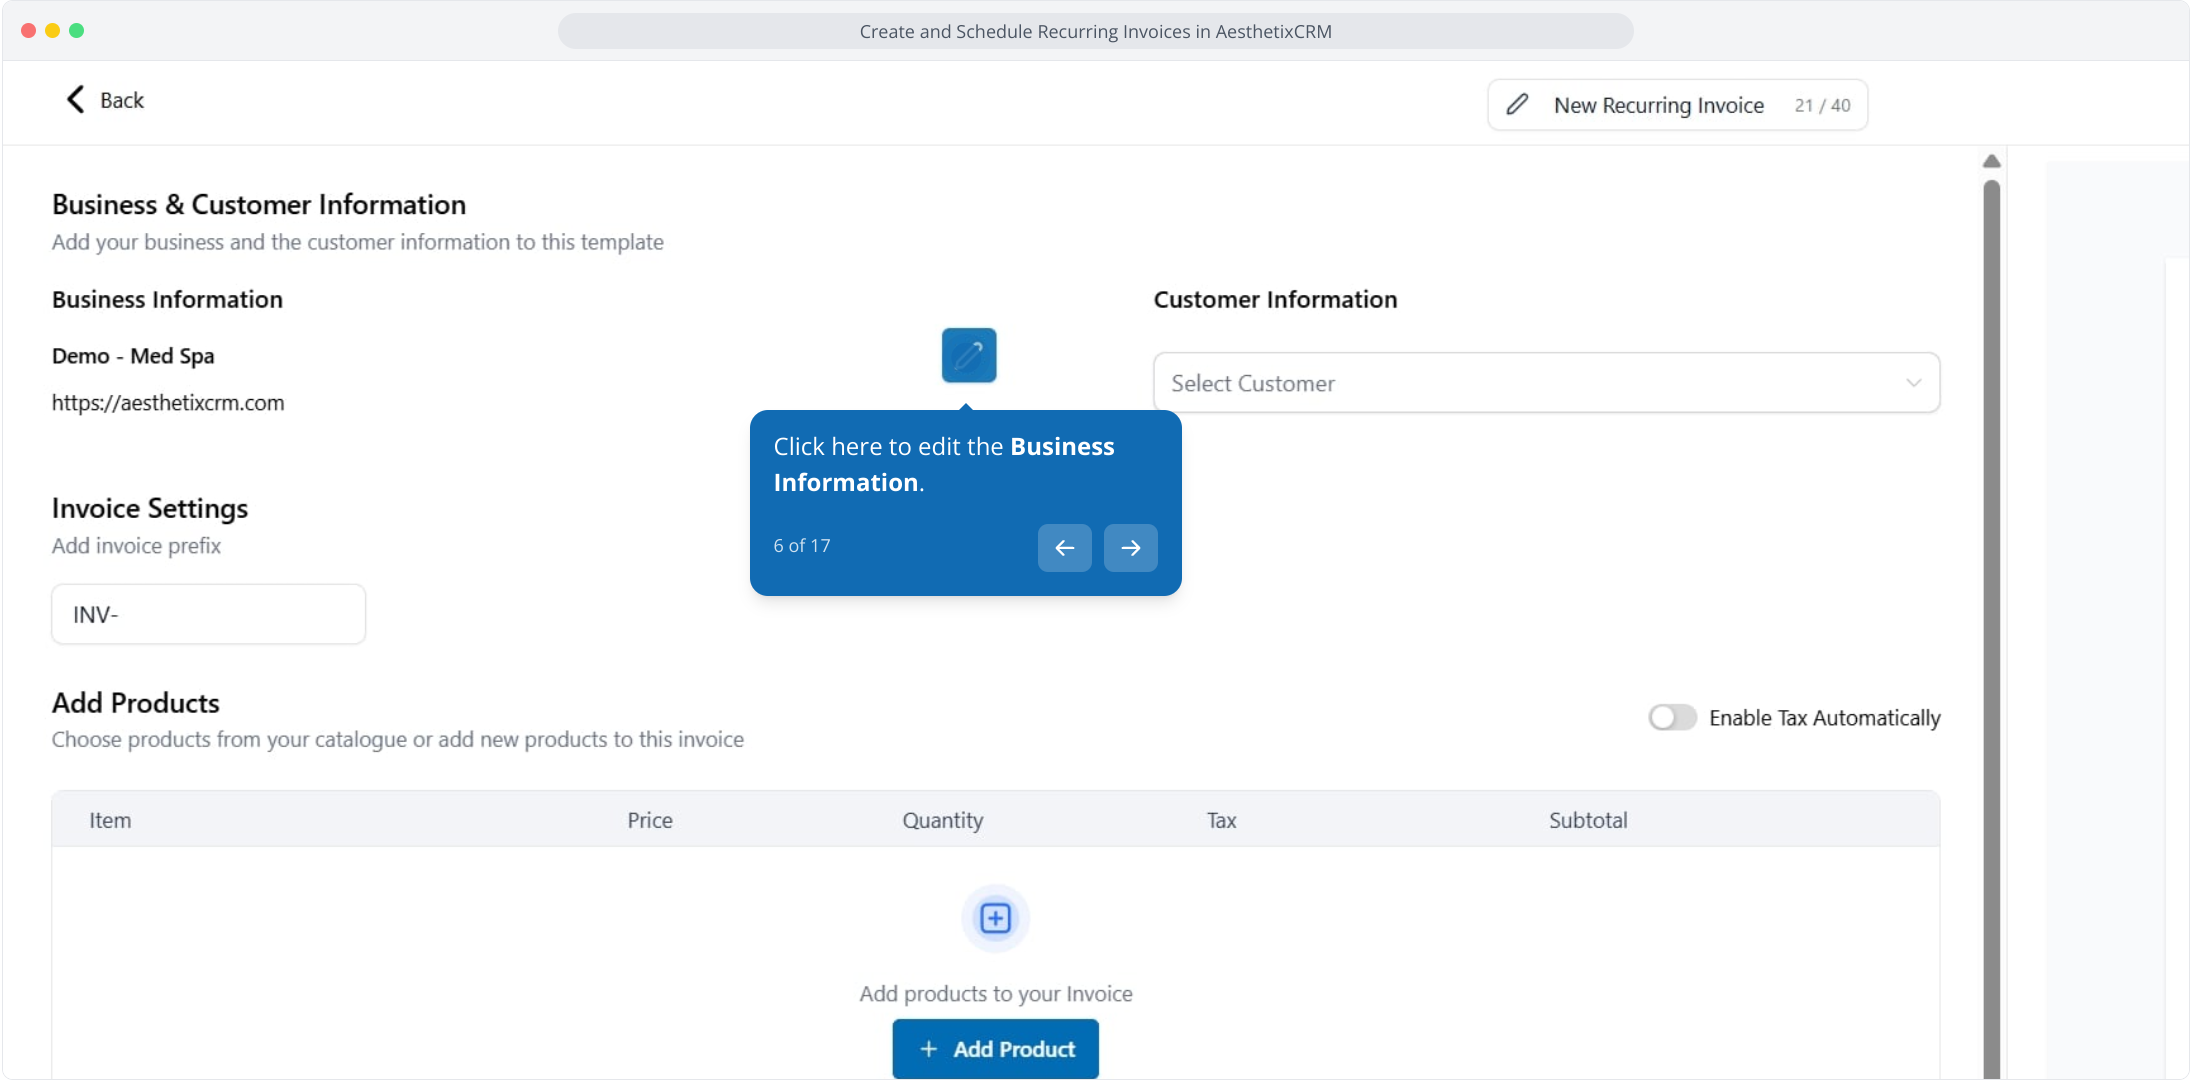
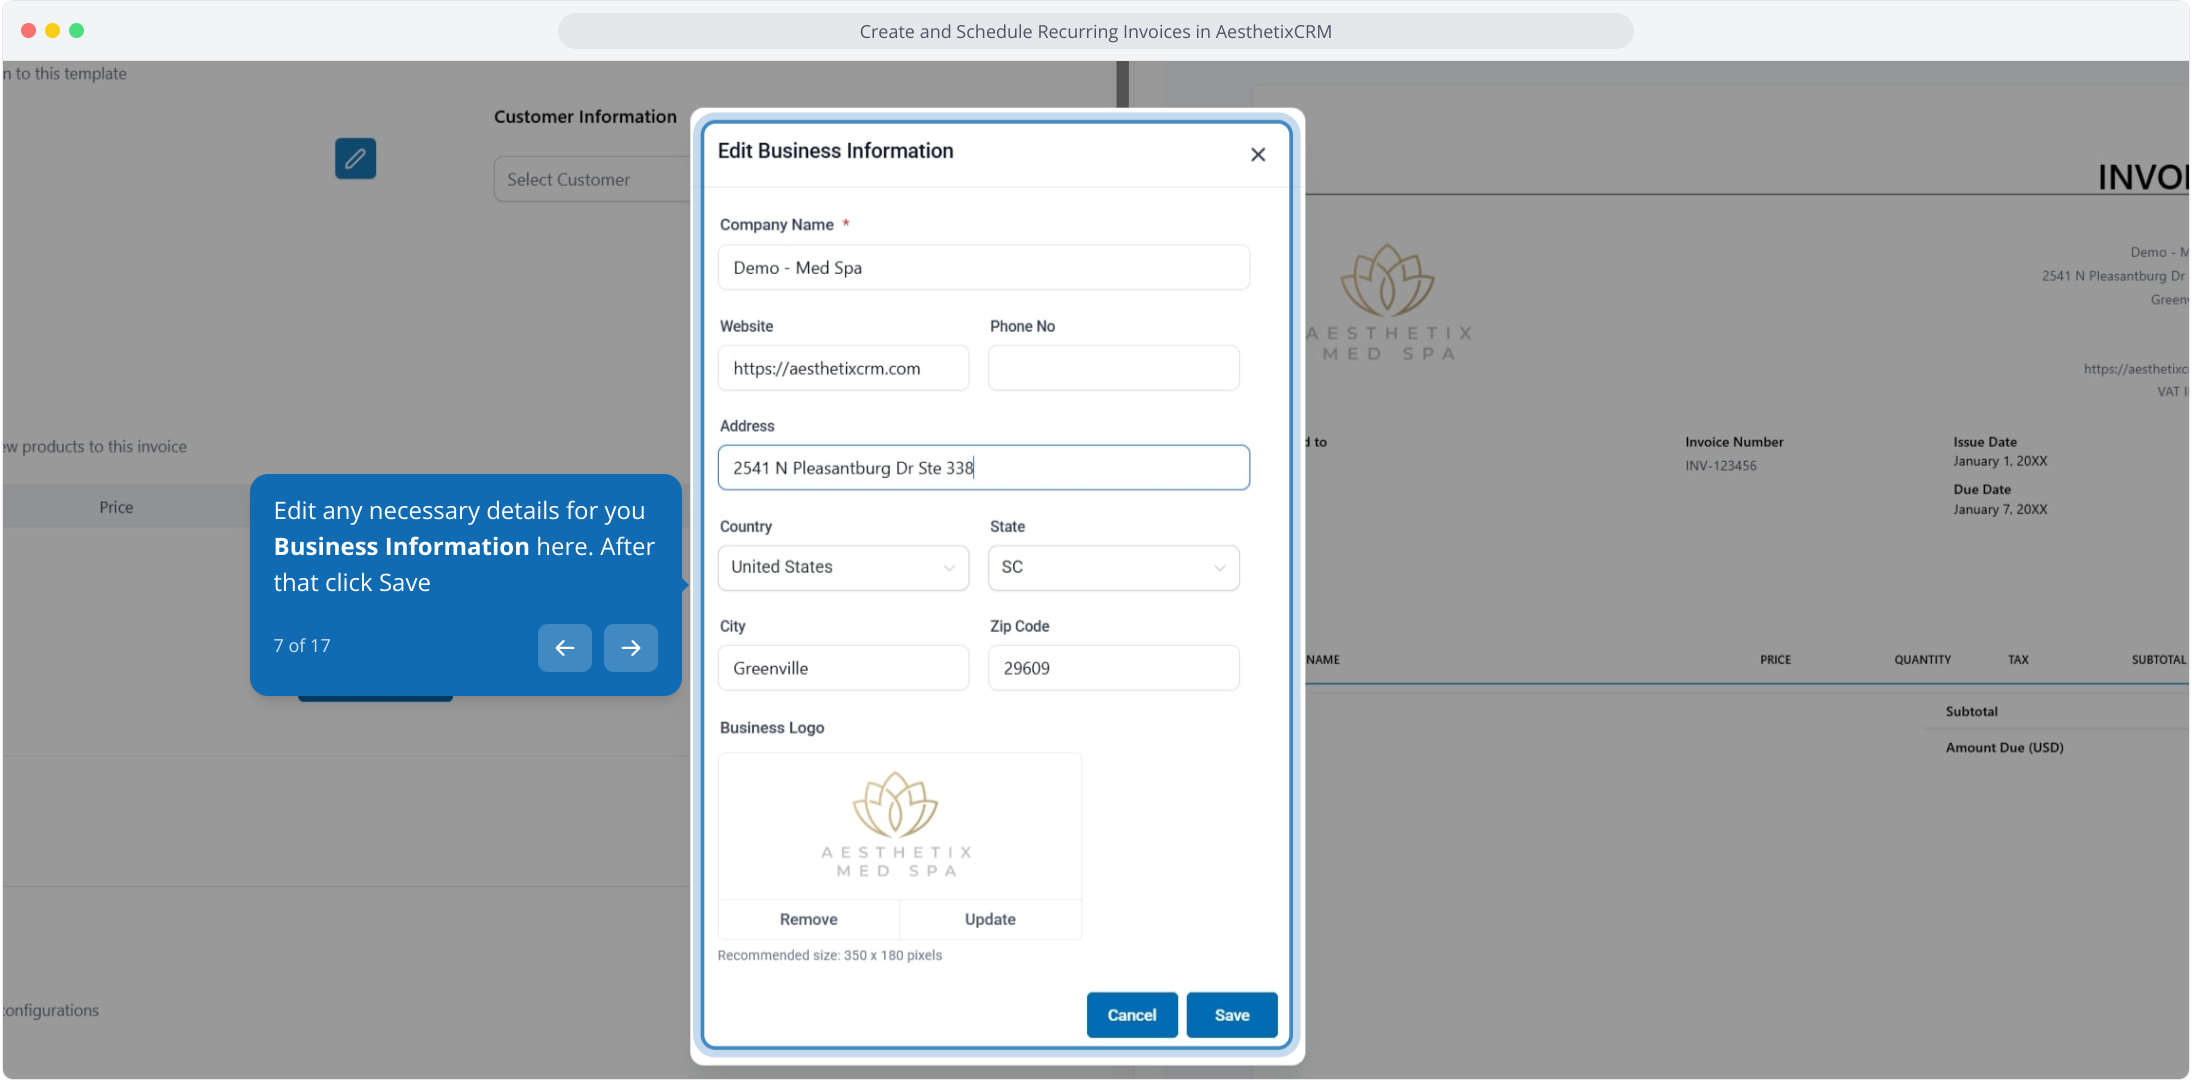
Click to edit the Business Information.
Edit any necessary business details, then click Save.
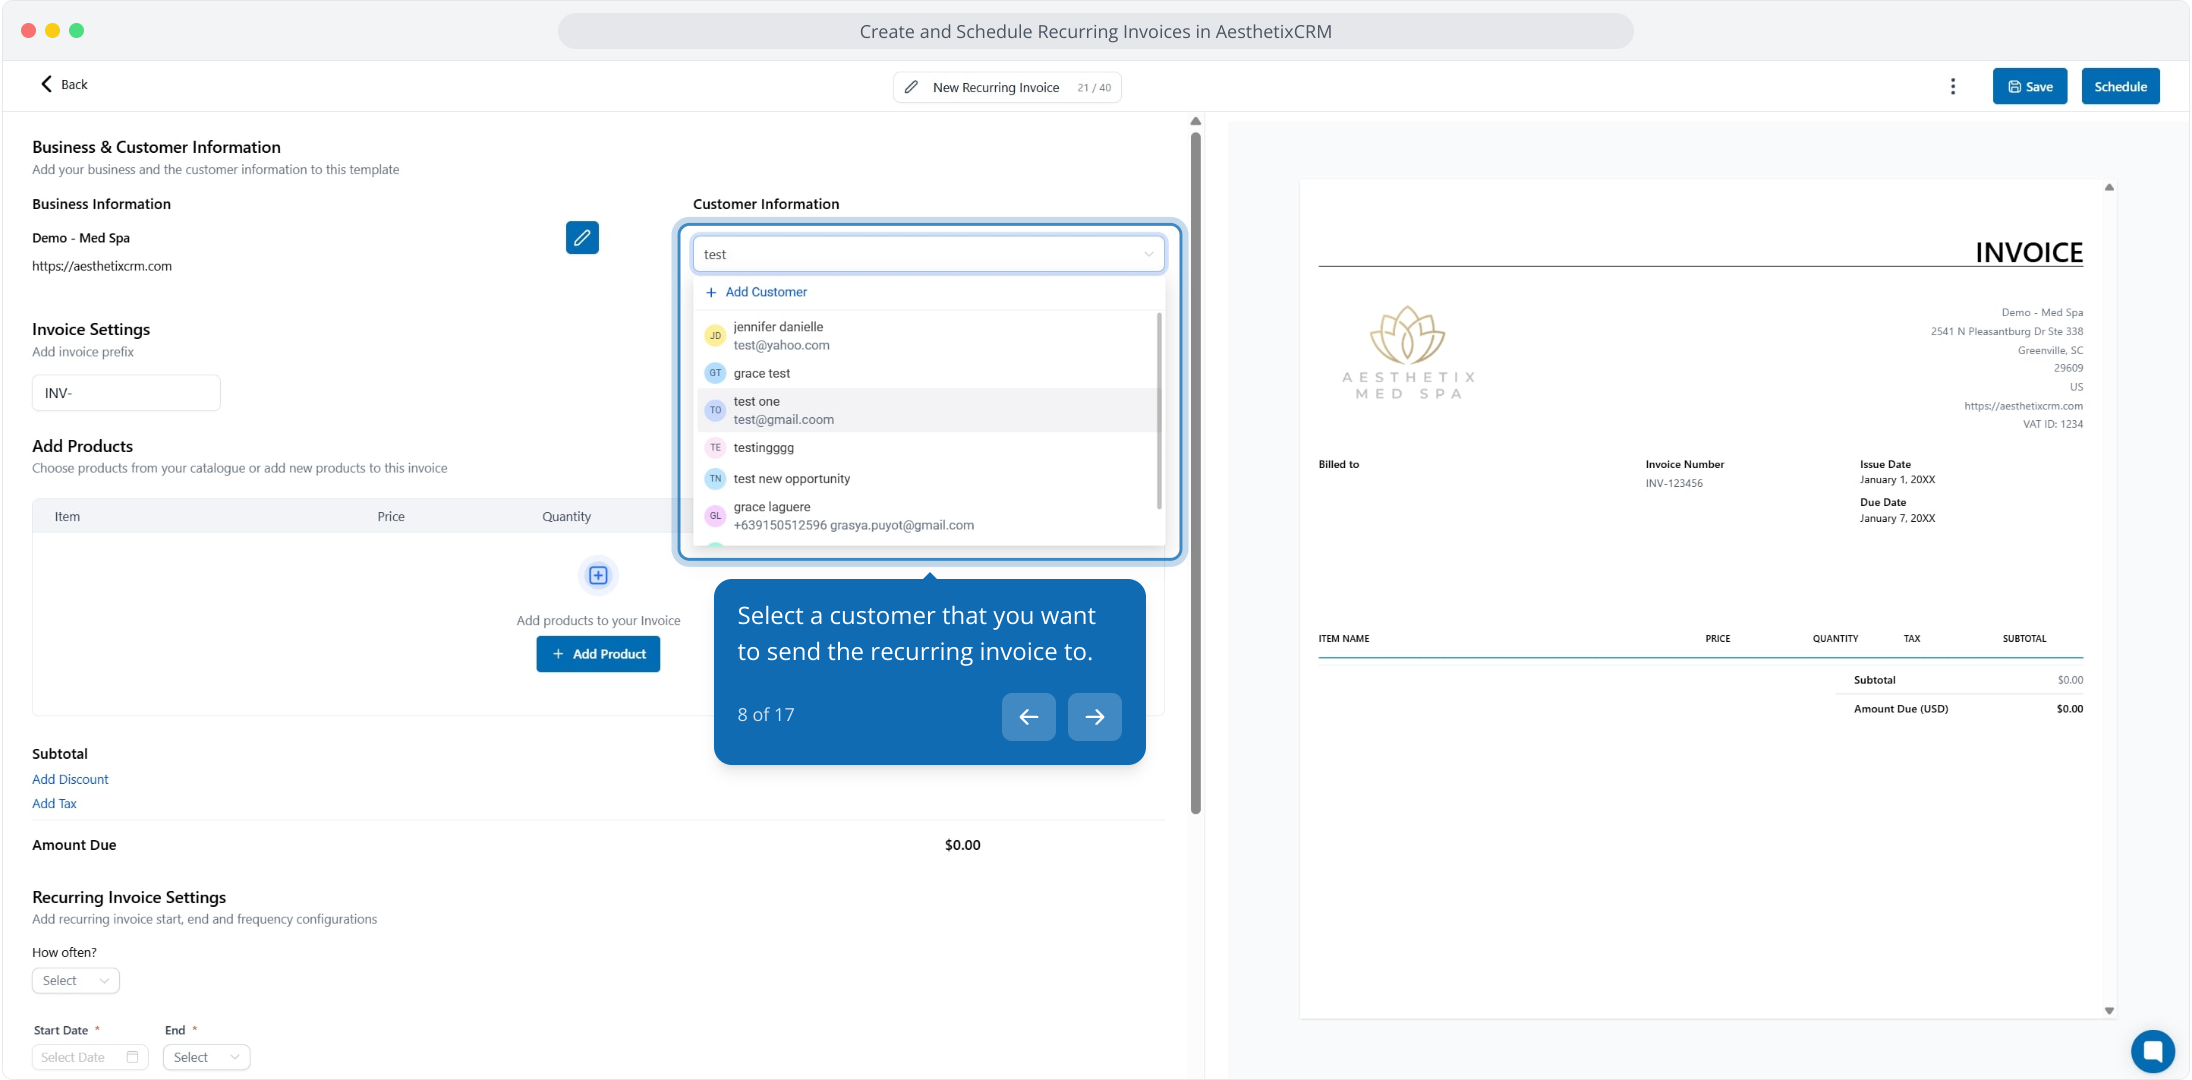
Select the patient who will receive the recurring invoice.
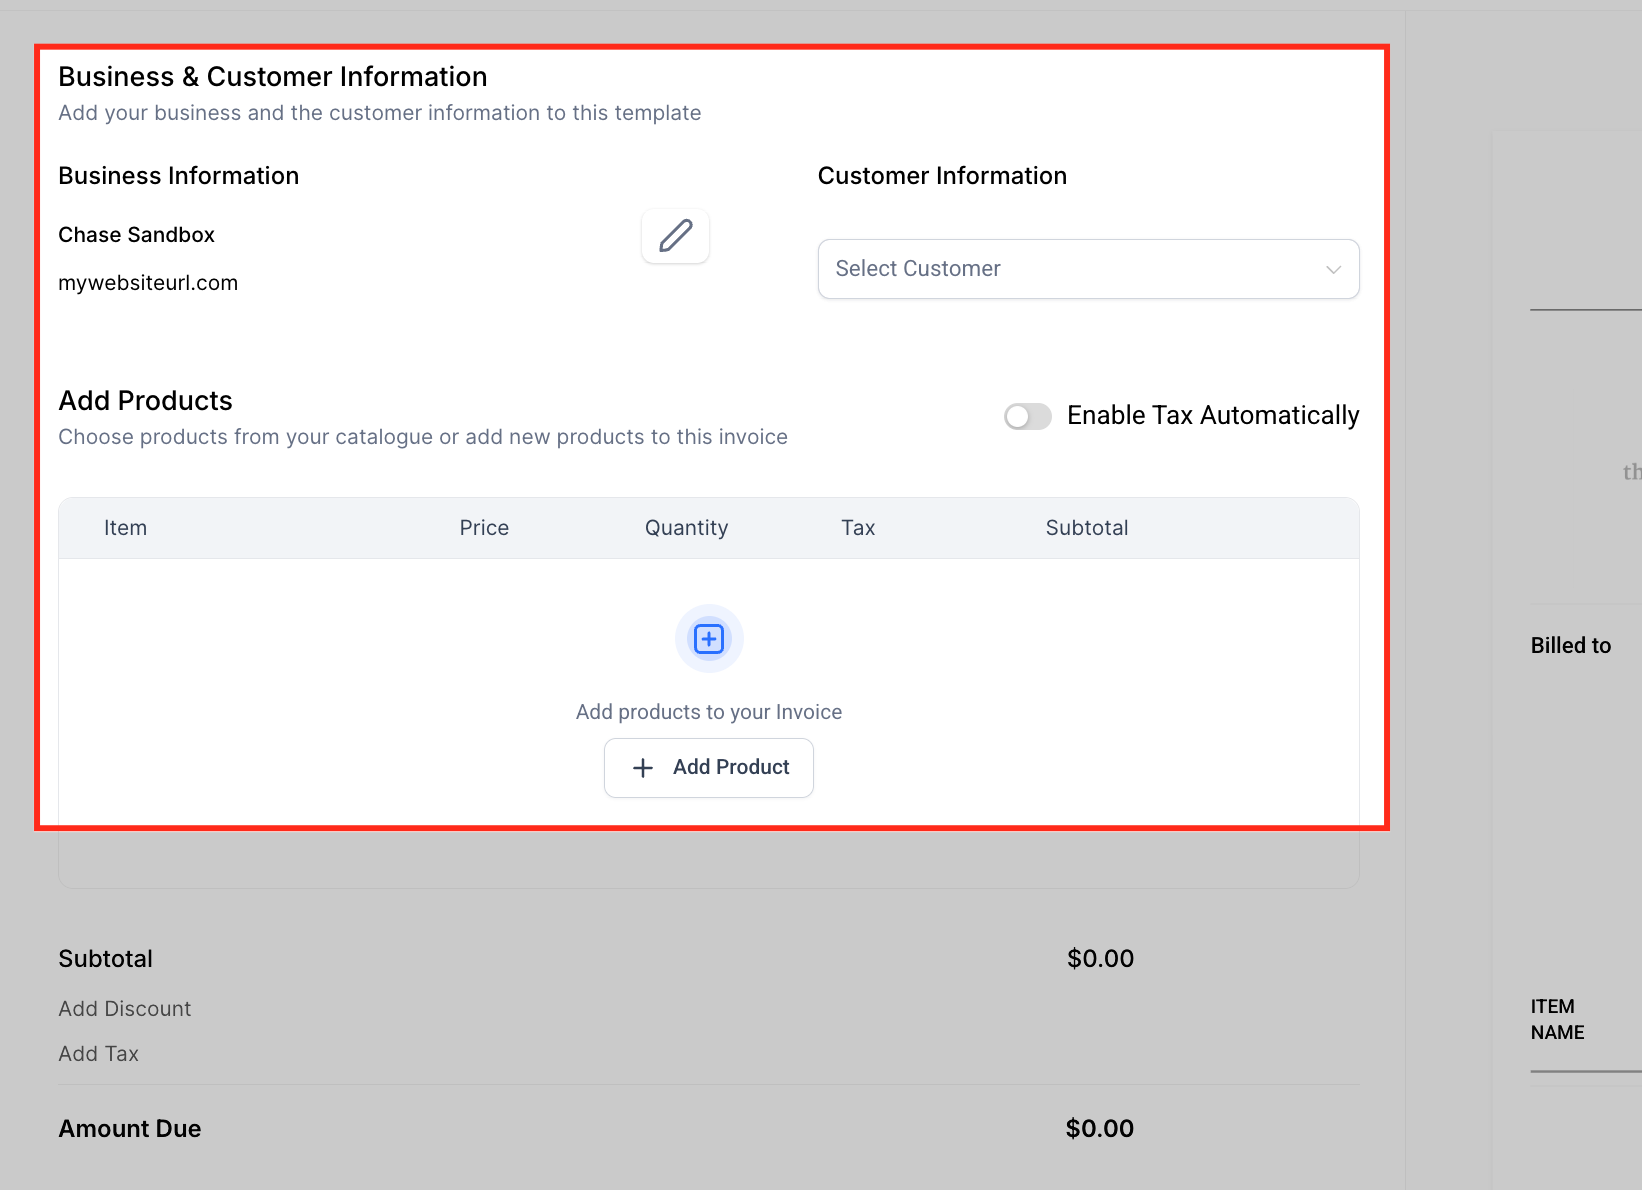
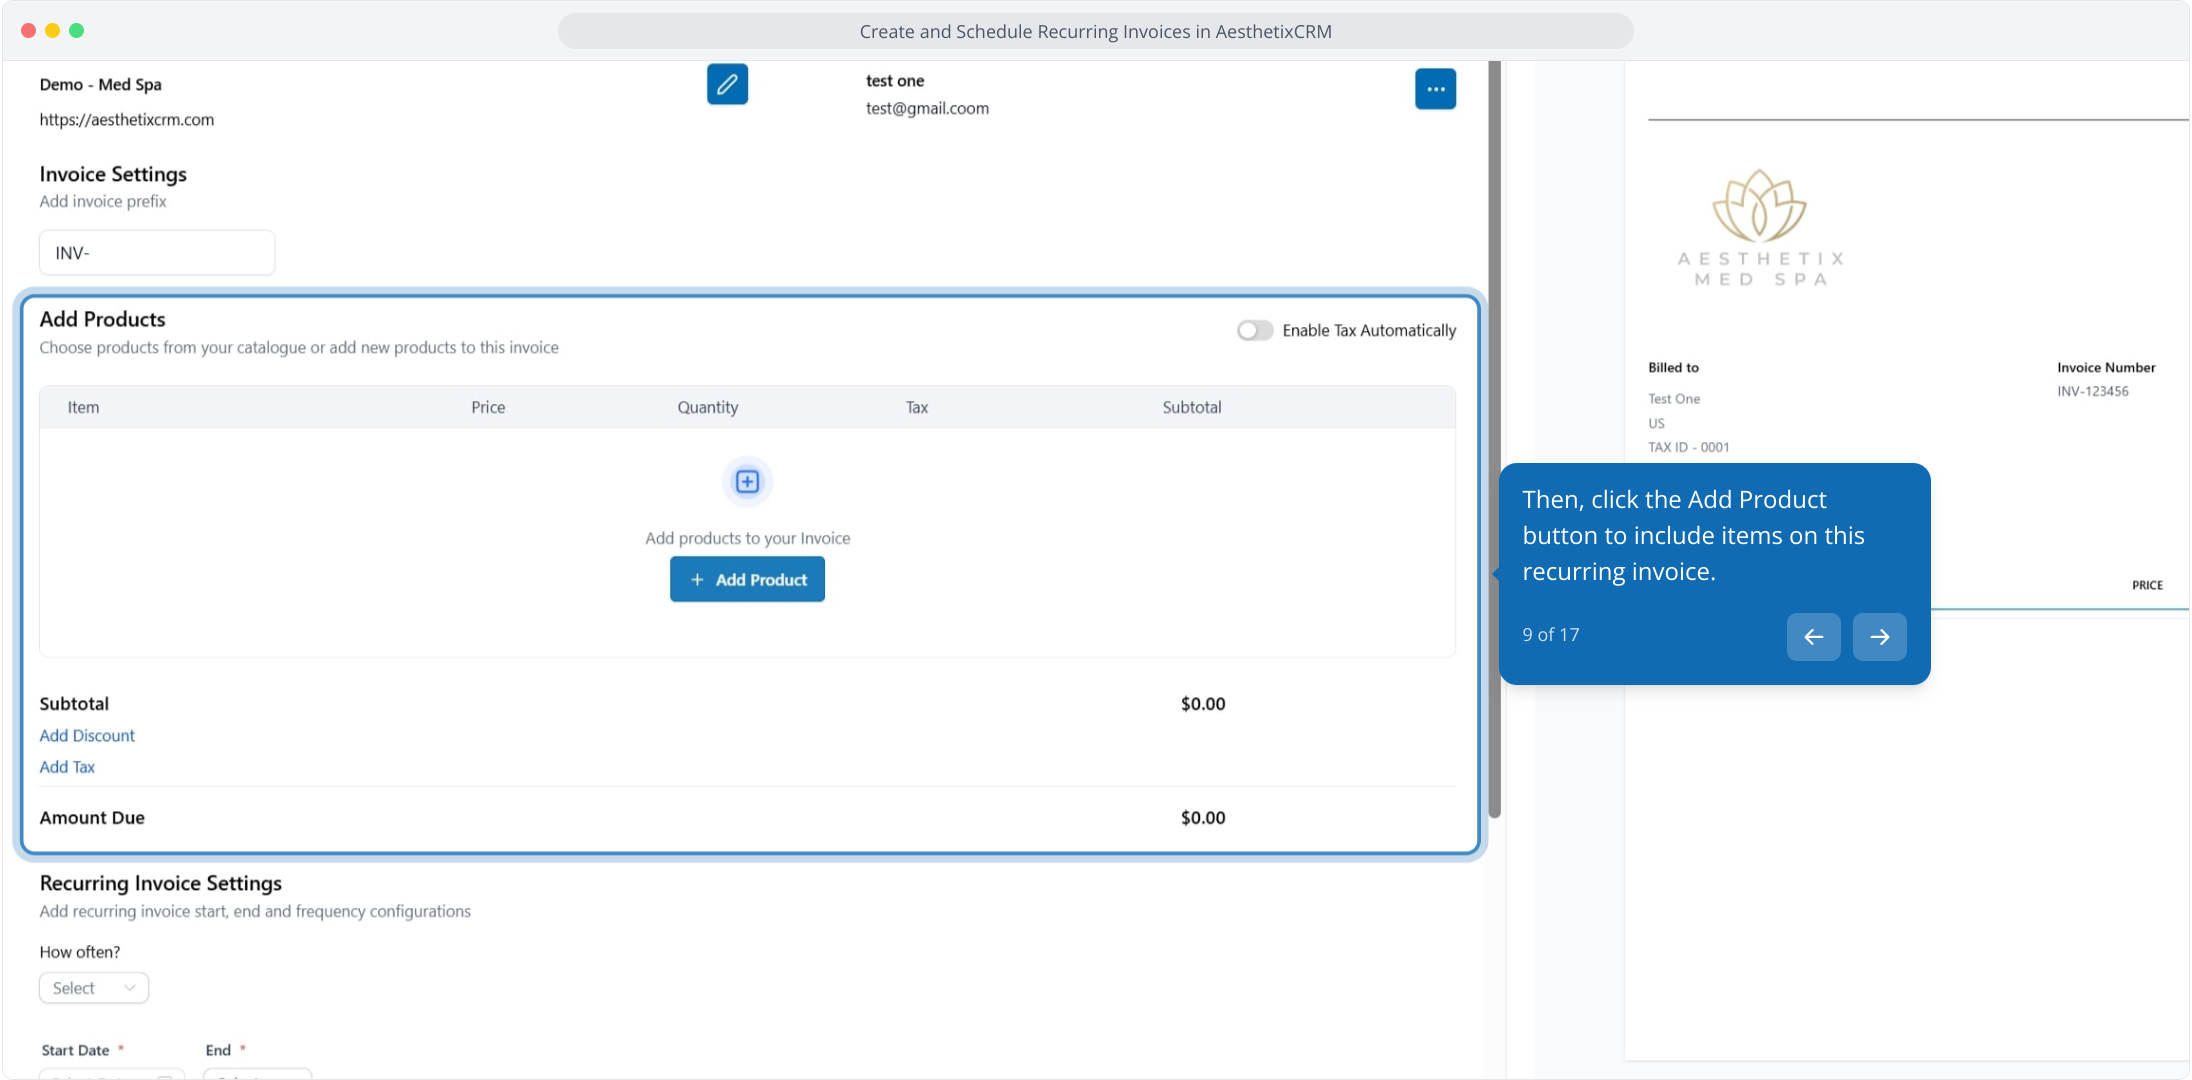
Click the Add Product button to include items on this recurring invoice. You can also set pricing, taxes, and quantities.
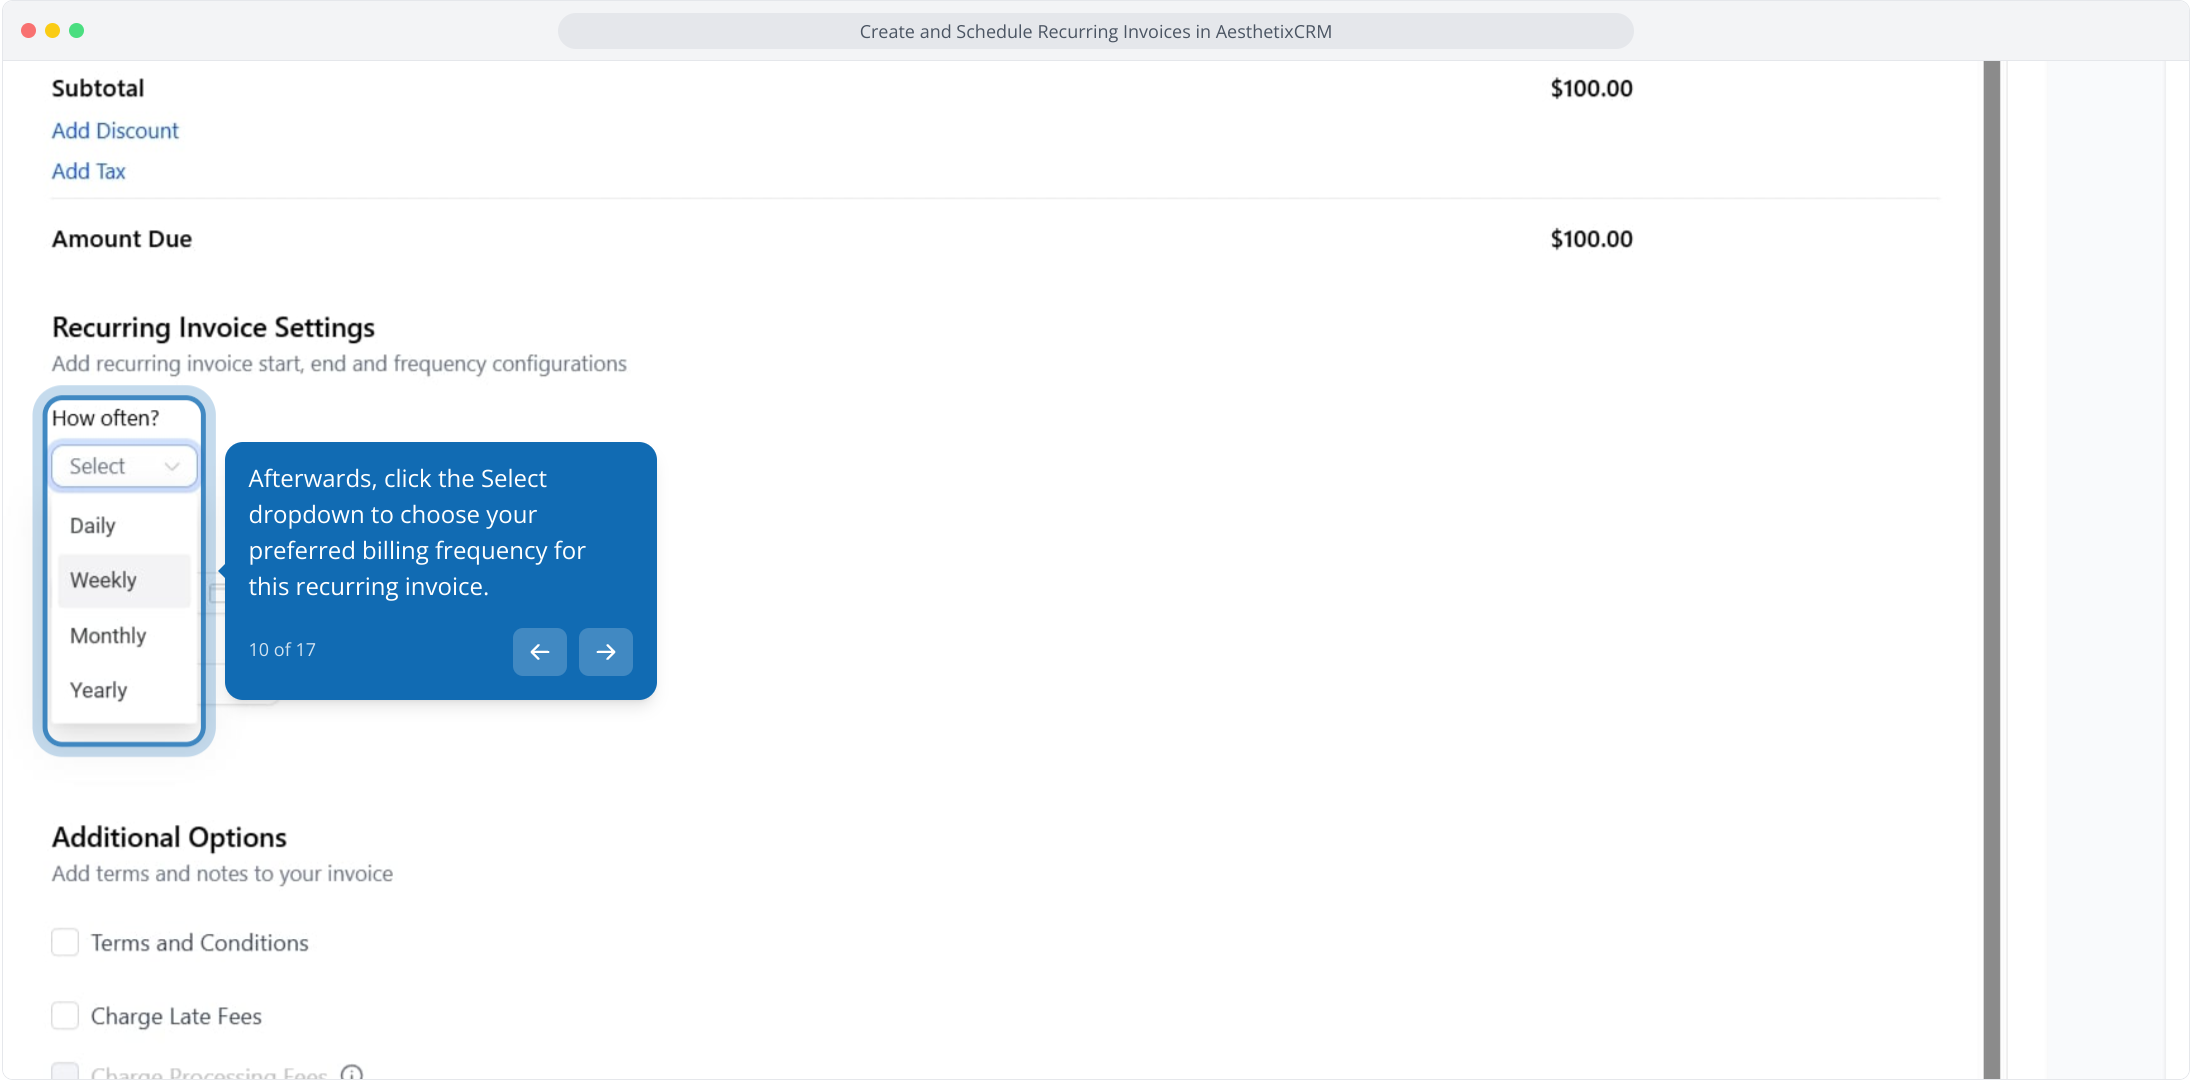
Click the Select dropdown (labeled How often?) to choose your billing frequency.
Edit the frequency of the recurring invoice.
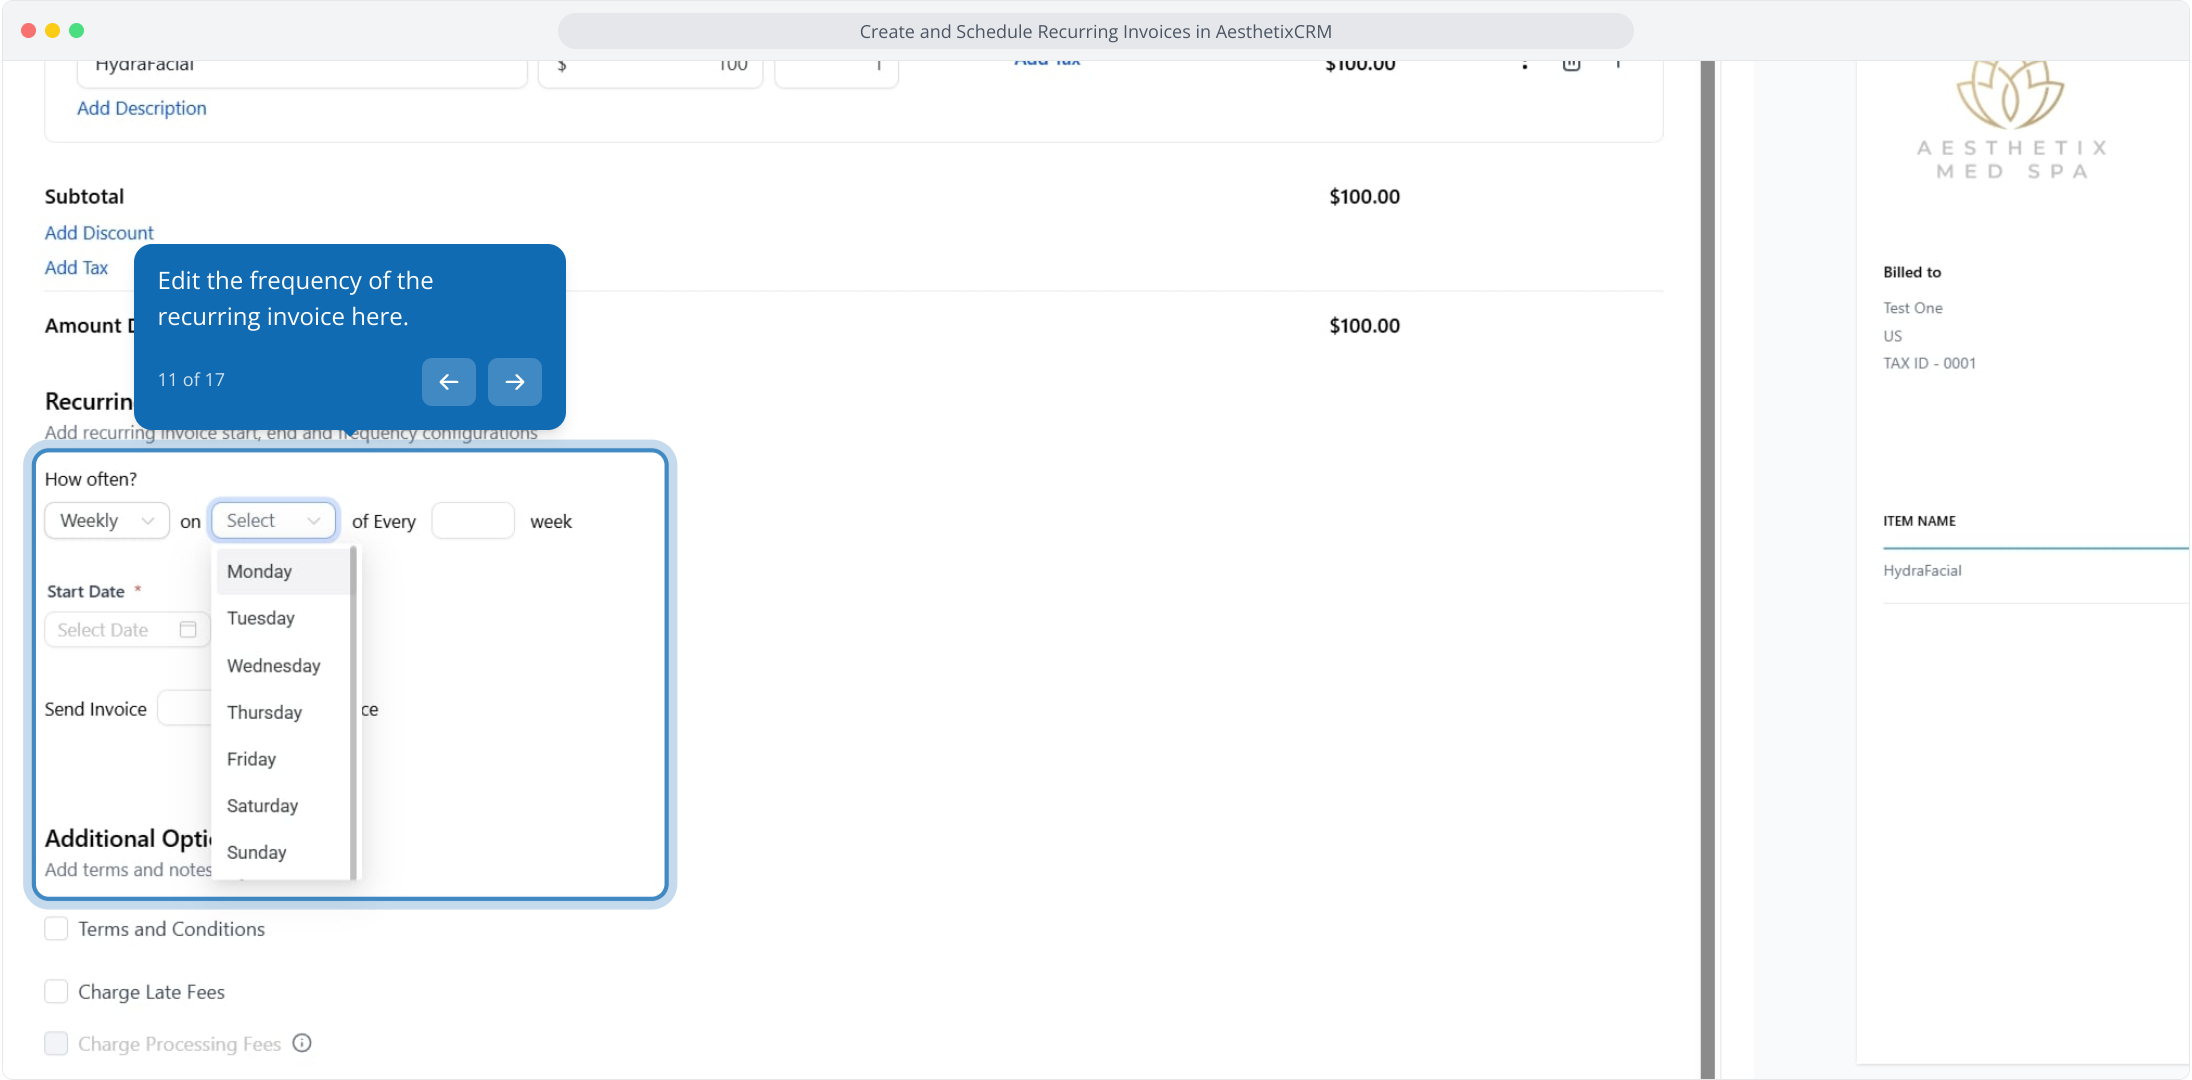
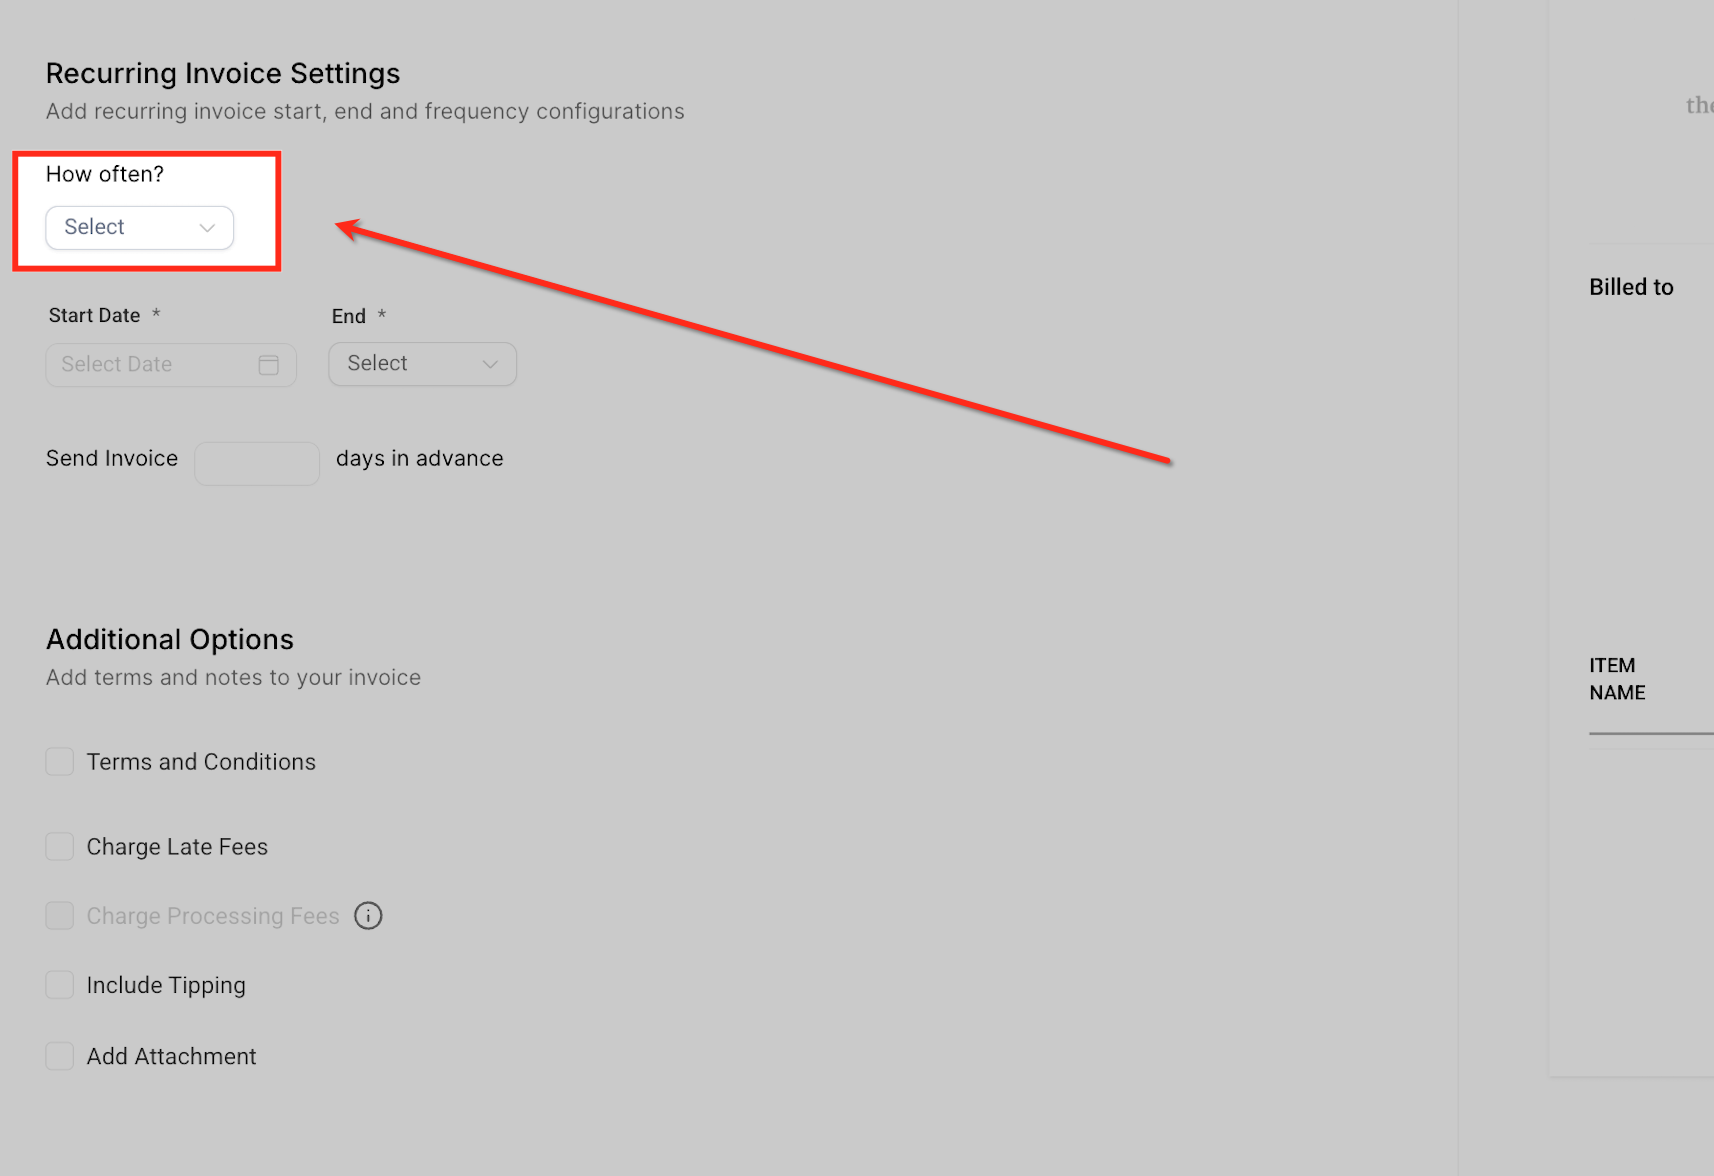
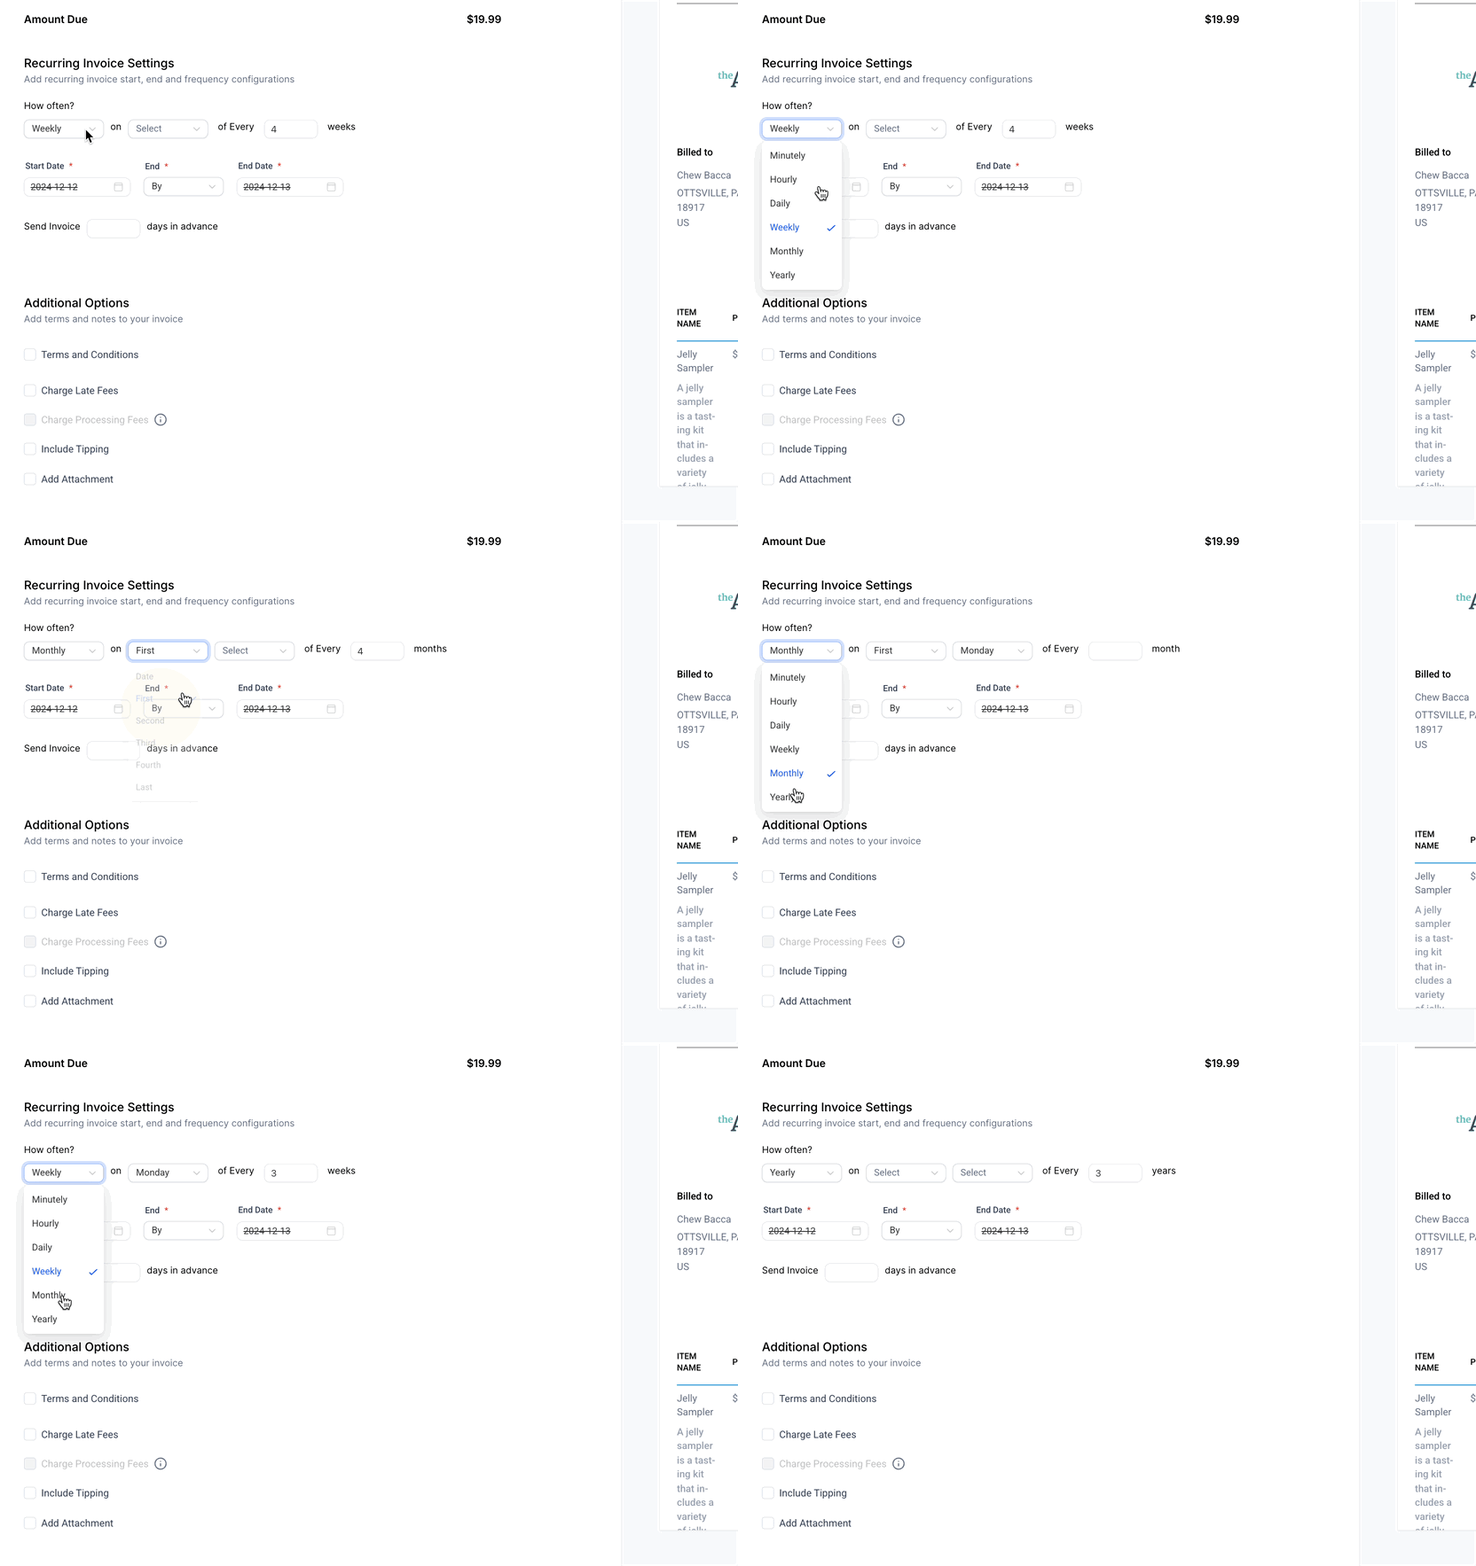
Frequency settings determine how often and when invoices are generated. Common patterns include:
Regular intervals: Invoices generate at equal time gaps (for example, every 2 days, every week, or every month). If the first invoice is due July 5 with a 7-day interval, the next is due July 12, then July 19, and so on.
Specific days: Invoices can be scheduled for a particular day, such as the first Monday of every month. You can also set an end condition, such as stopping after the first Monday in December.
Annual billing: Invoices can be scheduled once a year on the same date, ideal for yearly memberships or renewals. You can end the cycle after a set number of occurrences (for example, after 5 years).
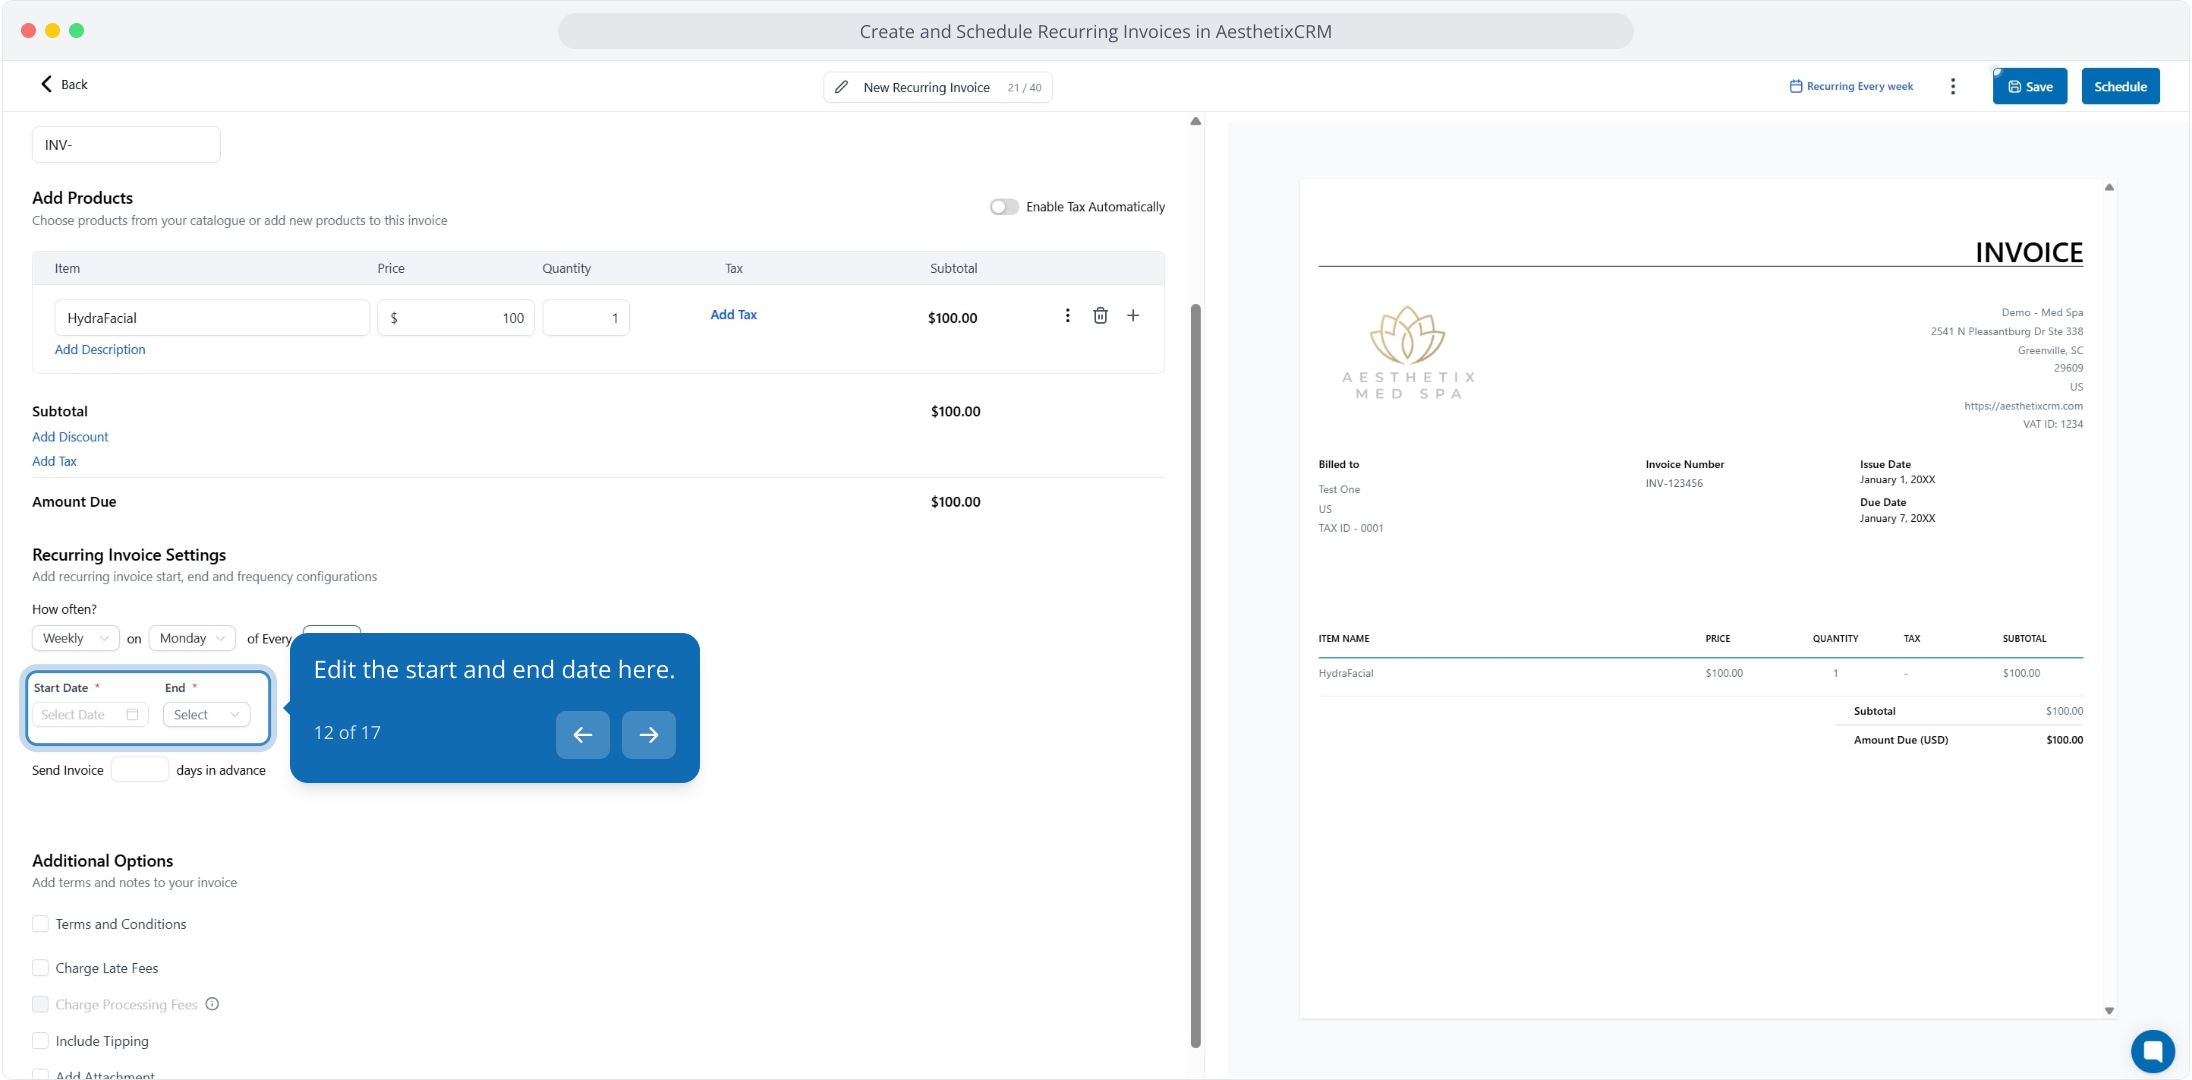
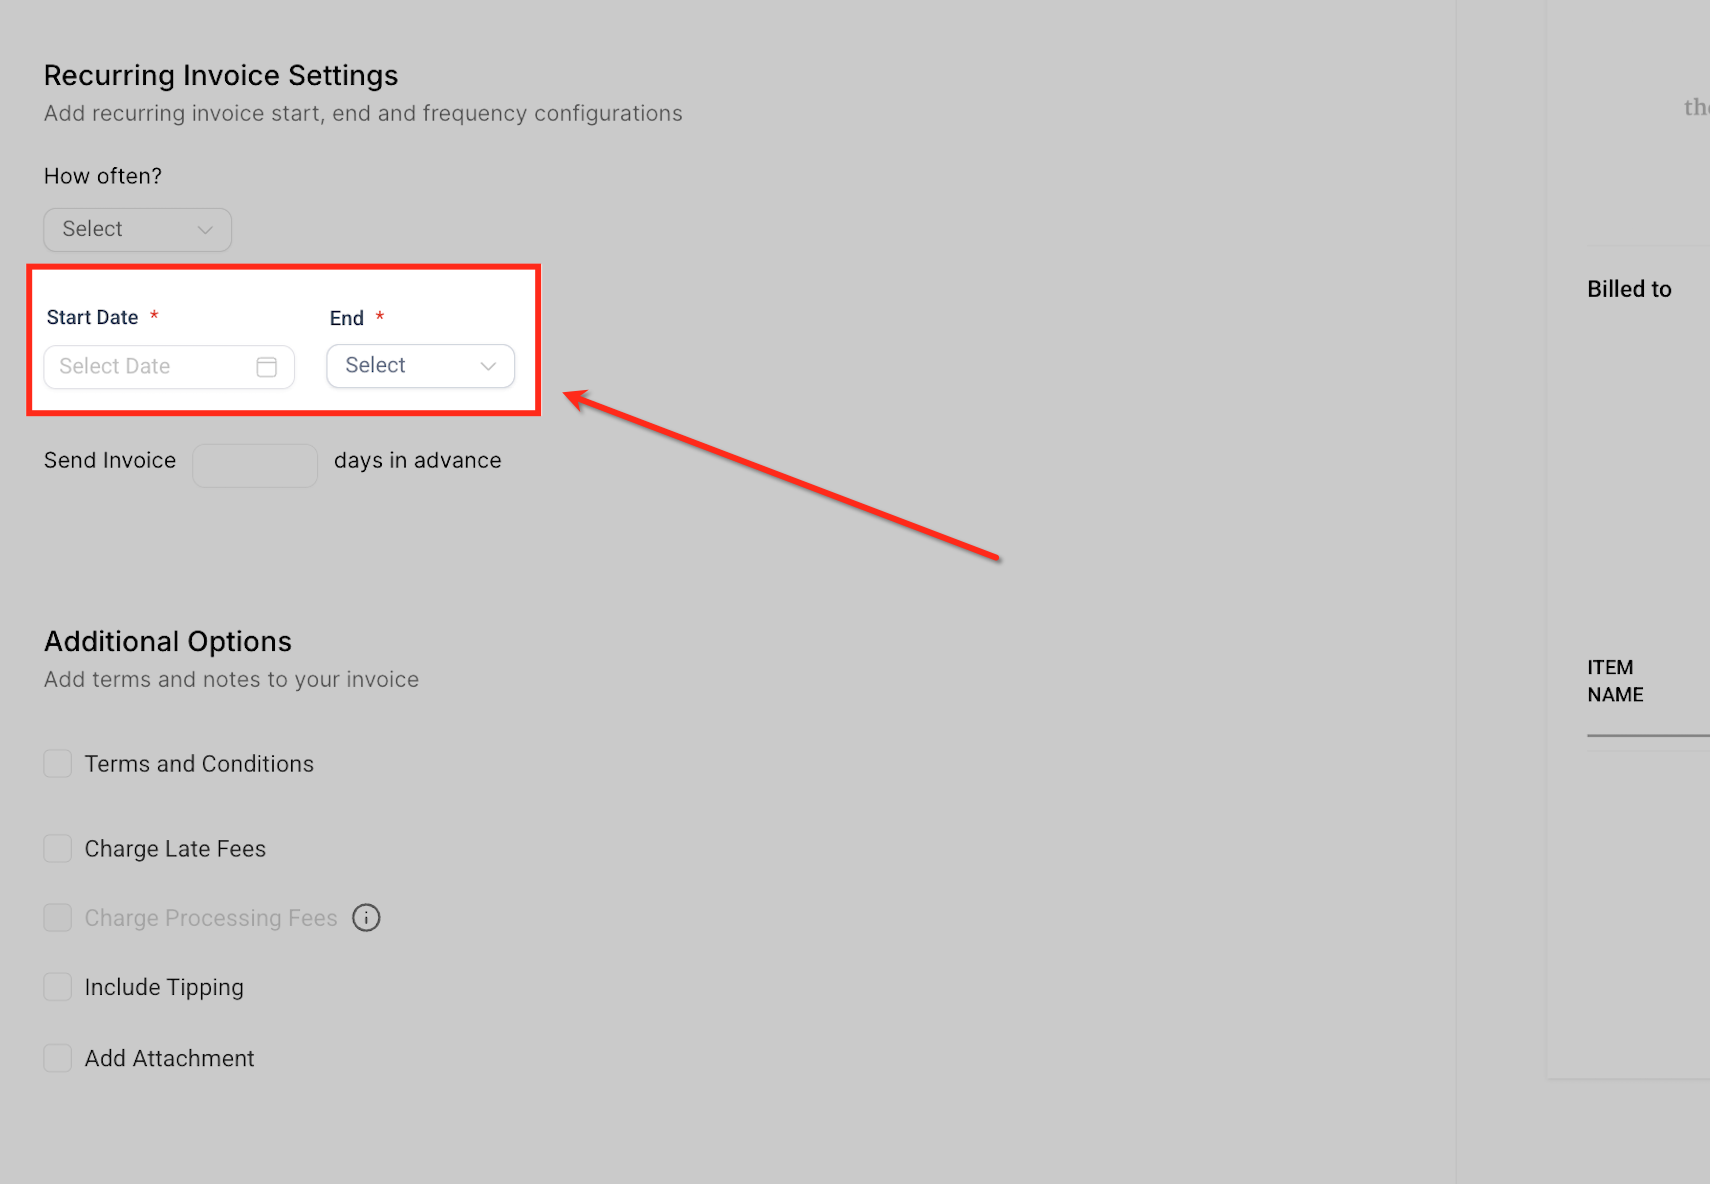
Edit the start and end date. Choose the Start Date for the first invoice and define the End condition (a specific date or a number of occurrences).
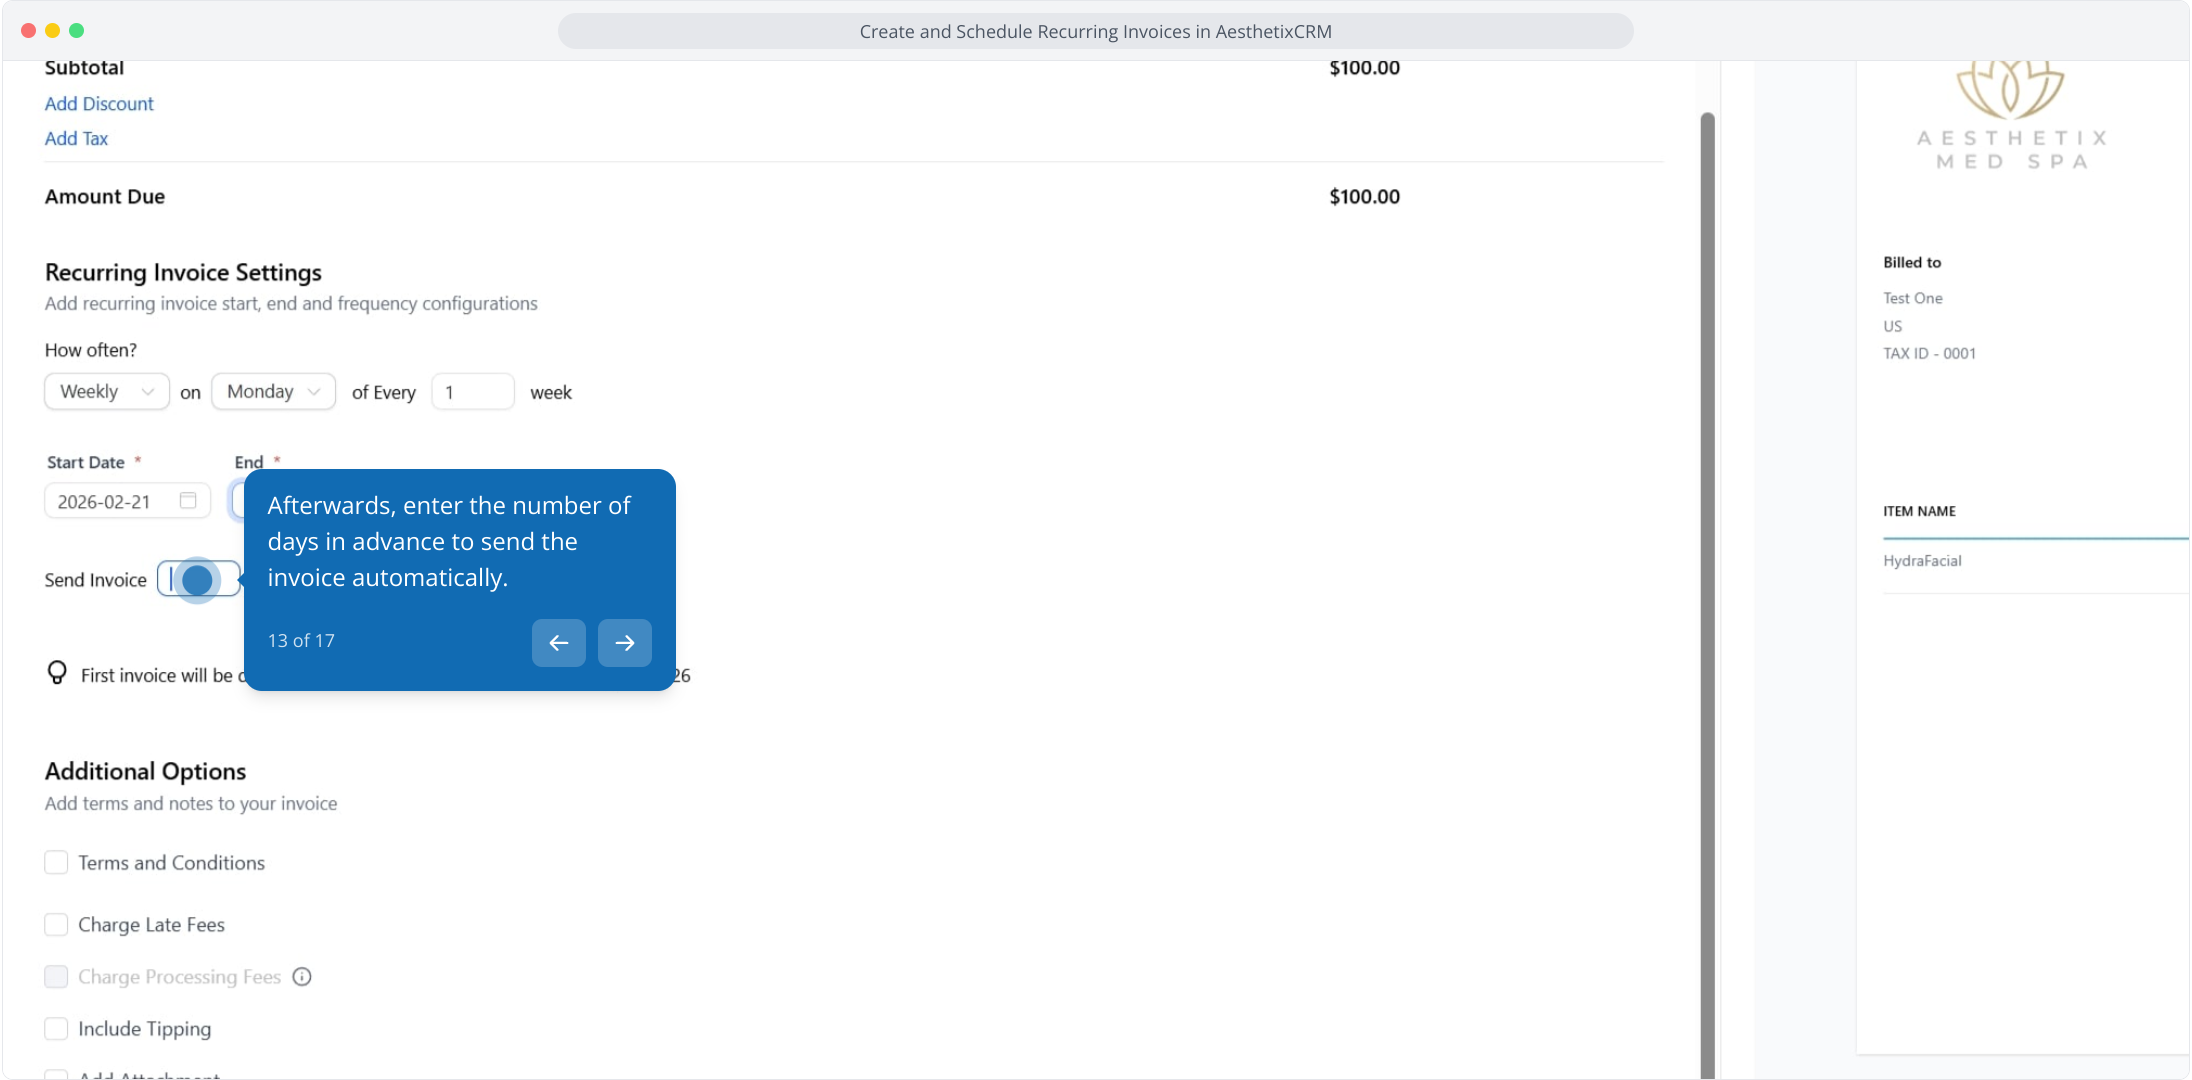
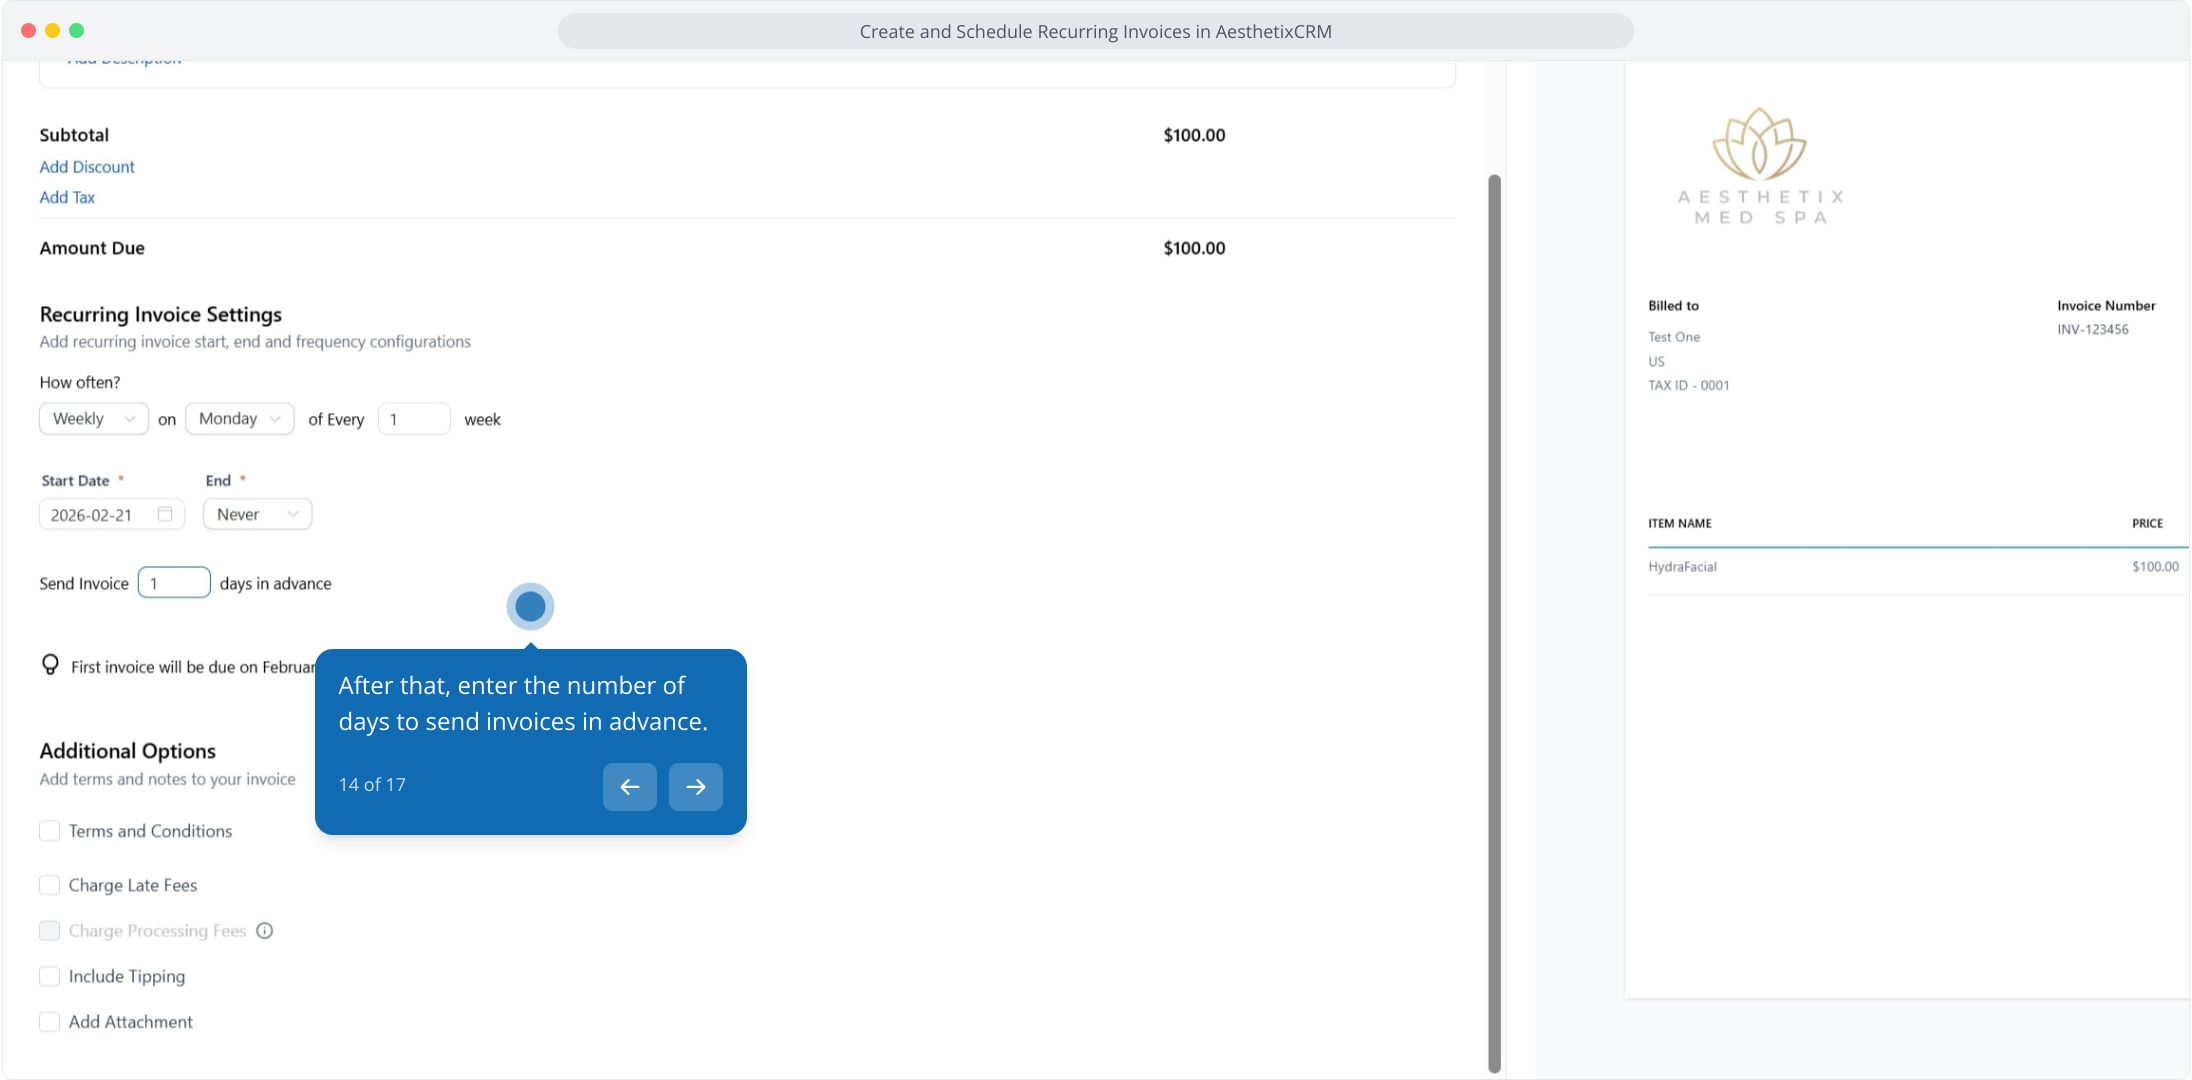
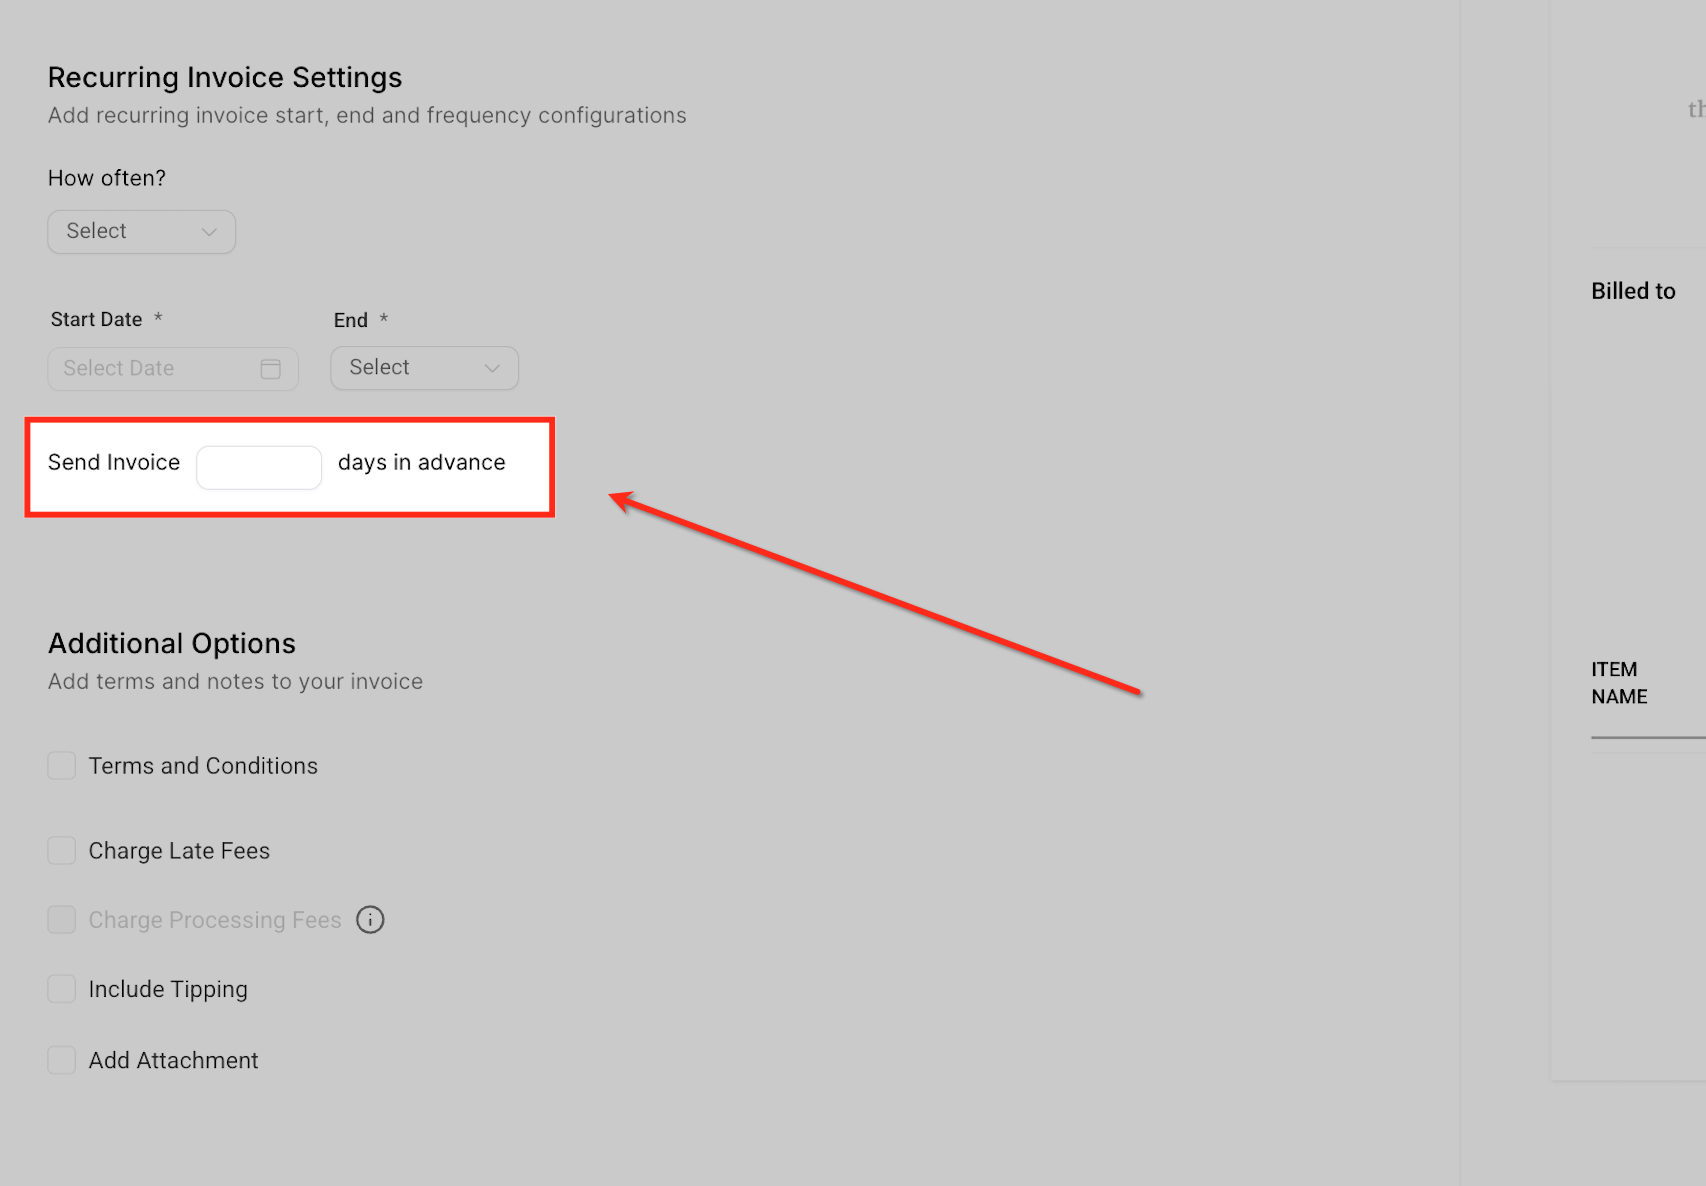
Enter the number of days in advance to send the invoice automatically. This gives patients time to review and pay before the due date. For example, an invoice due July 18 sent 2 days early reaches the patient on July 16.
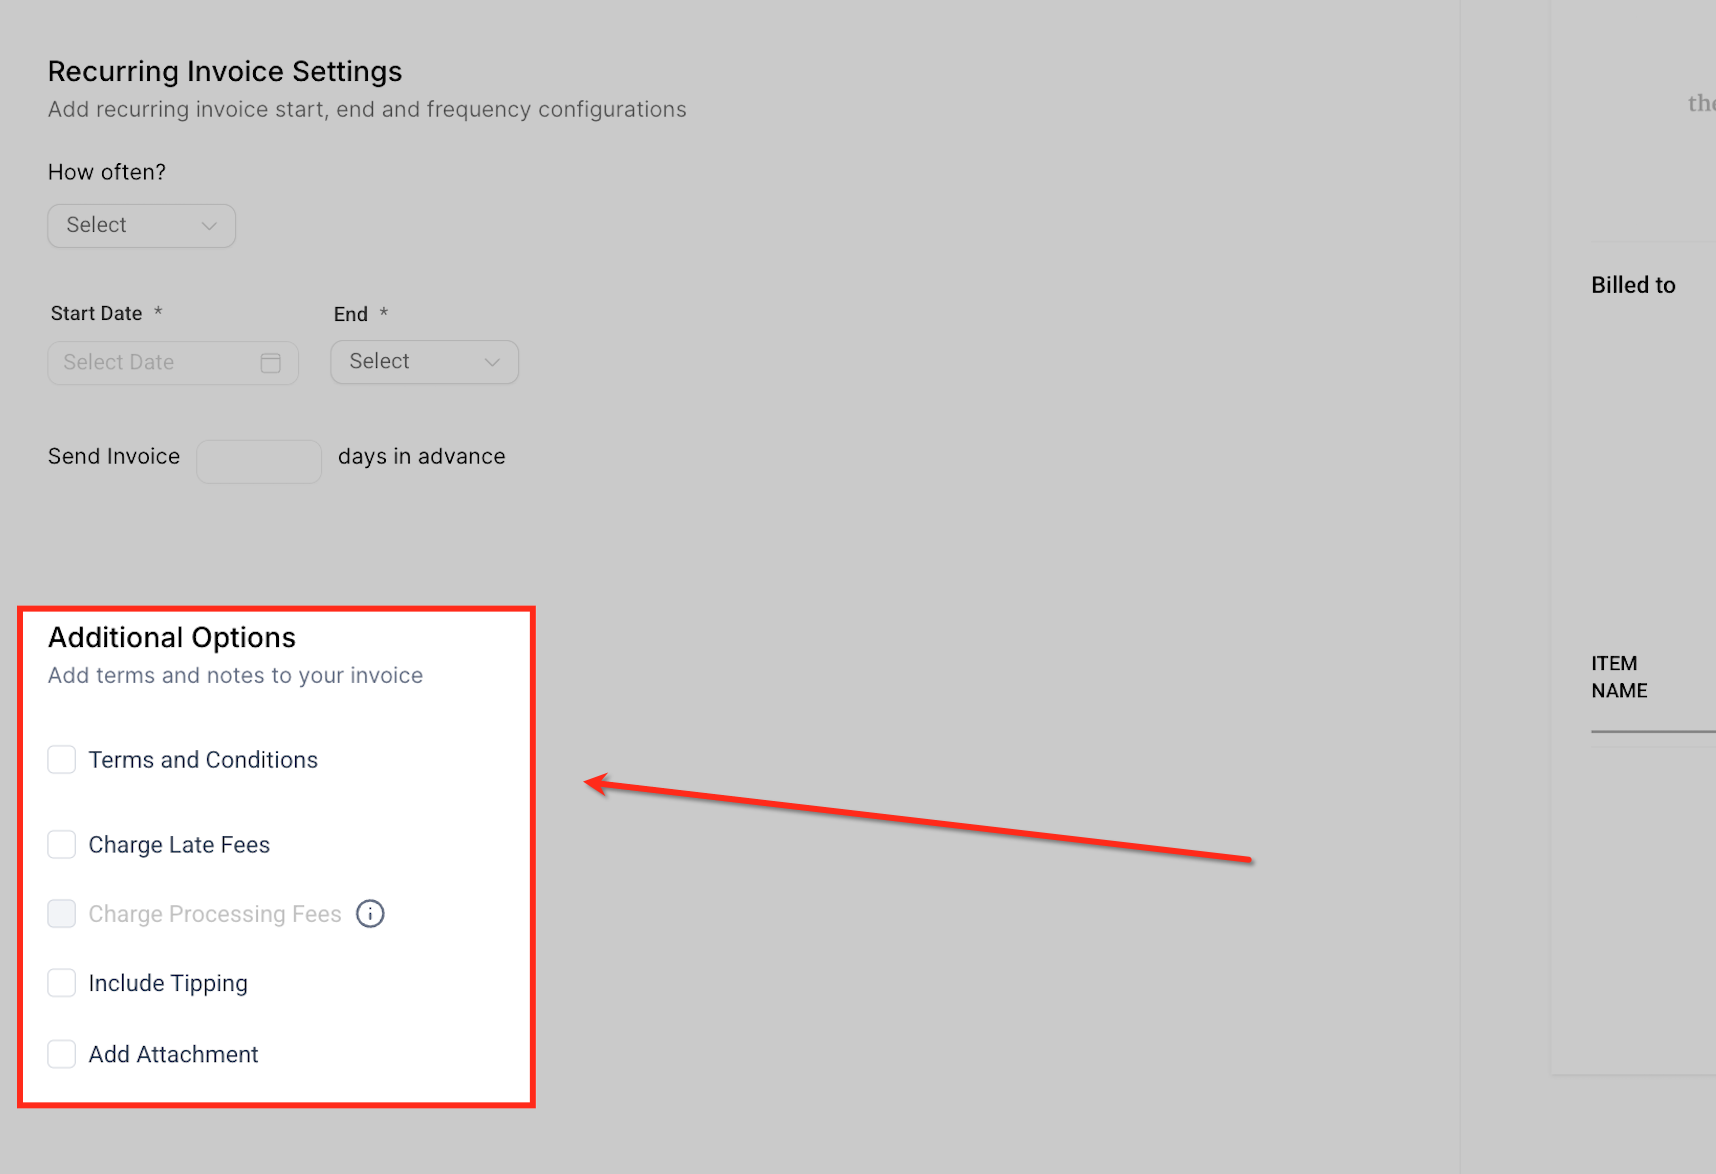
Enhance the invoice with extra details:
Terms and Conditions: Add standard policies or important notes (for example, payment timelines or refund policies).
Charge Late Fees: Automatically add a late fee if the patient misses the due date.
Charge Processing Fees: Pass on transaction fees (if enabled in your payment settings).
Include Tipping: Allow patients to add a tip.
Add Attachment: Upload supporting documents or details to accompany the invoice.
Best practice: Double-check details such as frequency, price, and taxes while the invoice is still in Draft. Once a template becomes Active or Scheduled, these fields cannot be changed.
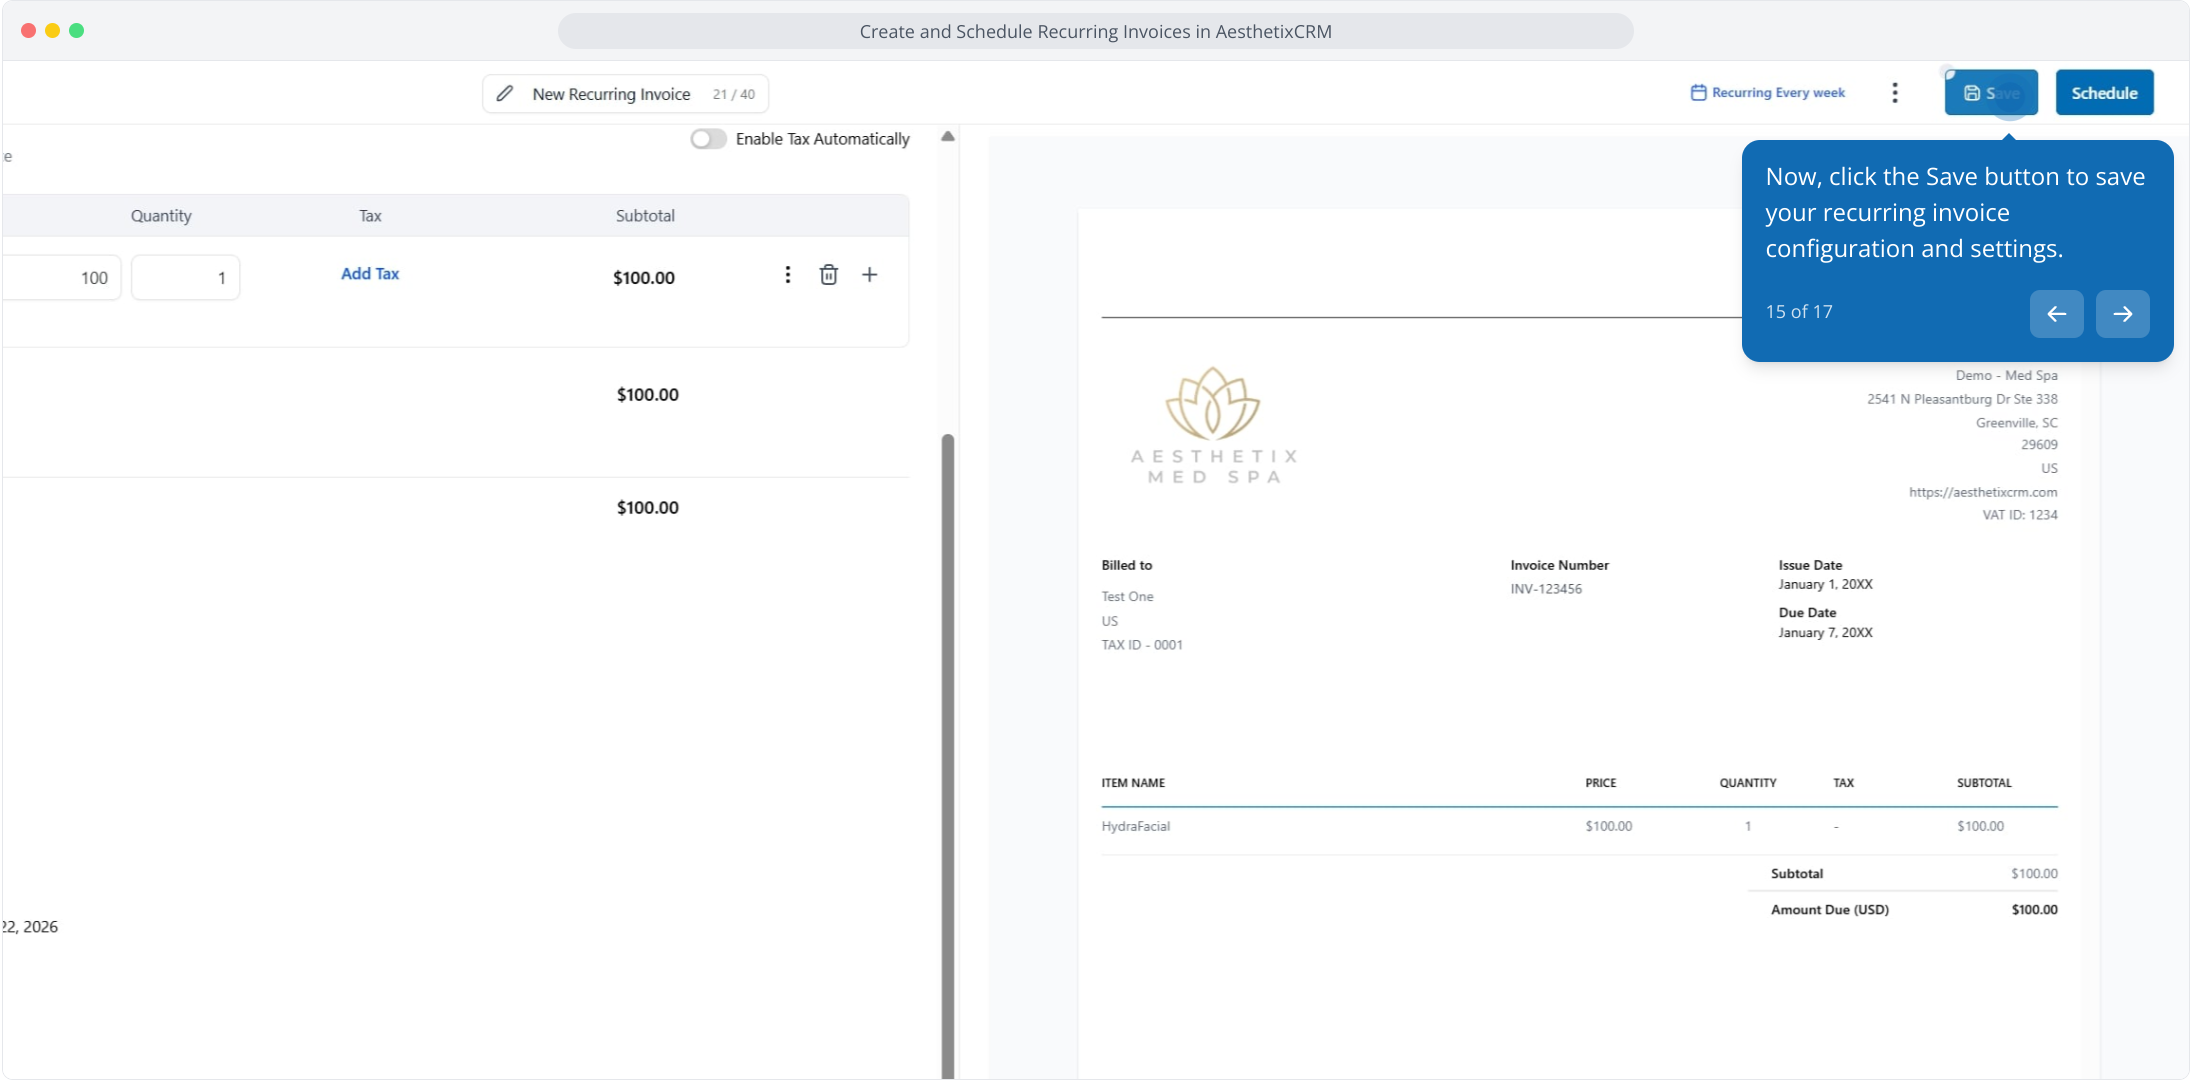
Click Save to store your configuration.
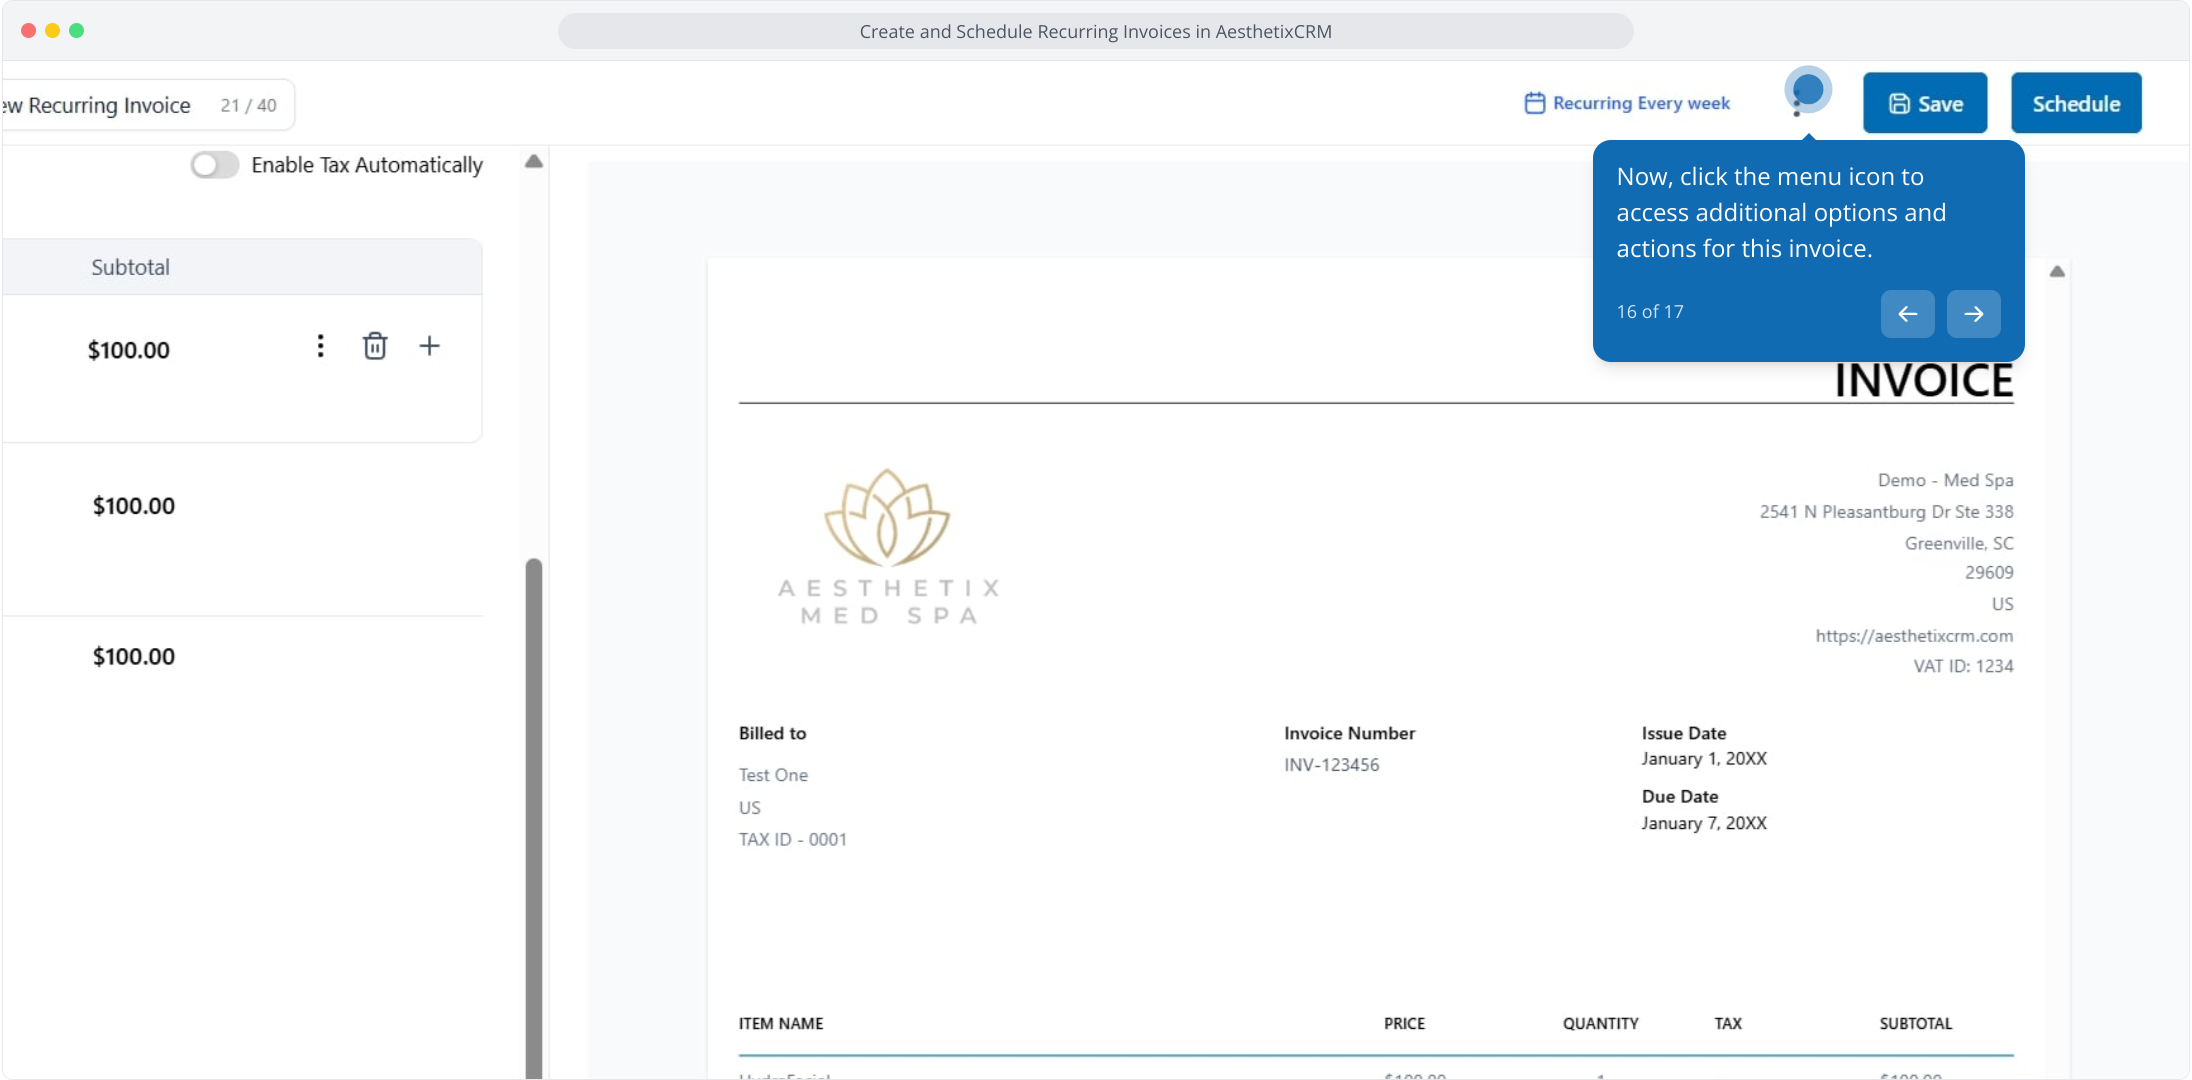
Click the menu icon to access additional options and actions for this invoice.
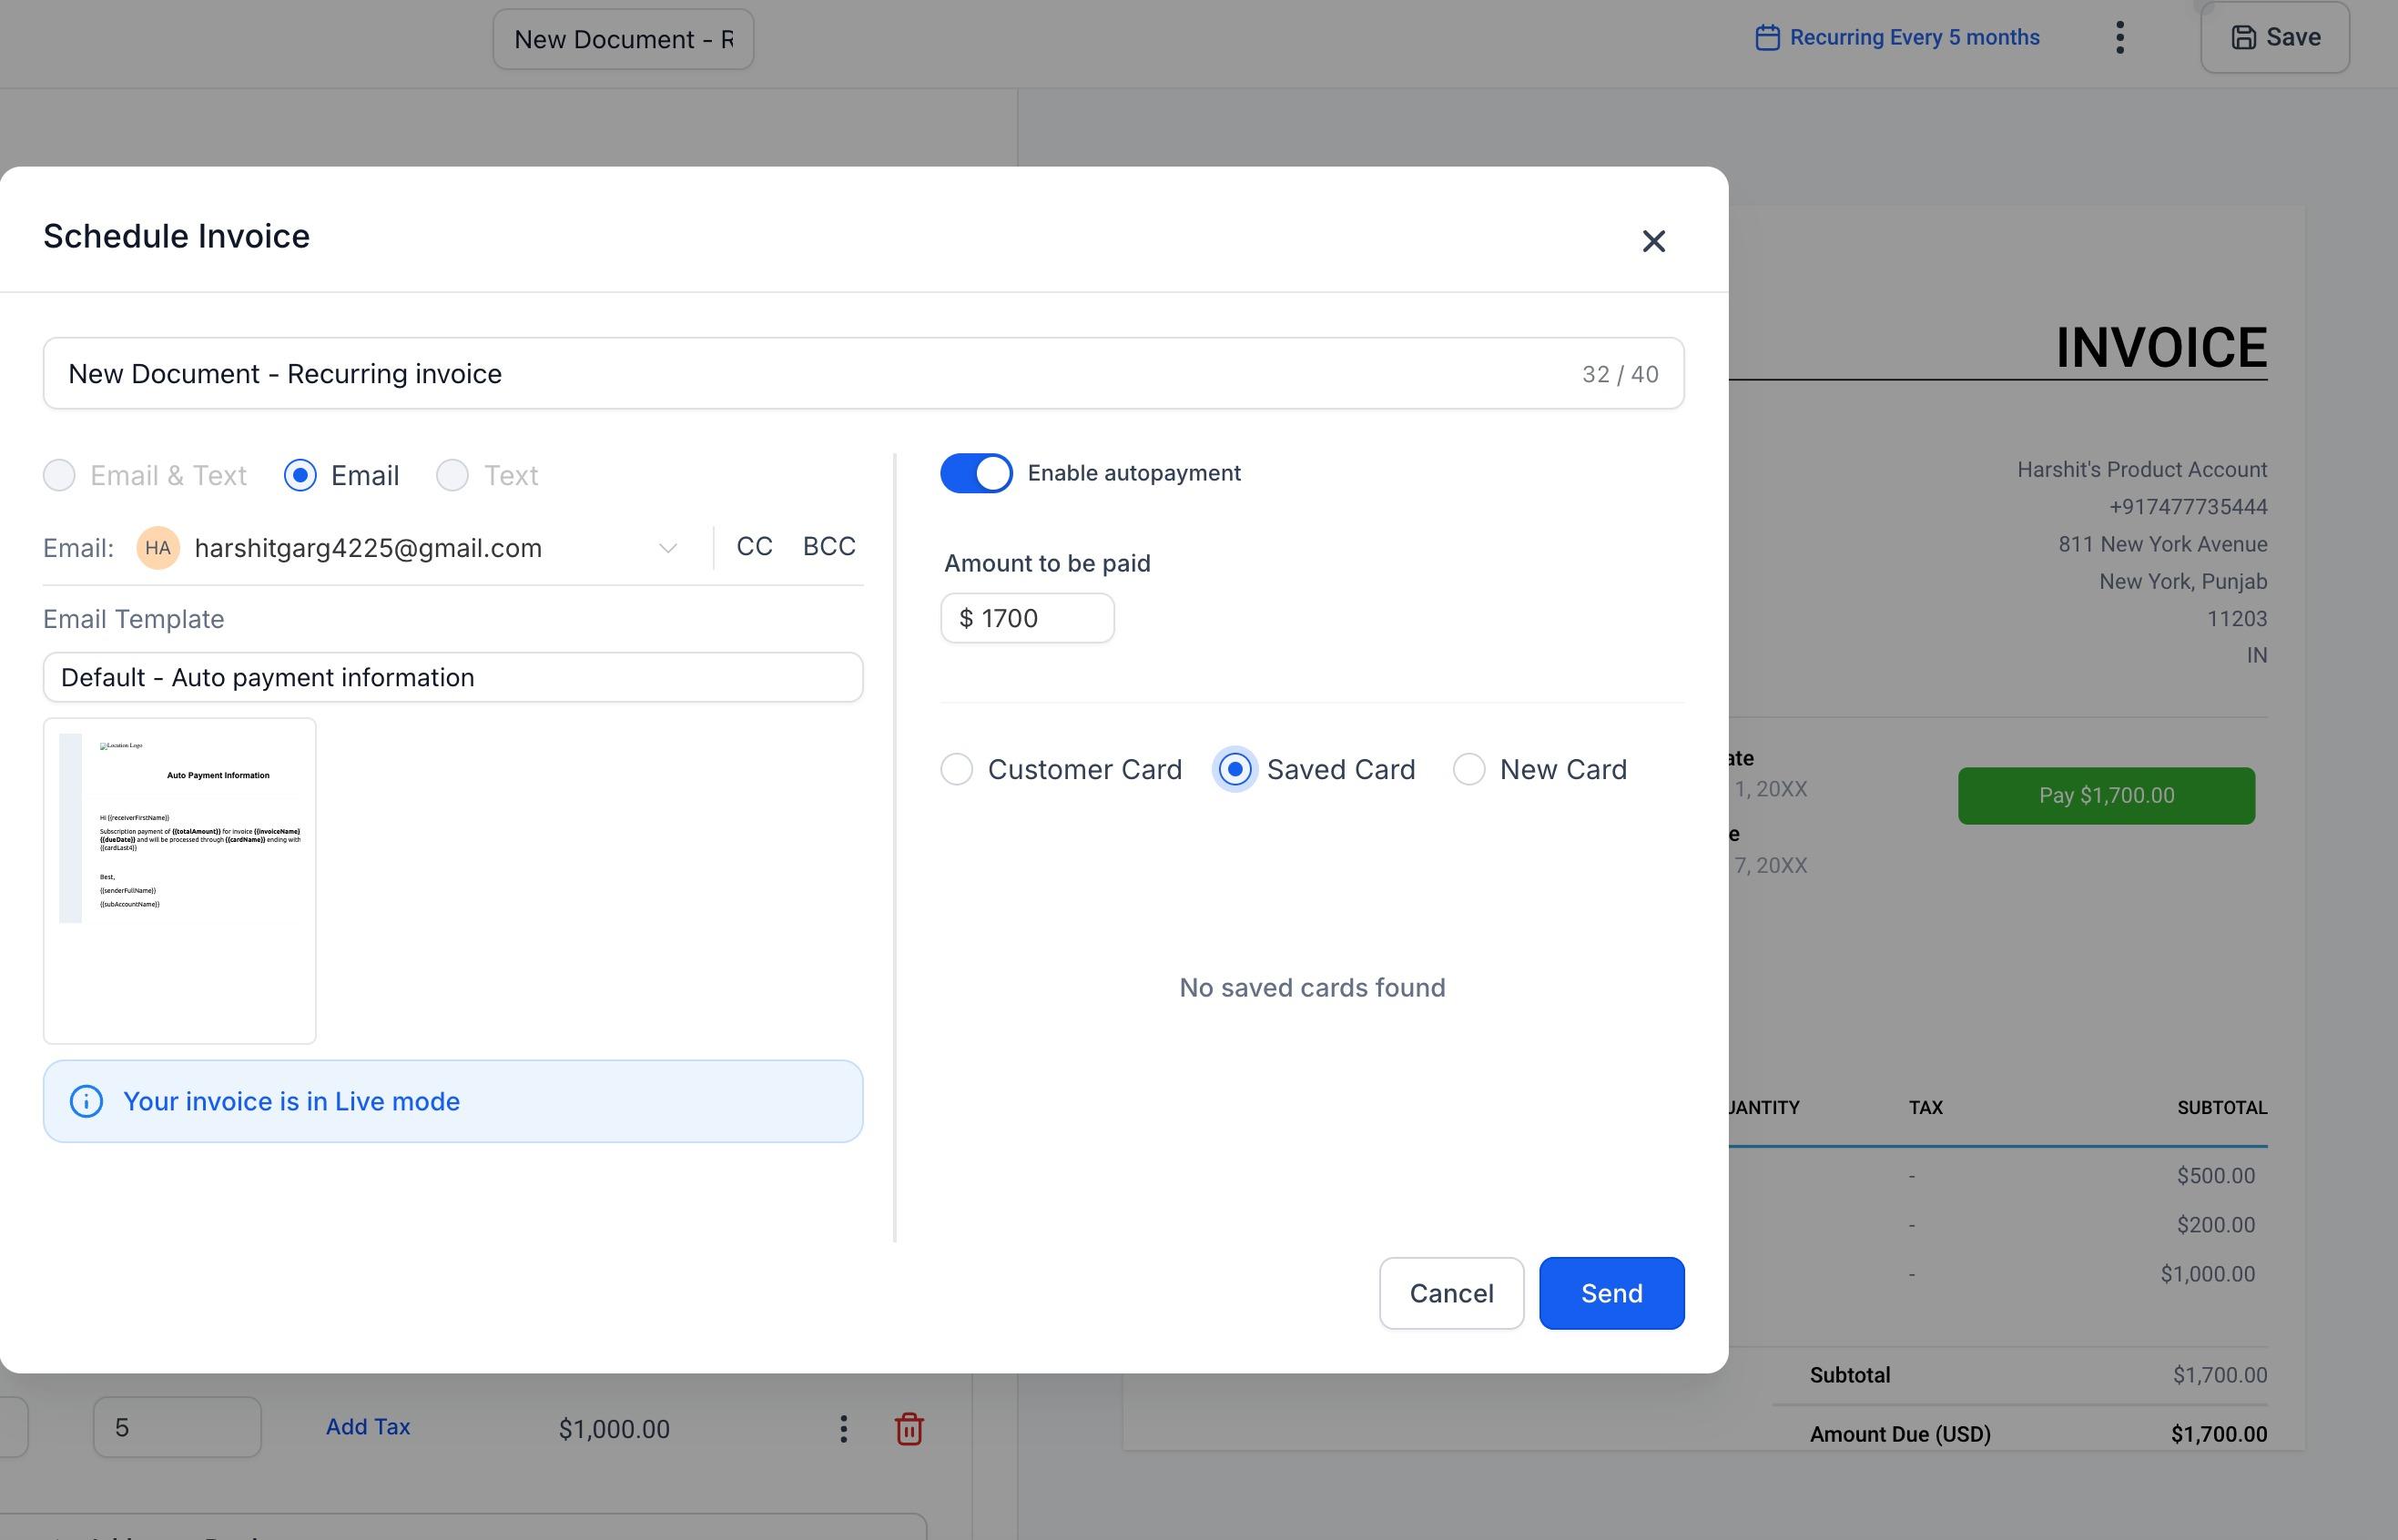
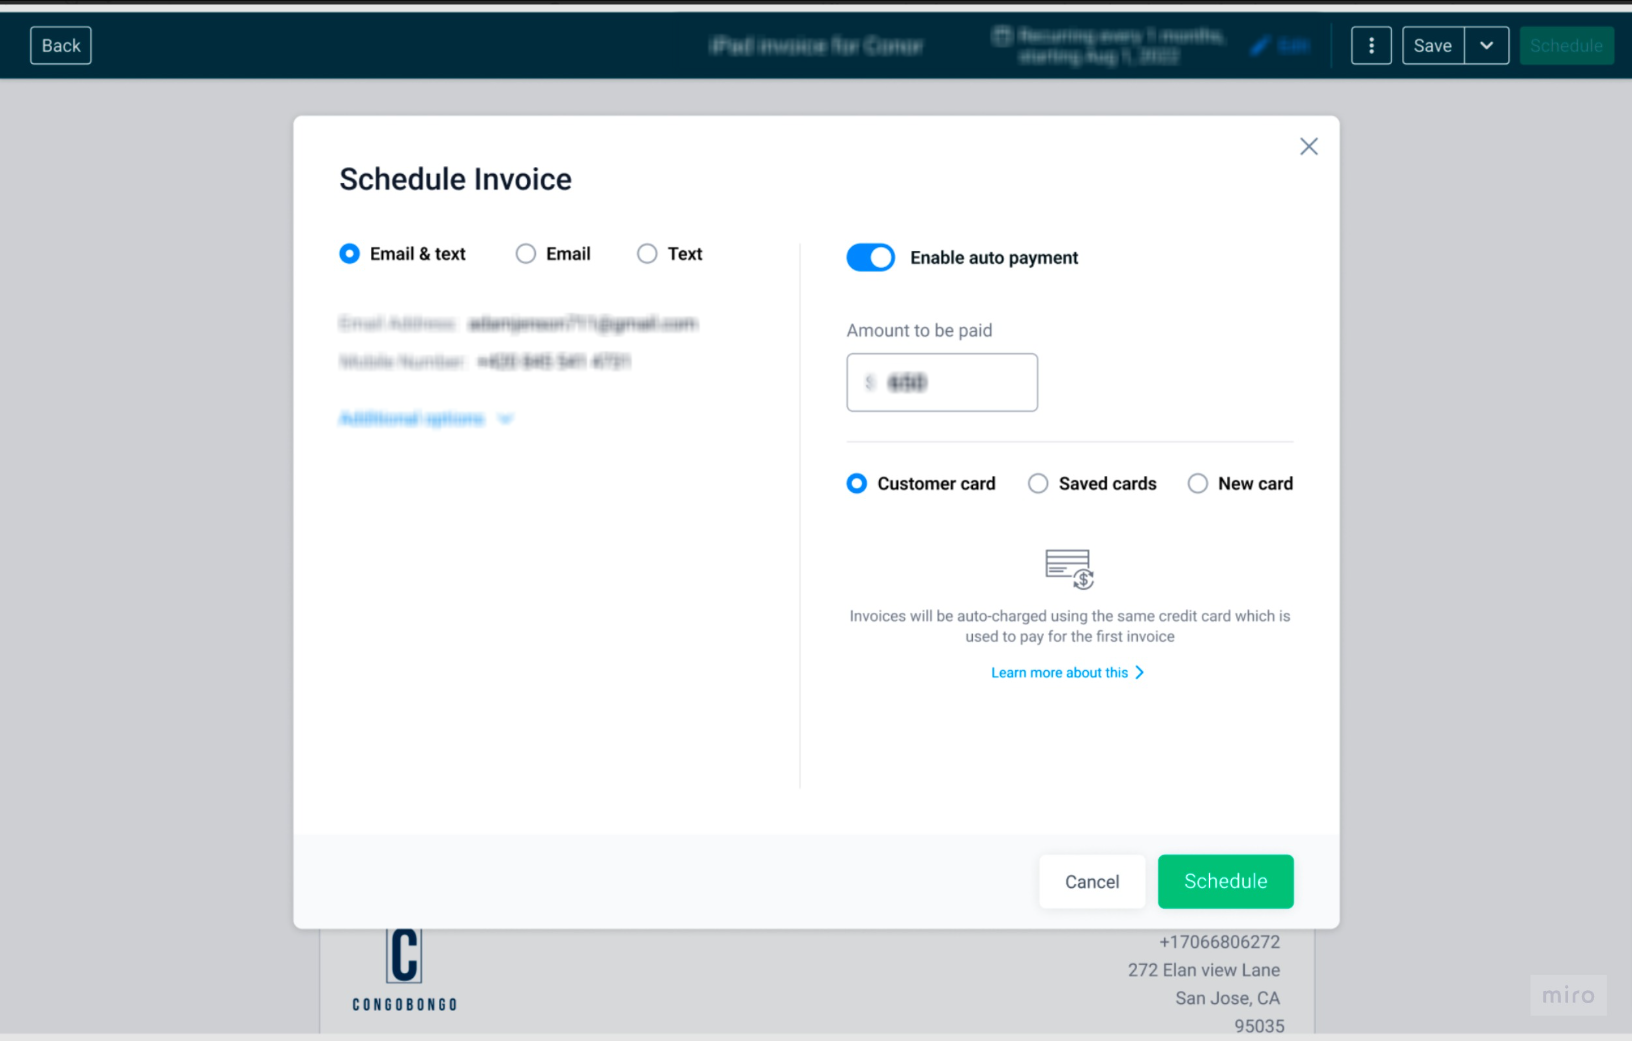
Edit the invoice settings, then click Send or Schedule to deliver it to the selected patient. When scheduling, you can also configure auto-payment options in the confirmation window.
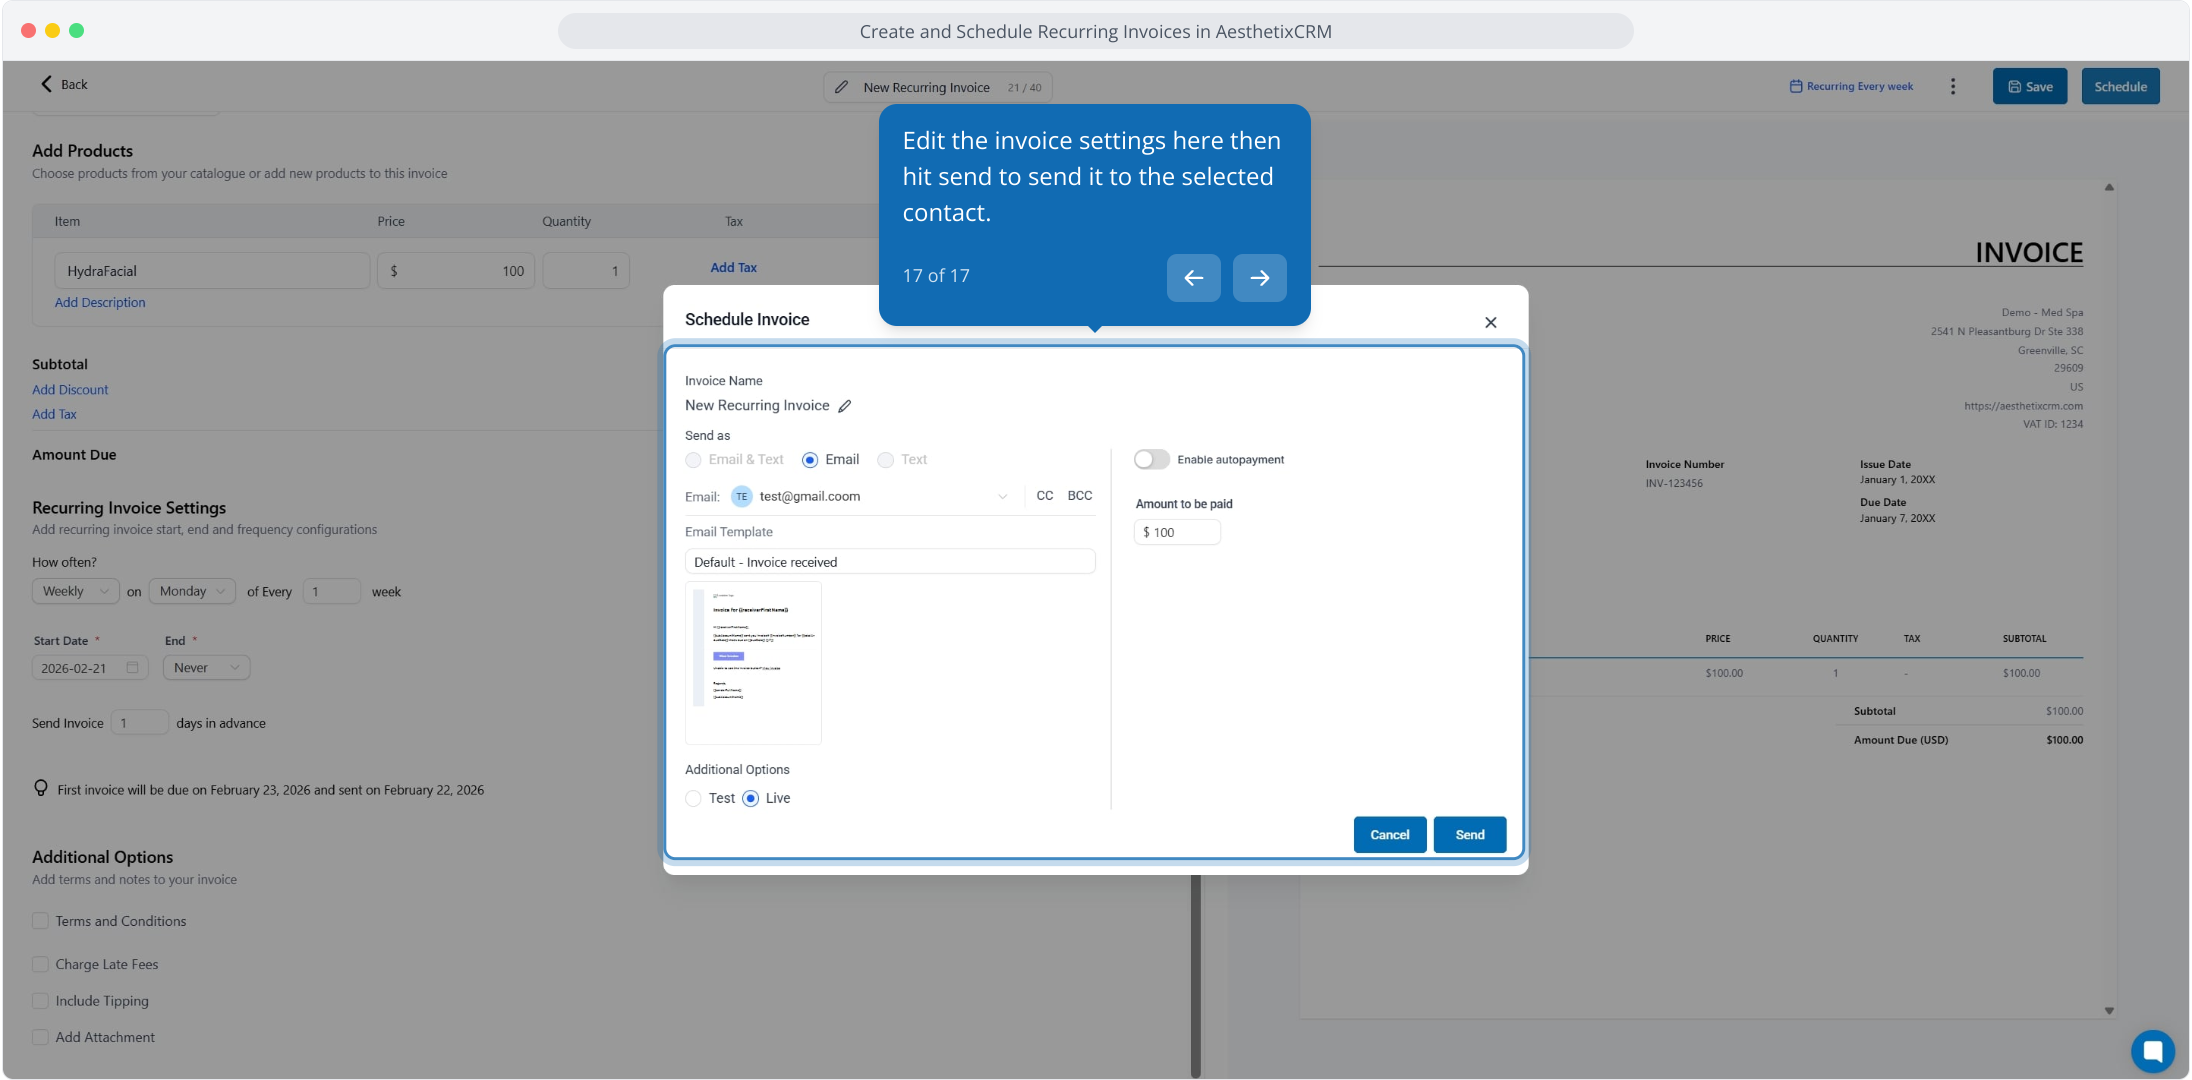
Important: Once your recurring invoice is scheduled, the template details are locked. To change frequency, dates, or products afterward, use the editing options described later in this guide, or end the template and recreate it.
You can bill an upfront setup fee and a recurring charge on a single invoice, useful for a program that has an enrollment fee plus a monthly charge.
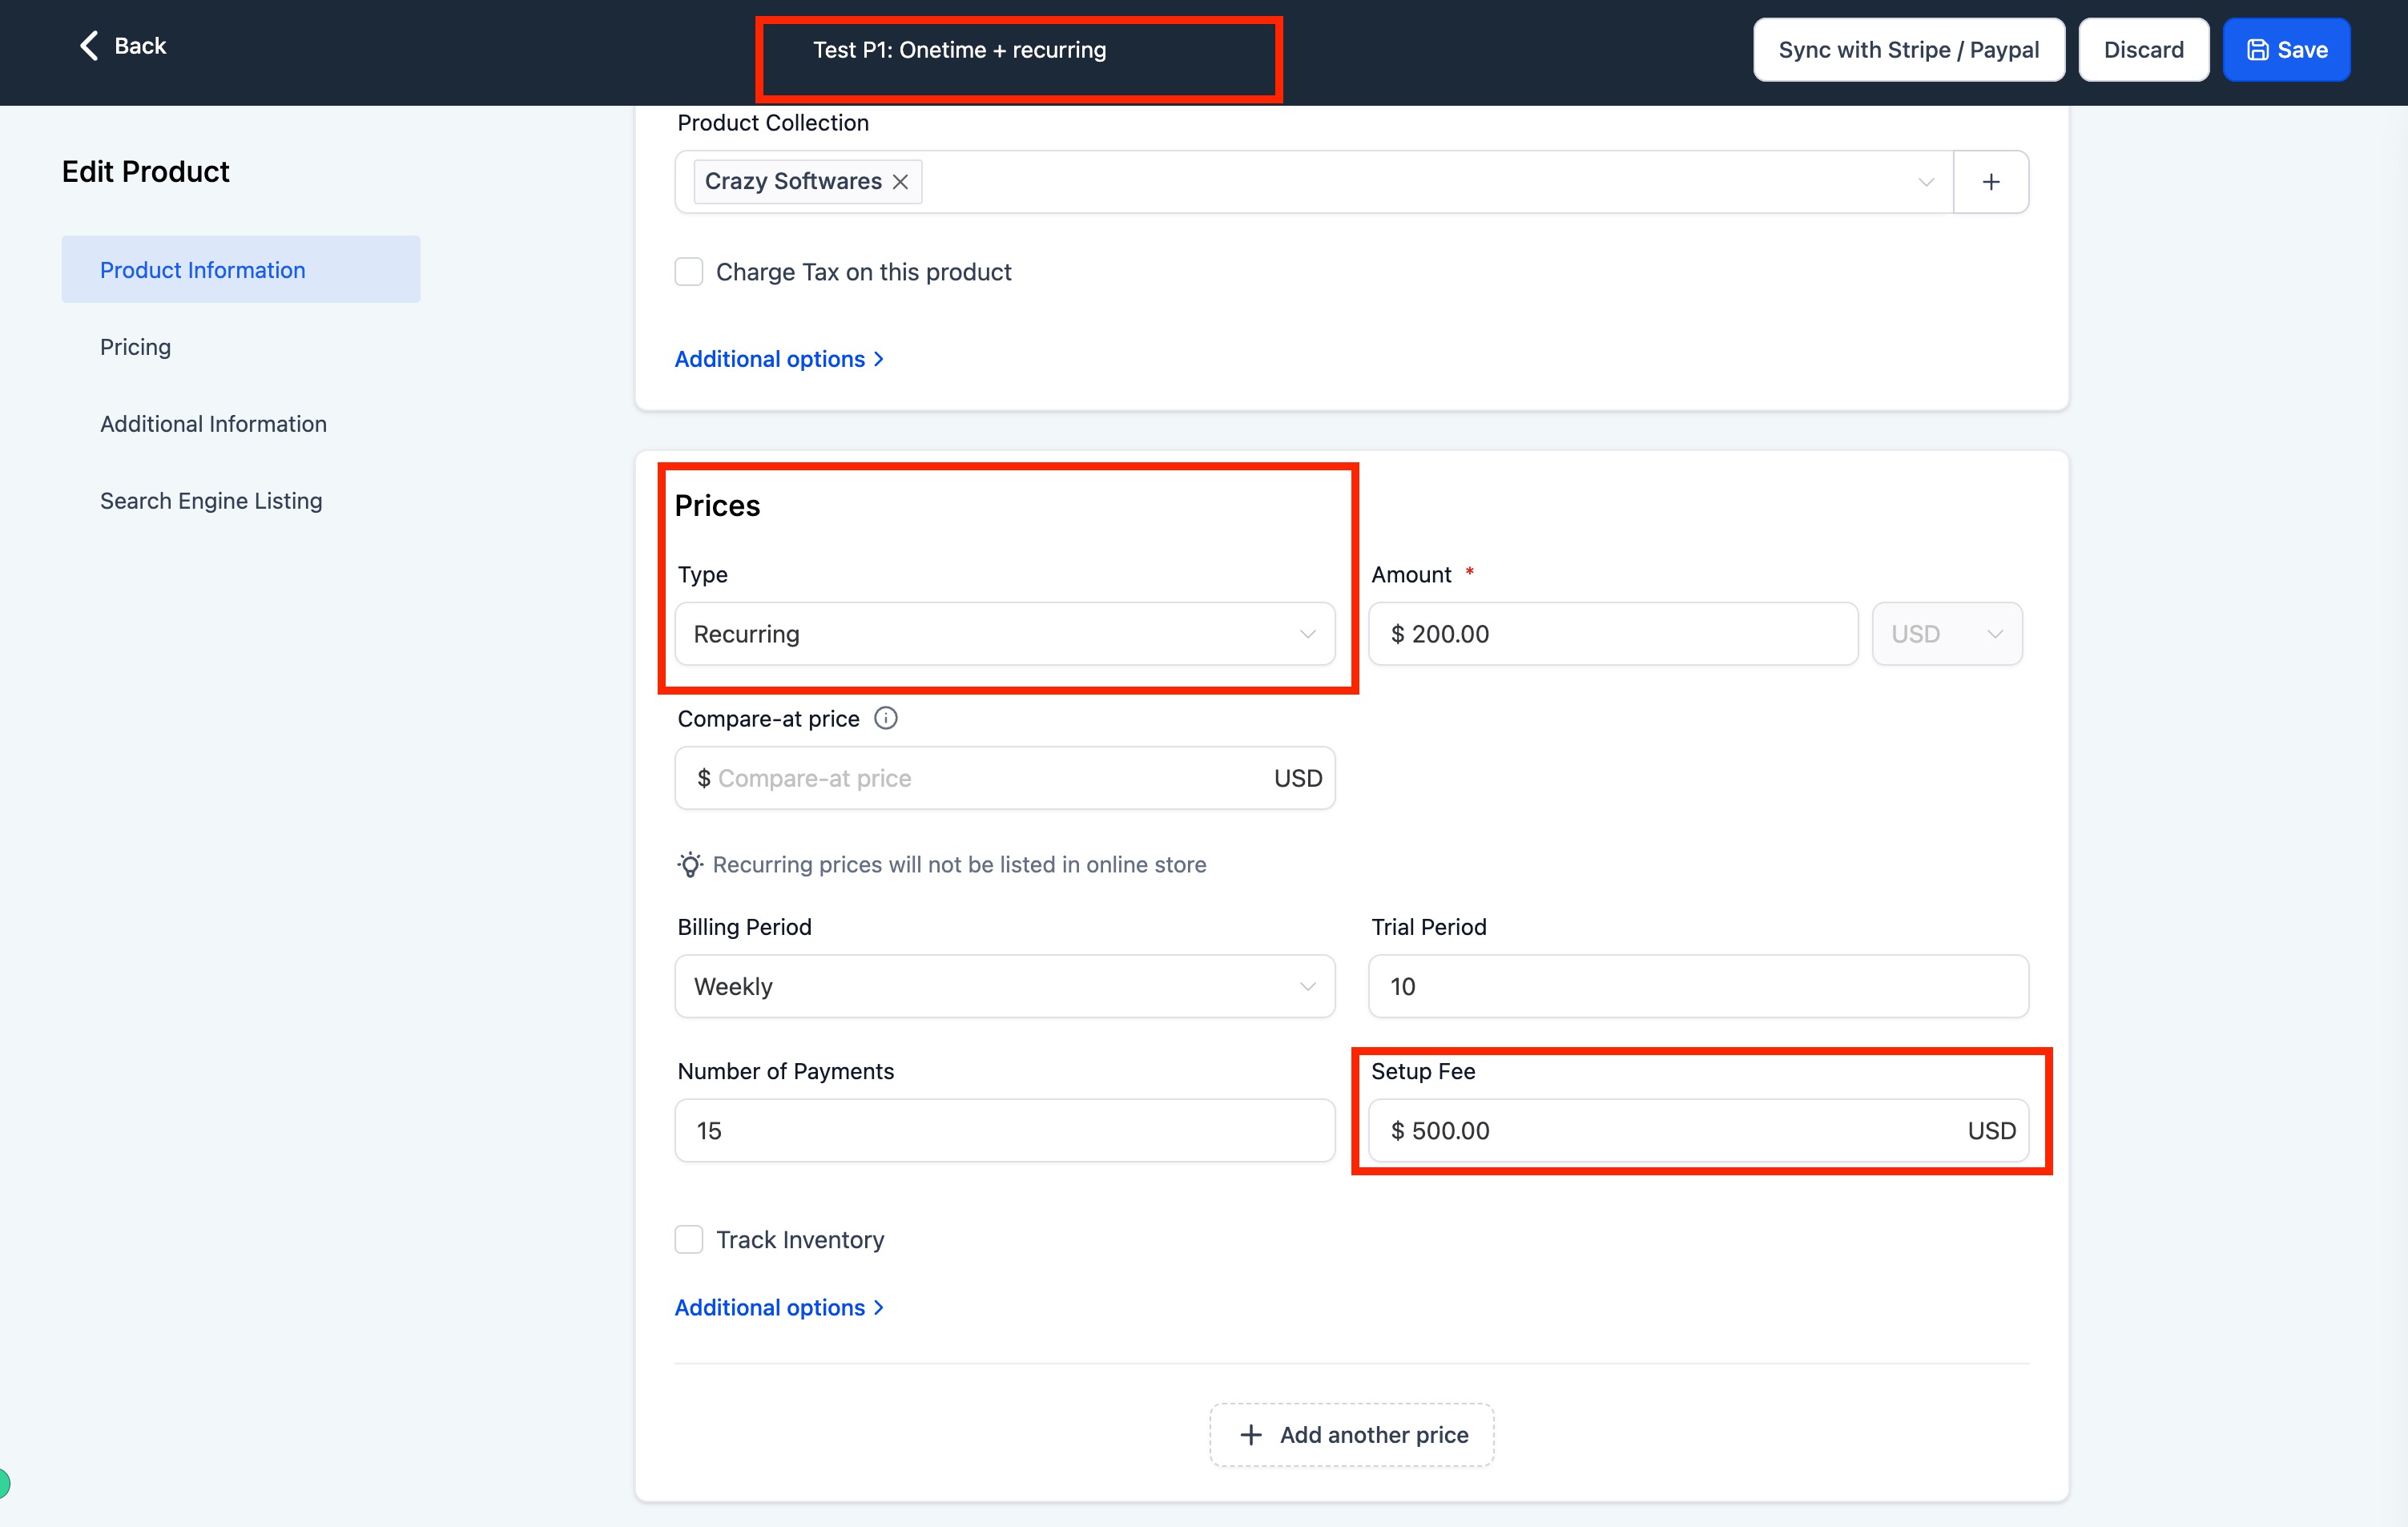
Go to the Products section and create a product with price type recurring, then add a setup fee to it.
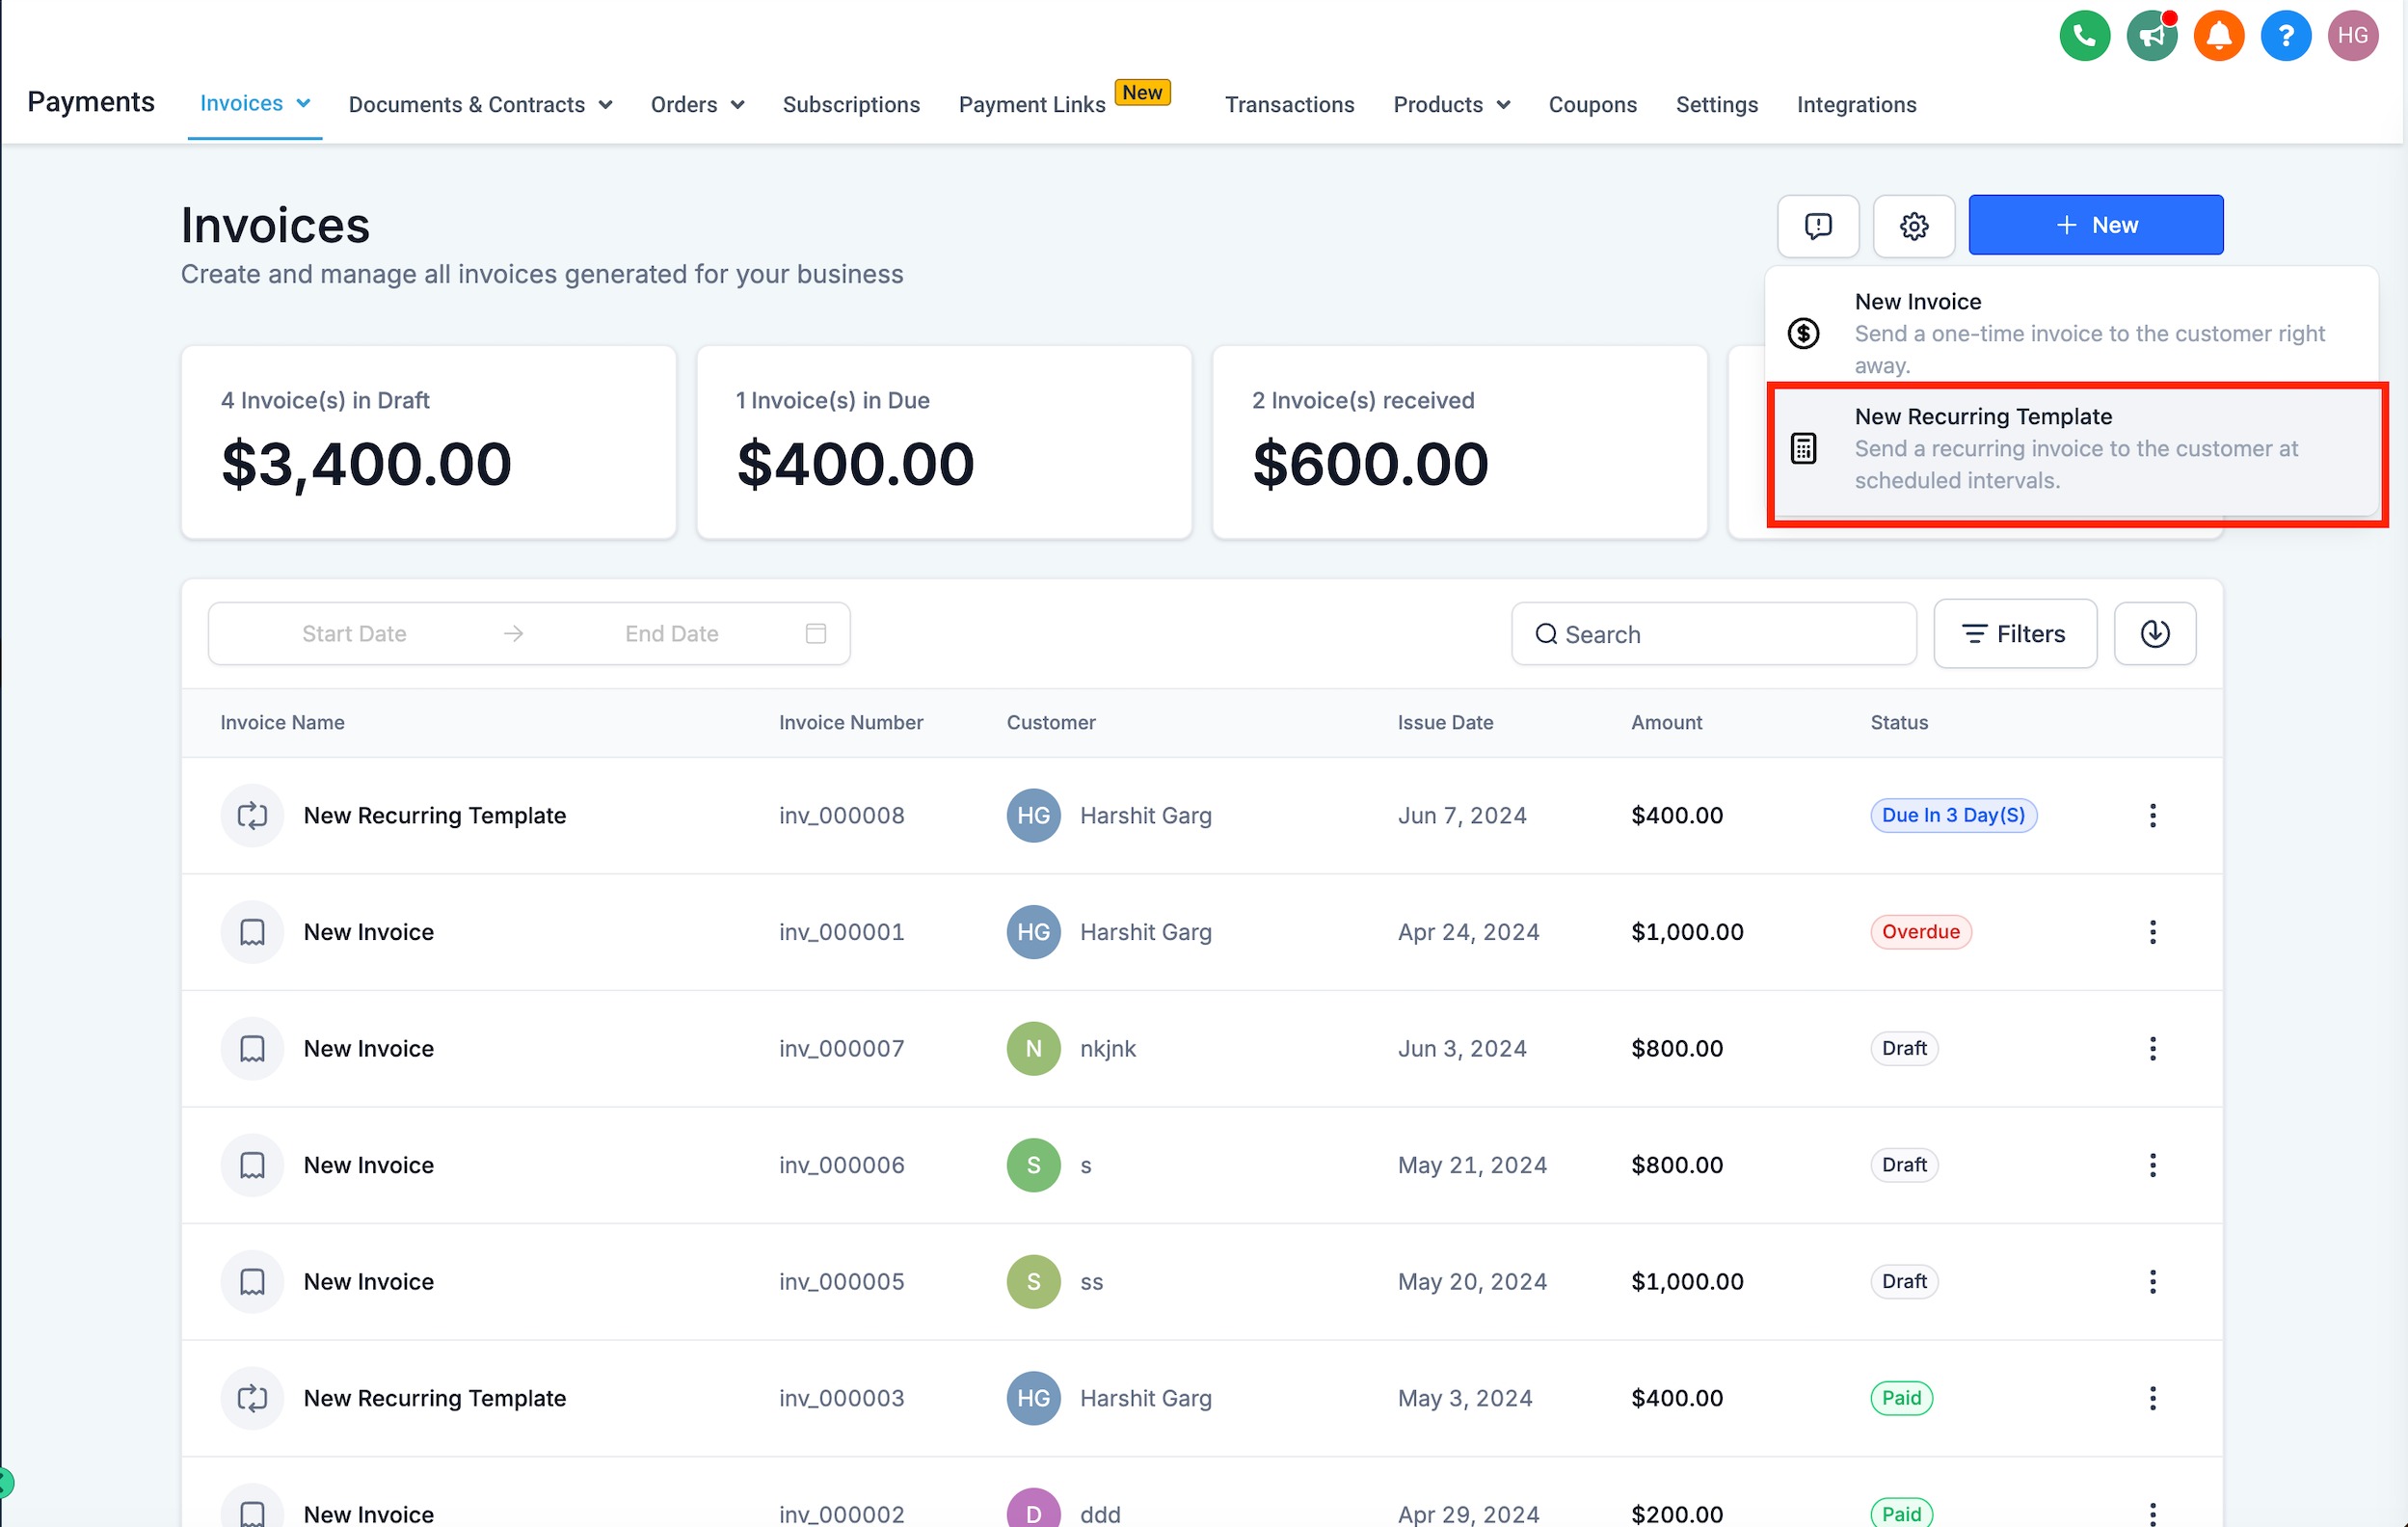
Create a recurring invoice from the Invoices section.
Add the product that has a setup fee.
Two line items for the same product appear, with the suffix "Setup Fee" added to the setup portion of the price.
For all subsequent auto-generated invoices, only the recurring portion of the price is sent; the setup fee is charged only once.
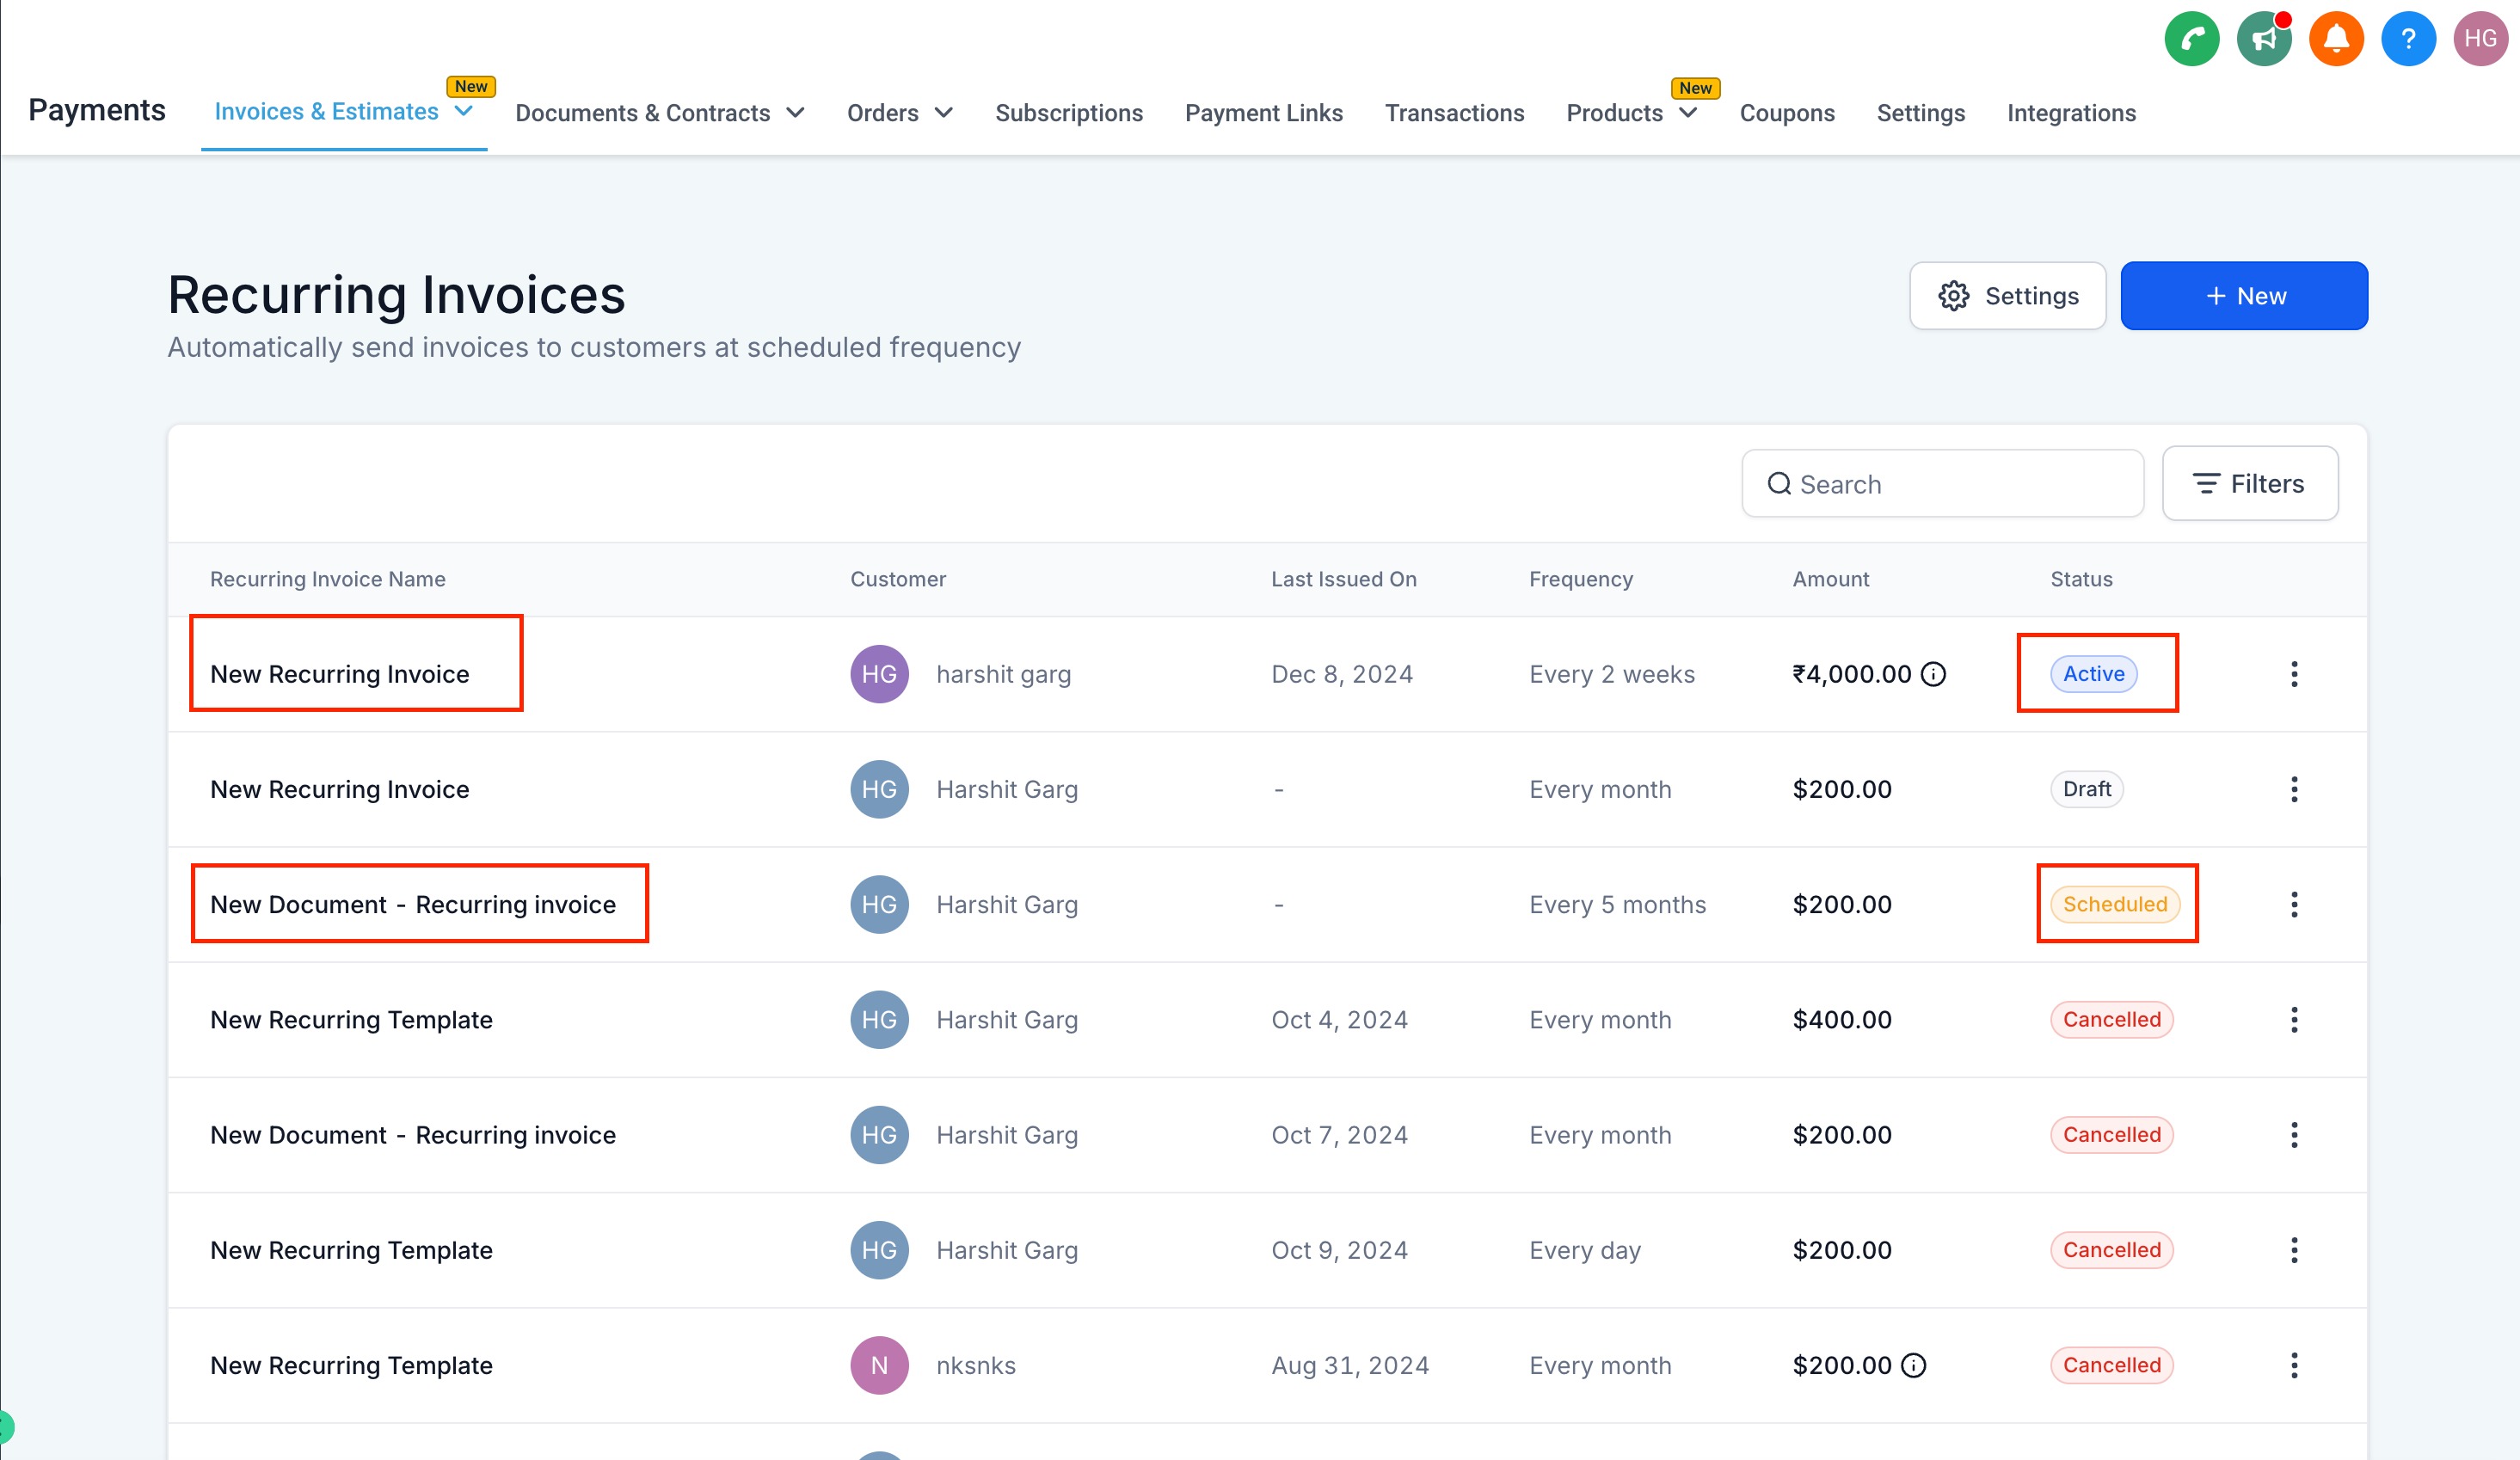
Recurring templates move through different statuses that determine what you can do with them:
Draft: Created but not activated. You can freely edit or delete it. This is the best time to adjust pricing, frequency, or products.
Active: Currently generating invoices on schedule. You cannot edit or delete it, but you can End it.
Scheduled: Set to begin at a future date. You cannot edit it, but you can delete or end it before the cycle starts.
Canceled: Will not generate further invoices. It stays visible for reference and can be deleted only if no invoices were ever sent.
Completed: Finished generating invoices (usually reached its end condition). Like Canceled templates, it can be deleted only if no invoices were sent.
This matrix summarizes the available actions per status:
Action / Status | Draft | Active | Scheduled | Canceled | Completed |
|---|---|---|---|---|---|
Edit | Yes | No | No | No | No |
View | No | Yes | Yes | Yes | Yes |
Delete | Yes | No | Yes | Only if none sent | Only if none sent |
End | Not applicable | Yes | Yes | Not applicable | Not applicable |
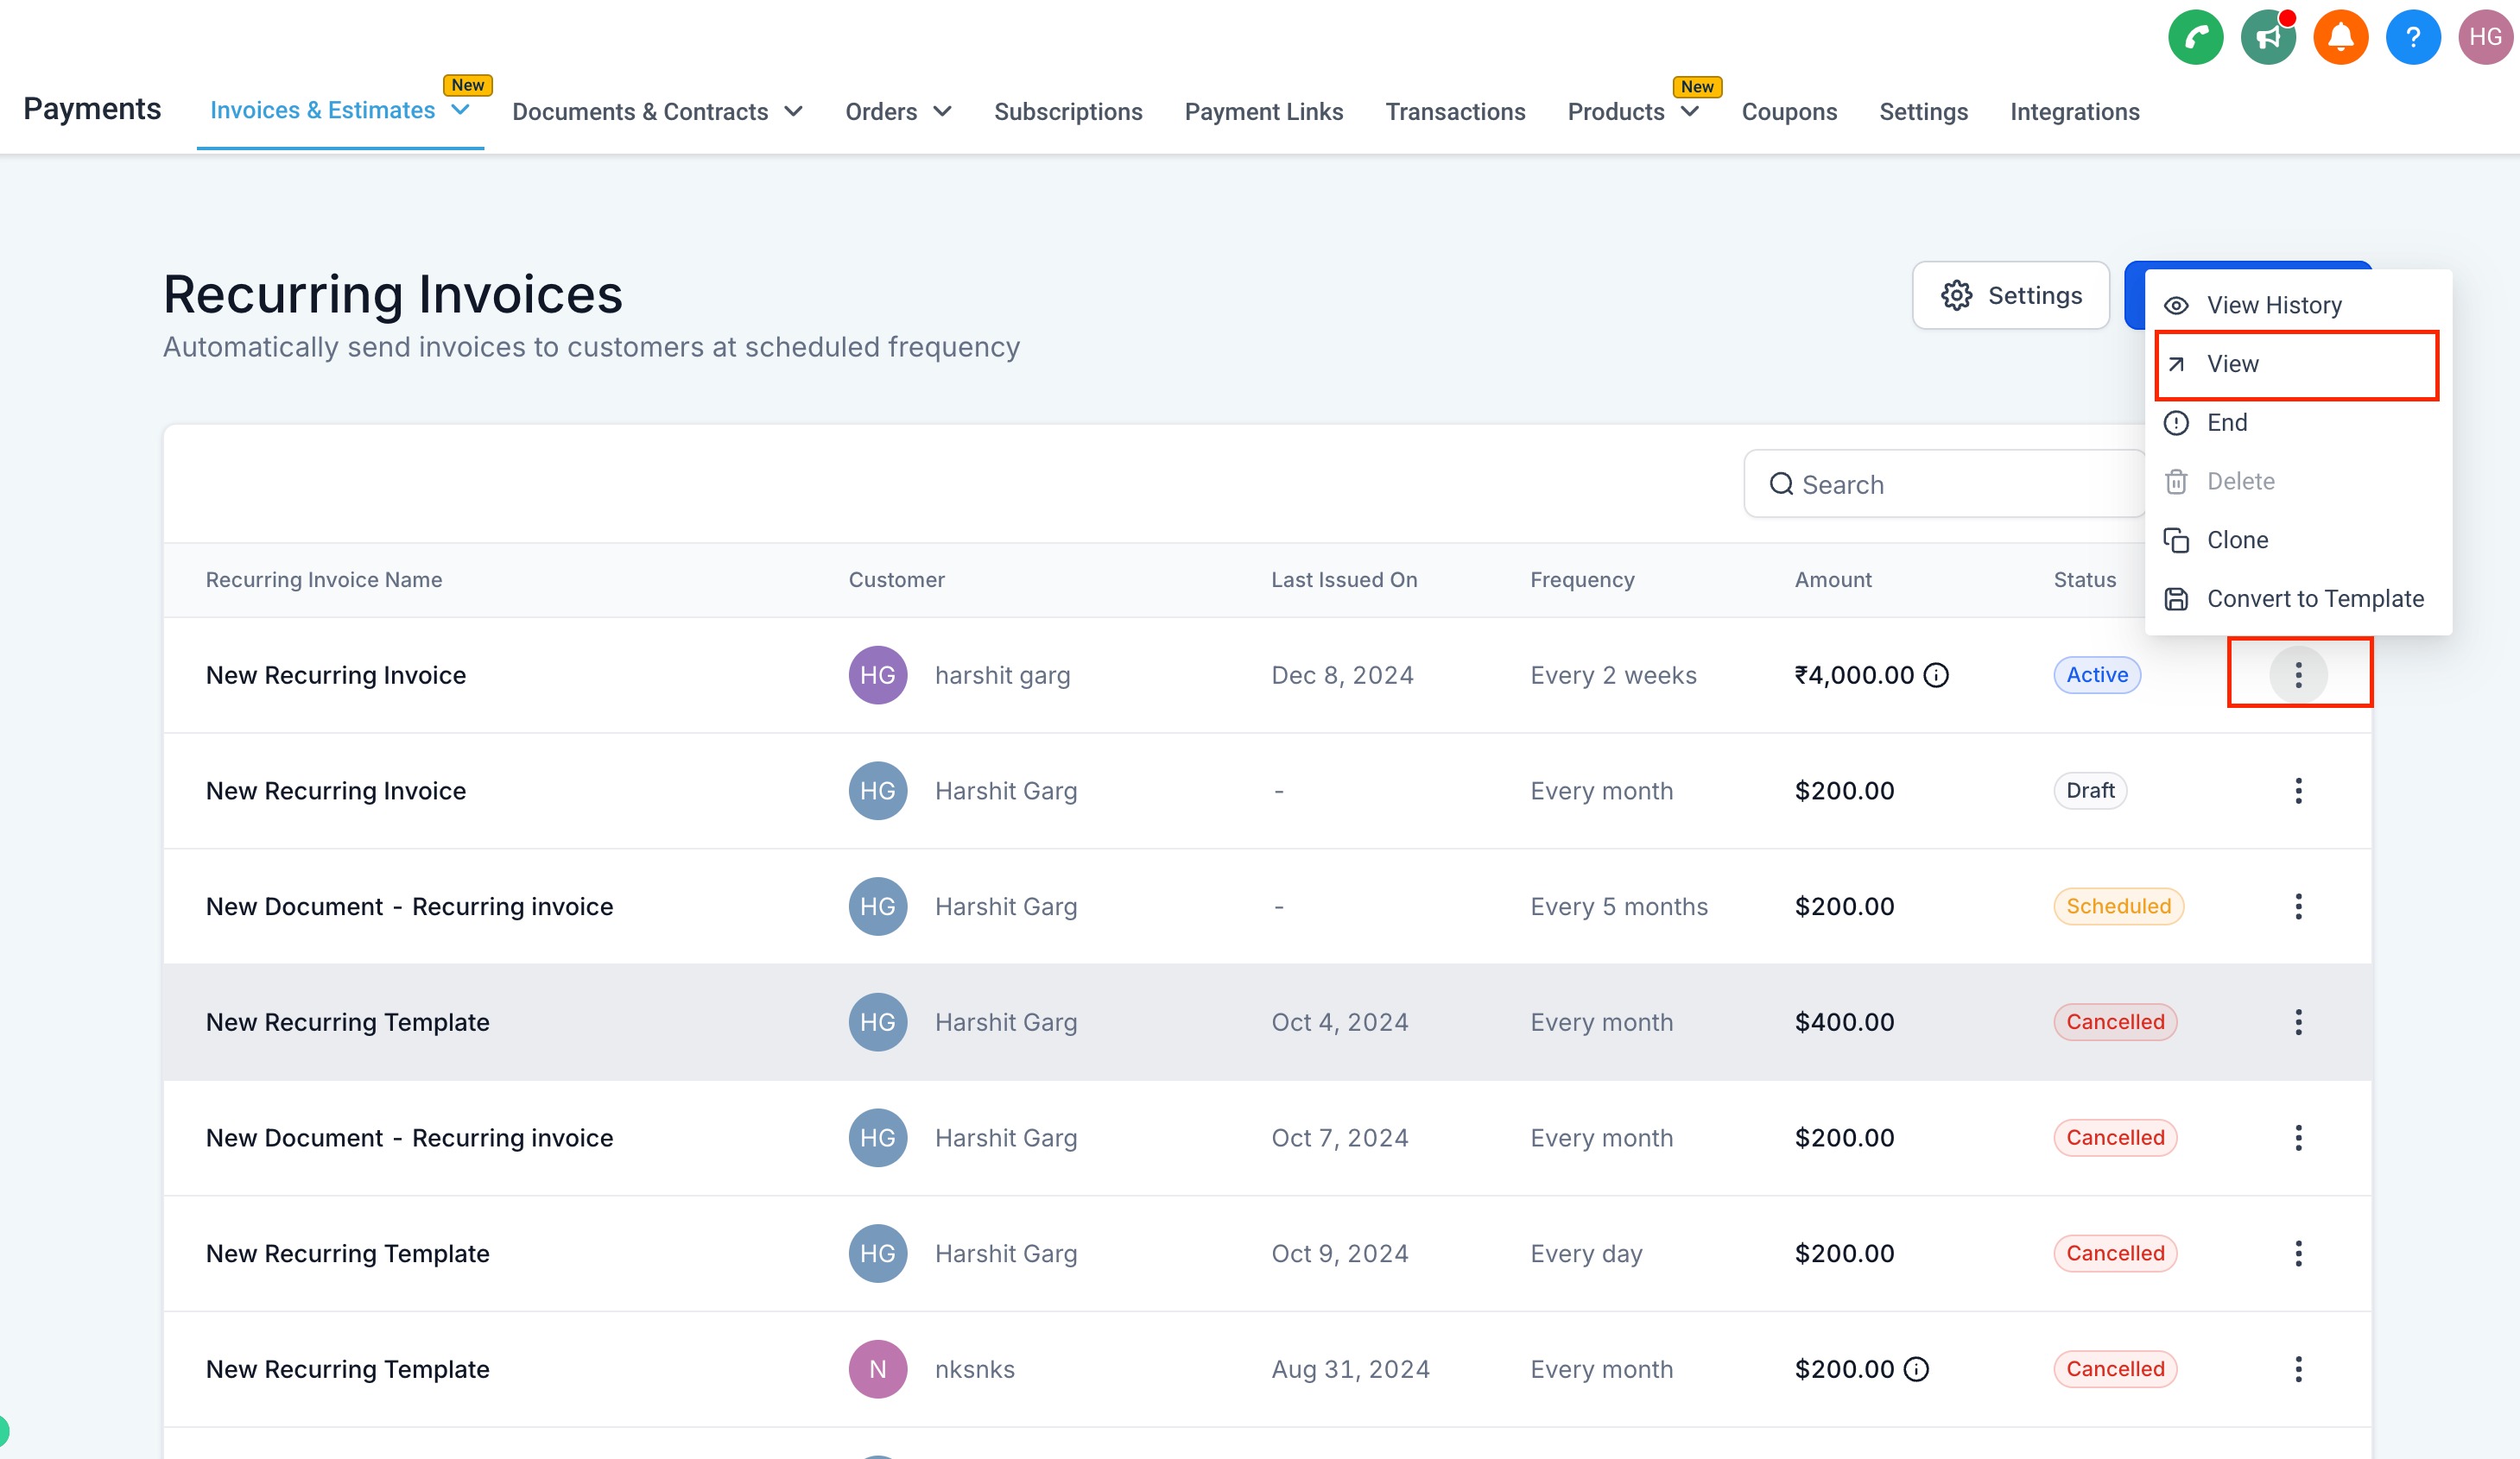
From the Recurring Templates list, click the More Options (⋮) menu next to a template to manage it:
View History: See all invoices generated by the template, with due dates and payment status.
View: Open the template to review its details.
End: Stop future invoices while keeping past ones intact.
Delete: Remove the template (only if no invoices have been sent).
Clone: Duplicate the template for reuse.
Convert to Template: Save the invoice as a reusable template.
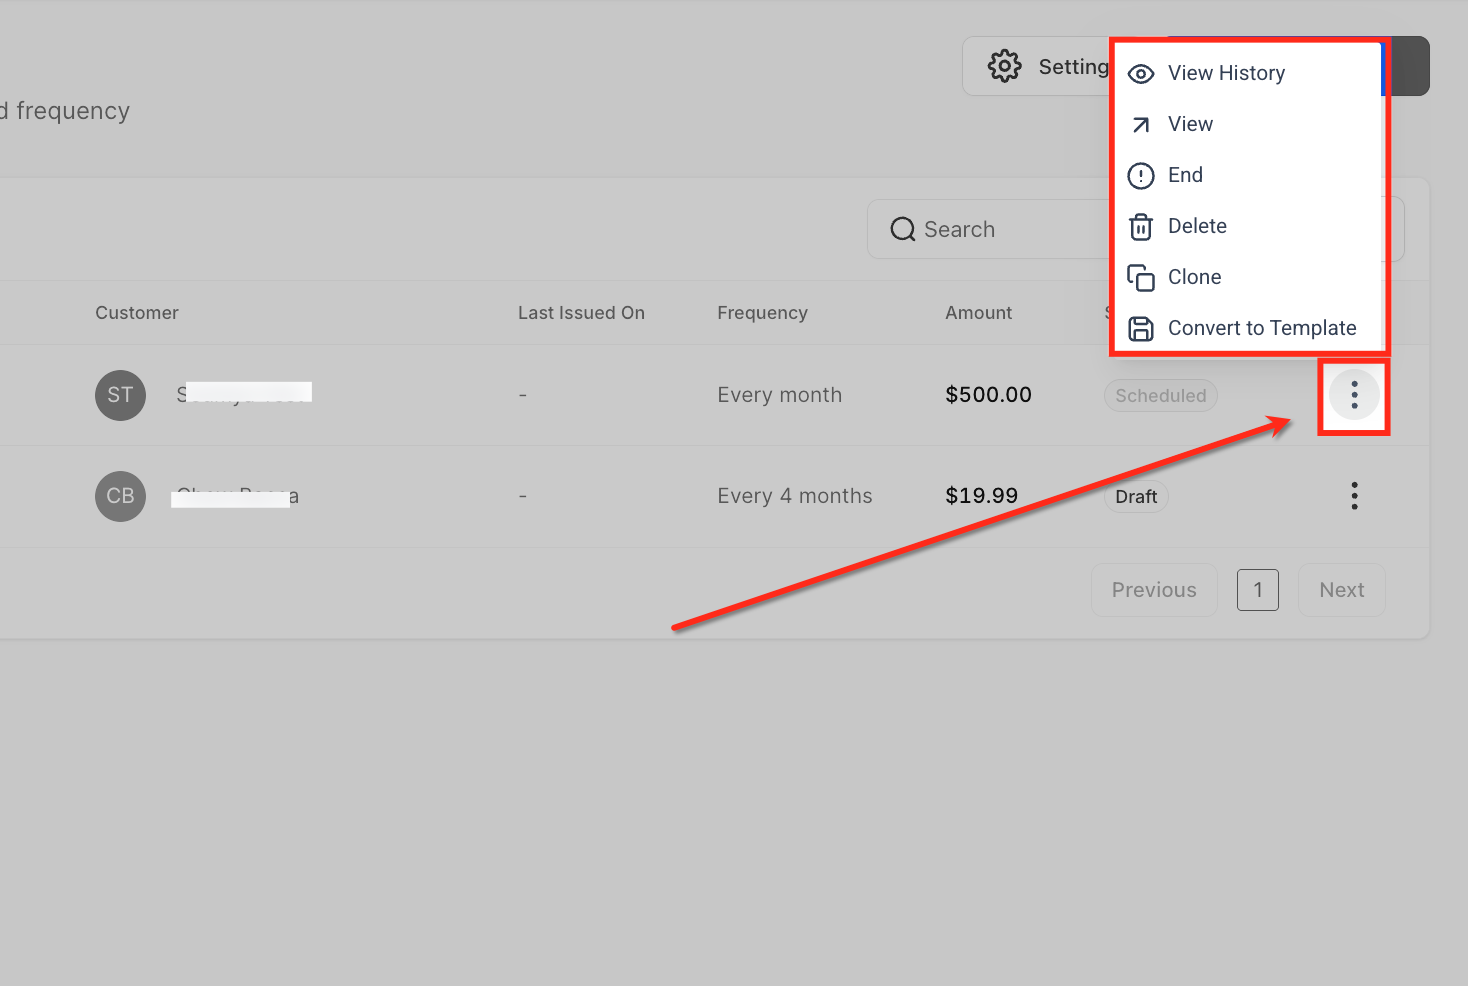
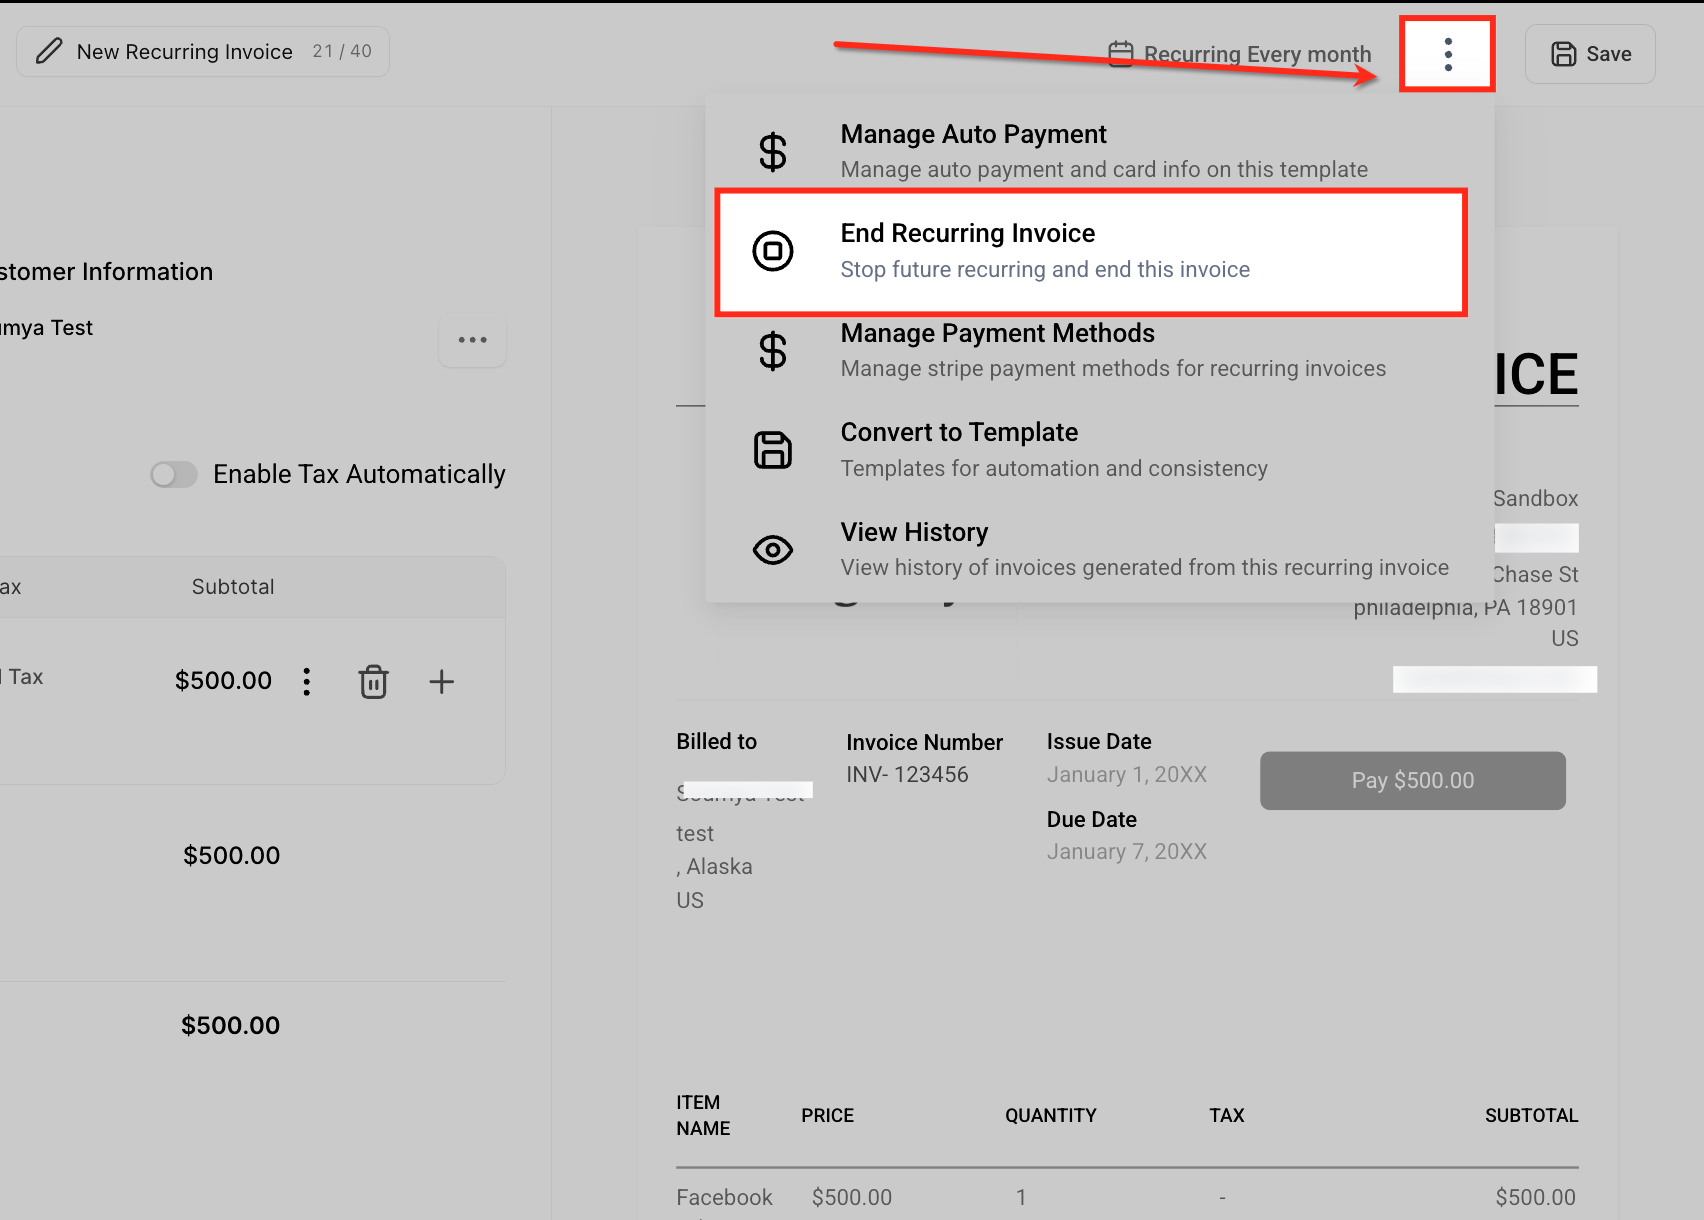
To stop a series, select End Recurring Invoice from the More Options (⋮) menu inside the invoice. This immediately stops future invoices while preserving the history of invoices already sent.
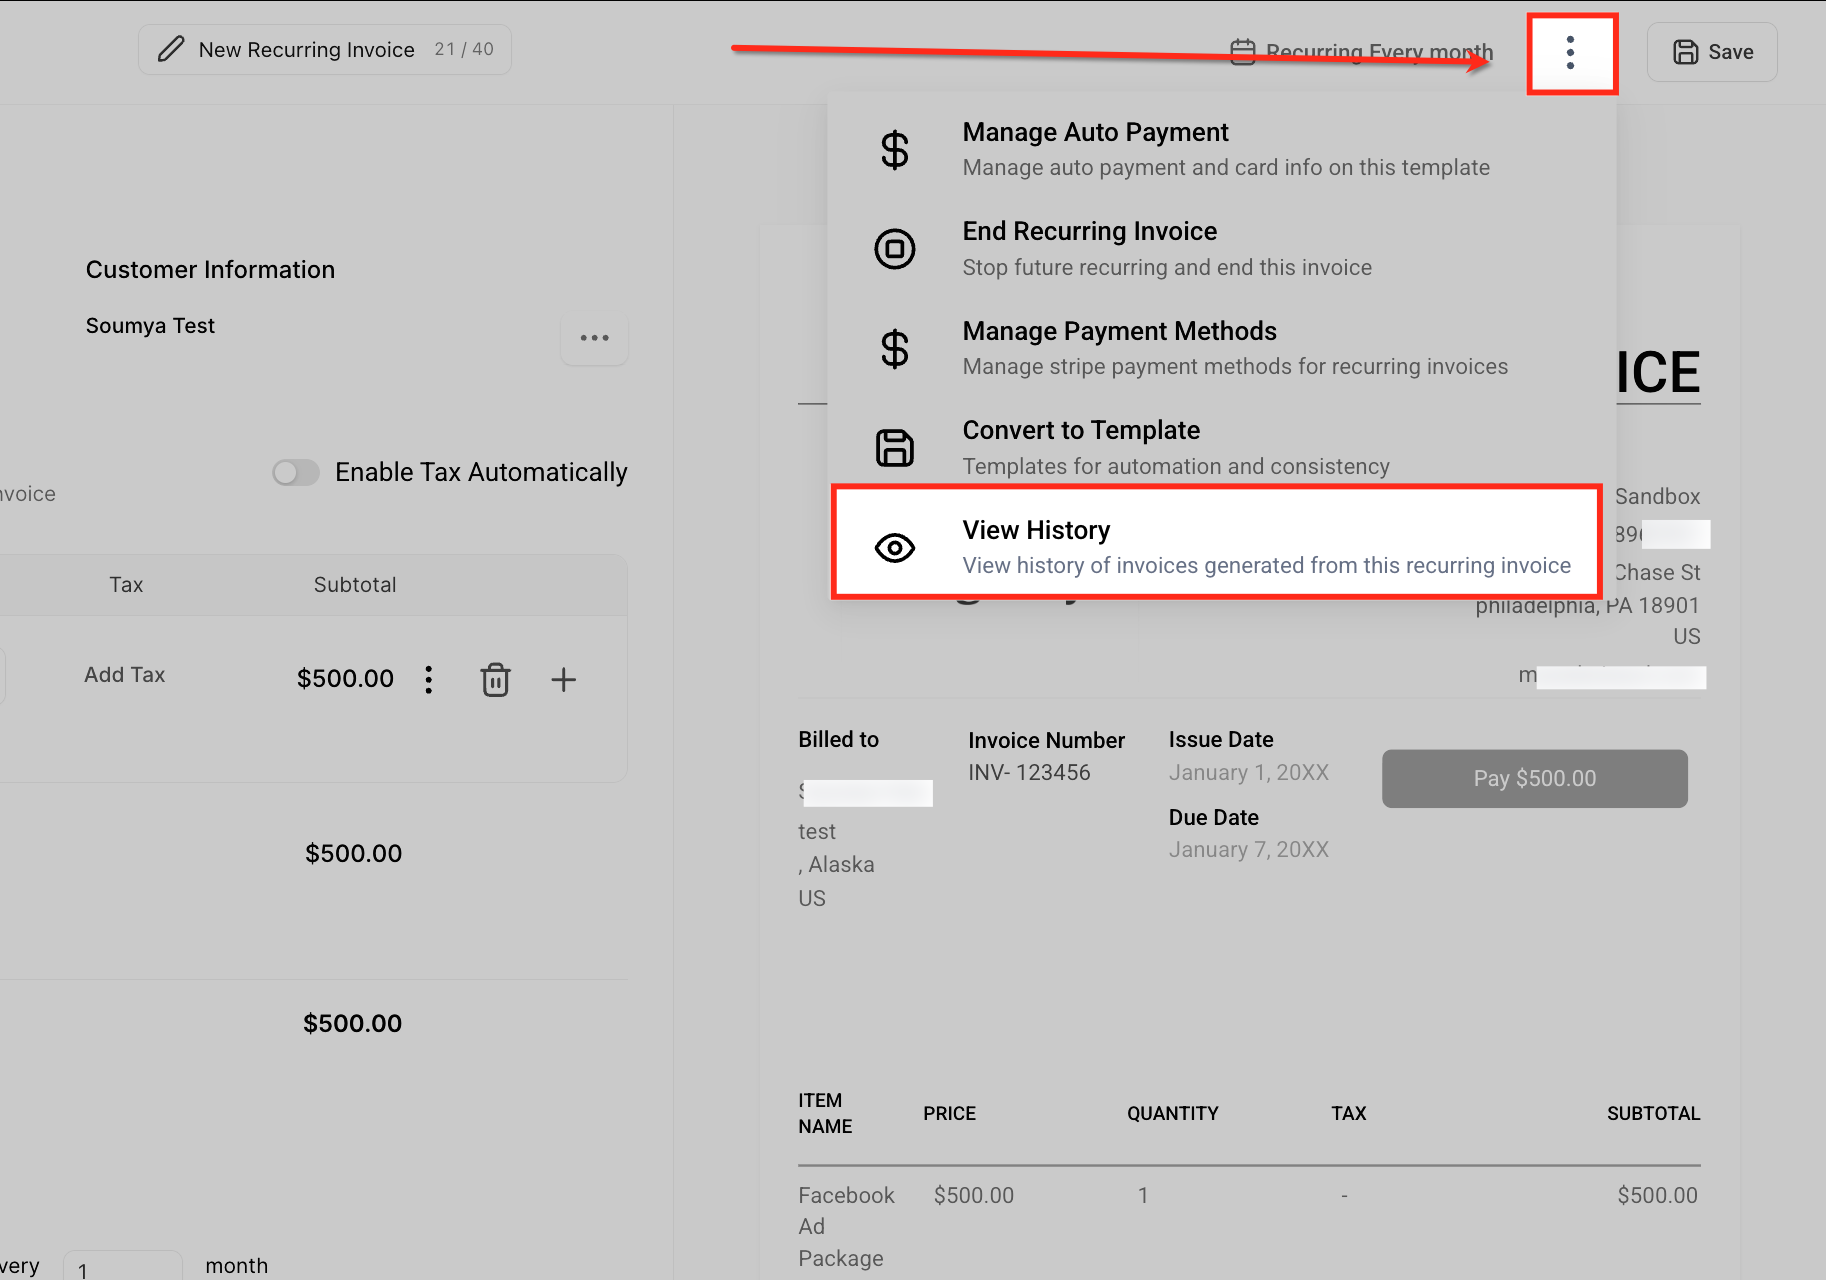
To review activity, select View History from the same menu.
From the Recurring Templates page, click Details to open a side panel showing all invoices generated by that template. Each invoice has one of these statuses:
Sent: Delivered successfully.
Overdue: Sent, but payment is still pending.
Paid: Paid by the patient.
Not Sent: Delivery failed due to a system error and needs to be resent.
You can also view these statuses inside the invoice builder once the template is scheduled.
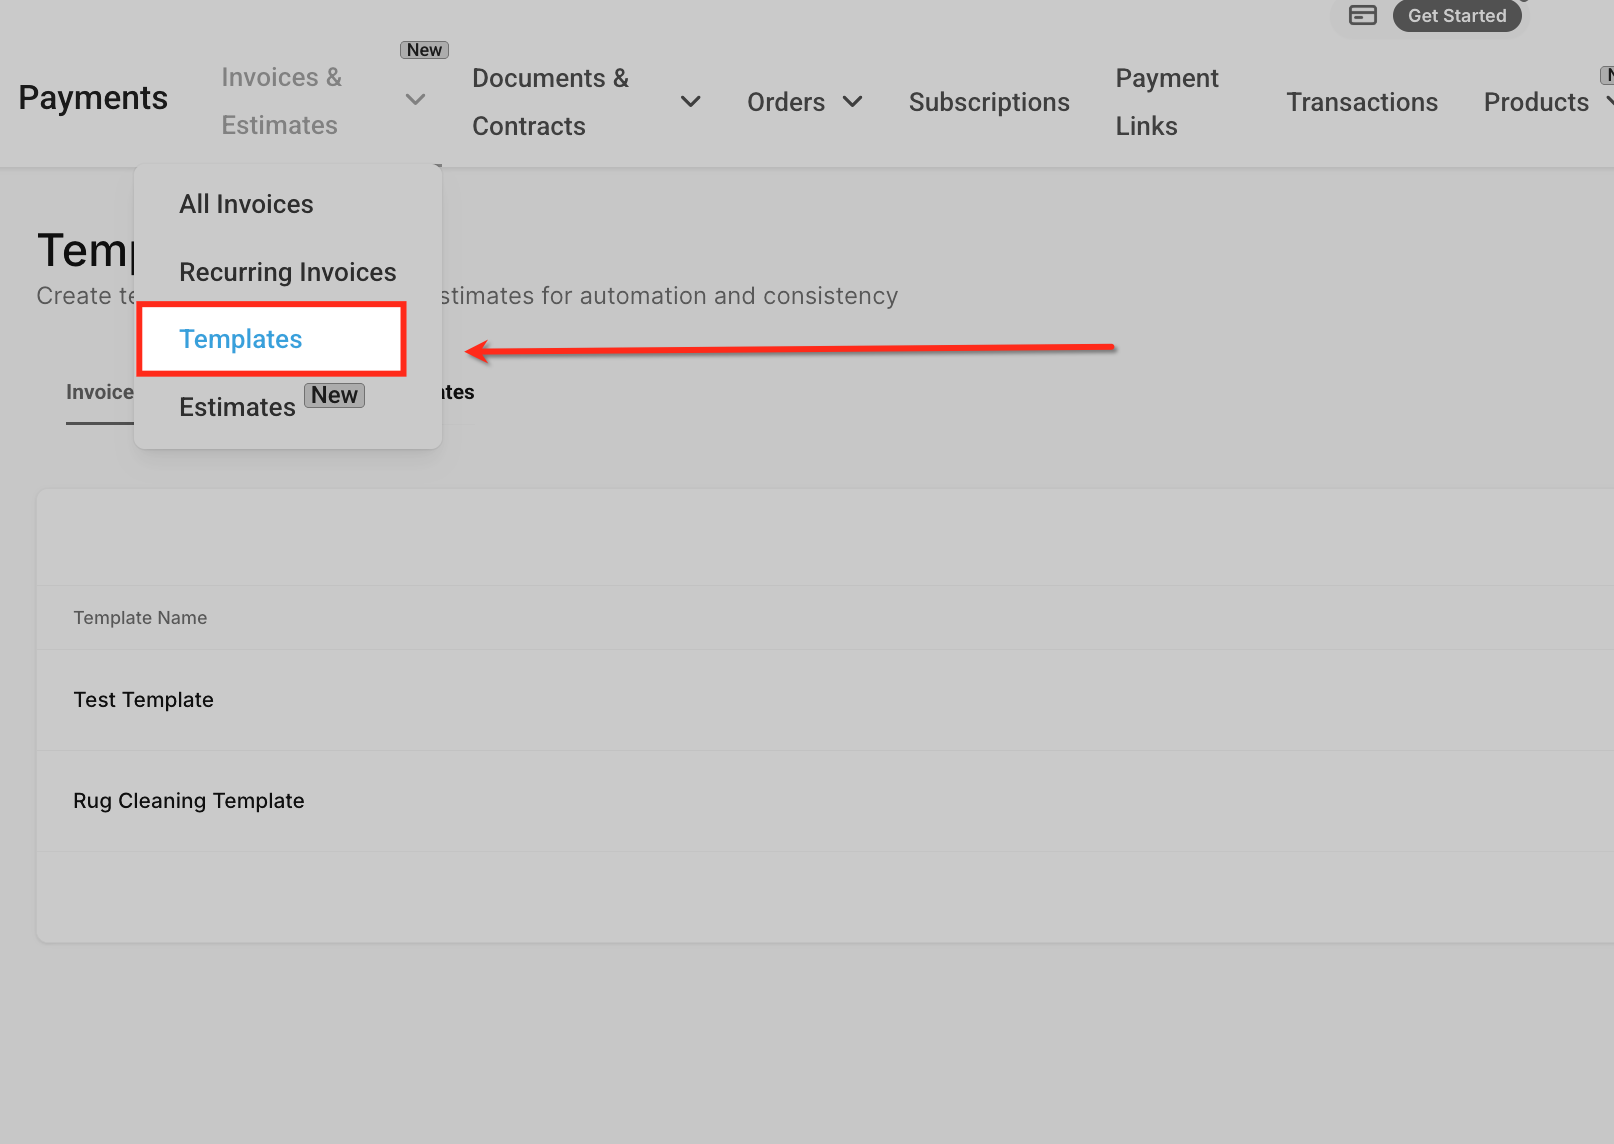
You can modify active or scheduled recurring invoices without creating new ones. You can:
Modify frequency: Adjust the billing cycle to match a patient's plan.
Change dates: Update start and end dates.
Update products or services: Add, remove, or alter items.
Trigger automated email alerts: When auto-payment is enabled on an edited invoice, an email notification is sent automatically.
Navigate to the Invoicing section and select Recurring Invoices.
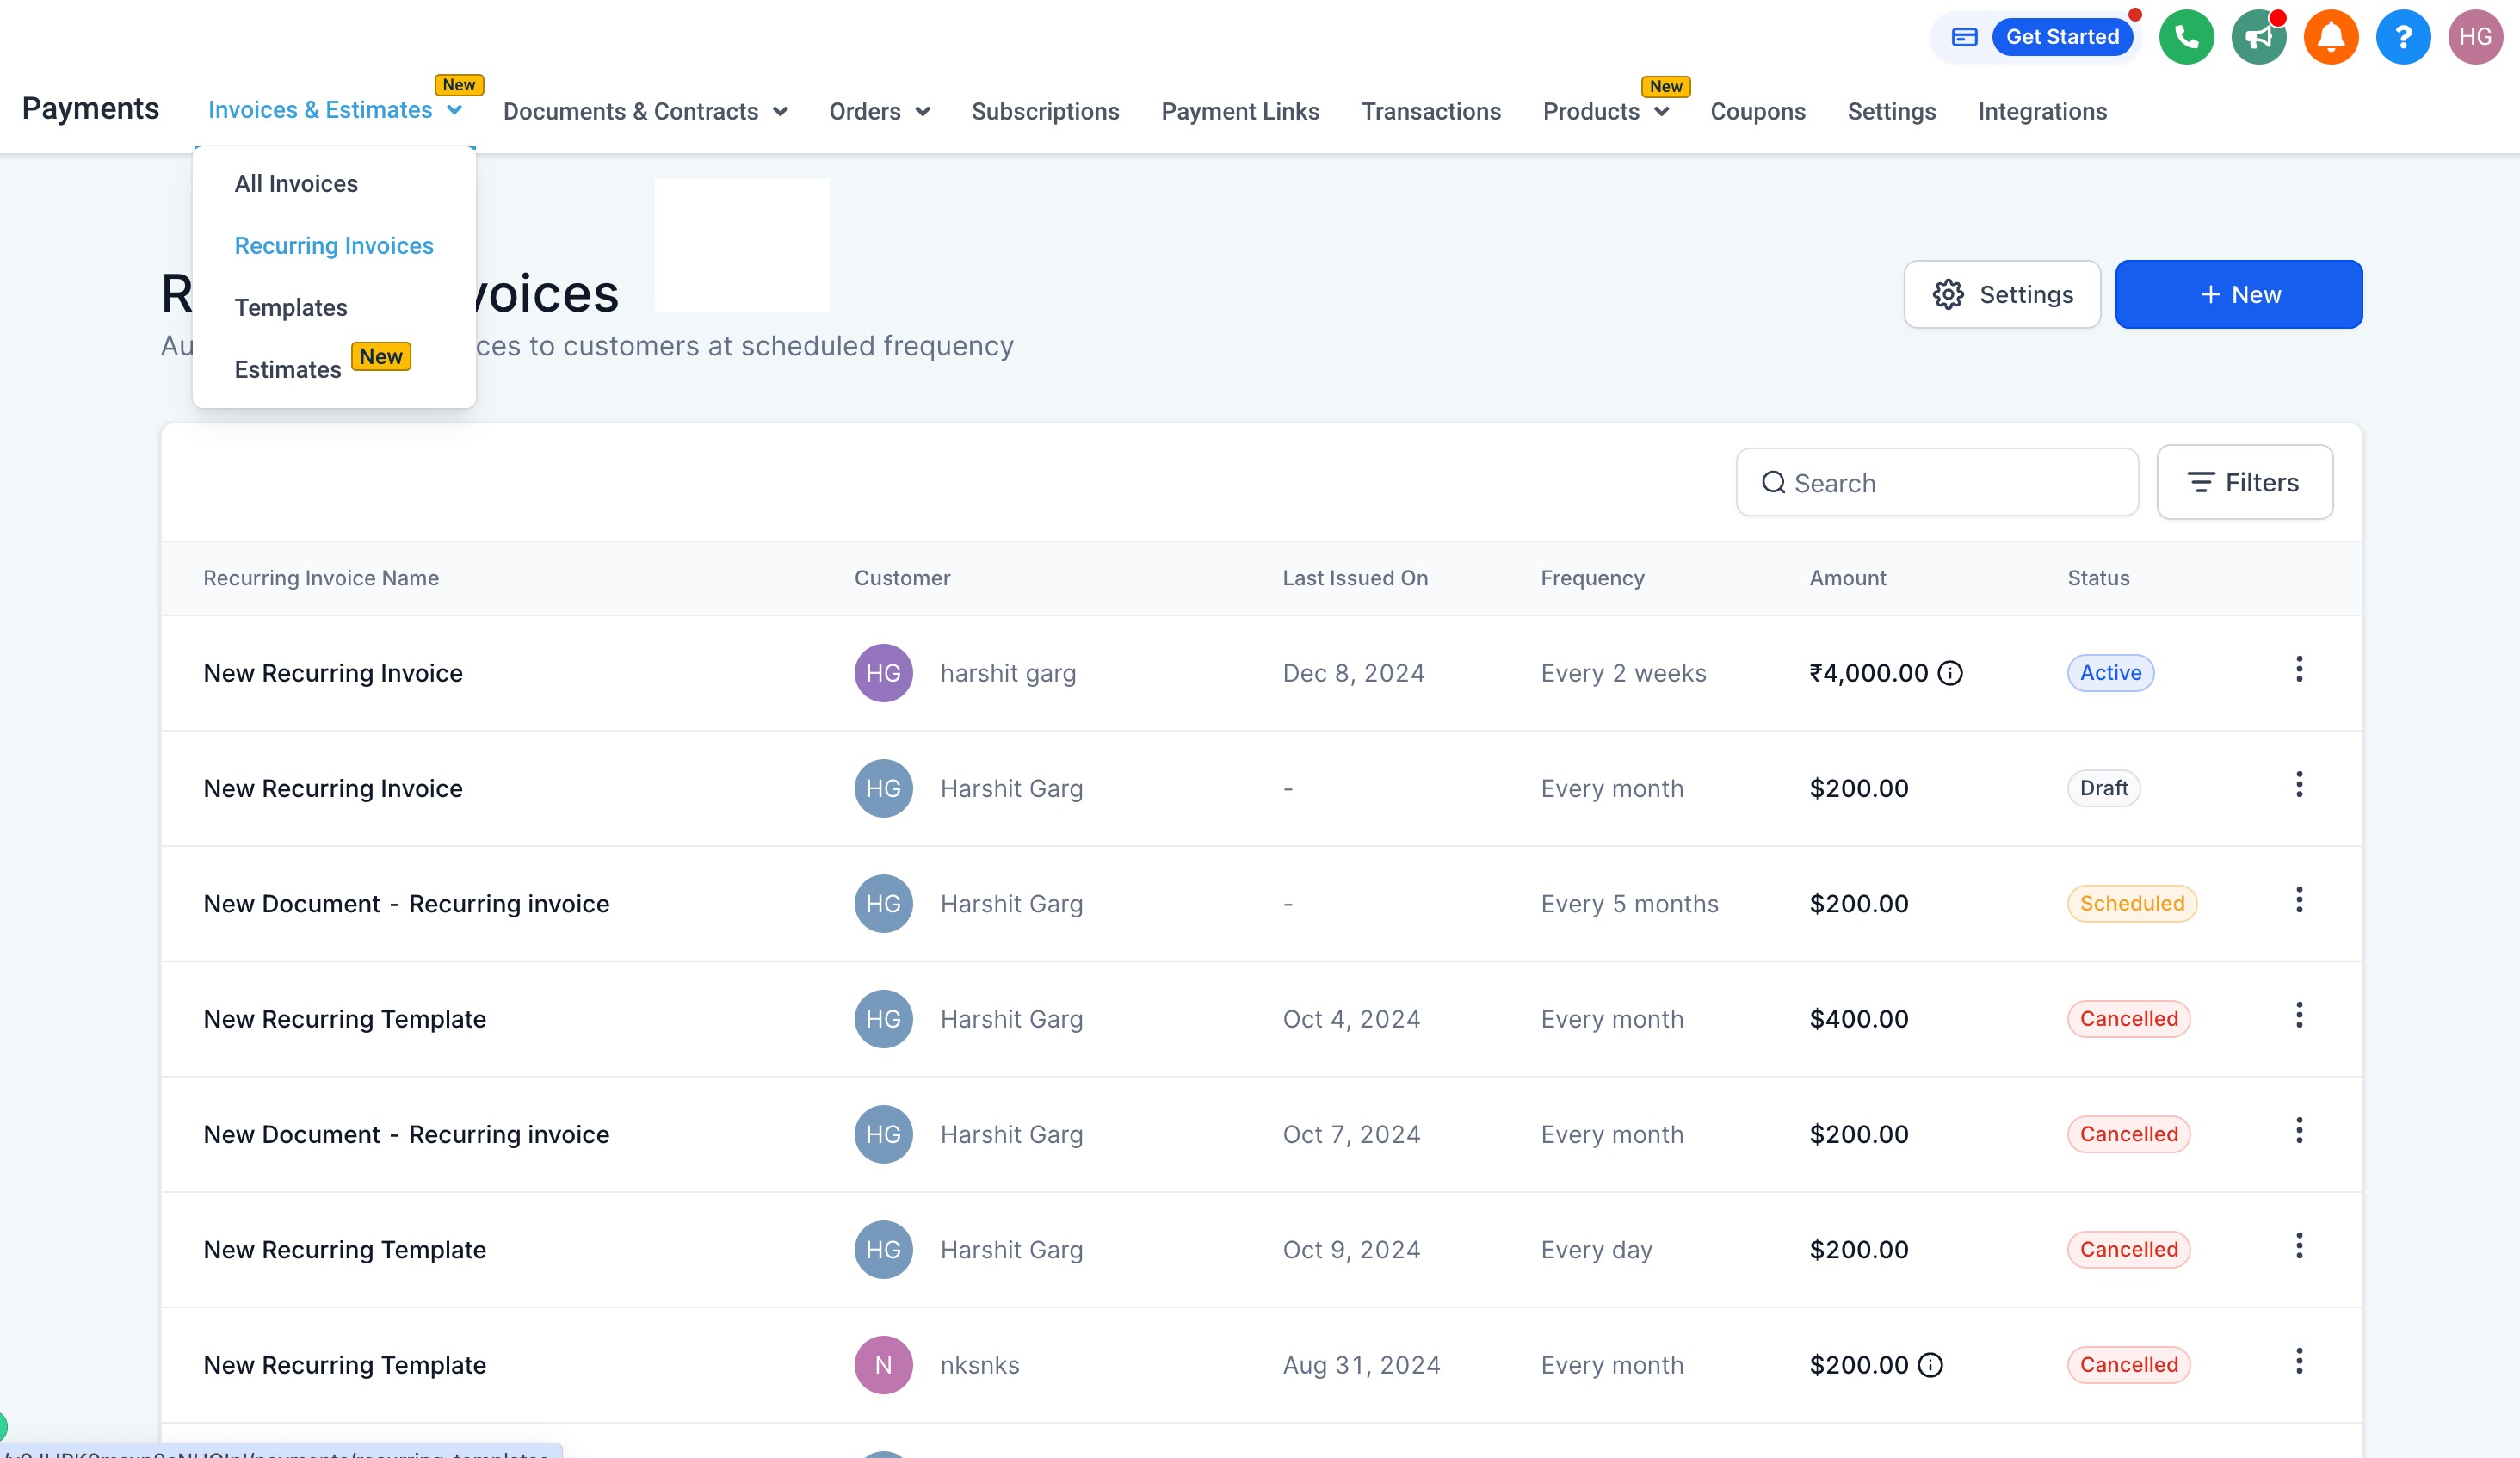
Choose the active or scheduled recurring invoice you want to modify.
Change the frequency, dates, or products as needed.
Save the invoice to apply the updates.
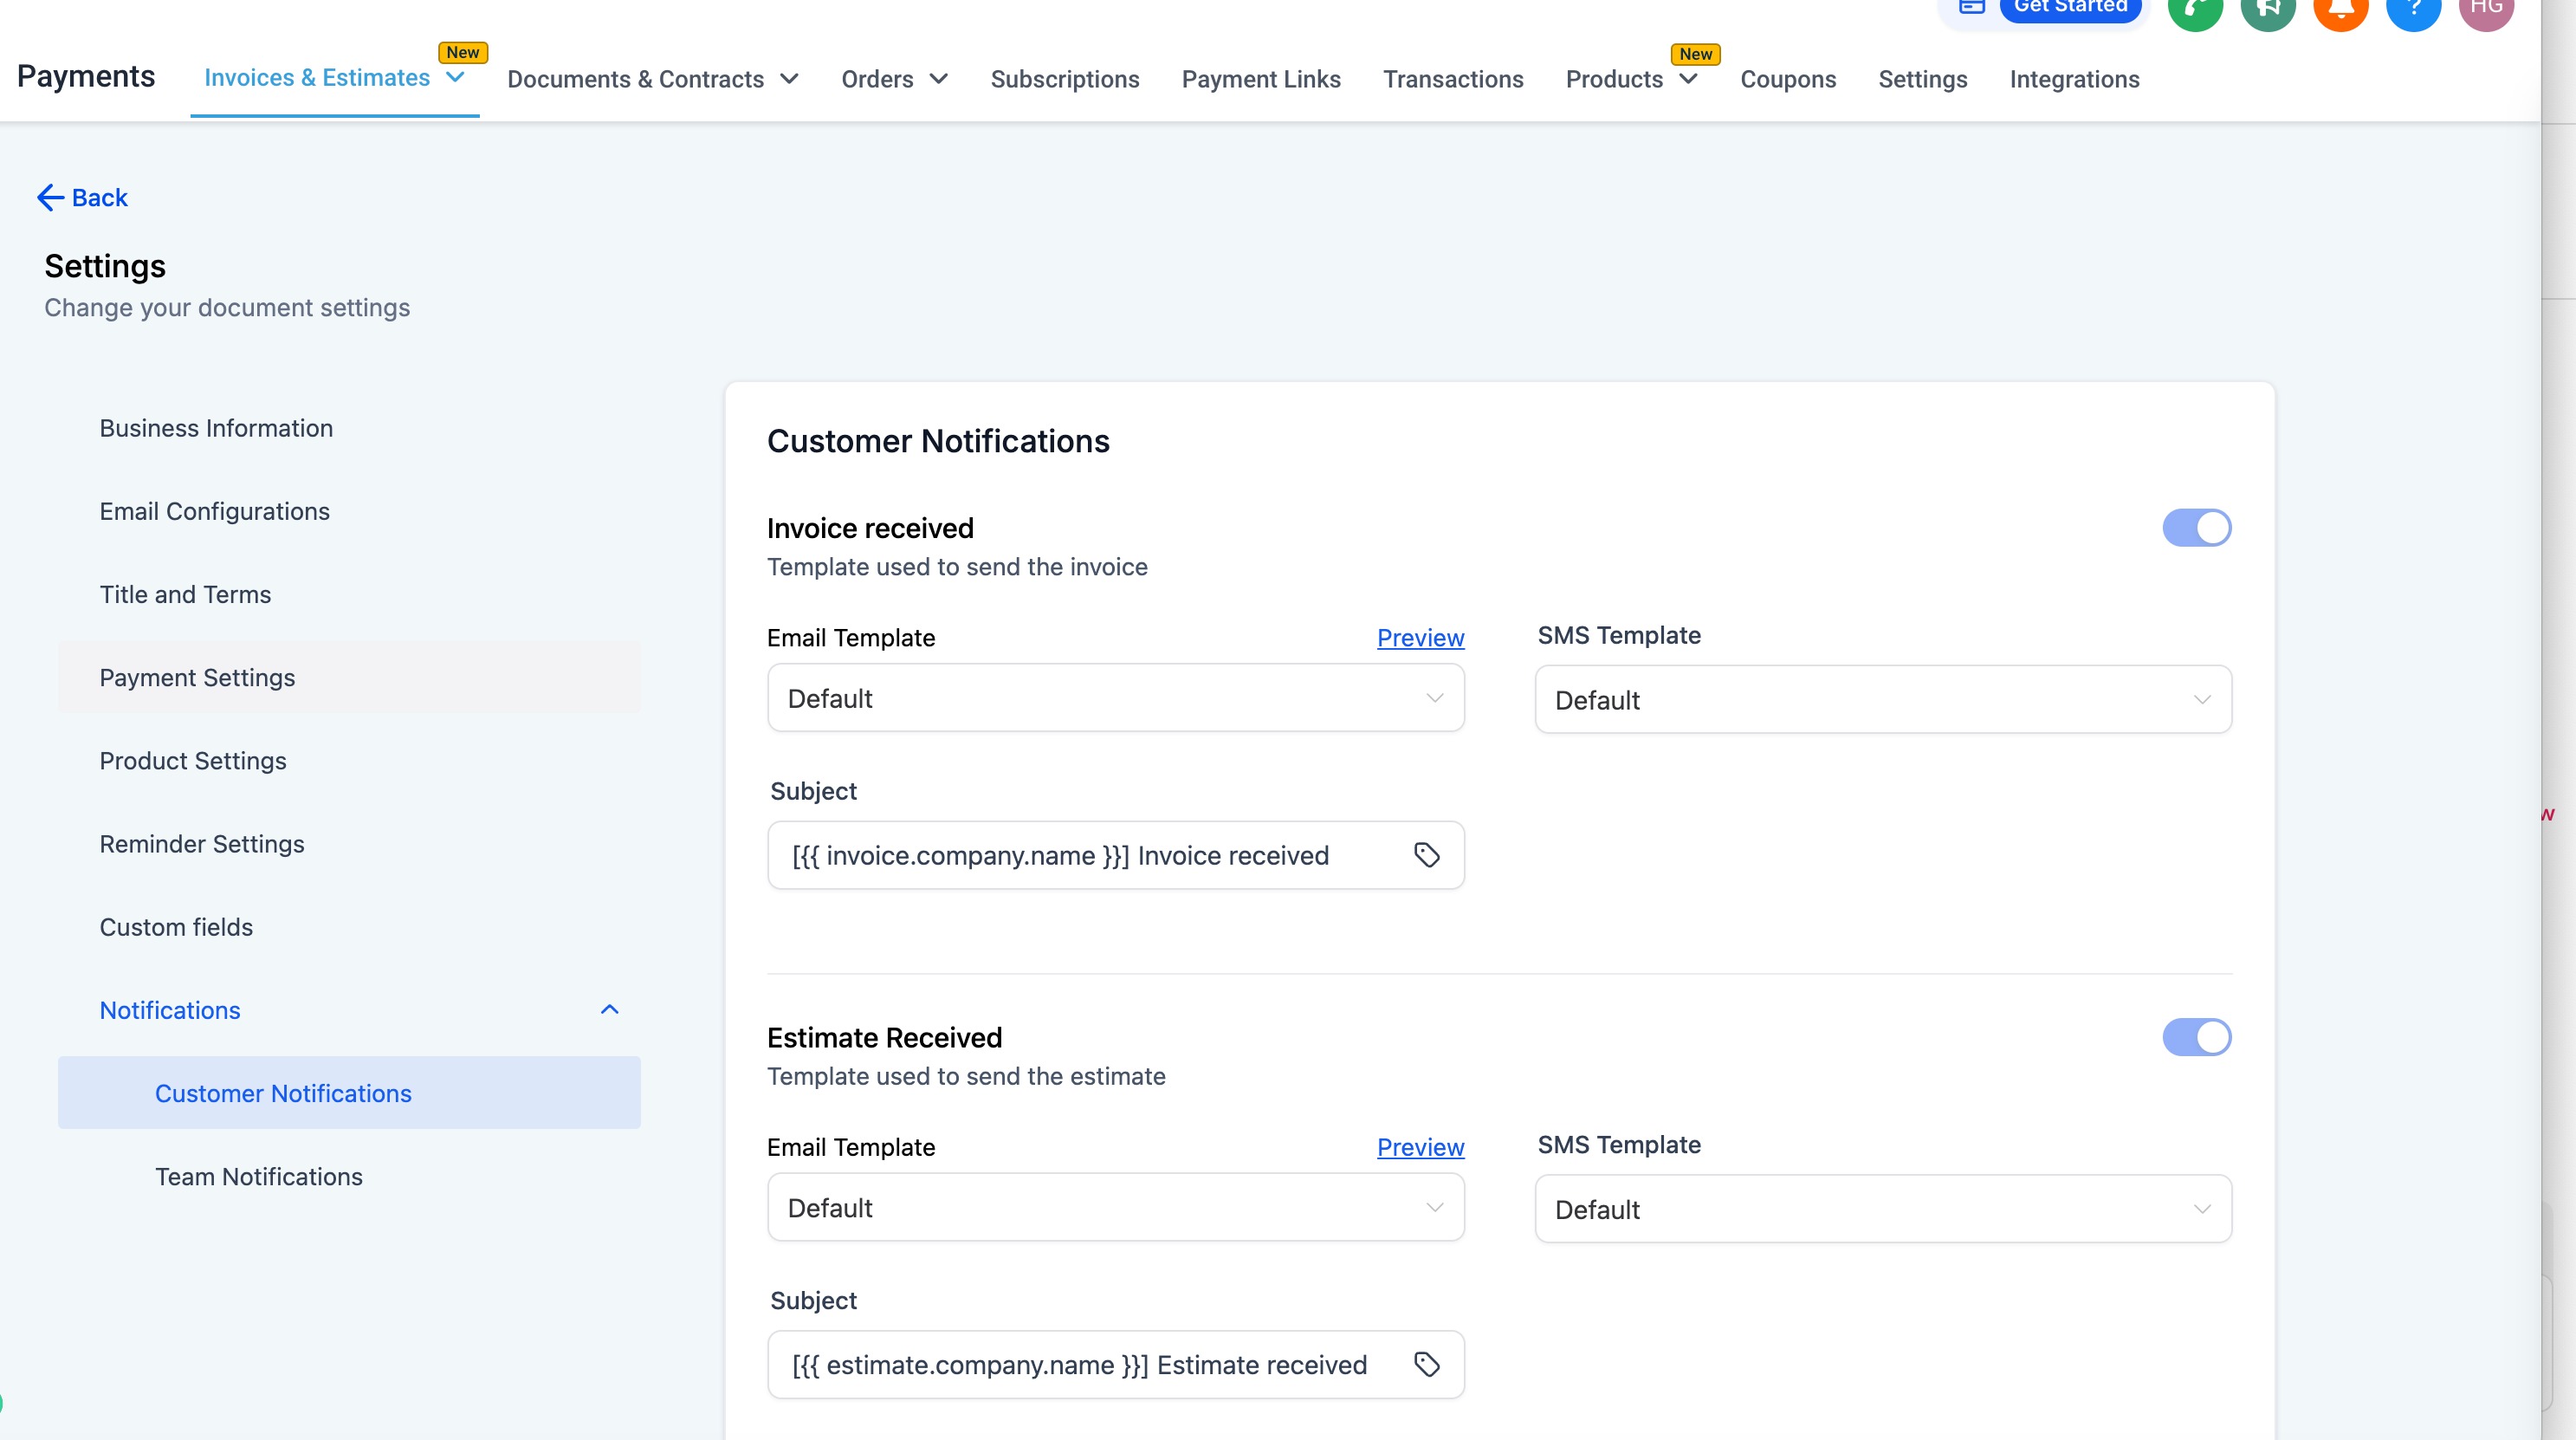
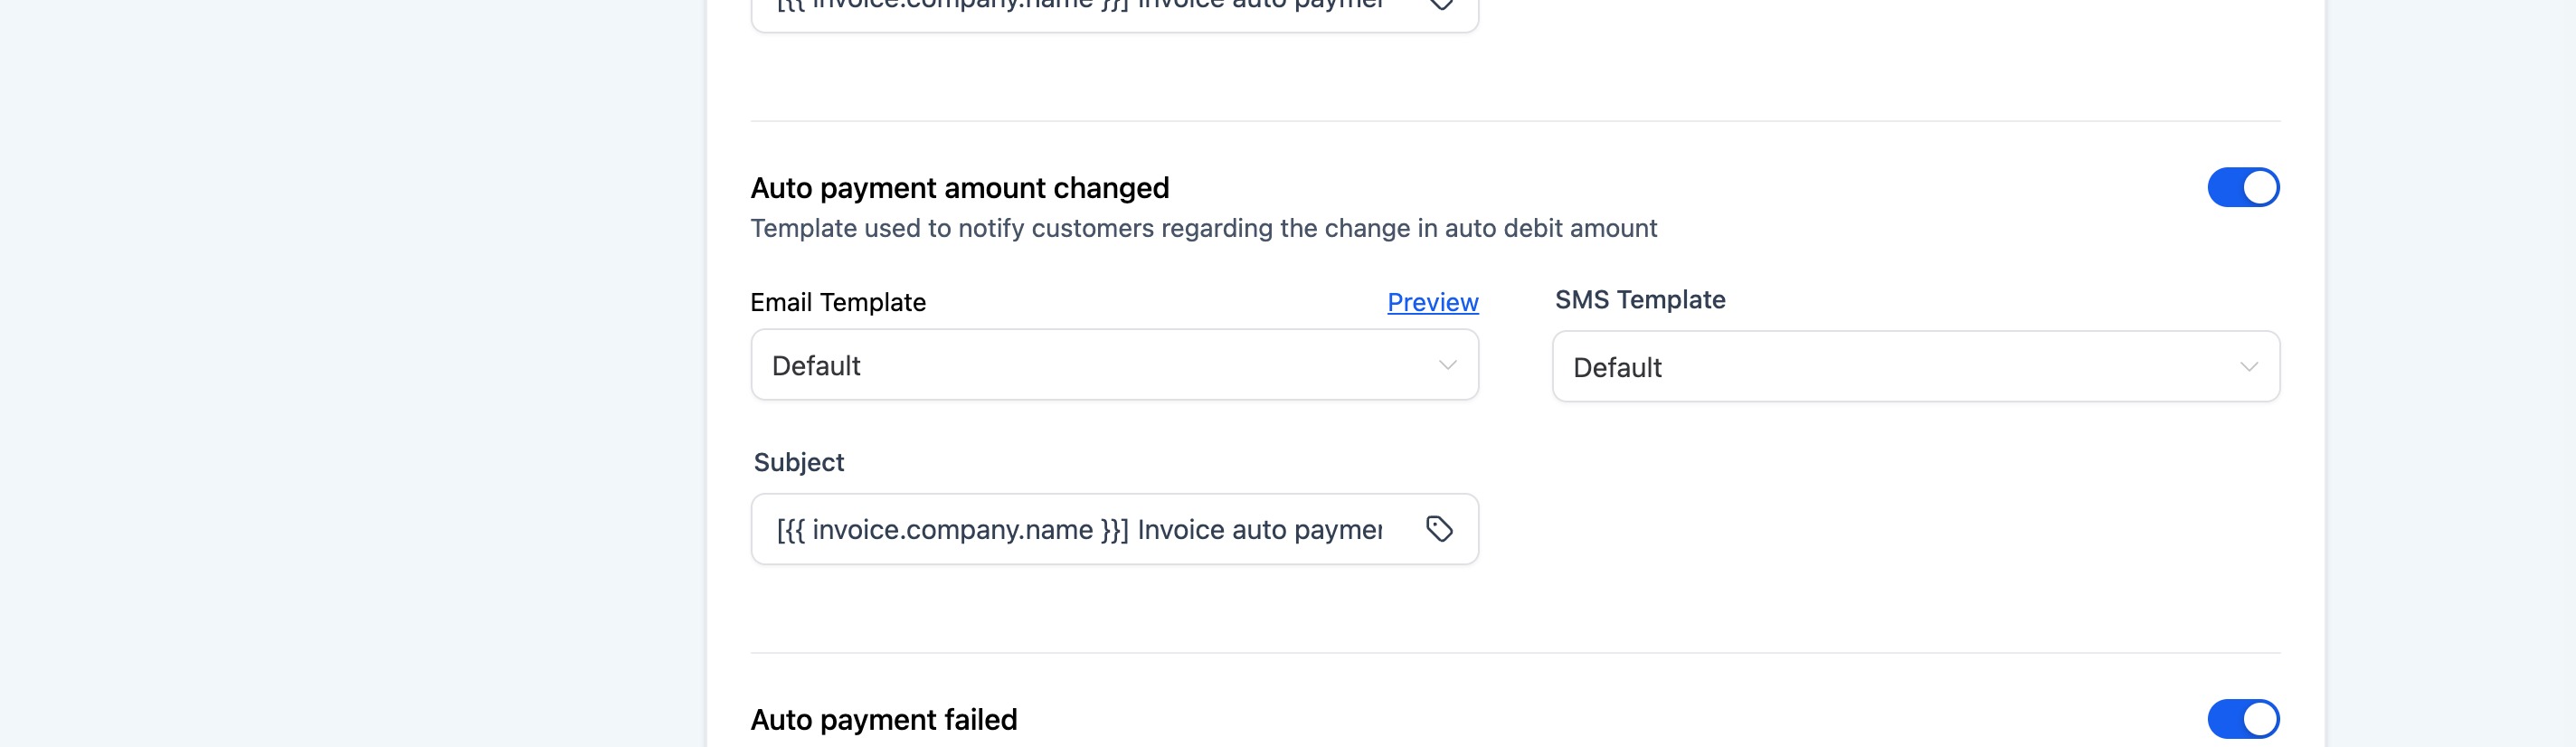
To customize the related email, go to Invoice Settings, open customer notifications, and edit the Auto payment amount changed notification to modify the subject line, message body, and other details.
Auto-payments automatically charge a patient's card whenever a recurring invoice becomes due, so you collect on time without manual follow-up.
Important: Auto-Pay behavior can vary depending on when the recurring invoice is created, whether the next invoice has already been generated, and whether a valid card is already available. Always review the next scheduled occurrence and the selected payment method after enabling Auto-Pay.
A recurring invoice created (or in the process of being created).
A supported payment gateway connected.
A valid patient card available if you want future invoices charged automatically.
Auto-Pay applies to future recurring occurrences, so verify it before the next invoice is generated.
Auto-payments can use one of three card types, and each affects when charging begins:
Customer Card: Uses the card the patient first uses to pay any invoice in the schedule. Auto-pay begins on the next occurrence after that first successful payment. For example, if the first payment happens on the 4th invoice, auto-pay starts with the 5th.
Saved Card: Uses a card already on file in the patient's profile. Auto-charging starts from the first occurrence, with no initial manual payment required.
New Card: Add a new card while creating or editing the schedule; it is saved for future use. A small authorization may occur when the card is added, and auto-pay begins from the first occurrence.
Where to manage cards on file: open the patient record, go to Payments → Cards on File. Only the last digits and expiry are visible.
Use this matrix to confirm whether the first invoice auto-charges or requires a manual payment:
Scenario | First Invoice | Future Invoices | Notes |
|---|---|---|---|
Auto-Pay turned ON for an existing recurring schedule | Manual | Auto | Manual payment captures the card (Customer Card) for future auto-charges. |
New schedule + Saved Card on file | Auto | Auto | Starts charging immediately on the first occurrence. |
New schedule + No Saved Card | Manual | Auto | The patient's first successful payment stores the card for future auto-charges. |
When enabling Auto-Pay on an existing schedule, the next invoice must be paid manually once; after that payment succeeds, all future invoices charge automatically. You cannot change the date of invoices already created.
Navigate to Payments → Invoices & Estimates → Recurring Invoices and open the schedule you want to update.
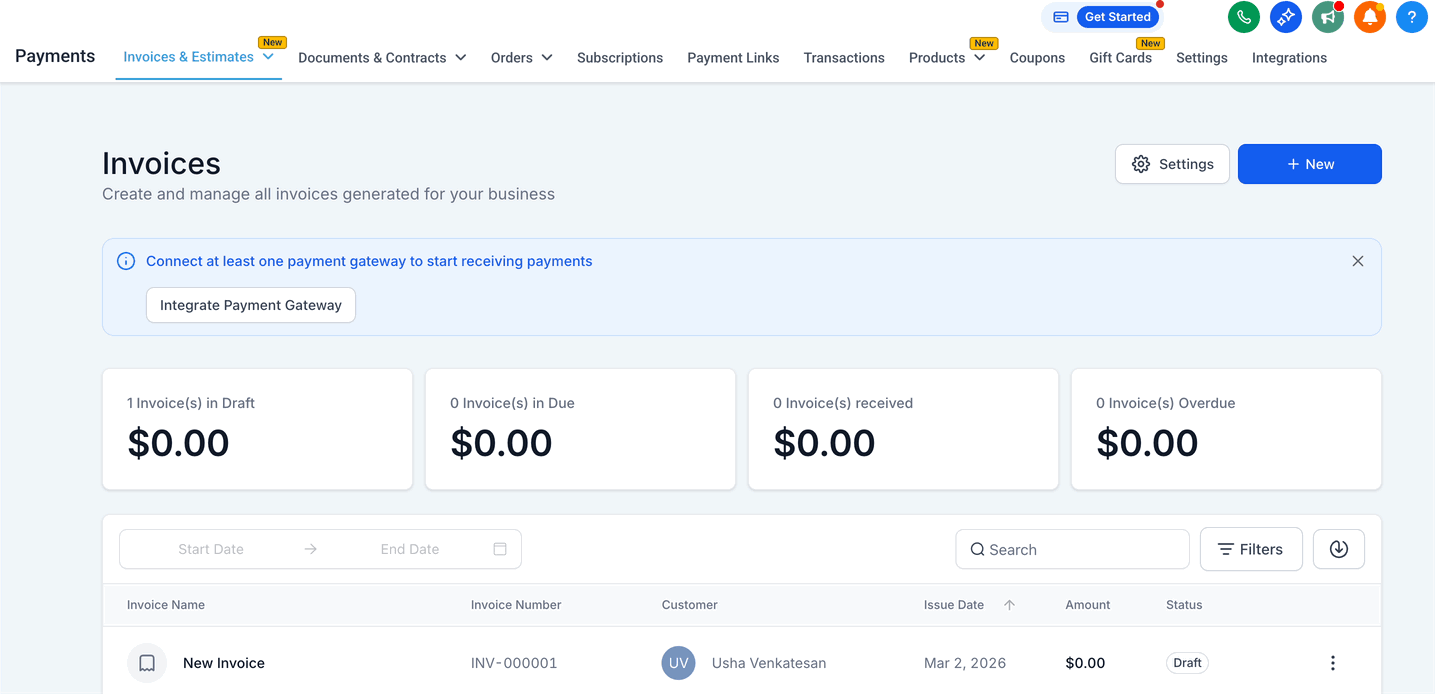
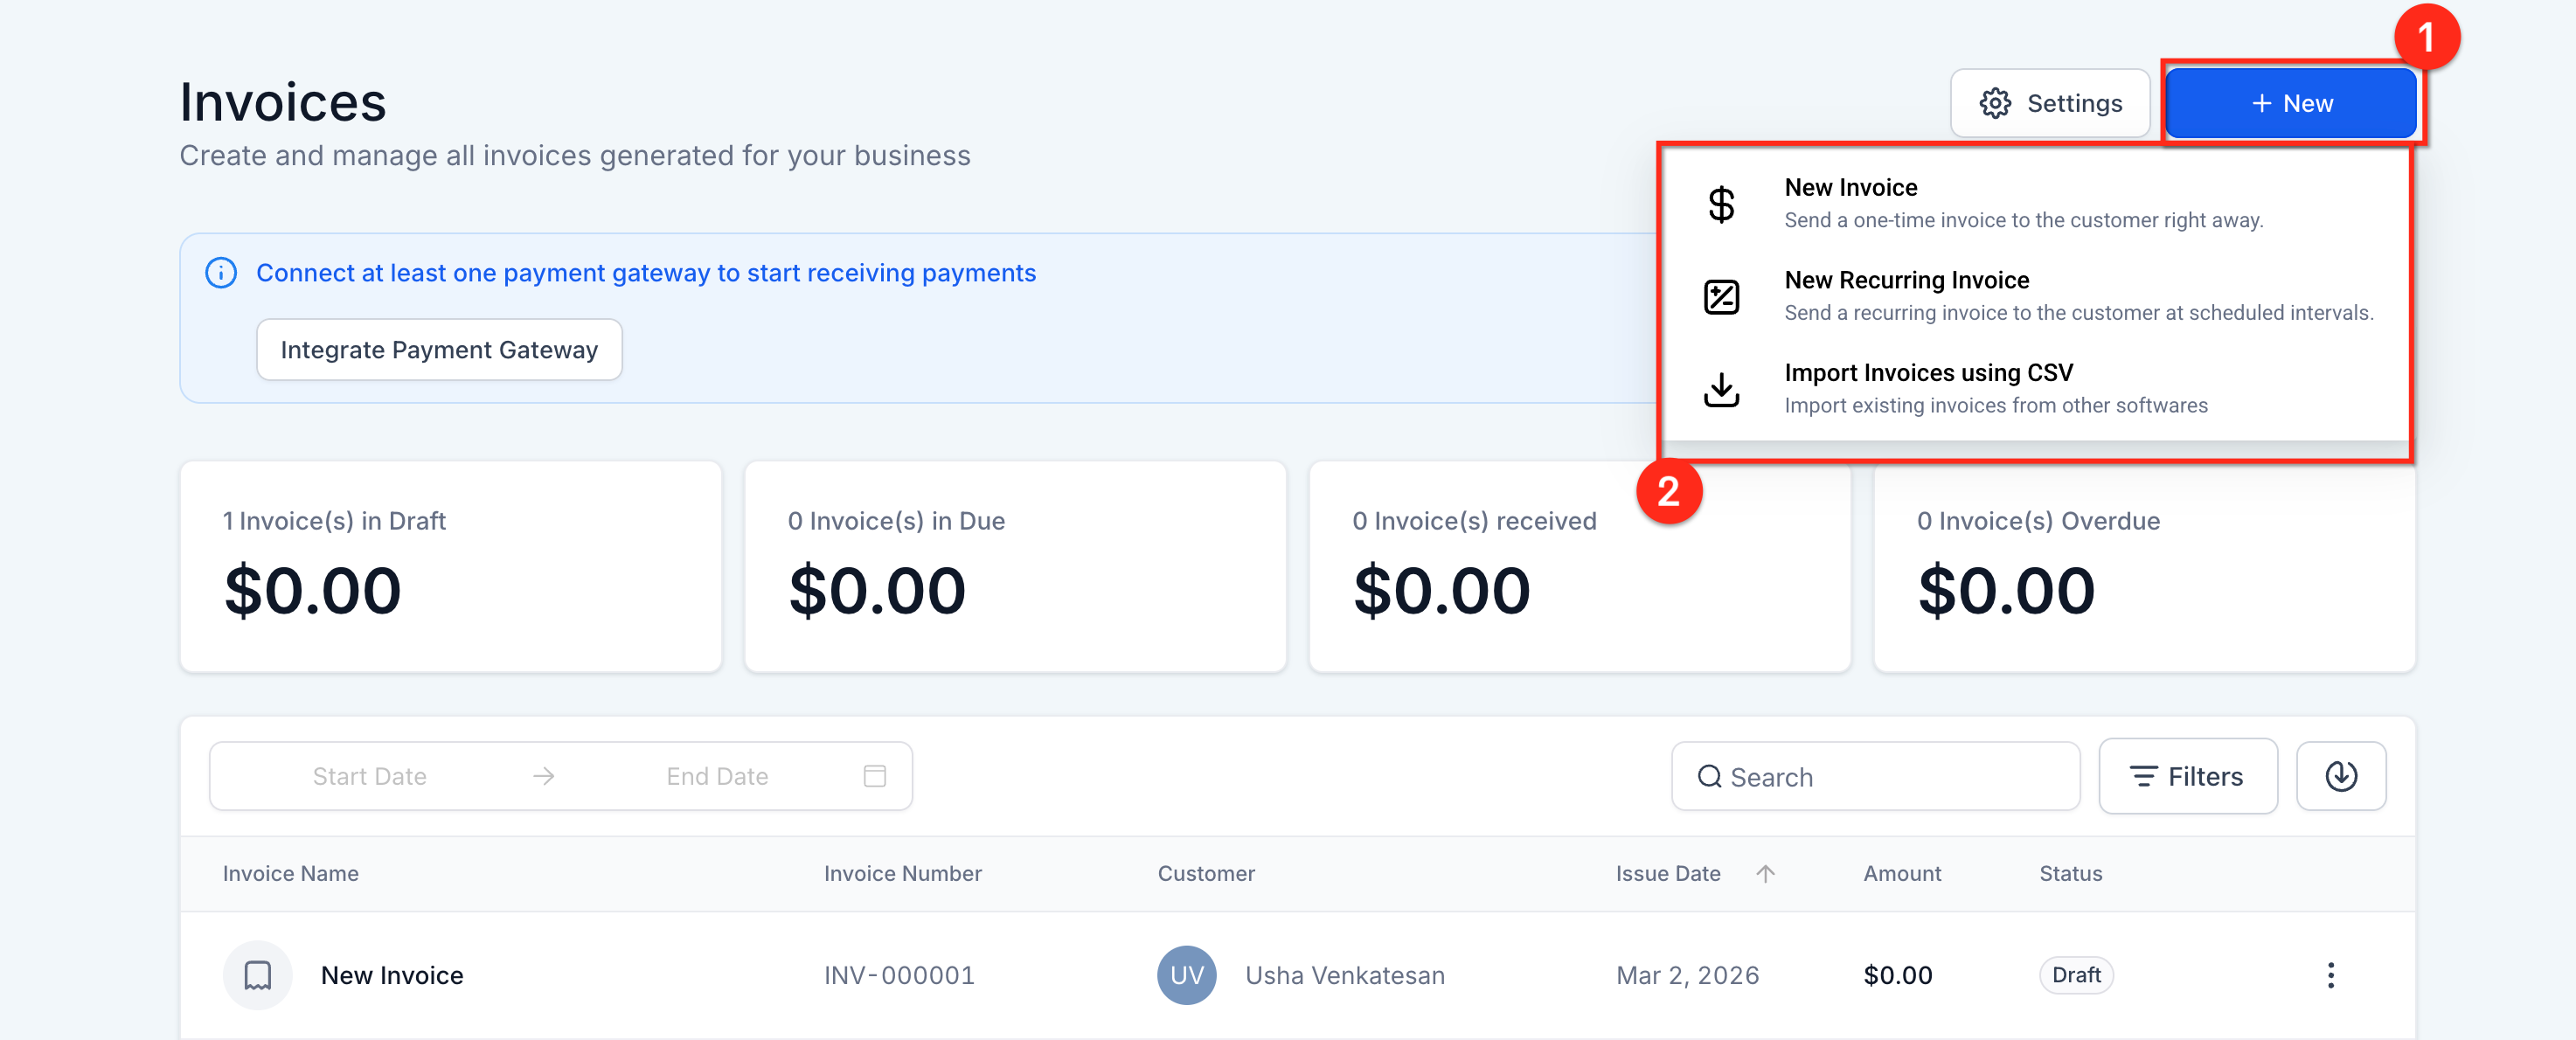
From here you can create a new schedule (New → New Recurring Invoice) or open an existing schedule by clicking its row.
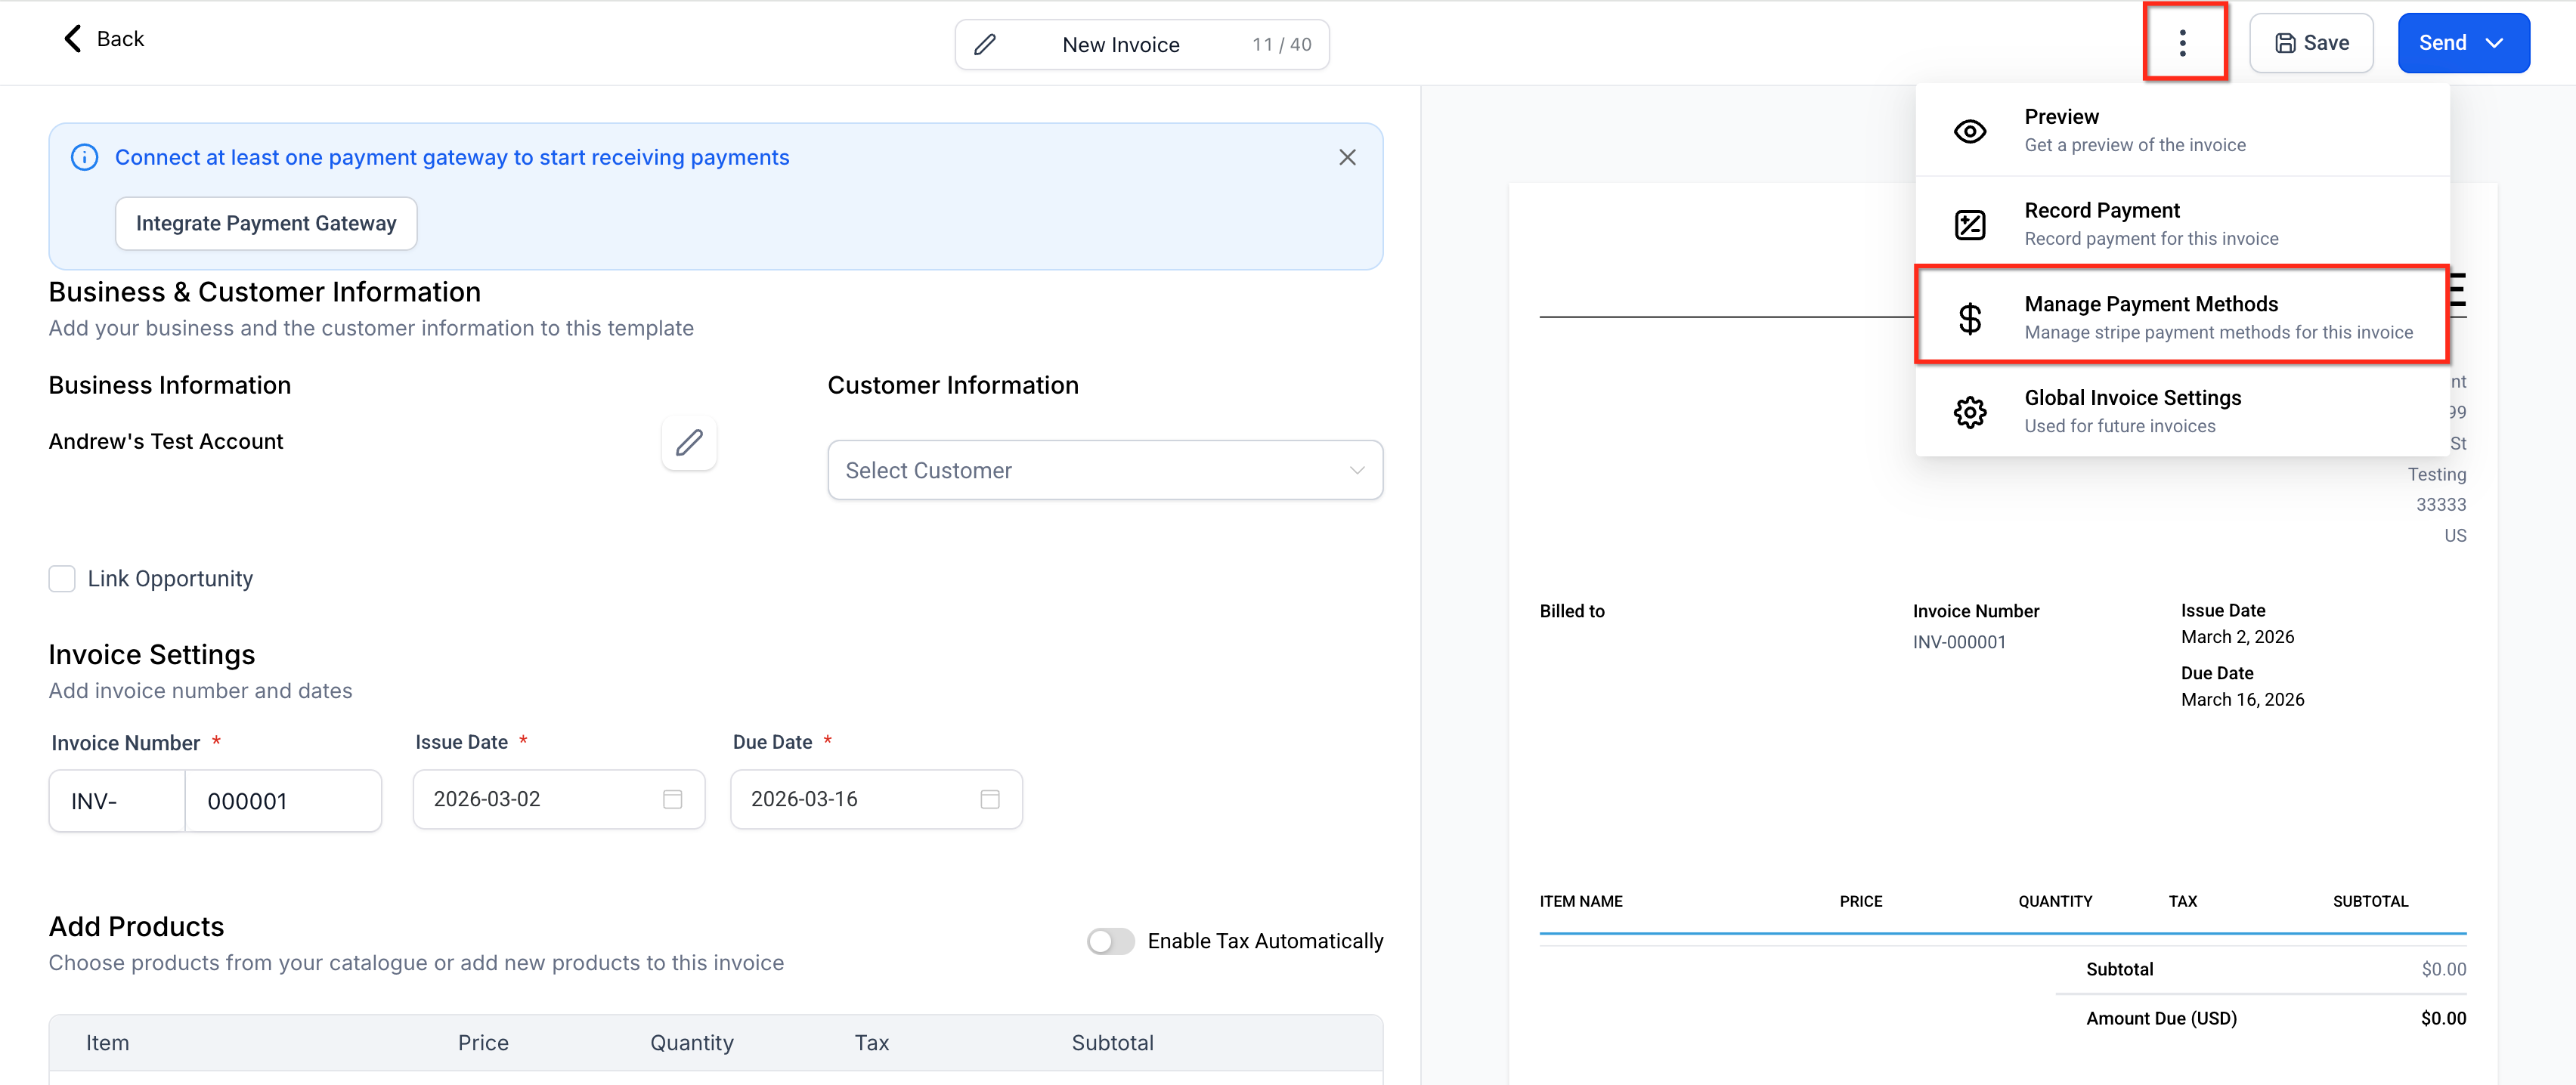
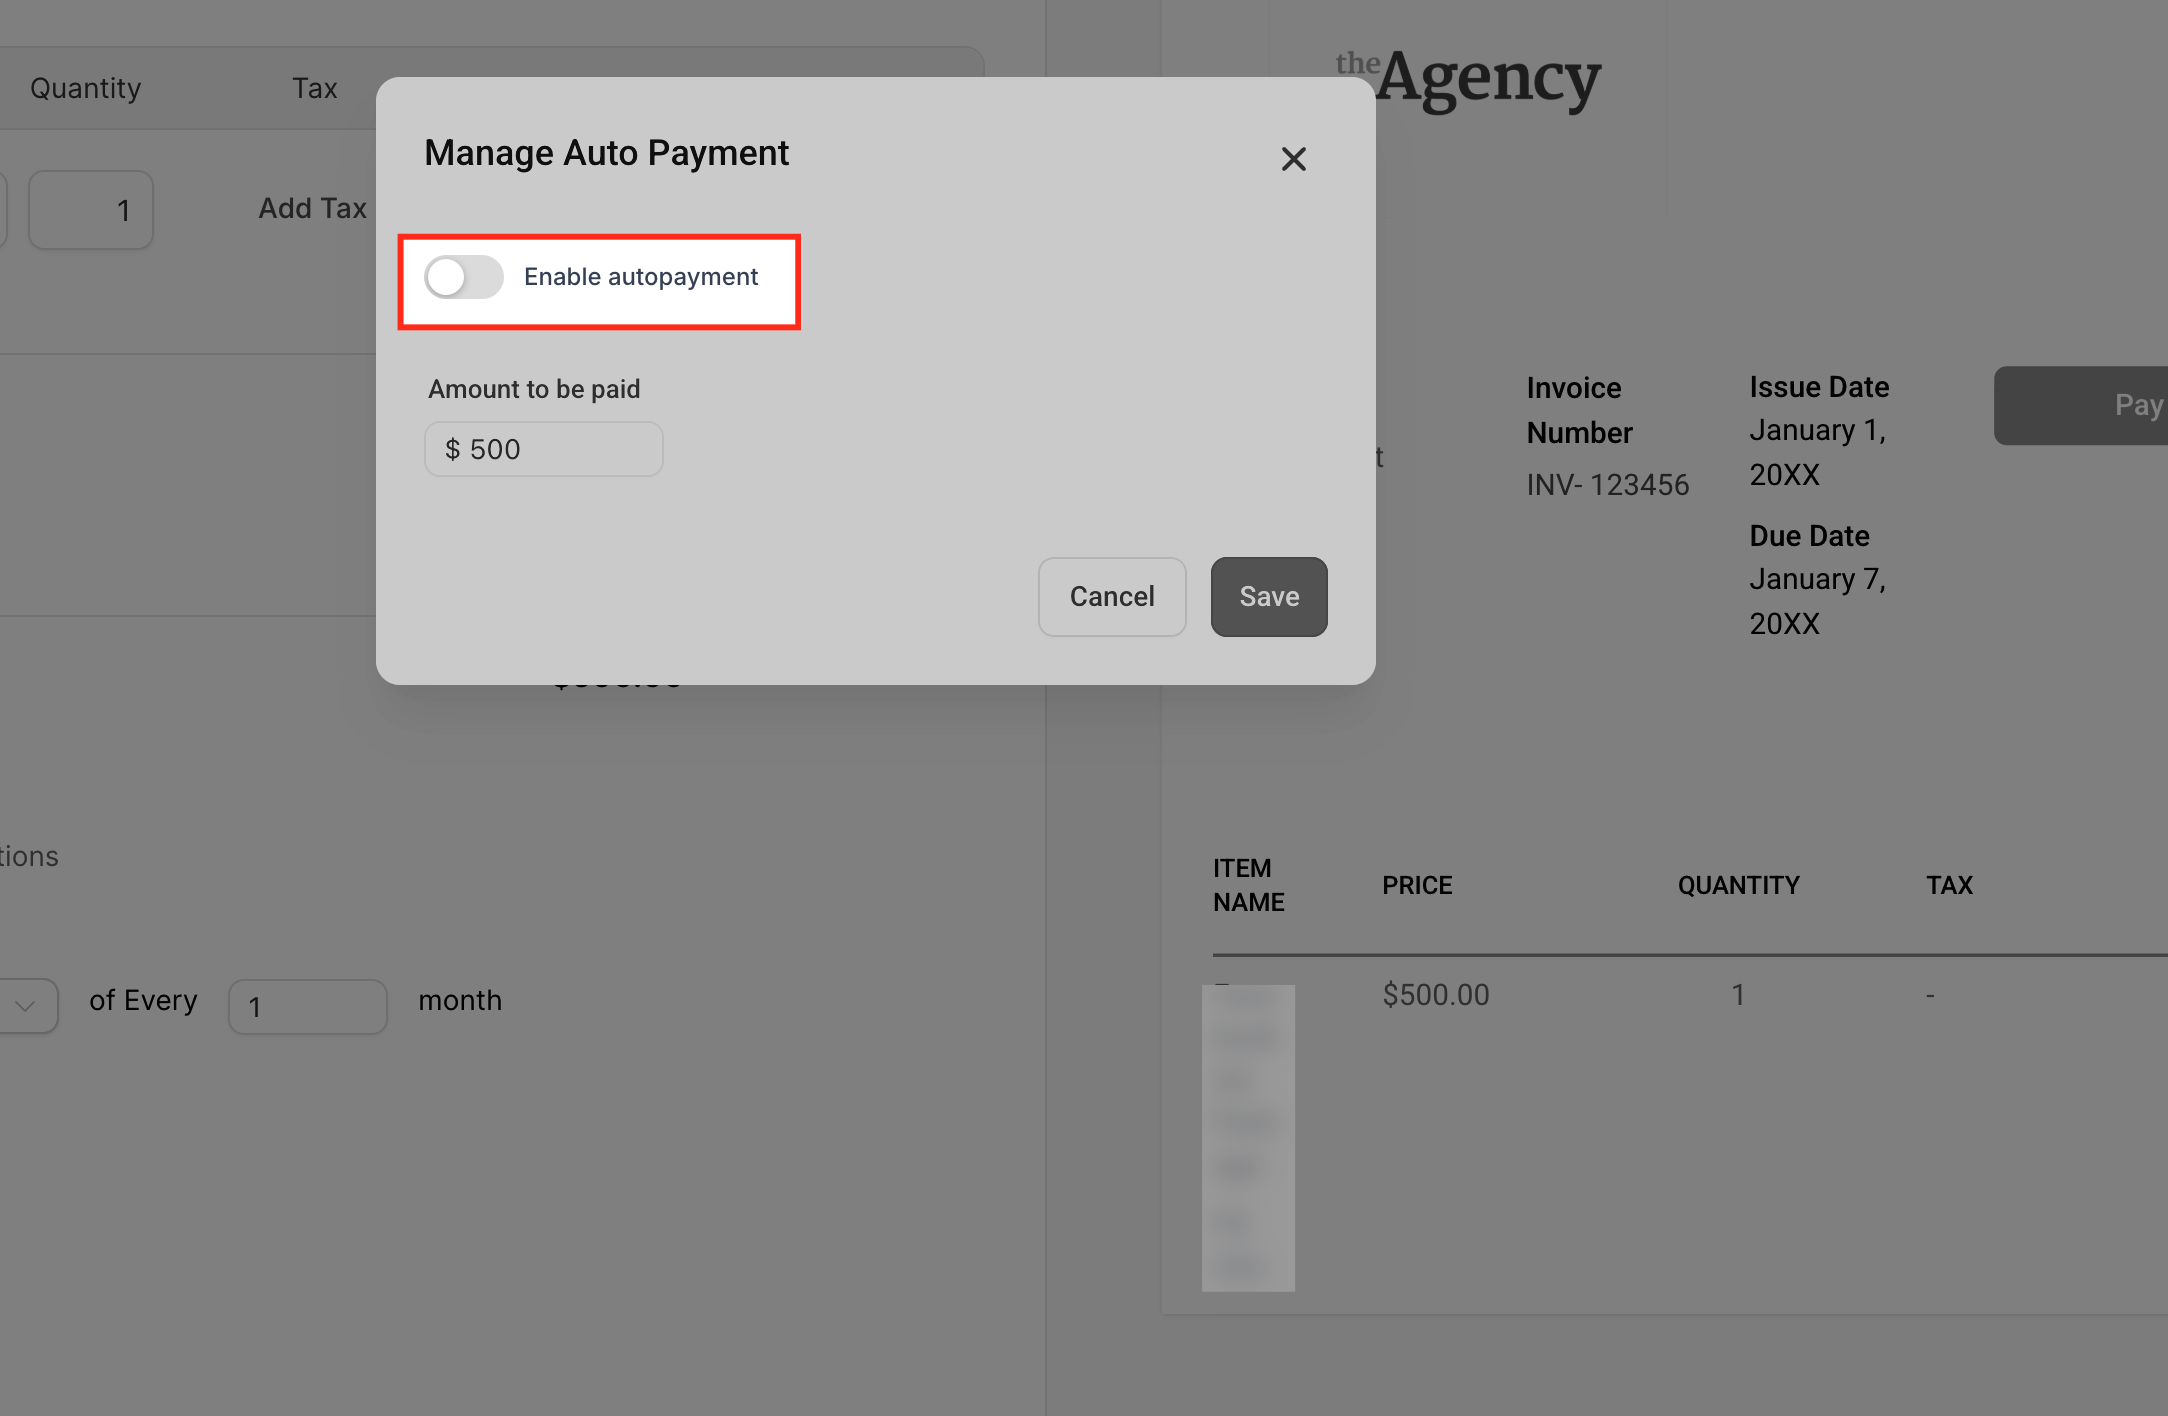
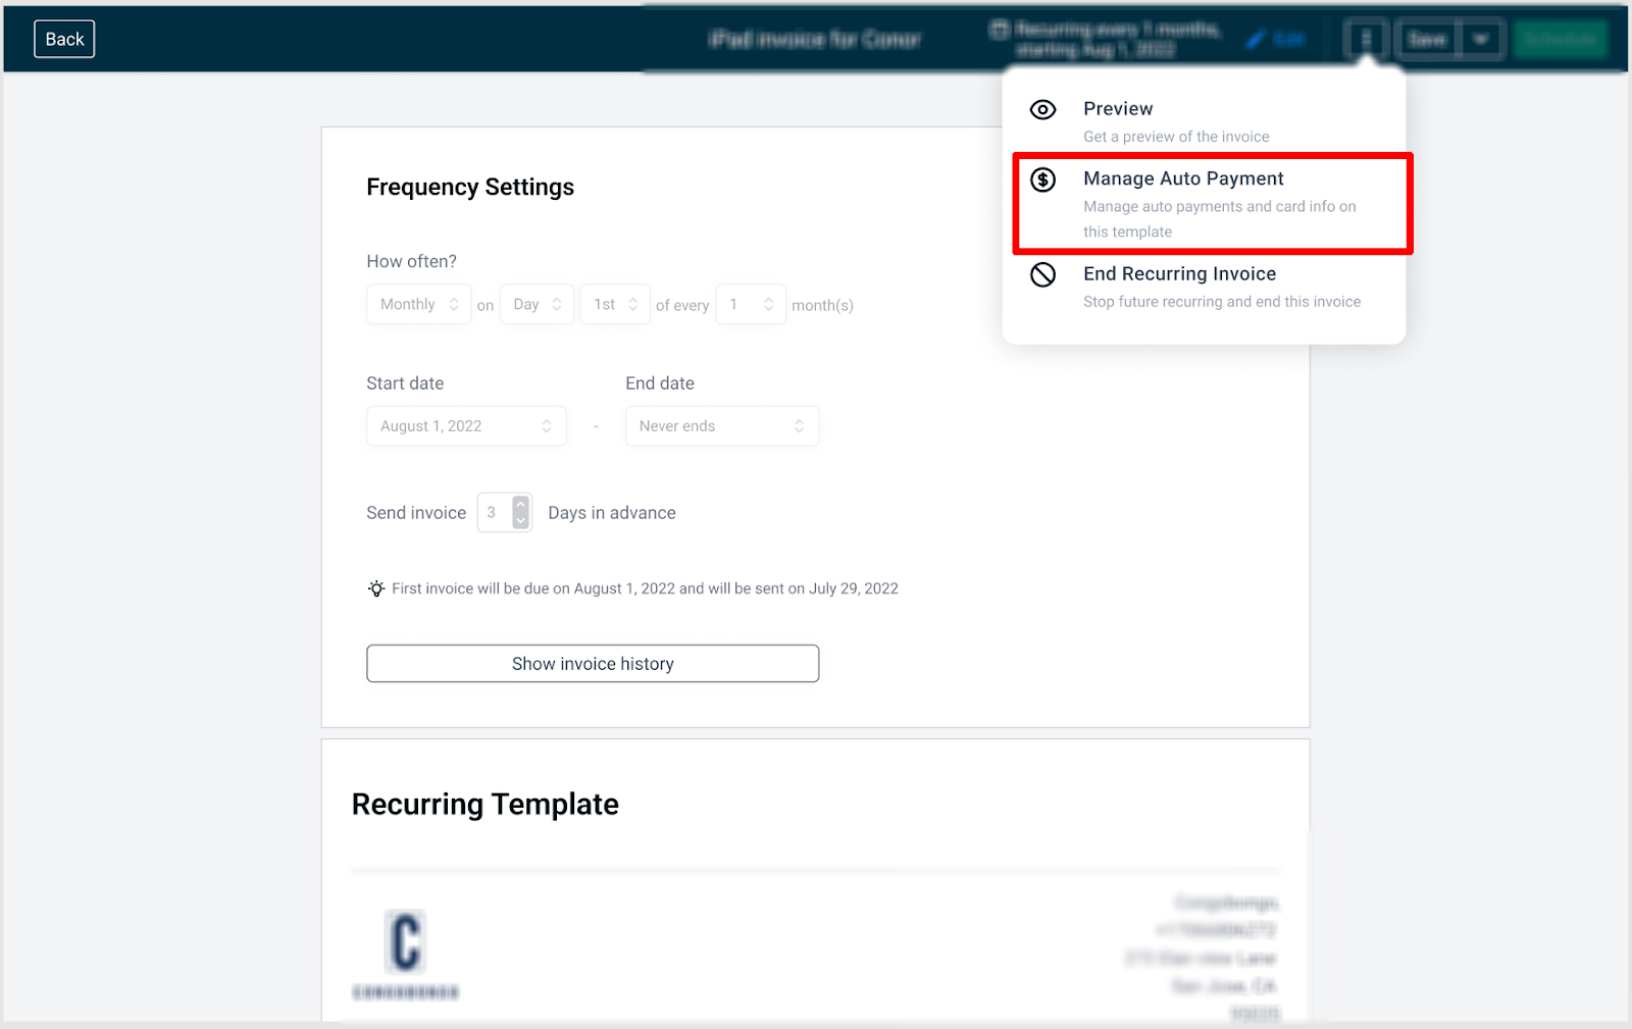
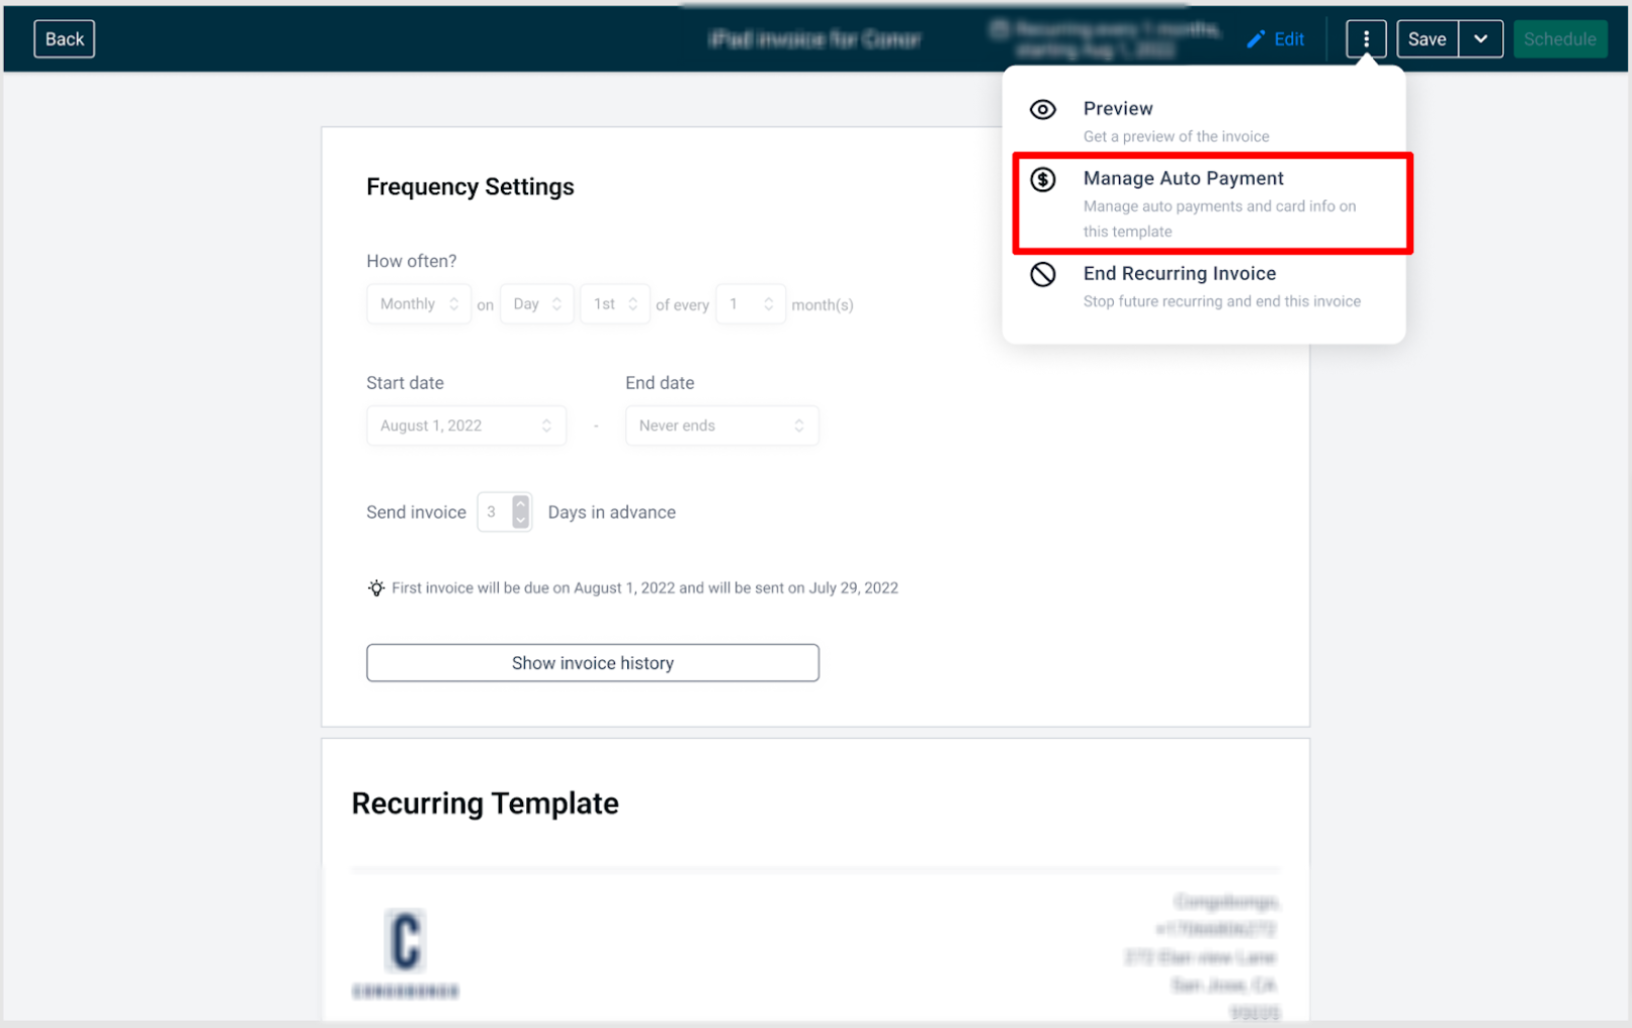
In the editor, click the ⋮ (three dots) menu in the top-right corner, then choose Manage Auto Payment.
Toggle Enable auto payment ON, then select Customer Card, Saved Card, or New Card. Click Save.
To disable auto-pay, open the same schedule, click the ⋮ menu, choose Manage Auto Payment, toggle it OFF, and save. Auto-Pay stops beginning with the next invoice occurrence.
Patient receives: optional upcoming-charge reminders, payment success notifications, and payment failure notifications.
Staff receives: payment success alerts, payment failure alerts, and notice if a child invoice was edited before its auto-charge (that invoice's auto-pay is paused).
Before an automatic charge, the patient is notified a set number of days in advance based on your reminder settings. You can customize these invoice notifications (subject, body, branding) from your invoice notification settings.
If an auto-payment fails, both the patient and staff are notified.
The patient can pay manually with the same card, or pay with a new card (which then becomes the default for future auto-pay in this schedule).
The system makes two additional retry attempts, 24 hours apart.
If payment still fails, no further automatic attempts occur for that invoice and it must be paid manually.
Editing a generated child invoice before its charge time pauses auto-payment for that invoice only.
When auto-pay is enabled on an edited recurring invoice, an email notification about the change is also sent.
To resume charging, ensure details are correct and let the schedule proceed; future occurrences are unaffected unless edited.
After saving, confirm that:
Auto-Pay shows as enabled in the recurring invoice configuration.
The intended payment method is selected.
The next scheduled occurrence has not already passed or been generated under older settings.
The patient has a valid card available for future charges.
If auto-pay does not run as expected, review these common causes:
The next invoice was already generated before Auto-Pay was enabled.
A valid card is not available for the patient.
The recurring invoice was updated after an earlier occurrence was already created.
The payment setup is not configured for automatic charging.
The invoice requires manual review because the charge was not completed successfully.
You can also enable auto-payment when sending a recurring invoice from the mobile app. Auto-payment on mobile supports card payments only (not cash or manual entry), and works with recurring invoices created via the Invoices or POS module.
On the scheduling sheet, toggle Enable Auto-Payment.
Select a payment method: Saved Card (any card stored on the contact) or Customer Card (the card captured during Tap to Pay or online checkout).
When a card is selected, you will see it summarized with the last 4 digits. Use Change Card if needed, then tap Send or Schedule to start the recurring invoice with auto-payment enabled.
You can enable auto-payment while scheduling a recurring invoice by turning on the auto-payment option and confirming the amount to be charged.
To manage settings later, open the invoice menu and select the option to manage auto-payments.
Turn auto-payments on or off and select the desired payment method, then click update to apply changes.
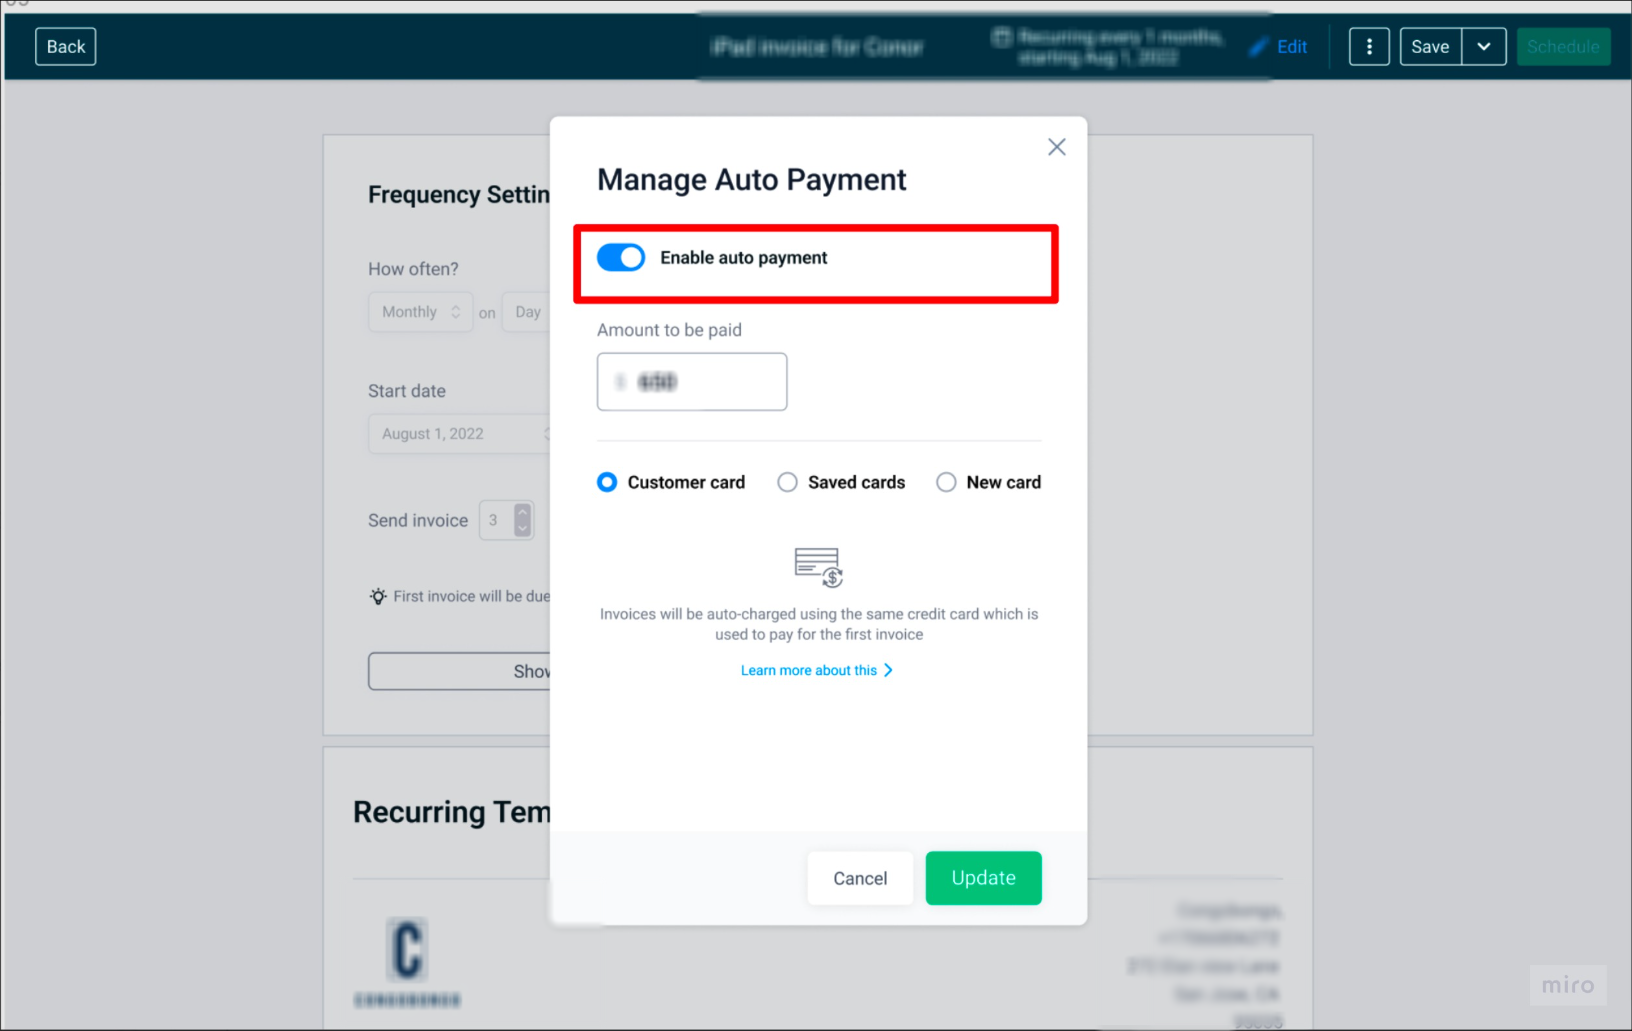
Auto-payments can be stopped or modified at any time from the invoice settings. Disabling auto-payment prevents future invoices from being charged automatically but does not affect past transactions.
You can also automate recurring invoices using workflow automation, which sends invoices on a schedule based on a trigger. This is ideal for enrolling new members automatically.
Prerequisites: at least one invoice template created, a payment method configured and active, and patient records with valid billing details.
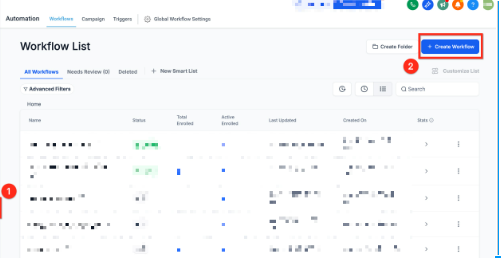
Click Create Workflow to start a new automation.
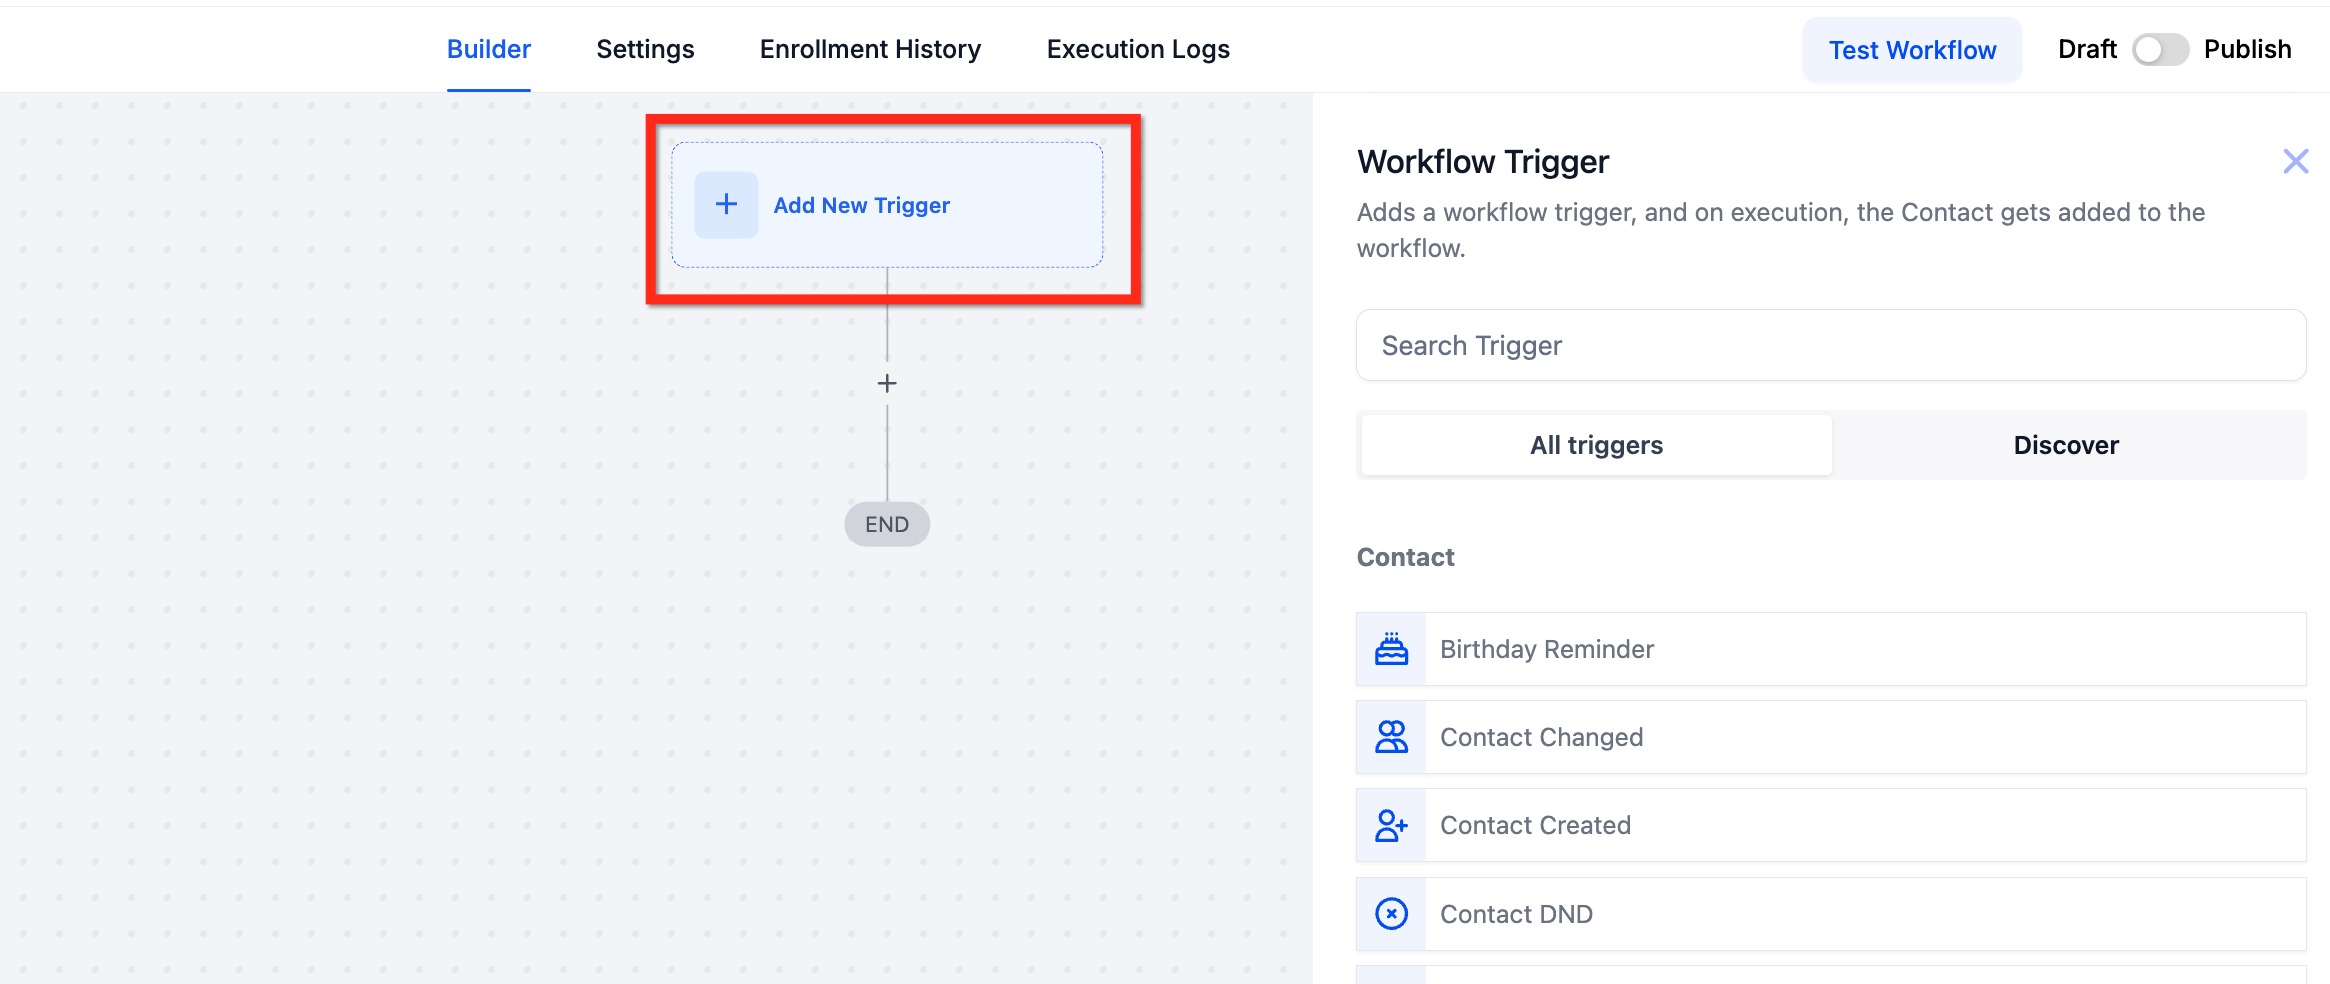
Click Add New Trigger, then select the condition that will start your workflow (for example, when a contact is created or updated).
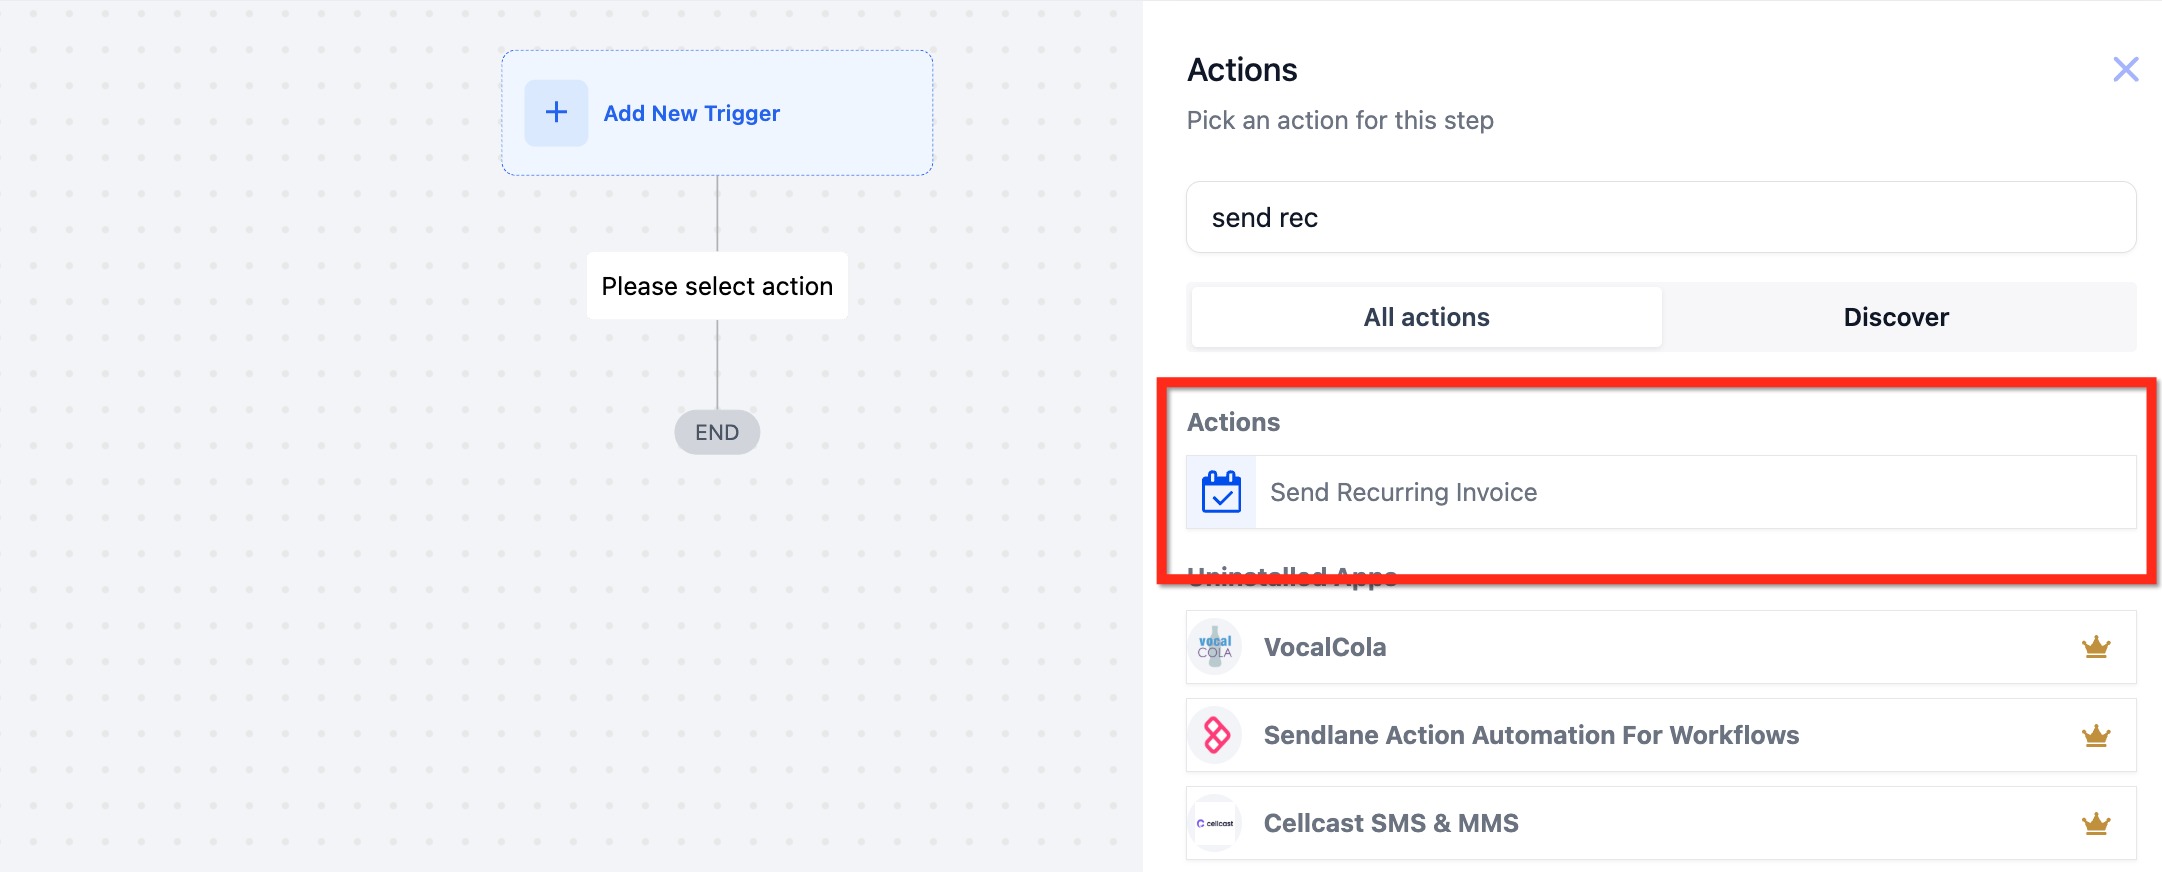
Search for Send Recurring Invoice and select it to add it to your workflow.
In the configuration panel, choose the sender, select an invoice template, choose test or live mode, set the start date, define when billing should end, choose the billing frequency, set interval rules, and enable auto-payment if needed. Click Save Action once complete.
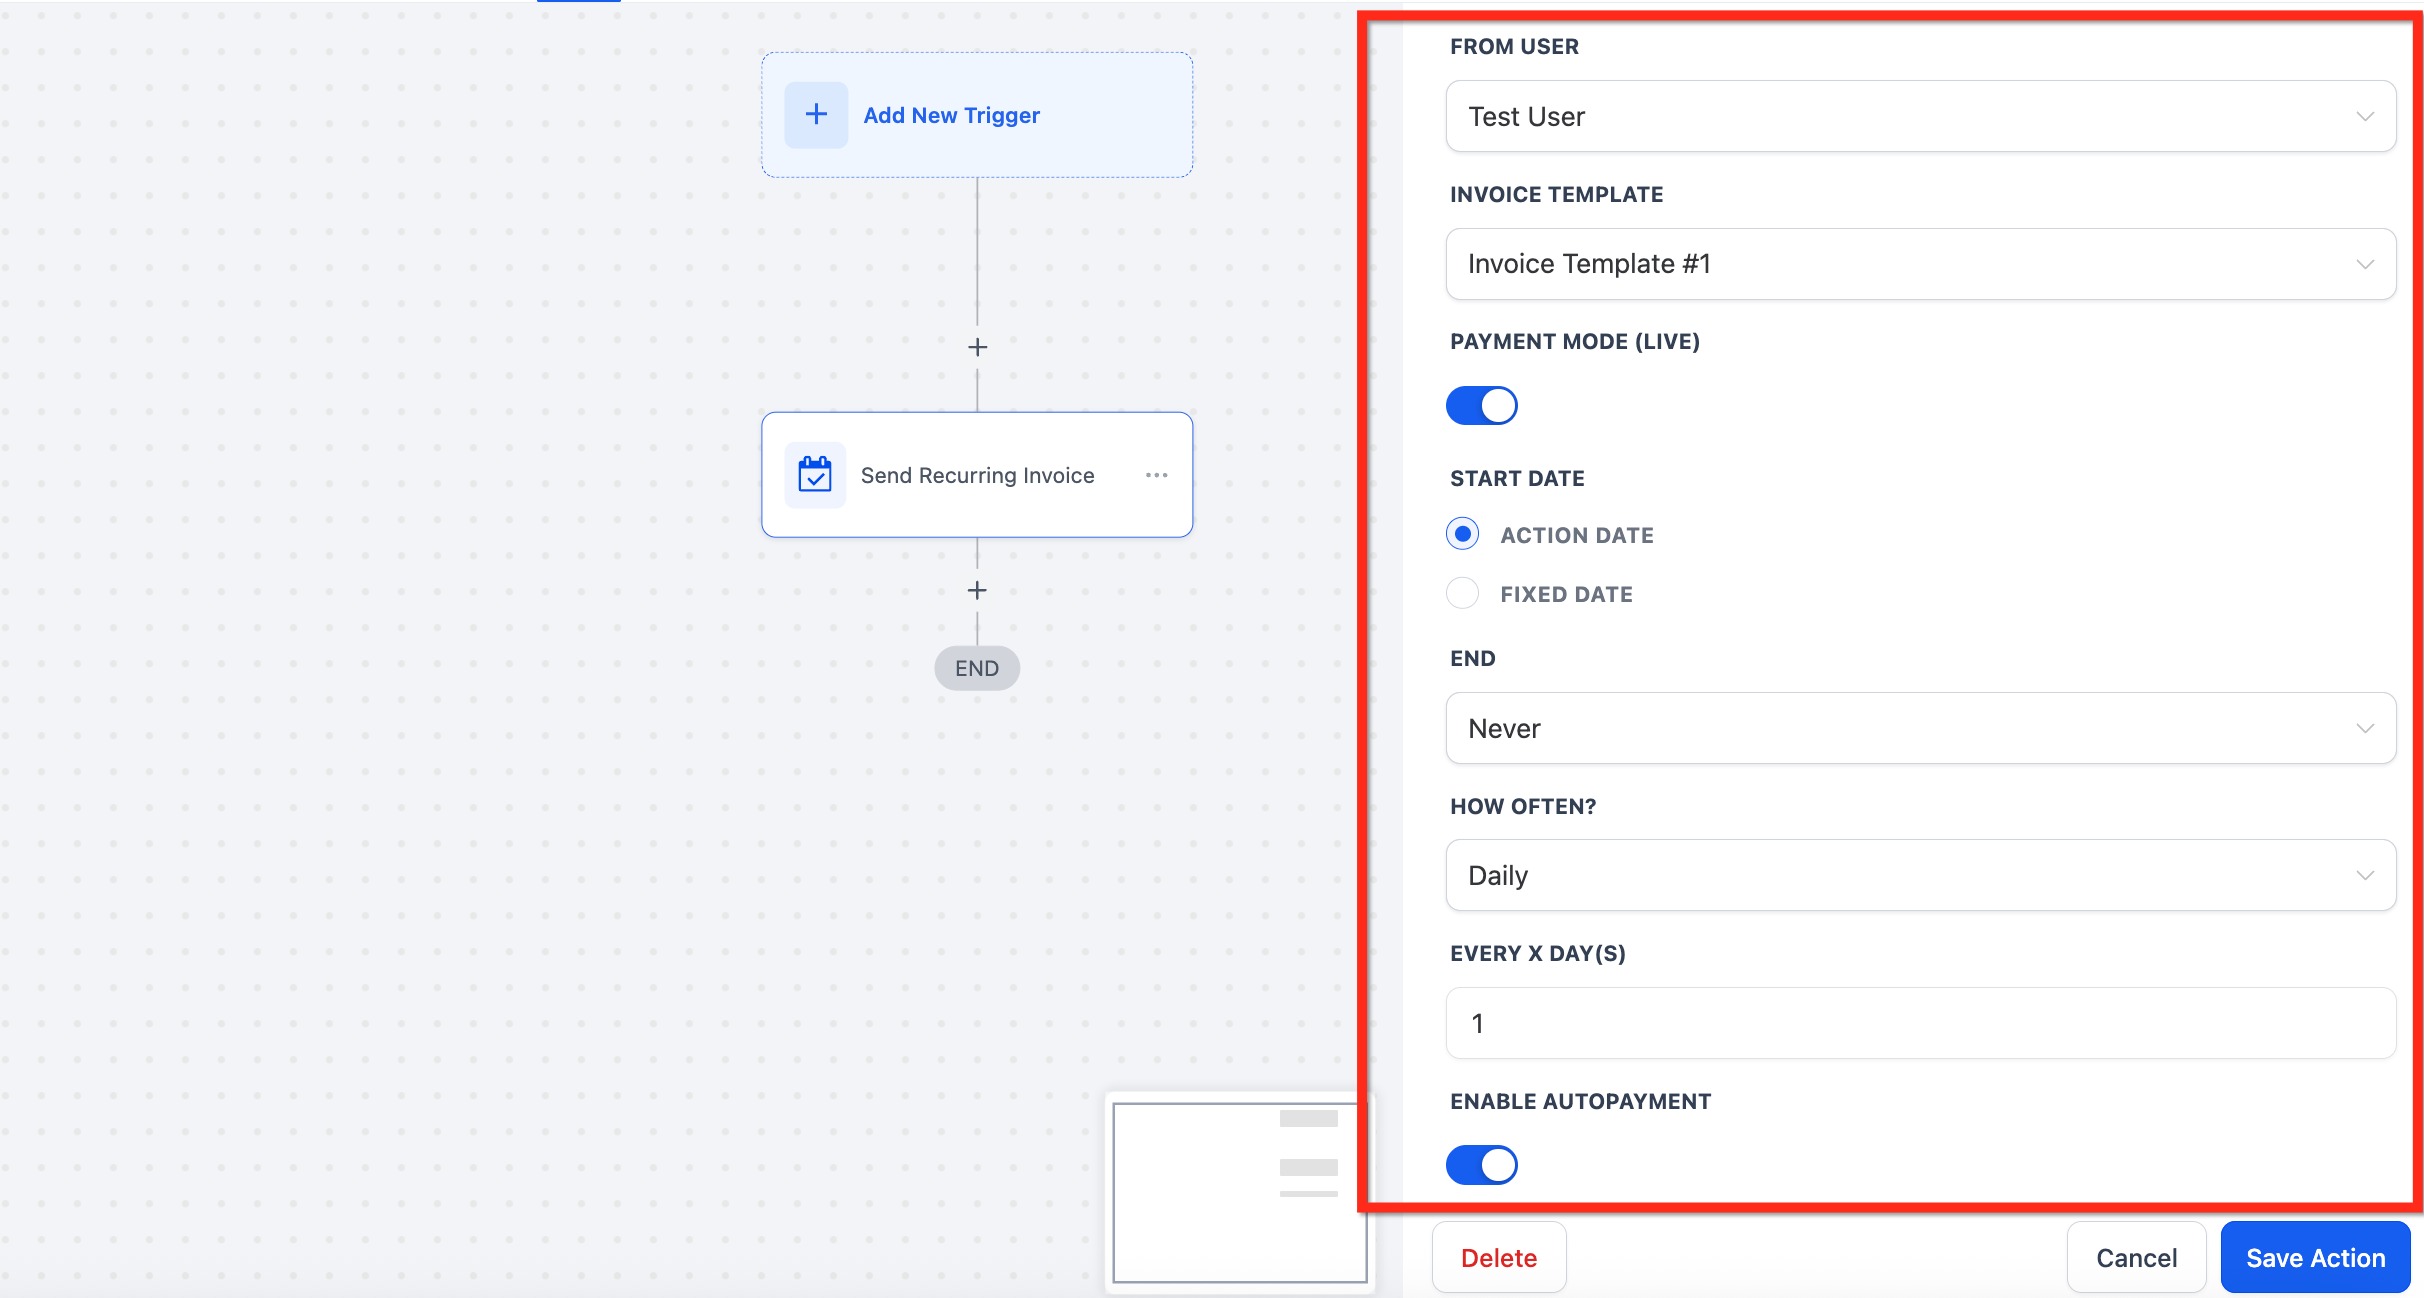
Best practices: test workflows before activating them, use clear naming, verify payment setup before enabling auto-payment, and monitor the first billing cycle.
Go to Payments → Invoices.
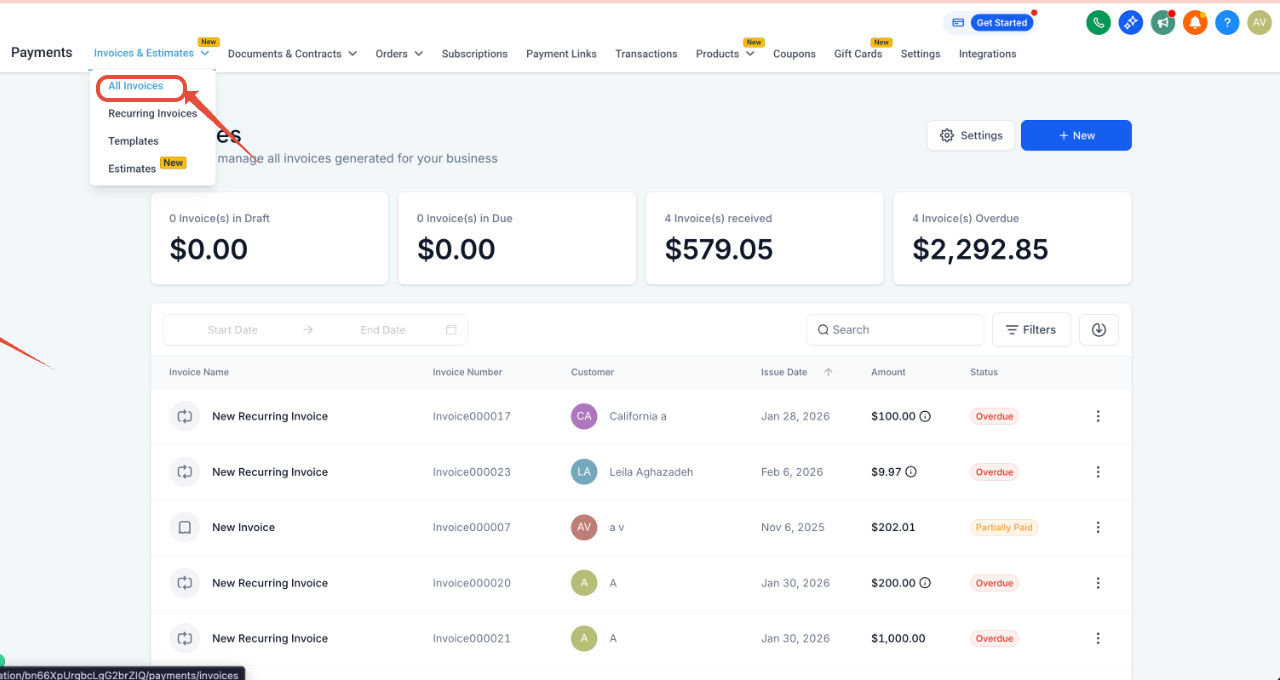
Locate the active recurring invoice and click the three-dot (⋮) menu.
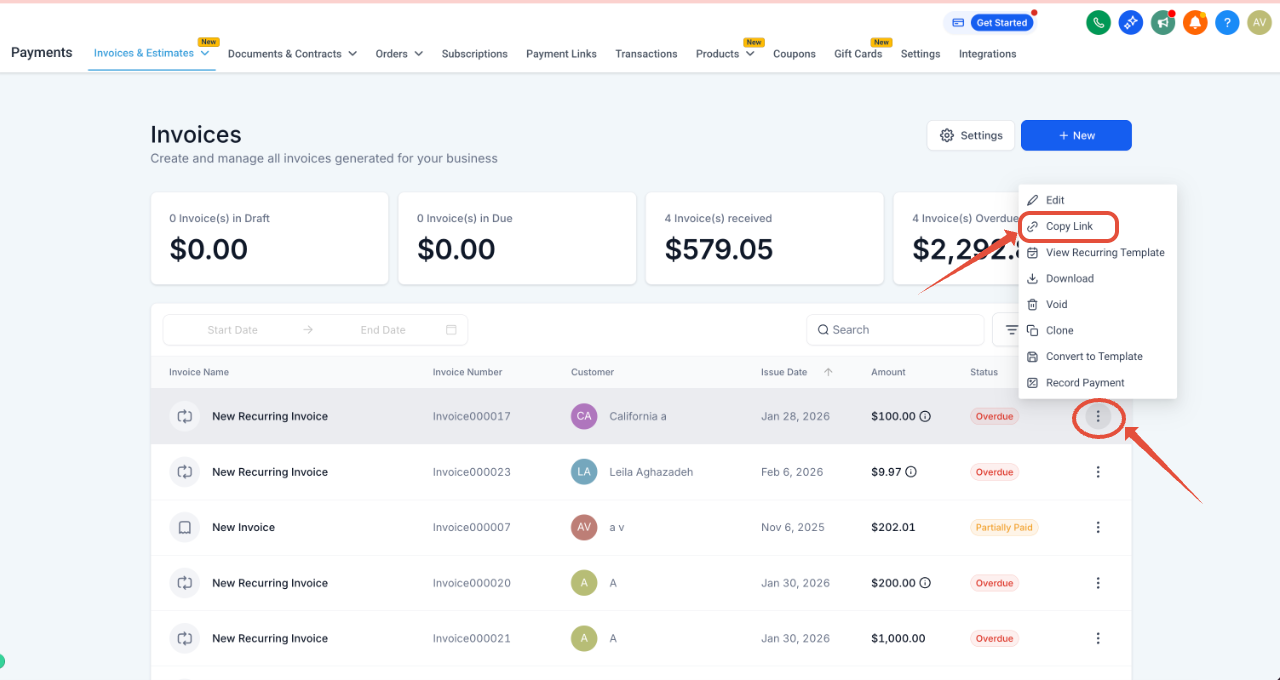
Click Copy Link and open the link in a new tab.
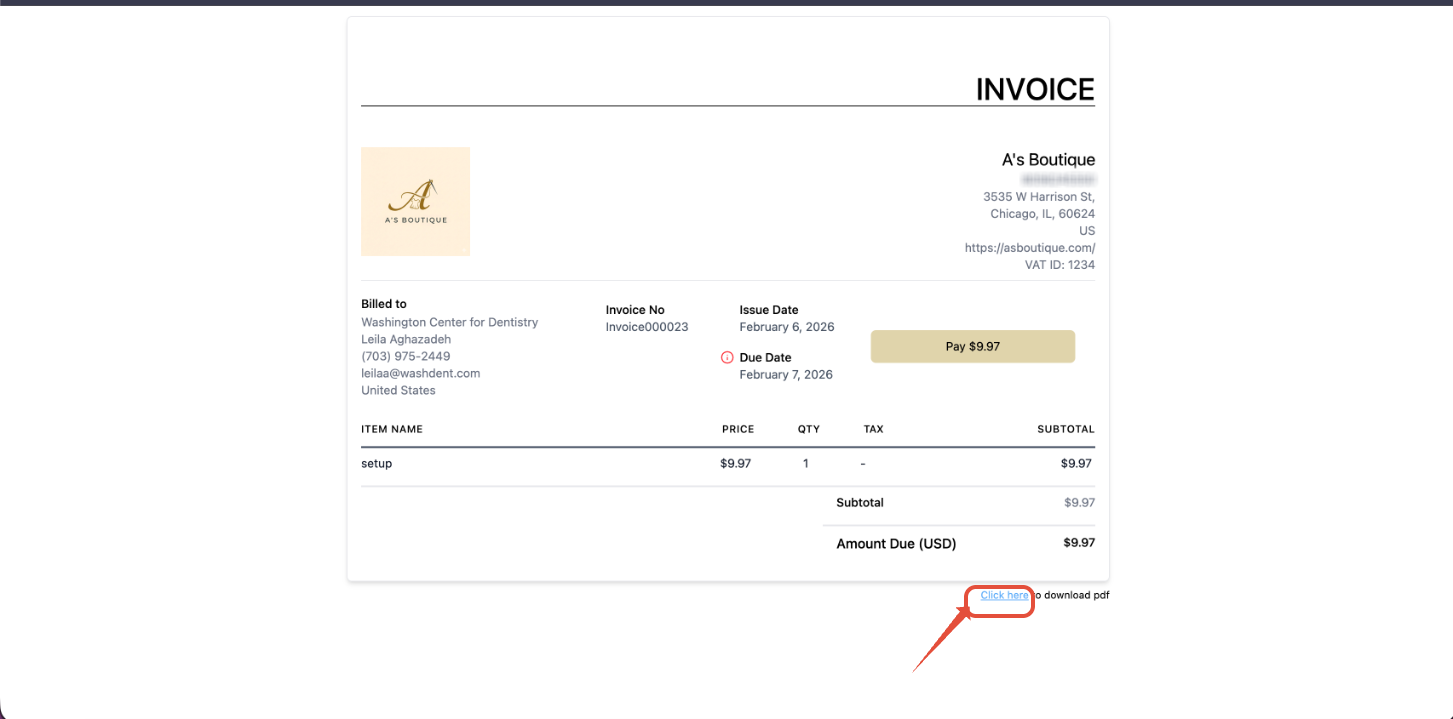
Select Click Here and the PDF will start downloading.
Can I pause or modify a recurring invoice after setup? Yes. Go to the Recurring Invoices section, select the invoice, and update the schedule or details. Note that once a template is Active or Scheduled, core fields such as frequency and price are locked; use the edit options for active or scheduled invoices, or end and recreate the template.
Which products can I add to a recurring invoice? Only one-time and recurring products qualify. For recurring products, only the recurring price applies and the frequency is set within the invoice frequency settings.
Does the first invoice always auto-charge? Not always. If no card is on file at schedule creation, the first invoice is paid manually and future invoices auto-charge after that. With a Saved Card, the first invoice auto-charges.
Which payment methods are supported for auto-pay? Card payments. Manual methods such as cash or bank transfer are not auto-charged.
What happens if a card is declined? Both the patient and staff are notified. The system retries twice, 24 hours apart, and then stops automatic attempts. You can collect a manual payment with a new card.
Can I customize the payment emails? Yes. Customize invoice notifications (subject, body, and branding) from your invoice notification settings.
I voided a recurring invoice, but the system keeps sending new ones. Why? Voiding cancels only that single invoice. The recurring schedule stays active. To stop the series, go to Payments → Invoices & Estimates, open the Recurring tab, find the schedule, click the three dots, and select End.
Why do setup fees and recurring payments show as separate line items, and will the setup fee be charged again? They serve different purposes within the same product. The setup fee is a one-time upfront charge collected only once; the recurring payment follows its own billing cycle. Paying the setup fee does not trigger it again.
If I add a discount to a recurring invoice, does it stay forever? A discount added to a specific invoice draft affects only that one payment. A discount added to the recurring template applies to every future payment. For a one-time reduction, edit the specific draft, not the template.
Why does my first invoice show both the setup fee and the first month even though I added a trial period? Invoices do not recognize a product's trial period; the trial applies to the subscription, not the invoice. To charge only the setup fee upfront, create two invoices: one for the setup fee (mention the trial in the description) and one for the recurring subscription sent after the trial ends.
Can I CC additional recipients on recurring invoices? There is no built-in field to automatically CC additional email addresses on each occurrence of a recurring invoice. You can specify the primary recipient (the patient).
Will patients get automatic reminders for unpaid recurring invoices? Not by default. You can set up automated workflows using triggers such as Invoice and Payment Received to send reminders or recovery messages.
