Invoicing is a core part of running your practice. It helps you track revenue and makes sure you are paid promptly for treatments, packages, and product sales. In Aesthetix CRM you can create, edit, discount, tax, and send invoices directly from the Payments section.
This guide covers how to set up your invoice defaults, build a one-time invoice, add products and payment options, and send it to a patient by email or text.
Tip: Aesthetix CRM offers AX Pay, our own payment processing with rates better than Stripe. See AX Pay Overview and Setup Guide.
There are two types of invoices available:
Feature | One-Time Invoice | Recurring Invoice |
|---|---|---|
Product Type | One-Time Products | Recurring products |
Backdating | Yes (Issue Date) | No (starts current or future) |
Automation | Send once, then done | Automatically generates on a schedule |
Best For | Deposits, one-off treatments, product sales | Memberships and monthly plans |
This article focuses on one-time invoices. For recurring billing, see the recurring invoices guide.
Note: If you are invoicing without a connected payment provider, you will need to manually record payments. Connecting a provider (AX Pay or Stripe) lets patients pay online directly from the invoice.
Before creating your first invoice, it is worth configuring your global invoice defaults so every new invoice starts with the right business details, layout, and options.
Go to the Payments tab, open Invoices & Estimates, and select All Invoices from the dropdown.
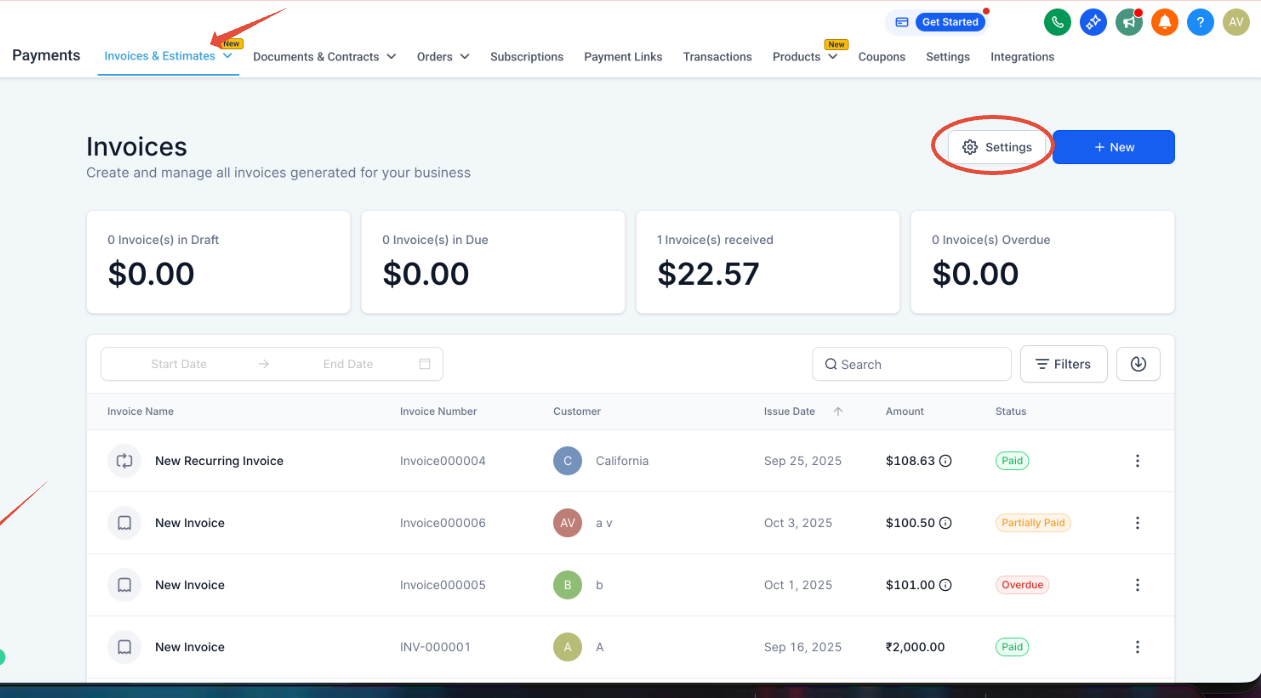
Click the Settings button (within the Invoices tab) to customize the following defaults.
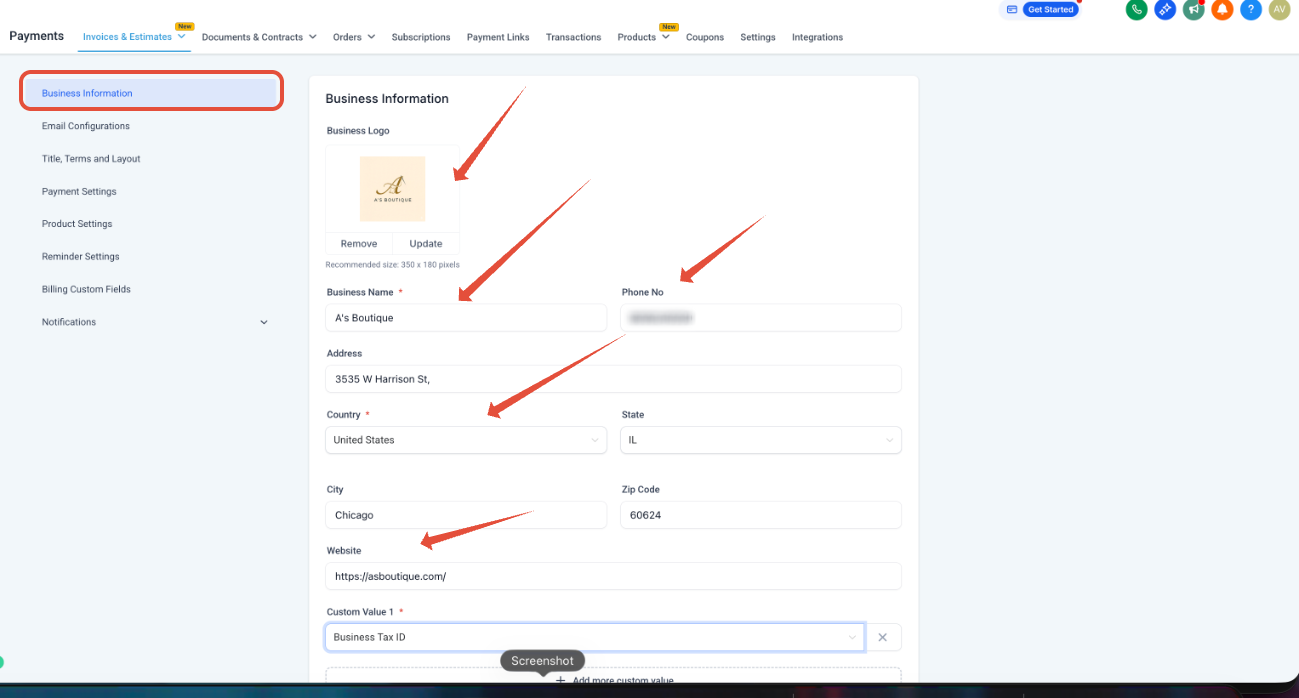
Business Information: Add your practice logo, name, phone number, address, and website.
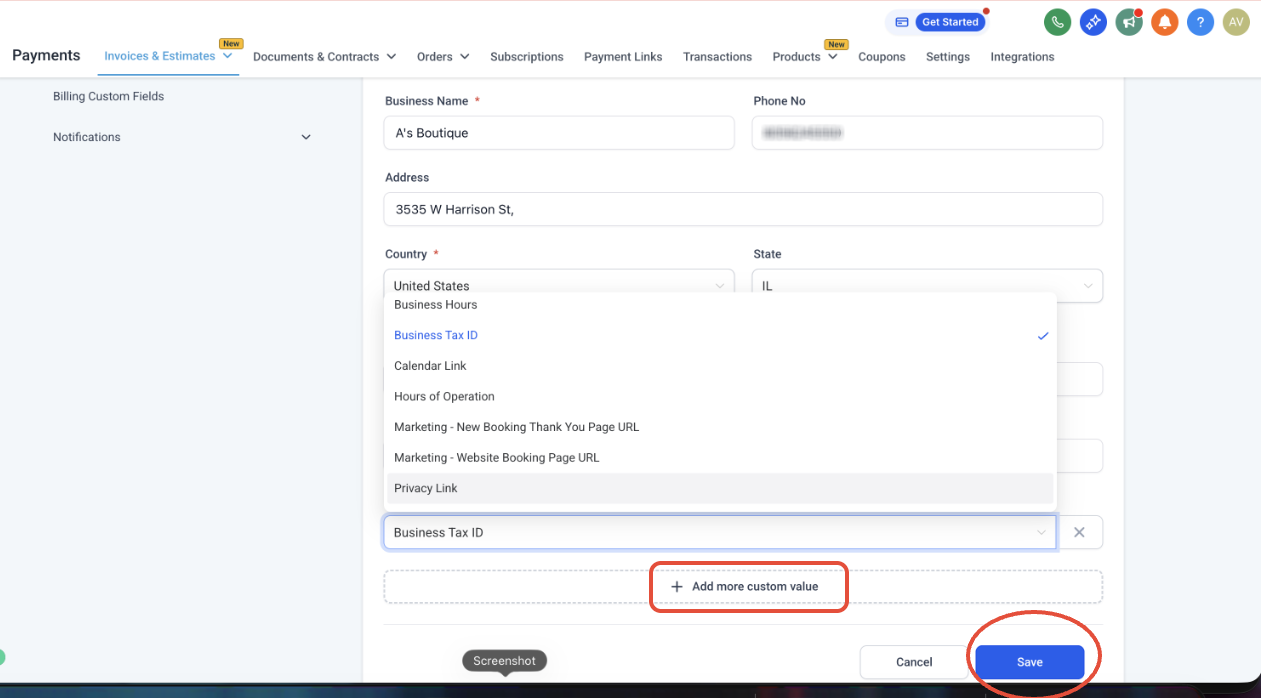
You can also add custom information using the + Add custom value option, select the value from the dropdown, and click Save.
Email Configurations: Specify the From email address and From name the invoice should be sent from, then click Save.
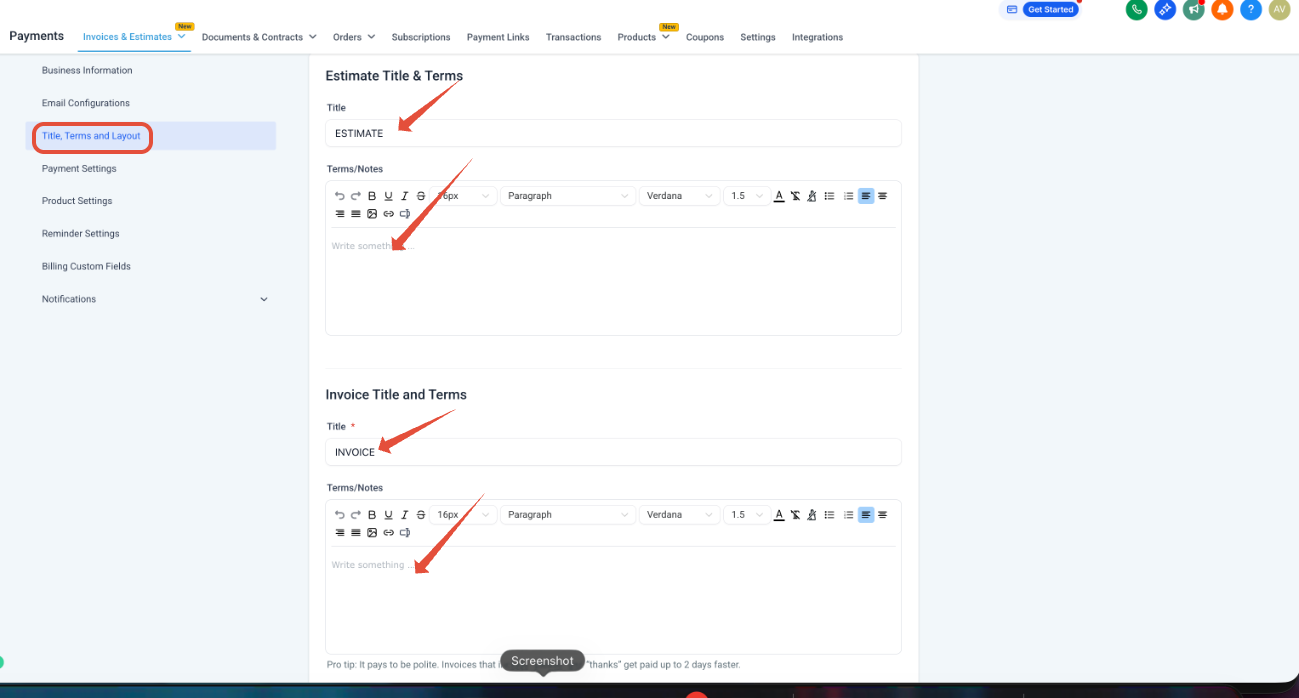
Title, Terms and Layout: Edit the invoice and estimate title, terms, and notes.
You can also customize the invoice layout and labels by clicking Customize Layout, then save.
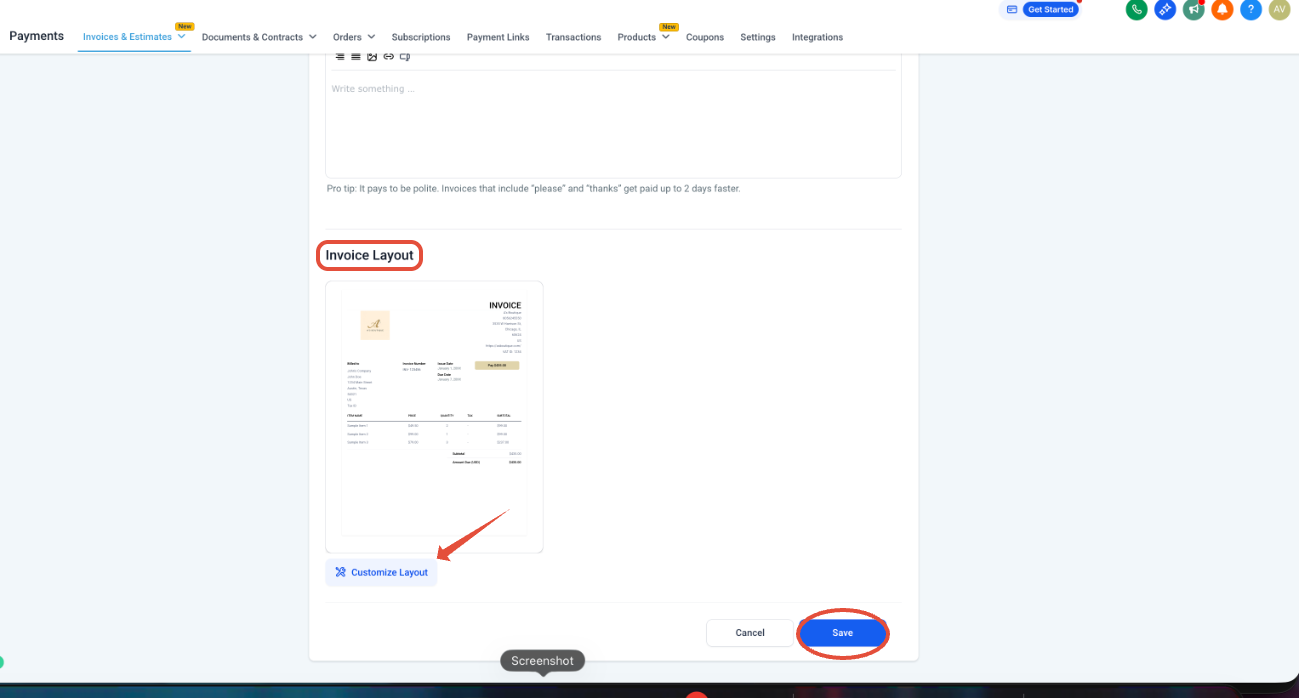
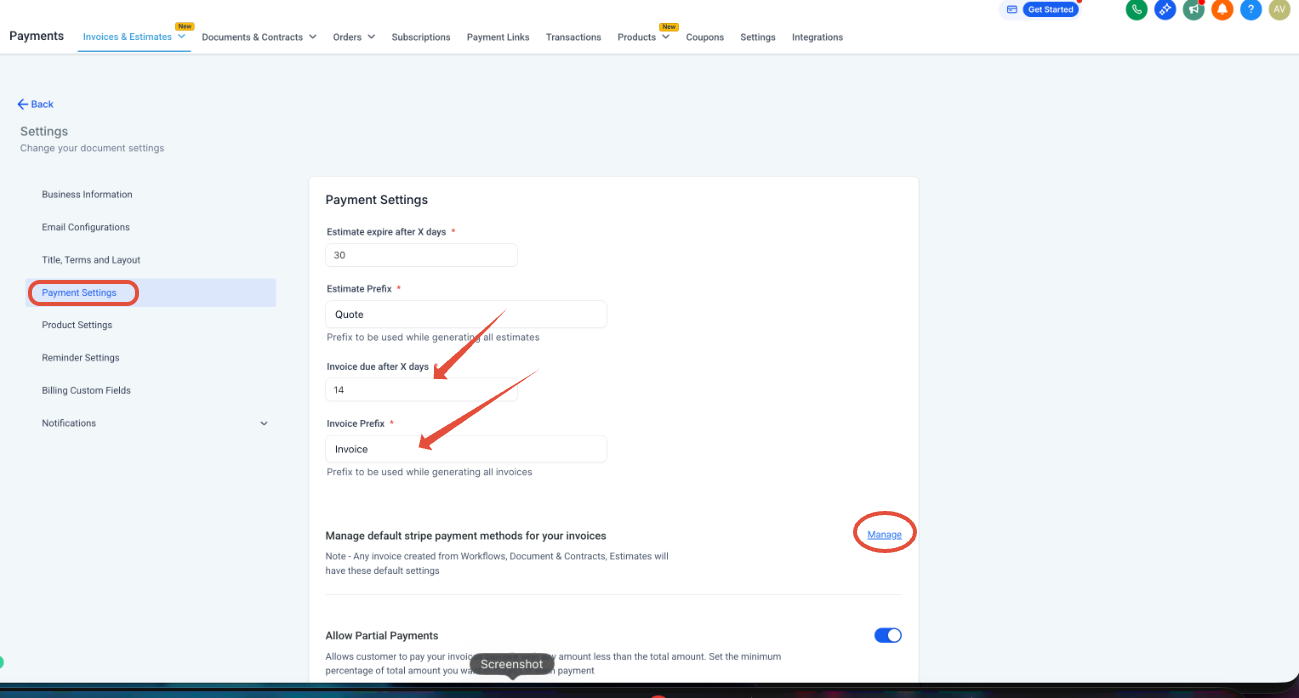
Payment Settings: Set the invoice due-after days, set the invoice prefix, and manage default payment methods by clicking Manage.
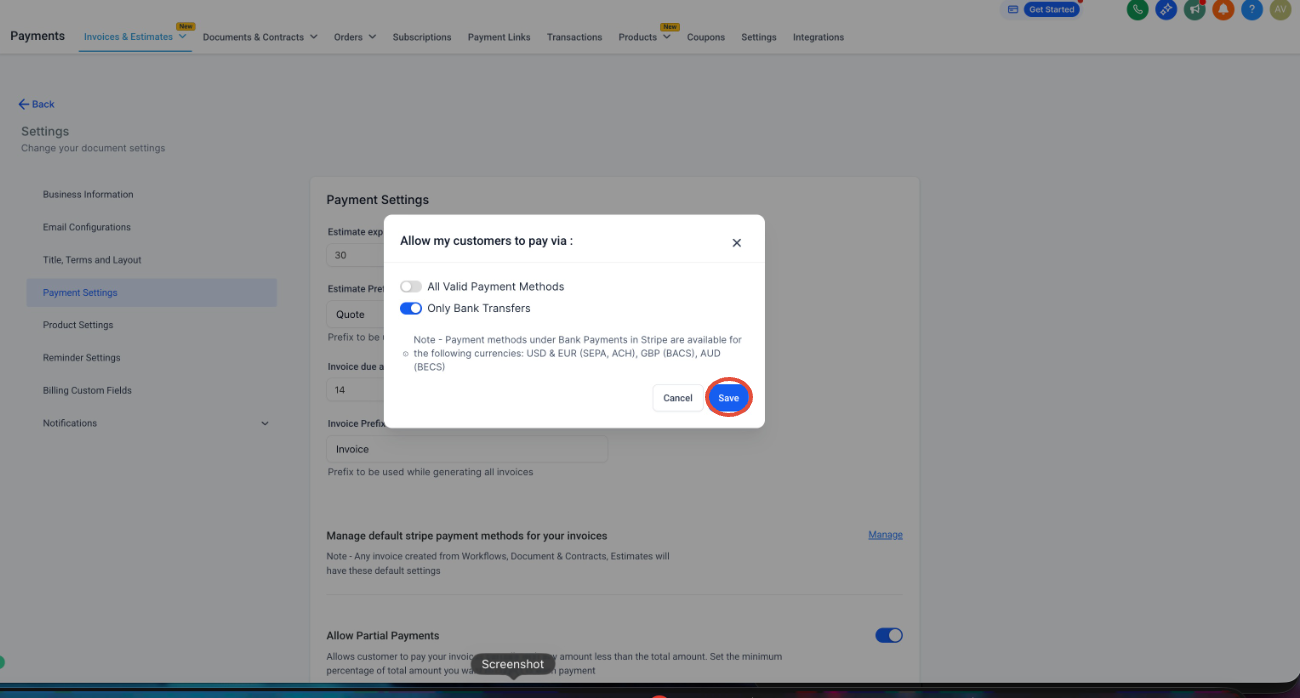
Here you can allow All valid payment methods or Bank transfer only by enabling or disabling the toggles, then click Save.
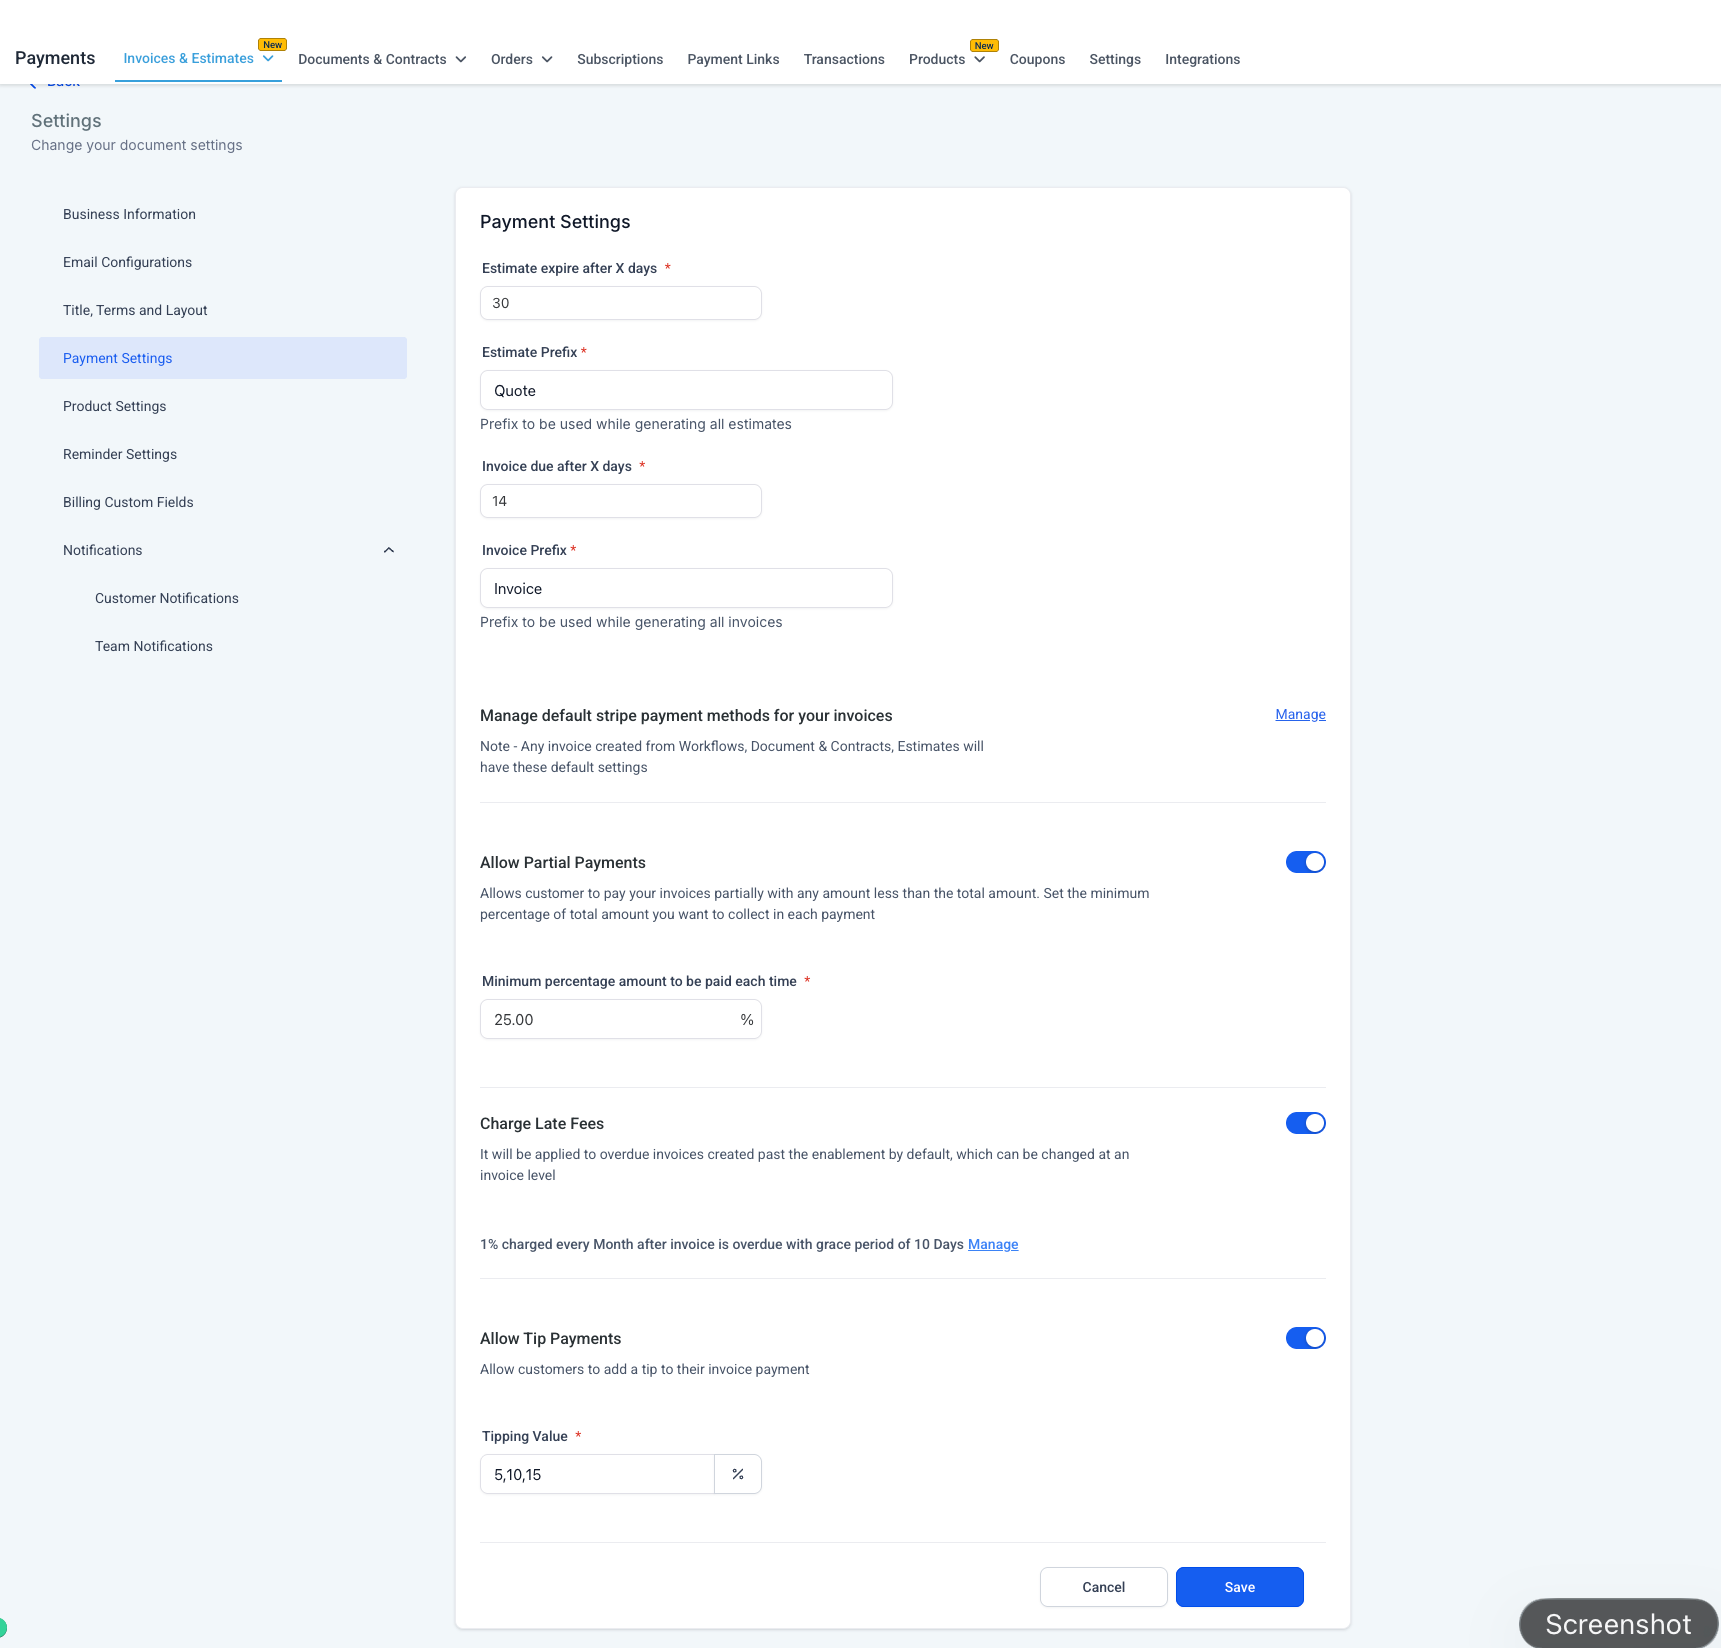
Enable Partial Payments and set the minimum percentage to be paid, and enable the option to charge late fees.
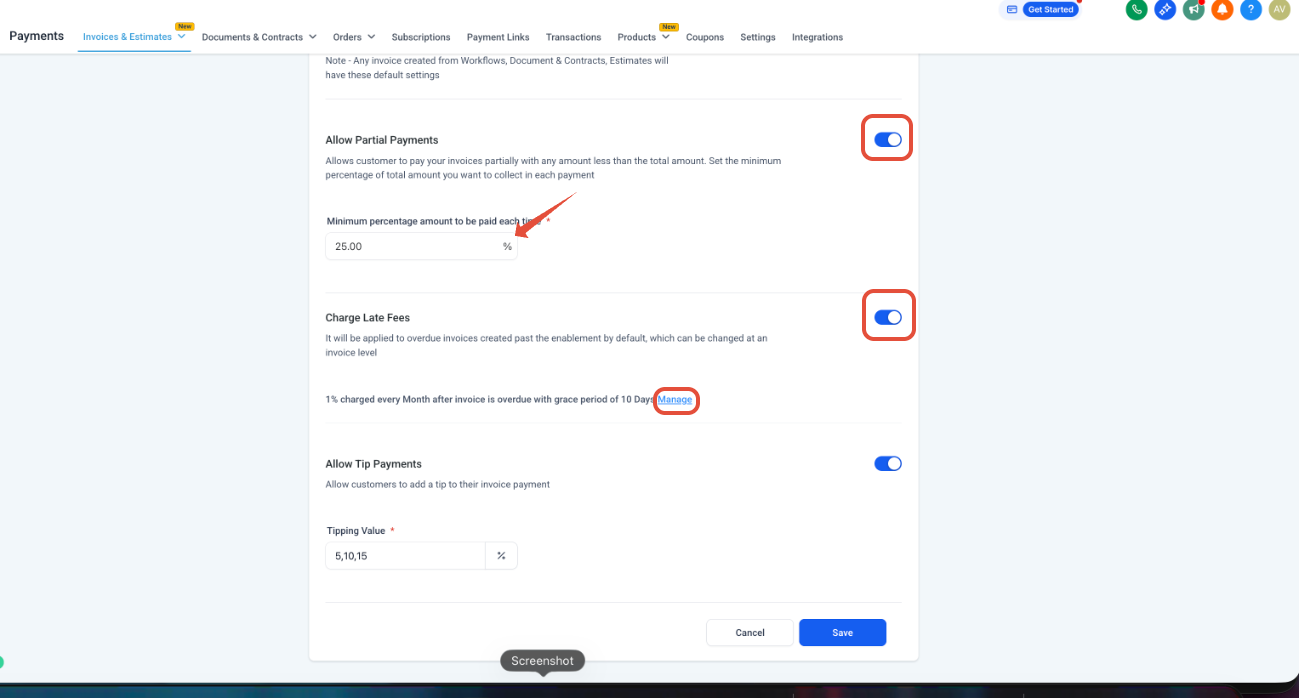
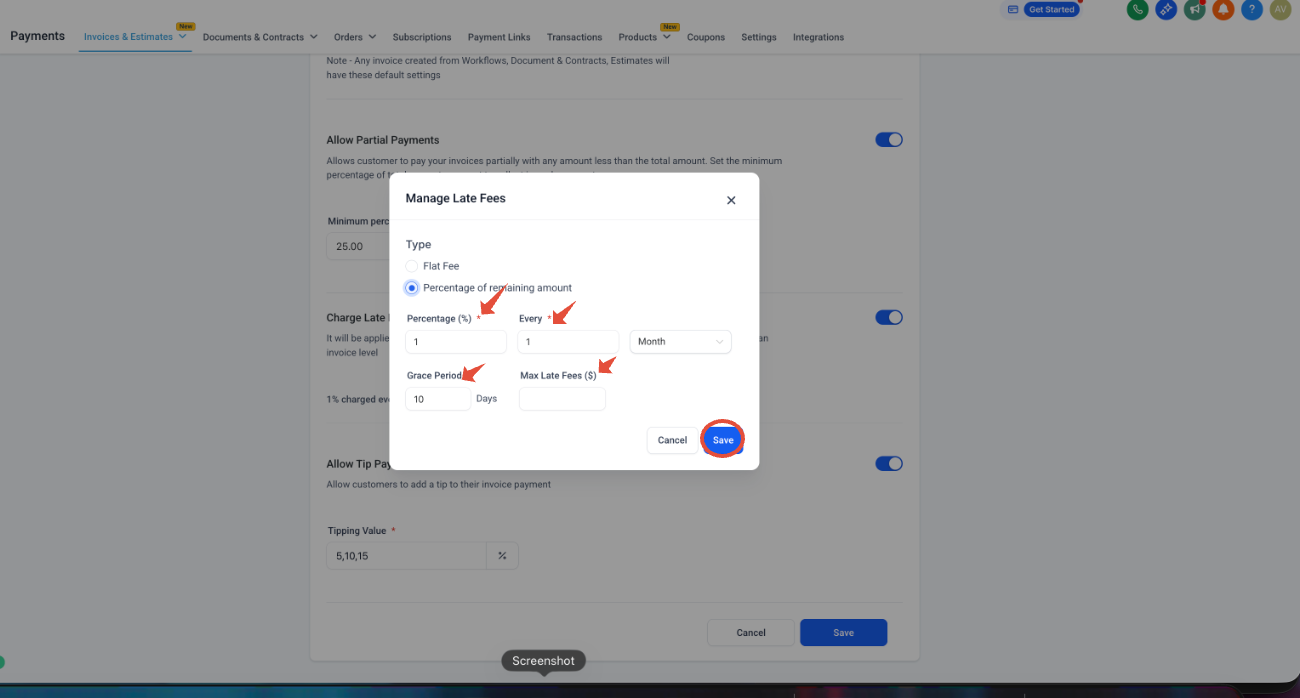
Click Manage to open the late fee window, where you can choose between flat fees and percentage for the remaining amount.
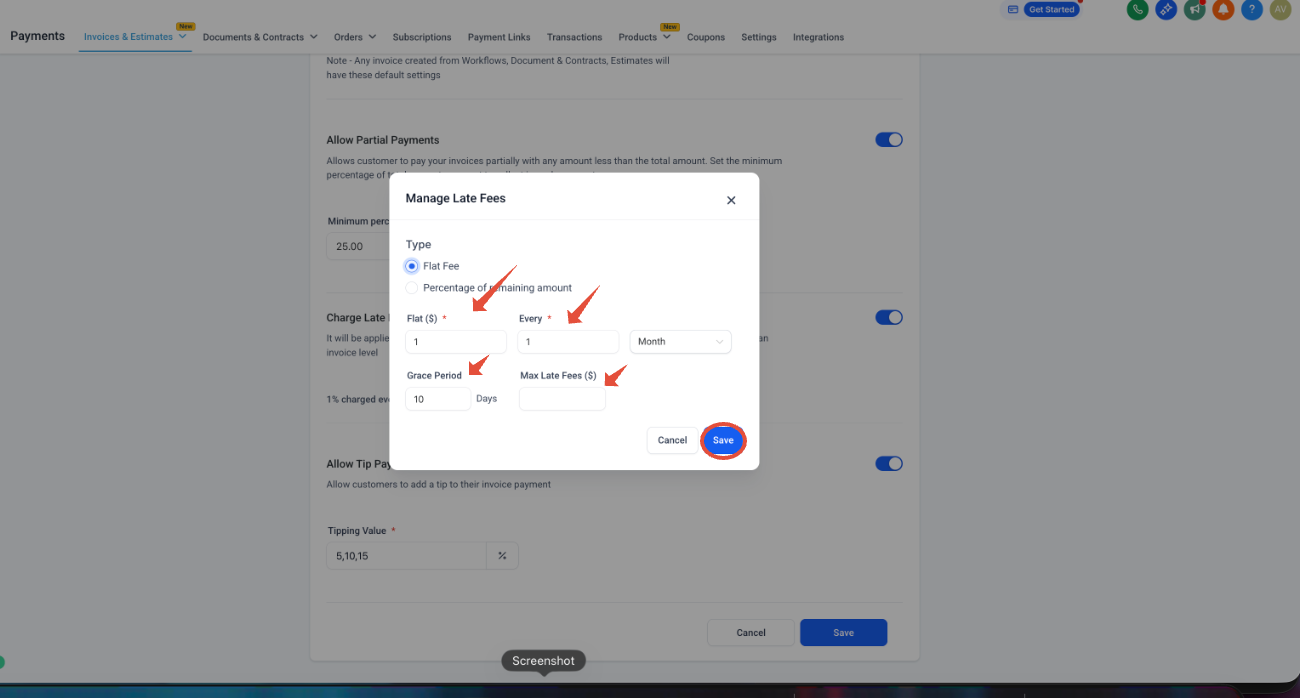
Set the percentage or amount, intervals, grace period, and maximum late fee, then click Save.
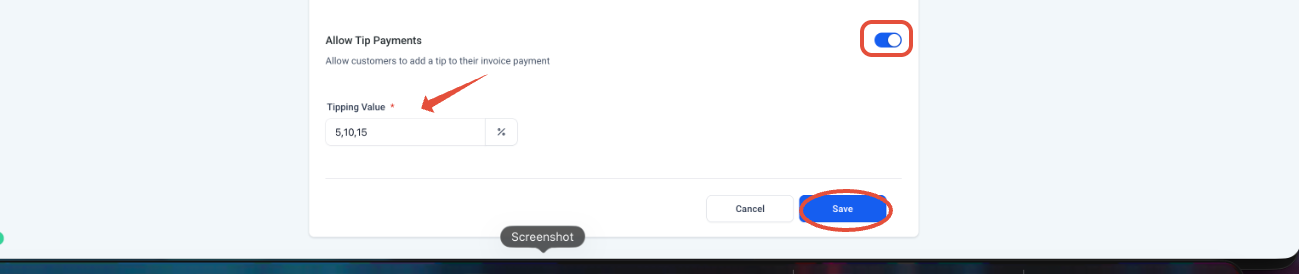
Enable Tip payments and set the tip percentage values, then click Save.
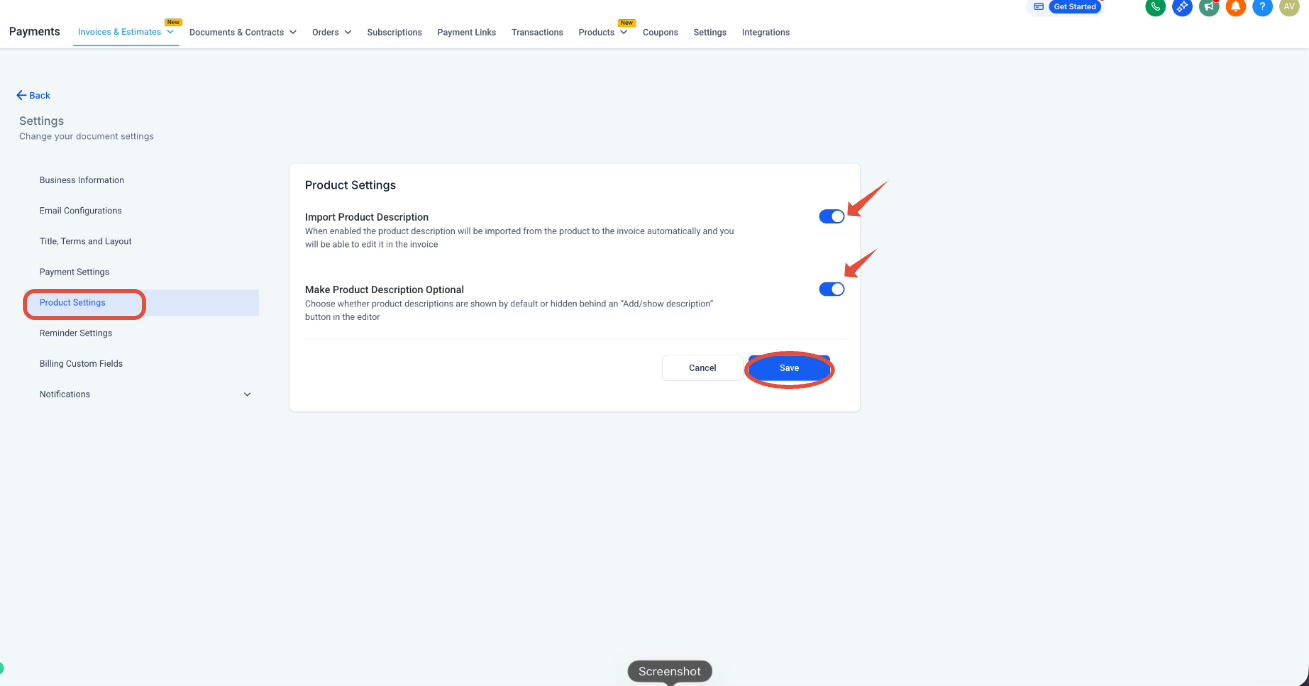
Product Settings: Choose whether to import product descriptions and make them optional.
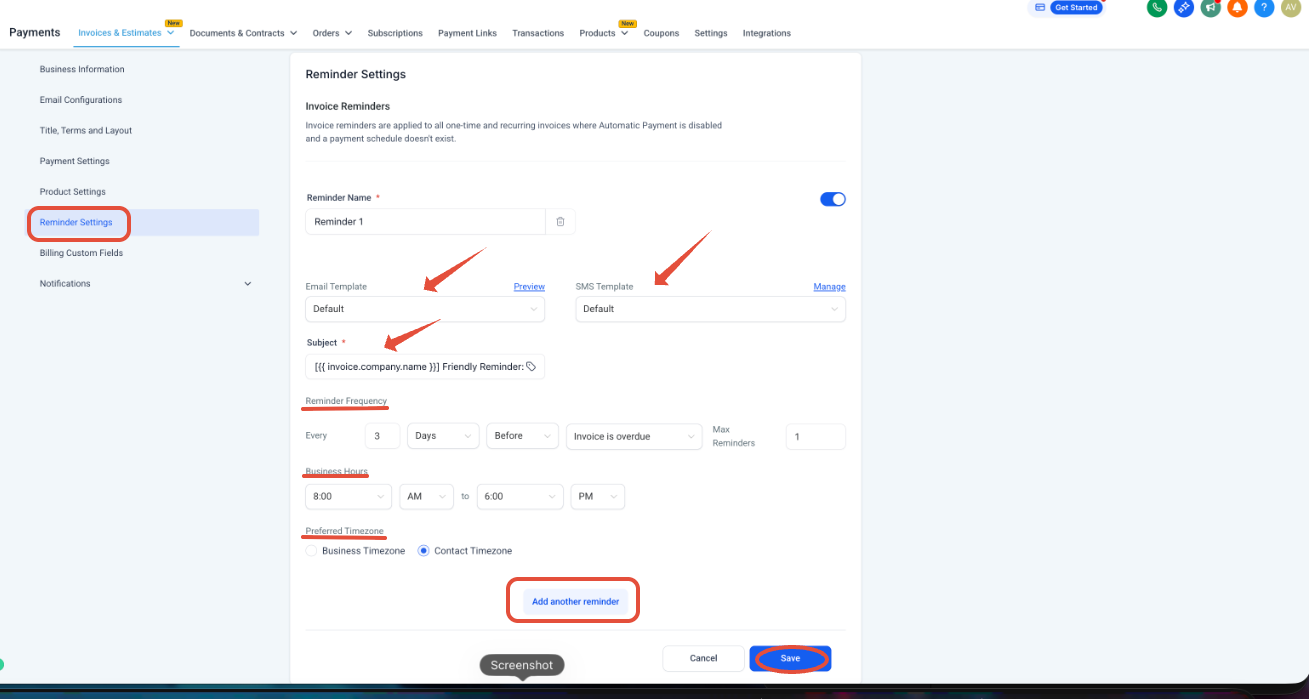
Reminder Settings: Invoice reminders apply to all one-time and recurring invoices where automatic payment is disabled and no payment schedule exists. By default you have one reminder for which you can modify the email and SMS template, subject line, reminder frequencies, business hours, and timezone. To add more, click Add another Reminder, then Save.
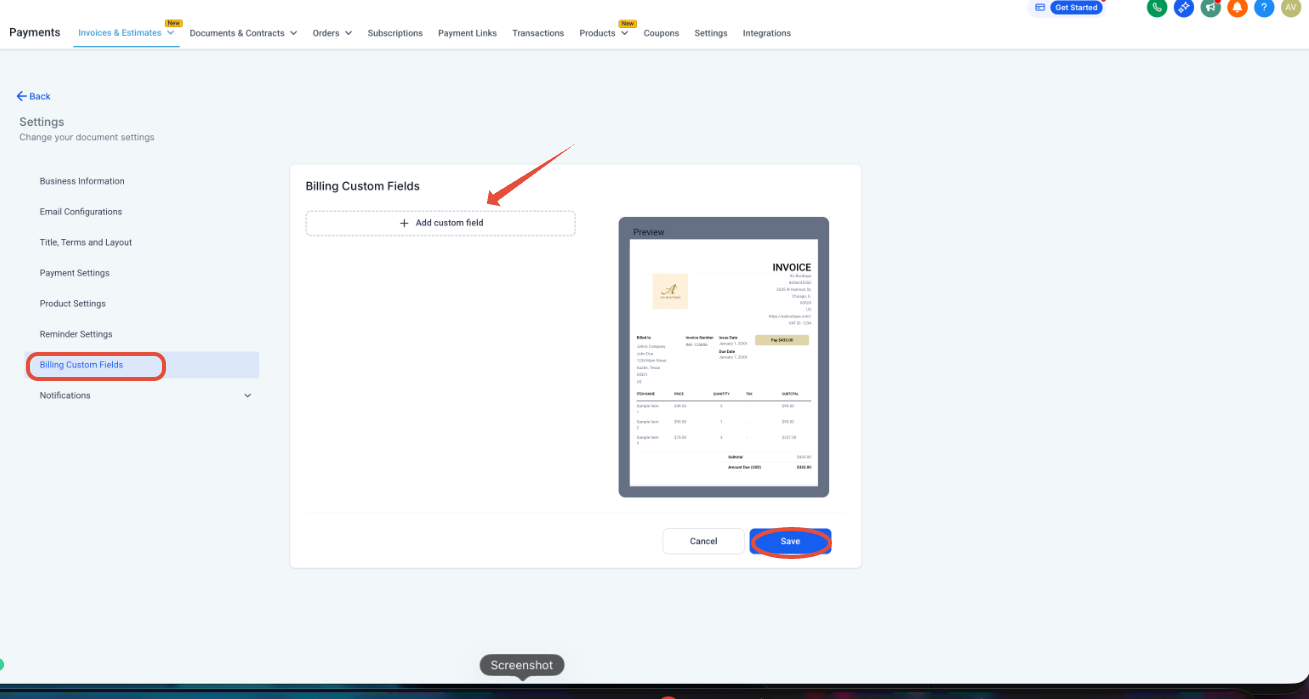
Billing Custom Fields: Add custom fields by selecting + Add Custom Field.
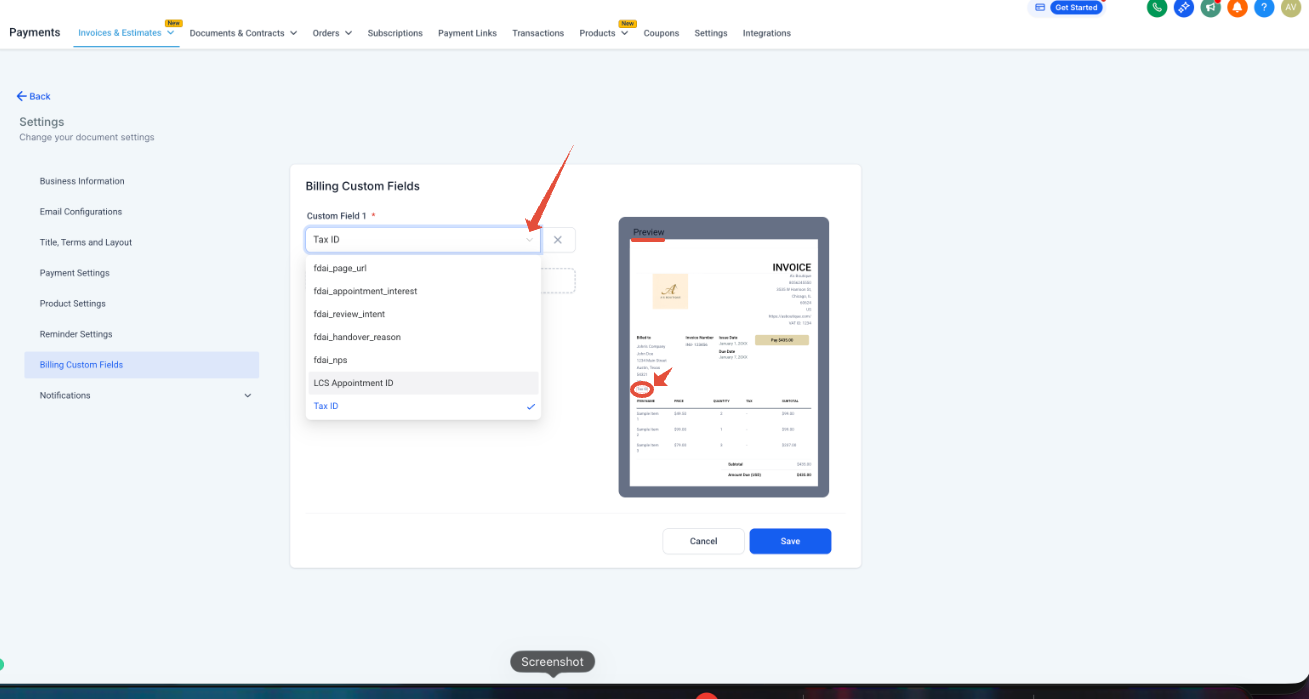
Select the required custom field from the dropdown and click Save. You can see the preview on the right.
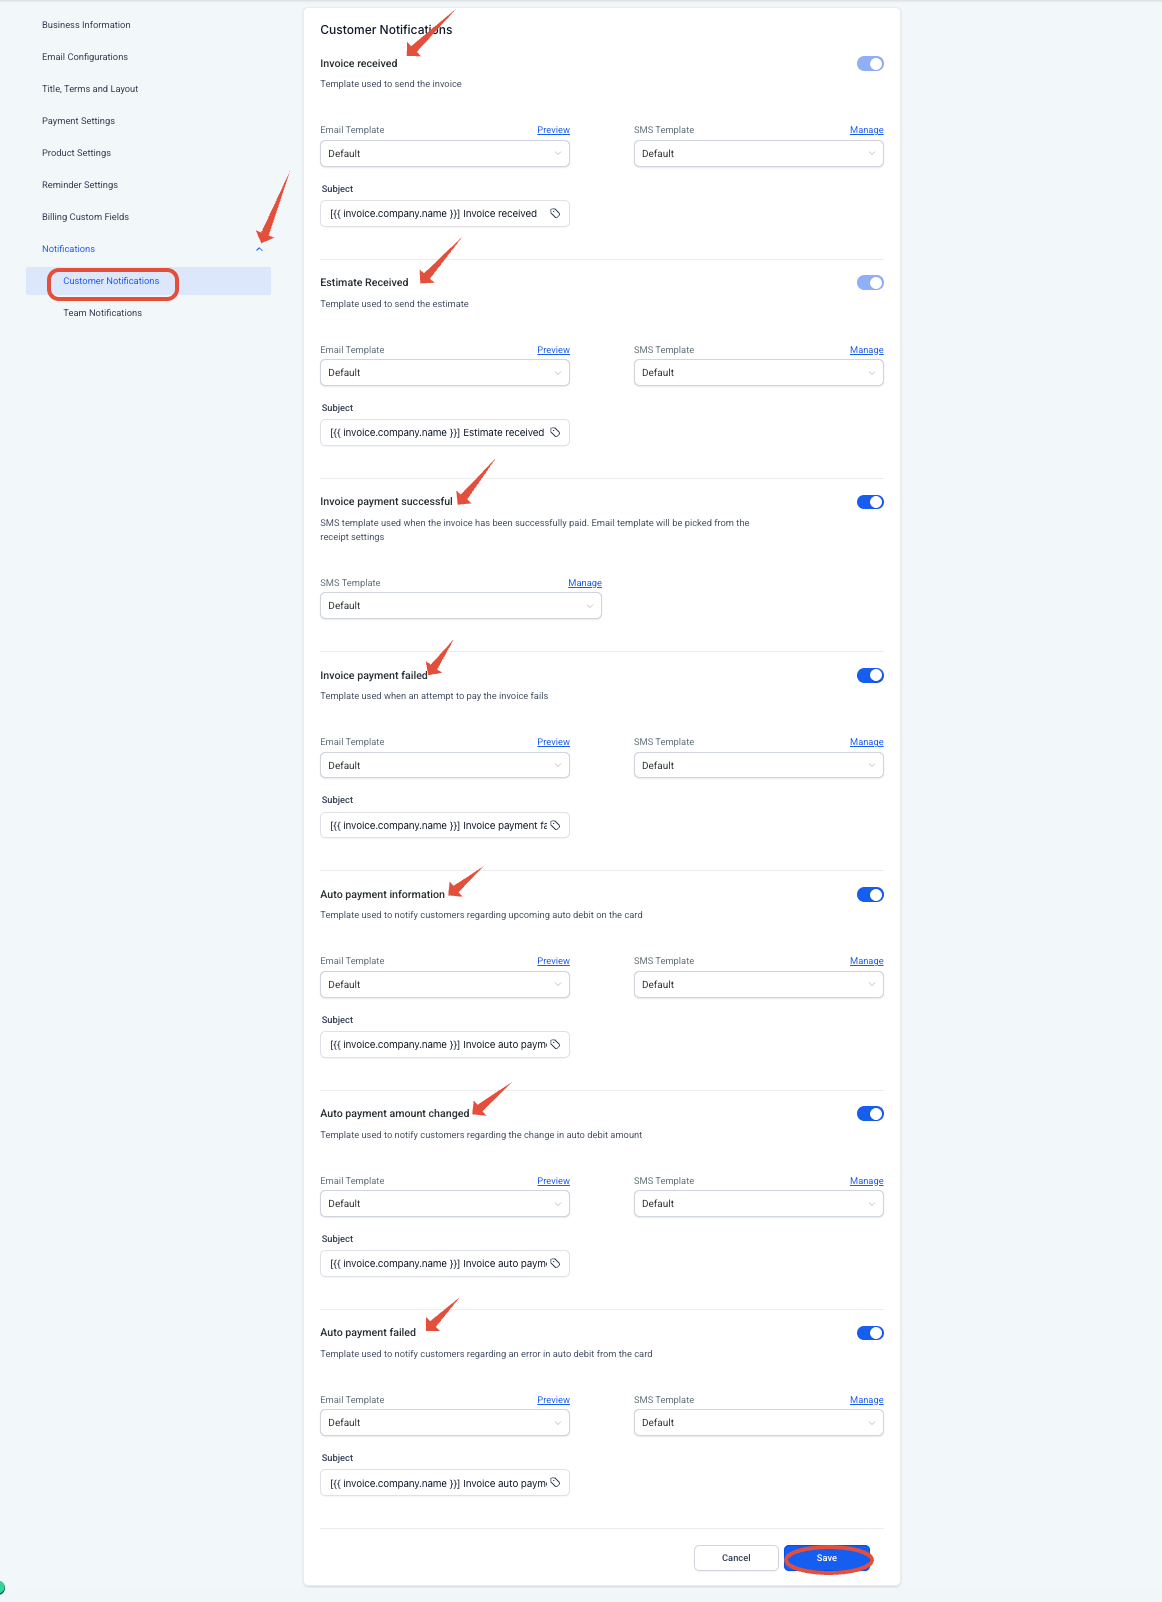
Notifications: The Notification dropdown has two types.
Under Customer Notification, you can enable and manage the email template, subject line, and SMS template for: Invoice received, Estimate received, Invoice payment successful, Invoice payment failed, Auto payment information, Auto payment amount changed, and Auto payment failed.
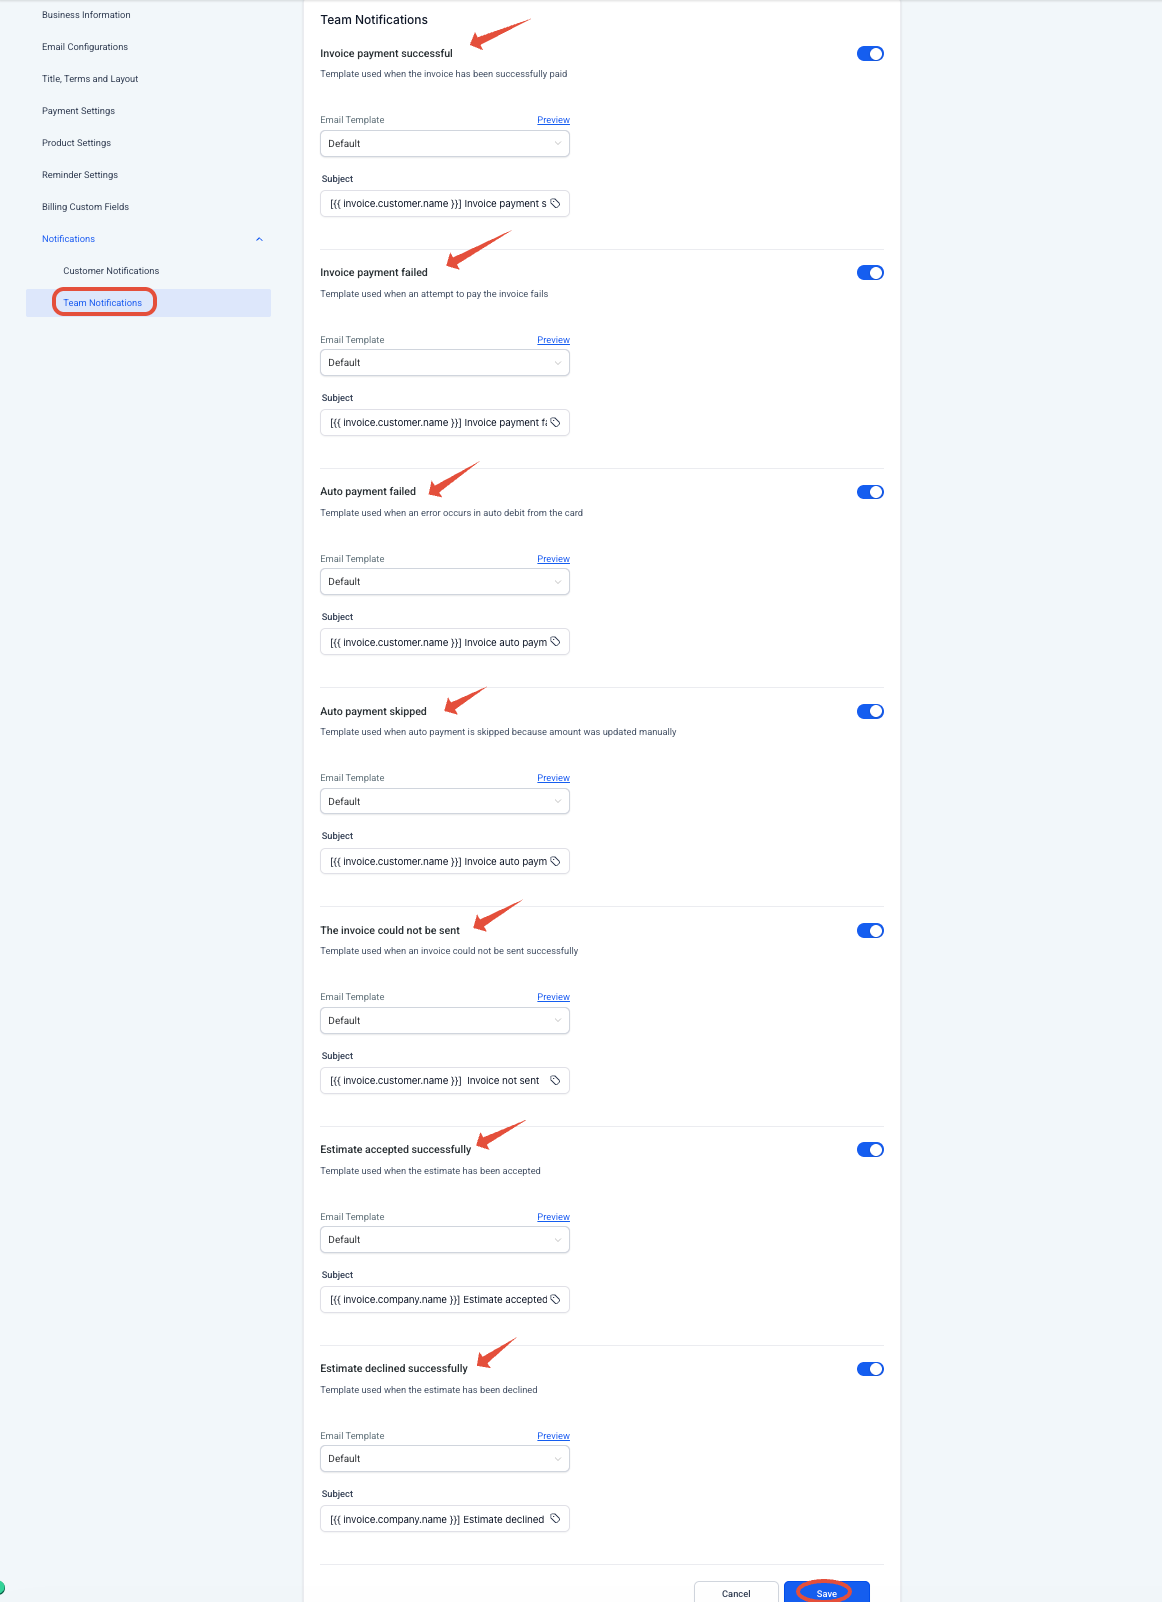
Under Team Notification, you can enable and manage the email template and subject line for: Invoice payment successful, Invoice payment failed, Auto payment failed, Auto payment skipped, The invoice could not be sent, Estimate accepted successfully, and Estimate declined successfully.
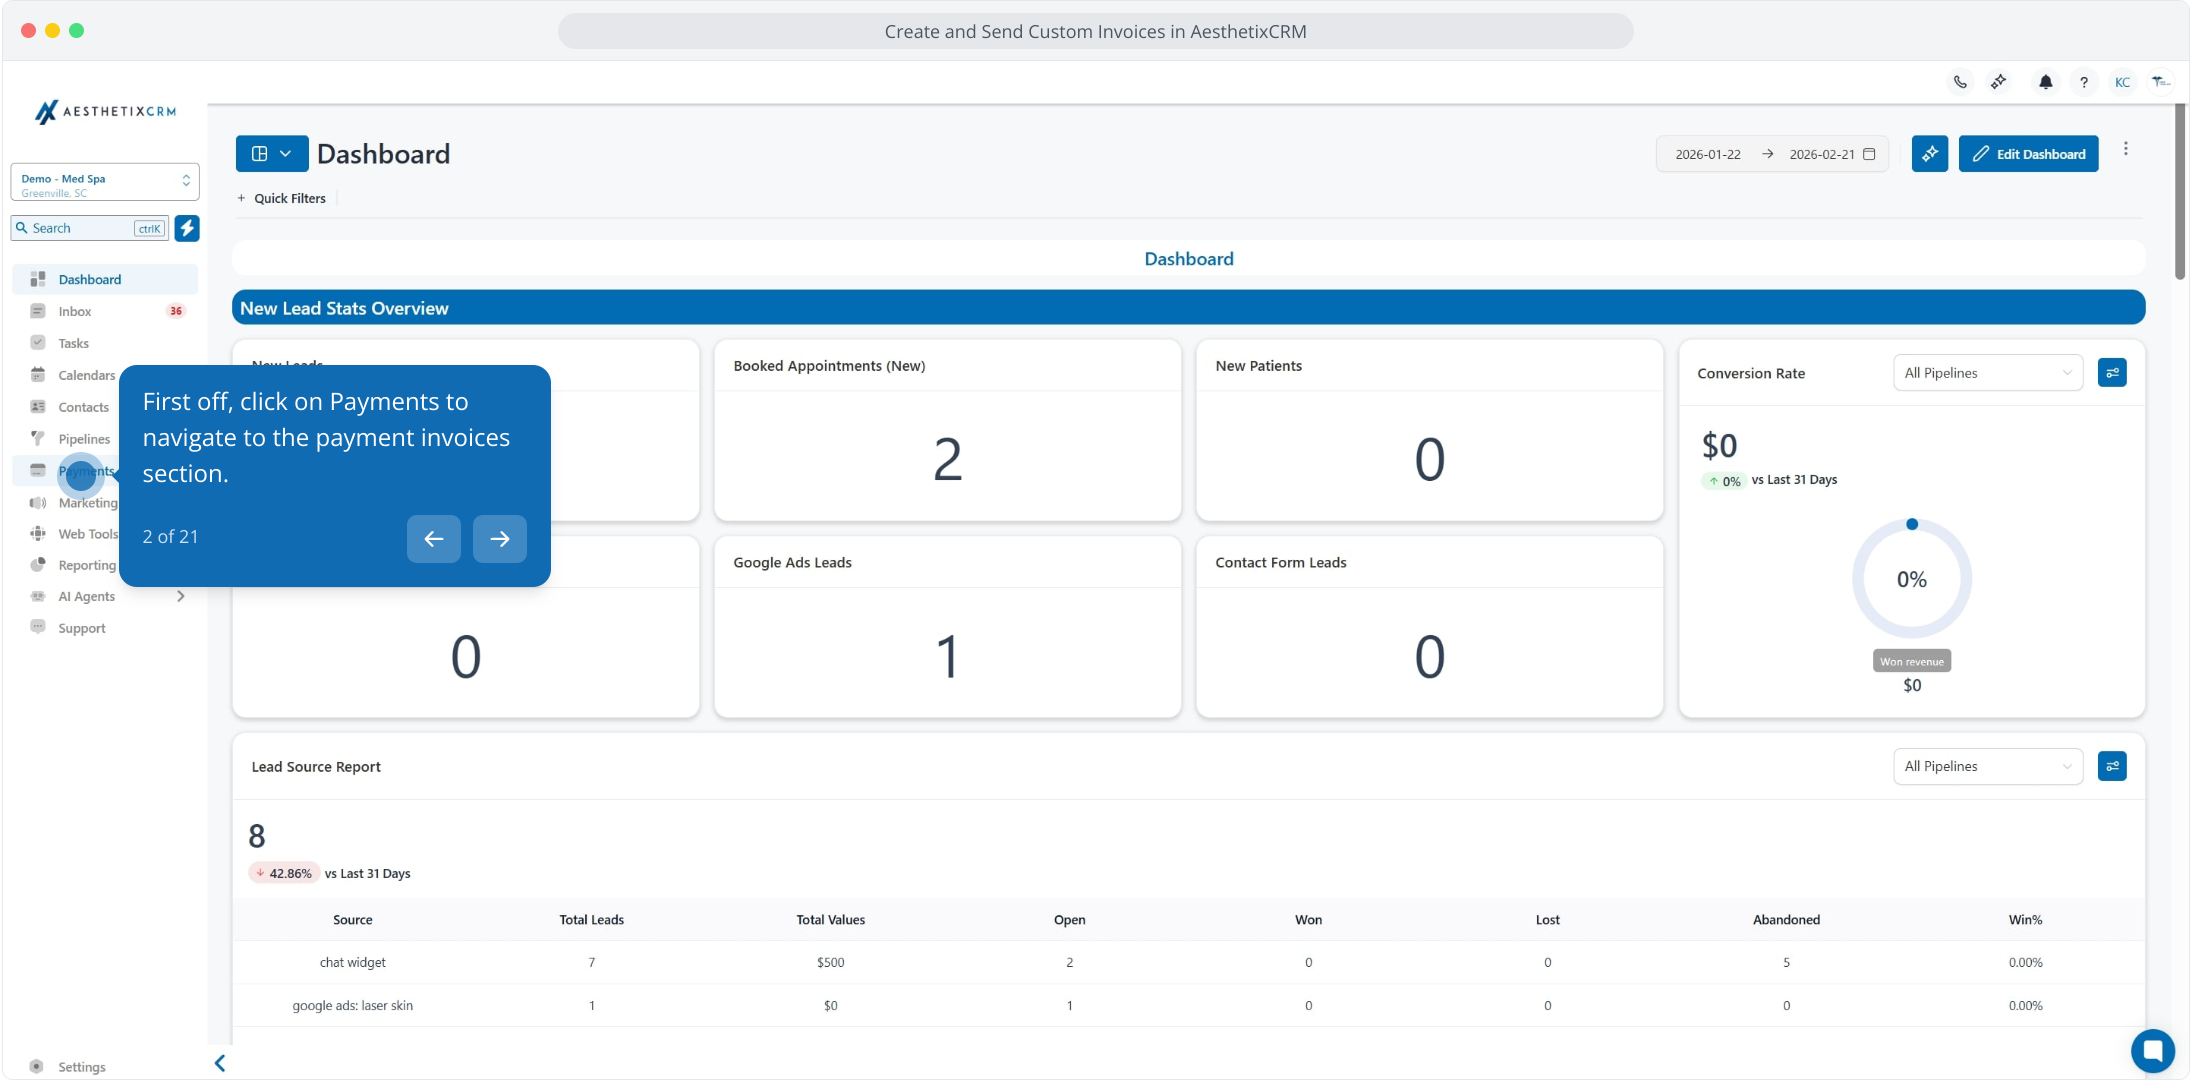
Click on Payments to navigate to the invoices section.
Go to the Payments tab, click the Invoices & Estimates dropdown, and select All Invoices.
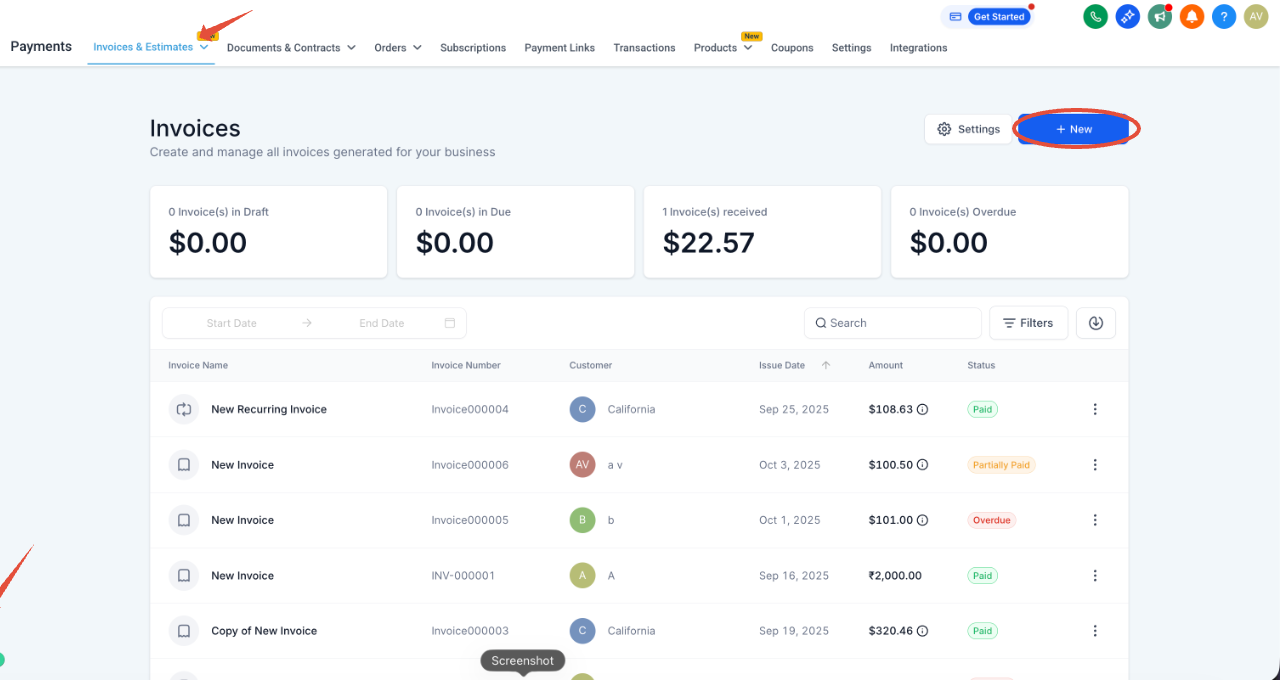
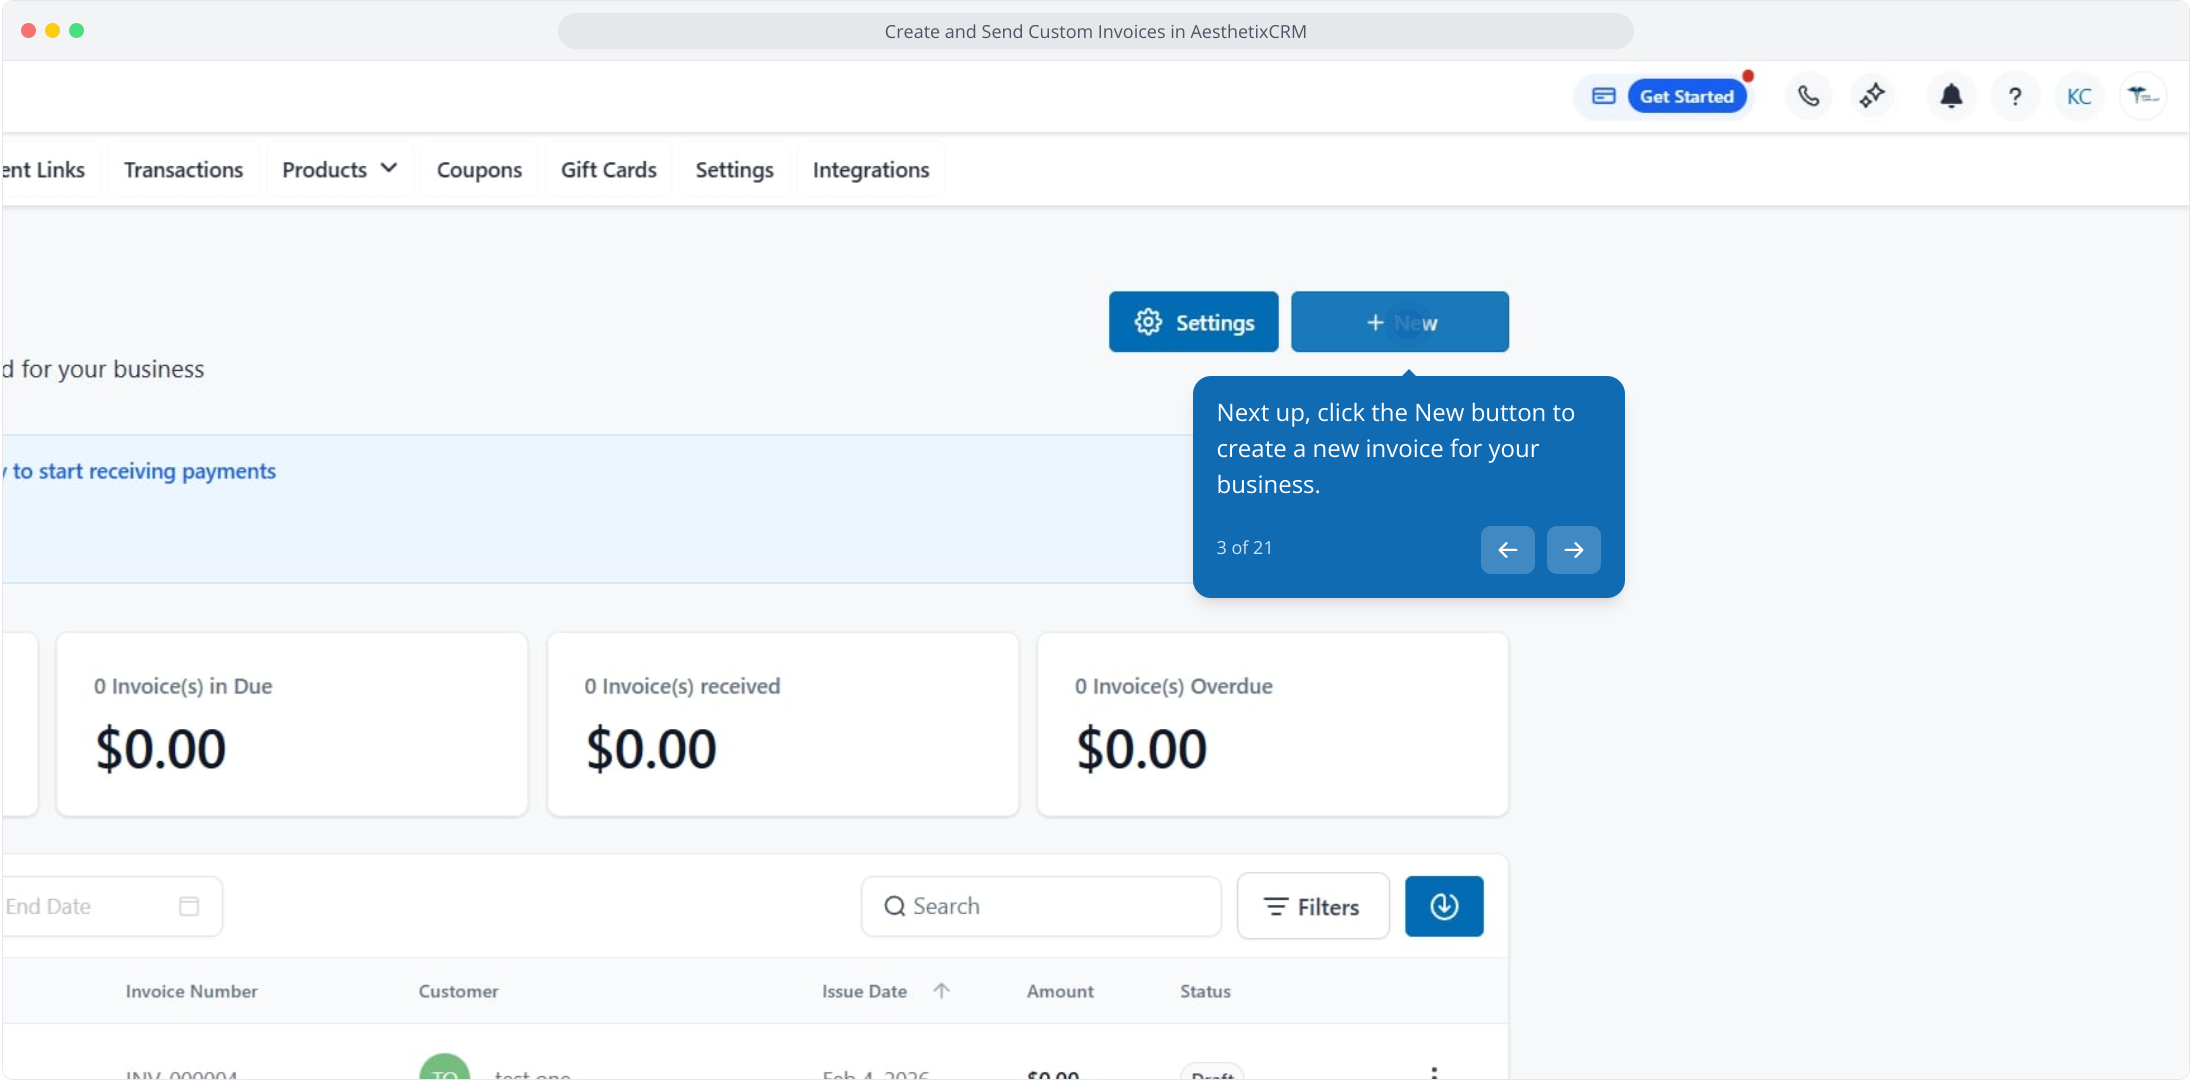
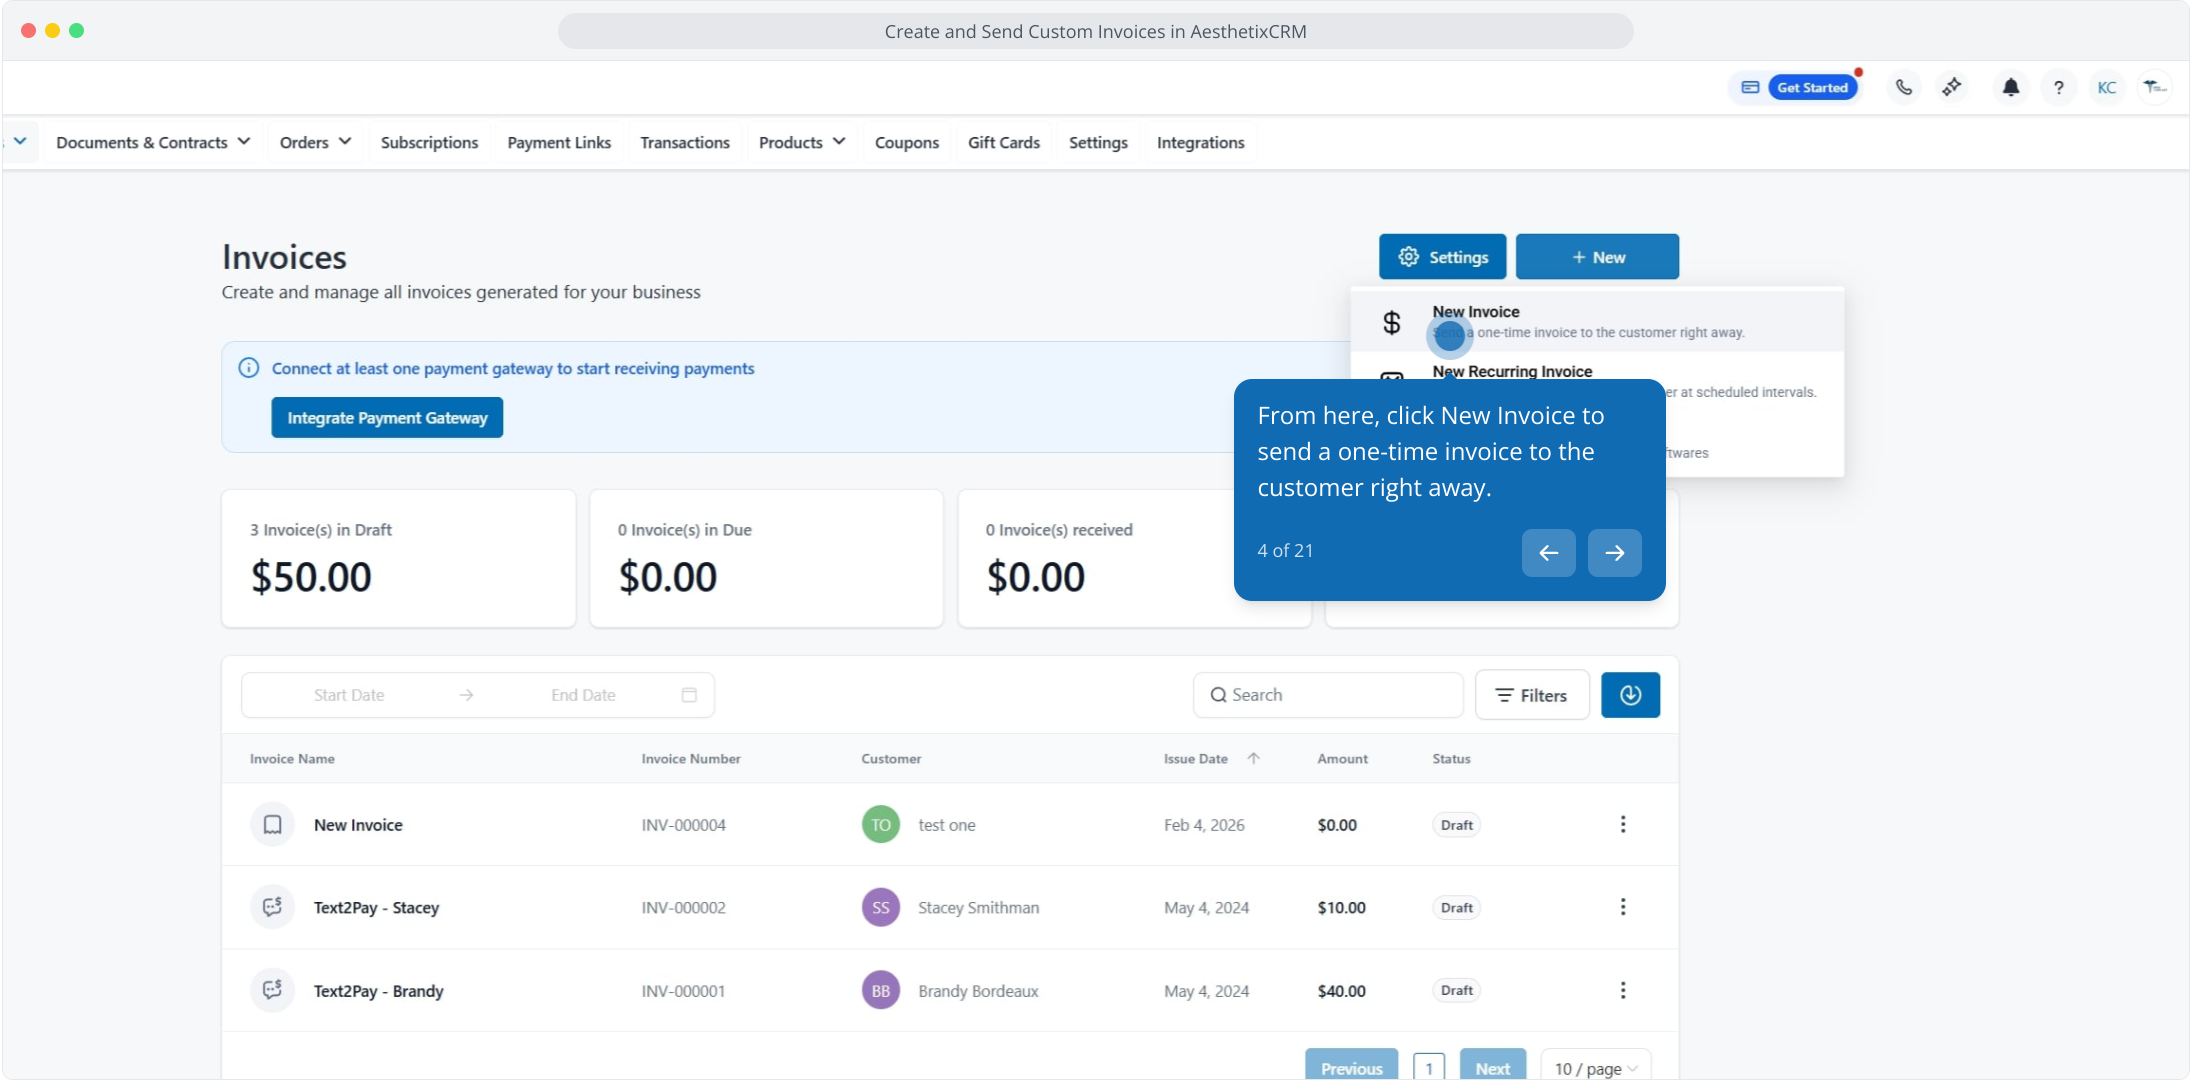
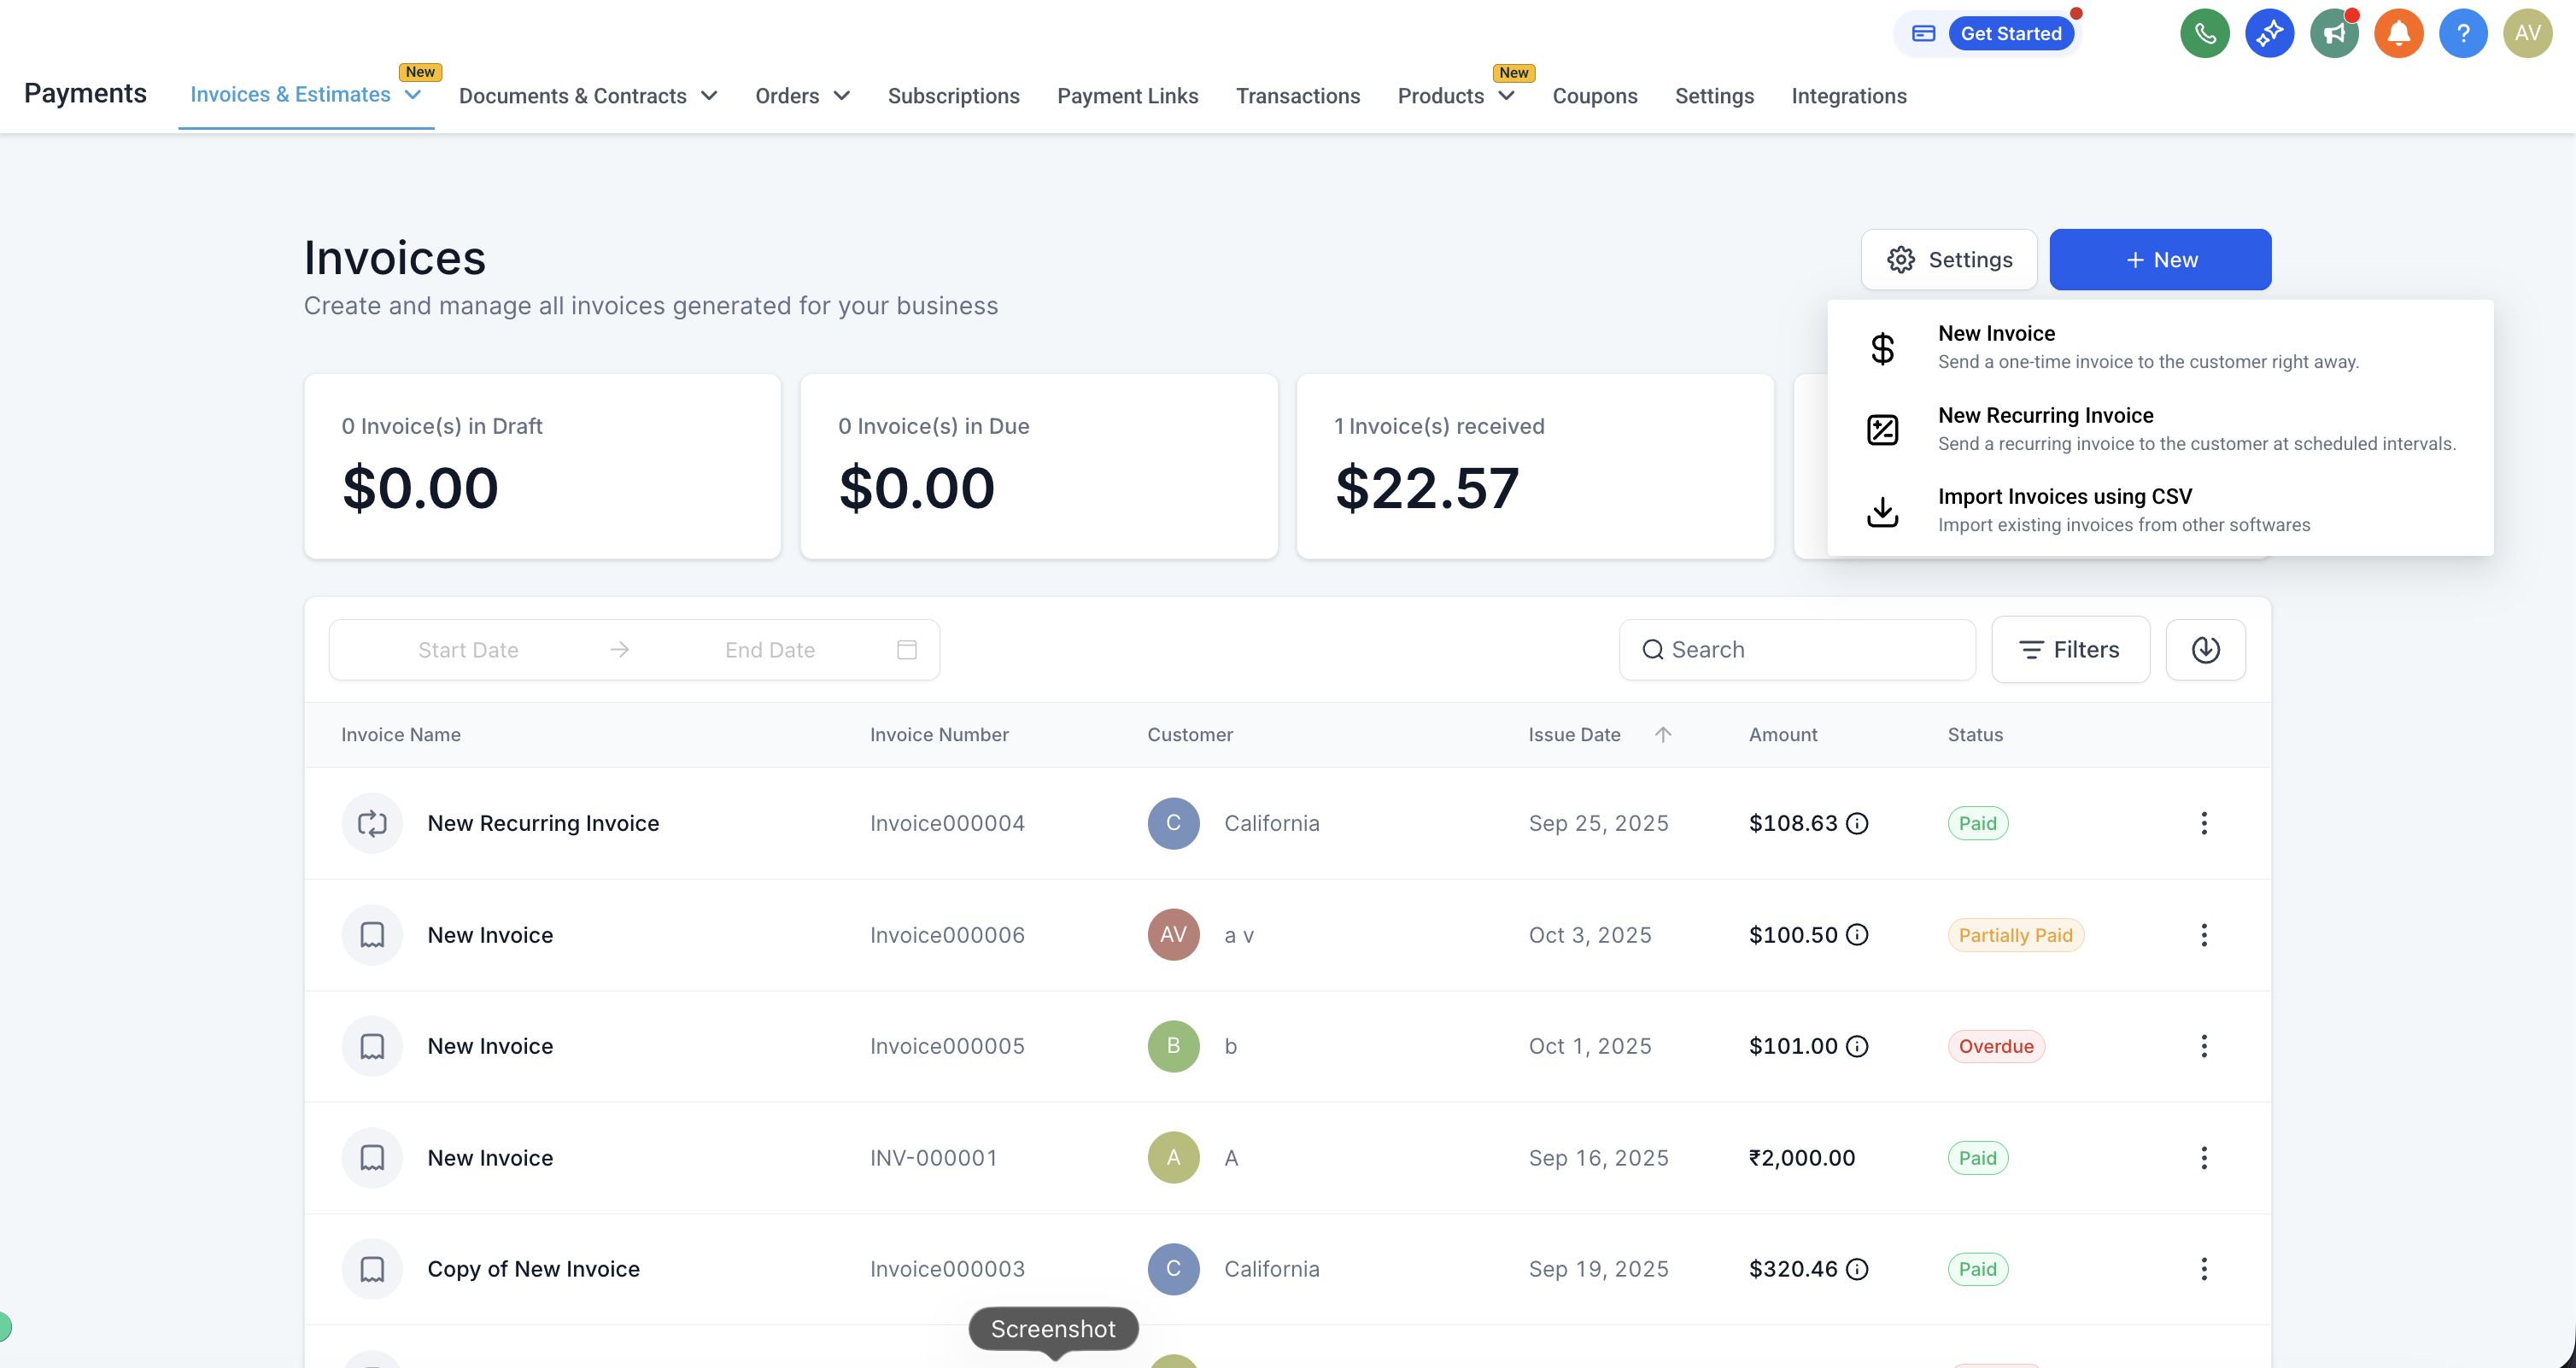
Click the New button, then select New Invoice to send a one-time invoice to a patient.
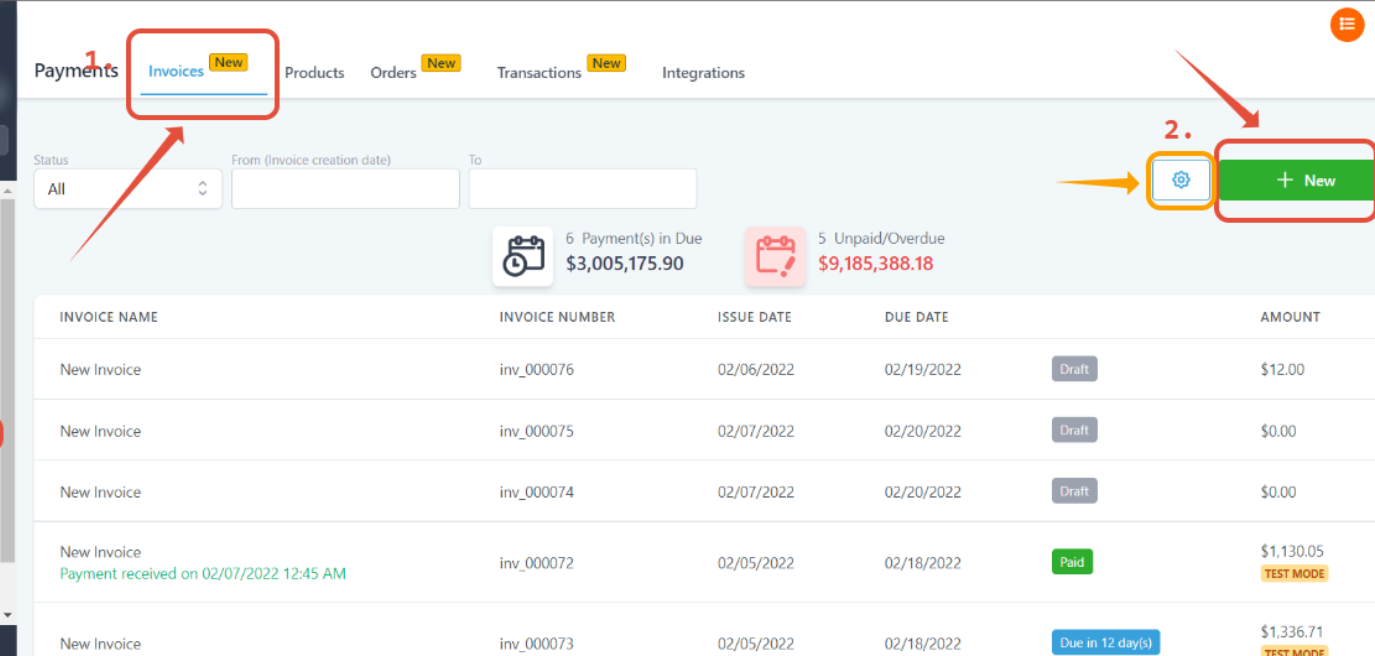
Note: You can add global terms of service and notes by clicking the gear icon next to the + New button.
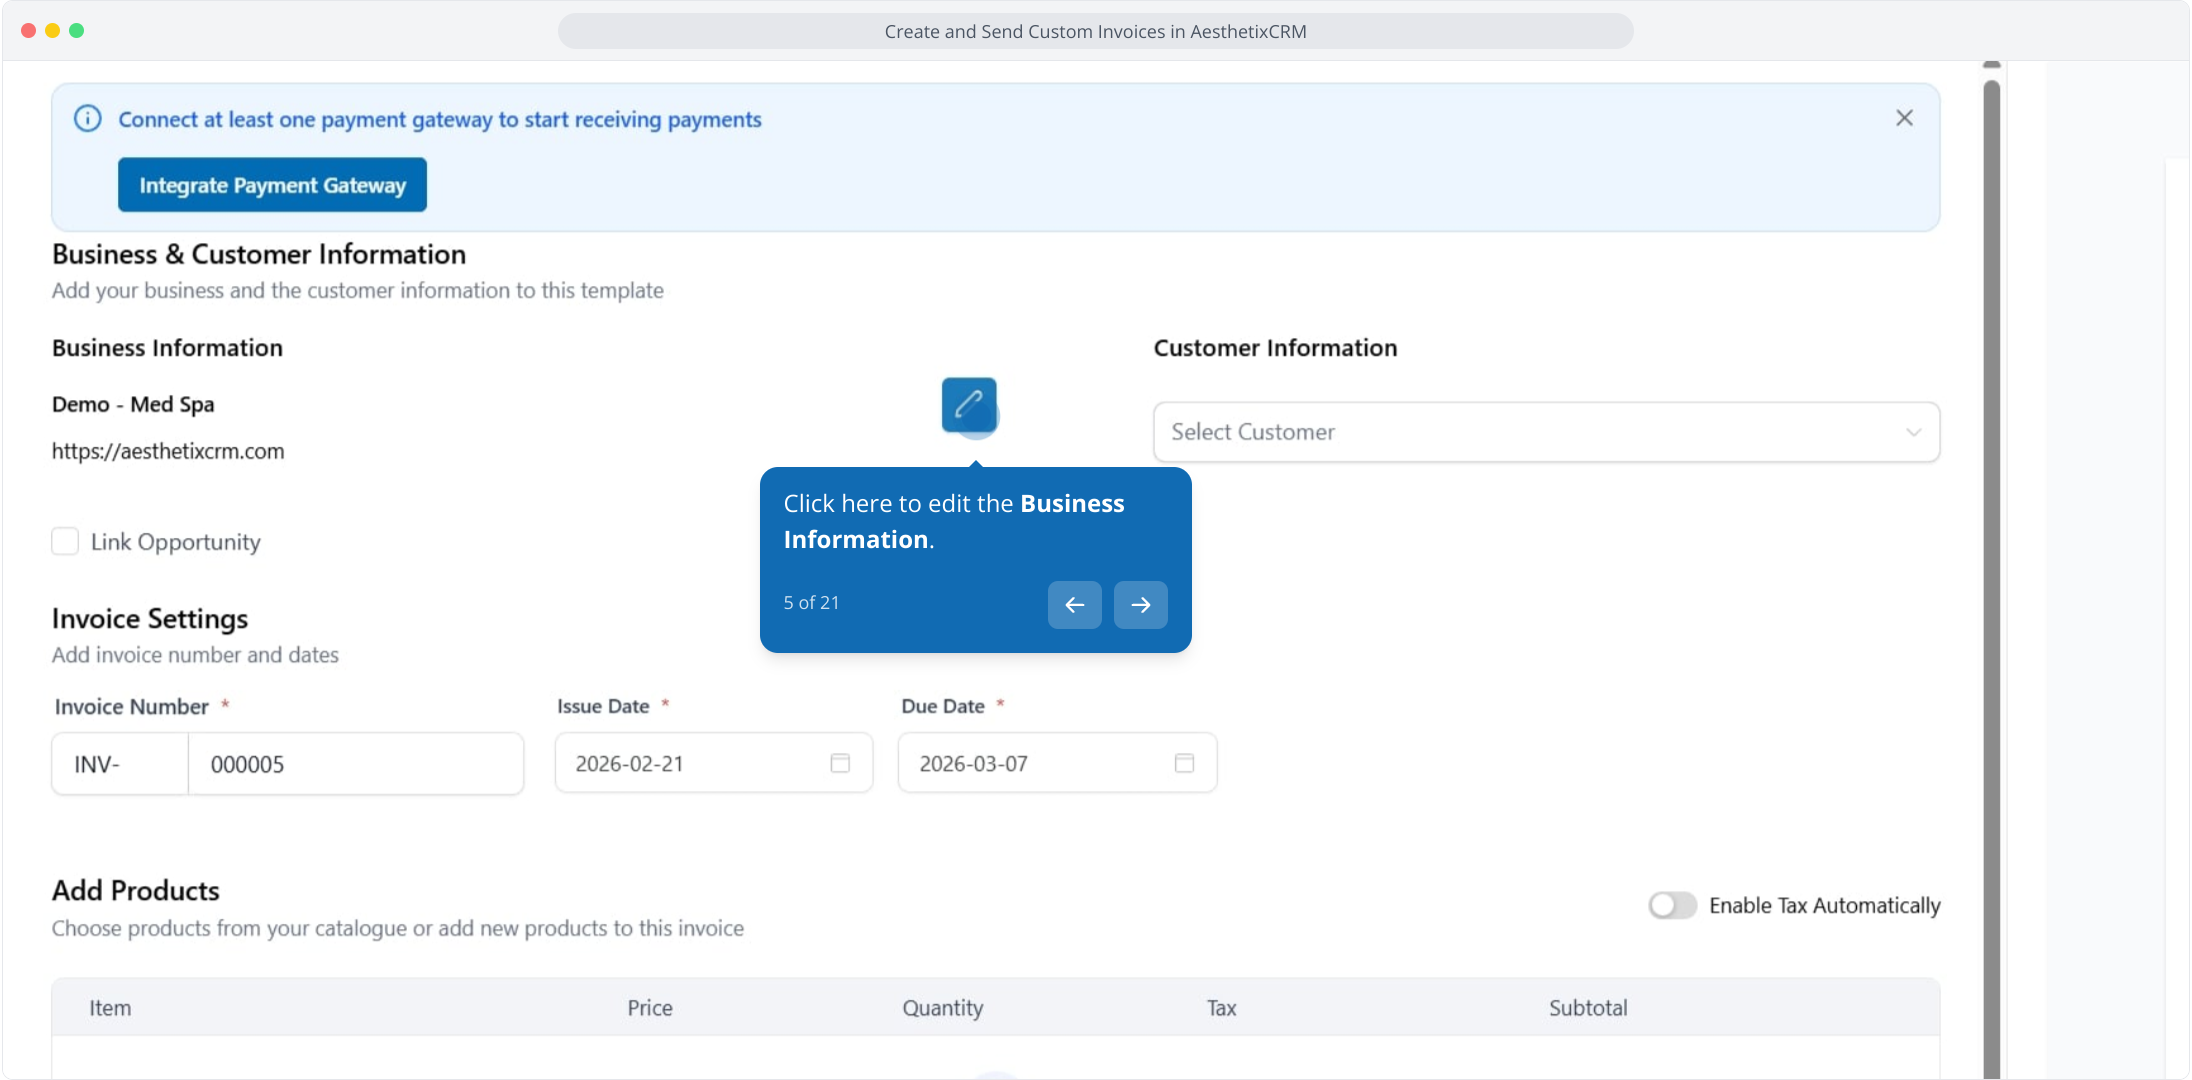
Click to edit the Business Information.
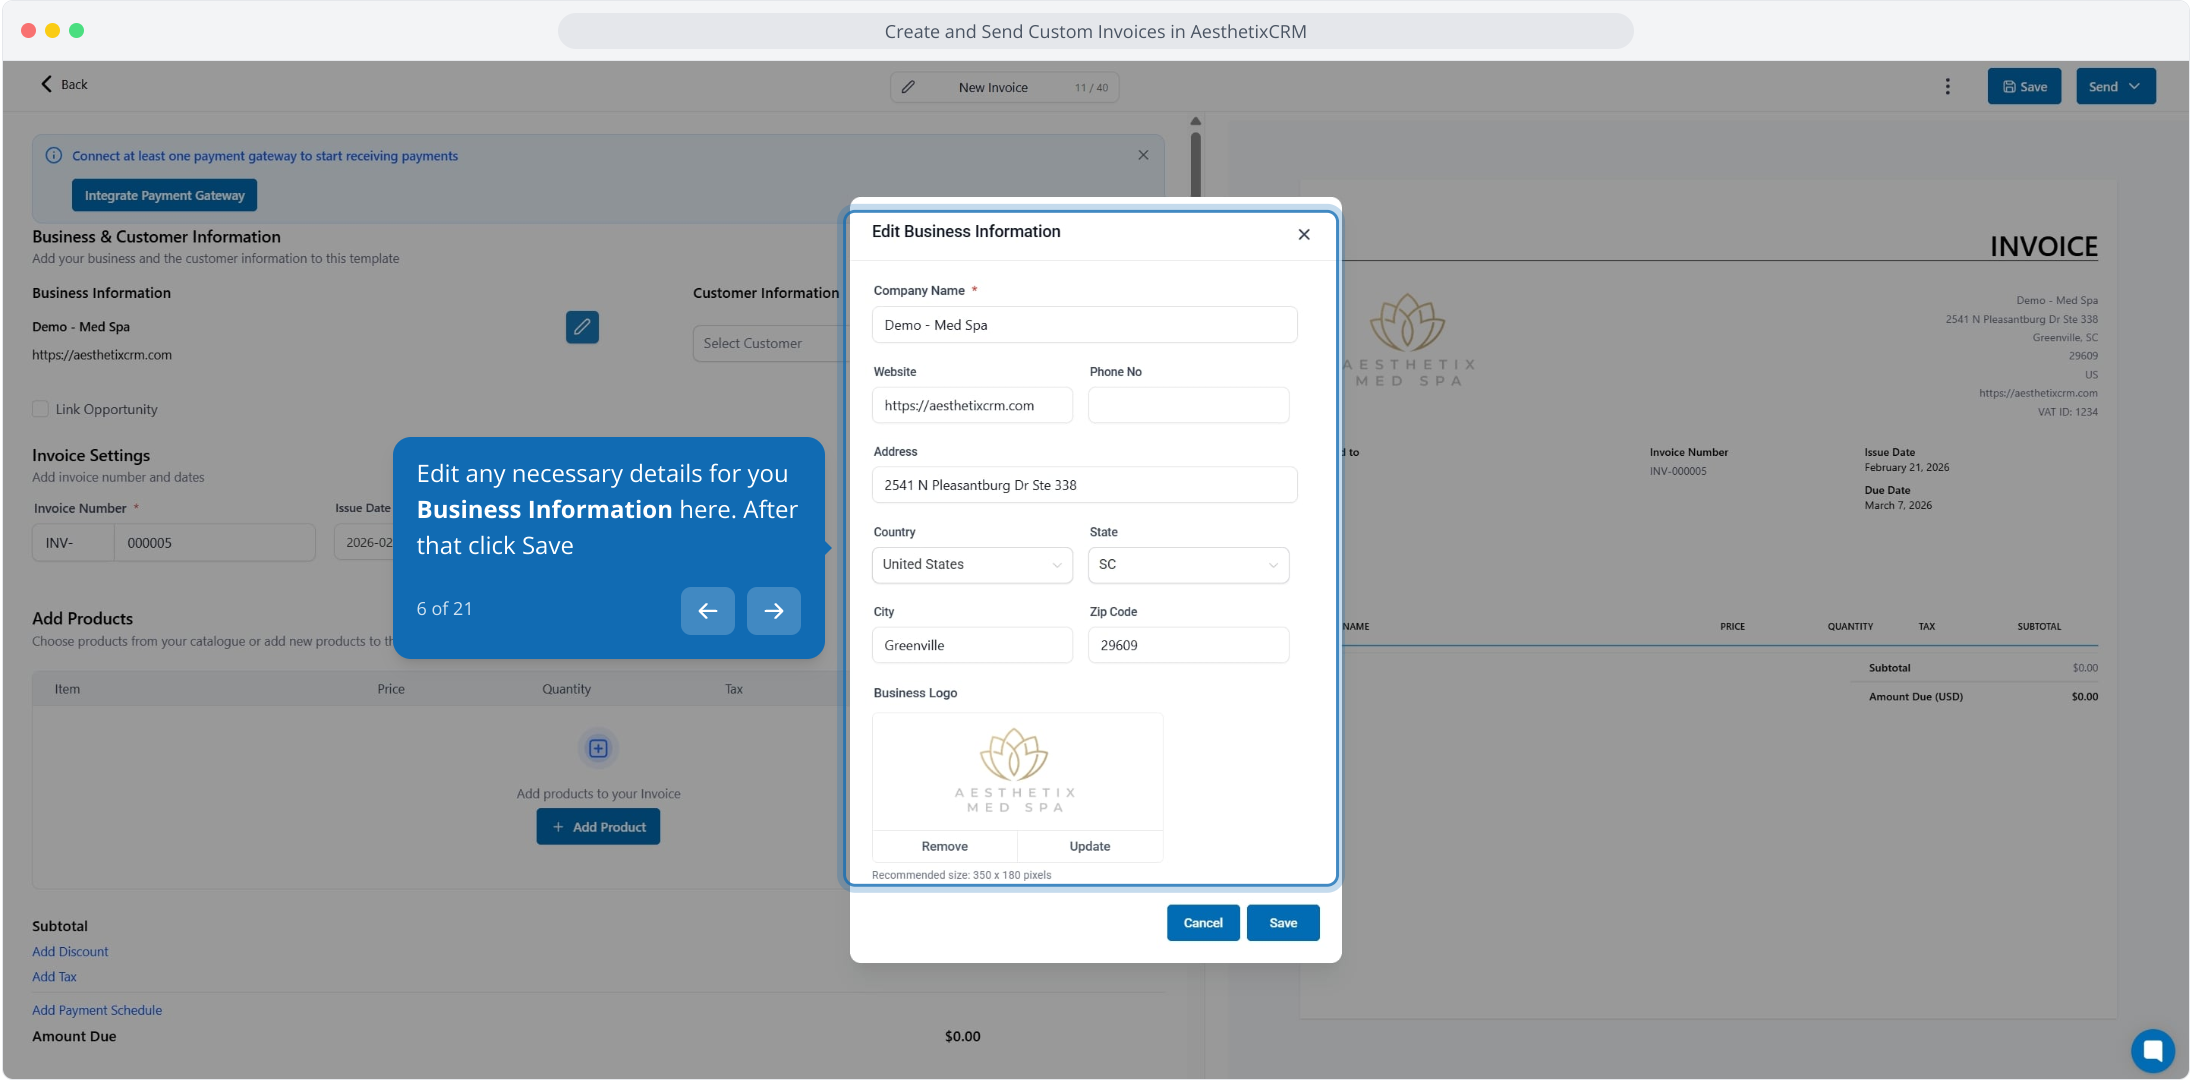
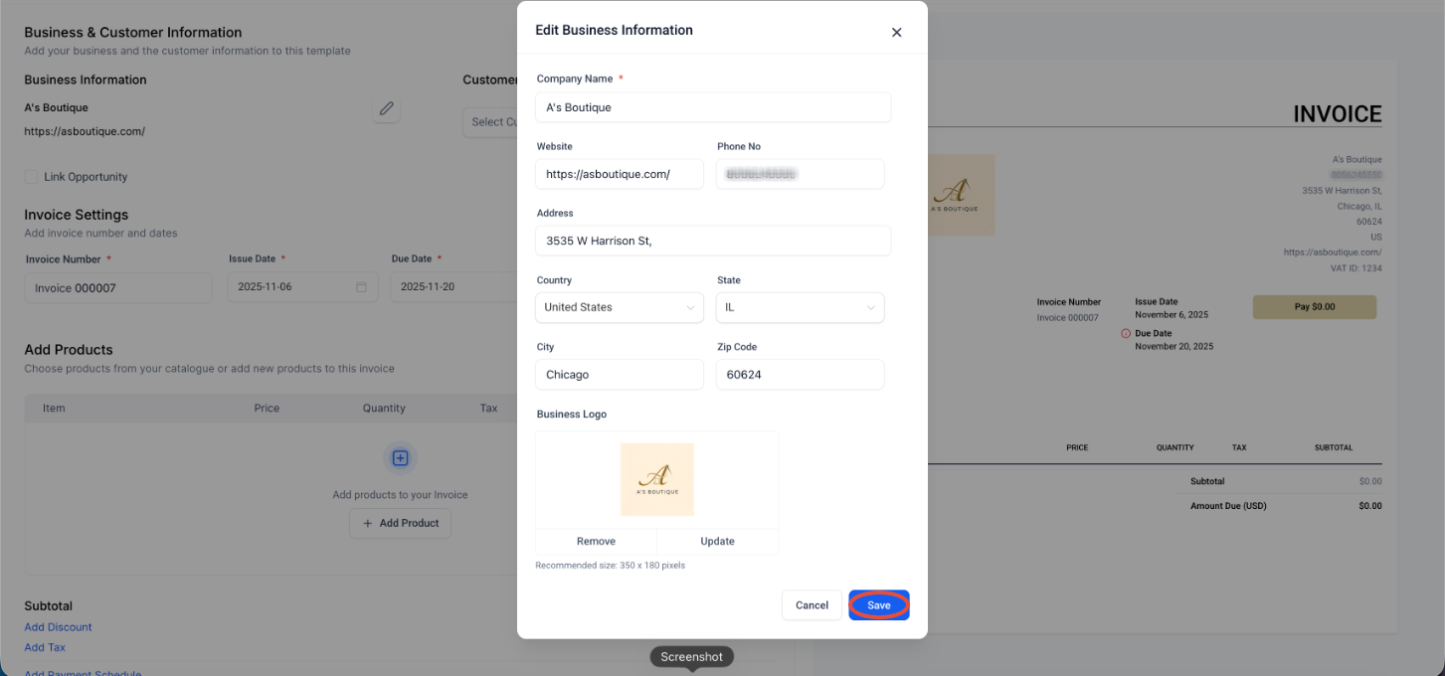
Edit any necessary details for your business information, then click Save. This information appears on the invoice.
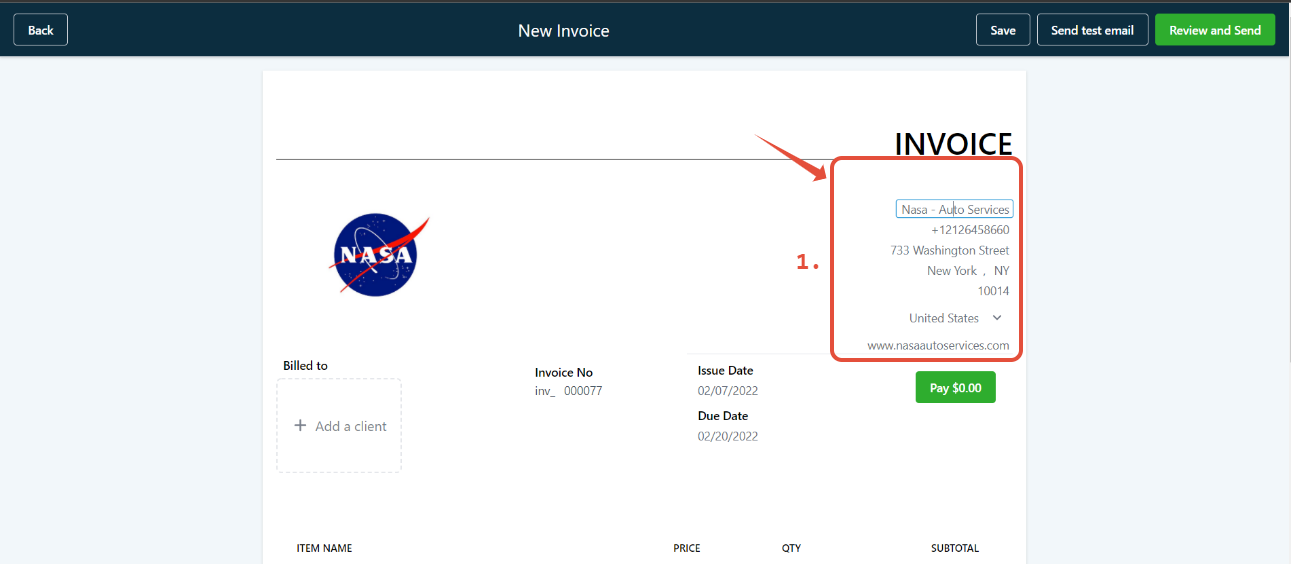
You can edit the "from" info by clicking directly on the text.
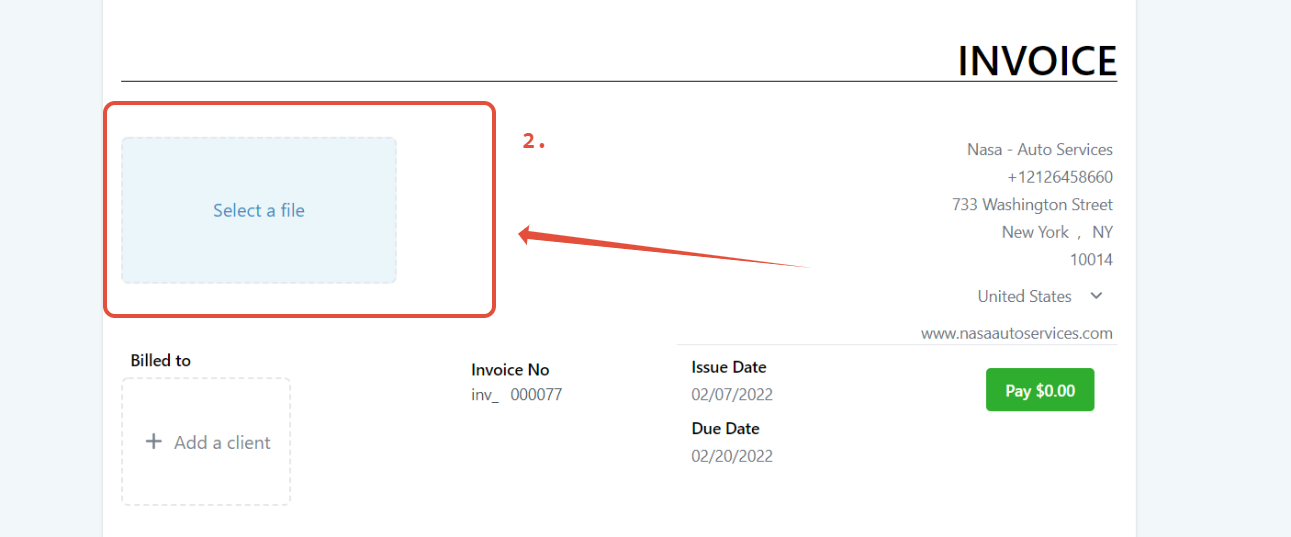
To change the logo, click on the image to open the media library, where you can choose or upload a new image.
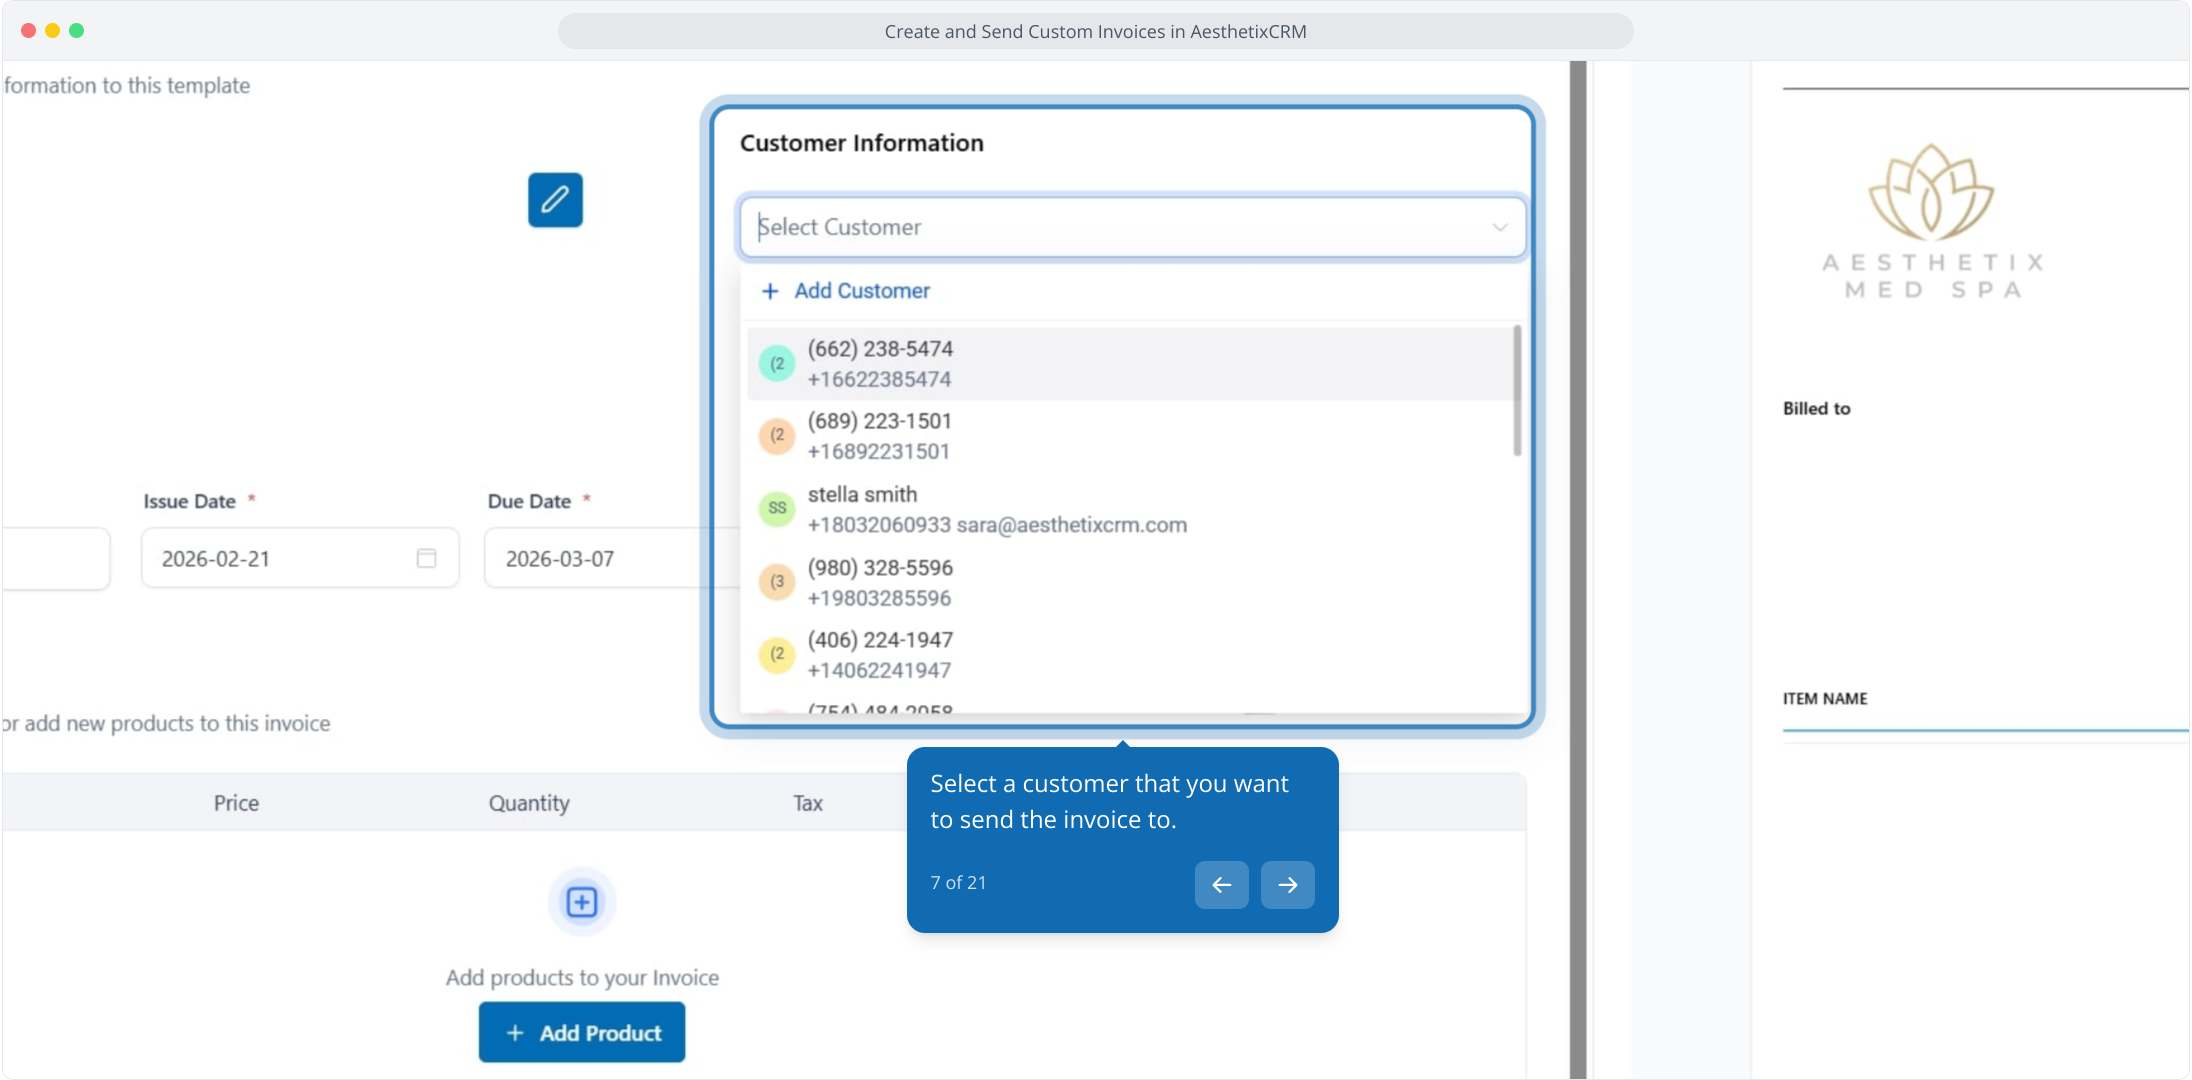
Select the patient you want to send the invoice to.
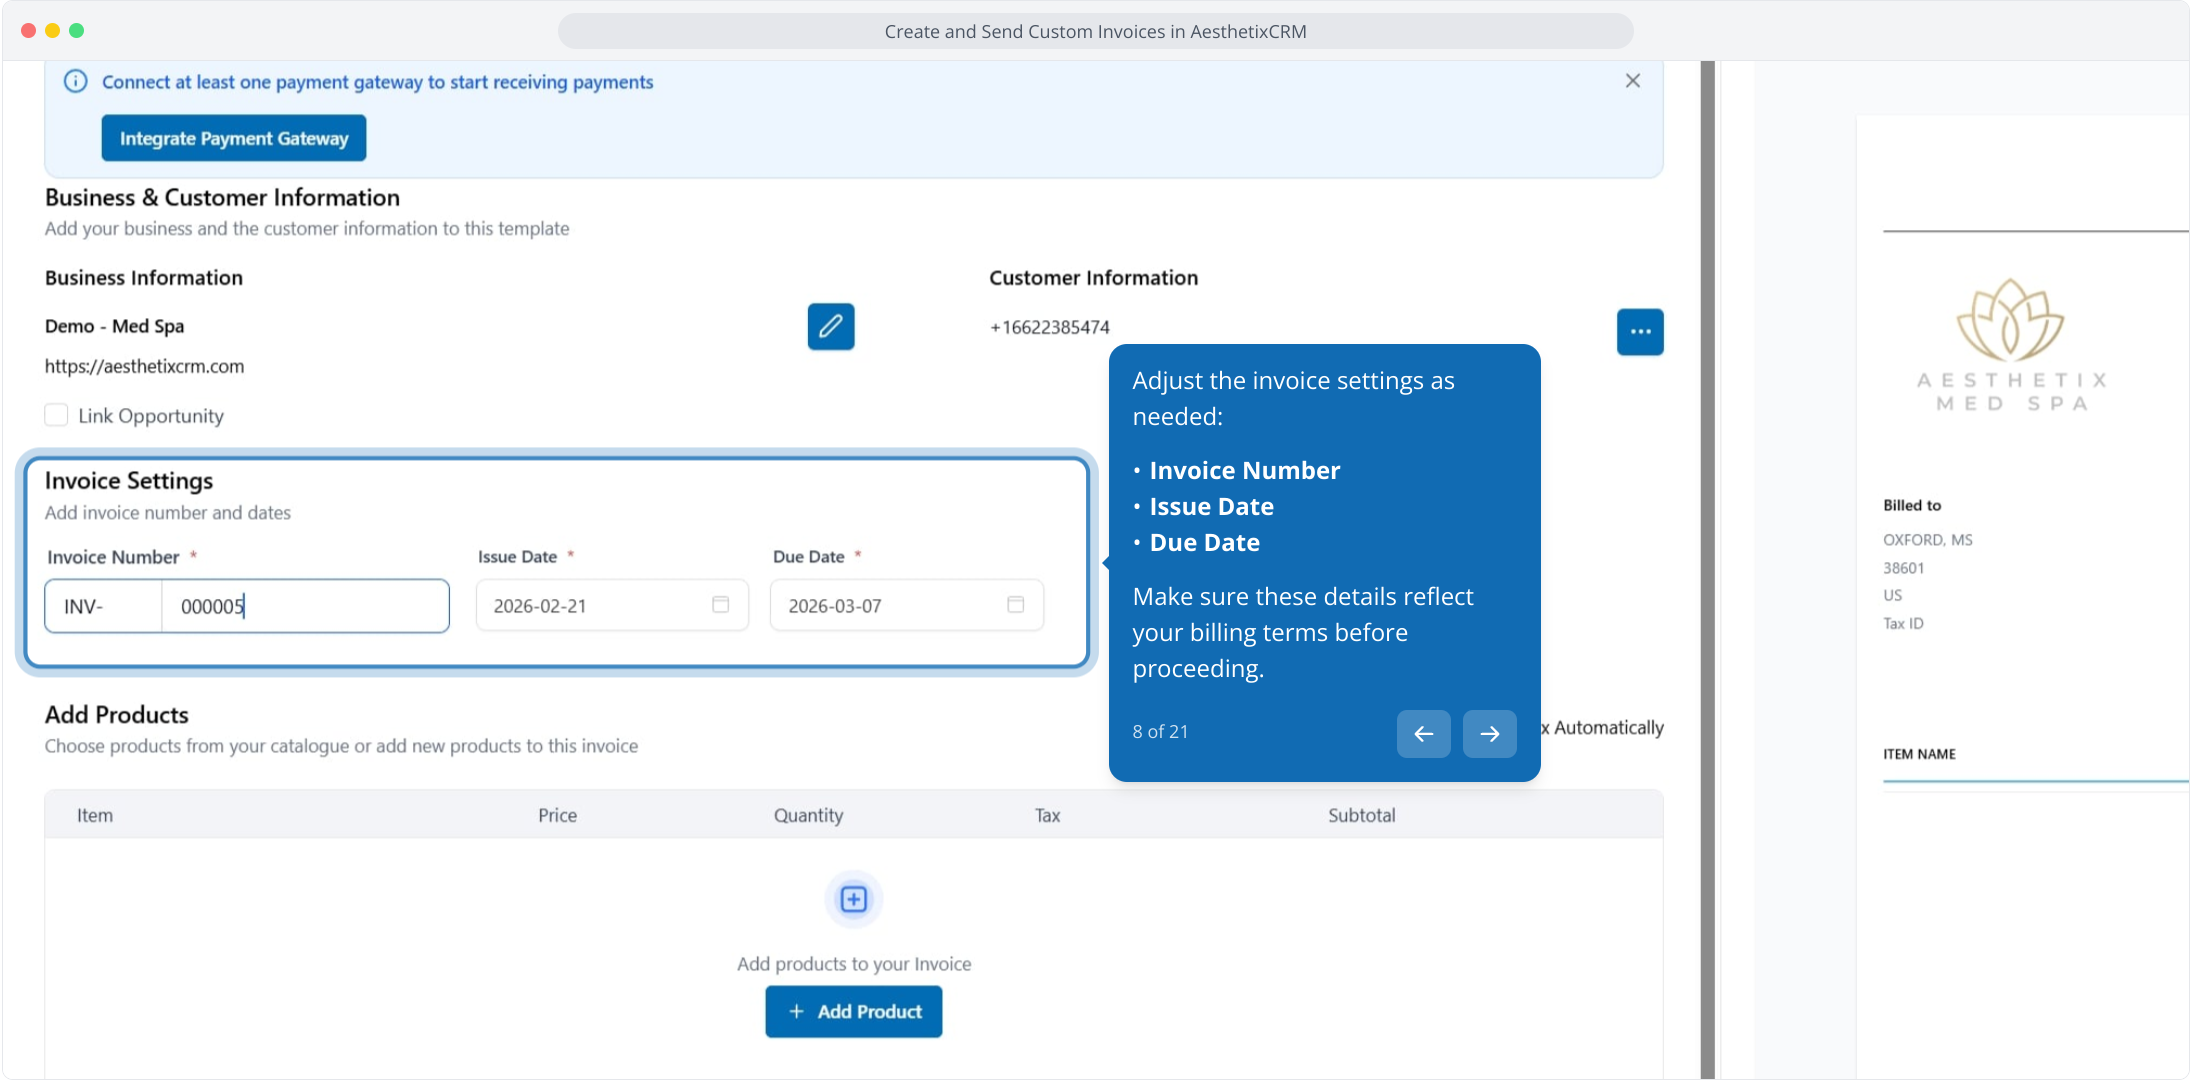
Adjust the invoice settings as needed: Invoice Number, Issue Date, and Due Date. Make sure these reflect your billing terms before proceeding.
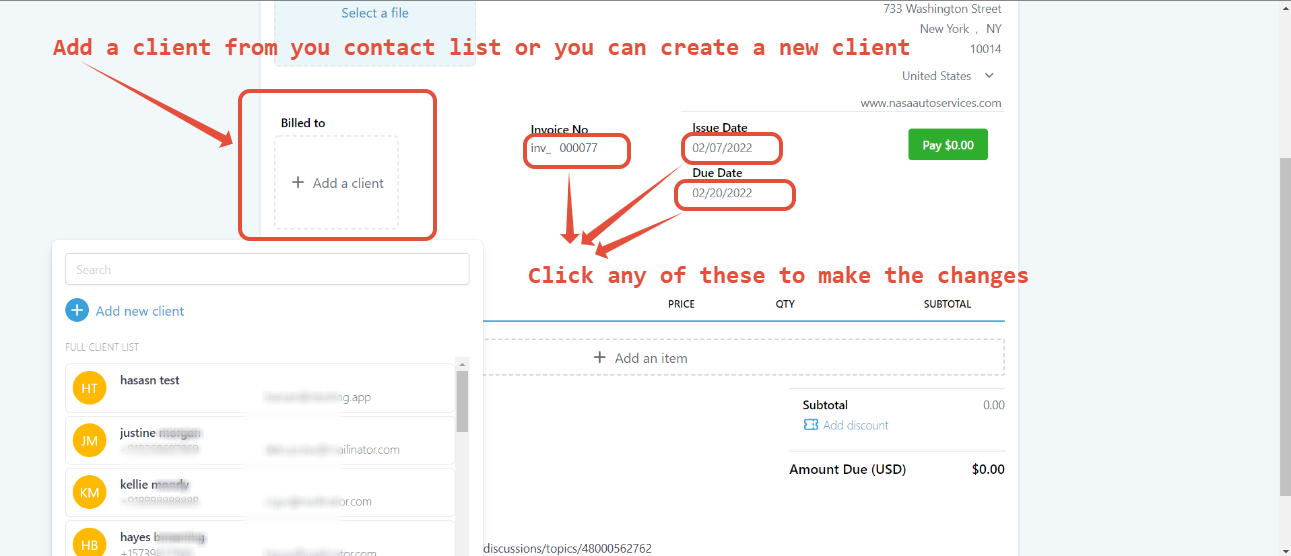
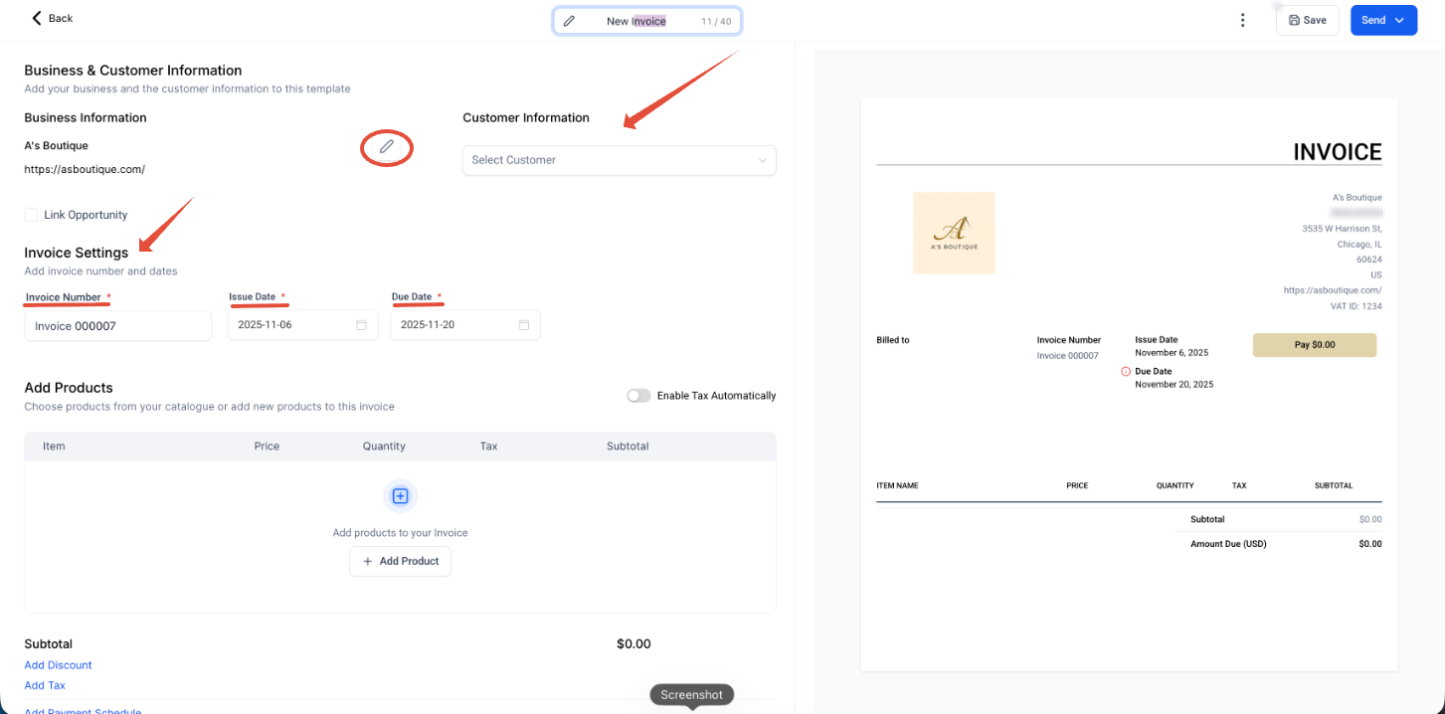
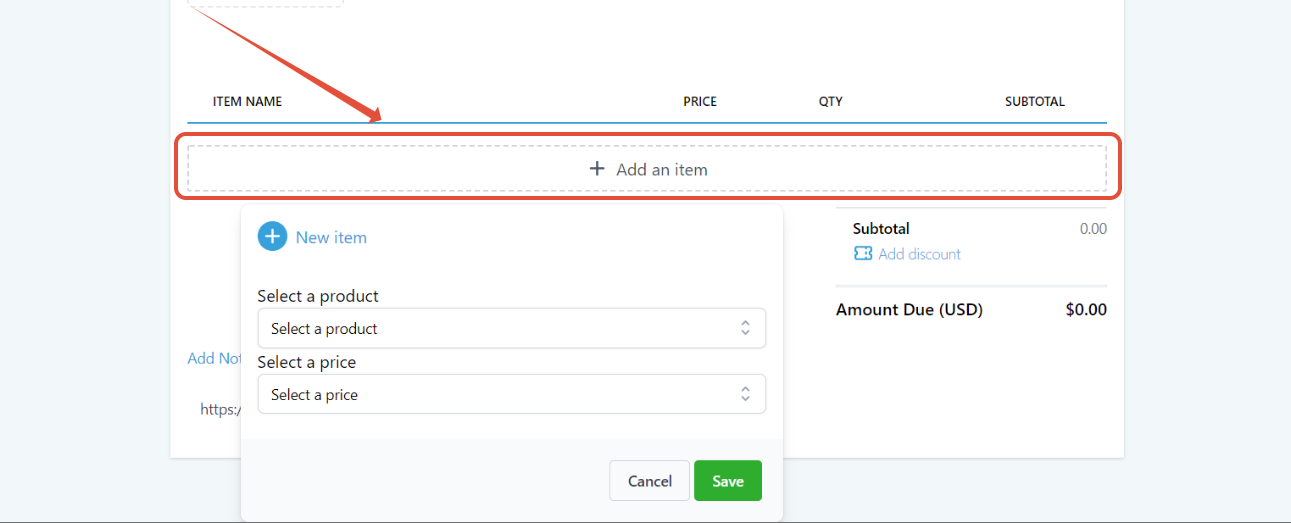
Click the Add Product (or Add an item) button to include treatments, packages, or products on this invoice.
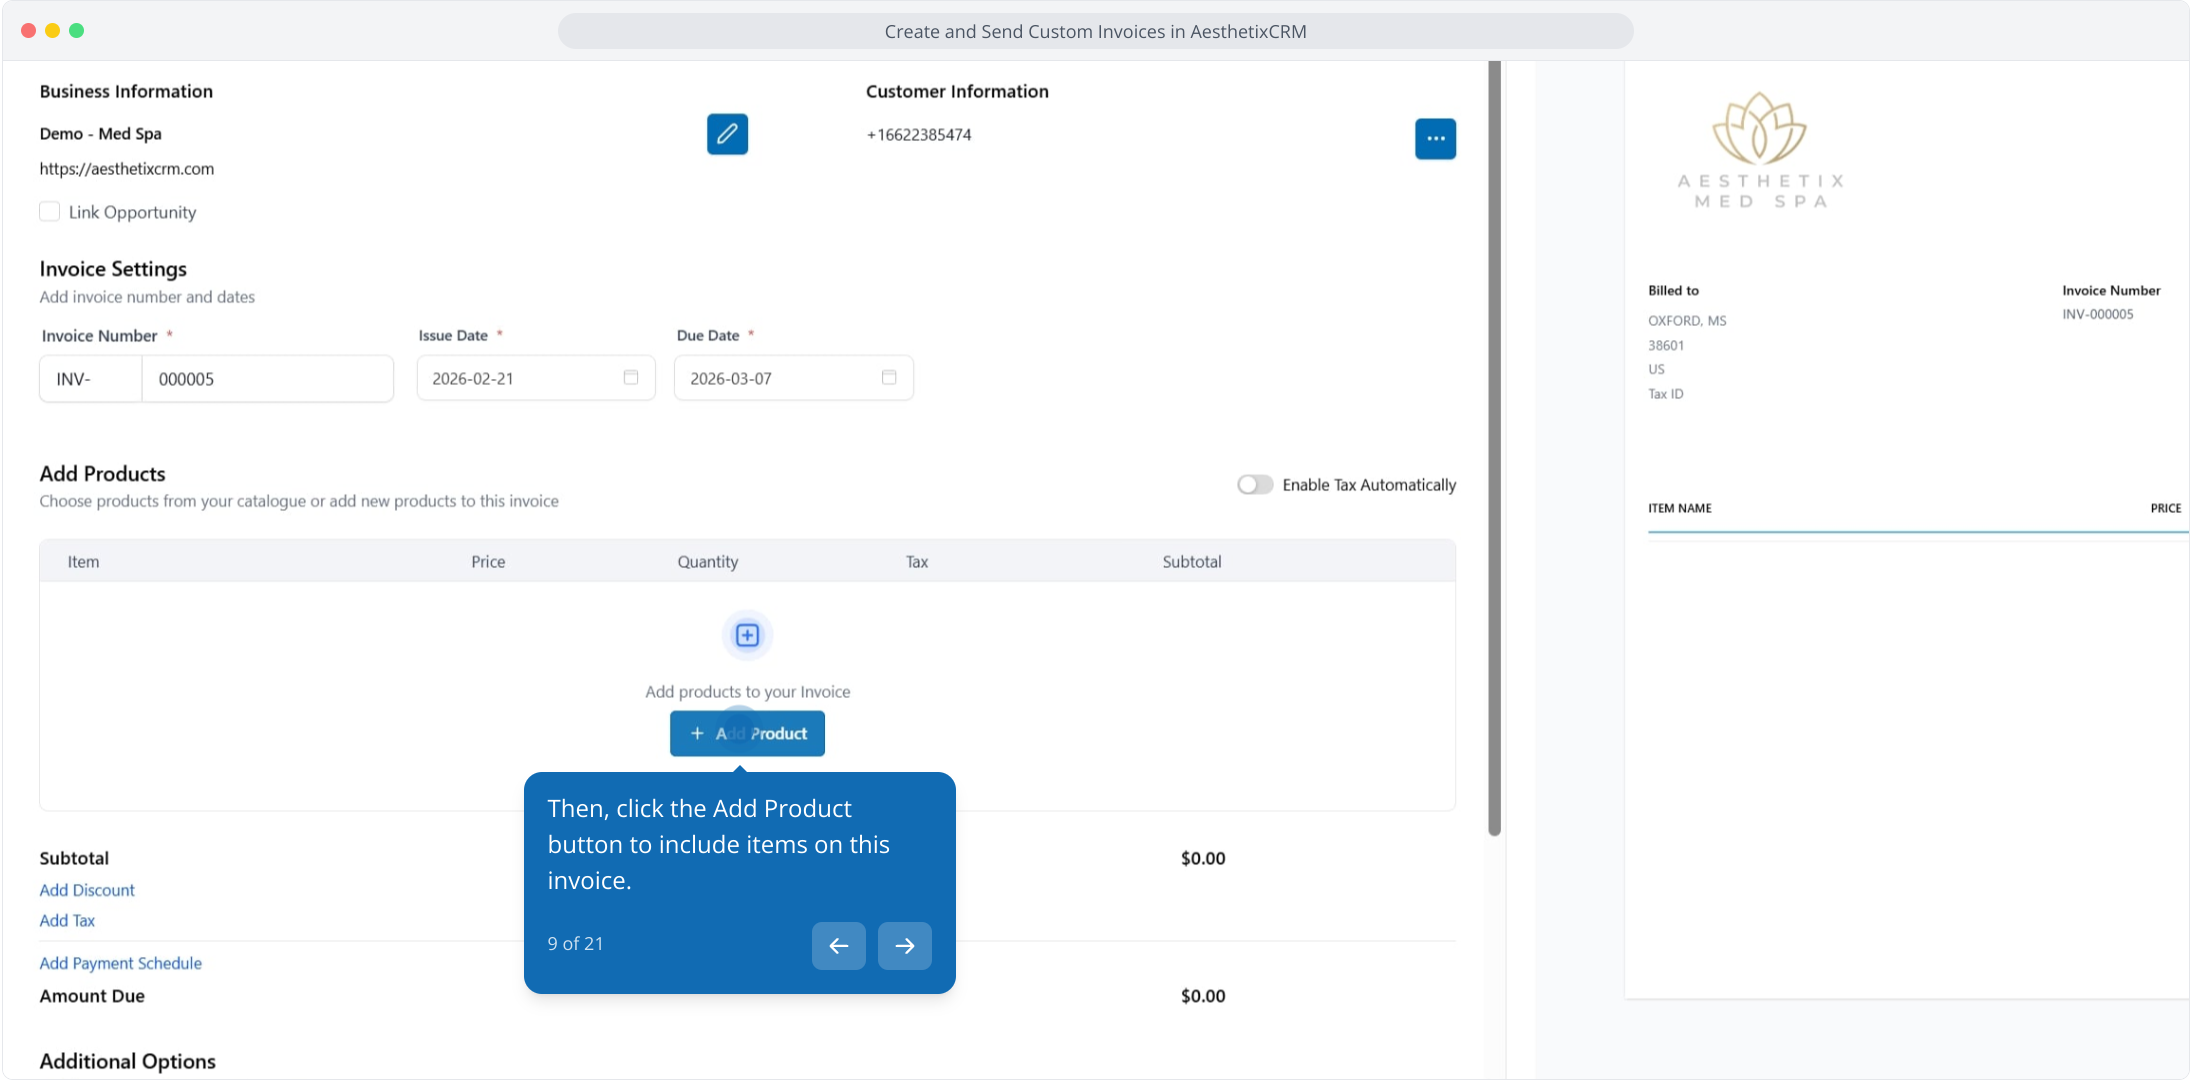
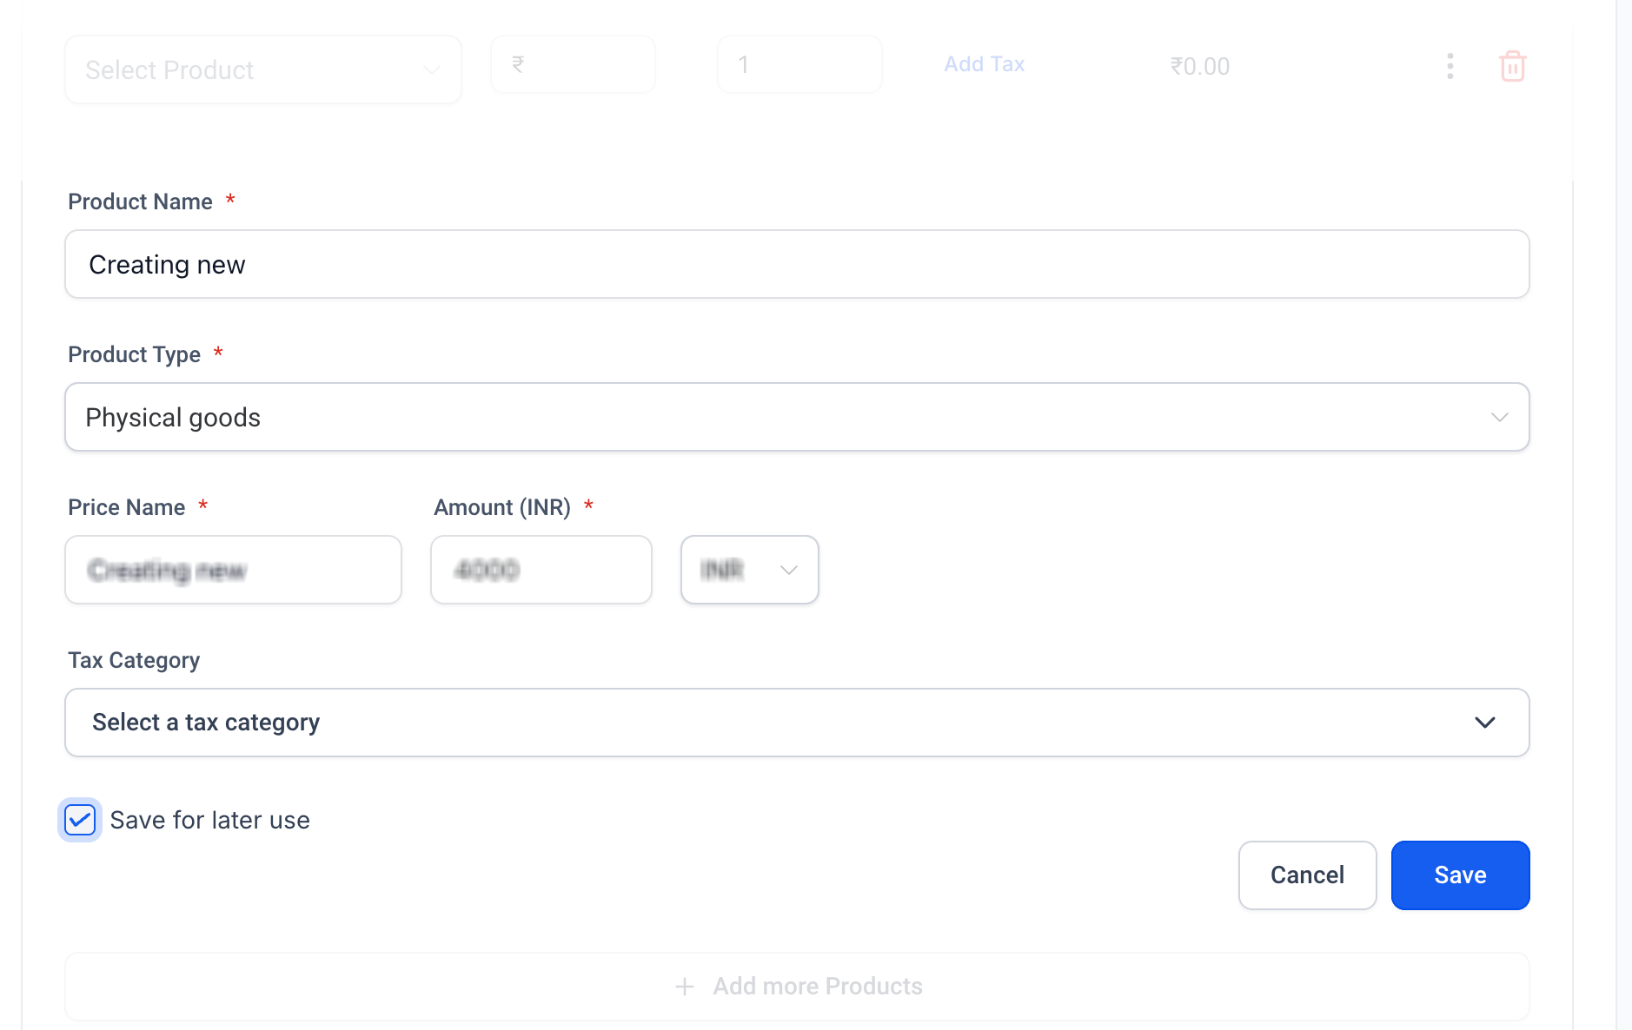
Click to Select a Product or create a new one.
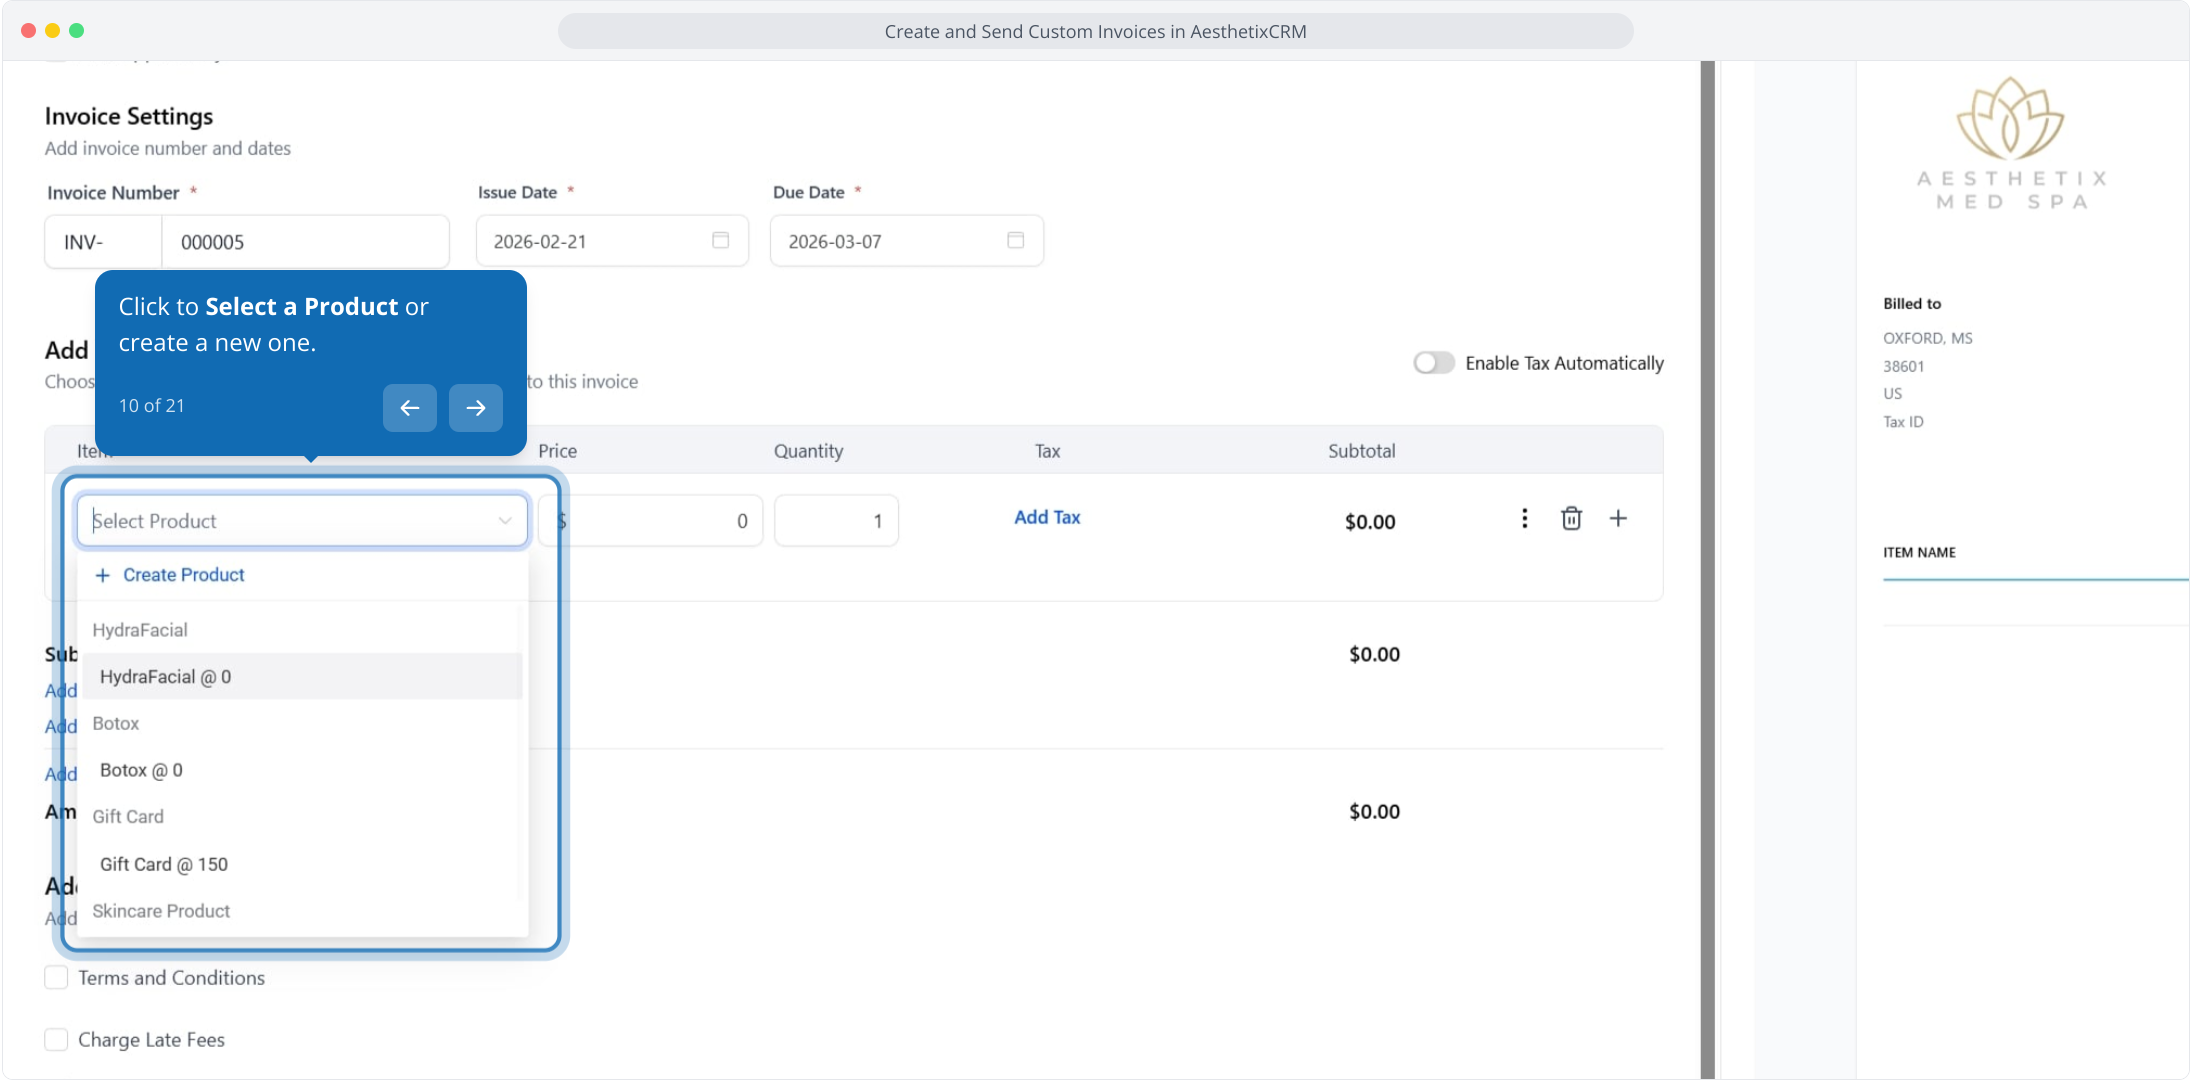
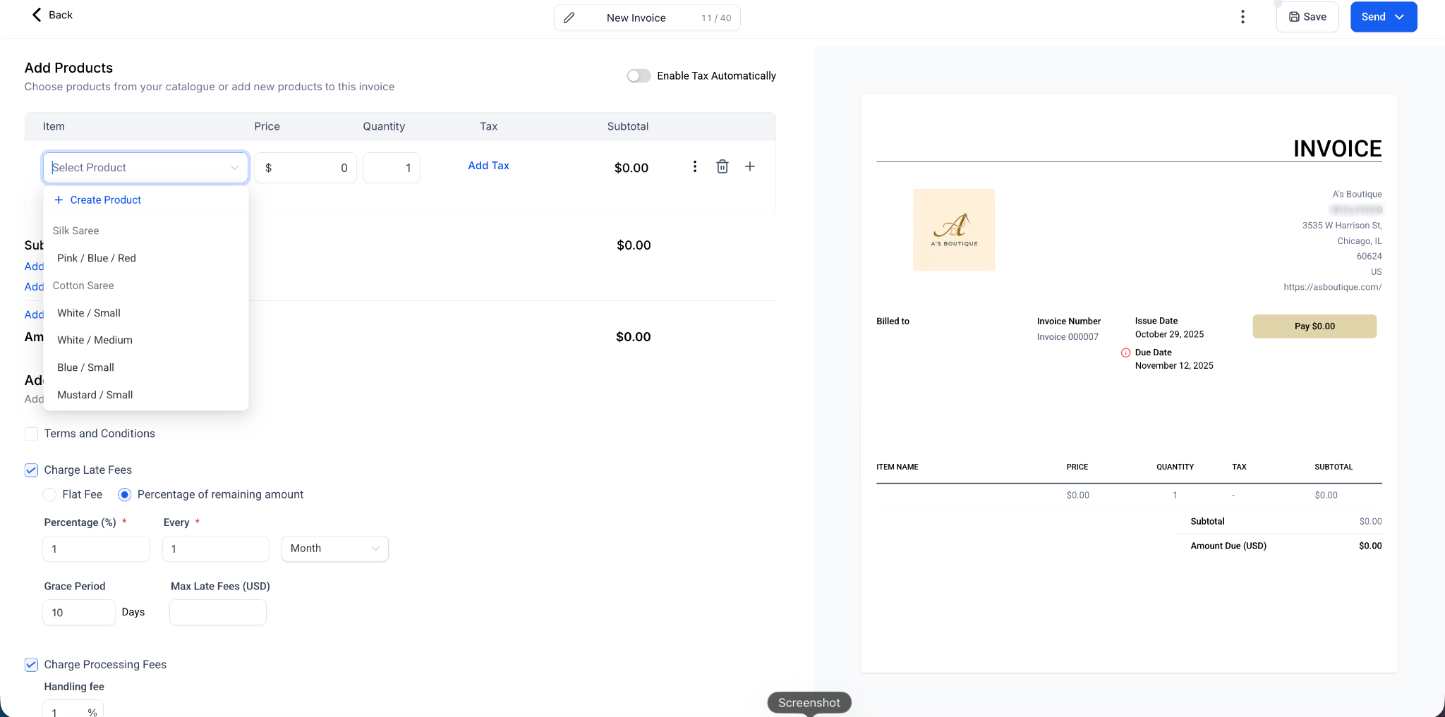
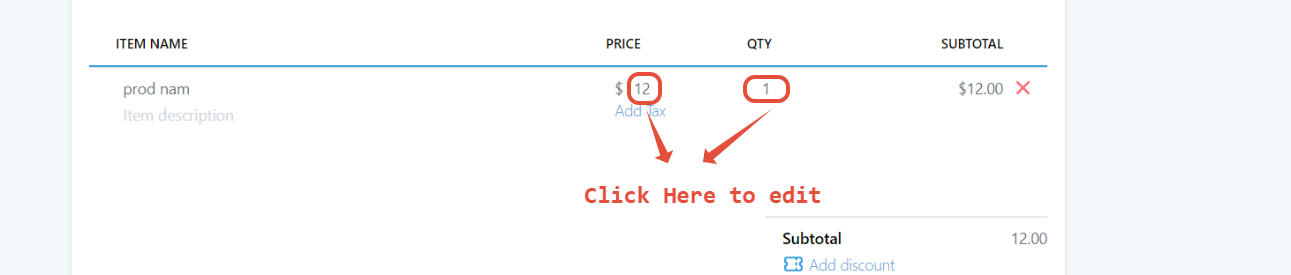
Once a product is added, you can edit the price and quantity directly on the line item.
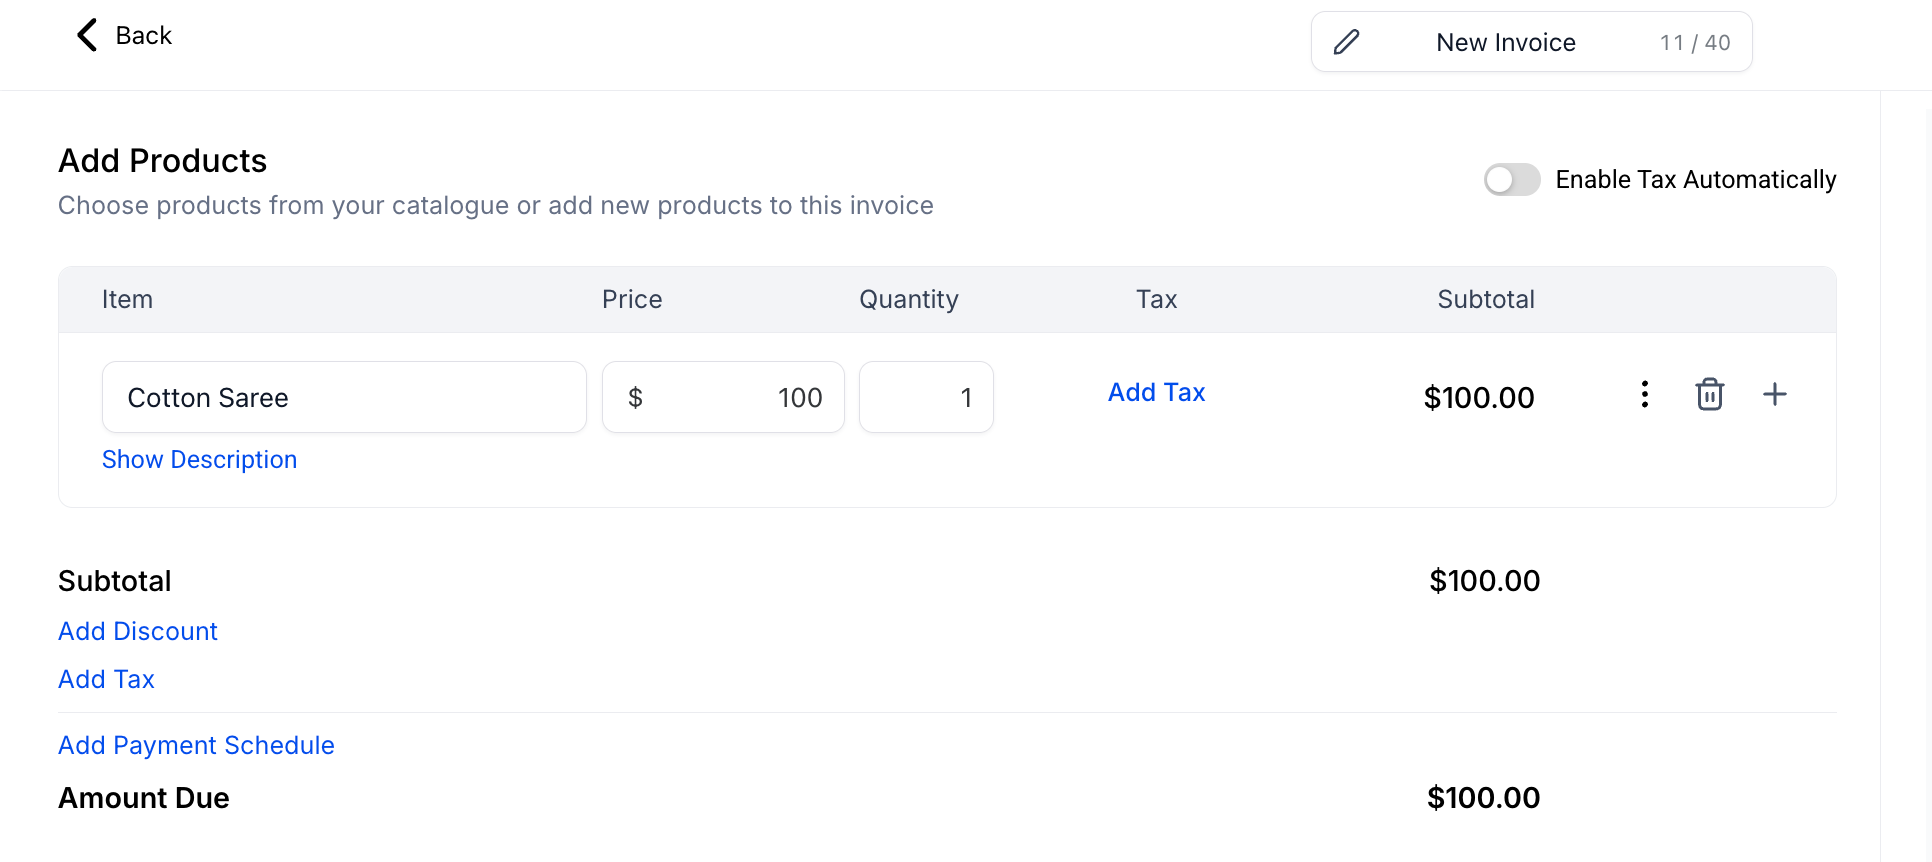
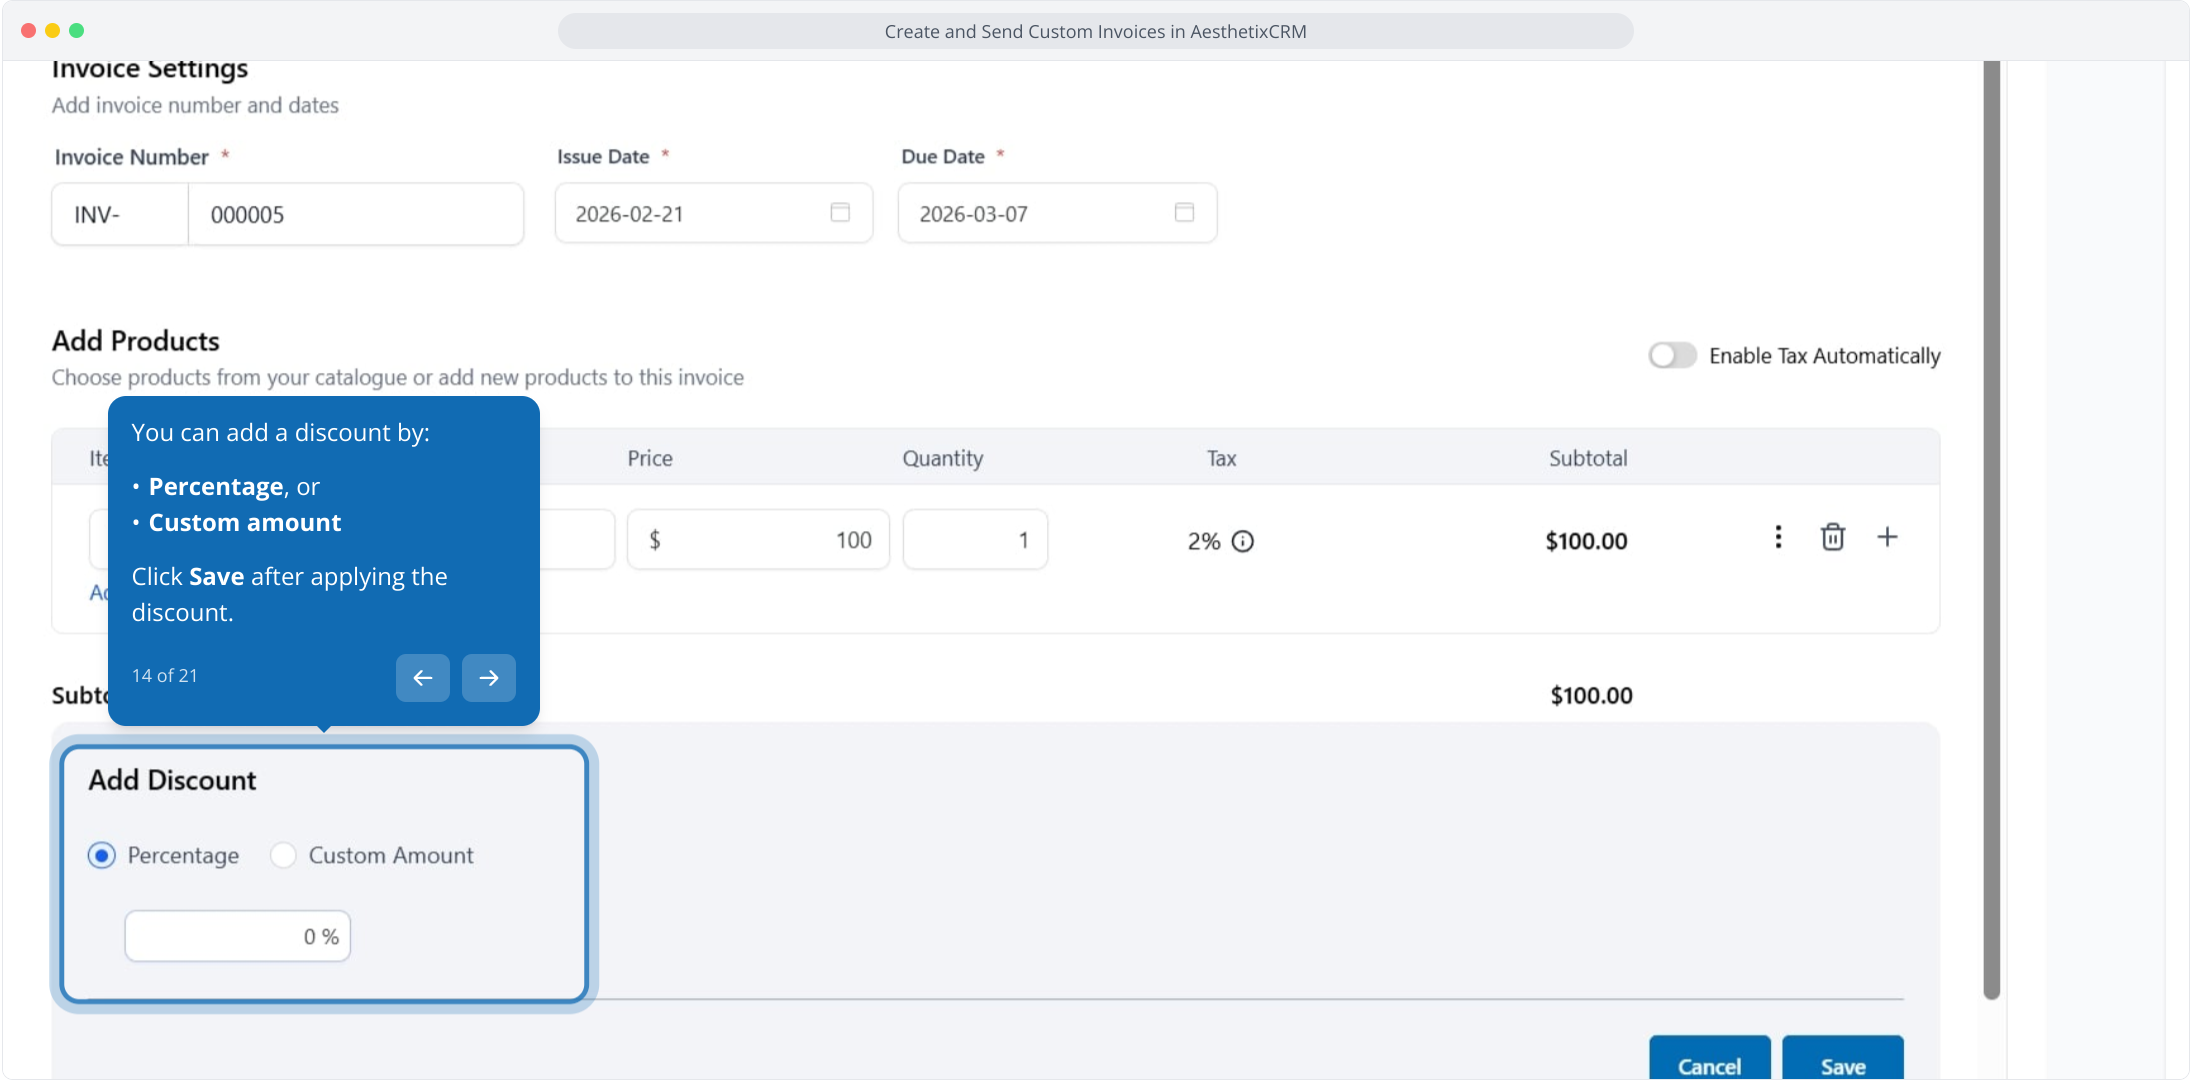
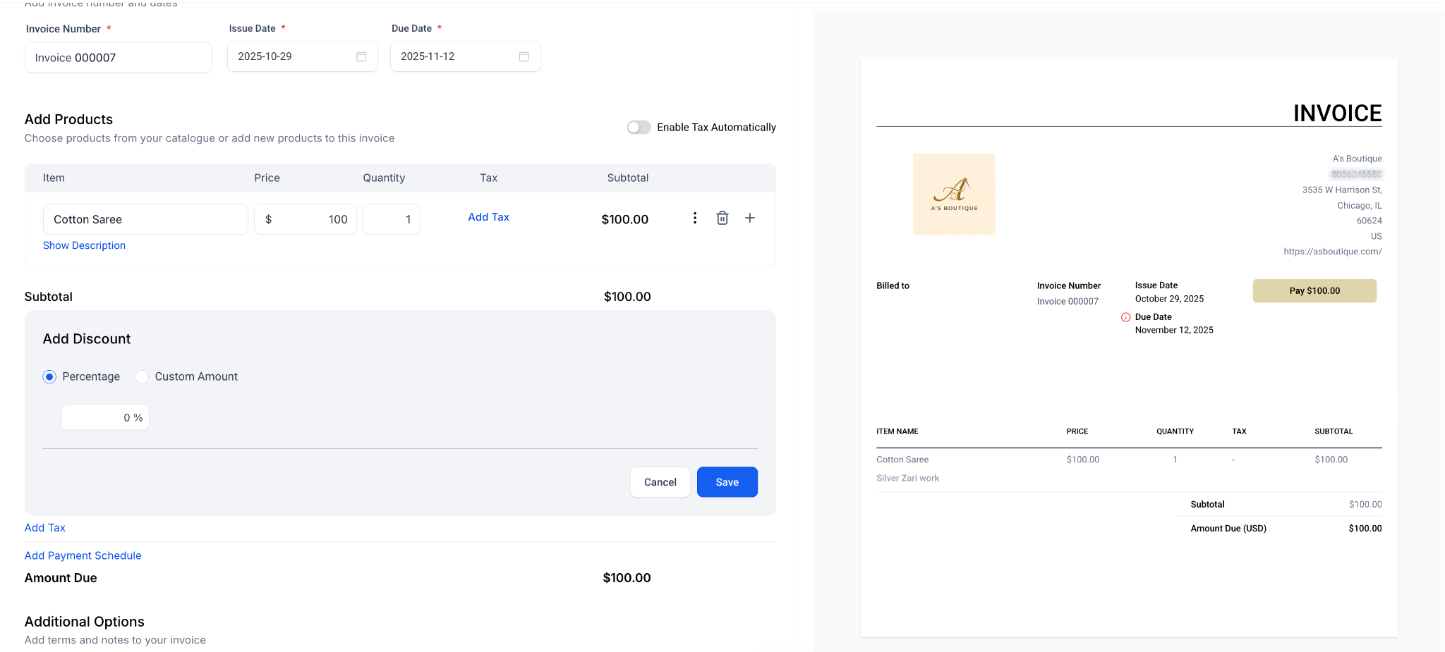
Click the Add Discount link below the subtotal to apply a discount to the invoice.
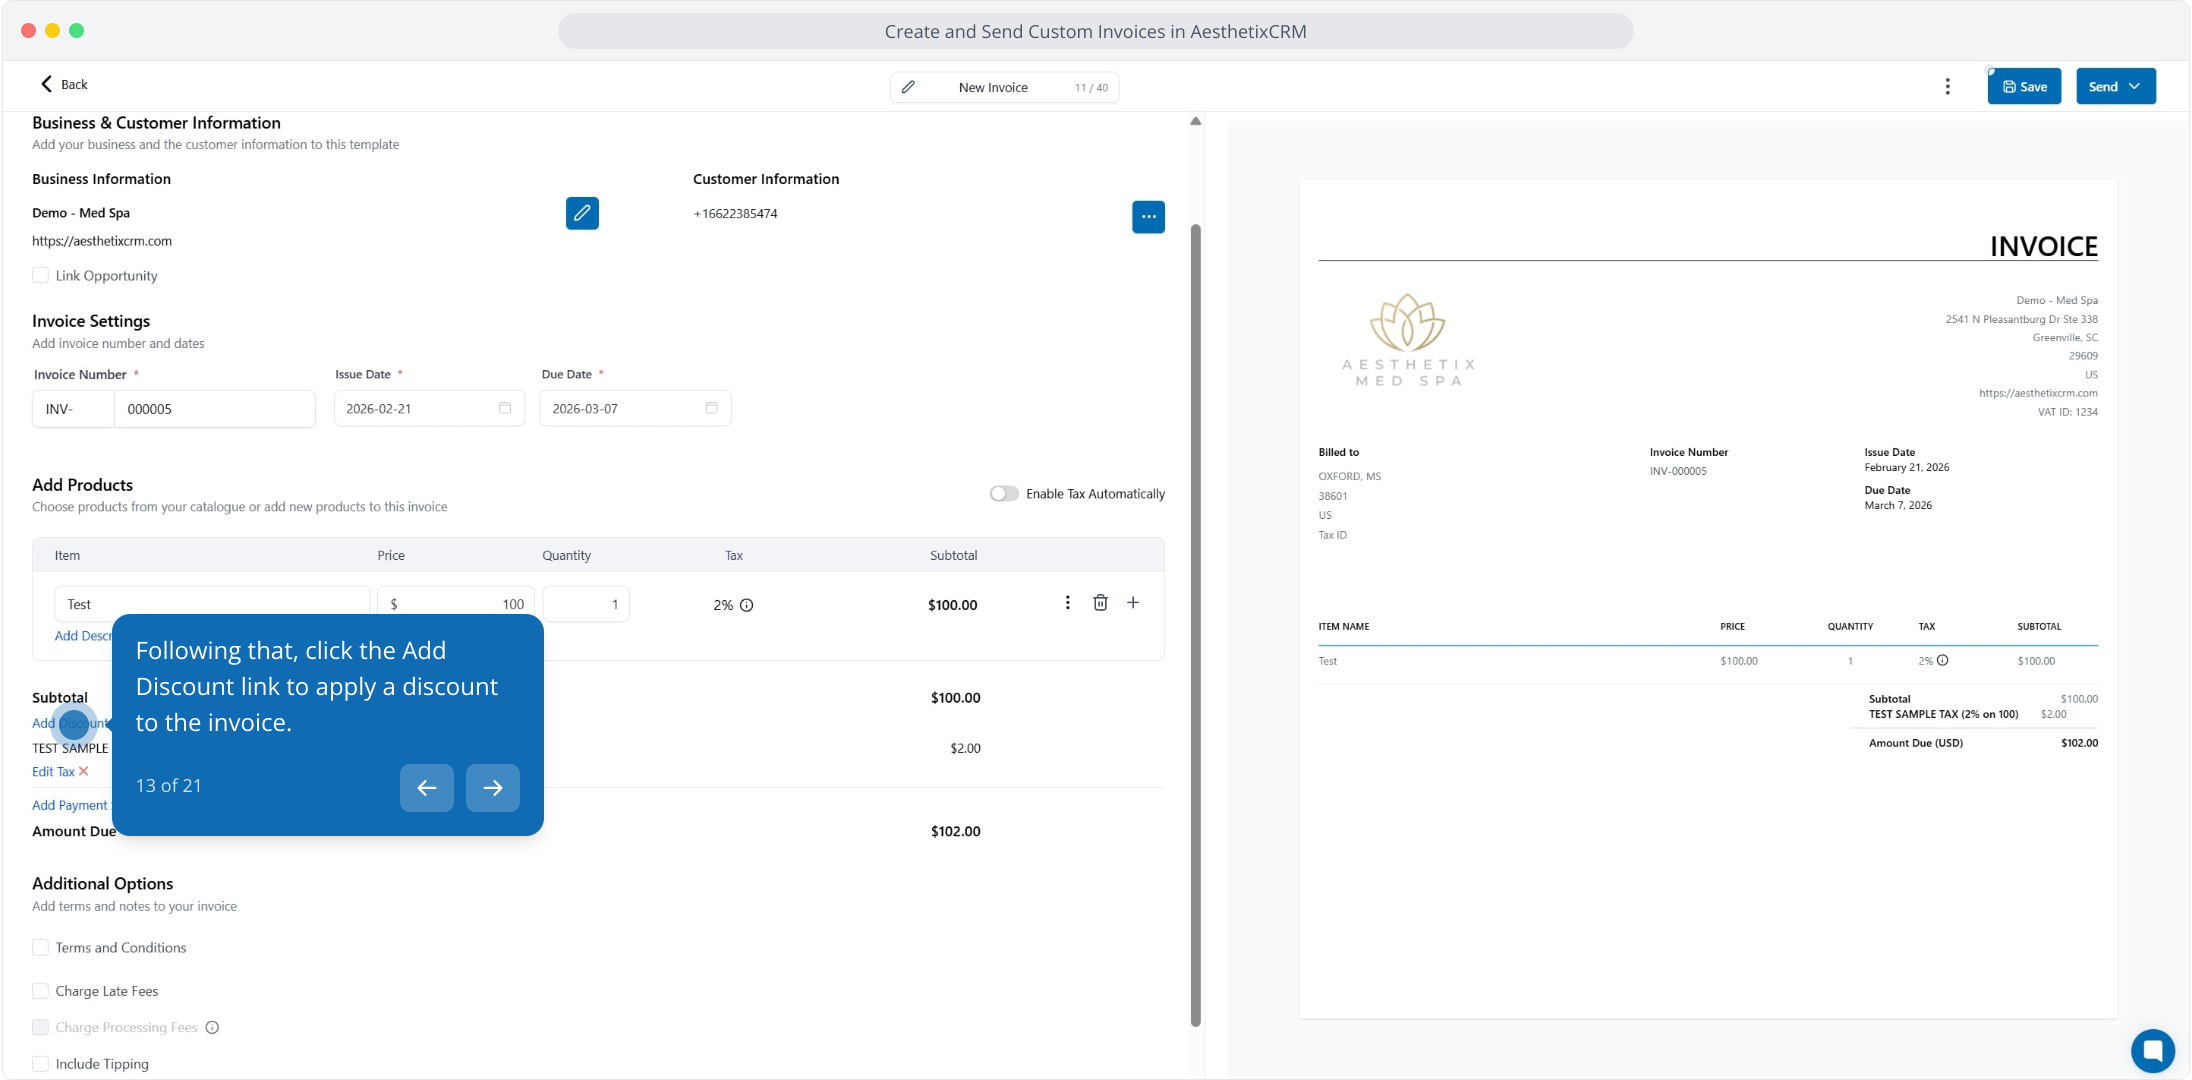
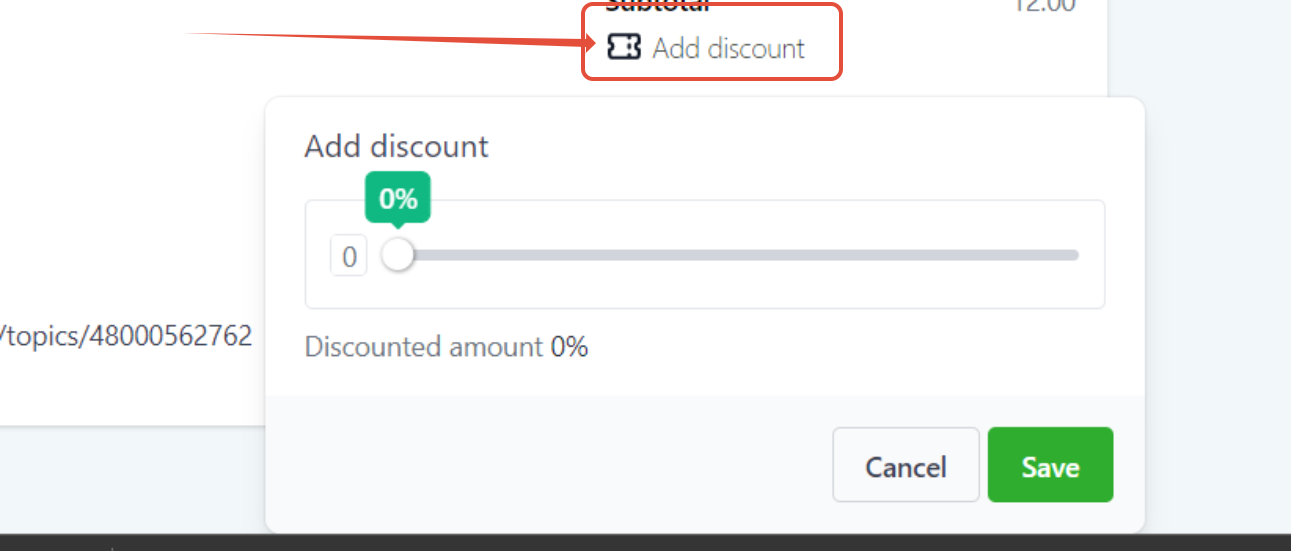
You can add a discount by percentage or custom (flat) amount. Enter the value and click Save.
Taxes are managed in two steps: globally and on the invoice.
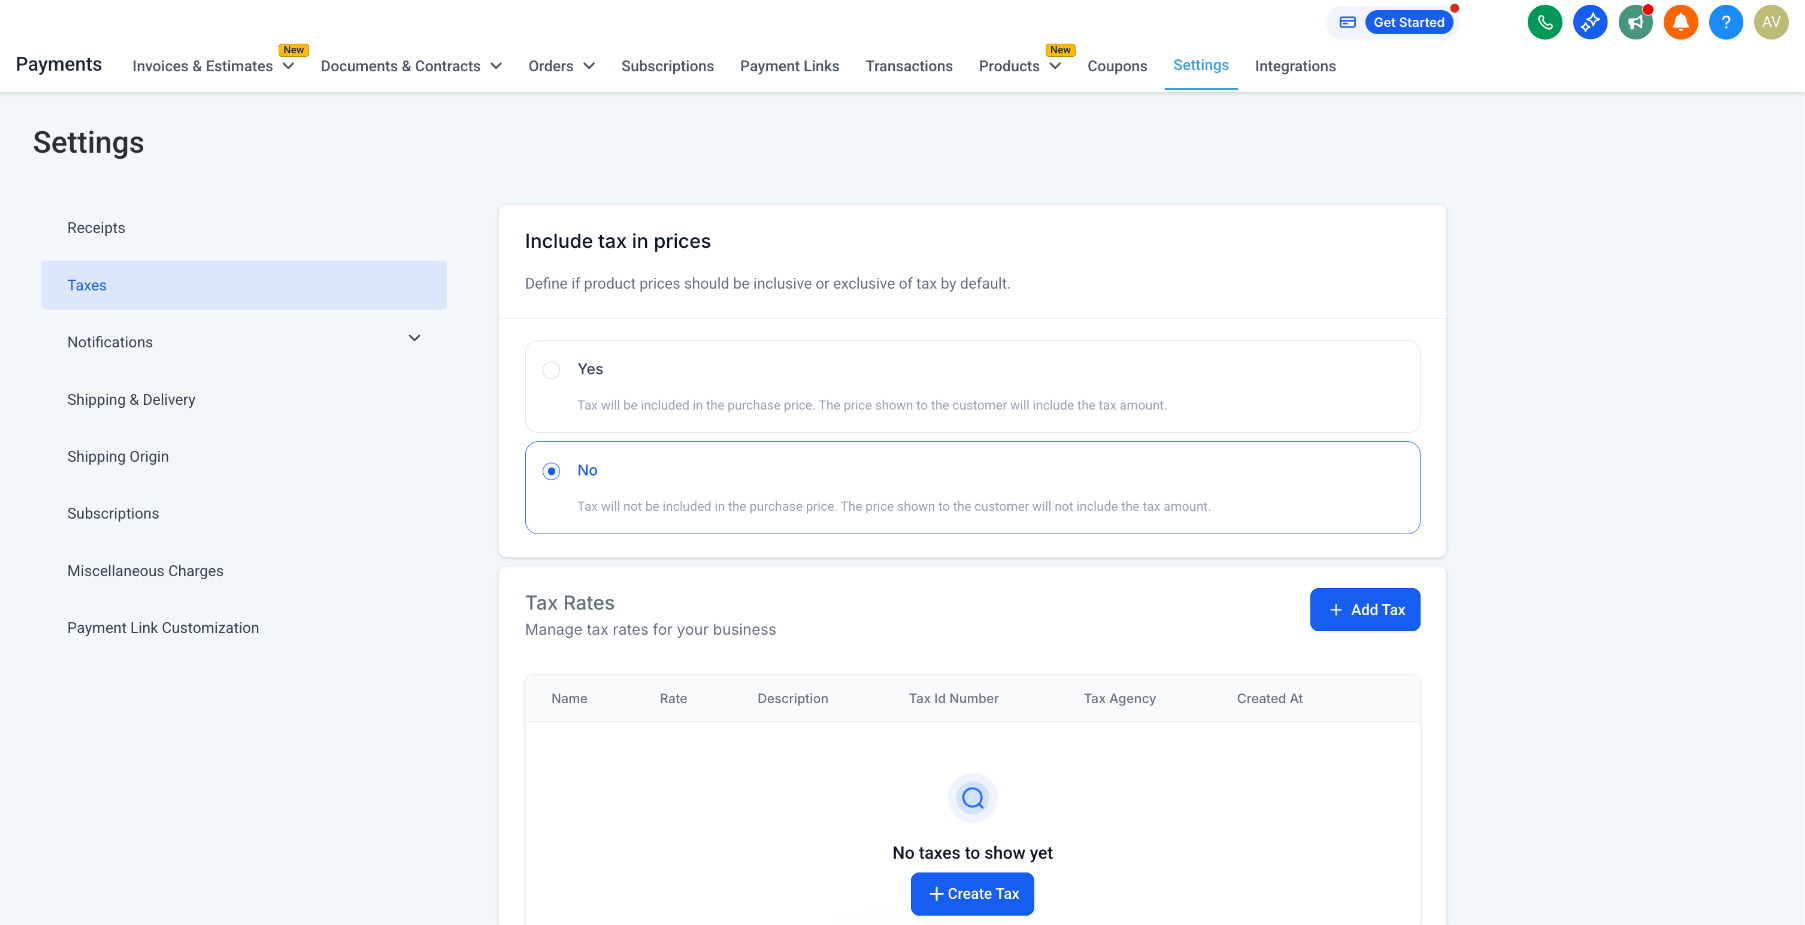
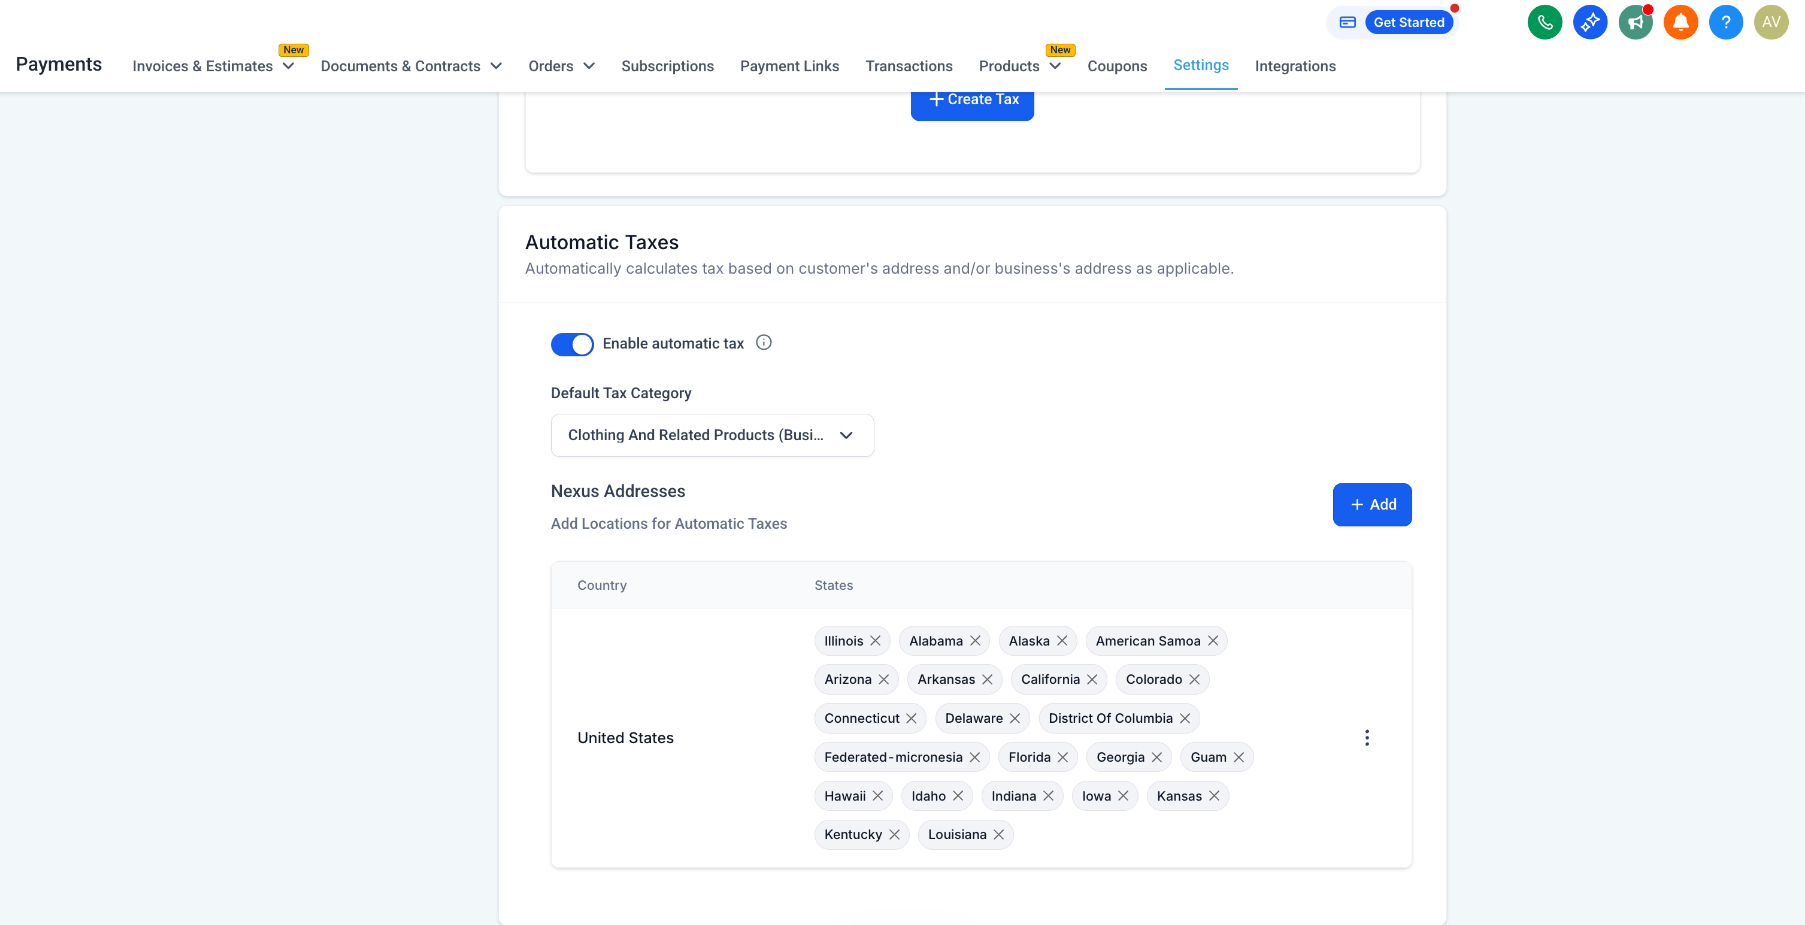
Global Tax Setup: Go to Settings in the left pane and select Taxes. Choose whether to include taxes in the purchase price or add them separately. To add taxes manually, click Add tax or Create Tax and define the rate. For automatic tax collection, enable Automatic Tax, select the tax category, and add the eligible locations.
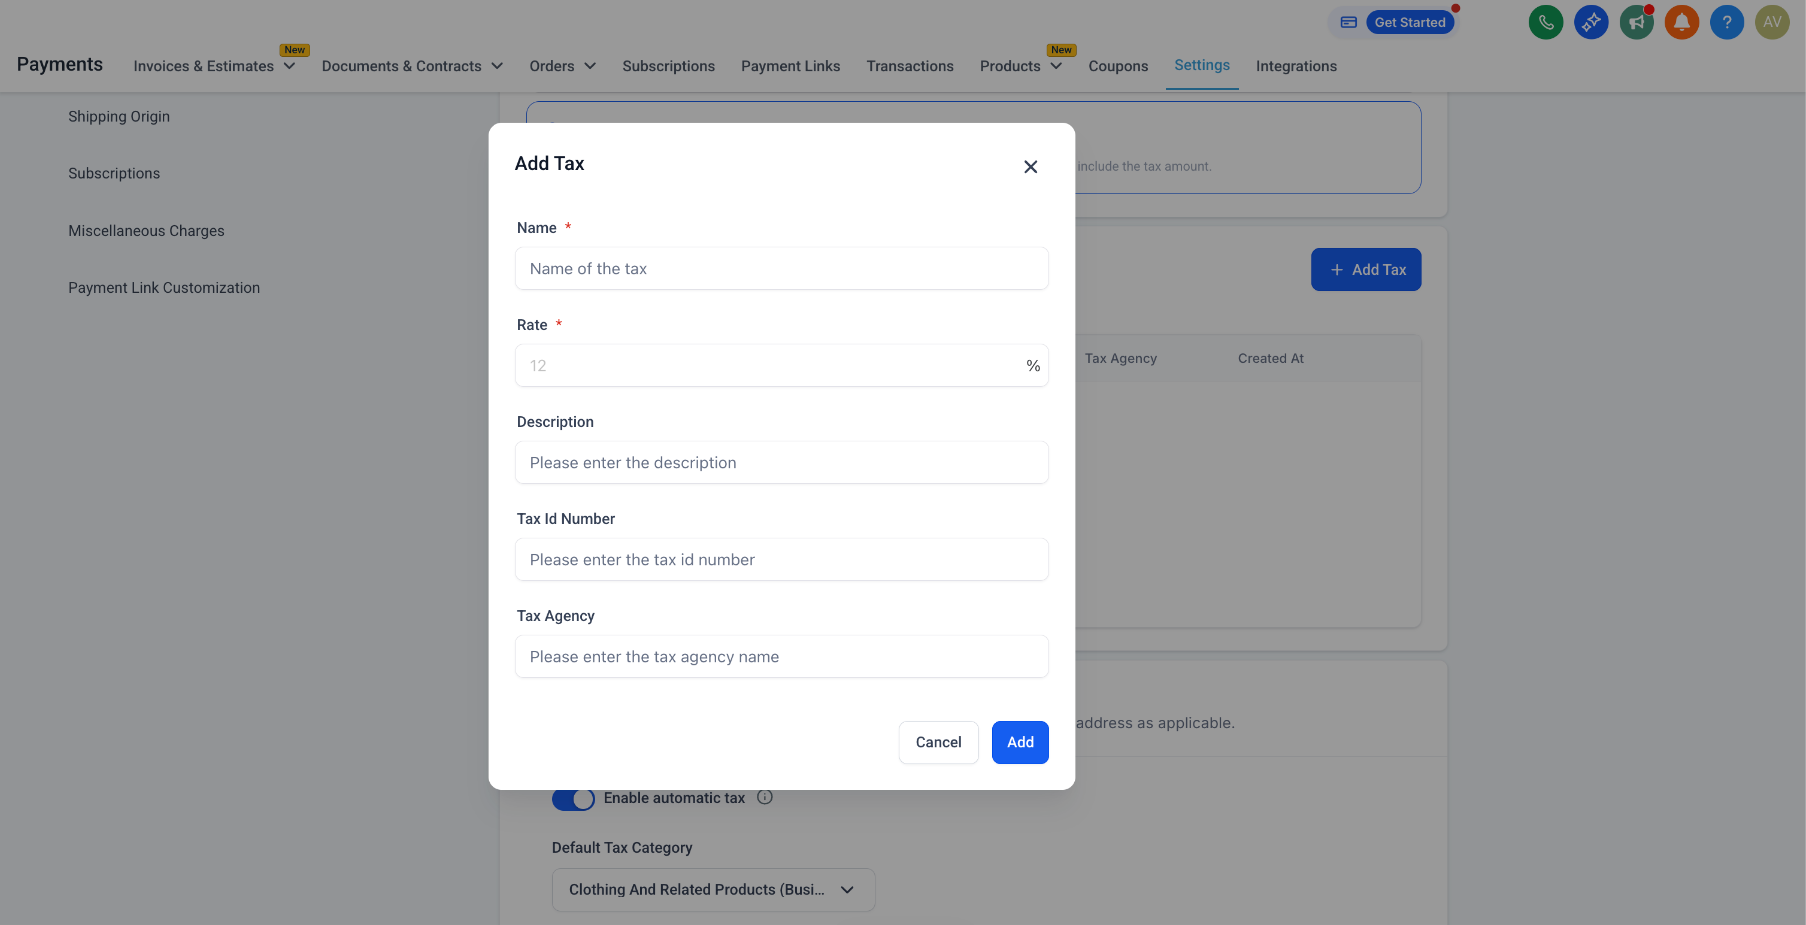
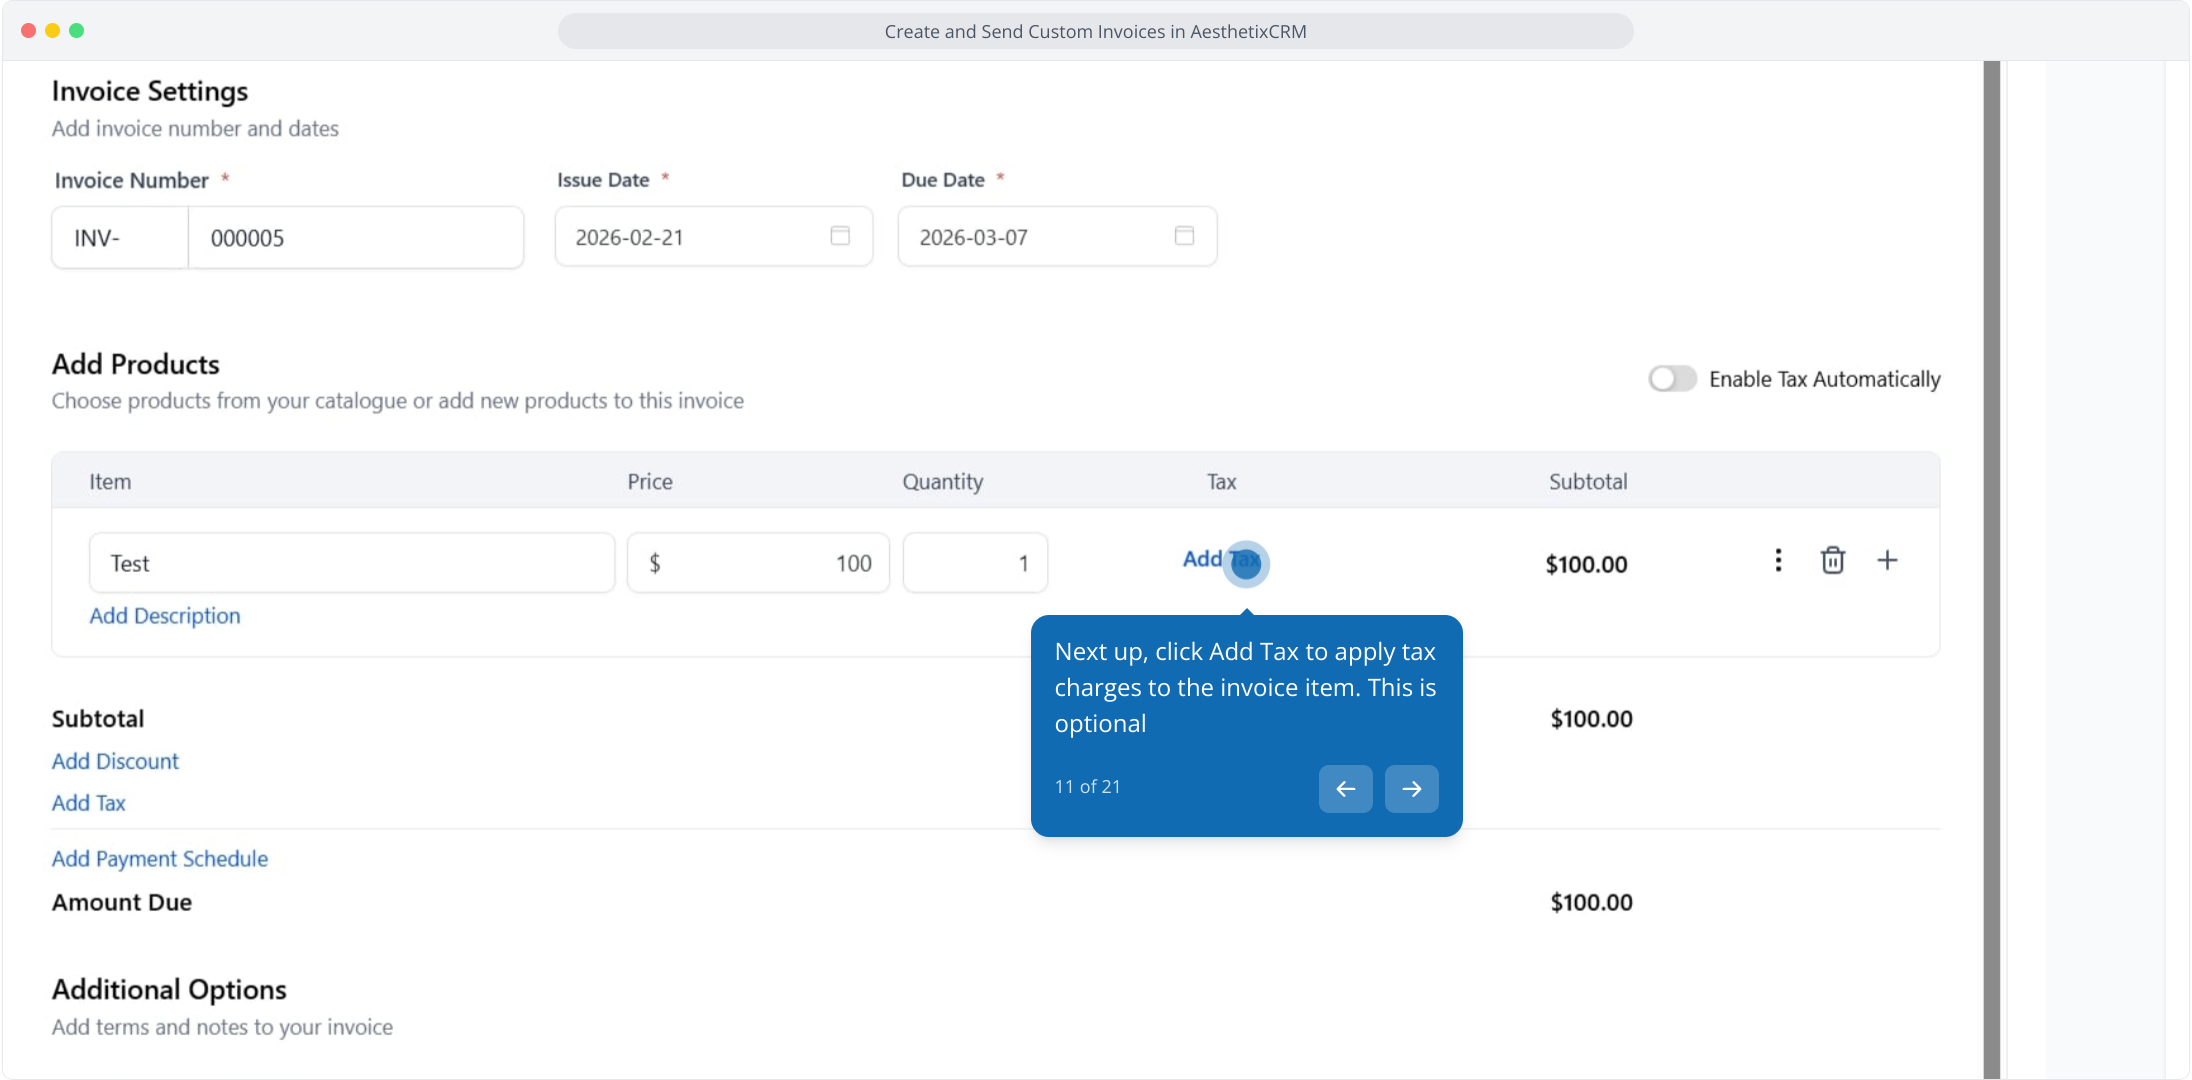
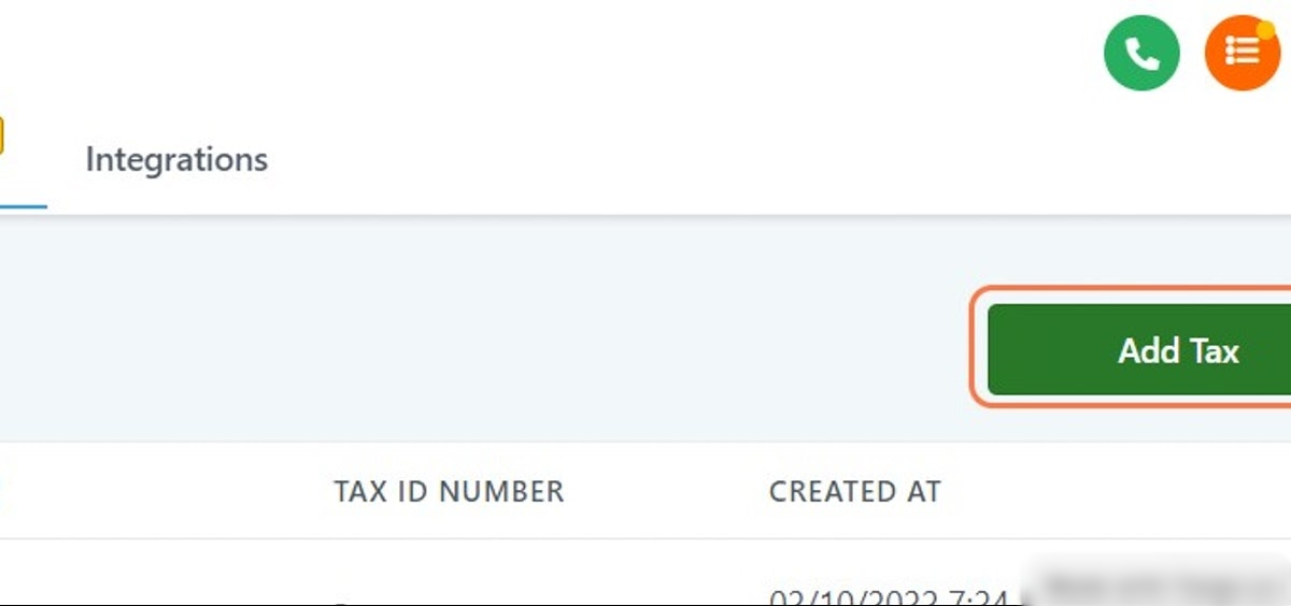
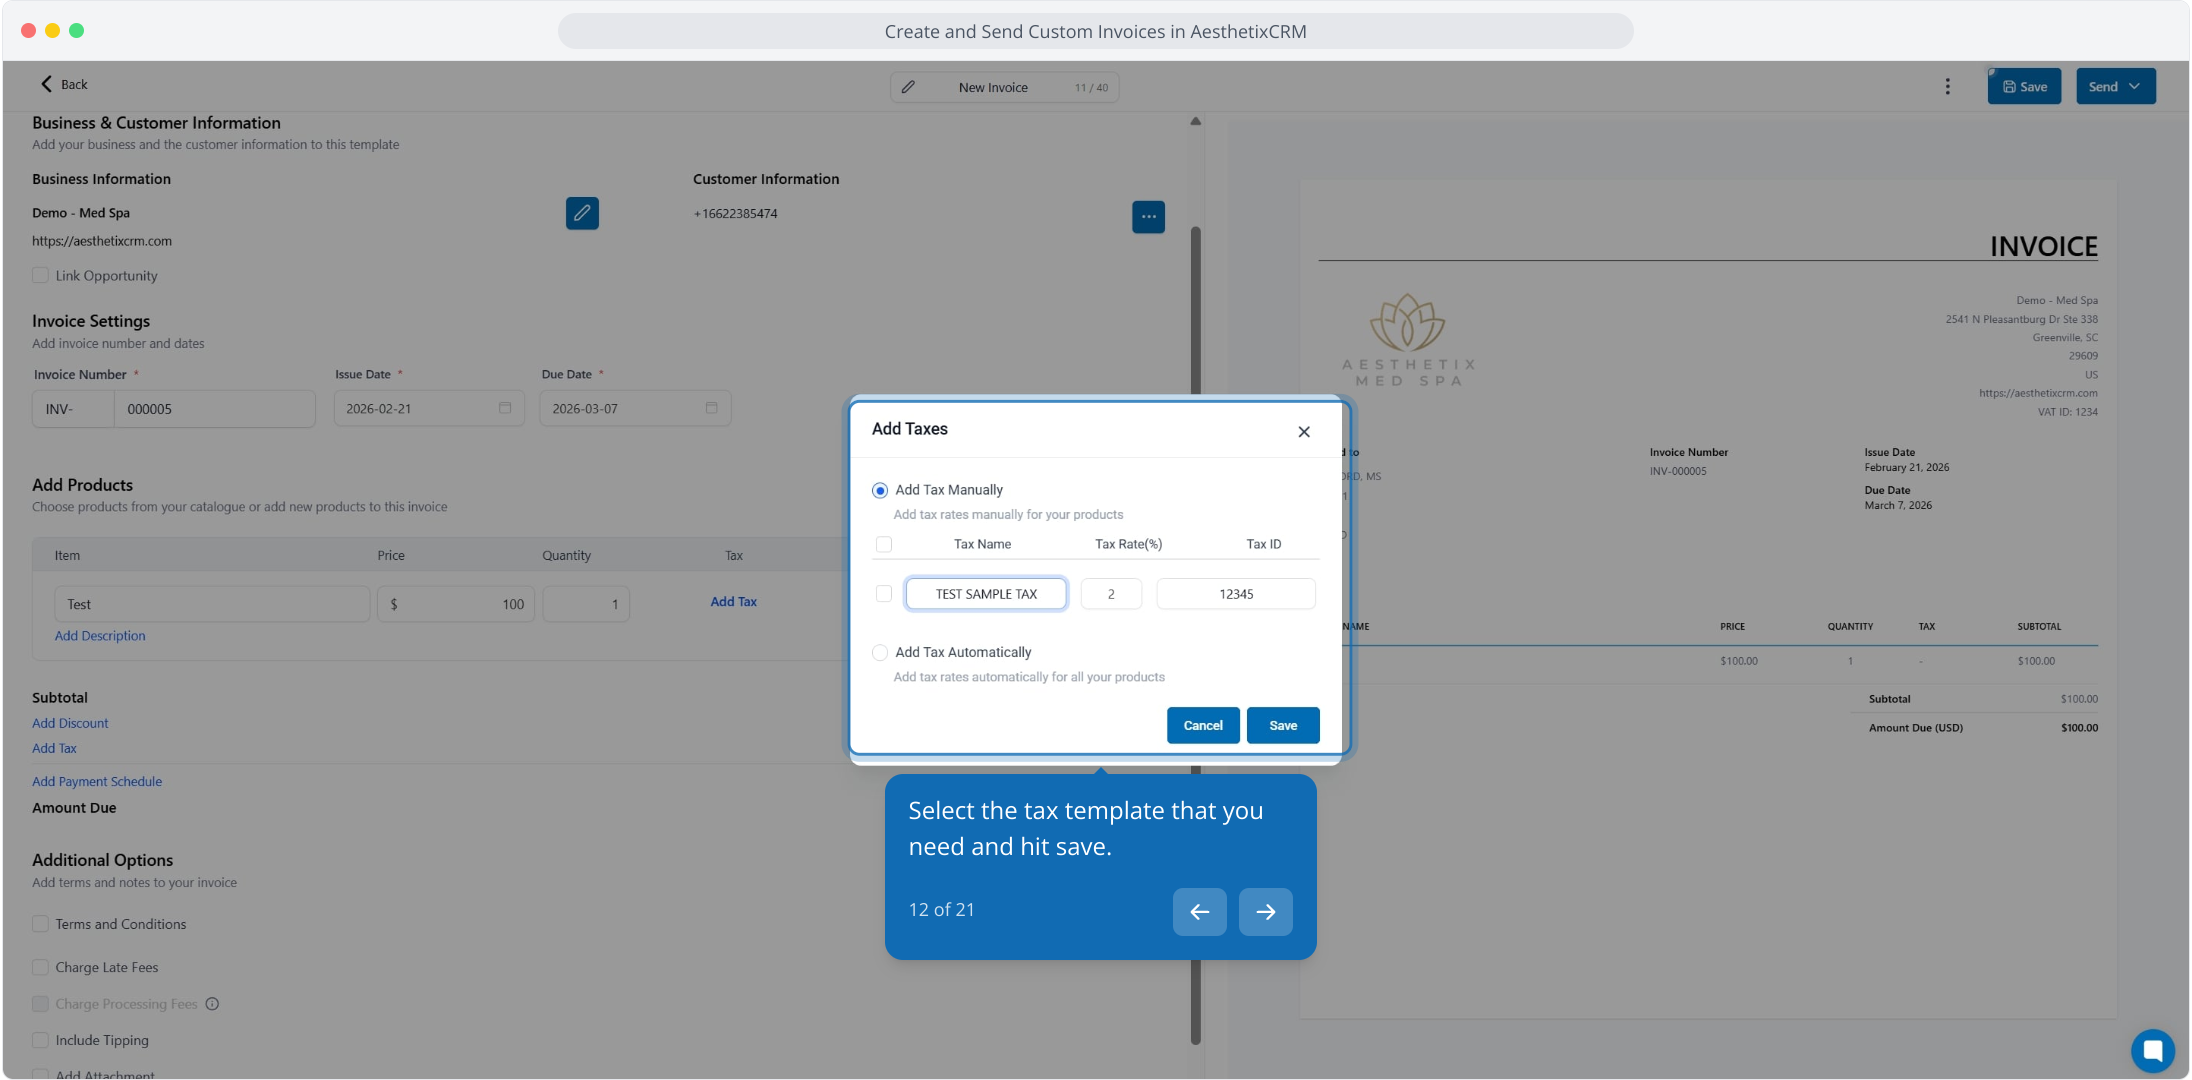
Applying Tax to the Invoice: Click Add Tax below the discount area and choose to add tax manually or automatically.
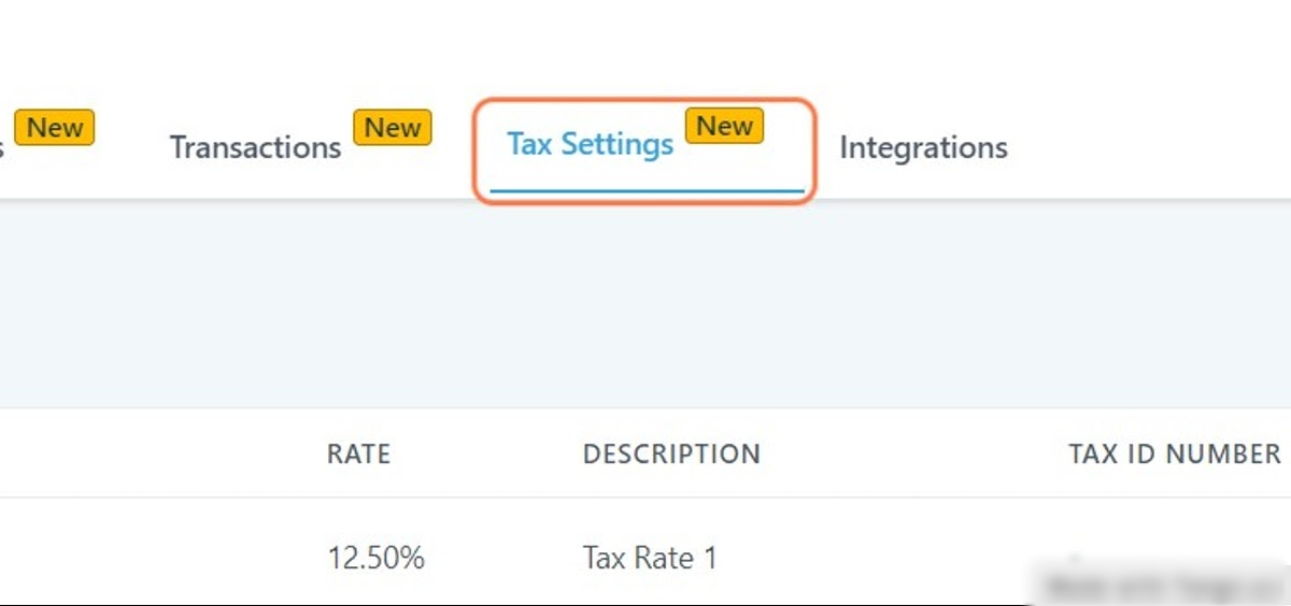
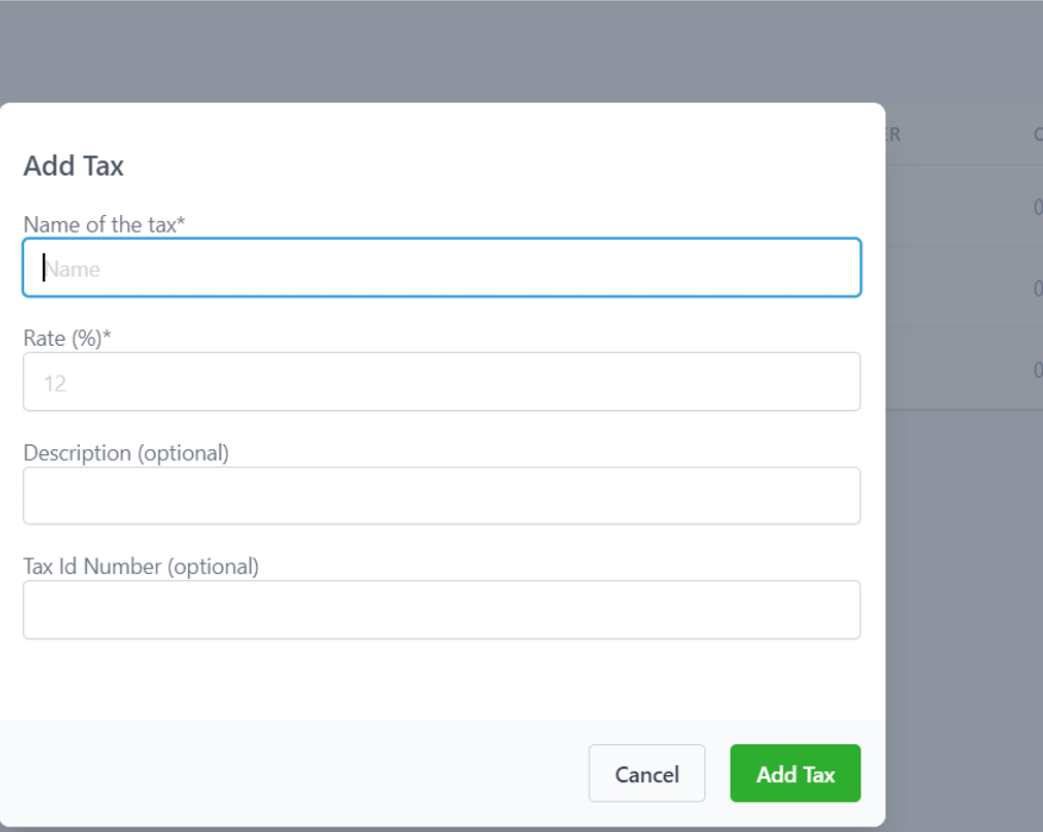
When adding a tax manually, add the name of the tax, the rate in percent, and a description or tax ID number.
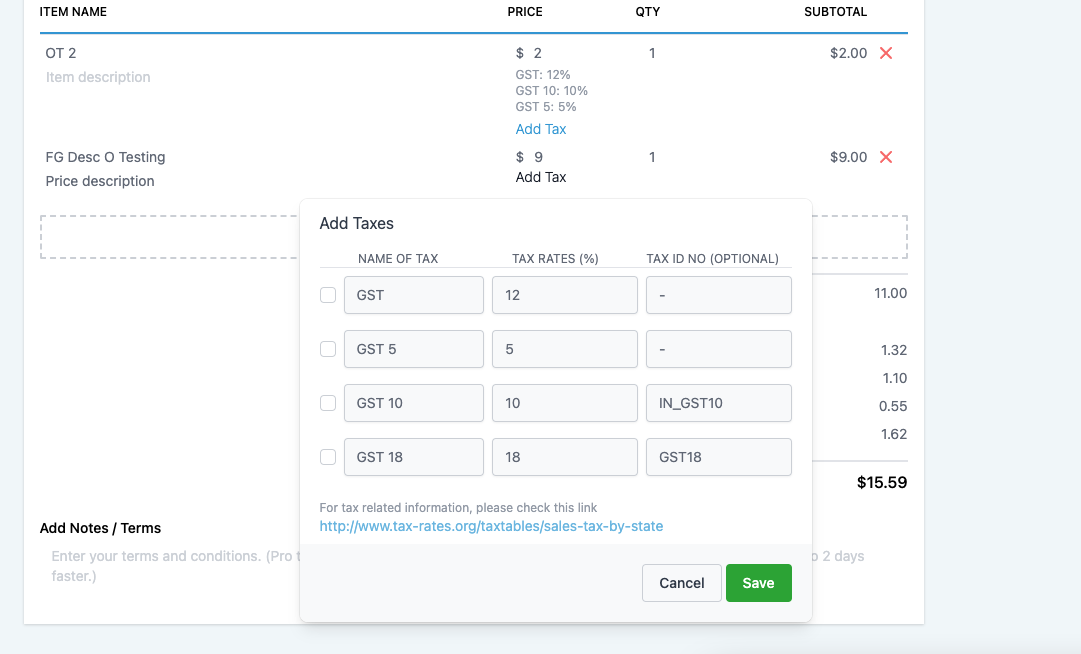
Select the tax template you need and click Save.
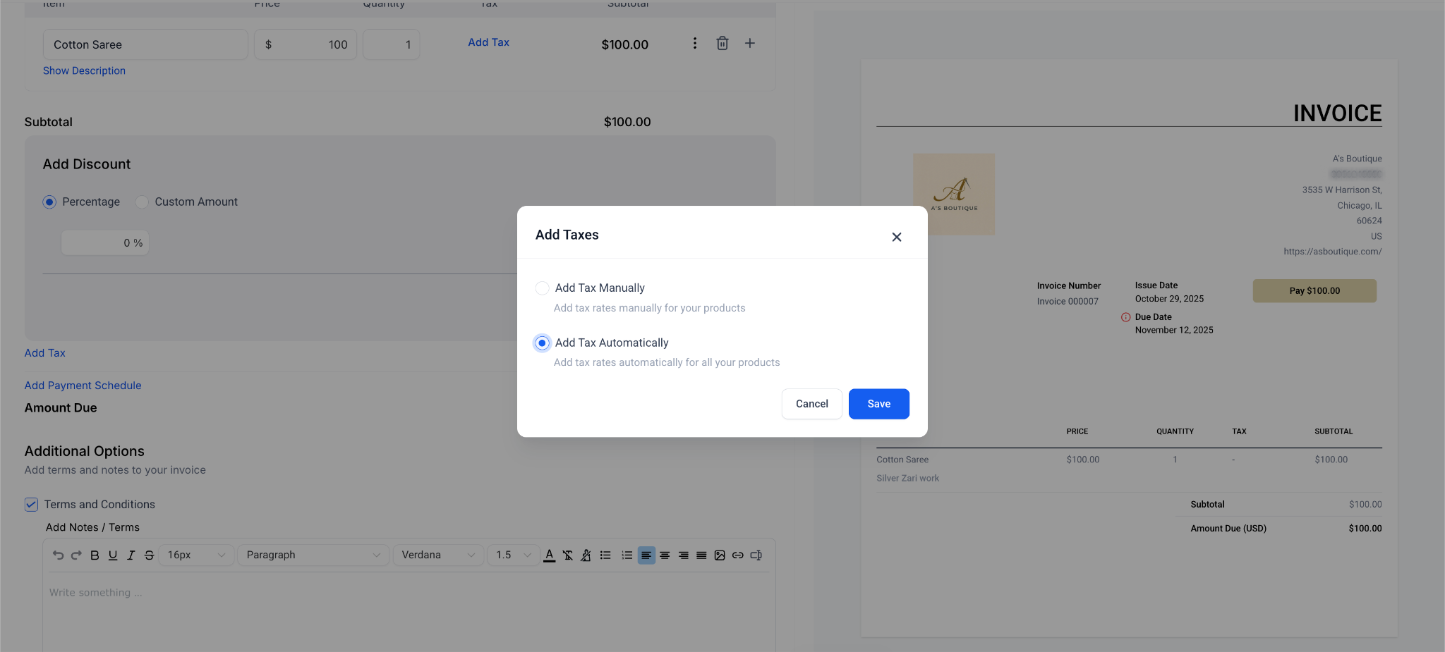
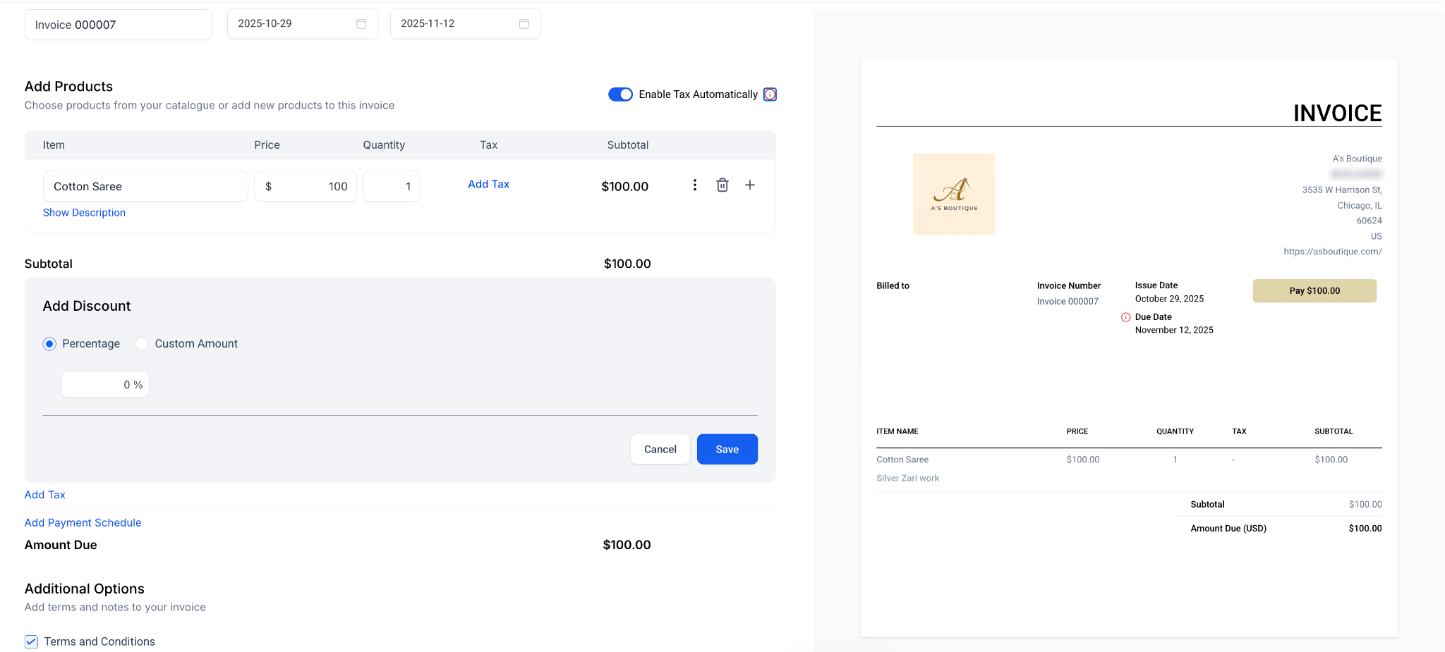
You can also use the Enable tax automatically toggle located above the products list.
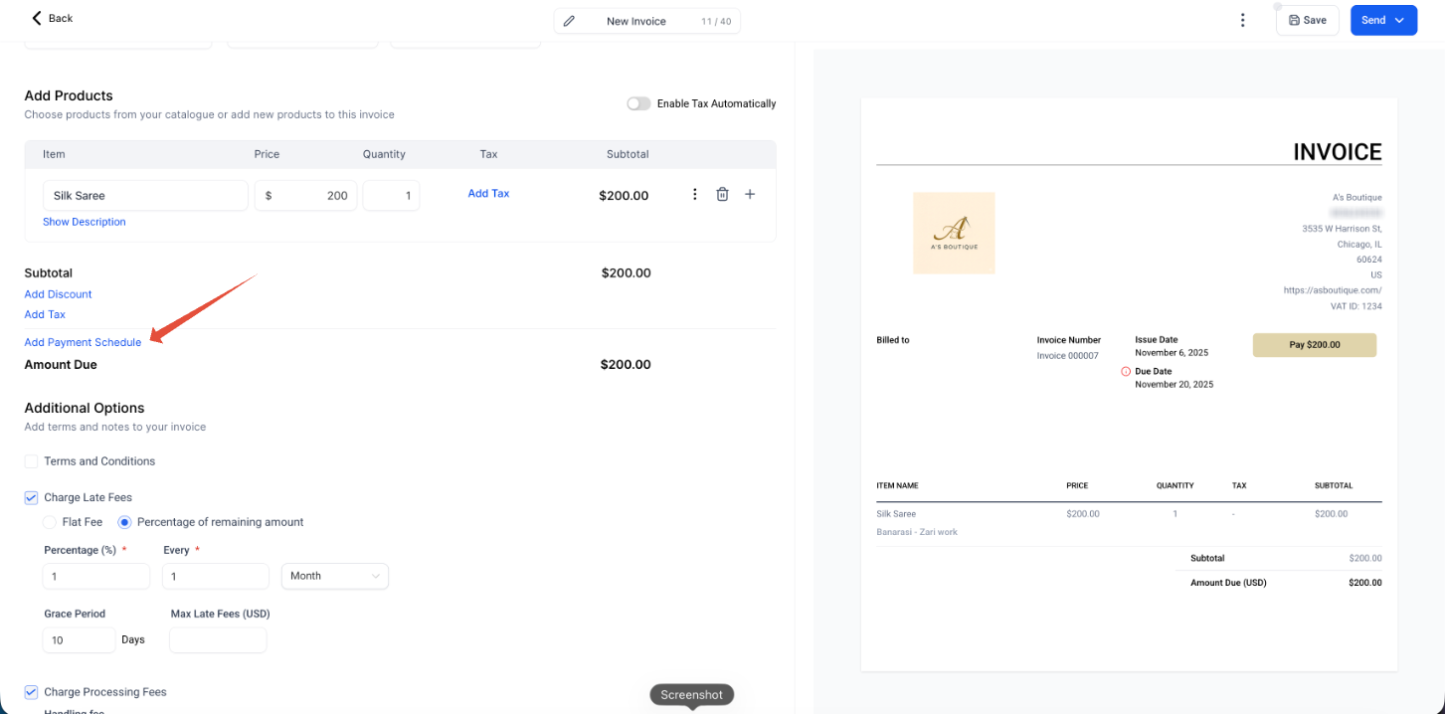
Click Add Payment Schedule to split this invoice into installments, useful for larger treatment packages or procedure deposits.
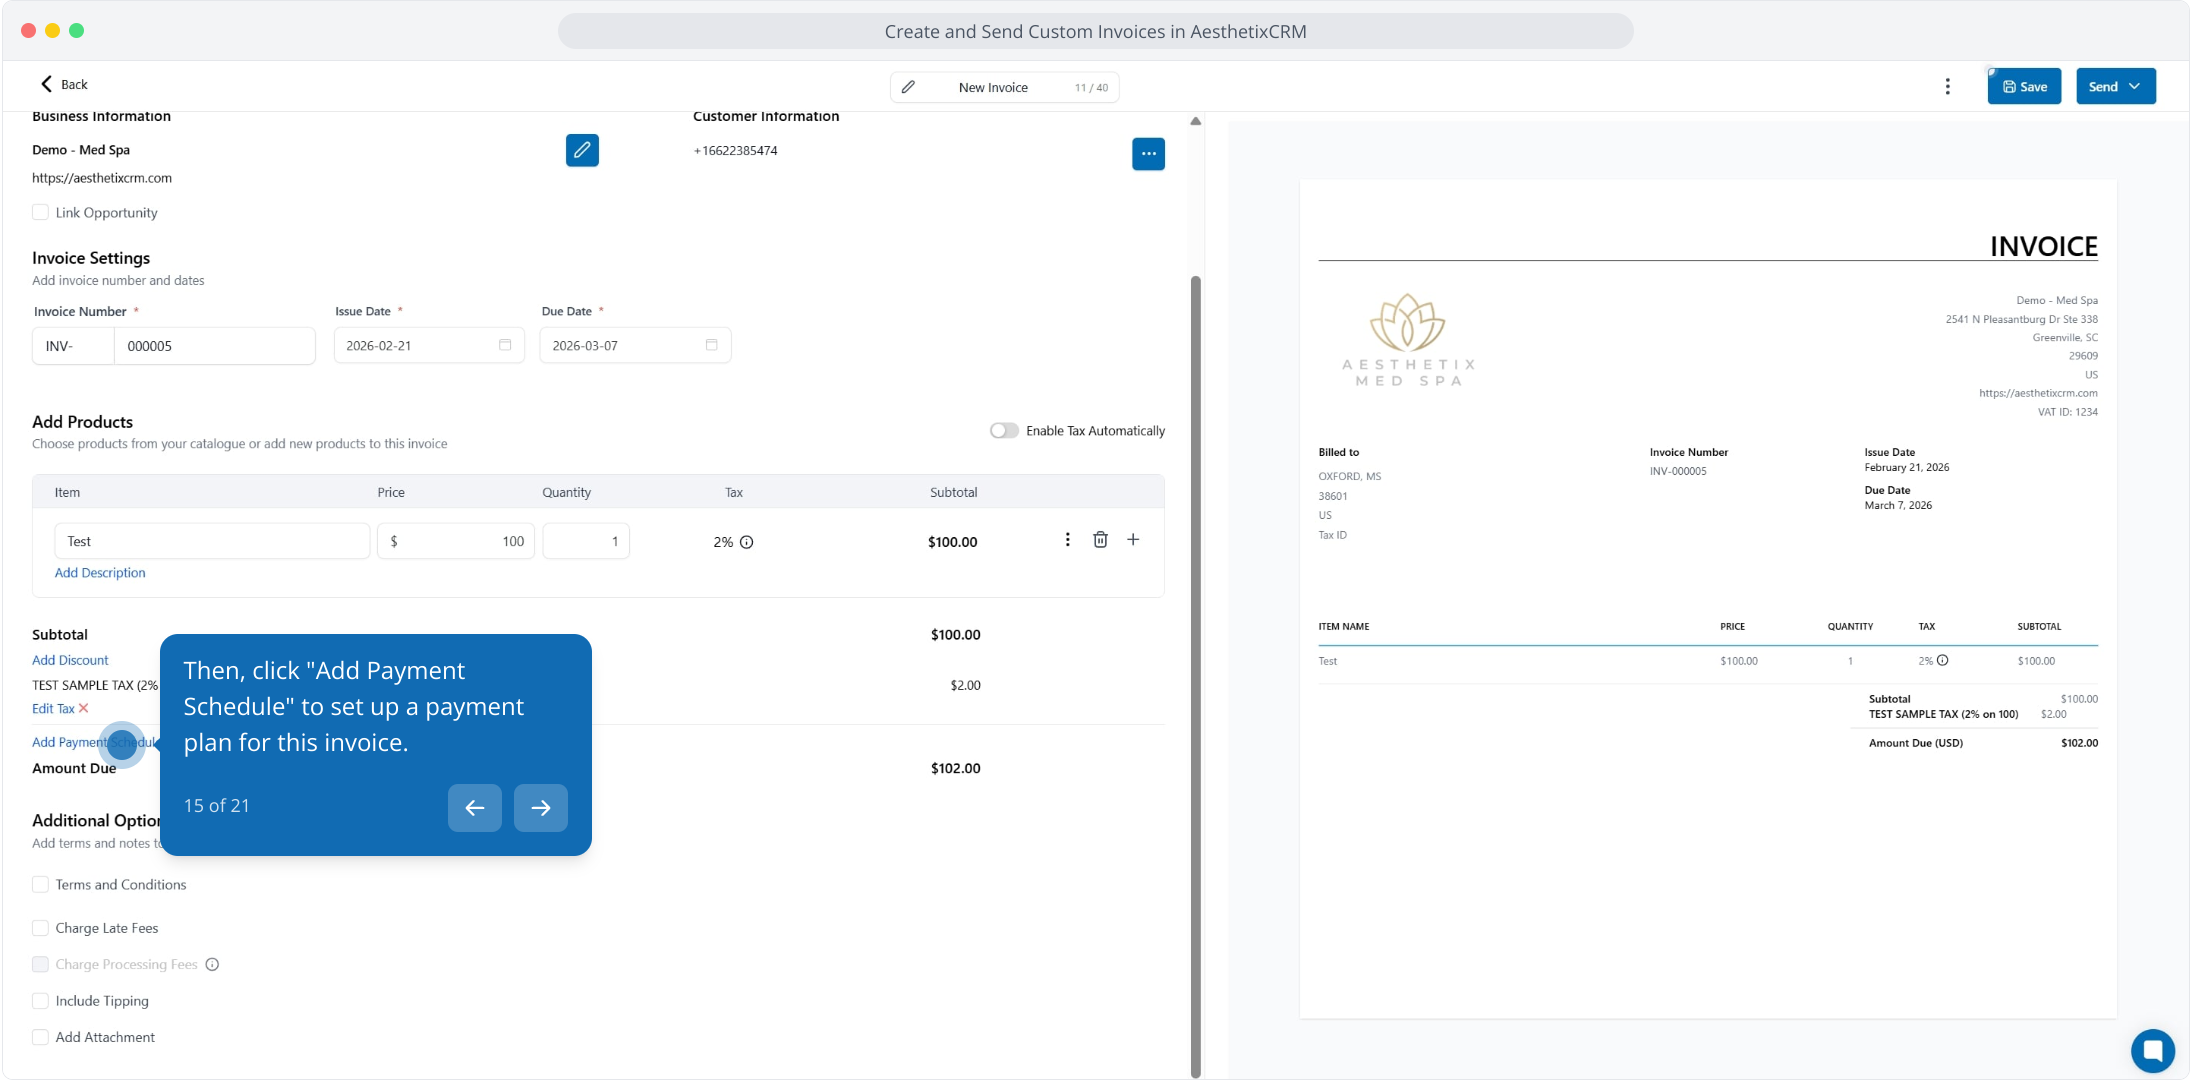
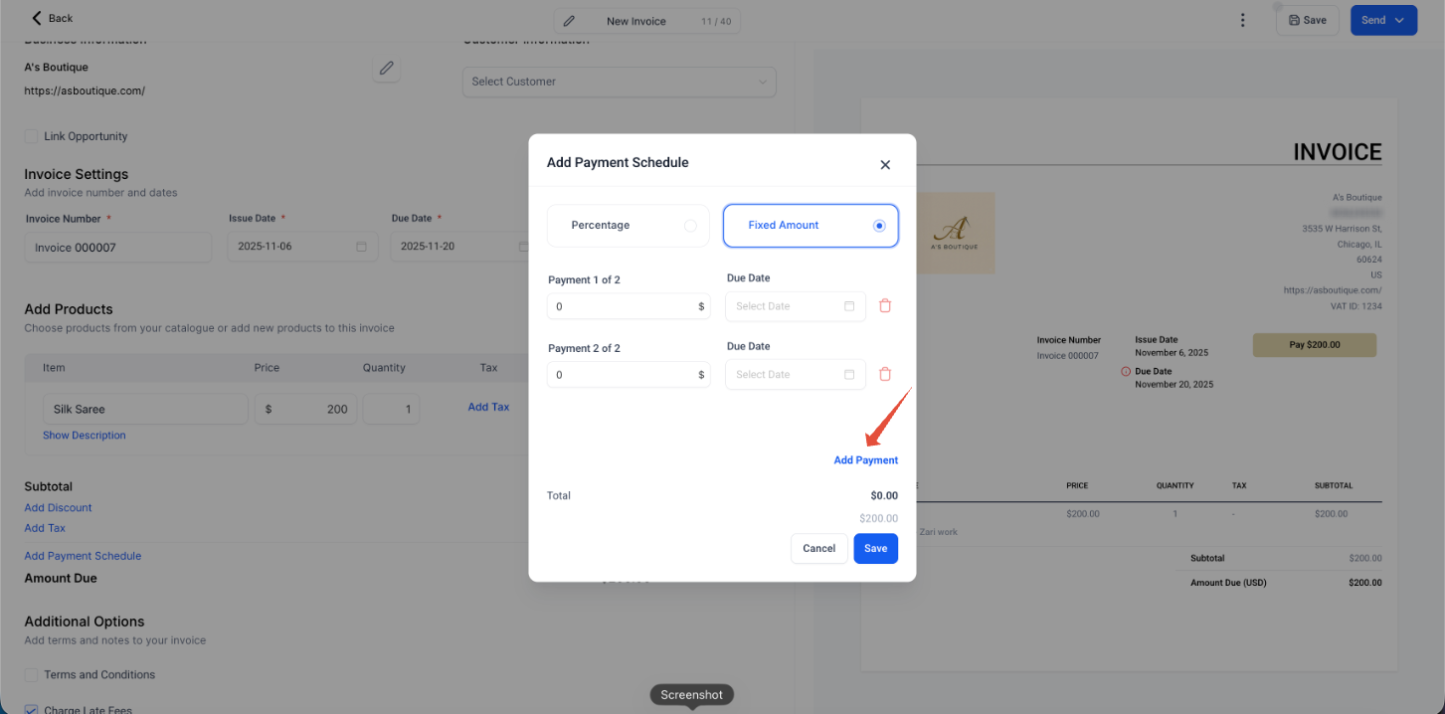
There are two types of payment schedules: Percentage and Fixed Amount. Choose one, set the value and due date for each payment, and click Save.
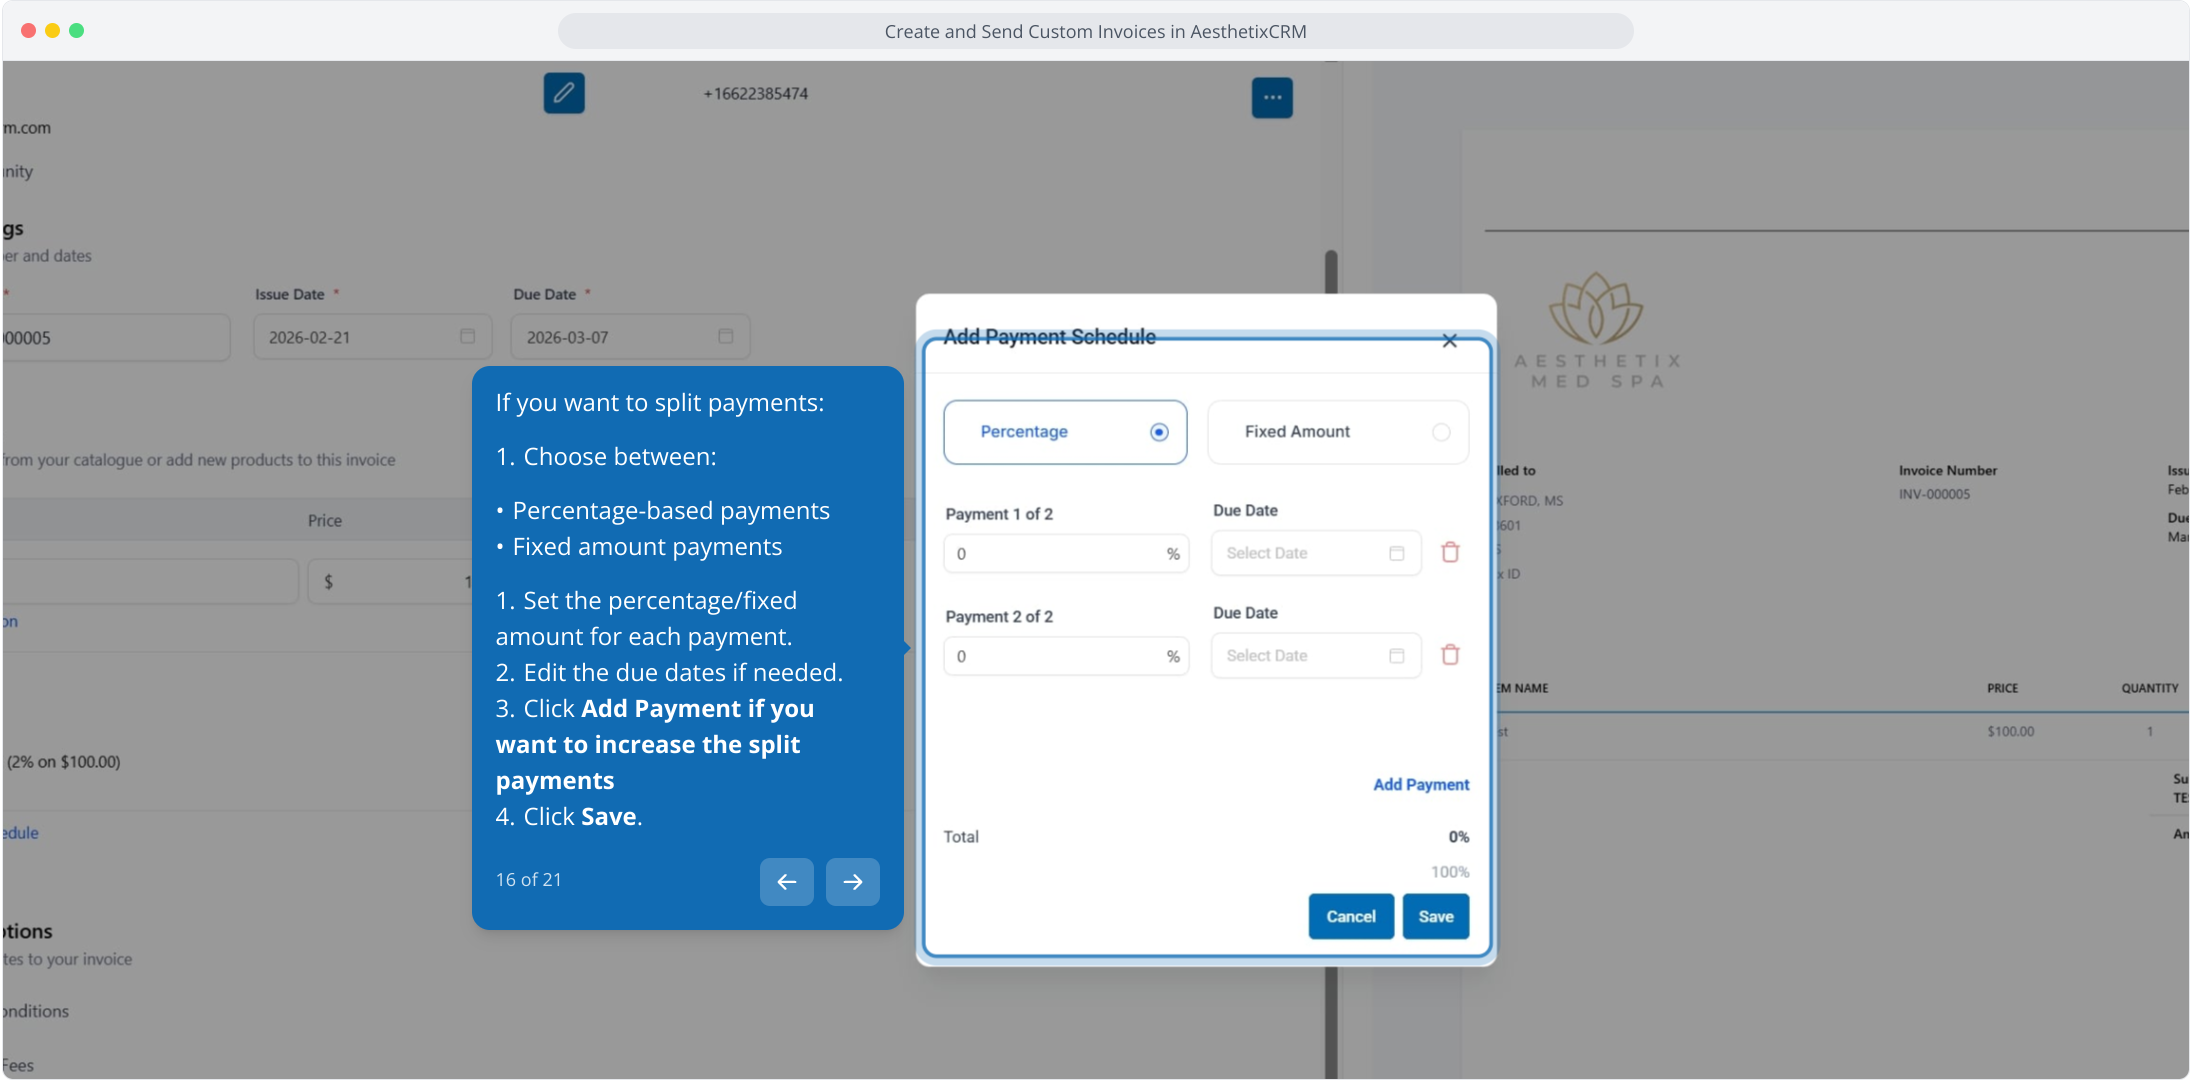
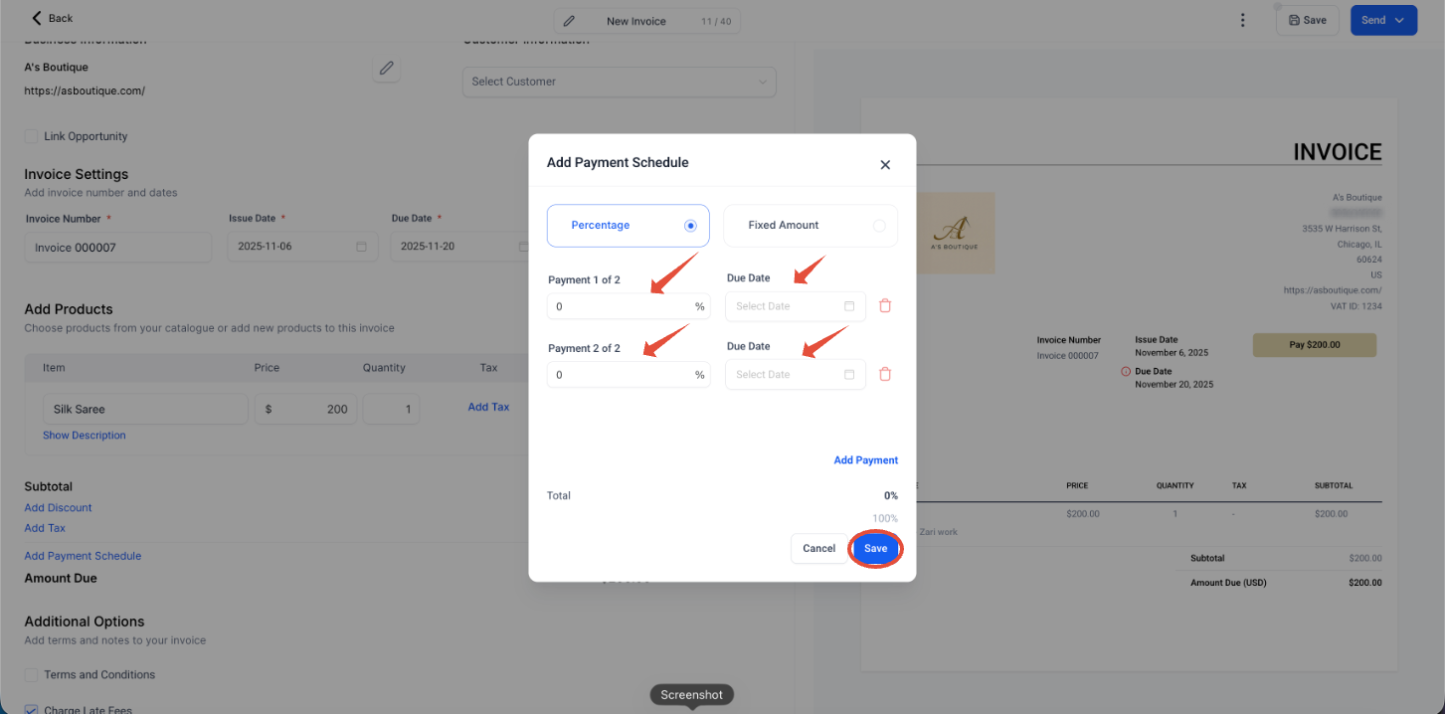
By default two payments are added. To add more, click Add Payment.
For full details, see the payment plans and installment schedules guide.
Invoices support the following features when you use a supported custom payment provider:
Payment schedules: Enable scheduled invoice payments and view or manage upcoming scheduled payments directly from the invoice.
Partial payments: Accept partial invoice payments when supported by the payment provider, and track payment history and outstanding balances.
Tips: Patients can add a tip when paying through a supported custom payment provider.
Late fees: Automatic late fee calculation is supported for overdue invoice payments made through custom payment providers.
Note: Feature availability depends on the custom payment provider connected to your account.
Use the Additional Options section on the invoice to enable specific terms or fees.
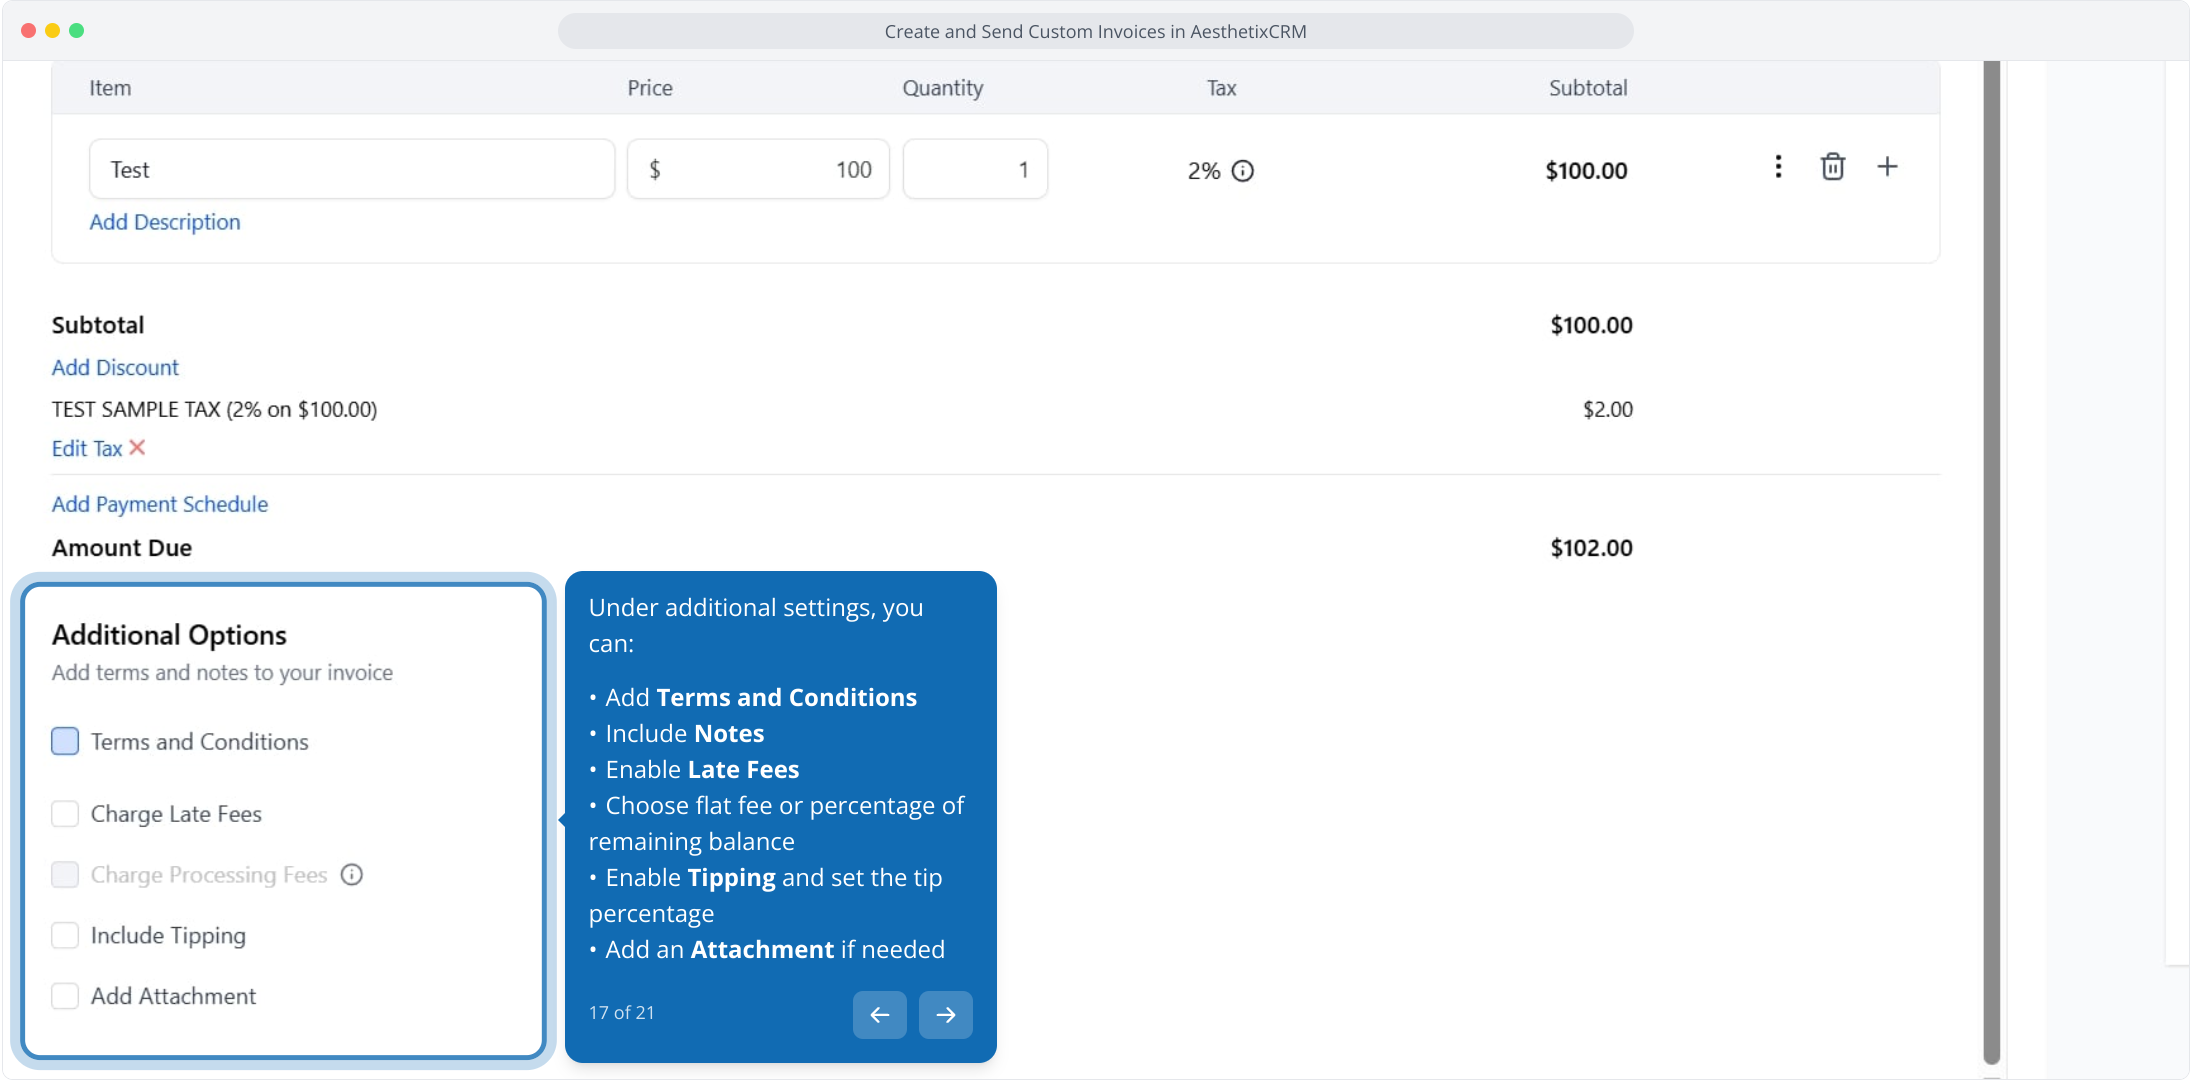
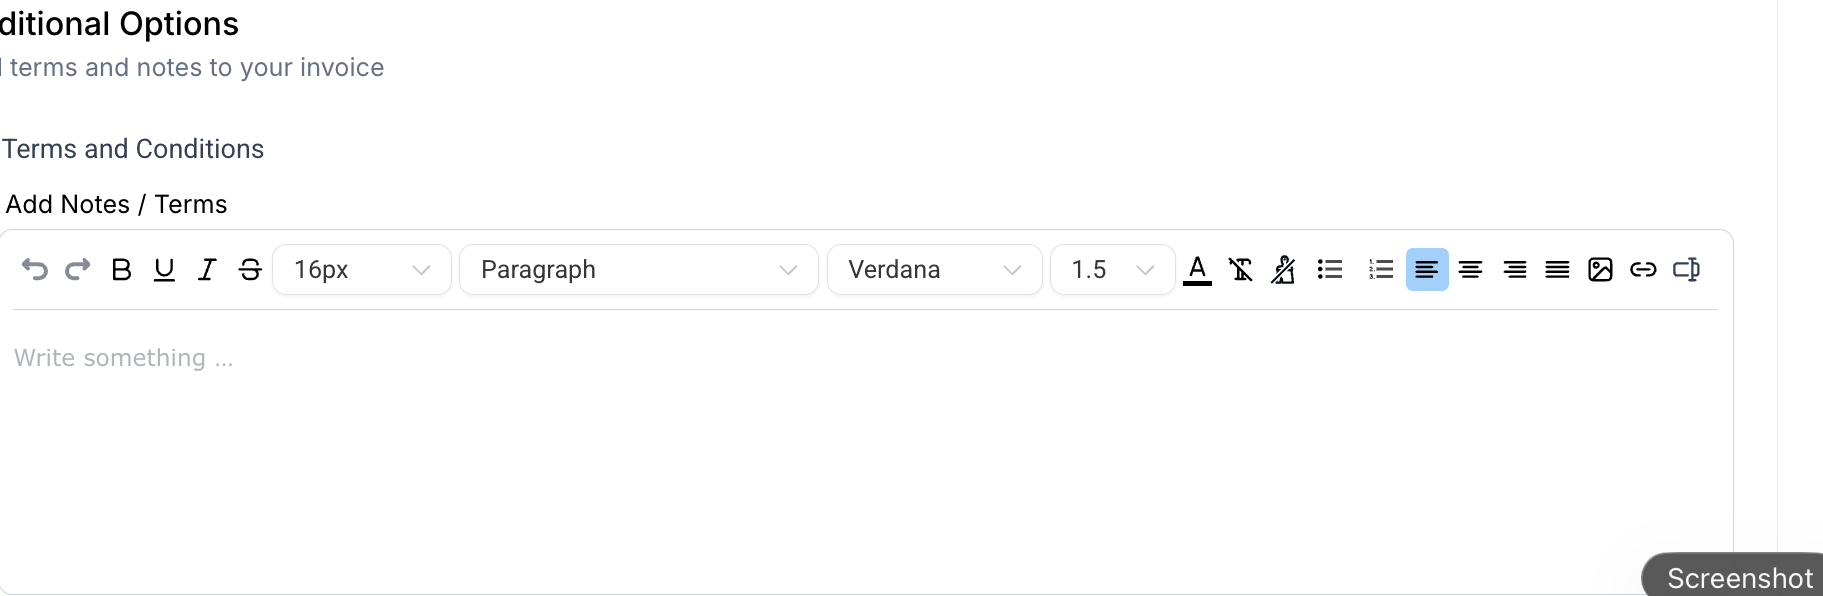
Terms and Conditions: Add your full terms of service for the patient to review.
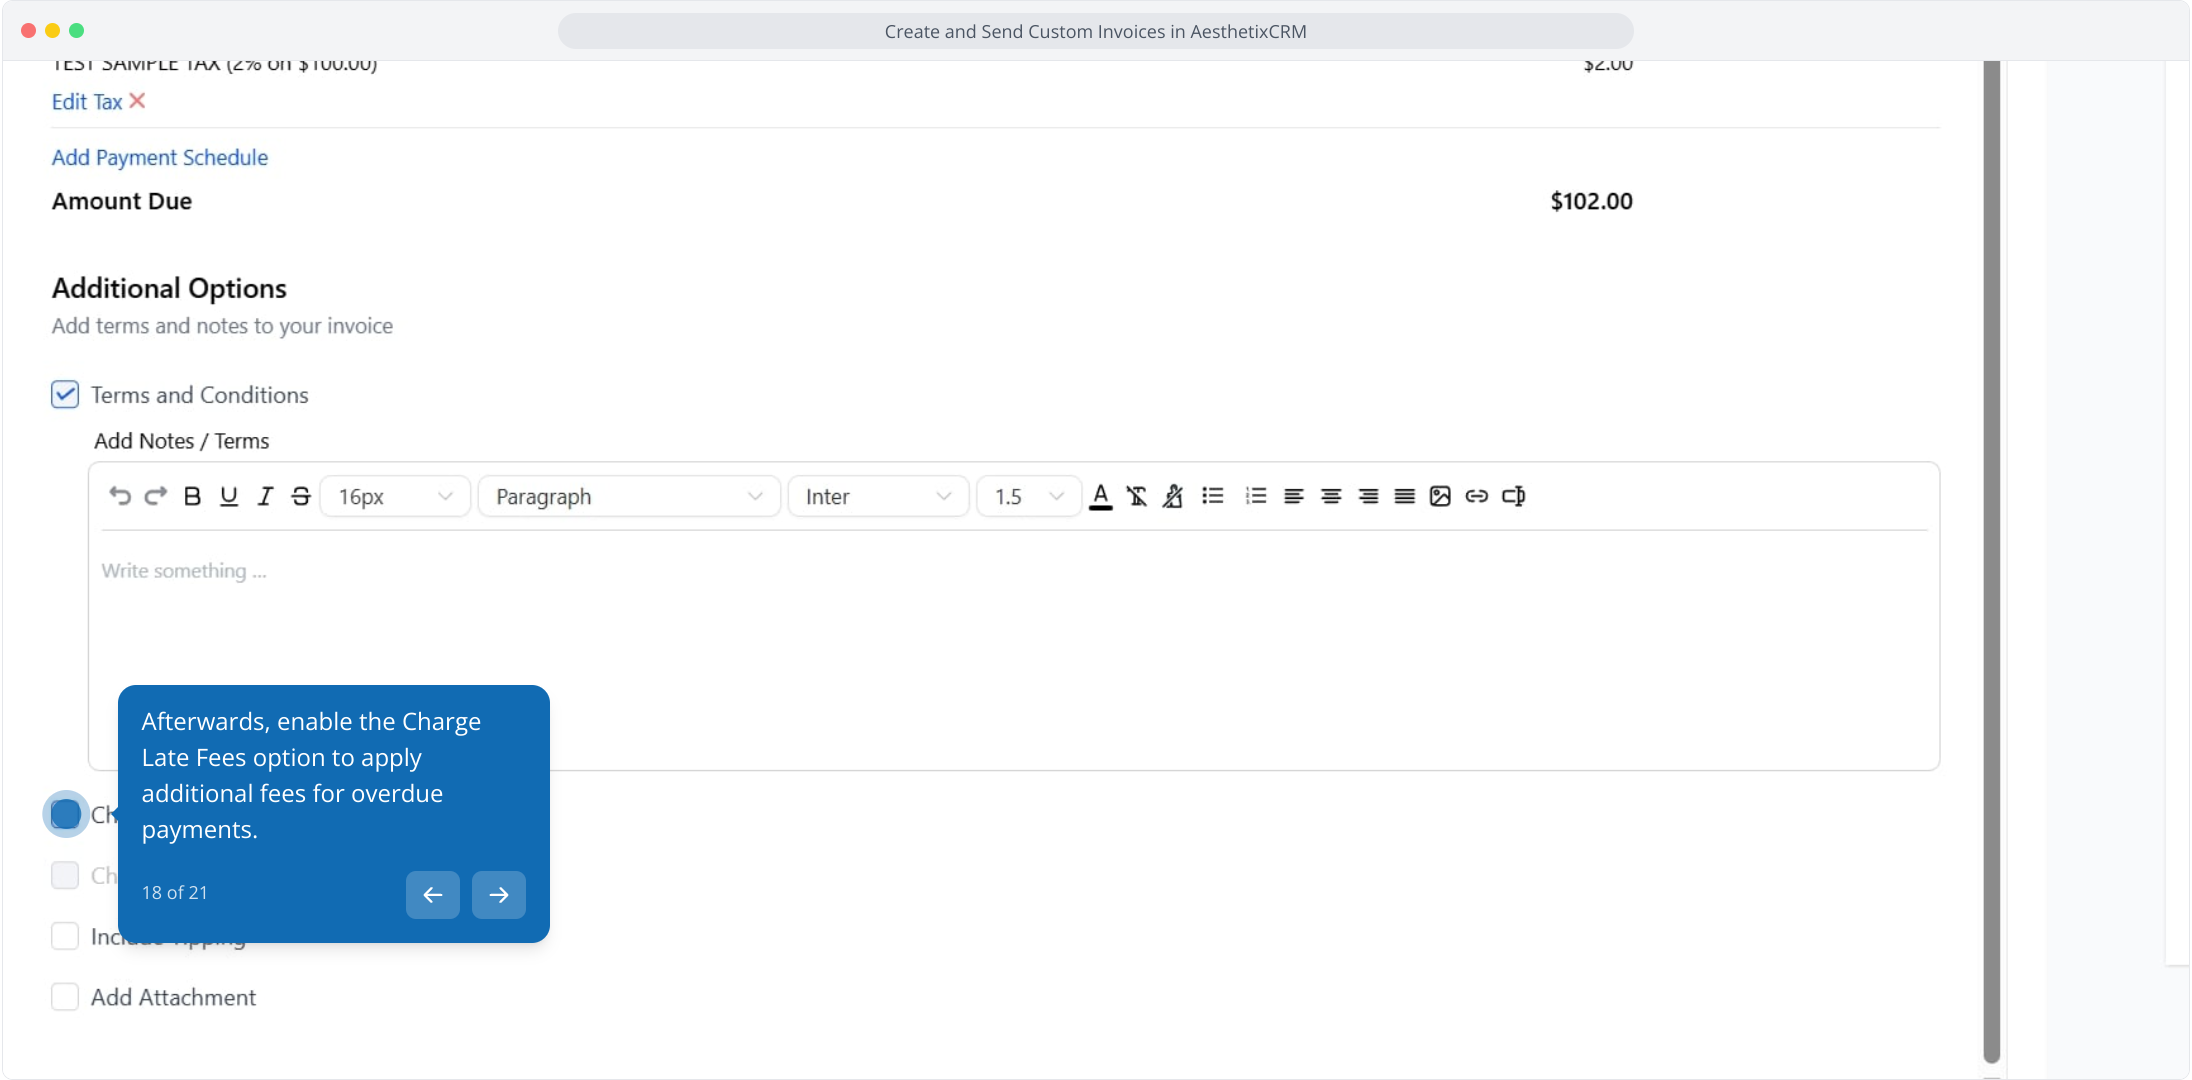
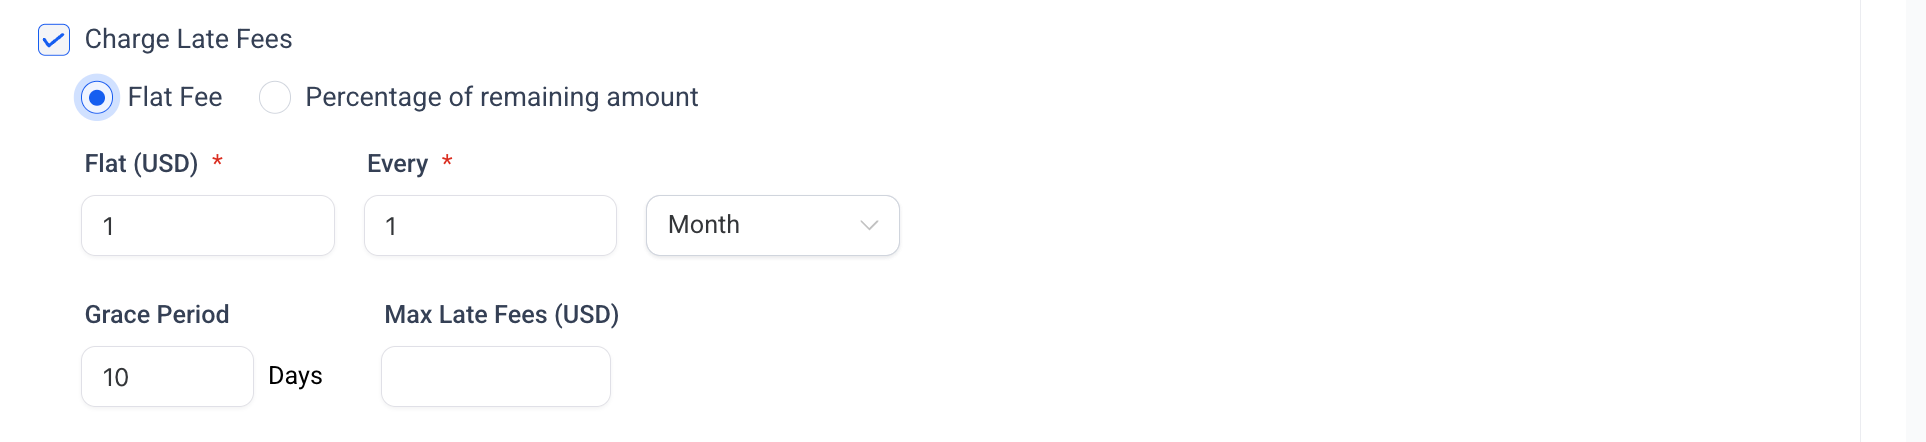
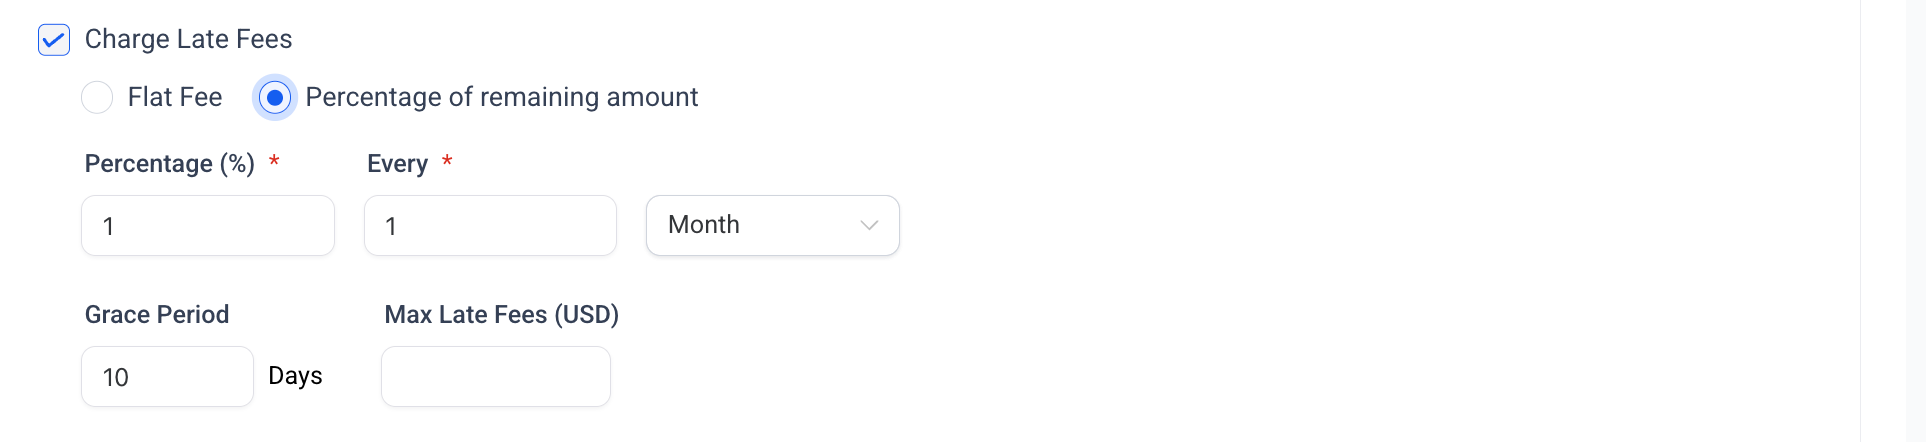
Charge Late Fees: Charge overdue invoices a percentage or flat fee. Enable the option and set the percentage or amount, intervals, grace period, and maximum late fee.
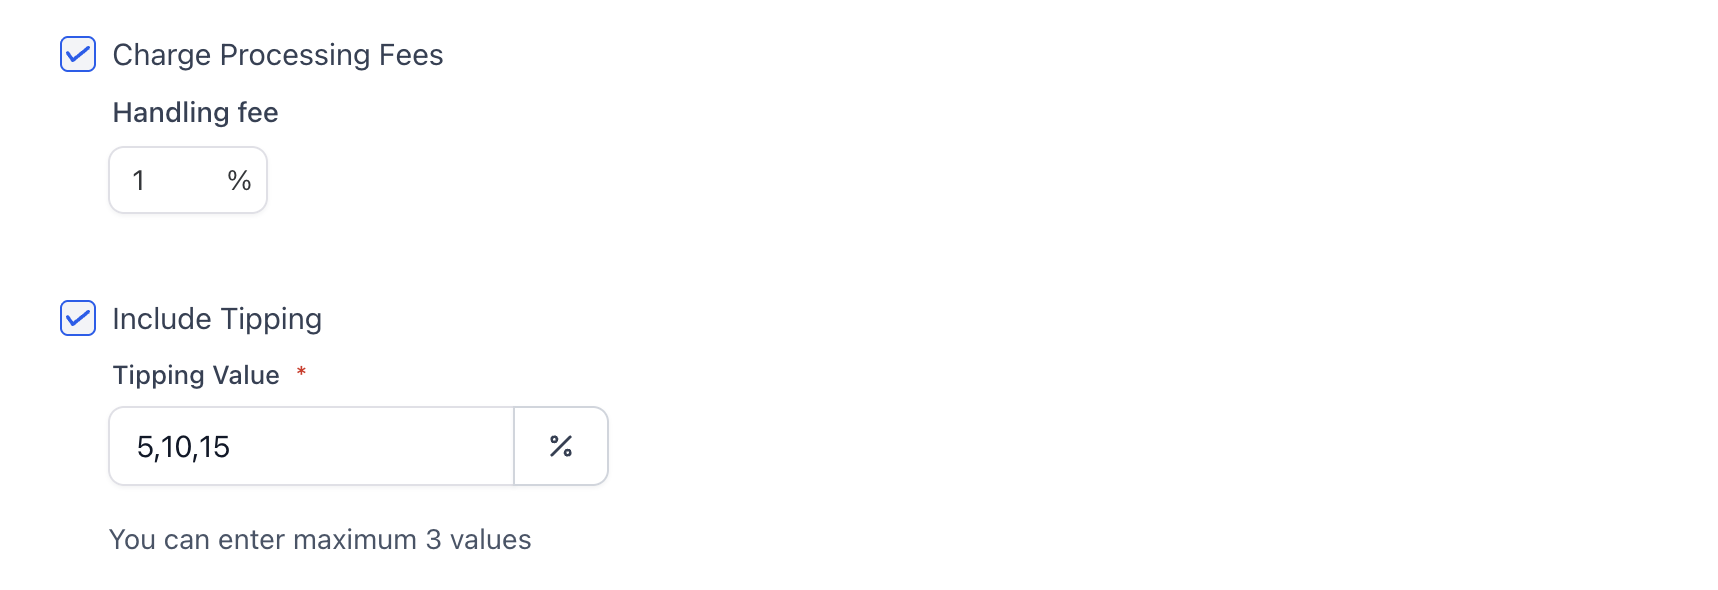
Charge Processing Fee and Include Tipping: Set the handling fee percentage and the tipping range to collect. Processing fees do not appear on the invoice editor or initial preview; they are only visible once the patient clicks Pay.
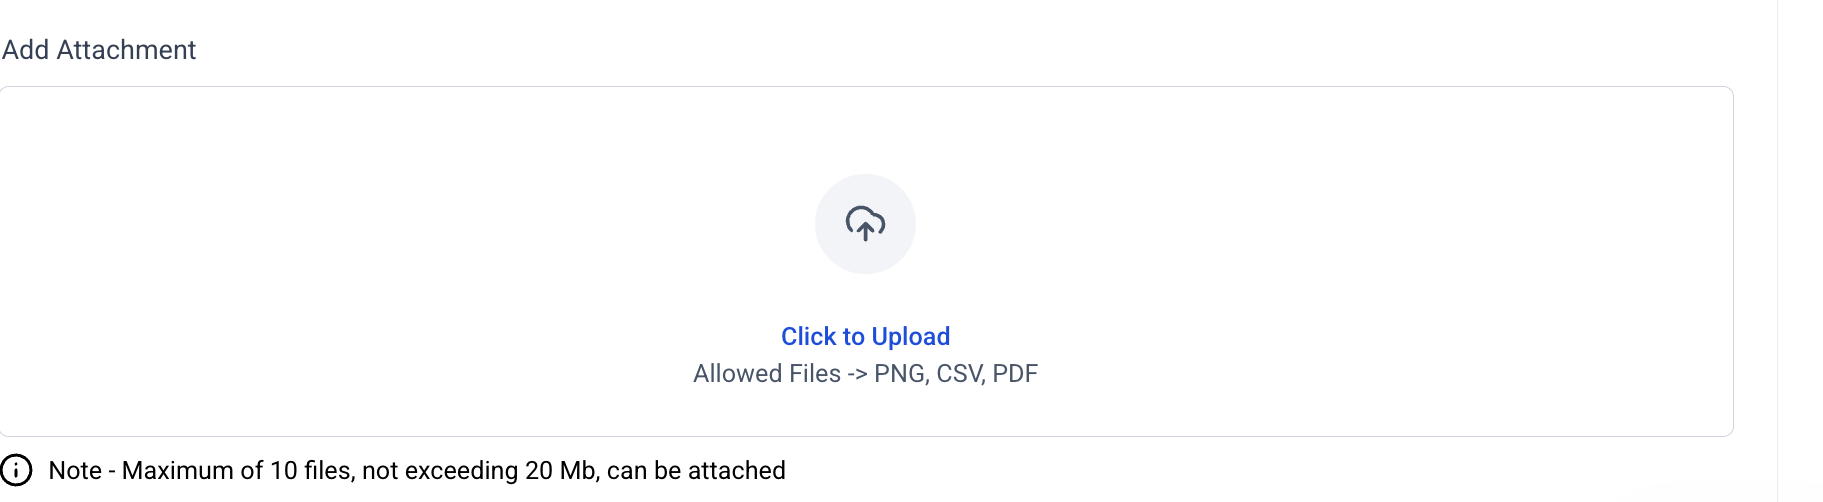
Add Attachment: This file is added to the invoice email sent to the patient.
Note: To allow partial payments, collect late fees, and allow tip payments, the corresponding options must be enabled in Payment Settings under the main Settings button in the Invoices & Estimates tab.
You can view the invoice as you build it.
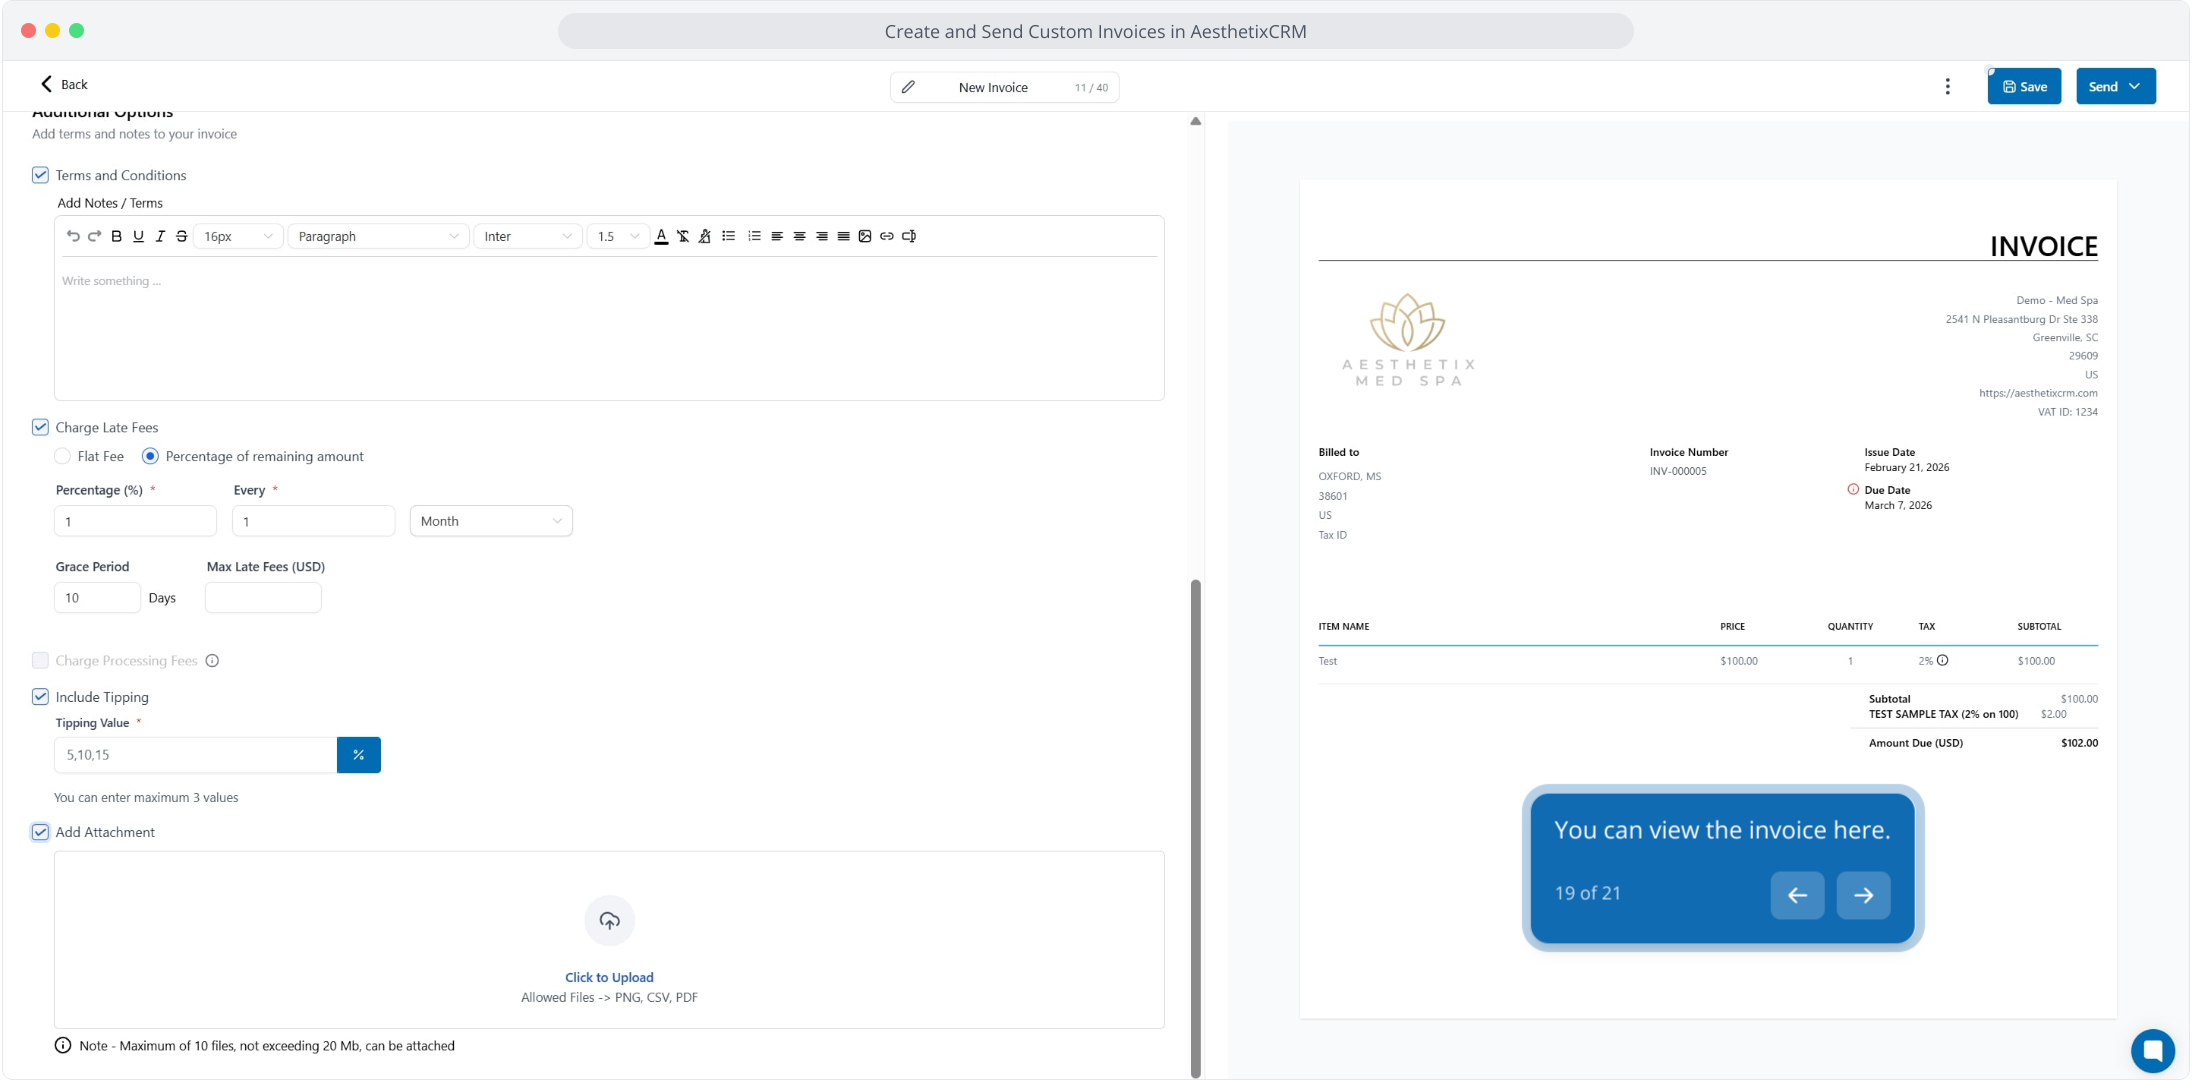
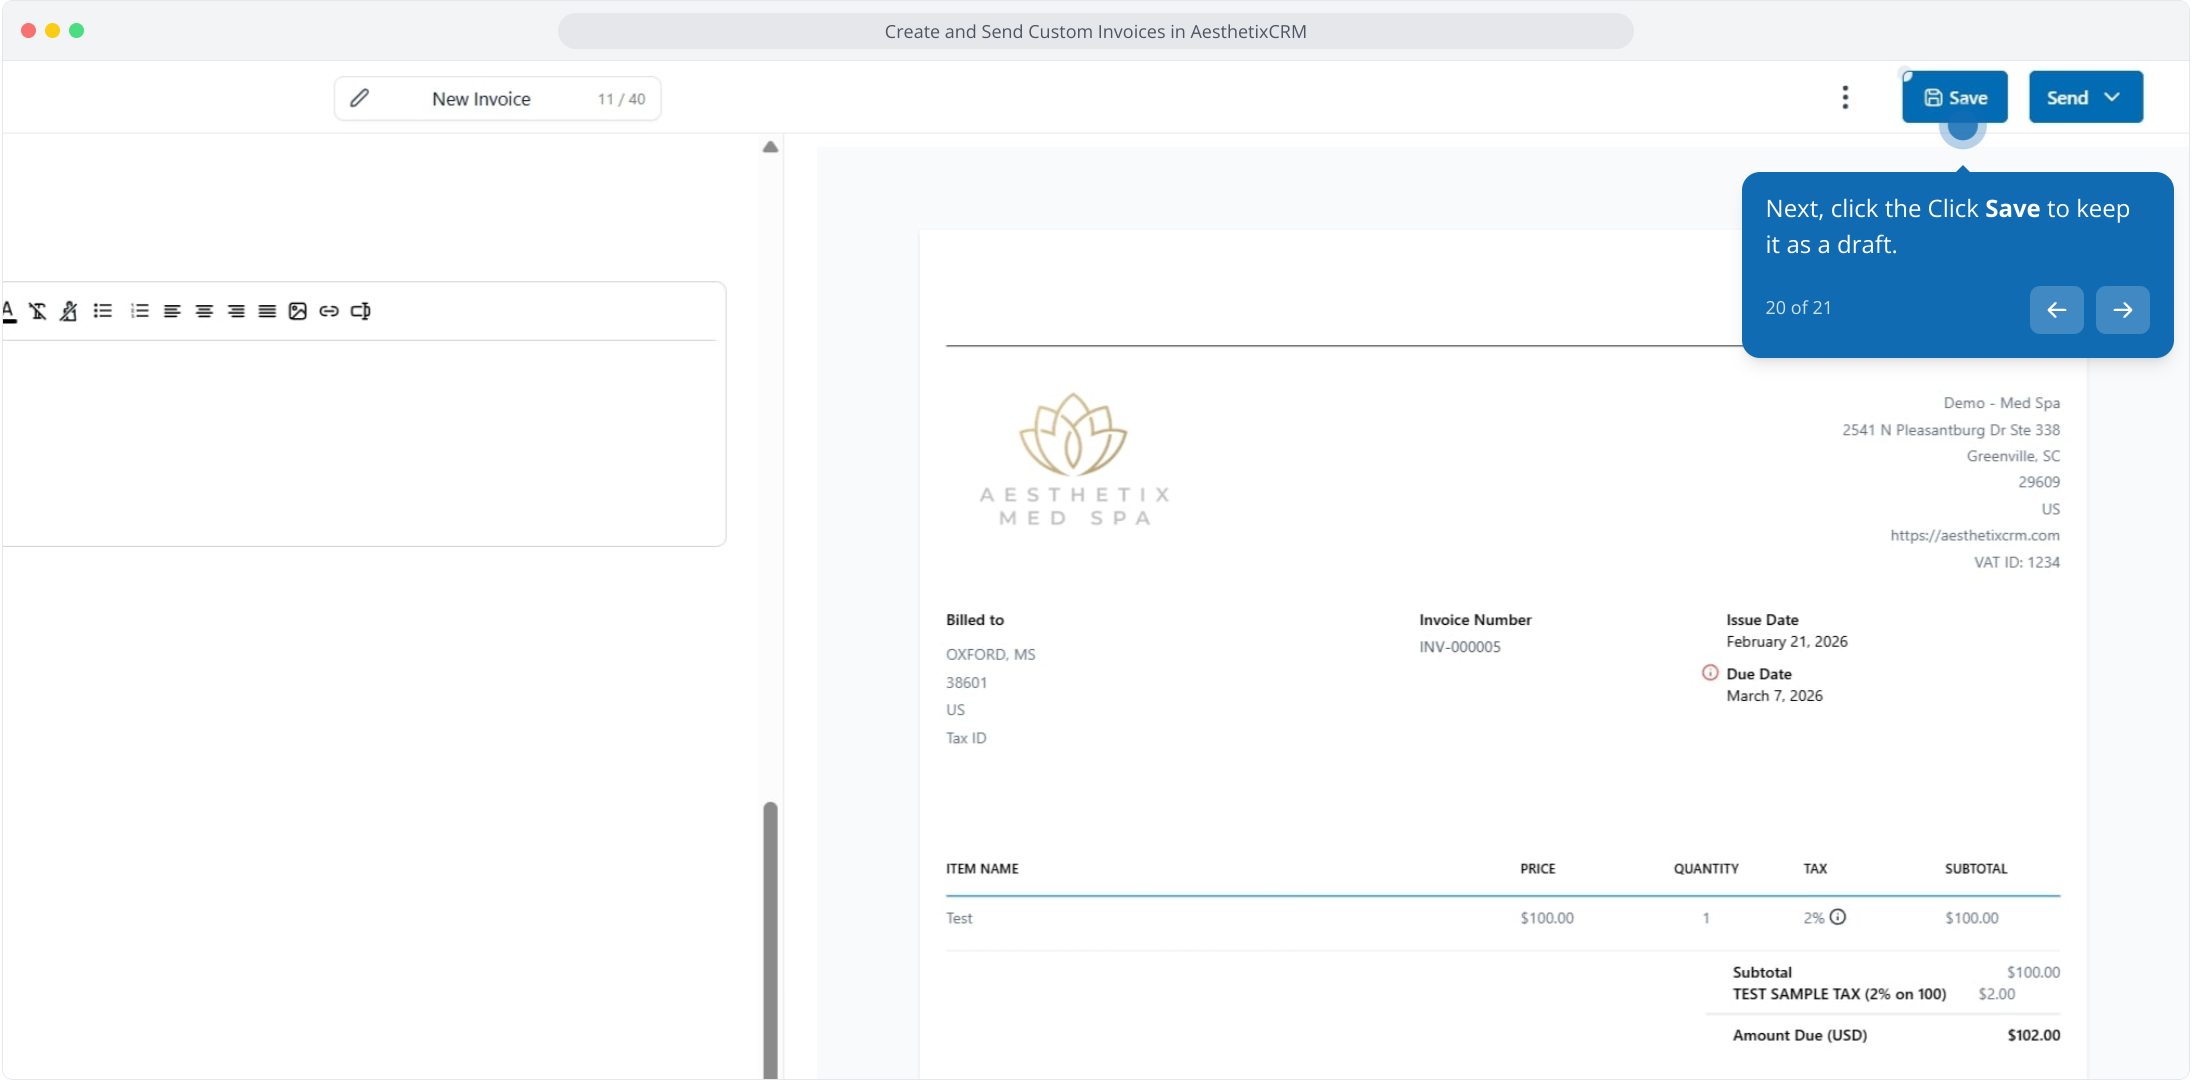
Click Save to keep it as a draft.
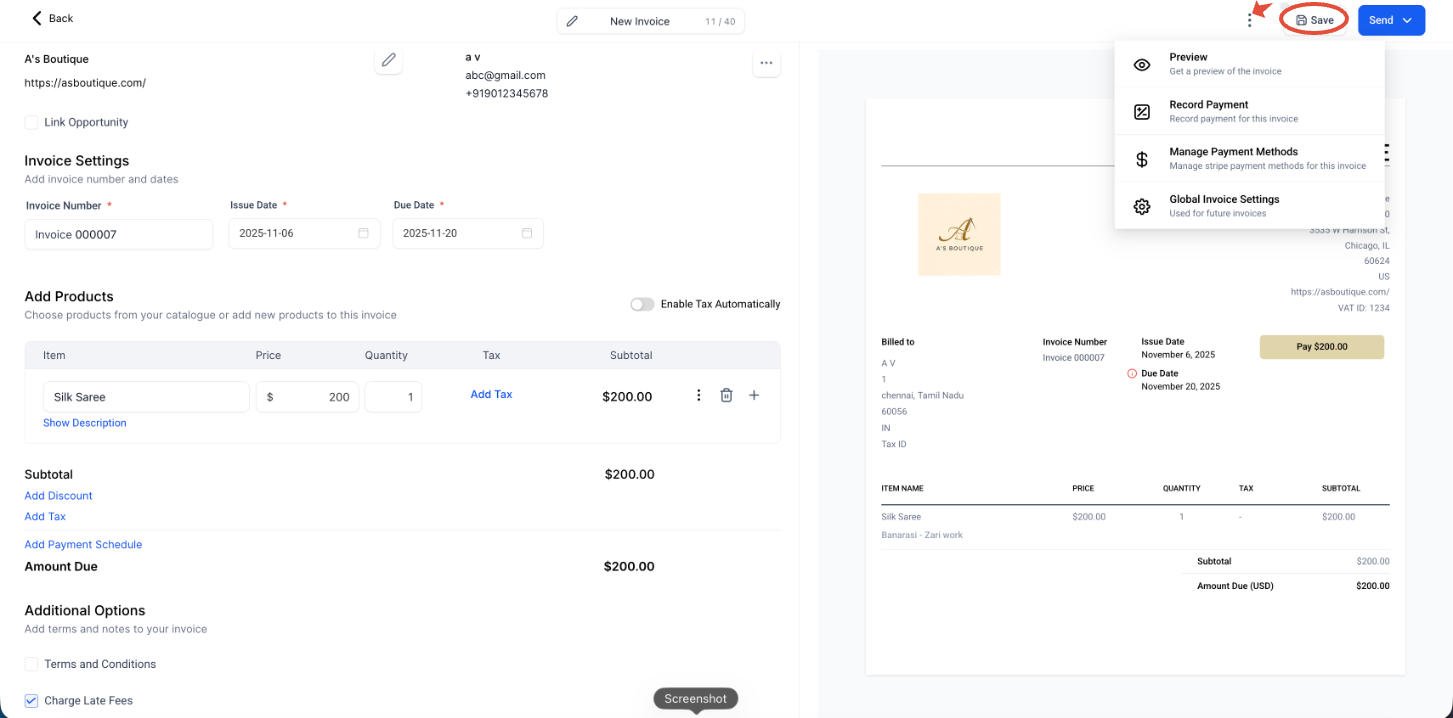
The editor's right-side preview is not a true WYSIWYG preview. It displays placeholder sample data meant only to show layout structure. To view the accurate final invoice, use one of the following:
Three dots (⋮) → Preview, or
After sending: Contact → Email → View Invoice
The accurate preview opens in a new browser tab and shows the full invoice as recipients will see it. Return to the editor by switching back to the original tab.
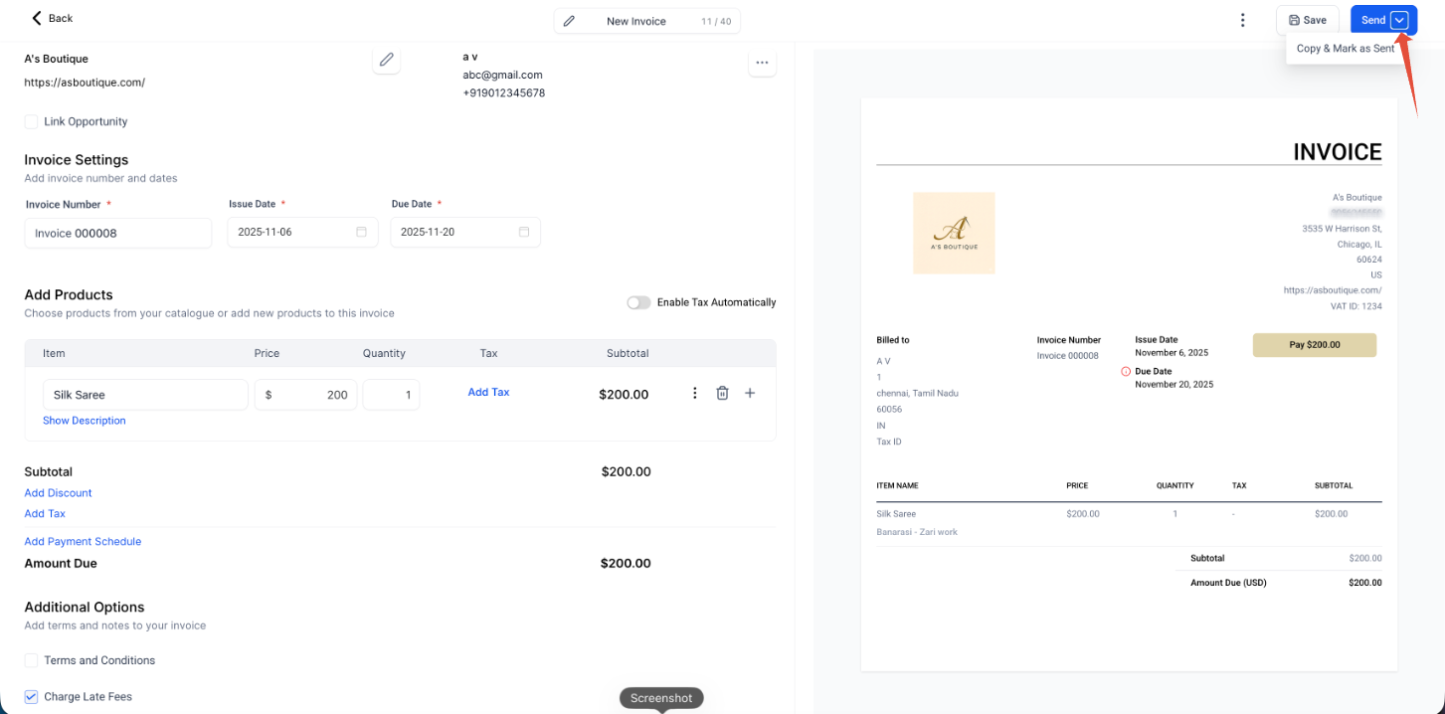
Click the small downward arrow next to Send to copy the invoice link or mark it as sent. This moves the invoice from Draft to Sent status and copies the live payment link to your clipboard, ready to paste into any email.
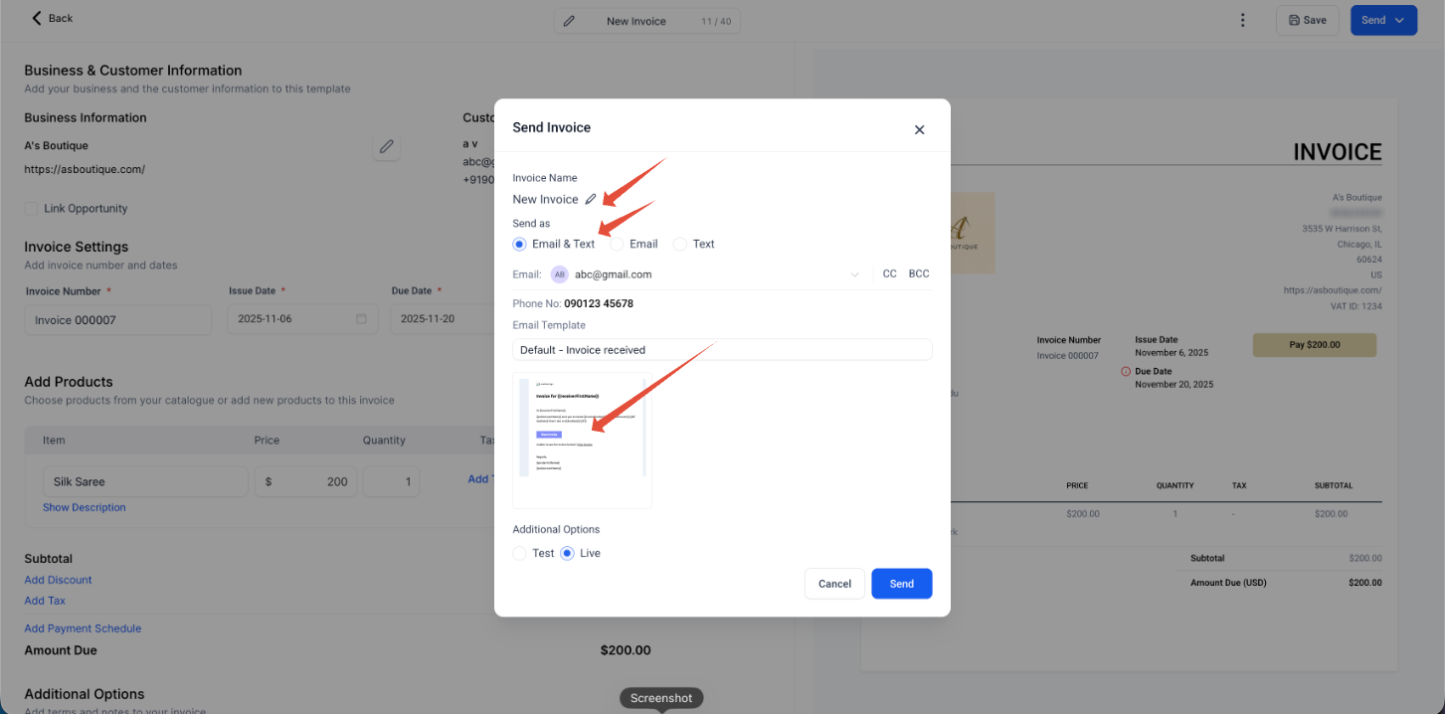
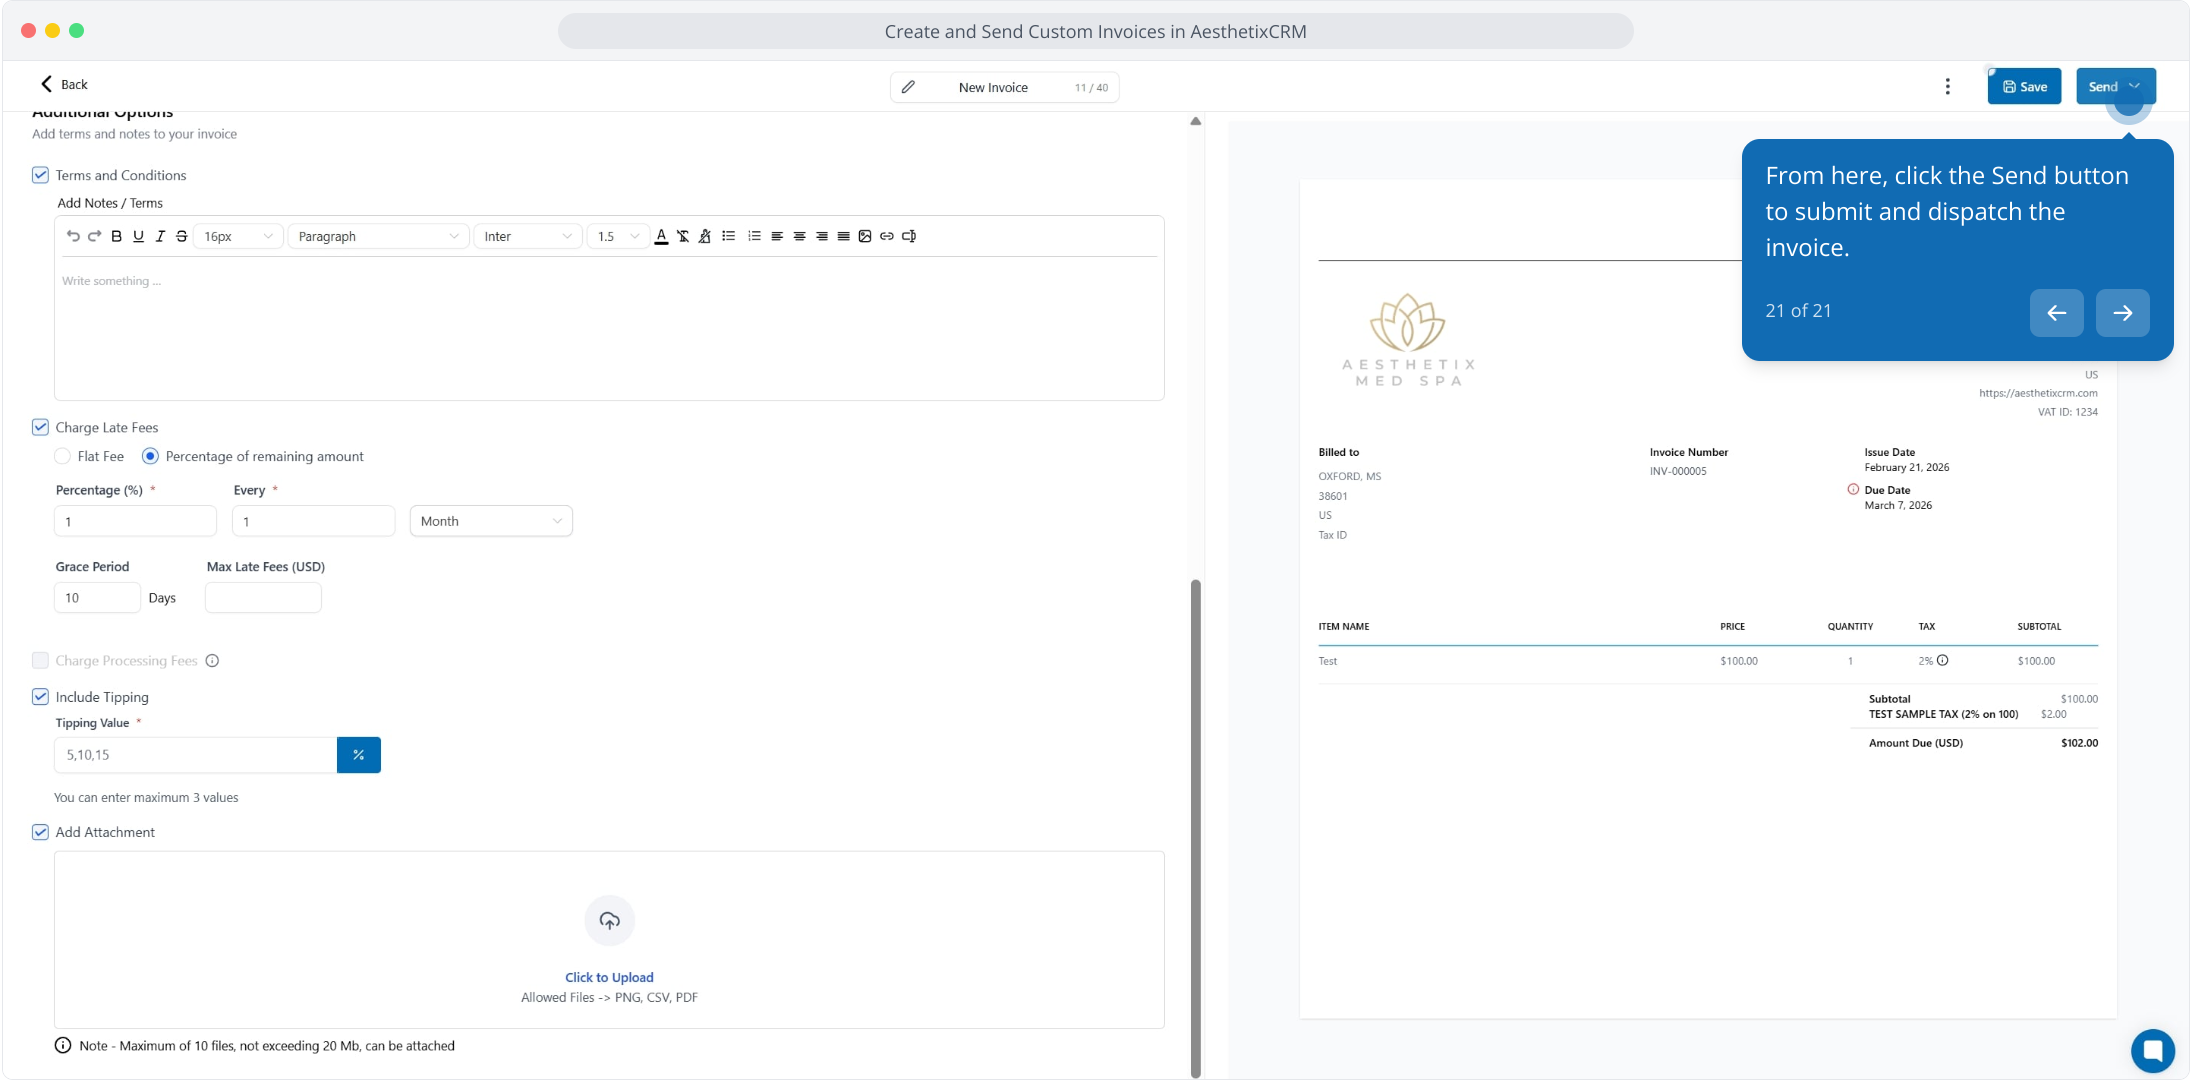
Click the Send button to dispatch the invoice.
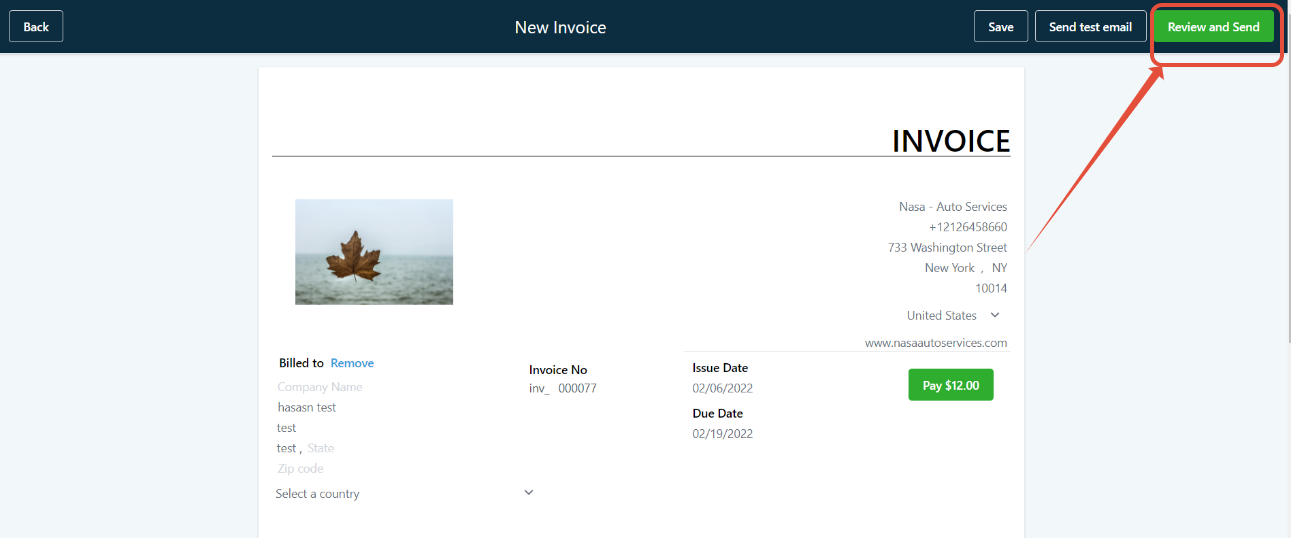
When you click Send, you can edit the invoice name, choose to send as email, text, or both, and edit the email elements by clicking the mail preview below the email template.
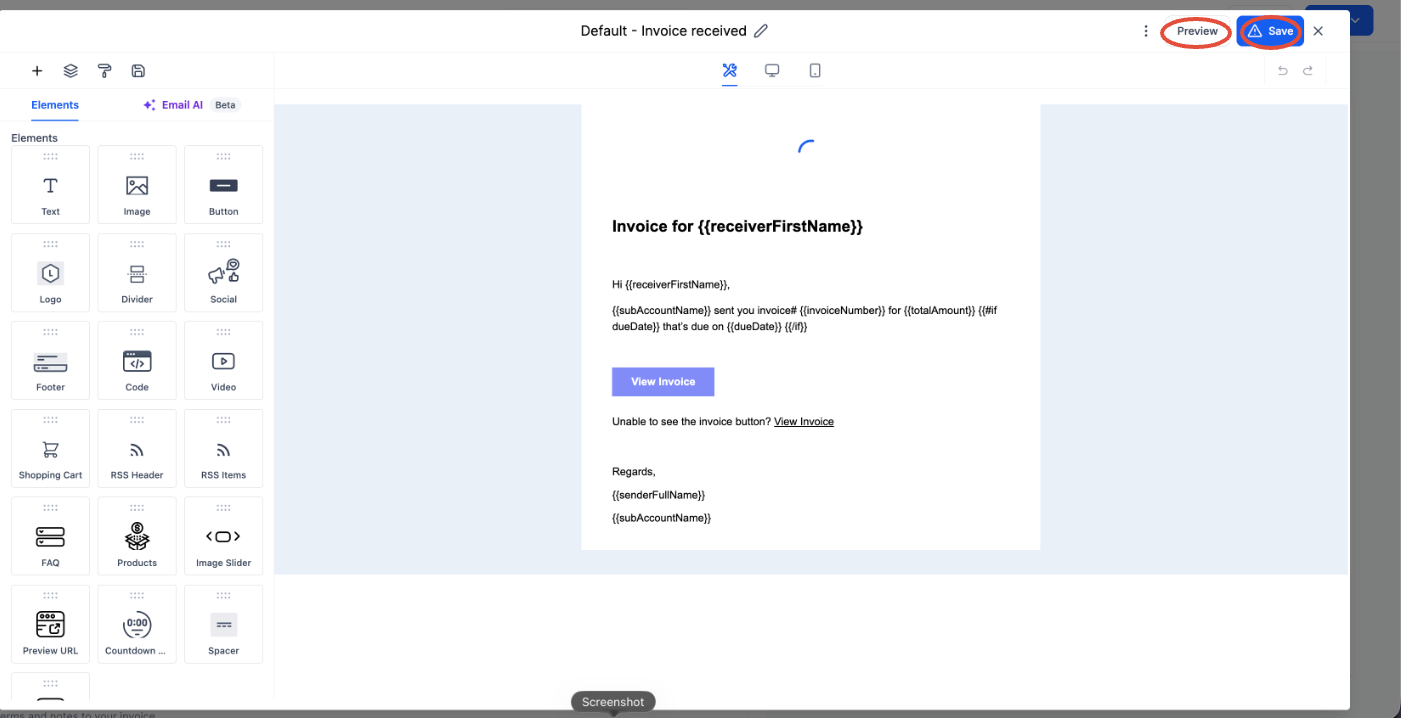
Once you edit the elements, you can preview and save the template.
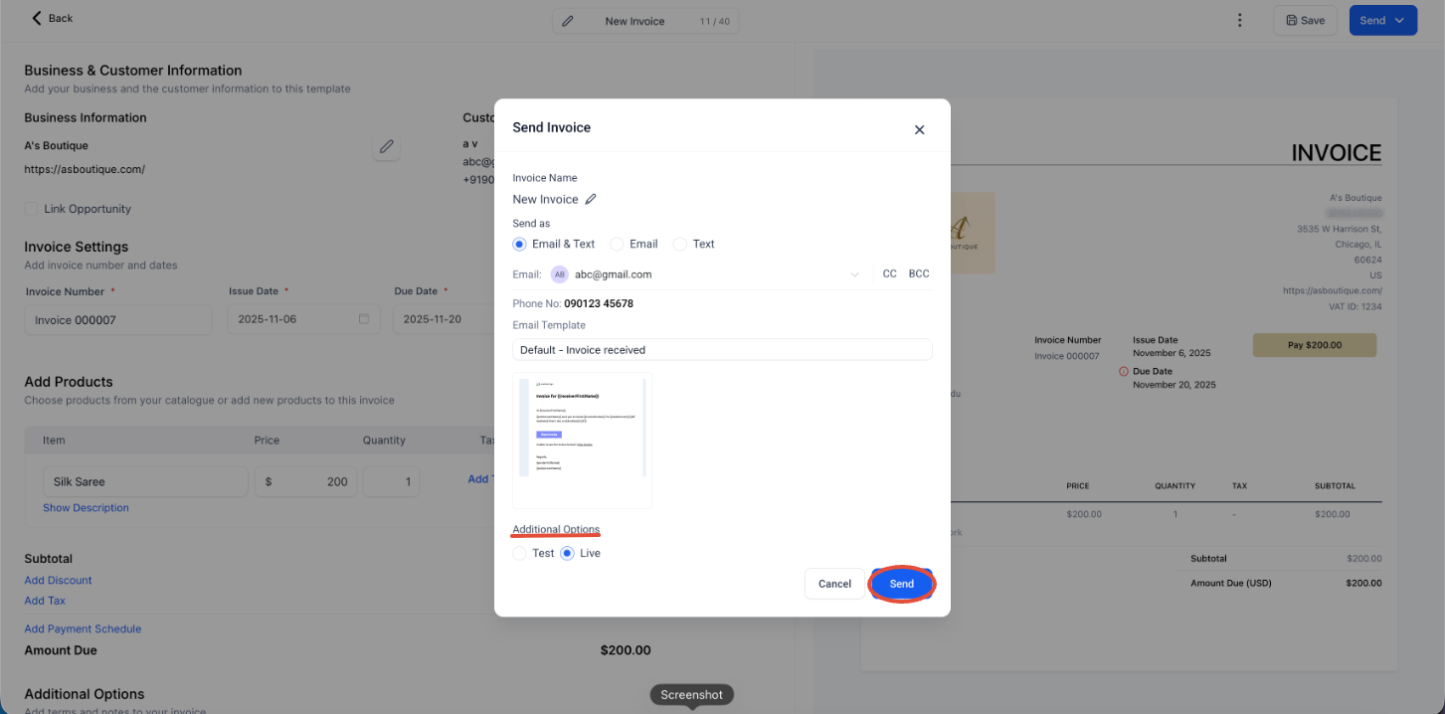
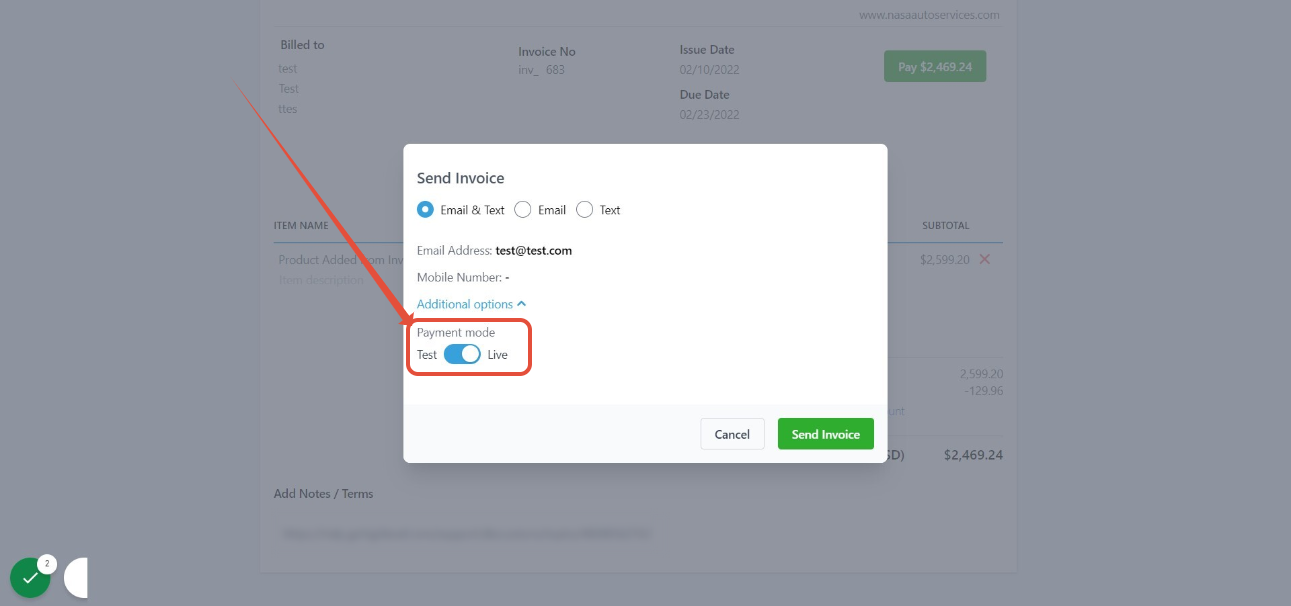
Under Additional options, you can set the invoice to Test or Live mode, then click Save.
You can send the invoice link through Outlook or any external email platform.
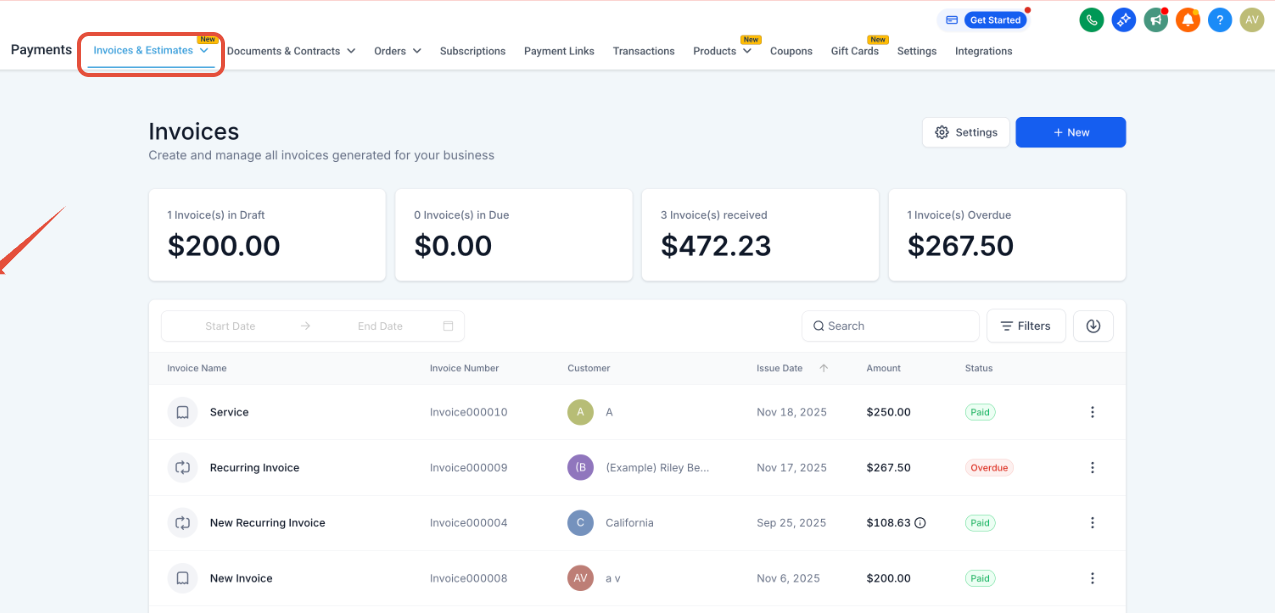
Go to the invoice, click the three-dot menu next to it, and choose Copy Link.
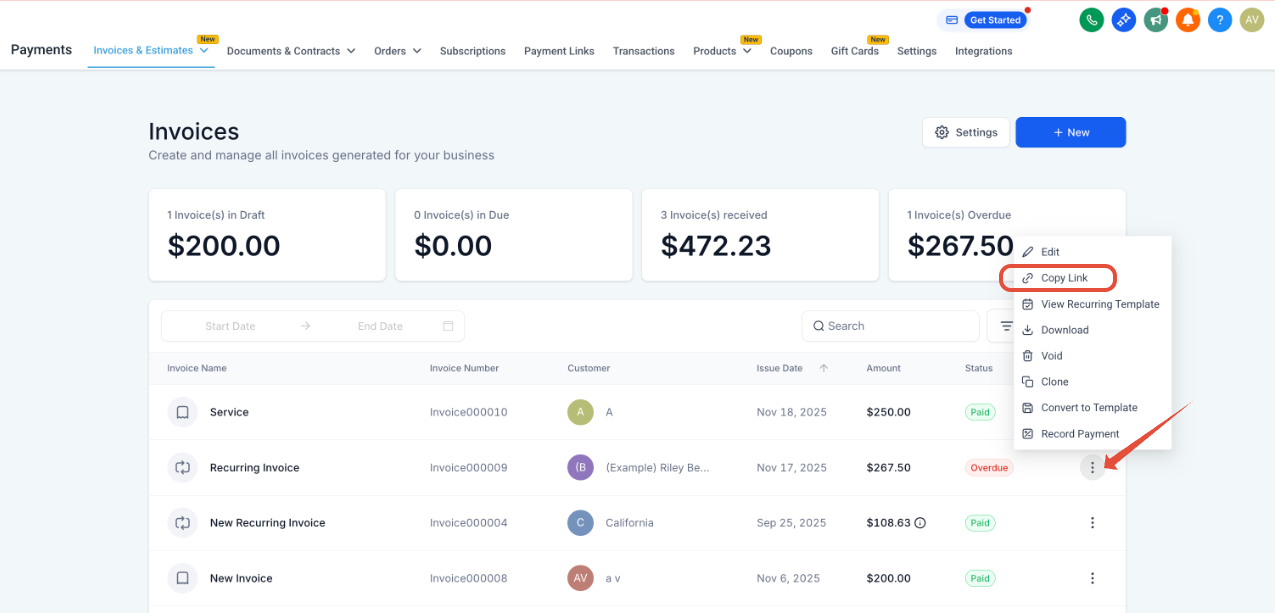
Paste this link directly into your email. You can also download the invoice as a PDF and attach it if you prefer.
Go to the Invoices tab to see the list of invoices and their statuses. You can filter by status and date range.
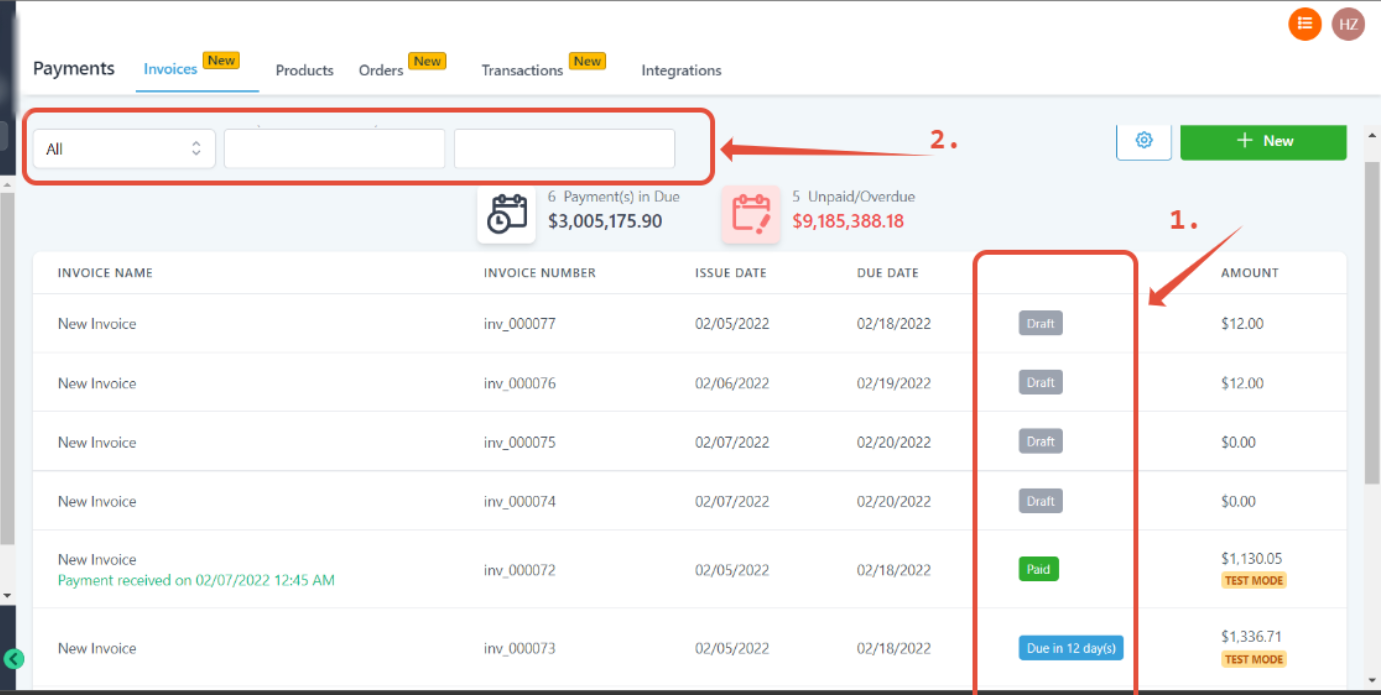
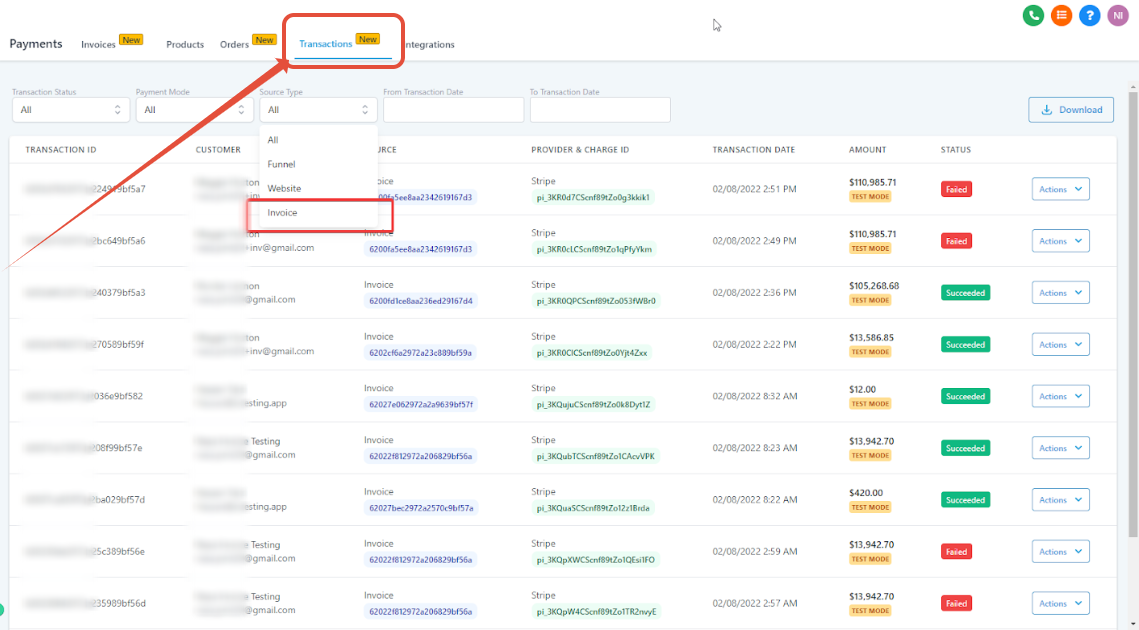
Invoices can also be found in the Transactions tab, where you can review successful or failed transactions and open the related invoice directly (Payments → Transactions).
If a patient has paid part of an invoice, you can still update eligible details, products, pricing, taxes, business information, and the payment schedule without voiding the invoice or creating a replacement. Previously collected payments stay associated with the invoice. This is available for invoices in Partially Paid status; once an invoice is fully Paid, standard editing is no longer available.
On an eligible partially paid invoice, you can update:
Invoice name, due date, terms, and notes (the patient on the invoice cannot be changed once a payment has been made)
Products: add, remove, or update quantities, descriptions, and unit prices, or create a new product while editing
Invoice amounts, applicable taxes, and business information
Payment schedule entries: add, edit, or delete entries, and change installment due dates and amounts
To edit a partially paid invoice:
Go to Payments → Invoices & Estimates and locate the partially paid invoice.
Click the three-dot menu next to the invoice and select Edit in a new tab.
Update the eligible business information, due date, products, pricing, taxes, discounts, payment schedule, or terms and conditions. The preview on the right reflects what the patient sees.
Click Save. Previously collected payments remain on the invoice.
If the patient needs the updated invoice, click Resend to send it without creating a new invoice.
Note: A payment schedule is different from the Partial Payments toggle in Payment Settings. Payment schedules set predefined installments, while Partial Payments let a patient pay an eligible portion of the invoice based on your configured settings. Partially Paid is also available as a status filter in workflow automations.
Aesthetix CRM offers an updated invoice editor with a split-screen experience: you edit invoice details on one side while previewing the final output on the other. This reduces errors and speeds up invoice creation.
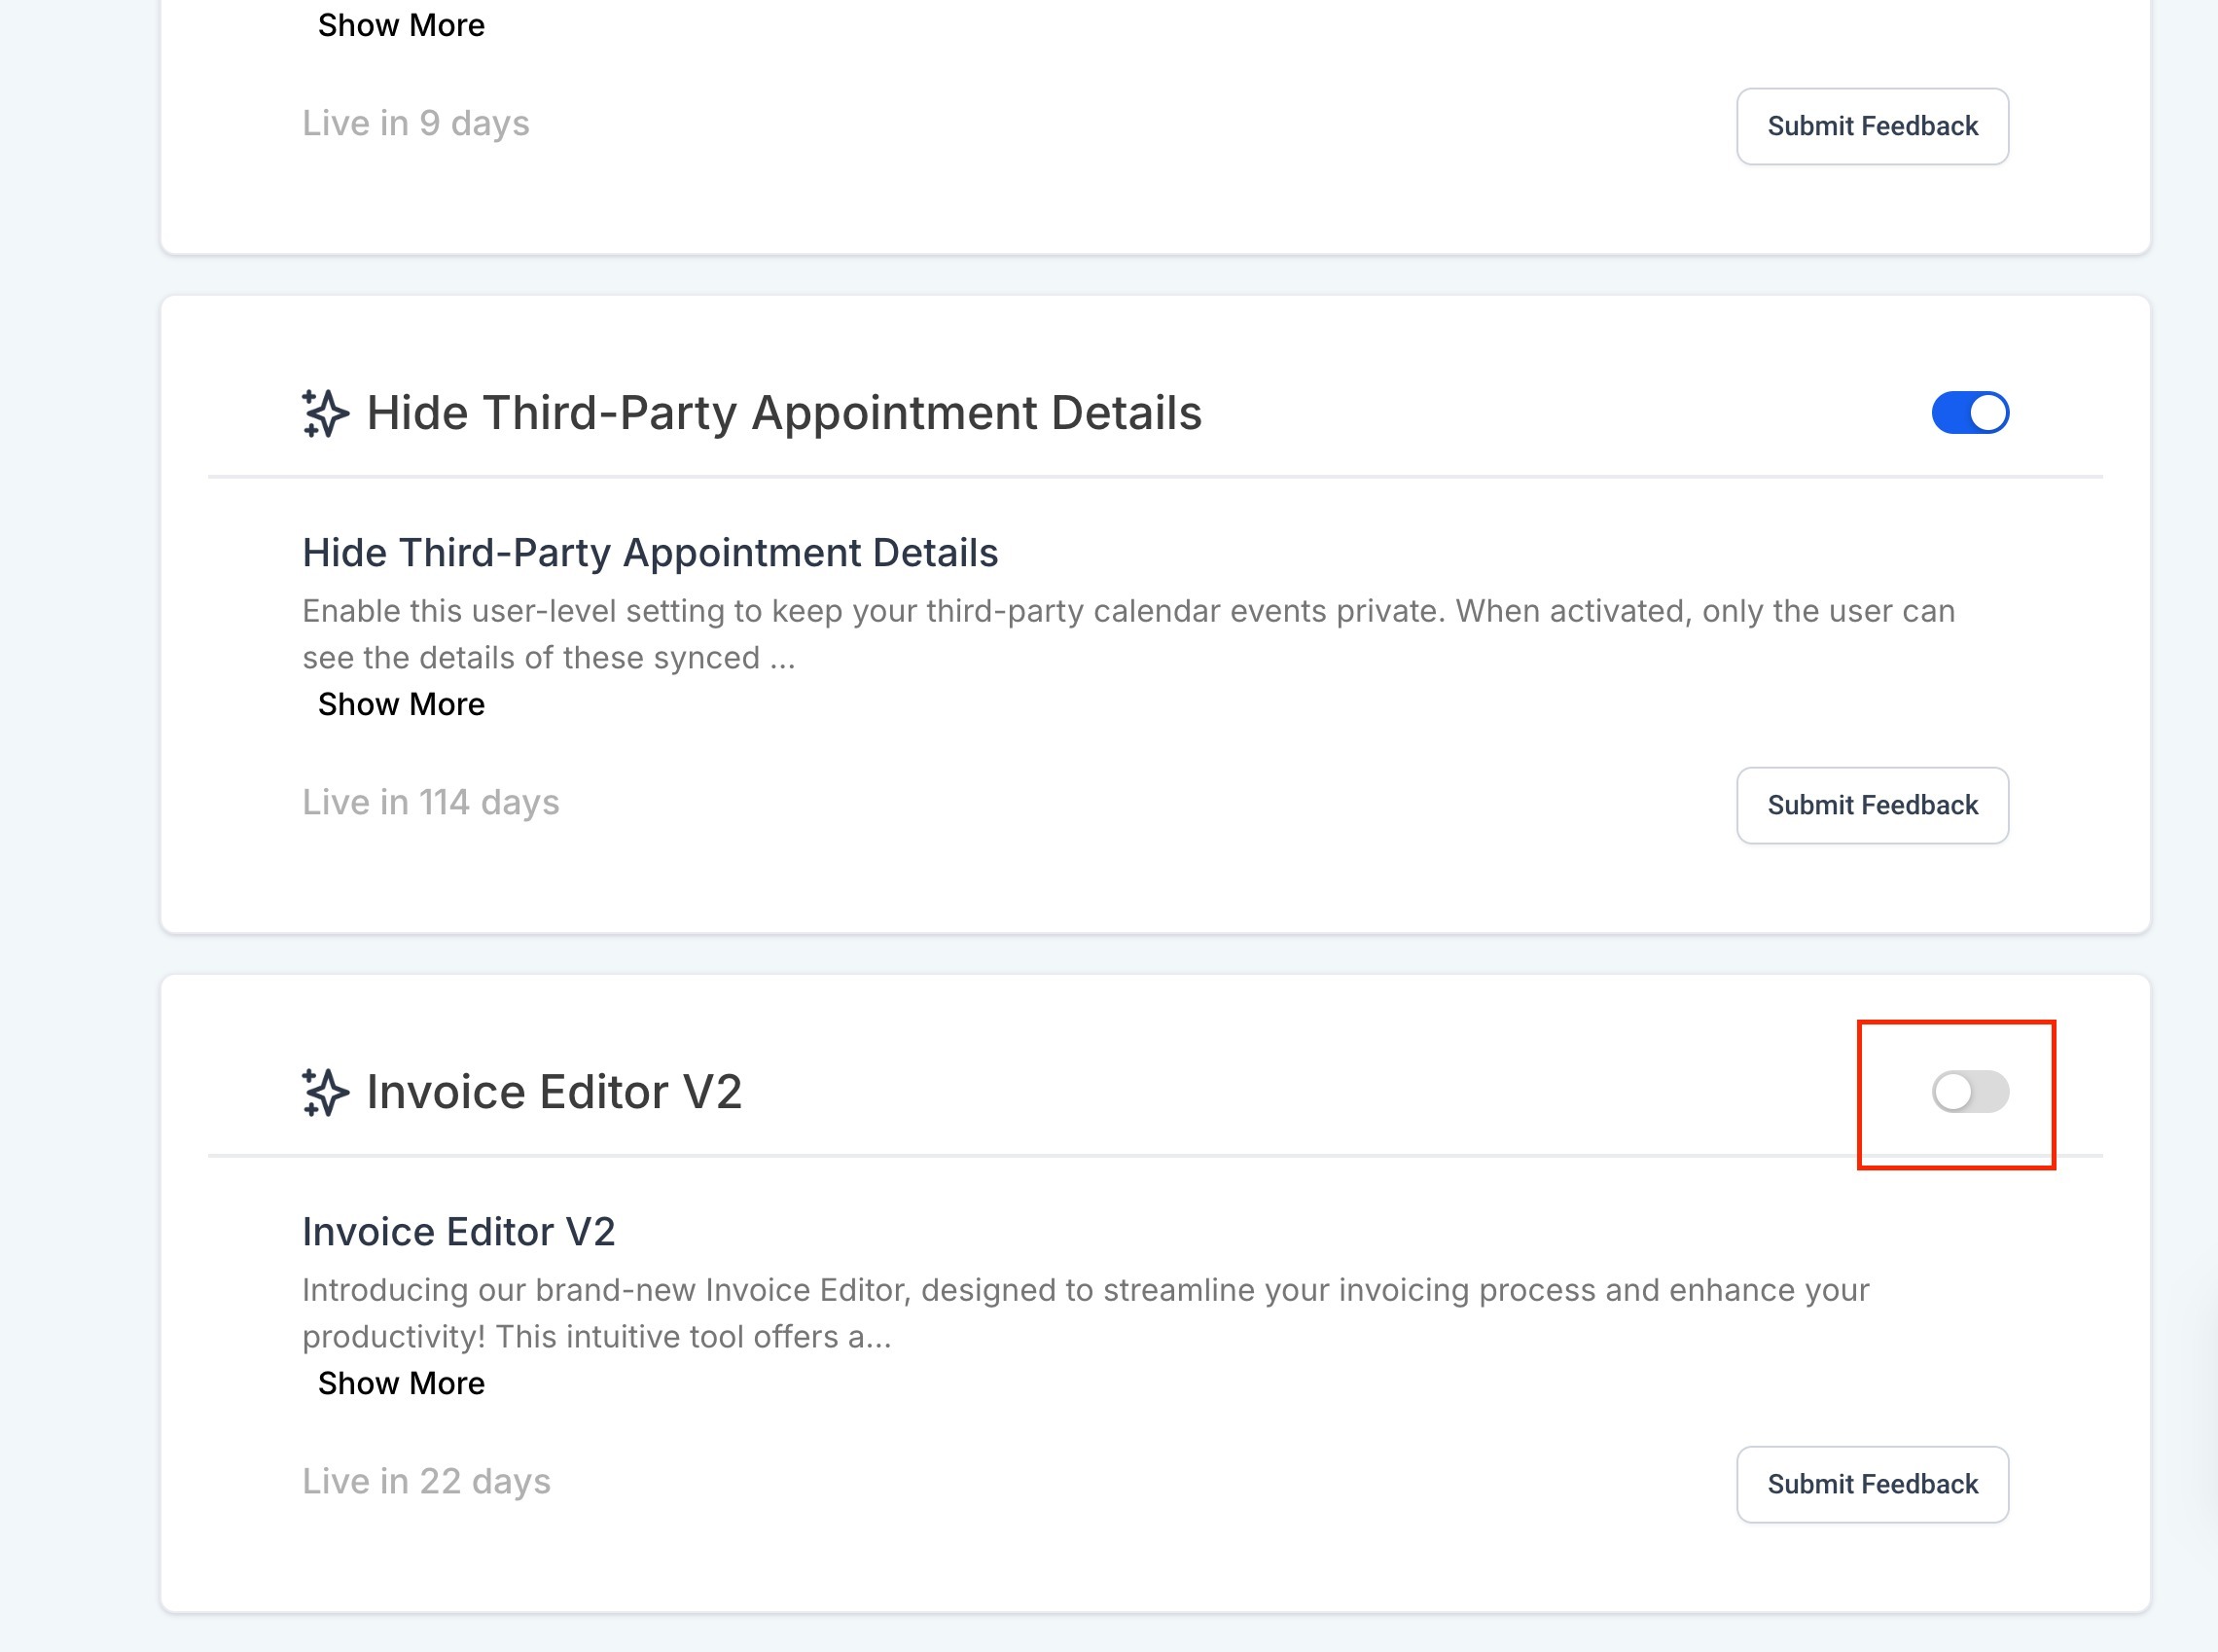
Enable the new editor from your settings by turning on the toggle.
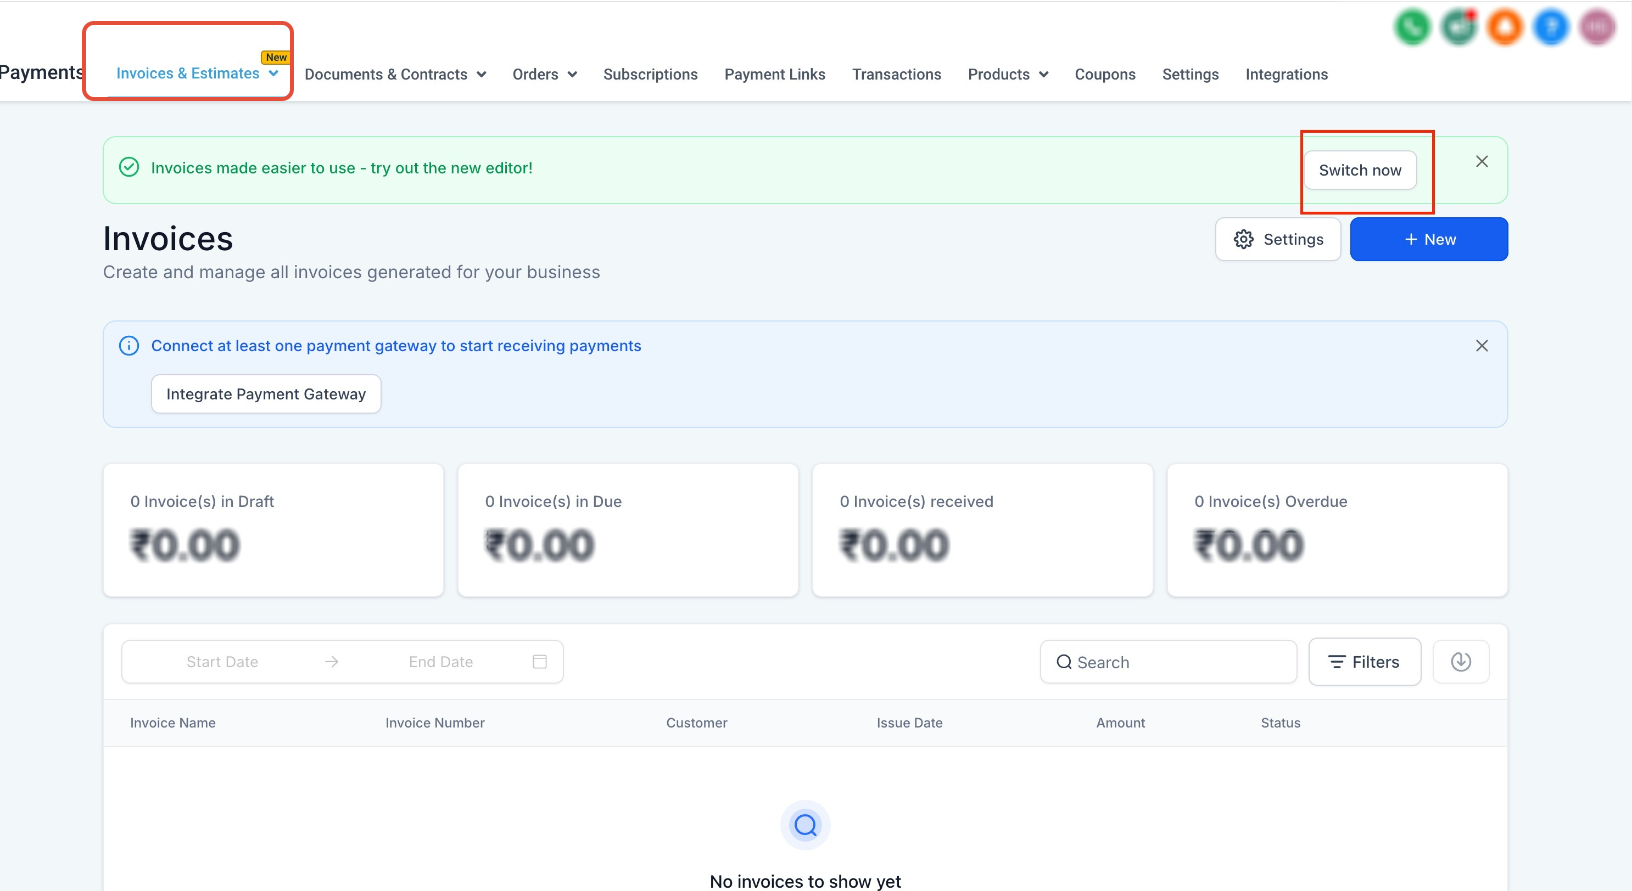
After enabling it, a banner appears at the top of the invoice page. Click the highlighted option to switch to the new editor.
The new layout shows editing fields on the left and a live preview on the right. Enter patient details, add products, and configure totals from the left panel while the preview updates automatically.
You can add products on the fly by typing their name and pressing enter, removing the need for multiple steps.
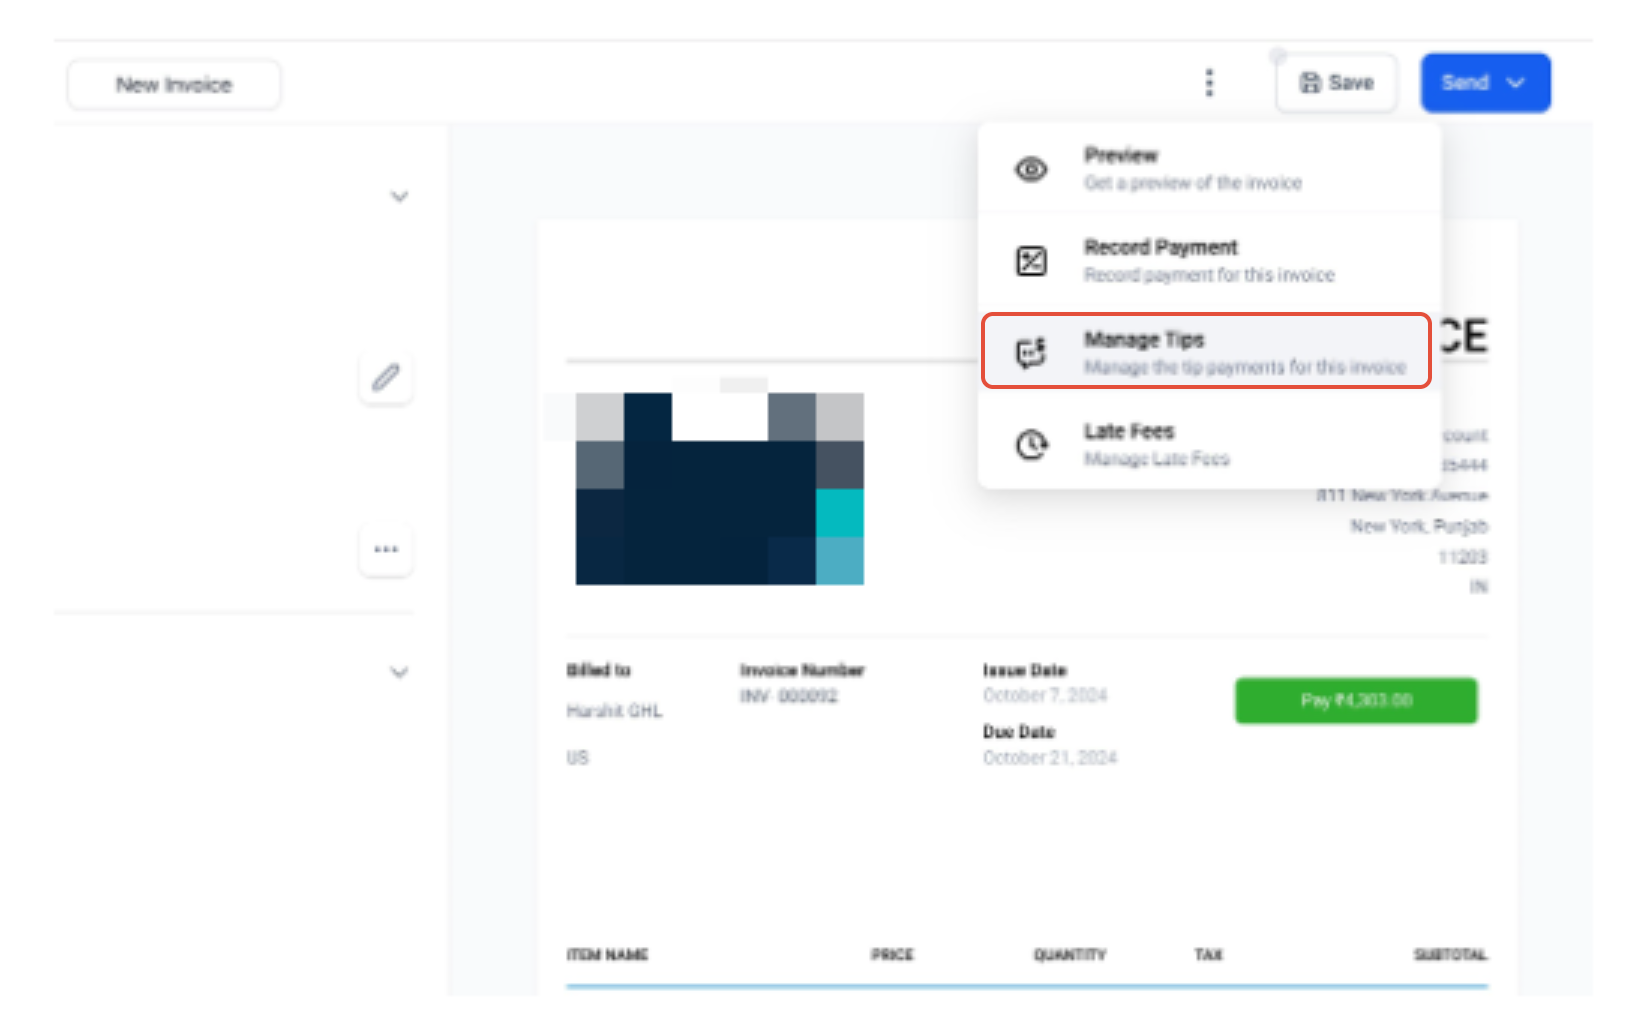
Use the additional options menu to manage payments, tips, and late fees. These options remain fully functional in the new editor.
Interactive walkthrough
Why is my logo missing on older invoices but showing up on new ones? Invoices pull the logo from its original file location in your Media Library. If that file was deleted, the link breaks for existing invoices. For unpaid invoices, upload a new logo and update your business details so it reappears. Paid invoices cannot be edited, so you would need to add the logo manually to the PDF if resending a receipt.
I can't type in the Terms & Conditions or notes field; only the formatting toolbar shows. How do I fix it? This is usually a local browser issue caused by old cached data. Fully clear your browser cache and cookies, close all tabs, and log back in. The text editor should then load correctly.
Can I charge a one-time setup fee and a monthly membership on the same invoice? No. One-time and recurring payments use different billing logic, so create two separate invoices: a one-time invoice for the setup or upfront fee, and a recurring invoice for the monthly membership.
Why does the system seem to skip invoice numbers? Invoice numbers are reserved the moment an invoice is created, even in Draft. If you delete a draft, that number is not automatically recycled. You can manually type a skipped number into the invoice number field to keep your records sequential.
Can I unvoid an invoice or mark a voided invoice as paid? No. Voiding is a final action. Once voided, the invoice value is set to zero for accounting purposes and cannot be moved back to Sent, Open, or Paid status.
How do I change an invoice from Test mode to Live mode? An invoice created in Test mode cannot be converted to Live. Clone the invoice, open the cloned Draft, and choose Live mode when sending.
My invoice says "Sent" but the patient never received it. What should I do? First try clearing the browser cache and cookies, then log out and back in and resend. You can also verify delivery through the patient's Conversations tab: locate the outbound email, hover over the message, click the three dots (More Actions), and select Details to see mail-server data. If the issue persists, contact support.
Why is my invoice not sending immediately? Confirm the Issue Date is set to Today (a future issue date delays sending), verify your account timezone under Settings → Business Profile, and remember that recurring invoices process in scheduled batches. For immediate delivery, use a one-time invoice and click Send manually.
How can I send an invoice to more than one recipient? By default, invoices go only to the contact's primary email. Click Send and use the CC option to add another email address before sending.
Why am I getting a "Something went wrong" error when sending? This usually means the invoice was not fully saved before sending. Open the invoice, click Save, wait for the confirmation, then click Send again.
Why am I getting an error setting installment due dates? Installment due dates must fall on or before the main invoice due date. Update the invoice's main due date first, then set the installment dates and save.
How can I collect a patient's card before a future invoice date? Scheduled invoices do not collect card details until they are sent on the due date. To capture a card in advance, add a small setup fee (for example, $1) so the invoice sends immediately, use a trial period on a recurring invoice, or use a zero-dollar order form that saves the card without charging.
Can I edit an invoice after it has been paid in full? No. Editing is available while an invoice is in Partially Paid status, but once it becomes fully Paid, that editing capability is no longer available.
What happens to payments I already collected if I edit a partially paid invoice? Previously recorded payments stay associated with the invoice. Editing eligible invoice details does not remove or affect those existing payment records.
Can I change the patient on a partially paid invoice? No. The patient associated with an invoice cannot be changed once a payment has been made against it.
Do I need to void a partially paid invoice before making changes to it? No. Eligible partially paid invoices can be edited directly through Edit in a new tab, without voiding the invoice or creating a replacement.
