Trigger workflows when patients submit a form, pre-fill known contacts with Sticky Contact, and control how timezones are captured.
Forms are one of the fastest ways to bring new patients into your practice, but the real power comes from what happens after someone hits submit. In Aesthetix CRM you can launch an automated workflow the moment a form is submitted, speed up repeat submissions by pre-filling returning patients, and capture (or lock down) the timezone tied to each submission. This guide walks through all three, so every form you use works harder for your practice.
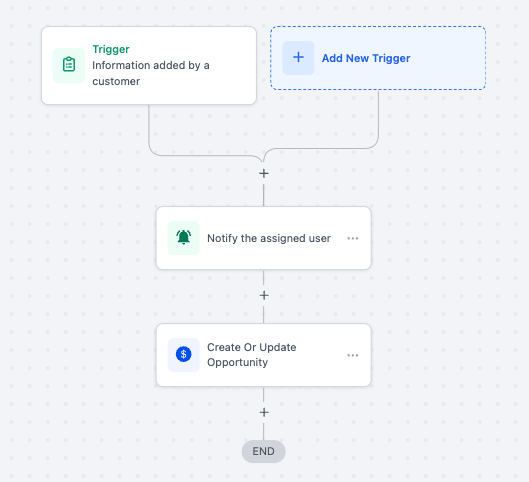
The Form Submitted trigger activates a workflow the moment a specified form is submitted, kicking off a series of automated actions. It streamlines tasks such as collecting data, sending notifications, updating records, and creating follow-up tasks, so your team responds quickly and every submission is processed consistently.
Improved efficiency: Automates routine tasks triggered by form submissions, saving time and reducing manual effort.
Enhanced communication: Sends automatic responses to patients and internal notifications to team members for follow-ups.
Data accuracy: Feeds submitted form data directly into the CRM, keeping records accurate and up to date.
Customizable workflows: Lets you set filters to target specific forms or submission criteria for tailored actions.
Scalability: Supports multiple workflows, so your practice can handle high volumes of submissions effortlessly.
Follow these steps to add the Form Submitted trigger to a workflow. For a full overview of building automations, see the Workflows collection.
Access workflow settings
Navigate to the workflow automation section. Create a new workflow from scratch, or open the existing workflow where you want to add the Form Submitted trigger.
Add a new trigger
Click Add New Trigger and select Form Submitted from the dropdown menu.
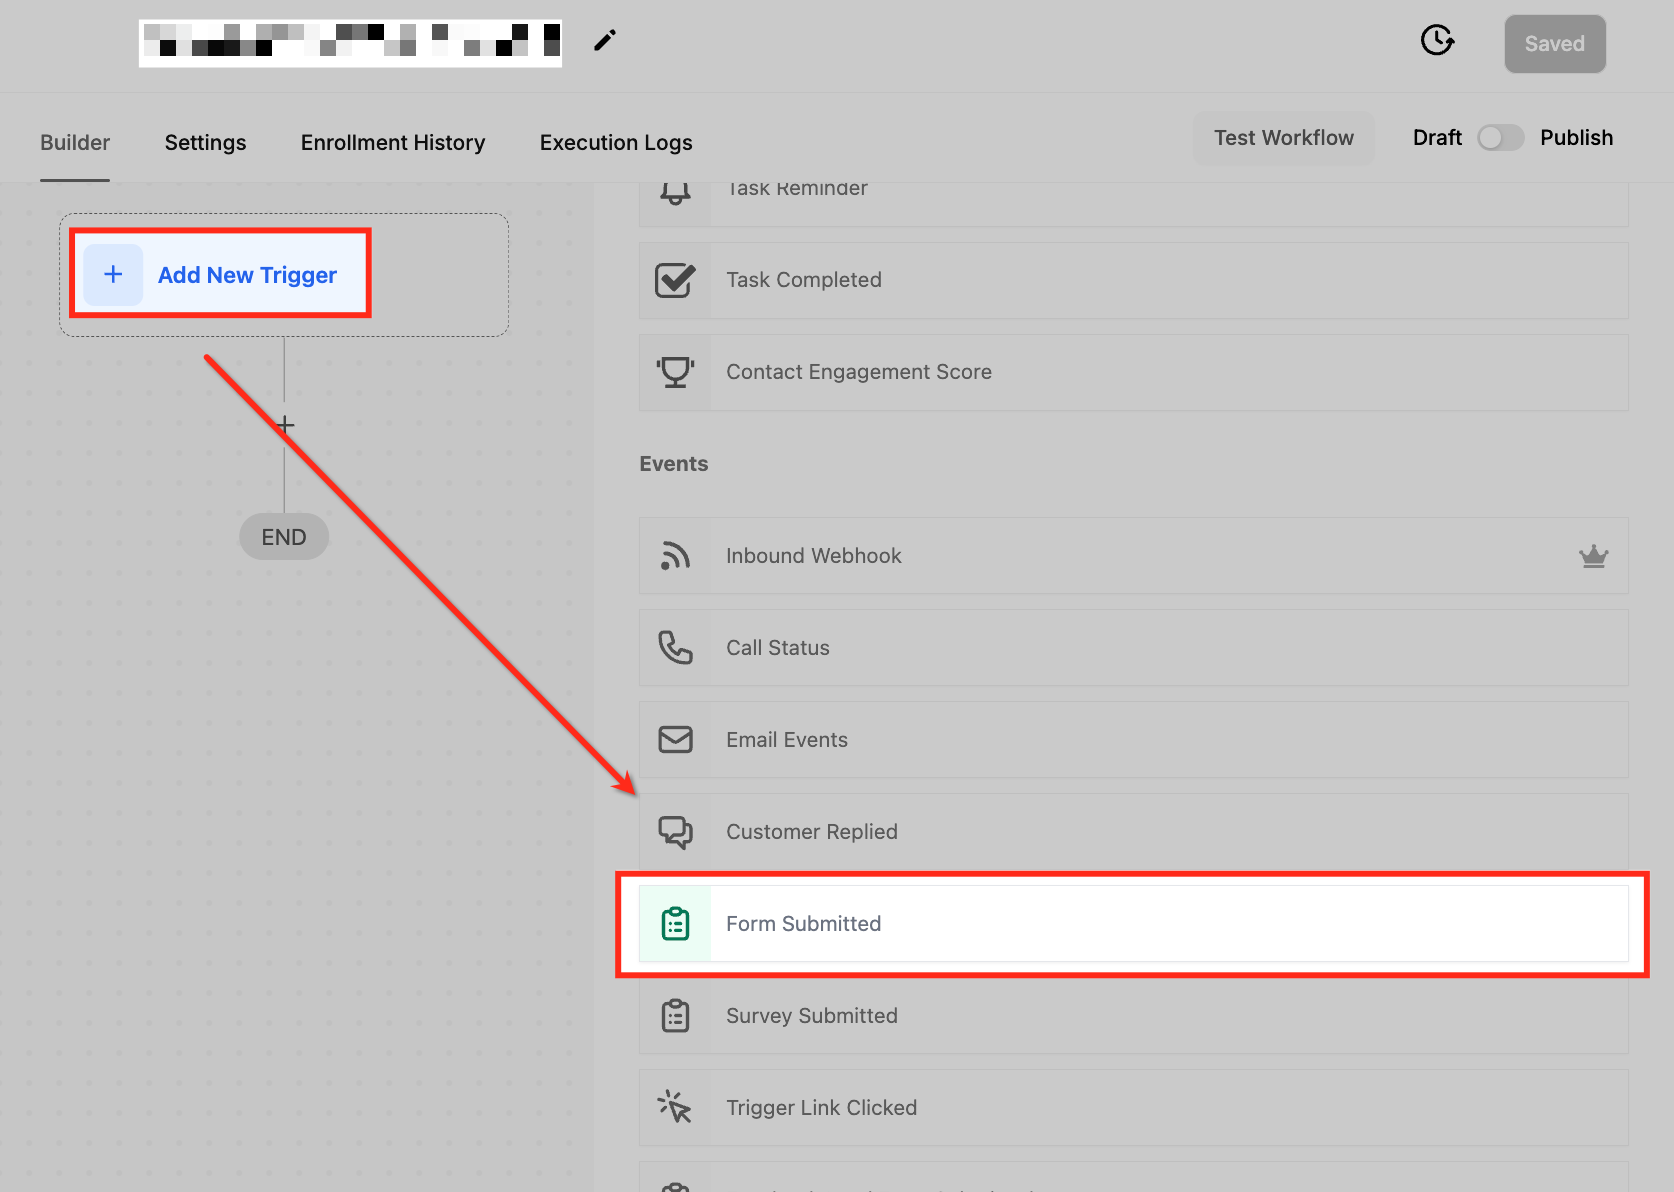
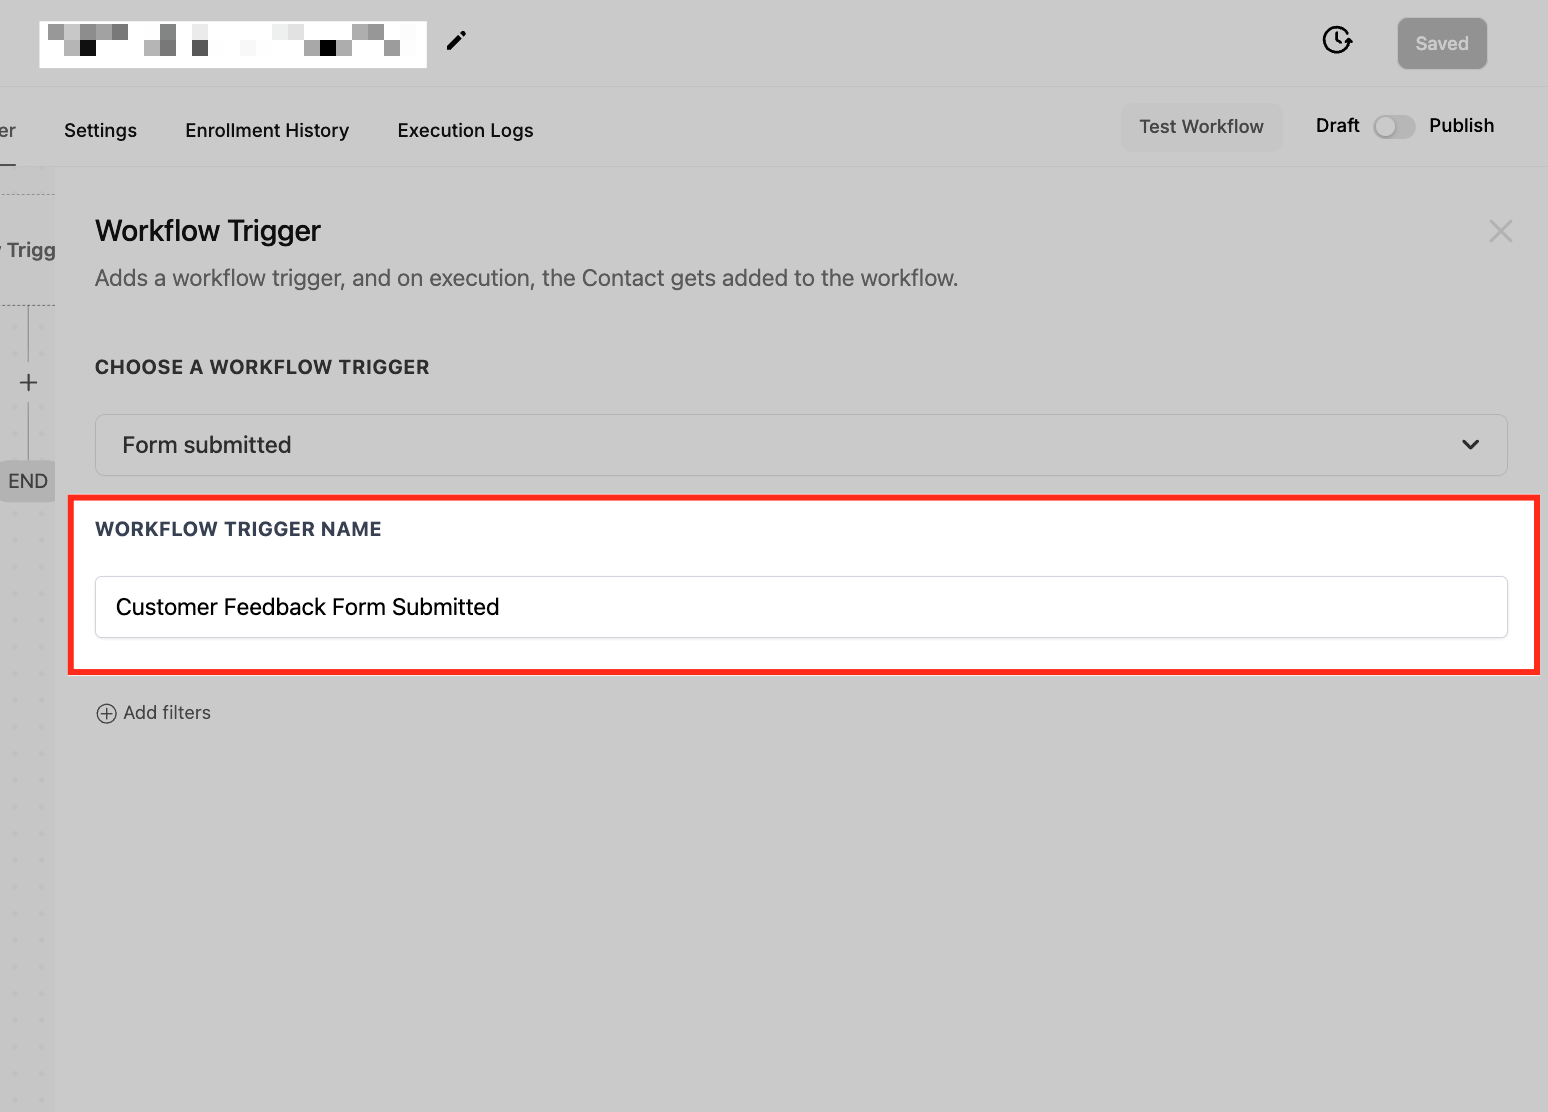
Name your trigger
Give the trigger a descriptive name, such as "Consultation Form Submitted."
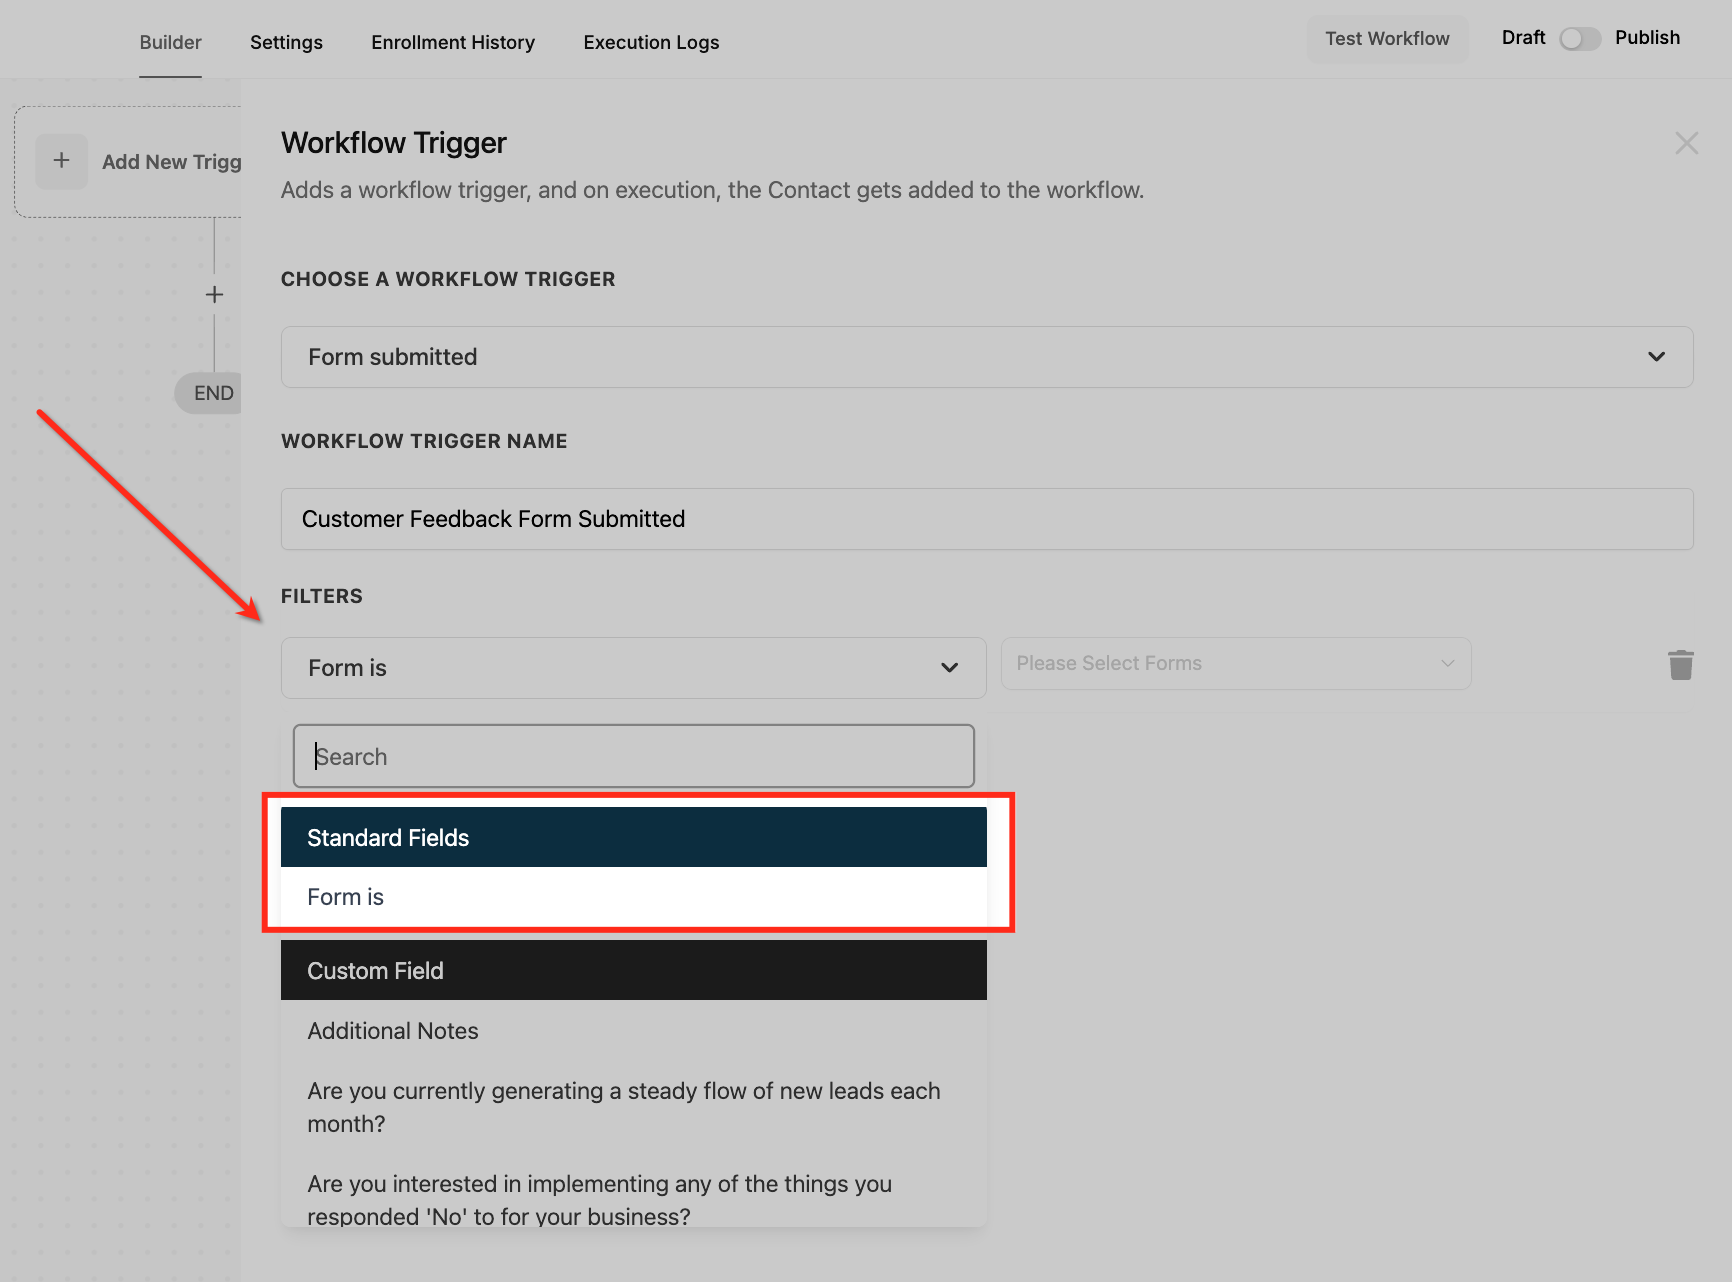
Set filters
Refine when the workflow activates by configuring filters:
Form Is: Specify the form that will activate the workflow. For example, select "Consultation Form" from your list of forms.
Save the trigger
Click the save button to confirm your setup.
Test and publish
Test the workflow using sample data to confirm it behaves as expected. Once verified, enable the Publish toggle to activate the workflow.
New patient information collection
Your practice wants to automate collecting and managing patient information through an online form.
Trigger: Form Submitted.
Filter: Form is "Patient Information Form."
Outcome: Submitted data is entered into the CRM, a notification is sent to your front-desk team, and a follow-up task is created.
Lead qualification workflow
Your marketing team collects prospective patients from a form submission and wants to qualify them automatically.
Trigger: Form Submitted.
Filter: Form is "Lead Capture Form."
Outcome: The workflow assigns a lead score, updates the CRM with the contact's details, and notifies your team for further action.
Event registration management
You use a form to register attendees for an event, such as an open house or injectable clinic, and need to automate communication.
Trigger: Form Submitted.
Filter: Form is "Event Registration Form."
Outcome: An email confirmation is sent to the registrant, and their details are added to the attendee list in the CRM.
Patient feedback collection
Your practice collects feedback using an online form and wants to analyze the responses.
Trigger: Form Submitted.
Filter: Form is "Patient Feedback Form."
Outcome: The workflow sends a thank-you email to the patient and adds their responses to a feedback record for analysis.
Appointment booking notifications
You collect appointment requests through a form and want to notify the relevant team.
Trigger: Form Submitted.
Filter: Form is "Appointment Booking Form."
Outcome: The workflow notifies your scheduling team, updates the calendar, and sends a confirmation email to the patient.
Sticky Contact uses browser cookies to store and retrieve data a patient previously entered. Fields like name, email, or phone number are then pre-filled on subsequent visits, giving returning patients a smoother experience.
This mimics autofill functionality, but it works directly within Aesthetix CRM to keep data consistent and reduce friction. It is especially valuable for recurring sign-ups, where returning patients can re-enter quickly without retyping their details, and patient portals, where frequent visitors benefit from faster navigation thanks to automatically populated forms. By reducing repetition, Sticky Contact supports better engagement and higher completion rates.
Note: Do not use Sticky Contact if your team members fill out a form, survey, or calendar widget on behalf of patients, or if multiple patients fill out the same form at a shared kiosk. In those cases, Sticky Contact will keep overwriting the first submission's contact record with details from the next submission, because the saved data lives on a single device. For shared devices or team-completed forms, disable Sticky Contact or update the contact record directly instead.
Speeds up form submissions for returning visitors.
Enhances the experience by reducing repetition.
Ideal for multi-step funnel workflows.
Works across forms, surveys, calendars, and order forms.
Helps maintain data consistency across touchpoints.
Can increase conversion rates by reducing drop-off.
Navigate to Web Tools > Forms, then open the Form Builder.
Select an existing form or create a new one.
Click on the Form Settings tab.
Toggle the Sticky Contact switch to "On," then click Save to apply your changes.
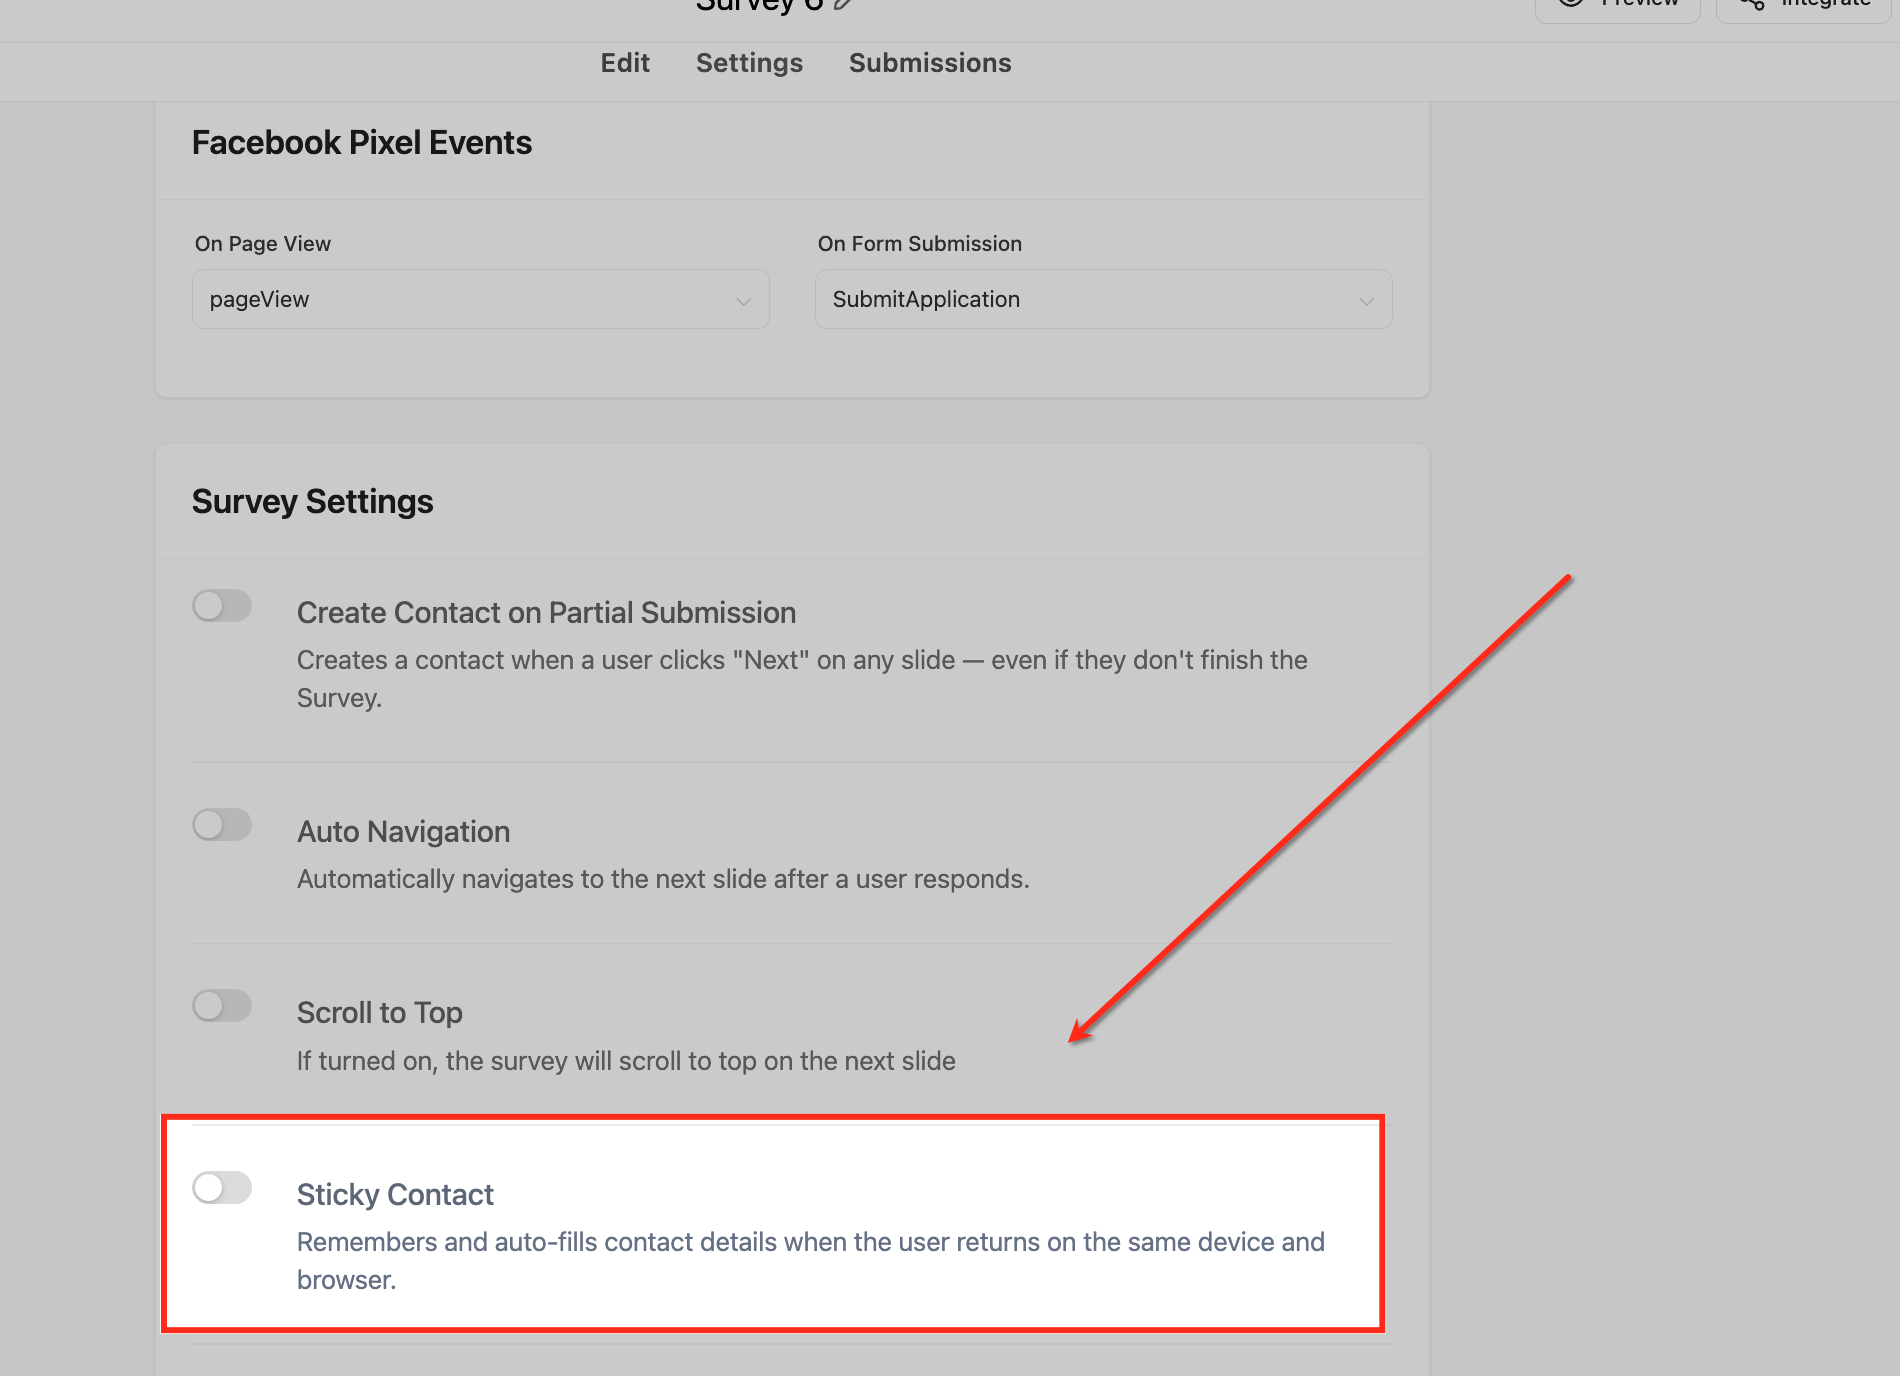
Sticky Contact can also be enabled in Surveys, allowing data collected in forms to auto-populate survey fields, which is especially useful in funnel follow-ups.
Go to Web Tools > Surveys, then launch the Survey Builder.
Open or create a survey.
Navigate to the Survey Settings section.
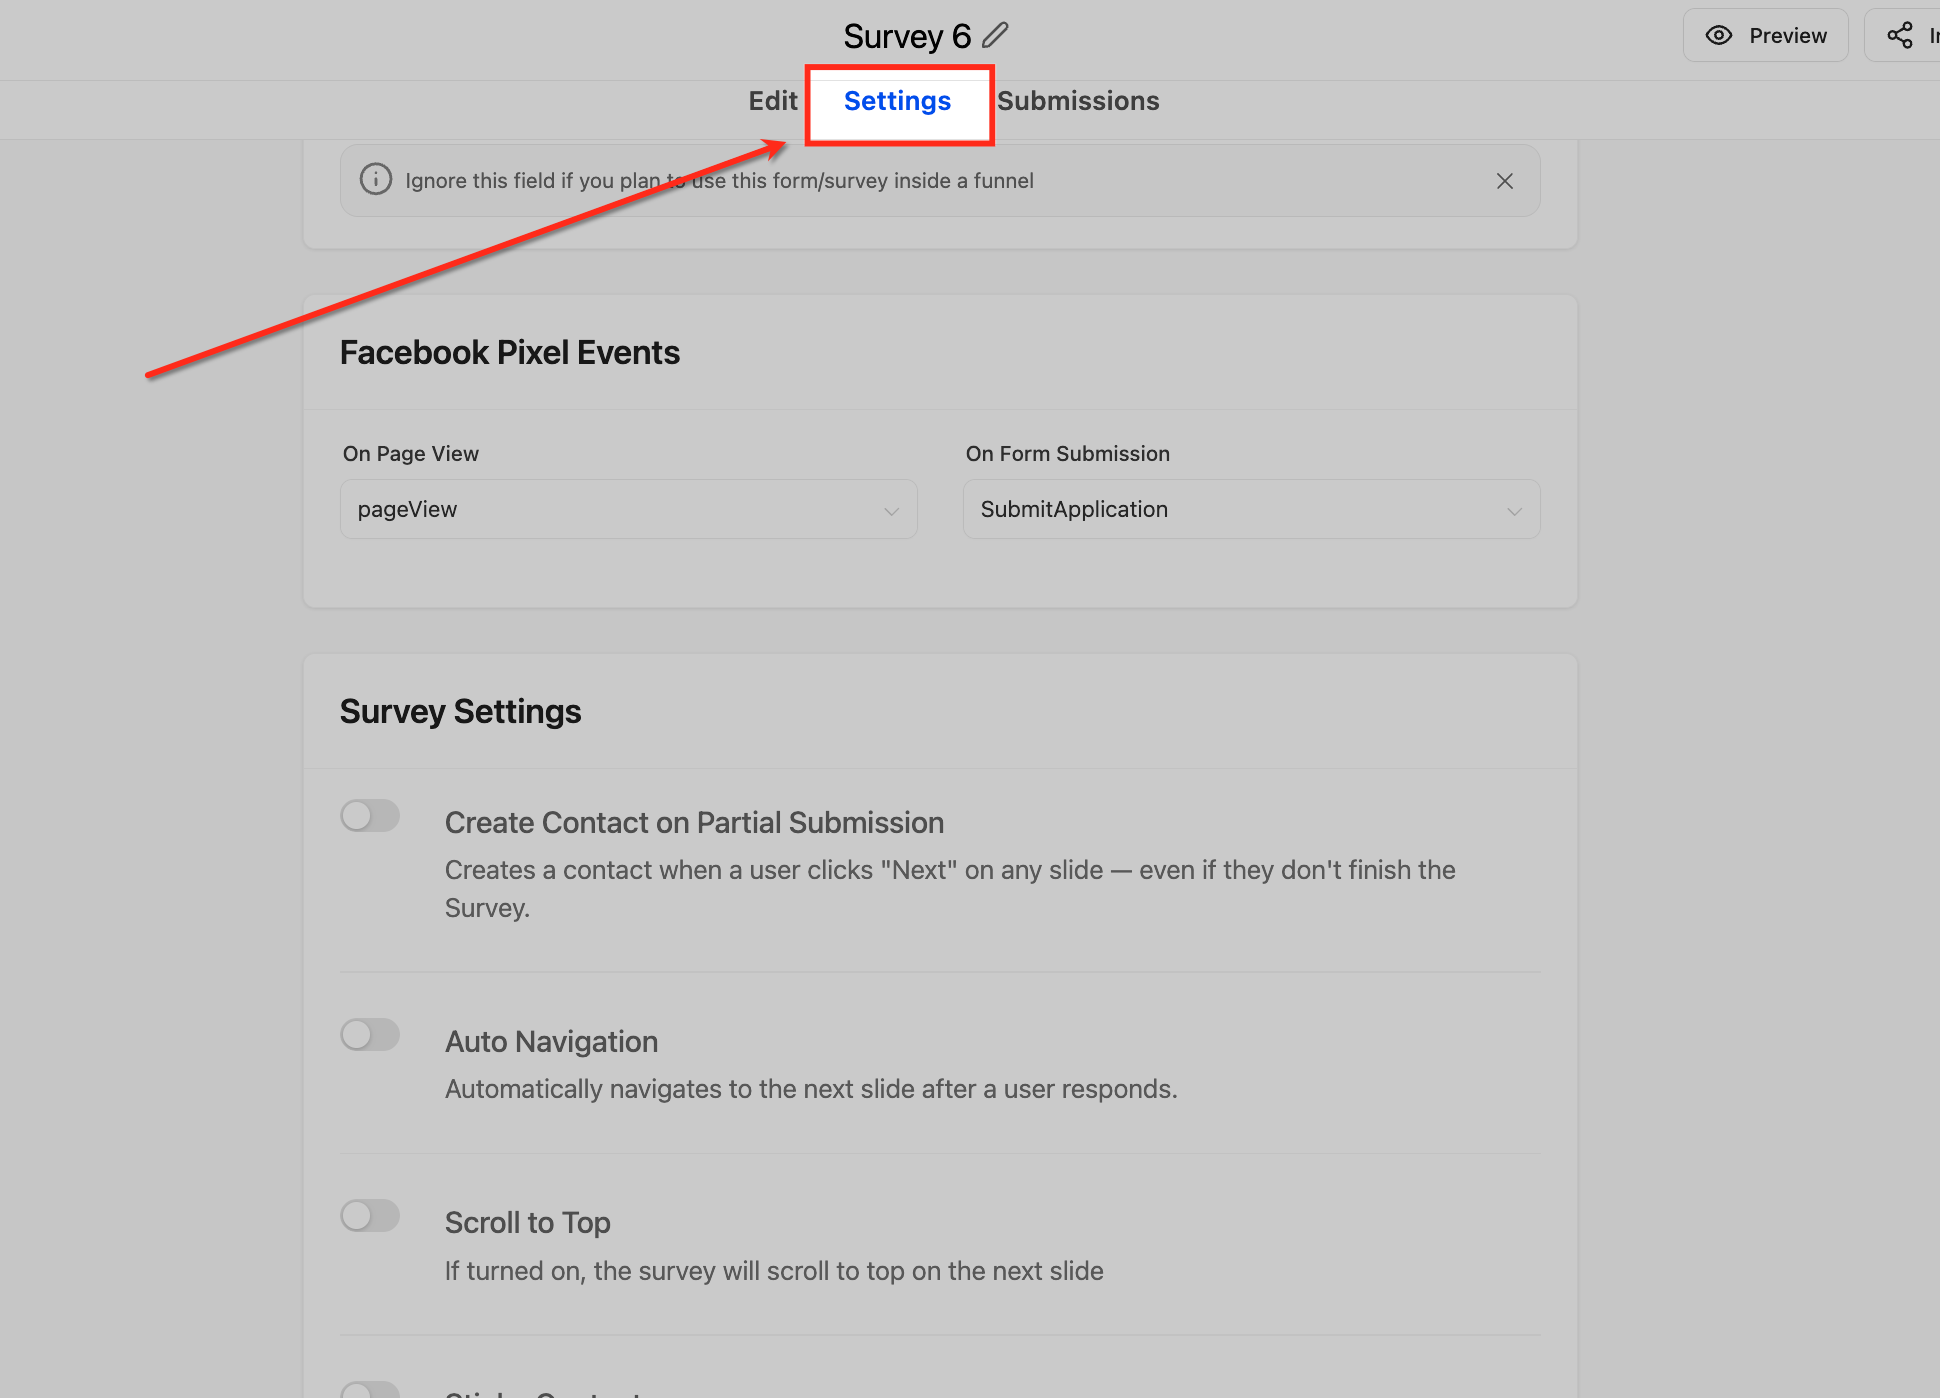
Toggle Sticky Contact to "On," then save your settings.
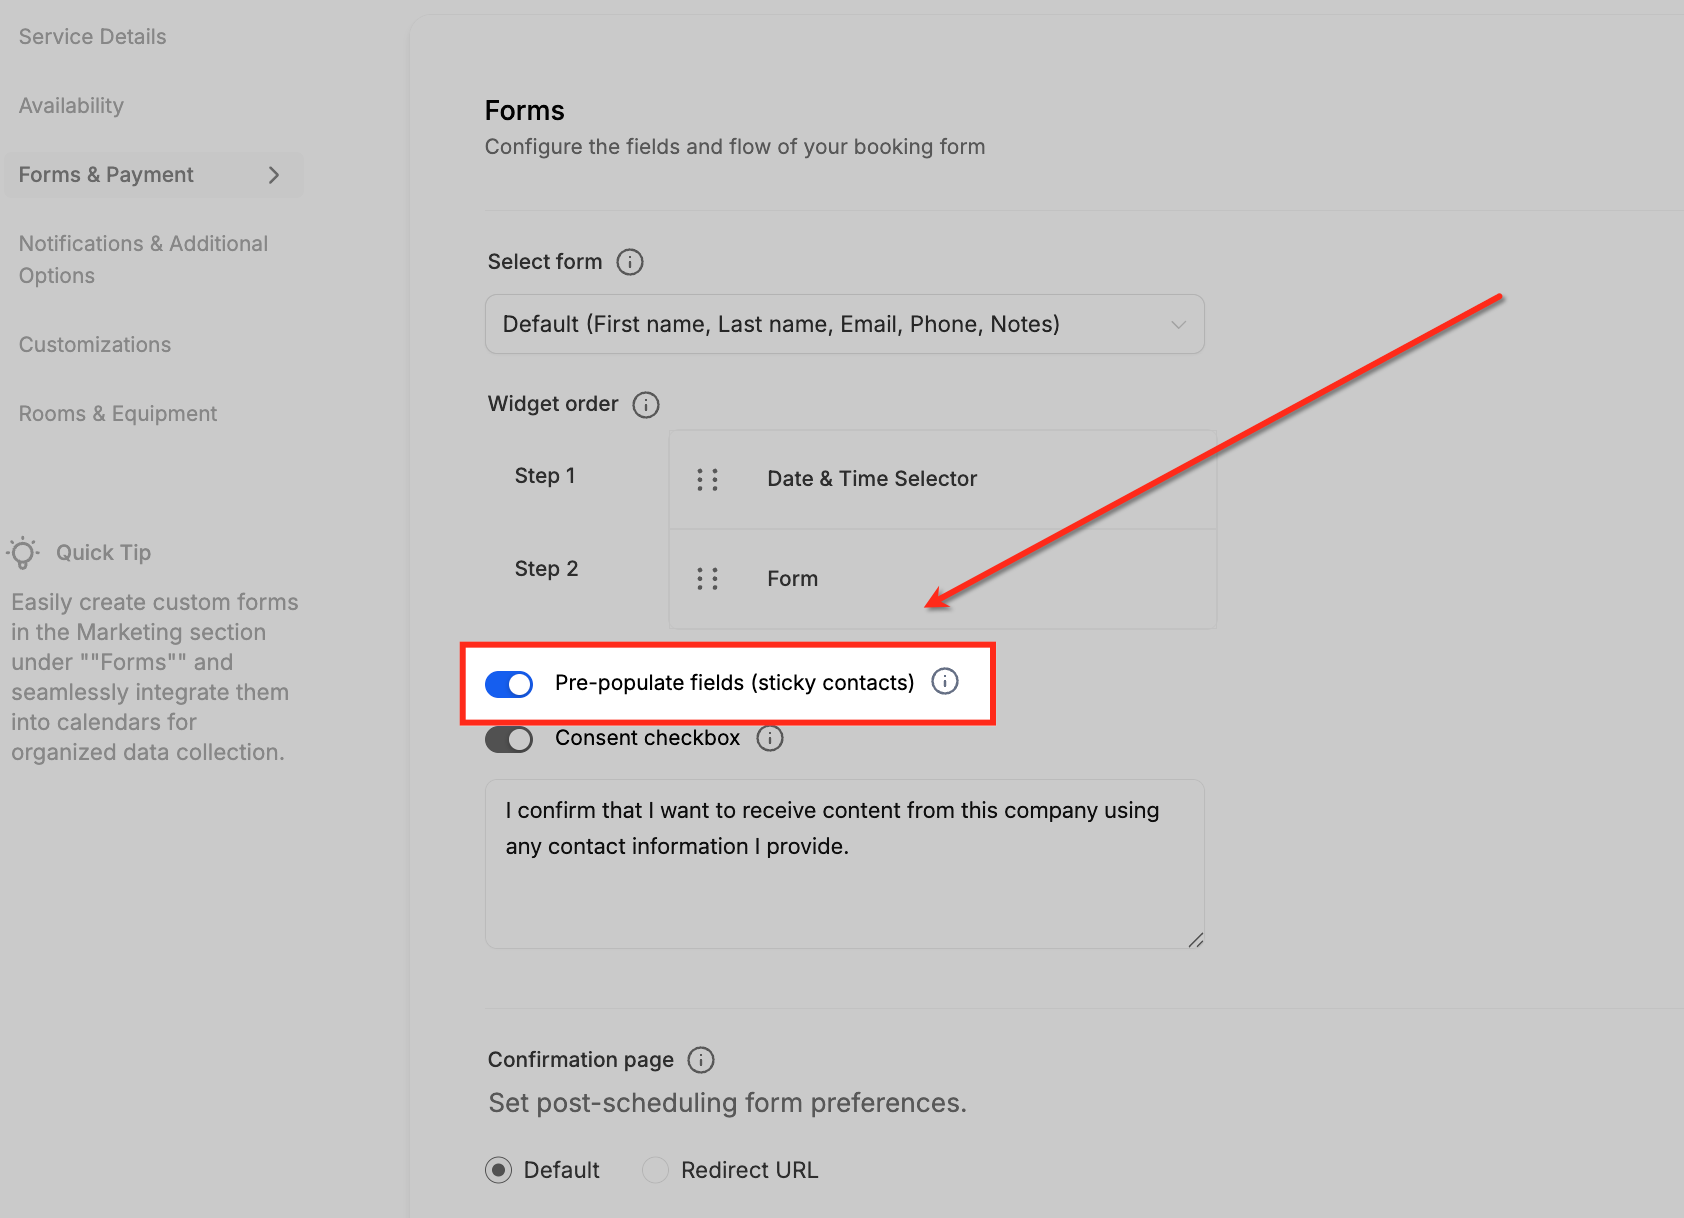
Calendars benefit from Sticky Contact by auto-filling patient details for repeat appointment bookings.
Go to Calendars > Calendar Settings.
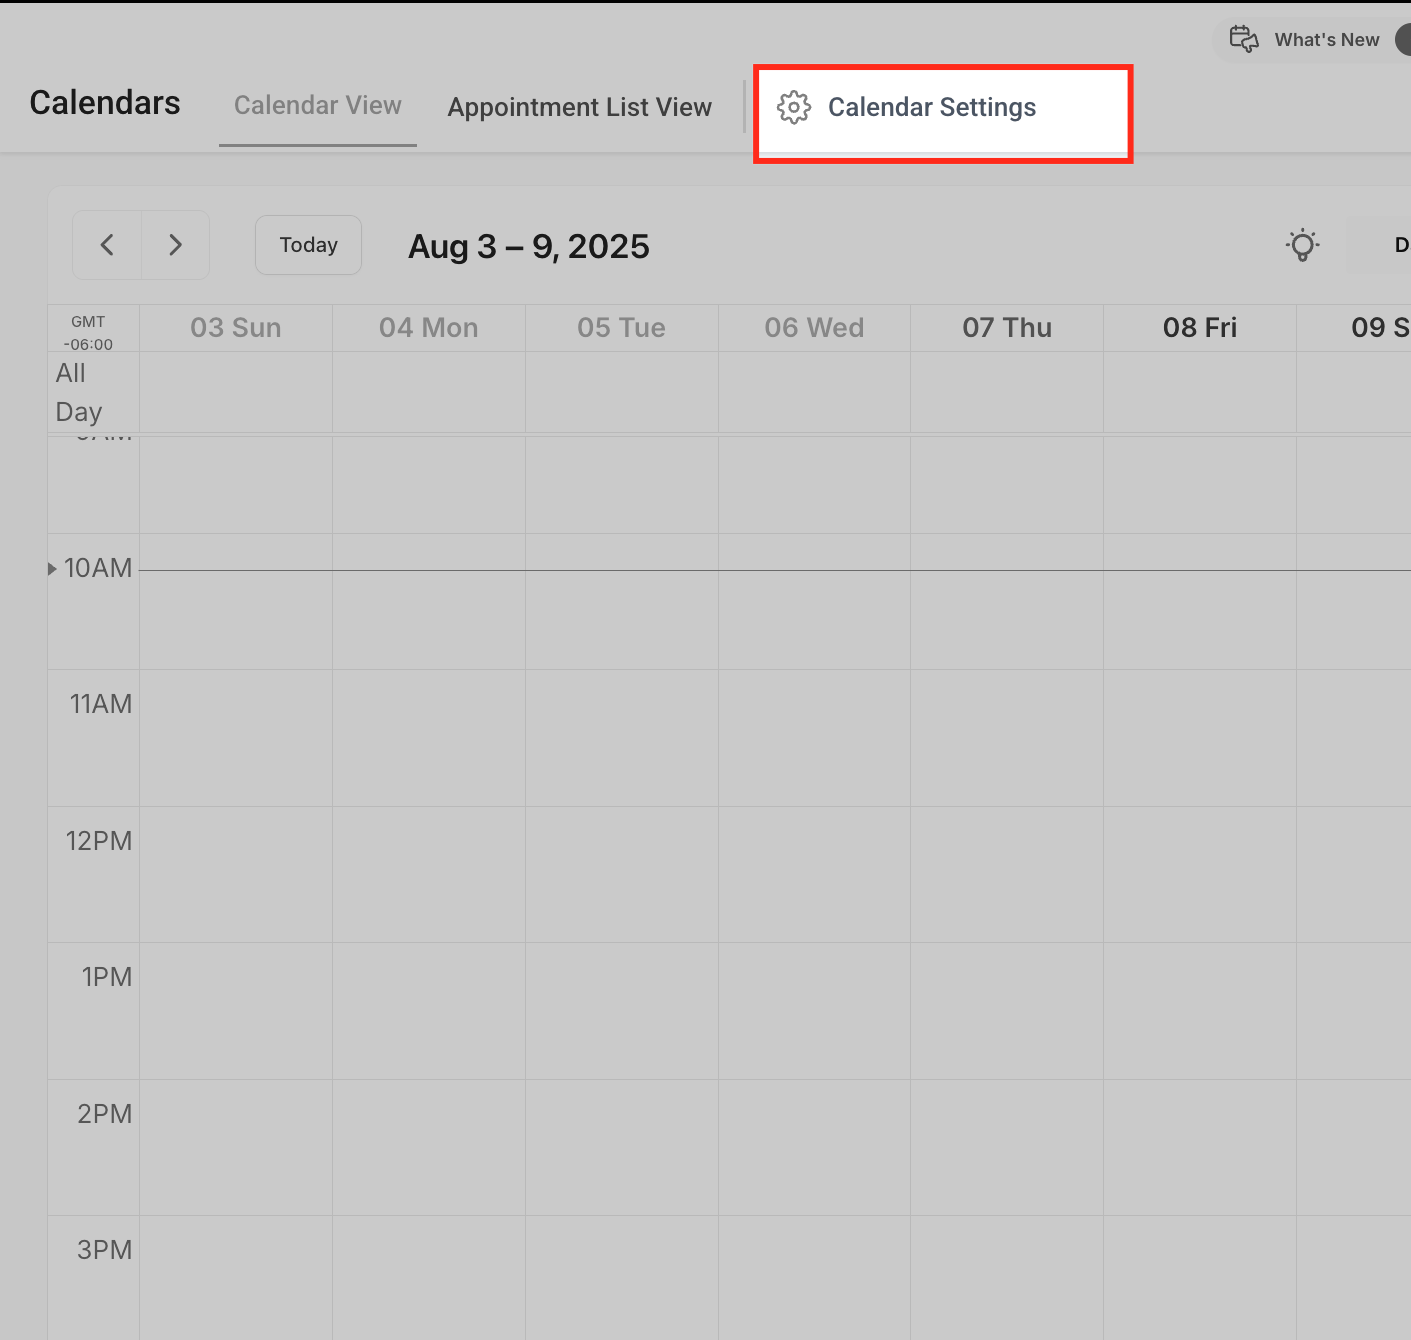
Select the calendar you'd like to edit.
Scroll to Forms & Payments.
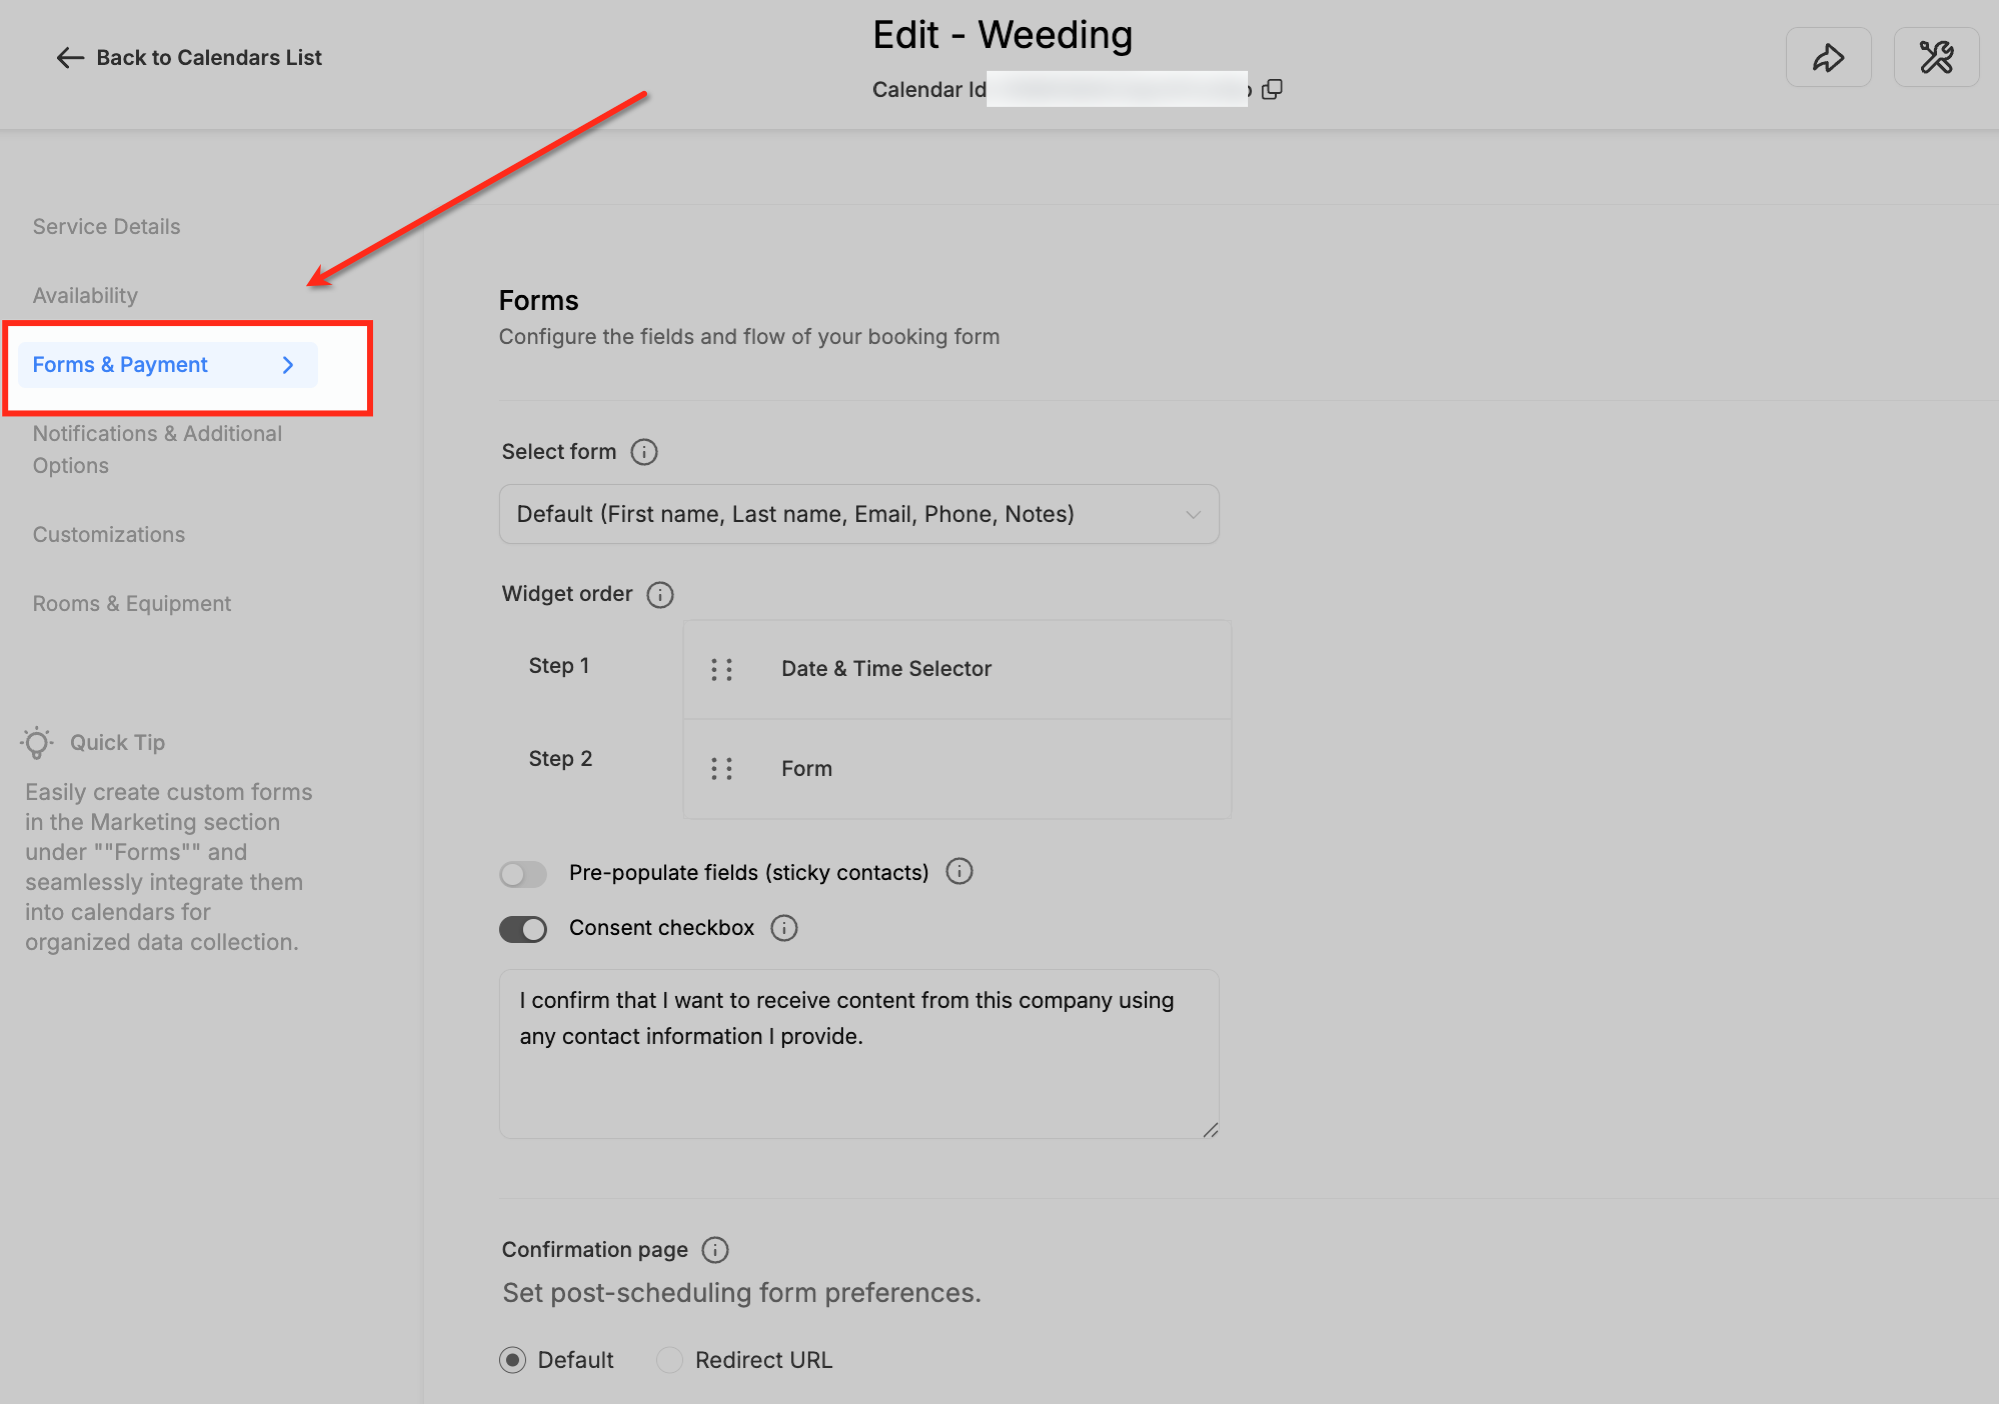
Turn on Sticky Contact using the toggle, then save your changes.
Capturing timezone data with your forms and surveys keeps response timestamps precise and gives you a clearer picture of where your patients are located. The captured timezone can then be used to send messages and emails at the right time for each patient.
You can find this feature under the options in Timezone. By default it is enabled, and it can be turned On or Off from here. The captured timezone appears on each form or survey submission and can be used to send messages and emails according to the contact's timezone. The format is standard, listing the region followed by the GMT offset to keep it readable.
If your practice is located near a timezone border or in a tourist area that attracts patients from different timezones, you may want to limit appointment bookings to your practice's specific timezone rather than each contact's own timezone.
Click Settings.
Click Calendars.
Confirm that Timezone is currently enabled.
Click Business Profile.
Navigate to General.
Check the checkbox to Disable contact timezone.
Timezone is now disabled, and bookings will follow your practice's timezone.
Can the Form Submitted trigger handle multiple forms in a single workflow?
Yes. You can configure the workflow to activate for multiple forms by adding more filters or setting broader criteria.
What happens if the form is submitted multiple times by the same patient?
The trigger activates each time the form is submitted. Use conditions or cooldown periods in the workflow to manage duplicate submissions effectively.
How can I include form submission data in the response email?
Use contact and custom field merge tags in your email step to pull in the submitted data. For example, if your form collects Name, Email, and message details, you can insert these into your email body using merge fields like {{contact.name}}, {{contact.email}}, or custom fields linked to your form. When the email is sent, these placeholders are automatically replaced with the actual submitted data.
How do I handle form submissions with incomplete data?
Add conditions within the workflow to validate required fields and take specific actions, such as sending an alert or skipping incomplete submissions.
Is the Form Submitted trigger compatible with external form tools?
The Form Submitted trigger works with forms created within Aesthetix CRM. For external tools, you may need to use an integration or webhook to capture submissions.
Can Sticky Contact work across subdomains?
No. Sticky Contact data is domain-specific and cannot pre-fill forms across different subdomains.
What happens if a patient clears their cookies?
If cookies are deleted, Sticky Contact will no longer retain previously entered data, and fields will not be pre-filled.
Is Sticky Contact GDPR-compliant?
Yes, but it is essential to inform patients about cookie usage and provide opt-out options to comply with data protection laws.
Does Sticky Contact interfere with browser autofill?
No. Sticky Contact operates independently of browser autofill, though the two can complement each other for a seamless experience.
Sticky Contact isn't showing in my calendar settings. Why?
If you are using a custom form for calendar bookings, the Sticky Contact setting will not appear in calendar settings. Instead, enable Sticky Contact on the custom form itself, and the calendar will honor the Sticky Contact data stored by that form.
