Notify your team when patients submit a form or survey, send an automatic reply, and customize the on-submit thank-you message or redirect.
Email notifications keep your practice informed the moment a patient submits a form or survey, so you can follow up quickly without manually checking for new entries. Auto Responder sends an automatic confirmation back to the patient, and the On Submit message lets you design a branded thank-you screen or redirect that appears right after they submit. This guide covers all three.
Email notifications are alerts sent whenever a form or survey is submitted. They go directly to the inboxes you designate, keeping your team informed in real time. Auto Responder works alongside notifications, sending an automated reply to the patient who filled out the form, which can include a copy of their responses.
Instant alerts: Receive an immediate email whenever someone submits a form or survey.
Improved response time: Follow up with leads and patients faster.
Collaboration: Send notifications to multiple team members at once.
Customization: Personalize the subject, sender name, and reply-to email for better organization.
Auto Responder: Automatically acknowledge the patient who submitted the form, adding a professional touch.
The notification option lives in the form editor's secondary bar. From here you can enable email notifications and Auto Responder.
Go to Web Tools > Forms (or Web Tools > Surveys) from the top navigation bar. This is where all your forms and surveys are stored and managed.
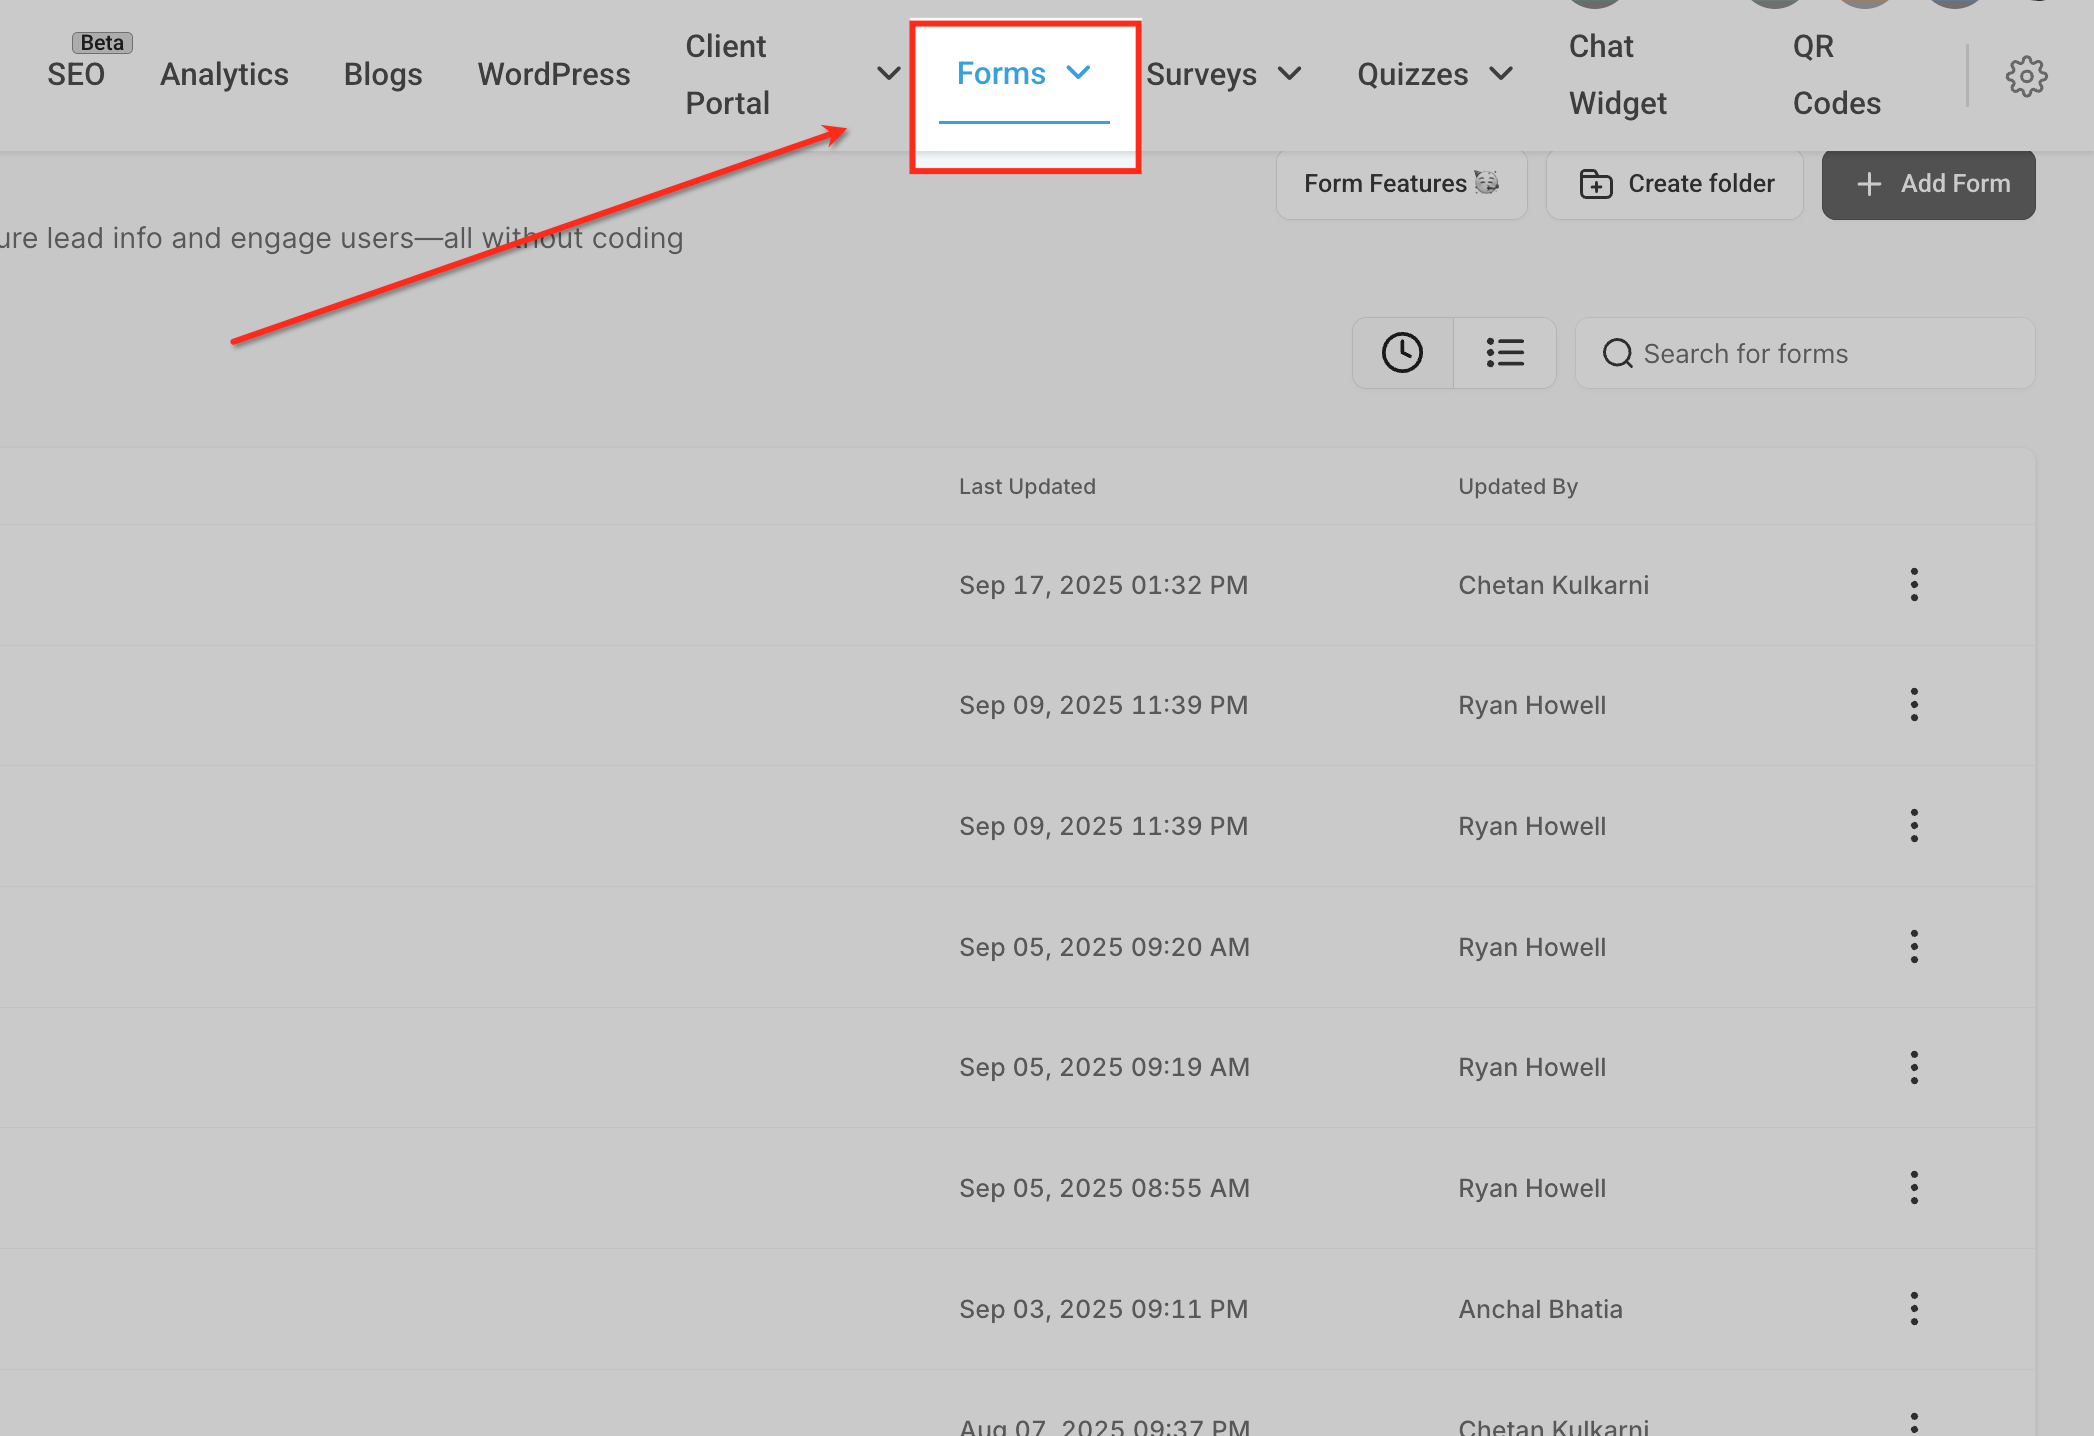
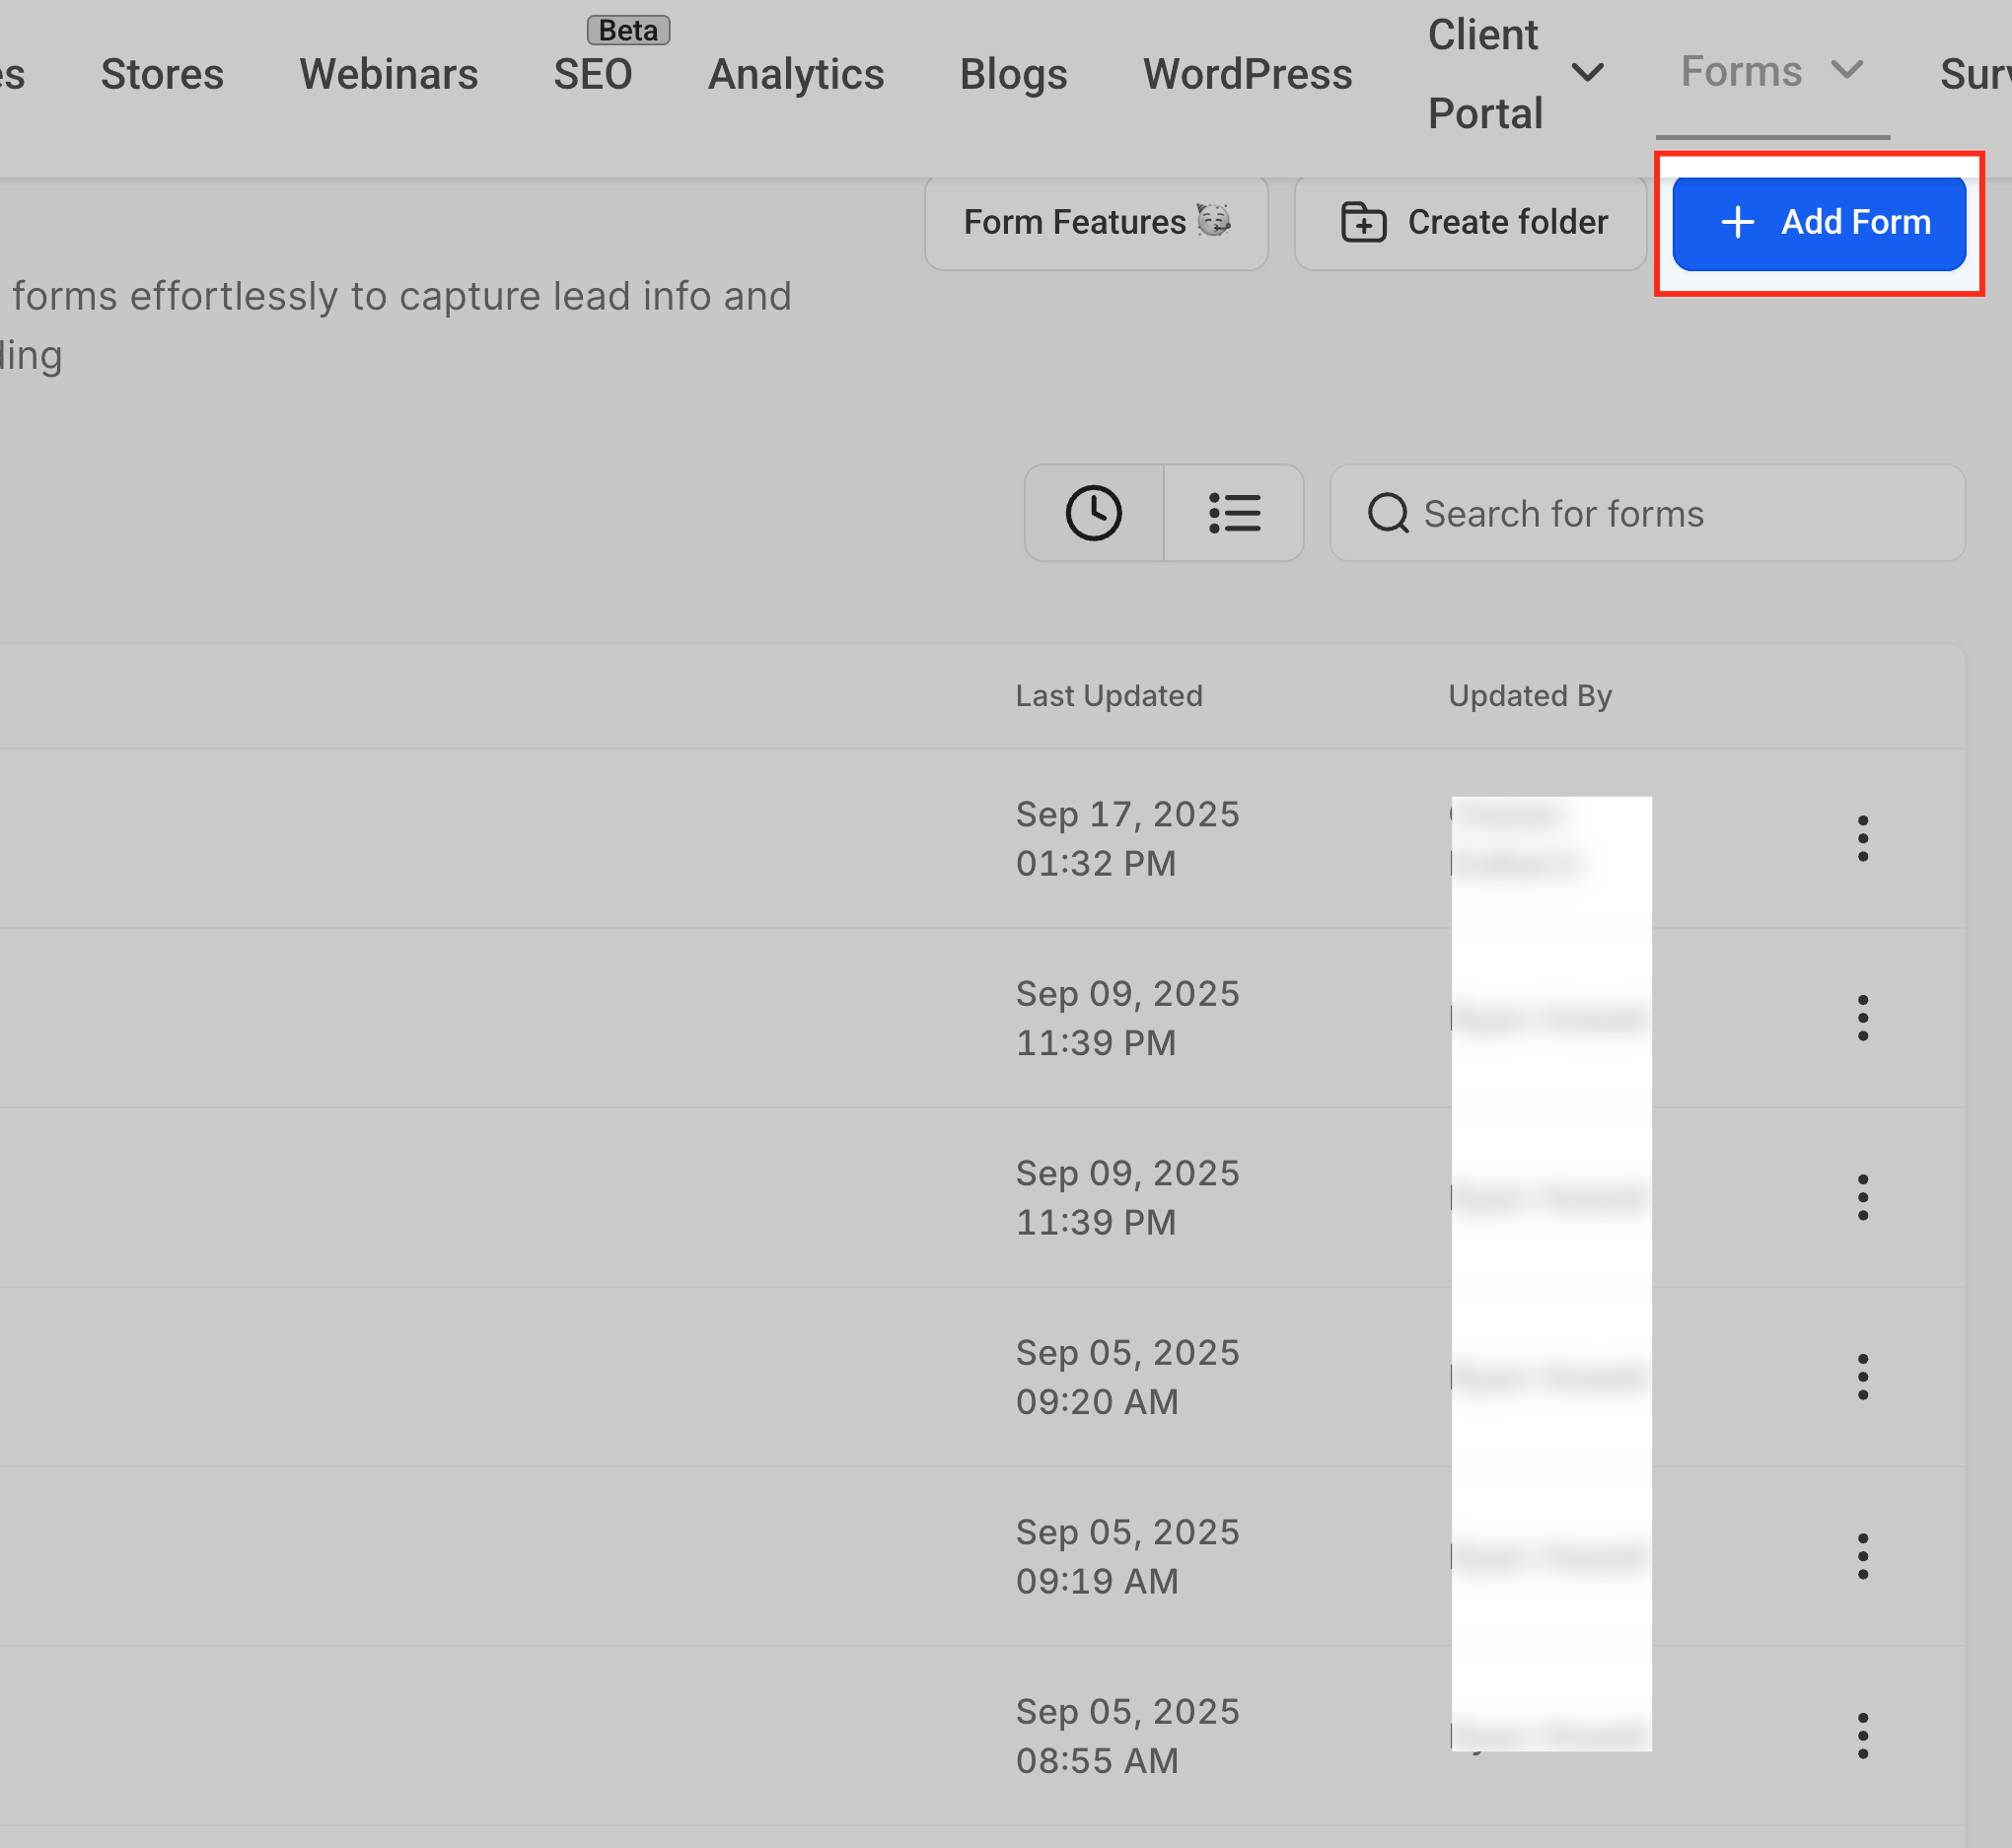
Select an existing form or survey from the list, or click Add Form in the top right to create a new one.
Inside the form or survey editor, click the Bell icon in the secondary bar. This opens the Form Notification panel.
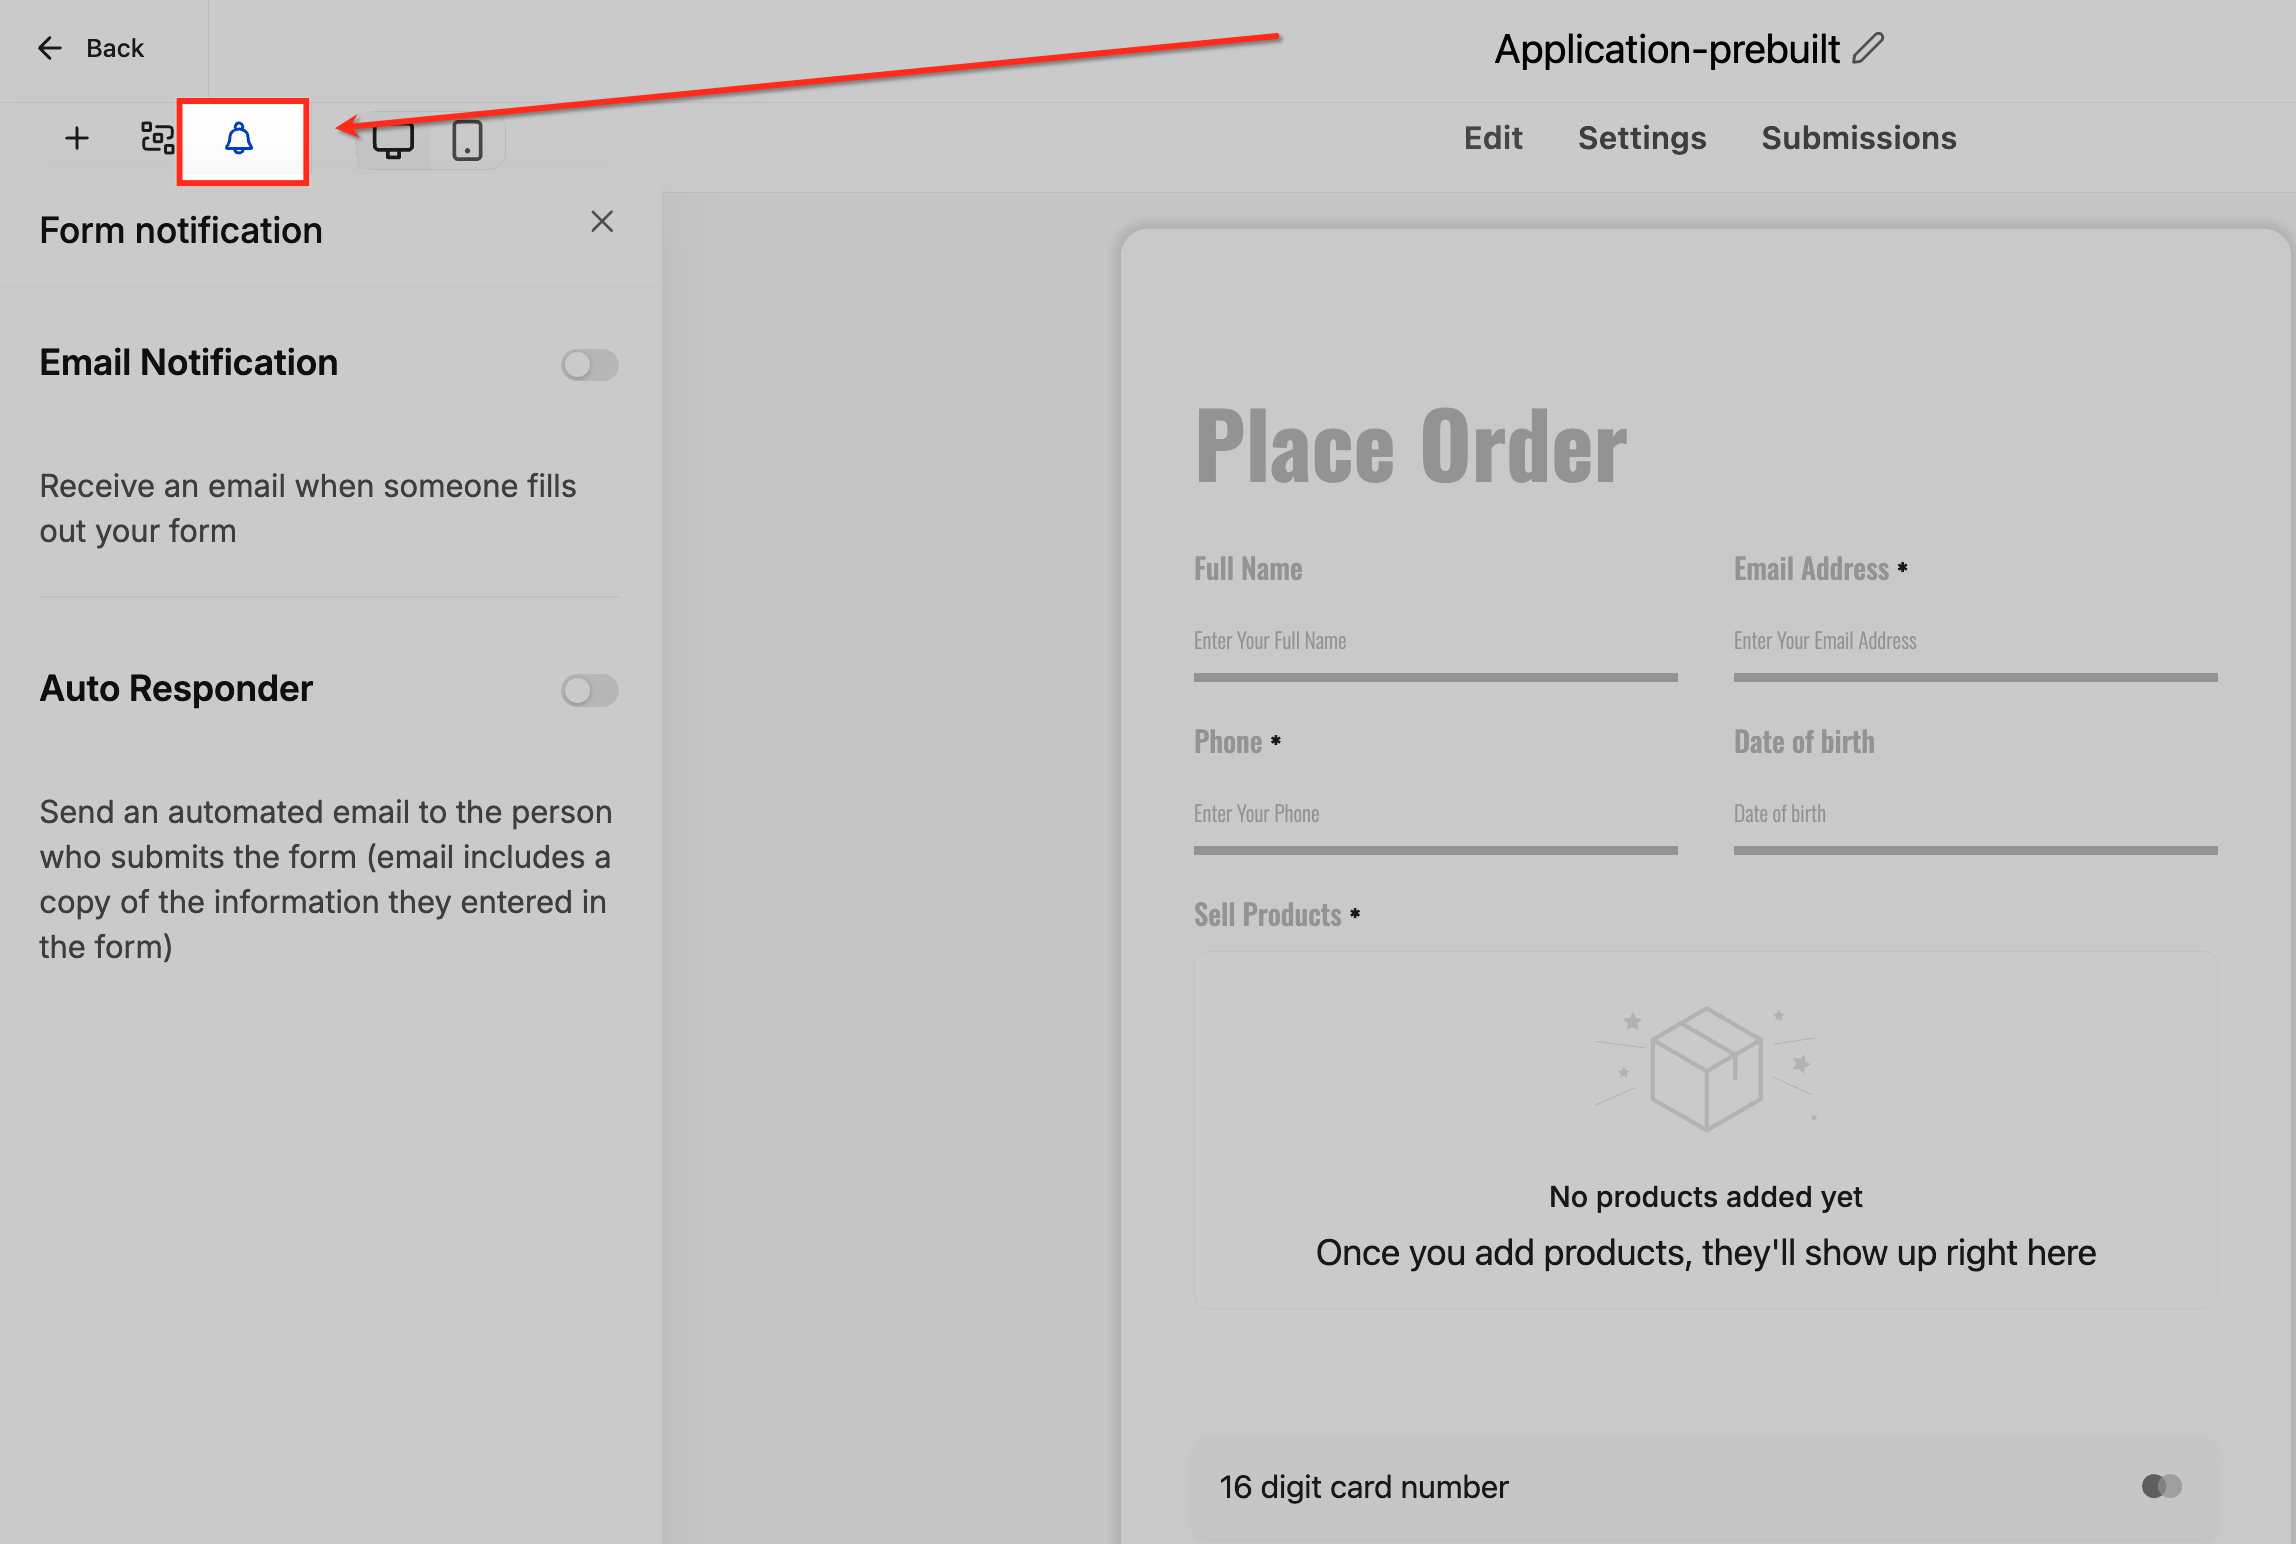
The Email Notifications panel controls who receives alerts and how the email appears. Configuring it properly ensures the right team members are informed and that your notifications stay consistent with your practice's standards.
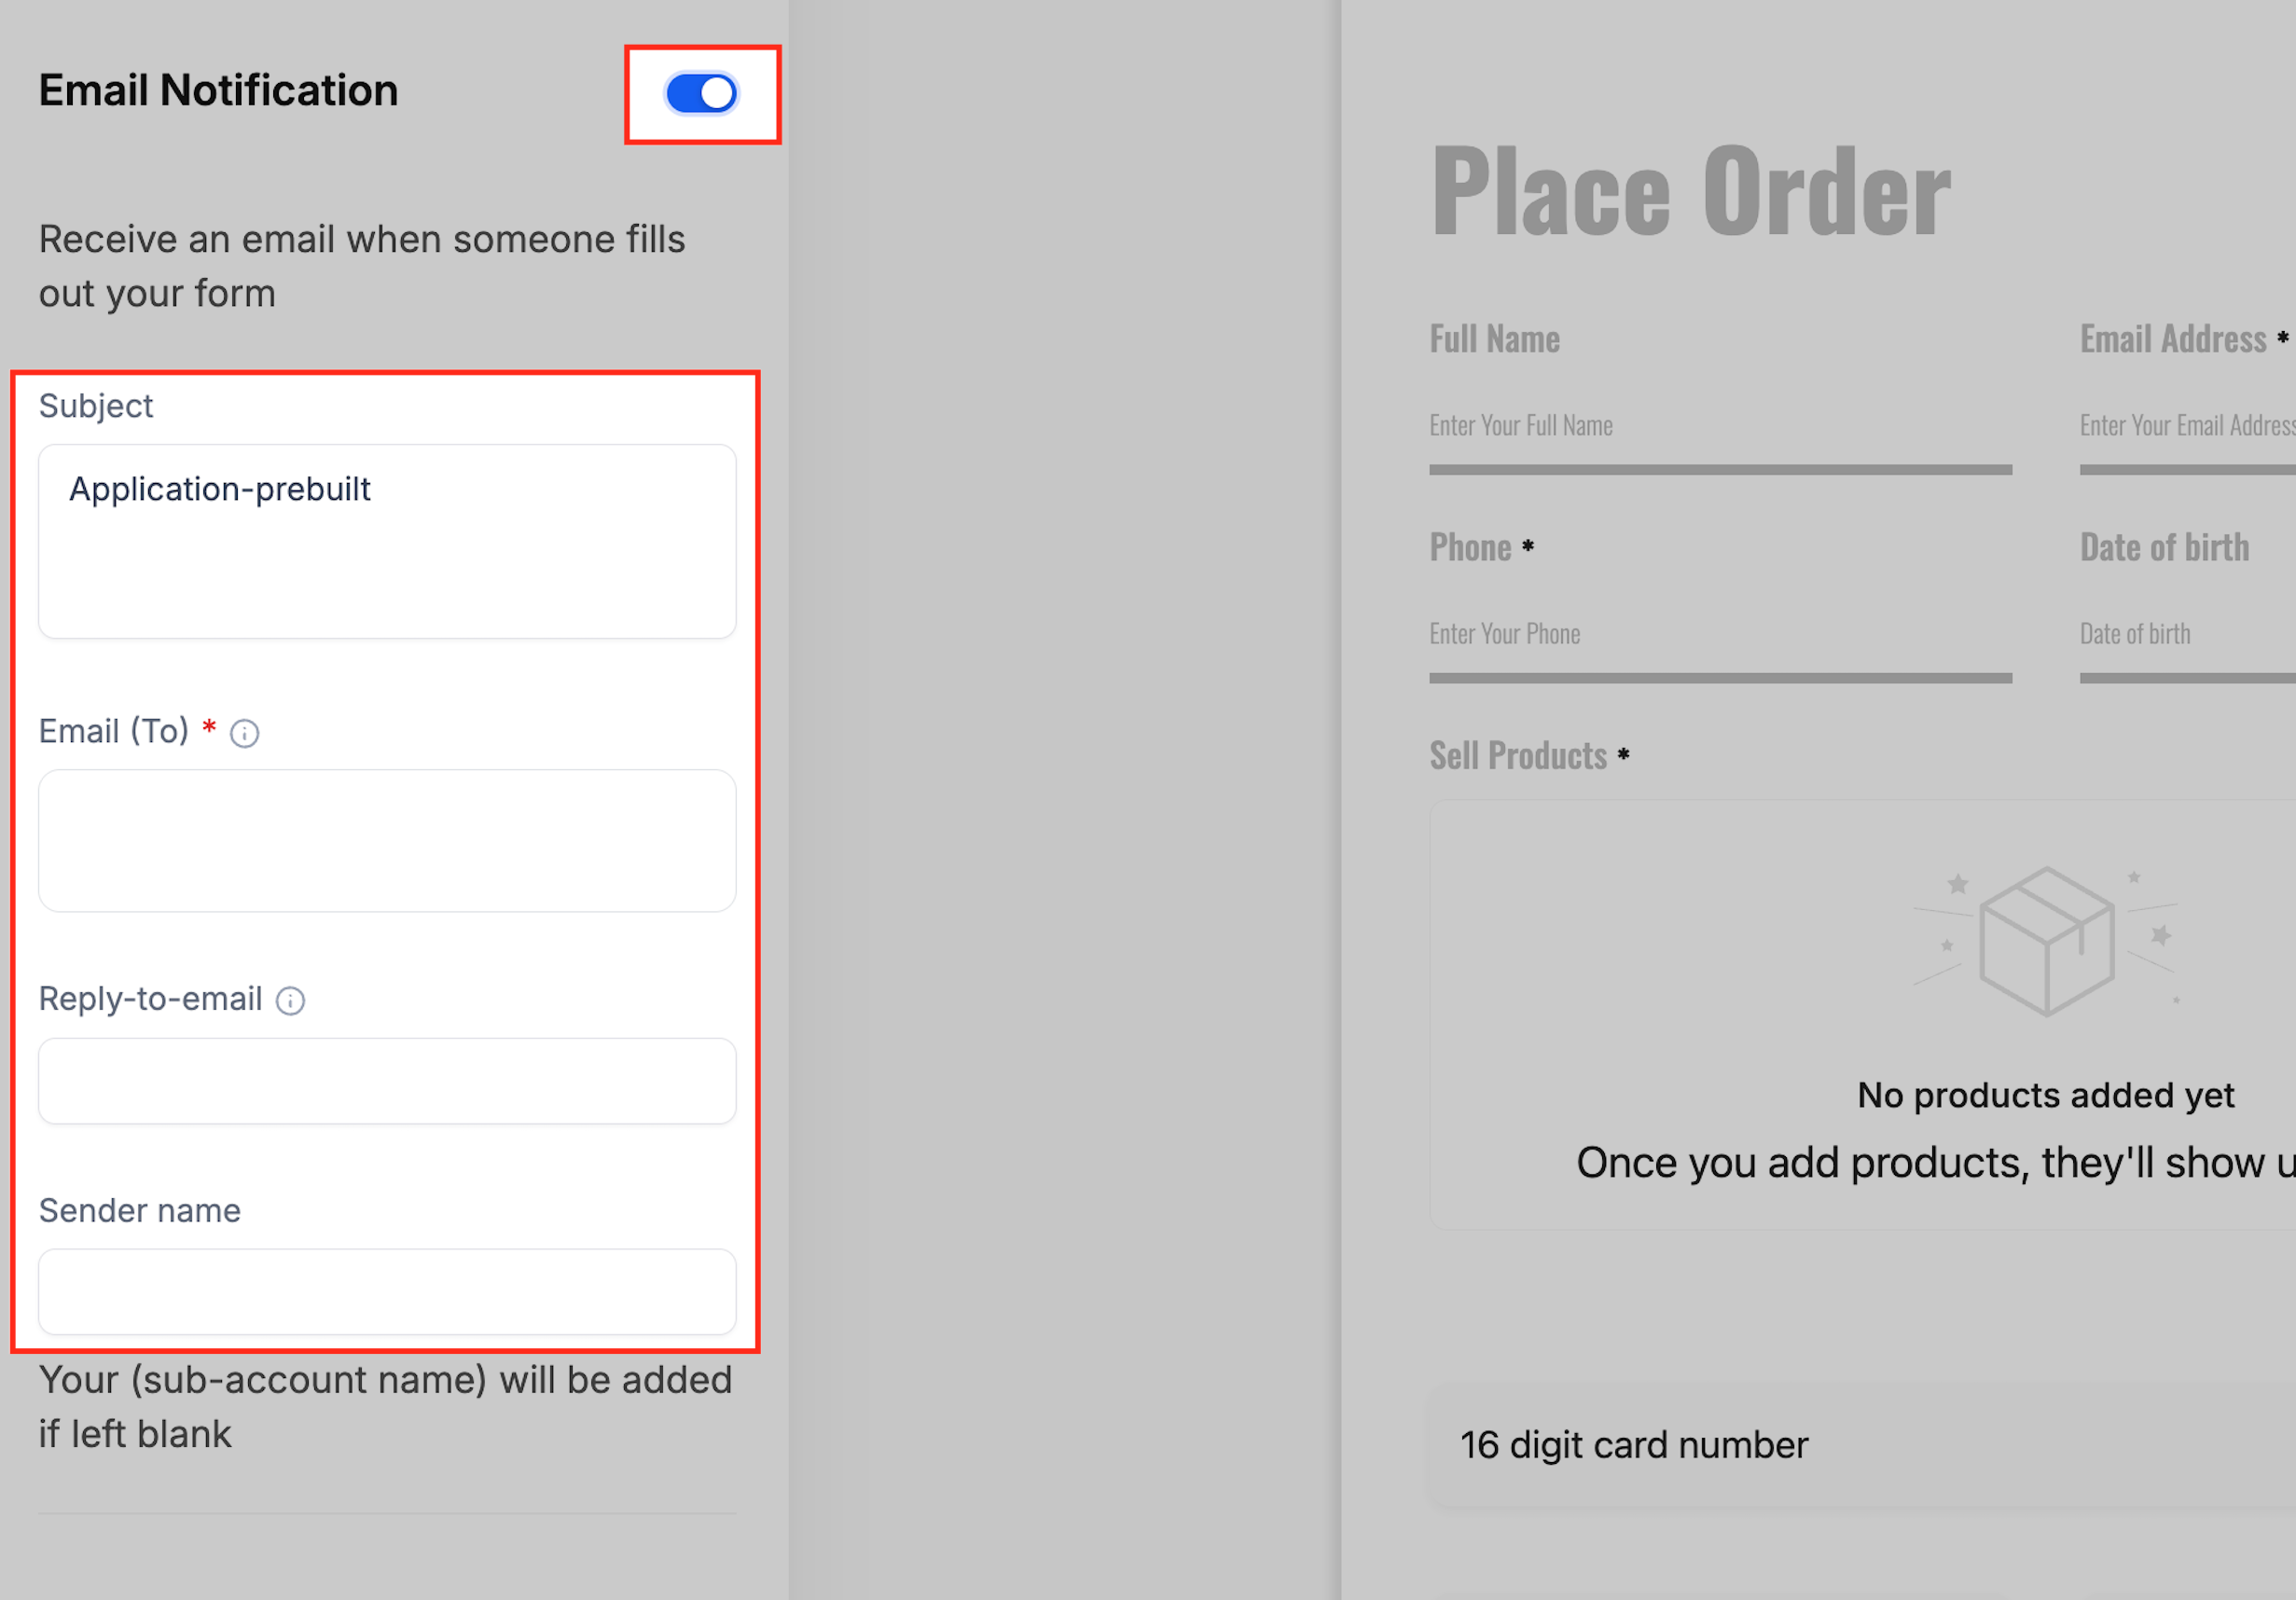
Click the Bell icon in the form editor, then toggle on Email Notification.
Fill out the configuration fields:
Subject: Enter a subject line. If left blank, the form or survey name is used. You can also include a custom field.
Email (To): Enter one or more email addresses. Each address converts into a tag.
Reply-to Email: Add the email address you want replies directed to.
Sender Name: If left empty, your account name is used by default.
Click Save.
Note: Email notifications use email credits. Make sure your account has credits available.
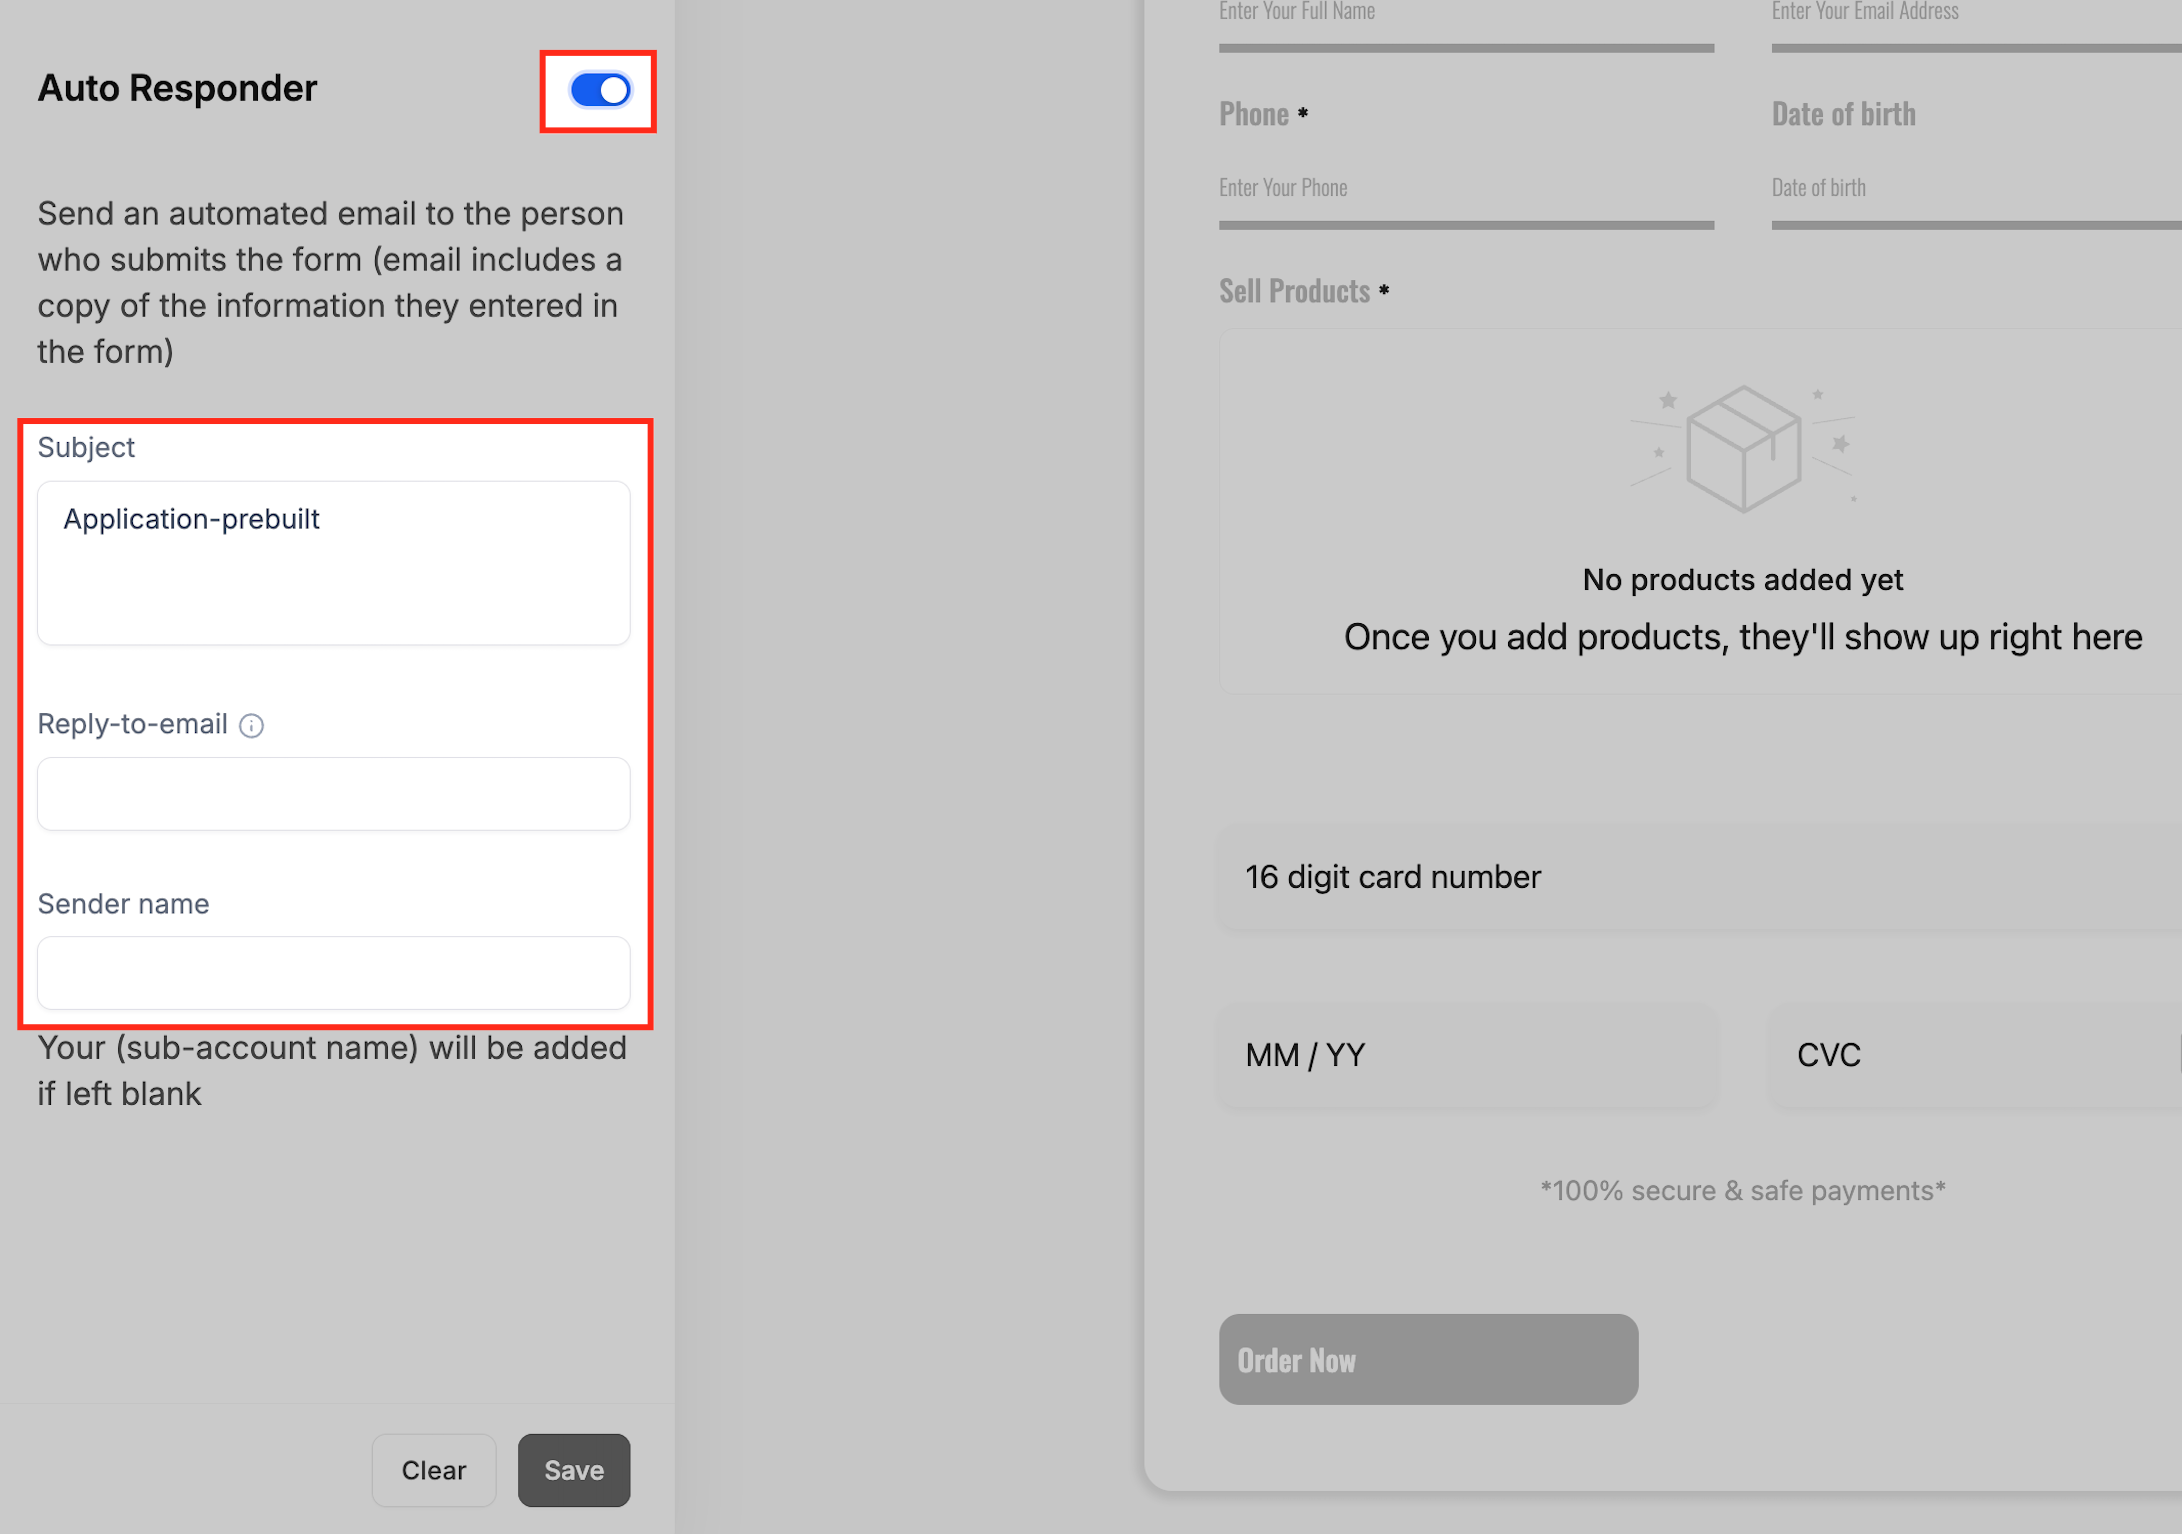
Auto Responder sends an automated email to the patient who submitted the form. It builds trust by instantly acknowledging their submission and can optionally send them a copy of their responses.
Open the Form Notification panel, then toggle on Auto Responder.
Fill out the configuration fields:
Subject: Enter a subject line. The default is the form name.
Reply-to Email: Add an email address for patient replies.
Sender Name: If left blank, your account name is used.
Click Save.
Note: The Reply-to you set here applies only to the Auto Responder email that goes to the patient. It does not affect the team notification email. Replies to the team notification go to the address set in that notification's Reply-to Email field.
Email notifications serve as alerts only and do not include full survey responses. To view the responses:
Go to Web Tools from the left-hand menu.
Select the Surveys tab, then click Submissions.
Review the list of submissions with timestamps and answers.
Click an individual entry to see all responses.
The On Submit message controls what a patient sees immediately after submitting a form, survey, or quiz. Instead of a plain confirmation, you can design a branded thank-you screen with headings, images, and layout controls that adapt to desktop and mobile, or send the patient to a redirect.
Richer formatting: Create a headline and subtext with bold, italics, sizes, colors, emojis, links, and images directly inside the editor.
Brand consistency: Align fonts, weights, padding, margins, and corner radius with your visual identity.
Background blur overlay: Softens busy backgrounds so text stays readable, with an optional solid or transparent message box color.
Device-specific control: Style Desktop and Mobile independently for the best readability.
Live visual preview: See changes against your actual background as you edit.
Fewer rebuilds: Design post-submit states without creating separate pages or redirects.
These steps configure your On Submit message, style it for both devices, and let you preview it for clarity before you save and publish.
Log in to your account.
Go to Web Tools > Forms / Surveys / Quizzes > Builder.
Click + Add Form / Survey / Quiz to create a new item, or edit an existing item by clicking the ⋮ (three dots) > Edit to open the Builder.
Customize your form, survey, or quiz, then click Settings > On Submit.
From the dropdown, select Message.
Use the rich text editor to write your headline and subtext.
Apply text formatting as needed: text size, color and background, alignment, bullet or numbered lists, links, images, and custom values.
In Message Styling, set the background color, text weight, and corner radius.
Adjust Margin and Padding.
Toggle Background Blur on or off. (This option is only available when an image is set as the background.)
Switch between Desktop and Mobile views to style each independently.
Use the Preview panel to see how your customizations look.
When you are finished, click Save in the builder.
Note: To send patients to another page instead of showing a message, select Redirect from the On Submit dropdown and enter the destination URL. You can choose a Message or a Redirect as the default behavior, but not both at once.
Can I send email notifications conditionally, based on how someone answers a question?
No. Native email notifications in the Form Notification panel apply to all submissions equally. For conditional routing (for example, send to one team member if the answer is "Option A" and another if it's "Option B"), use Workflows. The "Form Submitted" workflow trigger lets you set conditions and route notifications accordingly.
Do Auto Responder emails count toward my email credit usage just like notifications?
Yes. Both email notifications (sent to your team) and Auto Responder emails (sent to the patient) consume email credits from your account. If your credits are exhausted, neither type of email will send until you add more. You can monitor credit usage in your account's email reporting or billing area.
If I enter multiple emails in the "Email (To)" field and one is invalid, will the others still receive the notification?
Yes. Notifications are still delivered to valid addresses. Invalid addresses fail silently and do not block delivery to the other recipients. It's still a good idea to verify the addresses in the "Email (To)" field regularly to avoid repeated delivery failures.
Can I use dynamic merge fields (like {{user.email}} or {{contact.email}}) in the "Email (To)" field?
No. Merge fields are not supported in the "Email (To)" field, so you must enter static addresses. If you need notifications to go to dynamic recipients, set up a Workflow triggered by the form submission and use workflow actions to email the appropriate contact or user.
Can I use both a Message and a Redirect at the same time?
No. Choose one default behavior. Conditional logic can override it with a different message or redirect when its conditions match.
Do workflows depend on the On Submit message?
No. Form, survey, and quiz submitted workflows run independently of the visual confirmation screen.
Why don't my images or custom values render in the On Submit preview?
Some custom values only resolve on real submissions, so they may not appear in the preview. This is expected.
