An XML sitemap is a file that lists the pages on your site and how they relate to one another. Search engines read it to crawl your site more intelligently, learning which pages you consider important along with details like when a page was last updated and how often it changes. This guide walks you through generating an XML sitemap for your Aesthetix CRM funnels and websites and submitting it to Google.
A sitemap is a file where you provide information about the pages on your site and the relationships between them.
Search engines like Google read sitemaps to more intelligently crawl your site. A sitemap tells Google which pages you think are important on your site and also provides valuable information about these files: for example, when the page was last updated, how often the page is changed, and any alternate language versions of a page.
According to Google, if your site's pages are properly linked, Google can usually discover most of your site on its own. Even so, a sitemap can improve the crawling of larger or more complex sites, or more specialized files.
Using a sitemap doesn't guarantee that every item in your sitemap will be crawled and indexed, since Google relies on complex algorithms to schedule crawling. However, in most cases your site will benefit from having one, and you'll never be penalized for having a sitemap.
You might need a sitemap if:
Your site is really large. Google's web crawlers might overlook some of your new or recently updated pages.
Your site has a large archive of content pages that are isolated or not well linked to each other. If your pages don't naturally reference each other, listing them in a sitemap ensures Google doesn't overlook some of them.
Your site is new and has few external links to it. Crawlers discover pages by following links from one page to another, so Google might not find your pages if no other sites link to them.
Your site has a lot of rich media content (video, images) or appears in Google News. Google can take additional information from sitemaps into account for search where appropriate.
You might not need a sitemap if:
Your site is small. By small, we mean about 500 pages or fewer. (Only pages you think need to appear in search results count toward this total.)
Your site is comprehensively linked internally. Google can find all the important pages by following links starting from the homepage.
You don't have many media files (video, image) or news pages that you need to appear in the index. If you don't need image, video, or news results to appear, you might not need a sitemap.
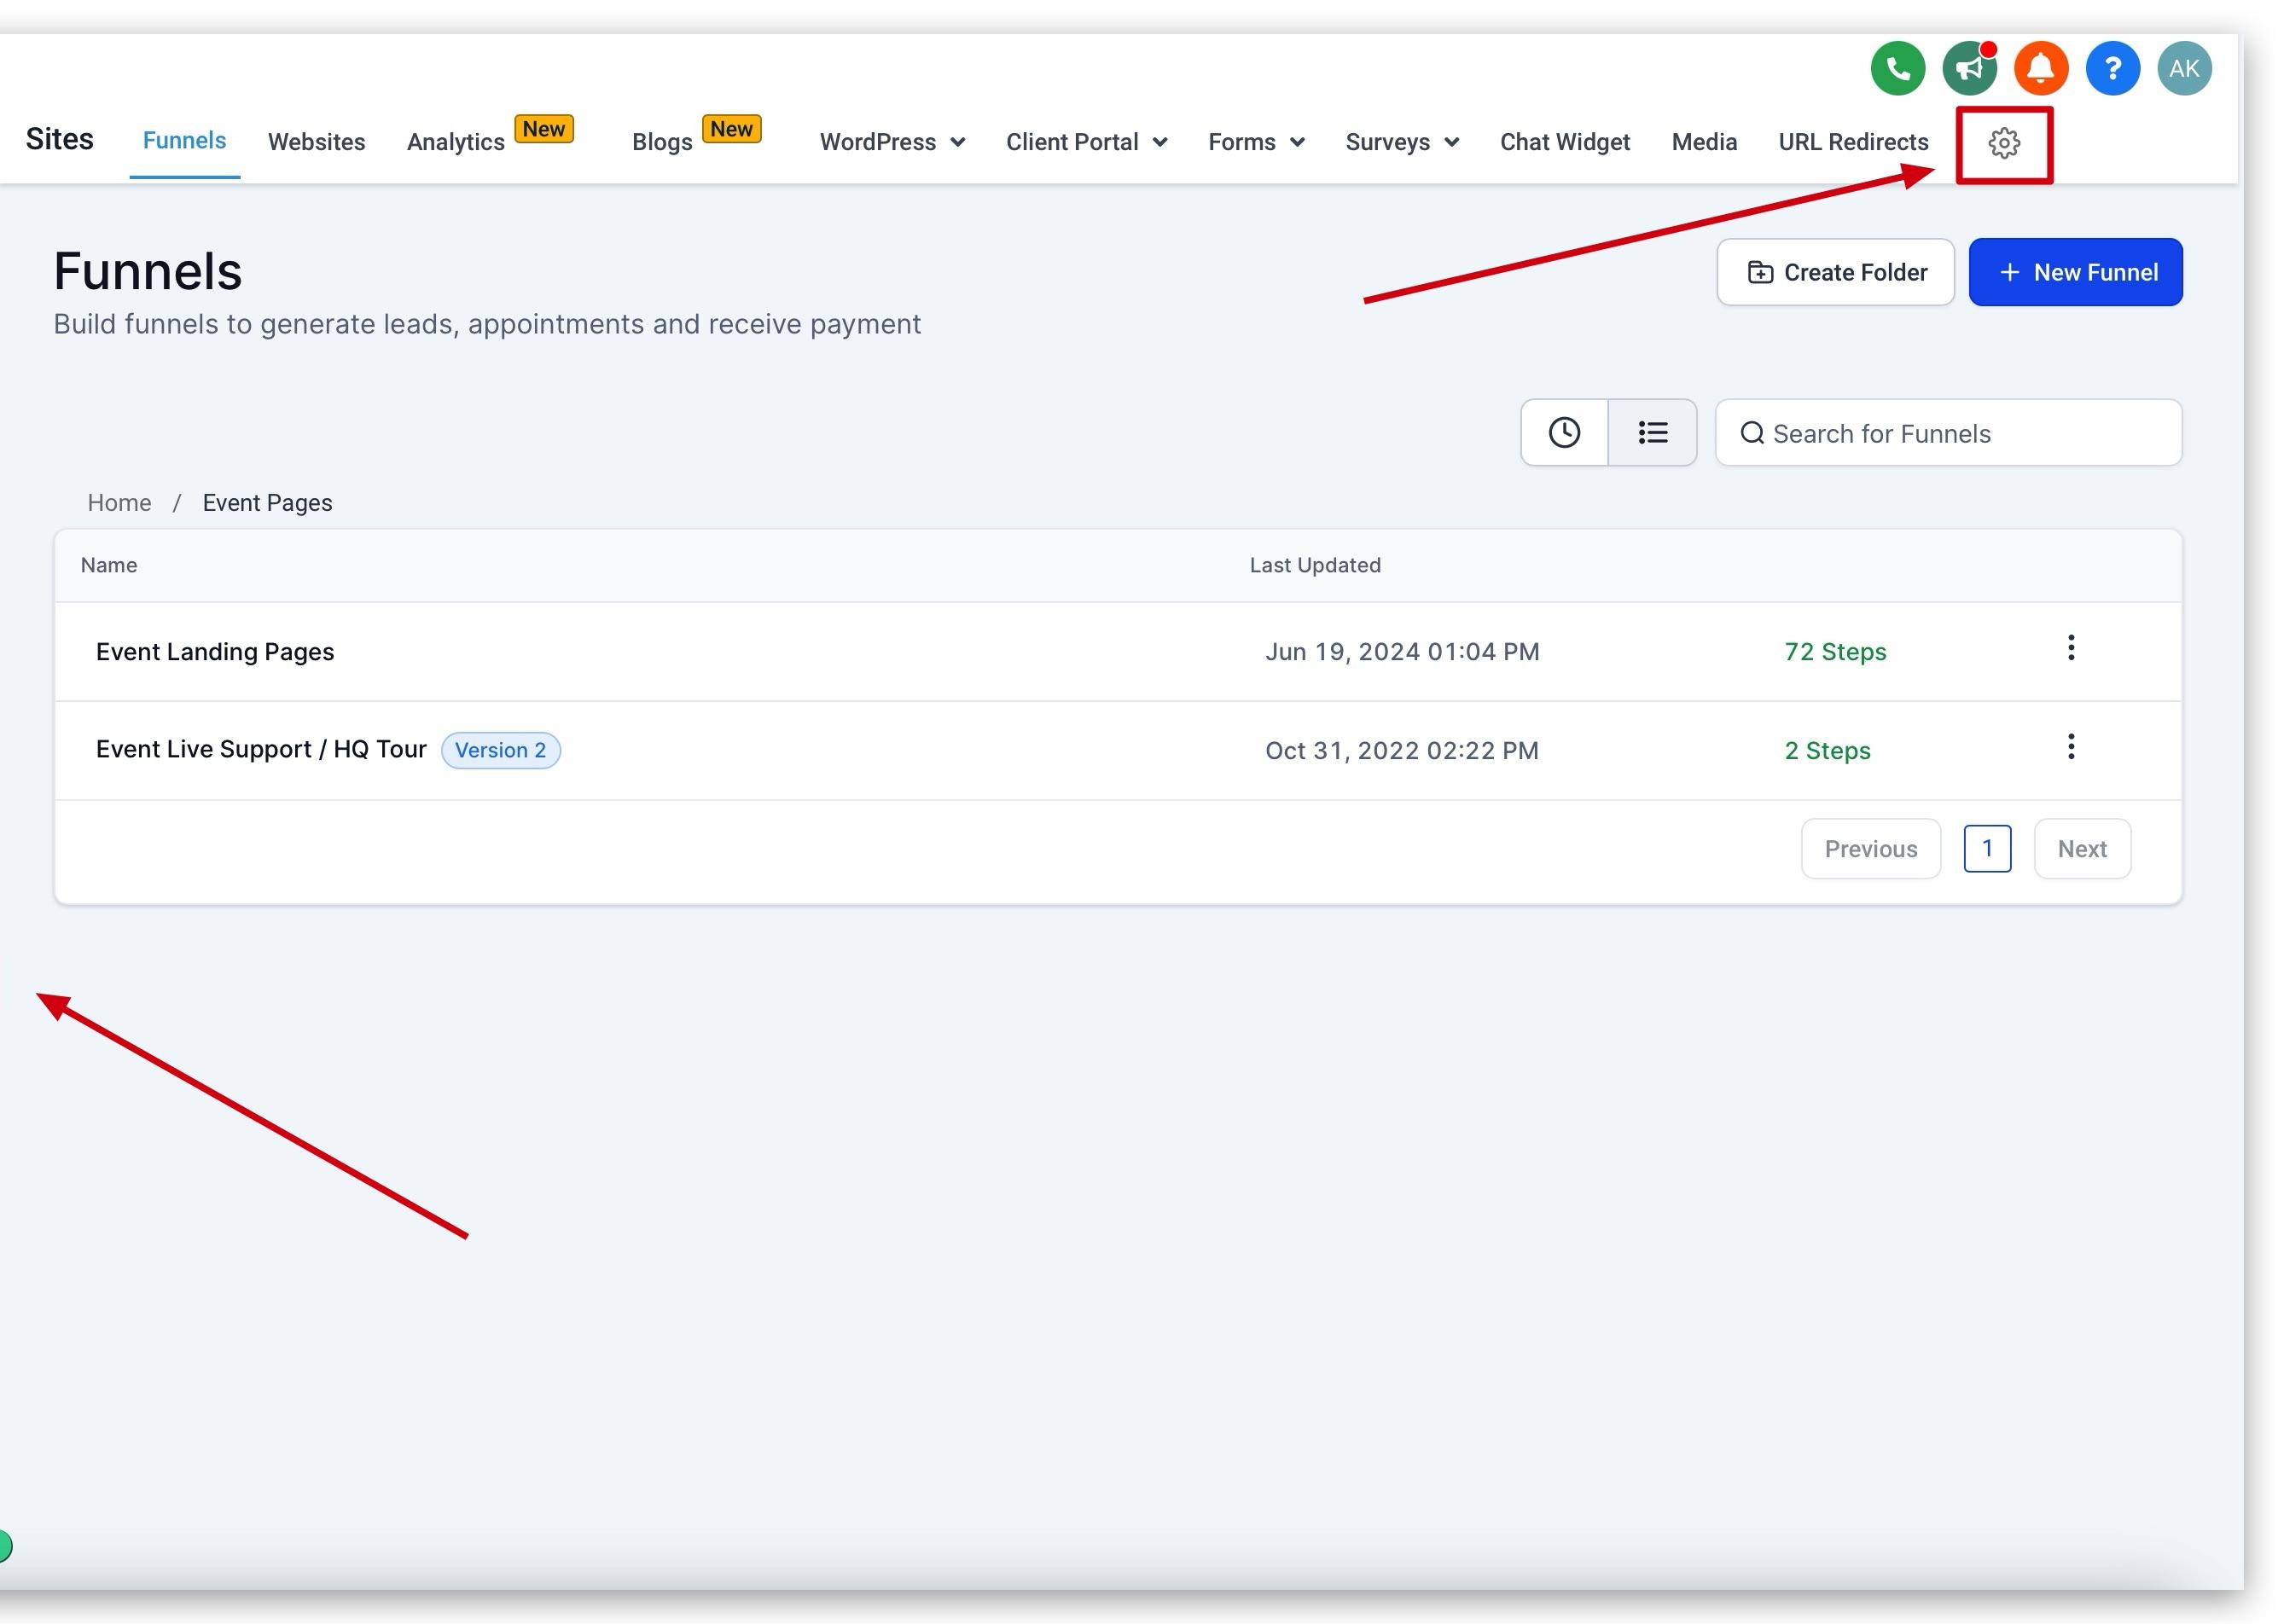
To find your XML sitemaps, navigate to the Web Tools → Websites section in Aesthetix CRM and click the small gear icon in the secondary navigation menu in the top right corner of your screen.
You'll be directed to the Domains section in your settings. You can also reach this section by navigating to Settings in the main navigation and scrolling down to Domains on the left-hand side of your screen.
Once you're in the Domains section, you'll see Manage to the far right of any domain you've added. This three-dot icon is the actions button for the domains listed here.
Note: If you have not added a domain yet, you'll need to do so before the Manage option appears.
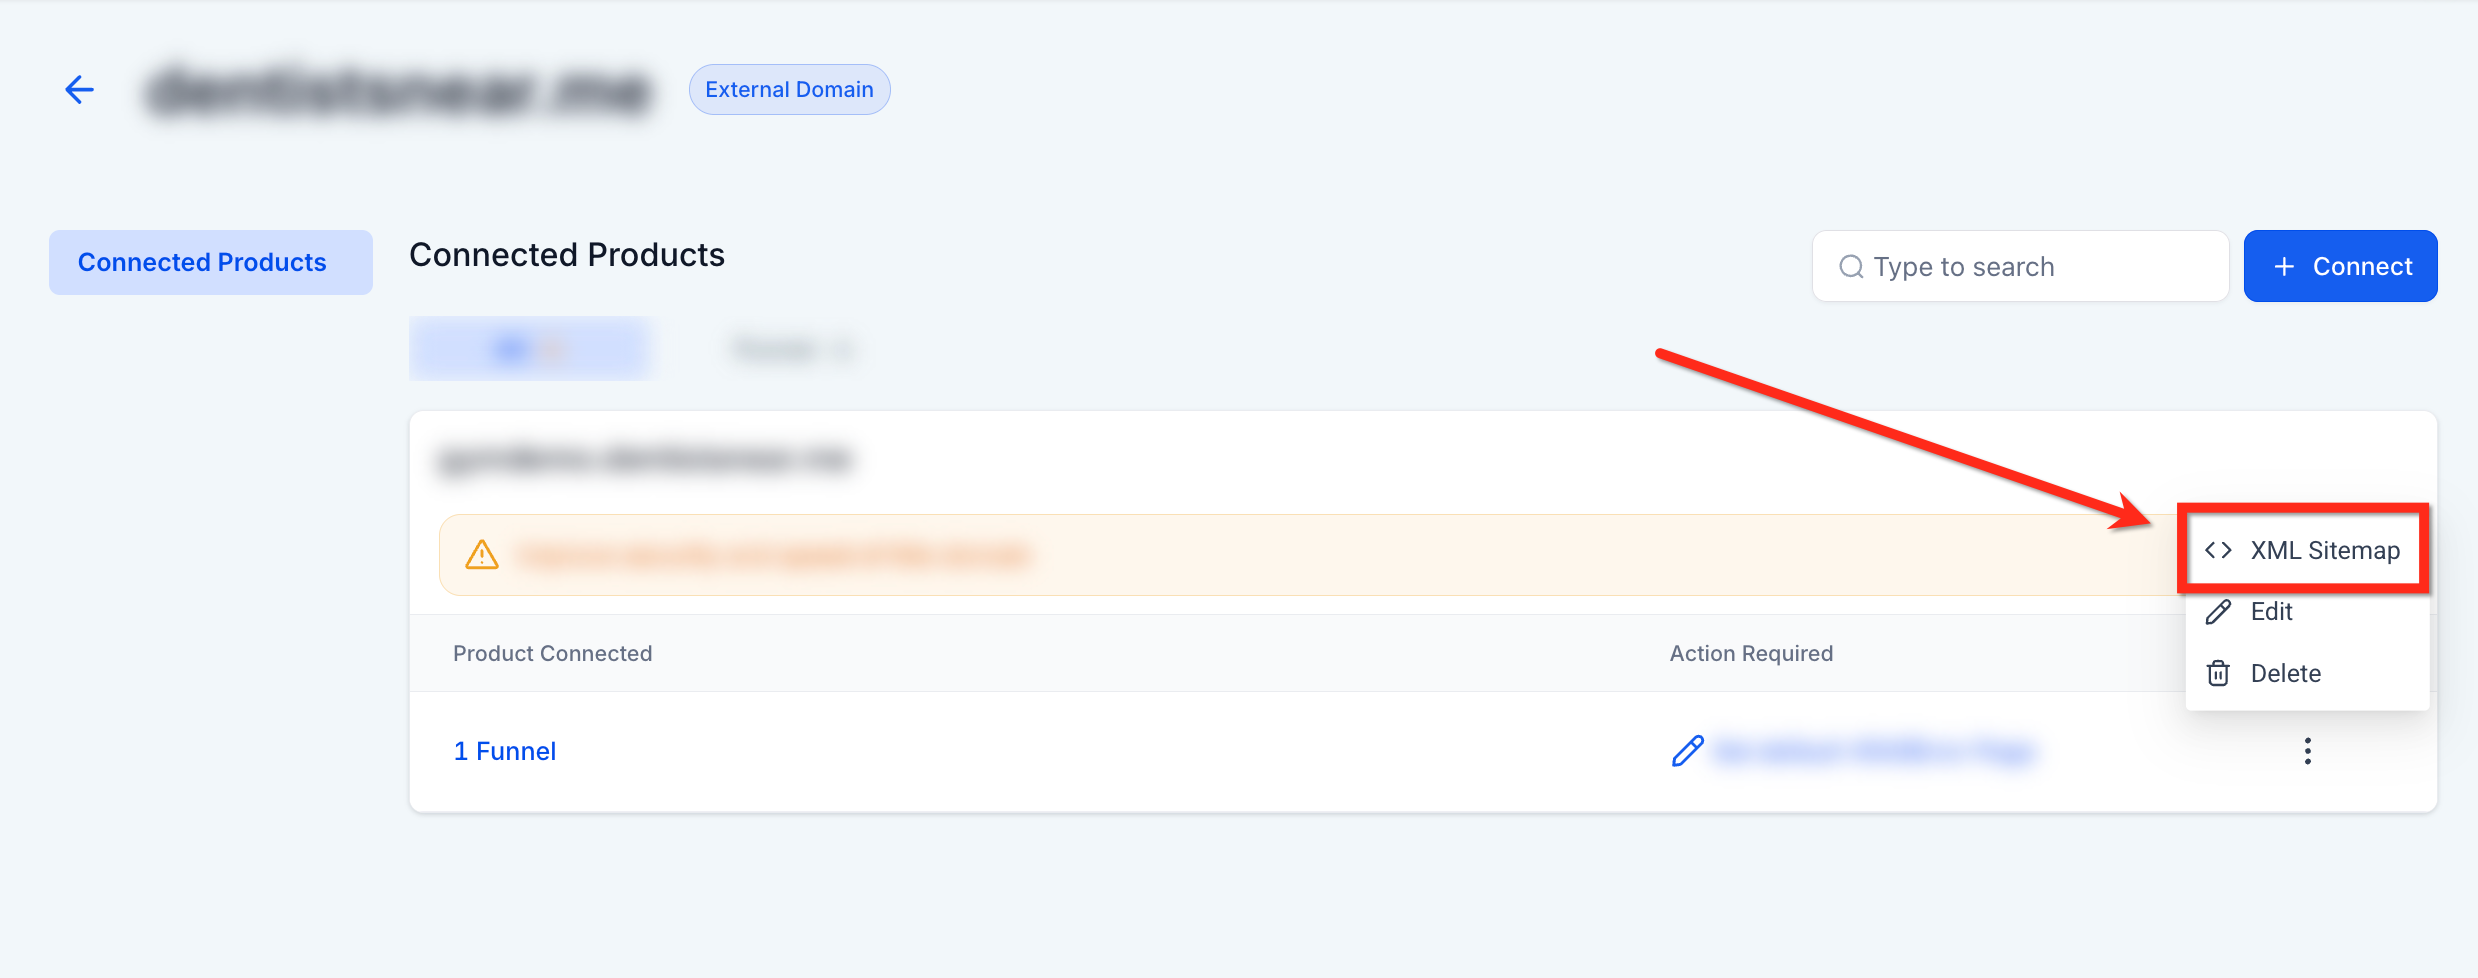
Once clicked, you'll be brought to the Connected Products page for that domain. Next to the desired asset, click the three-dots icon to see the different actions you can perform. One of these actions is labeled XML Sitemap. Click it to add, change, or delete XML sitemaps for your domains.
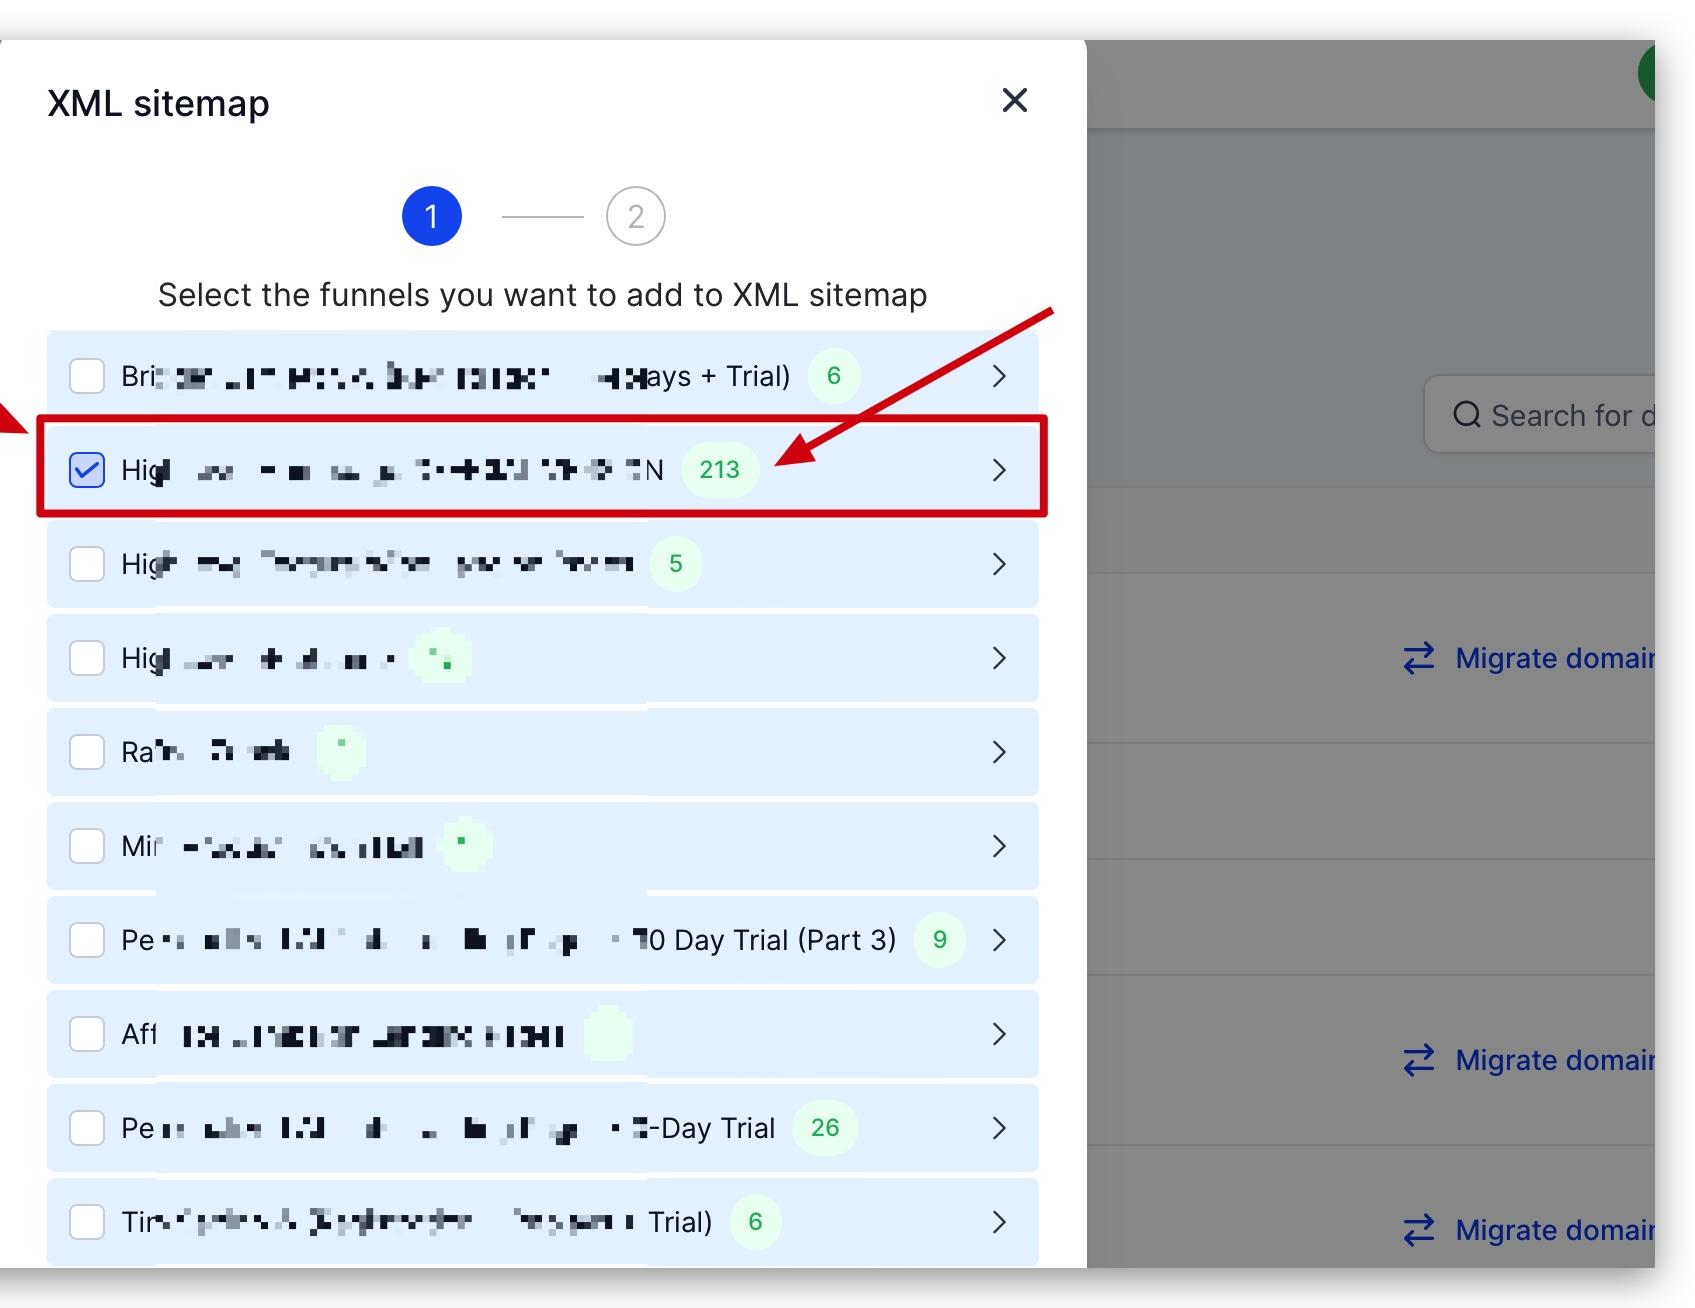
After you click the XML Sitemap action, you'll see a list of all websites and funnels connected to that particular domain.
Note: Because you can connect many different websites and funnels to the same domain, be careful when provisioning your XML sitemap. Only choose the website and funnel pages you want Google to crawl and associate with that domain.
When looking at websites and funnels in this view, a few elements on the screen are important to understand:
Connected Websites and Funnels: Websites and funnels connected to this domain are separated from each other inside a light blue rectangle accordion drop-down.
Website and Funnel Names: The name of the website or funnel is visible in these accordion drop-downs.
Checkbox: The checkbox on the left-hand side of the website or funnel name lets you select the entire website or funnel and add all its pages to the XML sitemap.
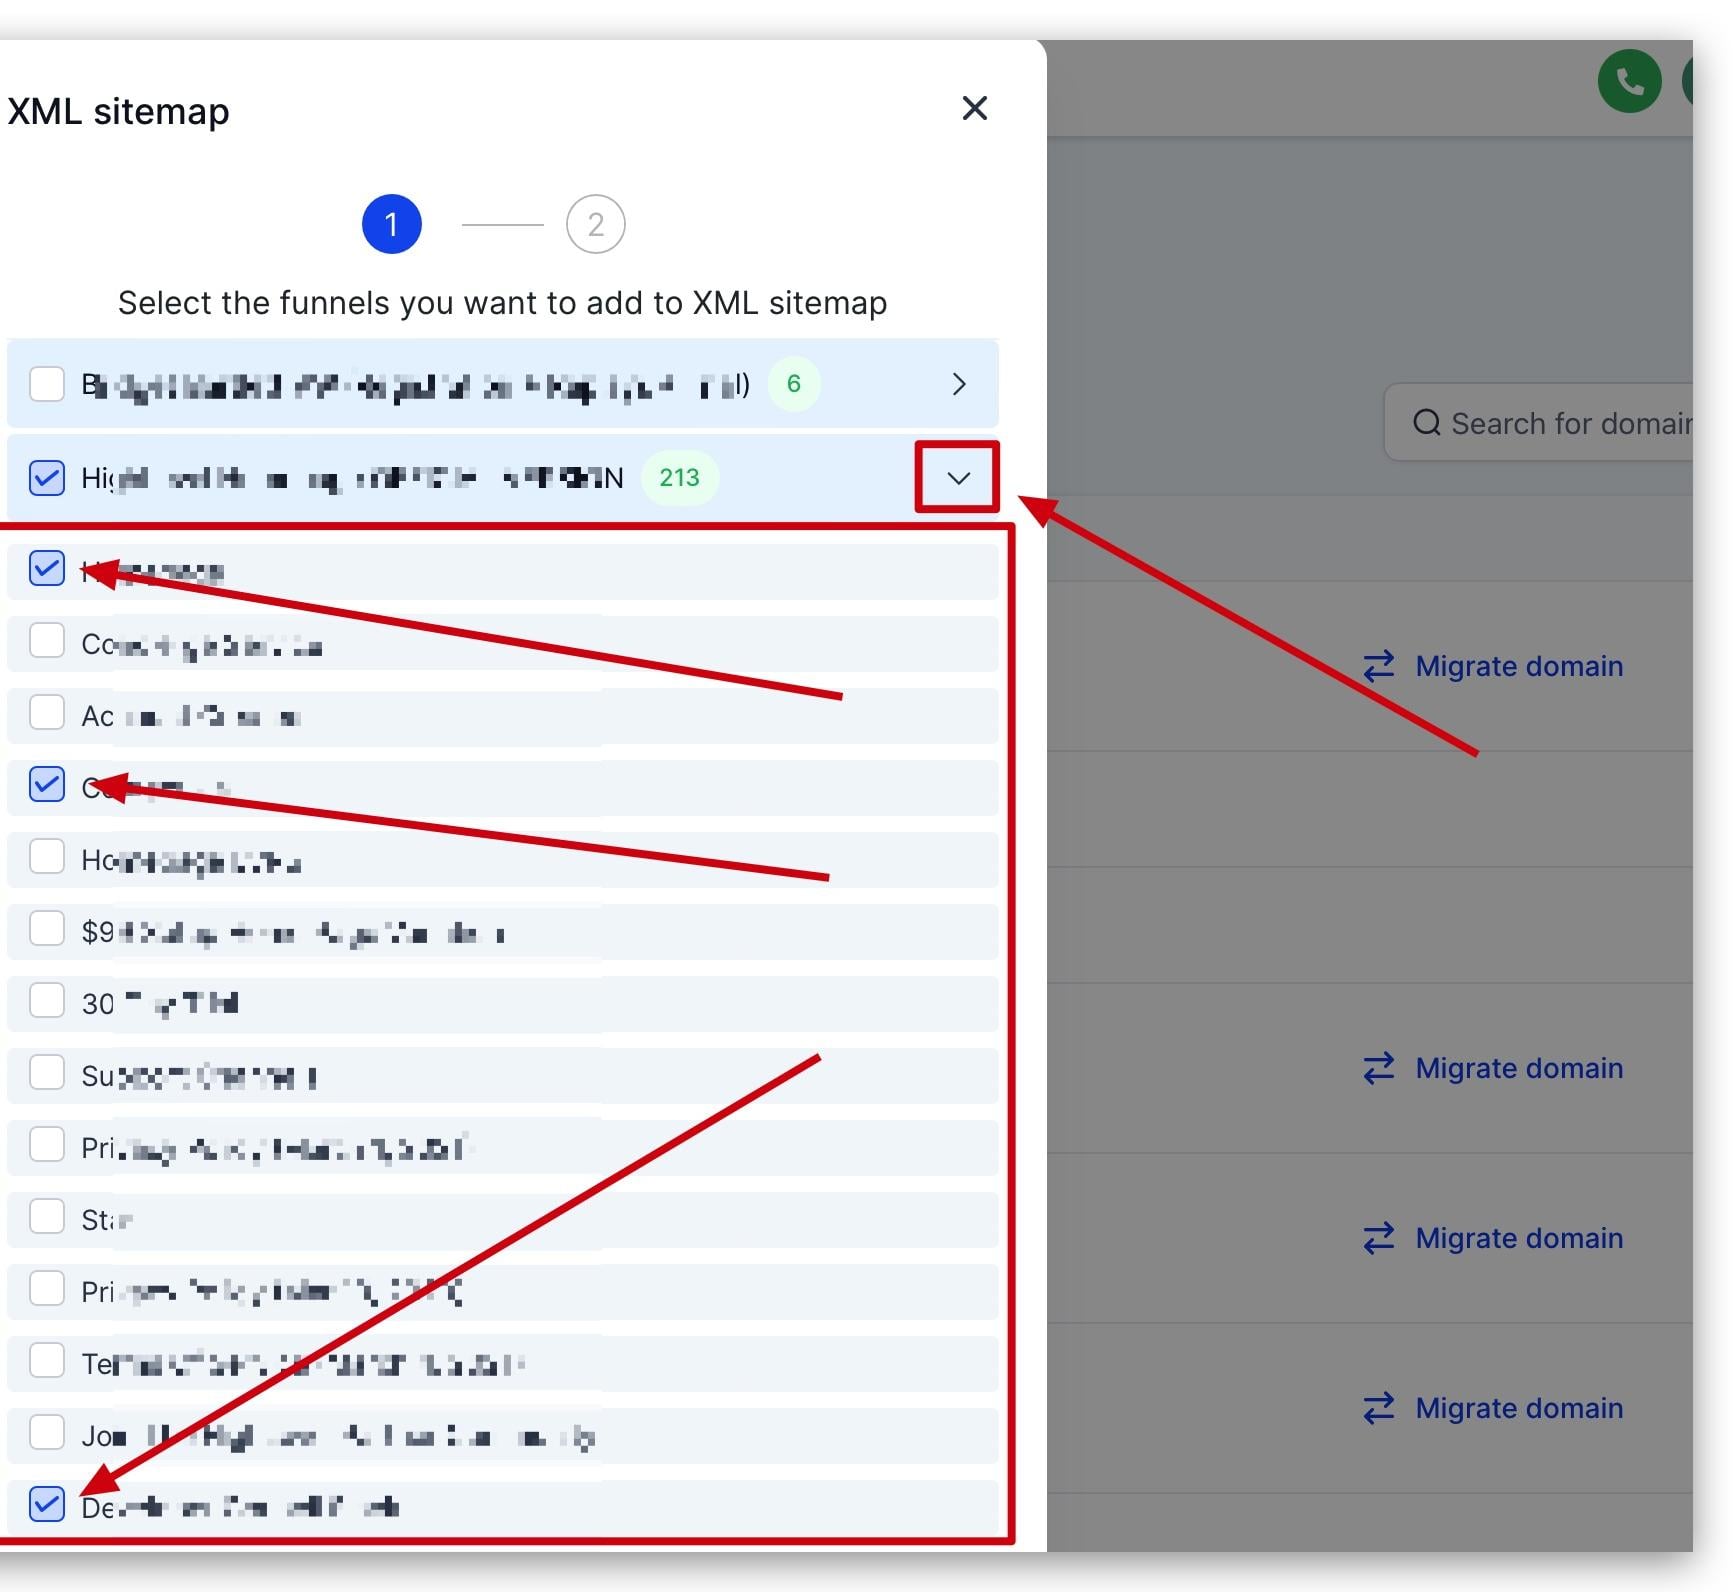
Arrow (carat): On the right-hand side of the website or funnel there is an arrow icon. When clicked, it reveals all pages associated with that website or funnel so you can select individual pages for your XML sitemap. This lets you keep certain pages out of the sitemap.
Note: Leaving a page out of your XML sitemap does not guarantee it will never be crawled by a search engine. If any hyperlinks point to a page you don't want crawled, you'll need to restrict access to that page in other ways.
To create your first sitemap or edit an existing one, start by clicking the arrow (carat) on the right-hand side of the website or funnel in the XML sitemap configuration wizard.

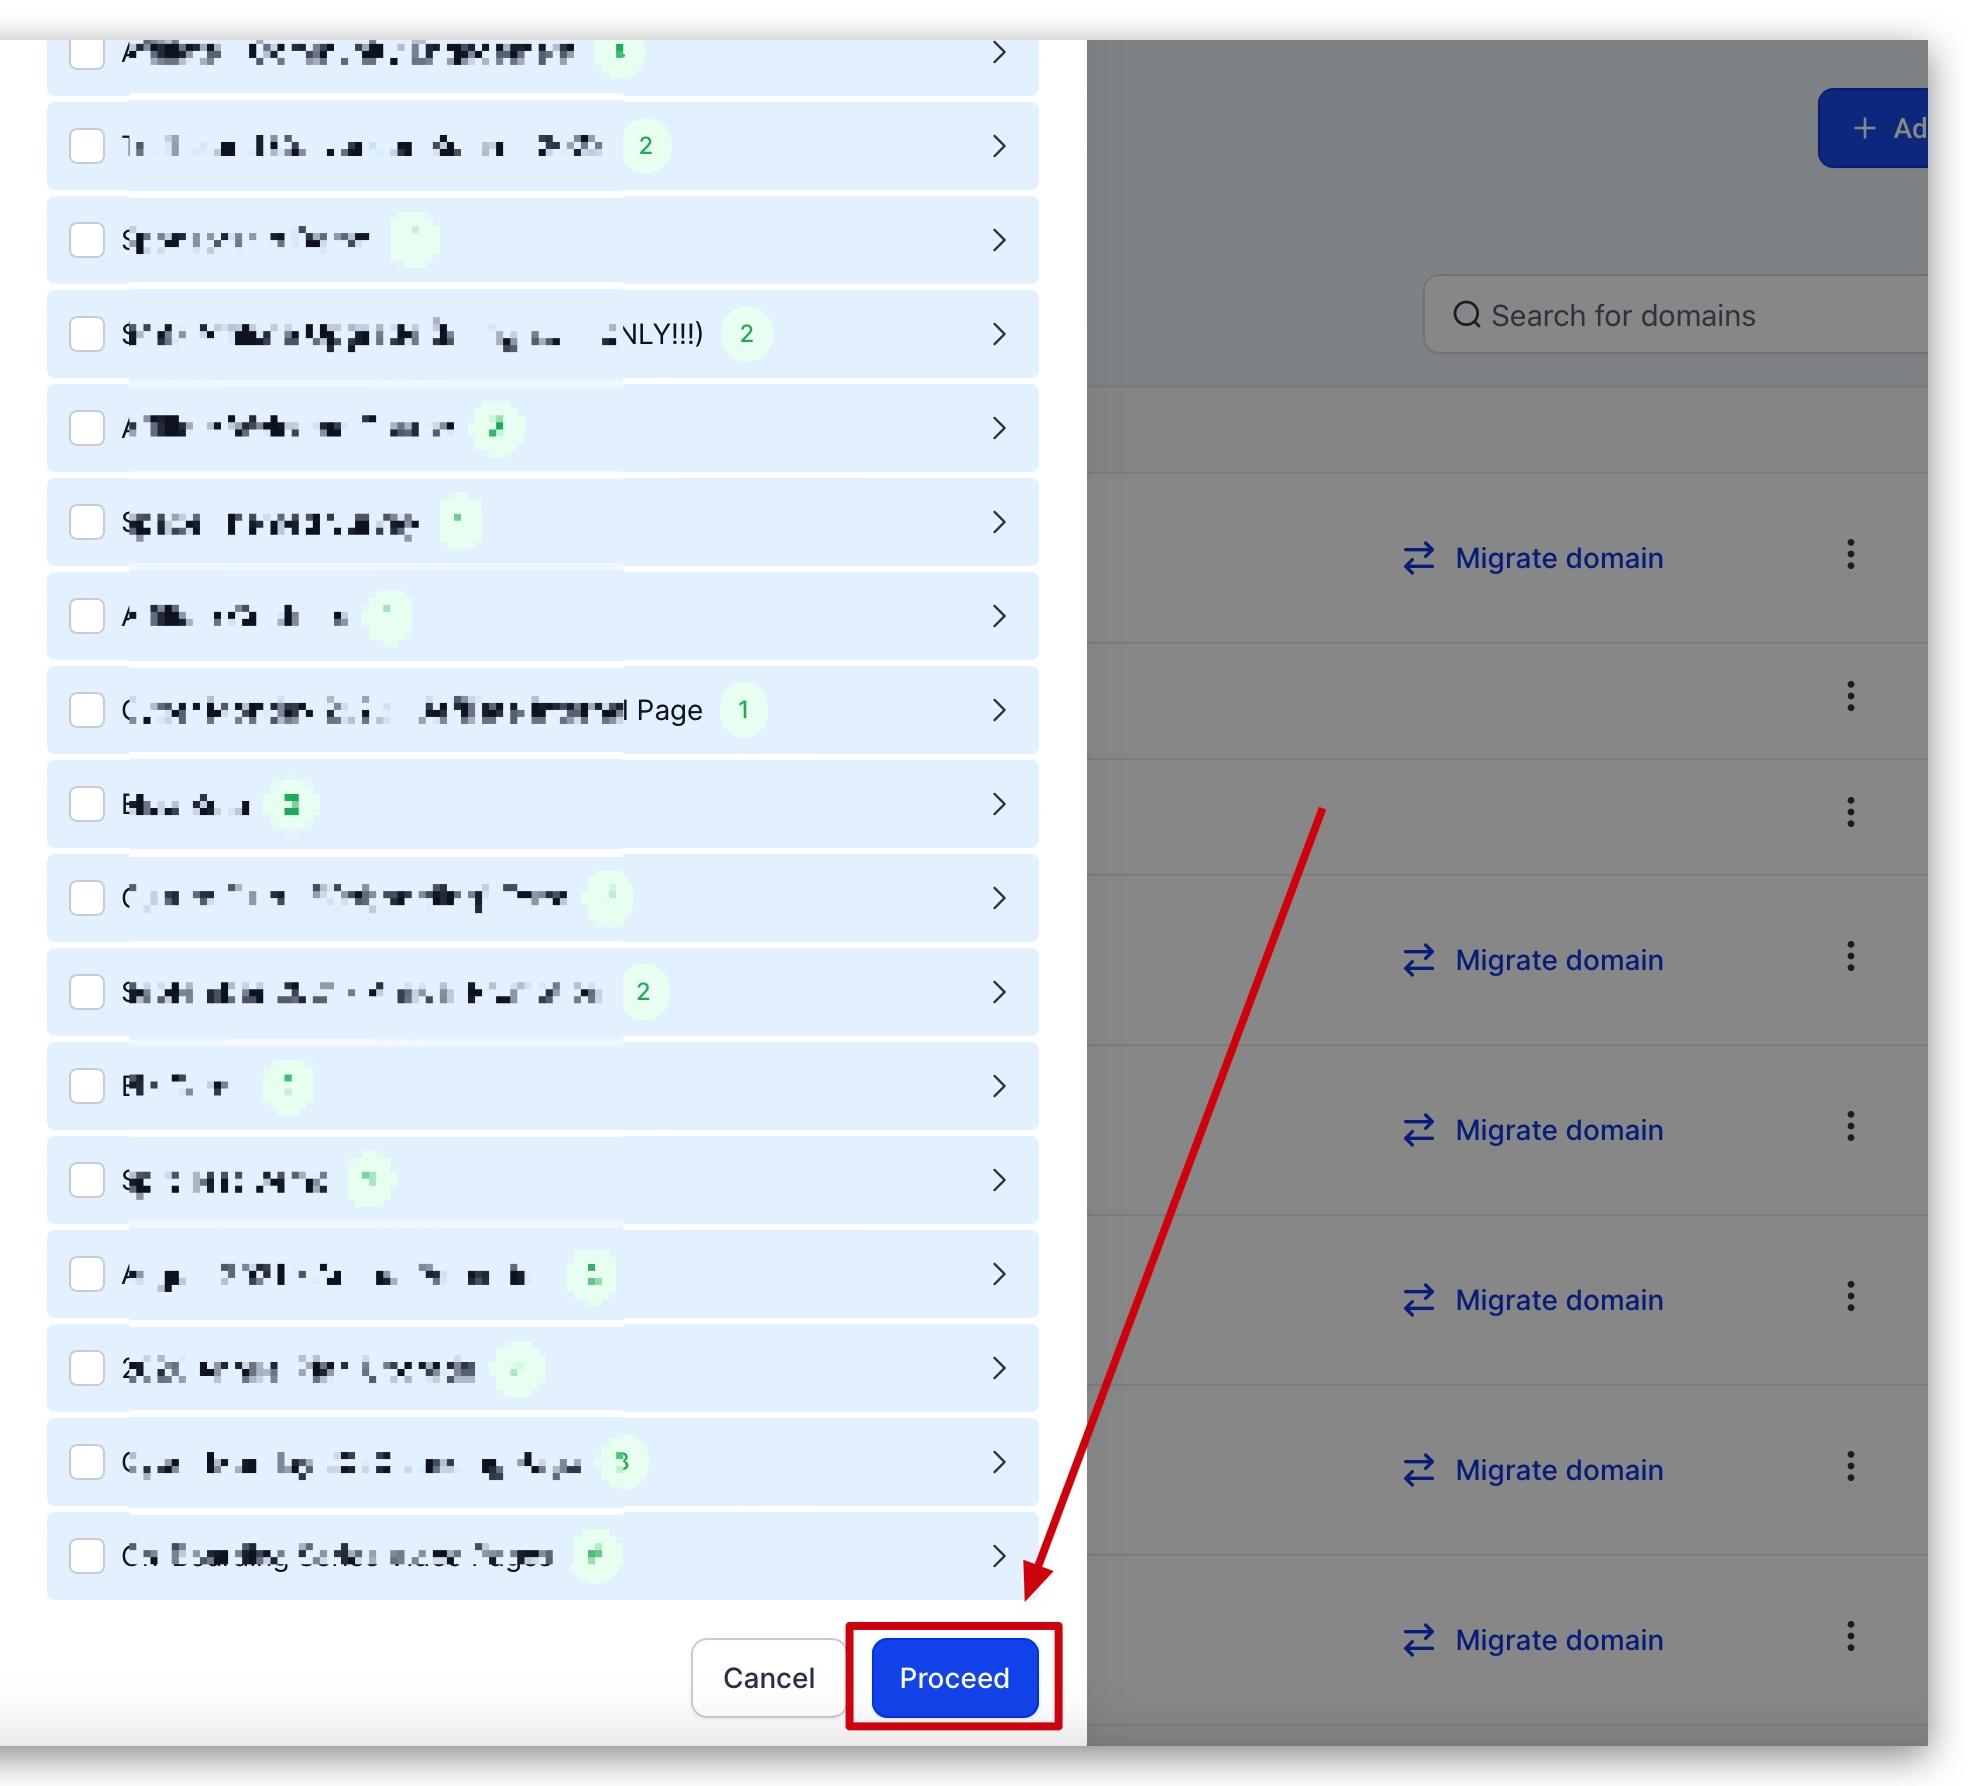
Select the website or funnel pages you'd like to add to your XML sitemap. Because you can connect many different websites and funnels to the same domain, make sure you select all the pages you want added before proceeding.
When you're ready to move to the next step, click the Proceed button at the bottom of the list of websites and funnels.
Note: If you haven't created an XML sitemap for this domain before, you'll see a message prompting you to add one. Click the Add New button to create your first sitemap.
After choosing the pages to include, you'll see a popup containing:
List of XML Sitemaps: Shows all XML sitemaps created for this domain. If you have more than one, each is displayed here.
Custom Path: The custom URL path assigned to your XML sitemap when it's created. It is configurable and can be changed at any time. If you change this path, remember to resubmit your sitemap to Google.
Last Modified Date: Indicates the last time the sitemap was modified. You can modify a sitemap by adding or removing pages or changing the custom URL path.
Three-Dot Action Button: Gives you the option to either edit or delete an XML sitemap.
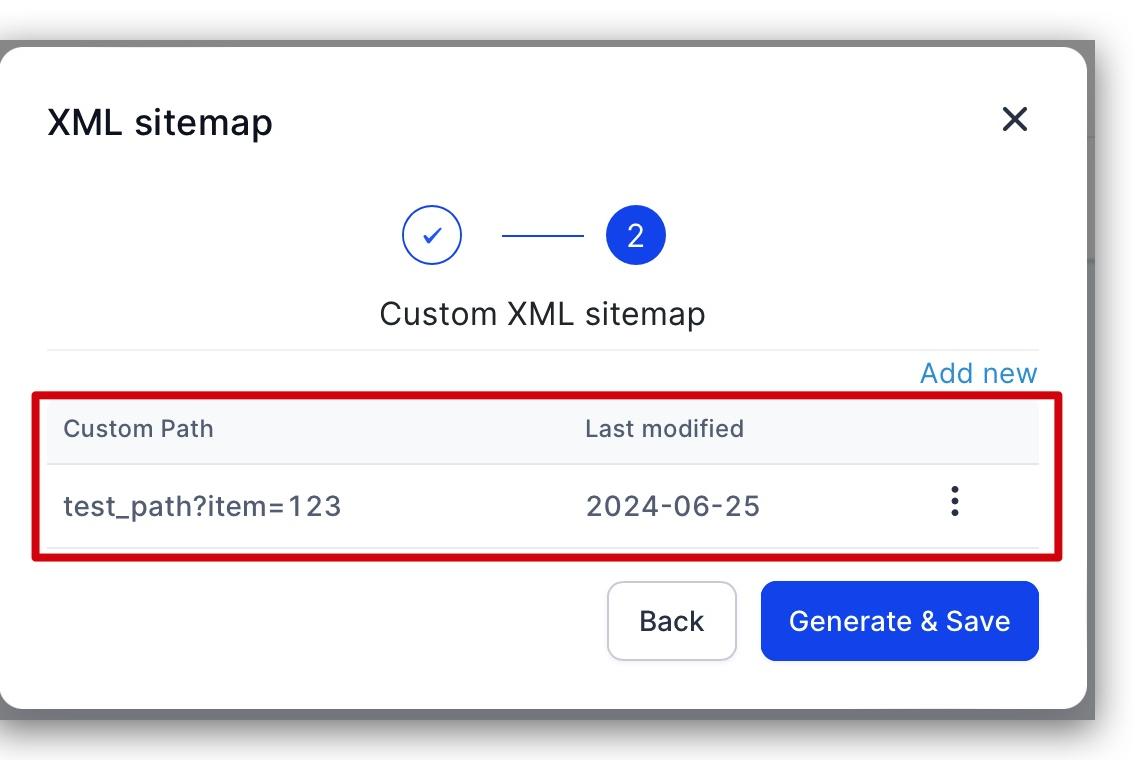
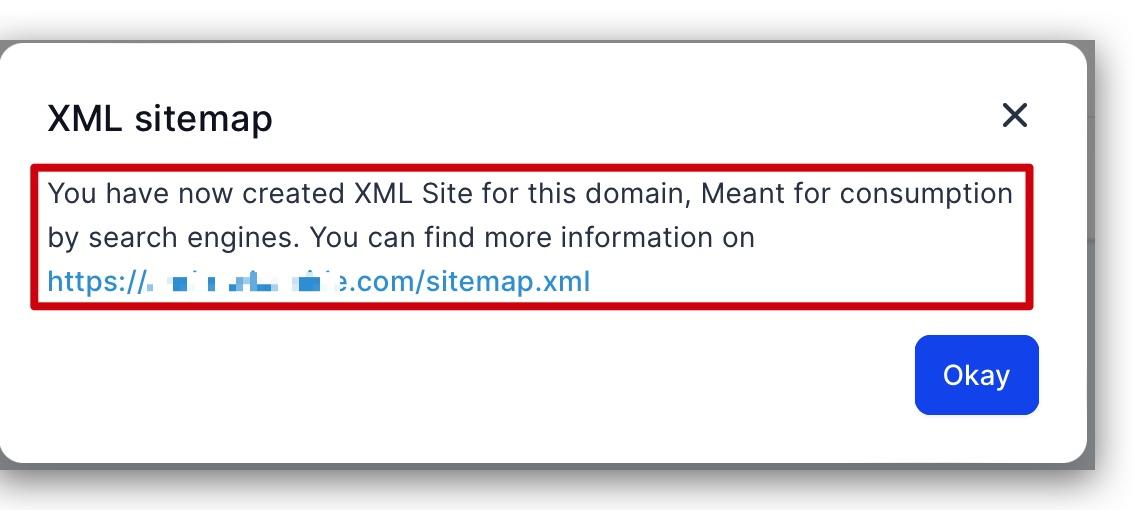
Once you're satisfied with your XML sitemap, click the Generate & Save button to finish creating or editing it. You'll see a confirmation message with the URL of your new XML sitemap.
Google doesn't check a sitemap every time it crawls a site. A sitemap is checked the first time Google notices it, and thereafter only when you let Google know that your sitemap has changed. Alert Google about a sitemap only when it's new or updated; don't submit unchanged sitemaps multiple times.
Google recommends submitting your sitemap using the Sitemaps Report in Google Search Console. This method also gives you valuable data and insight into your sitemap, such as:
Active status
Total crawled pages
Crawl errors
And more
Let's walk through the steps.
Go to Google's Search Console Help center page that contains the Sitemaps Report link (https://support.google.com/webmasters/answer/7451001). Once you're on this page, click the Open Sitemaps Report button.

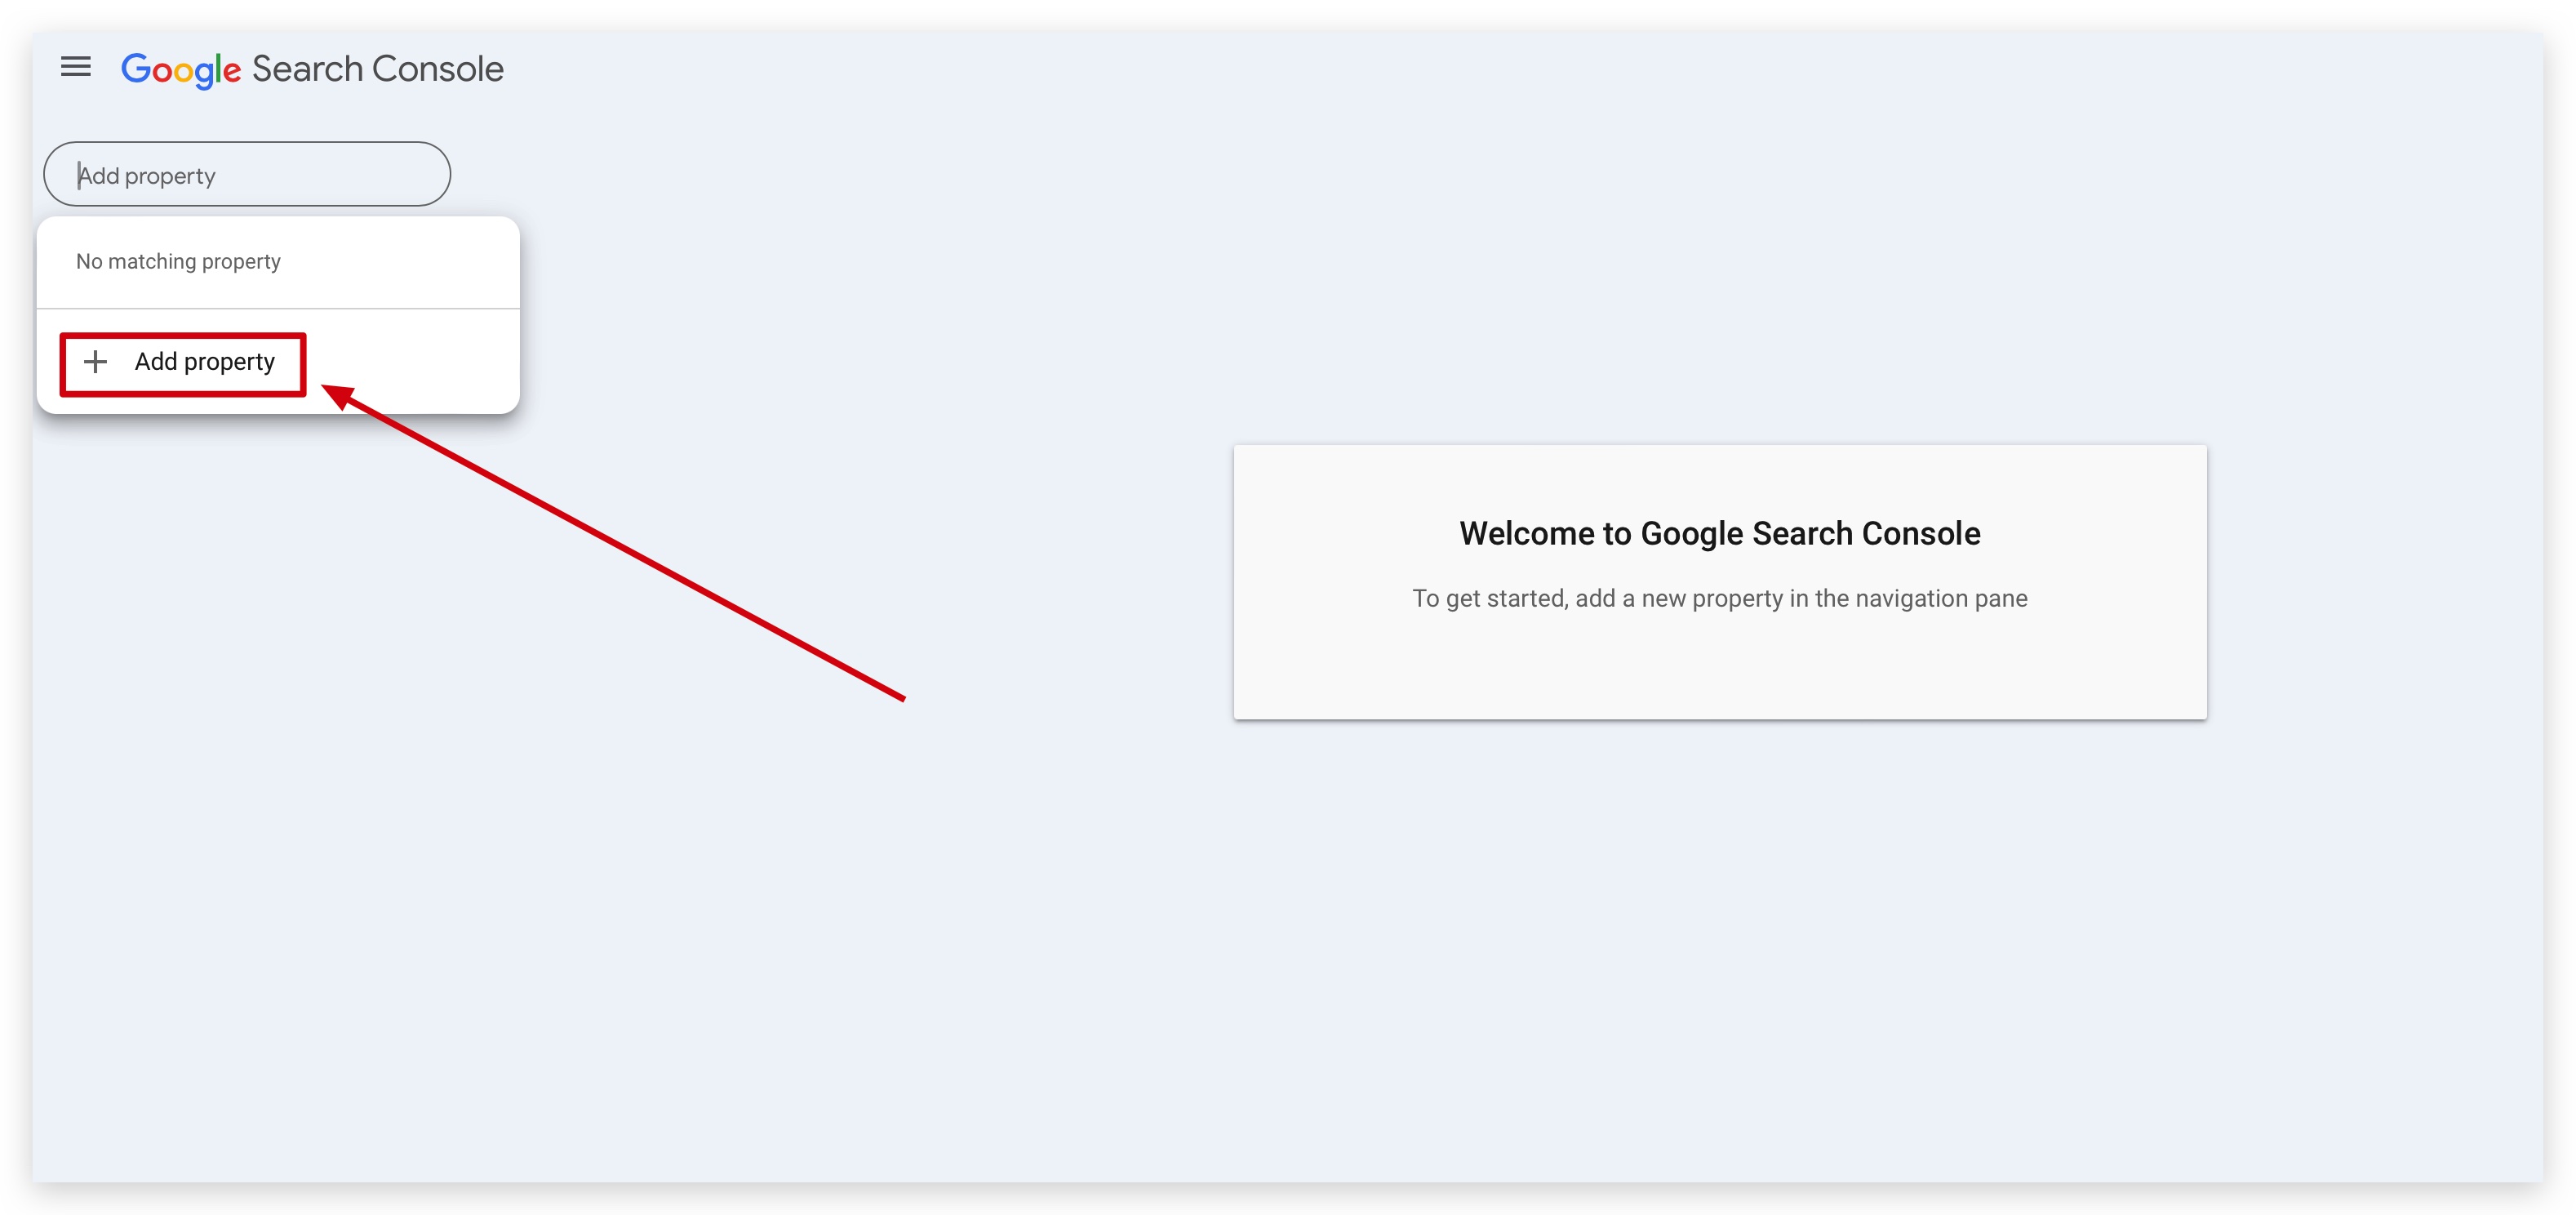
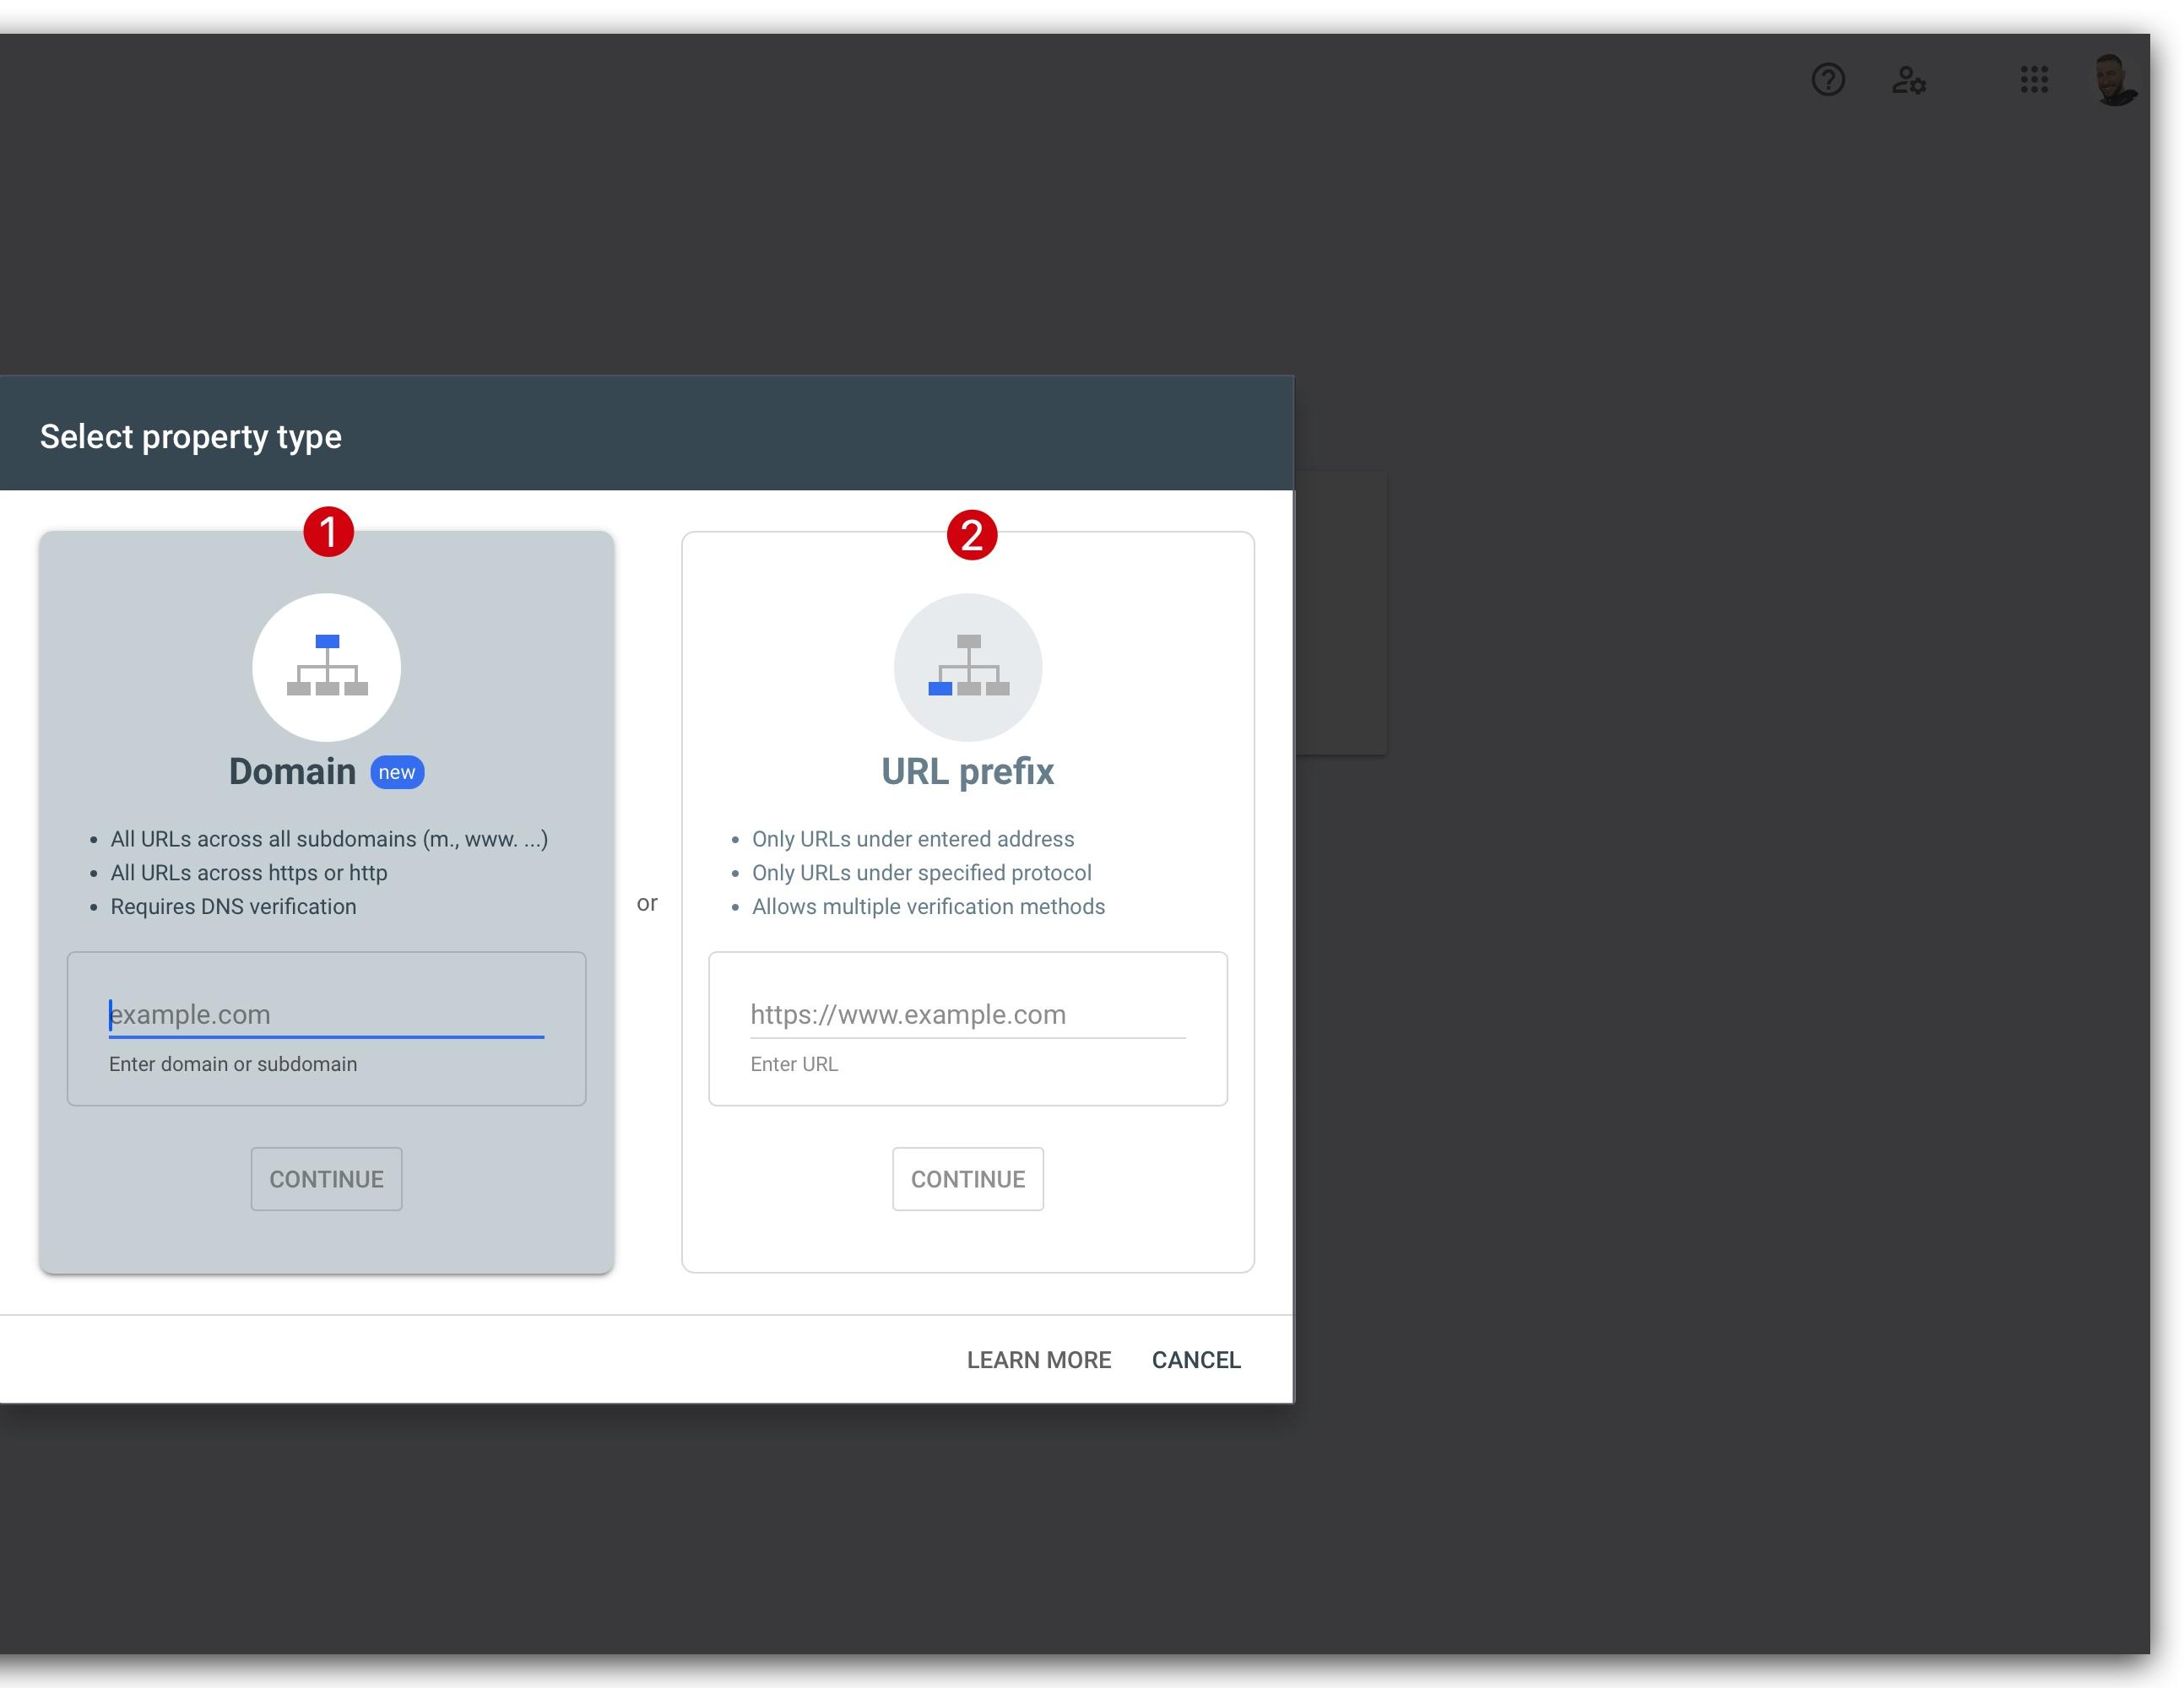
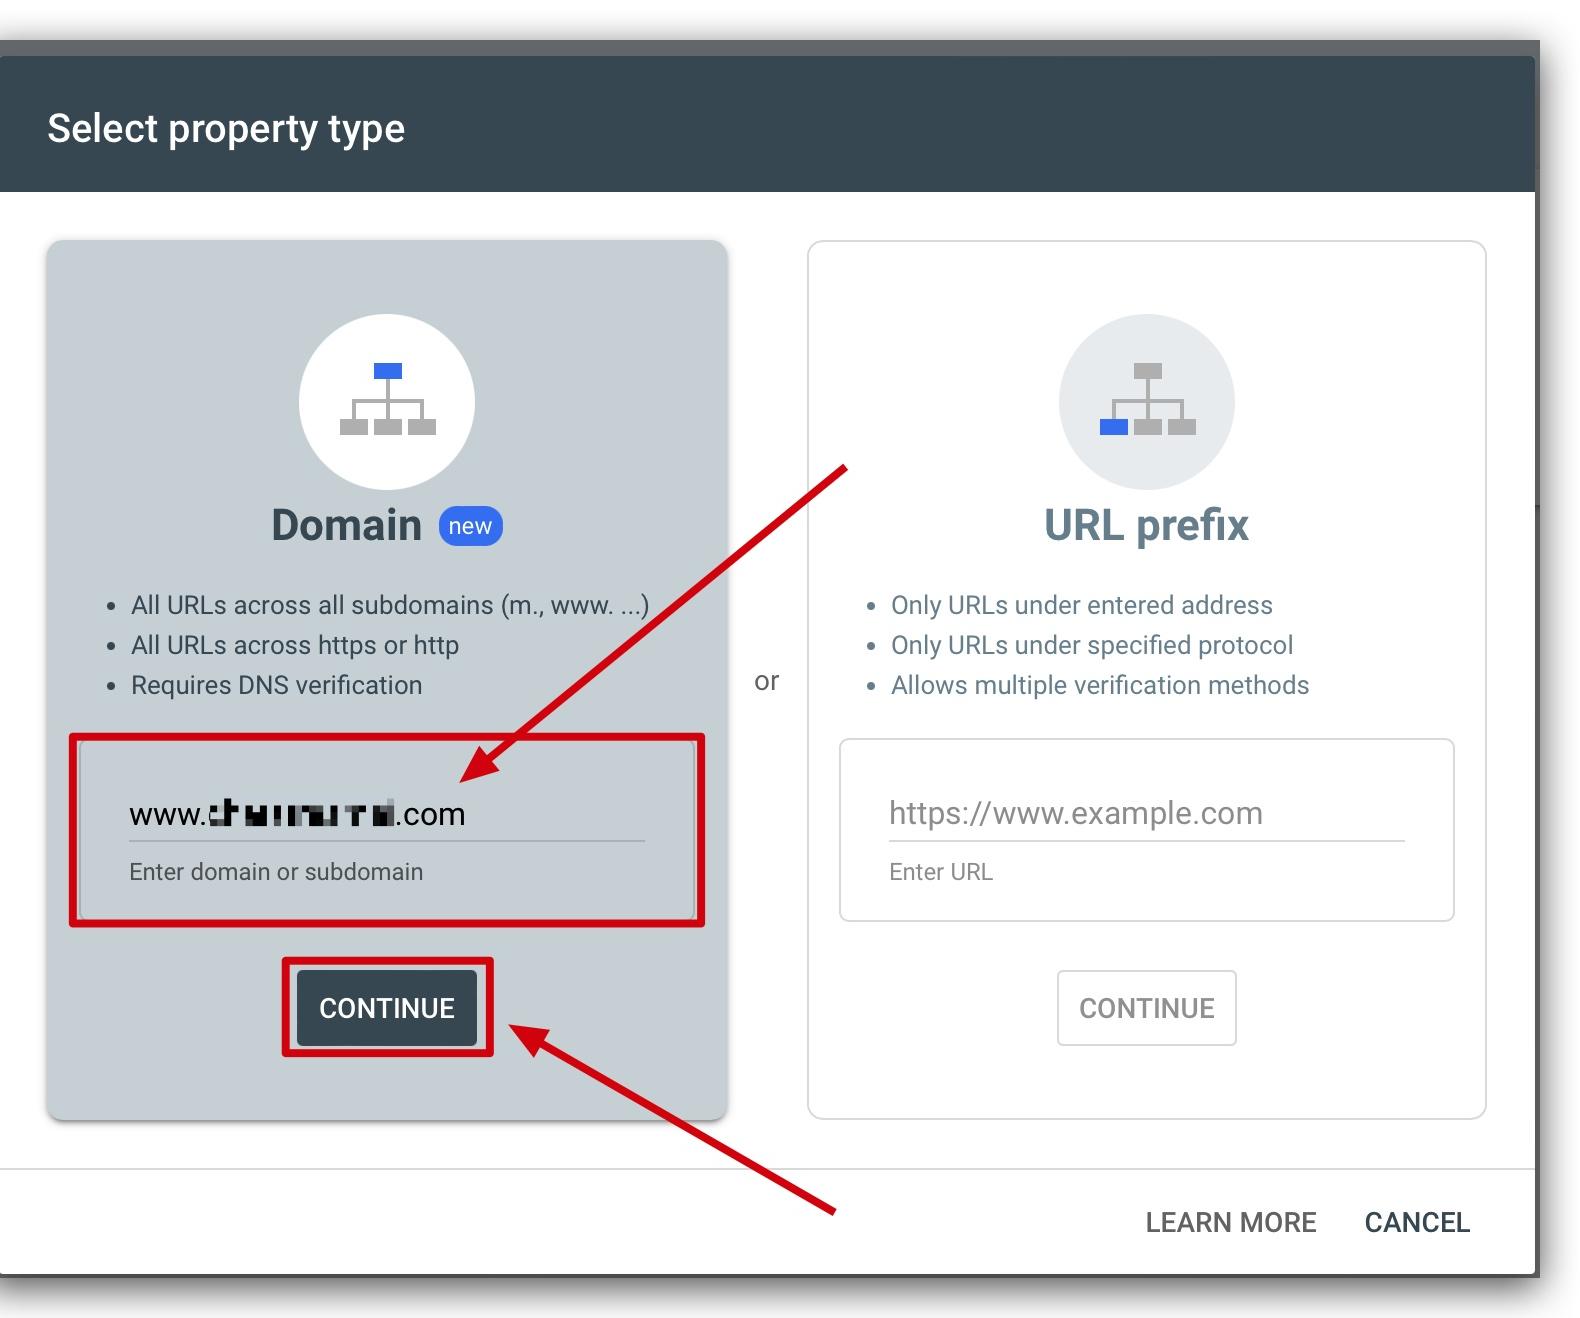
If you don't already have a property (website domain) associated with your Google Search Console account, you'll need to add one. If you already have a property configured, you can skip ahead a few steps.
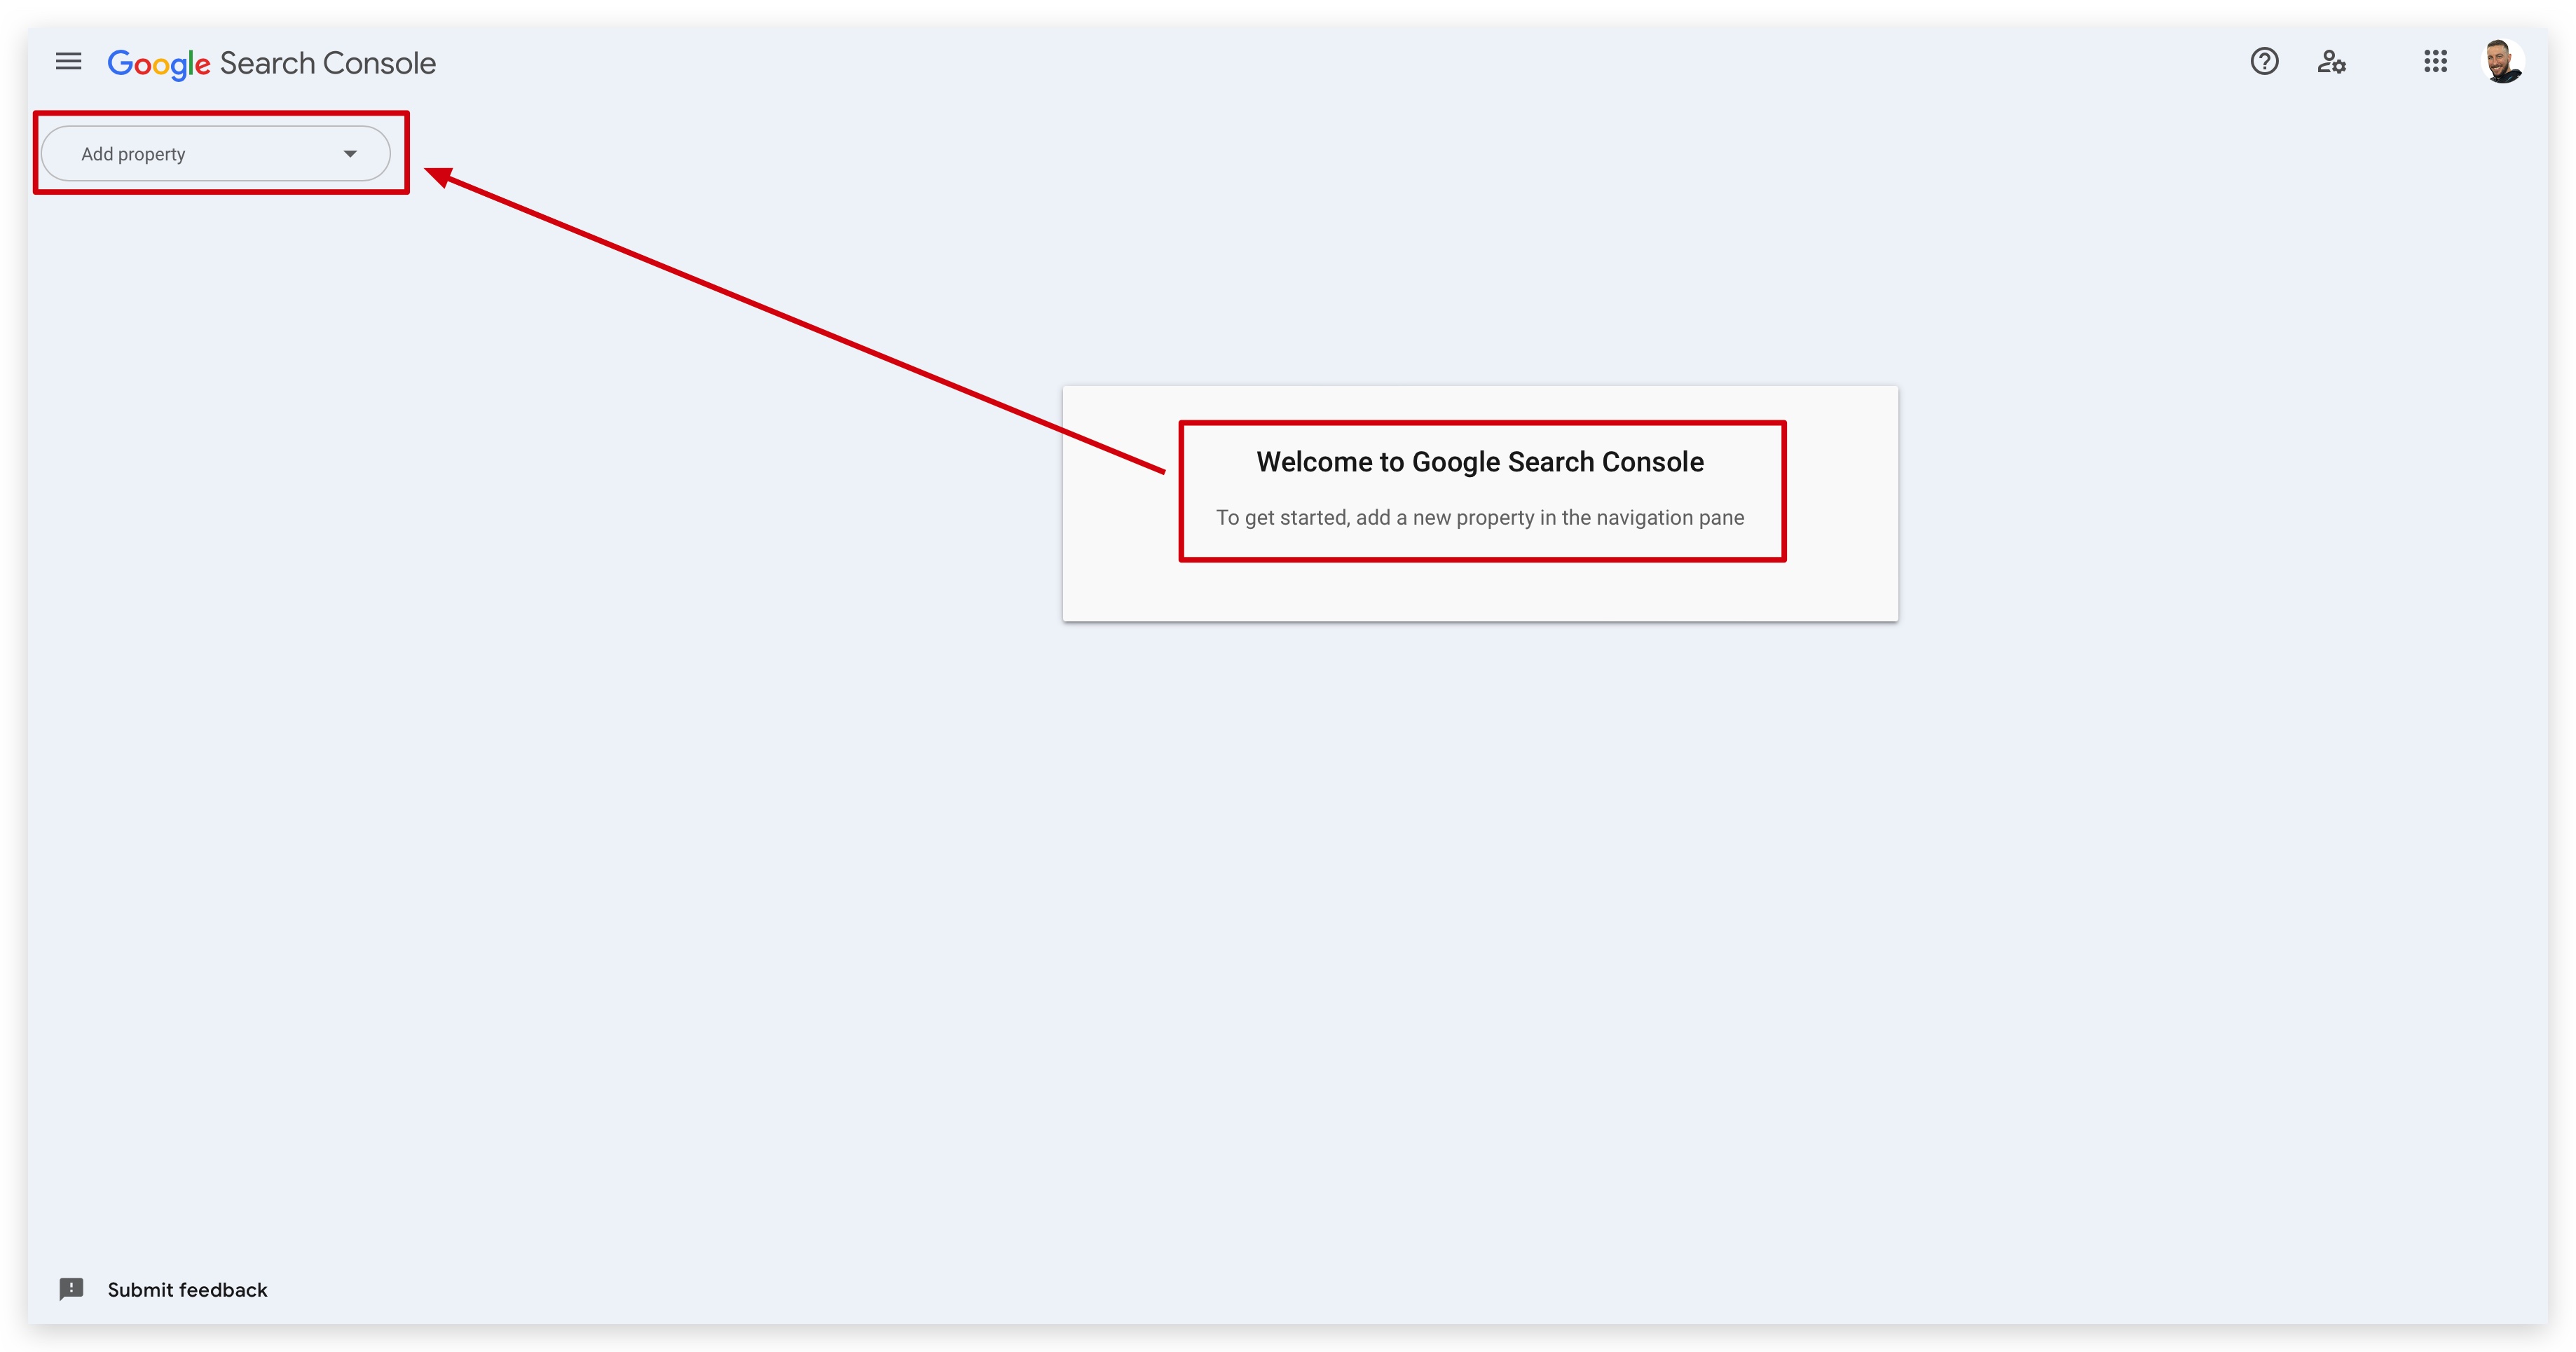
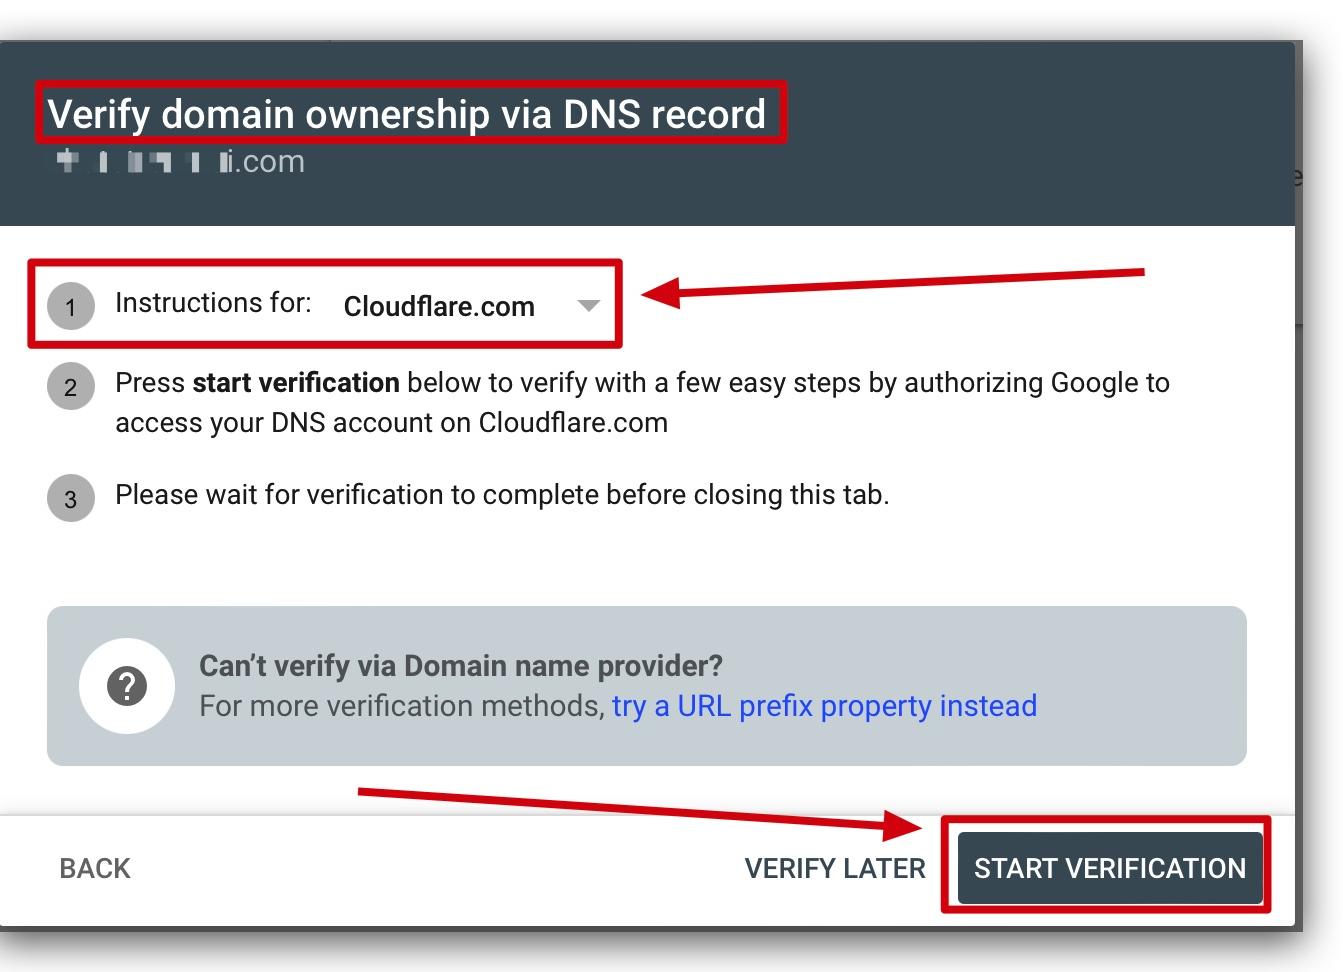
Once you add your property, verify it so that Google can collect and display all of the search console data associated with that domain.
To submit your sitemap, navigate to the Sitemaps section in your Google Search Console.
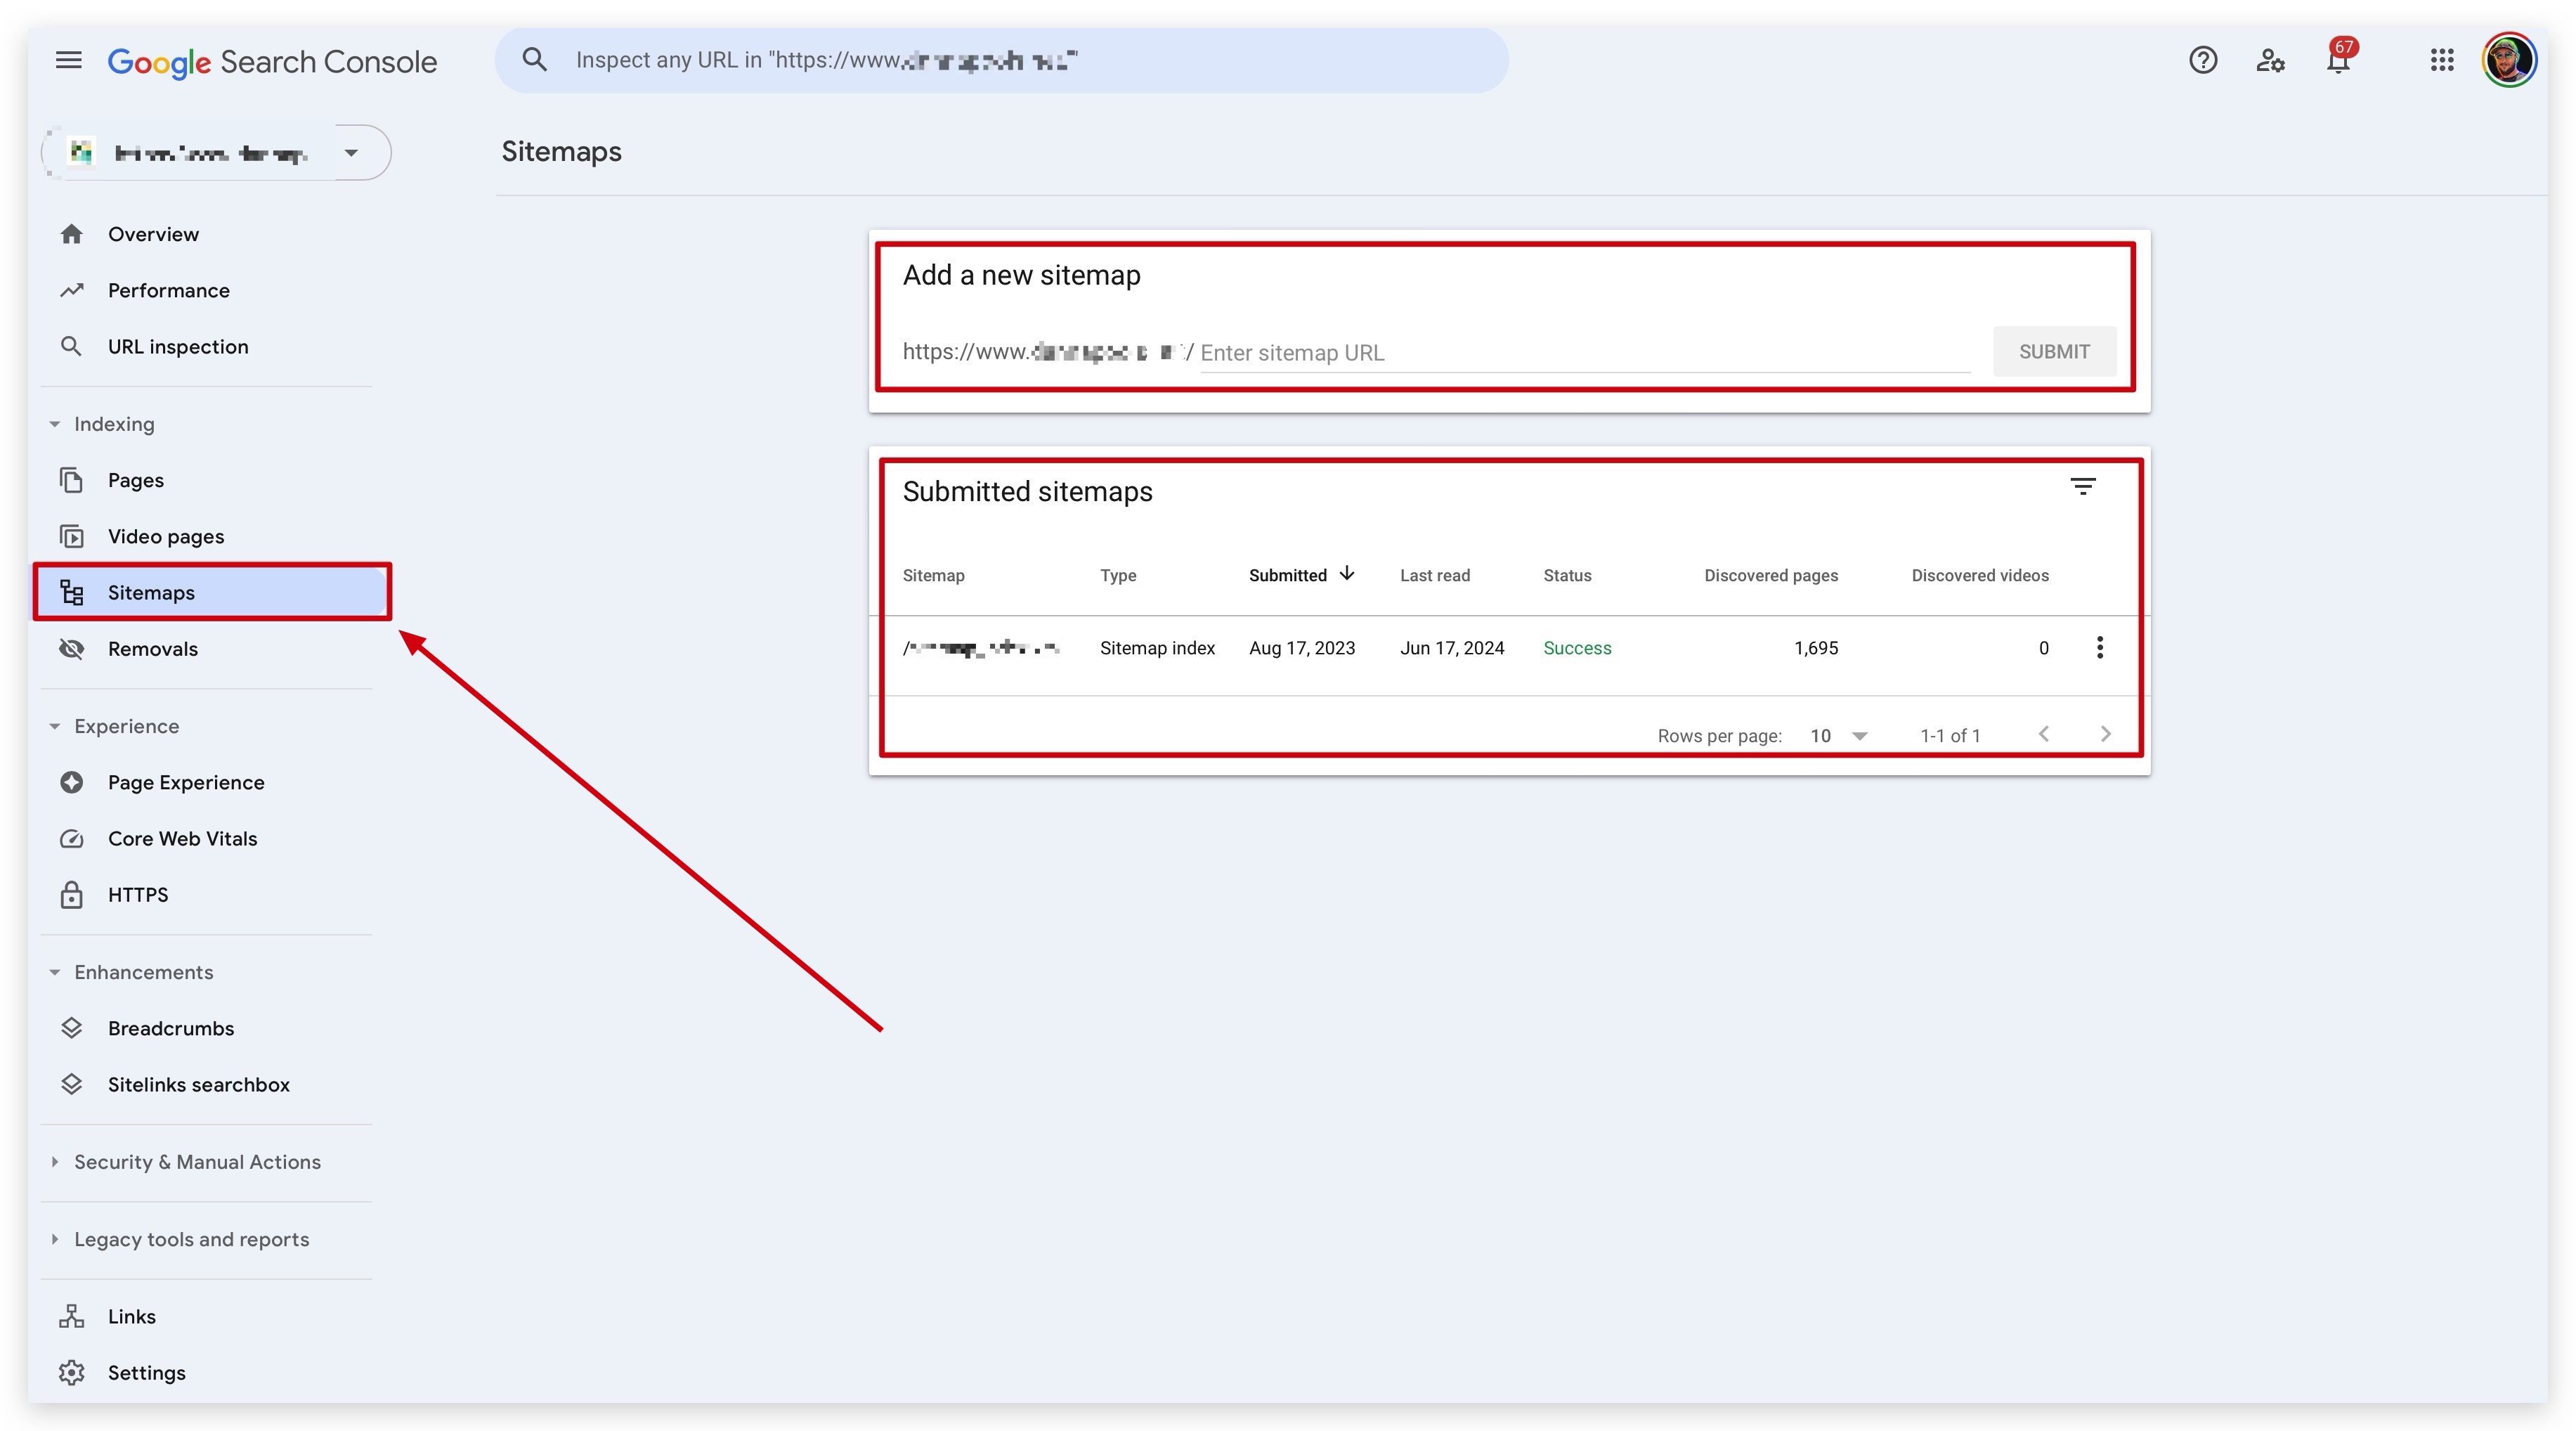
To submit your XML sitemap to Google, you'll need its URL. Aesthetix CRM provides this to you after you create or edit a sitemap. Grab the URL path for your sitemap and add it here.
Note: Normally the URL path for your XML sitemap will simply be
sitemap.xml. This may change, so take note of the exact URL path so you can successfully submit it to Google.

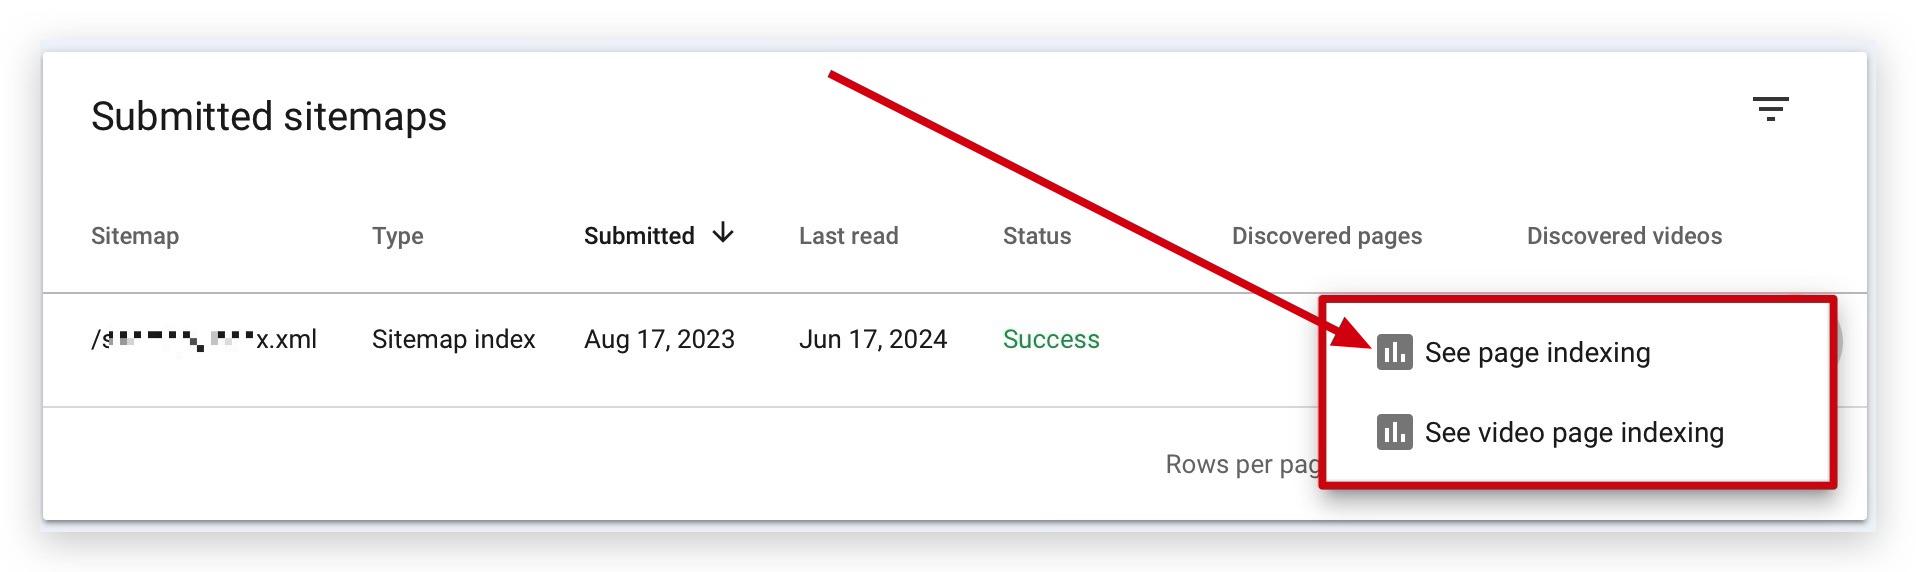
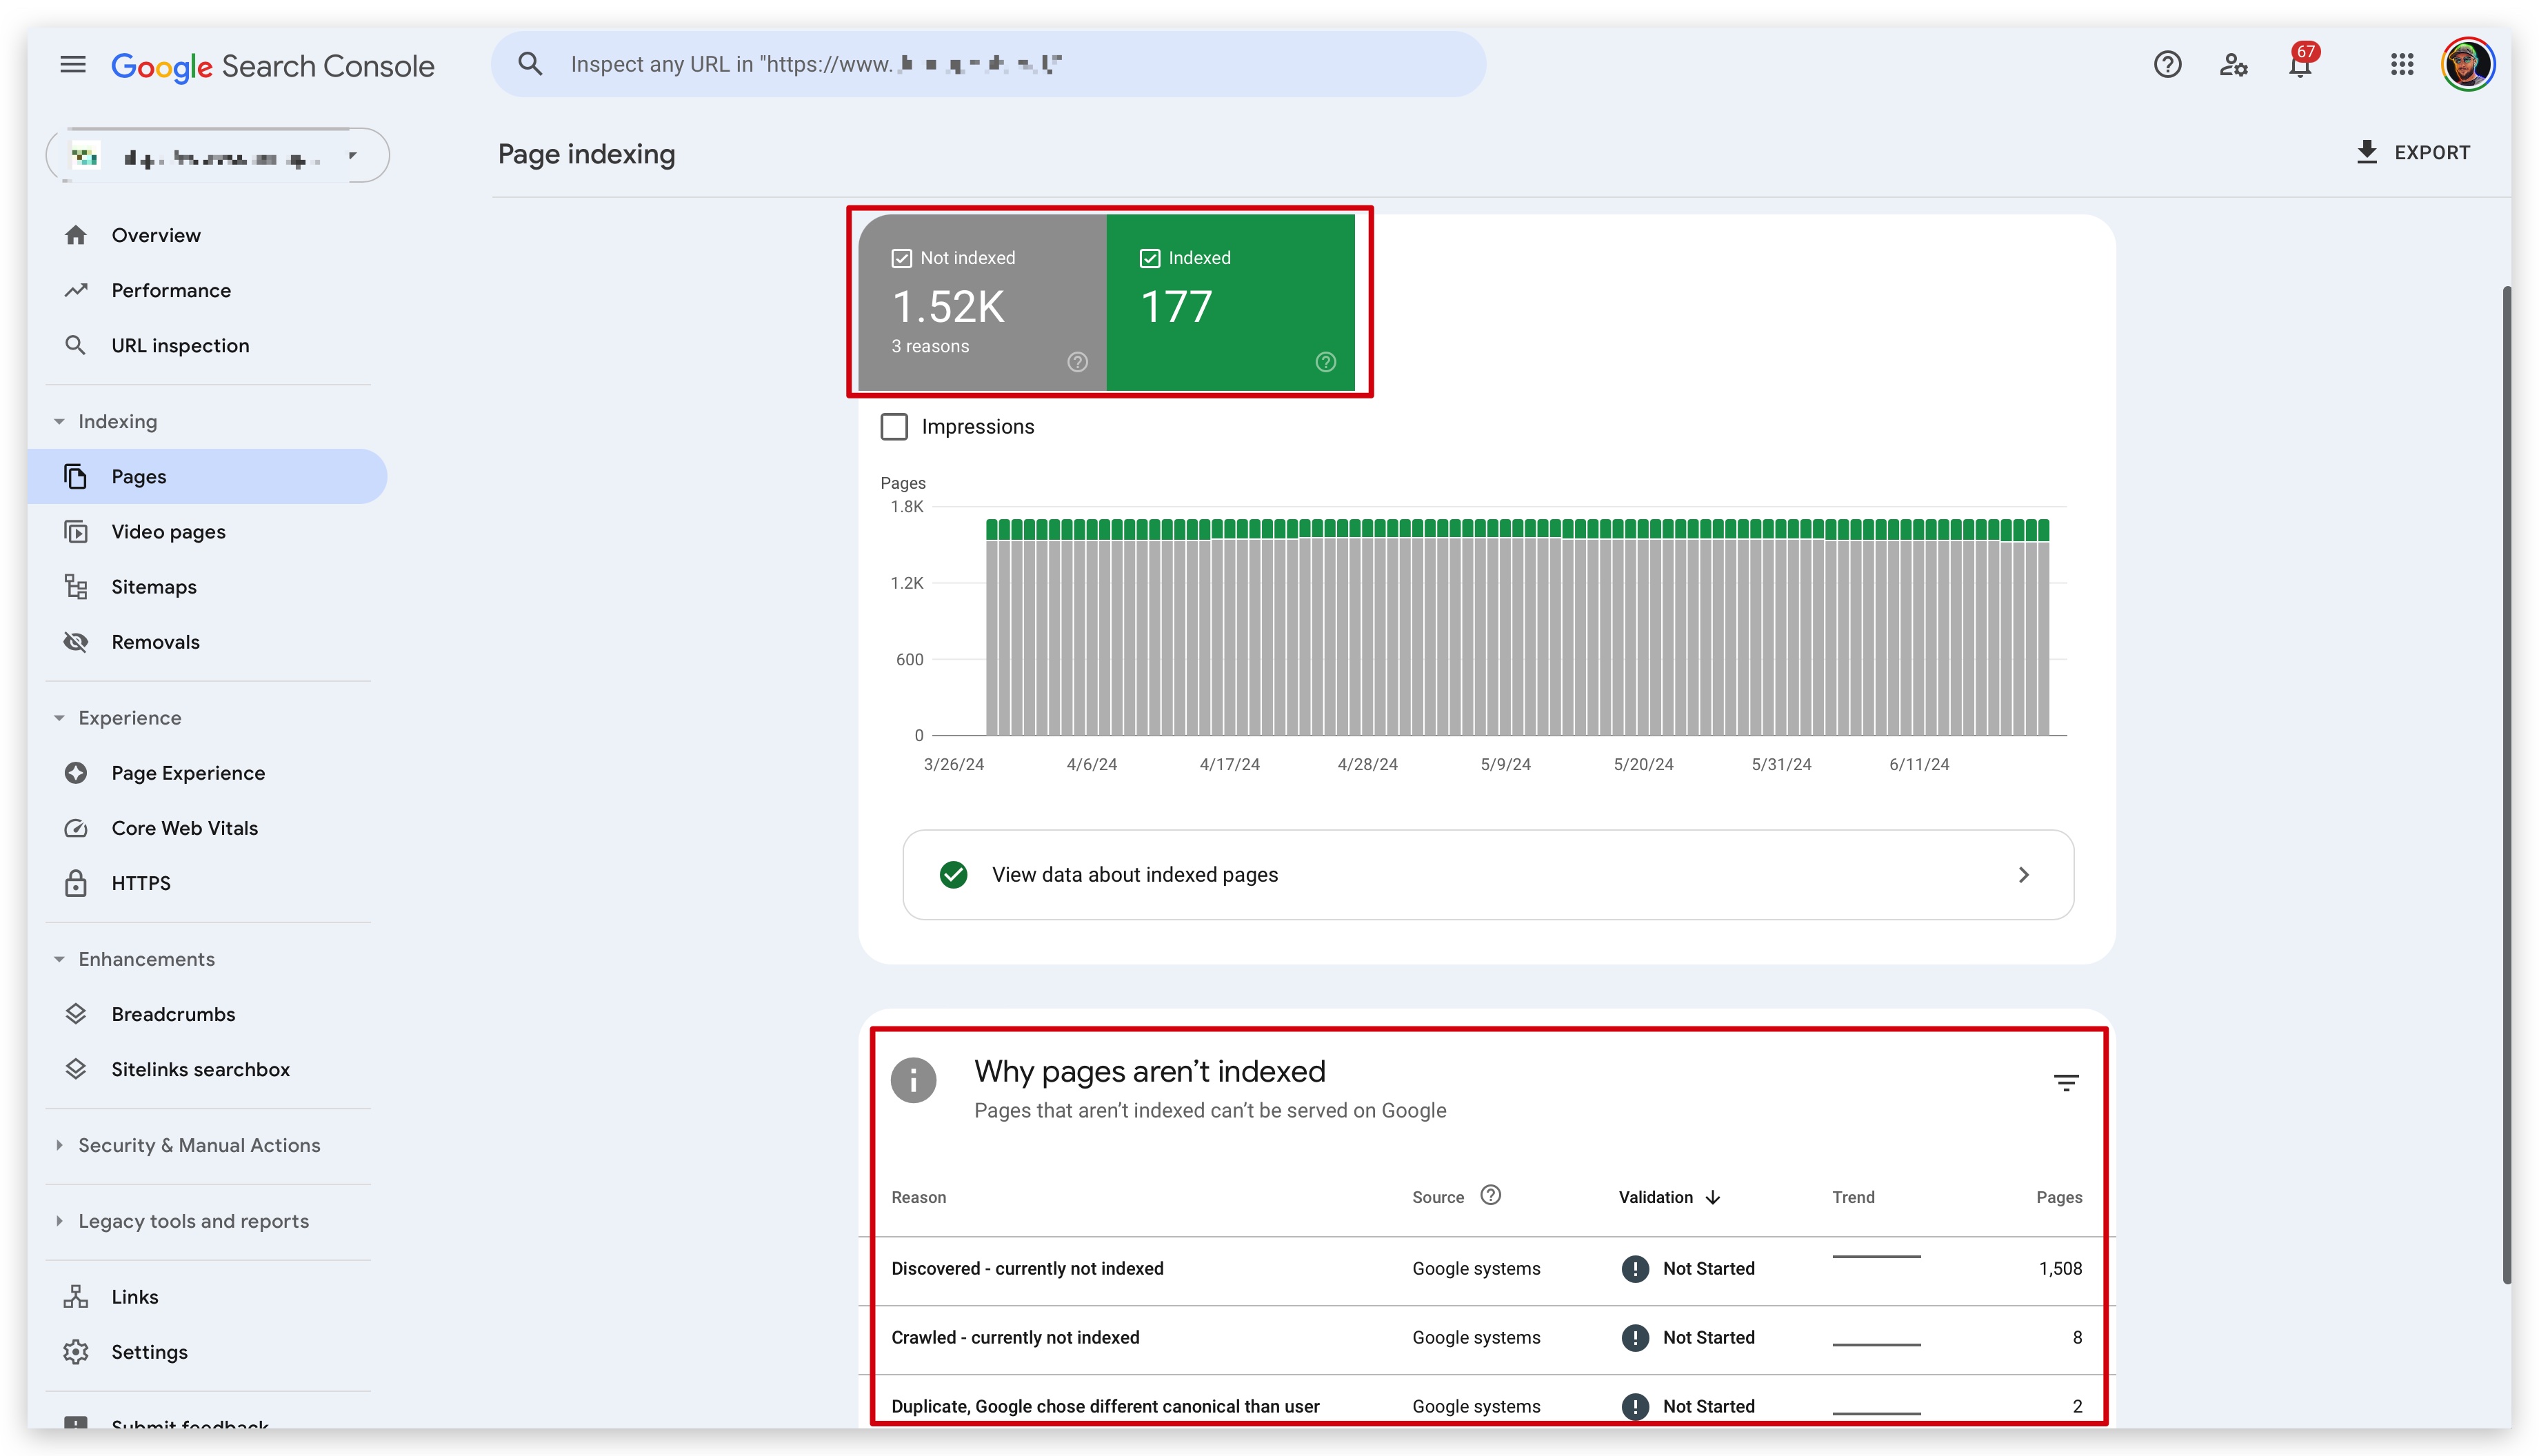
After you successfully submit your XML sitemap, you'll need to wait until Google crawls your site to see any data associated with the sitemap. Once your site is crawled, you'll see useful data that helps you understand how search engines are interacting with and crawling your site.
This information is found in the Pages section of your Google Search Console, and can be accessed from the Sitemaps section by clicking the three-dot action button to the right of any XML sitemap in your list.
If you're having trouble submitting your sitemap using the recommended method, you can use these alternatives:
Insert your sitemap's URL path anywhere in your robots.txt file. For example: https://www.yourdomain.com/sitemap.xml
Use the ping service to request that Google crawl the sitemap. Send an HTTP GET request in this format: https://www.google.com/ping?sitemap=<complete_url_of_sitemap>. For example: https://www.google.com/ping?sitemap=https://www.example.com/sitemap.xml
