Connecting a custom domain lets your funnels, websites, stores, blogs, and webinars live on your own branded web address instead of a system-generated URL. A domain can be a root domain like mydomain.com or a subdomain like www.mydomain.com.
The process has three parts: register your domain with a provider (such as GoDaddy, Namecheap, or Cloudflare), add the required DNS records so the domain points to Aesthetix CRM, and then connect the domain inside your account and link it to the page you want visitors to see. This article walks through each part in detail and covers how to verify records and fix common propagation issues.
Note: This article covers manually configuring a domain. If your registrar is supported, Aesthetix CRM can also add the required DNS records automatically during the connection flow (see the automatic method below).
Make sure you have the following in place:
Access to your DNS provider's control panel (for example, Cloudflare, GoDaddy, Namecheap, AWS Route 53, or Google Domains). This is the platform where your domain is currently hosted.
The root domain or subdomain you want to connect.
Credentials or permissions to add and edit DNS records.
A basic understanding of DNS record types (A, CNAME, TXT).
You complete this step inside your domain registrar, not in Aesthetix CRM. Based on your setup, choose one of the two methods below for each host, do not create both a CNAME and an A record for the same host.
Add a CNAME record for your subdomain pointing to the value sites.ludicrous.cloud.

Important:
In your DNS provider, the Host/Name should be only the subdomain part (for example,
wwwforwww.mydomain.com, orsubforsub.mydomain.com).The Value/Target should be
sites.ludicrous.cloud.Do not create both a CNAME and an A record for the same host (for example,
www). Choose either the CNAME method or the A record method.
Most registrars (Namecheap, GoDaddy, Cloudflare, Wix, Hostinger, Bluehost, and others) let you add a CNAME record from their DNS settings.
Note: If you are using Cloudflare, make sure the Proxy status is set to DNS only. Cloudflare's proxy is not supported for these records.
Alternatively, add an A record for your root domain or subdomain, pointing it to 162.159.140.166.

This method works with the same registrars (Namecheap, GoDaddy, Cloudflare, Wix, Hostinger, Bluehost, and others) from their DNS settings.
Note: If you are using Cloudflare, make sure the Proxy status is set to DNS only. Cloudflare's proxy is not supported for these records.
After adding your record at the registrar, it can take time for the DNS settings to propagate. If it does not work right away, give it some time (up to 24 hours) and try again.
Once your DNS record is in place, add the domain to your account.
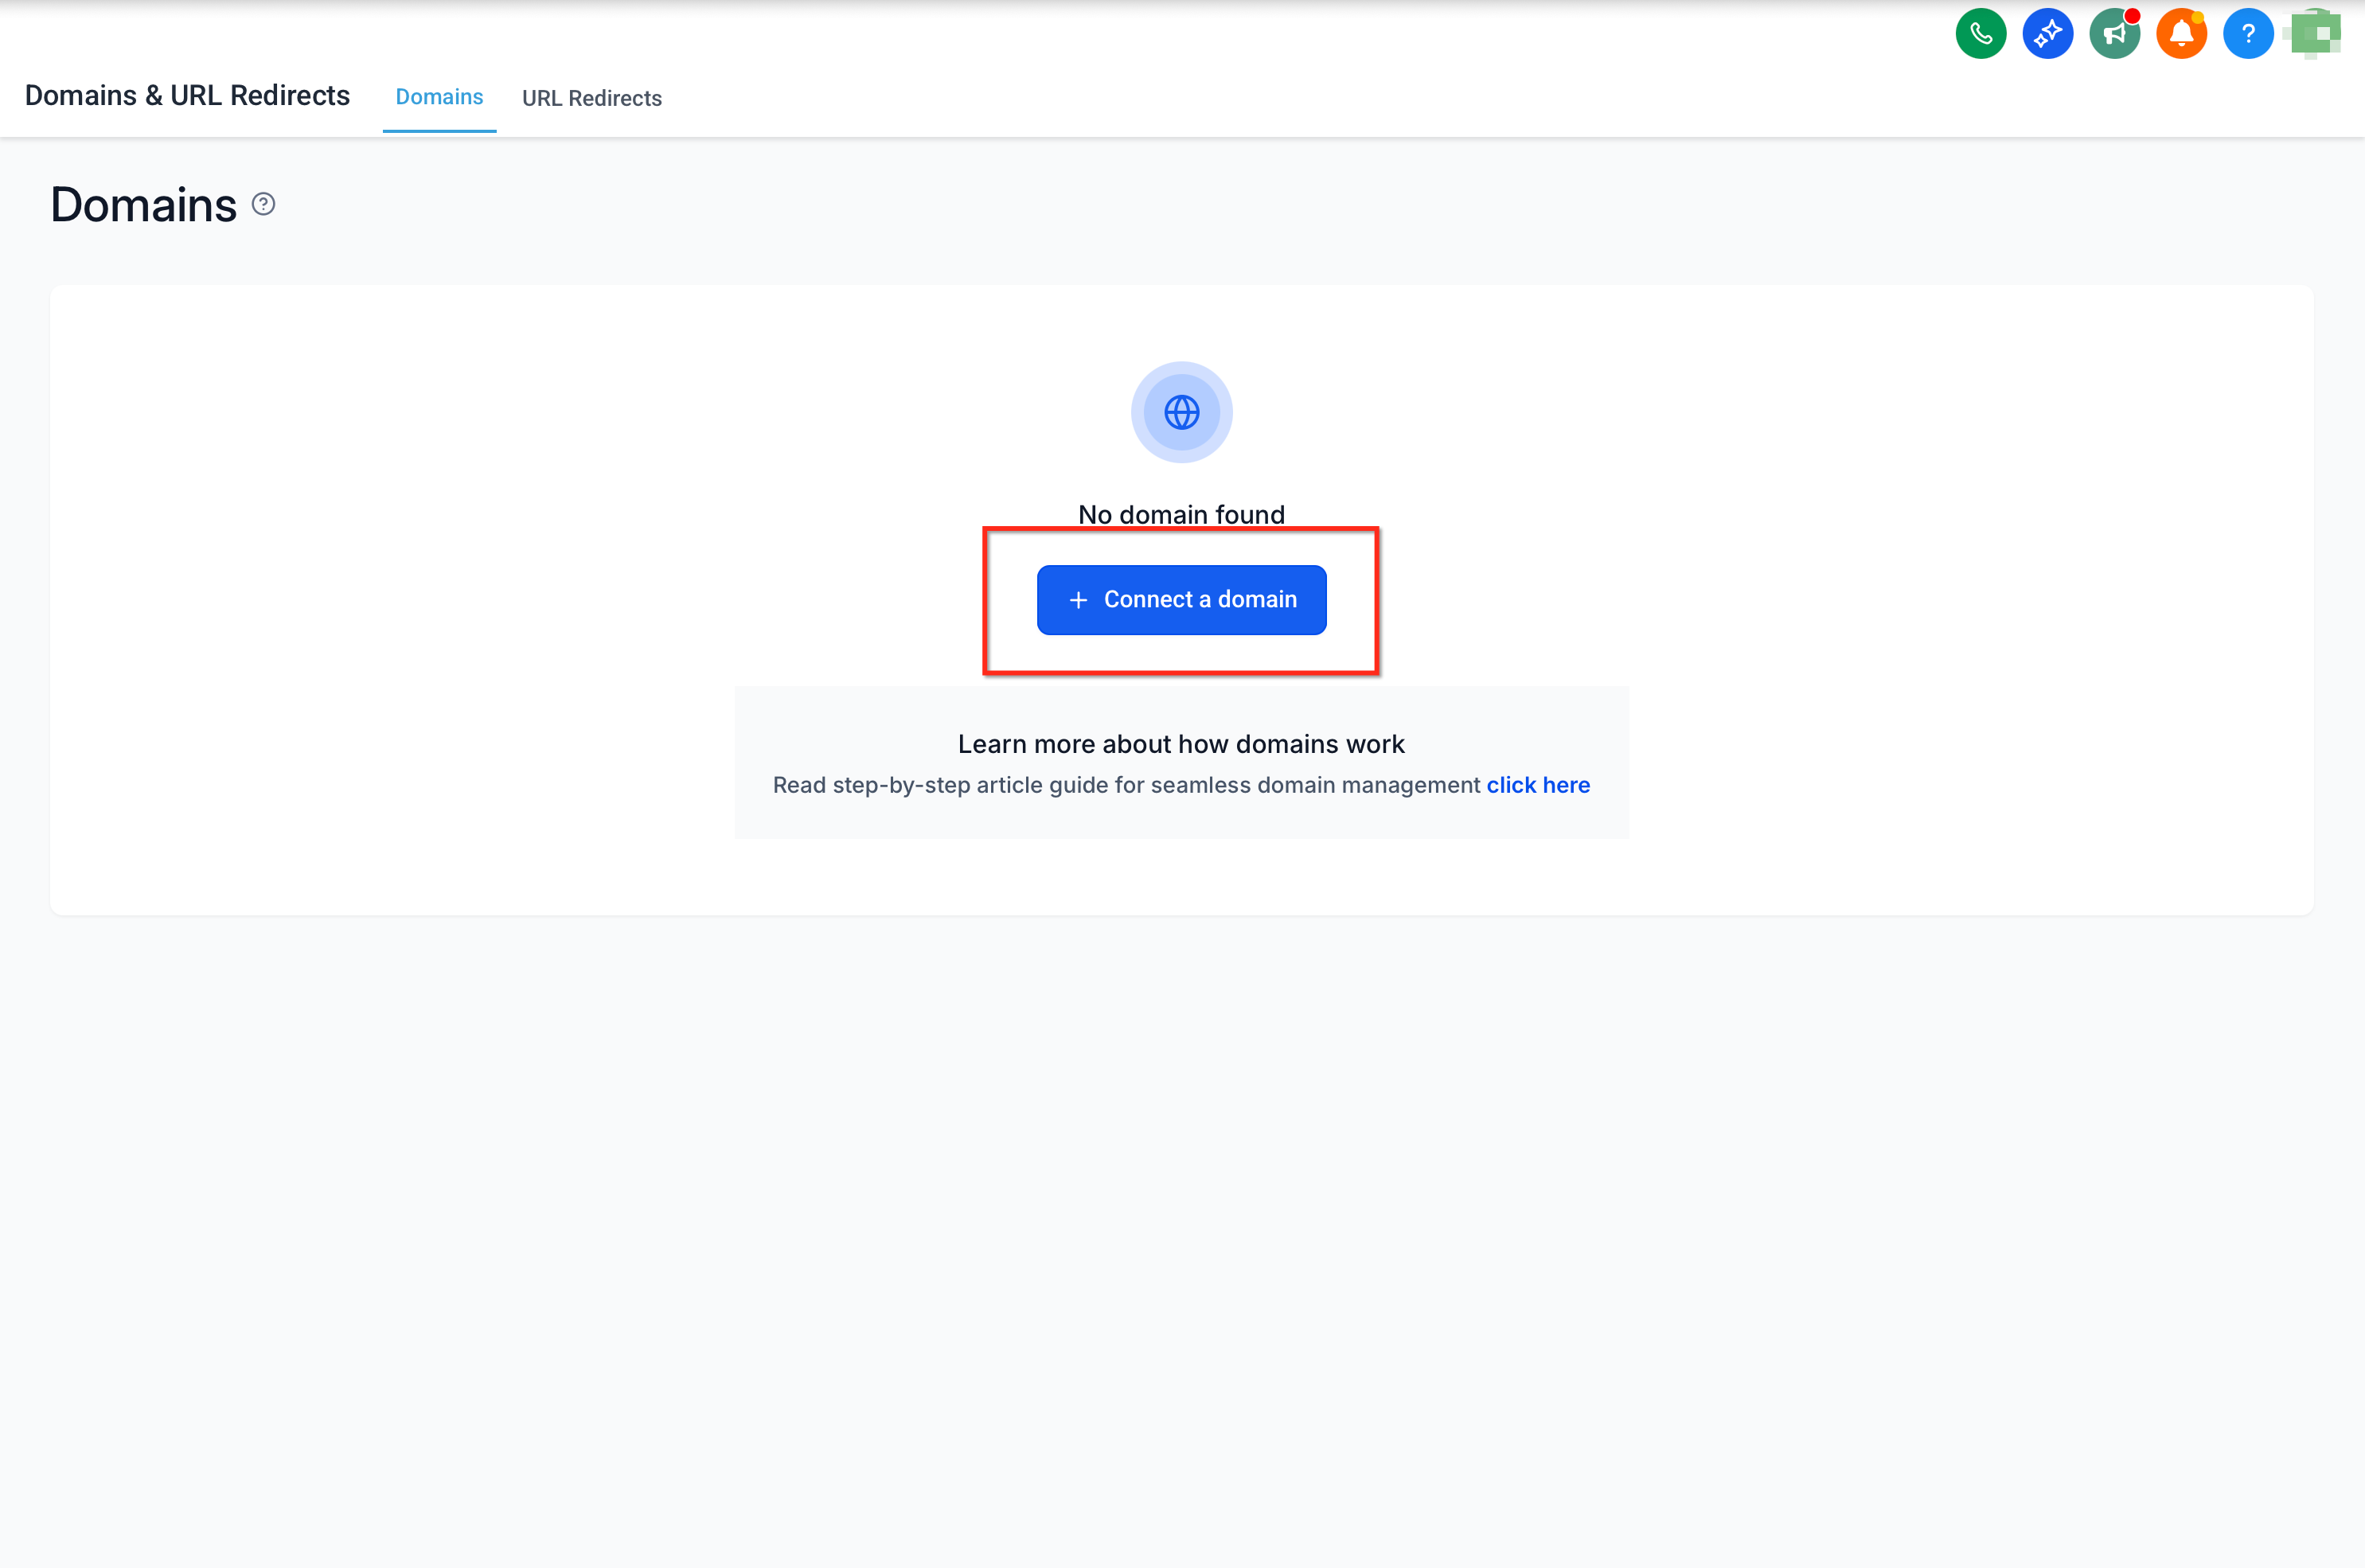
Go to Settings in the left navigation menu.
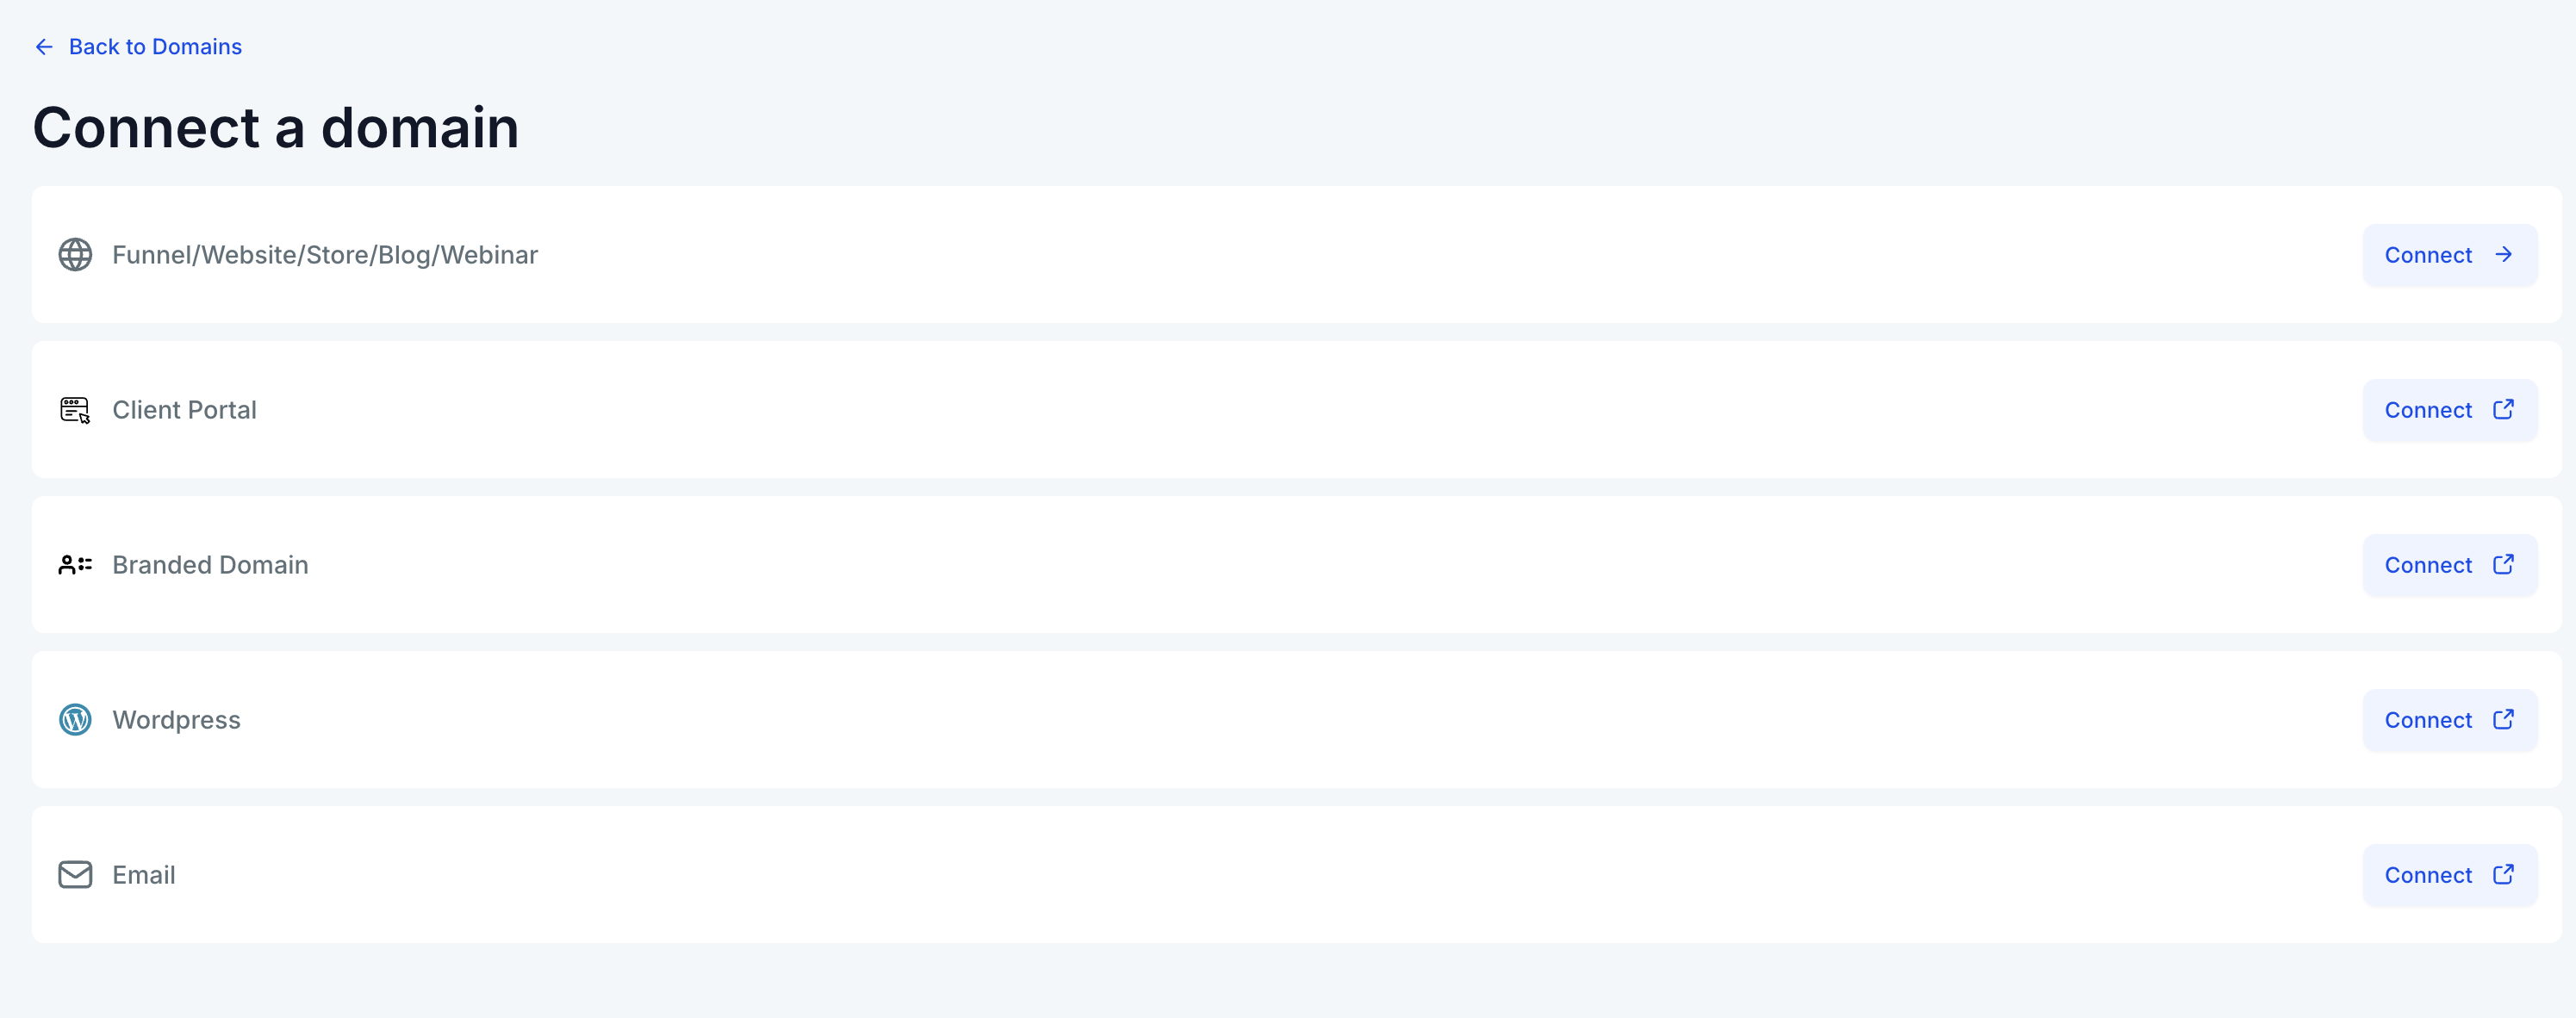
Go to Domains & URL Redirects, then click the + Connect a domain button.
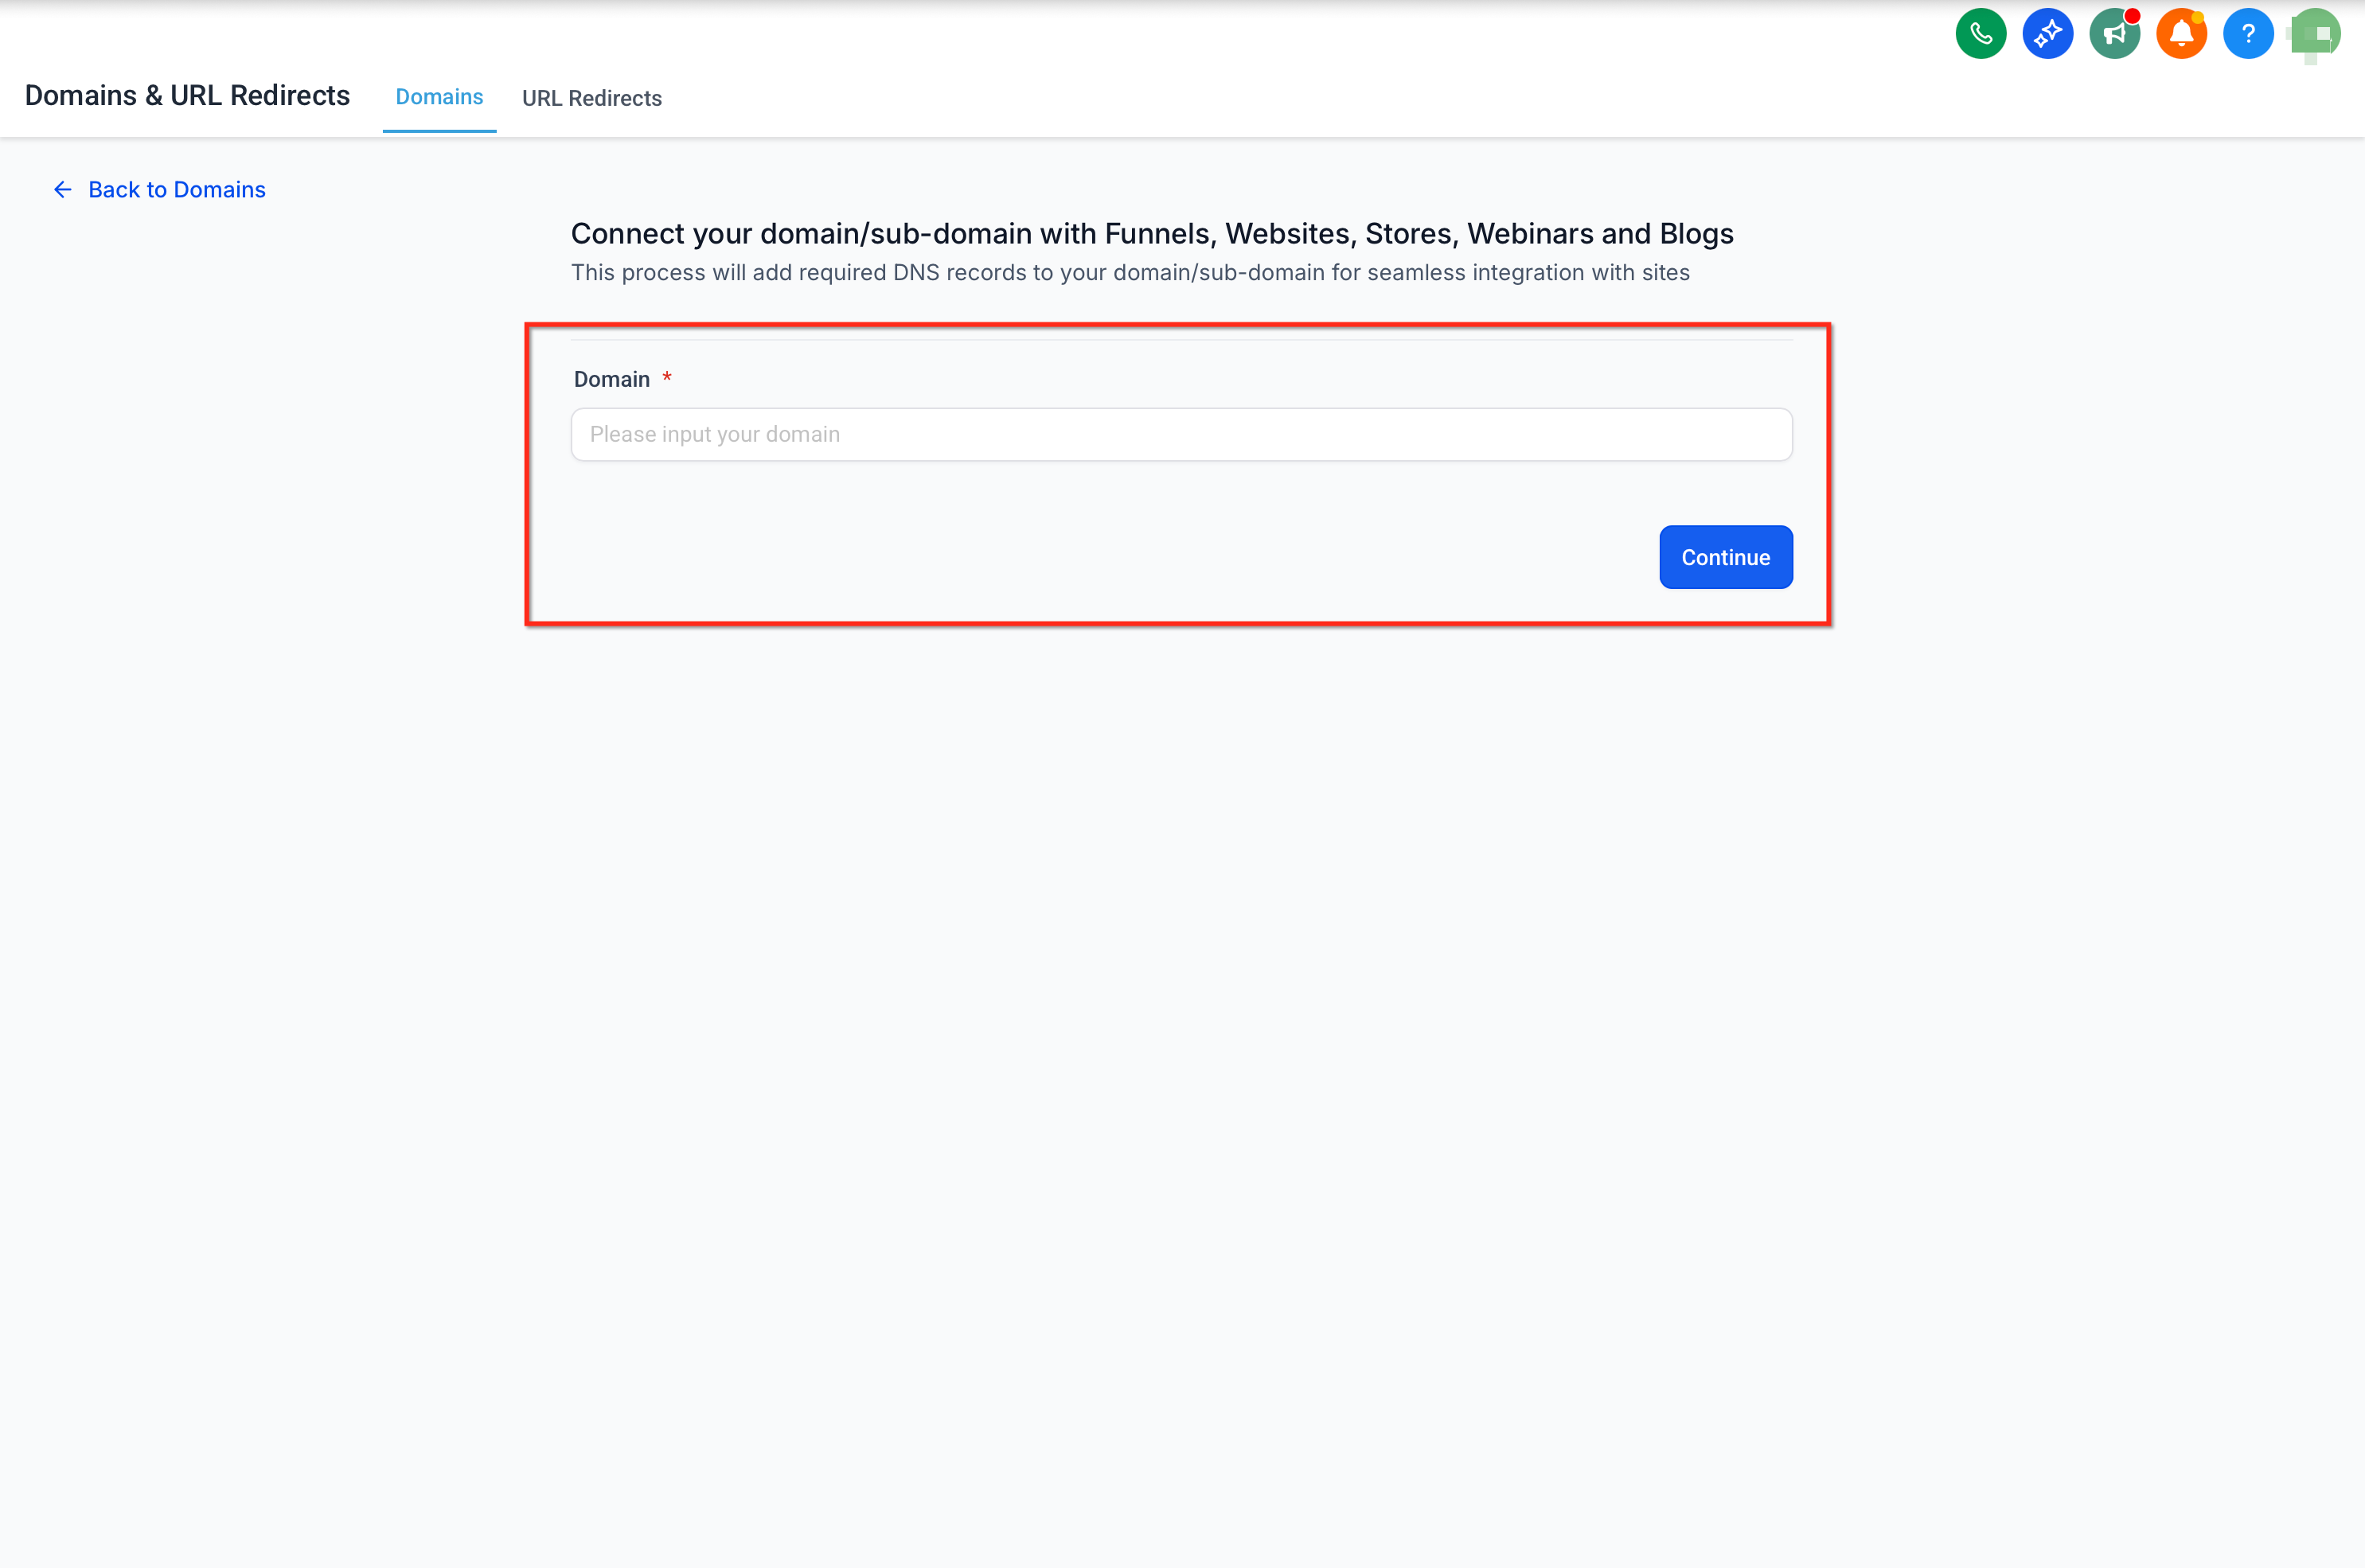
Click Connect for the Funnel / Website / Store / Blog / Webinar option.

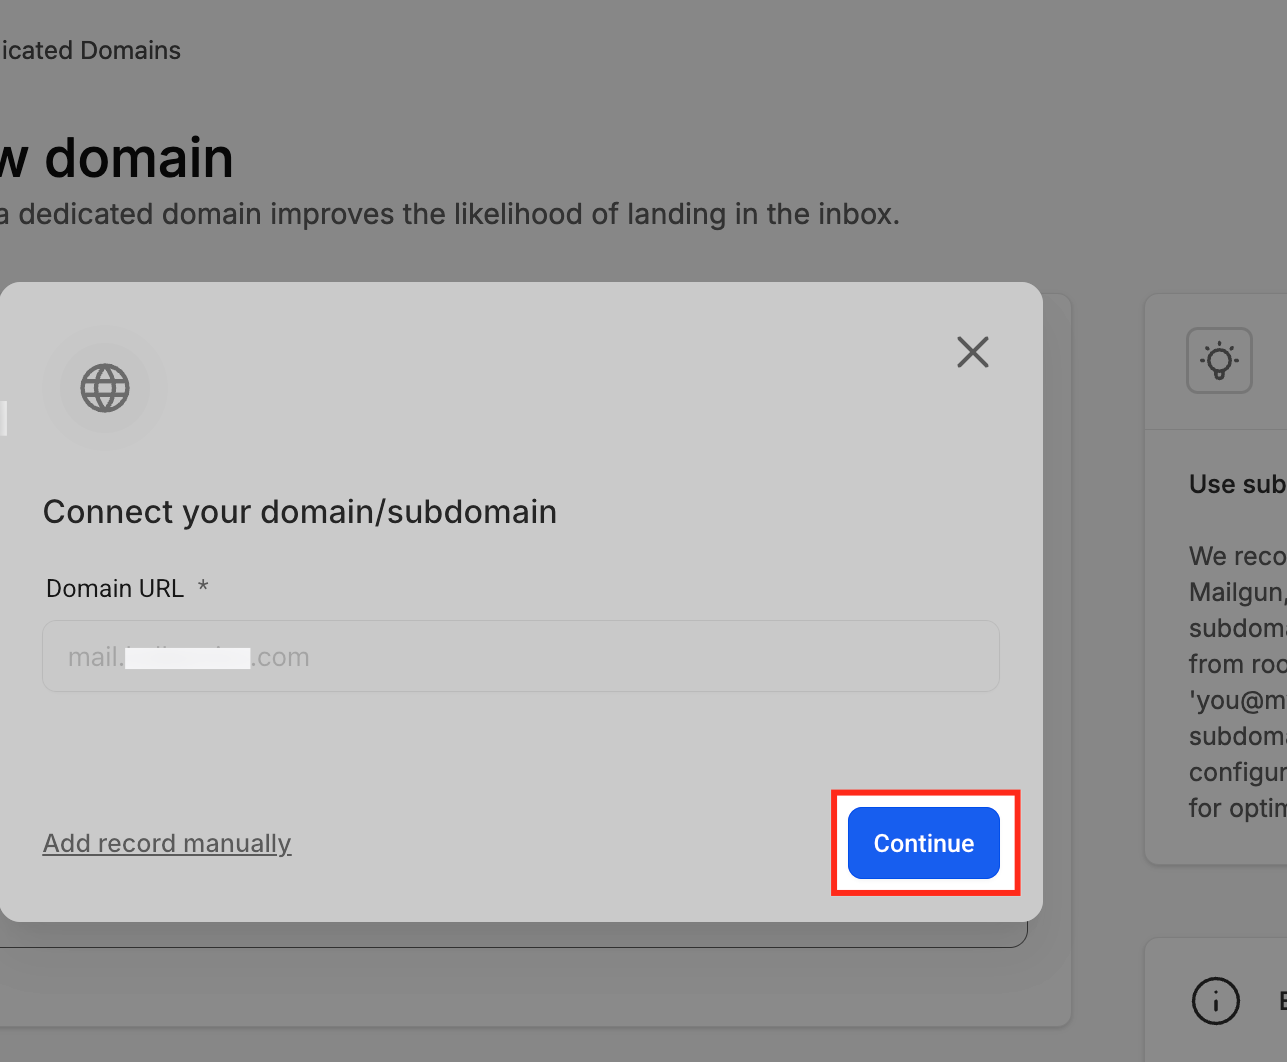
Type in the domain or subdomain and click Continue.
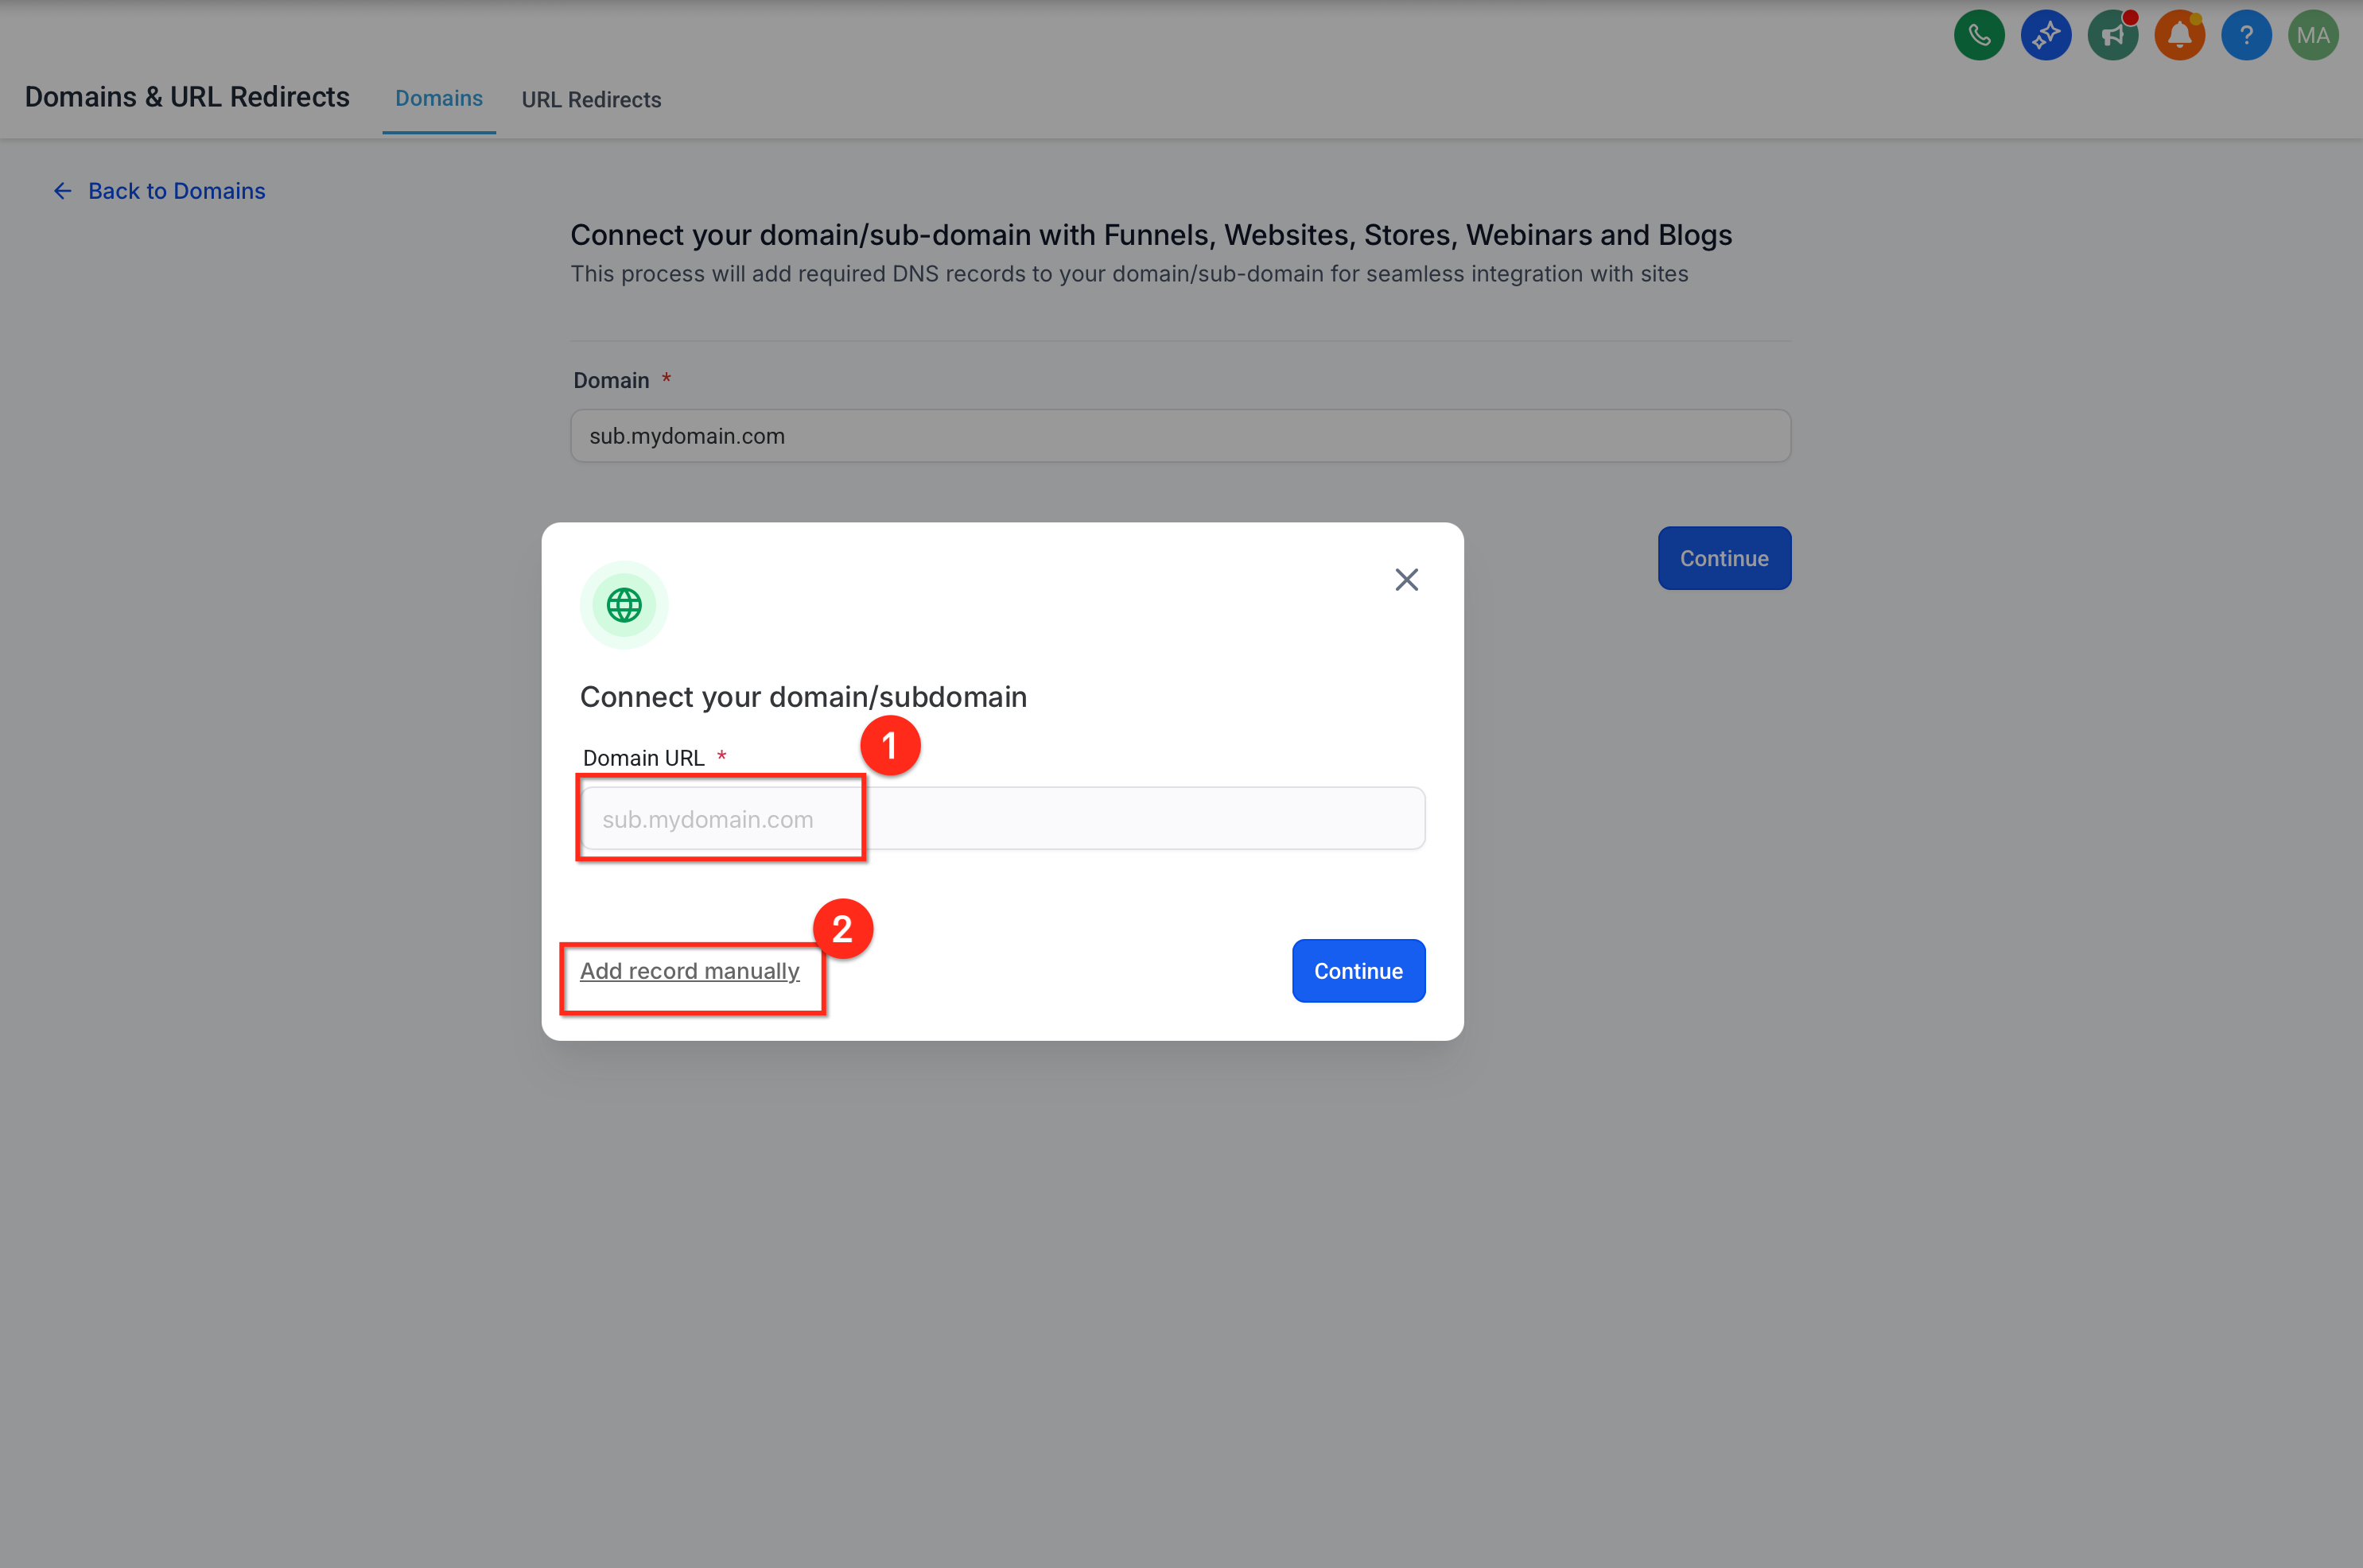
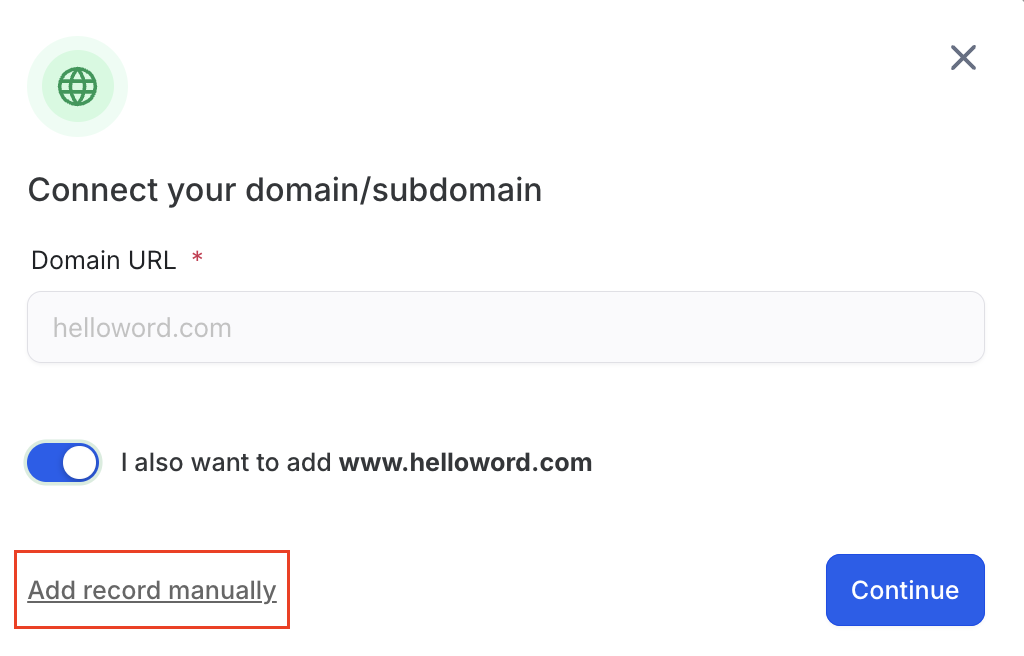
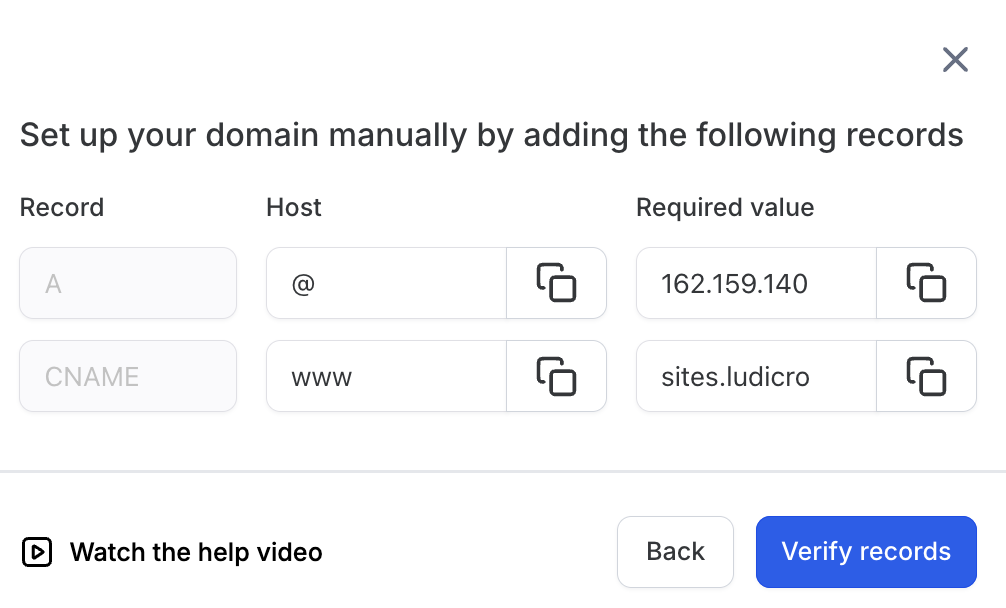
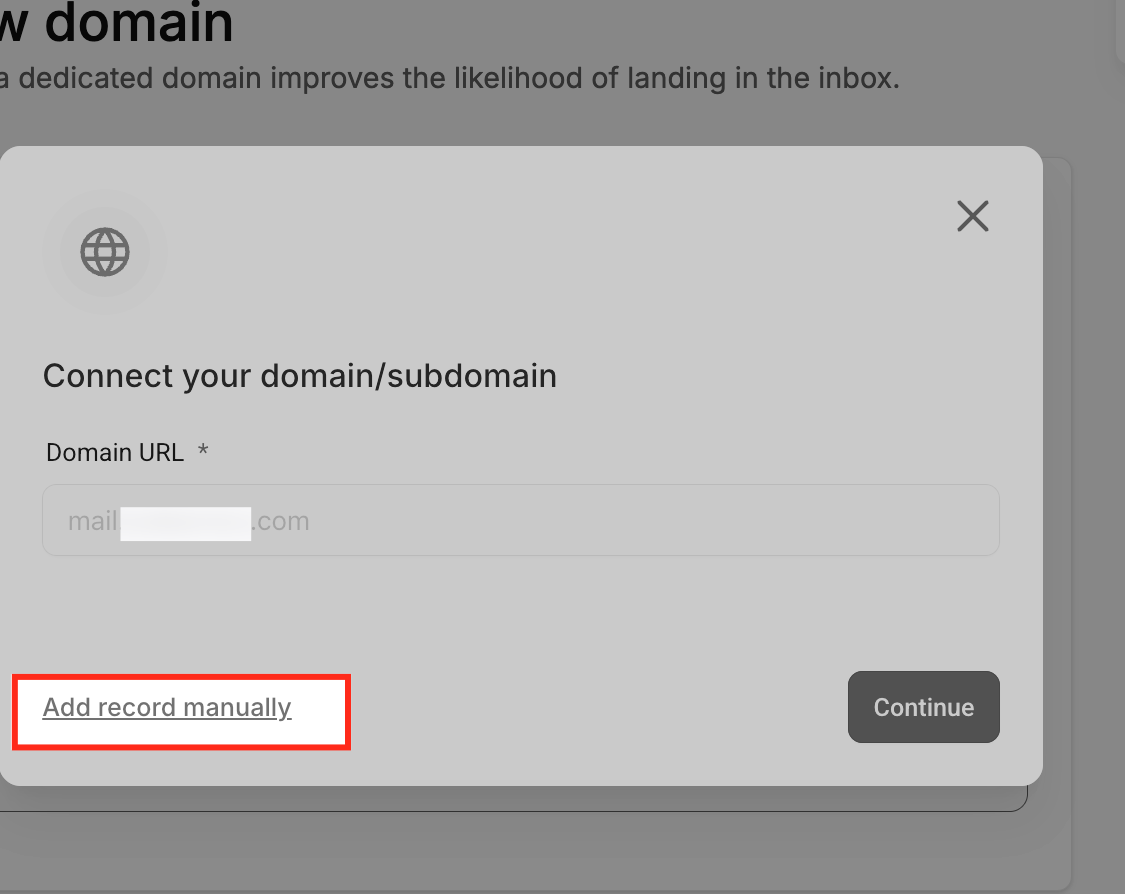
Enter your domain in the Domain URL field (use the root domain, not the subdomain), then click the Add record manually link.
By default, the system will also add the www subdomain in addition to the root domain.
This also enables a 301 redirect so that all traffic to the www subdomain is sent to the root domain.
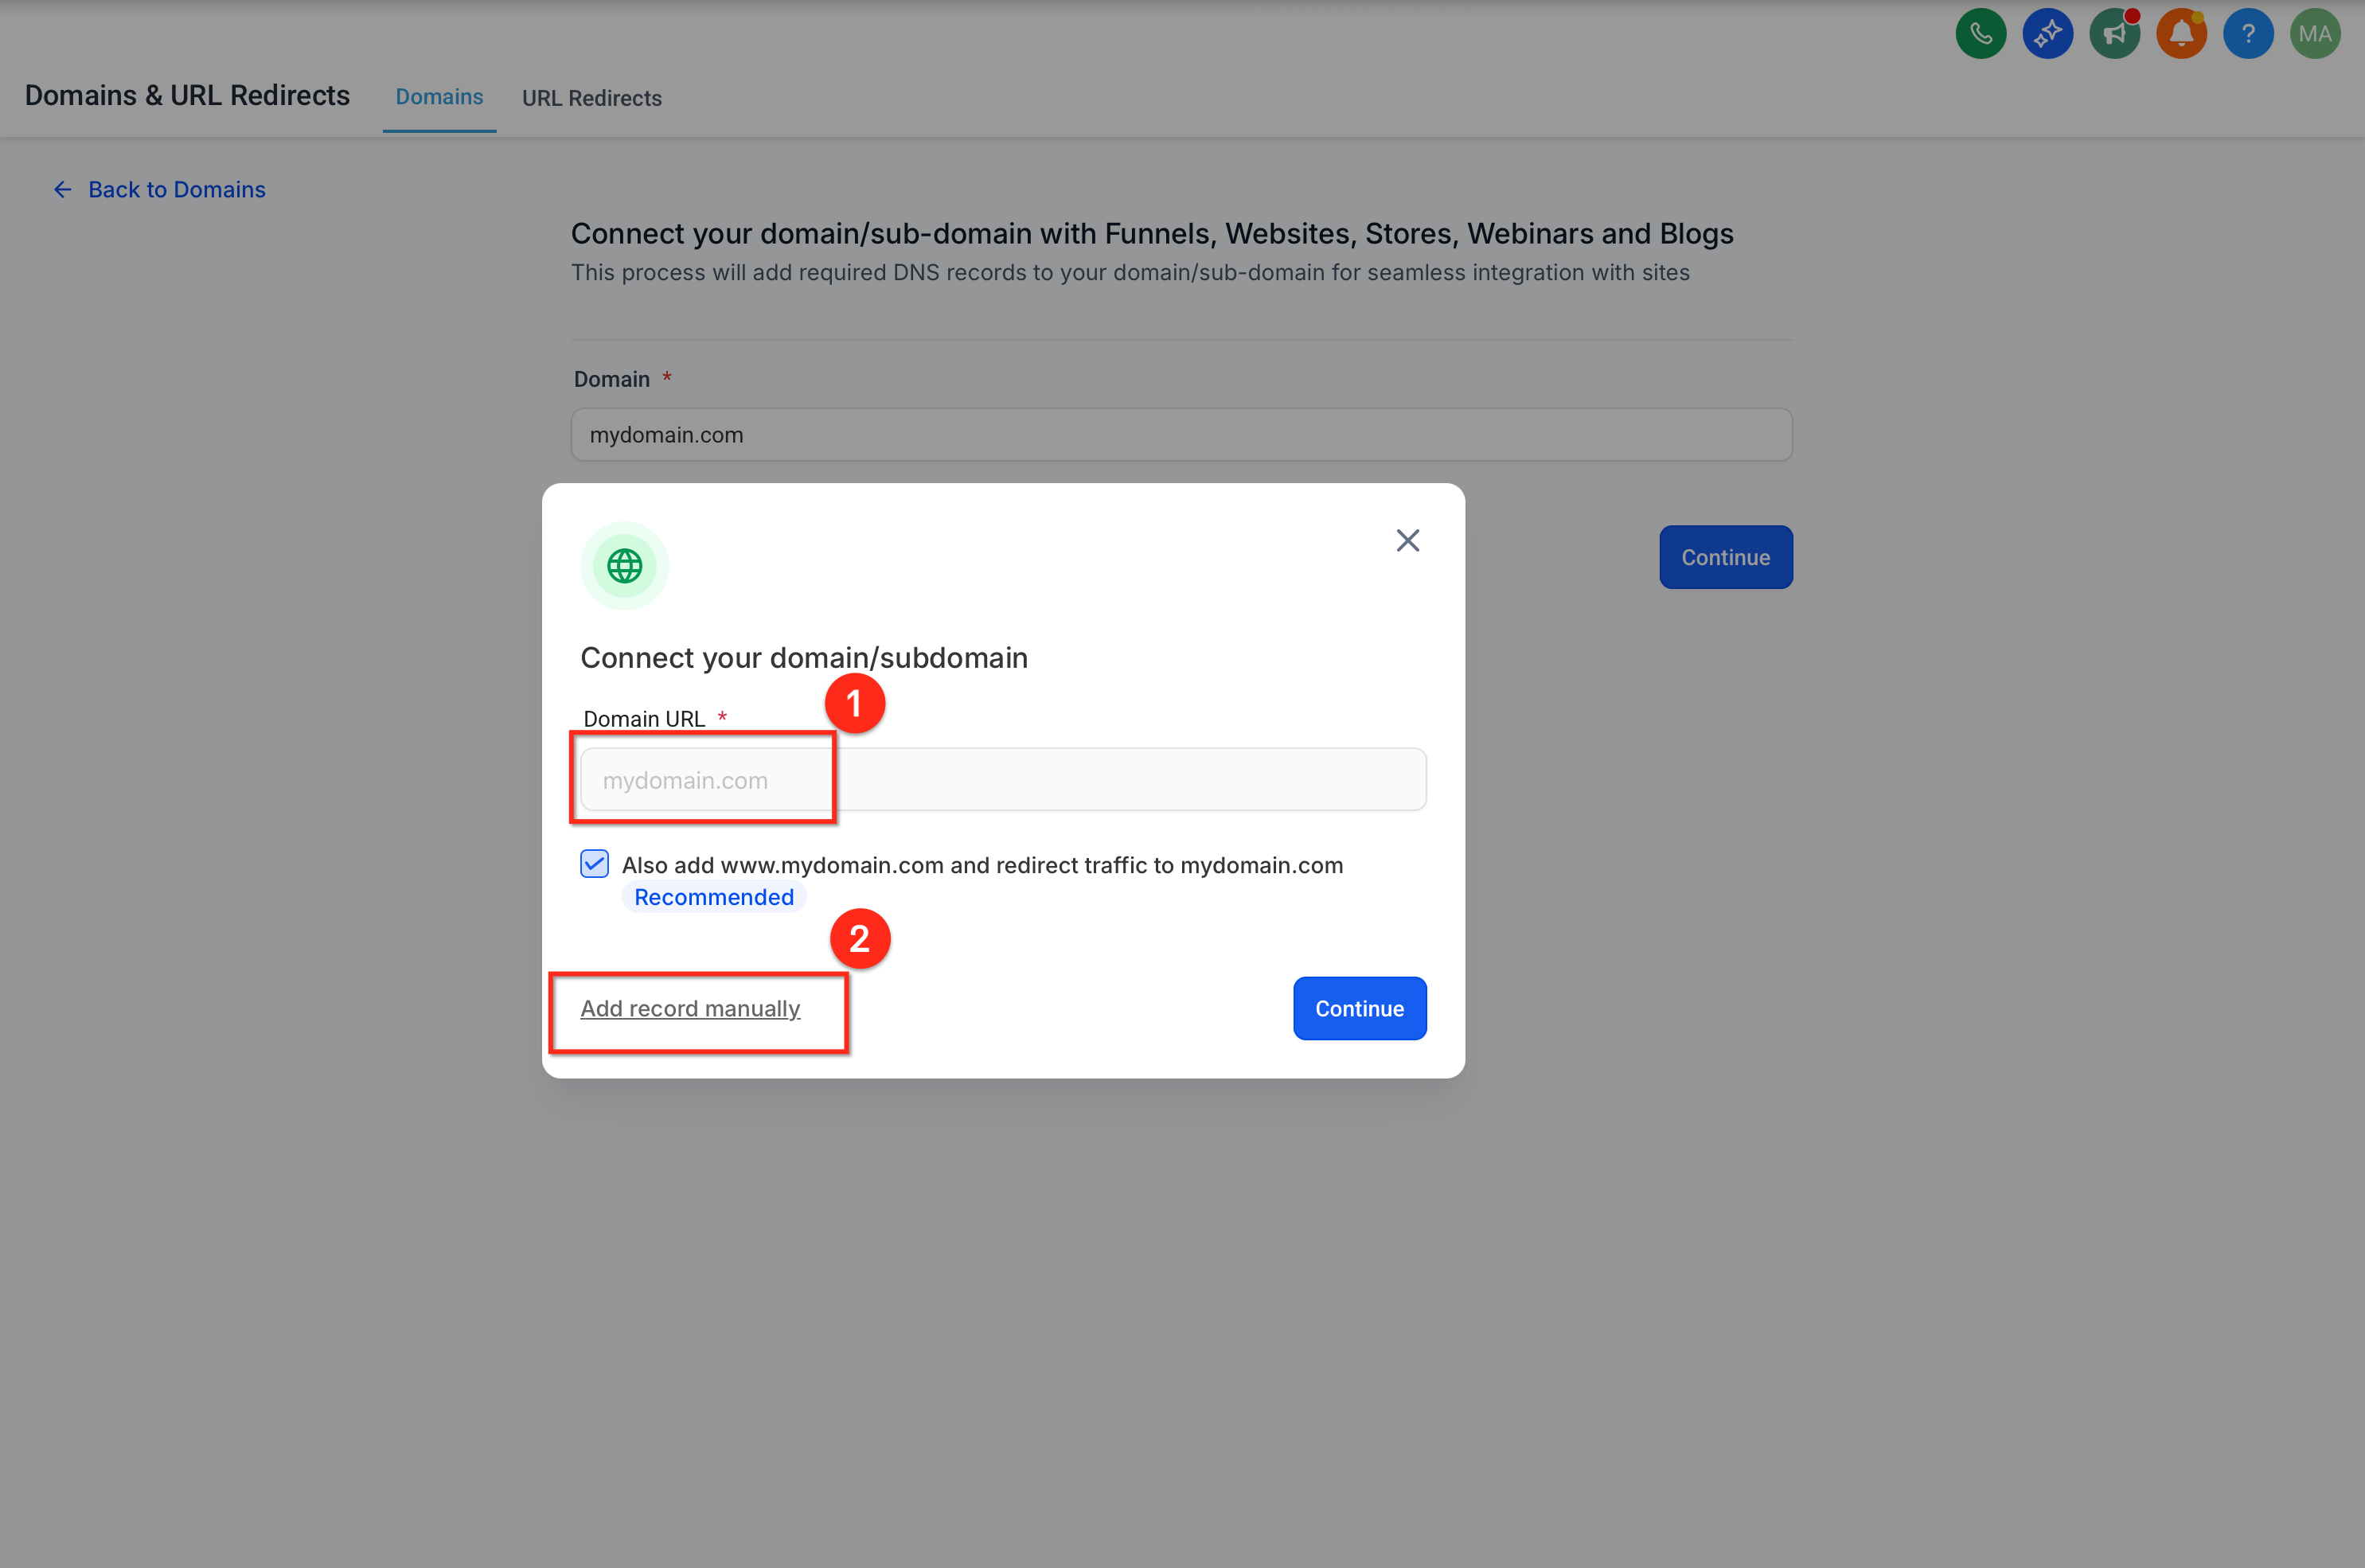
Note: Clicking Continue initiates the automatic domain connection feature, which looks up where the domain is registered and attempts to add the necessary DNS records for you. If your registrar is supported, this saves you from adding records by hand; if it is not supported yet, you will be prompted to add the DNS records manually.
Enter your subdomain in the Domain URL field, then click the Add record manually link.
Note: If you want a funnel step or website page to open without a path (
domain.cominstead ofdomain.com/home), select that page as the default page for the domain. A default page can be set from Settings > Domains & URL Redirects > Manage Domain > Edit Domain.
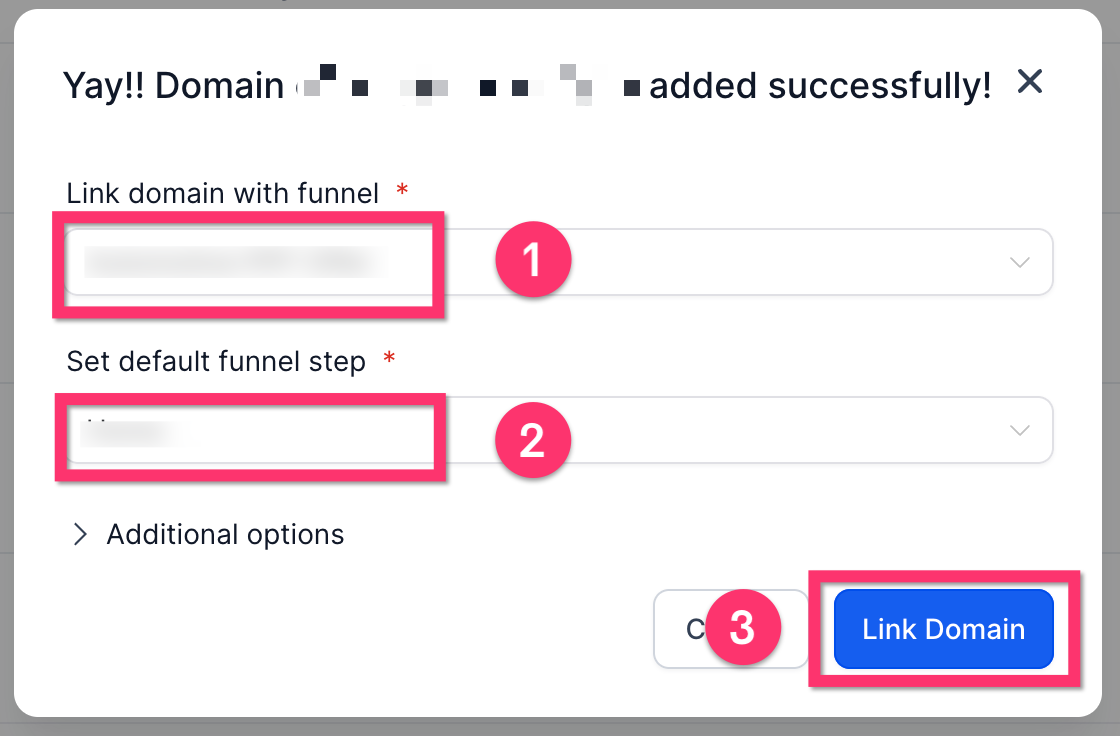
Once your DNS records have been verified, you will see a screen where you can choose what to link the domain to.
First, choose the funnel or website.
Then, choose which funnel step or website page should be the default landing page.
Finally, click Link Domain. This completes the process and adds an SSL certificate automatically. It takes a few minutes to finish on the backend.
There are two ways to connect a domain: automatically (if your provider is supported) or manually.
If your domain is registered with a supported provider (such as GoDaddy, Google Domains, or Cloudflare), you can connect it automatically using API-based authentication.
Go to Settings > Domains in Aesthetix CRM.
Choose Connect a Domain.
Choose the product you'd like to connect (for example, funnel, website, or email).
Enter your root domain or subdomain. If you add the www subdomain, you'll see an option to add the root domain as well.
If your domain is with a supported provider, you'll see an Authorize button. Click it to allow Aesthetix CRM to access your DNS settings.
Follow the on-screen prompts to complete authorization on your domain provider's interface. The required DNS records are added automatically.
Once authorization is complete, close that tab and return to Aesthetix CRM.
If your provider is not supported for automatic setup (for example, Namecheap or Bluehost), add the DNS records by hand.
Go to Settings > Domains.
Choose Connect a Domain.
Choose the product you'd like to connect.
Enter the domain name as prompted, then click the Add records manually option.
You'll receive specific DNS records (A, CNAME, and/or TXT) to add at your registrar.
Log into your domain provider and go to its DNS settings.
Add the records exactly as shown.
Save your changes and wait for DNS propagation (up to 24 hours).
The exact menus differ by registrar, but the values you enter are always the ones Aesthetix CRM provides. Use @ for the root domain and www (or your subdomain) for subdomains.
Log in to your Cloudflare dashboard.
Select your domain and click the DNS tab.
Click Add Record.
For each required record, choose the type (A, CNAME, or TXT):
A record for @ (root domain) → point to the provided IP address.
CNAME for www or subdomains (if applicable).
TXT for verification (e.g., SPF/DKIM).
Important: Set Proxy status to "DNS Only" (gray cloud) for A and CNAME records.
Click Save for each record.
Wait for propagation (a few minutes to 24 hours).
Log in to your GoDaddy account.
Go to My Products > Domains, then click Manage DNS next to your domain.
Under Records, click Add:
Select the type: A, CNAME, or TXT.
Use @ for the root domain and www for the subdomain.
Enter the record values exactly as provided.
Click Save after adding each record.
Allow time for changes to propagate.
Log in to your Namecheap dashboard.
Go to Domain List > Manage next to your domain.
Open the Advanced DNS tab.
Under Host Records, click Add New Record:
A record for @
CNAME record for www
TXT record for verification (if applicable)
Enter the exact values provided.
Click Save All Changes.
Wait up to 24 hours for DNS propagation.
Log in to your Squarespace account.
Go to Settings > Domains and select your domain.
Click DNS Settings (Advanced).
Add the records:
A record for @ (use the provided IP)
CNAME for www (if required)
TXT for verification
Click Save after each record.
Return to Aesthetix CRM and reconnect the domain once changes are saved.
A custom domain can also be used to authenticate your email sending, which improves deliverability and keeps your messages out of spam. This uses a dedicated sending domain and a different set of DNS records.
Navigate to Settings > Email Services > Dedicated Domain & IP.
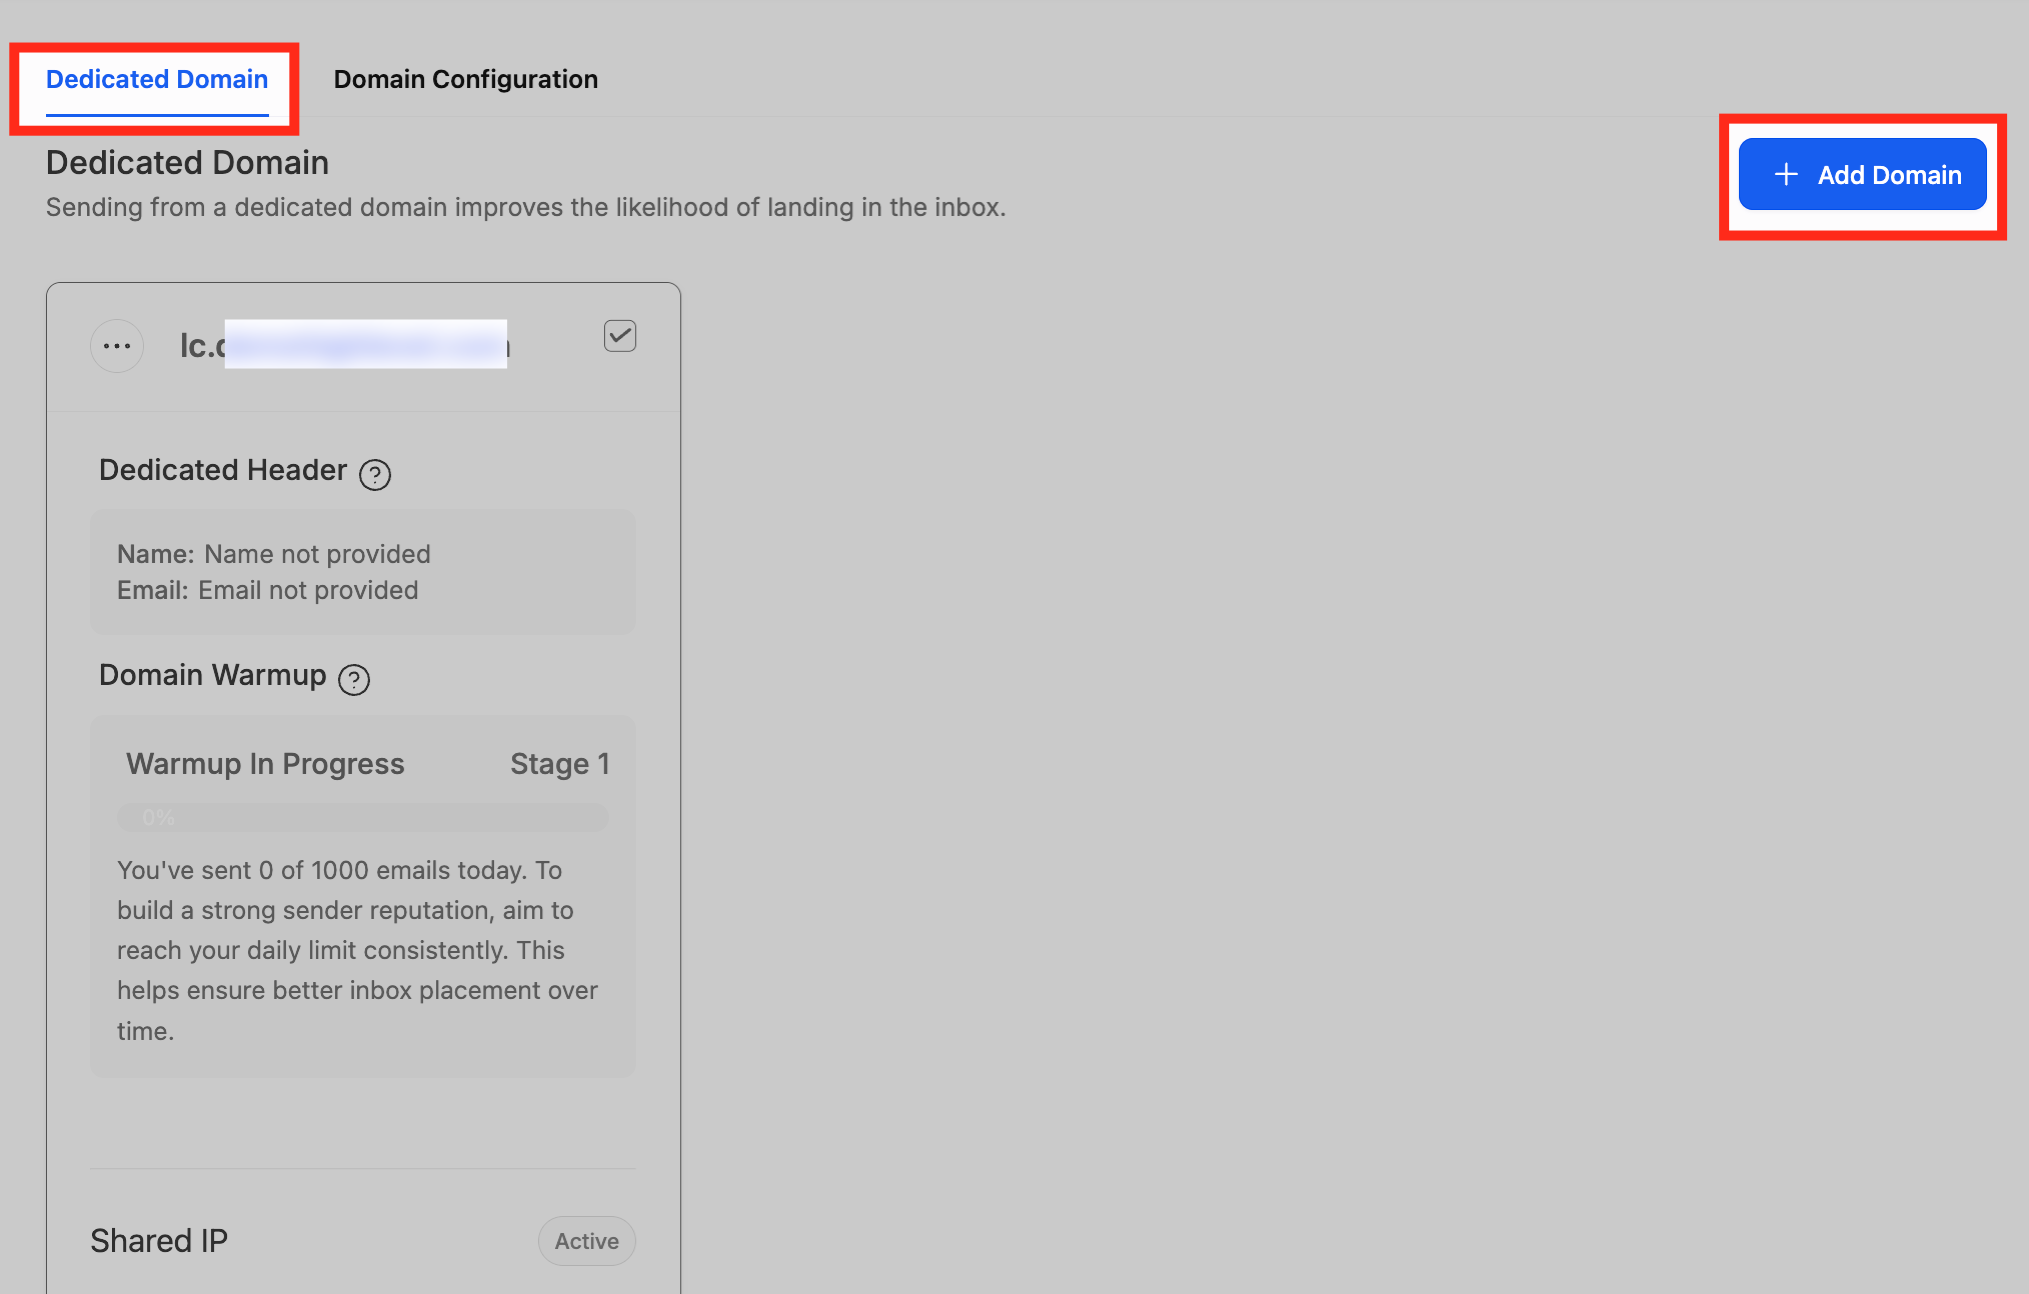
Inside the Dedicated Domains menu, click + Add Domain in the top-right corner.
Enter the domain or subdomain you want to use. We recommend a subdomain such as mail.yourdomain.com for better deliverability. Click Add & Verify.
Email authentication relies on three record types:
SPF (Sender Policy Framework): Authorizes which servers can send email on behalf of your domain.
DKIM (DomainKeys Identified Mail): Adds a digital signature that proves your emails haven't been altered.
DMARC (Domain-based Message Authentication, Reporting & Conformance): Enforces authentication policies and provides delivery reporting.
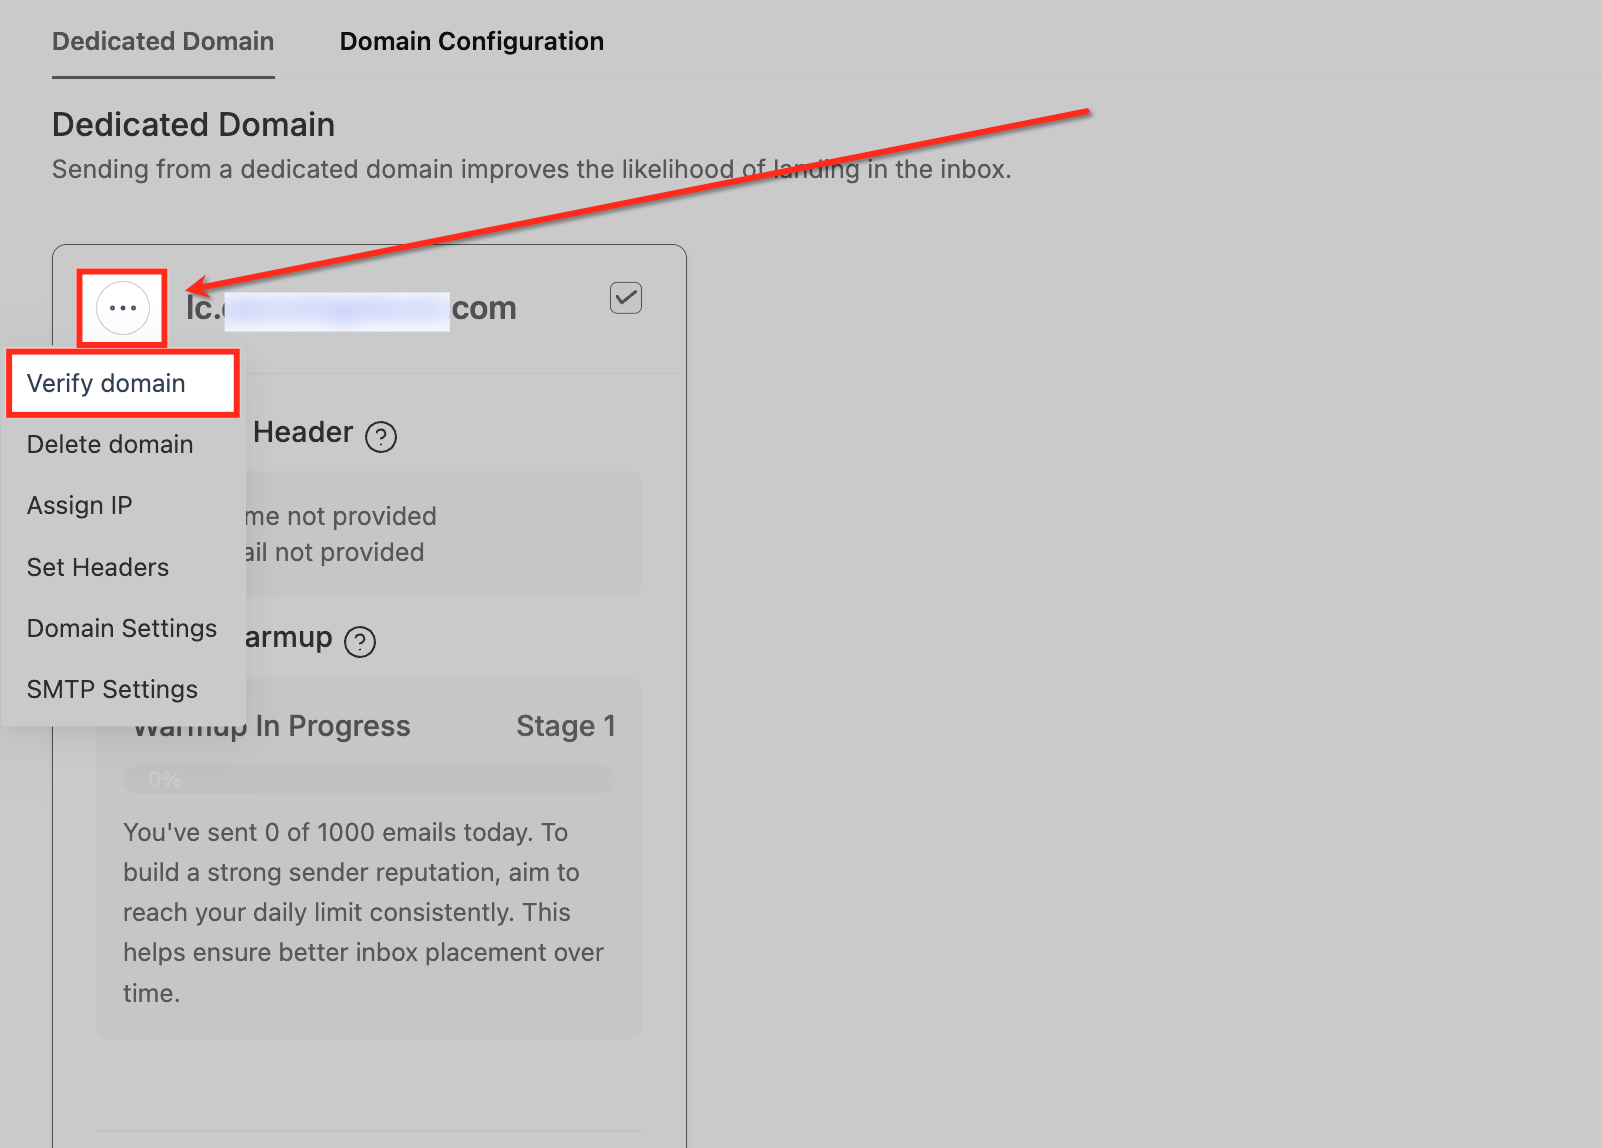
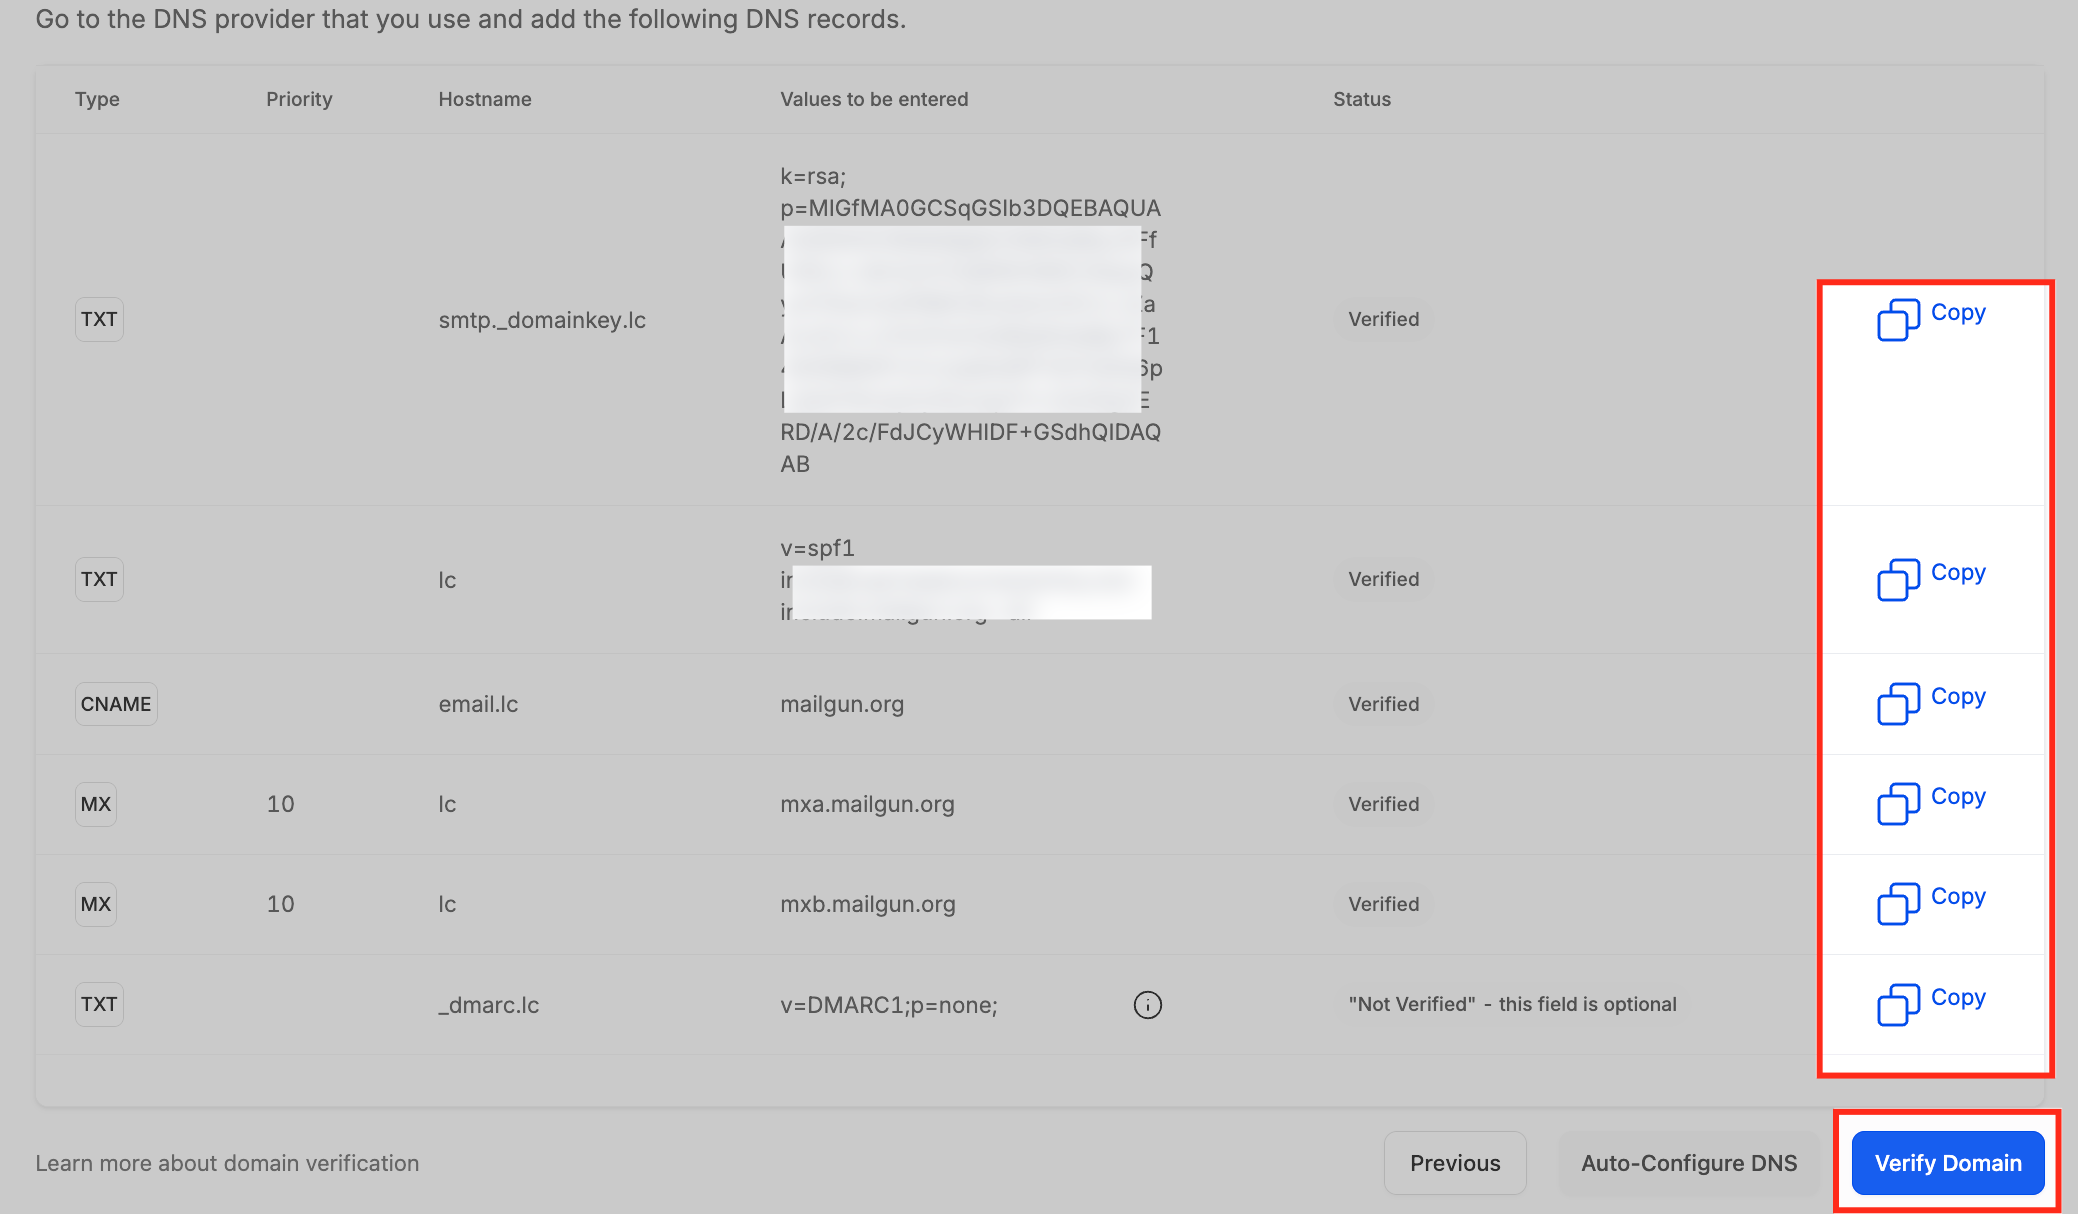
When your domain is added, open the three-dot menu next to it and click Verify domain to tell the system to check your DNS records.
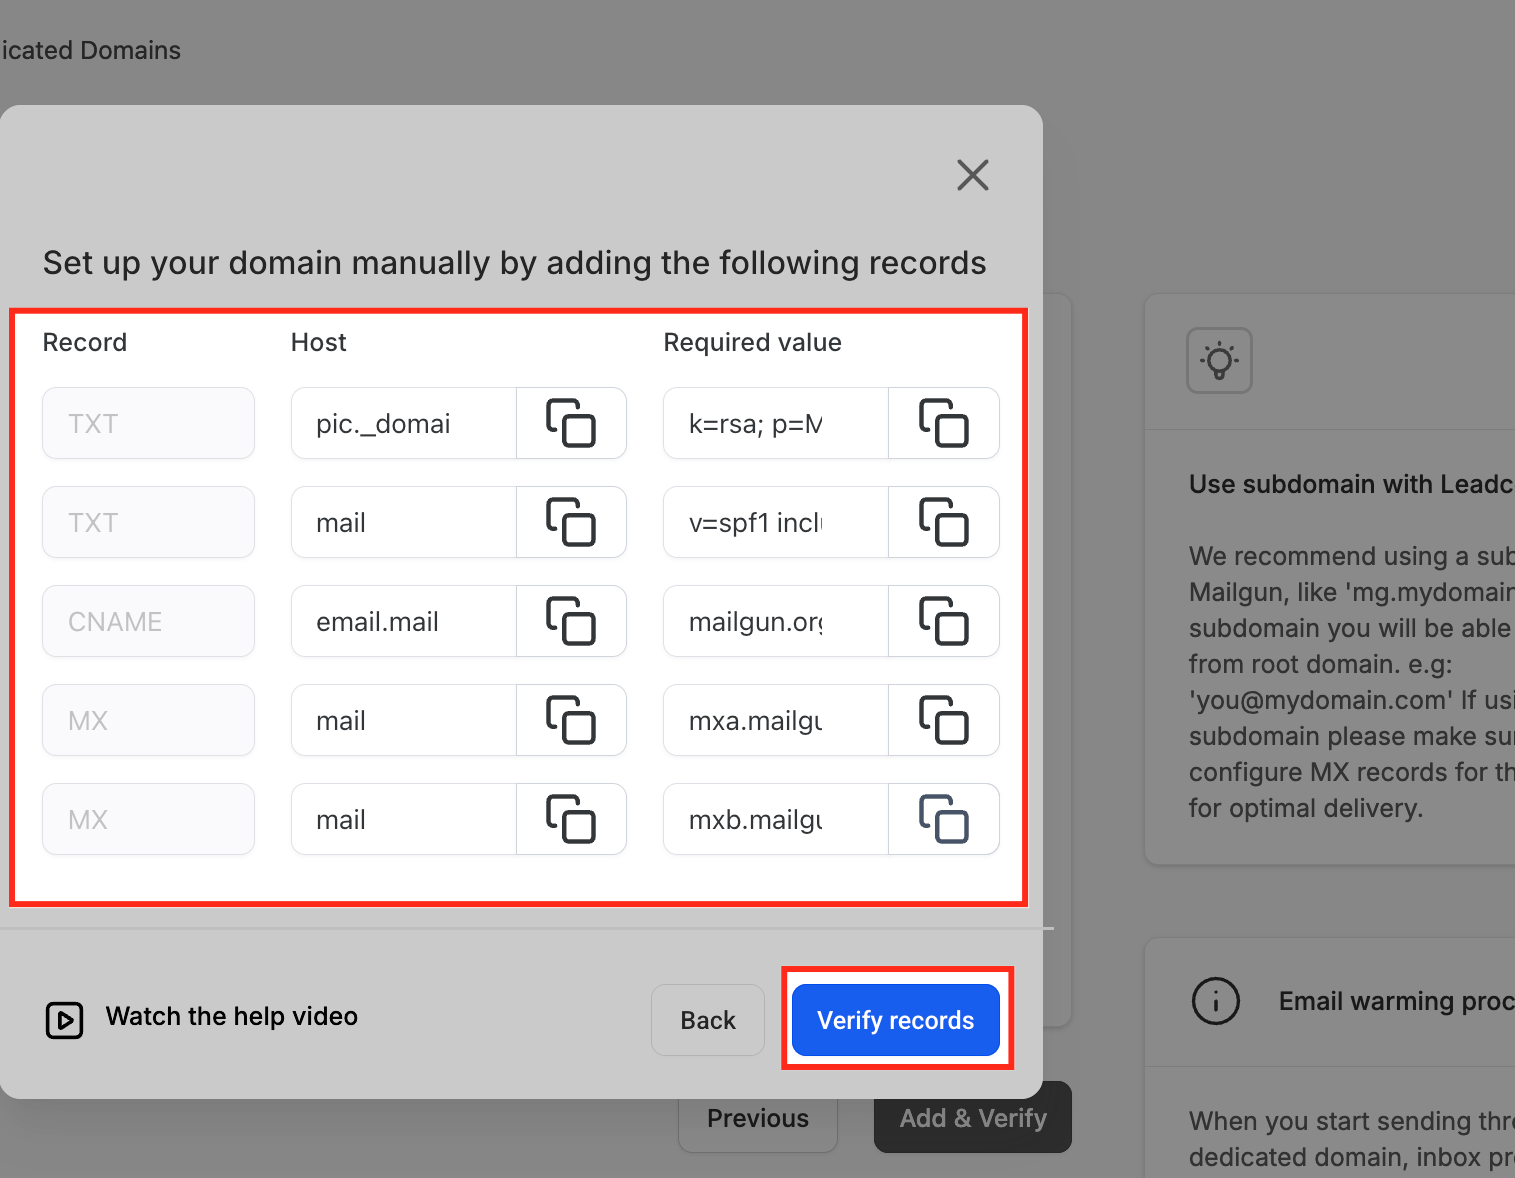
You'll then see a list of all the DNS records your domain needs (SPF, DKIM, CNAME, MX, and DMARC). Each shows whether it's verified, and you can use the Copy buttons to paste values into your DNS provider. Once everything checks out, your domain is marked as verified.
If your DNS provider is supported, click Continue after adding your domain. Aesthetix CRM will detect your provider, and once you log in and authorize, your DNS records are configured automatically and the domain is marked Verified. If your provider isn't supported, you'll be prompted to add the records manually.
For manual setup, add the records exactly as shown:
Type: Add records as TXT, CNAME, or MX as instructed.
Name/Host: For root domains, use @. For subdomains (e.g., mail.yourdomain.com), enter just the subdomain (e.g., mail).
Value: Copy and paste the values exactly as shown.
TTL: Set to 5 minutes (300 seconds) where possible.
Note: After verification, the SSL certificate is issued within about 1–10 minutes and the domain shows as Verified/Active. Send a test email to confirm SPF and DKIM pass. Ensure only one SPF record and one DMARC record exist per domain, duplicates cause verification to fail.
MXToolbox is a popular free tool for checking your domain's DNS records. To use it:
Go to https://mxtoolbox.com.
On the homepage, open the dropdown menu and select the type of record you want to check:
DNS Lookup: Check A, AAAA, CNAME, NS, and other records.
CNAME Lookup: Check your domain's canonical name (CNAME) records.
TXT Lookup: Check text records such as SPF, DKIM, and DMARC.
MX Lookup: Check your domain's mail exchange (MX) records.
Enter your domain name (e.g., example.com) in the input field next to the dropdown.
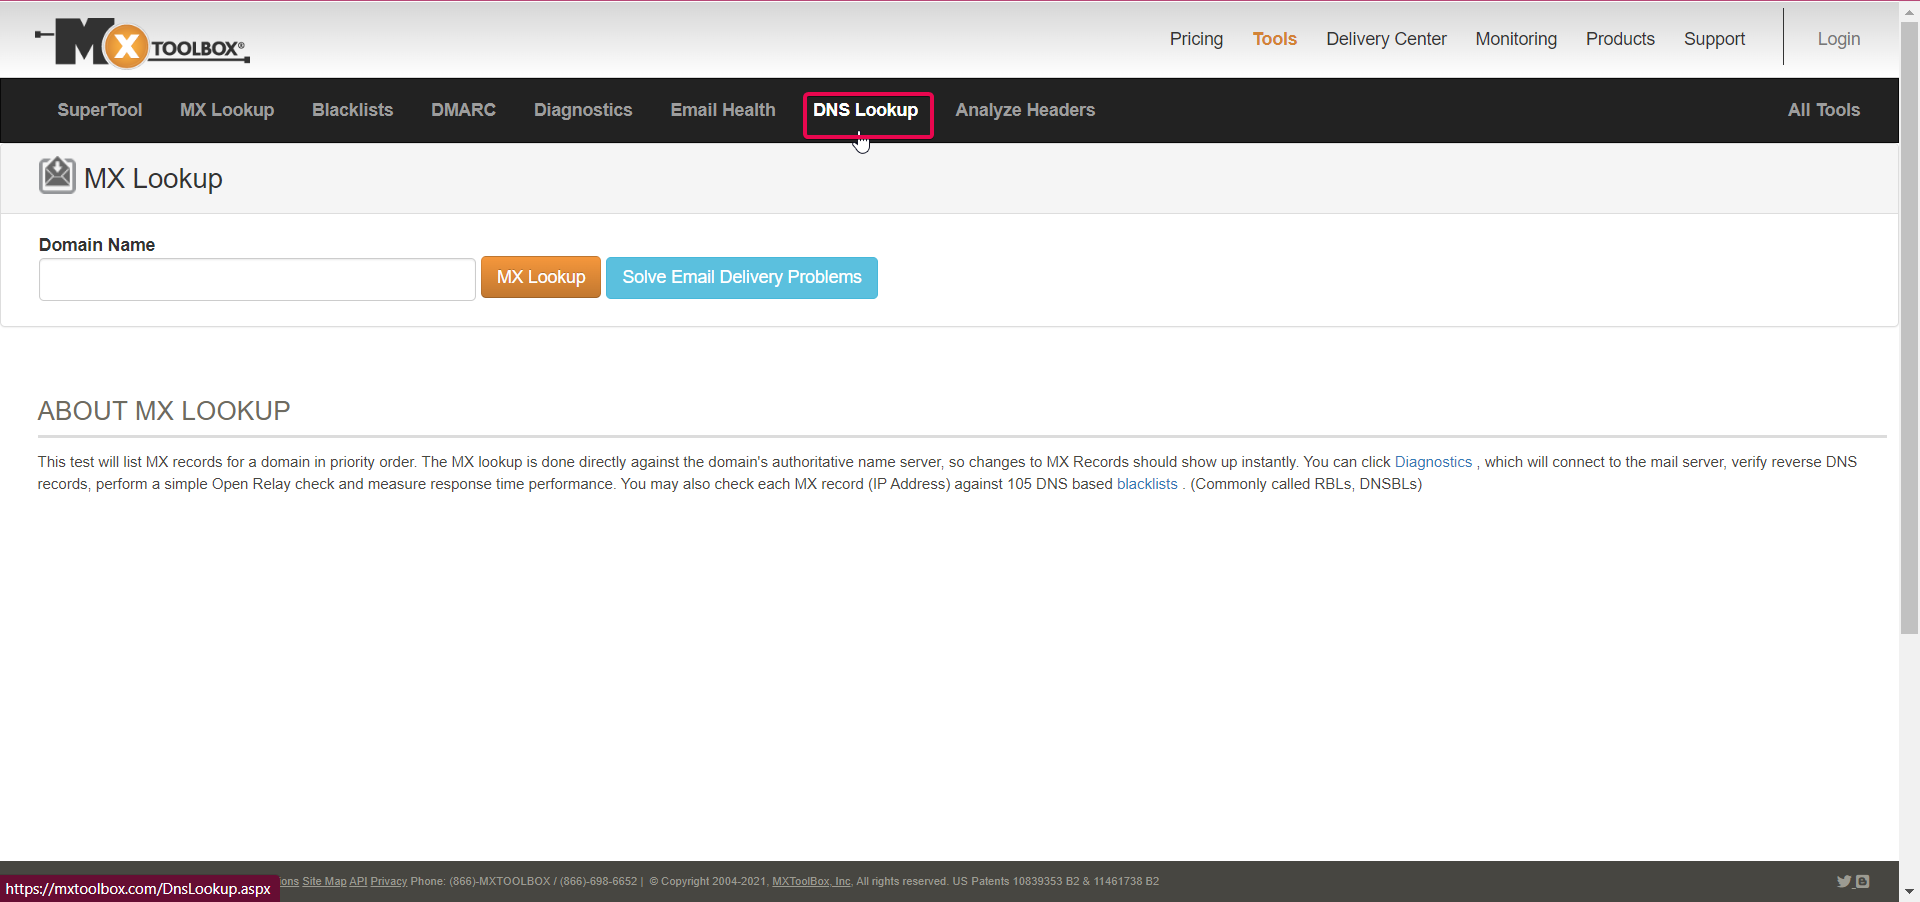
Click the DNS Lookup button to run the search.
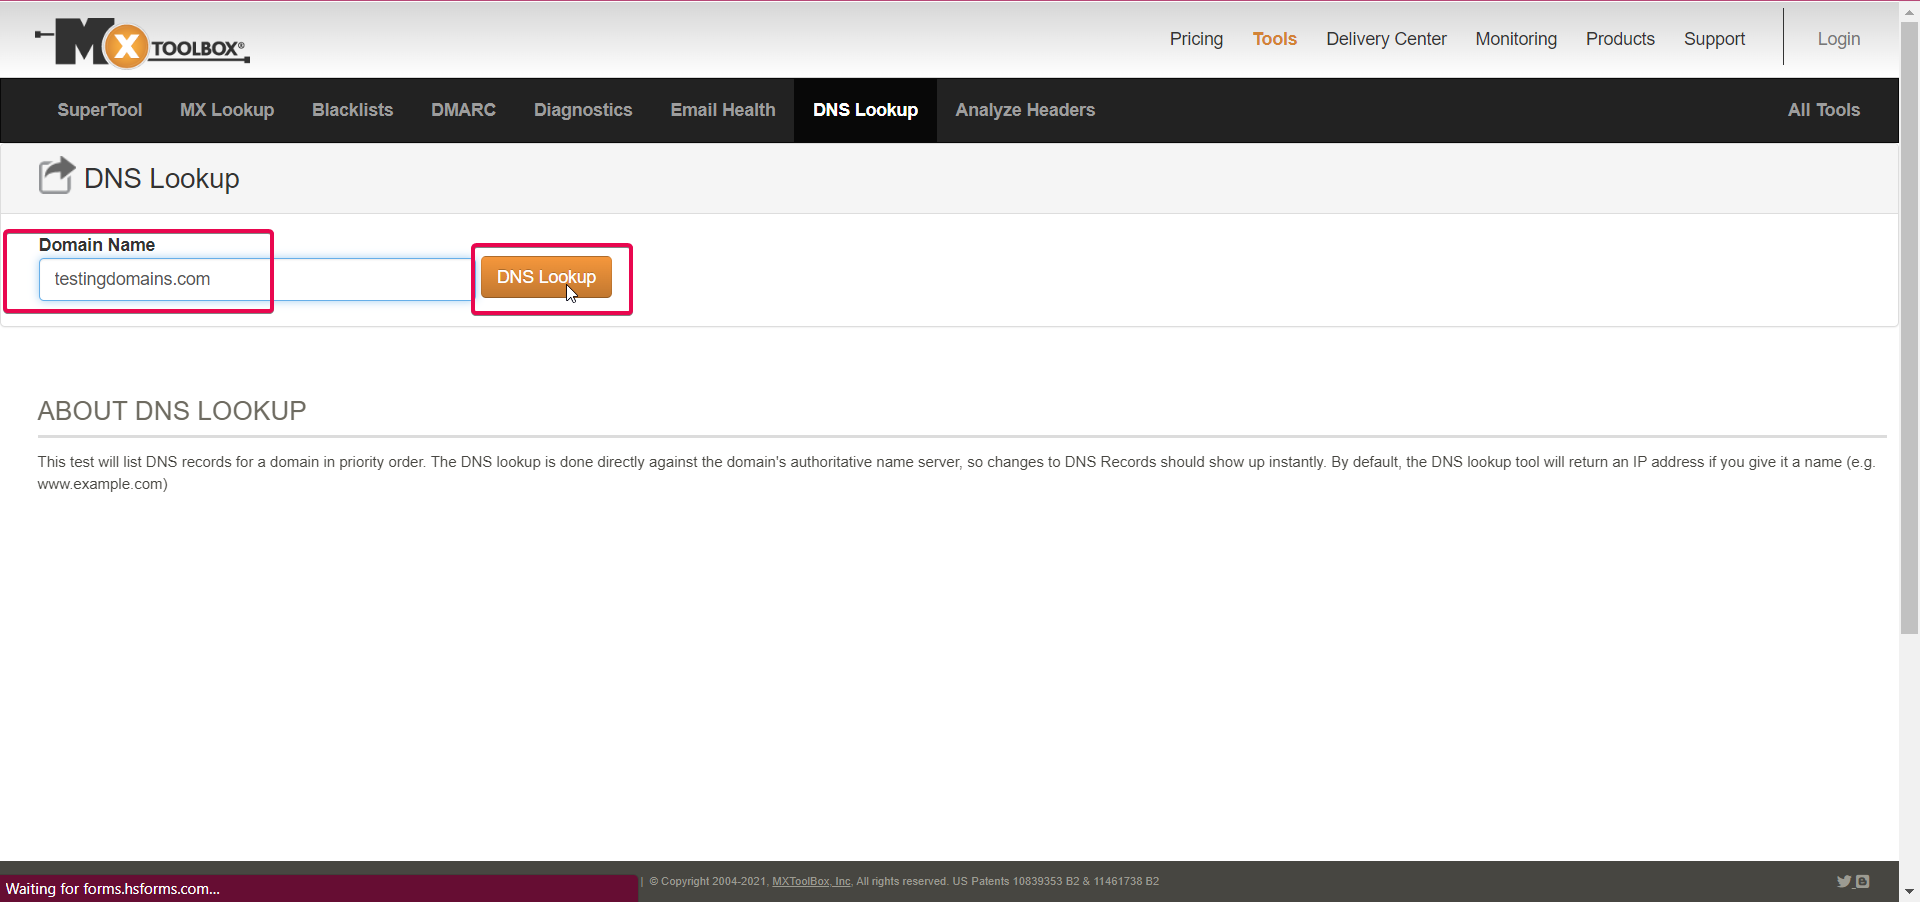
The tool displays the DNS records for the domain you entered. Scroll down to see all results.
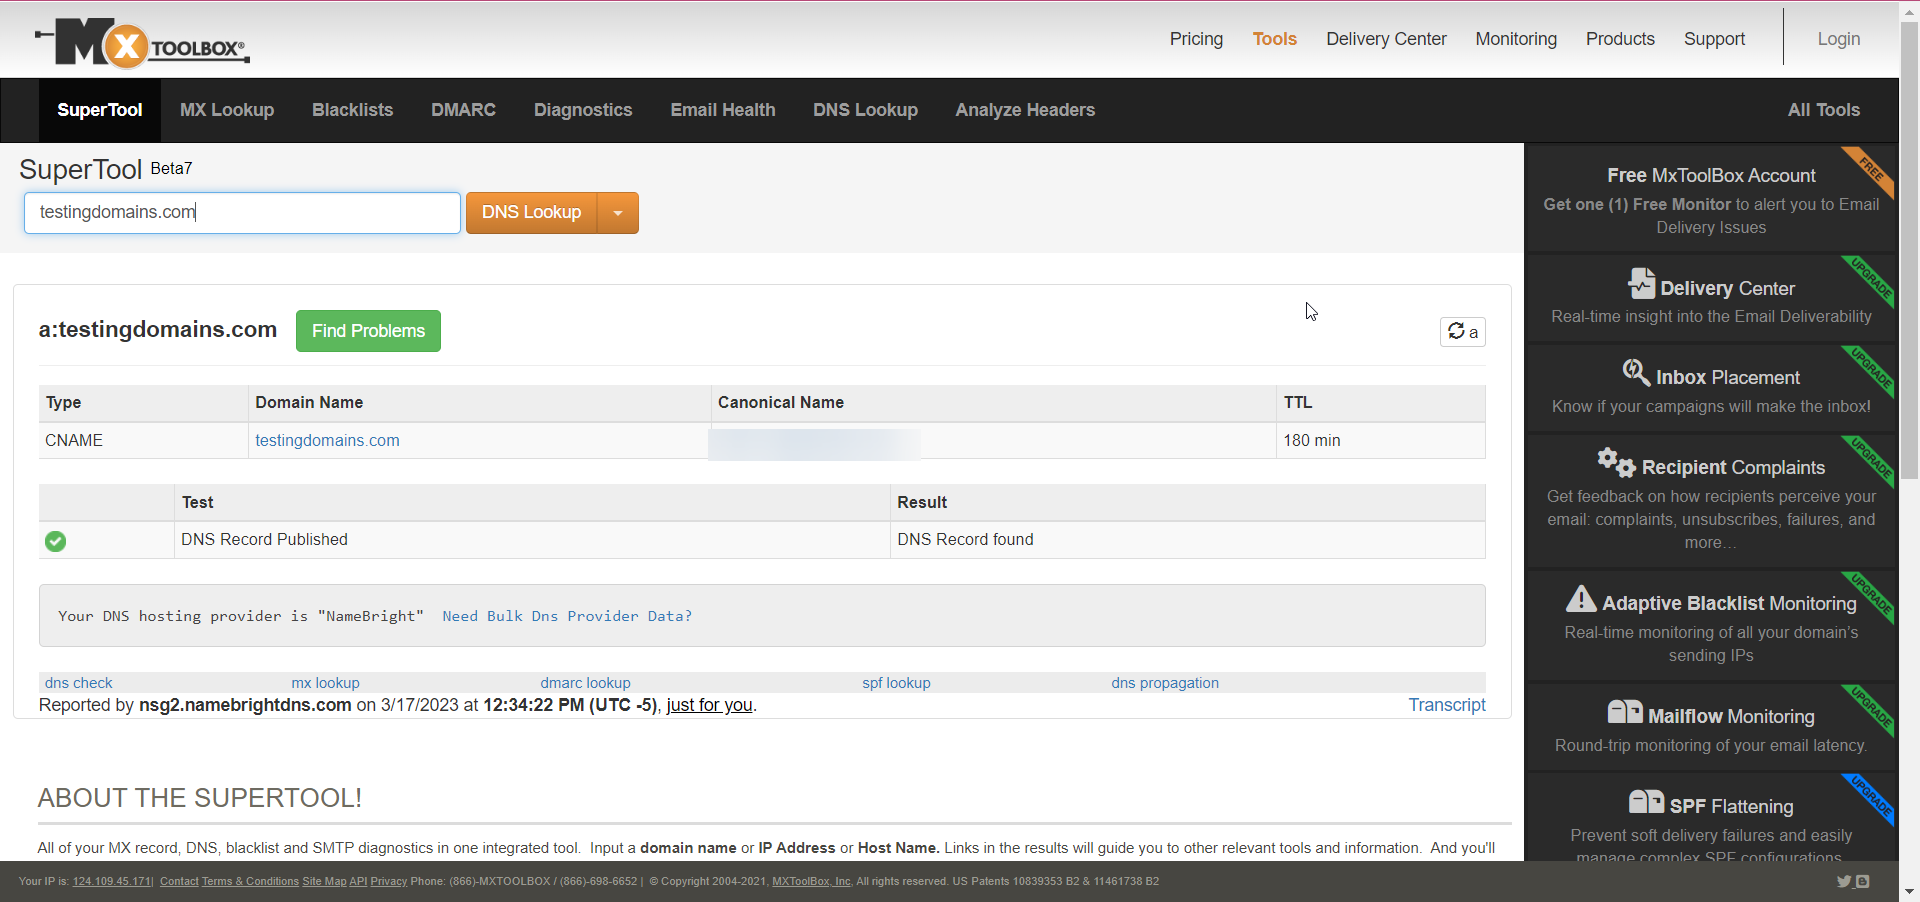
Note: If you recently changed your domain's configuration, the records may not appear right away. Changes can take some time to propagate across the internet, typically up to 24–48 hours.
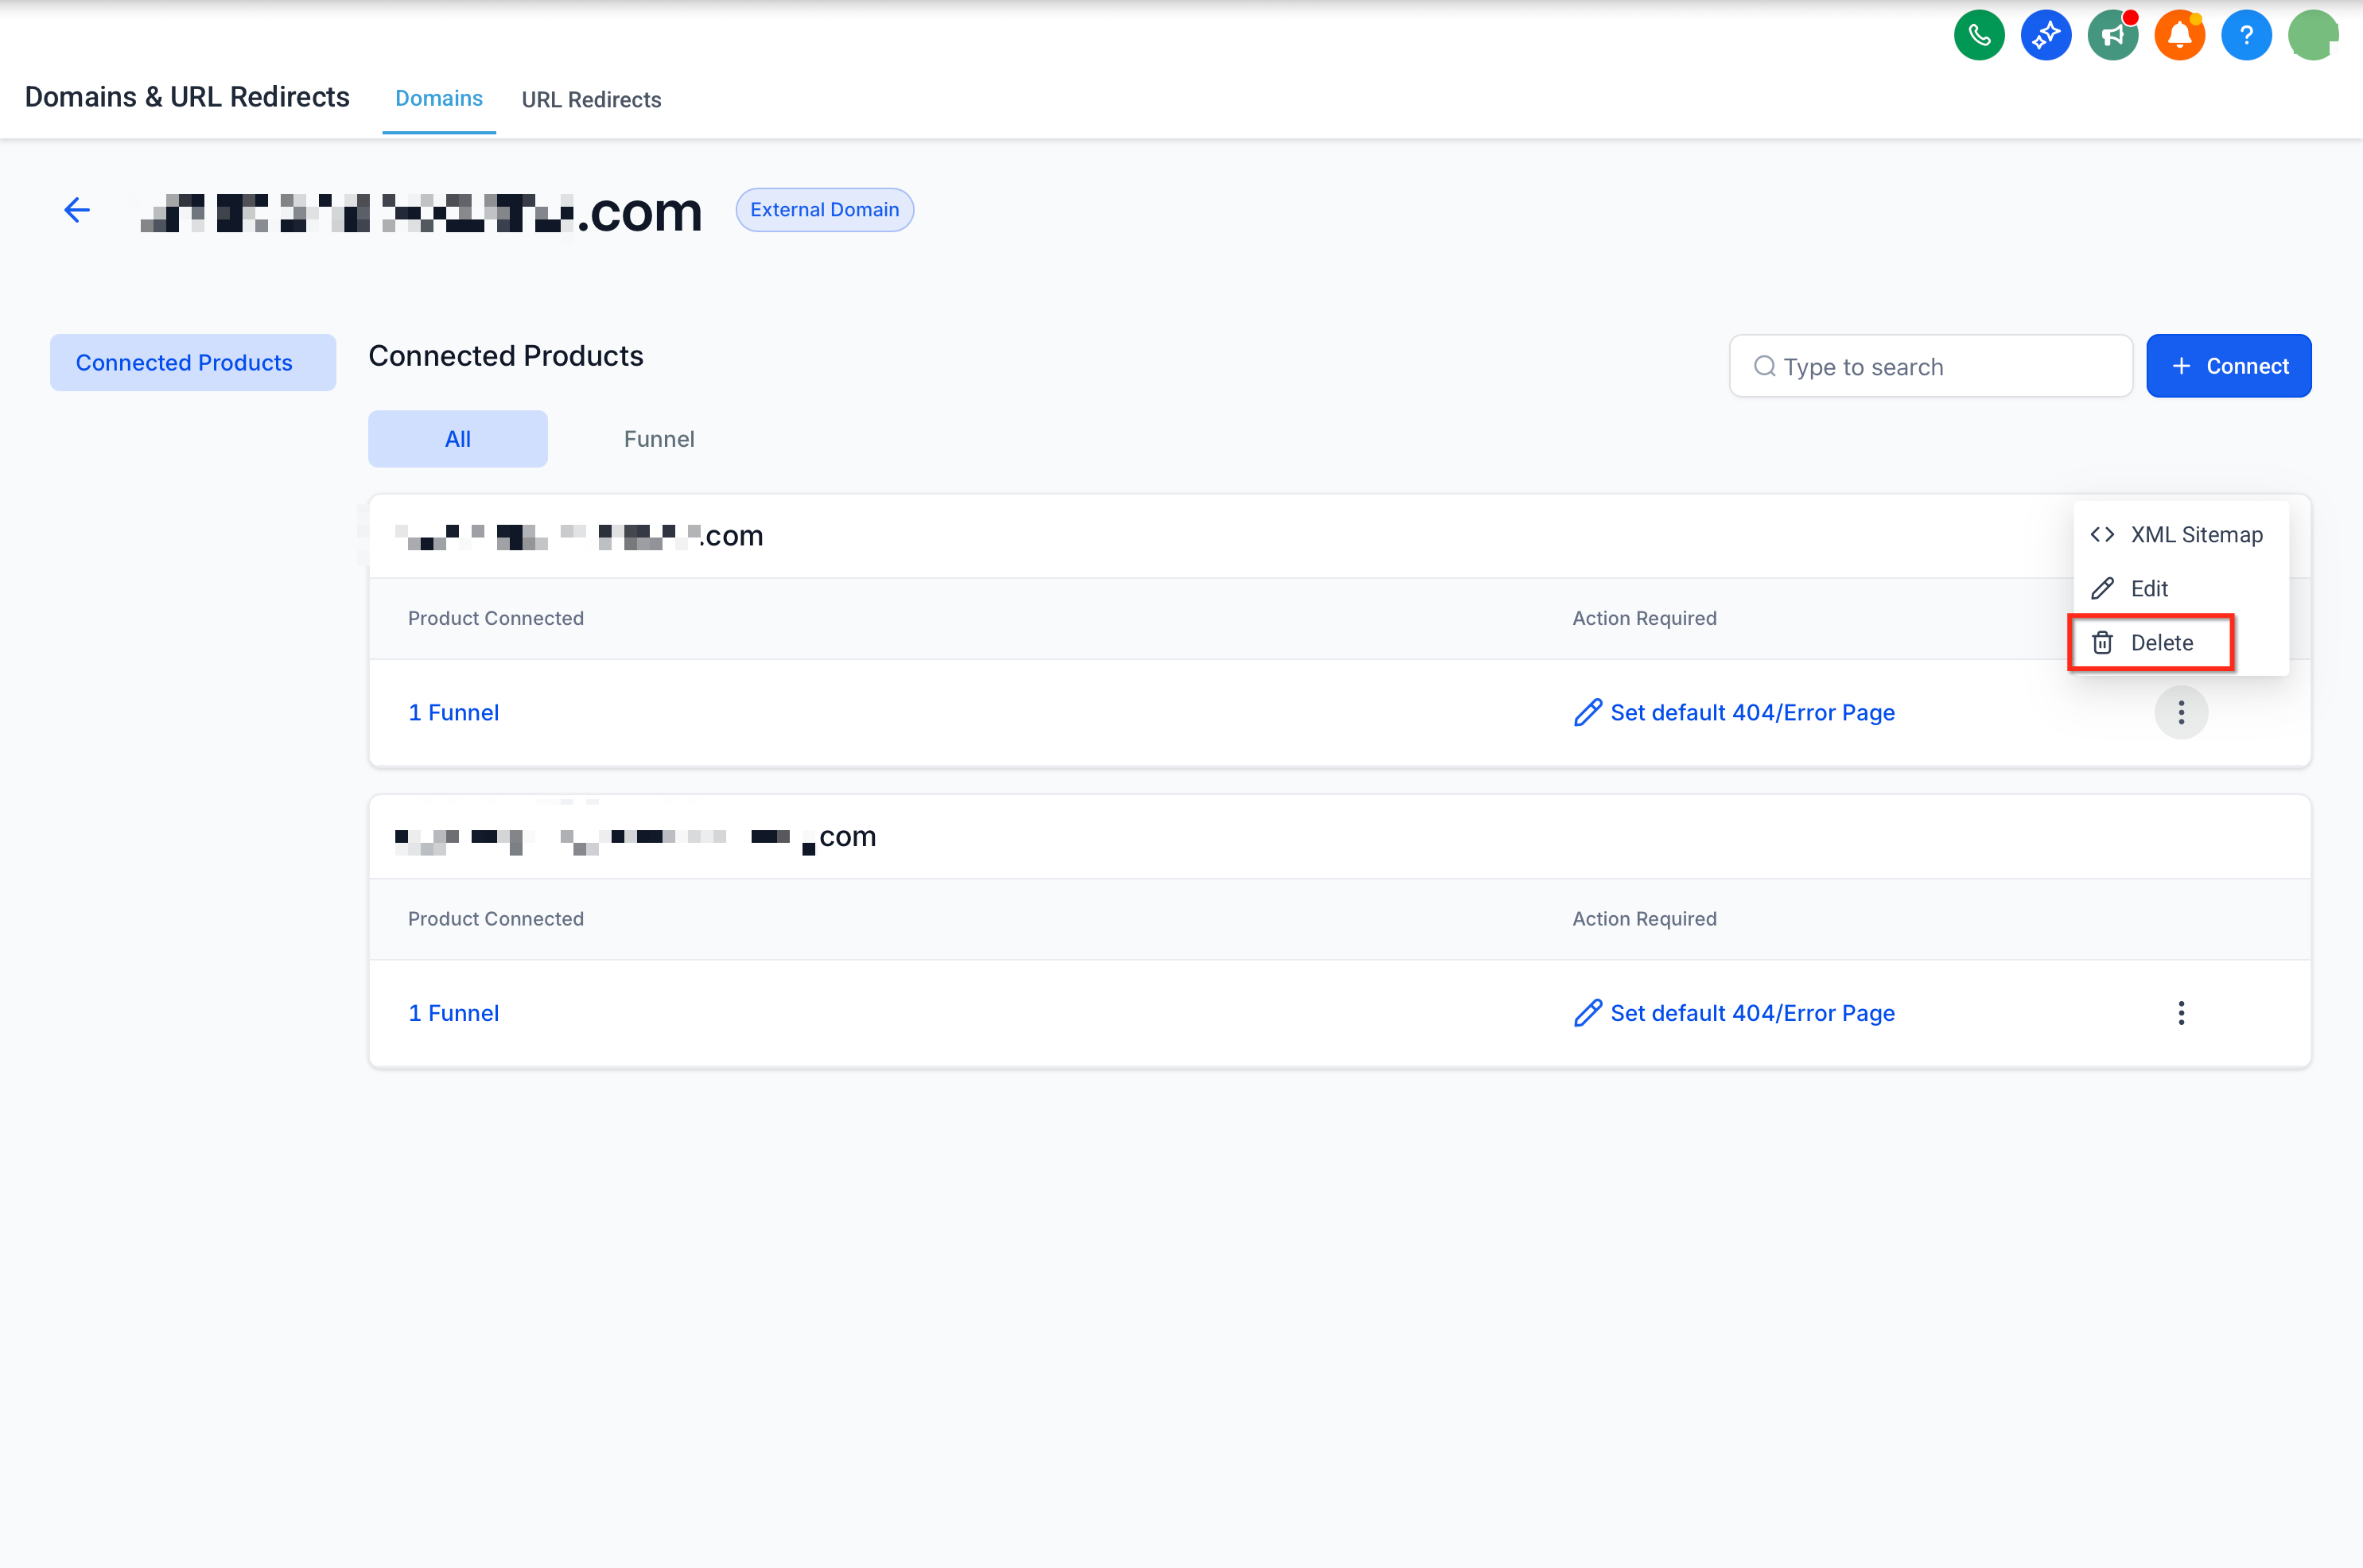
To remove a domain from your account, go to Settings > Domains & URL Redirects > Manage.

Click the three dots, choose Delete, and confirm your choice in the dialog box.
While connecting your domain, you may run into a few common issues.
An SSL error occurs when there is a problem with the SSL certificate or the SSL/TLS configuration on a site. SSL/TLS provides encrypted, secure communication between a visitor's browser and the web server, so an error usually means the connection is being flagged as insecure.
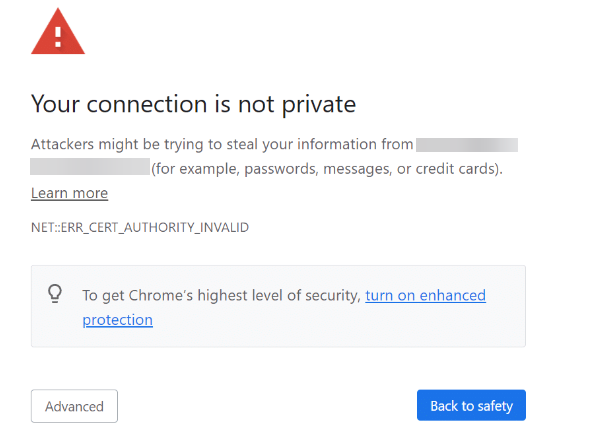
If your domain shows a privacy or SSL error, it is usually due to one of the following:
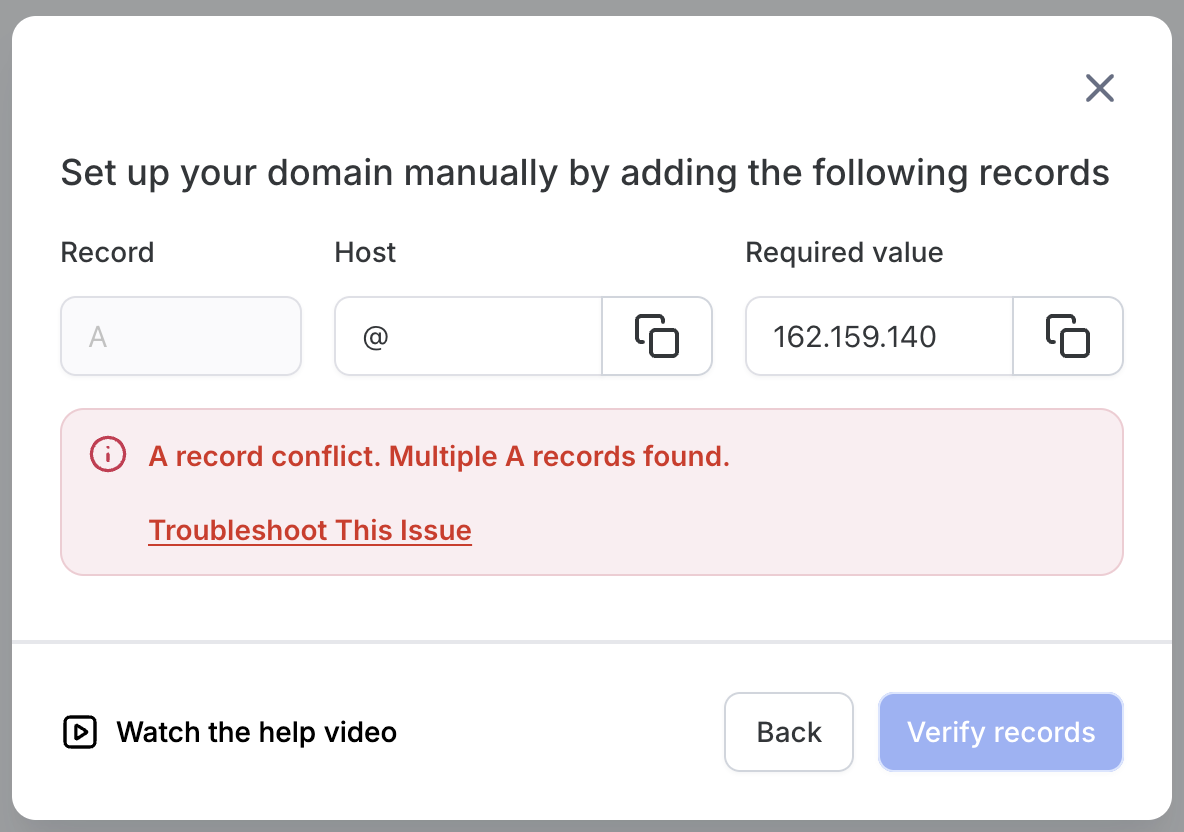
Multiple DNS records for the same host. More than one A or CNAME record exists for the same domain/subdomain. A domain or subdomain can only point to one platform at a time, so only one DNS record should be set up for it.
No DNS record has been added for the domain.
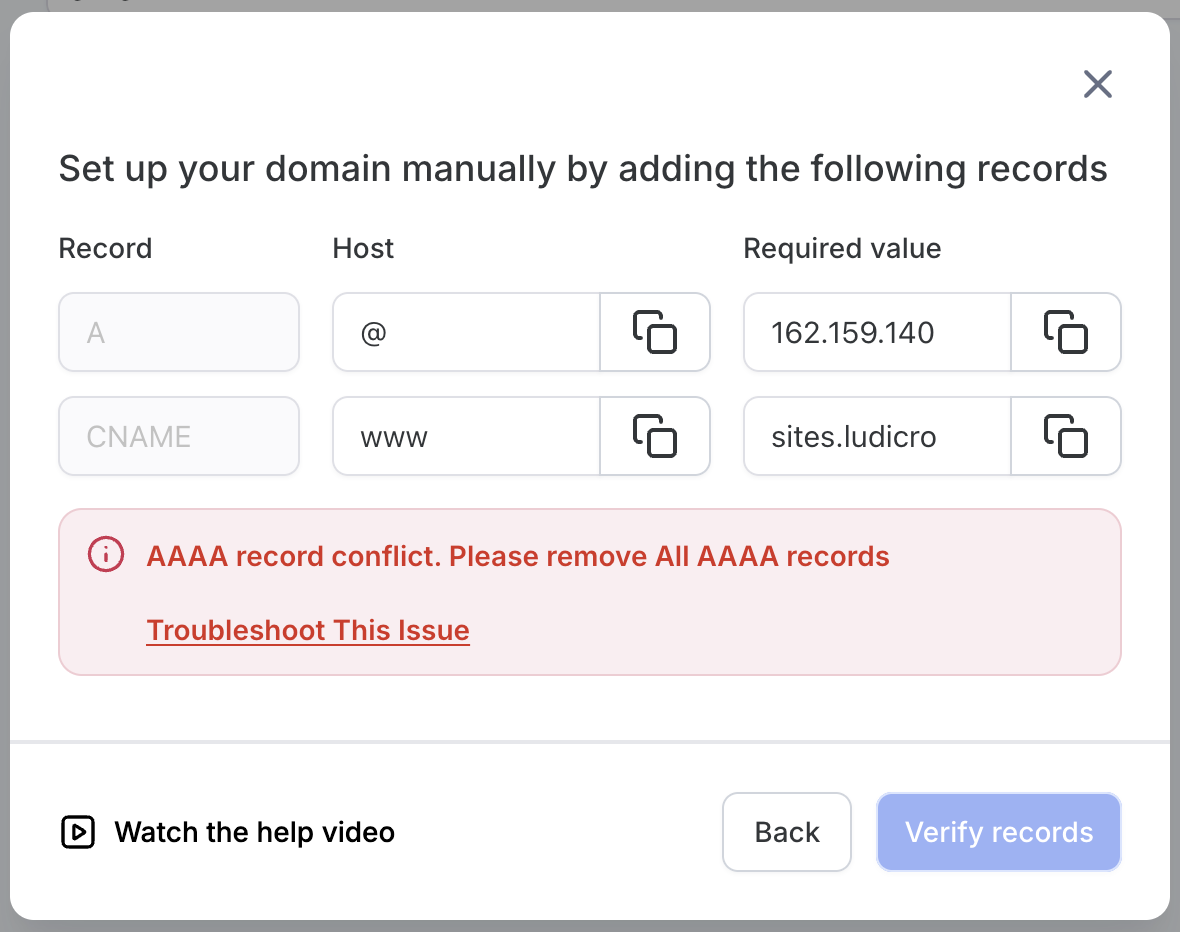
An AAAA record exists in addition to the A/CNAME record.
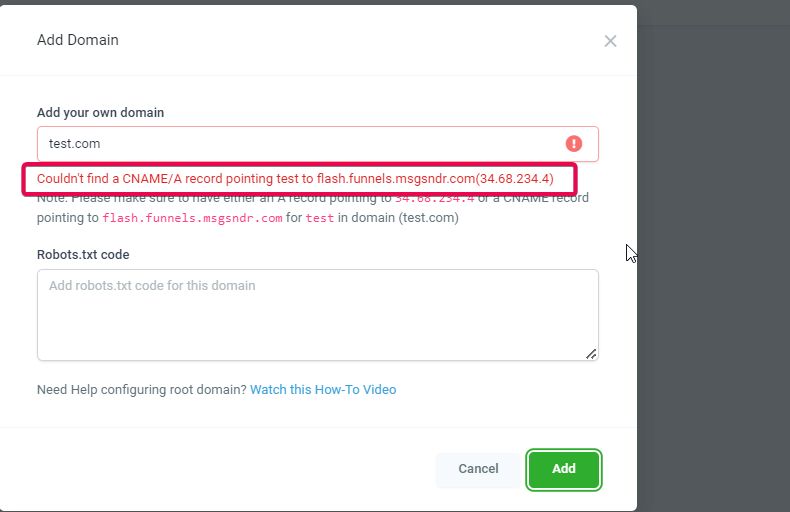
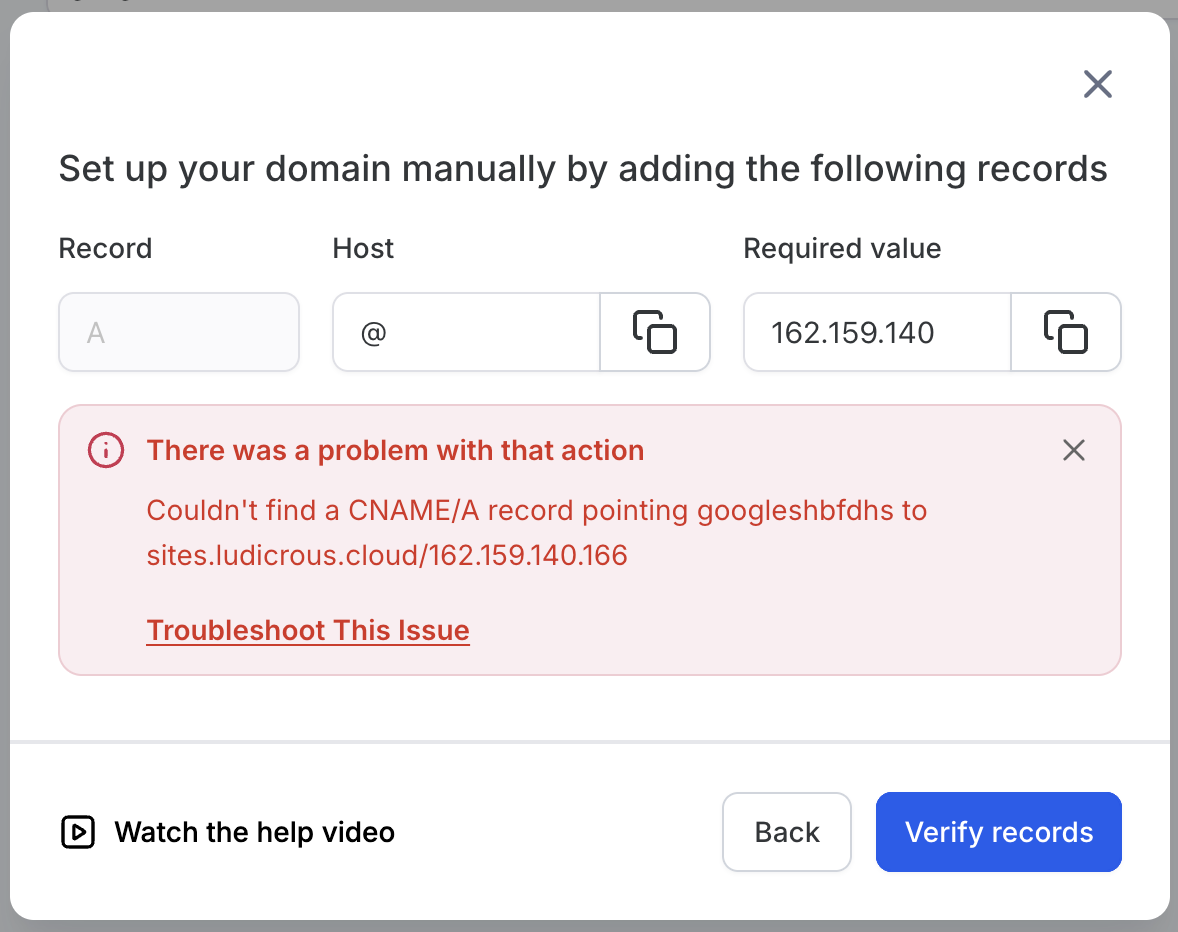
When adding a domain manually, you may see an error like:
"Couldn't find a CNAME/A record pointing
wwwtosites.ludicrous.cloud/162.159.140.166"
This does not mean you should enter the whole text sites.ludicrous.cloud/162.159.140.166 into a single field. It means Aesthetix CRM could not find either of the following DNS records for the host www:
A CNAME record with:
Host/Name: www
Value/Target: sites.ludicrous.cloud
OR
An A record with:
Host/Name: www
Value/IP: 162.159.140.166
If neither record exists (or they're set up on the wrong DNS provider), the domain can't be verified and this error appears.
How to fix it:
Confirm where your DNS is actually hosted. Use a DNS lookup tool or your registrar dashboard to see which nameservers your domain is using, and make sure you're editing DNS at the correct provider. For example, if your nameservers point to Cloudflare, add the records in Cloudflare, not GoDaddy.
Check for an existing www record. Look for any existing A or CNAME record with Host/Name www. If www already points somewhere else (an old website or another platform), remove or update it. Only one record for www should be active.
Create the required DNS record for www. Choose one method (do not use both for www):
CNAME method (recommended for subdomains): Type CNAME, Host/Name www, Value/Target sites.ludicrous.cloud.
A record method: Type A, Host/Name www, Value/IP 162.159.140.166.
Enter only www (or your subdomain, e.g., sub) in the Host/Name field, not www.mydomain.com and not https://www.mydomain.com.
If you're also using the root domain. For a root domain like mydomain.com, add an A record with Type A, Host/Name @, Value/IP 162.159.140.166. In Step 2, the system can automatically enable www and a 301 redirect so visitors to www.mydomain.com are redirected to mydomain.com.
If you are using Cloudflare. Make sure the CNAME or A record is set to "DNS only", not "Proxied." Cloudflare's proxy is not supported on the records used to connect funnels and websites.
Allow time for DNS propagation. After making changes, DNS can take up to 24 hours to update globally. If the error persists right after updating, wait a bit and then click Retry/Continue on the domain connection screen.
Re-check with a DNS lookup tool if needed. Confirm that www.yourdomain.com has either a CNAME → sites.ludicrous.cloud or an A record → 162.159.140.166. Once that record is visible, the domain should verify successfully.
Note: If your domain shows a 404 error intermittently, you may be mixing the
wwwand root versions. Make sure you have added a redirect fromwwwto the non-www(root) domain, or from the non-wwwdomain towww.
If your DNS setup is correct but you still get a privacy error, your site is not showing images, or you cannot add the domain, check that the proxy status inside Cloudflare is set to "DNS Only."
When a CNAME or A record has proxy status set to "Proxied," it causes an error. Cloudflare proxy status should only be set to "Proxied" when setting up a redirect, and only by following the exact steps for that setup.

Multiple A Records: More than one A record exists for the same host, causing a conflict.
AAAA Record Conflict: An AAAA record is present alongside your A/CNAME record and must be removed.
CAA Record Conflict: A CAA record is preventing the SSL certificate from being issued.

DNS Records Do Not Match: The values entered at your registrar don't match the records Aesthetix CRM expects.
Domain is Connected Elsewhere: The domain is already pointing to another platform or account and must be freed up first.
If your domain says "Pending" for over 24 hours, double-check your DNS values or reach out to support.
SSL is provisioned automatically once the domain is connected and records are correct.
You can manage all connected domains under Settings > Domains.
DNS changes can take from a few minutes up to 24 hours to fully propagate.
Can I use the same domain with more than one platform?
No. One domain or subdomain can only be used with one platform or server at a time (for example, WordPress, Wix, or Aesthetix CRM). If you already use mydomain.com with WordPress, use site.mydomain.com with Aesthetix CRM, or use a different domain. Likewise, a domain used with funnels and websites can't also be used with a feature hosted on a different server.
Can I add the same domain to more than one account?
Yes. The same domain can be added to multiple sub-accounts within your organization.
How many domains can I add to one account?
There is no limit, add as many as you need.
Do I have to purchase SSL separately?
No. Aesthetix CRM generates an SSL certificate automatically once the domain is added successfully. You don't need to buy it separately.
How many funnels or websites can I connect with one domain?
There is no limit, connect as many as you need.
Should I use a root domain or a subdomain?
Either works for websites and funnels. For email sending, a subdomain (e.g., mail.yourdomain.com) is recommended to protect your root domain's reputation.
