A Brand Board in Aesthetix CRM is a centralized space where you define and manage your practice's visual identity. Each Brand Board contains a Design Kit that holds your logos, brand colors, and typography, so you can apply the same look and feel across your funnels, websites, and emails. Set your branding up once, then reuse it everywhere your practice appears online.
A Brand Board bundles your practice's core visual identity, colors, fonts, and logos, into a reusable Design Kit. Once set up, these assets are available across your account so every page reflects your brand consistently.
Brand consistency: Keep all your visual elements in one place so you use the same logo, colors, and fonts everywhere, whether on your website, in your emails, or across social media.
Time efficiency: Instead of hunting for logo files or trying to remember your exact color codes, access everything instantly. Creating new materials becomes faster and simpler.
Easy management: Quickly find and apply your logos, colors, and fonts, keeping everything consistent and on-brand with far less effort.
Note: Define your colors, fonts, and logos once in a Brand Board, then apply them across your funnels and websites for a cohesive, professional presence.
Aesthetix CRM gives you multiple ways to create a Brand Board depending on how much of your branding is already defined. You can build everything manually, start from a preset style, or use a website URL to pull in your brand elements automatically for faster setup.
You can create a Brand Board in the following ways:
Start from blank and add your own logos, colors, and fonts manually
Choose a preset template as a starting point
Enter a website or landing page URL to generate a Brand Board automatically from your existing brand presence
Creating your own Brand Board is simple. Just follow these steps.
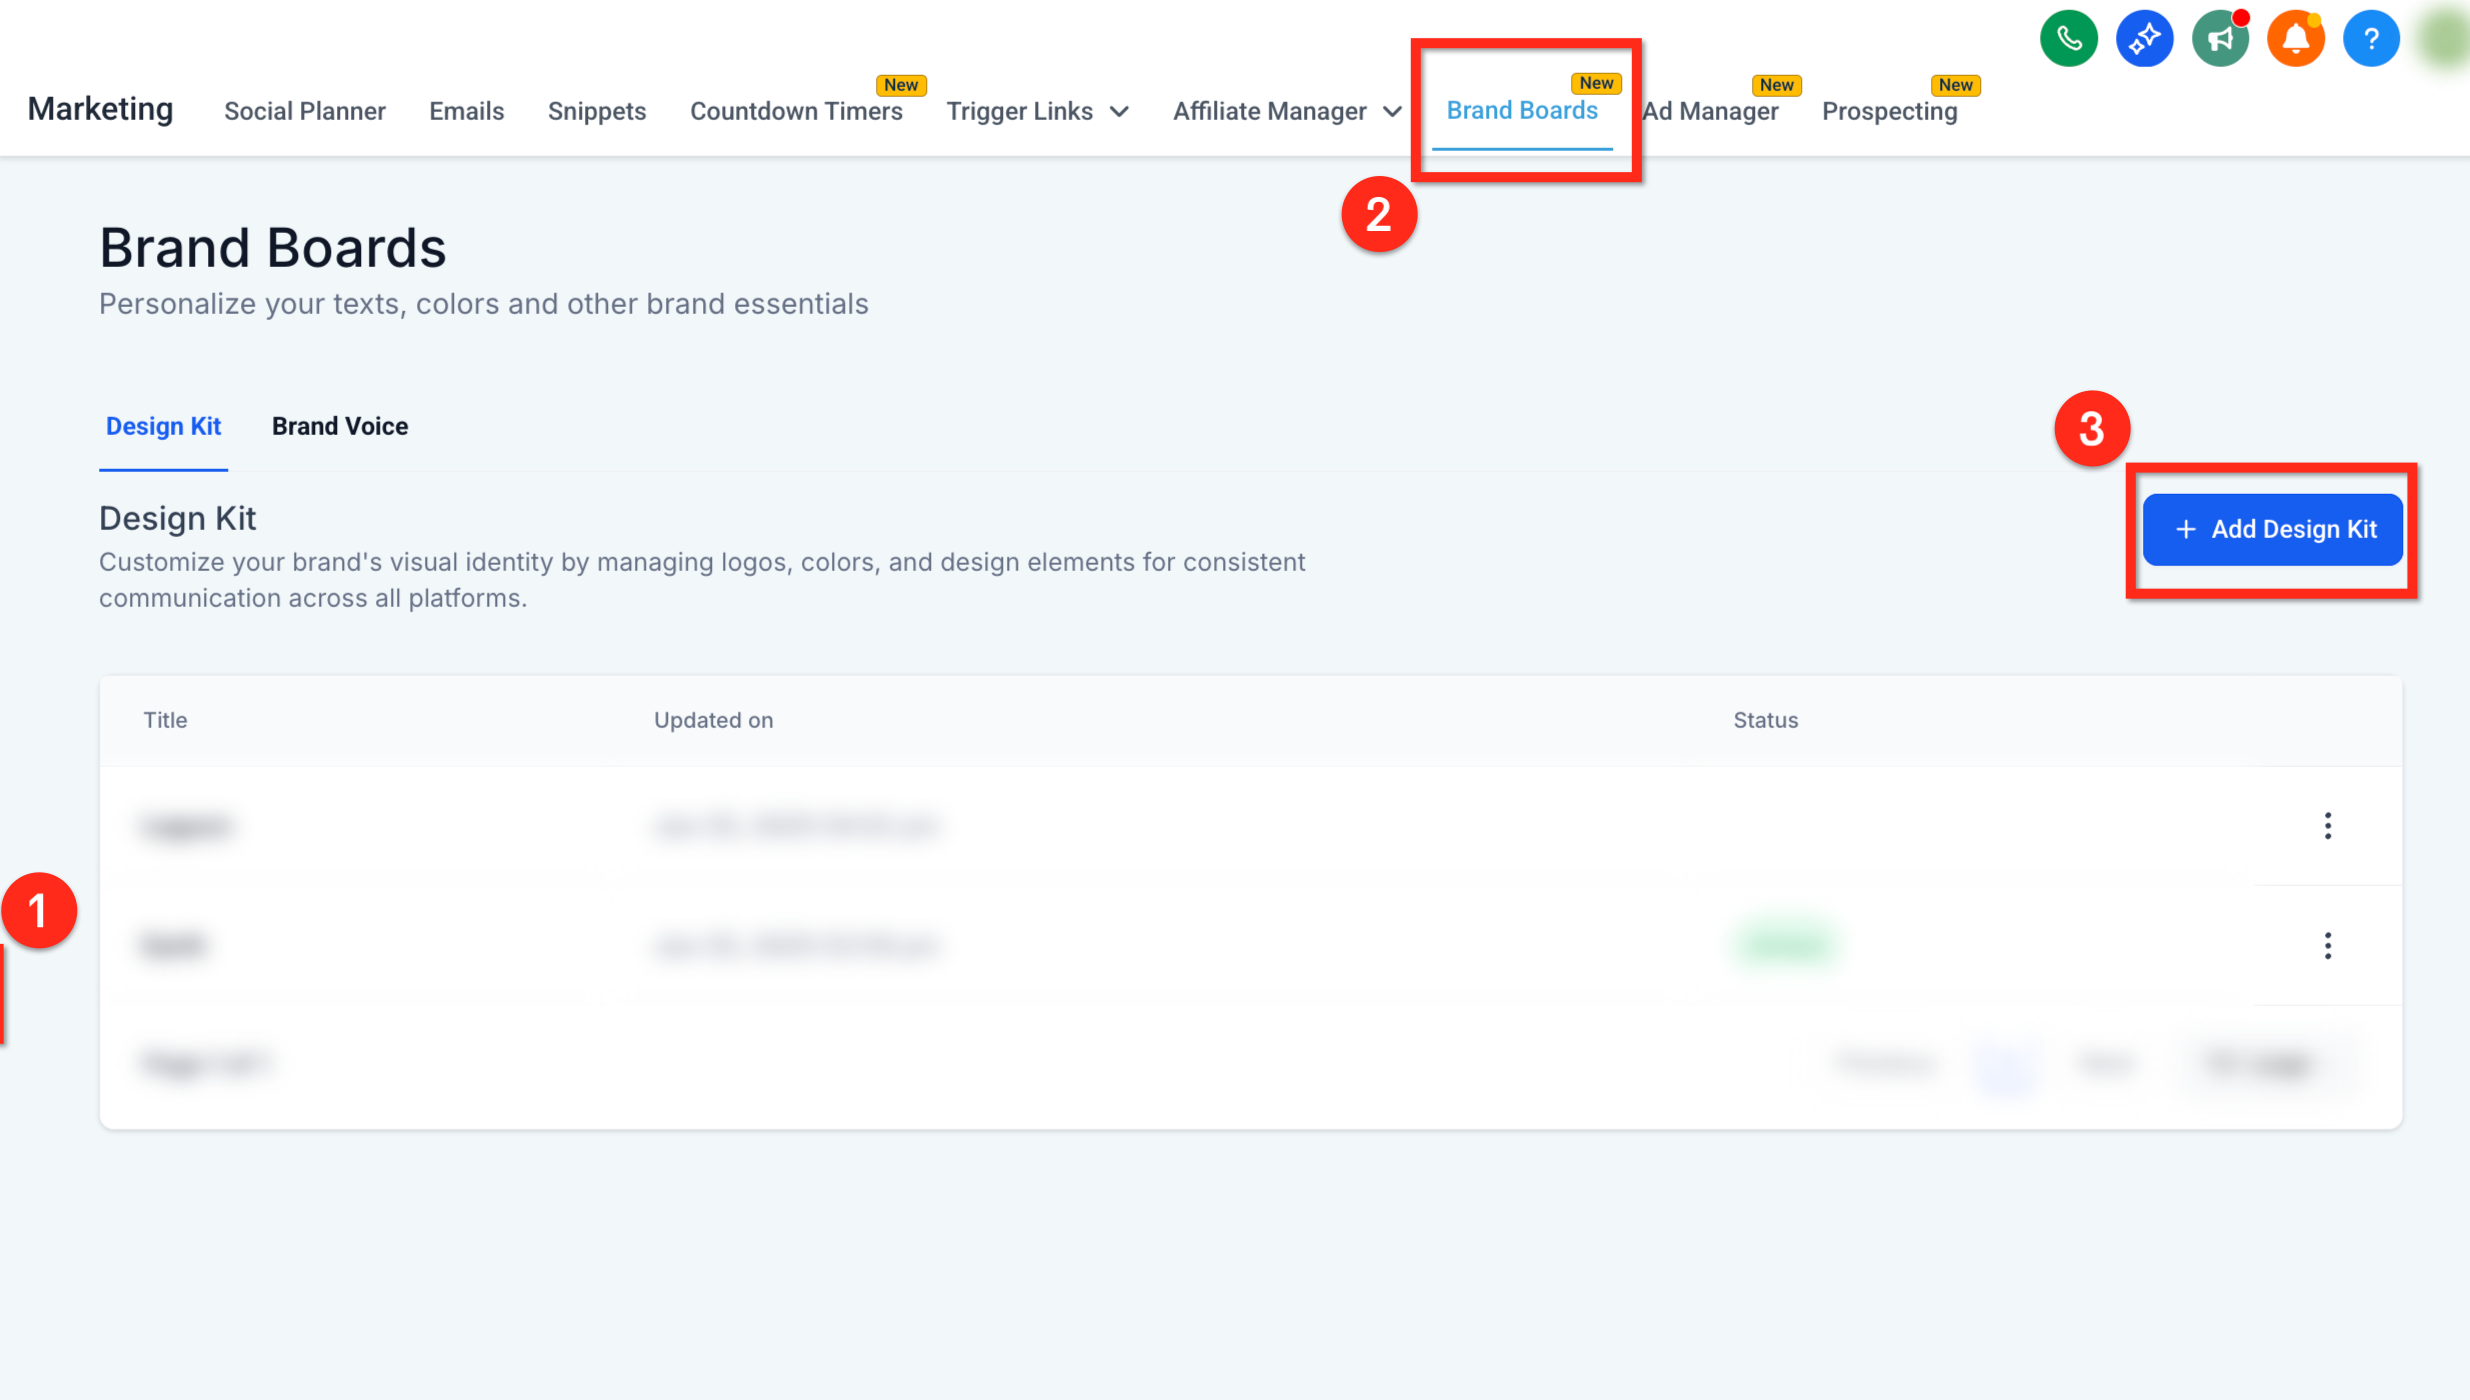
In the left-hand menu, go to Marketing
In the top navigation bar, click Brand Boards
Click the blue + Add a Design Kit button
Choose one of the following:
Start from Blank
Select a Template
Website URL import
If using Website URL import, paste your website or landing page URL and click Import Brand Kit.
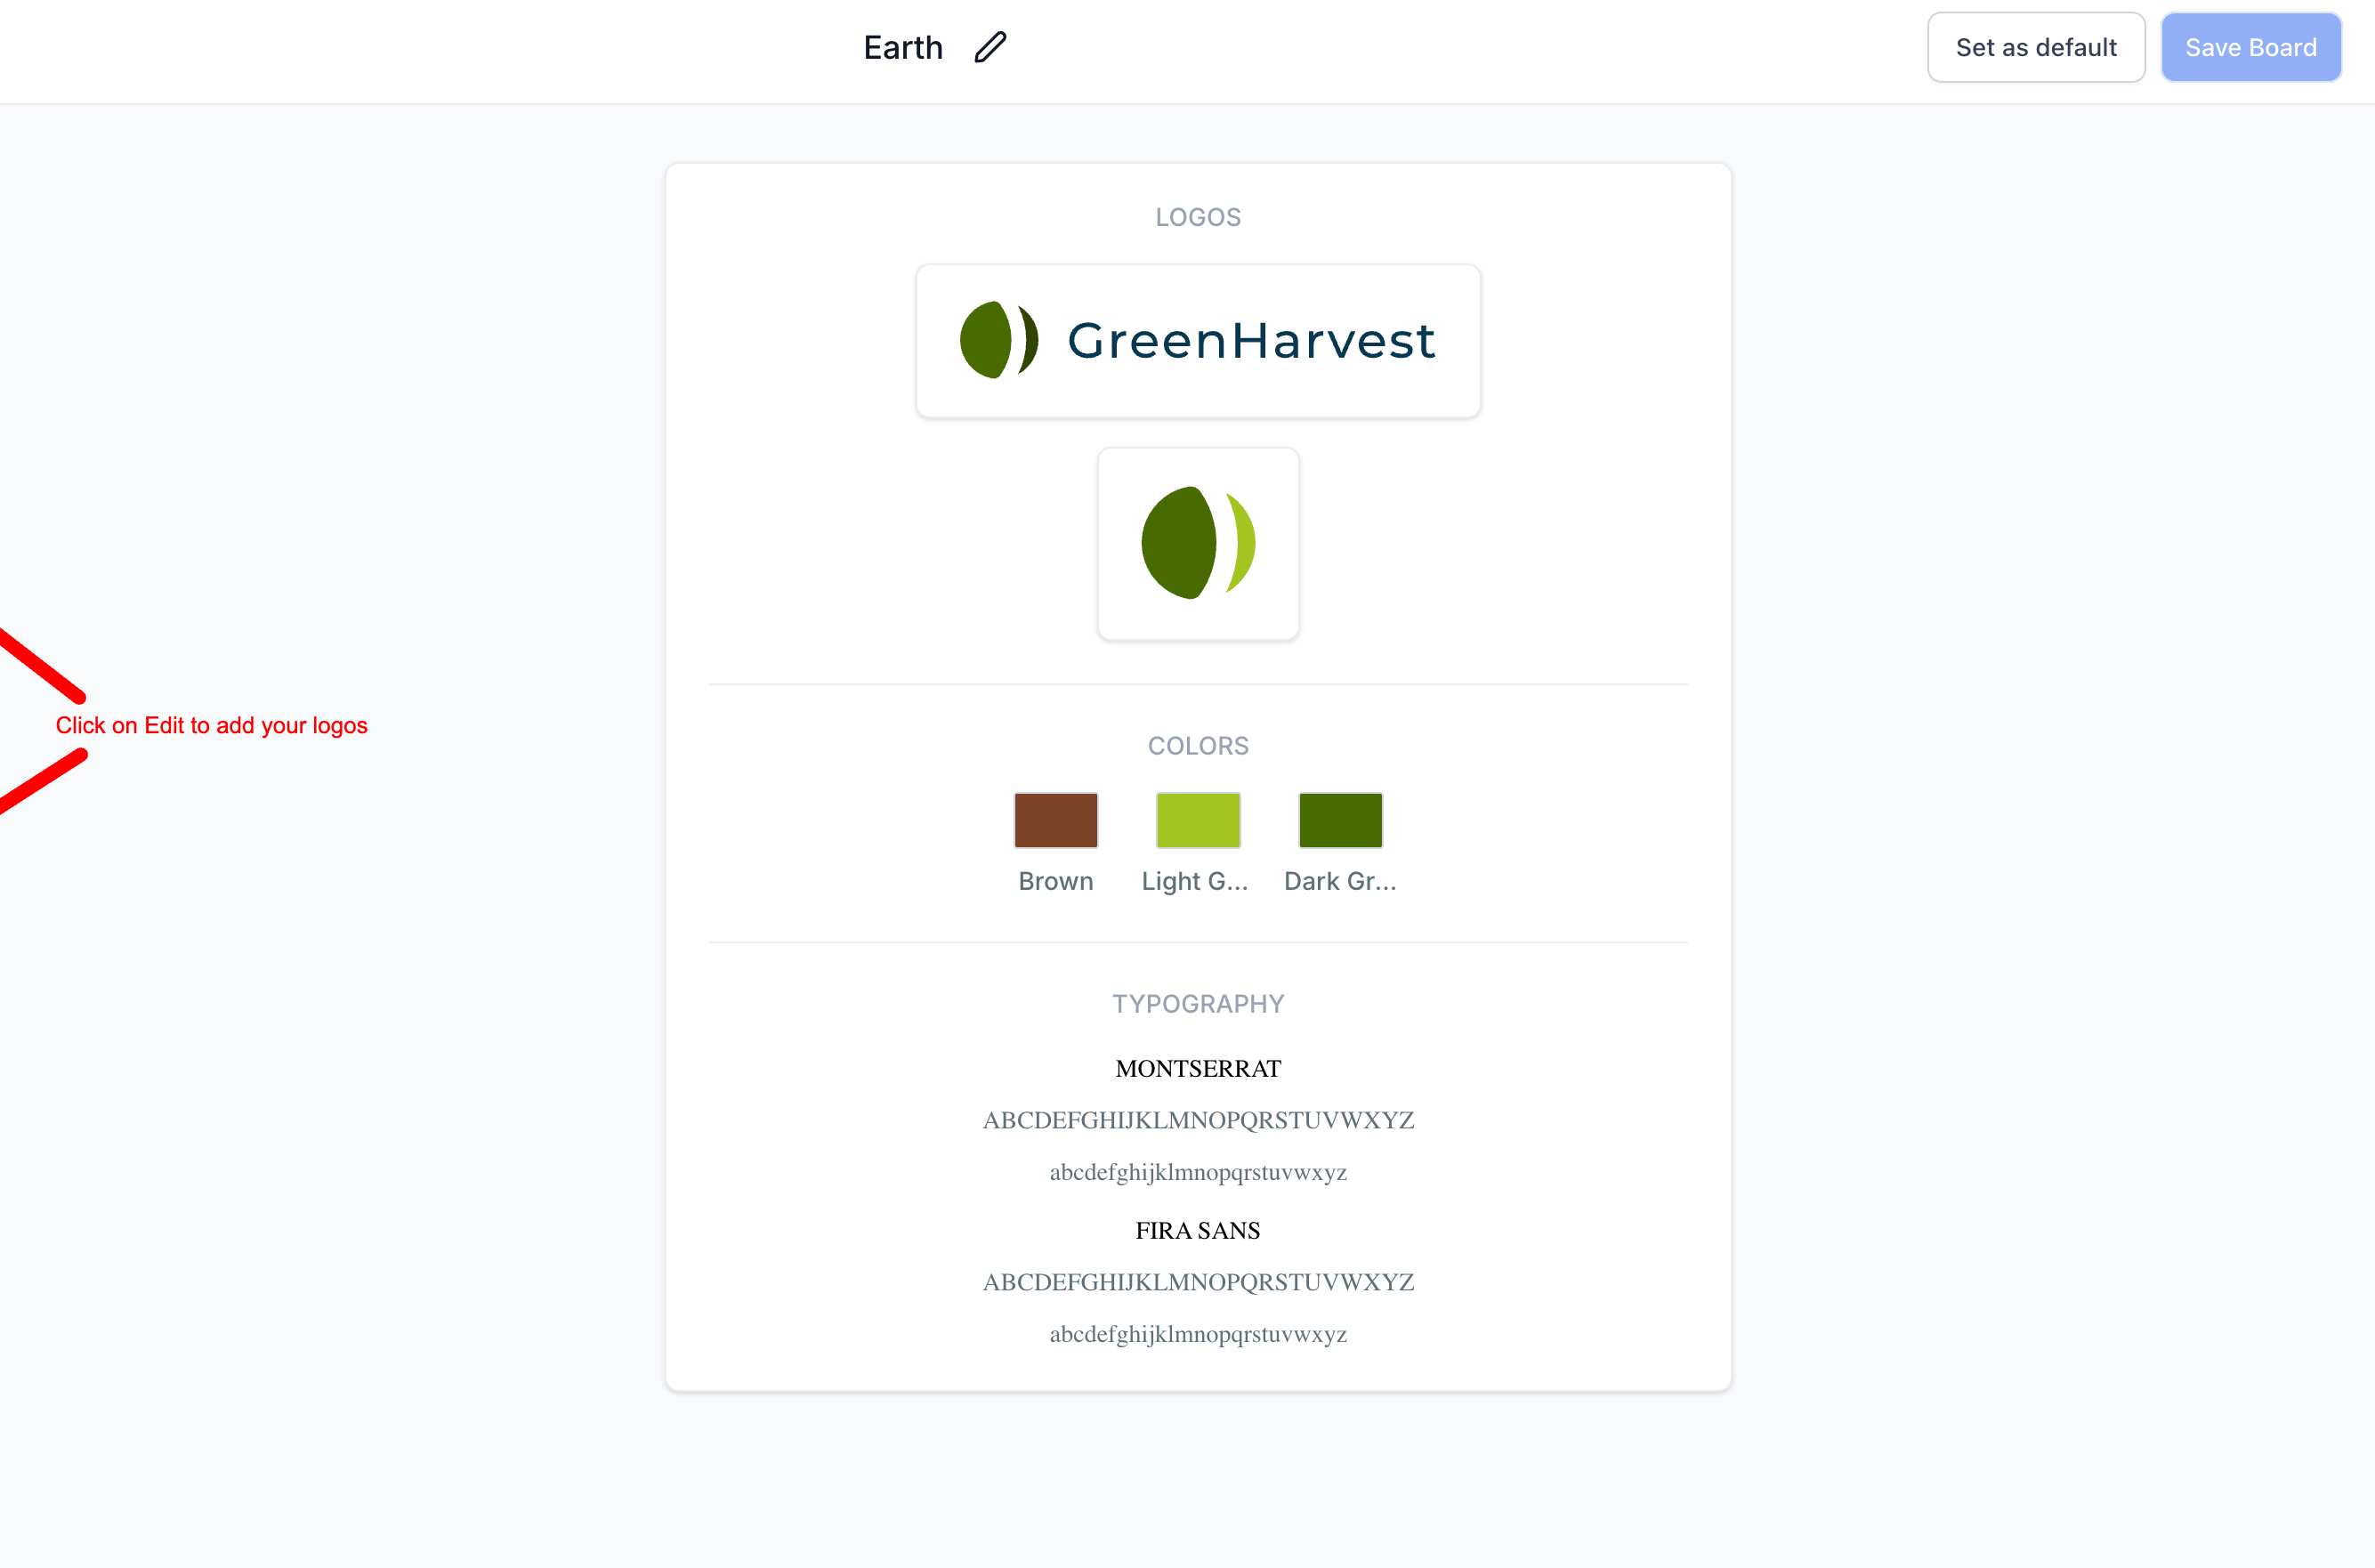
Click the Logos tab
Upload both your primary and secondary logos
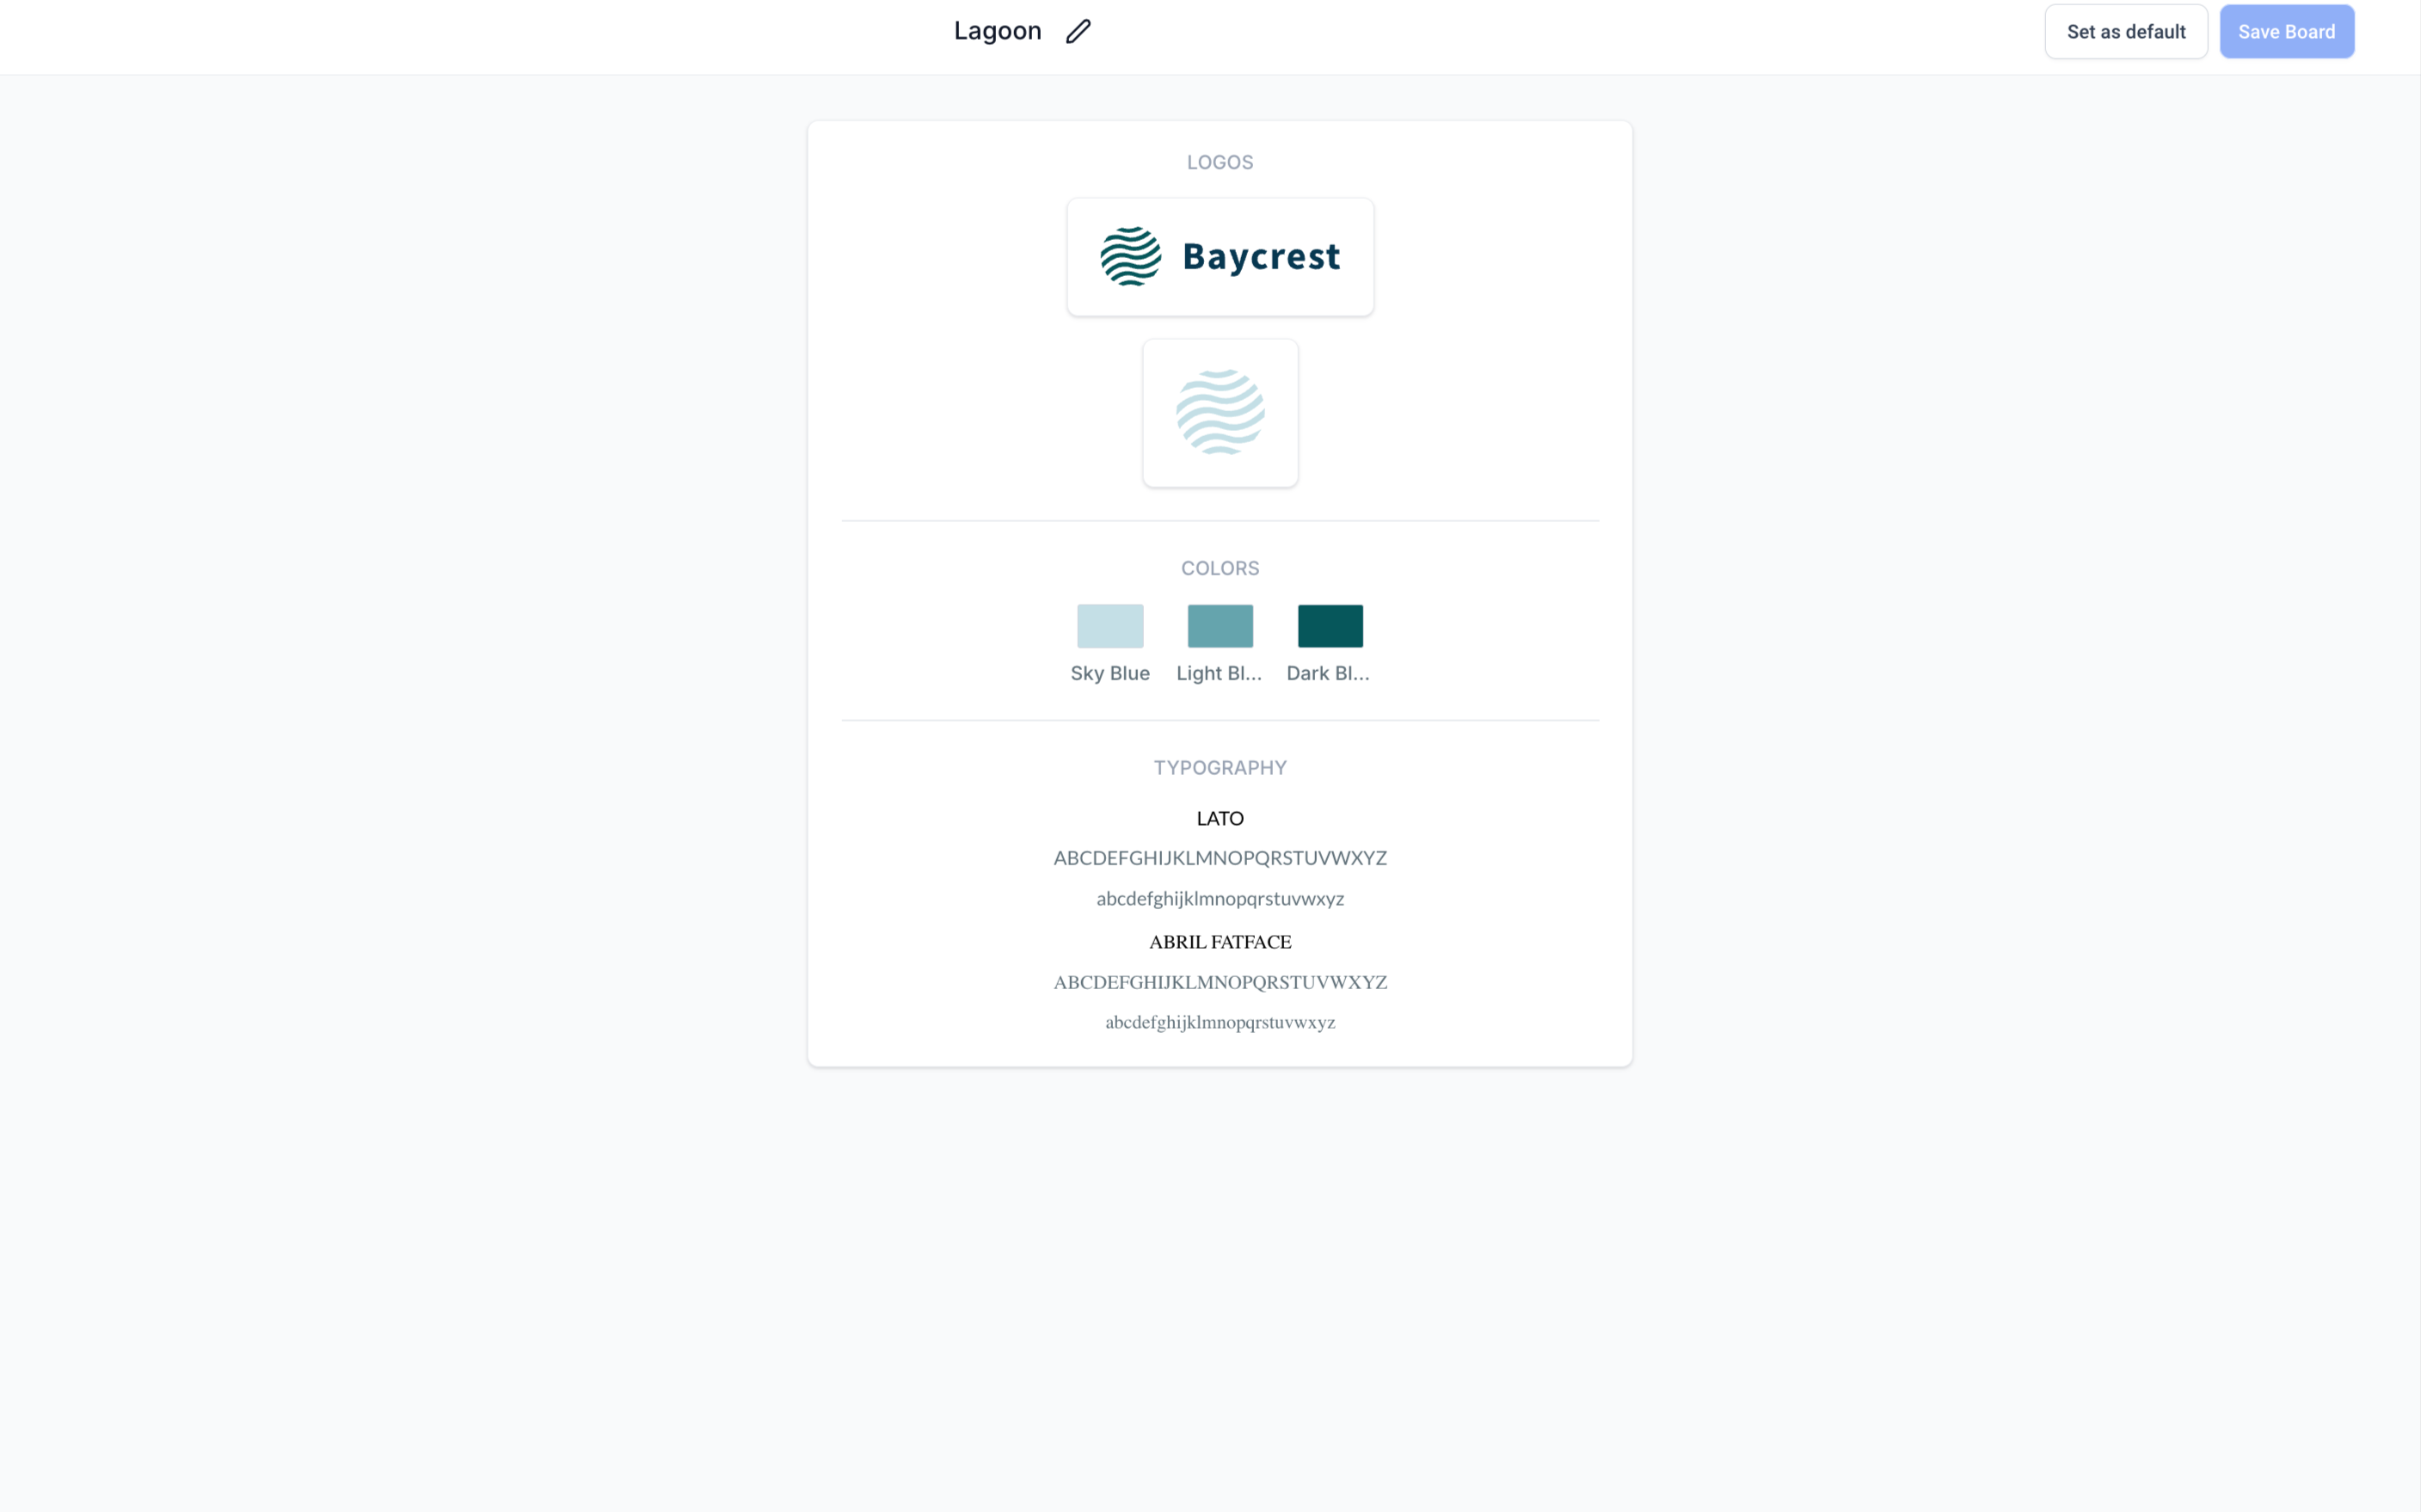
Click the Colors tab
Add your brand colors using the HEX or RGB color picker
Rename the colors for easy reference
You must include at least 2 colors and can add up to 10
Click the Typography tab
Add fonts using the dropdown fields
You can add between 1 and 5 fonts
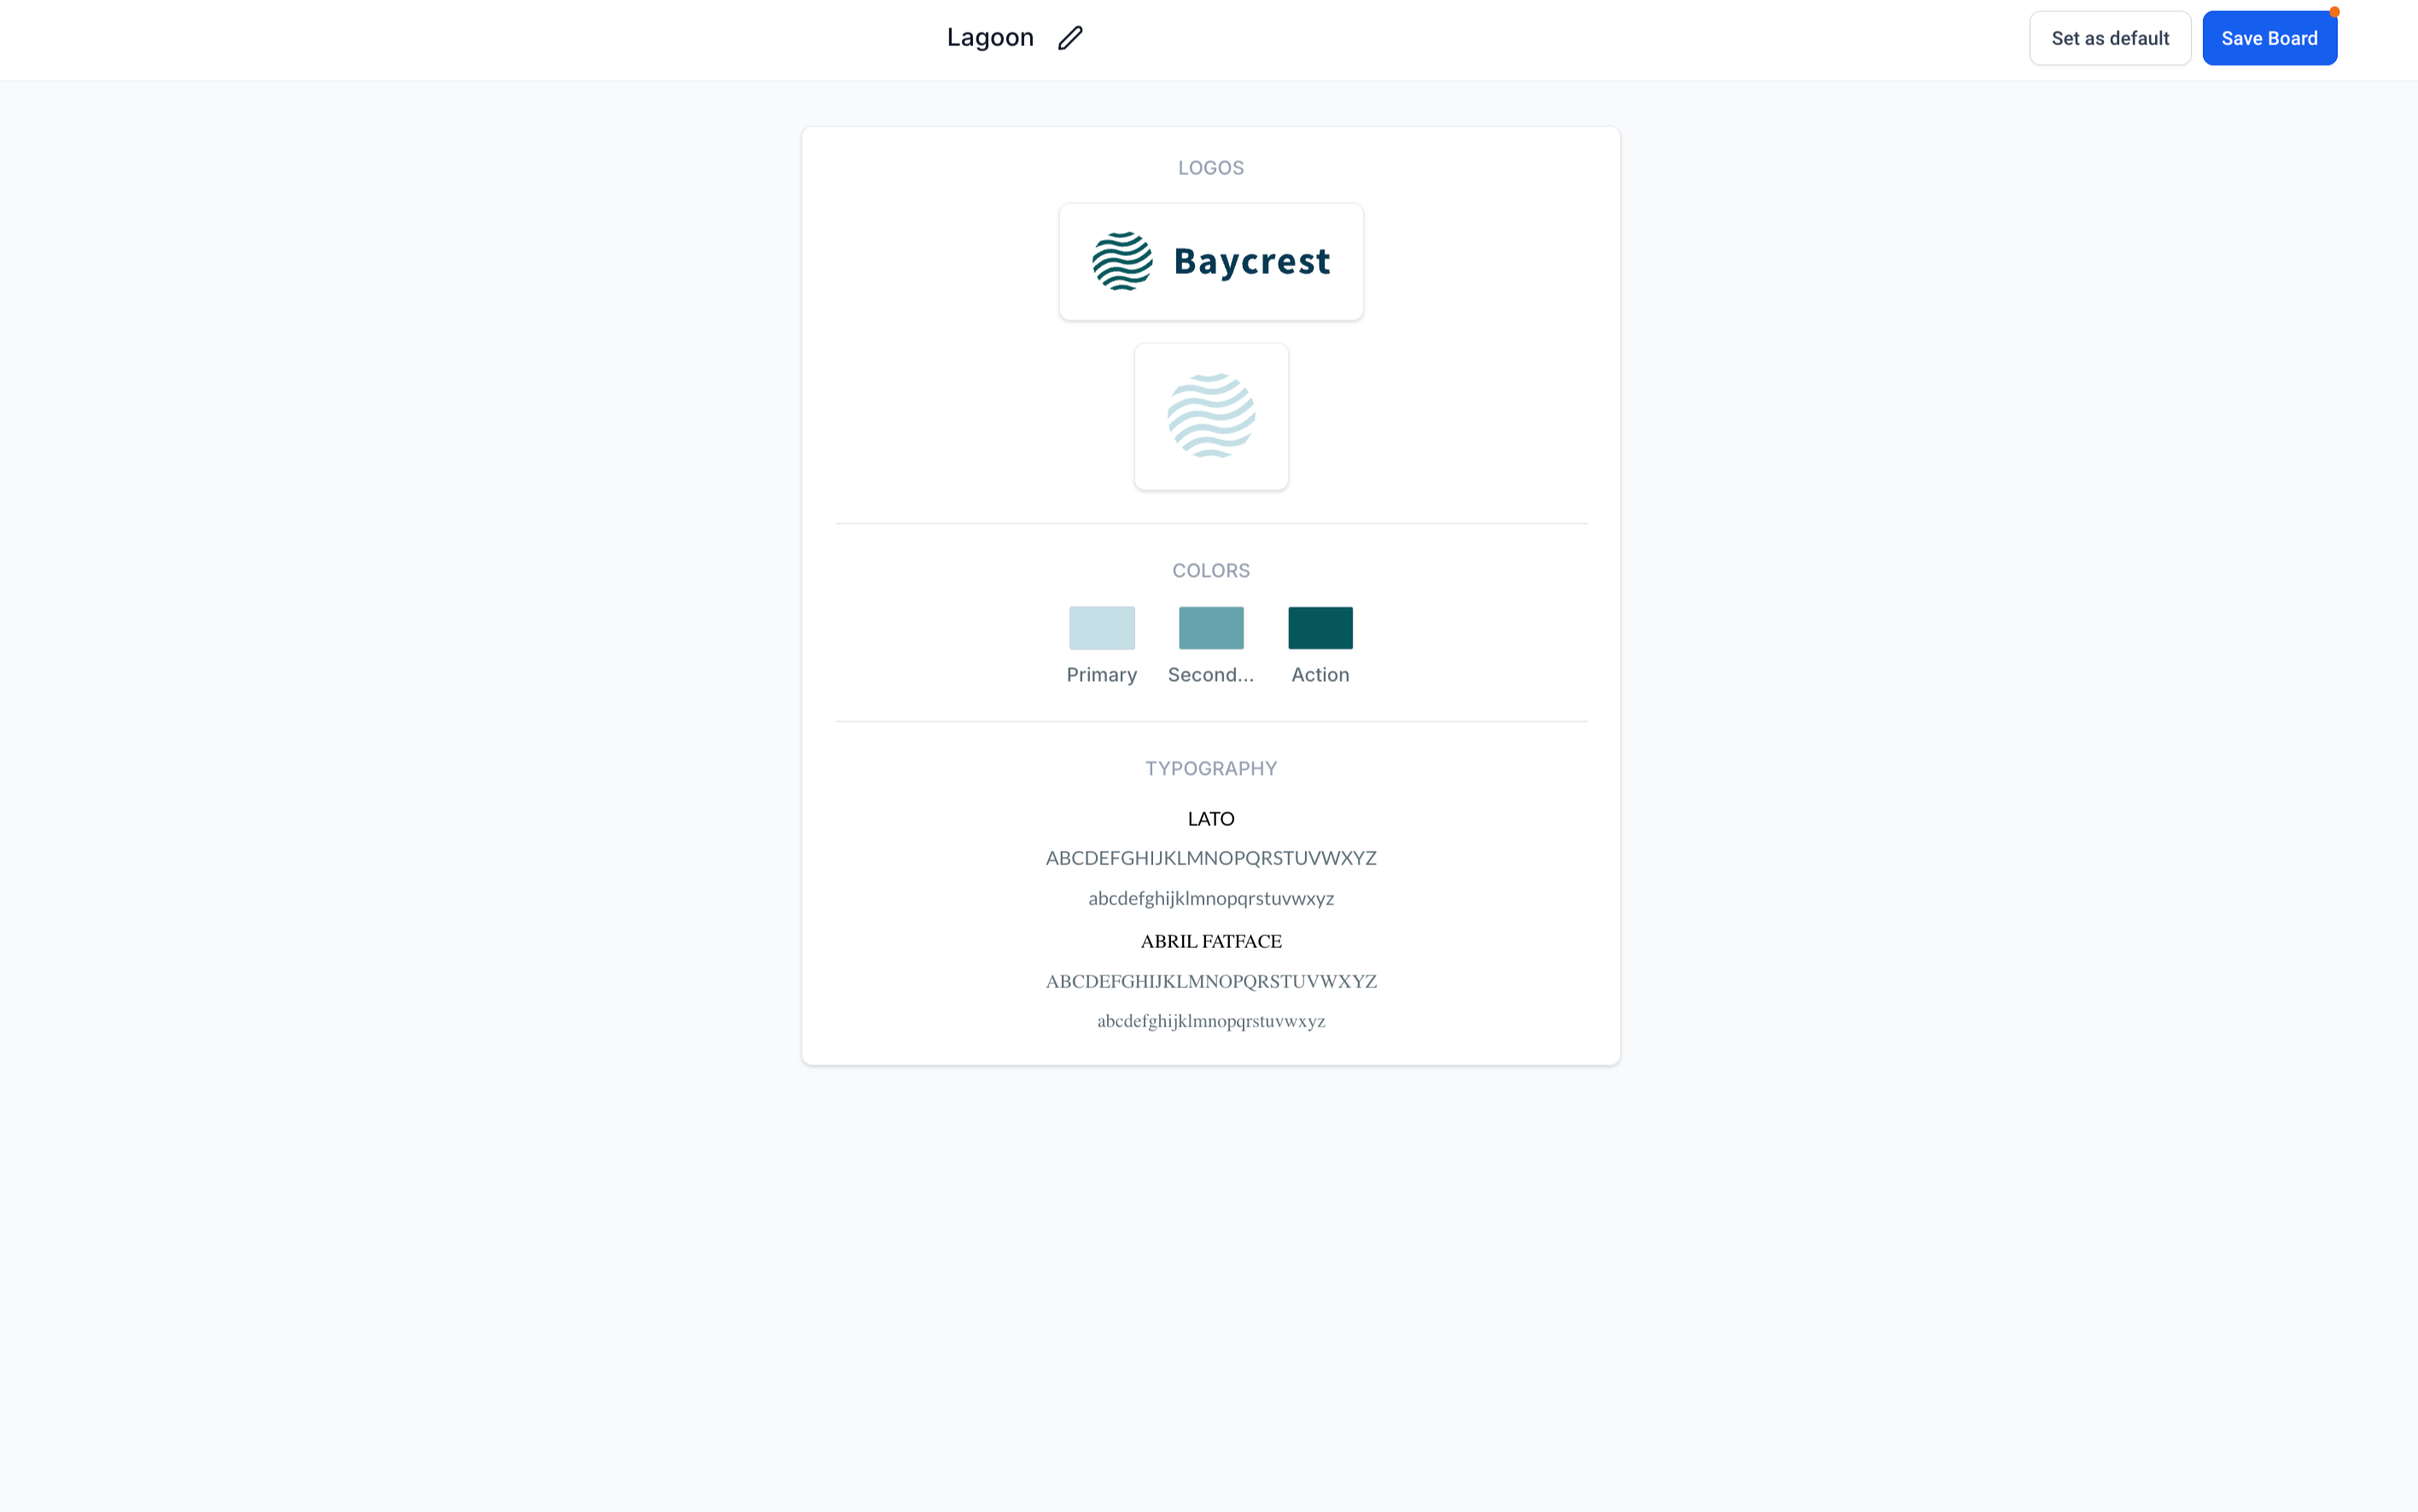
That's it. With your Brand Board ready, all your branding elements are neatly organized and easy to apply, making it effortless to maintain your practice's look and feel.
Note: Your uploaded logos are saved to a folder in your Media Library named after the Brand Board, giving you quick access. You can delete older logos from the Media Library if needed.
Marking one Brand Board as the Default tells the editors and pickers which branding to show first, speeding up design and reducing mistakes. The first Brand Board you create is automatically set as the default. Only one Brand Board can be the default at a time.
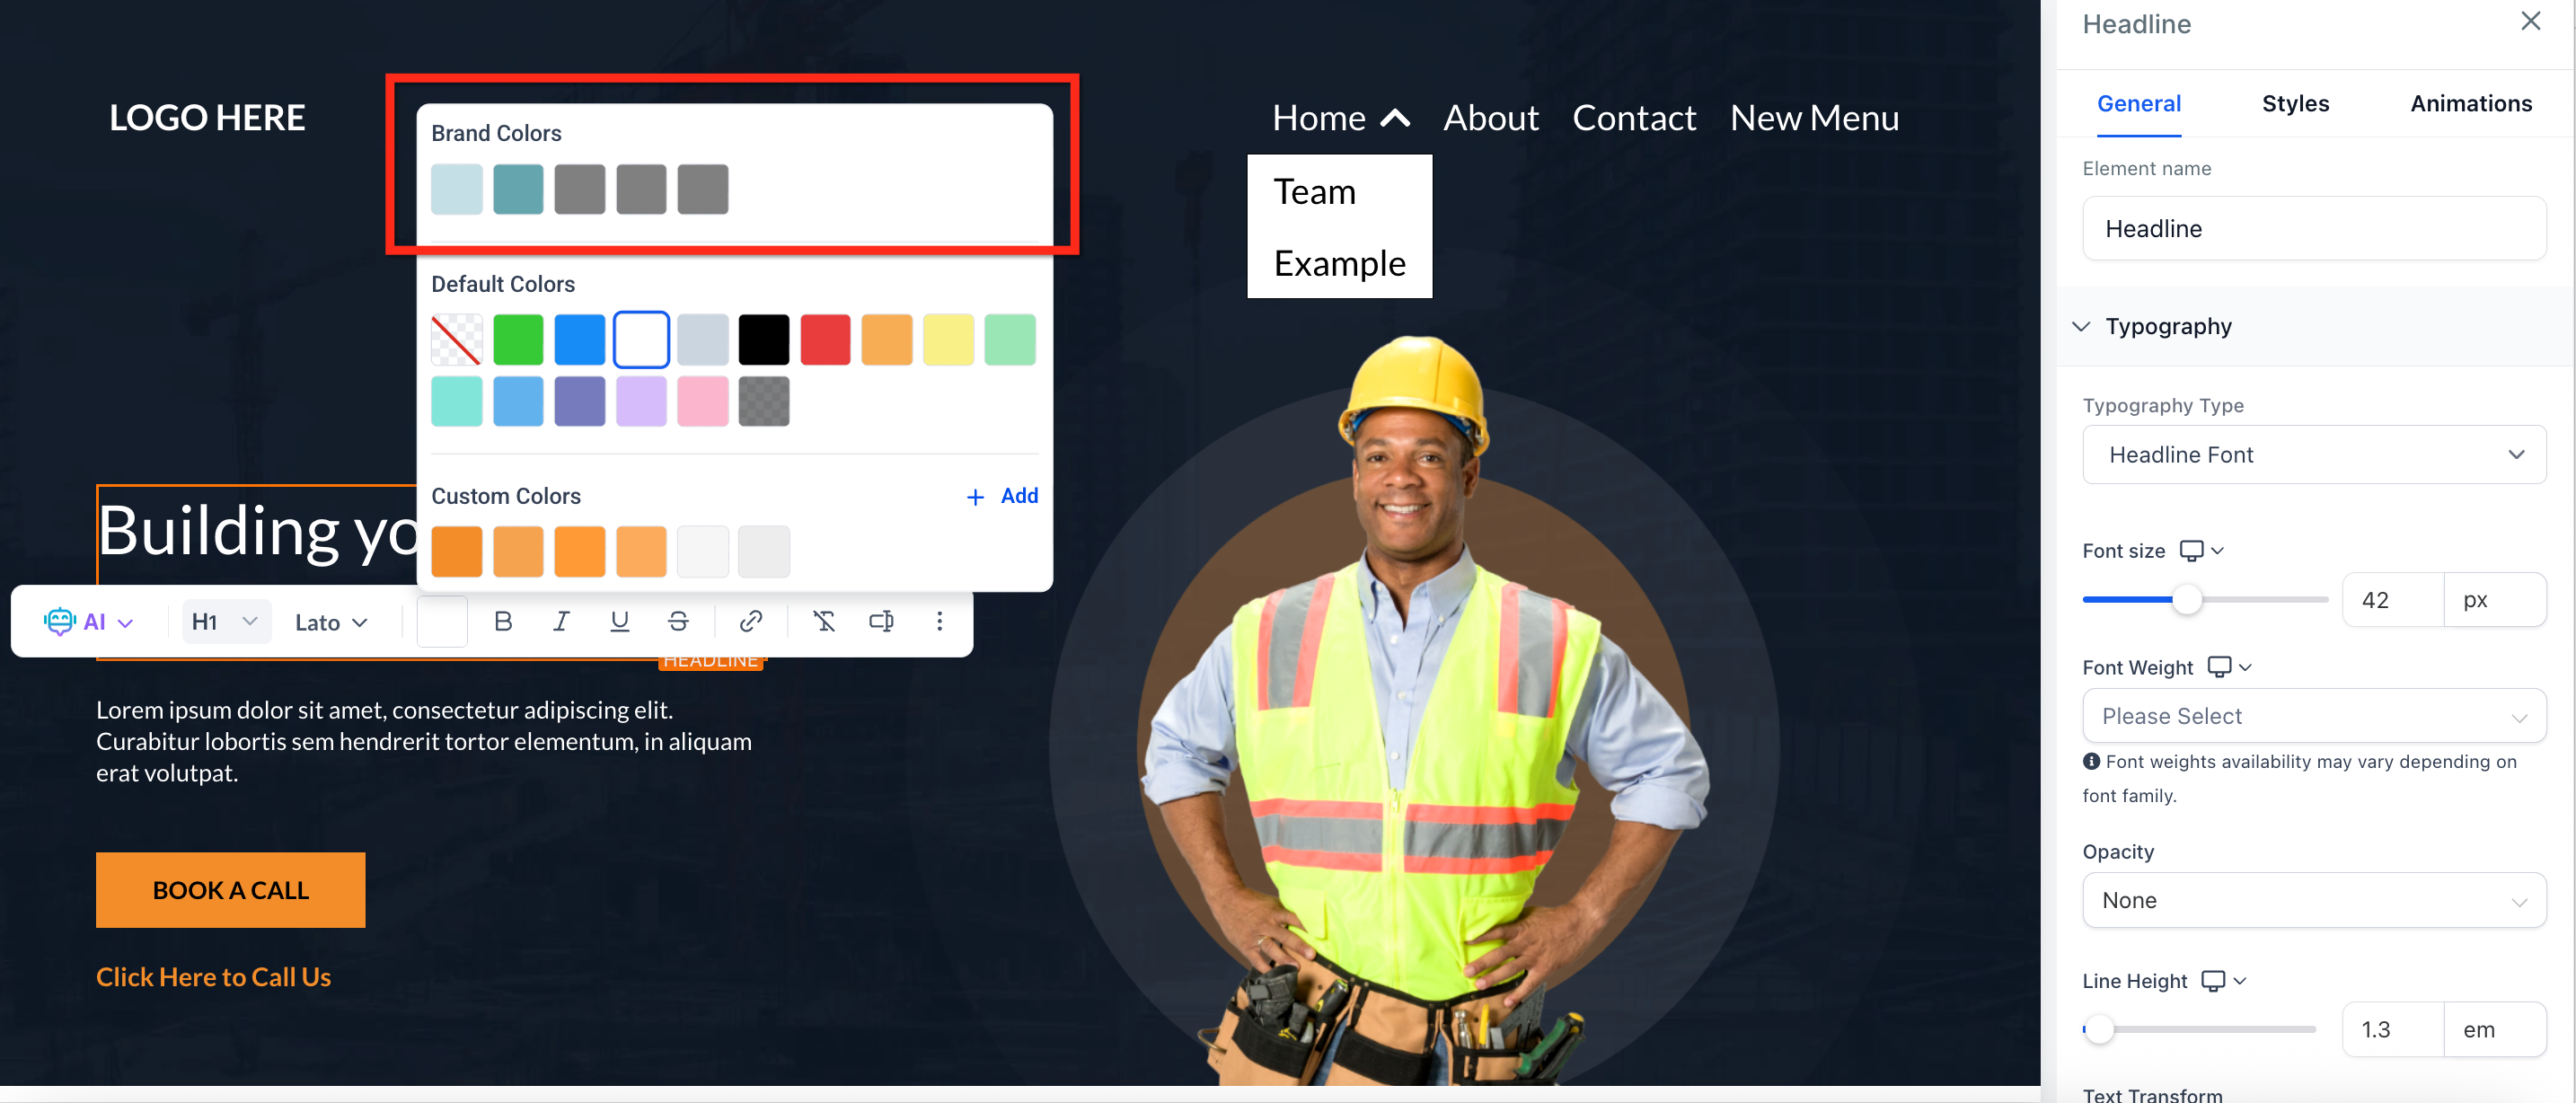
Below is an example of the default Brand Board colors displayed within the site editor, making it easy to keep your design aligned with your brand guidelines.
Updated guidelines: Change the default when there are significant updates to your branding, such as new colors or logos, so all materials align with your latest look.
Specific occasions: Switch the default for seasonal or event themes. In many cases it's more effective to create a separate themed board so you can easily switch back to your everyday default when the promotion ends.
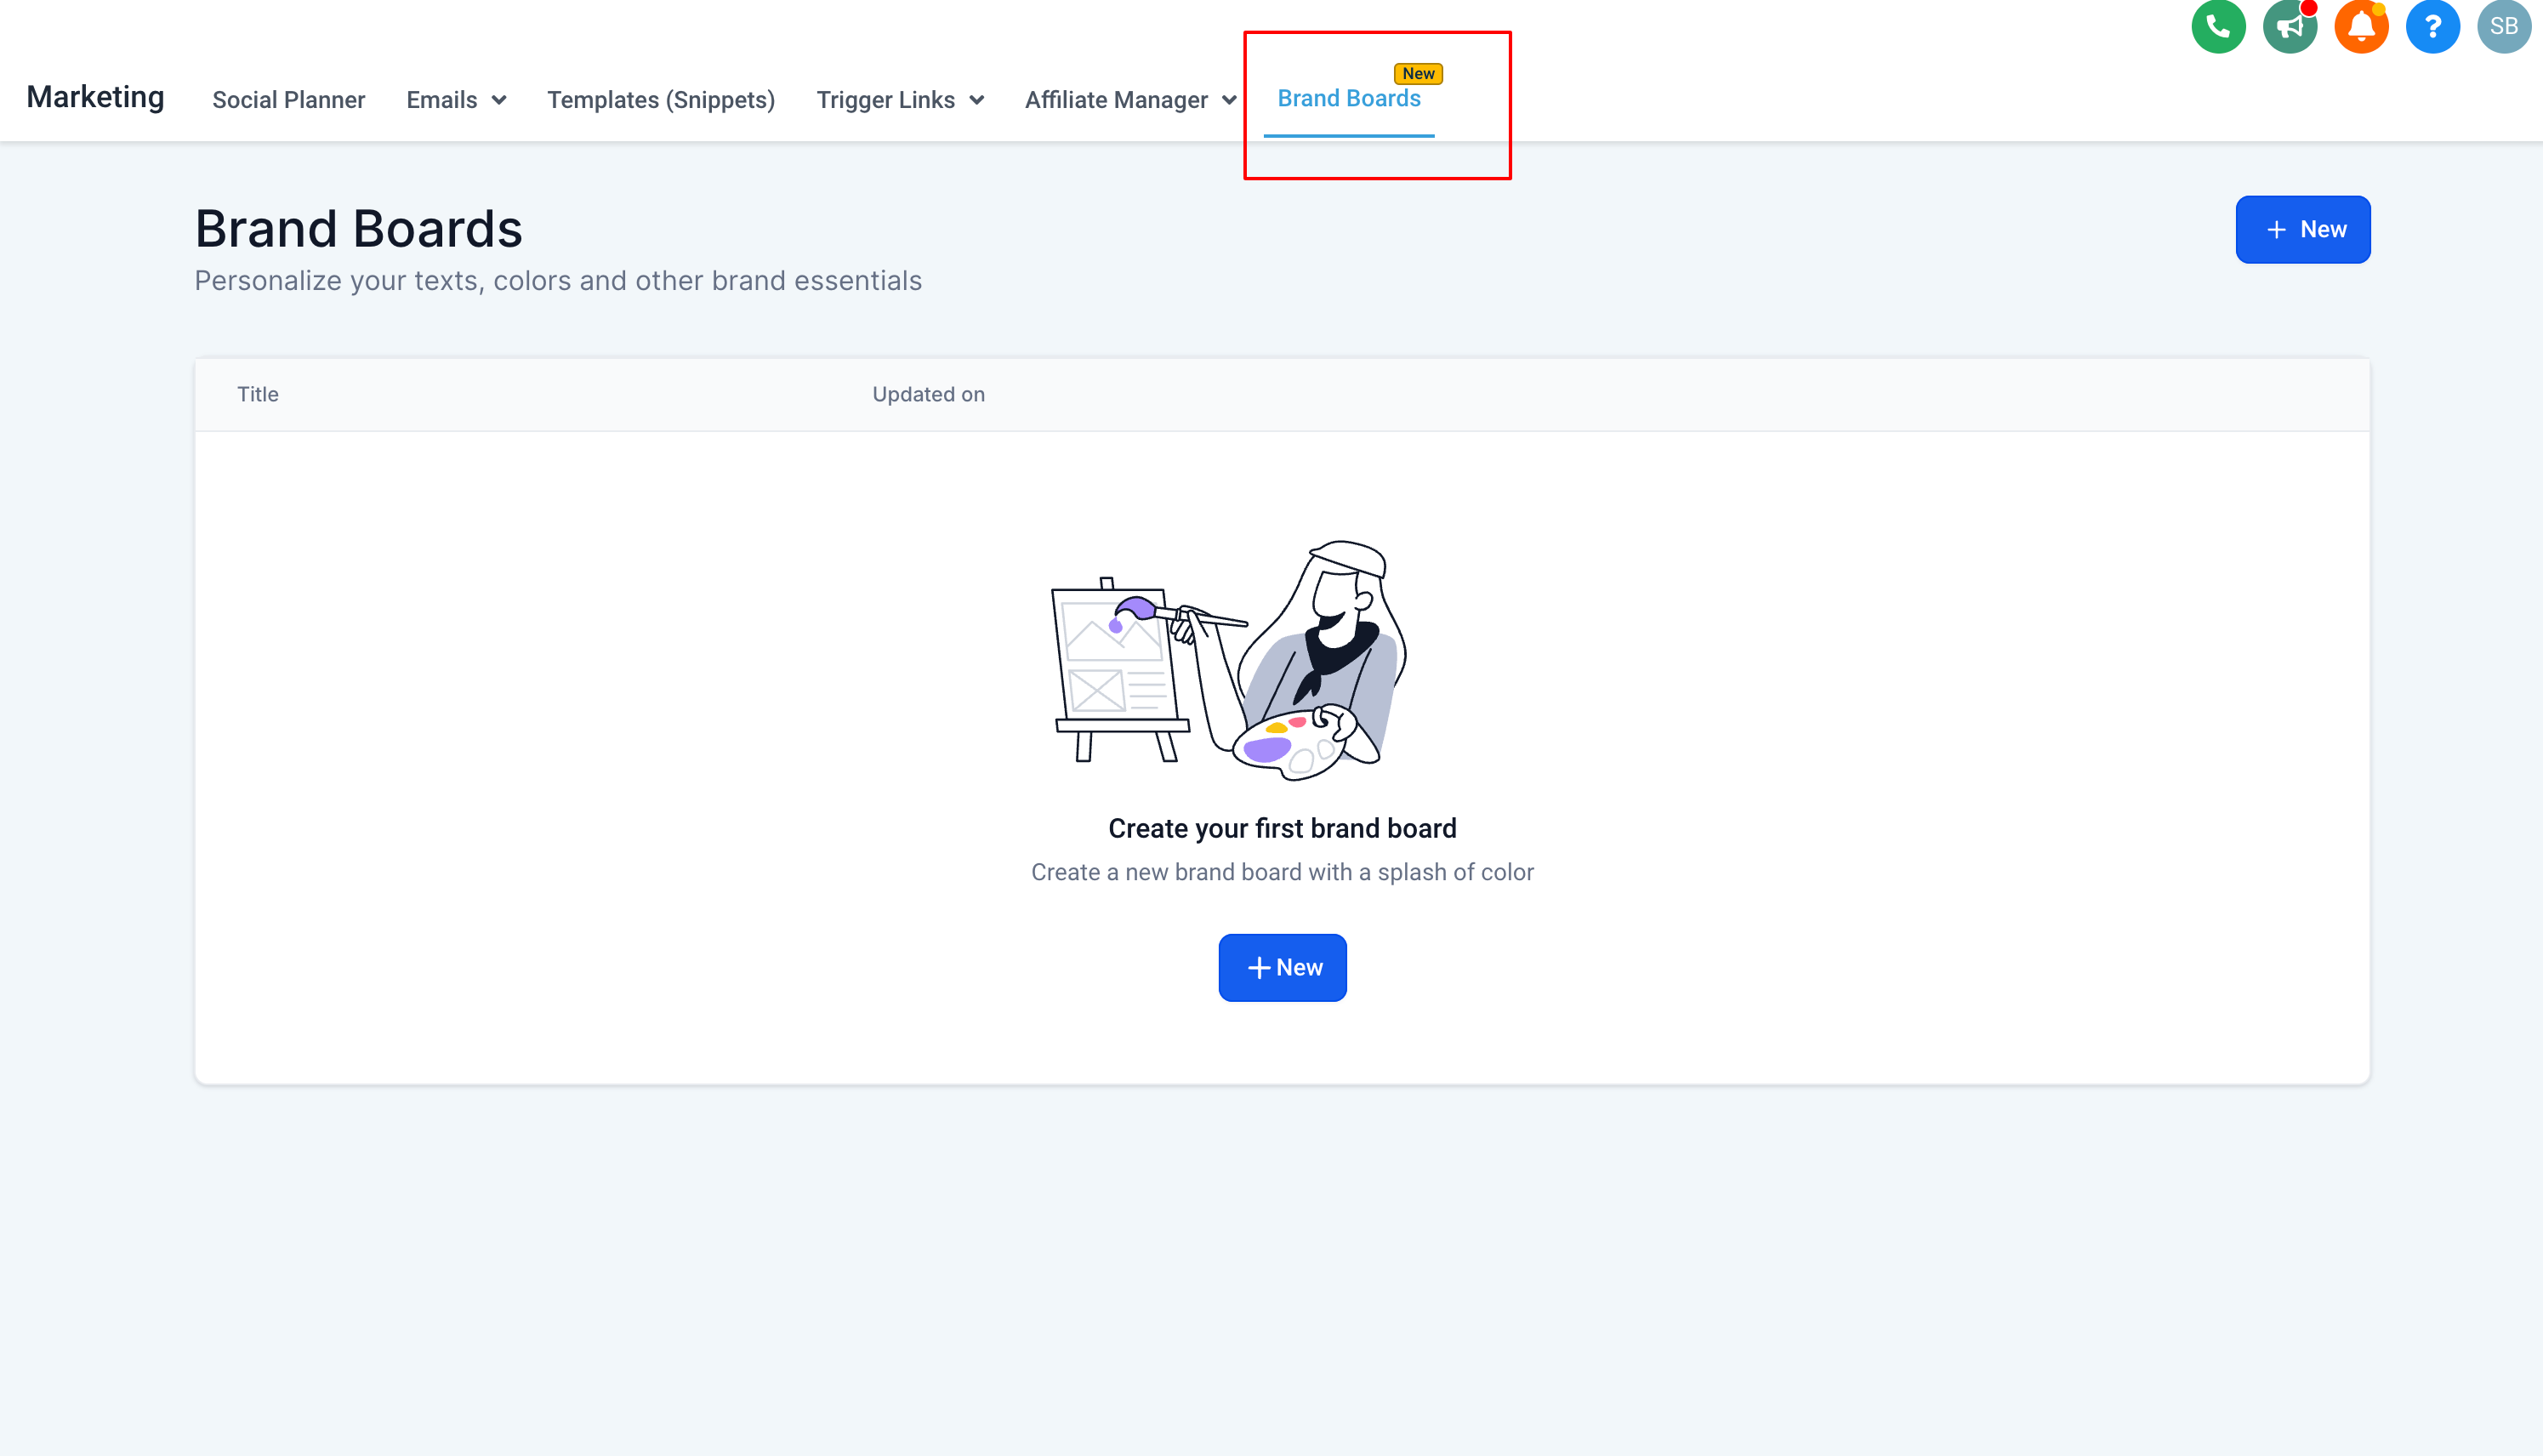
Go to Marketing in the main navigation bar
On the top navigation ribbon, select the Brand Boards tab
You can also access Brand Boards through Settings > Brand Boards
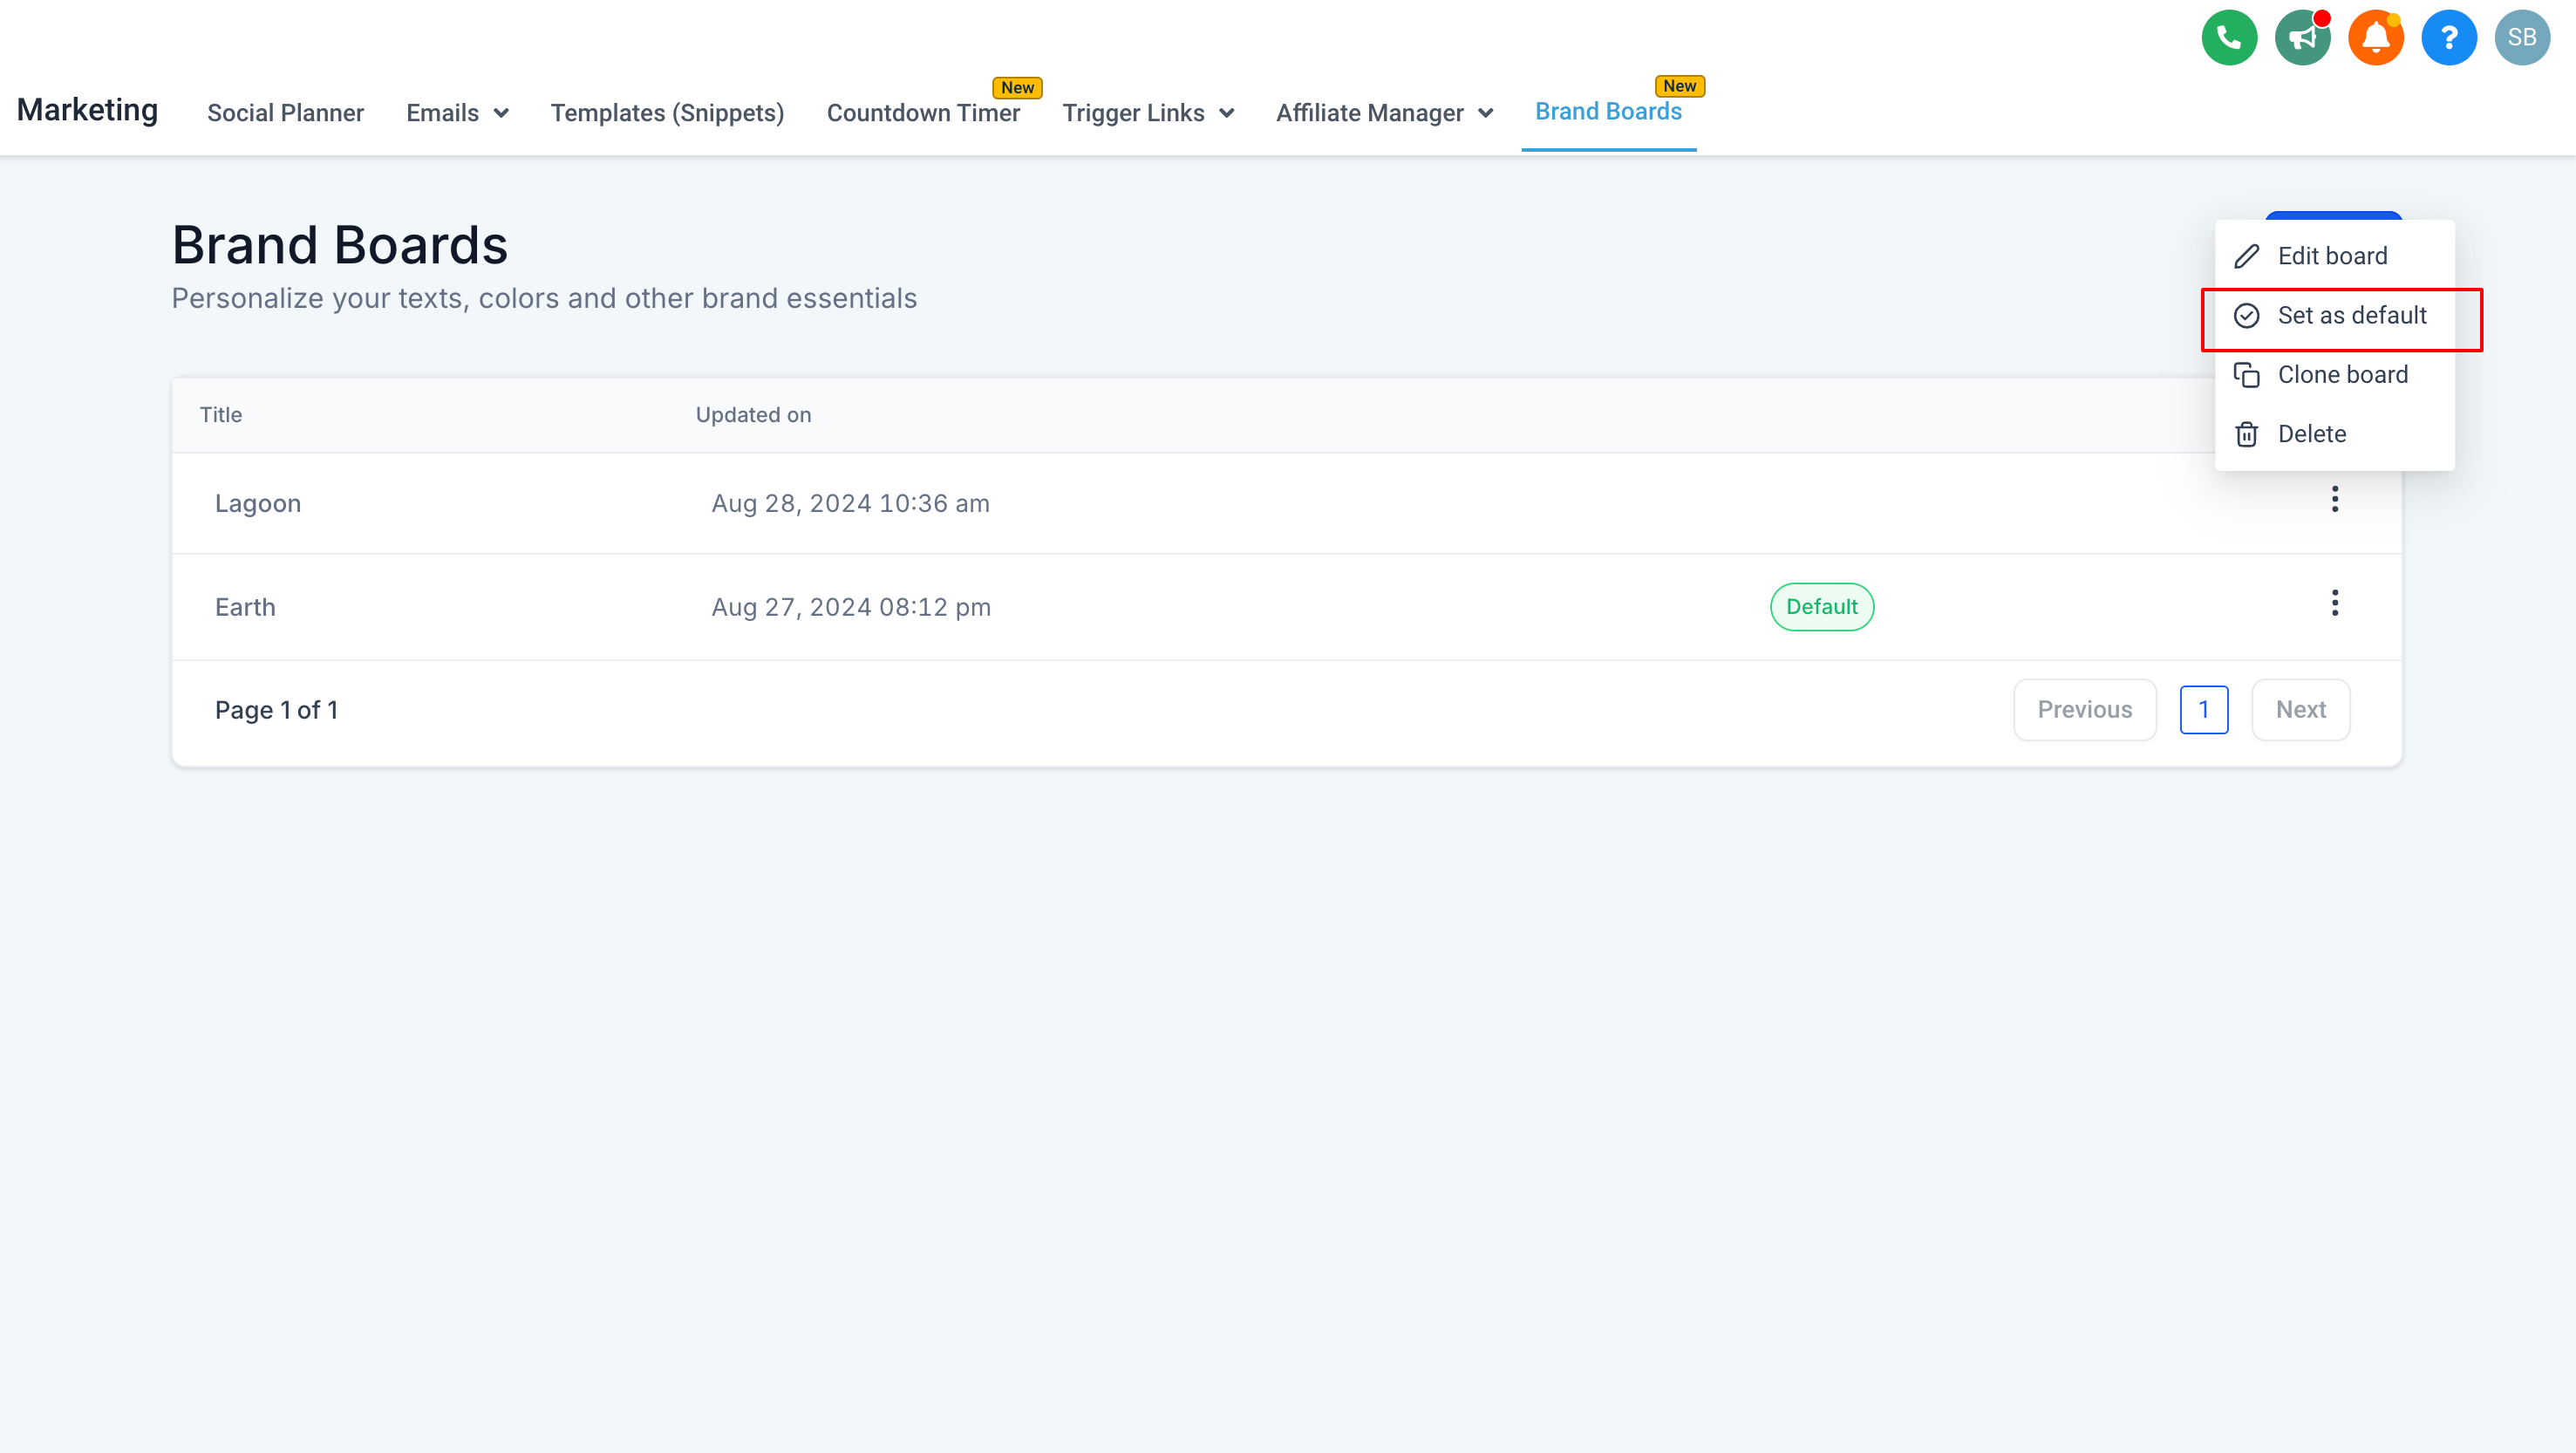
Find the Brand Board you want to set as default
Click the three dots icon next to it
Select Set as Default
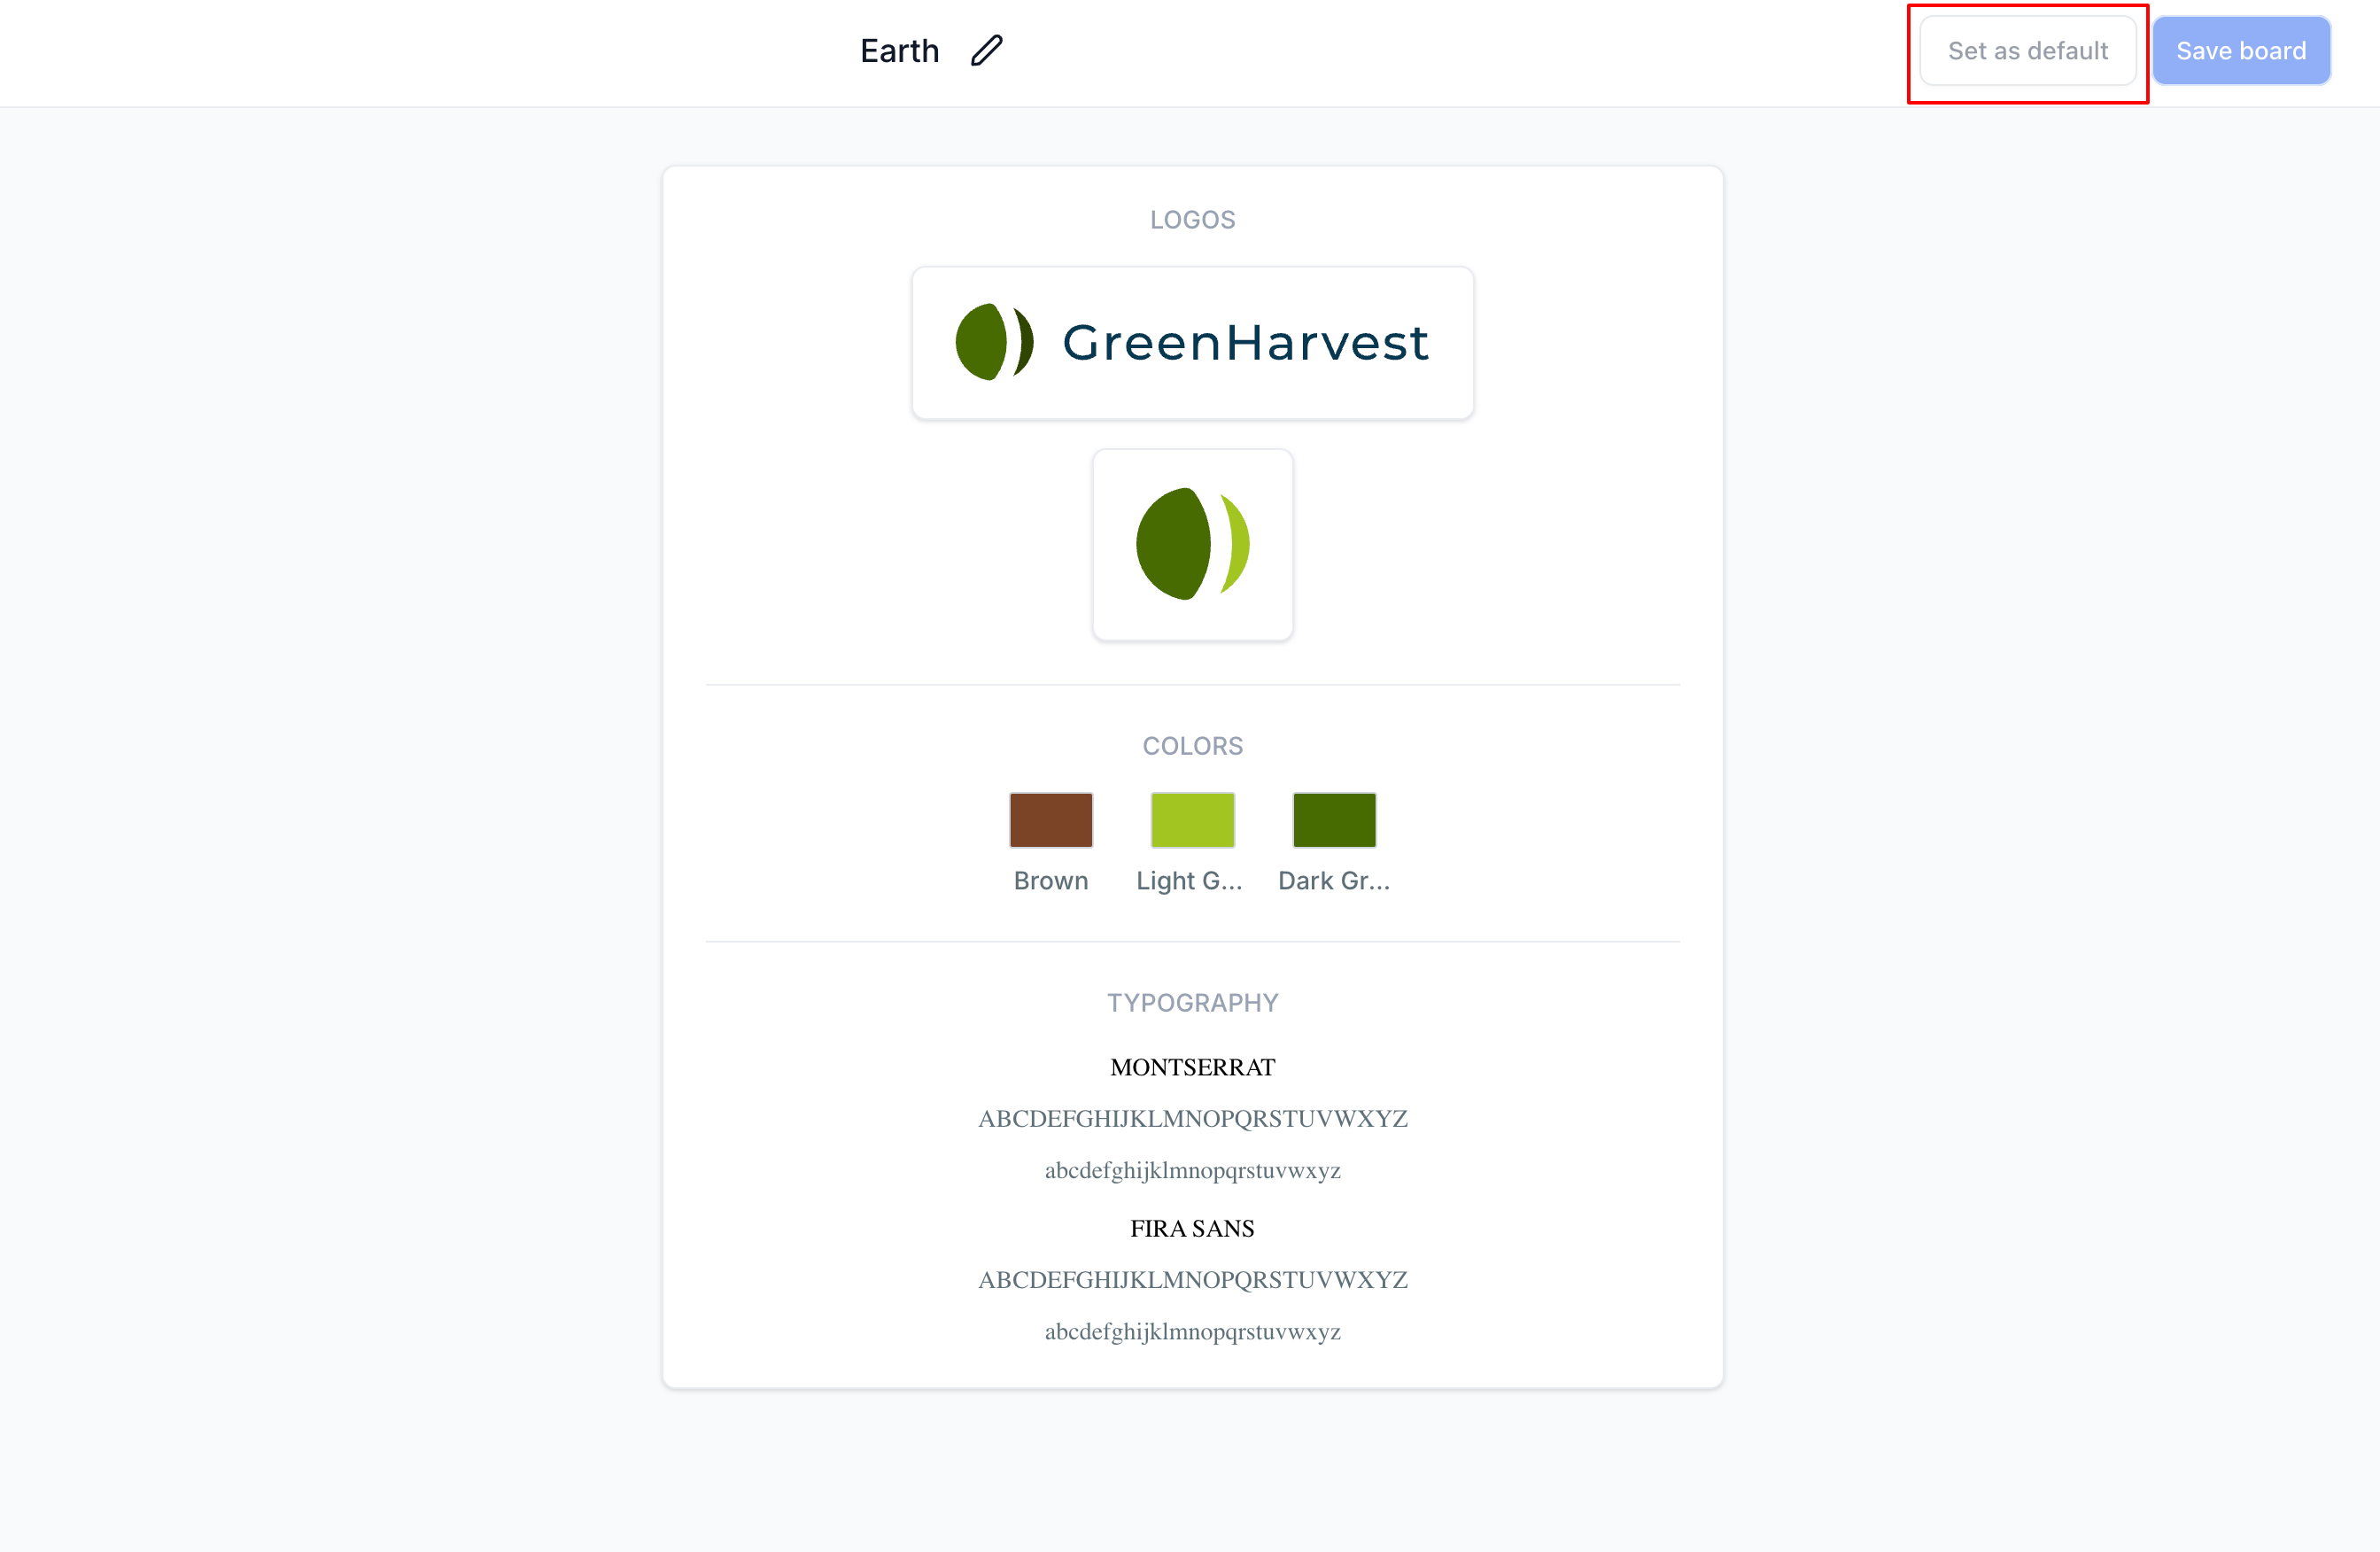
Alternatively, you can set the default while editing a Brand Board:
Click the desired Brand Board to open the editor
In the upper-right corner, click the Set as Default button
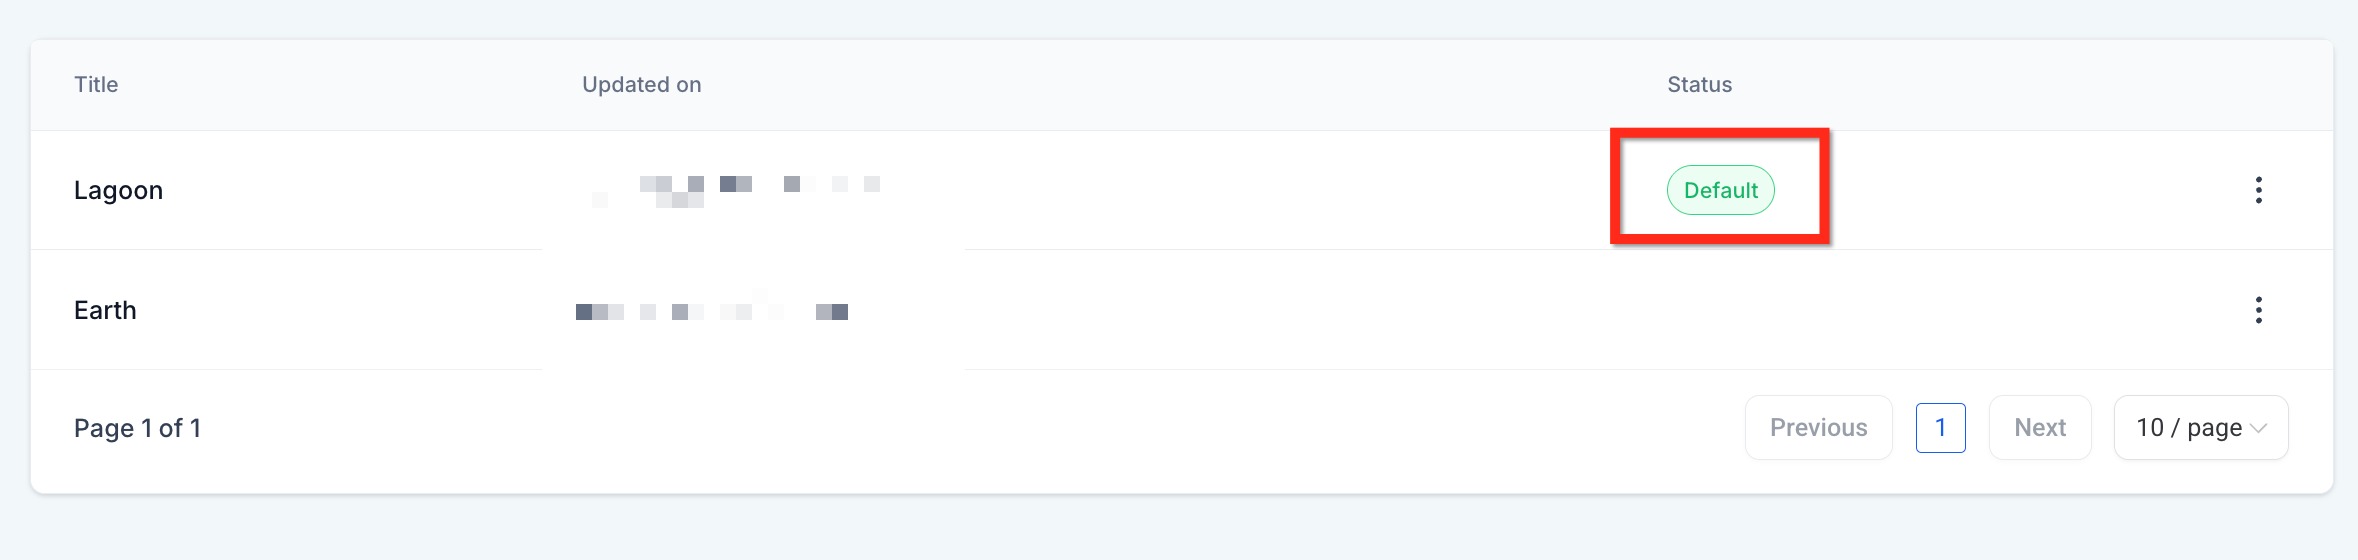
The Brand Board set as default will show Default as its status
You can also open an editor to confirm the selected brand colors appear
Once a Brand Board is created, its assets appear inside the funnel and website builder. This lets you apply the correct styles with one click, keeping your branding consistent across every site and funnel.
Brand consistency: Easily create or update sites that match your practice's brand
Save time: No more hunting for the right color or remembering HEX codes
Instant palette access: Your approved brand colors and fonts appear within the site builder, removing the need to copy HEX codes or refer to external branding guides
Centralized maintenance: Refresh your Brand Board once and the updated colors, fonts, and logos populate every picker in the builder
Note: You must have a Brand Board already created before you can use it in the funnel or website builder.
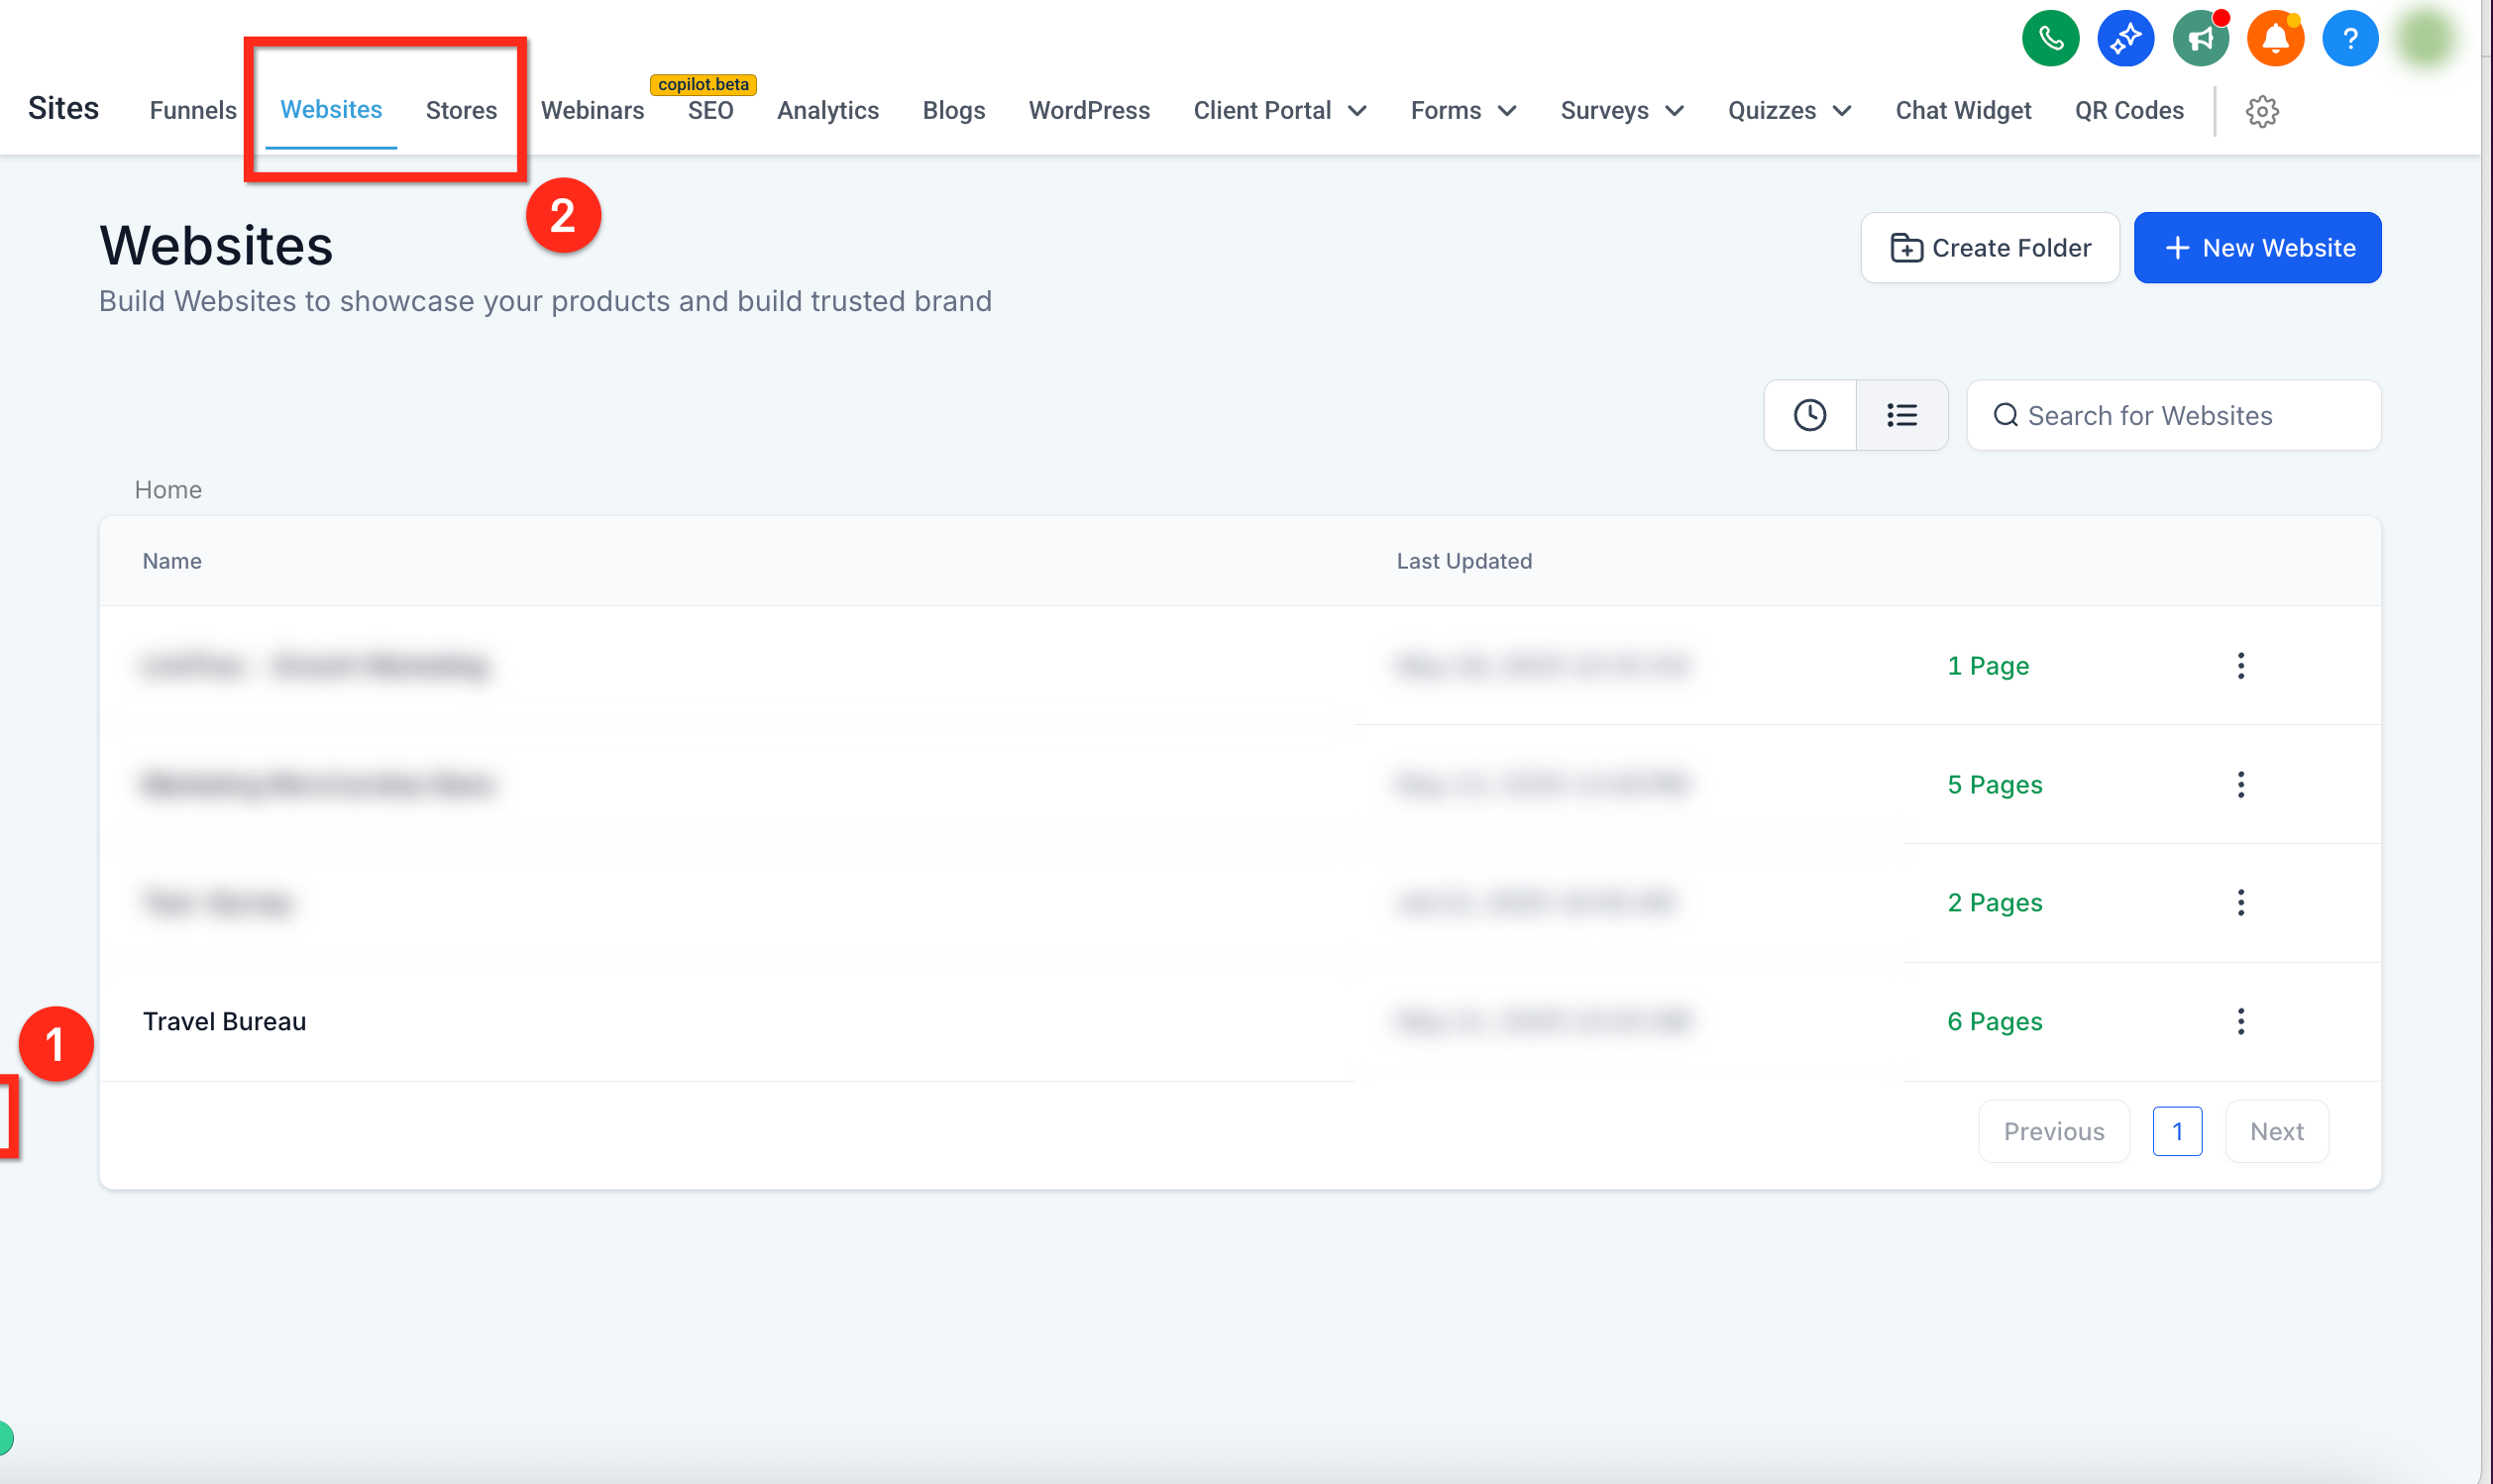
Select Web Tools from the main navigation bar
Using the top navigation ribbon, click either the Funnels or Websites tab
Select the site you'd like to edit, or click the blue + New Funnel / + New Website button to create one
Click the element you want to style
From the right sidebar, click a Color Swatch to open the color picker
For typography color, you can also open the color picker using the inline toolbar
At the top row of the color picker, the colors from your Brand Board appear
Click a color from the Brand Board to apply it
Note: Only the Brand Board set as Default appears in the color picker.
Global Custom Colors are a separate, centrally managed palette you set up under Brand Boards, distinct from the colors saved inside a Design Kit. The key difference is sync behavior: Design Kit colors are static and only affect the picker for future edits, while Global Custom Colors are two-way synced, so updating a saved Global Custom Color automatically updates every design that already uses that swatch. Once you add at least one Global Custom Color, that palette shows up in the color picker in emails, funnels, forms, and pages, regardless of which Brand Board is set as default.
Design Kit colors live inside a Brand Board and are quick-access only. Updating a Design Kit color does not change designs you've already built.
Global Custom Colors live under Global Settings and sync everywhere they're applied. Update the color once and every design using that swatch updates automatically.
Both palettes can appear in the color picker at the same time. Use functional names for your Global Custom Colors (Primary, Secondary, Accent) so your team always knows which swatch to use, and plan larger rebrands carefully since a Global Custom Color change propagates immediately to every design using it.
Step 1: Go to Marketing > Brand Boards > Global Settings.
Step 2: Click + Add, then Add New.
Step 3: Enter a Name (for example, Primary, Accent, or Background) and a HEX or RGB value, or select a color from the color picker.
Step 4: Click Save.
You can edit, rename, or delete an existing Global Custom Color from the same Global Settings screen at any time. Deleting a color removes it from the pickers, and designs that used it may update to reflect the removal depending on how the builder stores that swatch, so review where a color is in use before deleting it.
If you already have brand colors saved as Custom Values, you can bring them into Global Settings instead of re-entering them.
Step 1: From Global Settings, click New, then choose Import.
Step 2: Select the colors you want to import and proceed.
Importing creates a copy of the color under Global Custom Colors; it does not link back to or move the original Custom Value.
Once you've added at least one Global Custom Color, it appears automatically in the color picker across emails, funnels, forms, timers, and pages, no matter which Brand Board is set as default. Click Manage inside the color picker to add or edit Global Custom Colors on the fly without leaving the builder.
Will changing the colors in a Brand Board retroactively change colors in existing emails, funnels, or websites?
No. Updating a Brand Board does not retroactively change previously created emails, funnels, or website pages. The Brand Board's colors are used for quick access and only influence the color picker for future edits. Existing designs remain unchanged until you manually edit them.
How do I make a Brand Board the default for new projects?
Go to Marketing > Brand Boards, click the three-dot menu next to the board you'd like to use, and select Set as Default. This applies the selected Brand Board to new funnels, websites, and emails by default.
Why aren't my Brand Board colors showing up in the color picker?
Brand Board colors only appear in the builder if a Brand Board is actively selected. Go to the Design tab and make sure a Brand Board is applied. Remember that only the default board appears in the picker.
Will changing a Global Custom Color update my existing designs?
Yes. Global Custom Colors are two-way synced, so any change you make reflects instantly across every email, funnel, form, or page where that color is already applied. This is different from a Brand Board's Design Kit colors, which only affect future edits.
Why don't I see Global Custom Colors in the color picker?
The Global Custom Colors section only appears in the picker after you've added at least one color under Marketing > Brand Boards > Global Settings.
Can I import my existing Custom Value colors into Global Custom Colors?
Yes. From Global Settings, click New, then Import, and select the colors to bring in. This creates a copy of each color; it does not move or link back to the original Custom Value.
Can I have multiple Brand Boards?
Yes. Create as many as you like, but only one can be set as the default at a time.
Can I edit my Brand Board later?
Yes. Click the three-dot menu next to the Brand Board and select Edit.
Can I delete a Brand Board?
Yes. Use the three-dot menu and choose Delete. Be cautious, as this cannot be undone. Any styles or colors already used in existing pages remain, but the board will disappear from the pickers.
What are the limits for colors, logos, and fonts in a Design Kit?
You can add up to 5 fonts, 10 colors, and 2 logos in a single Brand Board.
What gets imported from a website URL?
The website URL import detects visual brand elements such as logos, colors, and typography from the page you provide and uses them to generate a Brand Board.
Where will I see the logos I added?
You'll find a folder in your Media Library named after the Brand Board for quick access. You can also delete older logos from the Media Library if needed.
