Motion and interactivity help guide attention and make your pages feel polished. In the Page Builder, you can apply and fine-tune entrance animations for any element, then layer in interactive behaviors like showing or hiding elements when a button is clicked. Both work without custom code or third-party tools, so you can build smooth, eye-catching experiences directly in the editor.
Animation Customizations let you control how individual elements animate across your funnels and websites. A dedicated adjustment panel lets you apply and fine-tune effects such as scale, duration, delay, and easing, all with a real-time preview. The controls are organized into clearly labeled sections, so you can shape how elements enter or move on the page without leaving the editor.
You can modify animations with precision:
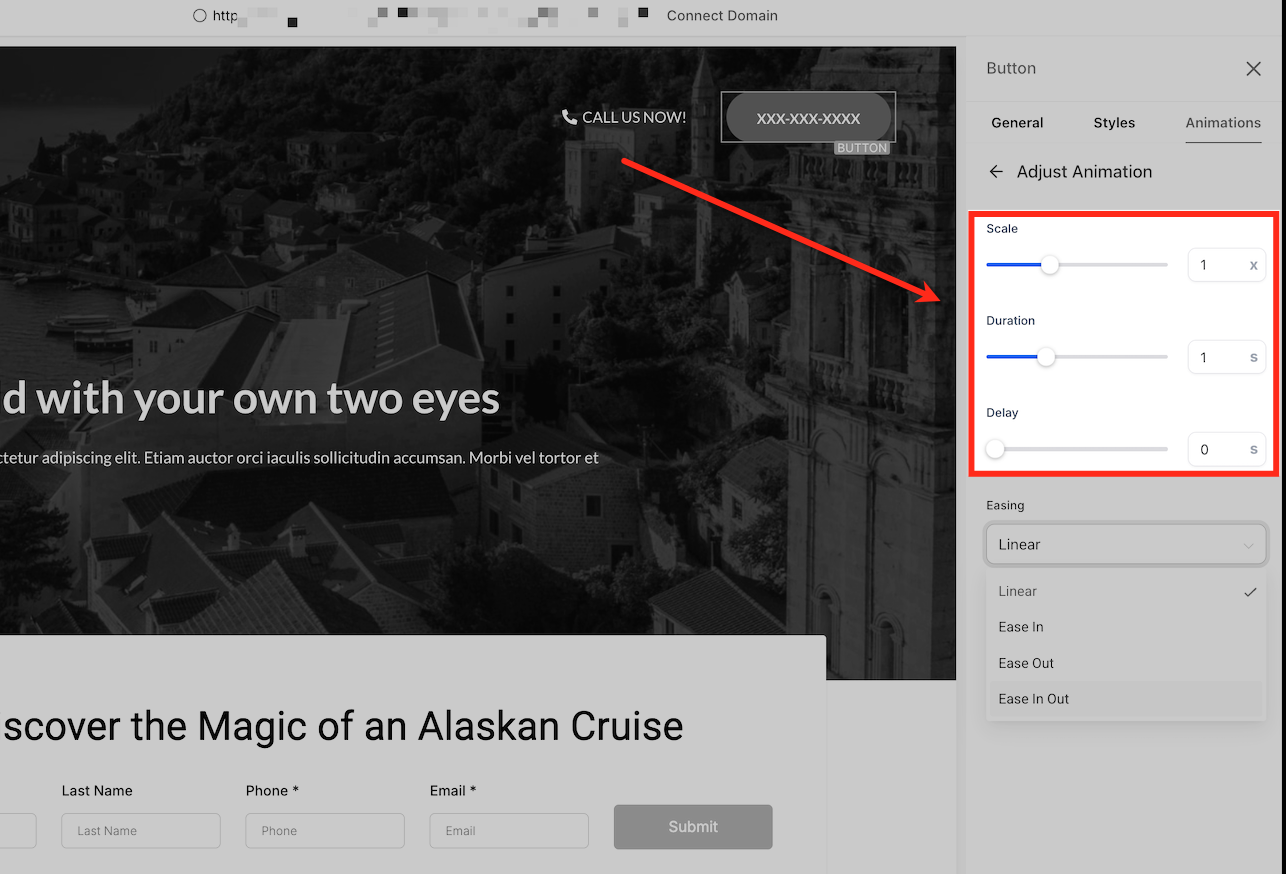
Scale: from 0.5x to 2x for subtle to dramatic effects
Duration: from 0.1 to 3 seconds to set pacing
Delay: up to 5 seconds for staggered sequences
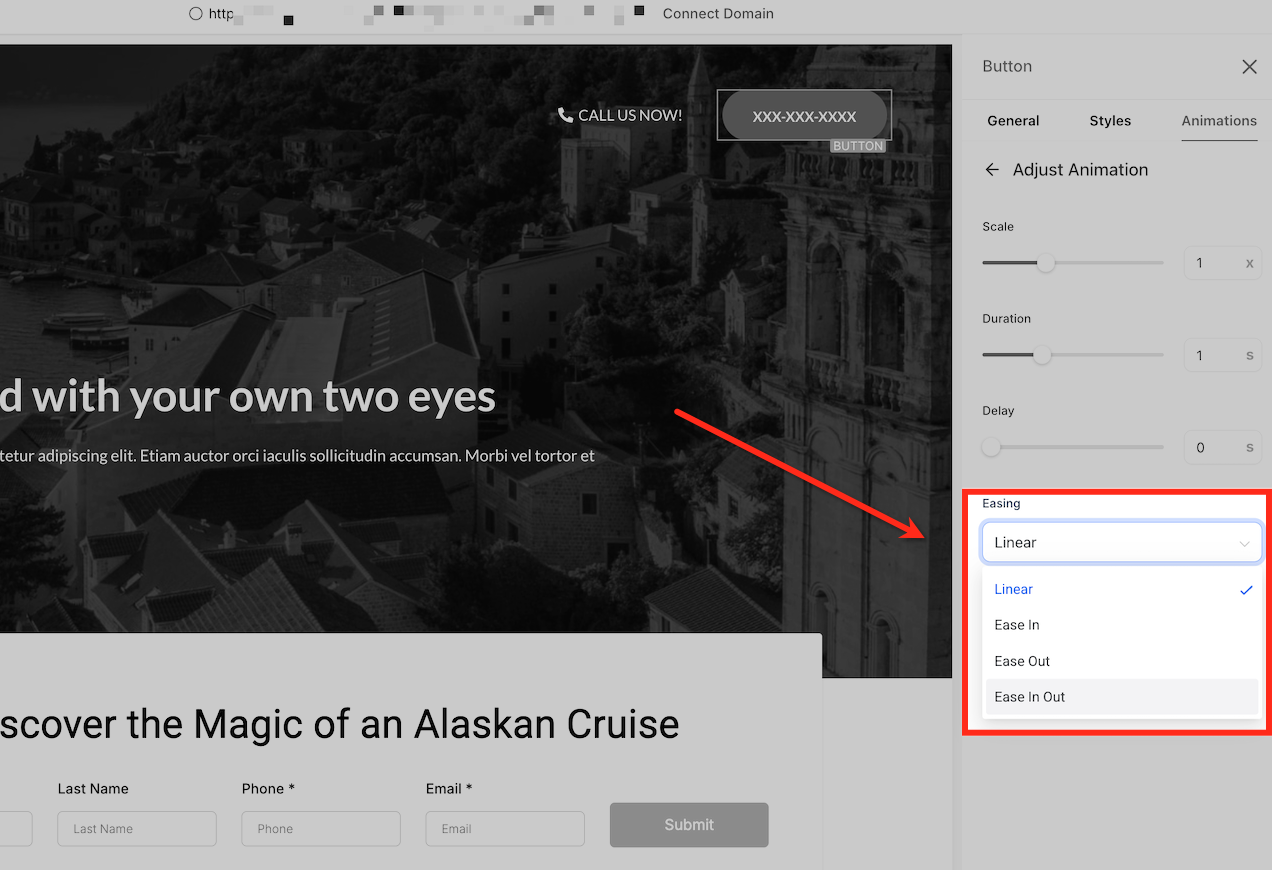
Easing: choose from Linear, Ease In, Ease Out, and Ease In Out for smooth transitions
Granular control: Tailor how each animation behaves by adjusting scale, duration, delay, and easing with exact values.
Real-time preview: See your adjustments immediately, so you can fine-tune motion without guesswork.
Organized layout: All controls are housed in a clean, intuitive panel that streamlines the editing process.
Professional polish: Customizing how elements animate helps you guide attention, reinforce your brand, and build more dynamic interactions.
Note: Animation delays are honored accurately. Elements stay fully hidden during the configured delay period and only become visible once the animation begins, which keeps staggered sequences smooth and visually consistent. No extra configuration is needed; existing animation delay settings follow this behavior automatically.
You can apply and customize animations for any element in just a few steps.
Open the Funnels section
From the left sidebar, click Web Tools, then select the Funnels tab at the top of the screen. This opens the list of all funnel projects in your account.
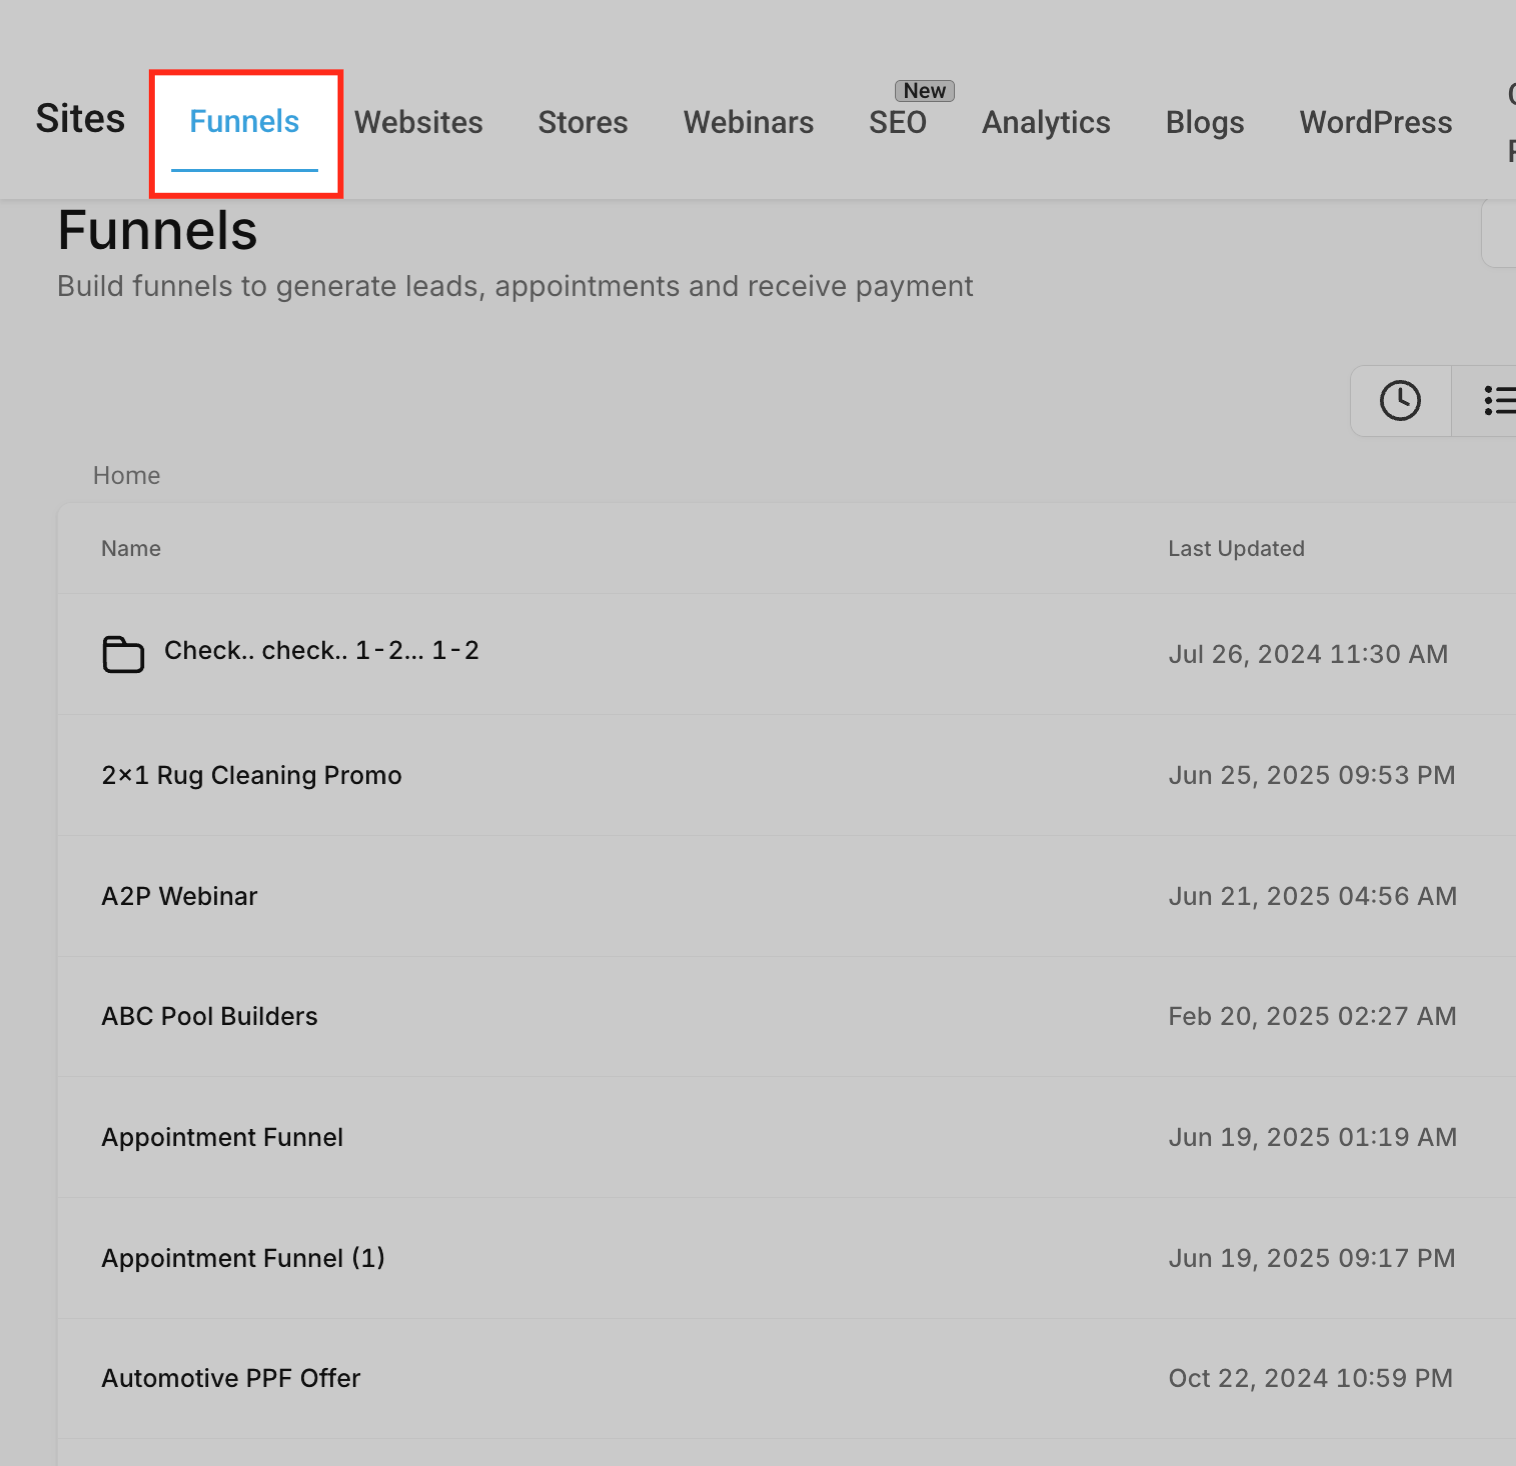
Choose or create a funnel
Use the Search for Funnels bar to open an existing funnel, or click + New Funnel to create one. This takes you to the Funnel Steps screen, where you can manage and edit each step.
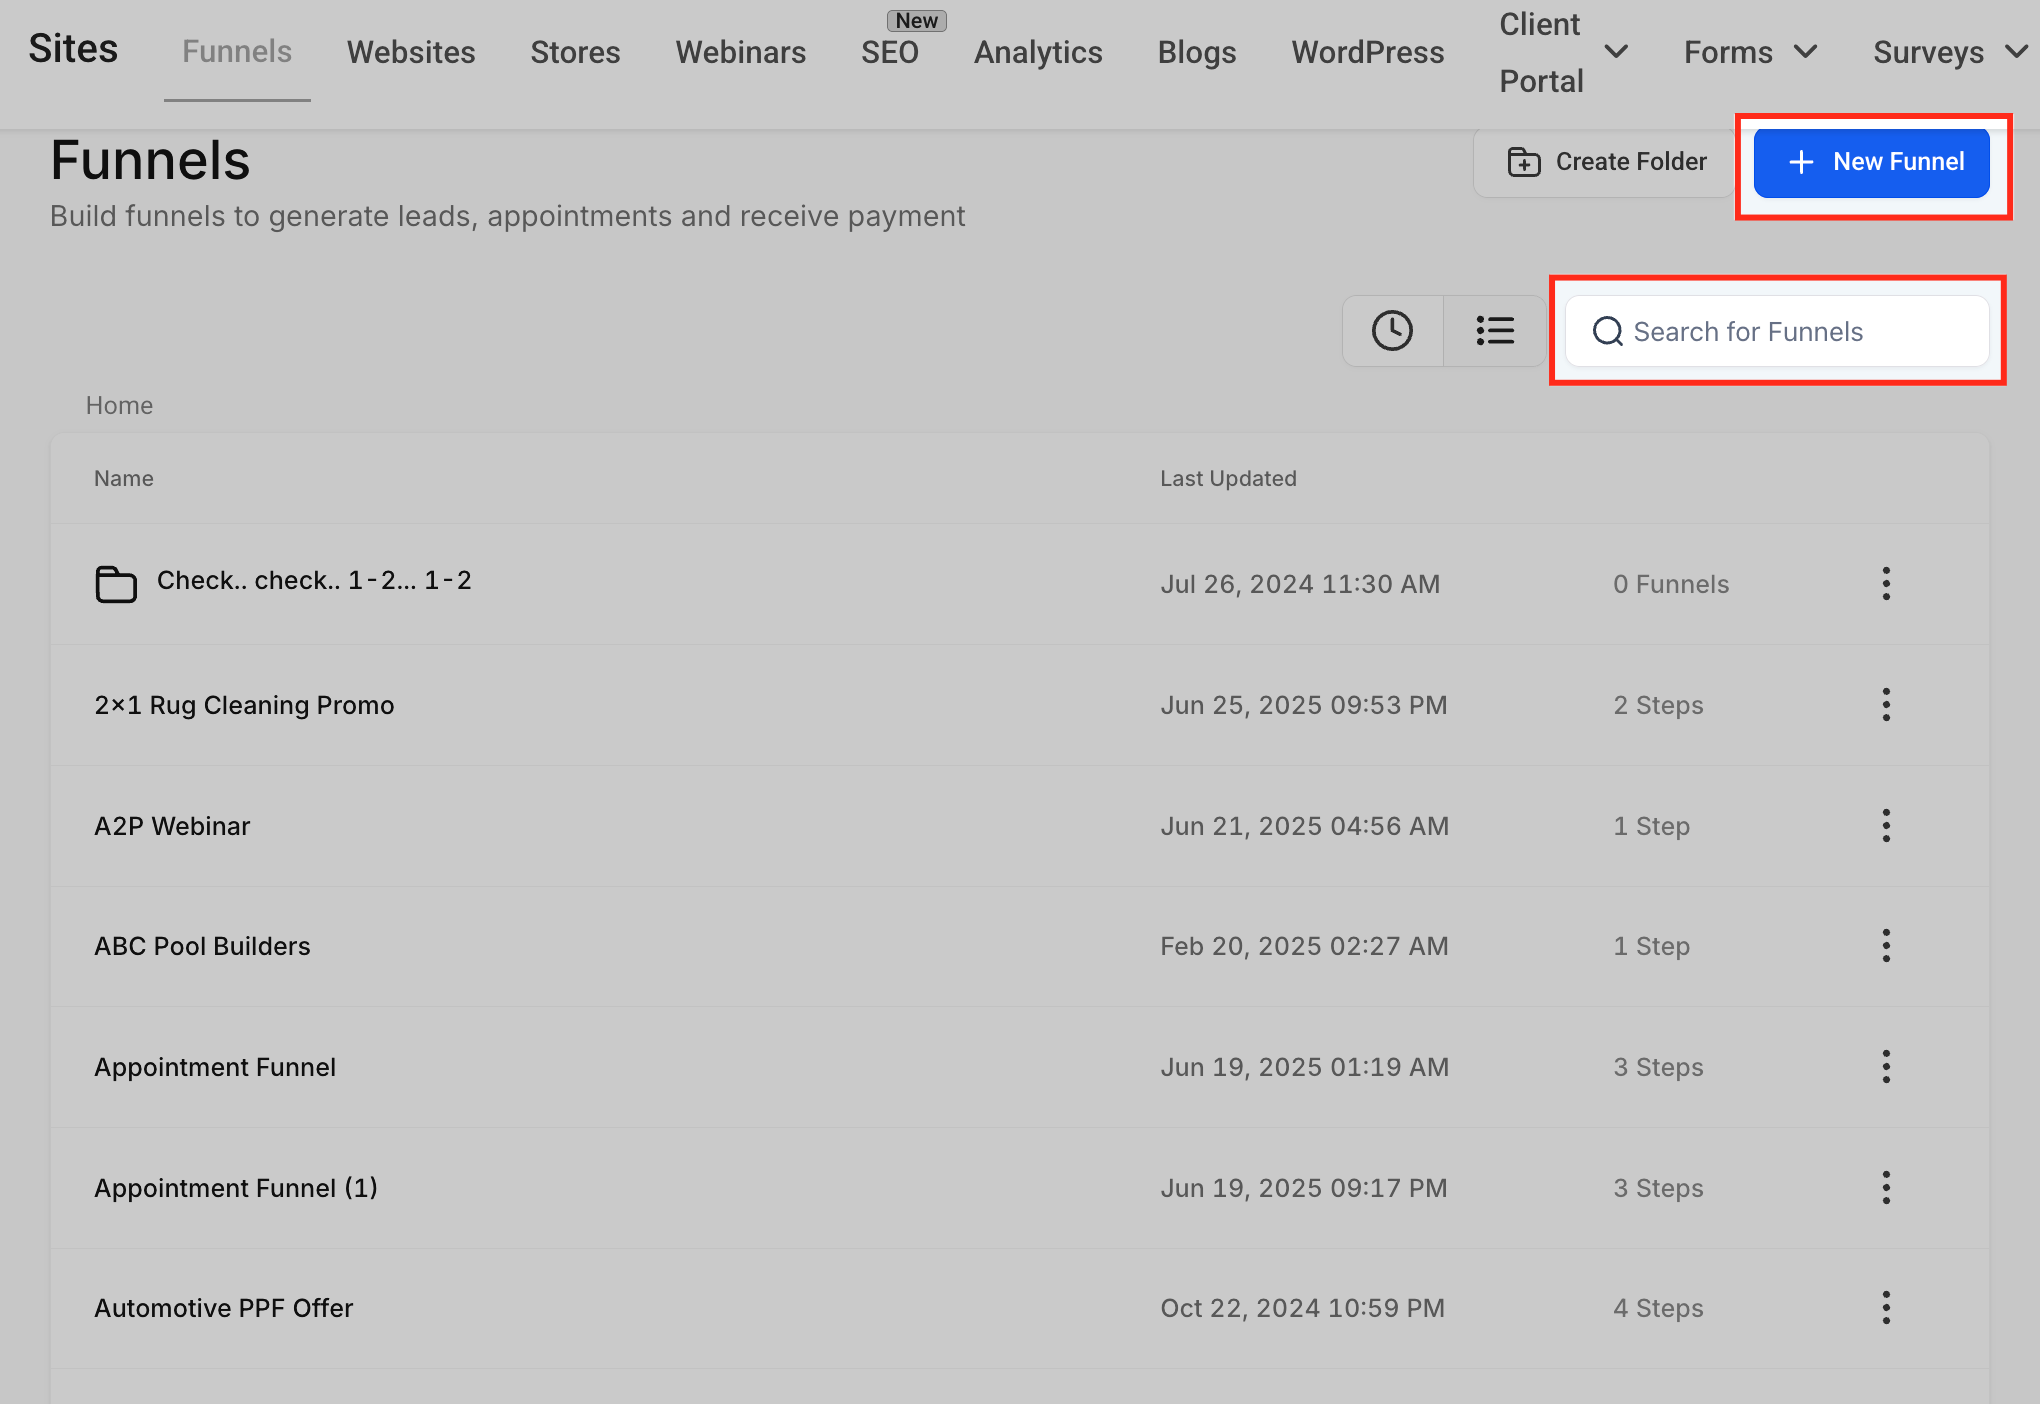
Select the page to animate
From the list of funnel steps on the left, choose the page where you want to add animations, such as a Landing Page, Schedule Page, or Thank You Page. This loads the selected page's preview and editing options.
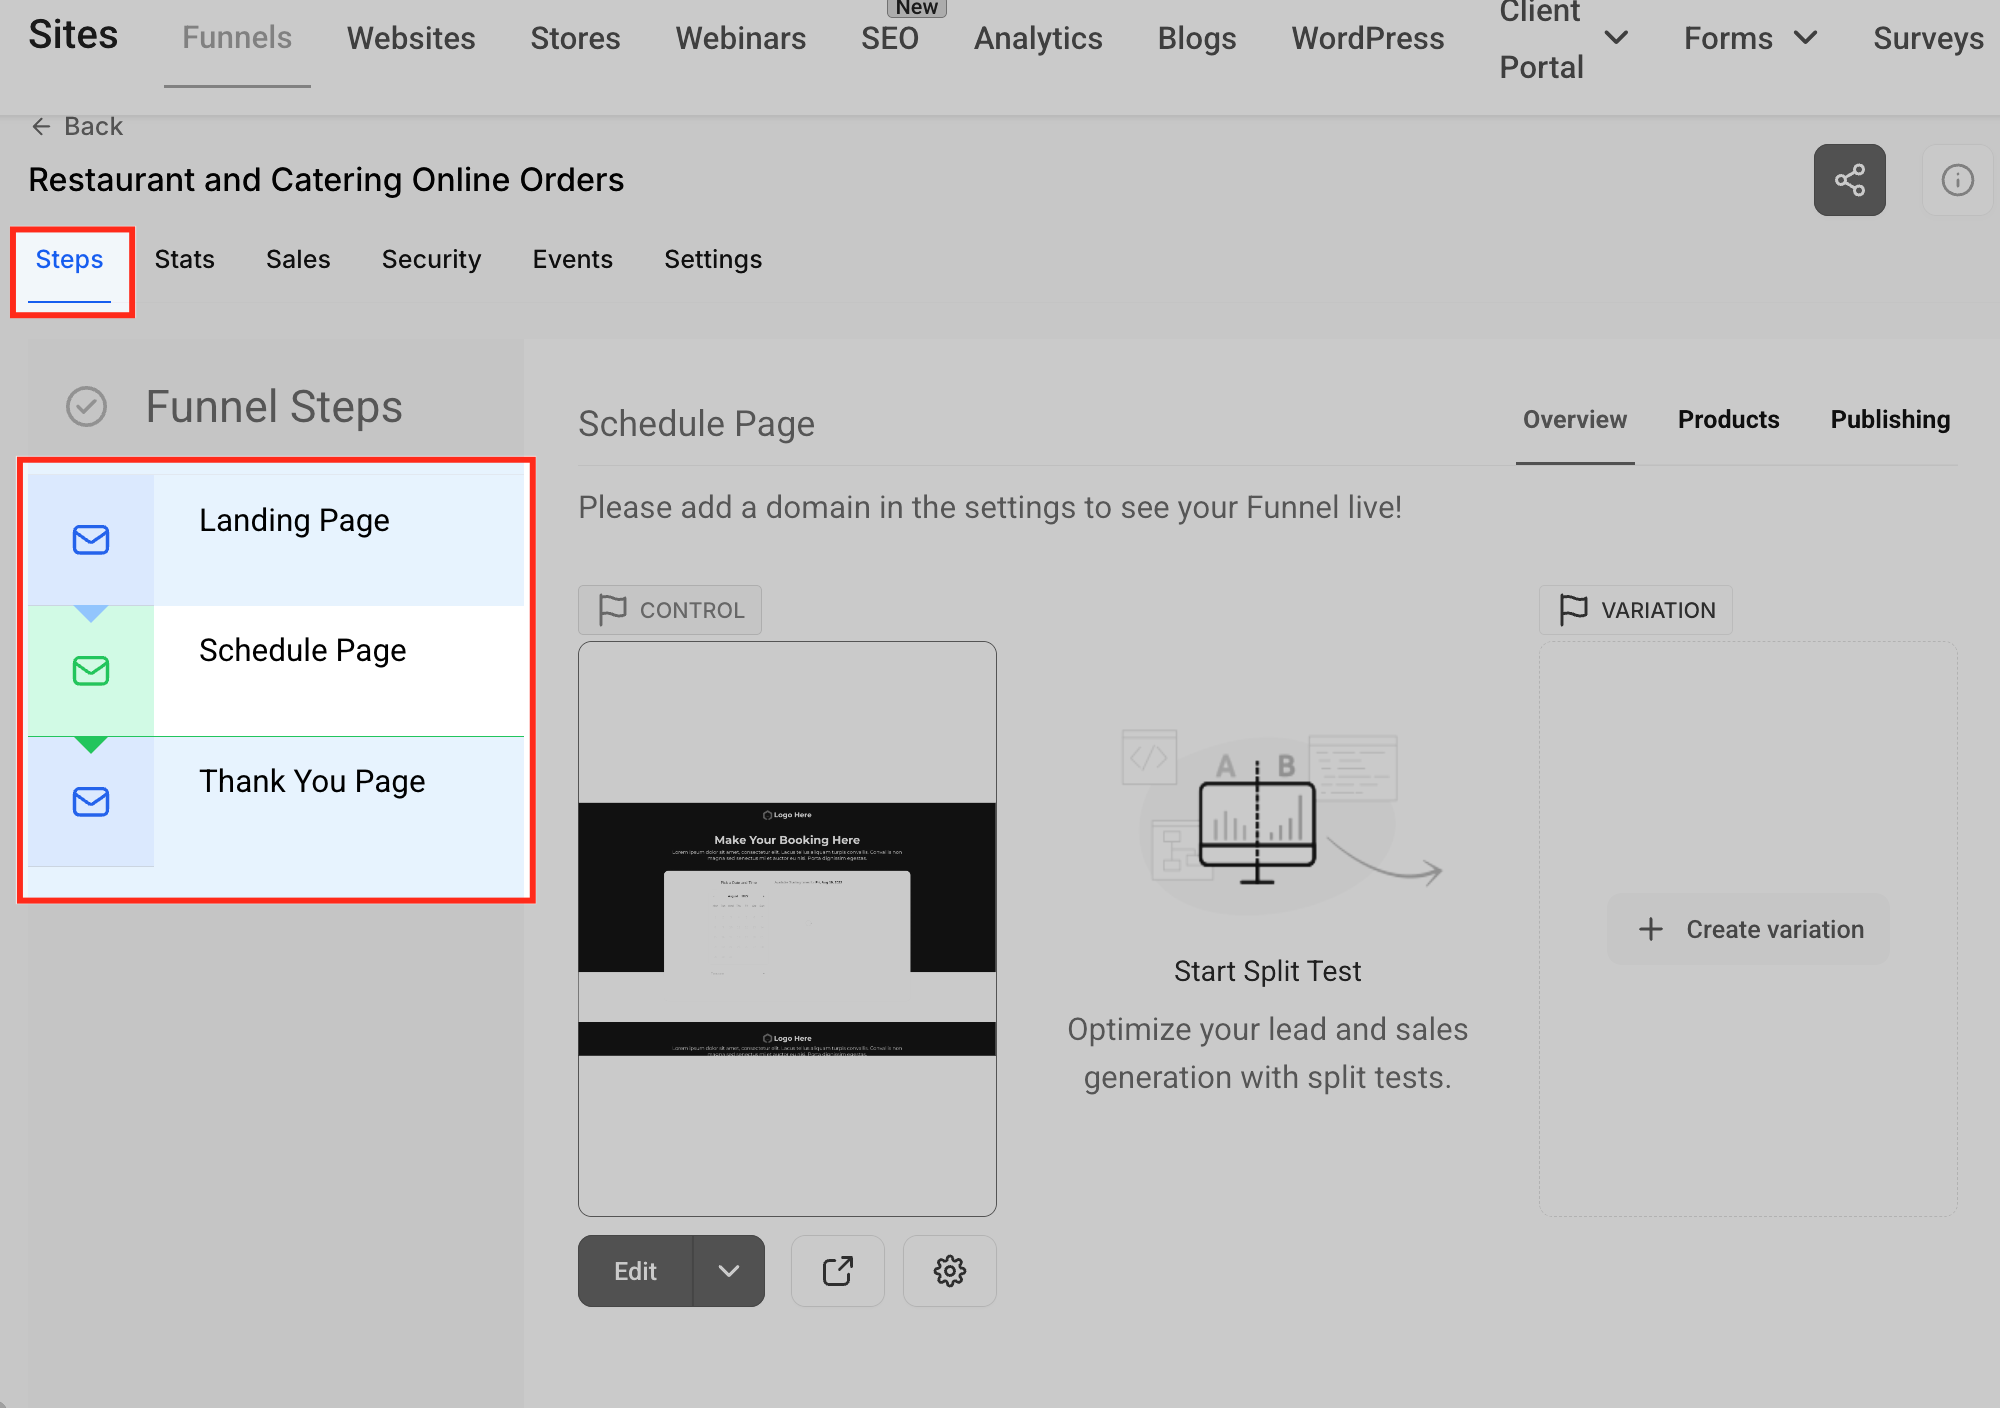
Open the page editor
Click the Edit button below the selected page preview, then choose Edit in a New Tab for a full-screen editing experience. This opens the page in the builder, where you can apply animation settings.
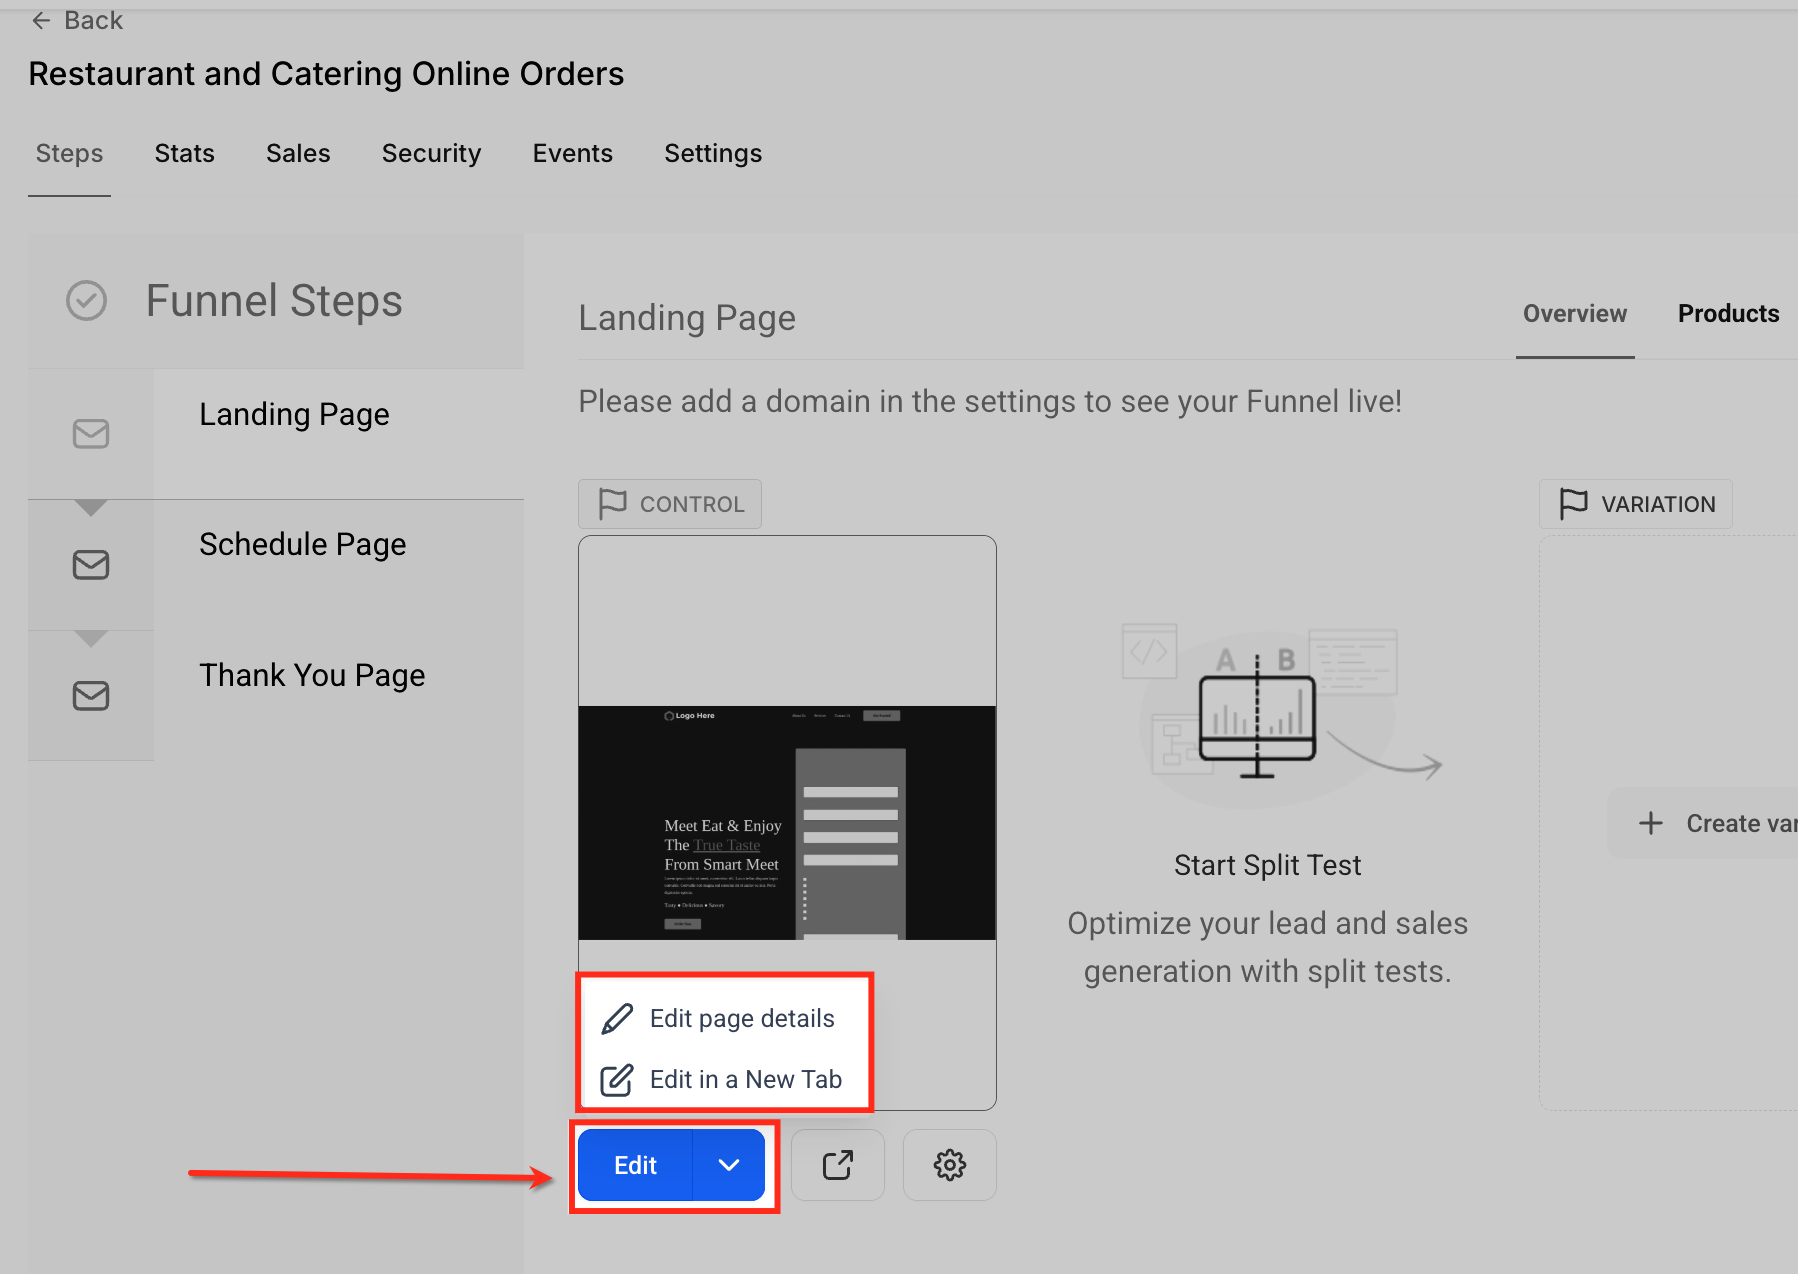
Select the element to animate
Click the specific element you want to animate, such as a button, text block, or image. Once selected, its settings appear in the right-hand panel of the builder.
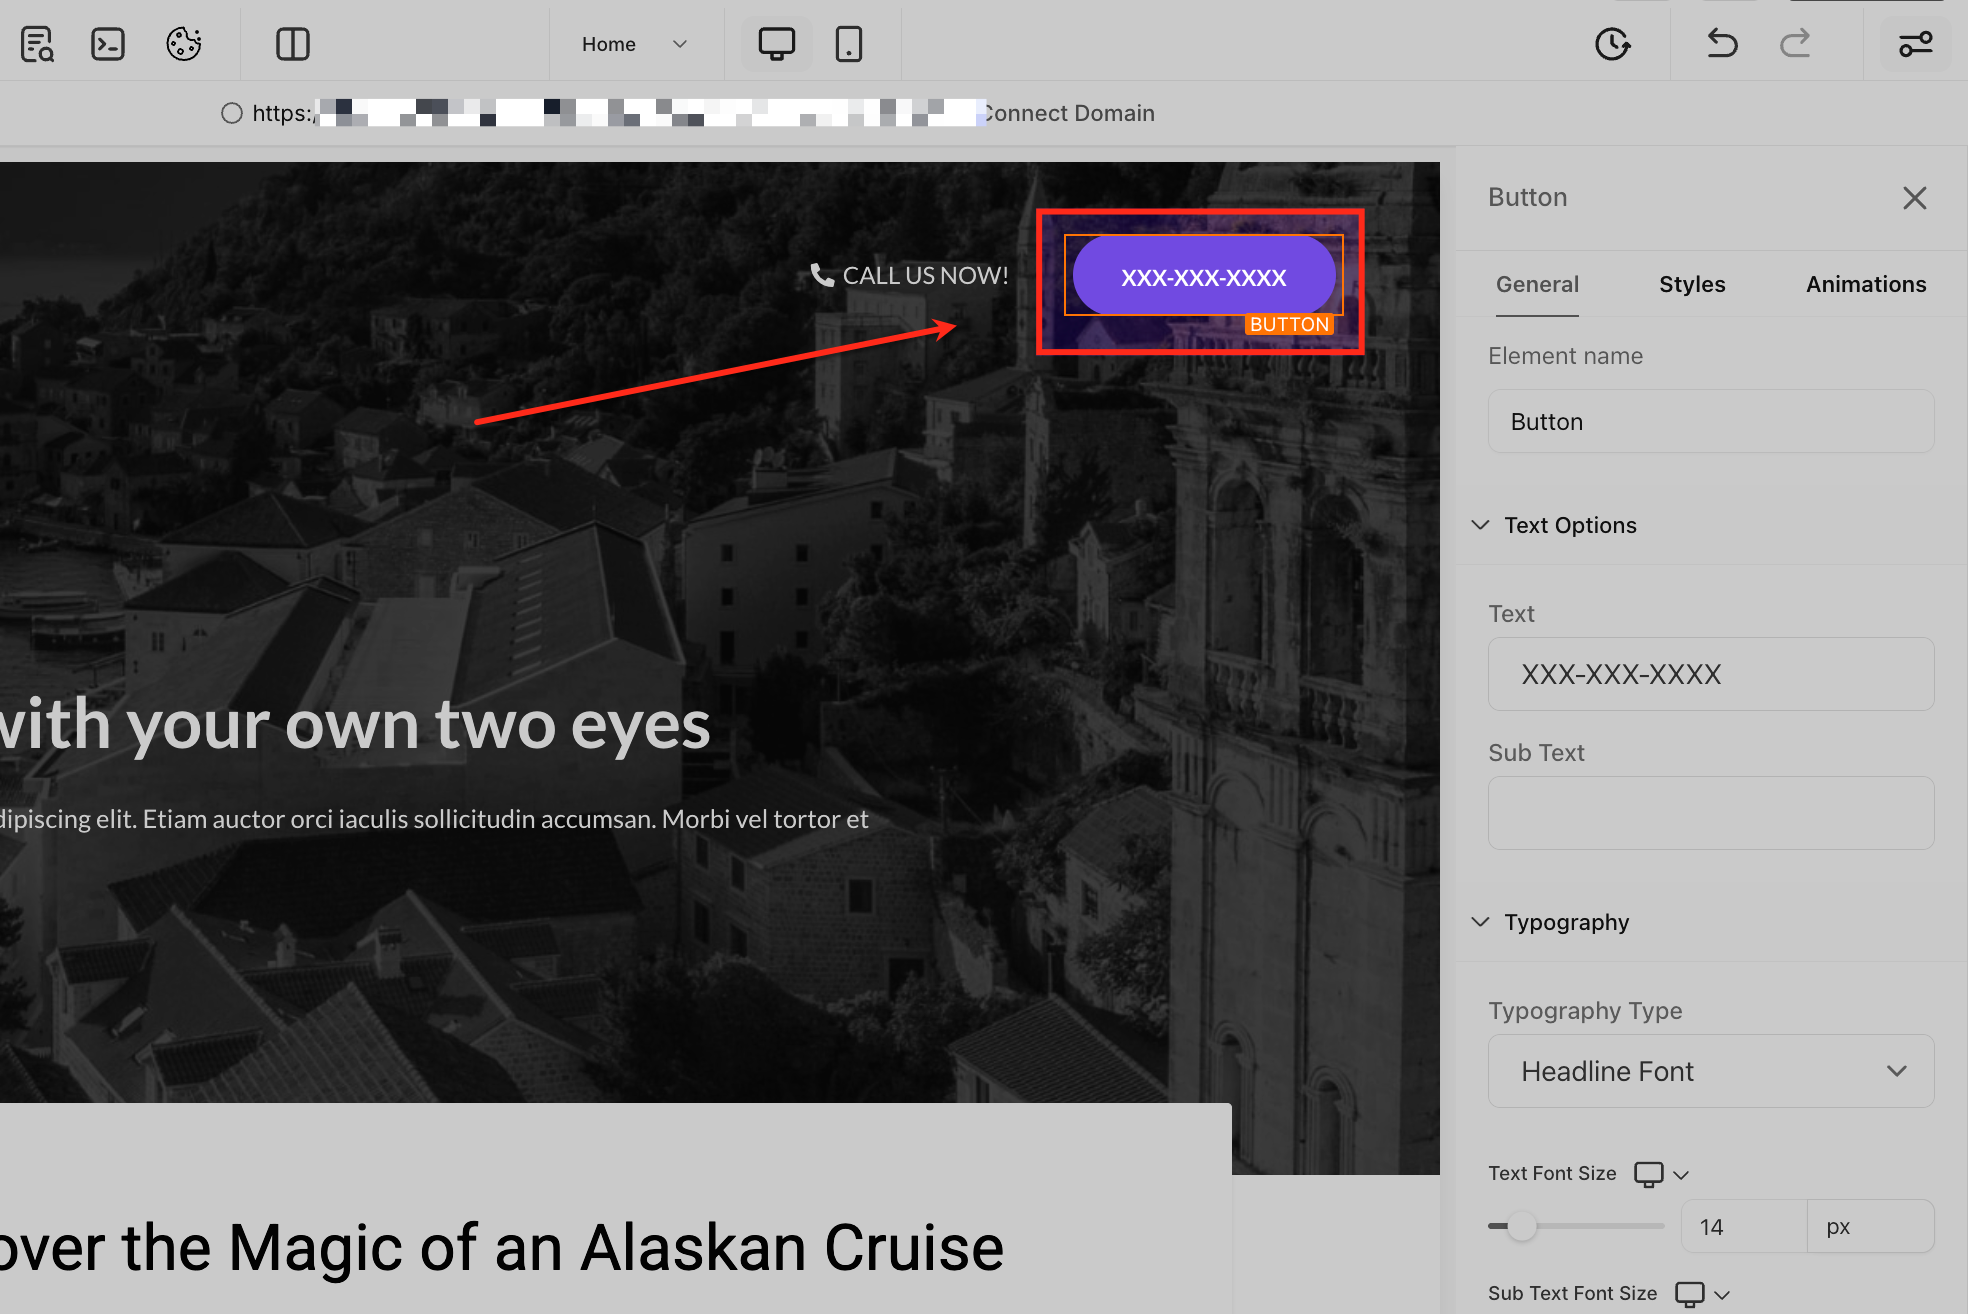
Open animation settings
With the element selected, click the Animations tab in the right-hand panel. This is where you manage entrance and hover animation effects for the chosen element.
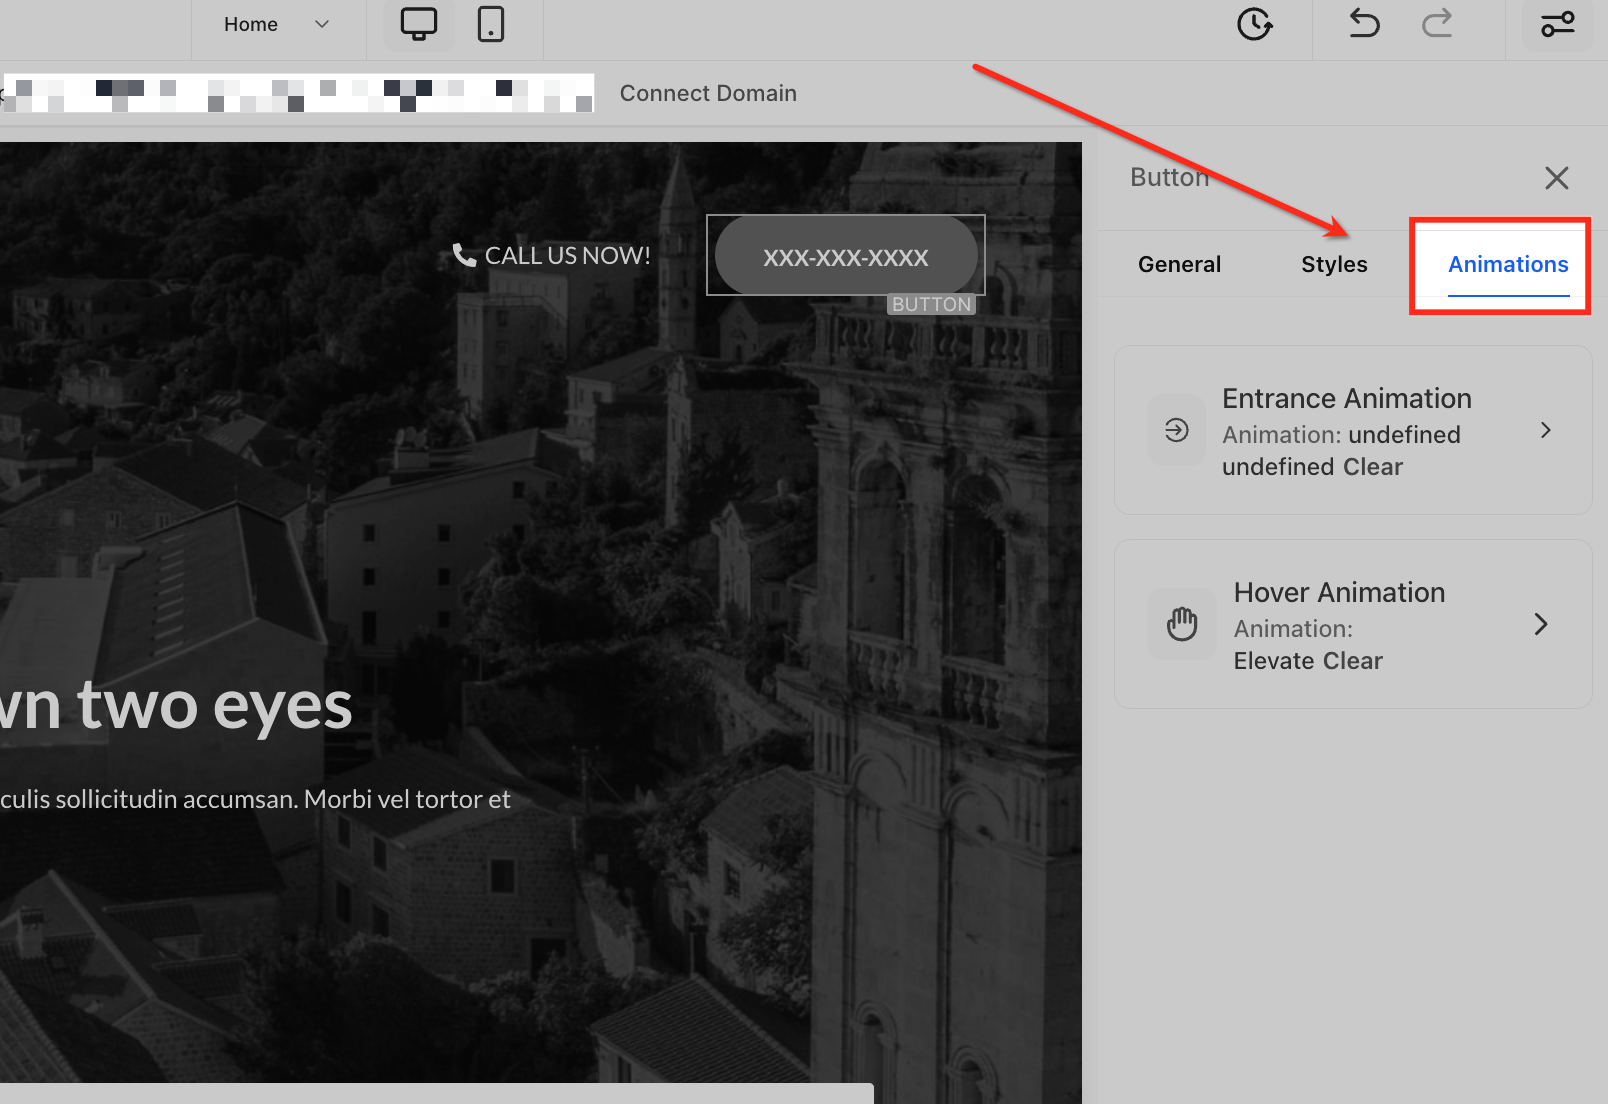
Select entrance animation
Click Entrance Animation to begin customizing how the element appears when it loads on the page. This opens a list of animation styles you can apply.
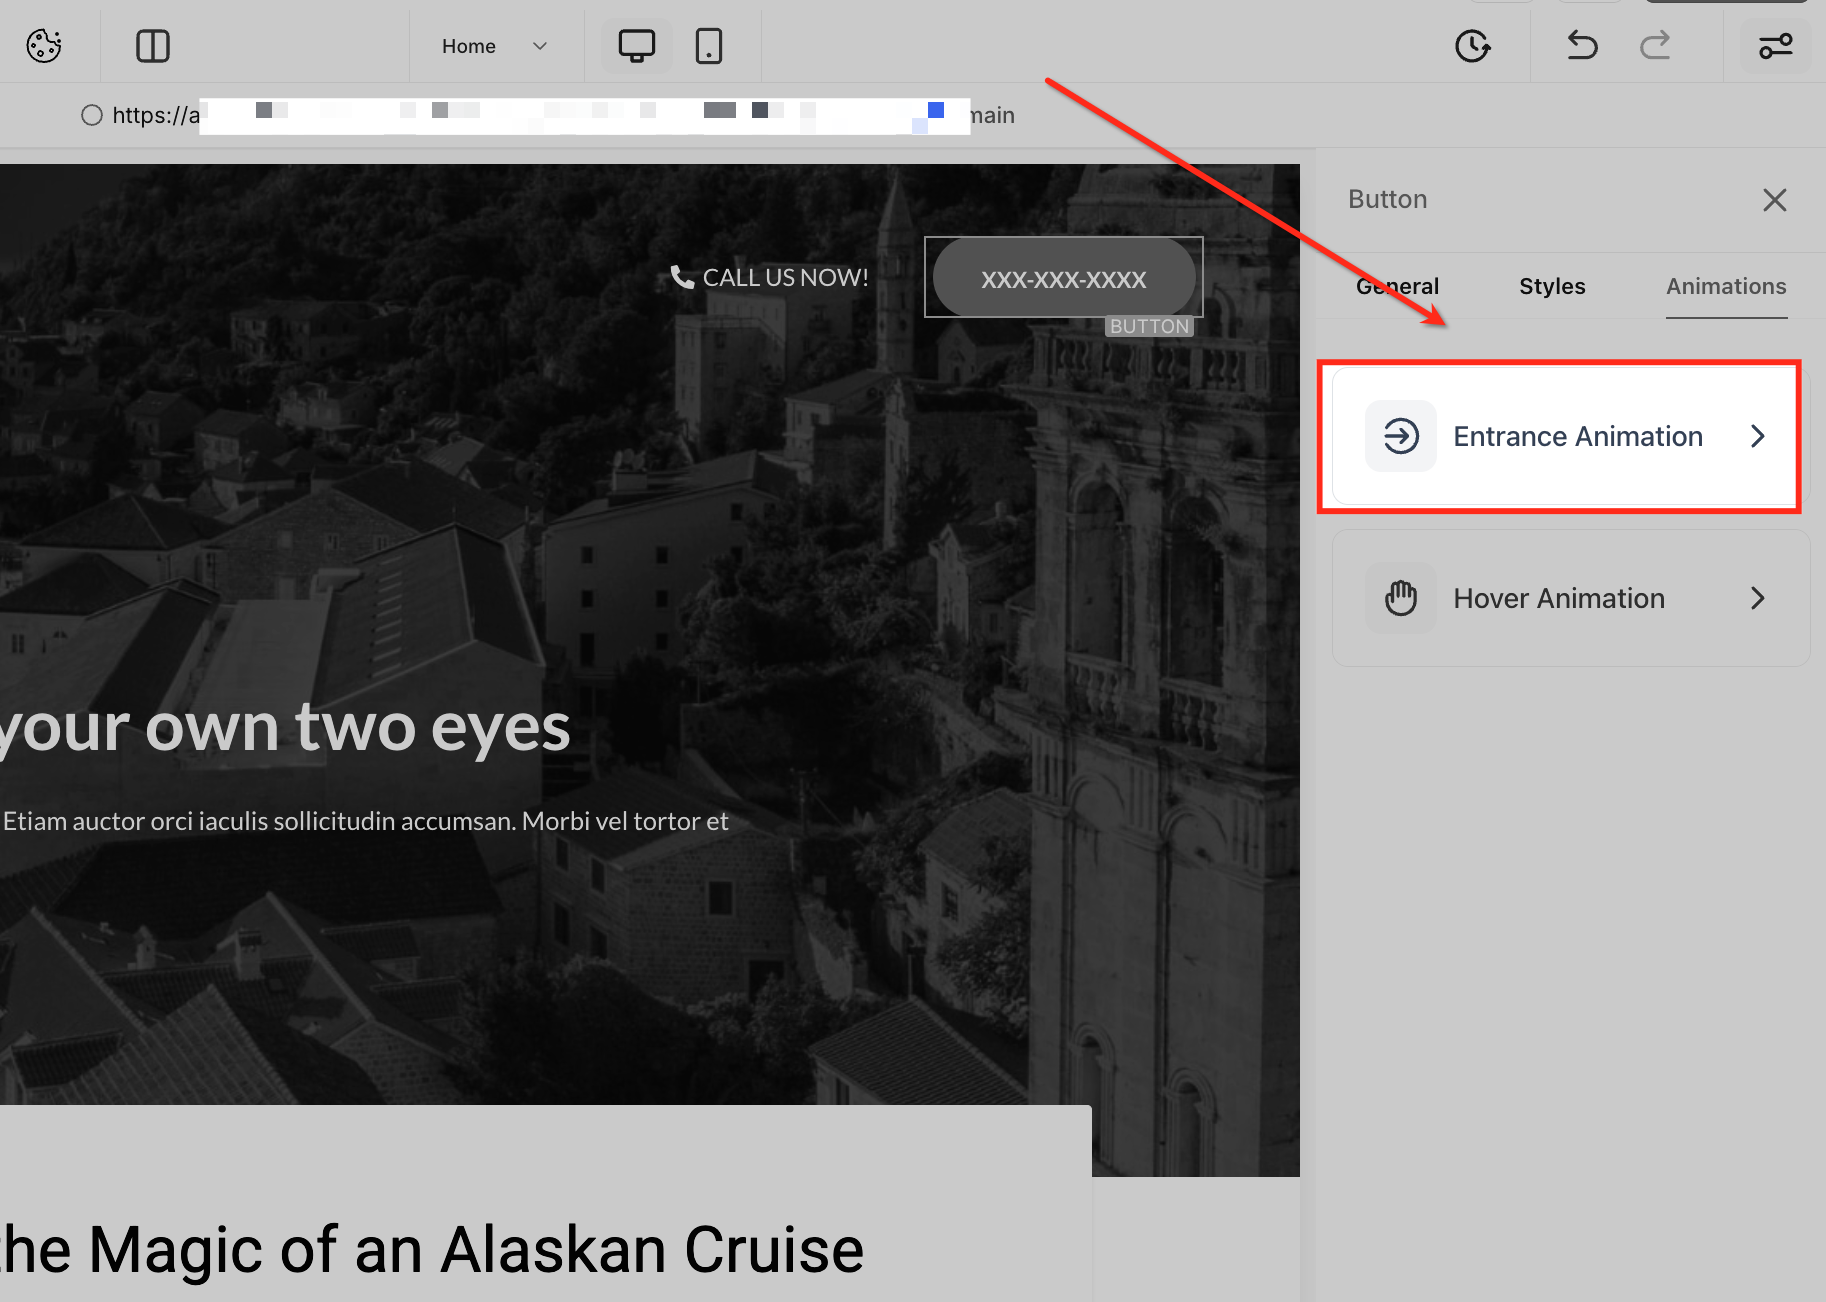
Choose an animation style
Browse the options under Fade, Slide, Bounce, and more. Click any style, like "Fade In" or "Slide Right," to instantly preview how the element will animate into view.
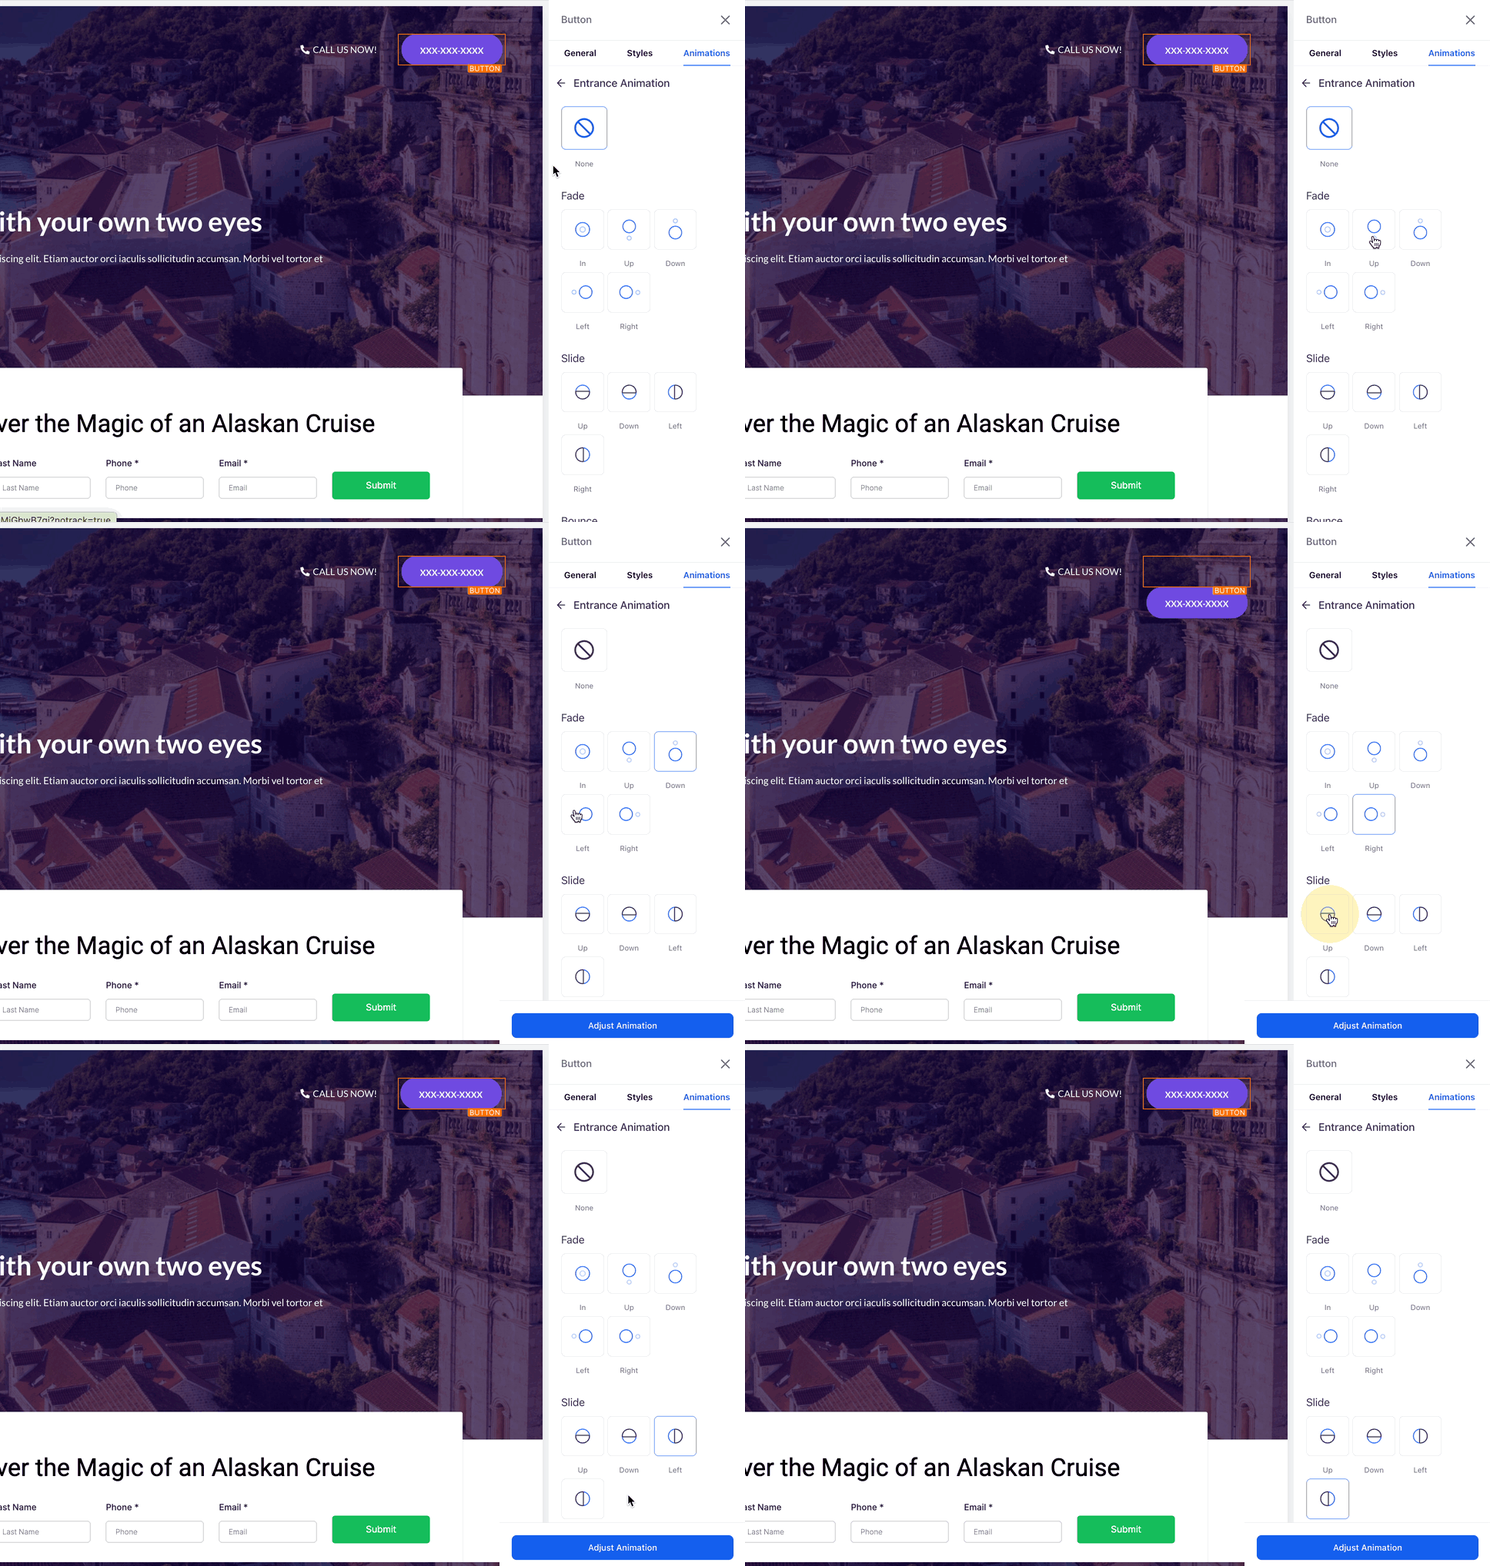
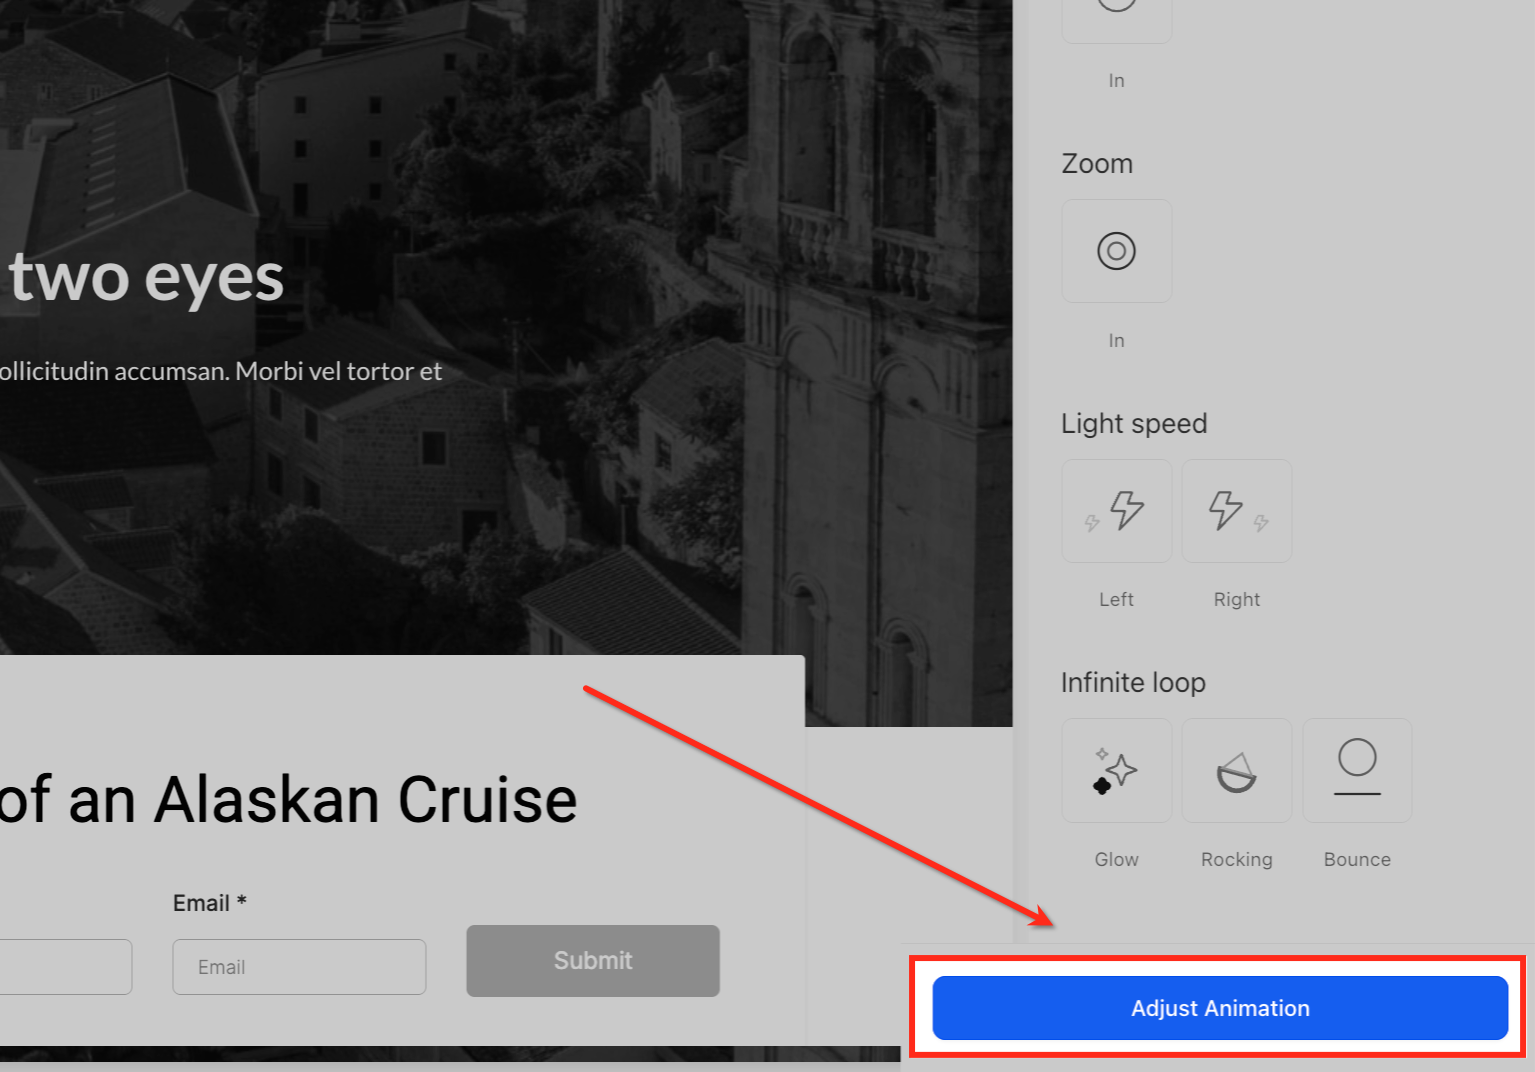
Click Adjust Animation
Once you've selected an animation style, click the Adjust Animation button at the bottom of the panel. This opens the advanced settings where you can fine-tune how the animation behaves.
Fine-tune animation behavior
Use the controls to adjust the Scale, Duration, Delay, and Easing of the animation. These settings control how fast, how smooth, and when the animation plays for the selected element.
Adjust easing behavior
Open the Easing dropdown to control how the animation flows. Choose from Linear, Ease In, Ease Out, or Ease In Out to define how the motion accelerates and decelerates for a smoother visual effect.
You can add an interactive layer to your designs by hiding or revealing elements when a button is clicked. This works on both mobile and desktop views, giving you more flexibility and interactivity in how you present content and boosting engagement.

Note: To show an element, that element must first be hidden. If no elements appear in the Show Elements dropdown, hide an element first.
Add an interactive layer to your designs by hiding elements when a button is clicked.
Step 1: Choose the button
In the funnel or website builder, choose the Button element that you want to use.
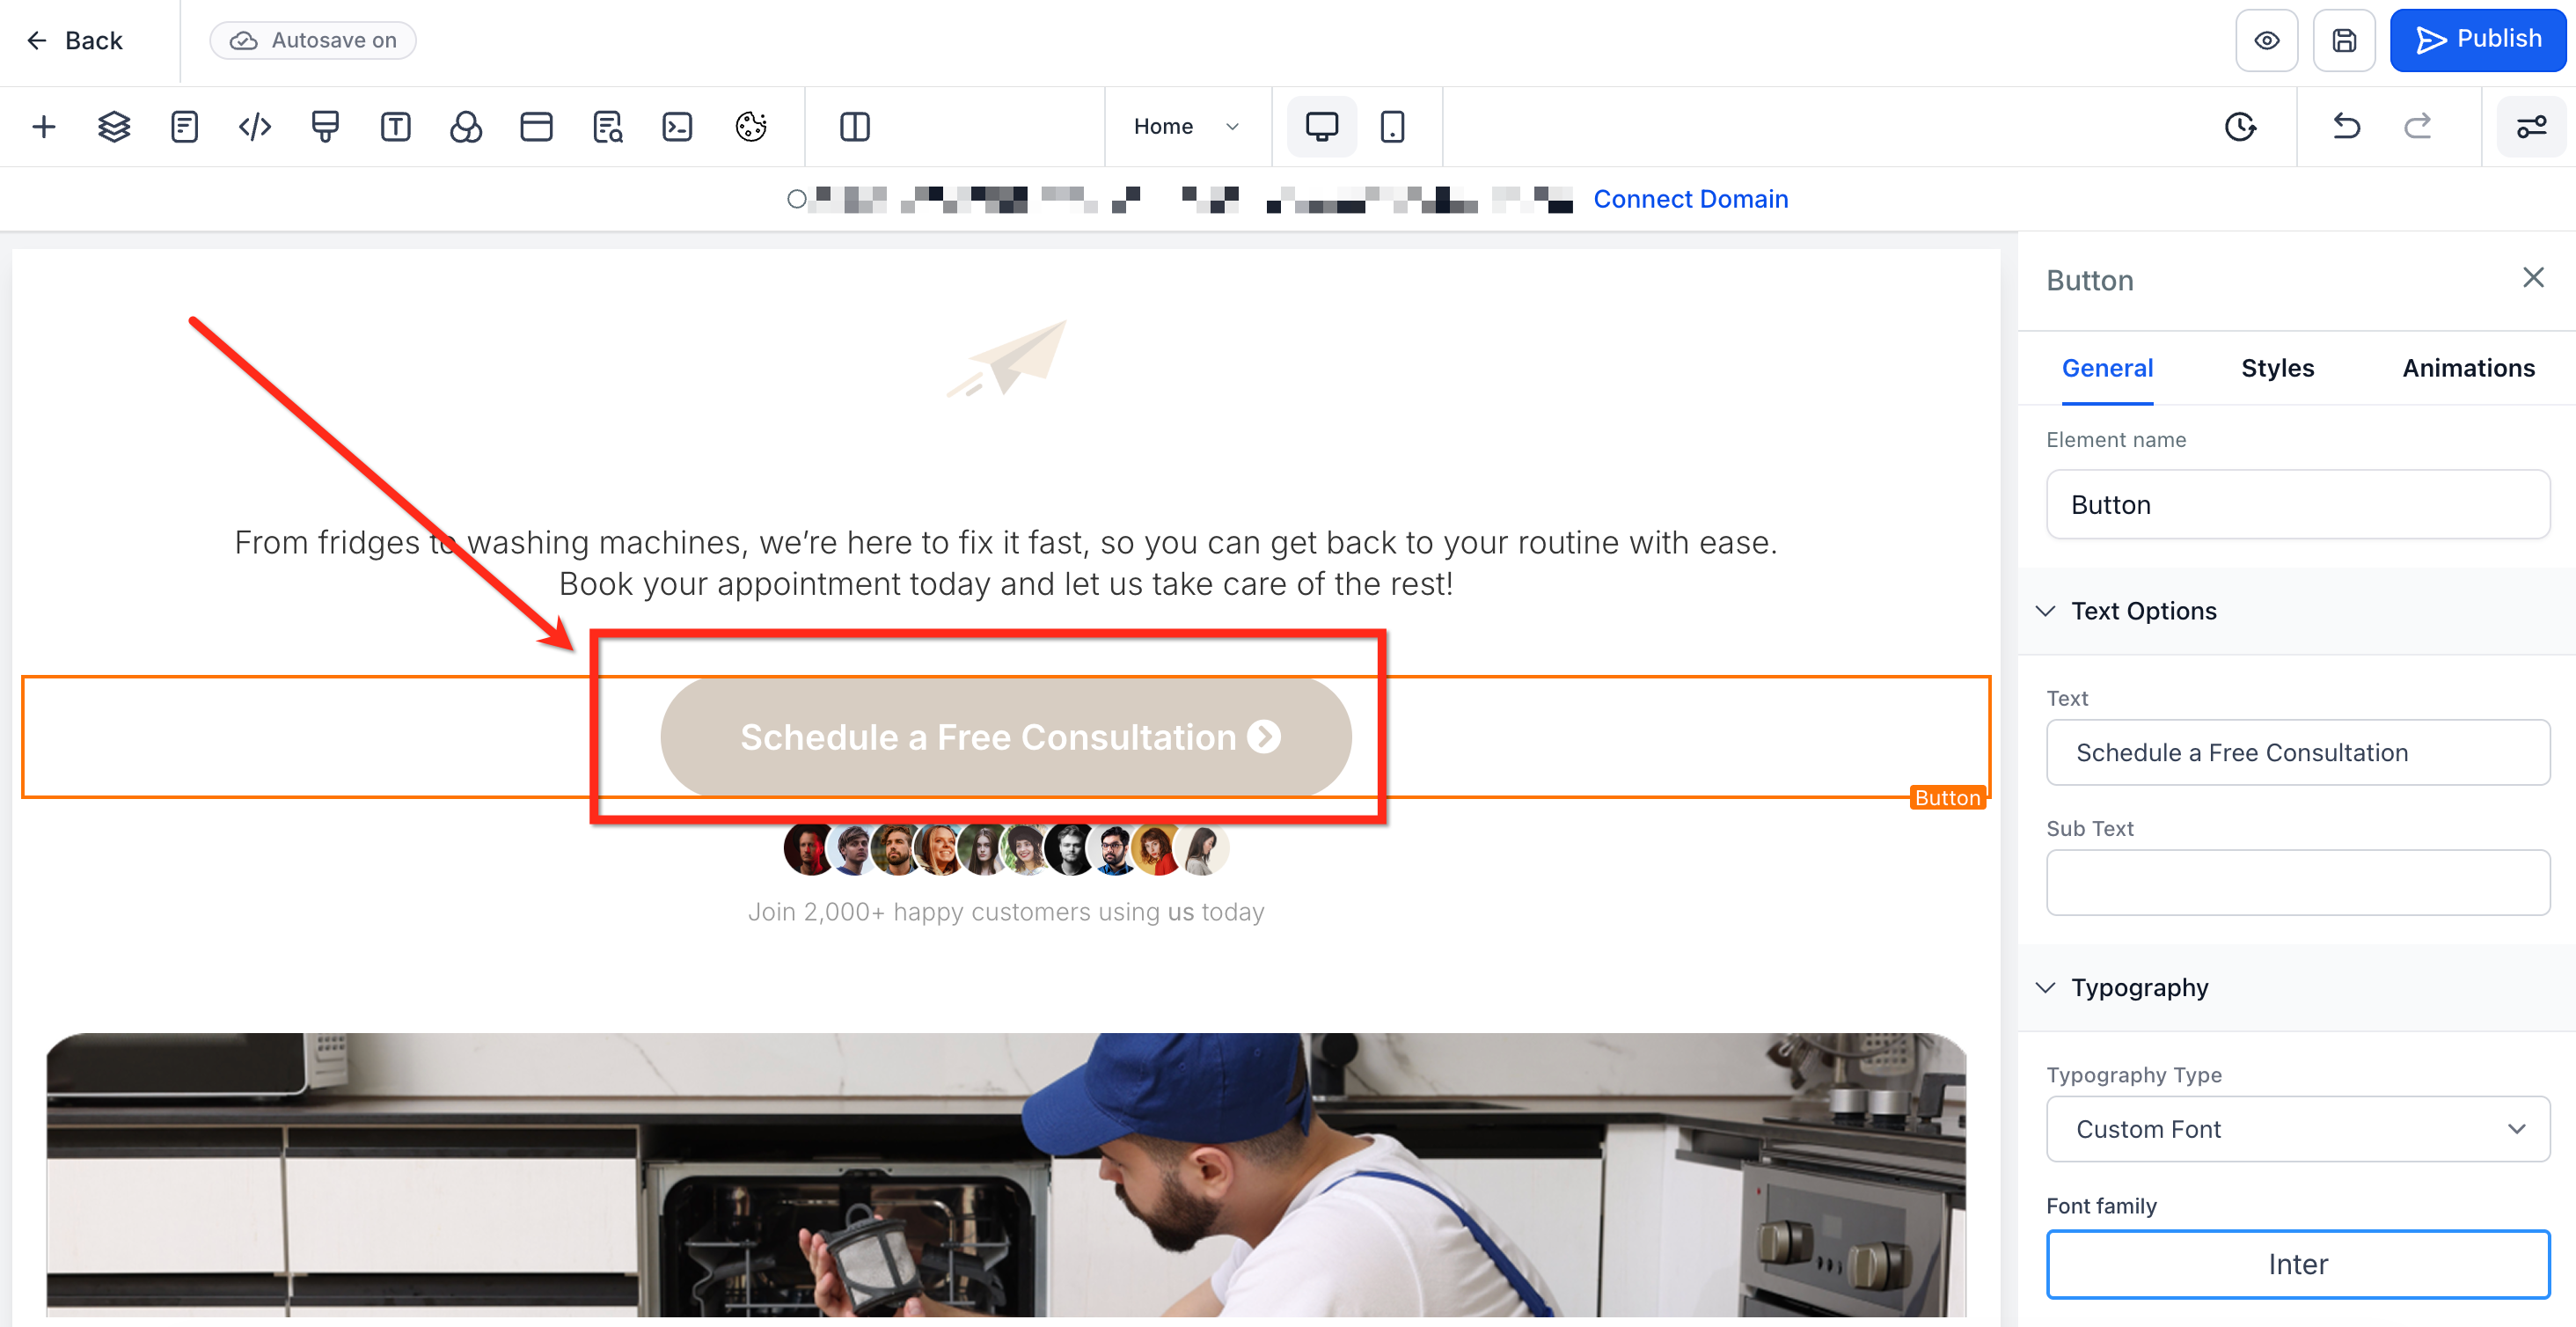
Step 2: Navigate to button actions
On the right side of the screen, you'll find the element settings. Under General, scroll all the way down to Button Actions. In the Link To dropdown, select Hide & Show Elements.
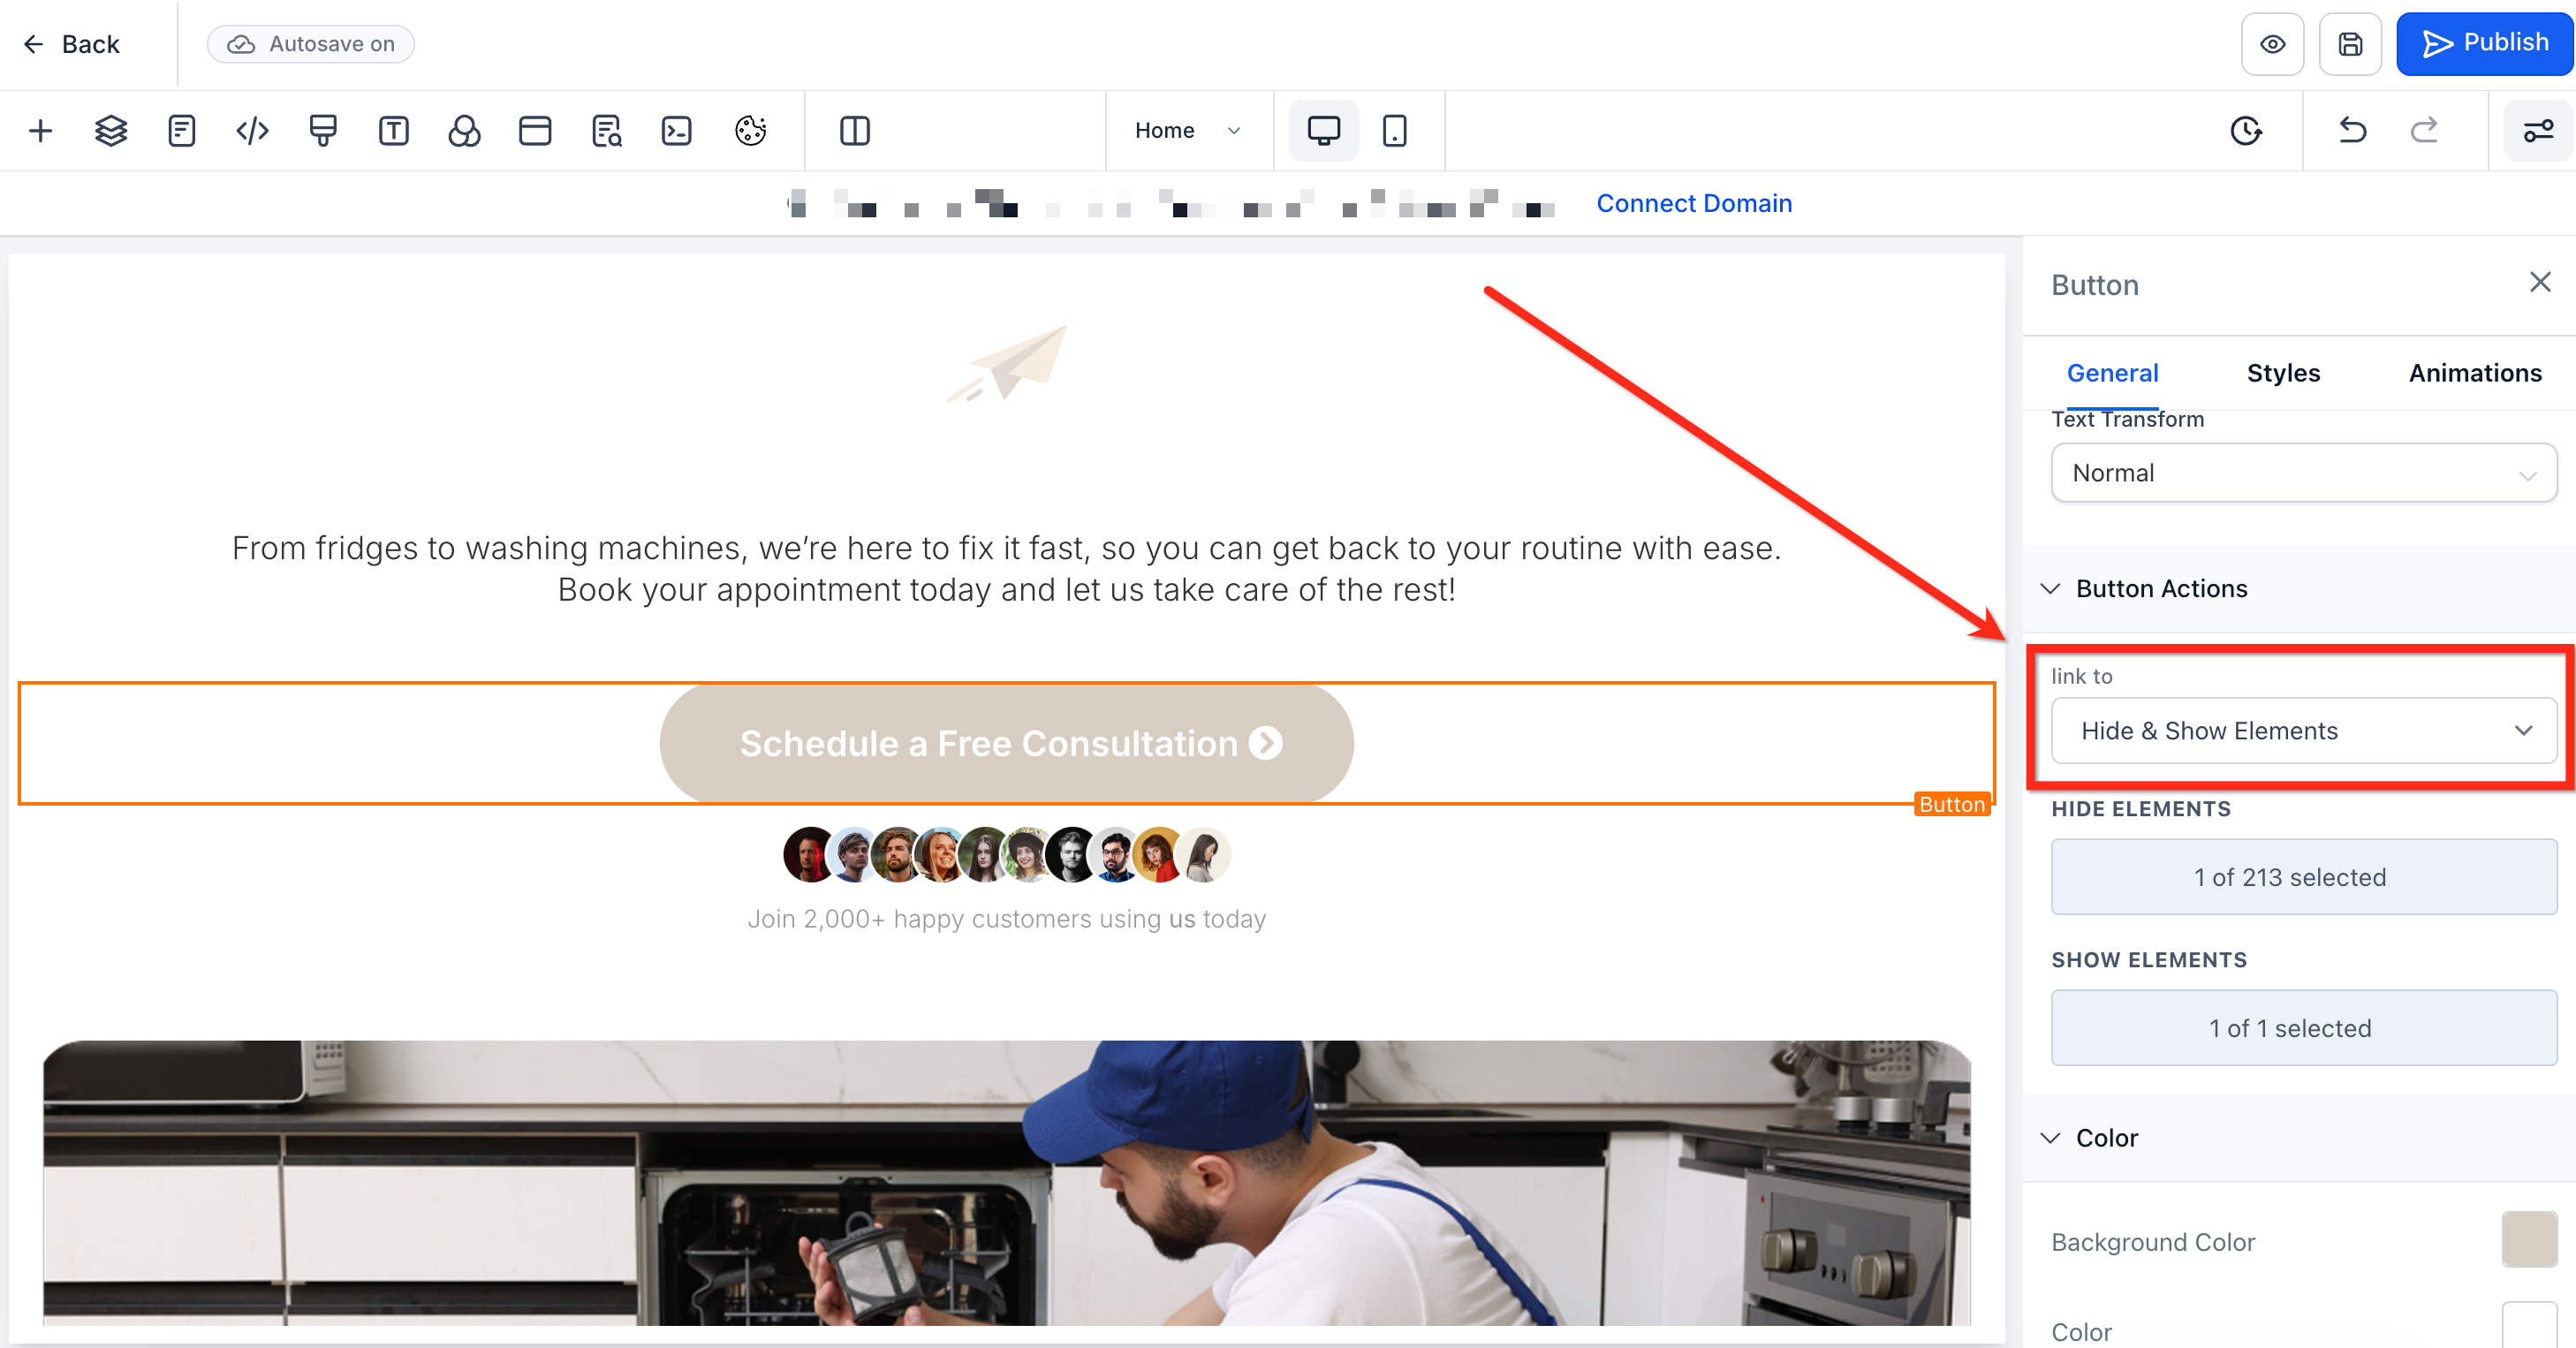
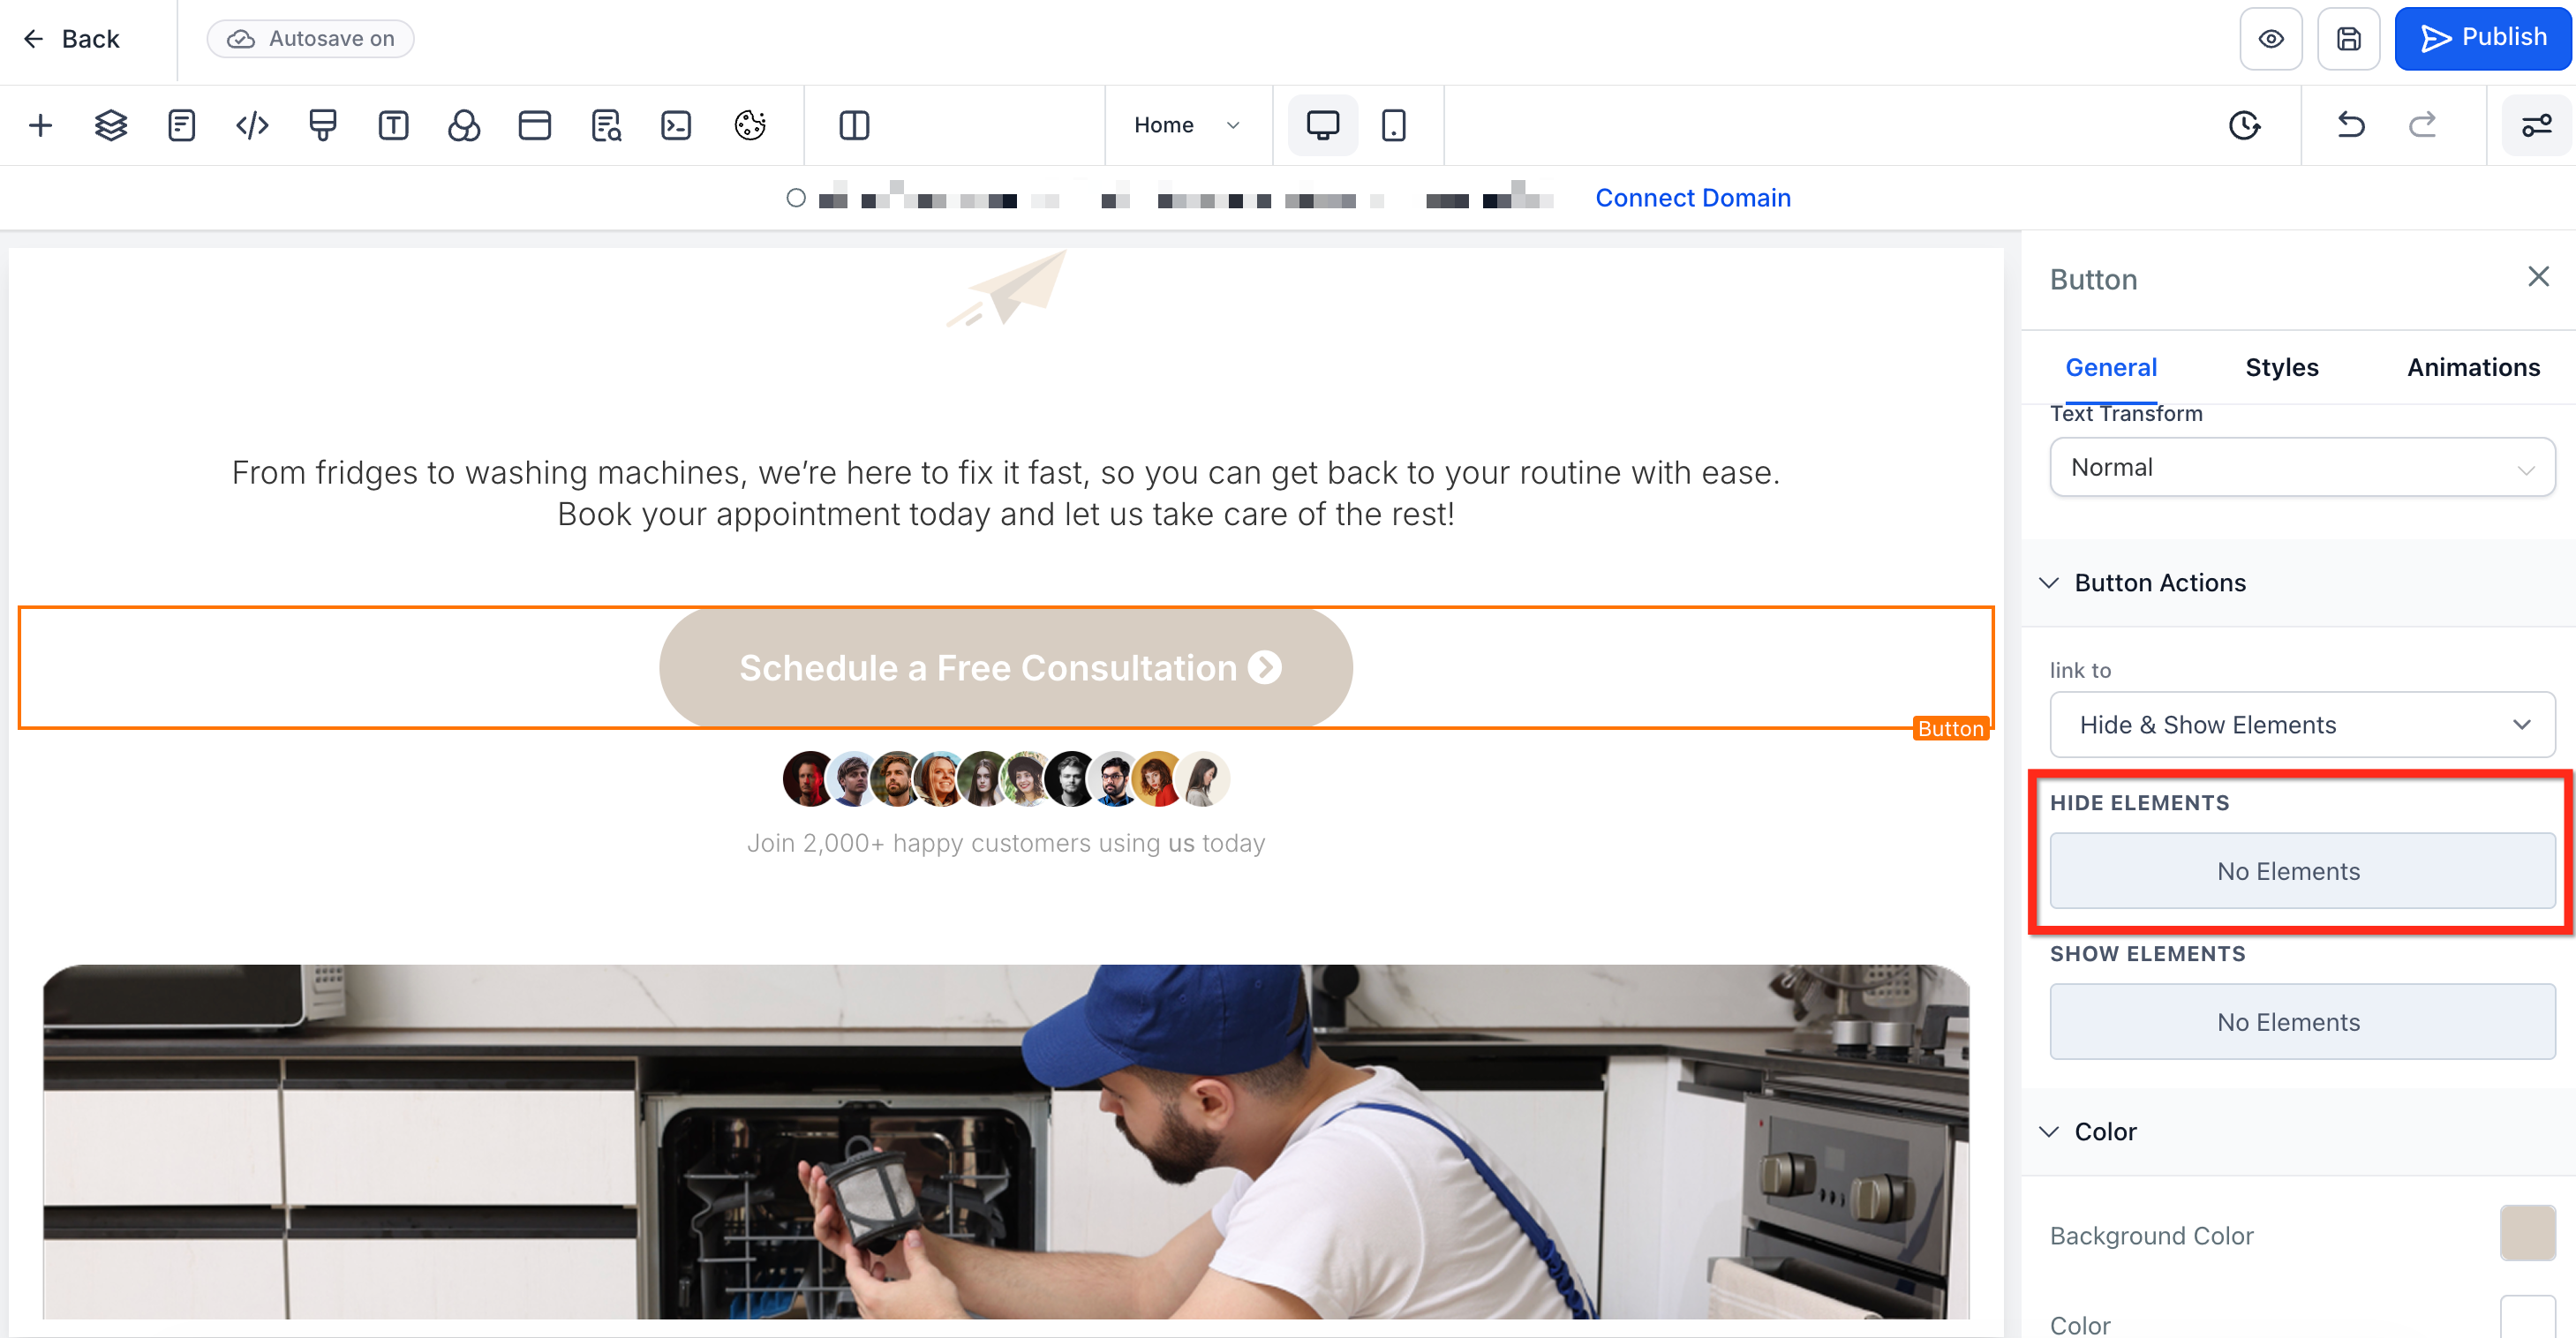
Step 3: Select the element to hide
Click Hide Elements to open a dropdown listing all elements on the page. Choose the element or elements you'd like to hide when the button is clicked. You can choose an element, a section, a column, or column rows.
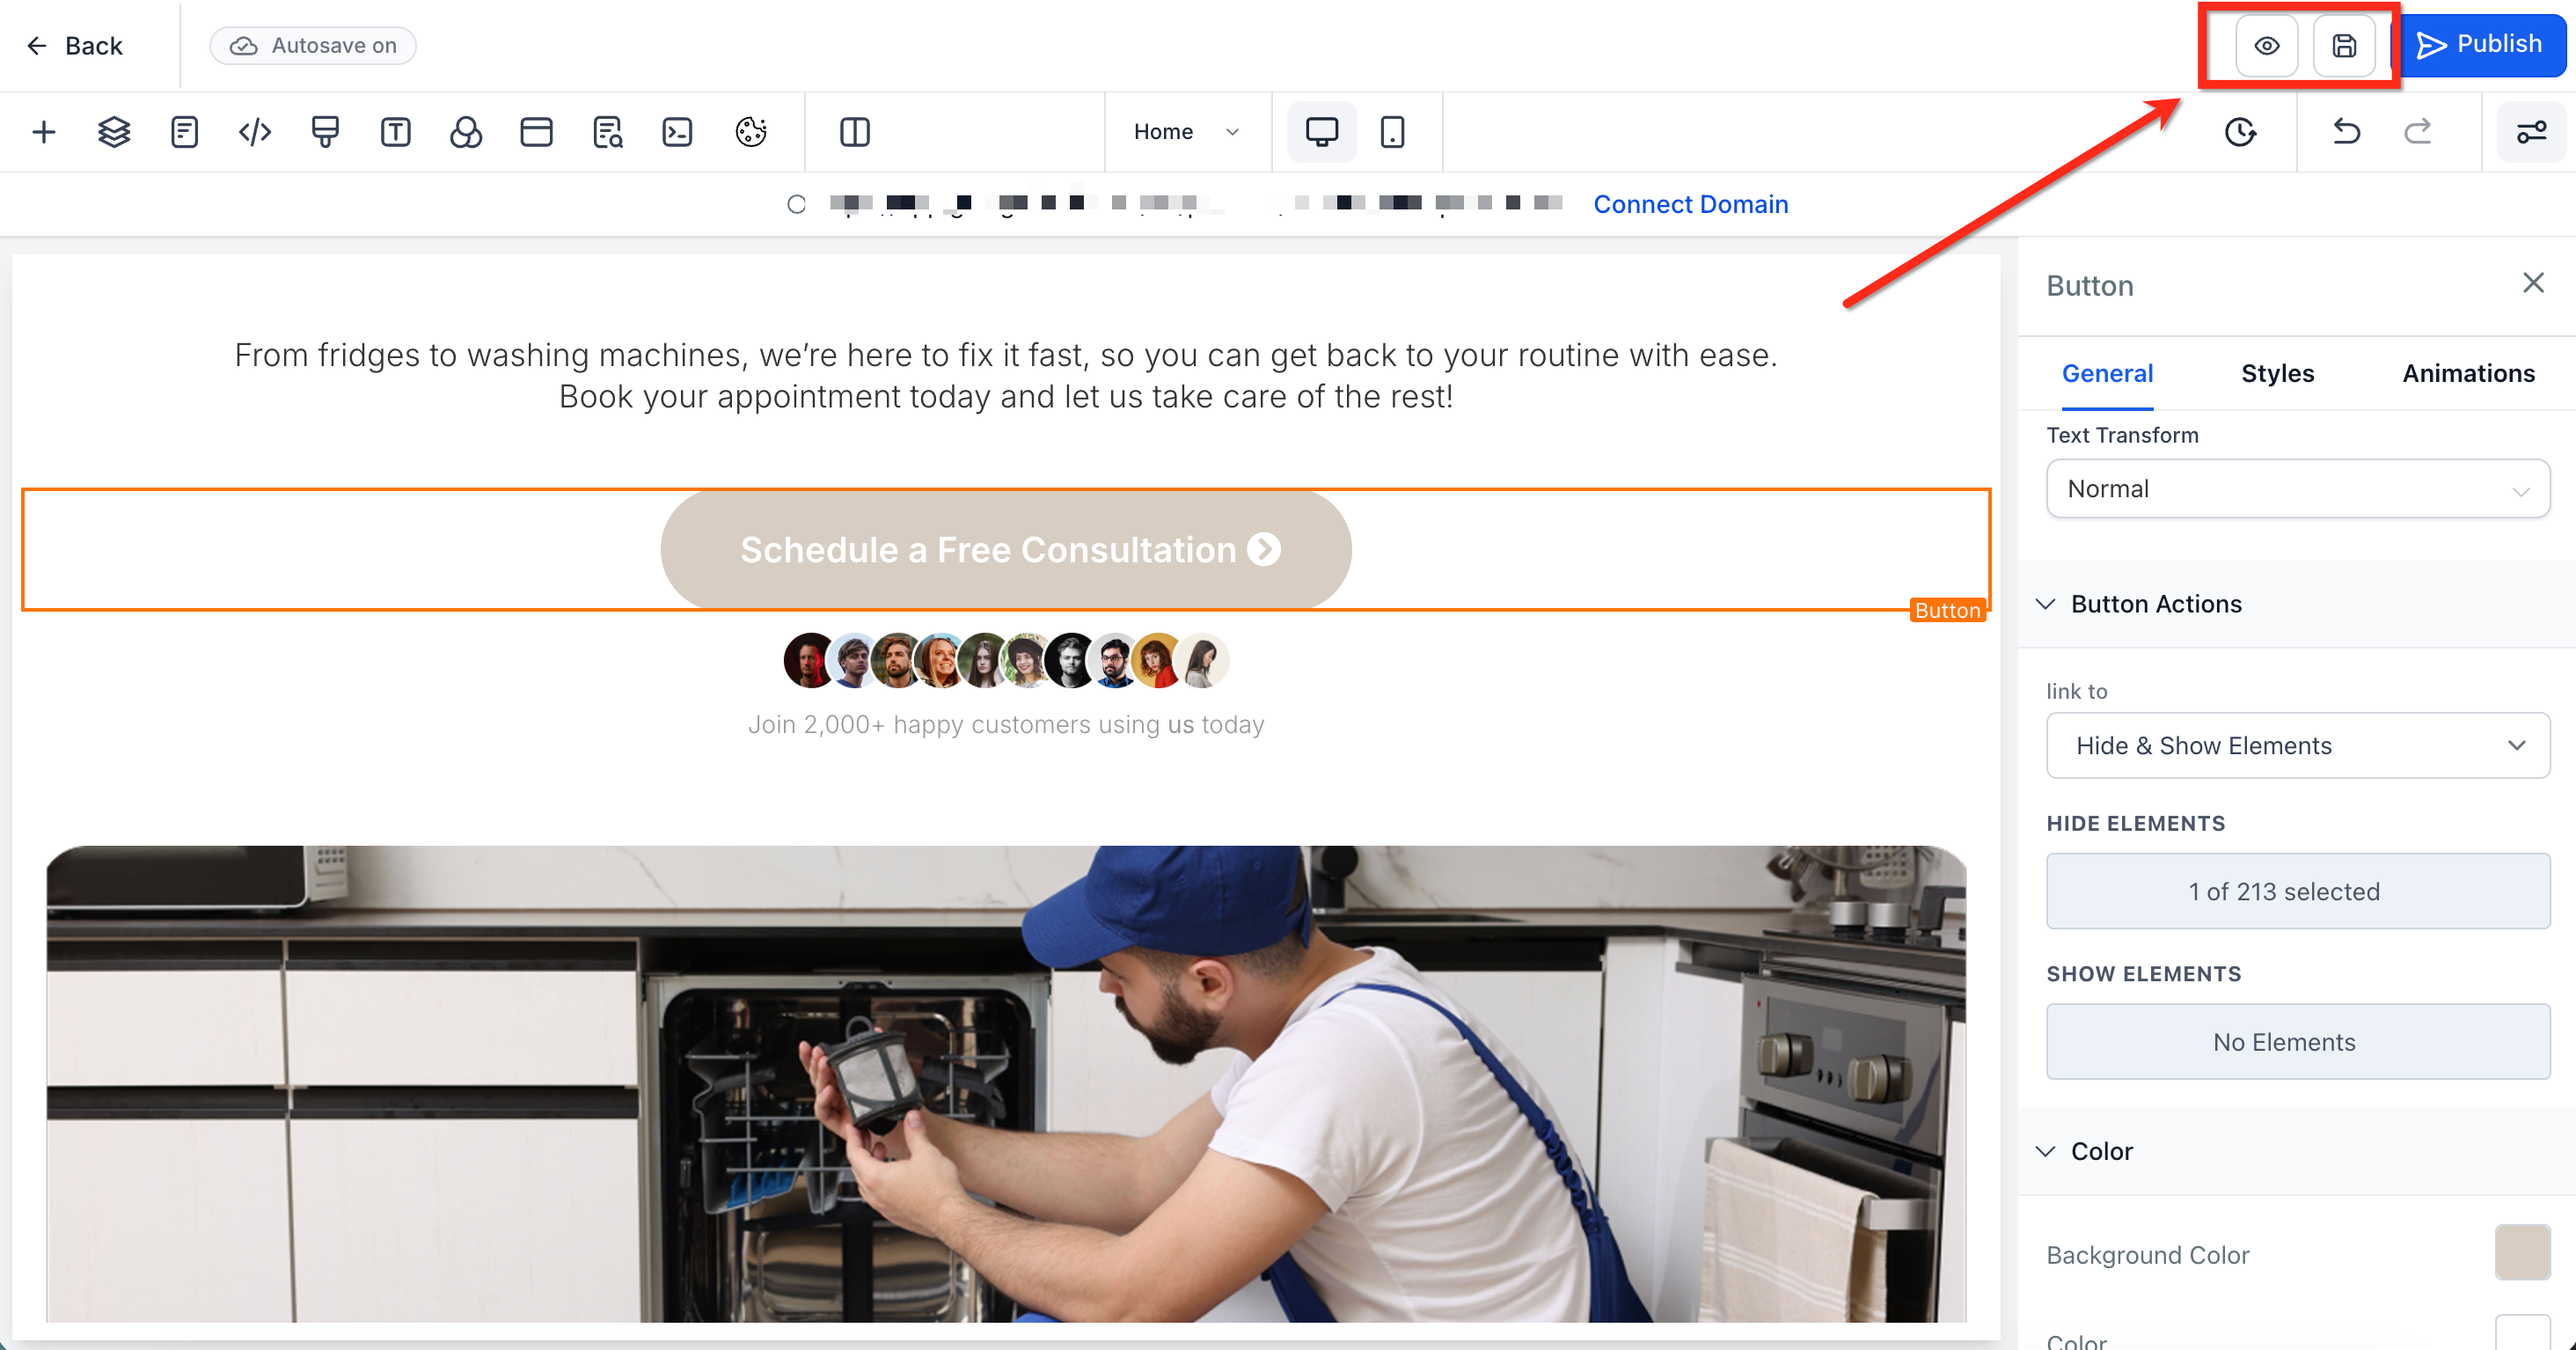
Step 4: Save changes
Once you've chosen which elements to hide, click Save to save your changes, or click Preview to preview and test your funnel or website.
Similarly, you can reveal hidden elements when a button is clicked.
Step 1: Select the element to be hidden
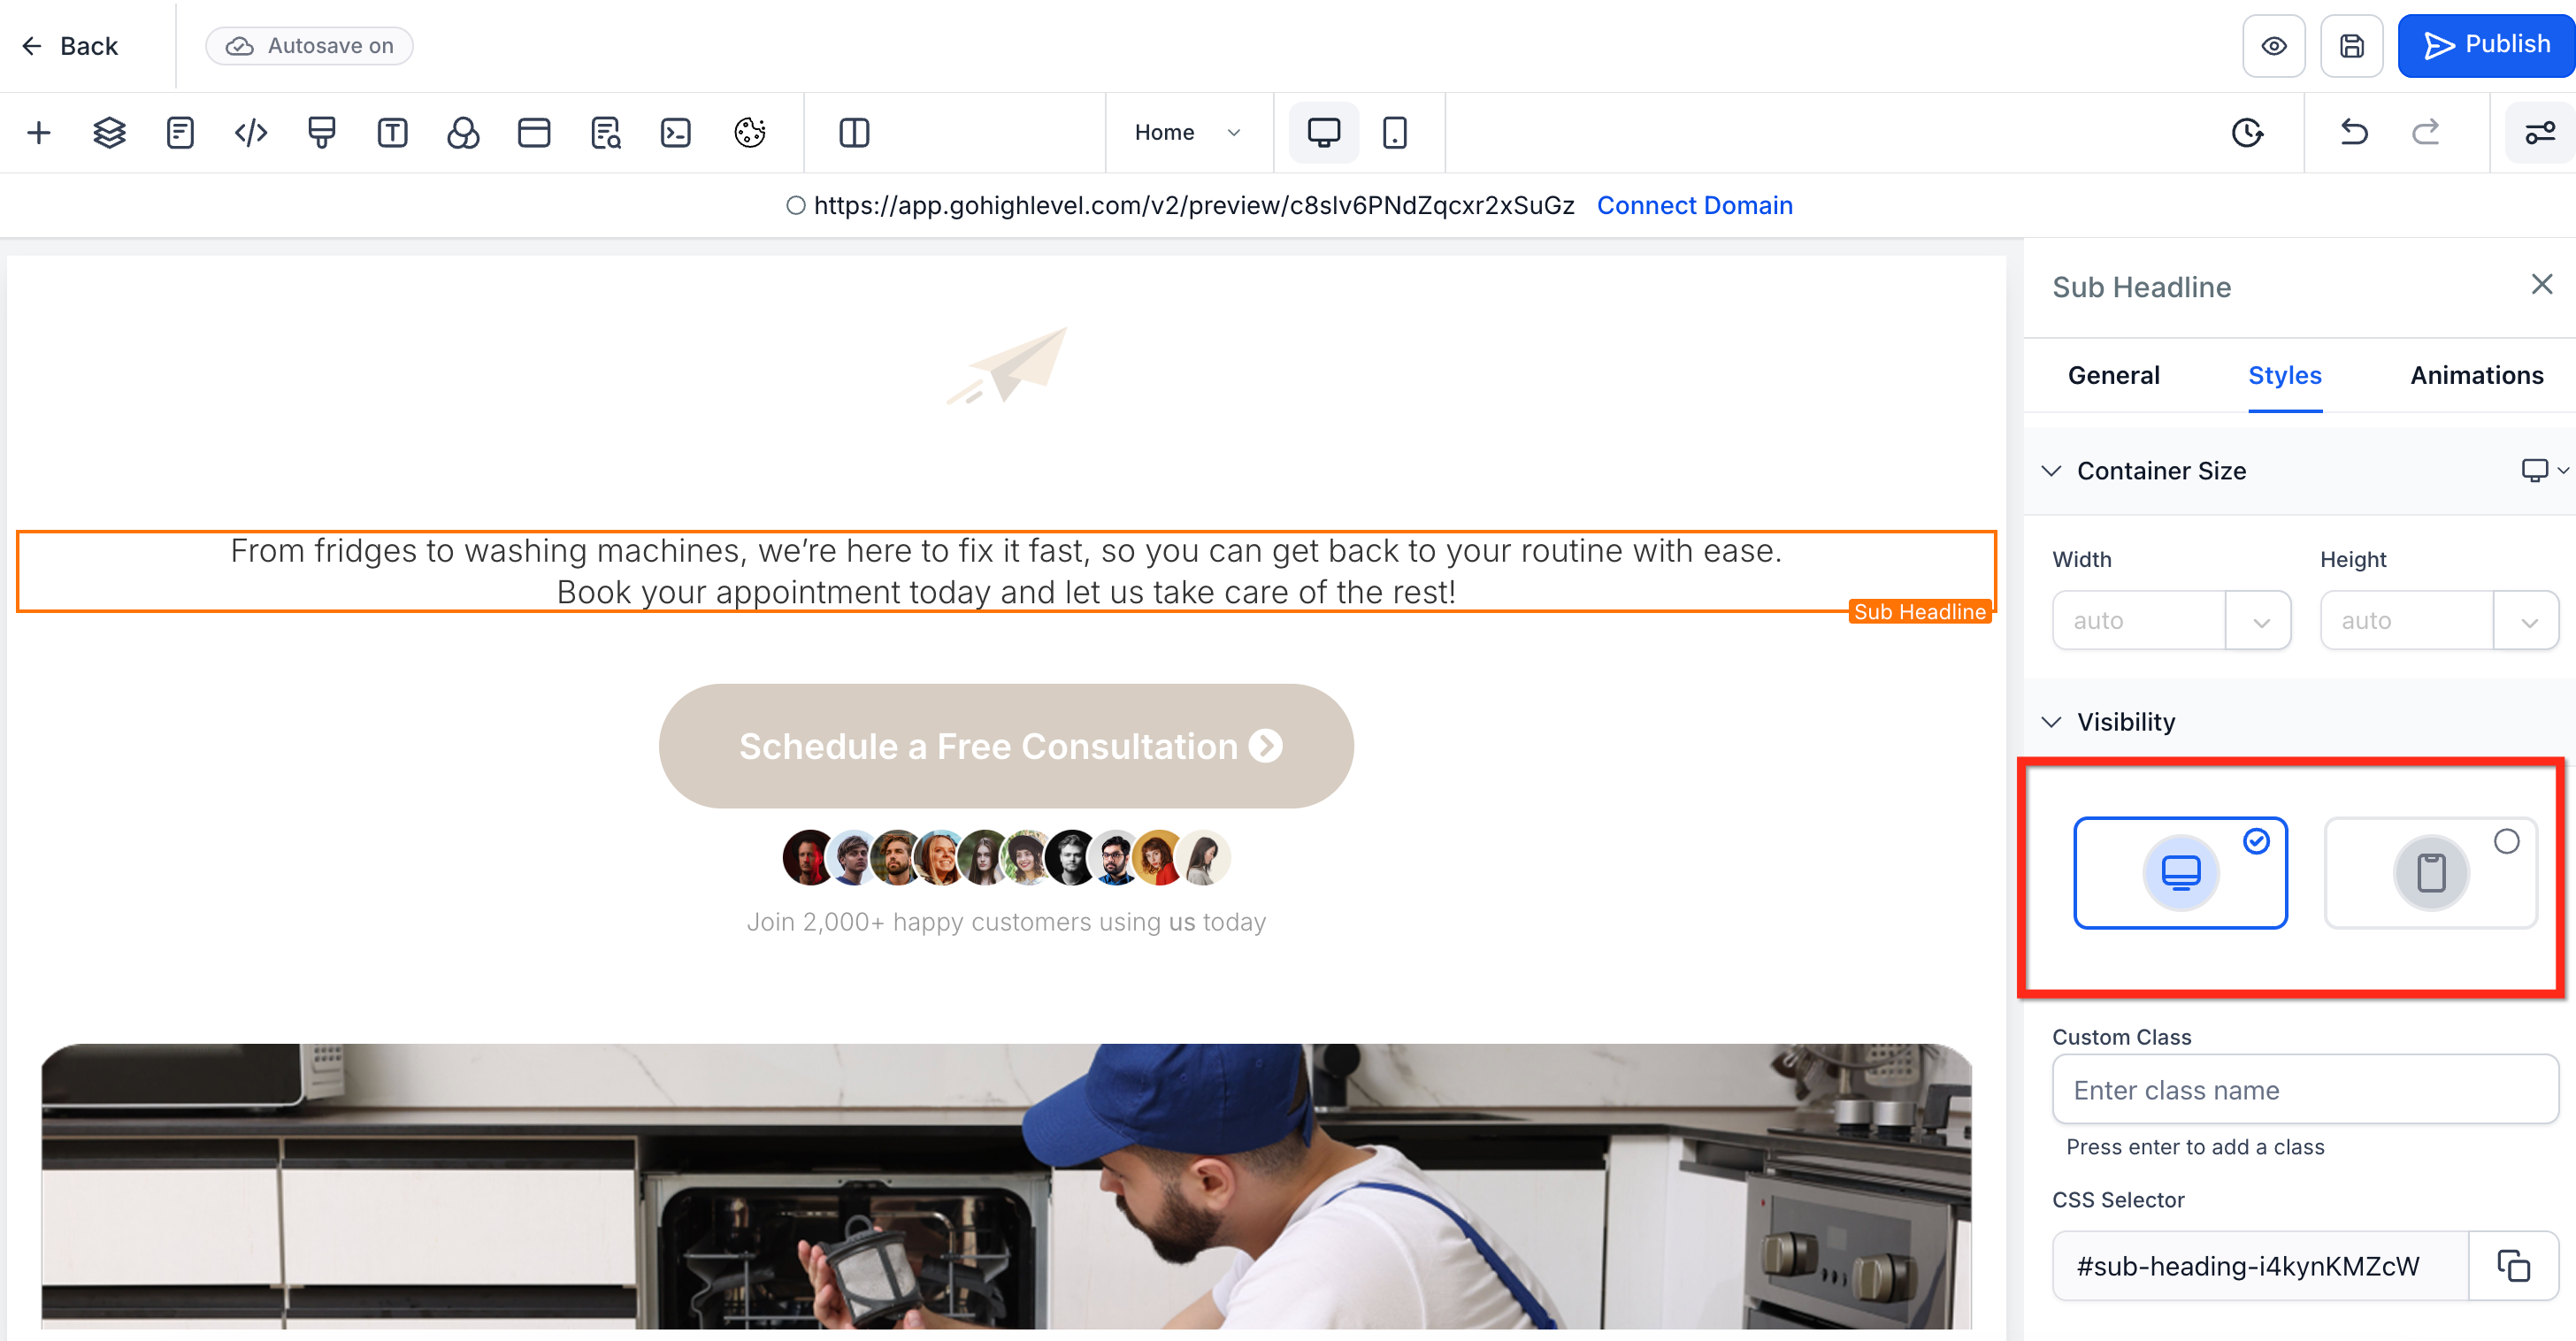
Select the element you want to "show" from a "hidden" state. In the left-side settings, go to the Styles tab, then scroll down to Visibility.
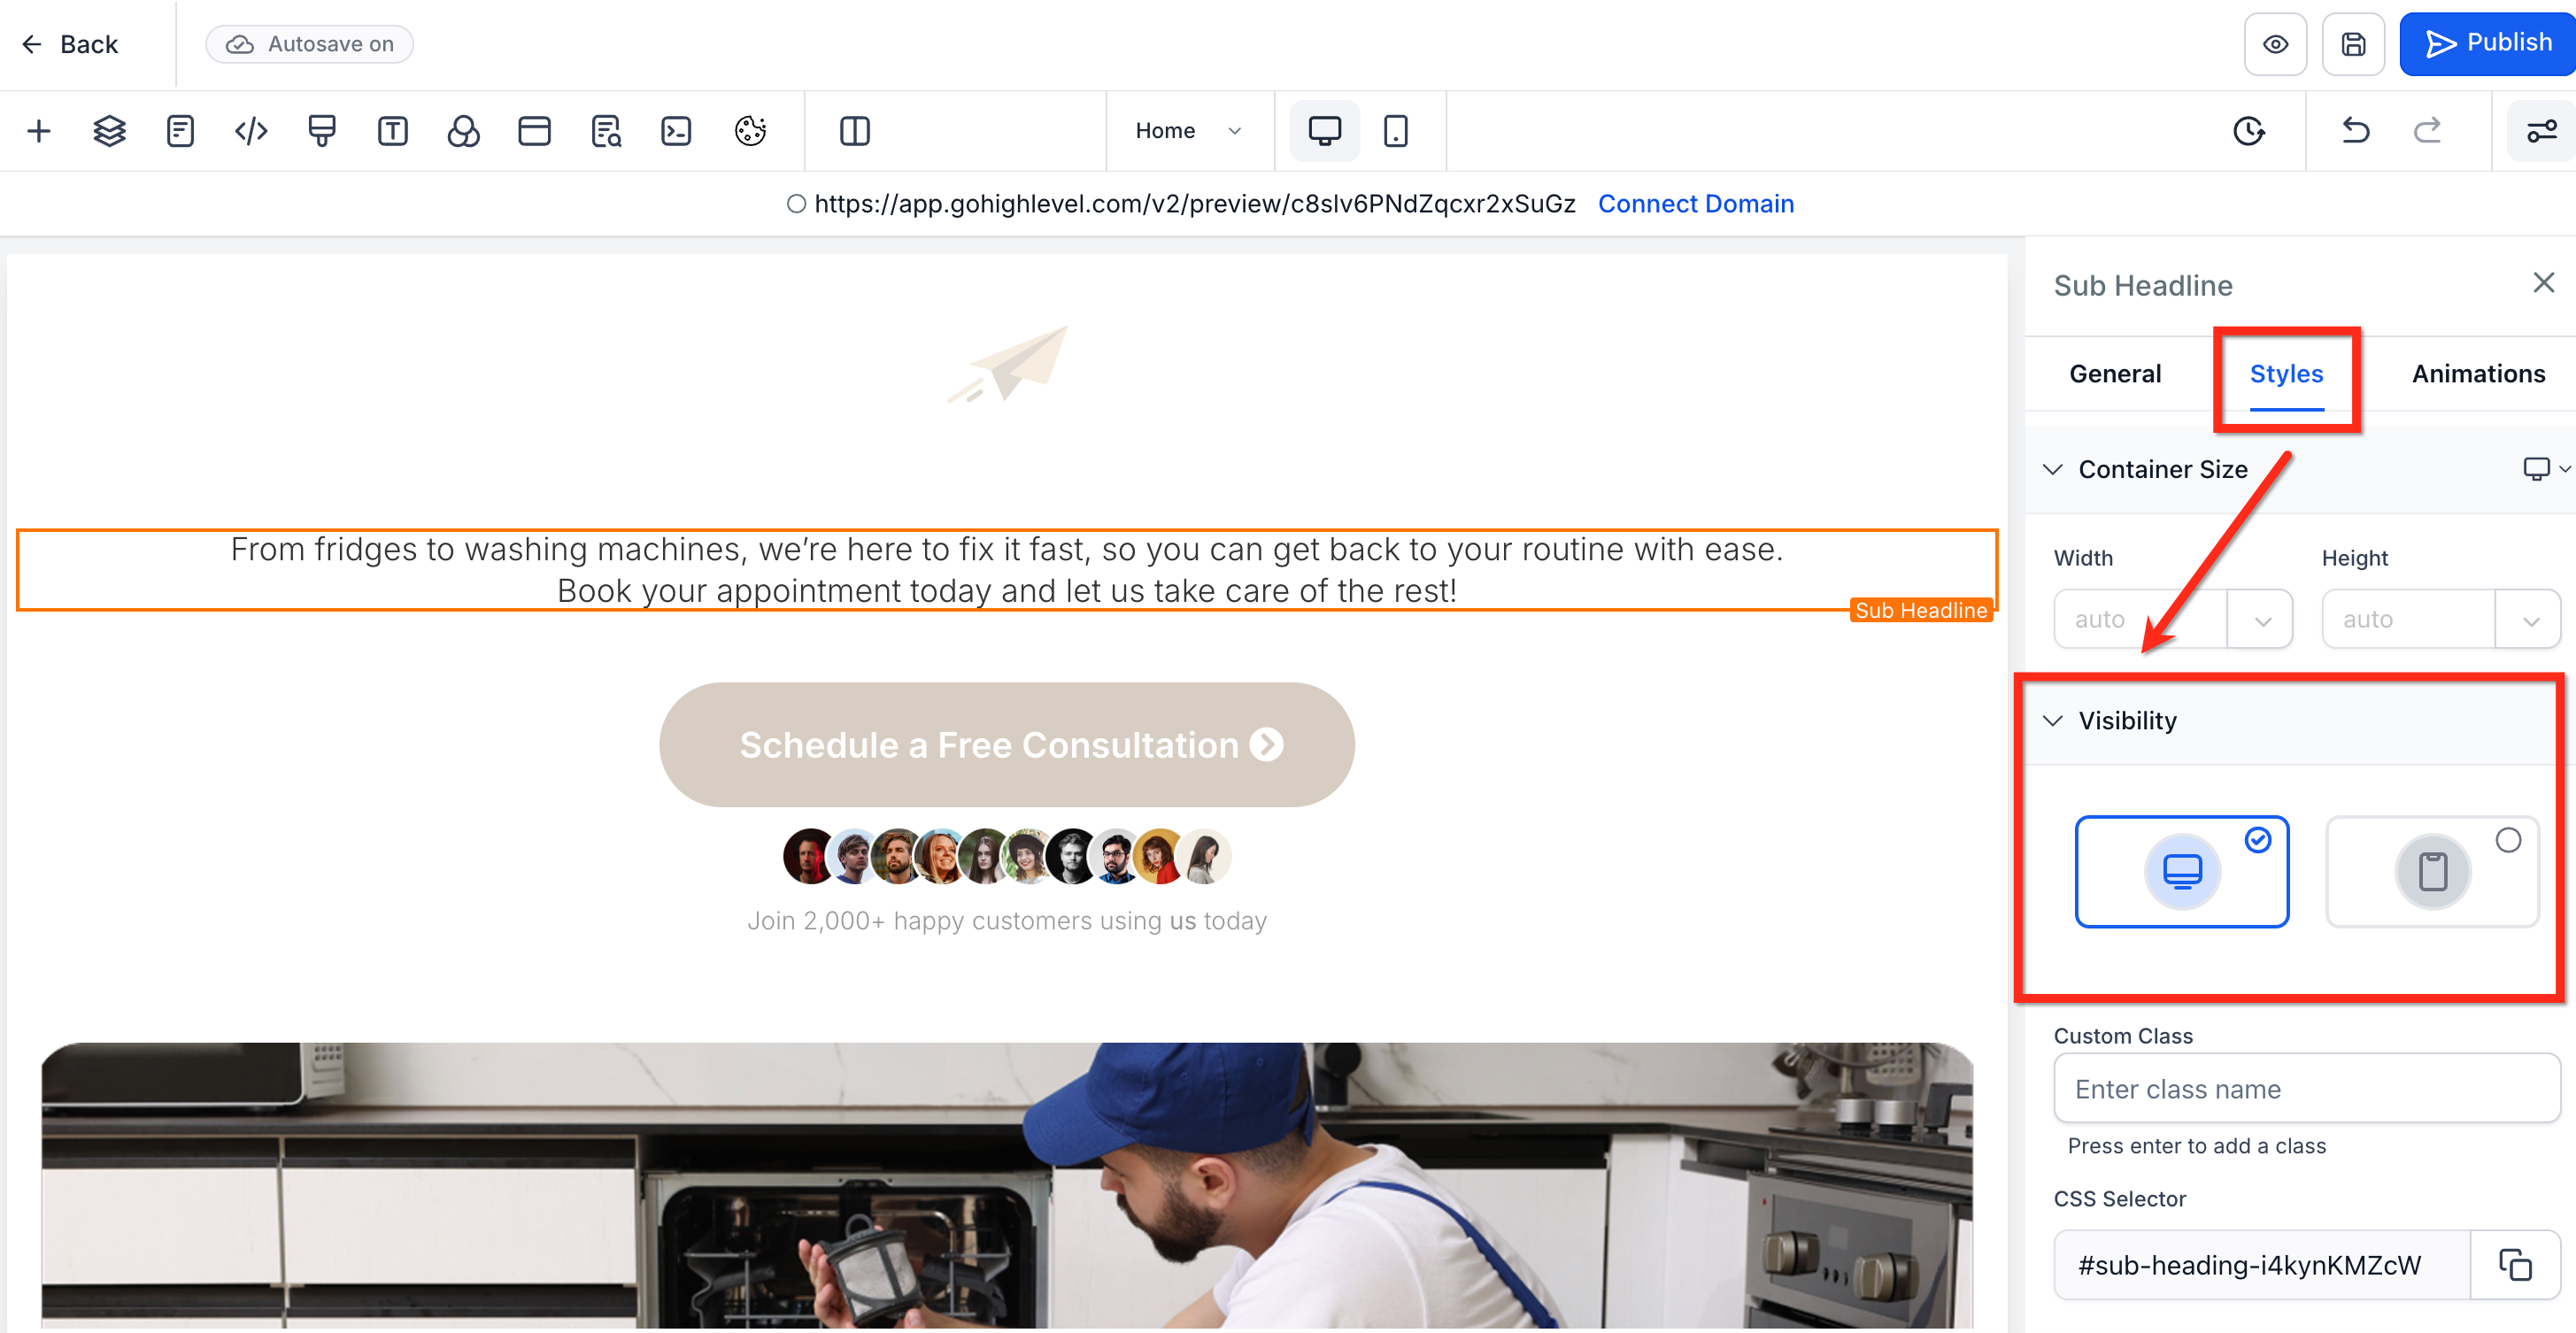
Step 2: Hide the element
Click both the mobile and desktop visibility buttons to hide the element in both views. When hidden, the icons appear gray.
Step 3: Choose the button
In the funnel or website builder, choose the Button element that you want to use. Step 4: Navigate to button actions
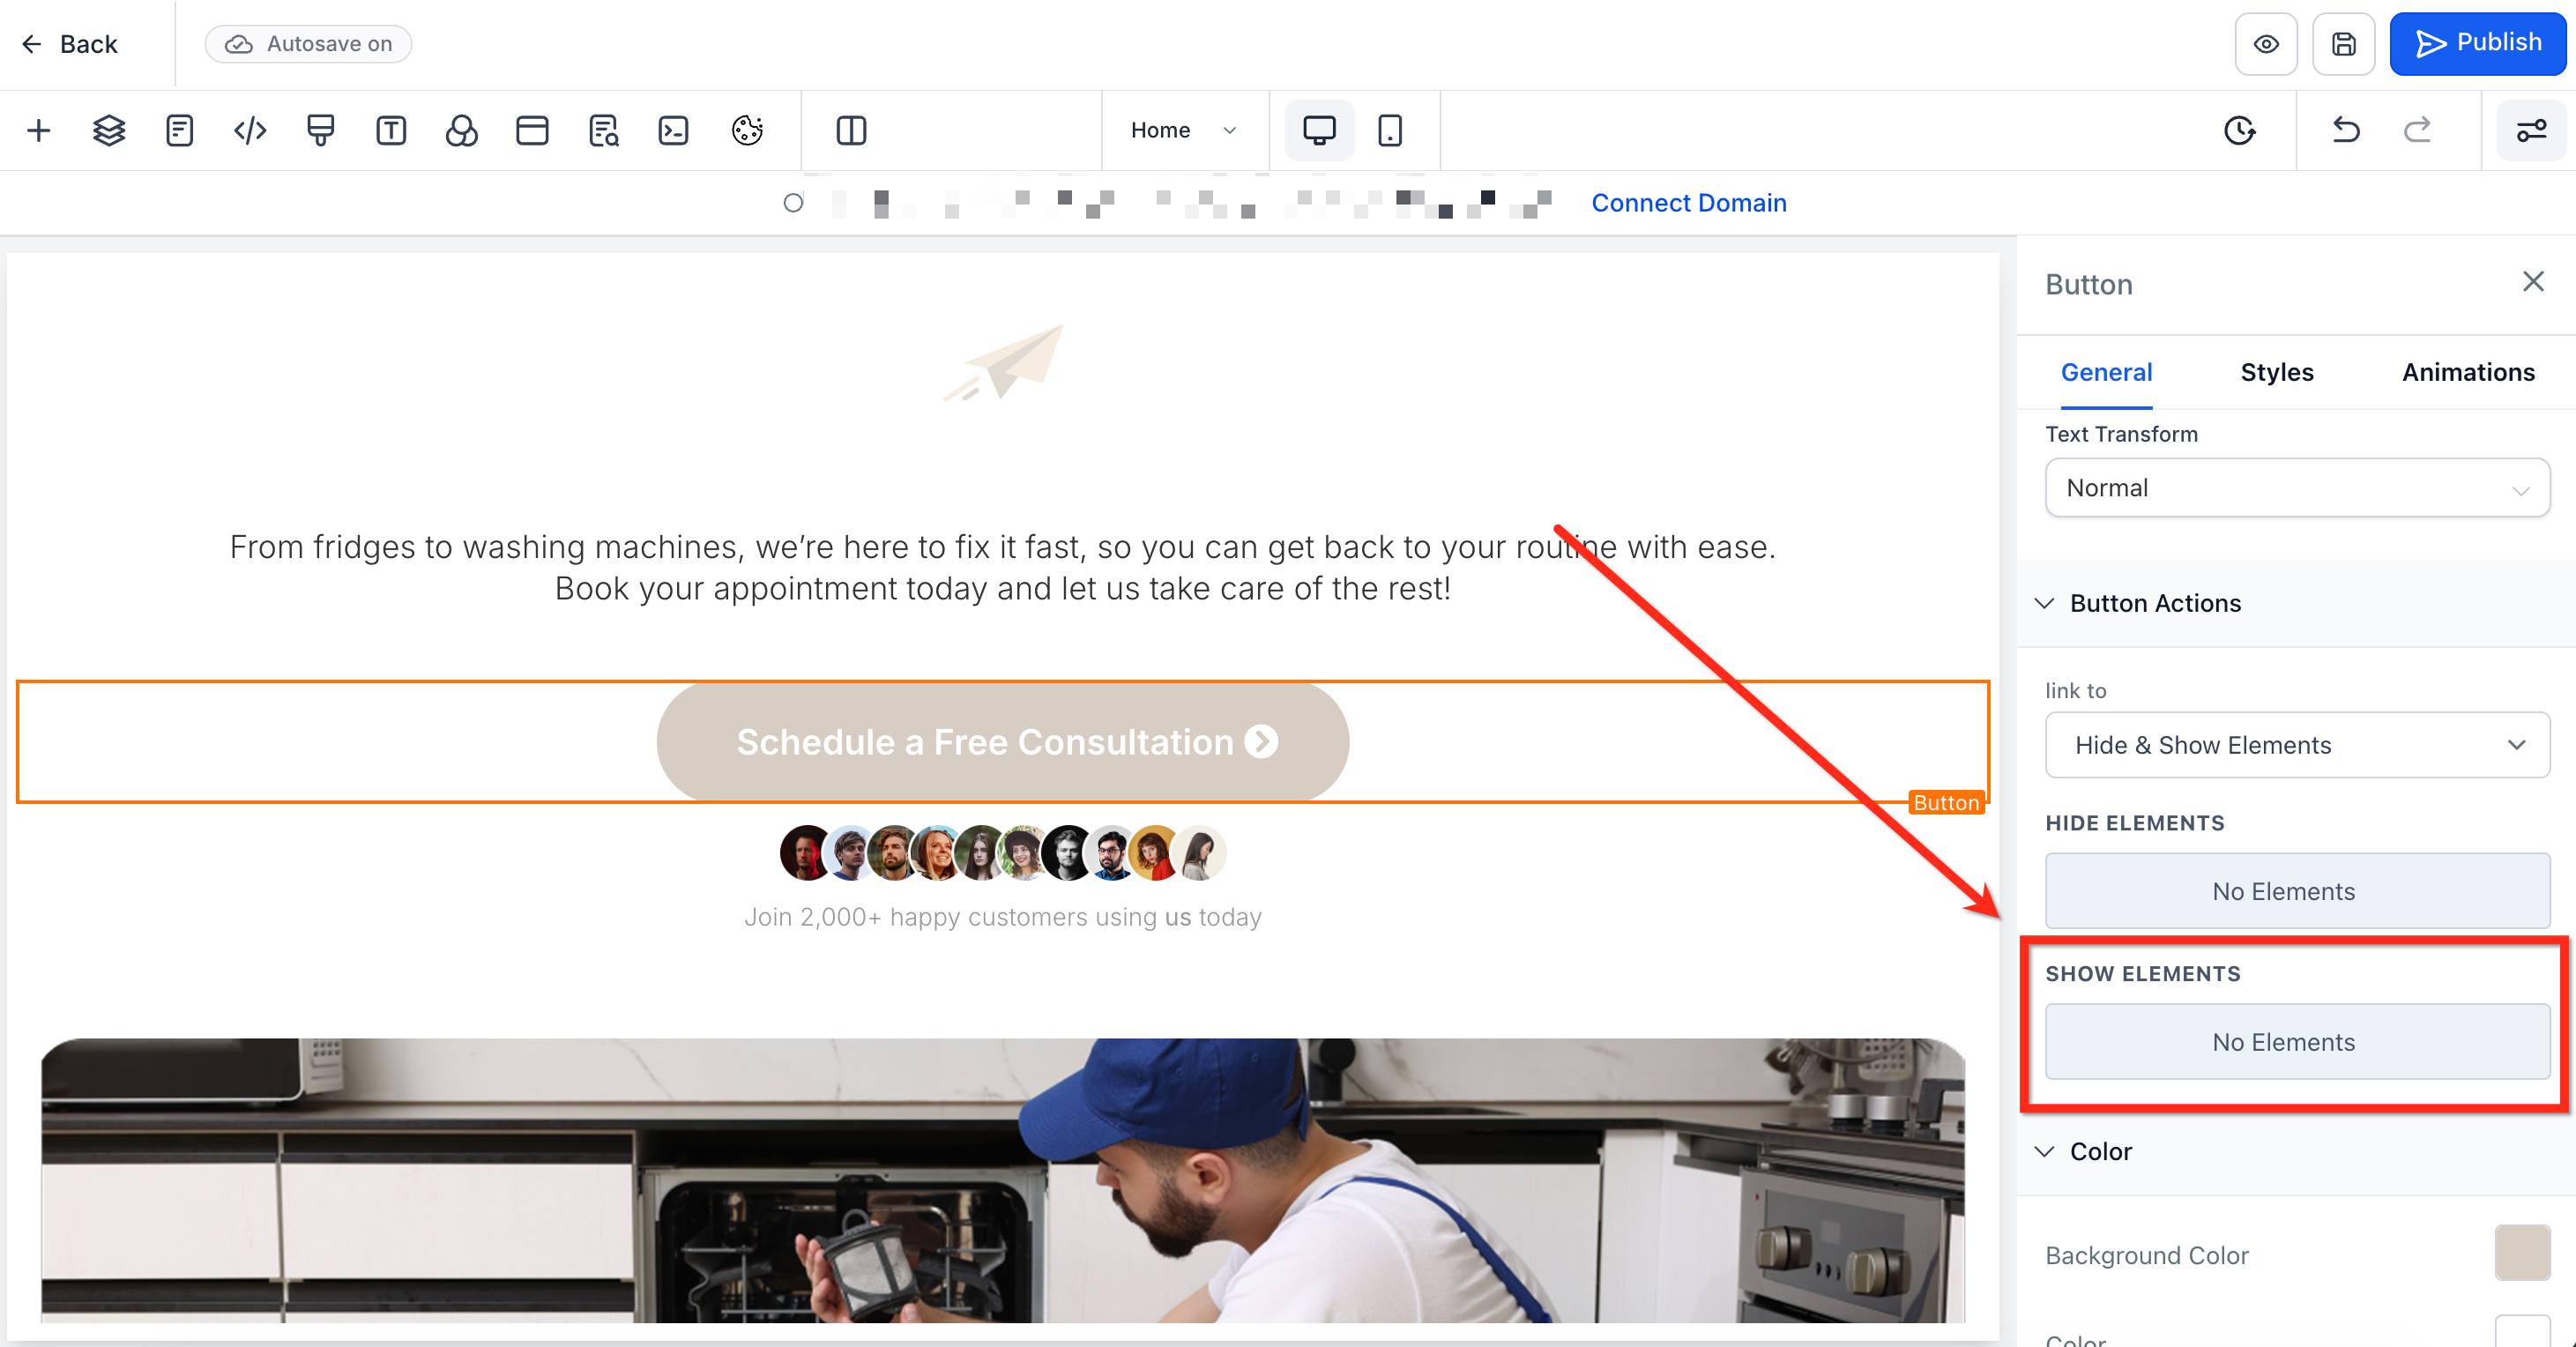
On the right side of the screen, you'll find the element settings. Under General, scroll all the way down to Button Actions. In the Link To dropdown, select Hide & Show Elements. Step 5: Select the element to show
Click Show Elements to open a dropdown listing all hidden elements on the page. Choose the element or elements you'd like to show when the button is clicked. You can choose an element, a section, a column, or column rows.
Step 6: Save changes
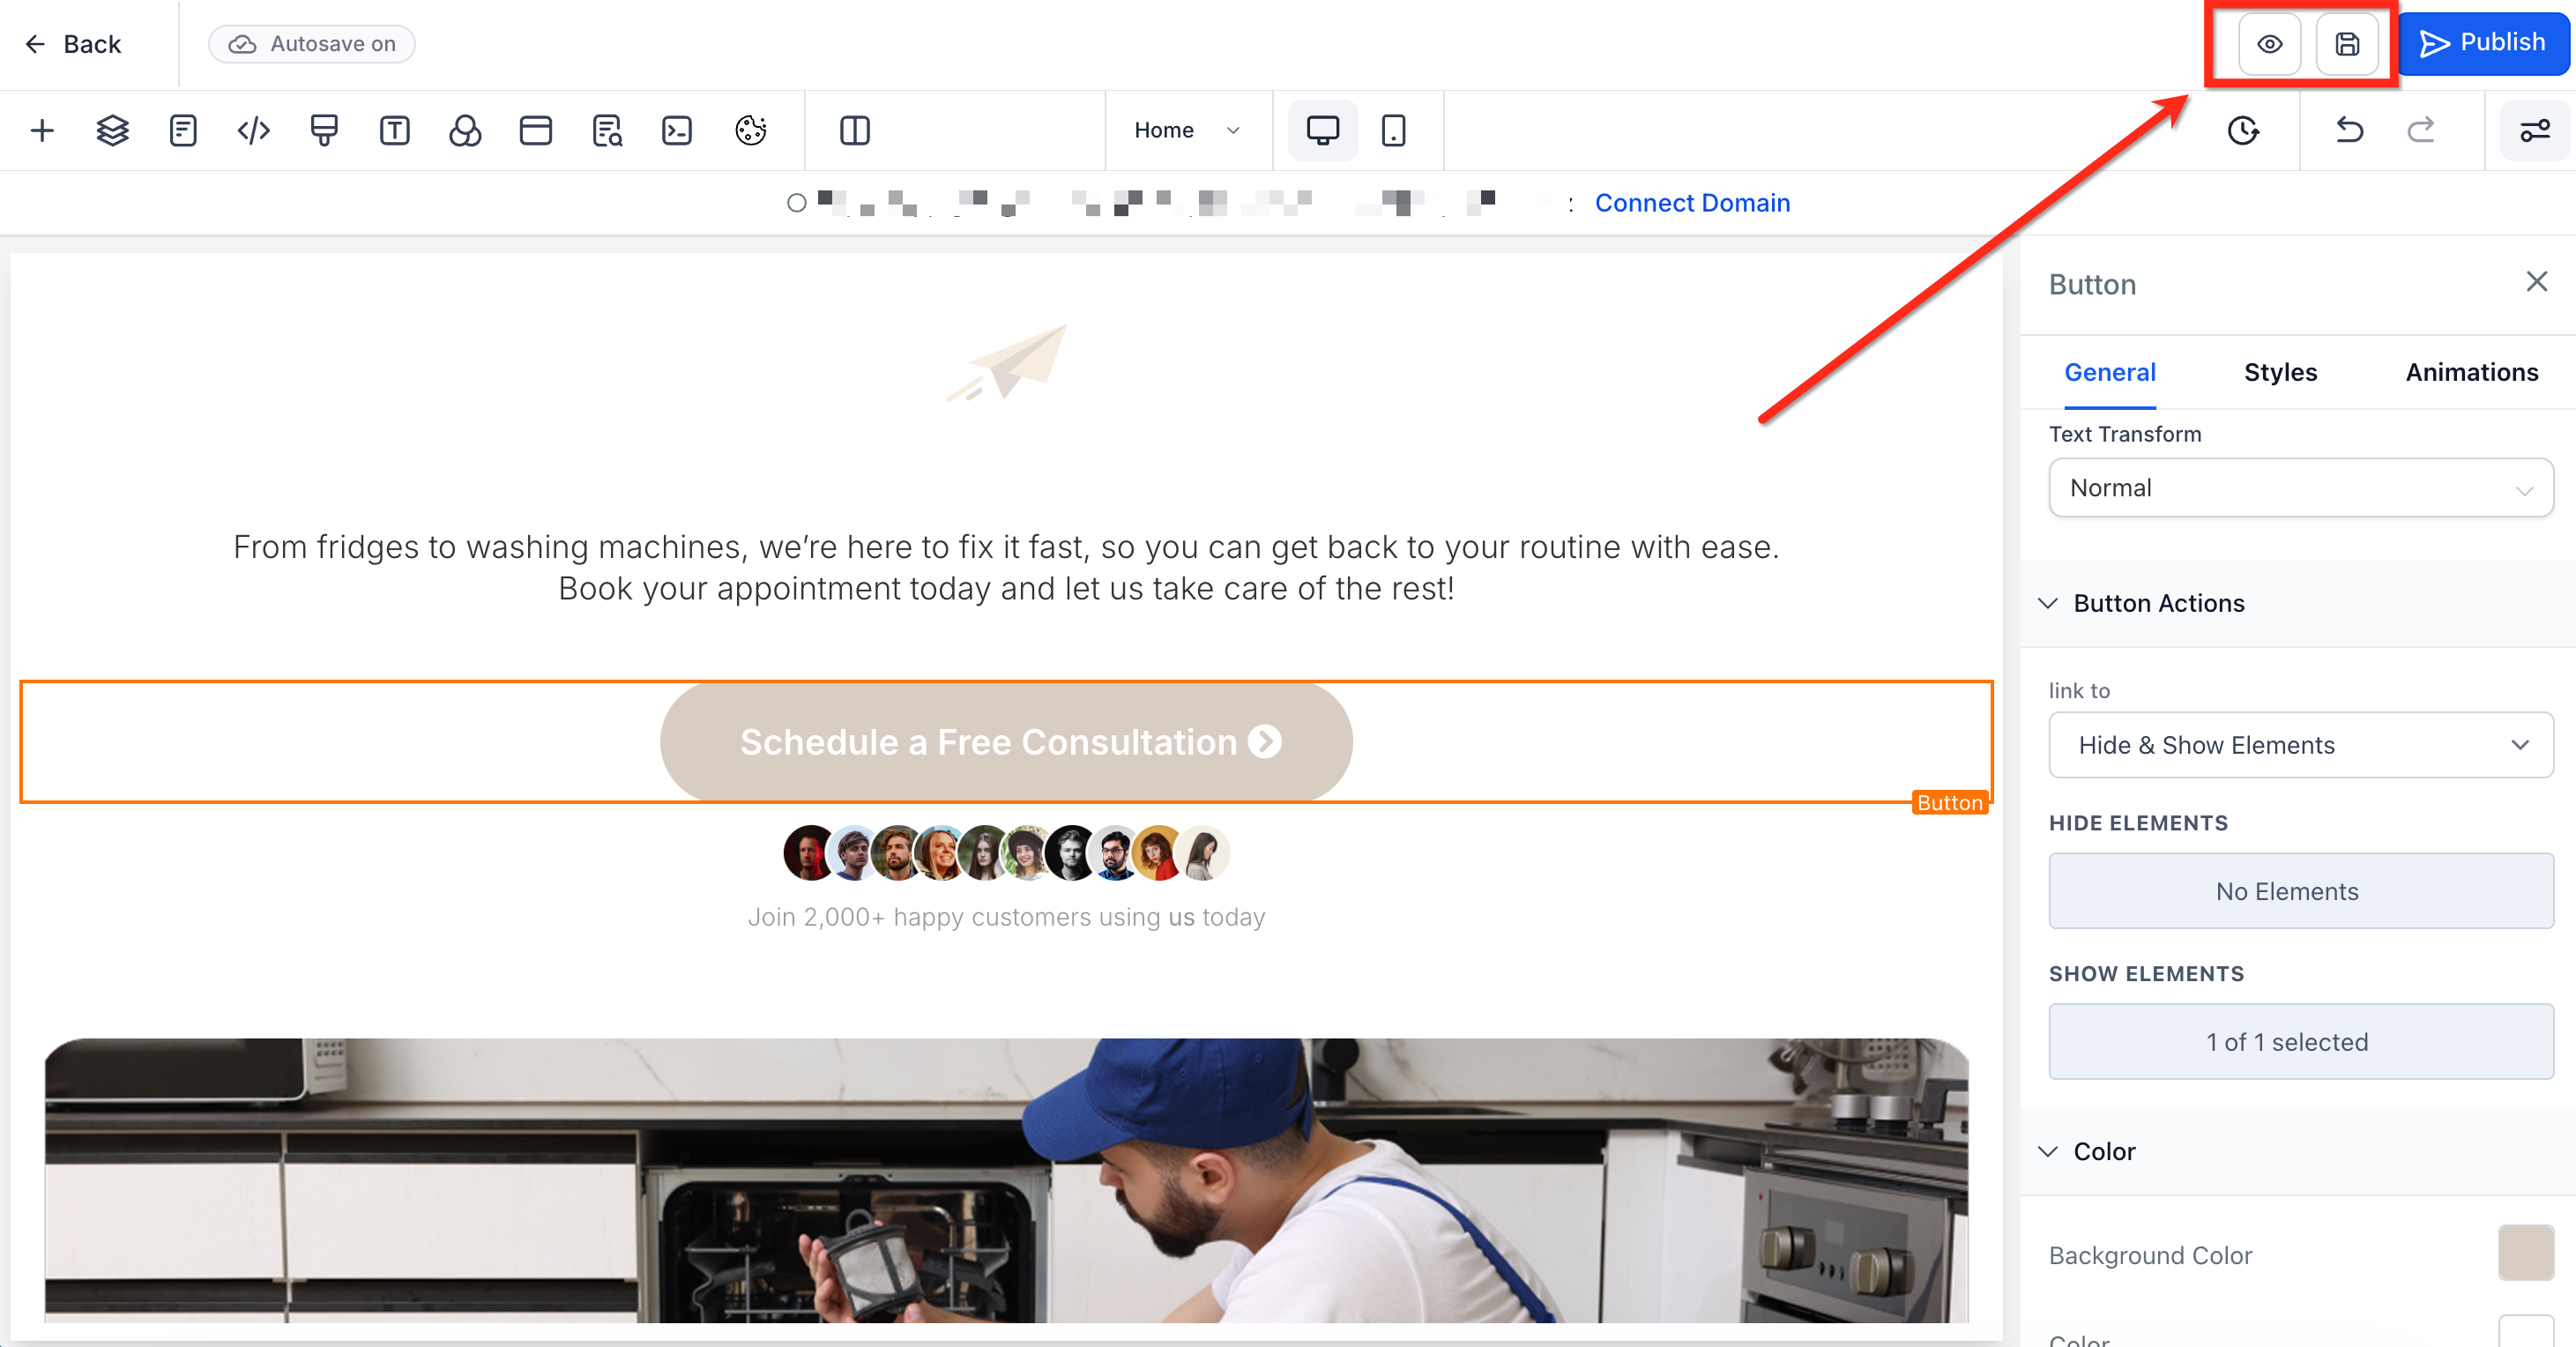
Once you've chosen which elements to show, click Save to save your changes, or click Preview to preview and test your funnel or website.
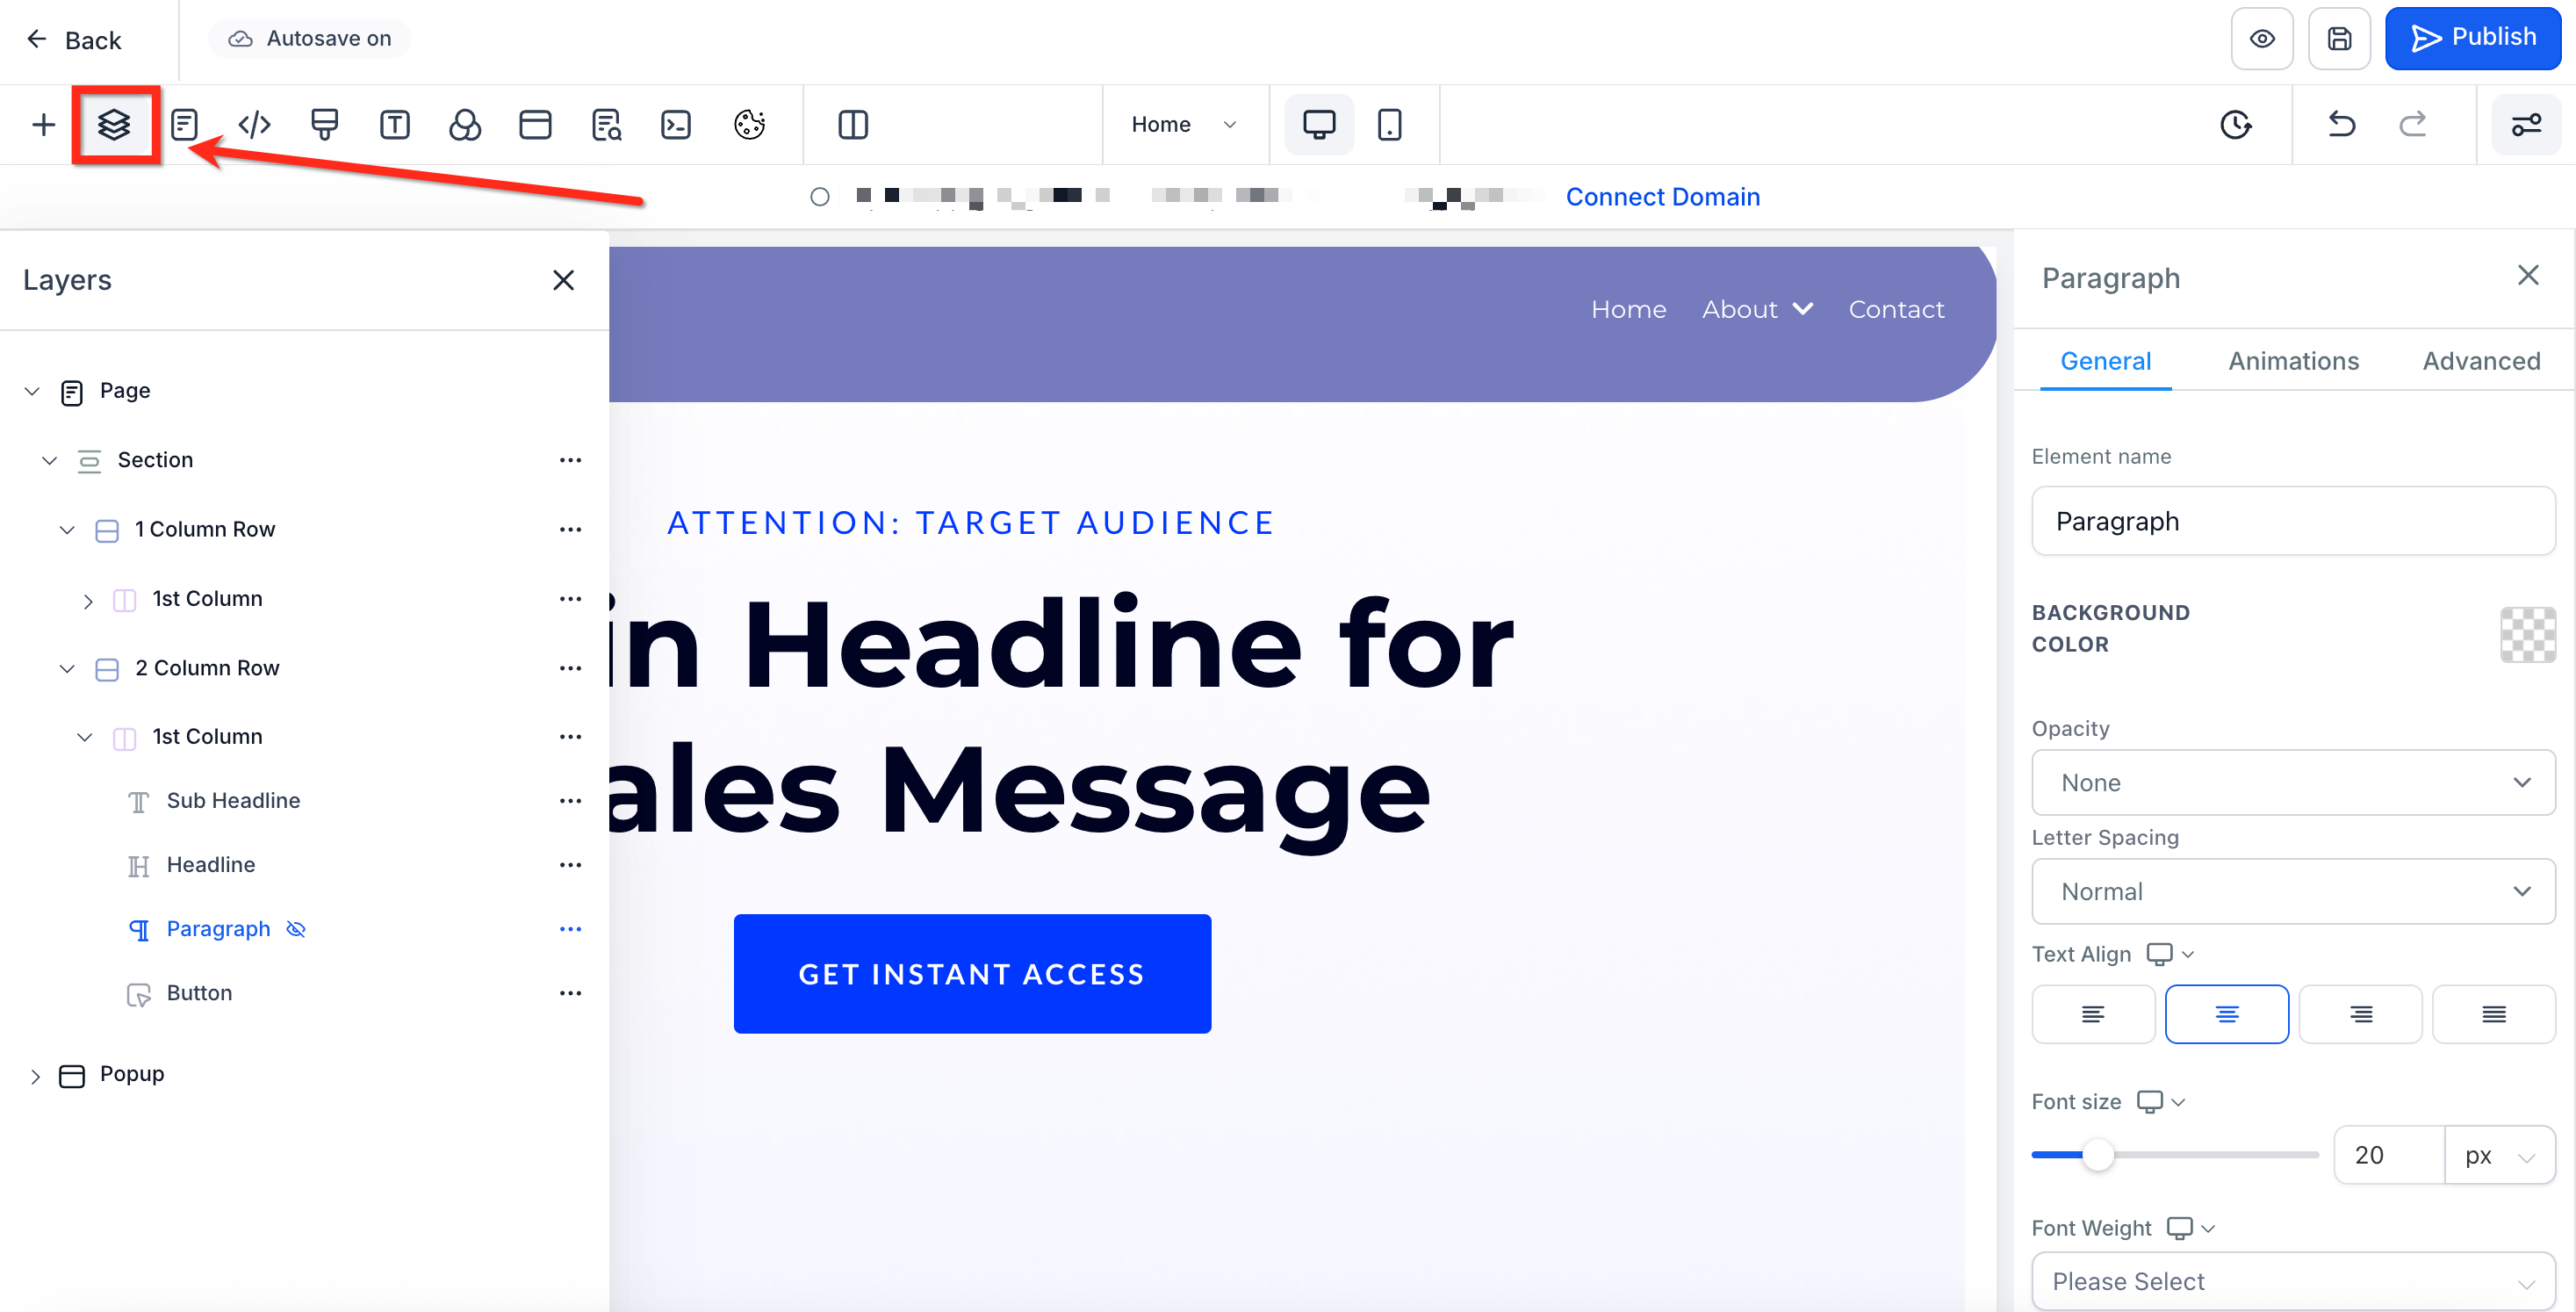
If you've accidentally hidden an element from both desktop and mobile views, you won't be able to see or click it on the canvas, but you can still access and edit it using the Layers panel in the builder.
Open the Layers panel. In the top left of the builder, click the Layers icon (stacked layers). This opens a list of all elements in your section or page, including hidden ones.
Find the hidden element. Scroll through the list to locate the element you hid. It may appear dimmed or with an "eye" icon indicating it's not visible in either view.
Select the element. Click the element's name in the list to select it. The element is now highlighted in the builder, and its settings panel appears.
Restore visibility. With the element selected, click the visibility toggle (eye icon) in the top bar to turn it back on for desktop and/or mobile.
Do I need any prior experience with animations to use this feature?
No experience is required. The interface is intuitive for all users, with real-time feedback and clearly labeled controls.
What types of animations can I apply?
You can choose from a variety of animation styles and customize them using the available controls for timing, scale, and easing.
Can I preview animations before publishing?
Yes. All animation settings display live in the Page Builder, so you can see the effect immediately.
What does easing do in an animation?
Easing determines how the animation moves, whether it starts slowly, ends slowly, or moves at a constant speed.
Can I combine multiple animations on one element?
Only one animation can be applied per element. However, you can use different animations across multiple elements to create coordinated effects.
