Forms are how your pages turn visitors into contacts. Whether you want a simple consultation request, a new-patient intake, or a full application, you can add and edit forms right inside the Page Builder without switching tabs or losing your place in the design. This guide covers adding form elements to a page, reusing forms you already built, and customizing them in context.
For building forms from scratch, managing fields, and reviewing submissions, see the Forms collection.
Aesthetix CRM lets you create, add, and manage forms without leaving your page canvas. You can build a new form in a large in-context editor, drop in an existing form with the Form Picker, customize fields and design, and keep everything organized for reuse across your pages and websites.
Understanding what the in-page experience gives you helps you decide when to build a new form versus reuse one, and where to manage submissions:
Speed inside the builder: Work in a large, in-context editor without switching tabs, so you keep momentum while designing pages.
Reuse existing forms: Add any existing form or survey through the Form Picker, keeping your branding and logic consistent across pages.
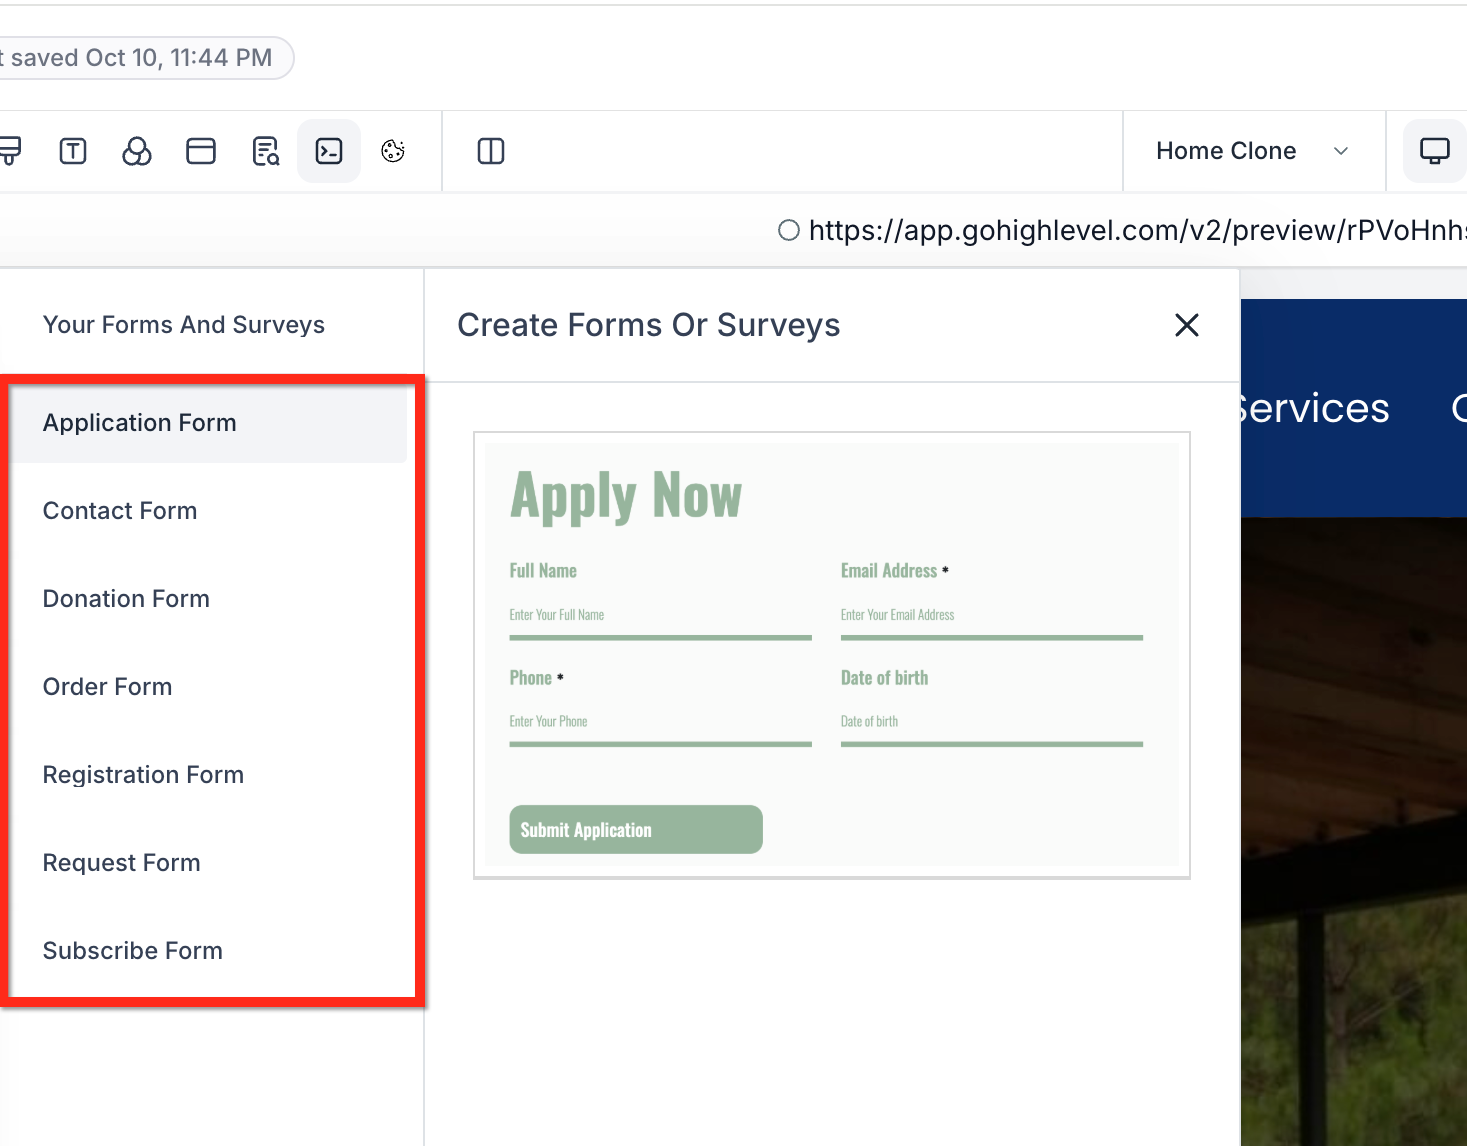
Template jump-starts: Start from curated, theme-based templates (Application, Contact, Donation, Order, Registration, Request, Subscribe) instead of building from scratch, for example, a Request template makes a fast consultation-request form.
One-click editing: Drag a form onto the canvas and open the editor instantly to refine fields, styles, and behavior.
Unified management: Every new or added form is automatically collected in a central list, making it easy to find, duplicate, and reuse.
Payments on forms: Use order-style templates with the Payment element to sell products, collect deposits, or accept payments directly from your form.
Templates give you a ready-made form structure, while Themes are visual style presets. Choosing the right starting point speeds up your build, and knowing the difference prevents accidental overwrites.
Templates (structure): Application, Contact, Donation, Order, Registration, Request, Subscribe. Customize the fields and settings to fit how your practice captures leads.
Themes (visual styles): Quickly apply a look to match your brand.
Note: Switching Themes replaces your current style changes, so choose your Theme before fine-tuning styles.
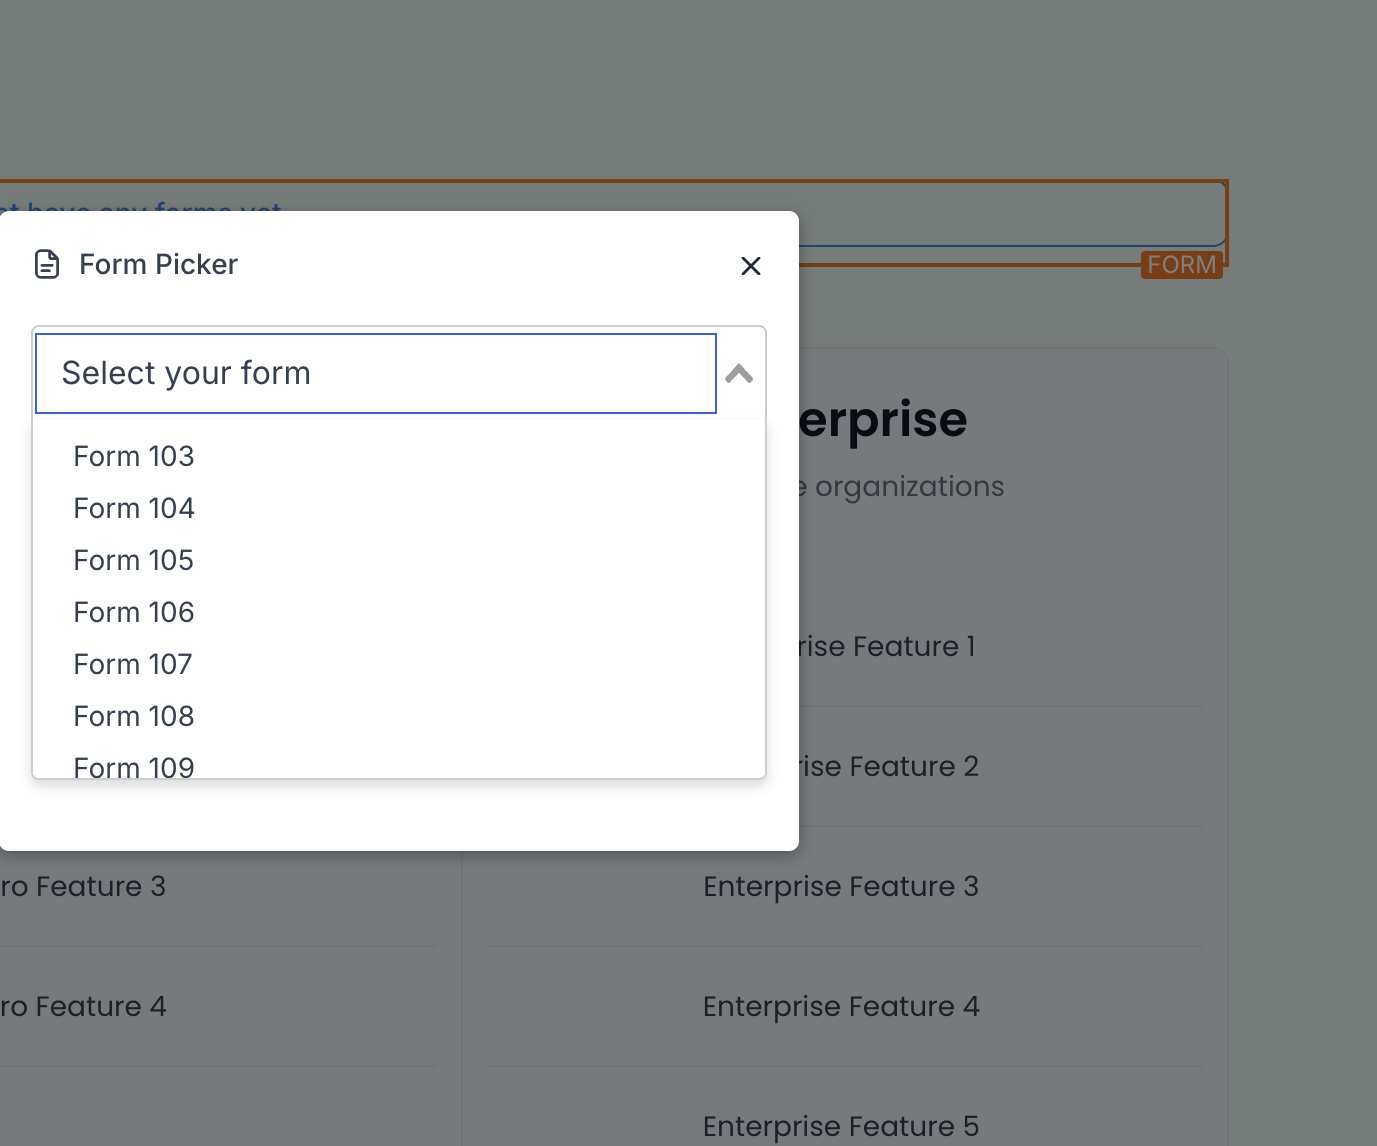
The Form Picker lets you reuse existing forms or surveys across multiple pages and websites, keeping the experience consistent and measurable.
Search, preview, and select any existing form.
Once selected, drag it to the canvas and open Edit for one-click customization.
Forms you create or add are automatically surfaced in a unified list, making it easy to find, duplicate, and reuse across your account.
Single source of truth: Forms created from the Page Builder also appear under Web Tools → Forms → Builder** and Web Tools → Surveys → Builder**, and can be selected via the Form Picker.
View all forms, search, and optionally duplicate them for variations.
Keep naming conventions consistent for accurate analytics and easy reuse.
The right sidebar of the Form Builder centralizes design and behavior controls, so you can quickly adjust presentation and advanced settings.
Fields: Add, remove, and reorder fields; map them to custom fields where needed.
Styles: Fonts, spacing, borders, backgrounds, and button styles.
Advanced: Confirmation behavior, redirects, conditional logic (survey-specific), tracking, and other options.
Forms and surveys use a refreshed default theme in the builder. You may notice:
clearer empty states when a page or component has no content,
more polished styling for inputs like checkboxes, radio buttons, and monetary fields,
improved visual consistency across placeholders, labels, and other supported elements.
These updates apply automatically to the default theme and supported components.
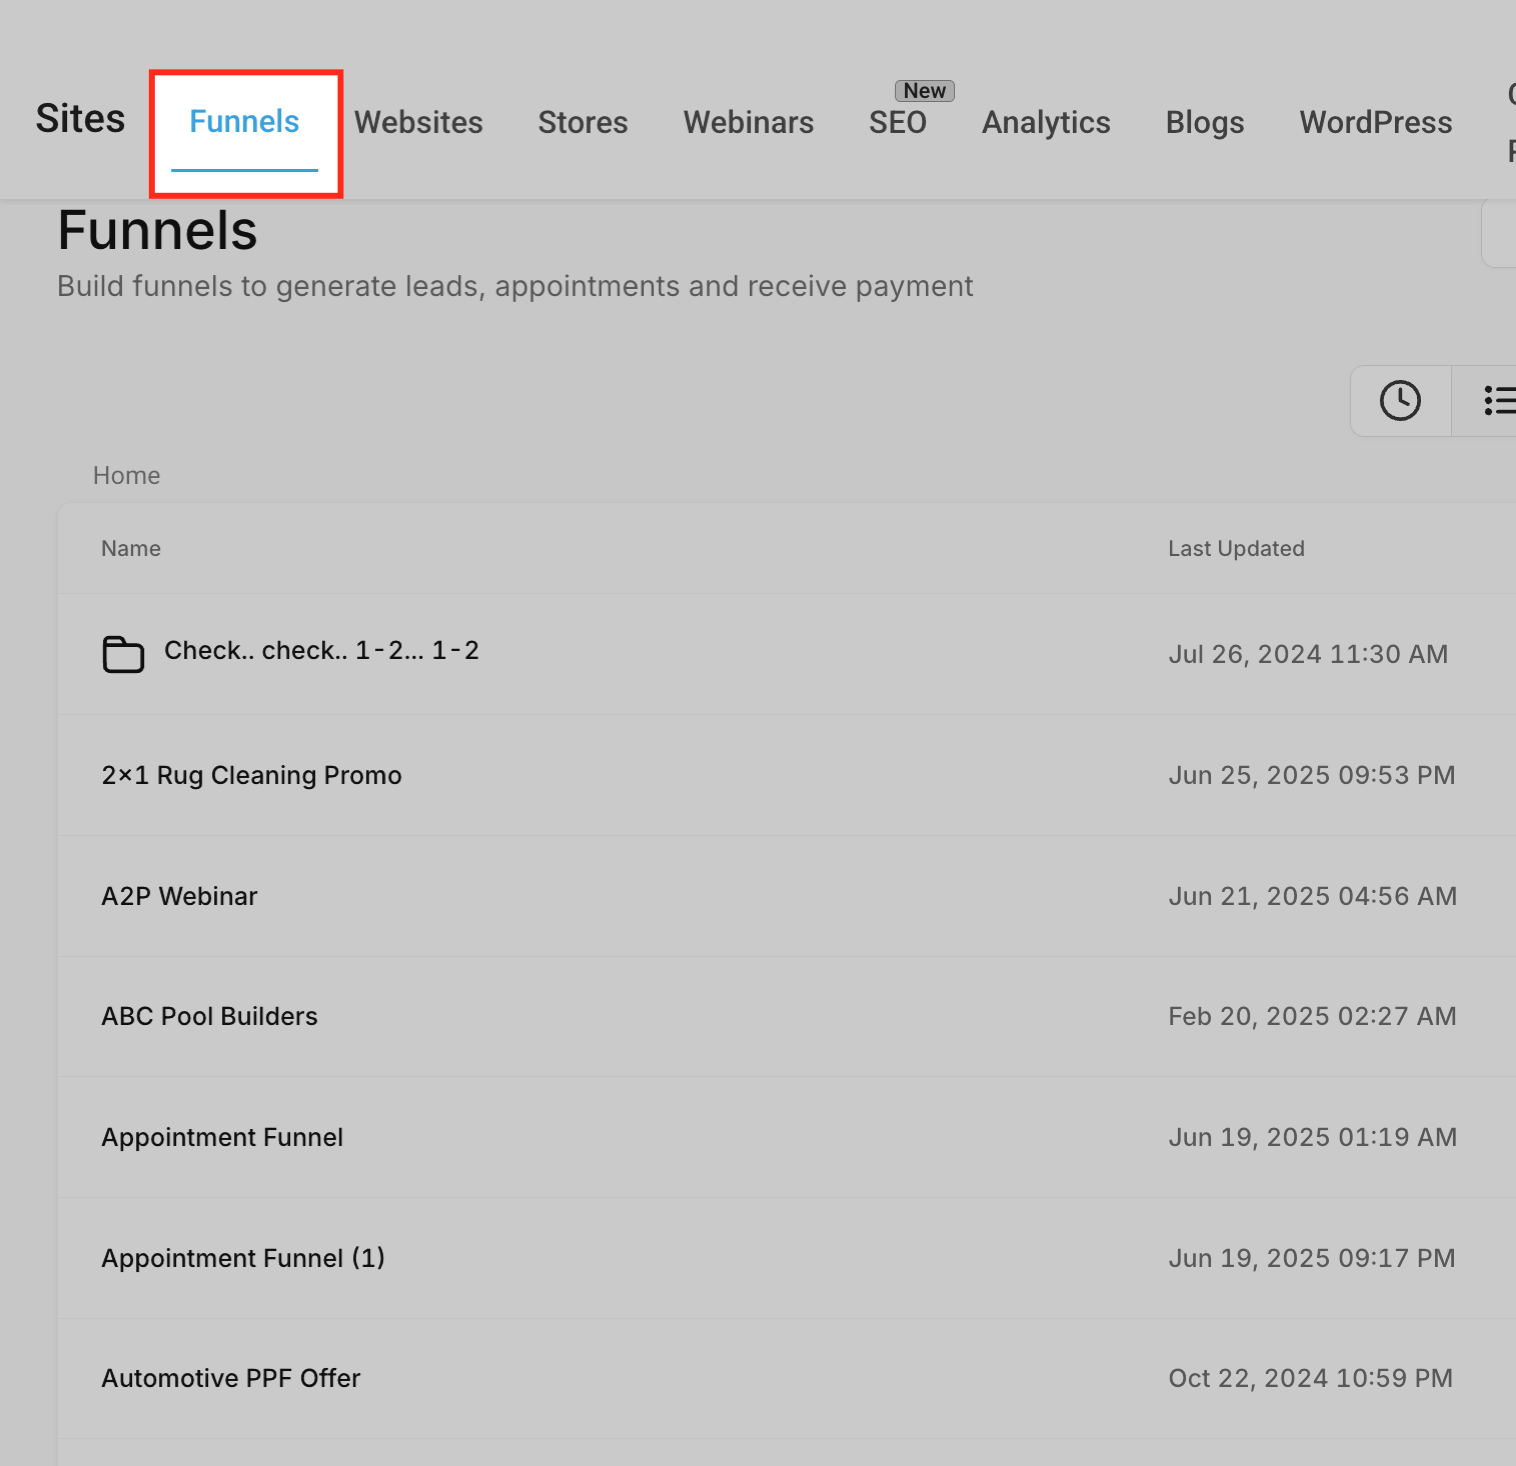
These steps work the same whether you start from a website page or a funnel step.
Open the Builder. From your website, choose a page and enter the editor. From a funnel, open your funnel, select a step, and enter the editor.
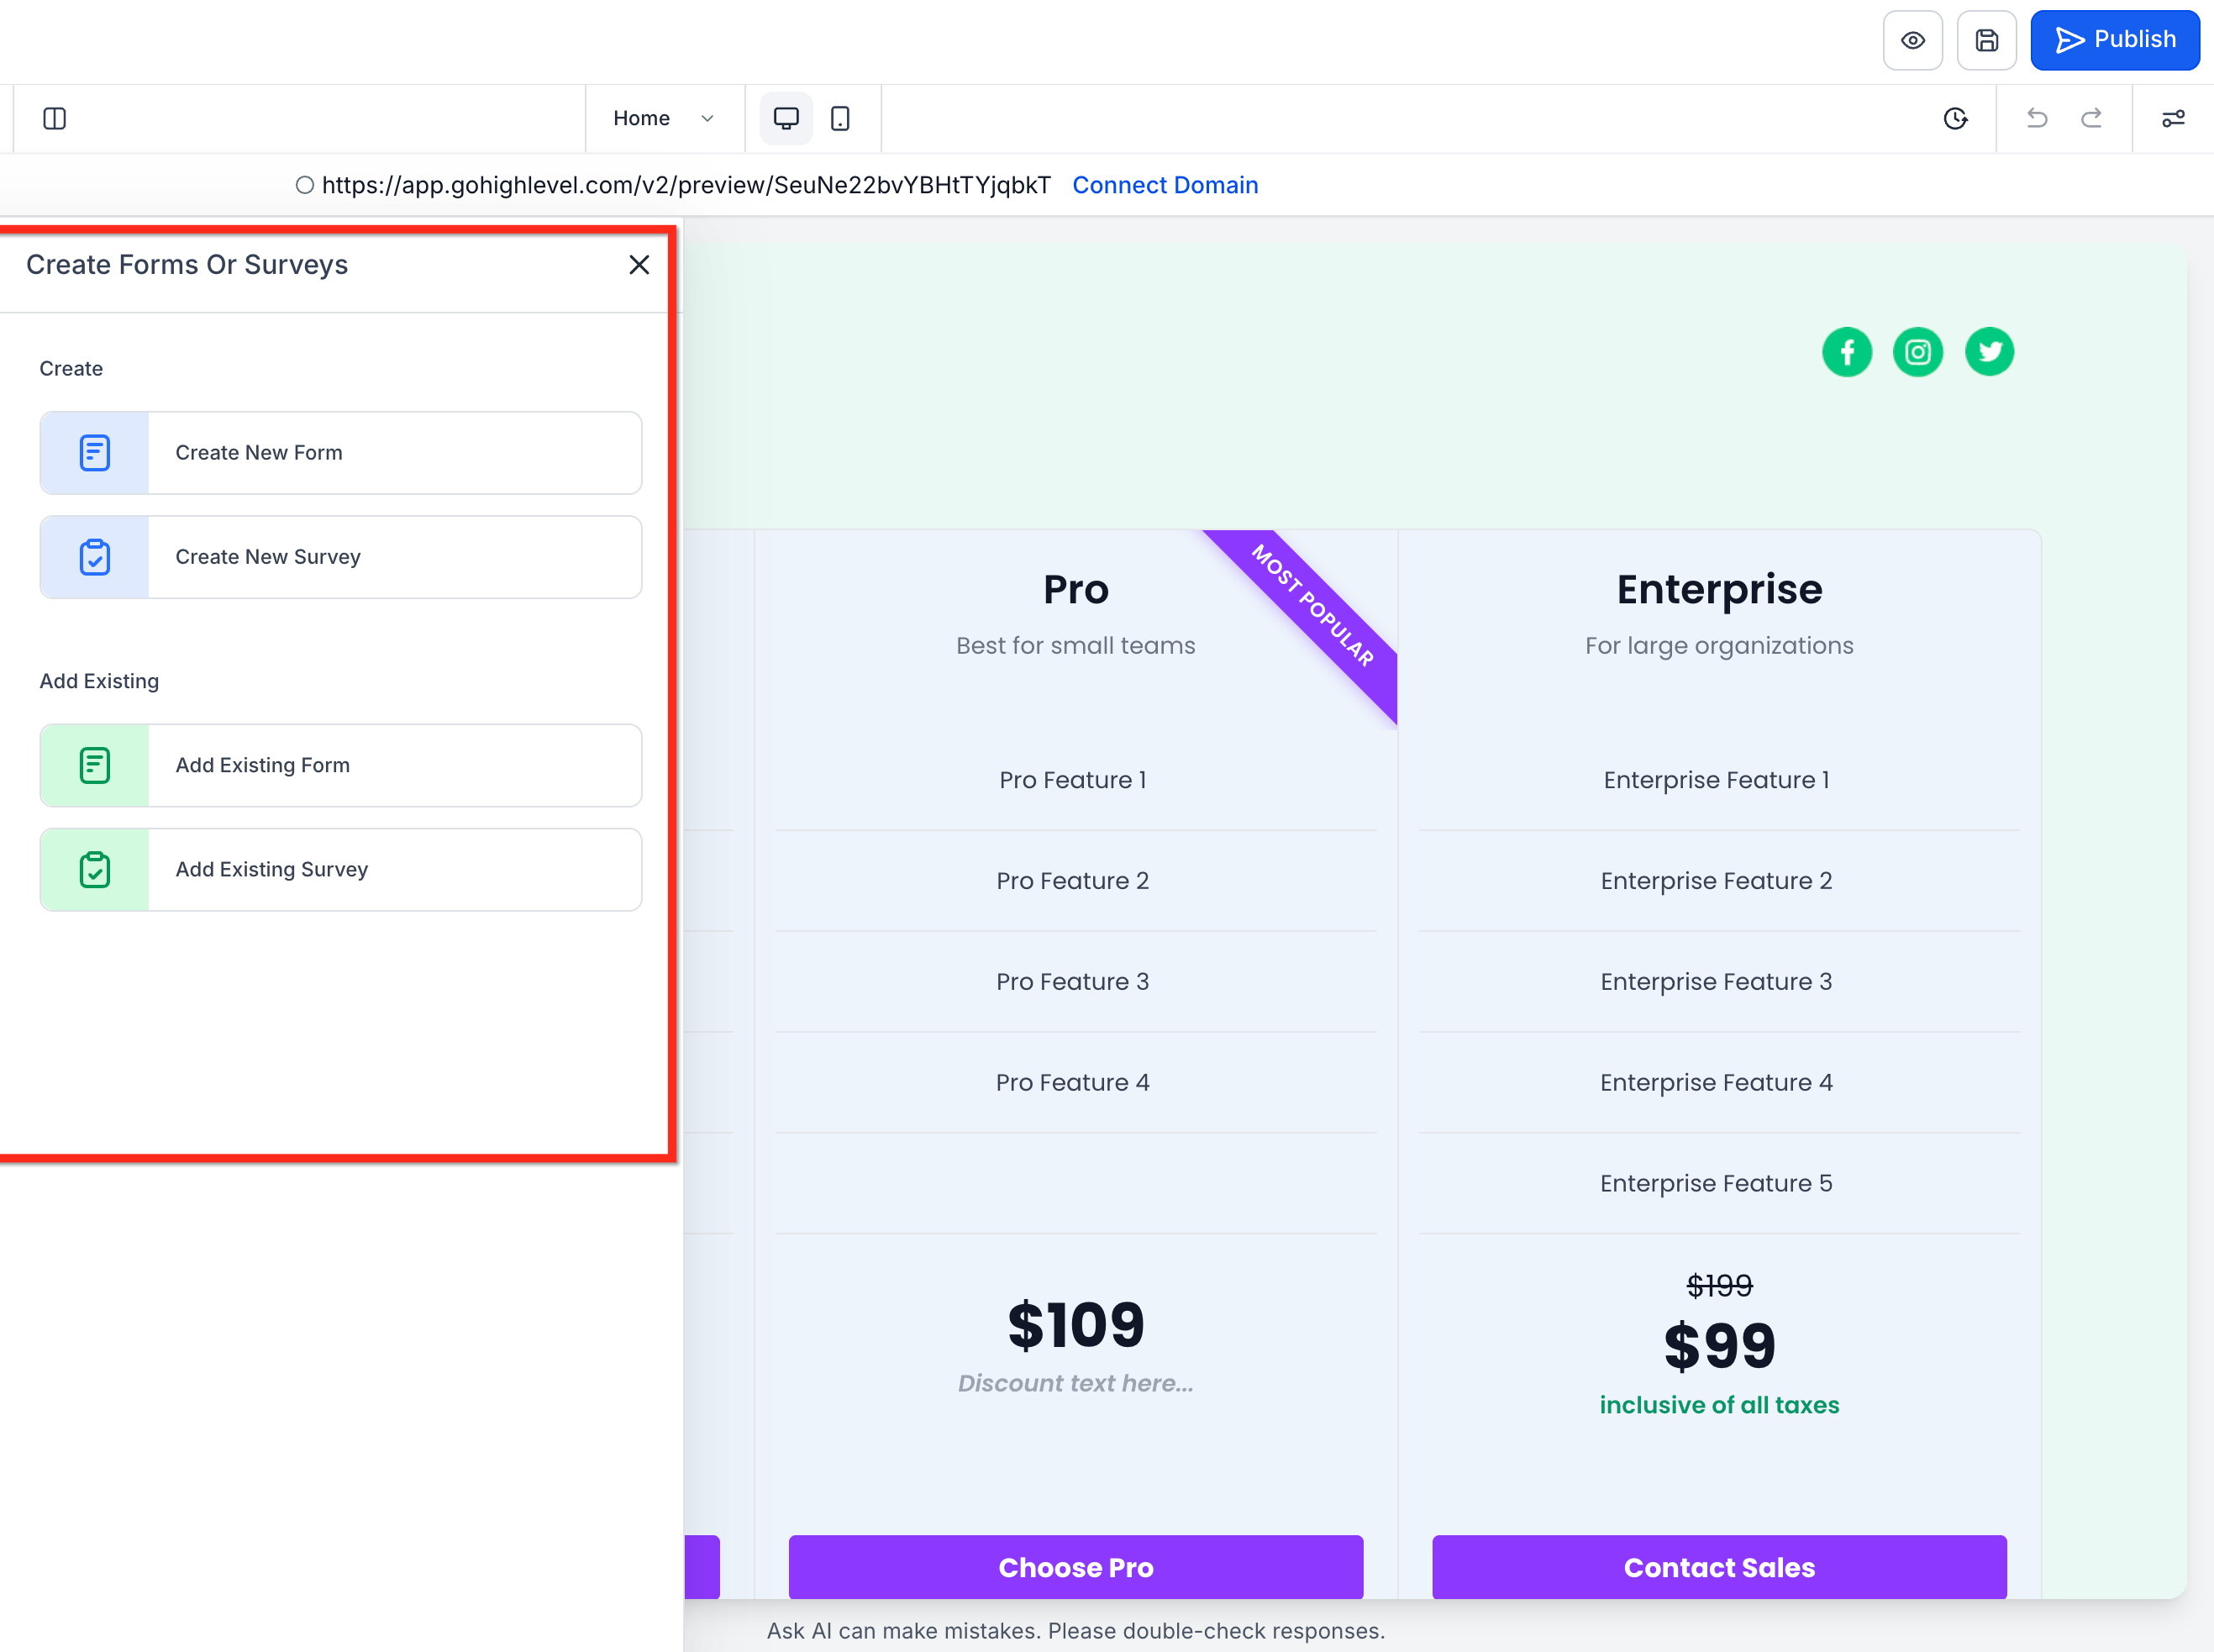
Open Your Forms & Surveys. In the left sidebar, choose Create New to build from scratch, pick any Prebuilt Form/Survey category, or select Add Existing to launch the Form Picker. Drag a new or existing form onto your page.
Create or modify the form.
Create New: Opens a large pop-up Form/Survey Builder where you can add fields, customize the design, and save.
Add/Edit Existing: Launches the Form Picker to search and select a form you built earlier.
Save and test. Save your page, then preview it and submit a test entry. Confirm submissions appear where you expect them (Web Tools → Forms/Surveys → Submissions).
You can also edit a form directly on a page you're already working in, using the pop-up Form Builder. This keeps your page in the background so you never lose your design context.
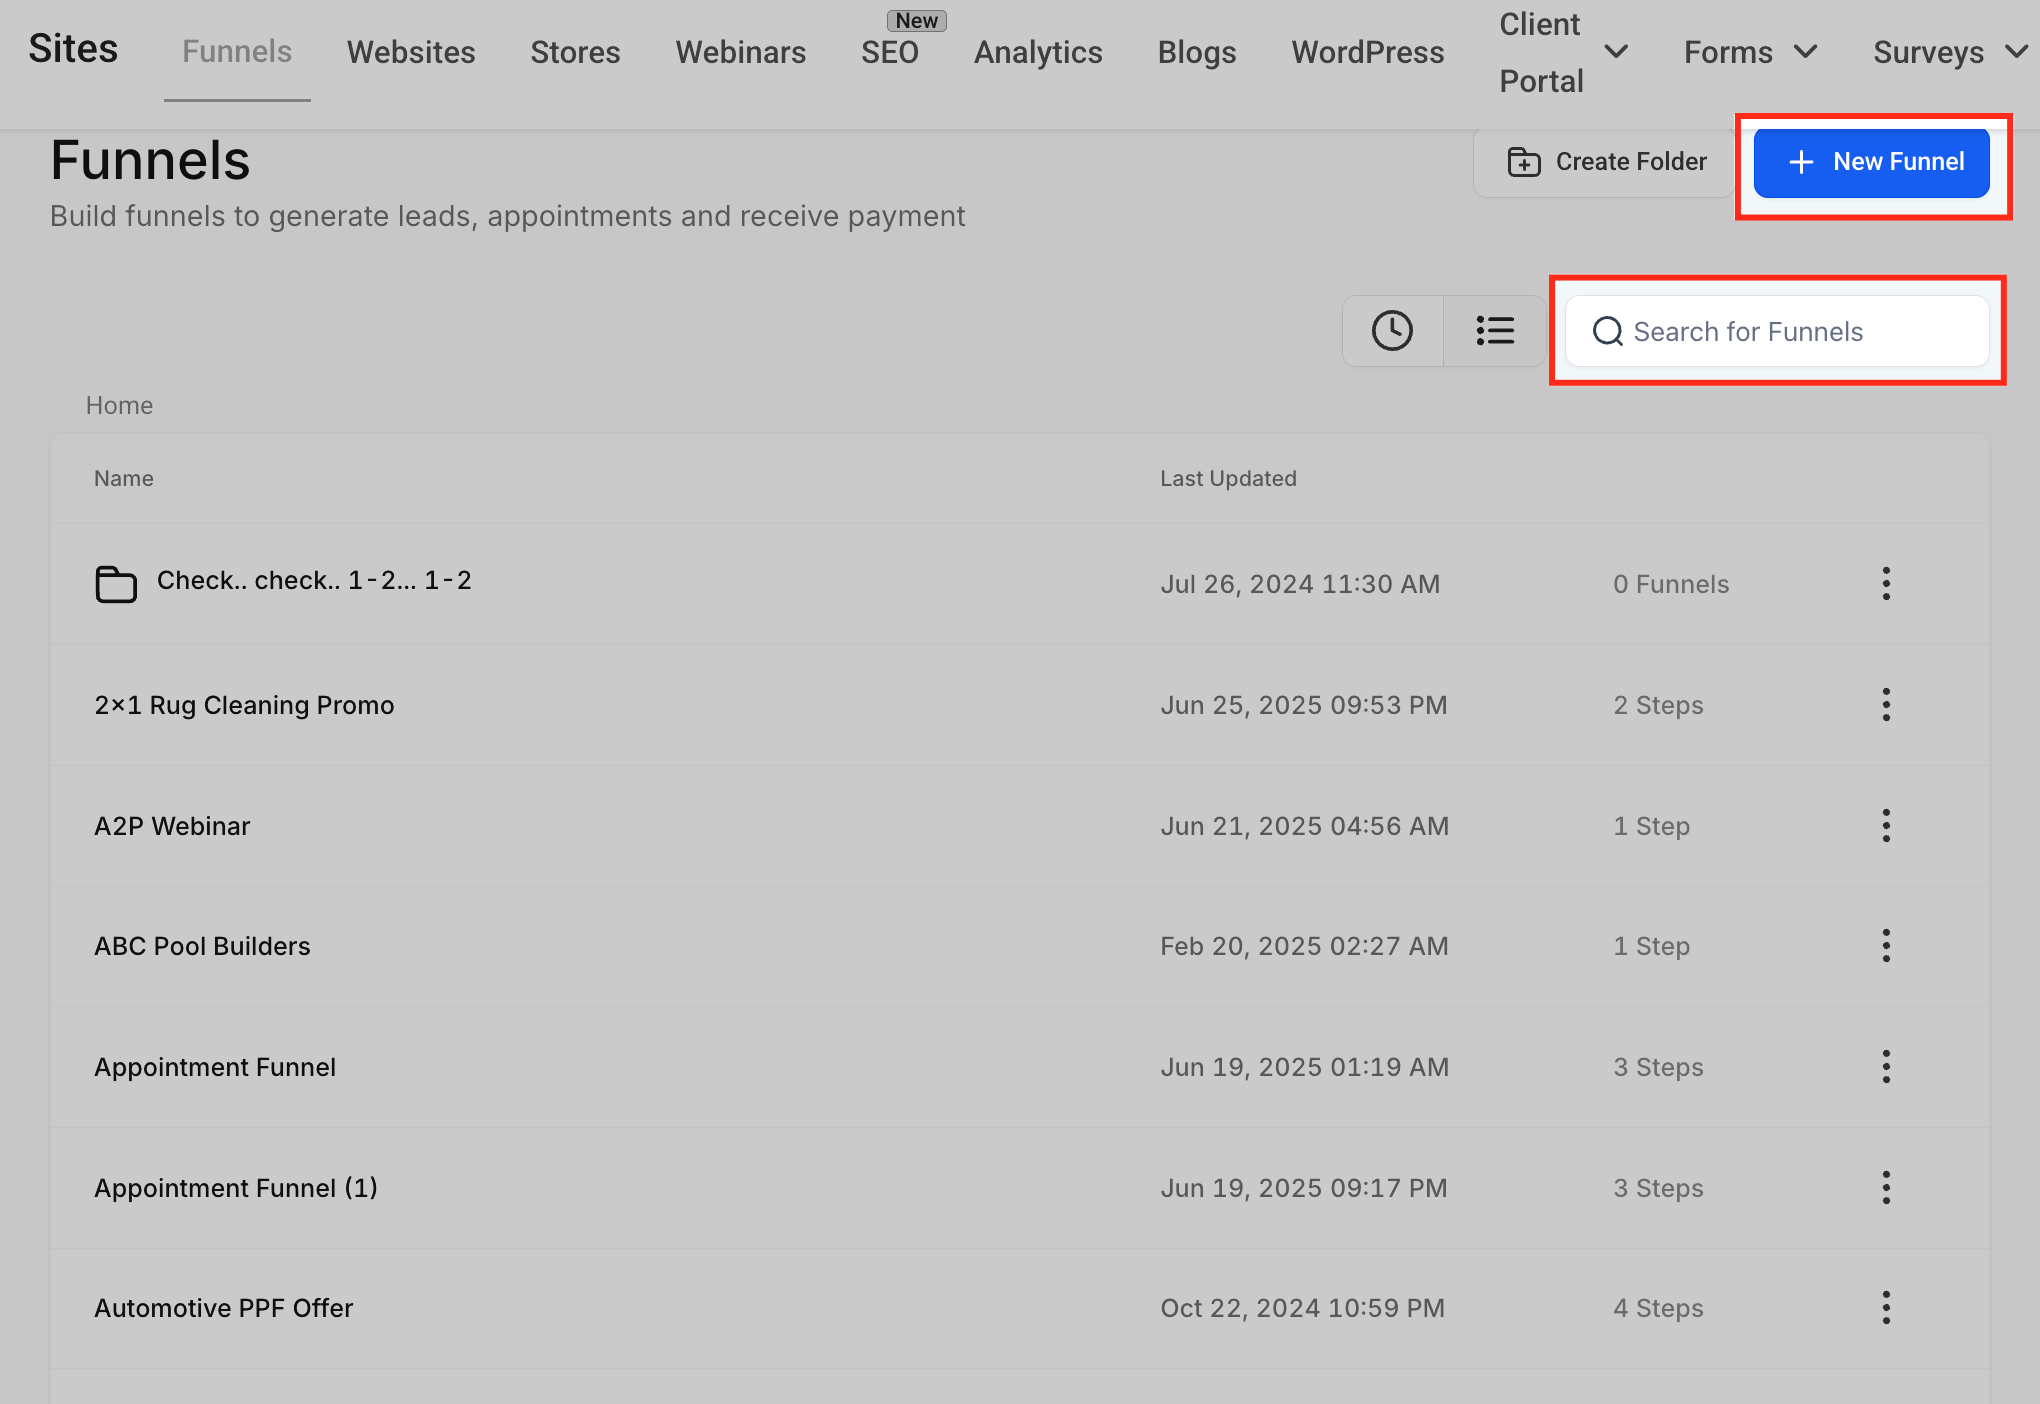
From the left-hand menu, click Web Tools, then open your website or funnel. This is where you manage the pages that contain your form elements.
Use the search bar to locate an existing page, or create a new one. This takes you into the workspace where you can edit pages and add form elements.
Open the page or step where you want to add or edit a form.
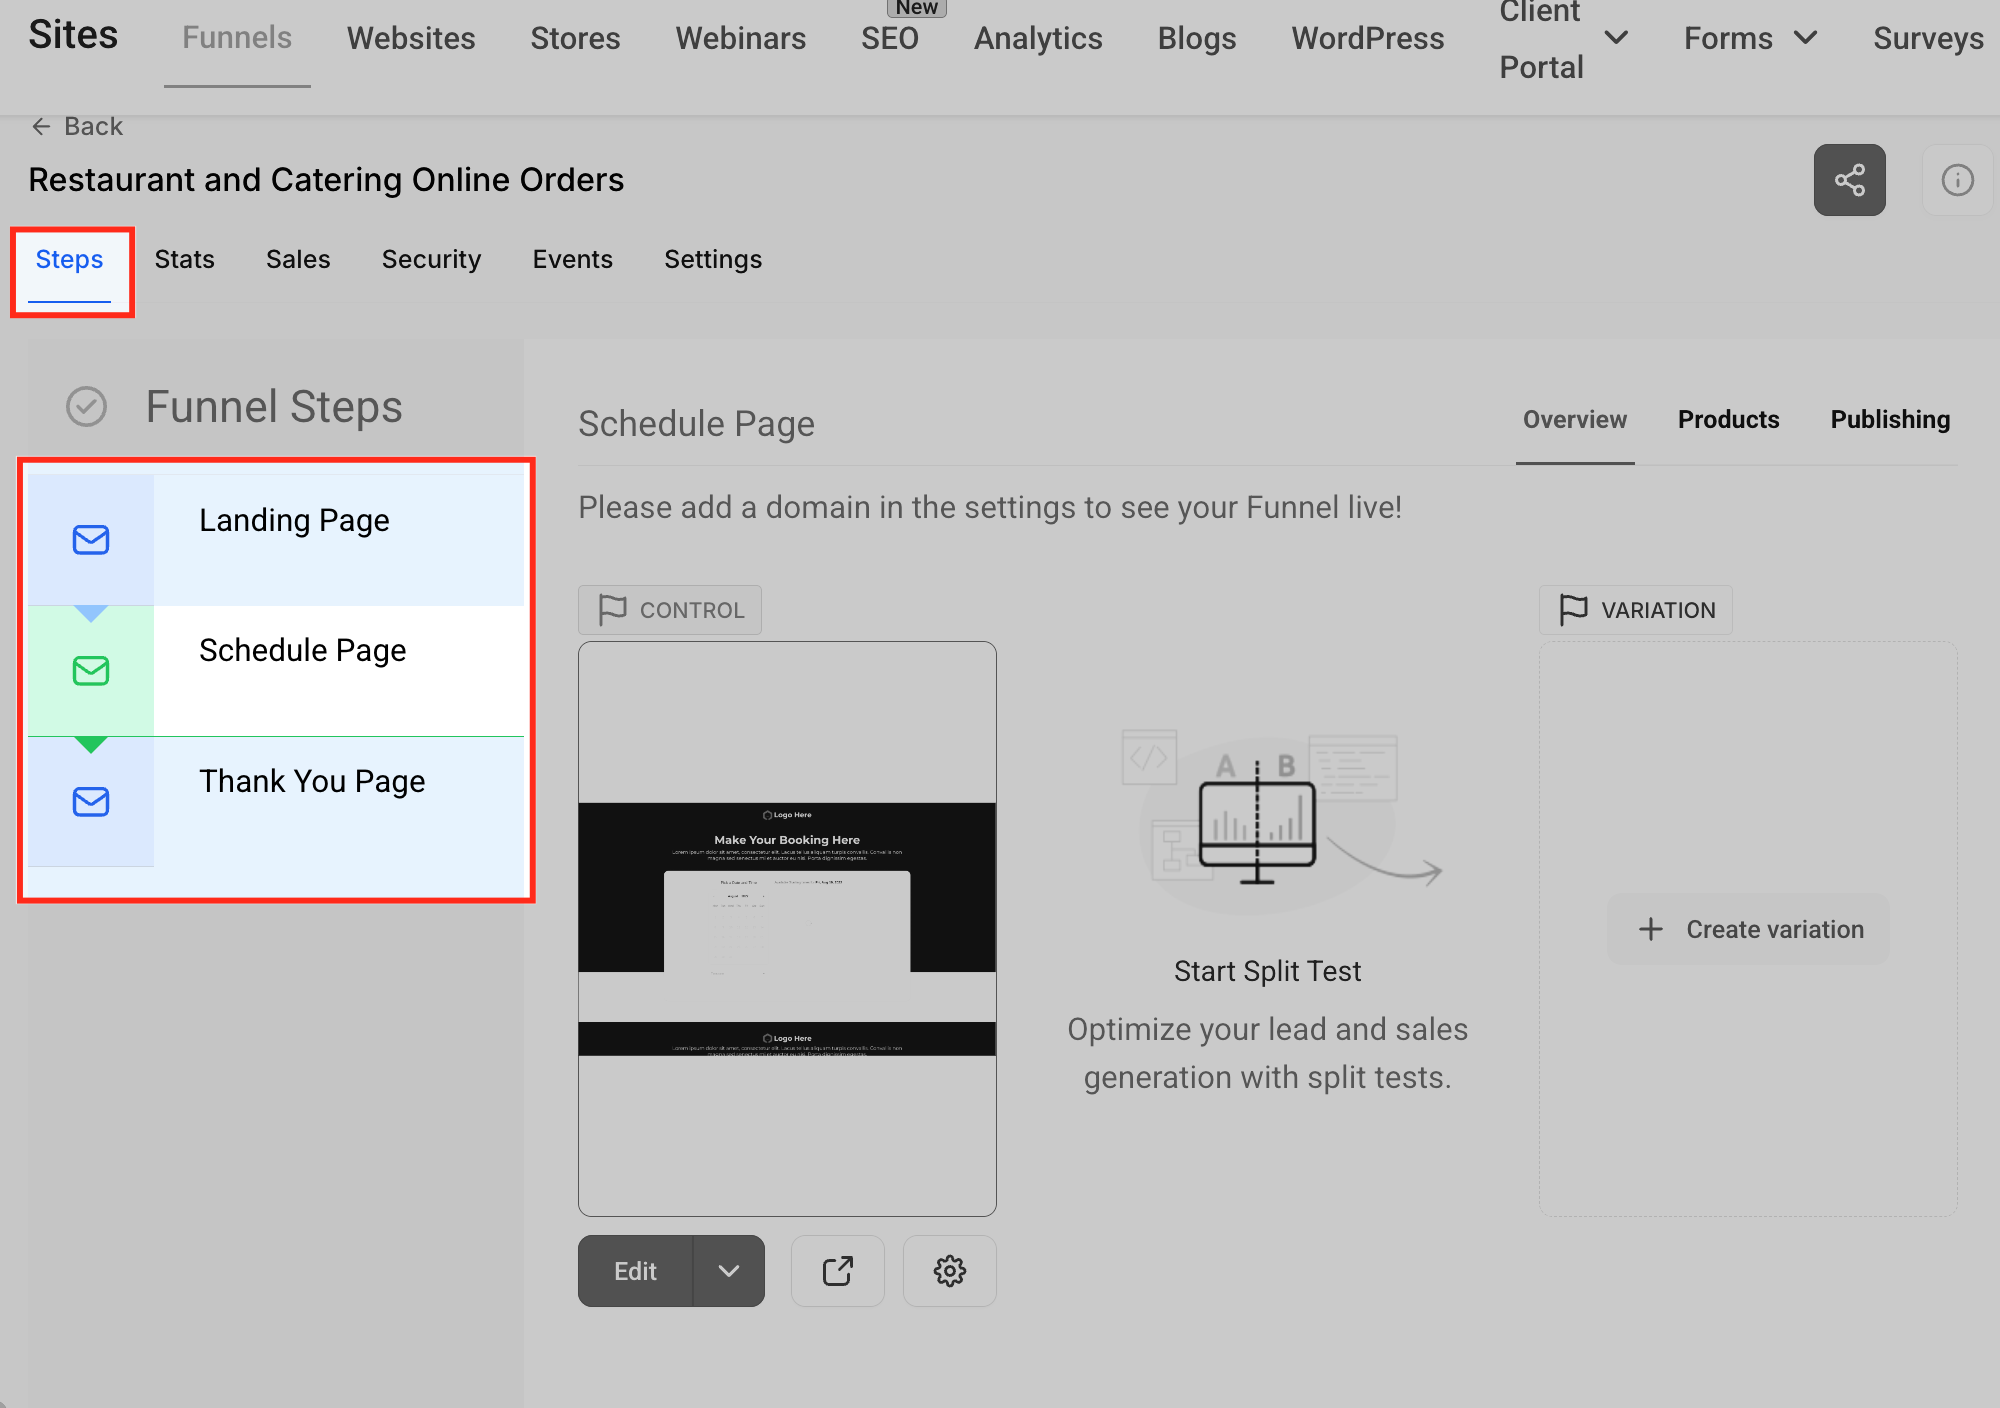
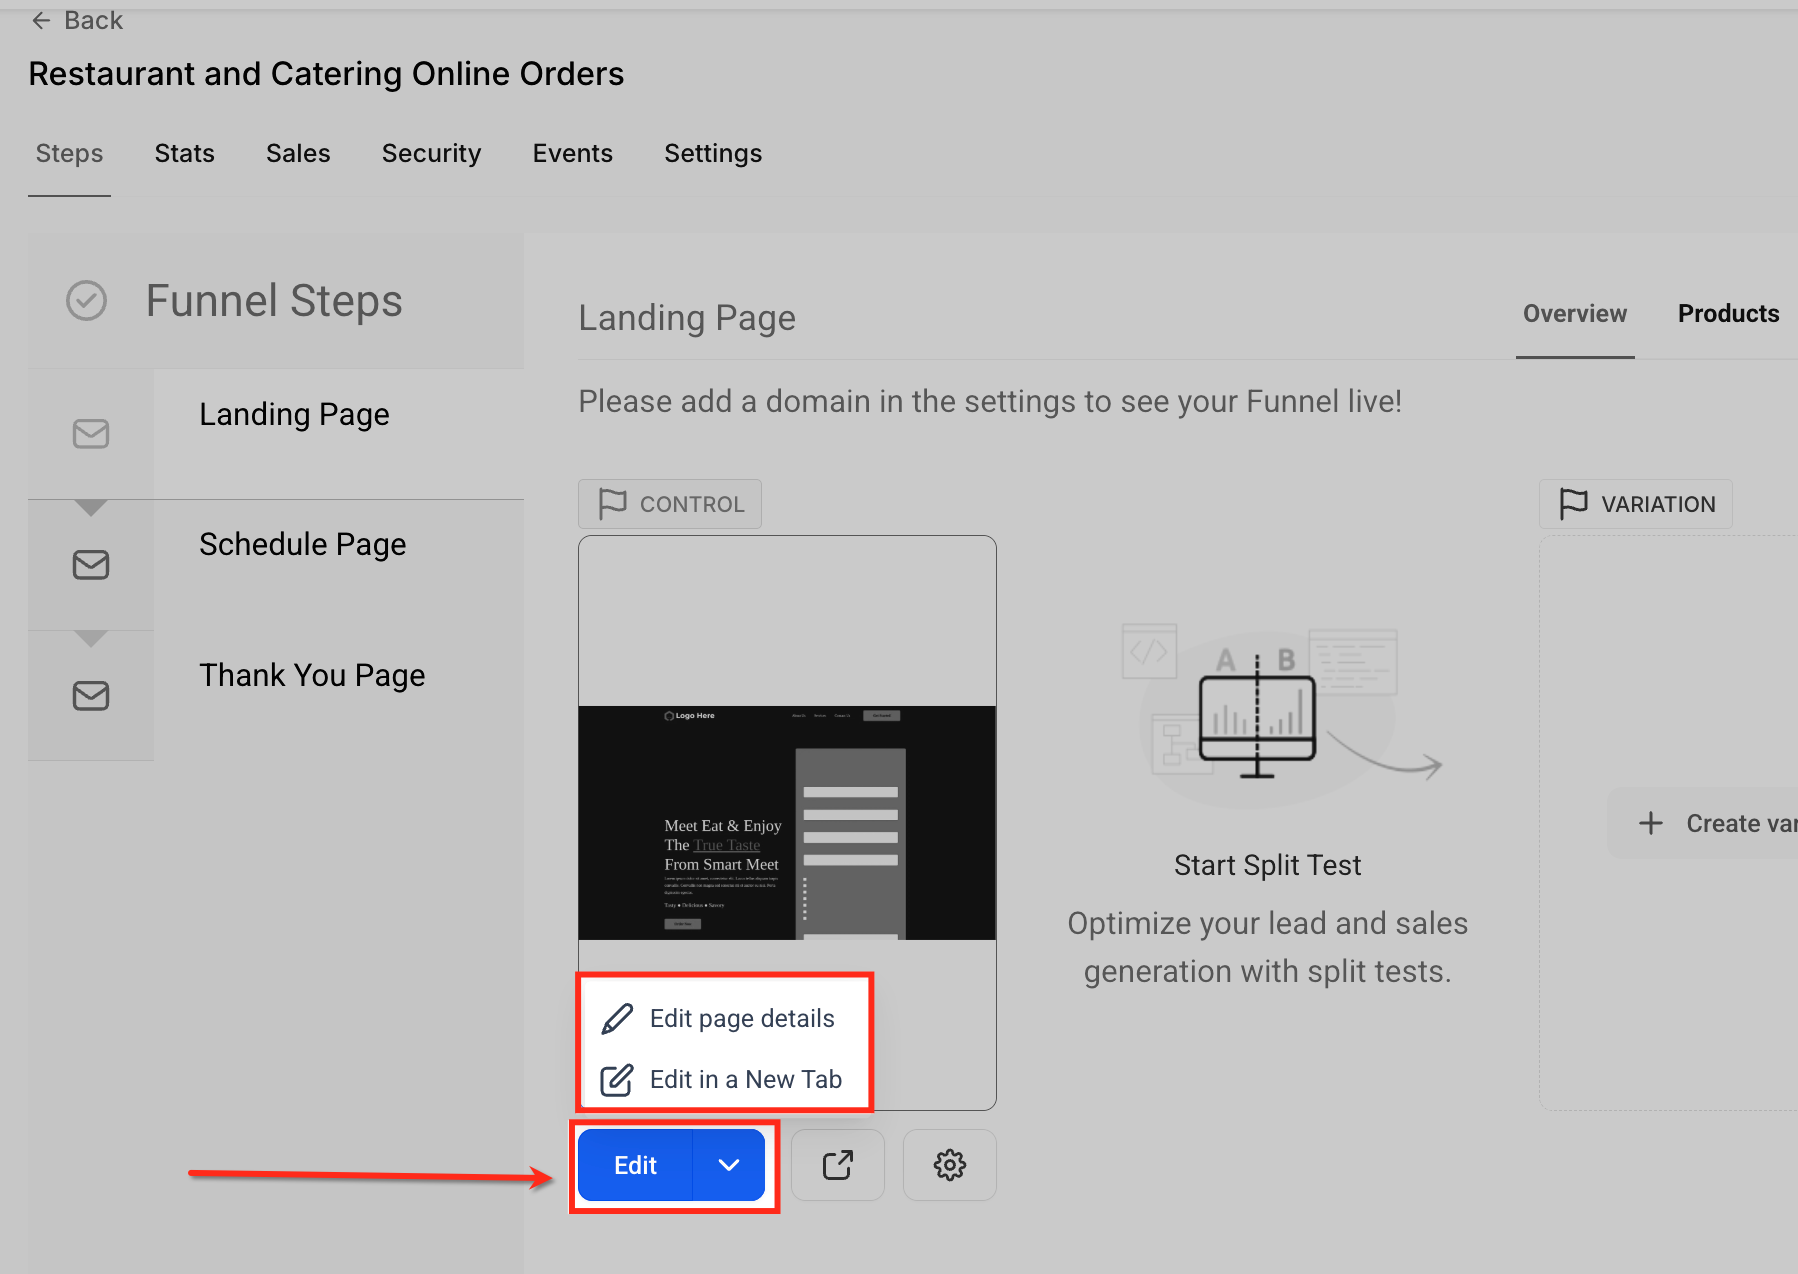
Click Edit below the page preview to start editing. You can choose Edit page details to update basic settings, or open the builder in a new tab for full-page editing.
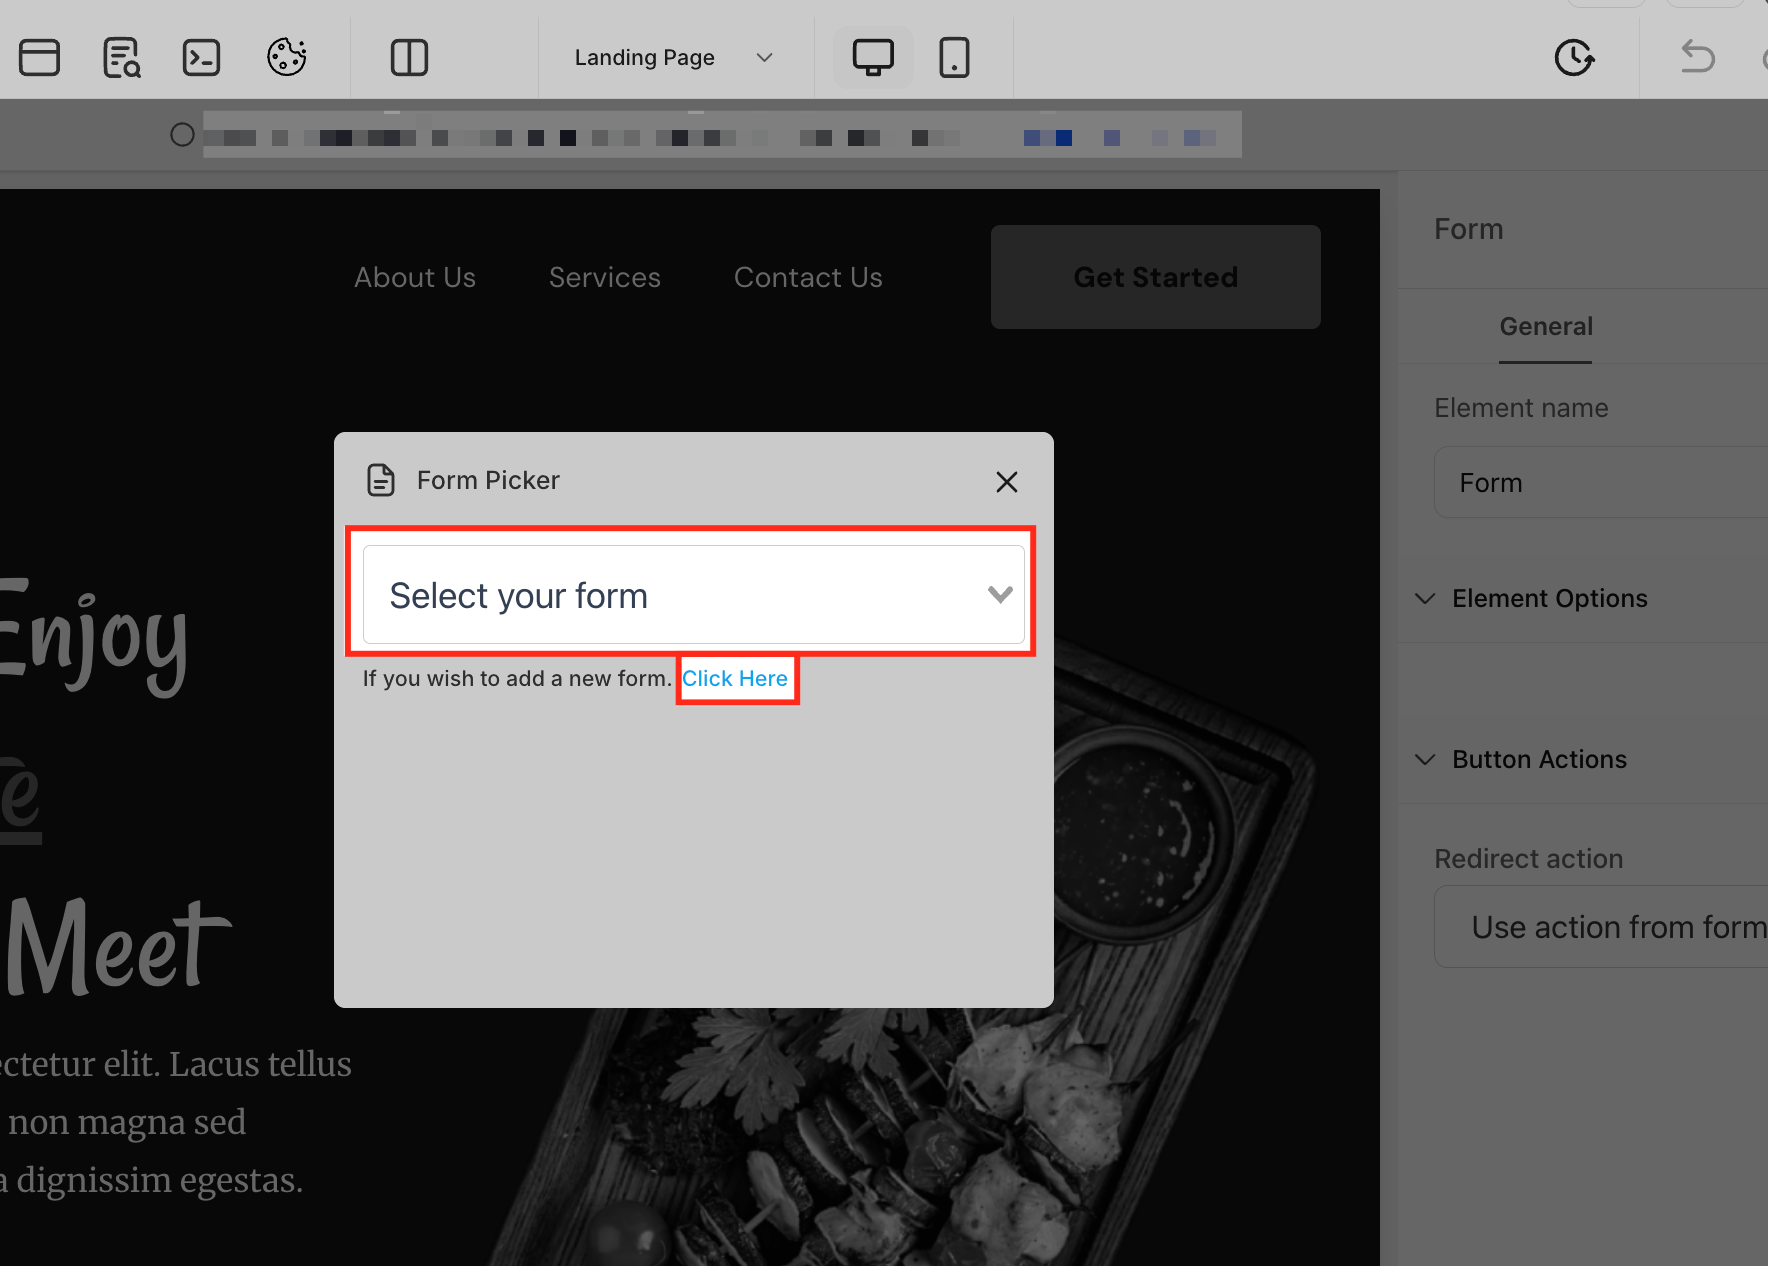
Click the + icon in the top toolbar to open the sidebar, then select Elements. Scroll to the Form section and drag the Form element onto your page to begin configuring it.
When the Form Picker appears, use the dropdown to select from your existing forms. To create a new form, click the "Click Here" link, this opens the Forms subsection within the Web Tools menu, where you can build and save a new form.
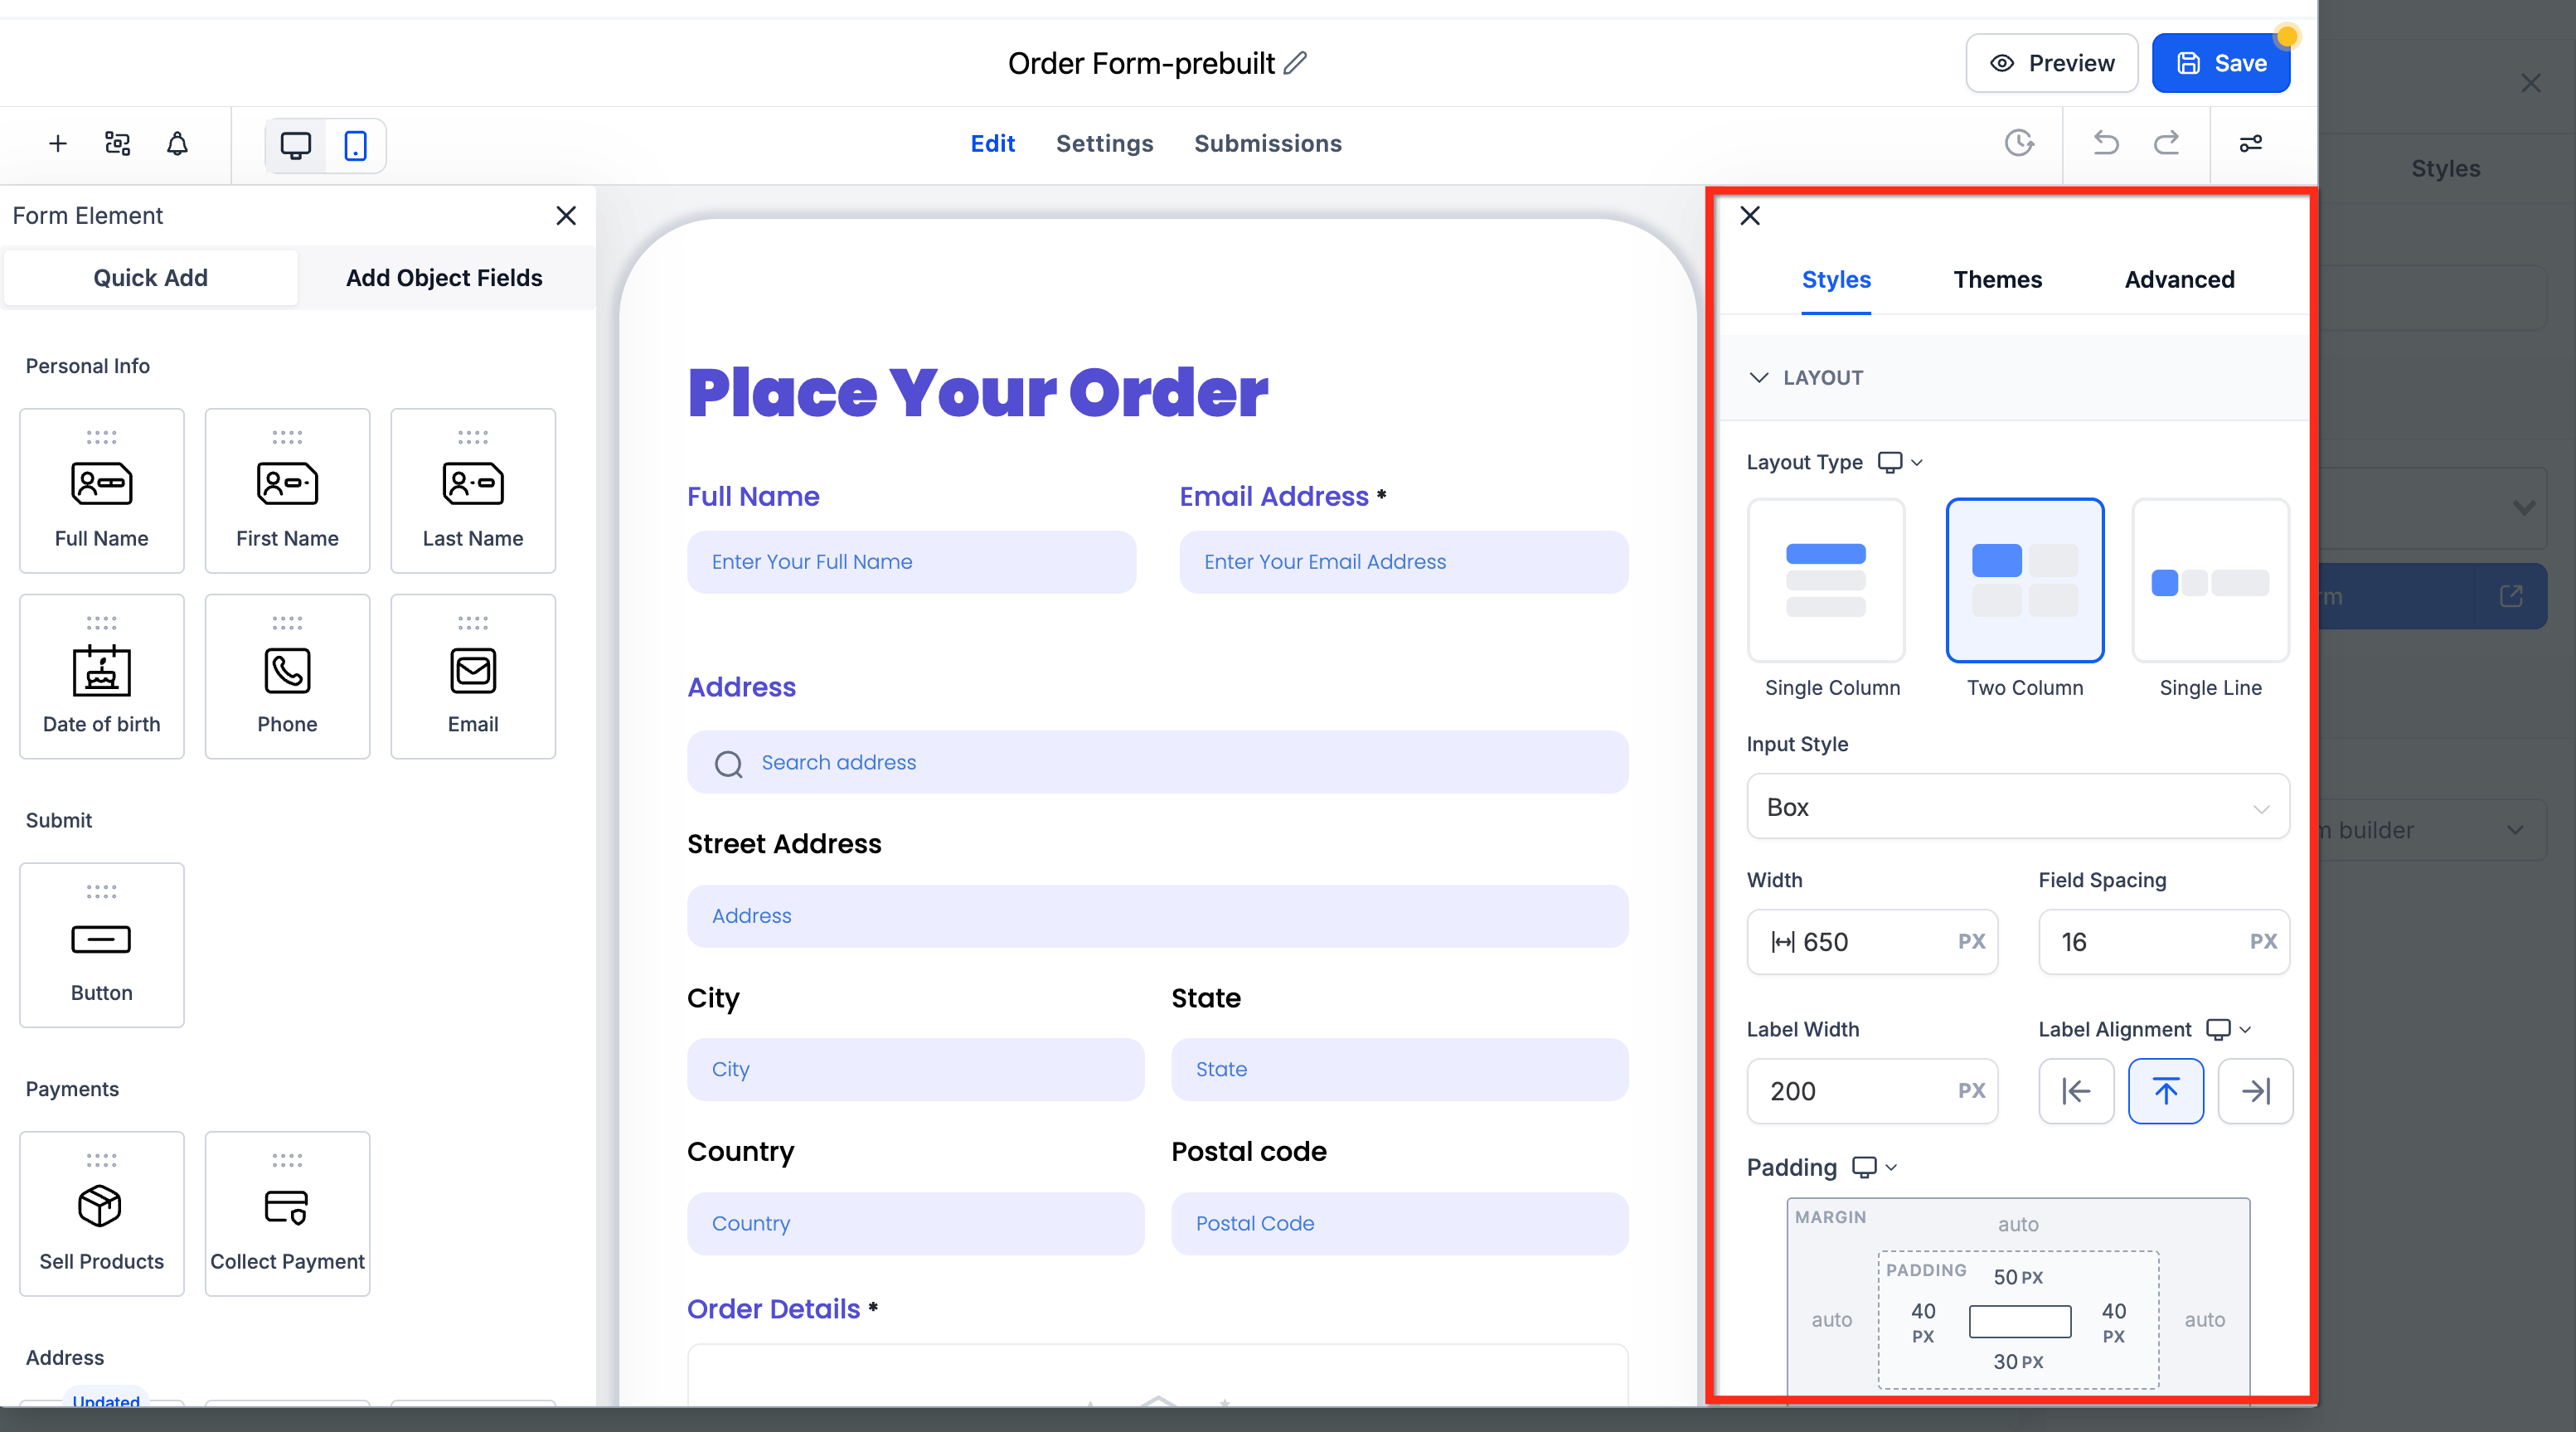
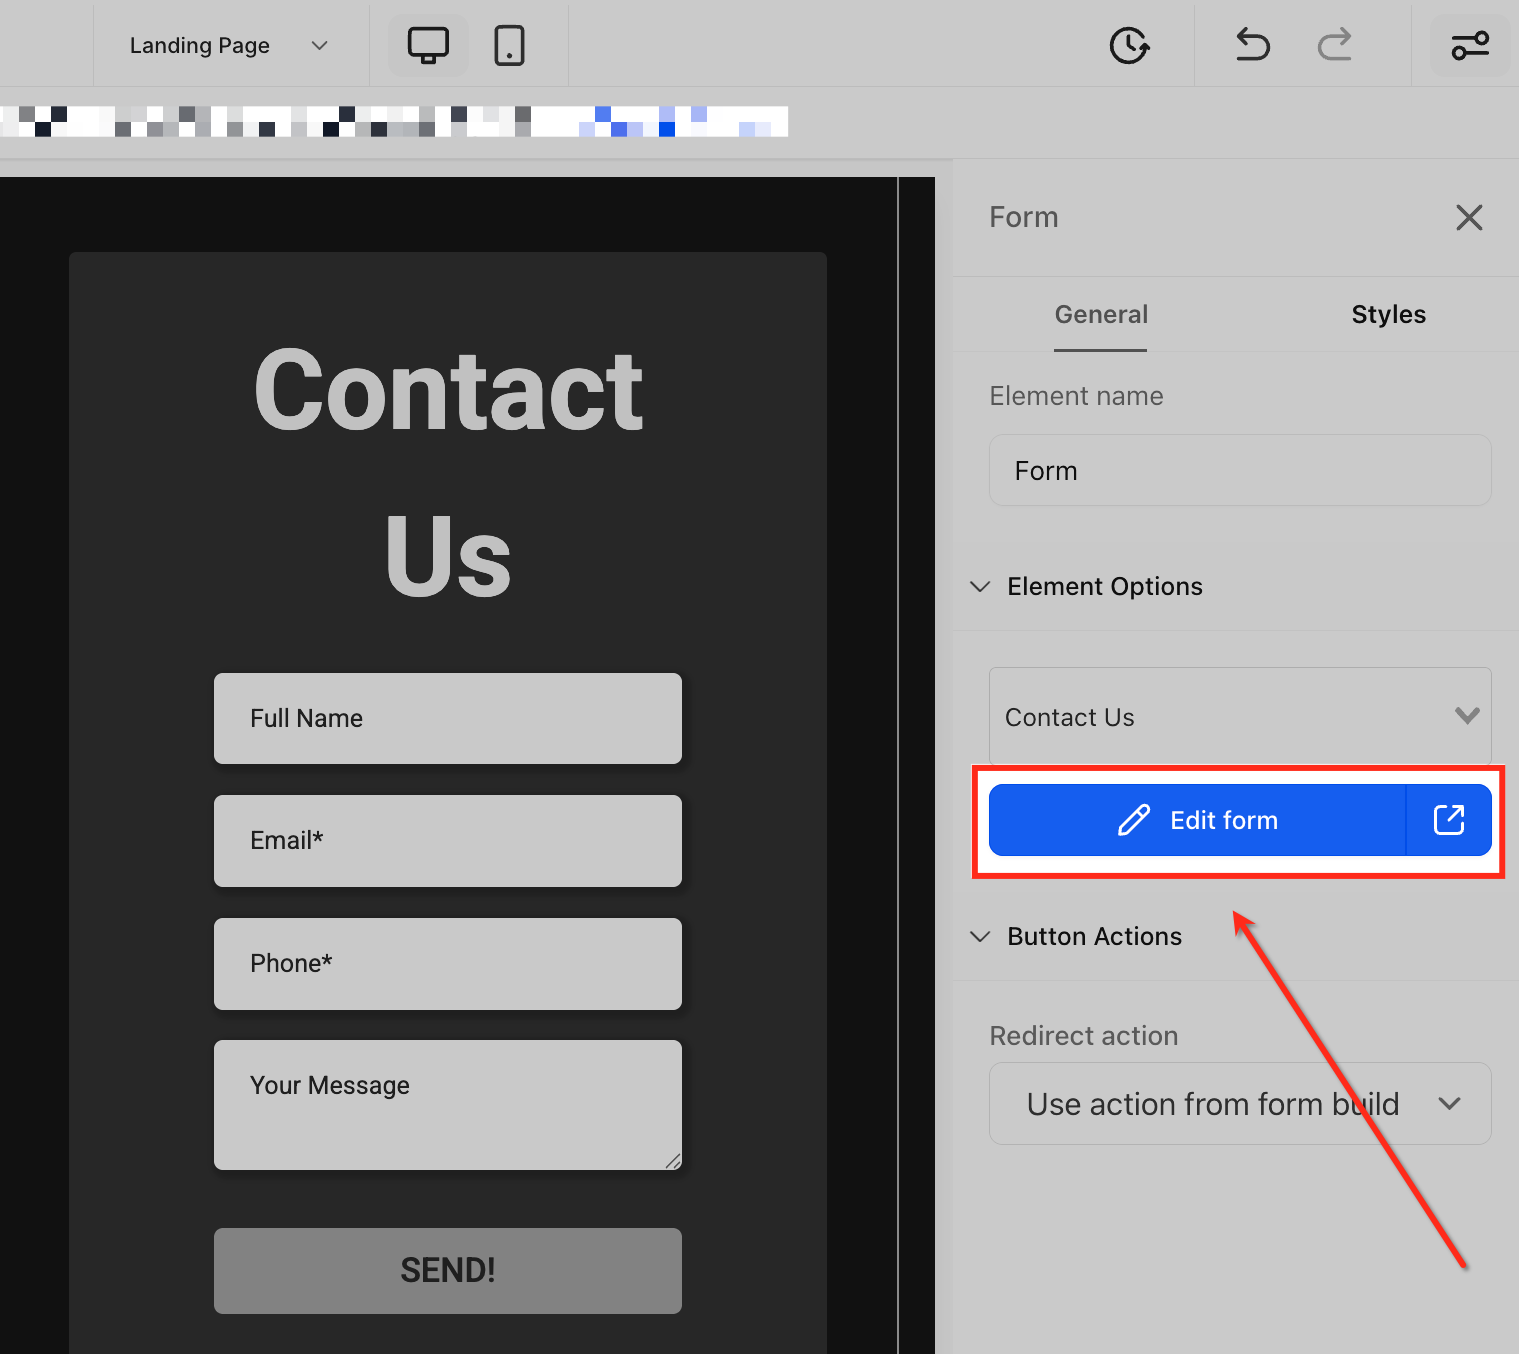
Once you've selected a form, click the Edit form button in the right-side panel. This opens a large pop-up window right within the builder, letting you customize fields, styles, and settings without navigating away from your page.
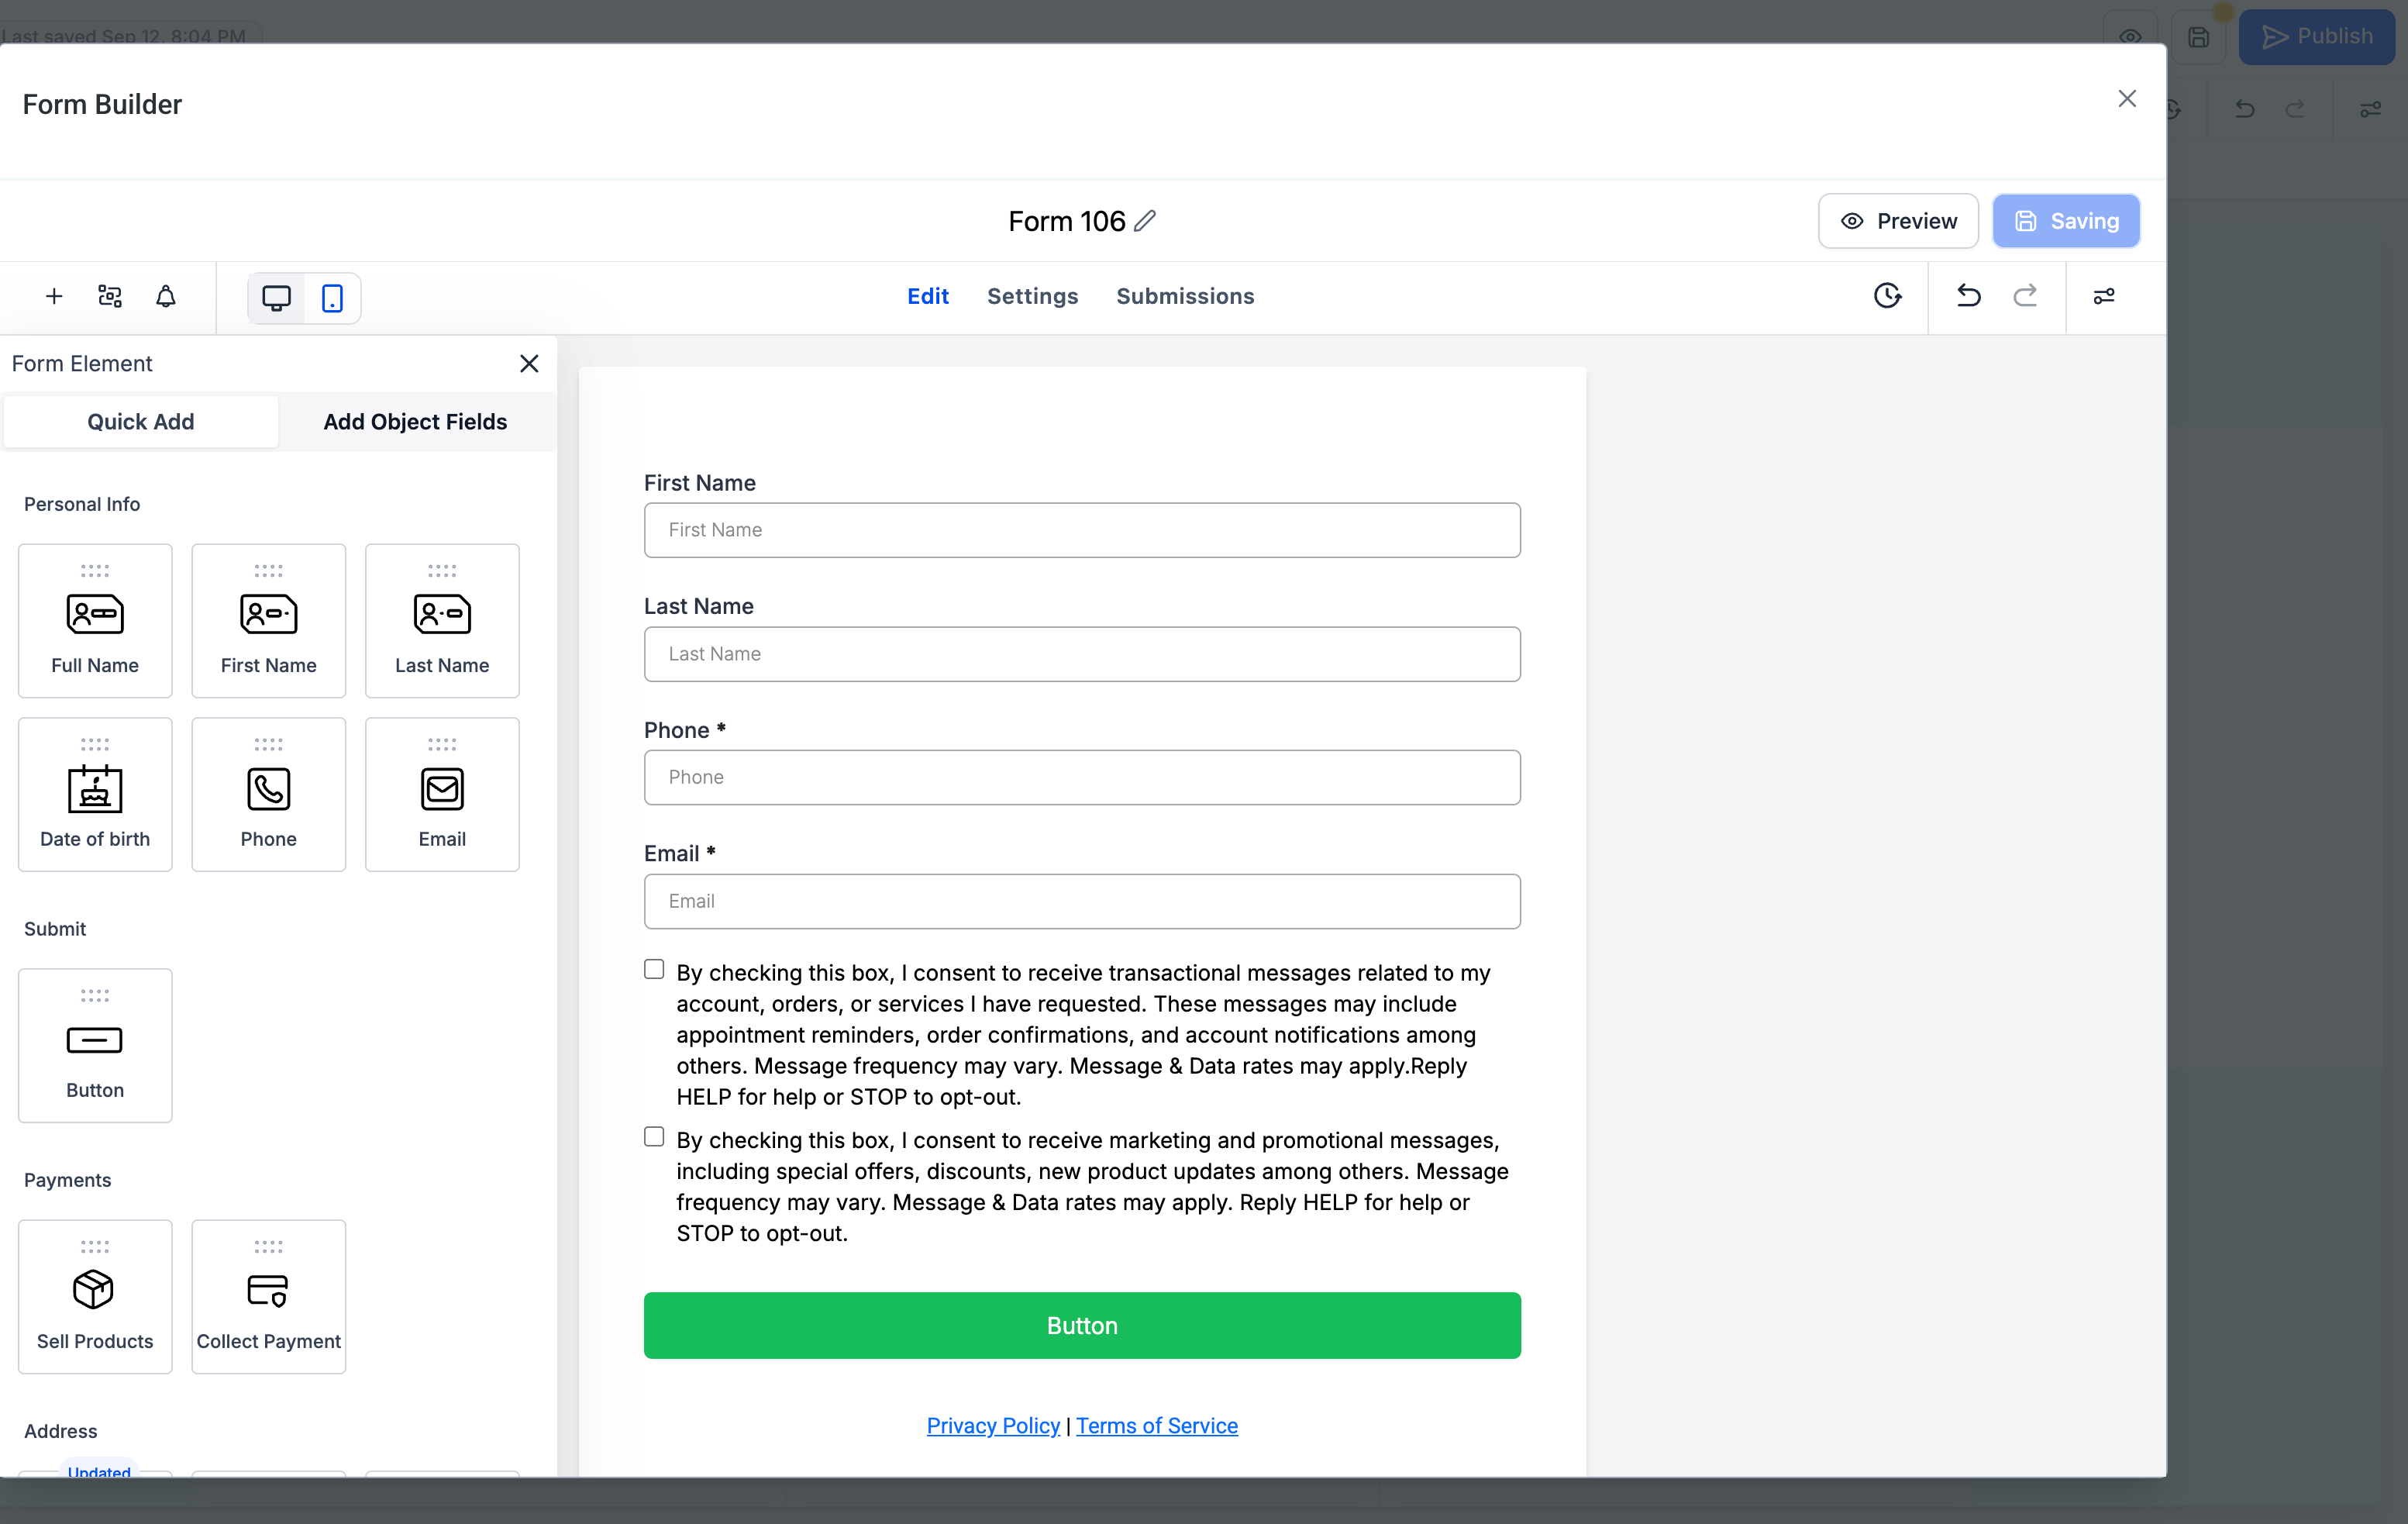
With the form builder open, use the Quick Add and Custom Fields panels to configure your form:
Quick Add: Instantly drag common fields like Full Name, Email, and Phone into your form.
Add Object Fields: Add custom input types that match how your practice captures leads, ideal for gathering consultation details or campaign-specific data.
This keeps your page in the background so you maintain your design context while making precise updates.
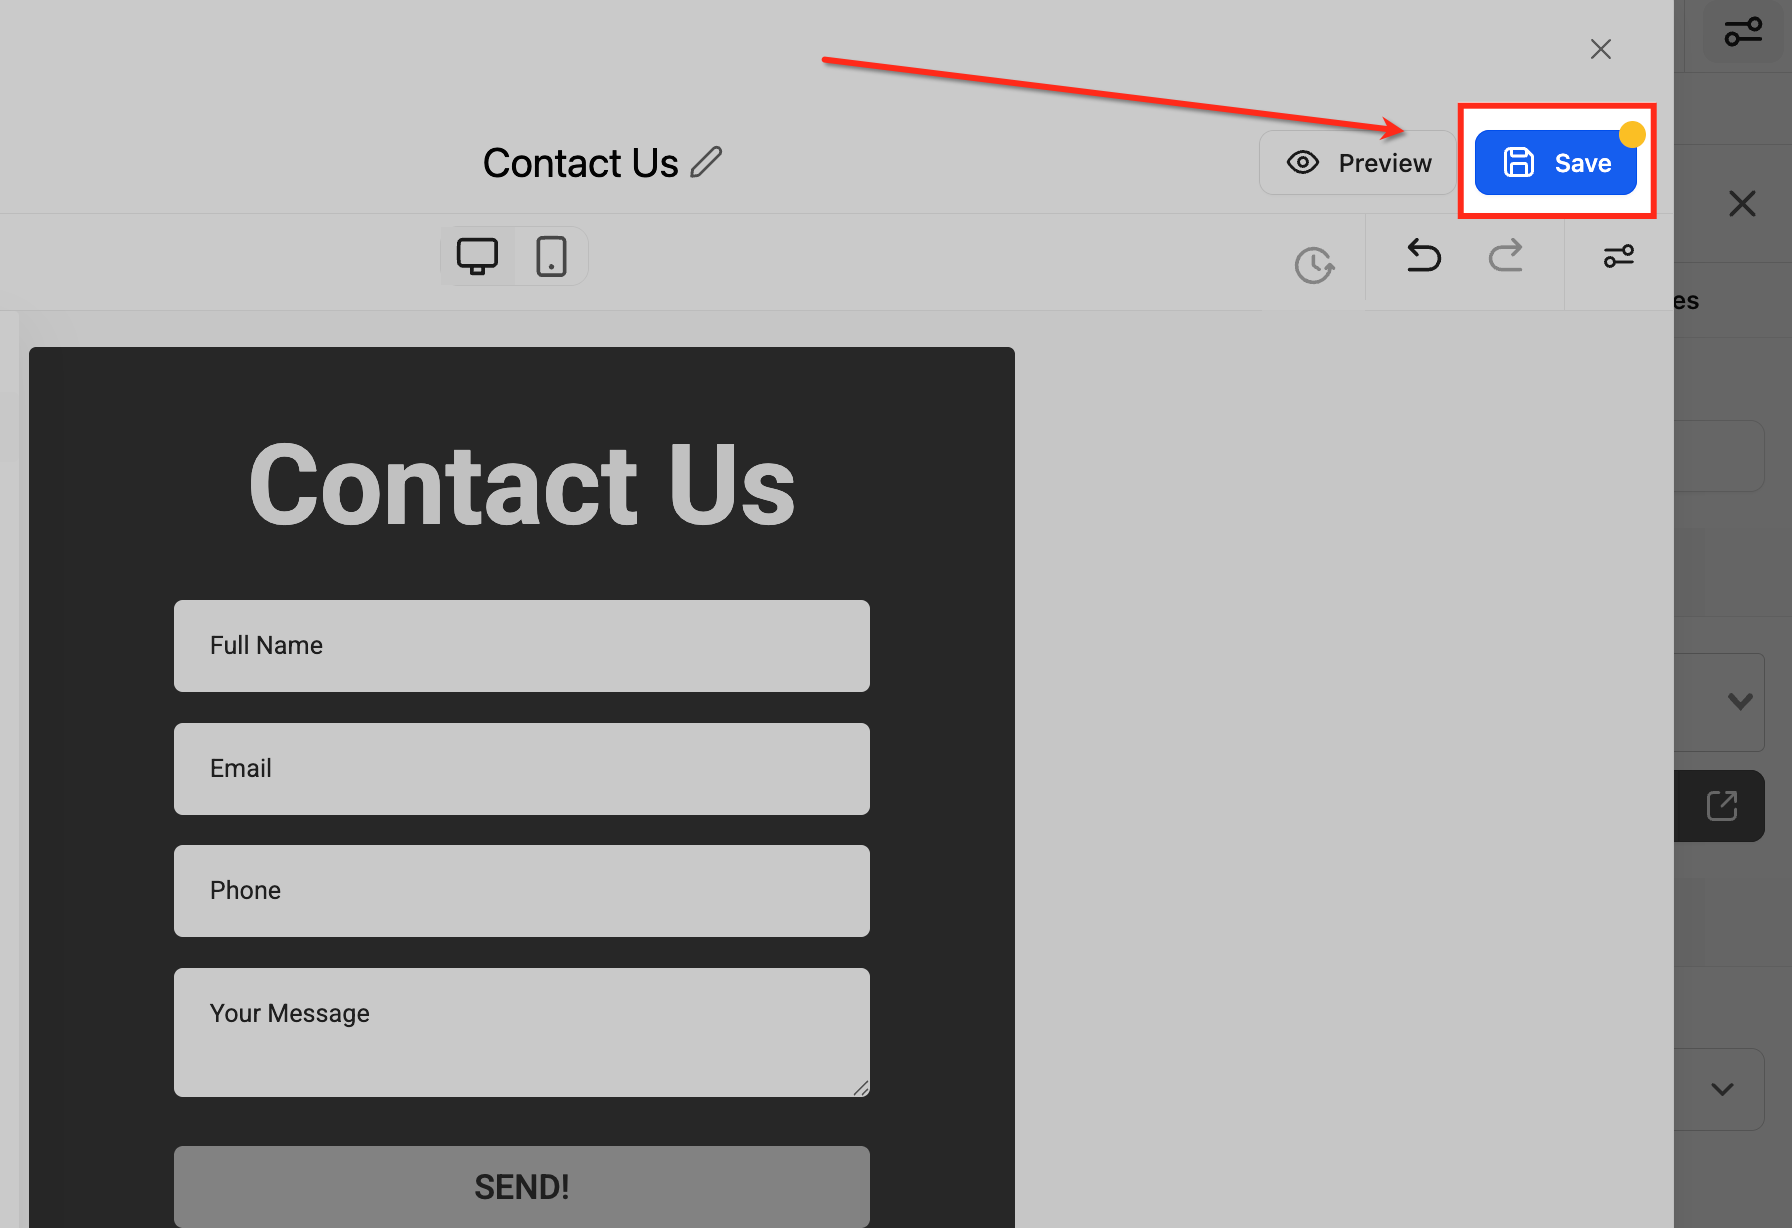
When your edits are complete, click Save in the top-right corner of the pop-up. Your updates apply instantly and the modal closes, returning you to your exact spot in the builder, no page reloads or tab switching.
Q: Can I customize the prebuilt templates?
Yes. Start from any template, then modify the fields, styles, and behaviors in the large in-builder editor.
Q: What's the difference between Templates and Themes?
Templates are starting structures (e.g., Request, Contact, Order). Themes are visual presets. Switching Themes replaces your existing style changes.
Q: How do I accept payments on a form?
Use an Order-style template, add the Payment element, and connect a supported payment gateway. Configure your products first, then test before going live.
Q: Where do submissions and analytics appear?
View entries under Web Tools → Forms → Submissions** or Web Tools → Surveys → Submissions**. For performance, open Analytics to track conversion and drop-off.
Q: Can I convert a form to a survey (or the reverse)?
Converting types isn't supported. Duplicate and rebuild in the other format to preserve data integrity.
Q: Will editing forms this way affect my existing forms or pages?
No. Your forms and pages stay unchanged, the in-page editor only changes how you access and edit them.
Q: What happens if I close the pop-up without saving?
Any unsaved changes are lost, so be sure to save before closing.
