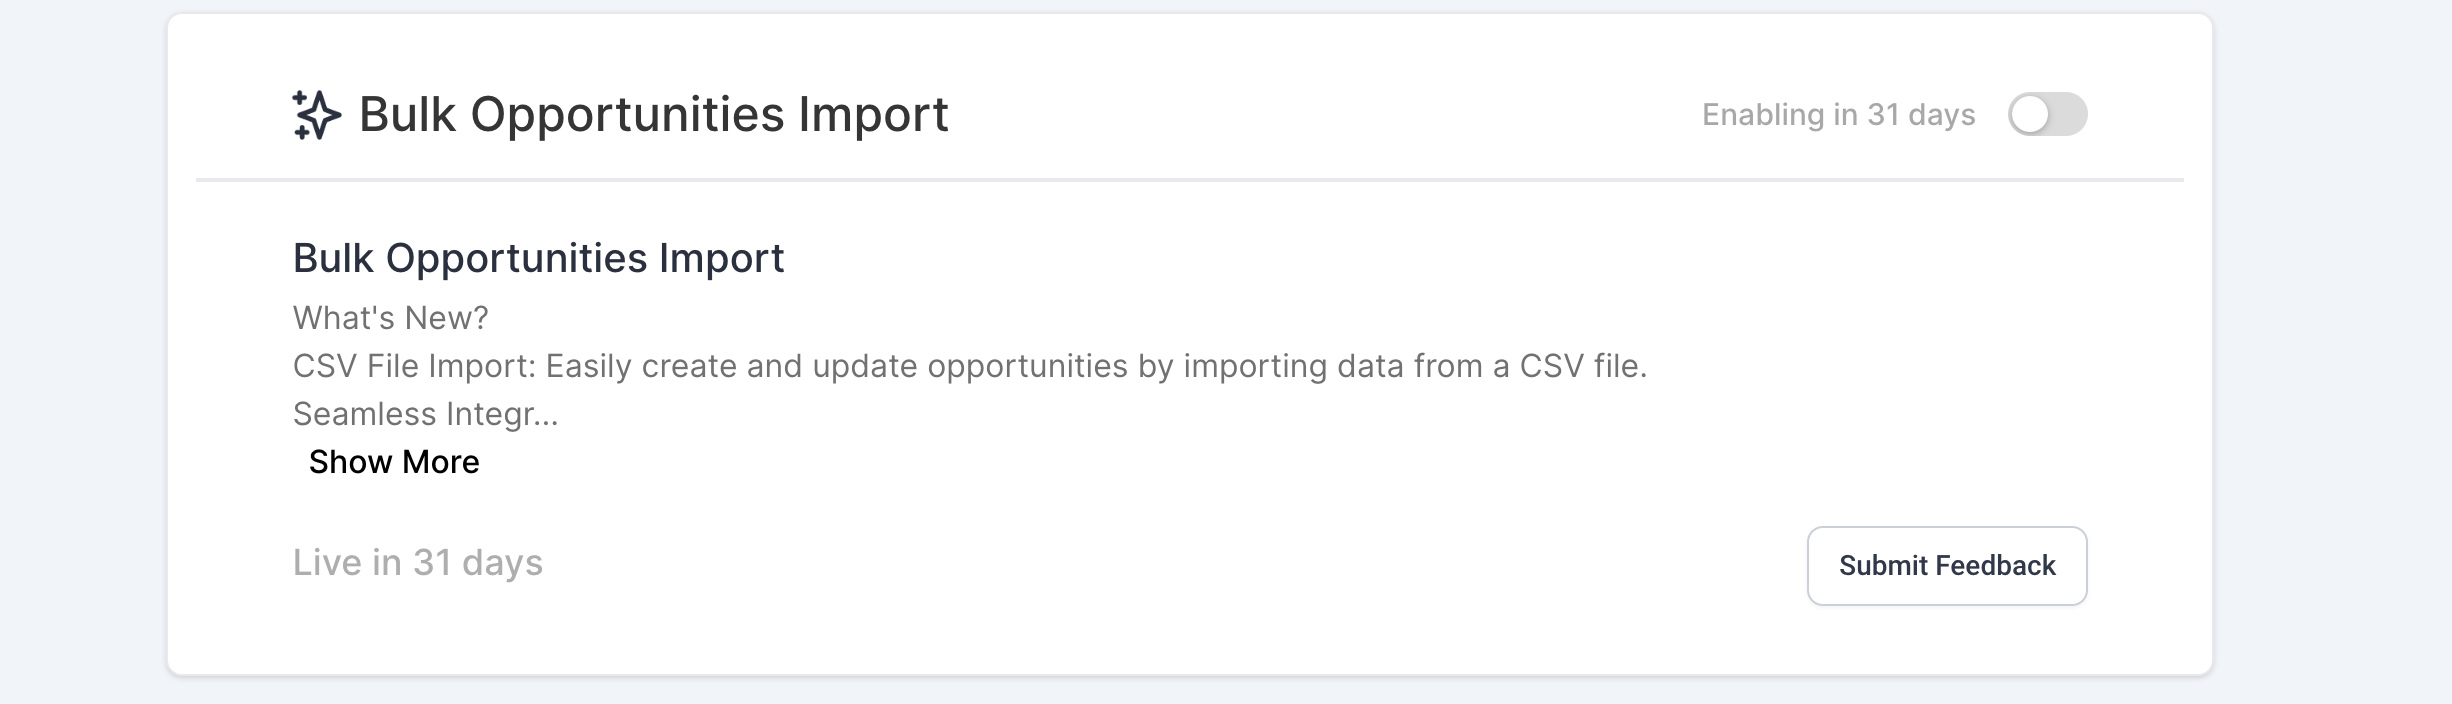
Bulk importing opportunities lets you create or update many opportunity records at once from a single CSV file. Instead of adding deals one at a time, you can upload an entire list, map each column to the right Aesthetix CRM field, and keep your sales pipeline accurate and up to date. This is especially useful when onboarding new clients, migrating from another system, or updating stages and values across many deals in one pass.
By preparing your file correctly and following the steps below, you can upload large datasets quickly while avoiding common errors. This guide covers preparing your data, the required and optional columns, how to map columns to a pipeline and stage, how imports match or create contacts, and how to monitor results after the import runs.
Make sure you meet these requirements before starting an import:
User permissions: Only users with Admin access can run imports.
File format: The file must be in CSV (.csv) format. Other file types such as Excel or Google Sheets are not accepted — export your spreadsheet as a CSV before uploading.
File size: The CSV must be smaller than 30 MB. If your file is larger, split it into smaller files.
Single sheet: The file must contain only one sheet or tab.
Header row: The first row must contain column headers and must not be blank. At least one column header must match a field in Aesthetix CRM.
Every opportunity in Aesthetix CRM must be linked to a contact — you cannot import an opportunity without contact data. When you import, each opportunity is associated with a contact using the Contact ID.
If the Contact ID in your file matches an existing contact, the opportunity is linked to that contact.
If your CSV includes both contact and opportunity information on the same row, the contact and opportunity are automatically mapped to each other during import.
Contact deduplication follows your account's Duplicate Detection Settings, which can match by Contact ID, email, or phone and either merge or skip duplicates.
Important — one opportunity per contact per pipeline. Aesthetix CRM does not allow duplicate opportunities: a single contact can only have one opportunity in a given pipeline at a time. When you import, avoid creating a second opportunity in the same pipeline for a contact who already has one. If you need to change an existing deal, update it using its Opportunity ID rather than creating a new record. Clean your CSV to remove duplicate rows before importing so you do not accidentally generate conflicting opportunities.
To bring contacts into Aesthetix CRM separately, or to learn more about deduplication behavior, see Contacts > Import & Export.
Which columns you must include depends on whether you are creating new opportunities, updating existing ones, or both.
When creating new opportunities, your file must include:
Contact ID
Opportunity Name
Pipeline ID or Pipeline Name (the pipeline must already exist in your account)
To update an existing opportunity, include:
Opportunity ID
Without an Opportunity ID, a new opportunity will be created instead of updating an existing one.
Common optional columns include Opportunity Value, Stage, Opportunity Status, Lost Reason, Opportunity Owner, Tags, and Opportunity Followers. You can also include contact columns when importing contacts and opportunities together.
If certain optional fields are missing, Aesthetix CRM applies default values:
Stage → Defaults to the first stage in the selected pipeline.
Opportunity Value → Defaults to 0.
Opportunity Status → Defaults to Open.
Lost Reason → If a valid lost reason is provided, the status automatically updates to Lost.
Some values need to be exported before you can reference them:
Opportunity ID, Pipeline ID, and Stage ID can be retrieved by exporting your existing opportunities.
Contact ID can be retrieved by exporting your contacts.
During import, you choose how the uploaded records should be handled:
Create Opportunities — Uploads only new opportunity records.
Update Opportunities — Updates existing records using the Opportunity ID.
Create and Update Opportunities — Creates new opportunities while updating existing ones within the same import.
A CSV (Comma-Separated Values) file stores tabular data as plain text, with each line representing one record and fields separated by commas. You can create or edit CSV files in tools like Excel, Google Sheets, or Notepad. Each row represents a single opportunity (or contact-and-opportunity pair), each column represents a distinct field, and the header row is required so the system can map your data correctly.
Follow these formatting rules for each field type to avoid import failures:
Accepted formats:
mm/dd/yyyy
yyyy/mm/dd
mm-dd-yyyy
yyyy-mm-dd
Example: 10/28/2020 or 2020-10-28. Choose one format and use it consistently.
Separate values with commas, semicolons, or periods. Values must match existing field options exactly. Slashes are not valid separators.
Example: Blue, Yellow, Green
Include only one value.
Example: Blue
Use the format FirstName LastName.
Example: Logan Paul
Separate multiple tags with commas or semicolons.
Example: Lead, Follow-up, VIP
Recommended (E.164) format: +1 1234567890
For US numbers, these formats also work: 123-456-7890 or (123) 456-7890. Remove spaces, letters, or unnecessary characters. Formats like 1234567 or abc1234567 are invalid.
Accepted formats: 1.23, 1234, .123
Accepted formats: 1234, 1,234,234.33
Separate multiple names with commas.
Example: Adam Smith, David Lee
Tip: Before importing, make sure any custom fields you plan to map already exist in Aesthetix CRM using the same labels and data types.
Follow these steps to upload and import your opportunities.
Step 1: Open the Opportunities section.
Navigate to the Opportunities section to manage your opportunity pipeline.
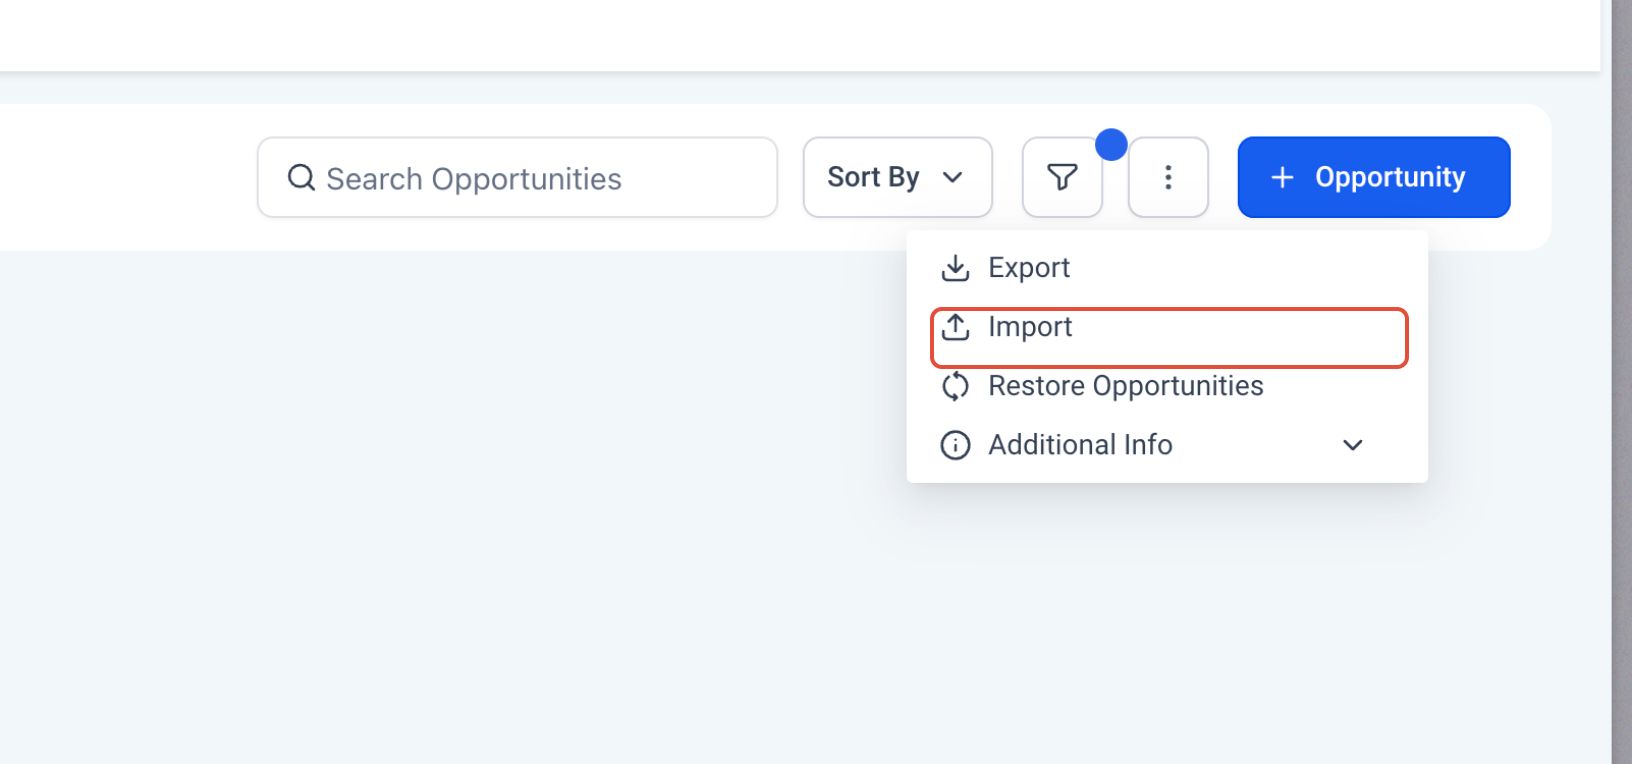
Step 2: Open the import option.
Click the menu icon and select Import to begin.
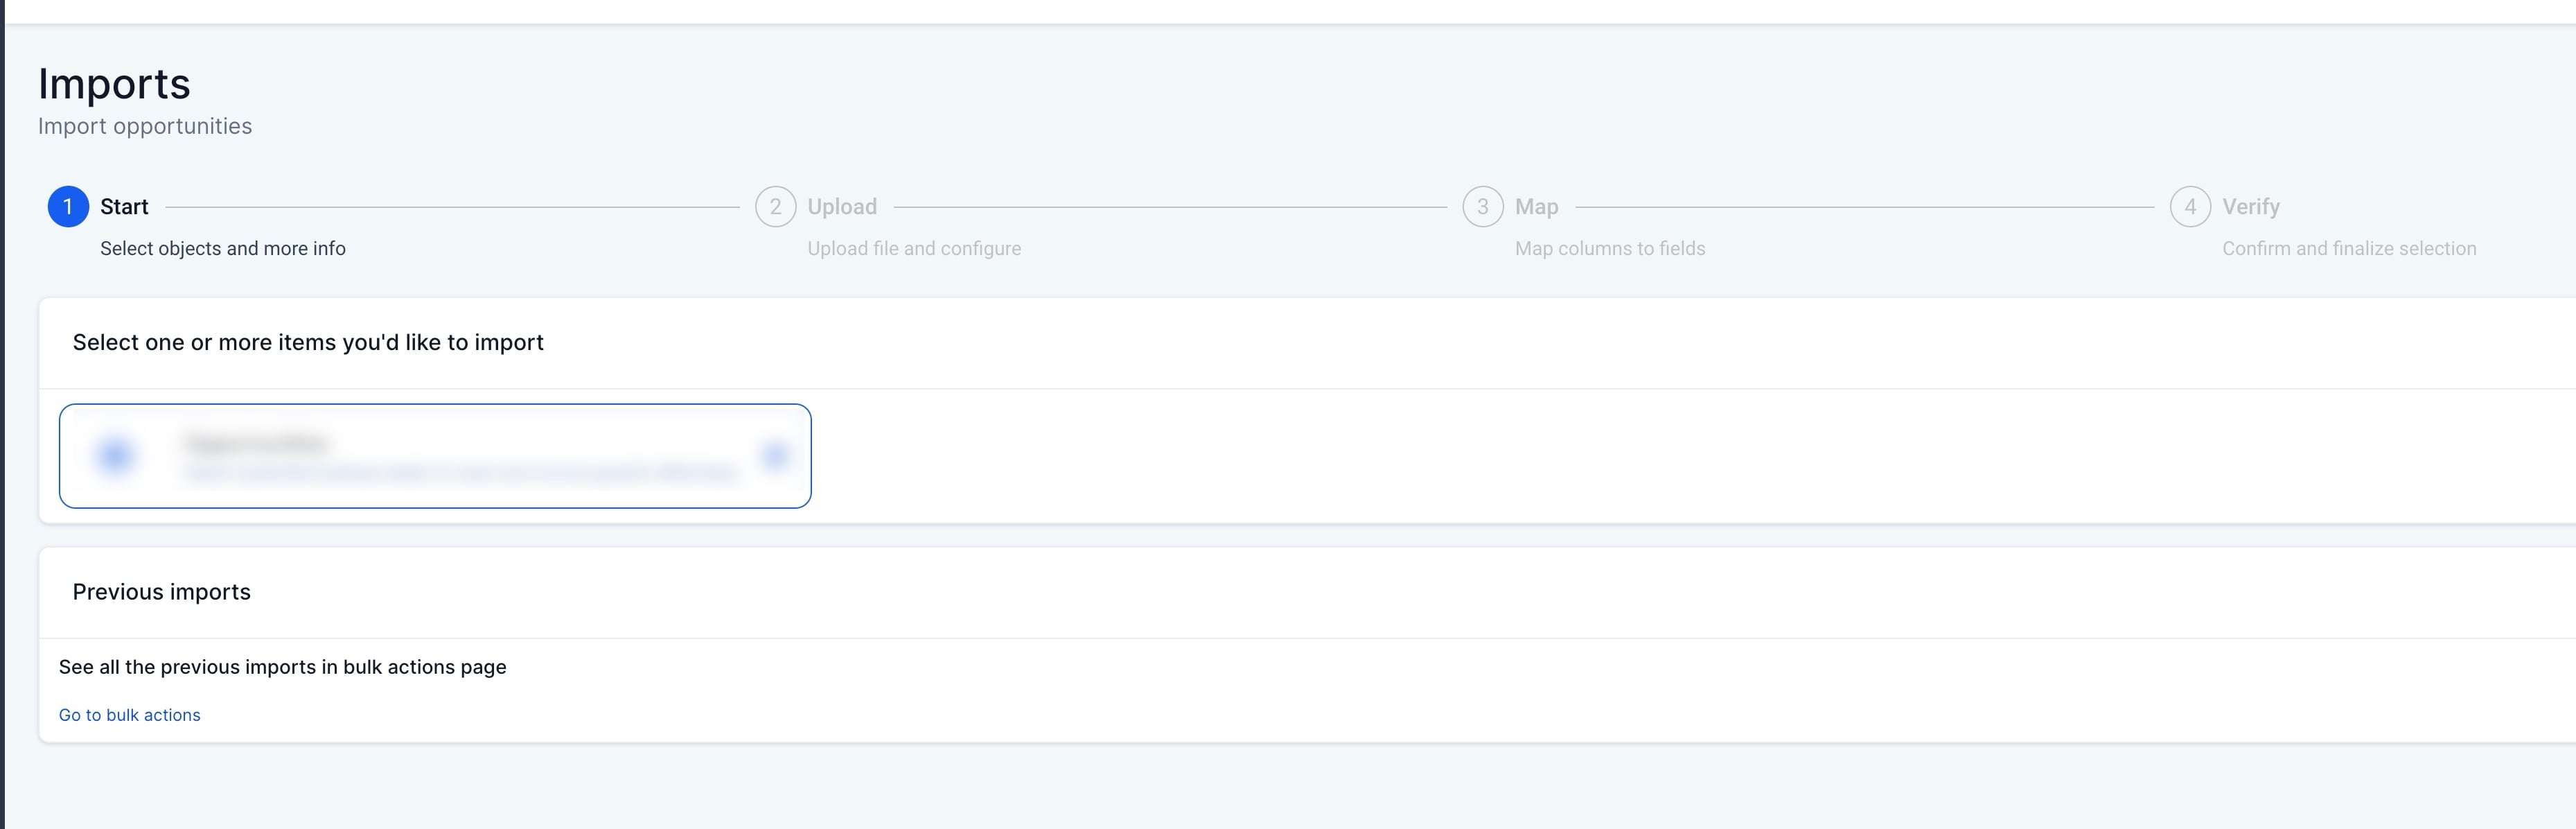
Step 3: Select what to import.
Choose whether you are importing only Opportunities or both Contacts and Opportunities, then continue to the next step.
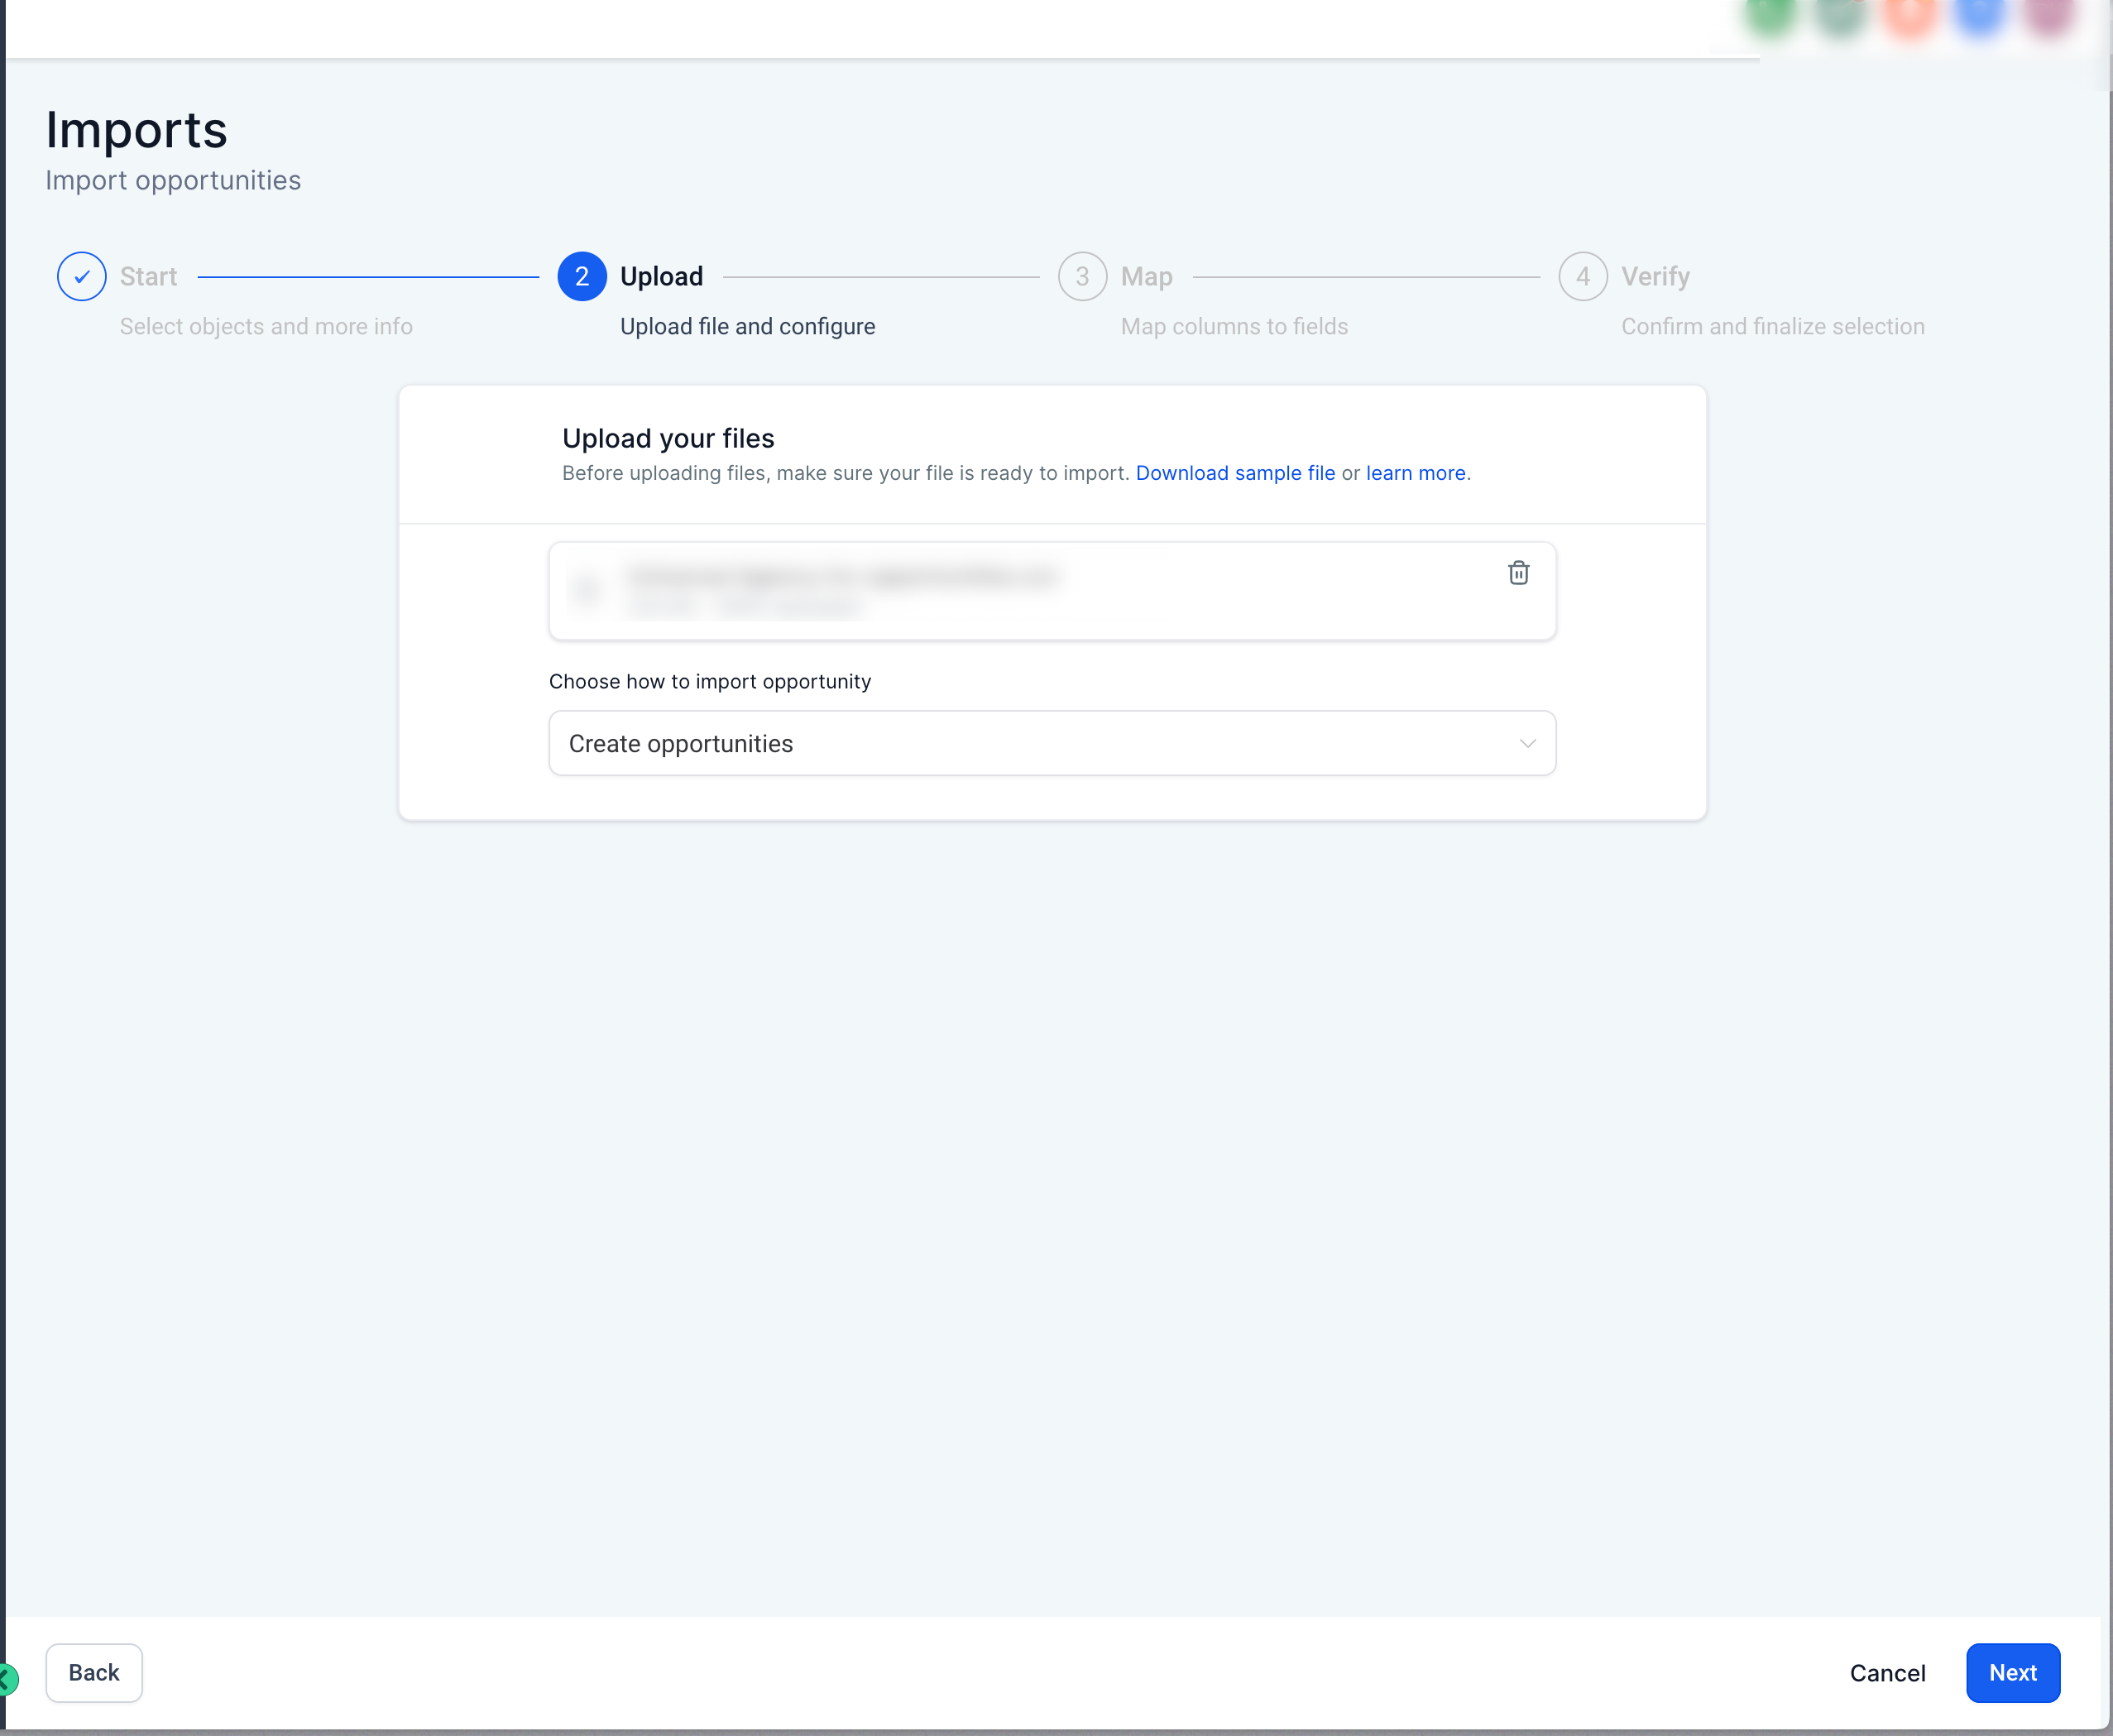
Step 4: Upload your CSV file.
Upload the CSV file containing your opportunity data. Then choose the import type:
Create opportunities
Update opportunities
Create and update opportunities
Proceed to the mapping stage.
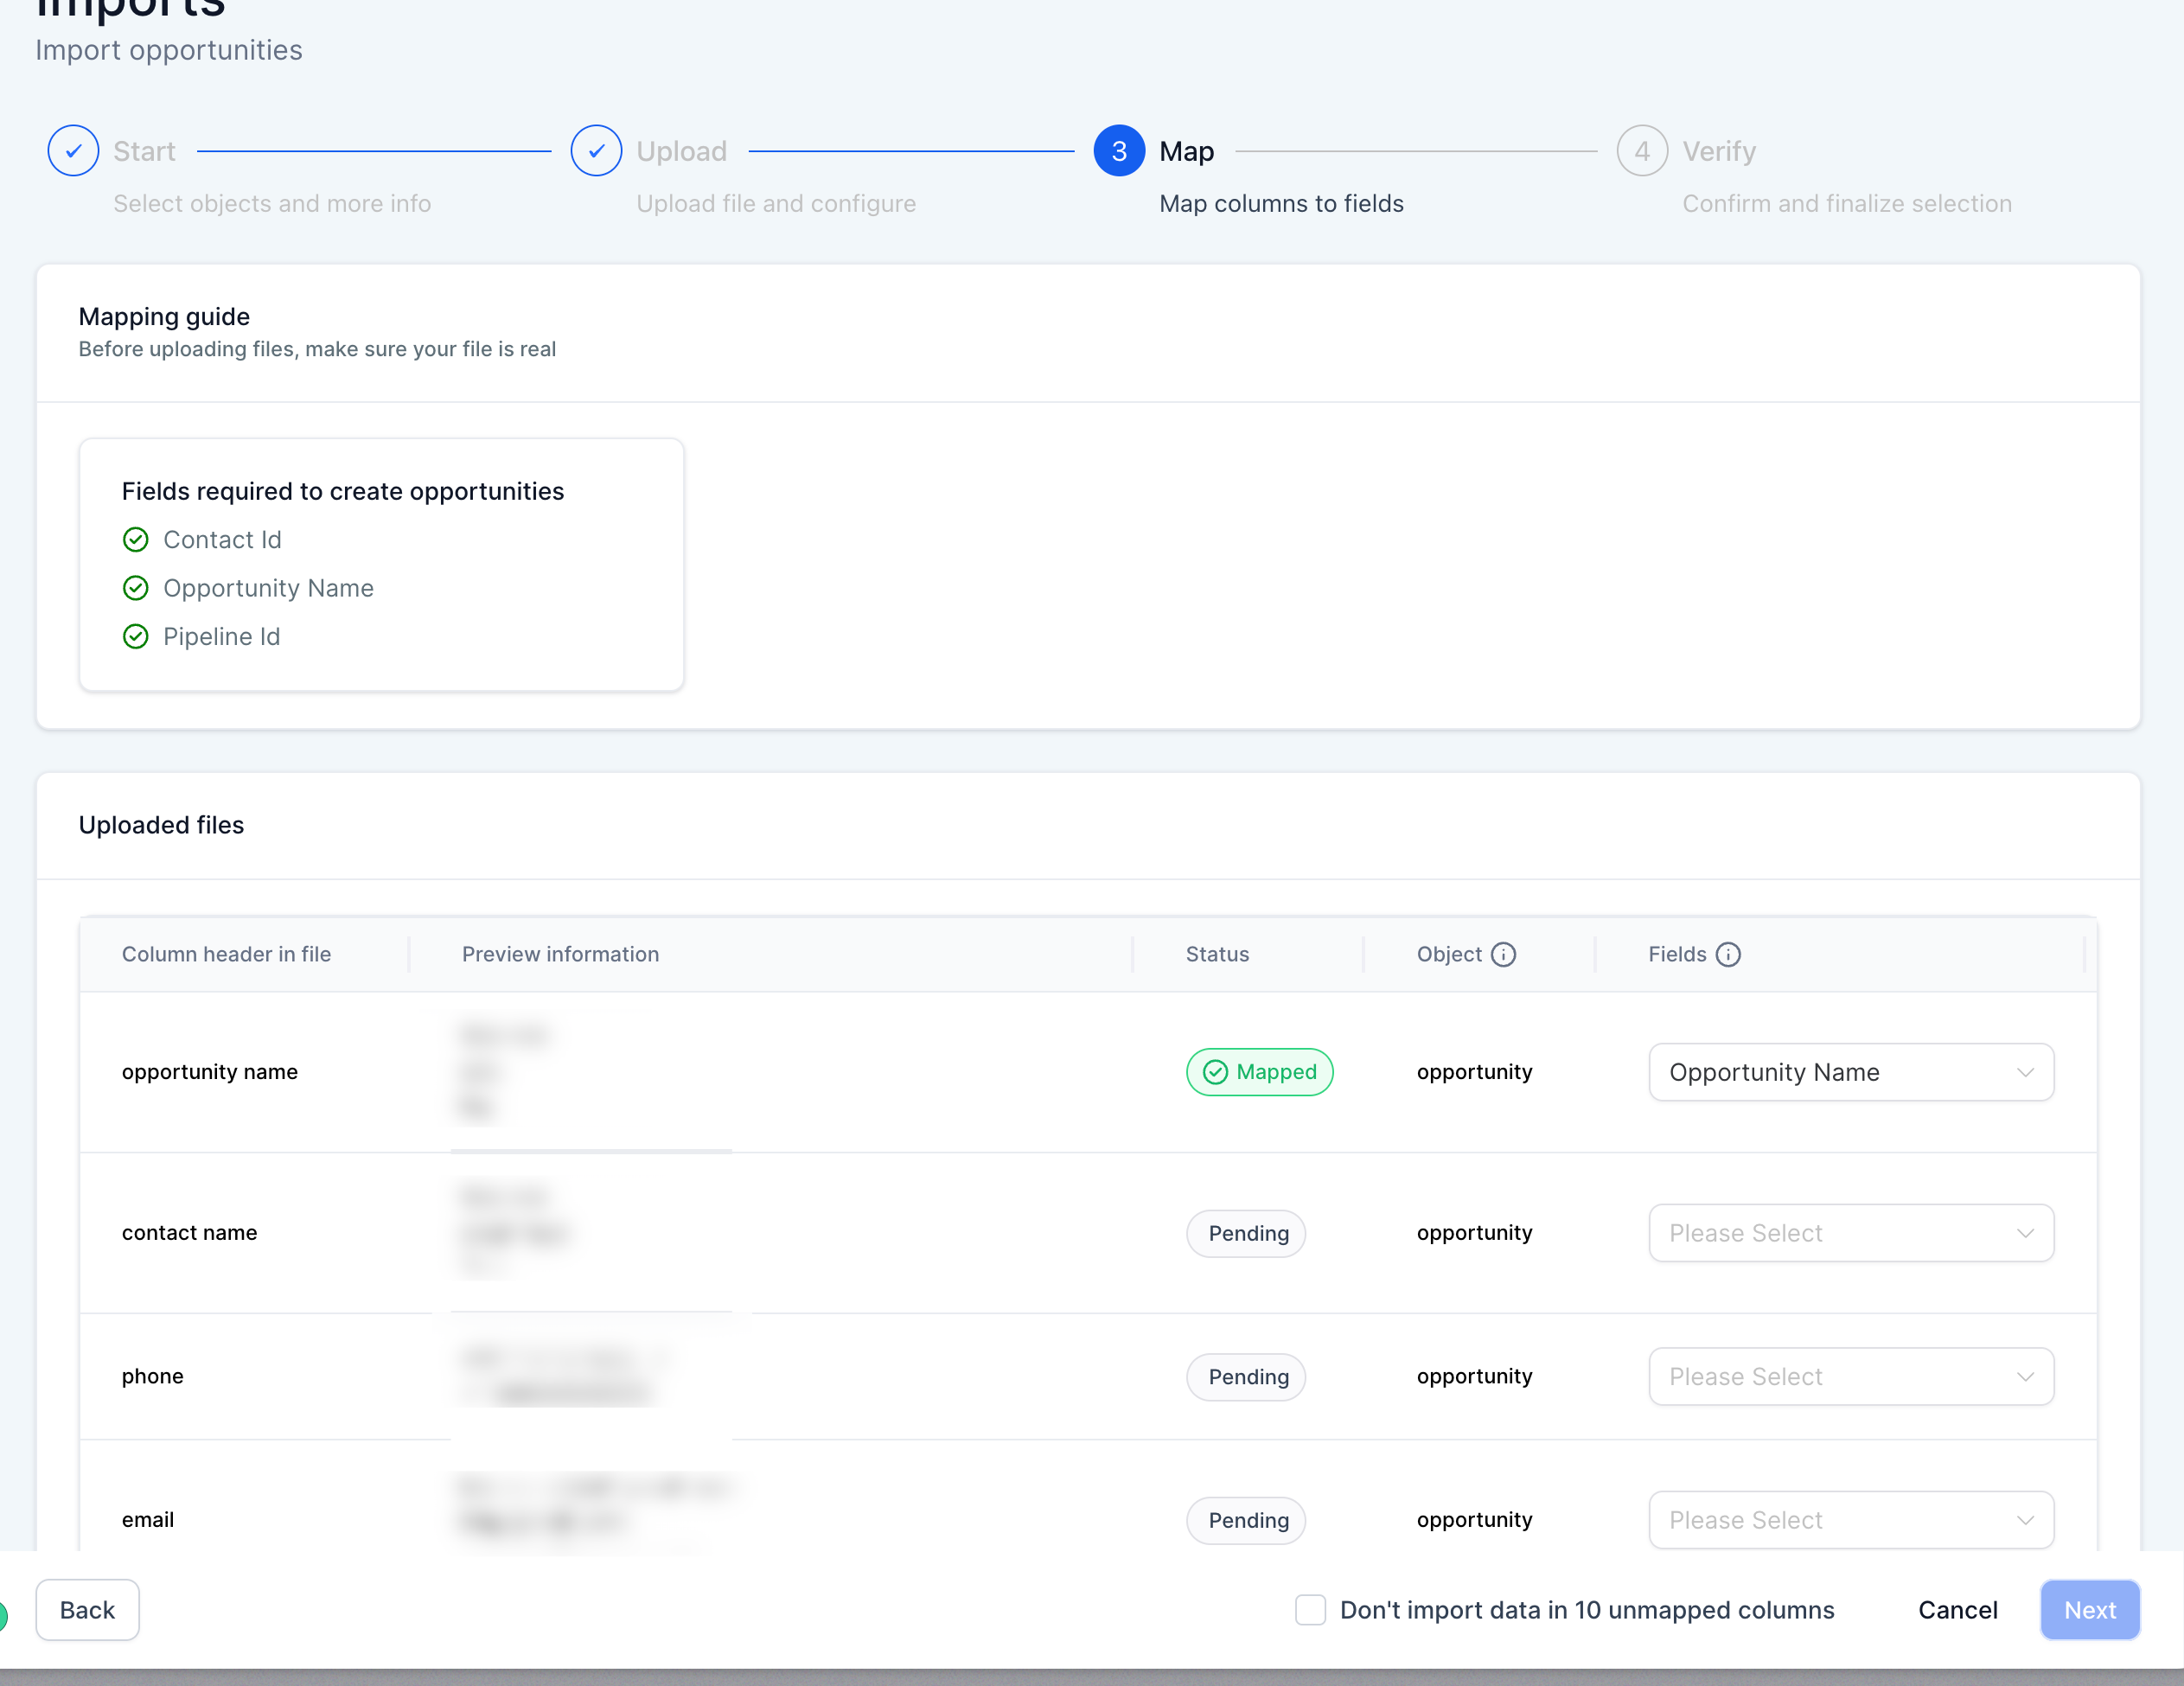
Step 5: Map your columns to fields.
Review each column from your CSV and confirm it is mapped to the correct Aesthetix CRM field. A few things to note:
Required fields (Contact ID, Opportunity Name, and Pipeline) must be mapped.
Mapped fields with correct values show a green checkmark; a missing or incorrect field shows a yellow warning triangle. When all required fields are mapped successfully, all indicators turn green.
If you do not want to import a column, you can leave it unmapped and check the box to proceed. Unmapped columns are ignored automatically.
Enable Don't update empty values to prevent the import from overwriting existing opportunity values with blank cells from your file.
If contacts and opportunities are on the same row in the CSV, they are automatically mapped to each other.
Step 6: Review, confirm, and finalize.
On the final screen, review your file and mappings before starting:
Confirm all required and custom fields are mapped as intended.
Select any tags you want applied to the imported contacts or opportunities (optional).
Review the document name and mapped fields.
Check the required confirmation box.
Then click Start Bulk Import.

If your CSV includes both contact and opportunity (deal) information, you can import both at once using the same flow. This is useful when onboarding new leads directly into your sales pipeline and associating them with a stage or deal value during import.
The process is the same as above — the only difference is selecting both Contacts and Opportunities during the initial import setup. When both objects appear on the same row, they are automatically linked to each other. To import contacts on their own, see Contacts > Import & Export.
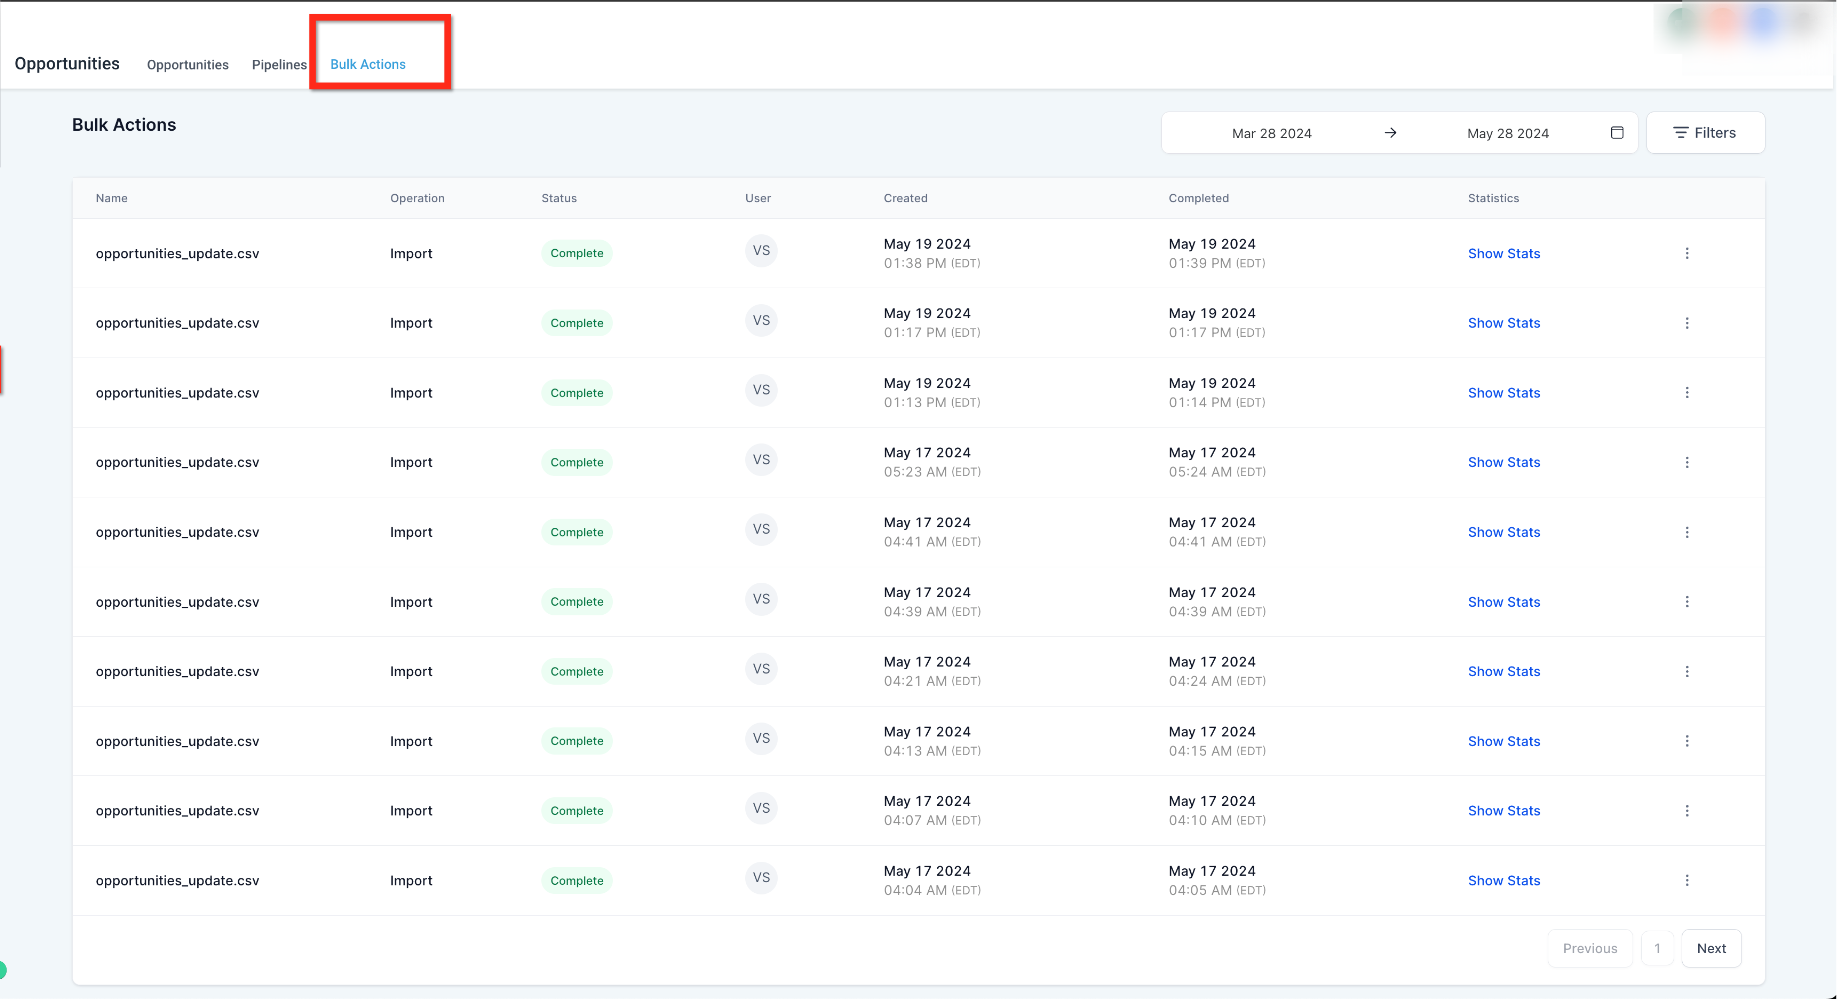
After starting the import, you can monitor the results on the Bulk Actions page, which displays the history of your import jobs. Each import shows its status, completion time, and available statistics.
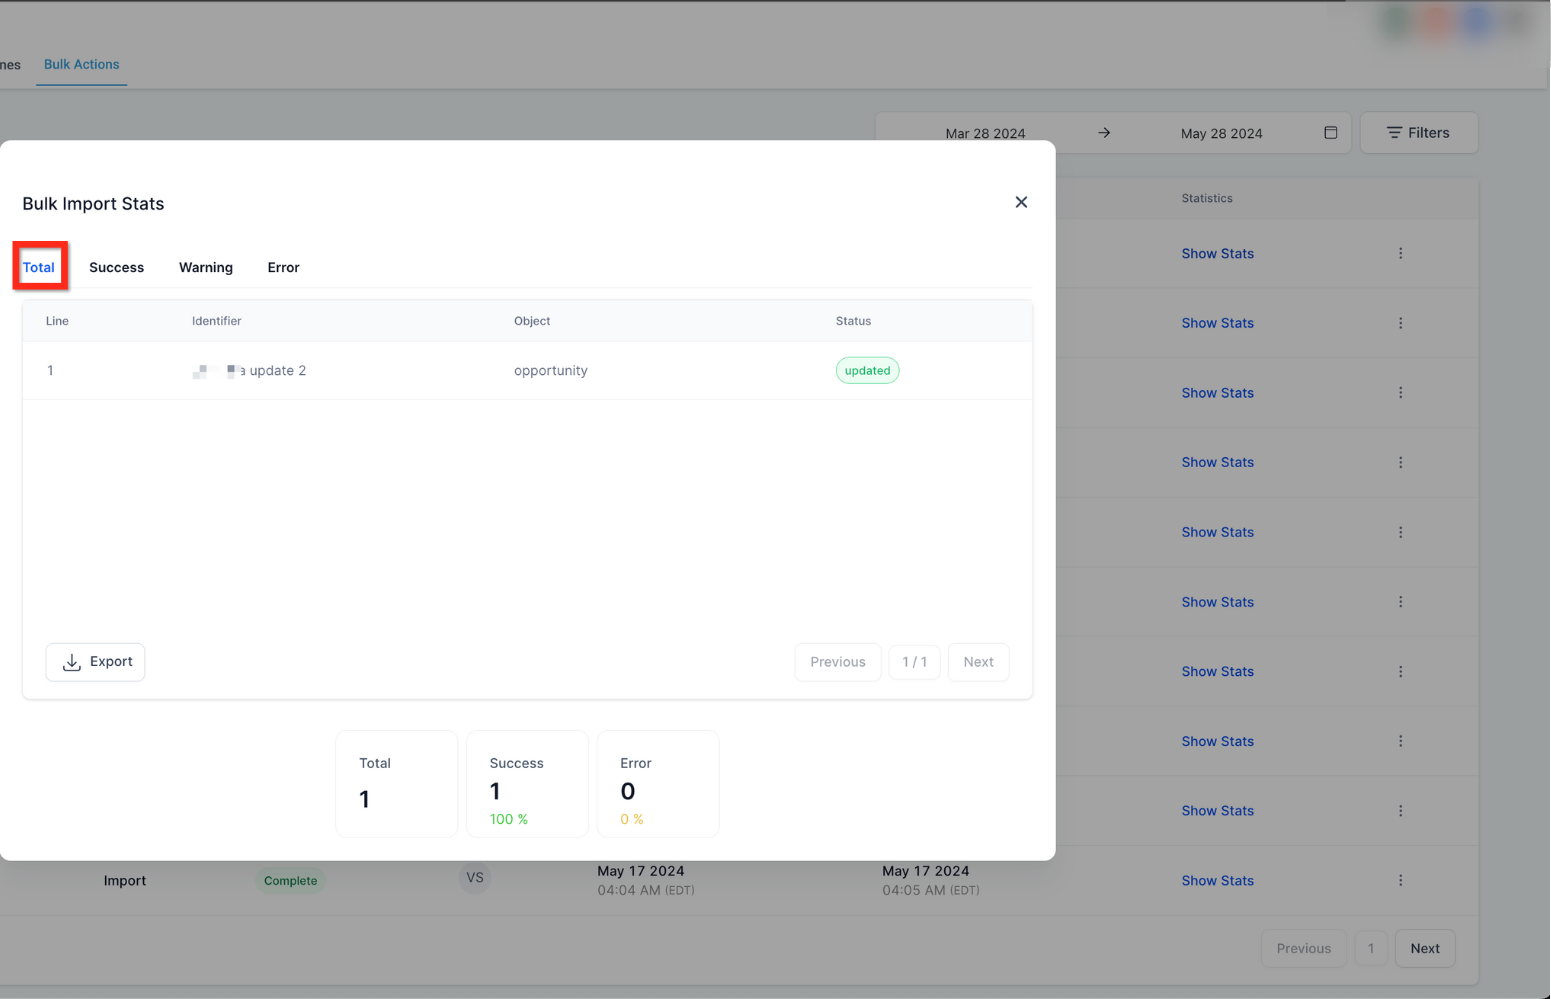
Selecting Show Stats opens a detailed report showing:
Total records processed
Successful imports
Warnings
Errors
Warnings usually affect optional fields, while errors prevent specific rows from importing.
Invalid option for multi-select fields: Check that the value in your file matches an existing field option exactly.
Invalid Contact ID: Ensure the Contact ID exists in the system, or remove the value if you are creating a new record.
Date format error: Make sure date values follow one of the accepted formats.
Duplicate unique property value: Ensure unique fields such as identifiers do not contain duplicate values. Remember that a contact can only have one opportunity per pipeline.
File not found: Confirm the uploaded file is a valid CSV and that the file path is correct.
Missing required fields: Ensure all mandatory fields — Opportunity Name, Contact ID, and Pipeline — are included and mapped.
Review your file carefully before importing.
Ensure column headers match existing fields where possible.
Test with a smaller dataset first.
Always verify your mapping before confirming the import.
Remove blank rows and columns to avoid unexpected import behavior.
Can I import opportunities without contact data?
No. Each opportunity must be linked to a valid Contact ID in your account.
Can I update existing opportunities using a CSV file?
Yes. Include the Opportunity ID in your file and choose the update option during import.
What file format is required?
The file must be in CSV (.csv) format and under 30 MB.
Can I import opportunities into multiple pipelines?
Yes, as long as each Pipeline name or ID matches a pipeline that already exists in your account.
What happens if a stage is not included in the file?
If a stage is not provided, the opportunity is automatically assigned to the first stage in the selected pipeline.
Can I import both new and existing opportunities at the same time?
Yes. Choose the Create and Update option during import.
What happens if fields are mapped incorrectly?
The import will fail or skip the affected rows. Make sure all required fields are properly mapped and formatted.
Can I add tags during the import process?
Yes. Tags can be applied to contacts or opportunities during the confirmation step before you start the import.
Can I preview or undo an import?
Imports cannot be undone, so always double-check your data before importing. You can review past imports on the Bulk Actions page.
Why did some rows fail to import?
Rows may fail if required fields are missing, IDs are invalid, or data formatting does not match the accepted formats.
If your opportunity import fails or produces unexpected results:
Review your CSV file structure and formatting.
Confirm that all required fields are included and mapped.
Verify that IDs such as Contact ID and Pipeline ID exist in your account.
Check the import statistics page to identify errors.
If issues continue, gather your CSV file and import details and contact support for assistance.
