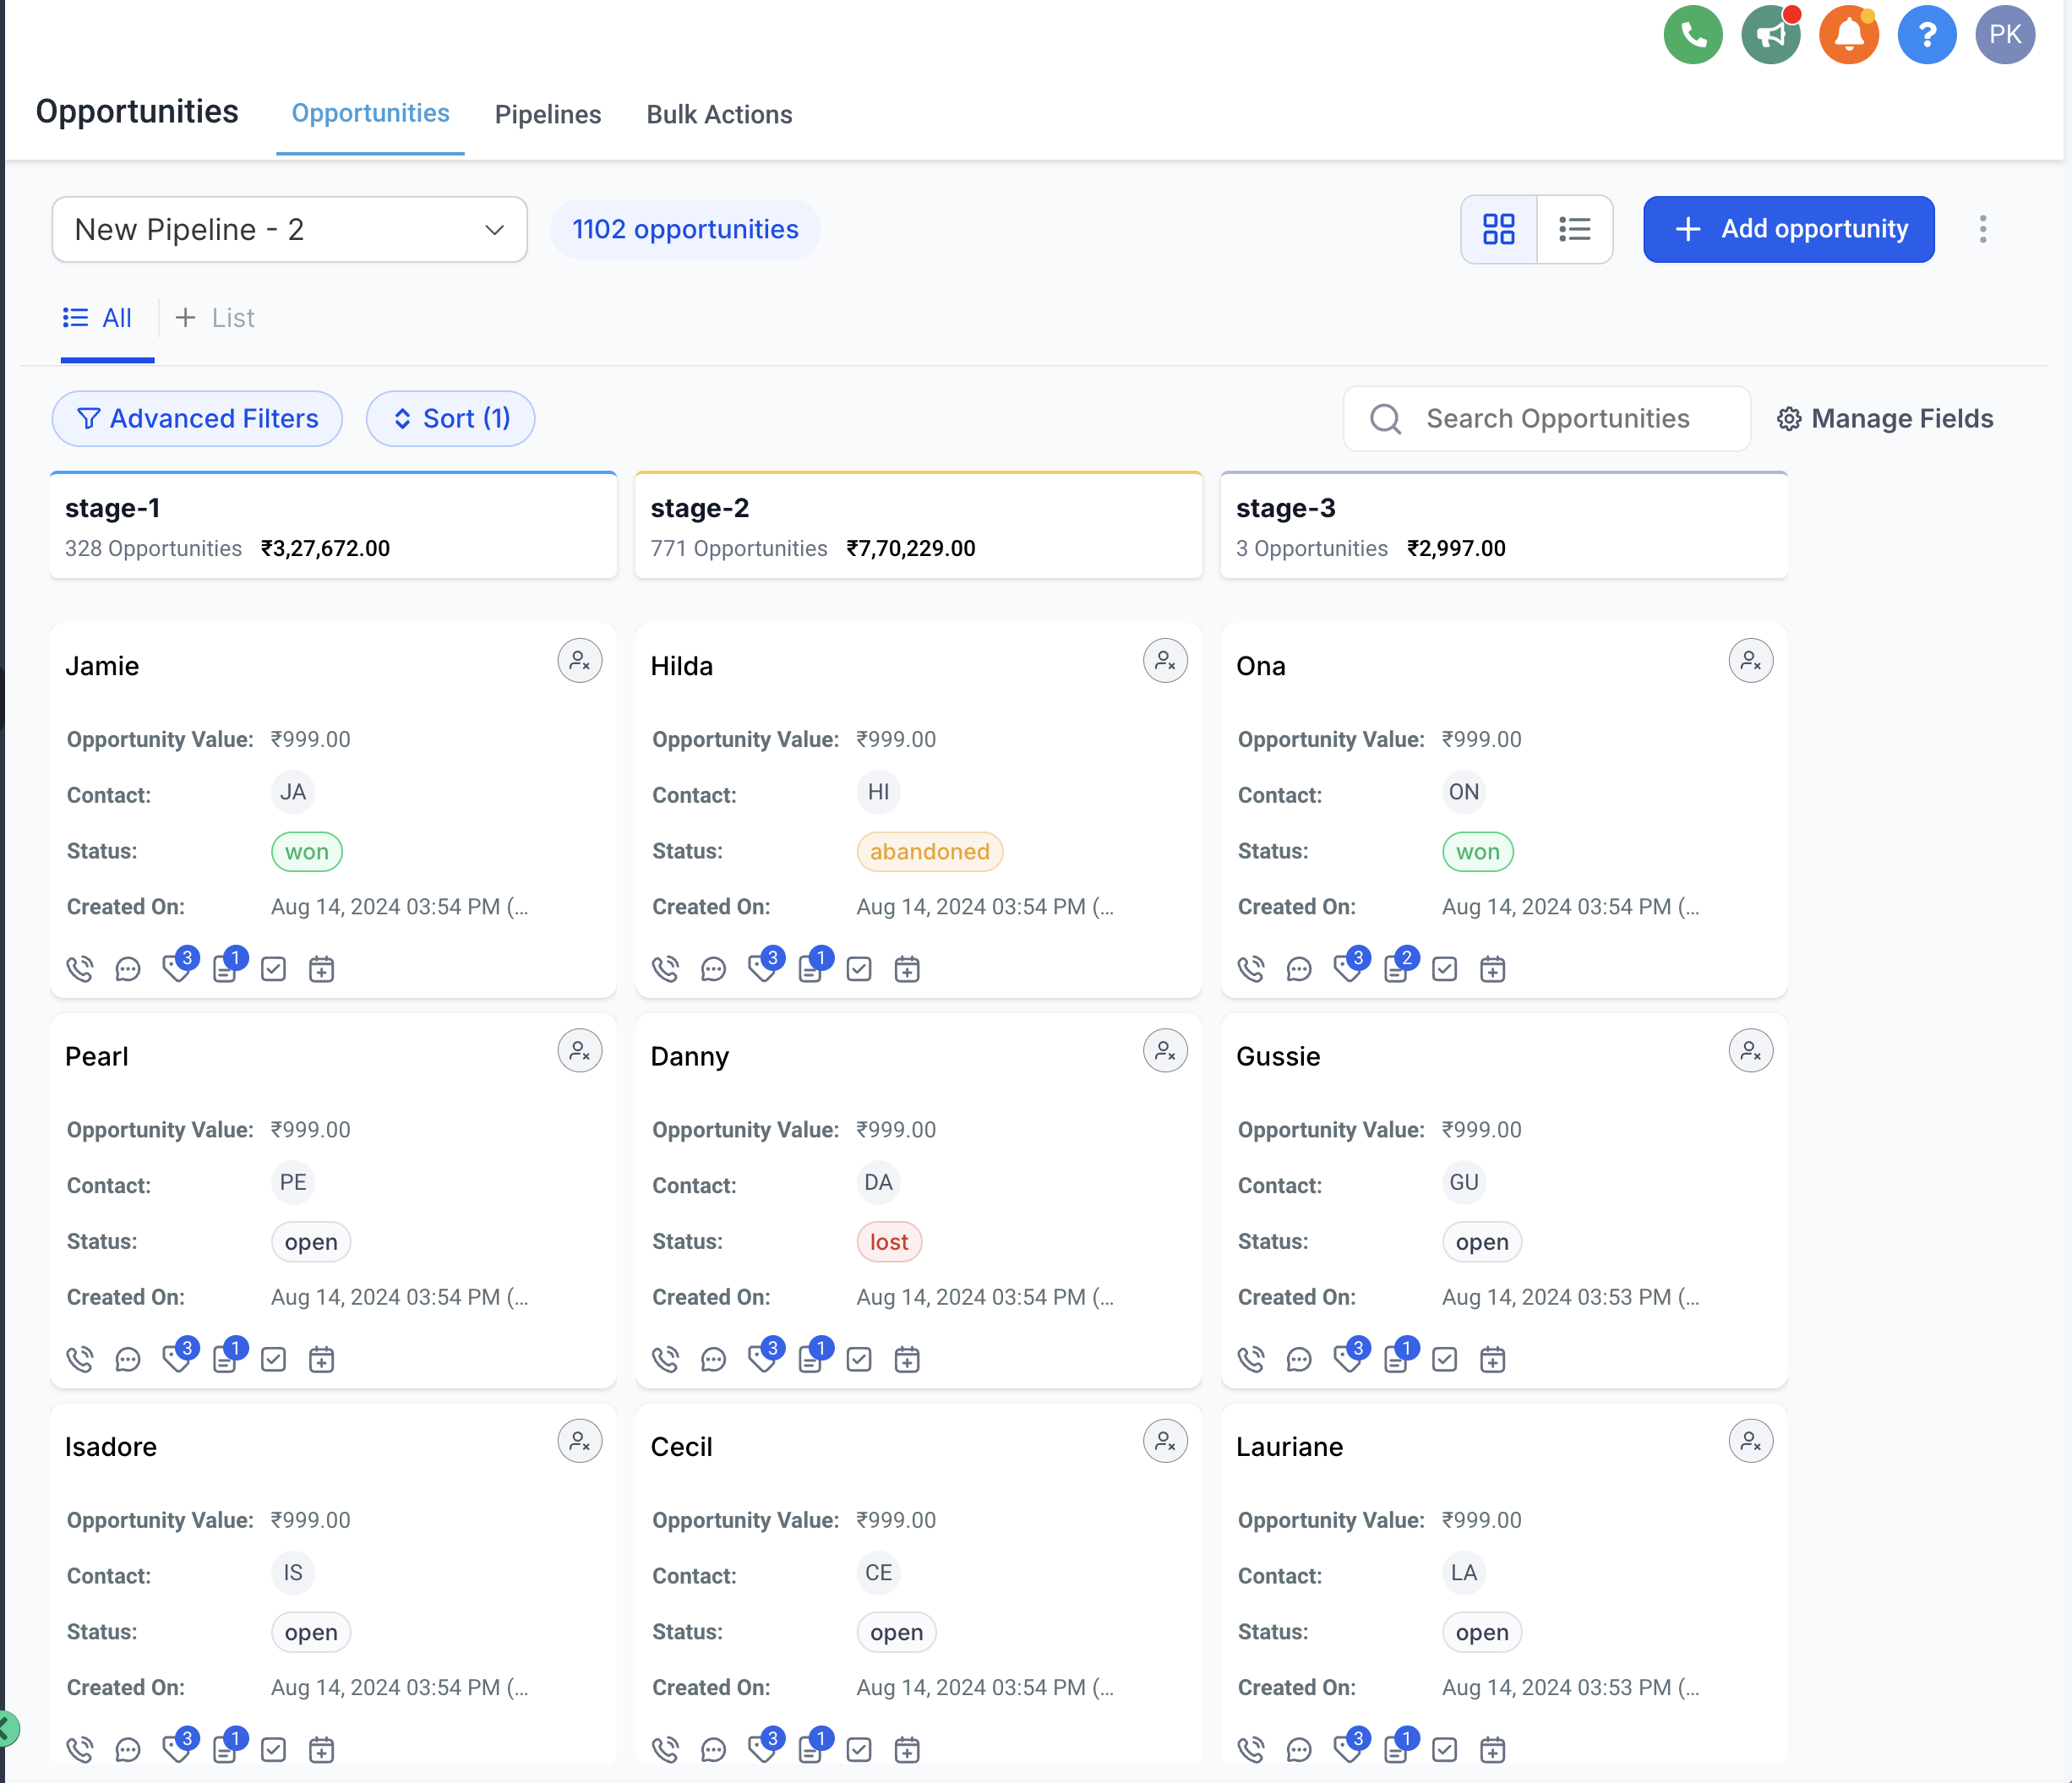
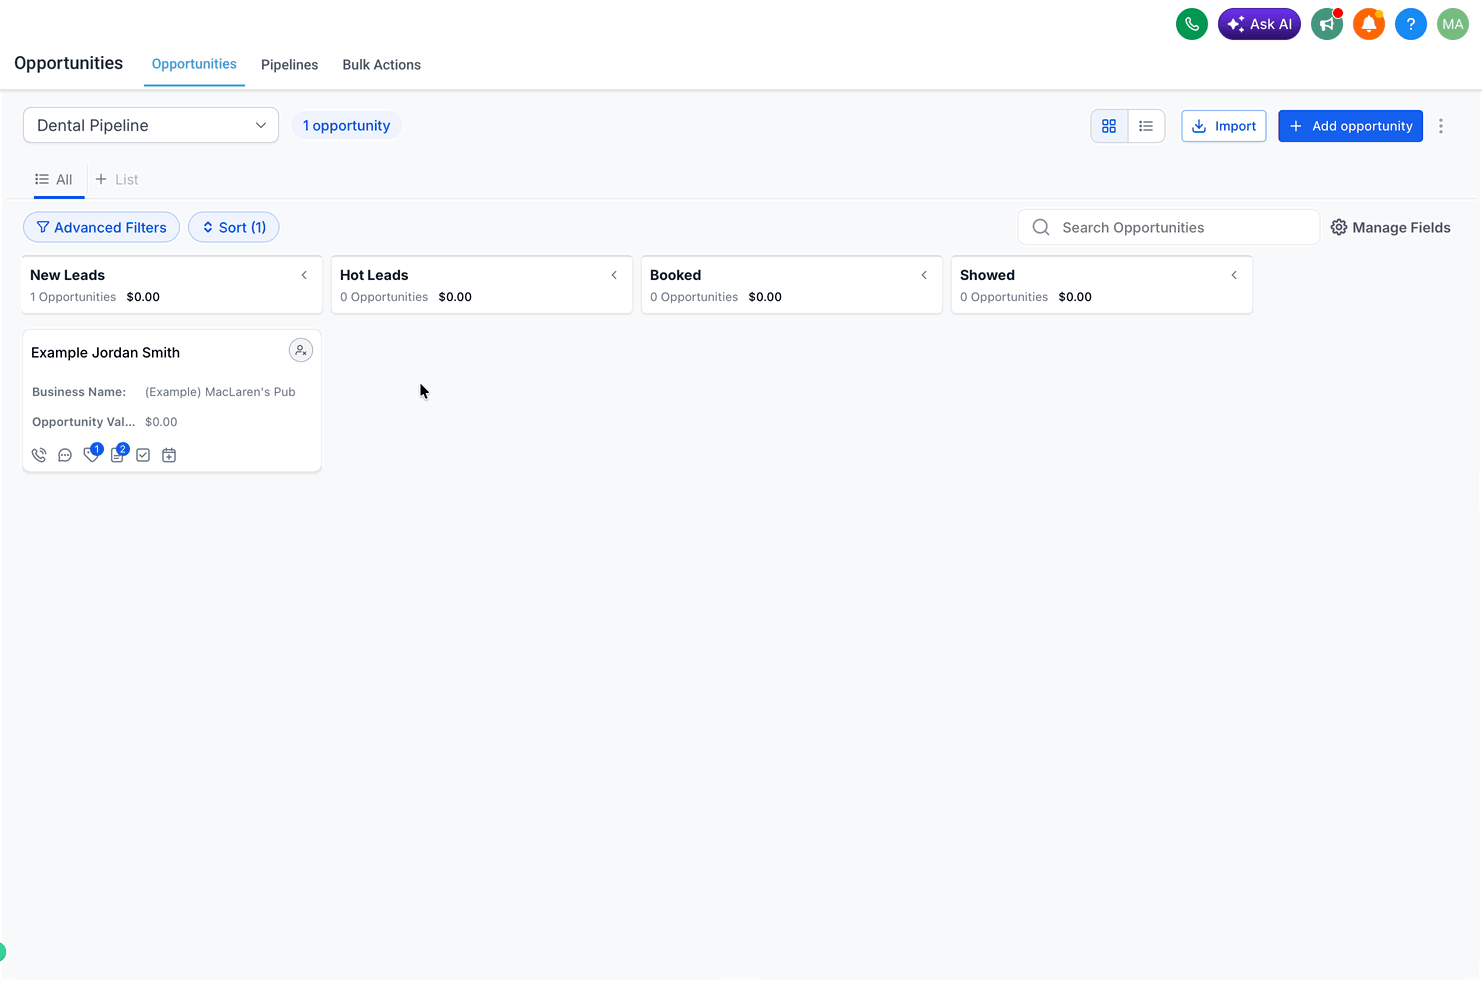
The Opportunities board (Kanban) view gives your team a visual way to manage deals across pipeline stages in Aesthetix CRM. Each opportunity appears as a card that you can drag between stages, quick-edit, and customize to show the details that matter most to your practice. This guide covers navigating the board, editing cards, customizing which fields appear, and tailoring the board layout so you can scan and prioritize your pipeline at a glance.
The Opportunities section lets you sort fresh opportunities into specific pipelines and monitor their progress through the complete sales cycle. Opportunity cards give you the power to manage and streamline your pipelines of potential customers, leads, and other opportunities, regardless of which stage they are at in the sales funnel.
Step 1: Open your pipeline. Navigate to the Opportunities section and select the pipeline you want to work in.
Step 2: Drag a card to start moving it. To move an opportunity to a different stage, click and hold the opportunity card you want to move.
Step 3: Drop the card on the new stage. Drag the card to the desired stage and release to drop it. The opportunity moves to that stage instantly.
Step 4: Search for a specific opportunity. To quickly locate a particular opportunity, use the search bar. Type in the name of the opportunity or any relevant contact details and hit search. The system will then display all the opportunities with matching search terms for easy access and better organization.
You can update opportunity details, modify statuses, and add important notes directly from a card, keeping your records current and accurate.
Step 1: Open your pipeline. Navigate to the Opportunities section and open the pipeline that contains the card you want to edit.
Step 2: Select the card. Click the opportunity card you want to edit to open its editing window.
Step 3: Edit the details. Update the desired details on the opportunity card, such as the opportunity name, status, value, owner, or any notes.
Step 4: Save your changes. Click Update to save your changes.
Step 5: Close the editing window. Click the x to close the editing window.
You can fully customize the fields displayed on the opportunity cards in the board view. This lets you tailor the card to show the most relevant information at a glance, improving workflow efficiency and enhancing visibility into important opportunity details.
Step 1: Open the card customization panel. Navigate to the Opportunities section and click the Manage Fields option, found in the top-right corner of the opportunity board.
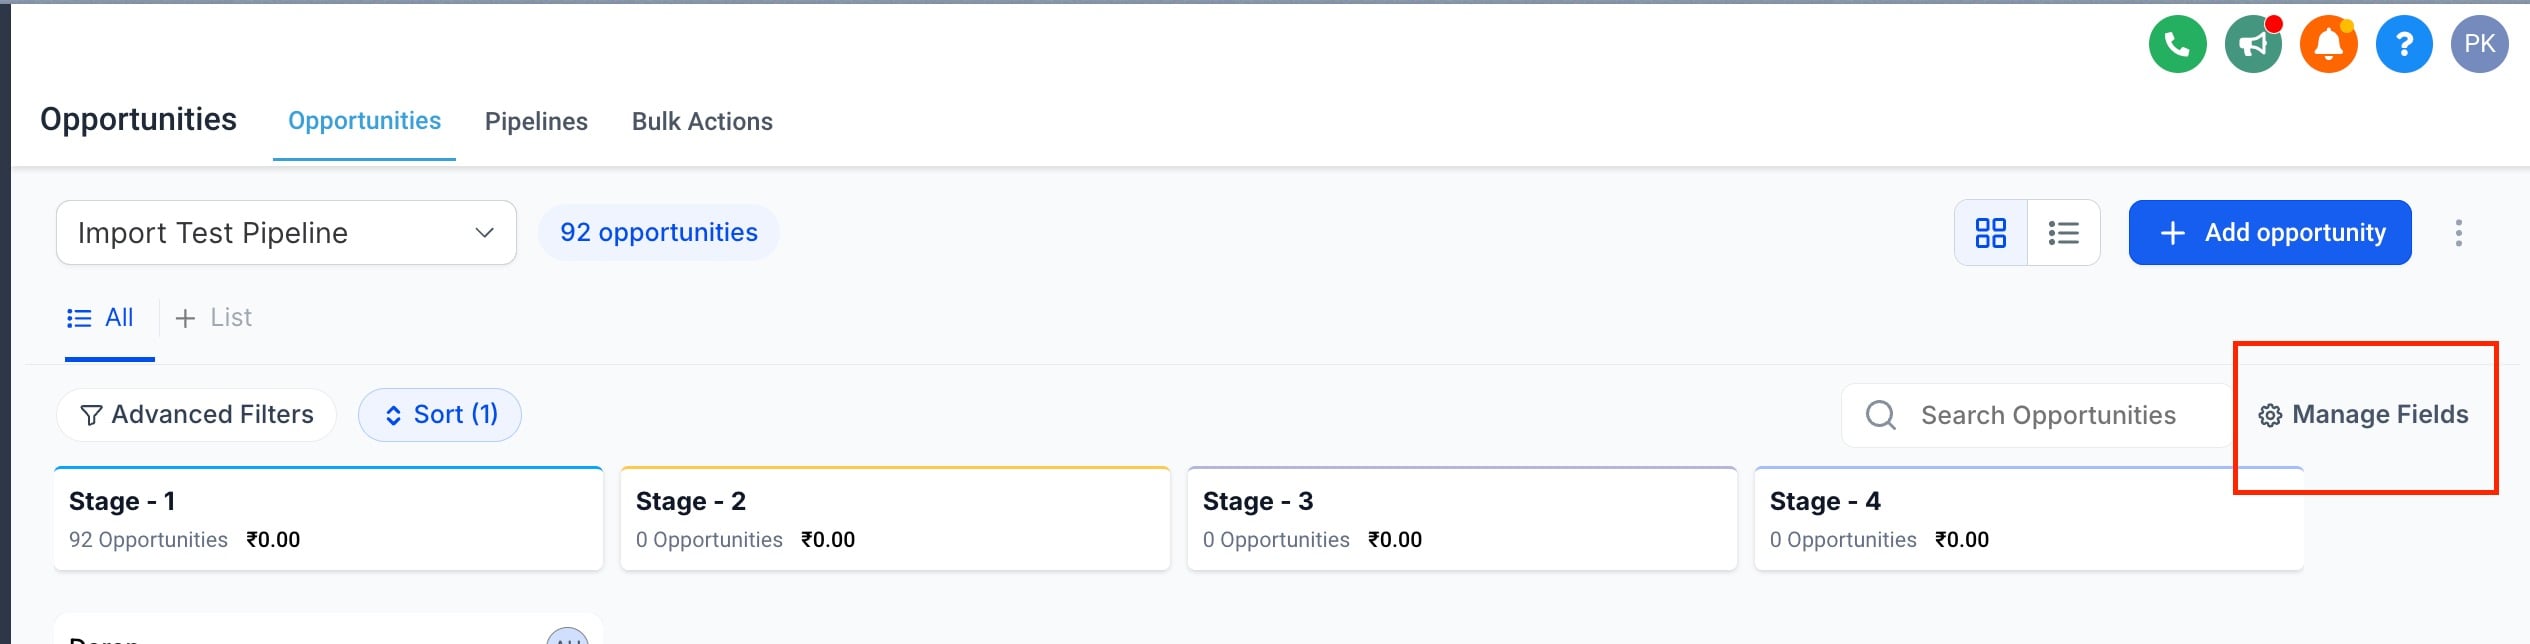
Step 2: Select the fields to display. You can choose up to 7 fields to display on your opportunity cards.
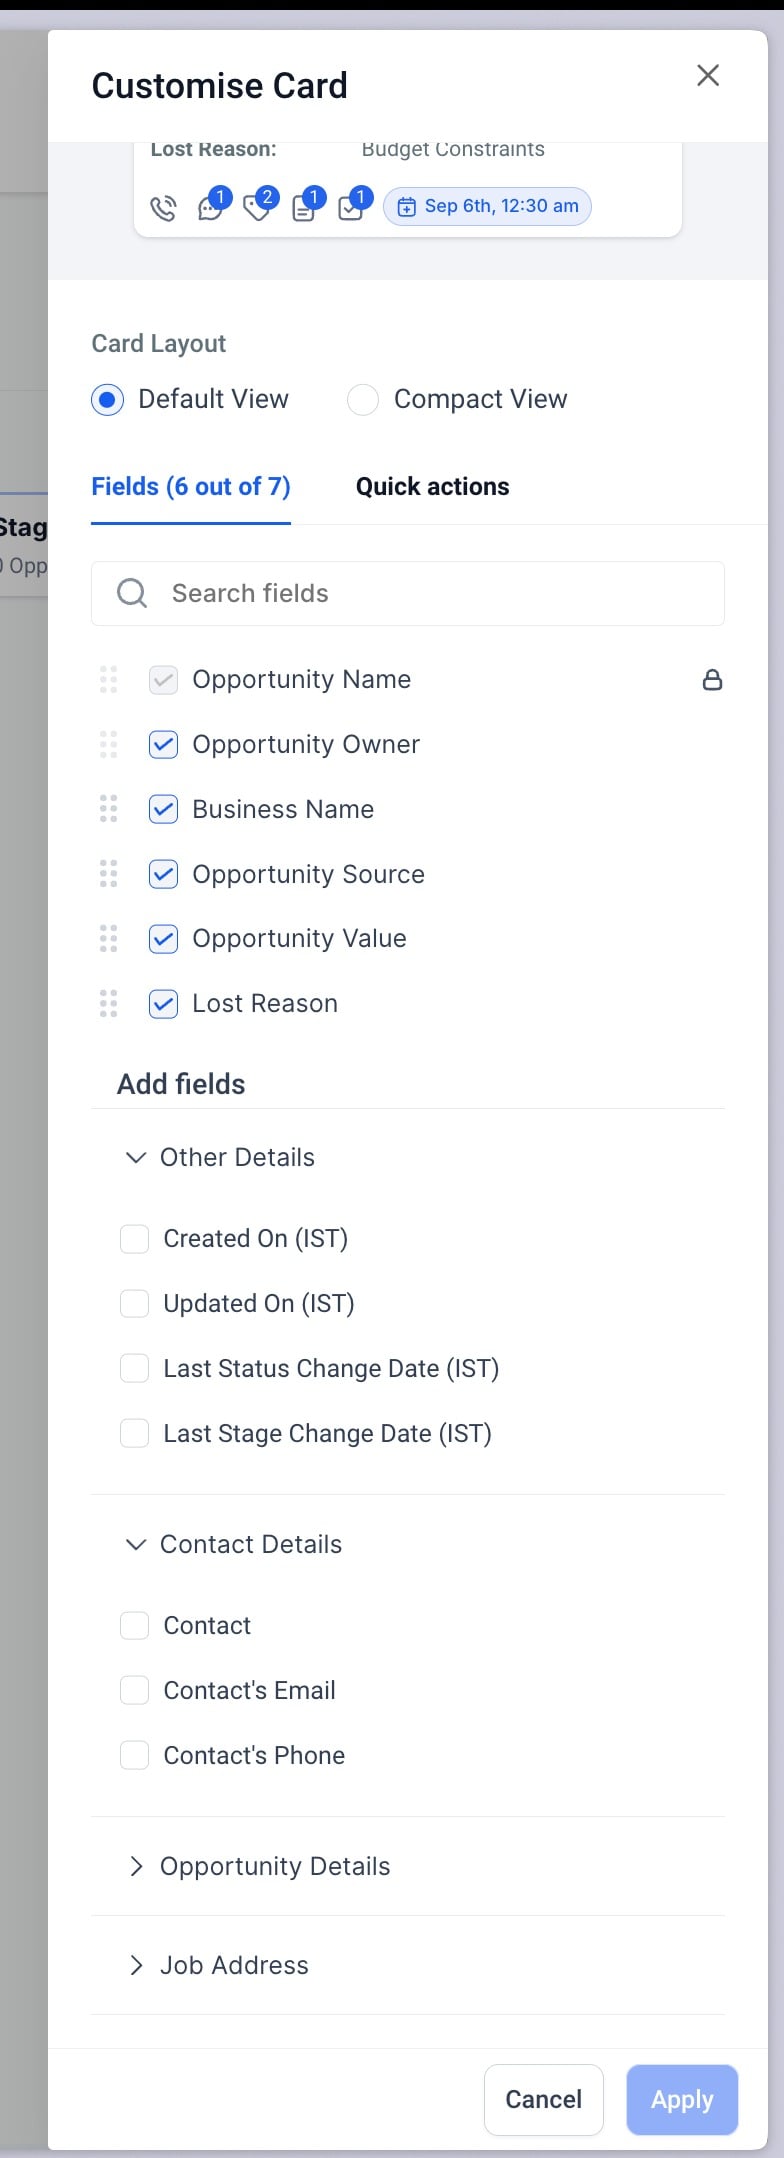
These fields include:
Subsection | What it includes |
|---|---|
Opportunity Standard Fields | Opportunity Name; Opportunity Status; Lost Reason; Opportunity Value; Opportunity Owner; Opportunity Source. |
Opportunity Custom Fields | Any custom fields created for opportunities (for example, custom dropdowns, checkboxes, dates, text fields) that you choose to display on the card. |
Primary Contact's Information | Contact Name; Contact Phone Number; Contact Email Address; Contact Business Name; Next Task Due Date; Days Till Next Task Due Date; Days Till Next Appointment Date; Engagement Score. |
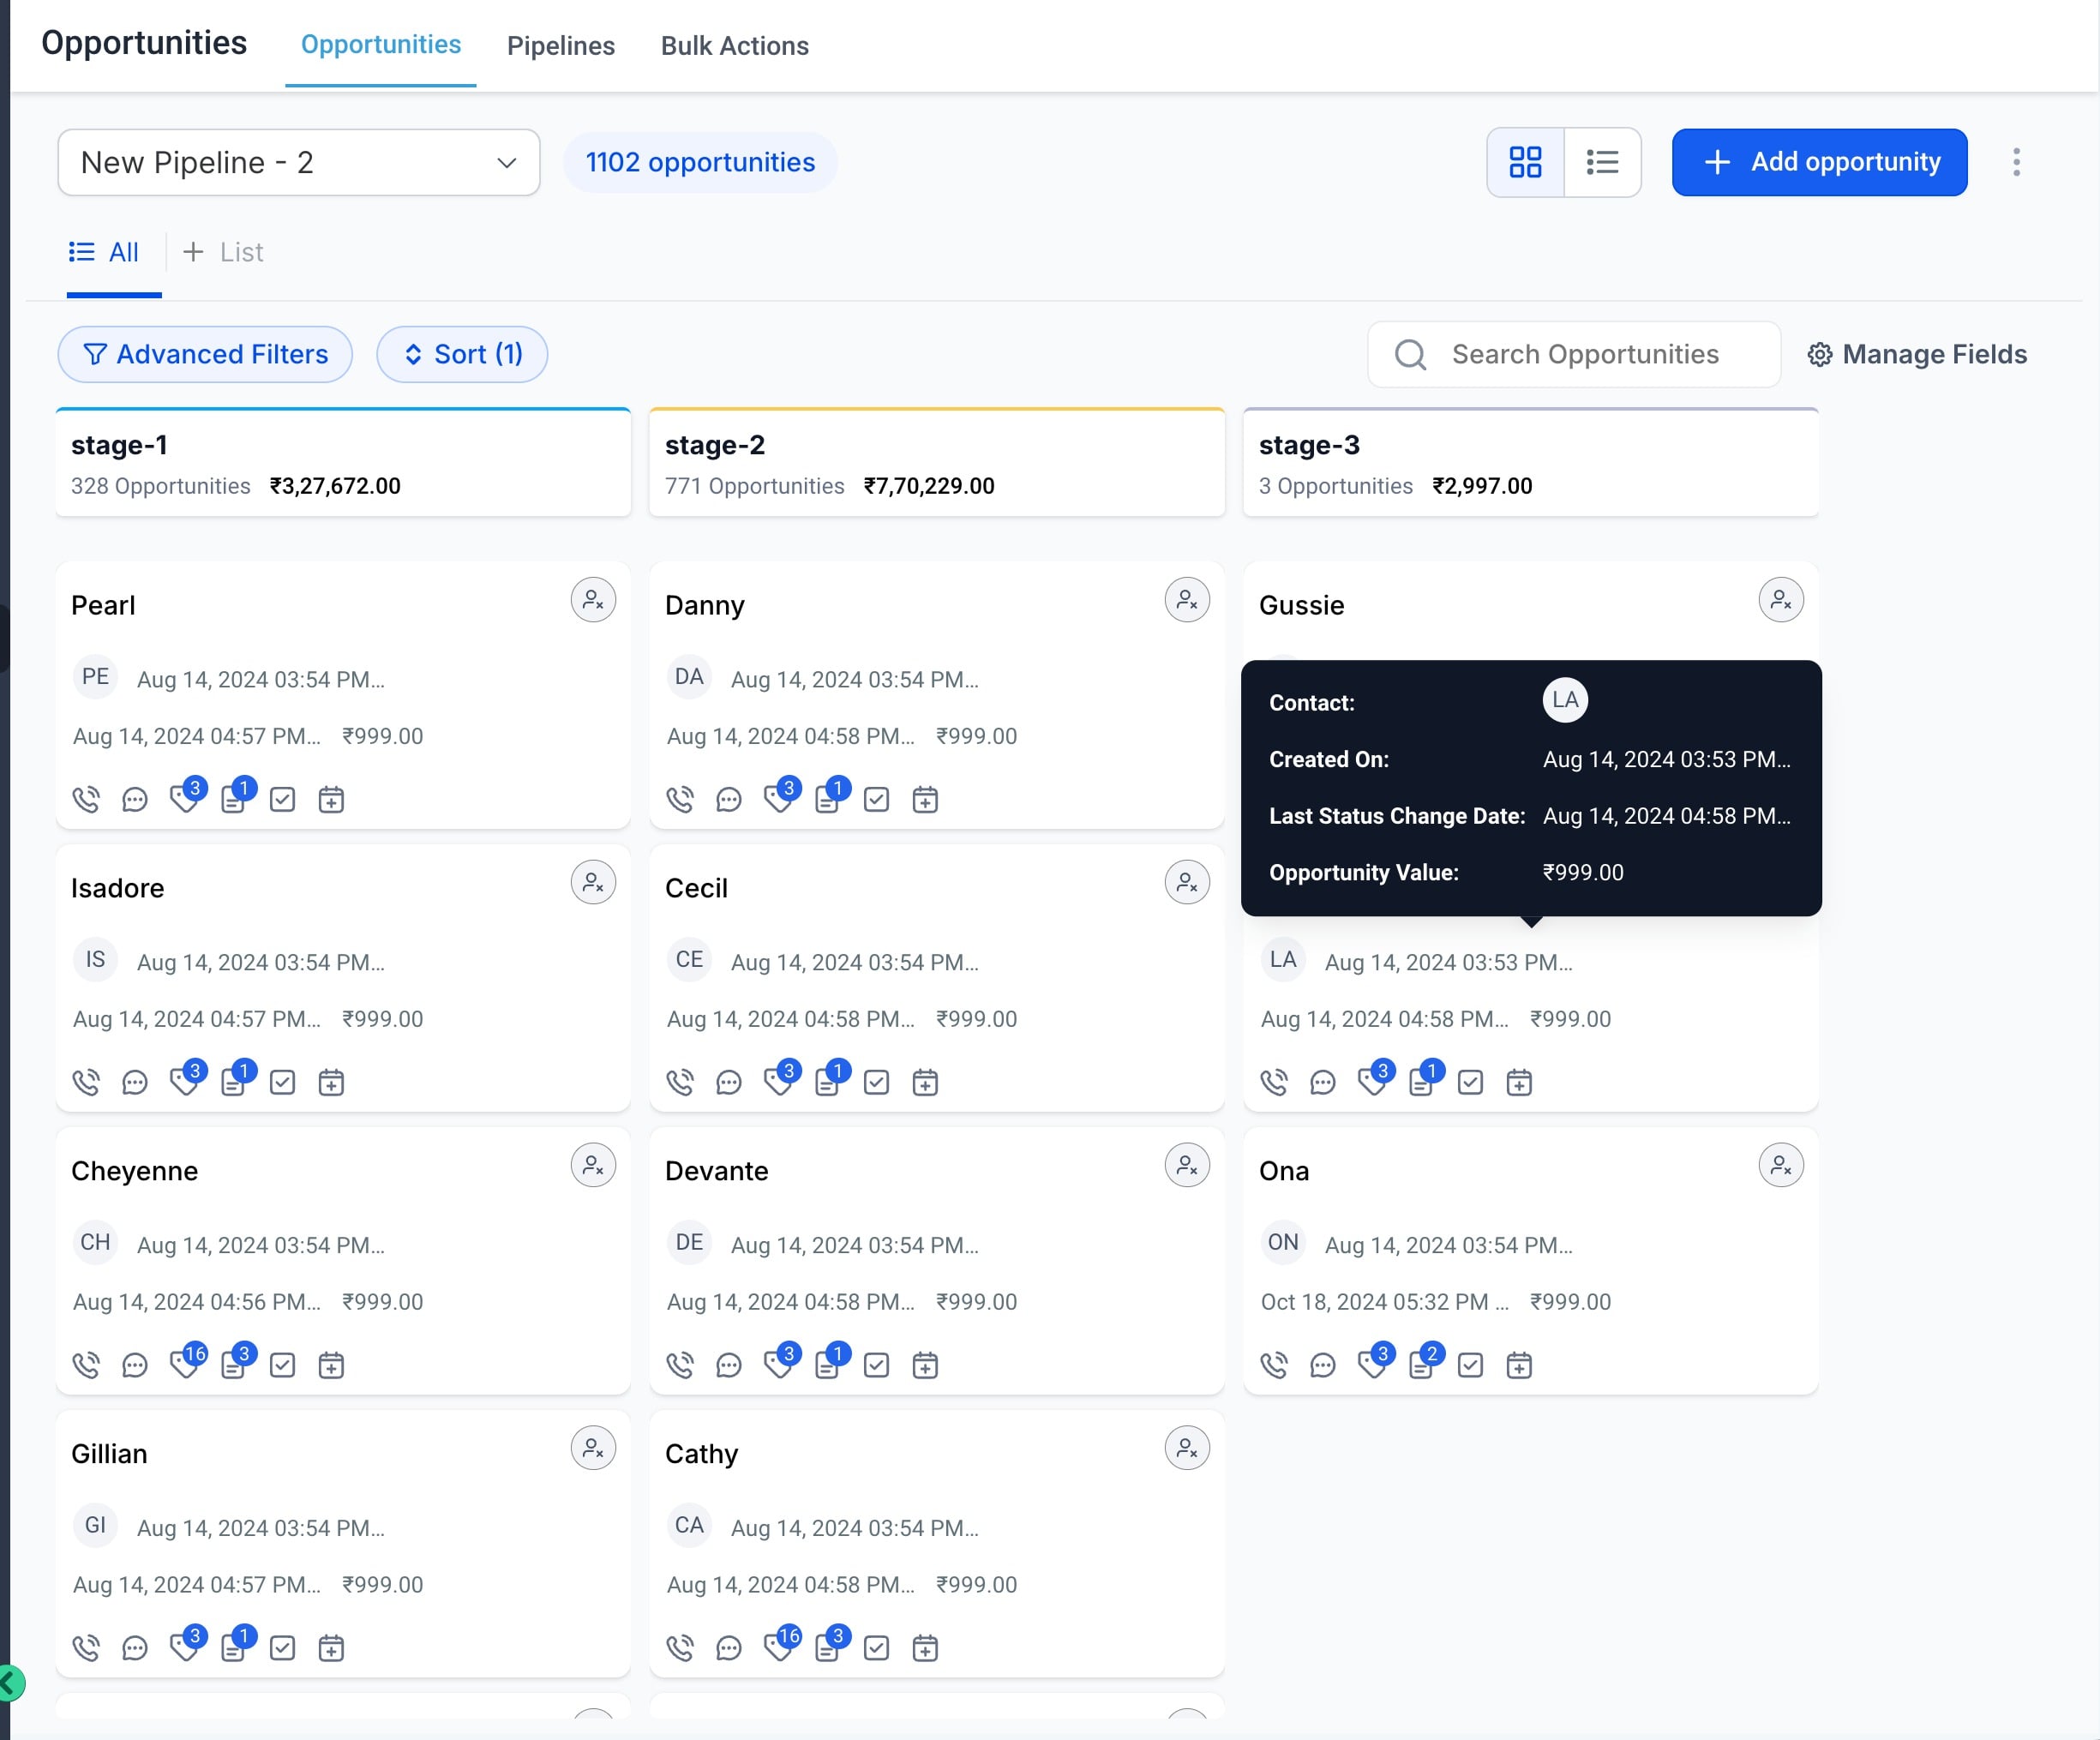
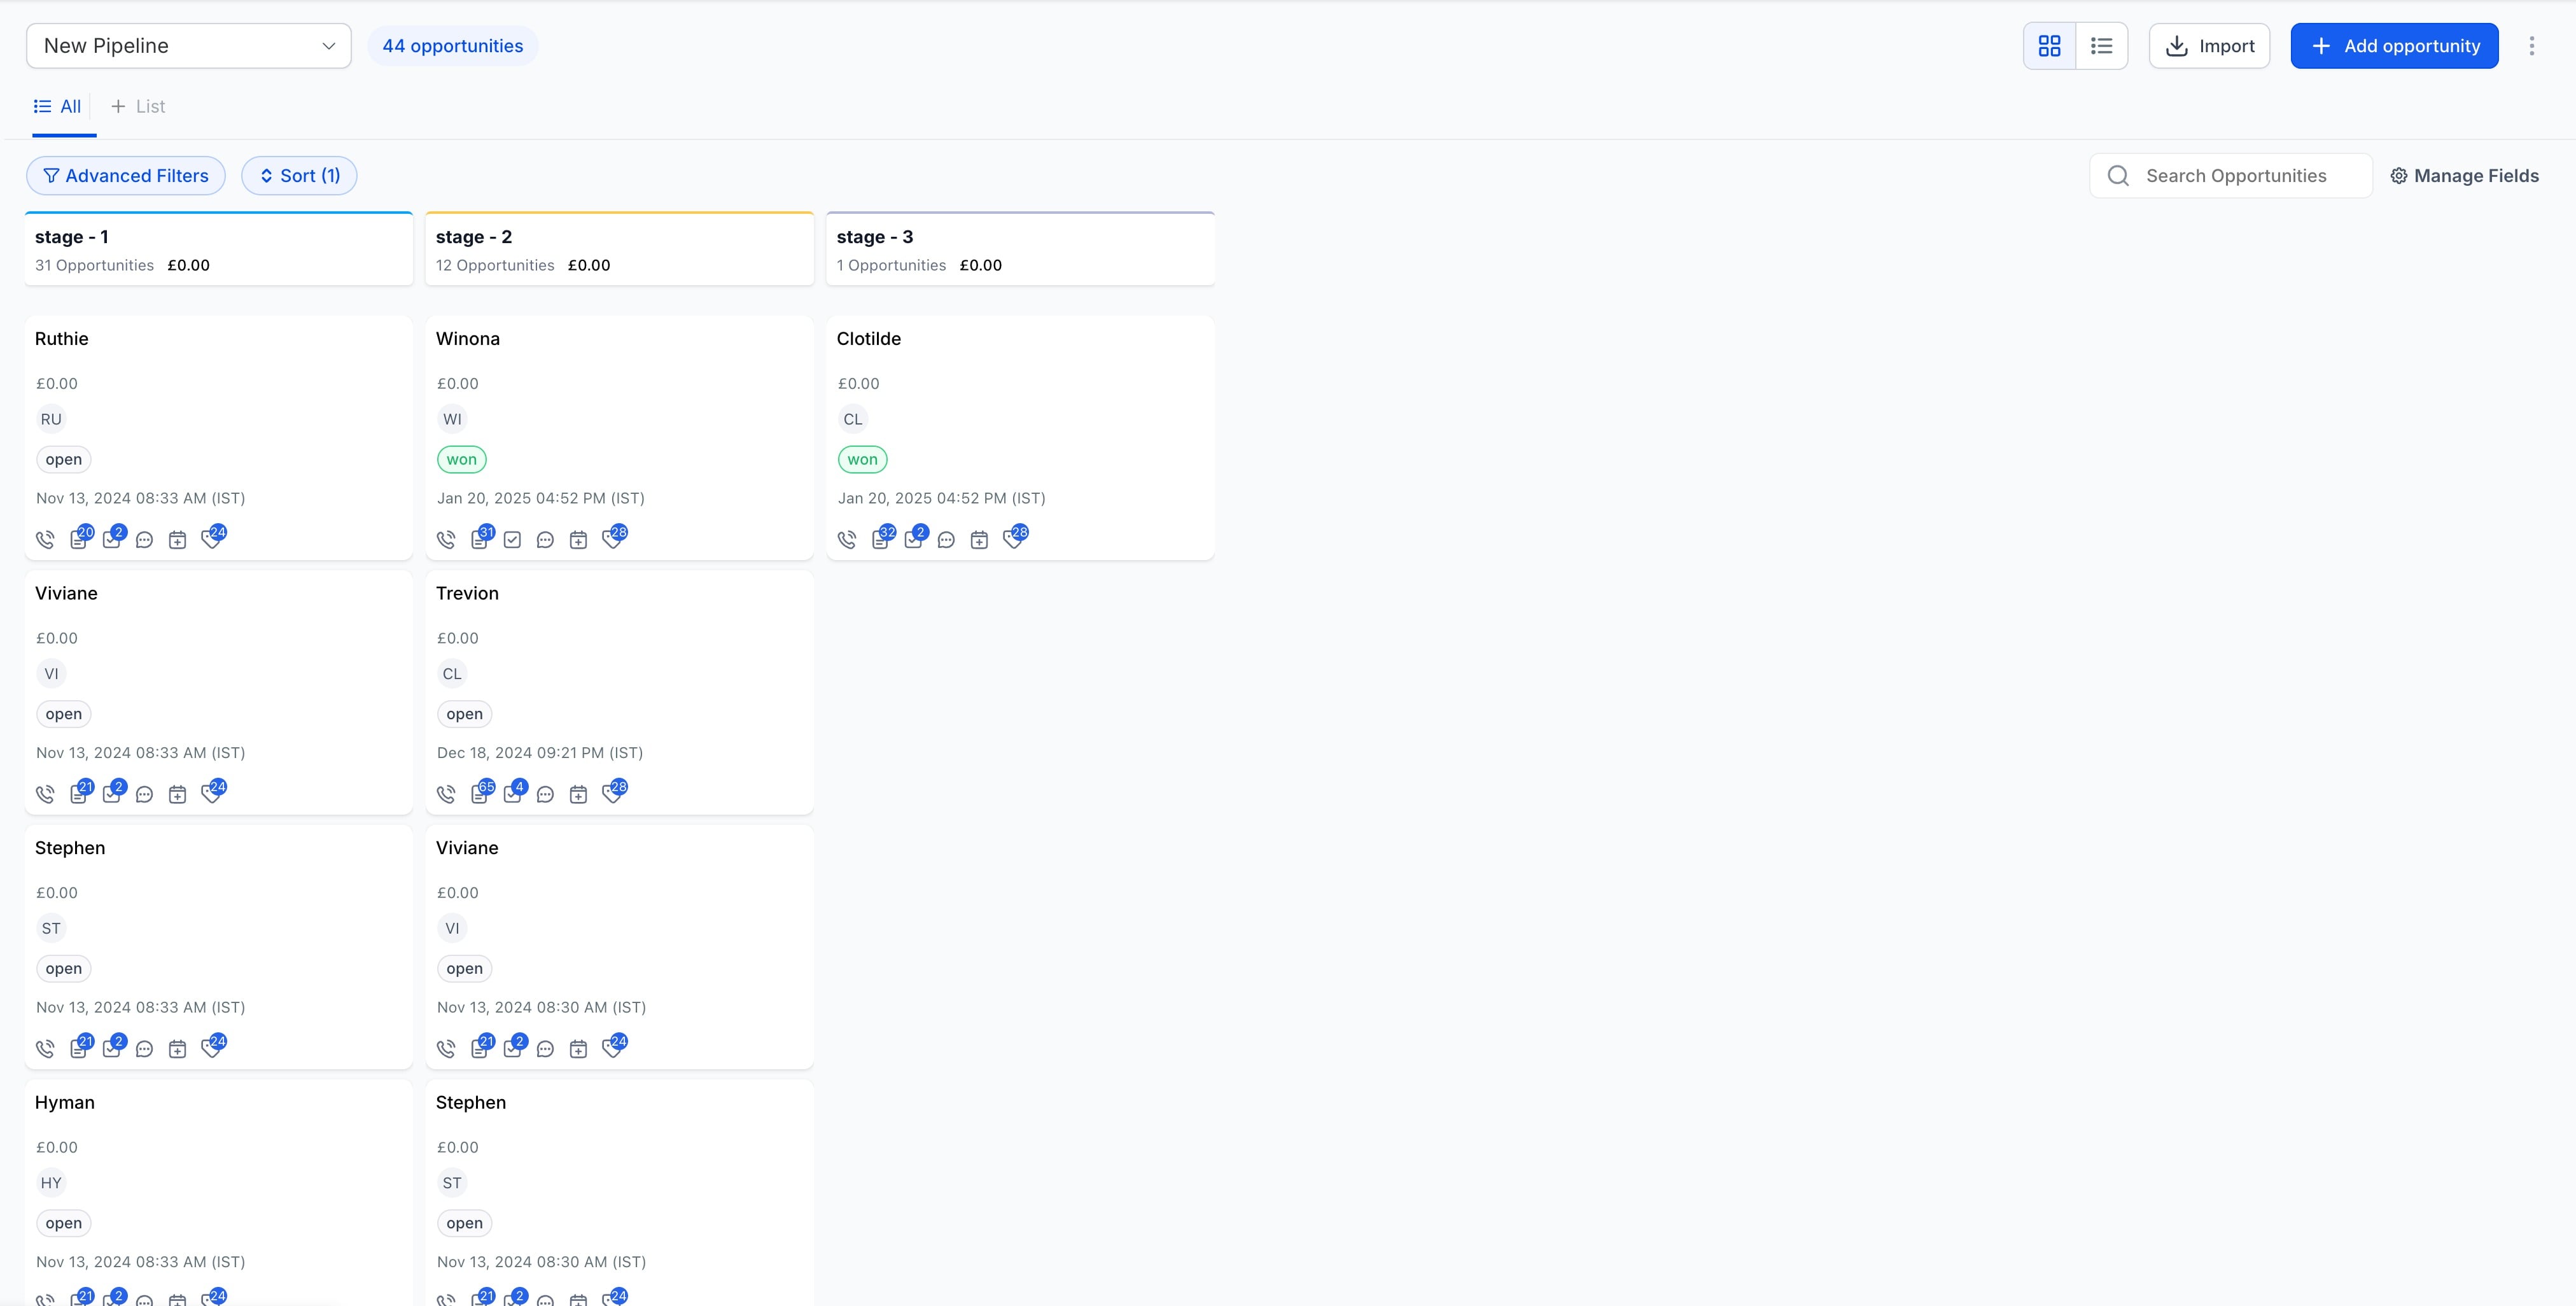
Opportunity Activity | Created On; Updated On; Last Stage Change Date; Last Status Change Date; Days Since Last Stage Change Date; Days Since Last Status Change Date; Days Since Last Updated. |
The fields and folders you see when customizing opportunity cards come from your Custom Fields. If folders like General Info or Additional Info are missing, it means they haven't been set up yet. See your Custom Fields settings to create them.
Note: Engagement Score will be visible only for opportunities created or updated after March 19, 2025.
Step 3: Customize the counters at the bottom of the card. You can also customize the counters and icons at the bottom of the opportunity card by moving to the Quick Actions tab.
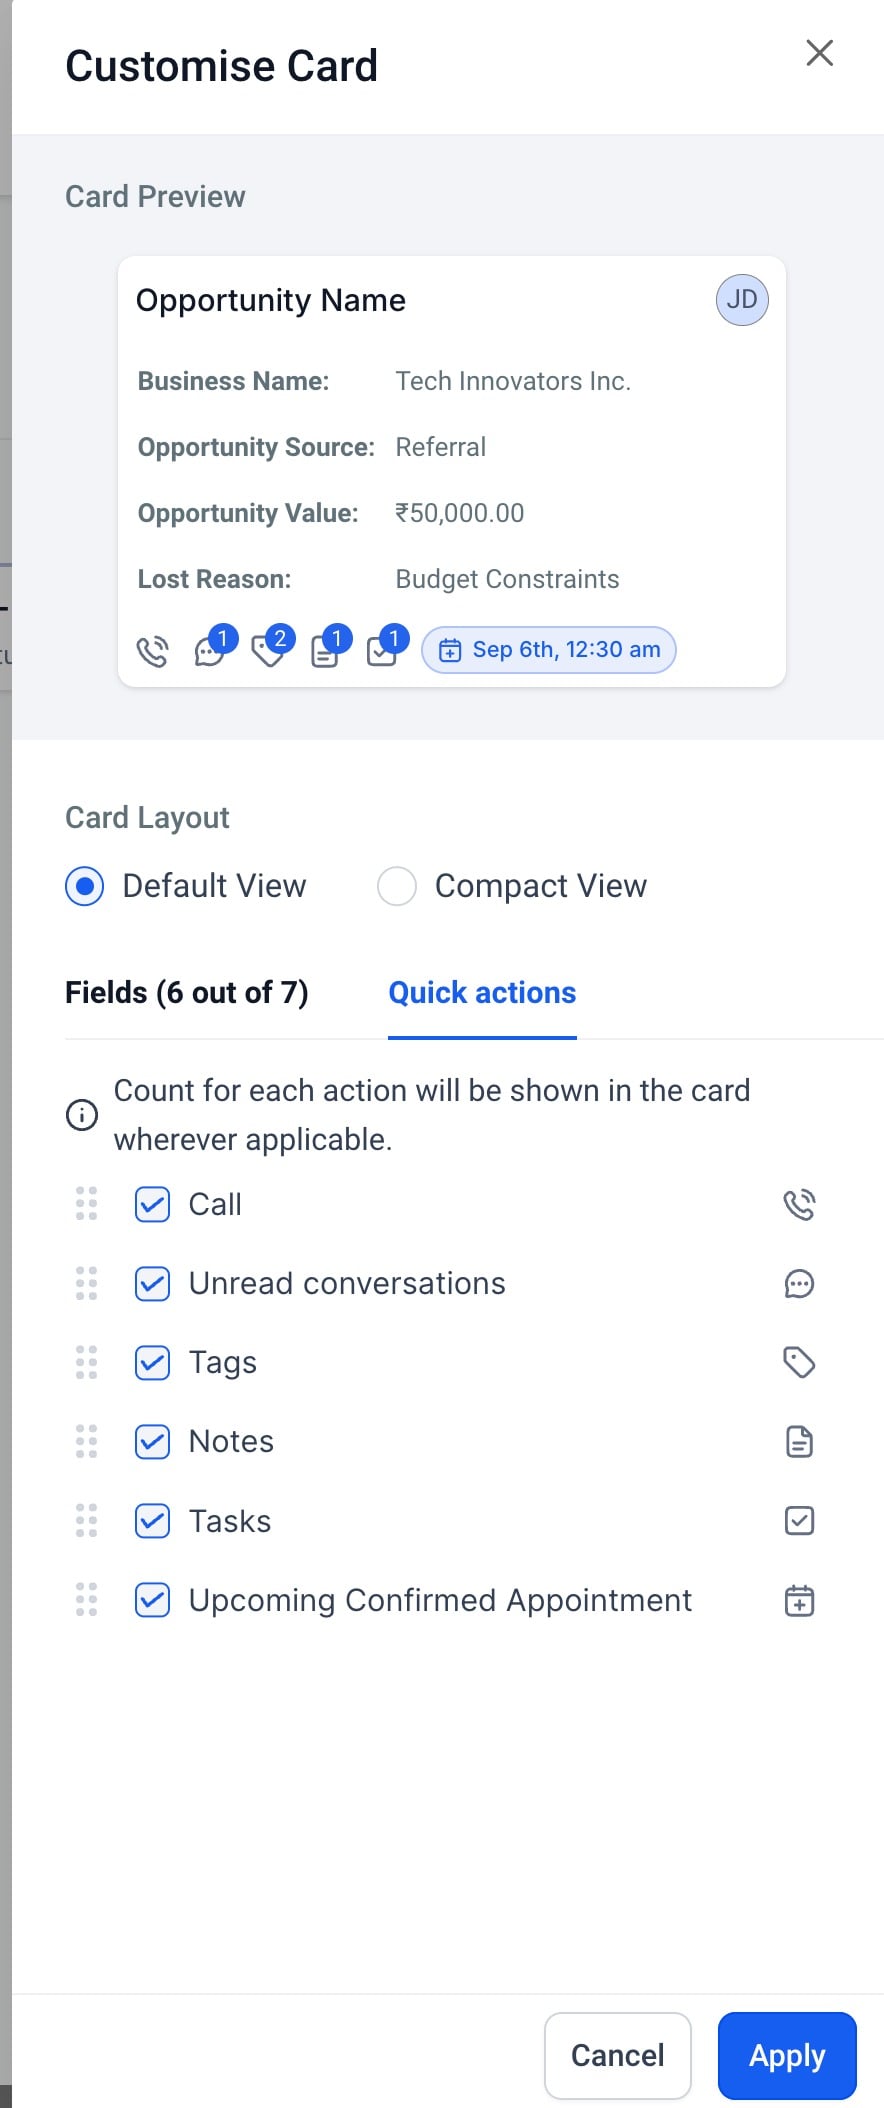
The available options include:
Conversations icon (with unread messages count)
Task icon (with task count)
Note icon (with note count)
Tags icon (with tag count)
Call icon
Appointment icon (with next appointment date)
Note: When you export opportunities from the customized view, the export will include all fields of the opportunity, not just the ones visible on the card.
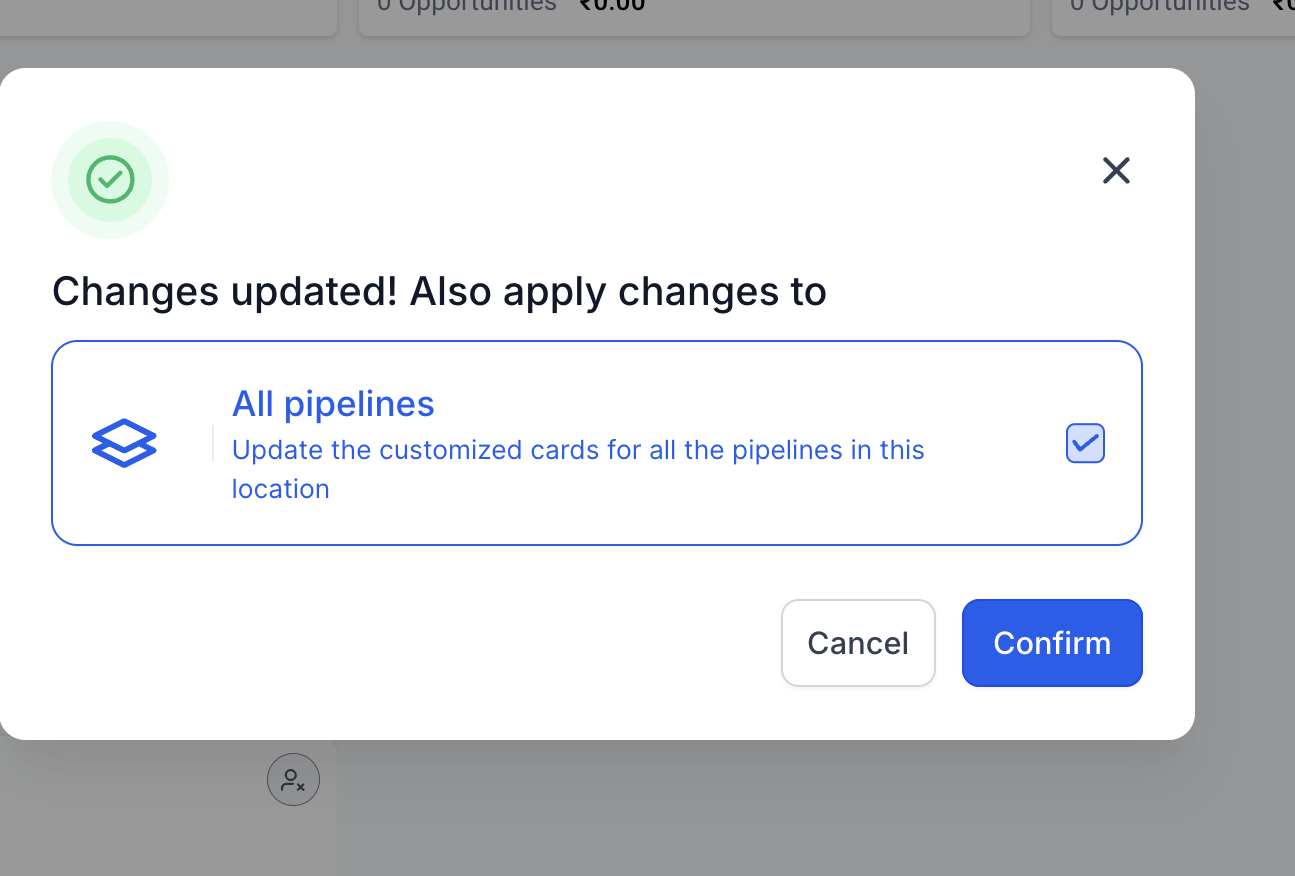
Customizations are applied per pipeline by default. However, if you have multiple pipelines in your account, you have an additional option to apply the changes to all pipelines.
Customizations are user-specific, meaning the changes will only apply to the user making the modifications, allowing personalized views.
Note: Customizations you make are sticky to the current view, meaning they persist until you choose to modify them again. However, the customizations only persist for the user on their current local storage and will not be reflected if you launch the same board in a different browser or for a different user.
You can choose how much detail each card displays:
Default View: Displays the selected fields with both field labels and values.
Compact View: Displays only the values of the selected fields. Hovering over a field reveals the label and additional details.
Unlabeled View: Each line of the card is dedicated to one field and displays only the values of the selected fields.
You can collapse, expand, and resize pipeline stages in the Opportunities board (Kanban) view to reduce clutter and focus on active work. Collapsed stages help keep the board tidy, while expanded stages make it easier to review a higher volume of opportunities in a specific part of the pipeline.
Step 1: Confirm you are in Kanban view. Open the Opportunities section and make sure you are in the Kanban view.
Step 2: Collapse or expand a stage. Locate the stage column you want to adjust, then click the stage header control ( > or < ) to collapse or expand that column.

Step 3: Resize a stage column. Hover near the right edge of a stage column and drag the divider left or right to adjust the column width. Repeat for any other stages you want to adjust. Double-click the column divider to reset the stage column to its default size.

Wider columns are useful for busy stages, while narrower columns help reduce clutter in stages that need less attention.

Sorting gives you a faster way to prioritize opportunity cards based on timing, value, or business-specific data. This is especially helpful when you need to focus on the newest, most urgent, or highest-value records first.
Step 1: Open the sort menu. In the Opportunities section, click Sort at the top of the page.
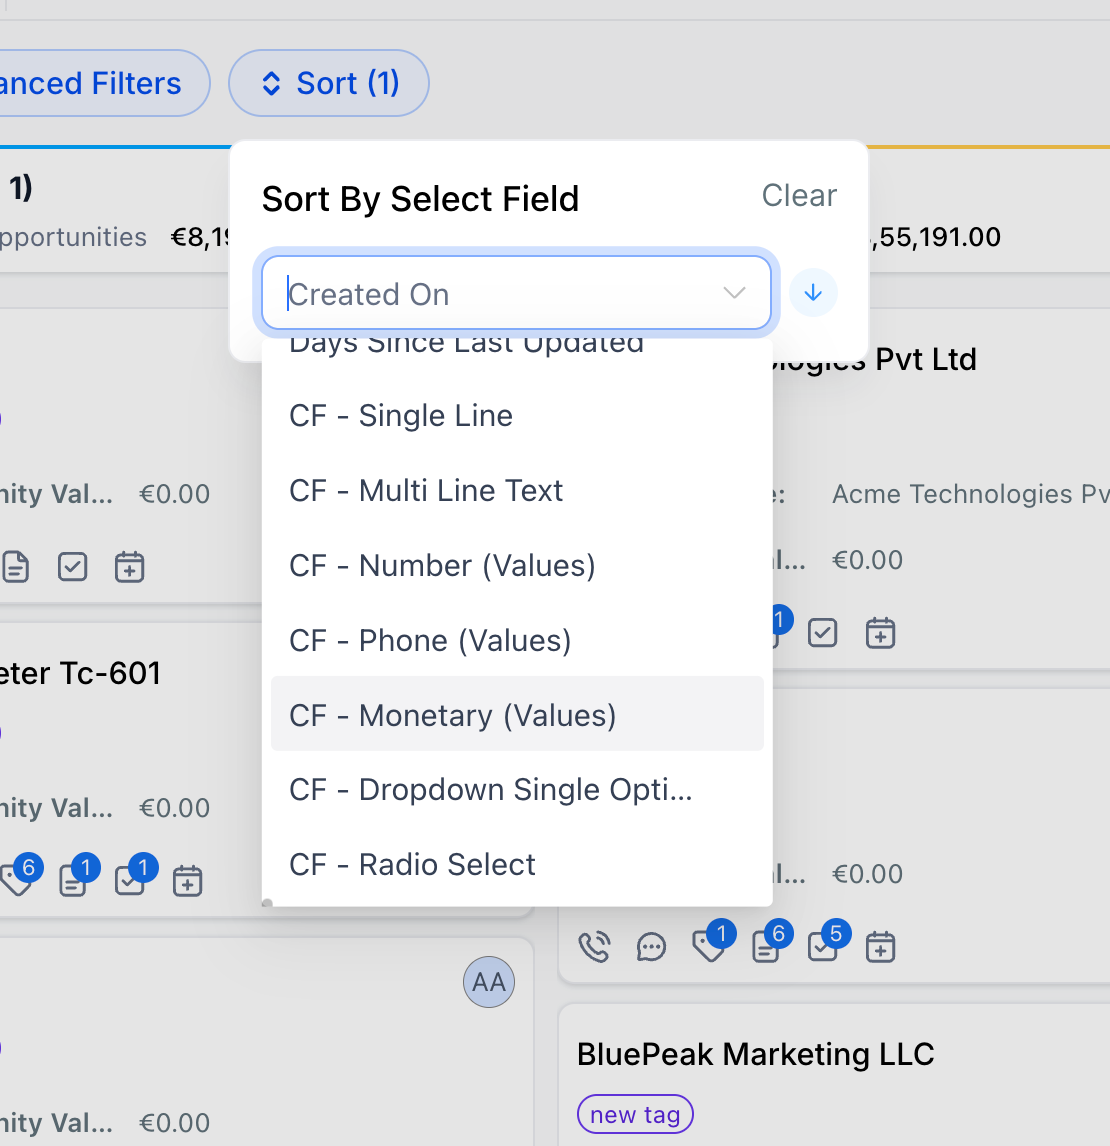
Step 2: Choose a field and order. Select the field you want to sort by (this includes default fields and supported custom fields), then choose Ascending or Descending order. Your opportunities will reorder automatically based on the selection.
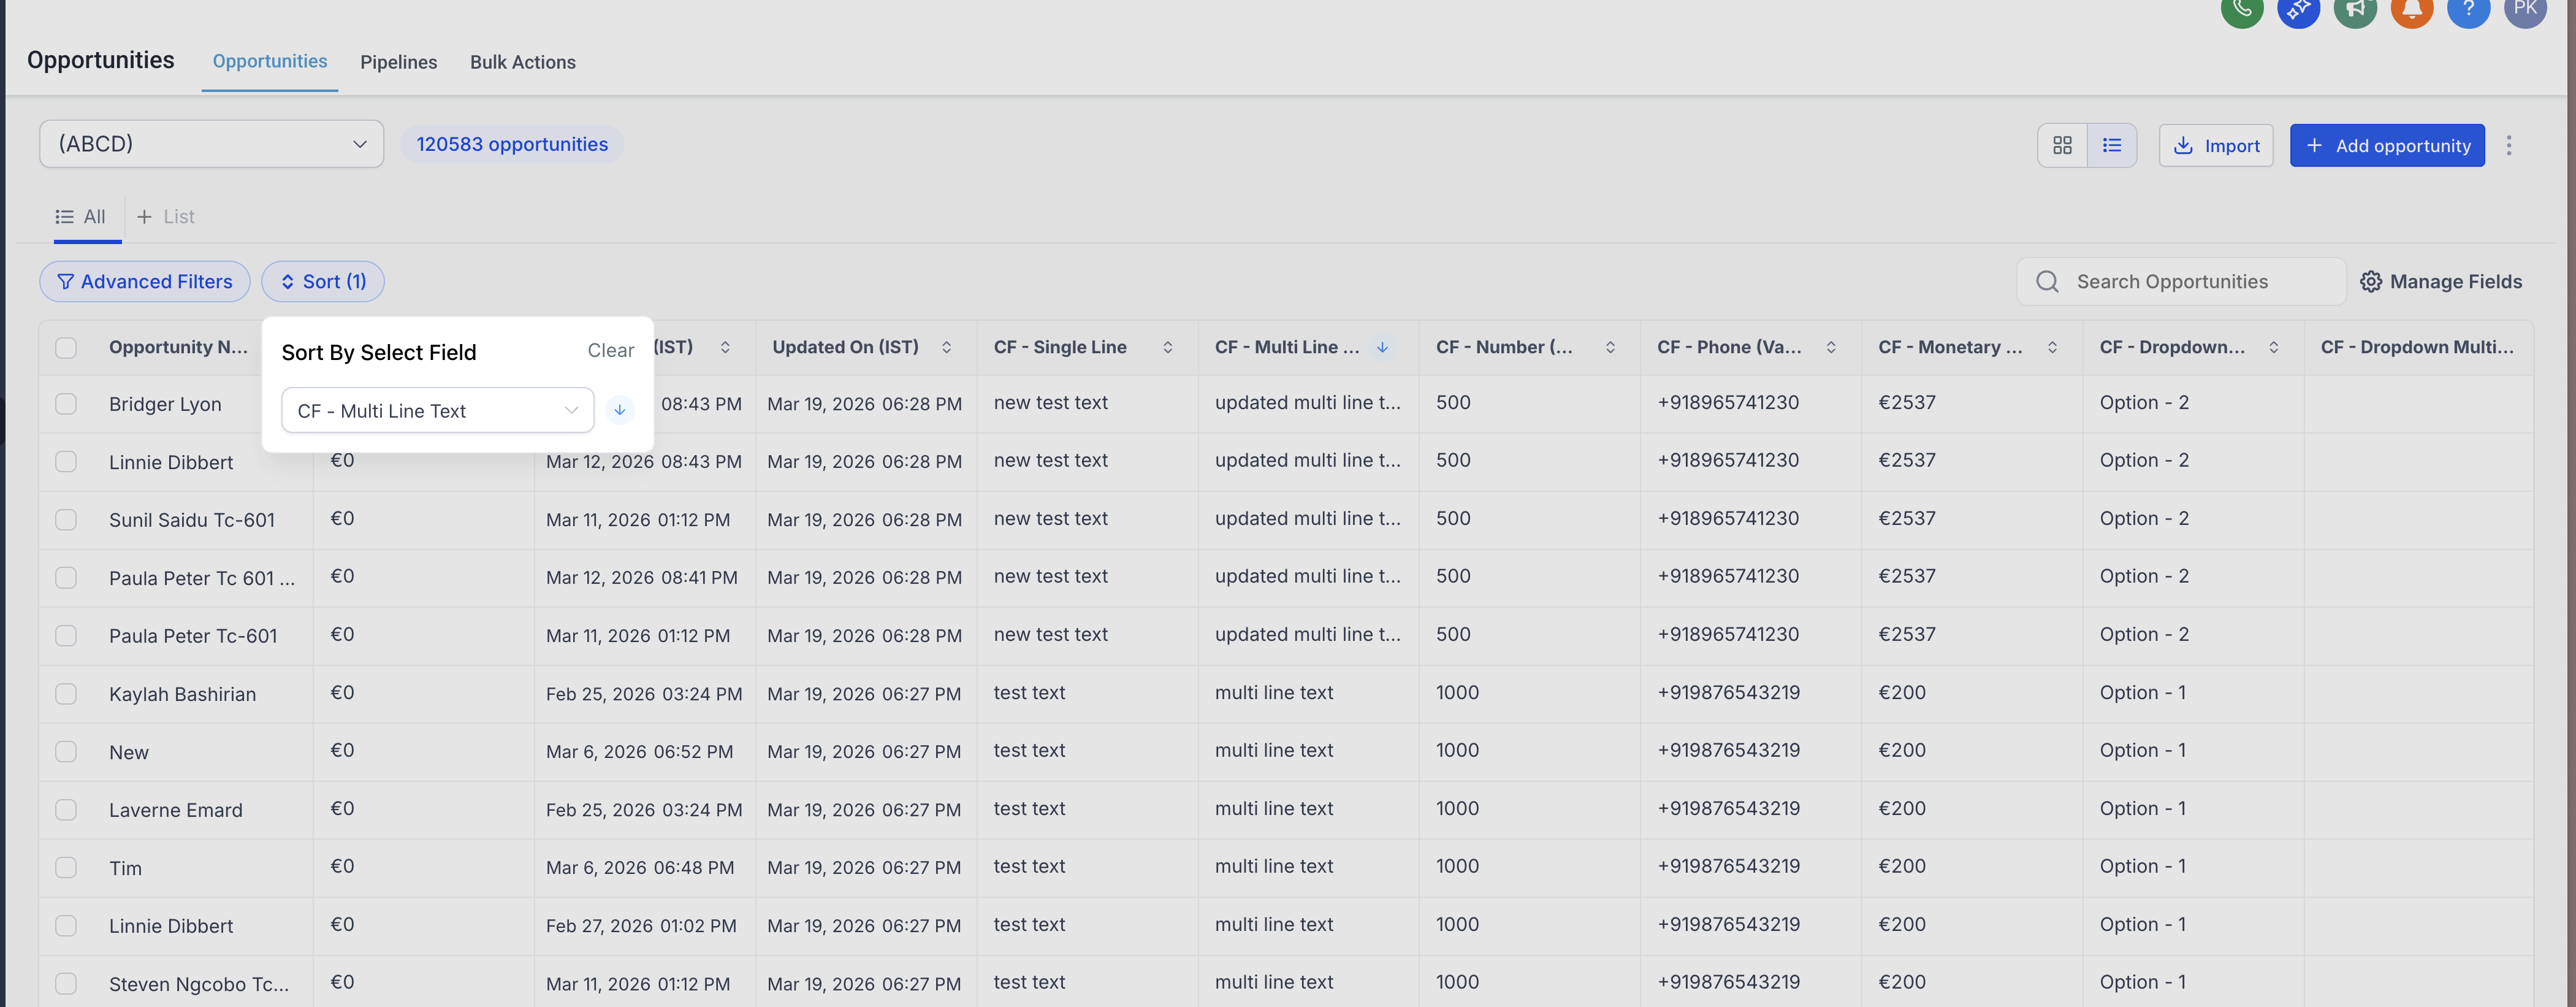
Supported sorting fields include:
Default fields such as Created On and Last Updated
Supported custom field types such as Single Line, Multi Line Text, Dropdown, Radio Select, Number, Monetary, Phone, and Date
Collapsed and expanded stages are saved automatically.
Resized column widths are also saved automatically.
These preferences are stored locally in your browser and are user-specific, so your changes apply only to your own view and do not affect other users.
If you open Aesthetix CRM in a different browser or device, your saved layout may not carry over.


A few simple workflow habits can make board view much more effective for day-to-day pipeline management. These suggestions help you keep the board readable, actionable, and aligned with how you actually review deals.
Collapse inactive or low-priority stages to reduce clutter and keep your pipeline easier to scan.
Expand and widen active stages so important opportunity cards are easier to review and prioritize faster.
Use sorting to bring high-priority or recently updated opportunities to the top.
Switch to List View when you need more detailed row-based review or column-style organization.
How many fields can I display on an opportunity card? You can choose up to 7 fields to display on each opportunity card, drawn from opportunity standard fields, opportunity custom fields, the primary contact's information, and opportunity activity data.
Do my customizations affect other users? No. All card customizations, layout choices, collapsed/expanded stages, and resized columns are user-specific. Your changes apply only to your own view and never change the board for other users.
Will my customizations carry over to another browser or device? Not necessarily. Customizations and layout preferences are saved in your current browser's local storage, so they persist for you in the same browser but may not carry over if you log in from a different browser or device.
Will exported opportunities only include the fields shown on the card? No. When you export opportunities from a customized view, the export includes all fields of the opportunity, not just the ones visible on the card.
Why don't I see certain field folders like General Info or Additional Info? The fields and folders available when customizing cards come from your Custom Fields. If a folder is missing, it hasn't been set up yet. Create the fields in your Custom Fields settings to make them available.
Why isn't the Engagement Score showing on some cards? Engagement Score is only visible for opportunities created or updated after March 19, 2025.
What's the difference between board (Kanban) view and List View? Board (Kanban) view is a visual, stage-based layout that lets you drag cards between stages, collapse and resize columns, and scan deal progress at a glance. List View is a traditional table that is better suited for detailed row-and-column management. You can switch between the two depending on your needs.
