Opportunities are how Aesthetix CRM tracks a contact's journey through your pipelines—from a new lead all the way to a booked and completed treatment. Each opportunity represents a potential deal tied to a contact, positioned on a pipeline stage with a value, owner, and status. This guide walks you through creating opportunities (manually or automatically), setting their details, editing them as your process evolves, and using opportunity custom fields to tailor your pipeline to your practice.
⚠️ Critical Aesthetix CRM rule: one opportunity per contact per pipeline. Aesthetix CRM is configured so that each contact has a single active opportunity in a given pipeline. Do not enable duplicate opportunities on your account. Allowing multiple opportunities per contact in the same pipeline breaks EMR integrations and distorts your pipeline reporting (contacts appear more than once, values double-count, and automations misfire). Keep duplicate-opportunity behavior turned off. See Settings > Duplicate Handling to confirm your configuration, and read the Create New Opportunity toggle section below before running any workflow that creates opportunities.
You can create an opportunity in a few ways: from the Opportunities board, from a contact record, or automatically through a workflow. The manual walkthrough below starts from the Opportunities board.
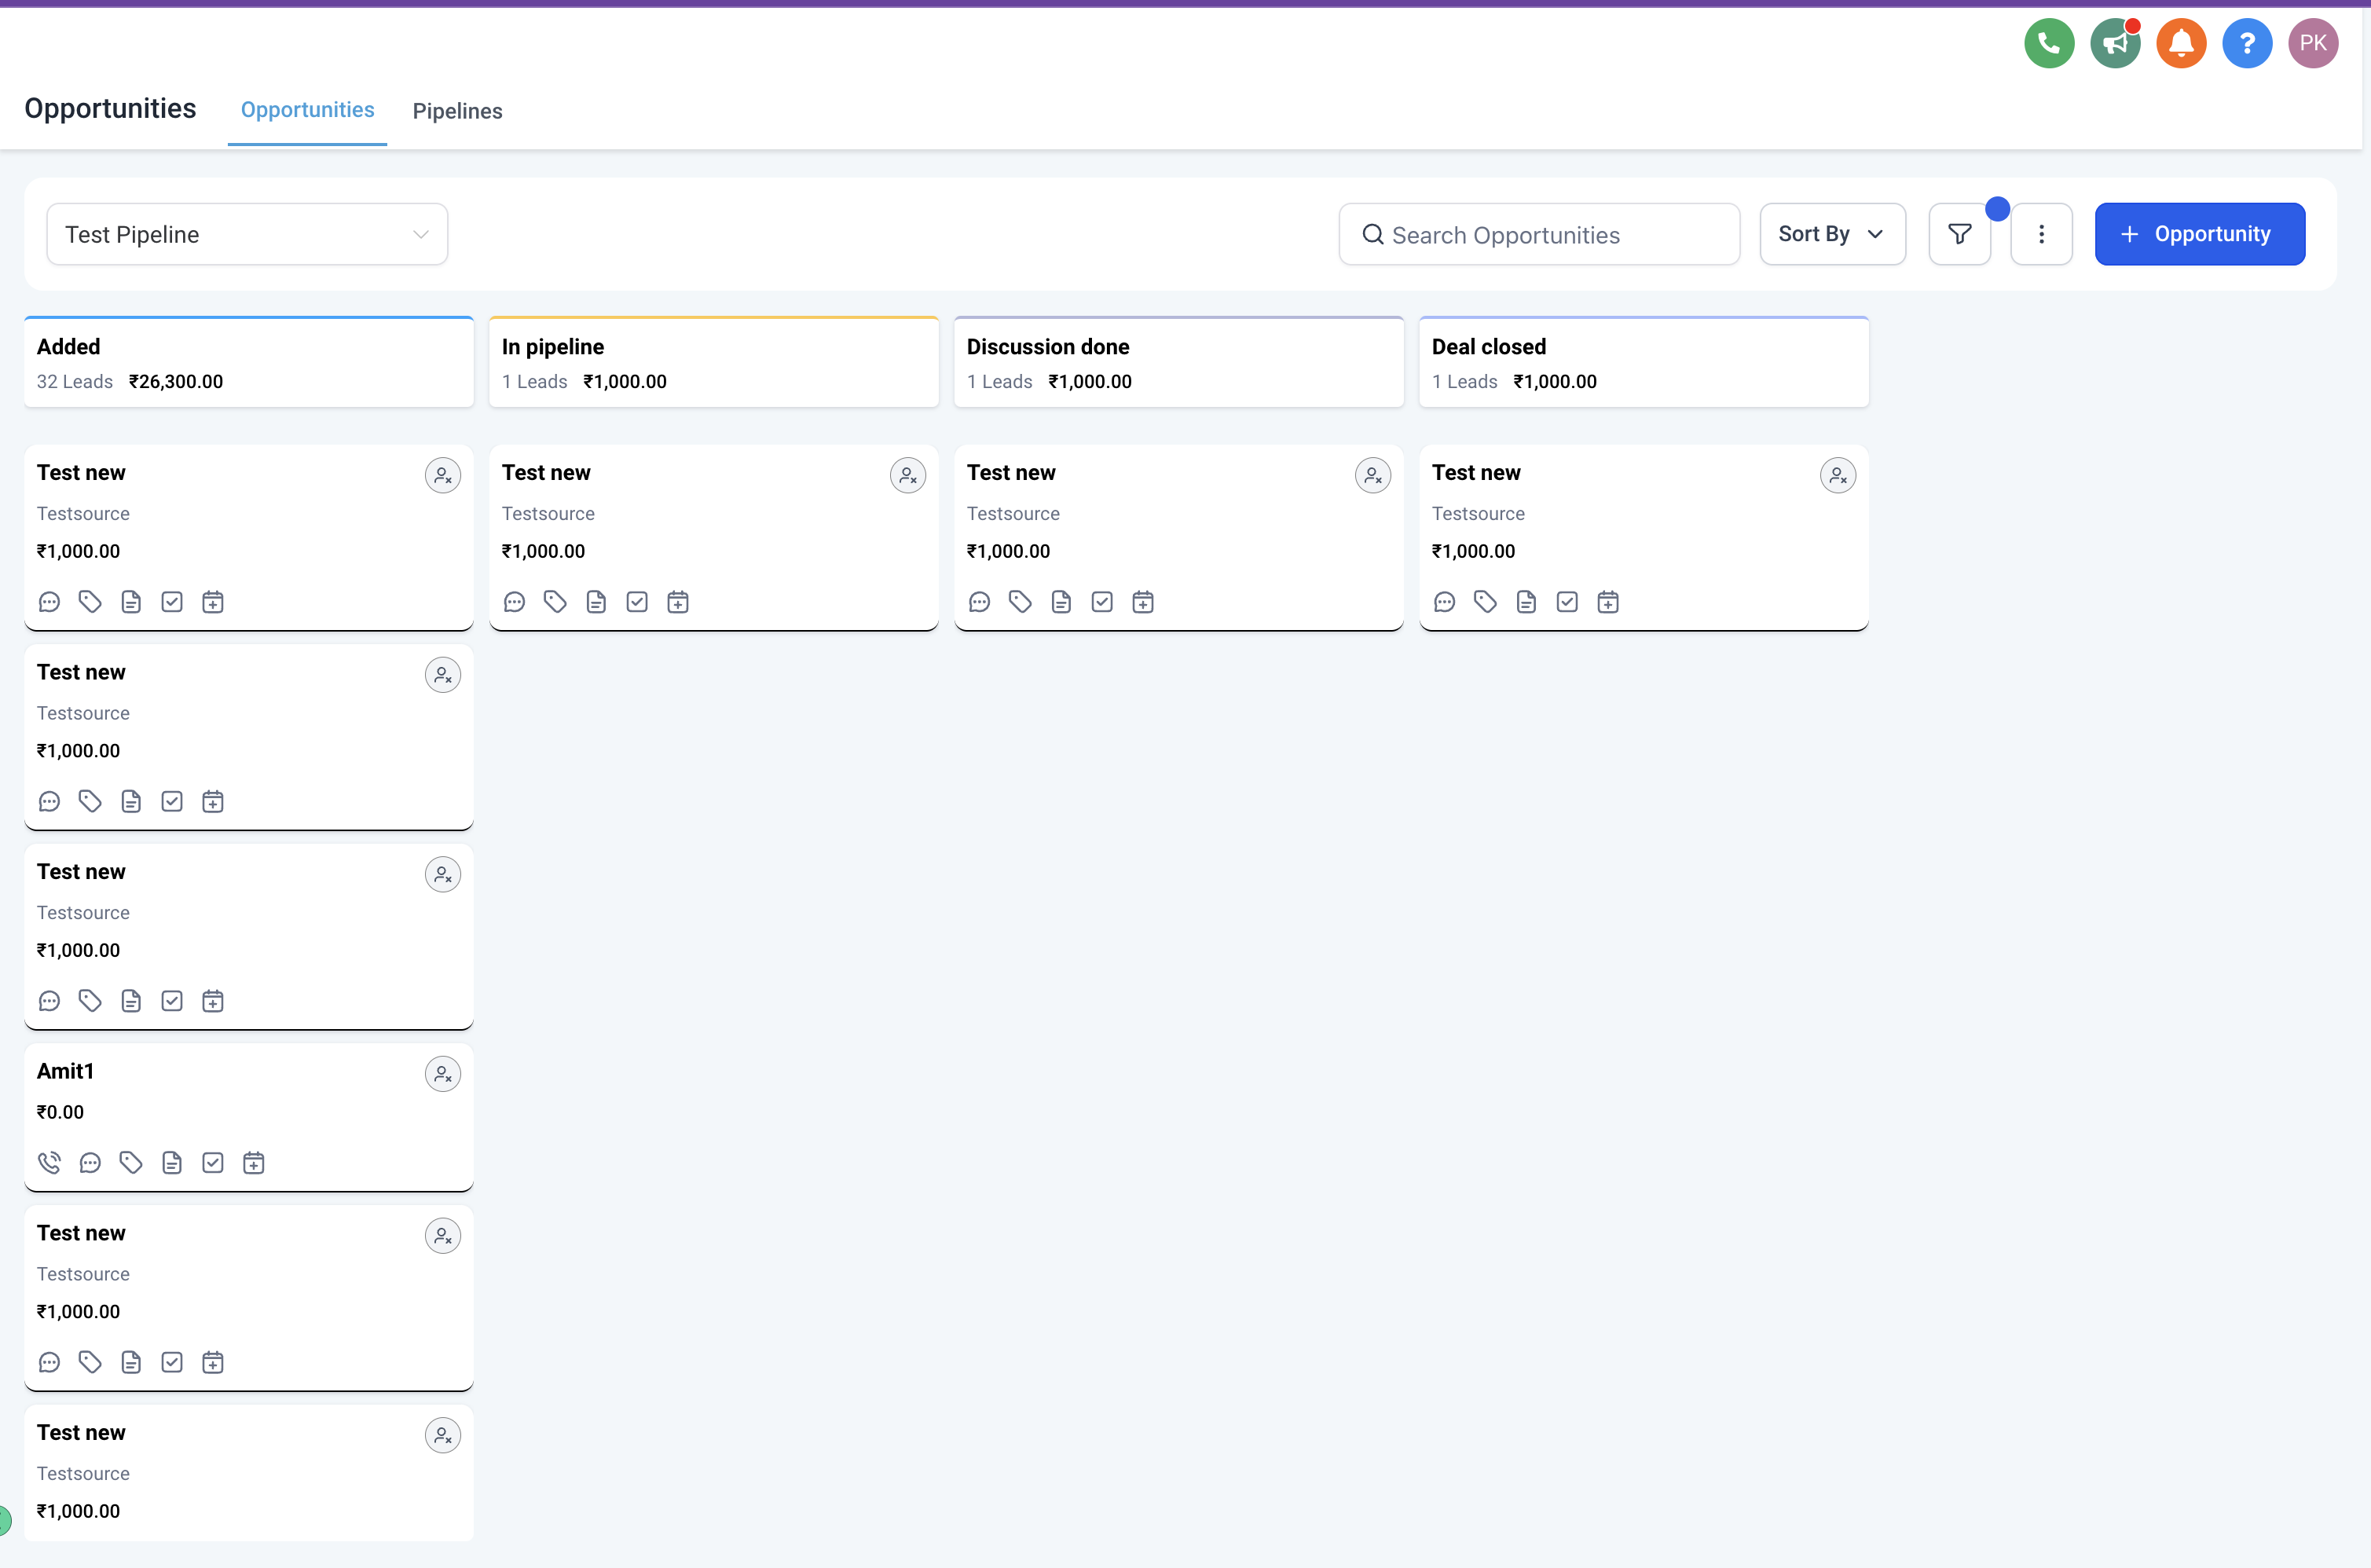
Step 1: Navigate to the Opportunities section. From the left sidebar, open Opportunities. This is where all of your pipelines and their opportunity cards live.
Step 2: Select the "Add Opportunity" button. Click the button to open the new opportunity panel.
Step 3: Enter the contact name. Search for an existing contact or type a new name. If the contact does not yet exist, Aesthetix CRM will create one for you.
Step 4: Provide the email address. Add the contact's email so the opportunity stays linked to their record.
Step 5: Add a contact phone number. Include a phone number to keep the contact's details complete.
Step 6: Define the opportunity name. Give the opportunity a clear, recognizable name (for example, the contact's name plus the treatment of interest).
Step 7: Specify the pipeline. Choose the pipeline this opportunity belongs to from the available options. Remember that a contact should have only one opportunity per pipeline.
Step 8: Select a pipeline stage. Pick the stage that reflects where this opportunity currently sits in your process.
Step 9: Determine the status of the opportunity. Set the status. The default status for a new opportunity is Open; other options are Won, Lost, and Abandoned.
Step 10: Indicate the value of the opportunity. Enter the monetary value of the potential deal so your reporting reflects accurate pipeline revenue.
Step 11: Assign an owner. Assign a team member as the owner responsible for this opportunity.
Step 12: Add followers if needed. Add any team members who should follow the opportunity and receive visibility into its progress.
Step 13: Input the business name. Record the business name associated with the contact, if applicable.
Step 14: Determine the opportunity source. Set the source so you can track where the lead came from.
Step 15: Activate the tag section. Open the tag section to begin tagging the opportunity.
Step 16: Specify a tag name. Add one or more tags to categorize the opportunity and support filtering and automation.
Step 17: Record the current lead status. Capture the lead status to reflect where the contact stands.
Step 18: Specify the current treatment of interest. Note the treatment the contact is interested in so your team can follow up appropriately.
Step 19: Click "Create". Finish by clicking Create to save the new opportunity to your pipeline.
You can also add an opportunity directly from a contact's record. Open the contact, find the Opportunities section on their profile, and add a new opportunity there. The contact's name, email, and phone are pre-filled automatically—you only need to set the pipeline, stage, value, owner, and other details.
Opportunities can be created automatically through workflows—for example, when a contact submits a form, books an appointment, or is tagged. The Create Opportunity workflow action places a new opportunity into the pipeline and stage you specify. Because Aesthetix CRM enforces one opportunity per contact per pipeline, pay close attention to the Create New Opportunity toggle covered below when configuring these automations.
When a workflow includes a Create Opportunity action, it offers a Create New Opportunity toggle. This setting controls what happens when the contact already has an opportunity in the target pipeline.
Leave the toggle OFF (recommended for Aesthetix CRM). With duplicate-opportunity behavior off, the workflow updates the contact's existing opportunity in that pipeline instead of creating a second one. This keeps you compliant with the one-opportunity-per-contact-per-pipeline rule and protects your EMR integrations and reporting.
Turning the toggle ON creates an additional opportunity for the same contact in the same pipeline. Do not do this. It produces duplicate opportunities, which breaks EMR syncing and inflates your pipeline metrics.
If you are unsure how your account handles duplicates, review Settings > Duplicate Handling before building or activating any opportunity-creating workflow.
As your sales and treatment process moves forward, you'll update opportunities to keep them current.
Step 1: Access the Opportunities section. From the sidebar, open Opportunities.
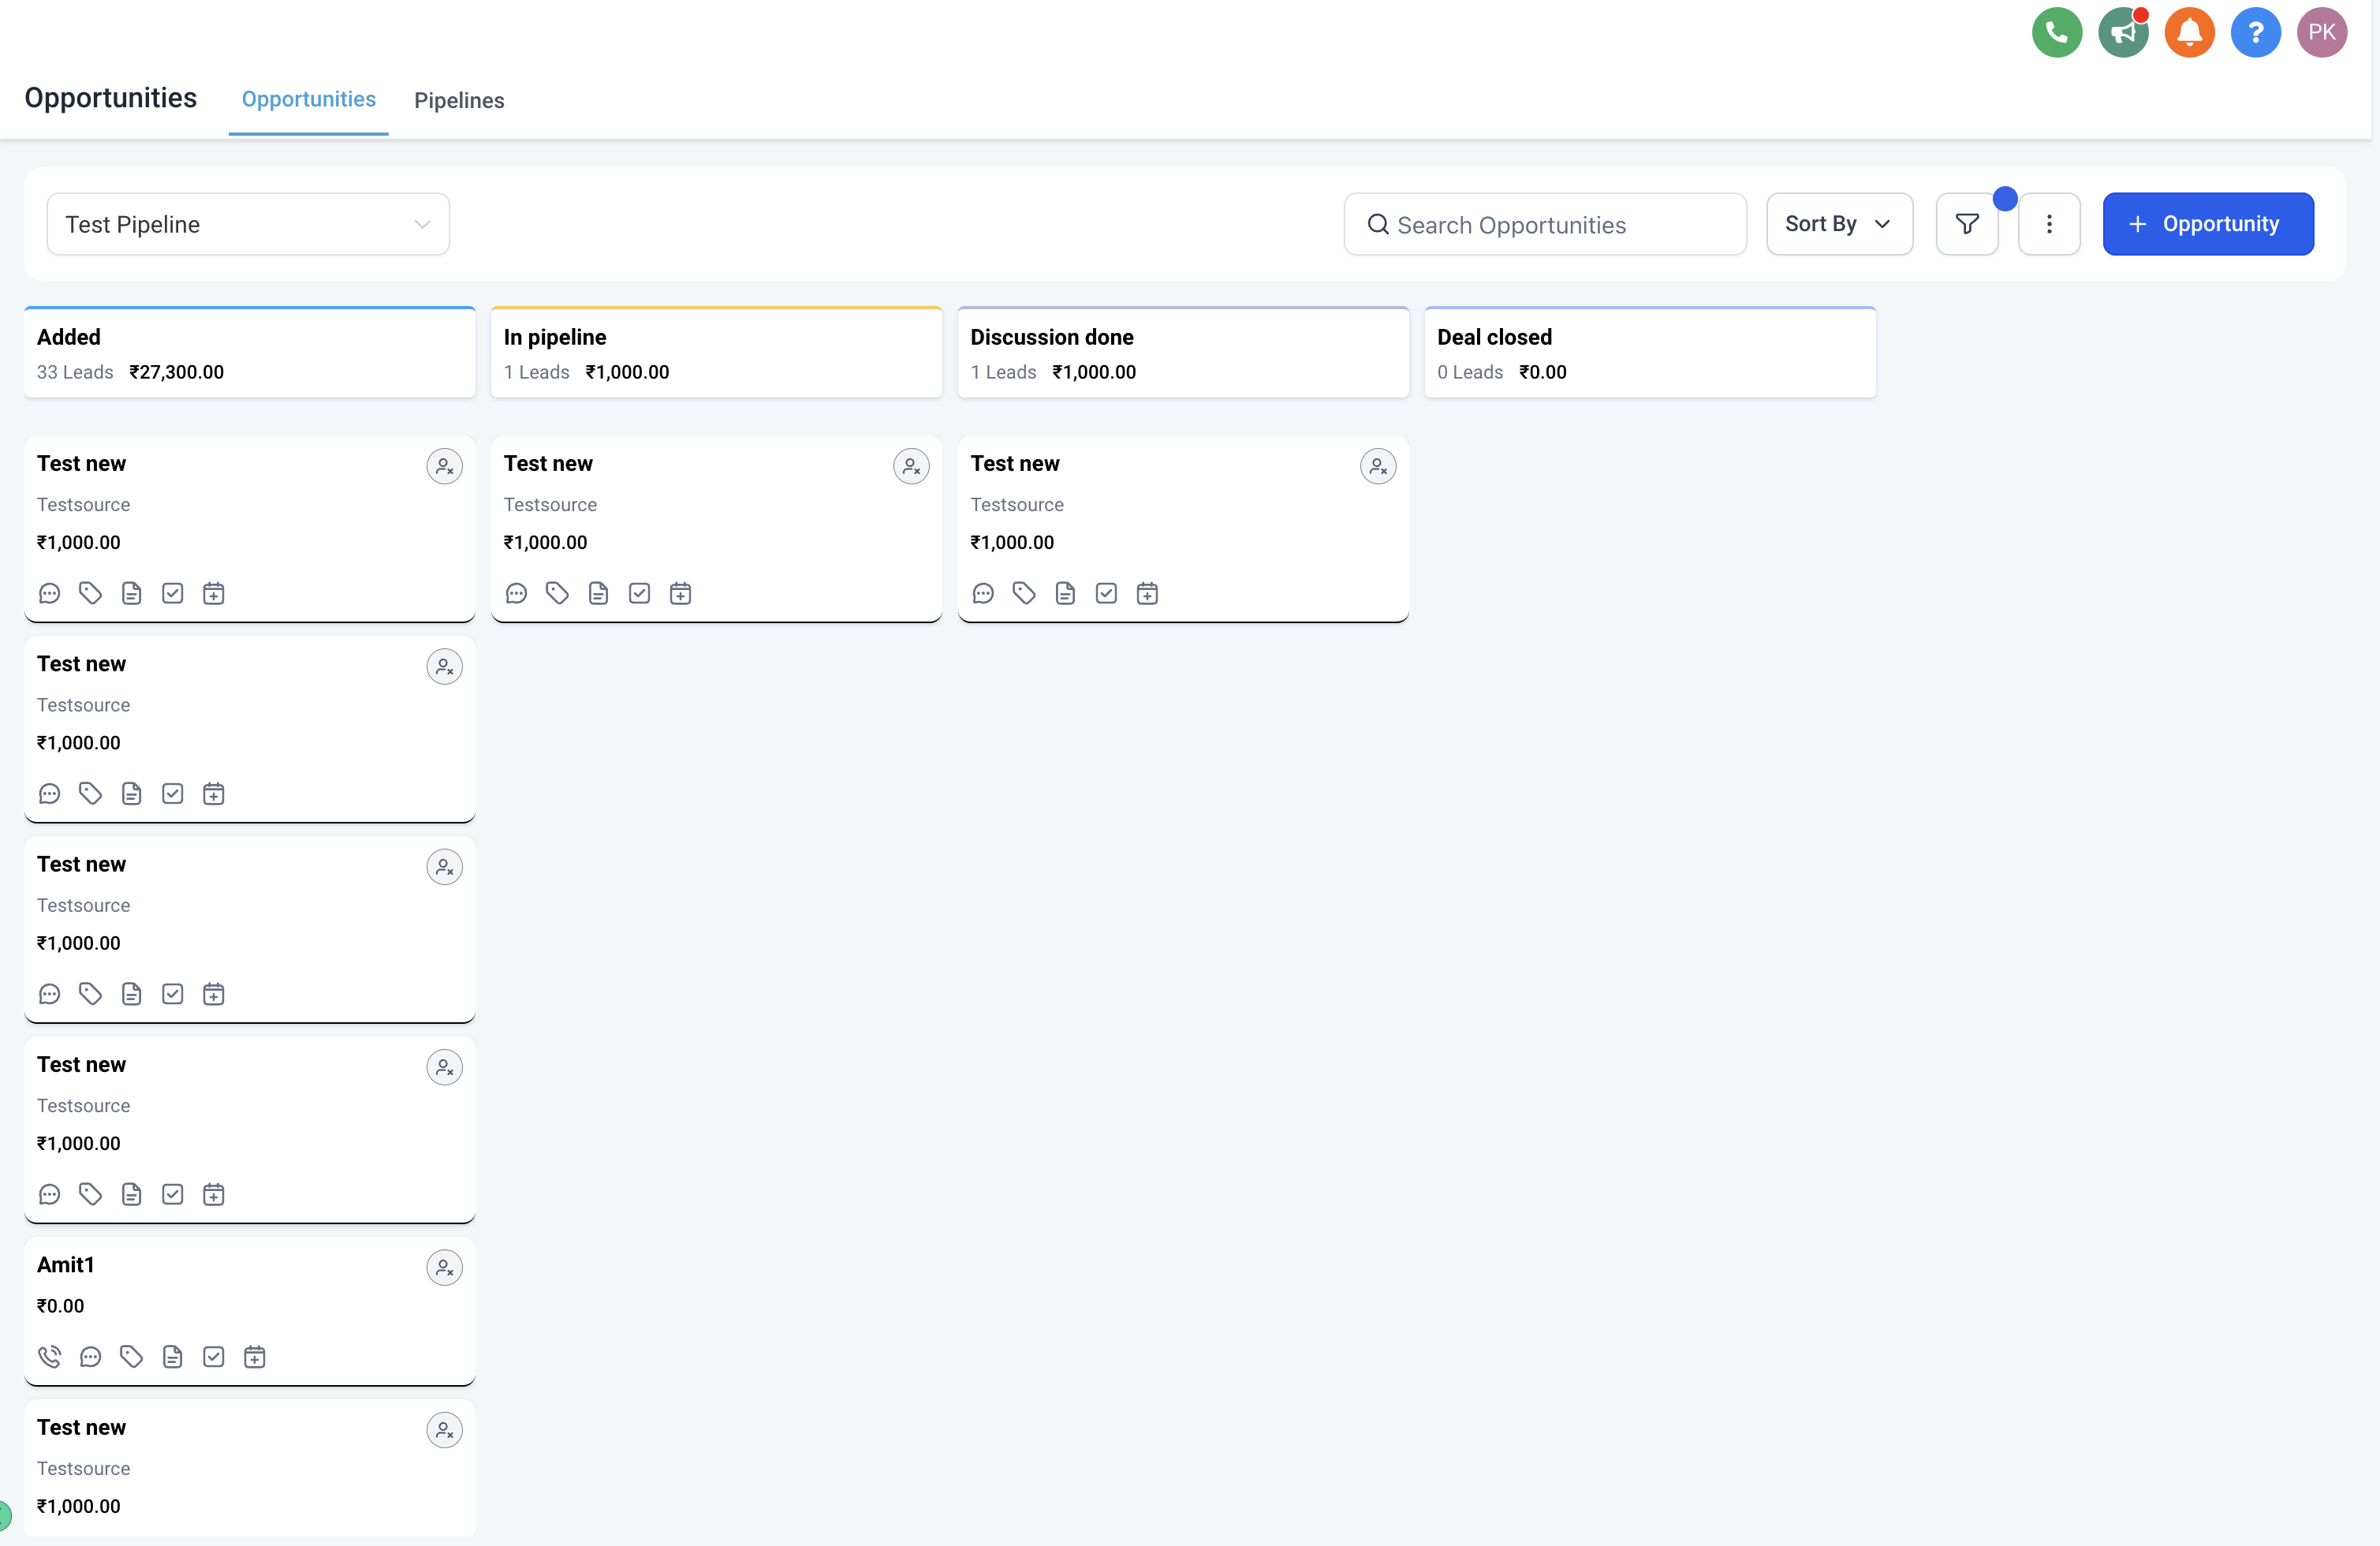
Step 2: Locate the opportunity to edit. Use search and filters, or browse the pipeline, to find the opportunity you want to update. Click its name or title to open its details.
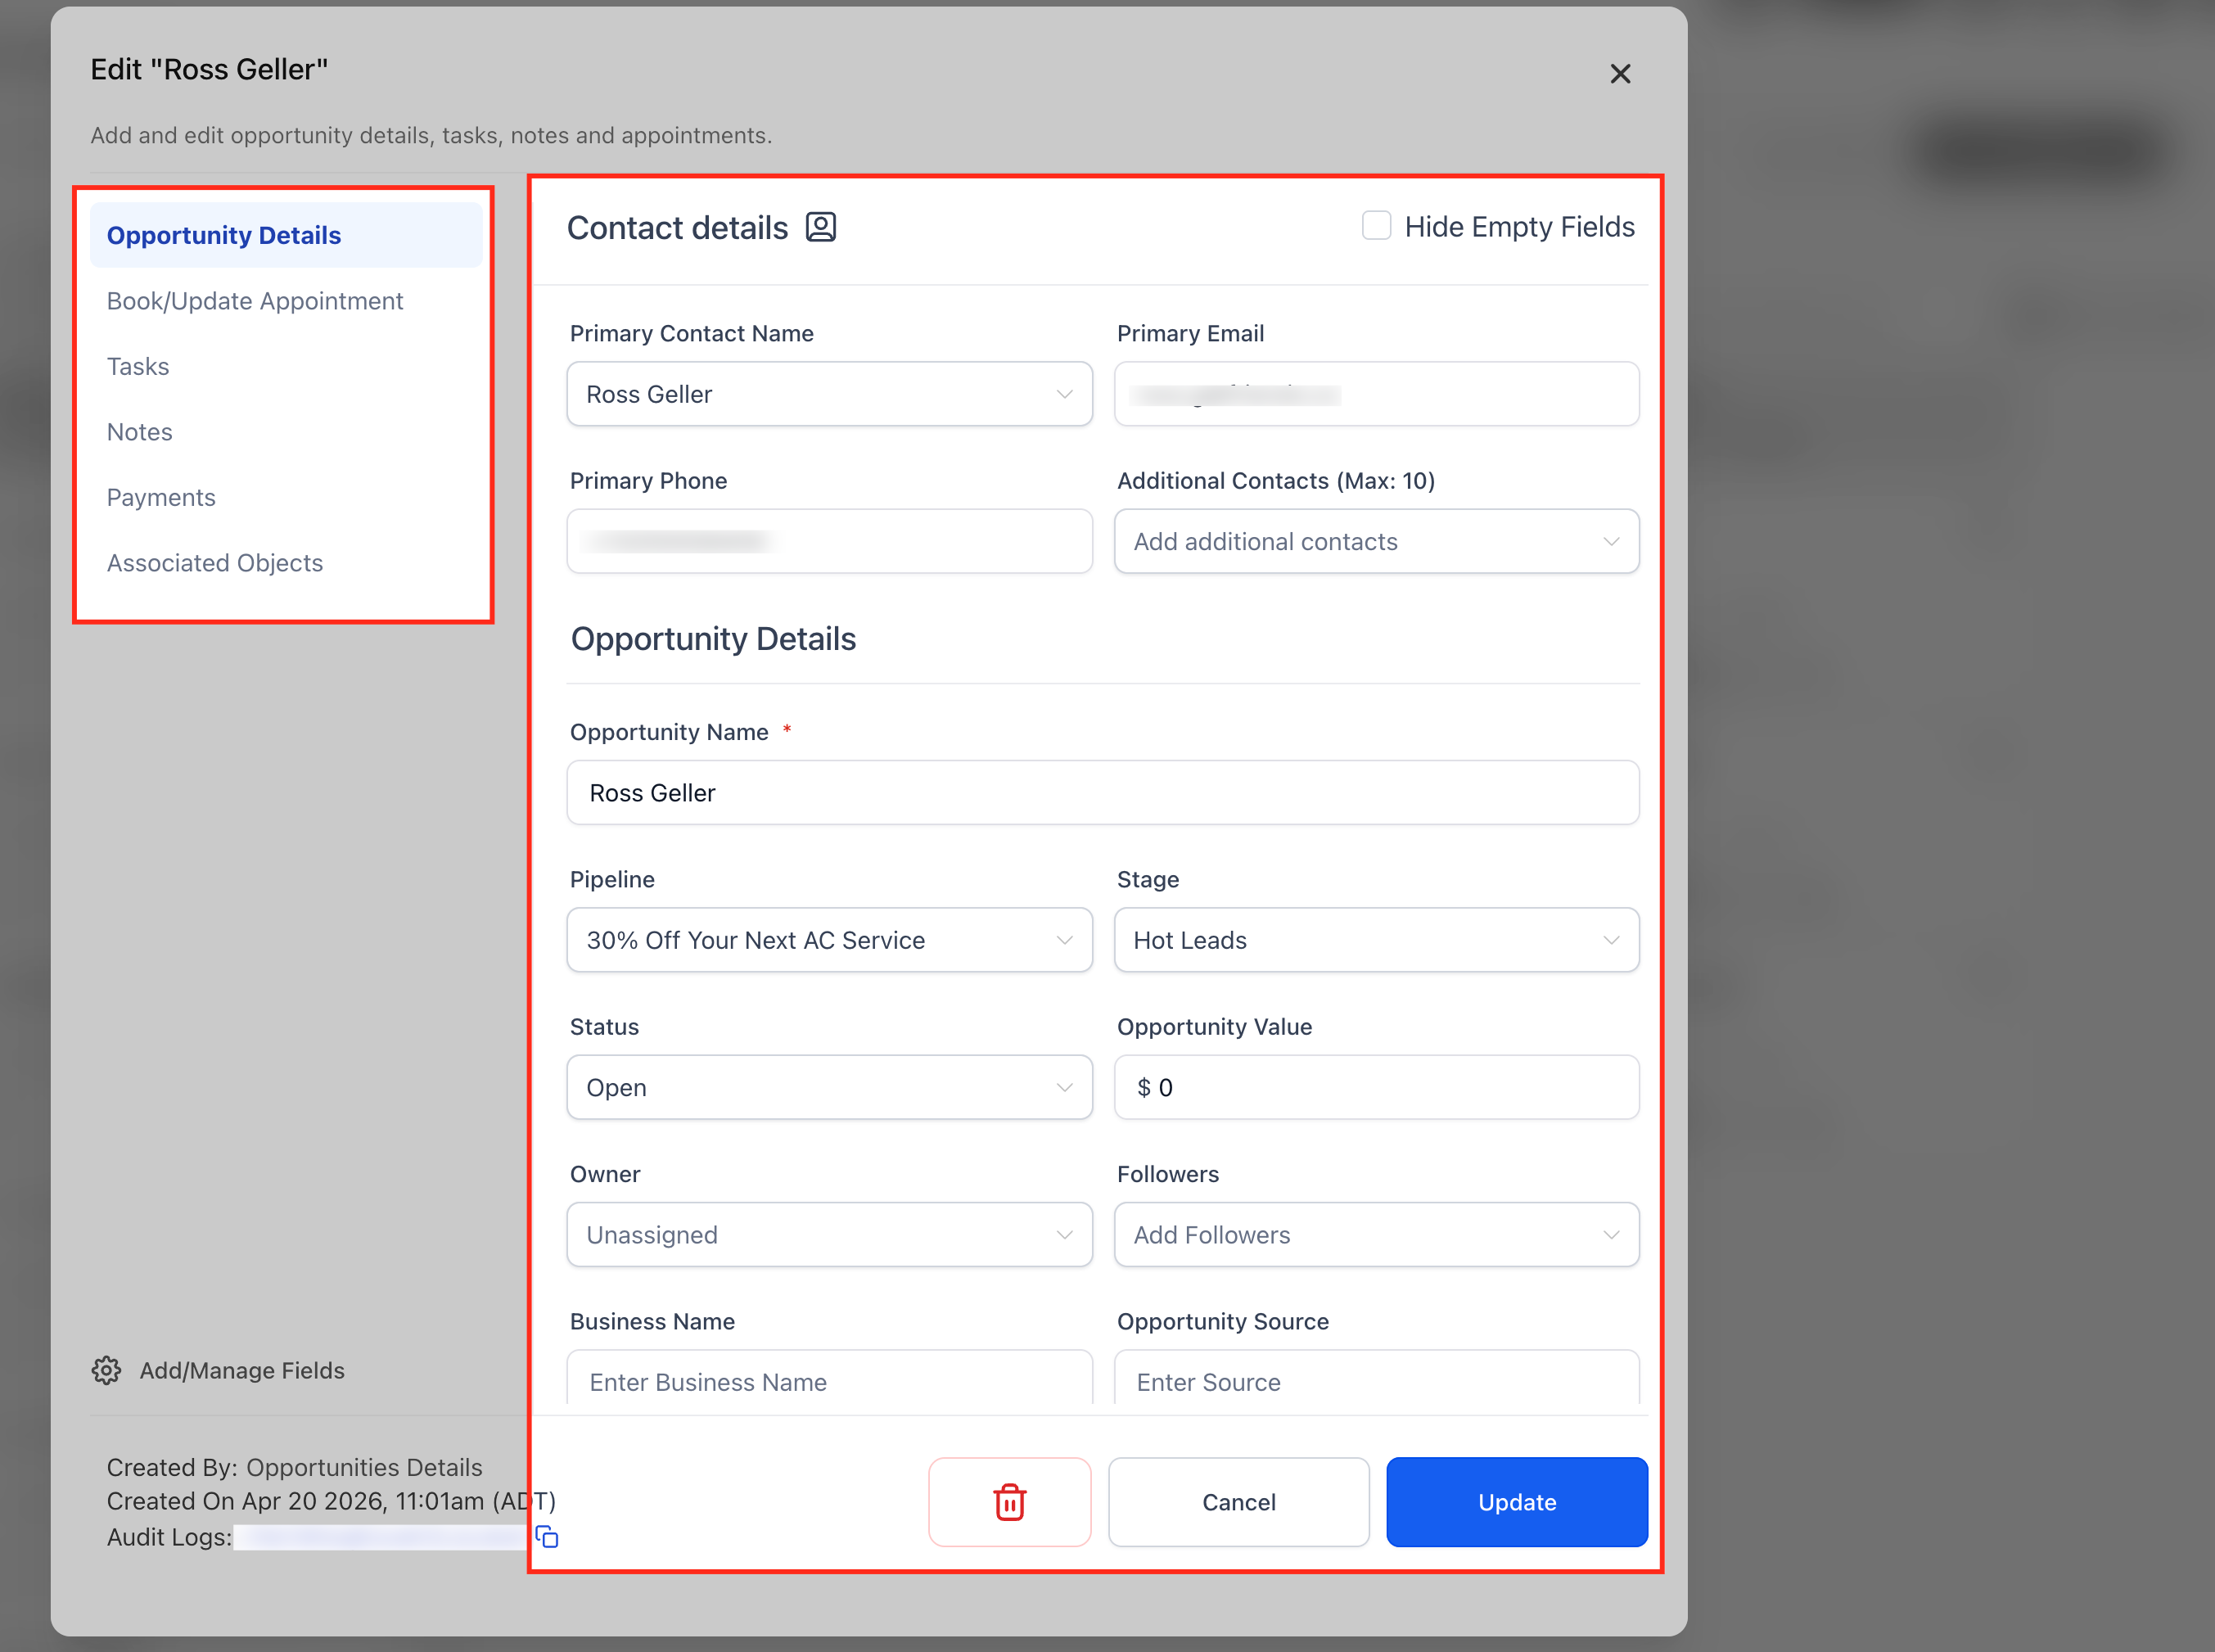
Step 3: Open the opportunity details page. The details page shows all of the opportunity's fields. Update any relevant details—the contact's name and contact information, opportunity value, and opportunity source. You can also change the pipeline stage, owner, tags, or any custom fields associated with the opportunity.
**
**
Step 4: Book or update an appointment. You can manage an appointment directly from the Edit Opportunity panel.
Open Opportunities and select the opportunity.
Open Book/Update Appointment.
If no appointment exists, click + New Appointment, then choose Meetings, Services, or Rentals.
If an appointment already exists, click the three dots to Edit, View, or Delete it. Choosing Edit opens the appointment with pre-filled details for faster updates.
Note: Each opportunity currently supports one appointment.
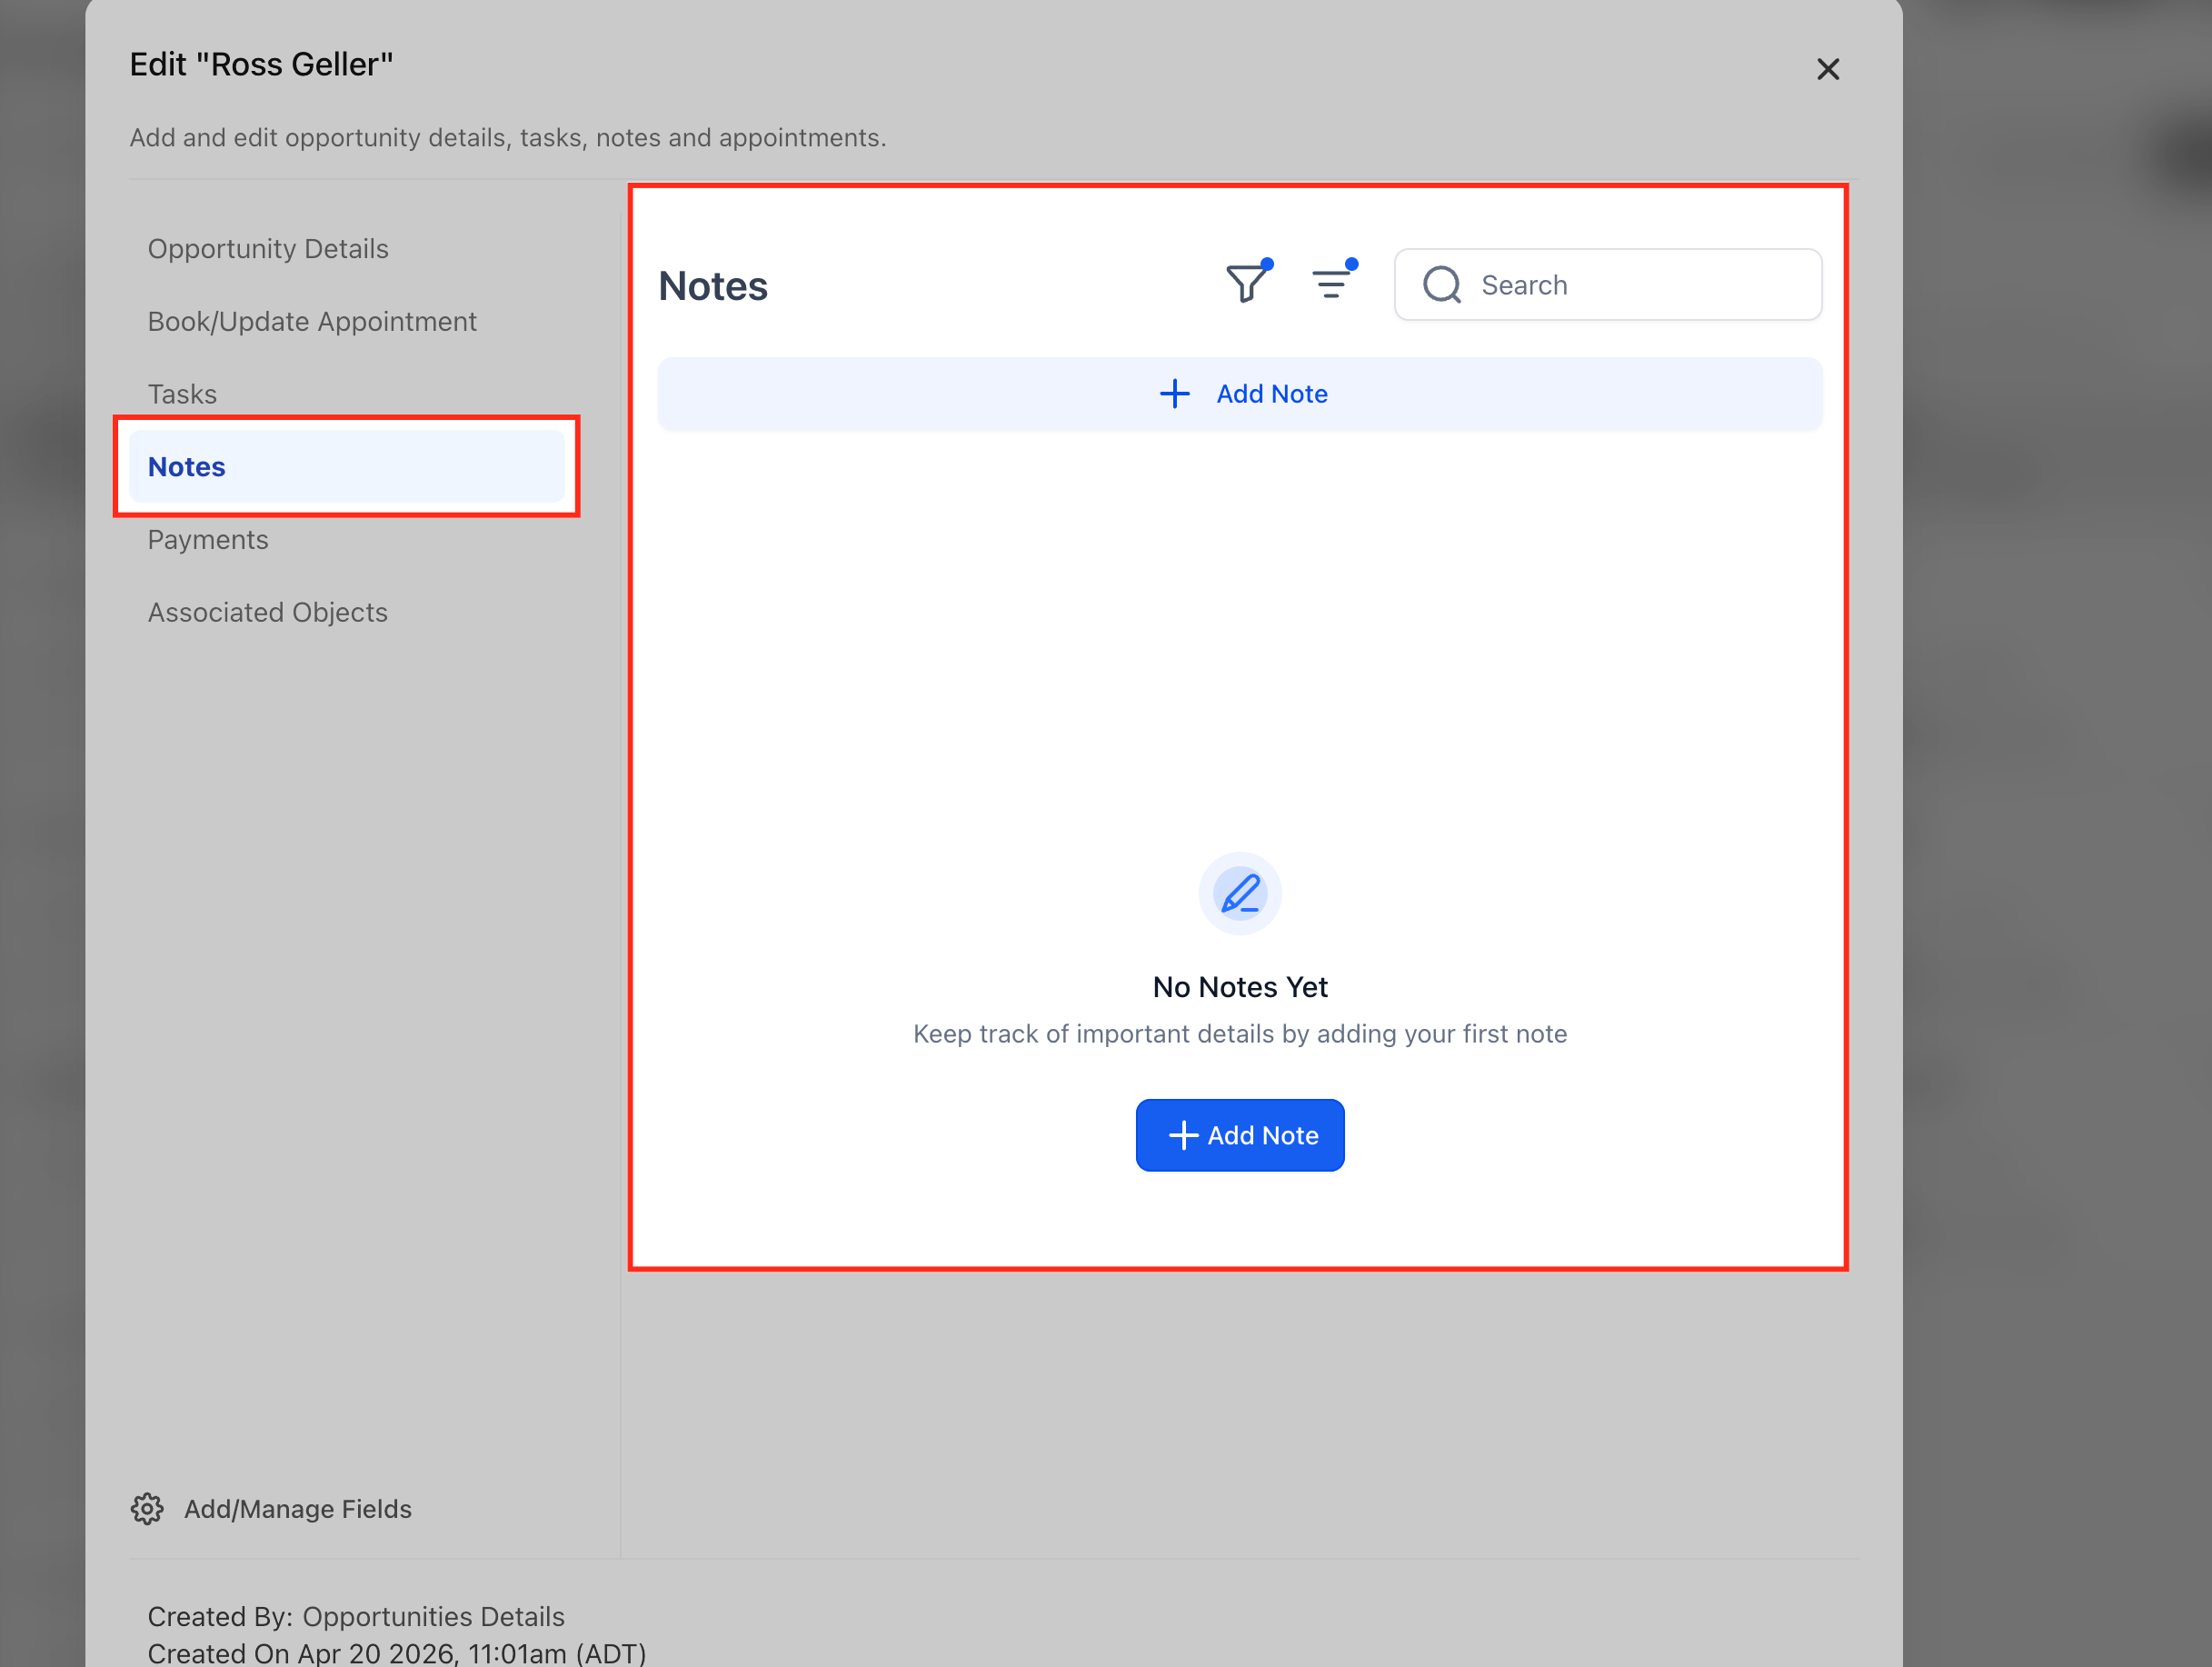
Step 5: Add notes and attachments. Add notes or additional information by clicking the Notes option in the left sidebar. Any notes added here also appear in the corresponding contact's notes.
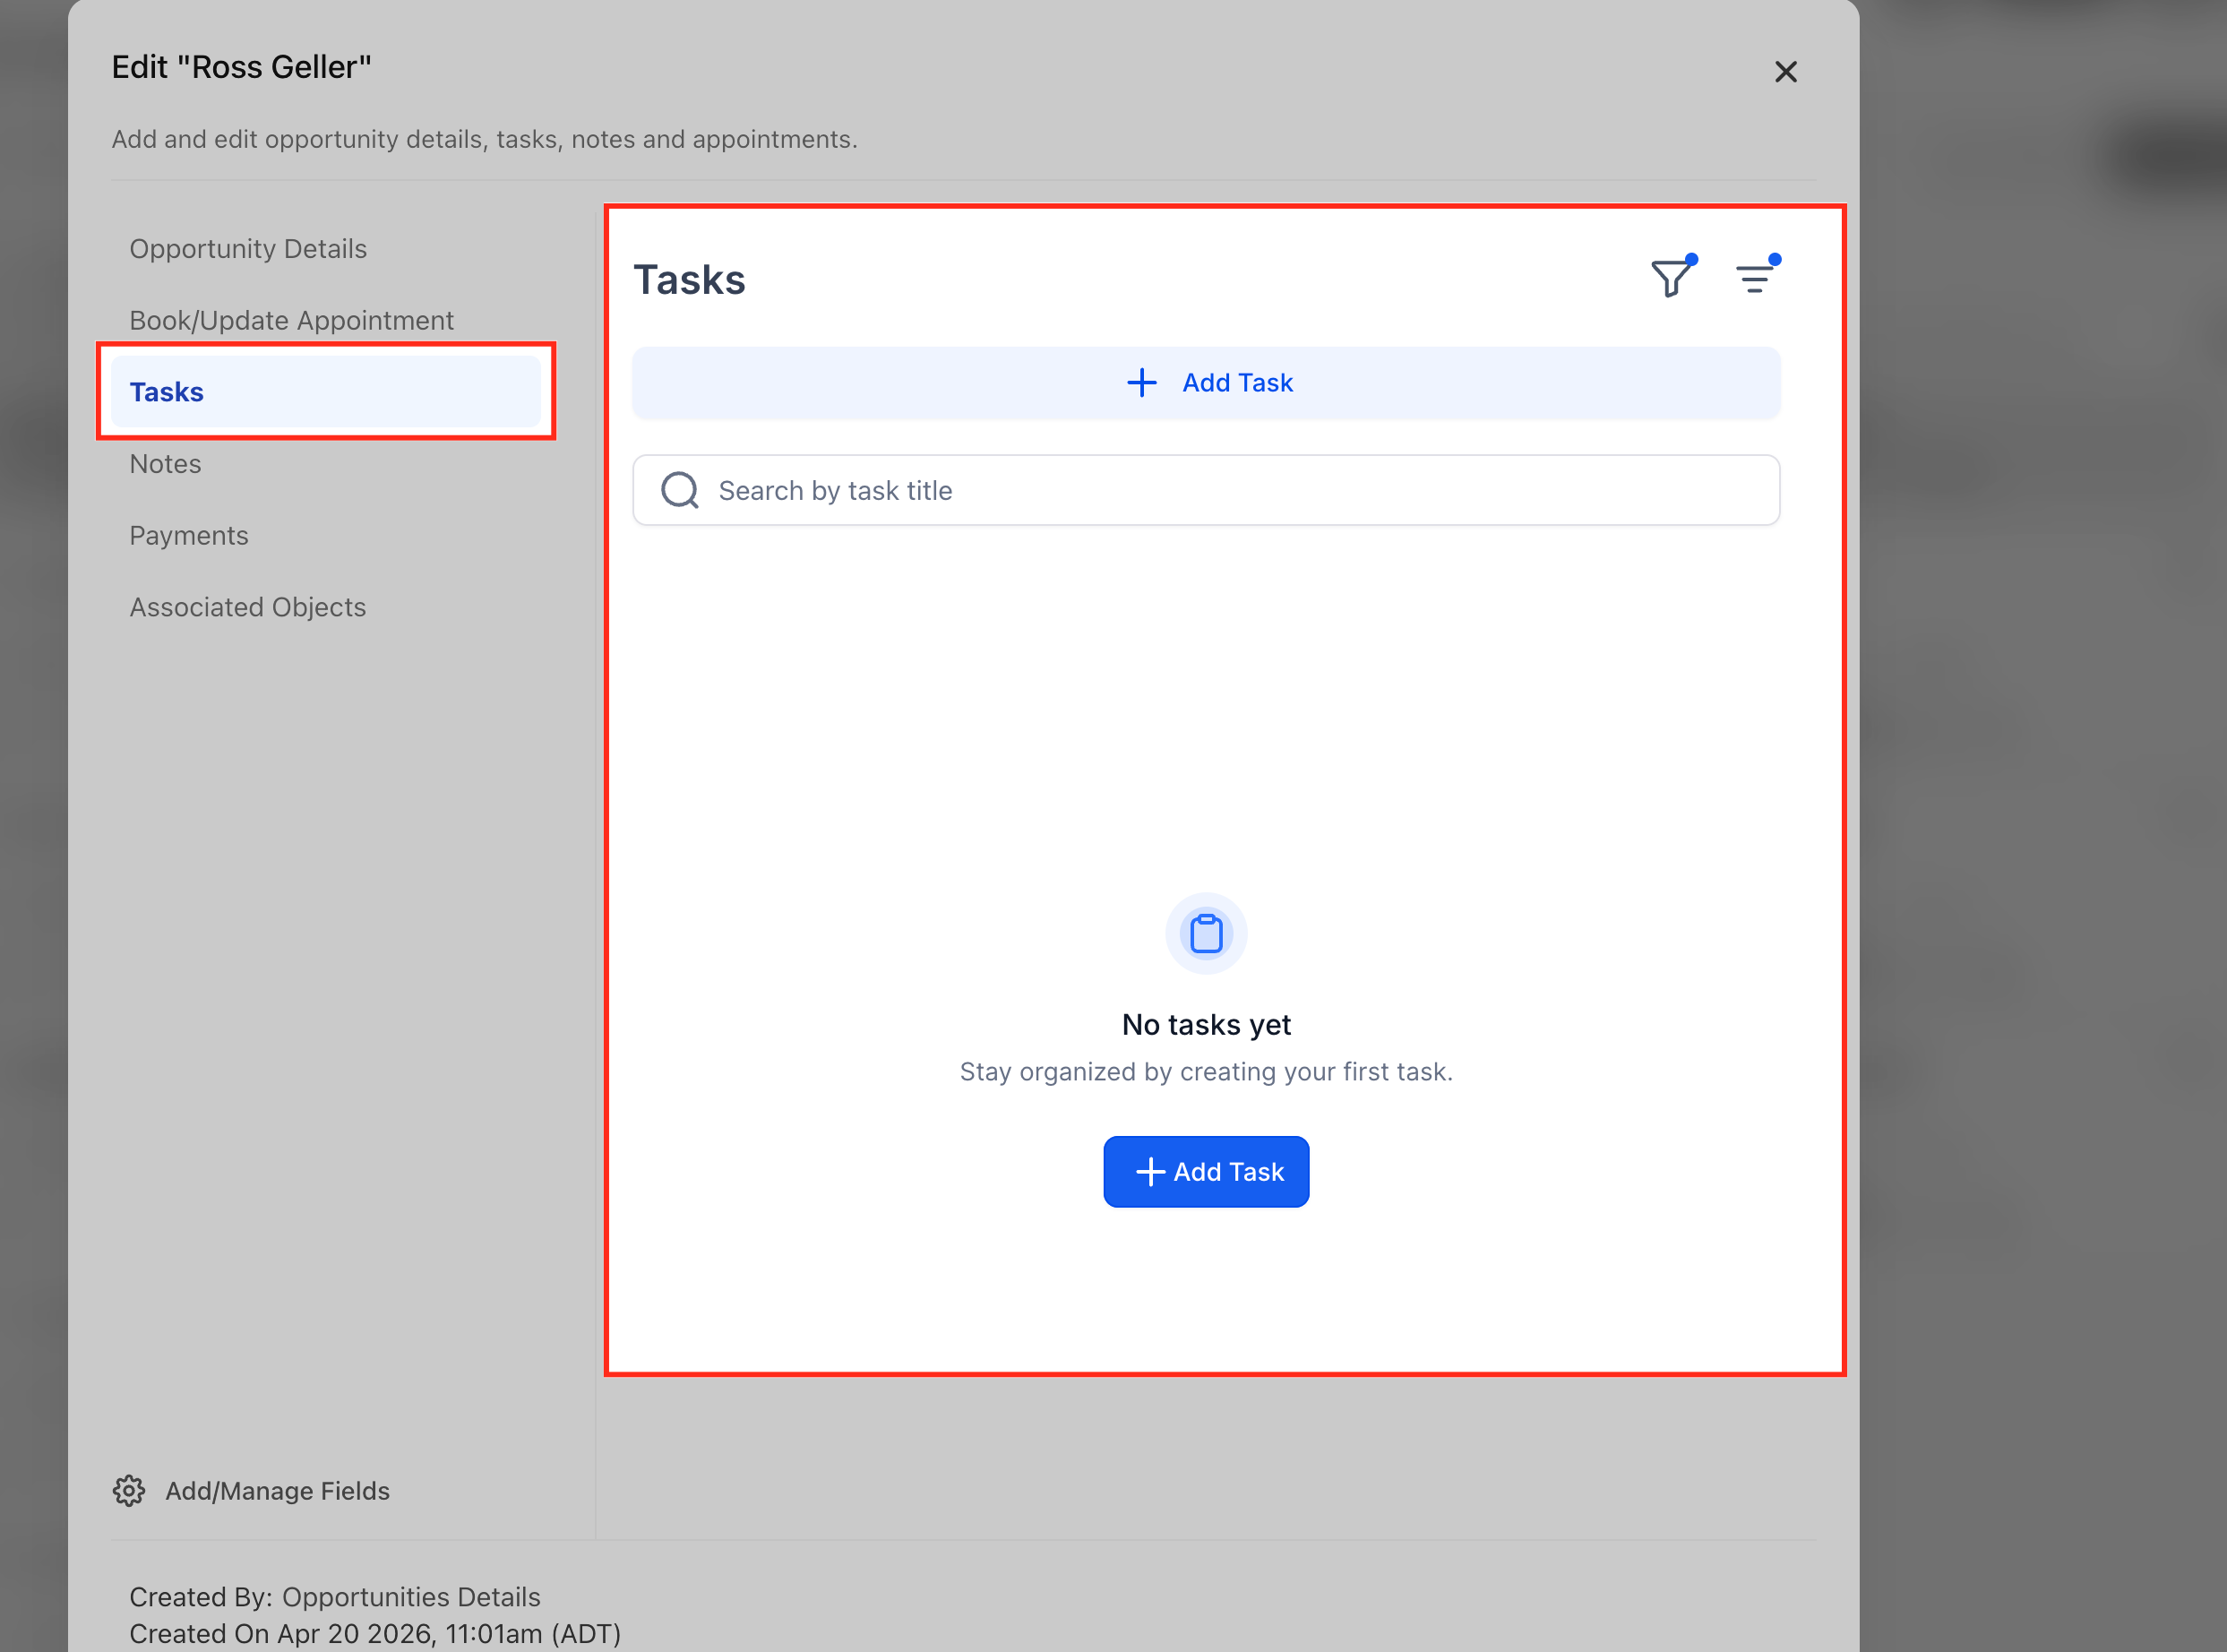
Step 6: Set tasks and reminders. For follow-up actions tied to the opportunity, set tasks and reminders from the sidebar. Assign tasks to yourself or team members with due dates and priority levels. You can add appointments the same way. Tasks and appointments added here also reflect on the contact's record.
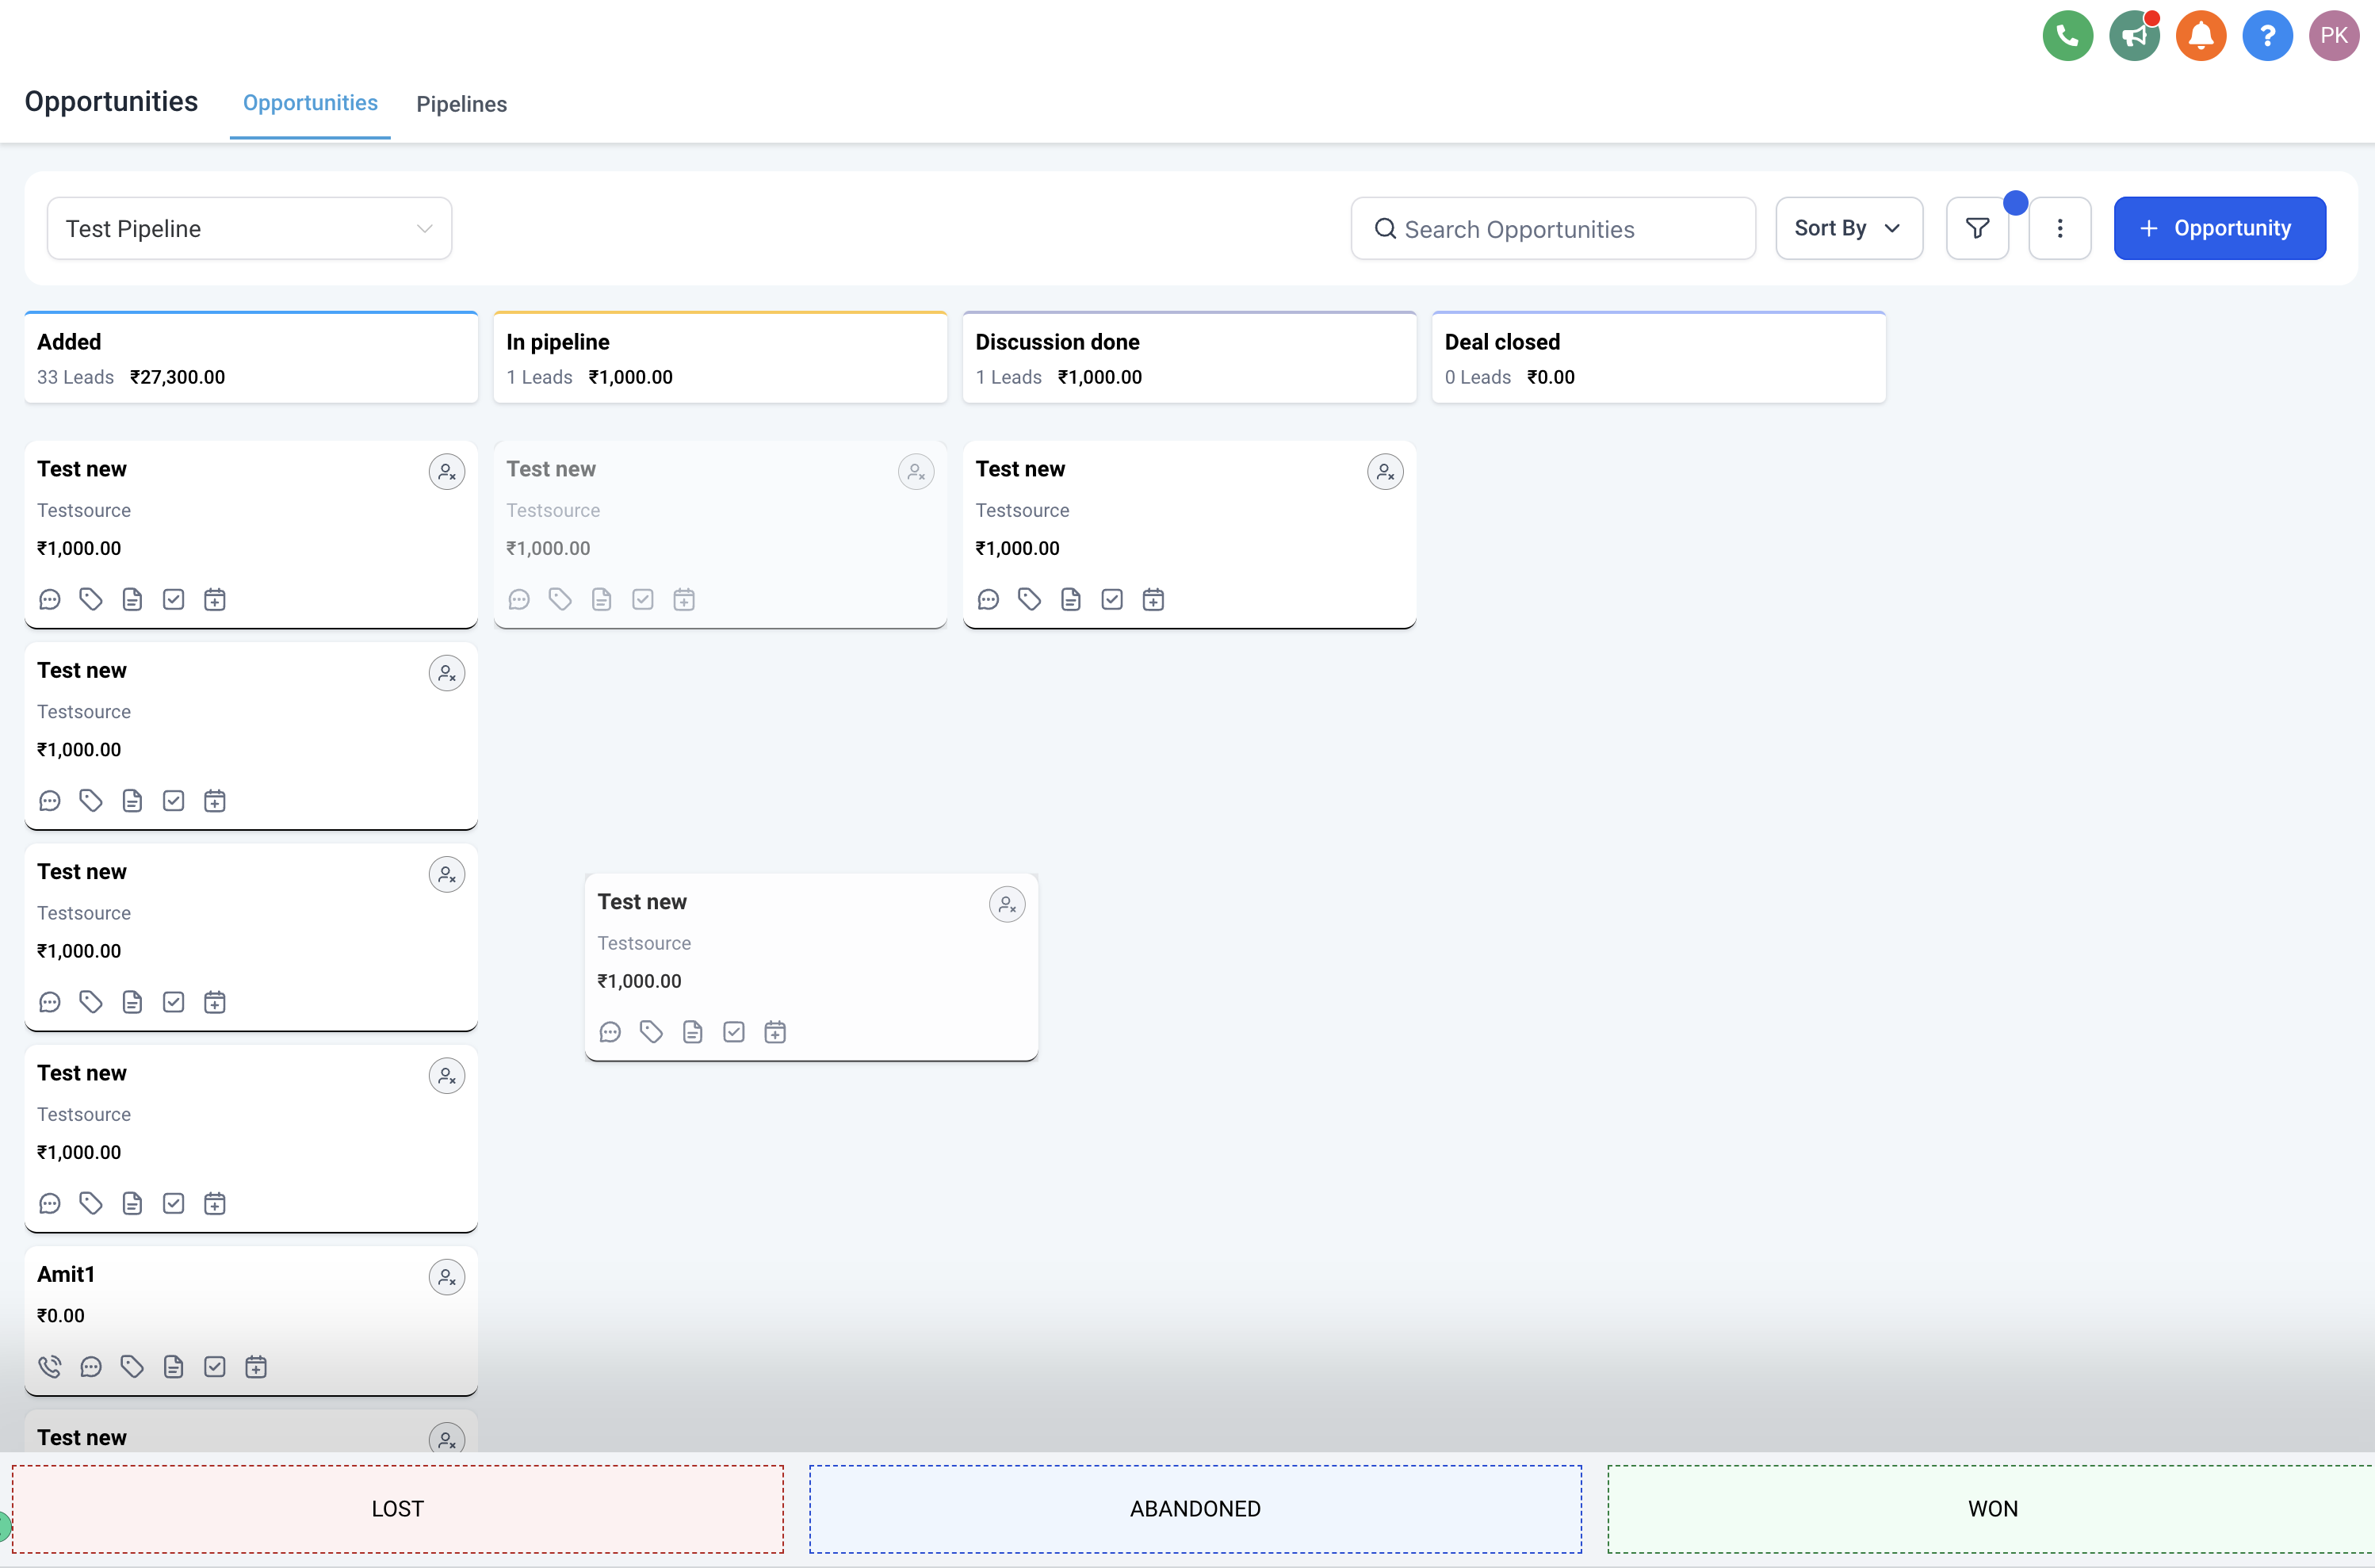
Step 7: Manage pipeline stages. Adjust the pipeline stage to reflect the opportunity's current position in your process, moving it through stages as it progresses toward closing.
Step 8: Manage opportunity status. Drag and drop the opportunity onto any status shown at the bottom to update it. Possible statuses are Open, Won, Lost, and Abandoned; the default for a new opportunity is Open. Marking an opportunity Lost also lets you add a lost reason.
Custom fields for opportunities let you tailor Aesthetix CRM to match your exact process. By creating, organizing, and applying custom fields, you can track the details that matter most to your practice—from projected close dates and client preferences to budgets and lead sources. These fields also integrate with filtering, reporting, and automation, helping your team focus on the right opportunities.
Custom fields let you add data points beyond the default opportunity fields. You can create text, dropdown, date, monetary, and other field types, categorize them into folders, and hide empty fields for a cleaner view.
Personalization: Capture information specific to your practice, such as budget, preferences, or treatment details.
Organization: Group fields into folders and reorder them for easier data management.
Efficiency: Use the Hide Empty Fields option to keep pipeline views clean and focused.
Better Reporting: Include custom fields in dashboards, widgets, and reports for deeper insight.
Filtering Power: Filter and sort opportunities by custom criteria to quickly prioritize leads.
Automation: Use custom fields in workflows, campaigns, and merge fields to save time.
There are two ways to reach the Custom Fields dashboard—both lead to the same place.
Via Settings: From your dashboard, open the Settings menu and scroll down to Custom Fields.
Via an Opportunity: Inside Opportunities, select any existing opportunity and click Add/Manage Fields to jump straight to the Custom Fields dashboard.
Step 1: Add the field. Click the + Add Field button at the top right of the Custom Fields dashboard.
Step 2: Choose the field type. Select the field type that matches your data. Options include text inputs (single line, multi-line, list), values (number, phone, monetary), choices (dropdowns, radio, checkbox), date/time (date picker), and other inputs like file upload or signature. Click Next to continue.
Field Type | Example Use Case |
|---|---|
Single Line | Enter the treatment name or referring practice. |
Multi Line | Add detailed notes about client requirements. |
Text Box List | Track multiple products or services tied to an opportunity. |
Number | Record a probability score for conversion (e.g., 80%). |
Phone | Save an alternate decision-maker's phone number. |
Monetary | Store the client's budget or estimated treatment value. |
Dropdown (Single) | Select the sales stage (e.g., Consultation, Closing). |
Dropdown (Multiple) | Mark all treatments a client is interested in. |
Radio Select | Capture yes/no style responses like "Is Budget Approved?". |
Checkbox | Flag if consent or compliance documents are required. |
Date Picker | Track key dates like follow-up or projected close date. |
File Upload | Attach proposal files or intake documents. |
Signature | Collect signed approvals directly within the opportunity. |
Step 3: Assign the field to Opportunity. After naming your field, set the Object to Opportunity so it applies specifically within opportunity records. Fill in the remaining details:
Name: The display label for the field (e.g., "Client Budget").
Group: The folder or category to organize the field under (e.g., "Budget Details").
Placeholder: Hint text shown inside the field when it's empty (e.g., "Enter estimated value").
Additional Preferences: Advanced options for certain field types (e.g., default values, required toggle).
Click Save to finalize the field. Once saved, it becomes available across opportunity records in your pipeline.
Tip: If you mistakenly assign the field to Contact instead of Opportunity, it will only appear in contact records and won't show in your pipeline opportunities.
Folders make it easy to organize multiple custom fields into logical groups, reducing clutter and helping your team find the right information.
Step 1: Add the folder. Click the Add Folder button at the top right of the Custom Fields dashboard.
Step 2: Name the folder. Enter a descriptive name (e.g., "Budget Details" or "Treatment Info") so your team knows what belongs inside.
Step 3: Select the object. Choose Opportunity as the object so the folder applies to opportunity records. Click Save to finalize the folder name and object.
Once your fields and folders exist, you can manage them by reordering, filtering, grouping, or deleting.
Filter by Object: Use the dropdown at the top right to filter fields by object type. Selecting Opportunity shows only fields linked to opportunities.
Group by Folder: Use the Group By dropdown to organize fields by folder or category for easier context-based viewing.
Bulk Actions: Select multiple fields with the checkboxes and use the Bulk Actions menu to edit, delete, or move them into a different folder at once.
Reorder Fields: Use the drag-and-drop hamburger icon to move fields up or down, controlling the order they appear when creating or editing an opportunity.
Custom fields integrate into filtering, reporting, and pipeline views to make sales management easier.
Open Advanced Filters: In the Opportunities view, click Advanced Filters to open the filtering panel.
Filter by Custom Fields: Scroll down to the Opportunities Custom Fields section to filter records using the custom fields you've created.
Tip: Combine multiple custom field filters to build precise views, such as identifying high-value leads that also meet specific qualification criteria.
You can surface custom fields directly on pipeline cards so important details are visible at a glance.
Open Manage Fields: In the Opportunities view, click Manage Fields at the top right, then scroll to the Add Fields section.
Add Custom Fields to Cards: Expand the Opportunity Details section under Add Fields and check the custom fields you want to display. Click Apply to update your cards instantly.
Hide Empty Fields: Inside any opportunity card, enable Hide Empty Fields at the top to show only fields with values, keeping your view clean.
If I add or remove custom fields from the opportunity card using "Manage Fields," will this change apply to all users? No. Changes made in the Manage Fields panel apply only to your personal view of opportunity cards. Other users still see their own customized layouts unless they adjust them, so each user can display the fields most relevant to their role.
What happens to existing data if I delete an opportunity custom field? Deleting a custom field permanently removes the field and any data stored in it from all opportunities. This cannot be undone. If you only want to hide a field without losing data, move it into a folder or use the Hide Empty Fields option instead of deleting.
Can all custom field types be used for filtering opportunities? No. Most opportunity custom fields (dropdowns, numbers, dates, and text fields) can be used in filtering, but File Upload and Signature fields cannot. They still appear in opportunity records but aren't available in the Advanced Filters panel.
How can I use opportunity custom fields in automations or workflows? Opportunity custom fields can be used as triggers, conditions, or actions in workflows. For example, you can update a custom field automatically based on lead activity, send personalized messages using merge fields that pull in custom field data, or move opportunities to a new stage when a custom field meets specific criteria.
Why should I avoid enabling duplicate opportunities? Aesthetix CRM relies on one opportunity per contact per pipeline. Enabling duplicate opportunities breaks EMR integrations and skews your pipeline reporting. Keep duplicate-opportunity behavior off and confirm your setup under Settings > Duplicate Handling.
What are the possible opportunity statuses? An opportunity can be Open, Won, Lost, or Abandoned. New opportunities default to Open, and marking one Lost lets you record a lost reason.
