Opportunities are how Aesthetix CRM helps you track potential deals and patients as they move through your sales and booking process. An opportunity represents a real, in-progress deal tied to a contact—someone who has shown interest in your services and is on the path toward becoming a paying patient. Each opportunity lives inside a pipeline, moves through defined stages, carries a monetary value, and holds a status that reflects exactly where it stands. This overview explains what opportunities are, how they relate to your contacts and pipelines, and how to navigate the Opportunities section so you can manage every deal in one place.
Looking for a specific task? Set up pipelines in Creating and Managing Pipelines; add or edit deals in Creating and Editing Opportunities; bring deals in via Importing Opportunities; and automate opportunity creation with workflow triggers (Form Submitted, Appointment Booked, Payment Received, and more) — see the Workflows & Automation collection.
An opportunity is a record that represents a potential sale or deal at any point in your pipeline—from a brand-new lead to a signed treatment plan. Each opportunity stores the prospect's contact information, deal value, and historical notes, ensuring everyone on your team has context and can take action quickly. Opportunities move through stages inside a pipeline, reflecting real-world progress toward a win.
A contact becomes an opportunity when there is a prospect of a sale or deal associated with that contact and it is added to a sales pipeline. In other words, contacts are the people in your database, and opportunities are the active deals those people represent as they progress toward booking or purchasing.
Opportunities allow you to organize, automate, and forecast your sales in one place.
Centralized Tracking: All notes, tasks, and communications live on the opportunity card, eliminating data silos.
Stage-Based Forecasting: Predict revenue by looking at how many deals sit in each stage and their expected values.
Automation Triggers: Fire workflows when an opportunity is created, moves stages, or changes status—saving hours of manual work.
Team Collaboration: Assign owners, tag teammates, and track activity history without endless email threads.
Performance Reporting: Use Aesthetix CRM dashboards and reports to see win rates and bottlenecks across team members or services.
Opportunities live inside pipelines, which are a series of consecutive stages. In Aesthetix CRM, your pipeline and its stages are pre-built for your practice during onboarding — for example, a Lead 2 Patient pipeline for med spas or a Surgery: Lead 2 Patient pipeline for plastic surgery — so the way you track deals matches how patients actually move through your practice. See the Med Spa Pipeline and Plastic Surgery Pipeline overviews for how your stages are structured.
Most of this movement happens automatically:
Opportunities are created for you. Website forms, the chat widget, and paid ads automatically create an opportunity when a new lead comes in. Organic inquiries (calls, texts, social messages) are added with a contact tag.
They advance through stages automatically. Your workflows and your EMR / booking integration move opportunities forward as things happen — for example, when an appointment is booked or a visit is completed. Stage changes can also trigger automated communications, such as your lead-nurture messages.
Values are assigned automatically. Opportunity values are set based on the treatment of interest, keeping your forecasting and reporting accurate.
Because your automations and EMR integration depend on this exact structure, do not create new pipelines or add/remove/rename stages yourself — see Creating and Managing Pipelines for the full caution.
"Open," "Won," "Lost," and "Abandoned" are the opportunity statuses that are present by default. An opportunity can be in one of these four statuses at any time, and you can use them to build filters and reports.
Open: Opportunities with the "Open" status are actively being pursued and are still in progress. These opportunities represent potential deals that have not yet been won, lost, or abandoned and are still viable for conversion.
Won: The "Won" status indicates that the opportunity has been successfully converted into a sale or deal. This status is applied when the lead has made a purchase or signed a contract, resulting in revenue generation for the business.
Lost: Opportunities with the "Lost" status represent deals that have been unsuccessfully concluded. This status is applied when the lead decides not to move forward with the purchase or chooses a competitor's offering.
Abandoned: The "Abandoned" status indicates that the opportunity has been neglected or disregarded, either by the lead or by the sales team. This status is applied when there is no further action or follow-up planned for the opportunity, and it is effectively removed from active consideration.
Robust data management within opportunities tracks the opportunity source, contact details, opportunity value, and notes. You can also streamline communication and task assignment under an opportunity's linked contacts, enhancing workflow efficiency and timely engagement.
The Opportunities section is where you view, organize, and update every deal. Whether you prefer a visual board or a detailed list, the following steps show how to move around and find what you need.
Step 1: Open the Opportunities section. Select Opportunities from the left sidebar to view your deals. This section can display your opportunities as a board (a Kanban-style view with a column for each pipeline stage) or as a list, so you can work the way that suits you best.
Step 2: Choose the pipeline you want to work in. Click Pipelines (or the Change Pipeline option) to switch between pipelines. Each pipeline shows its own set of stages and the opportunities currently sitting in them.
Step 3: Move an opportunity between stages. In the board view, click, drag, and drop the corresponding opportunity card to the desired stage. Moving a card updates the opportunity's position in your sales cycle instantly.
Step 4: Search for a specific opportunity. Use the Search bar (the "Search Opportunity" feature) to quickly locate a specific opportunity by name or detail.
Step 5: Sort your results. Click Sort by to organize your opportunities in the order that is most useful to you.
Step 6: Filter your results. Use the Filters option to narrow down your opportunities—for example, by status, stage, owner, or value—so you can focus on exactly the deals that matter.
Step 7: Add a new opportunity. Click Add new opportunity (or Add opportunity) to create a new entry. Select an existing contact or enter details for a new contact, fill in the opportunity details (pipeline, stage, value, and so on), and save.
How do I export opportunities?
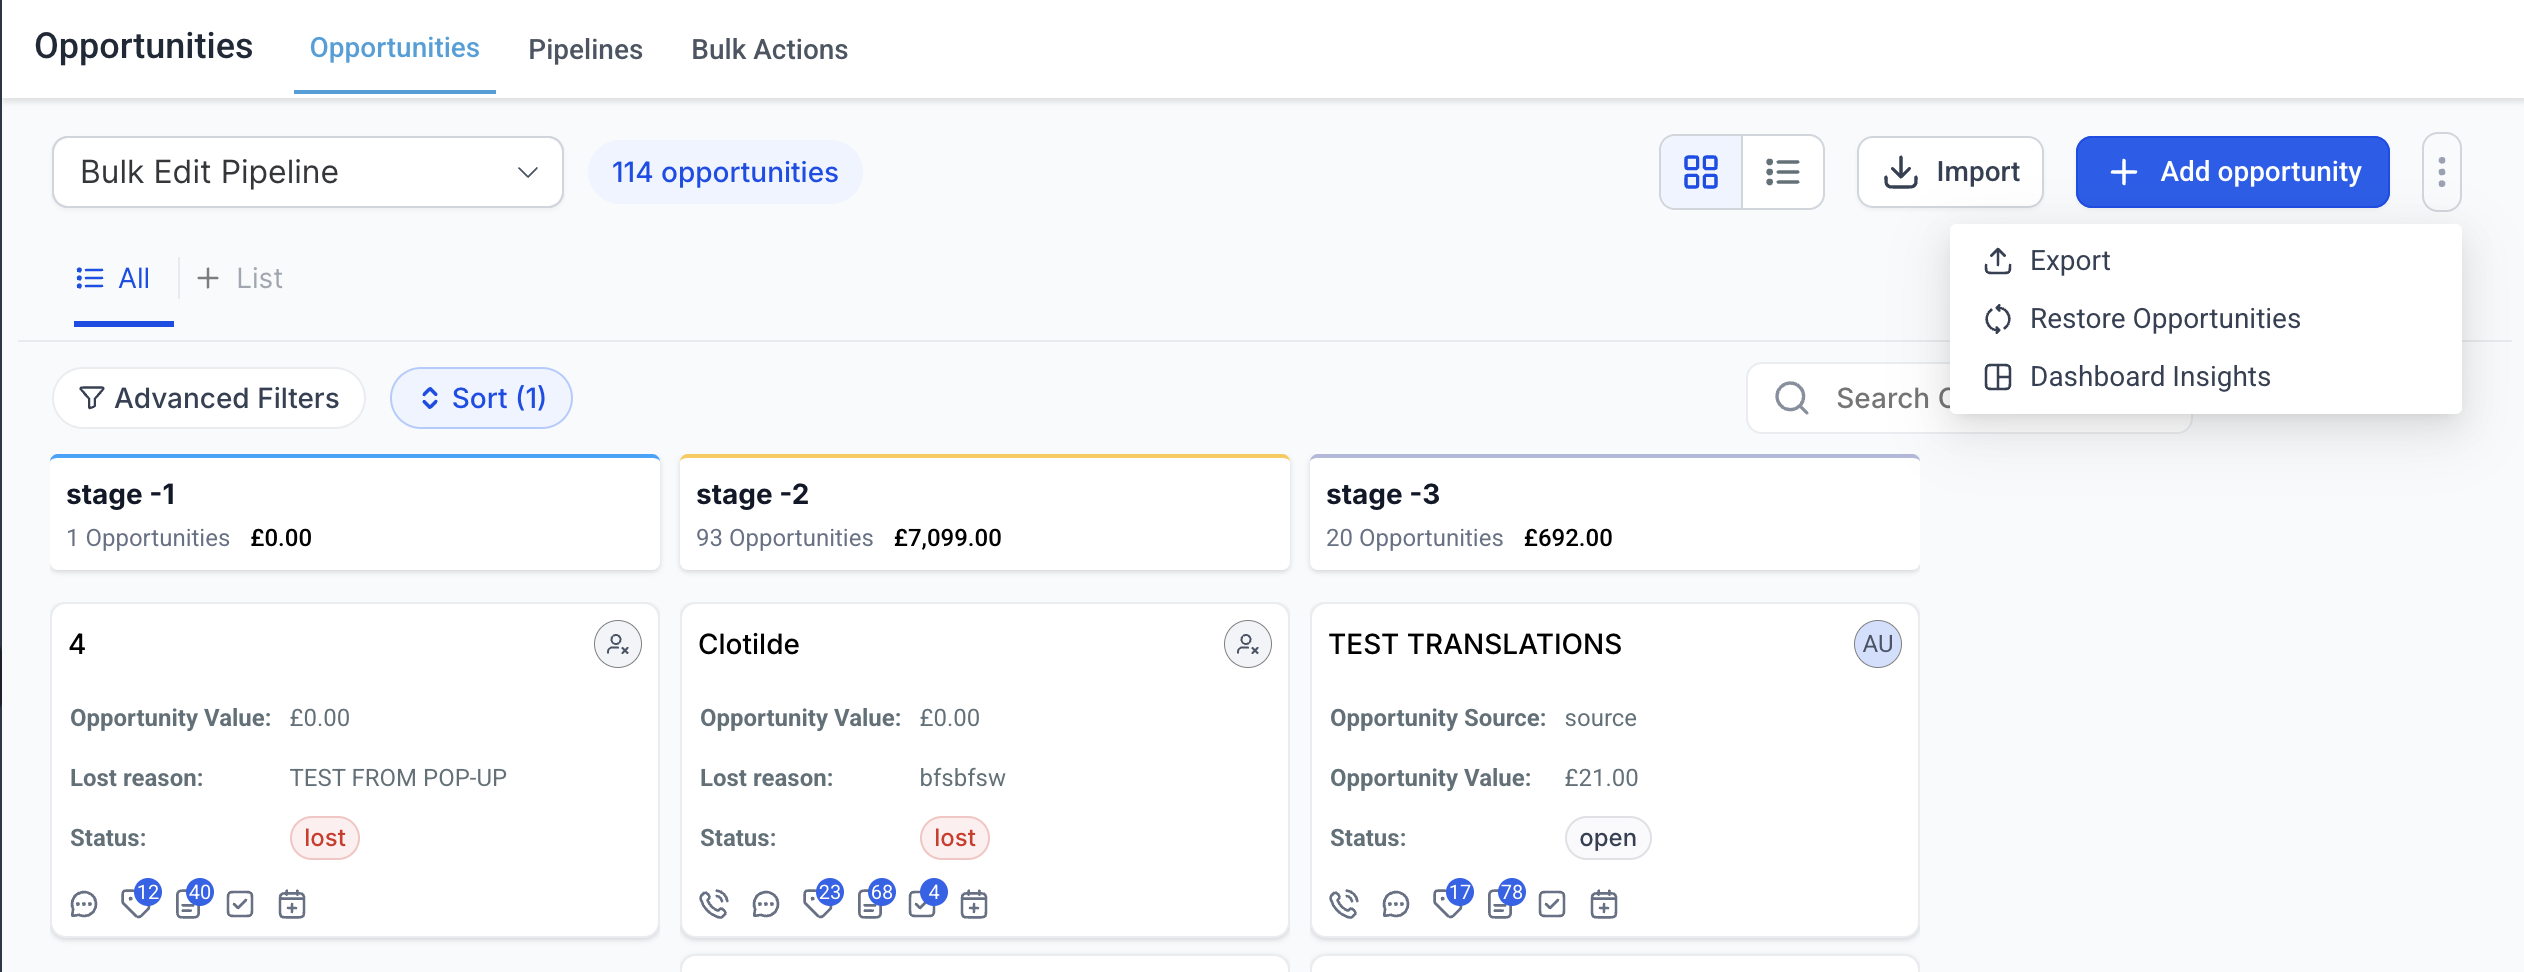
Go to Opportunities from the left sidebar.
On the top right, click the kebab menu (the three-dots menu).
Select Export Opportunities.
Your export file will be processed and downloaded to your default browser folder.
How do I share a specific opportunity with my team?
Open the desired opportunity in the app.
Copy the URL from your browser.
Share the link with your team or stakeholders.
The shared link will take them directly to the specific opportunity and its details, improving collaboration and saving time.
How do I track all activities in my opportunity and find the Opportunity ID?
Open the opportunity by clicking on the opportunity card.
Observe the Opportunity ID in the bottom left and click on it.
You will be redirected to the audit logs for that opportunity.
Audit logs allow you to monitor any activity that has taken place on the opportunity in the last 60 days.
How does the Multiple Contacts per Opportunity feature work?
Open the opportunity by clicking on the opportunity card.
In the Additional Contacts field, you can add any contact you would like to link to the opportunity.
A contact added as the primary on the opportunity cannot also be added to its additional contact list.
If you do not have the "Allow duplicate opportunities" setting on, one contact cannot be added to two different opportunities' primary/additional contact lists.
You can add a maximum of 10 additional contacts on an opportunity.
Lists and workflows will keep working only on the primary contact and fetch the primary contact's details.
You can view opportunities linked to a contact from the Opportunities tab on the contact record (right panel).
How do I find the names and details of contacts on lost opportunities?
Navigate in the left-hand menu to Opportunities.
Click the Advanced Filters button.
Under Status, select Lost and click Apply.
The list now shows only lost opportunities.
To view a contact's details, click the opportunity box.
How can I see my custom fields in an opportunity?
When you go to Opportunities and select or create an opportunity, you'll see your custom fields listed. When you edit an opportunity, these fields are available for input. If you've organized your fields into folders, these will appear one after the other.
What does the "hide empty fields" feature do?
When enabled, the "hide empty fields" feature hides all fields with no value. This lets you focus only on the fields that are relevant or required for you, providing a cleaner, more streamlined view of your opportunity data.
How can I edit the values in the "Lost Reason" field under Opportunities?
Go to Settings > Custom Fields.
Select Lost Reason and click Bulk Actions > Edit.
Make changes to your lost reason values in the modal and save for them to reflect.
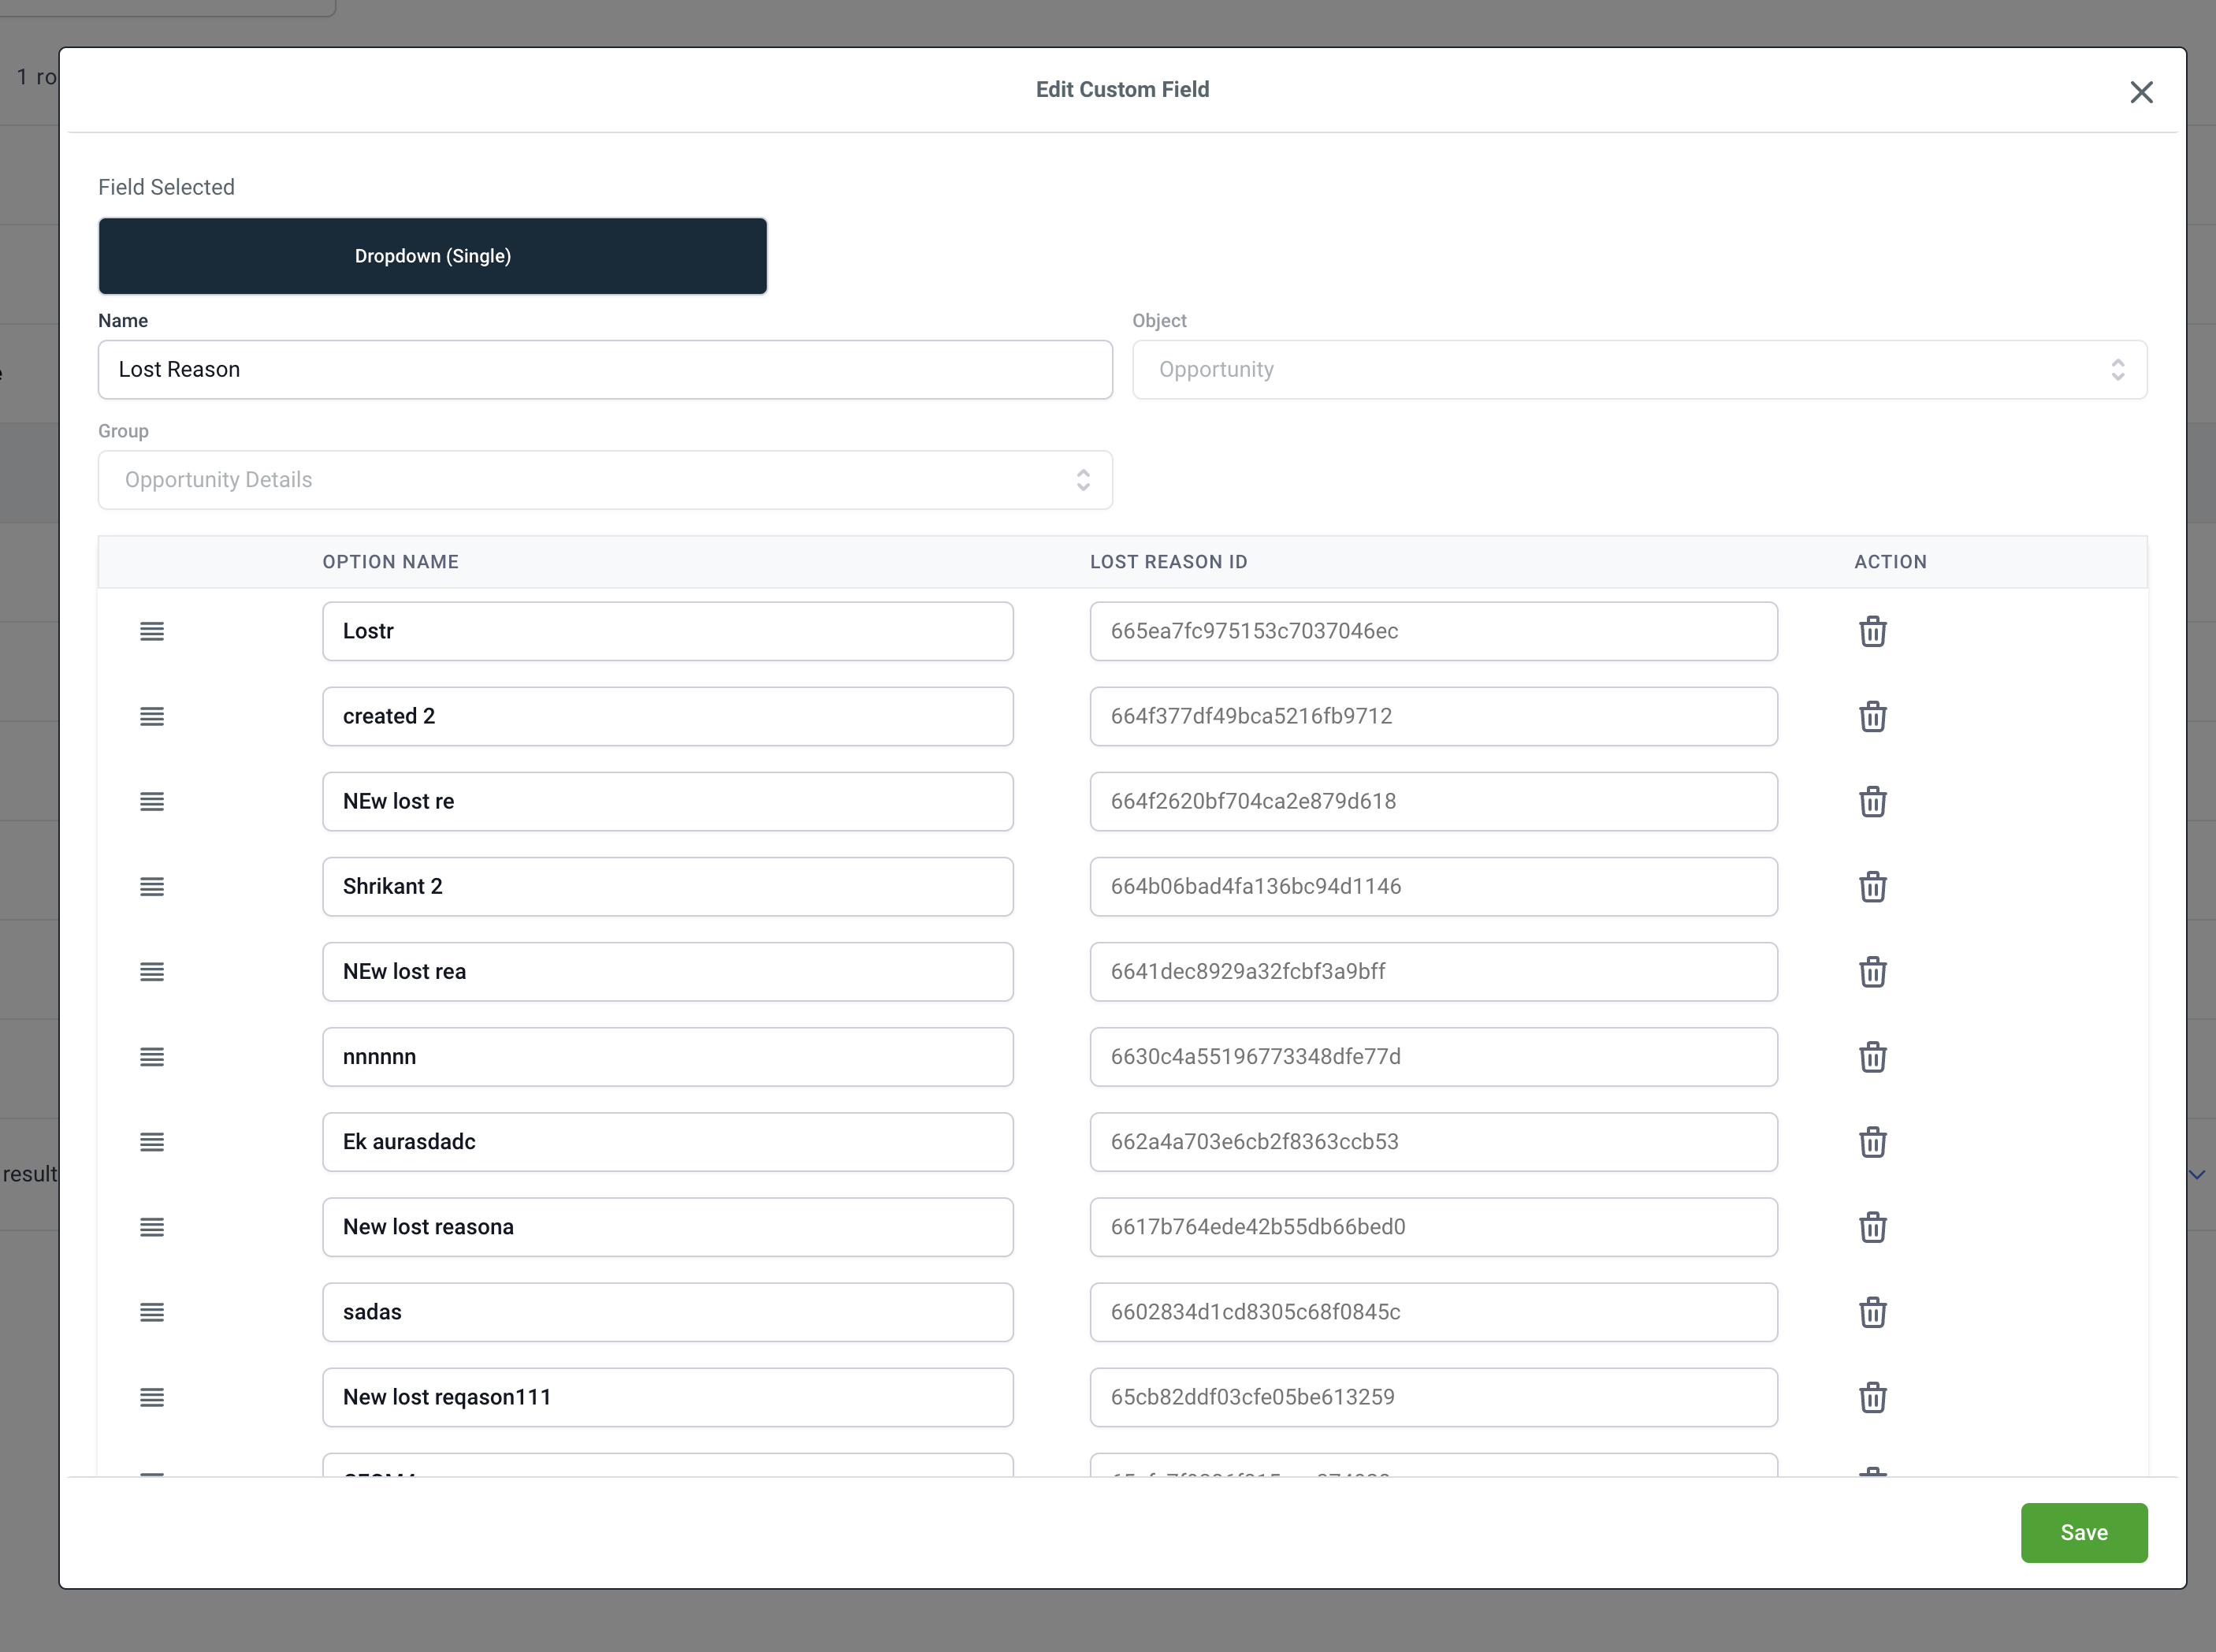
If the name of a lost reason is changed, all the places where that lost reason was being invoked will start showing the new name.
