Pipelines in Aesthetix CRM organize your sales or service process into a stage-based sequence, so you can visually track every opportunity as it moves from first contact to closed. Each stage represents a step in the customer journey—for a med spa or plastic surgery practice, that often means a consult-to-close flow such as inquiry, consult booked, treatment plan sent, and treatment completed.
By organizing opportunities into pipelines and stages, your team can visualize the process, spot bottlenecks, and make sure every lead follows a consistent path. Pipelines also power automation, reporting, and the opportunity dashboards throughout the platform.
This guide covers the full pipeline lifecycle: creating a pipeline, adding and reordering stages, editing, deleting, and restoring.
⚠️ Critical: Do not create new pipelines or add, remove, or rename stages in your existing pipelines. Aesthetix CRM builds your pipeline(s) and their stages for you during onboarding, matched to your practice type (for example, the Lead 2 Patient pipeline for med spas or the Surgery: Lead 2 Patient pipeline for plastic surgery practices). Your automations, lead-nurture workflows, opportunity reporting, and — most importantly — your EMR / booking integration all depend on these exact pipelines and stages. Changing them breaks that automation and your EMR integration, and restoring your setup is a paid service. If you need a pipeline or stage change, contact the Aesthetix team rather than editing it yourself. The steps below are provided for reference and for the rare cases where our team asks you to make a change.
A pipeline is a structured sequence of stages that tracks the progress of opportunities through a business process. Each stage defines a specific point in the journey, so your team always knows what should happen next.
For example, a typical pipeline may include stages such as:
Lead Received
Initial Contact
Consult Scheduled
Treatment Plan Sent
Closed or Completed
Your Aesthetix CRM pipeline is pre-built to mirror how patients actually move through your practice. To see how your stages are structured and how opportunities flow through them, see the Med Spa Pipeline overview and the Plastic Surgery Pipeline overview.
Opportunities move through these stages largely automatically — an opportunity is created when a new lead is captured (website forms, chat widget, and paid ads create it automatically; organic inquiries are added with a contact tag) and then advanced as your workflows and your EMR / booking integration report progress, such as when an appointment is booked. Because so much automation is tied to your specific stages, treat them as a fixed part of your setup rather than something to redesign.
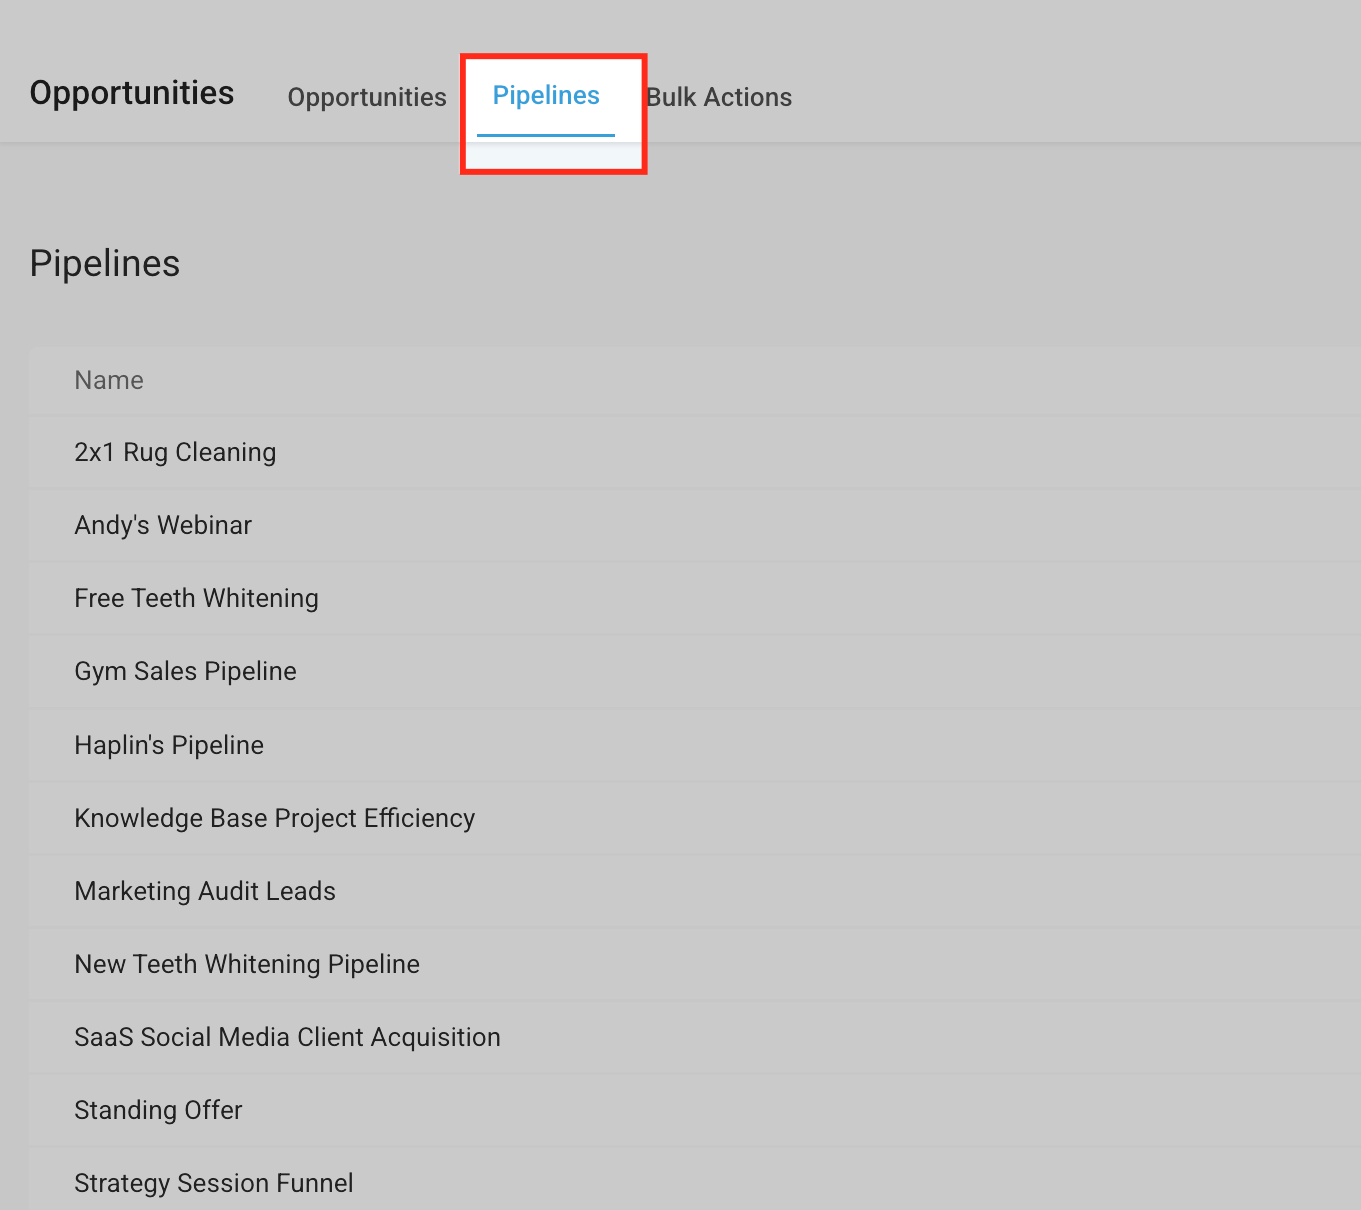
Step 1: Open the Pipelines section. From the left-hand sidebar, click Opportunities, then select Pipelines from the top navigation menu.
_
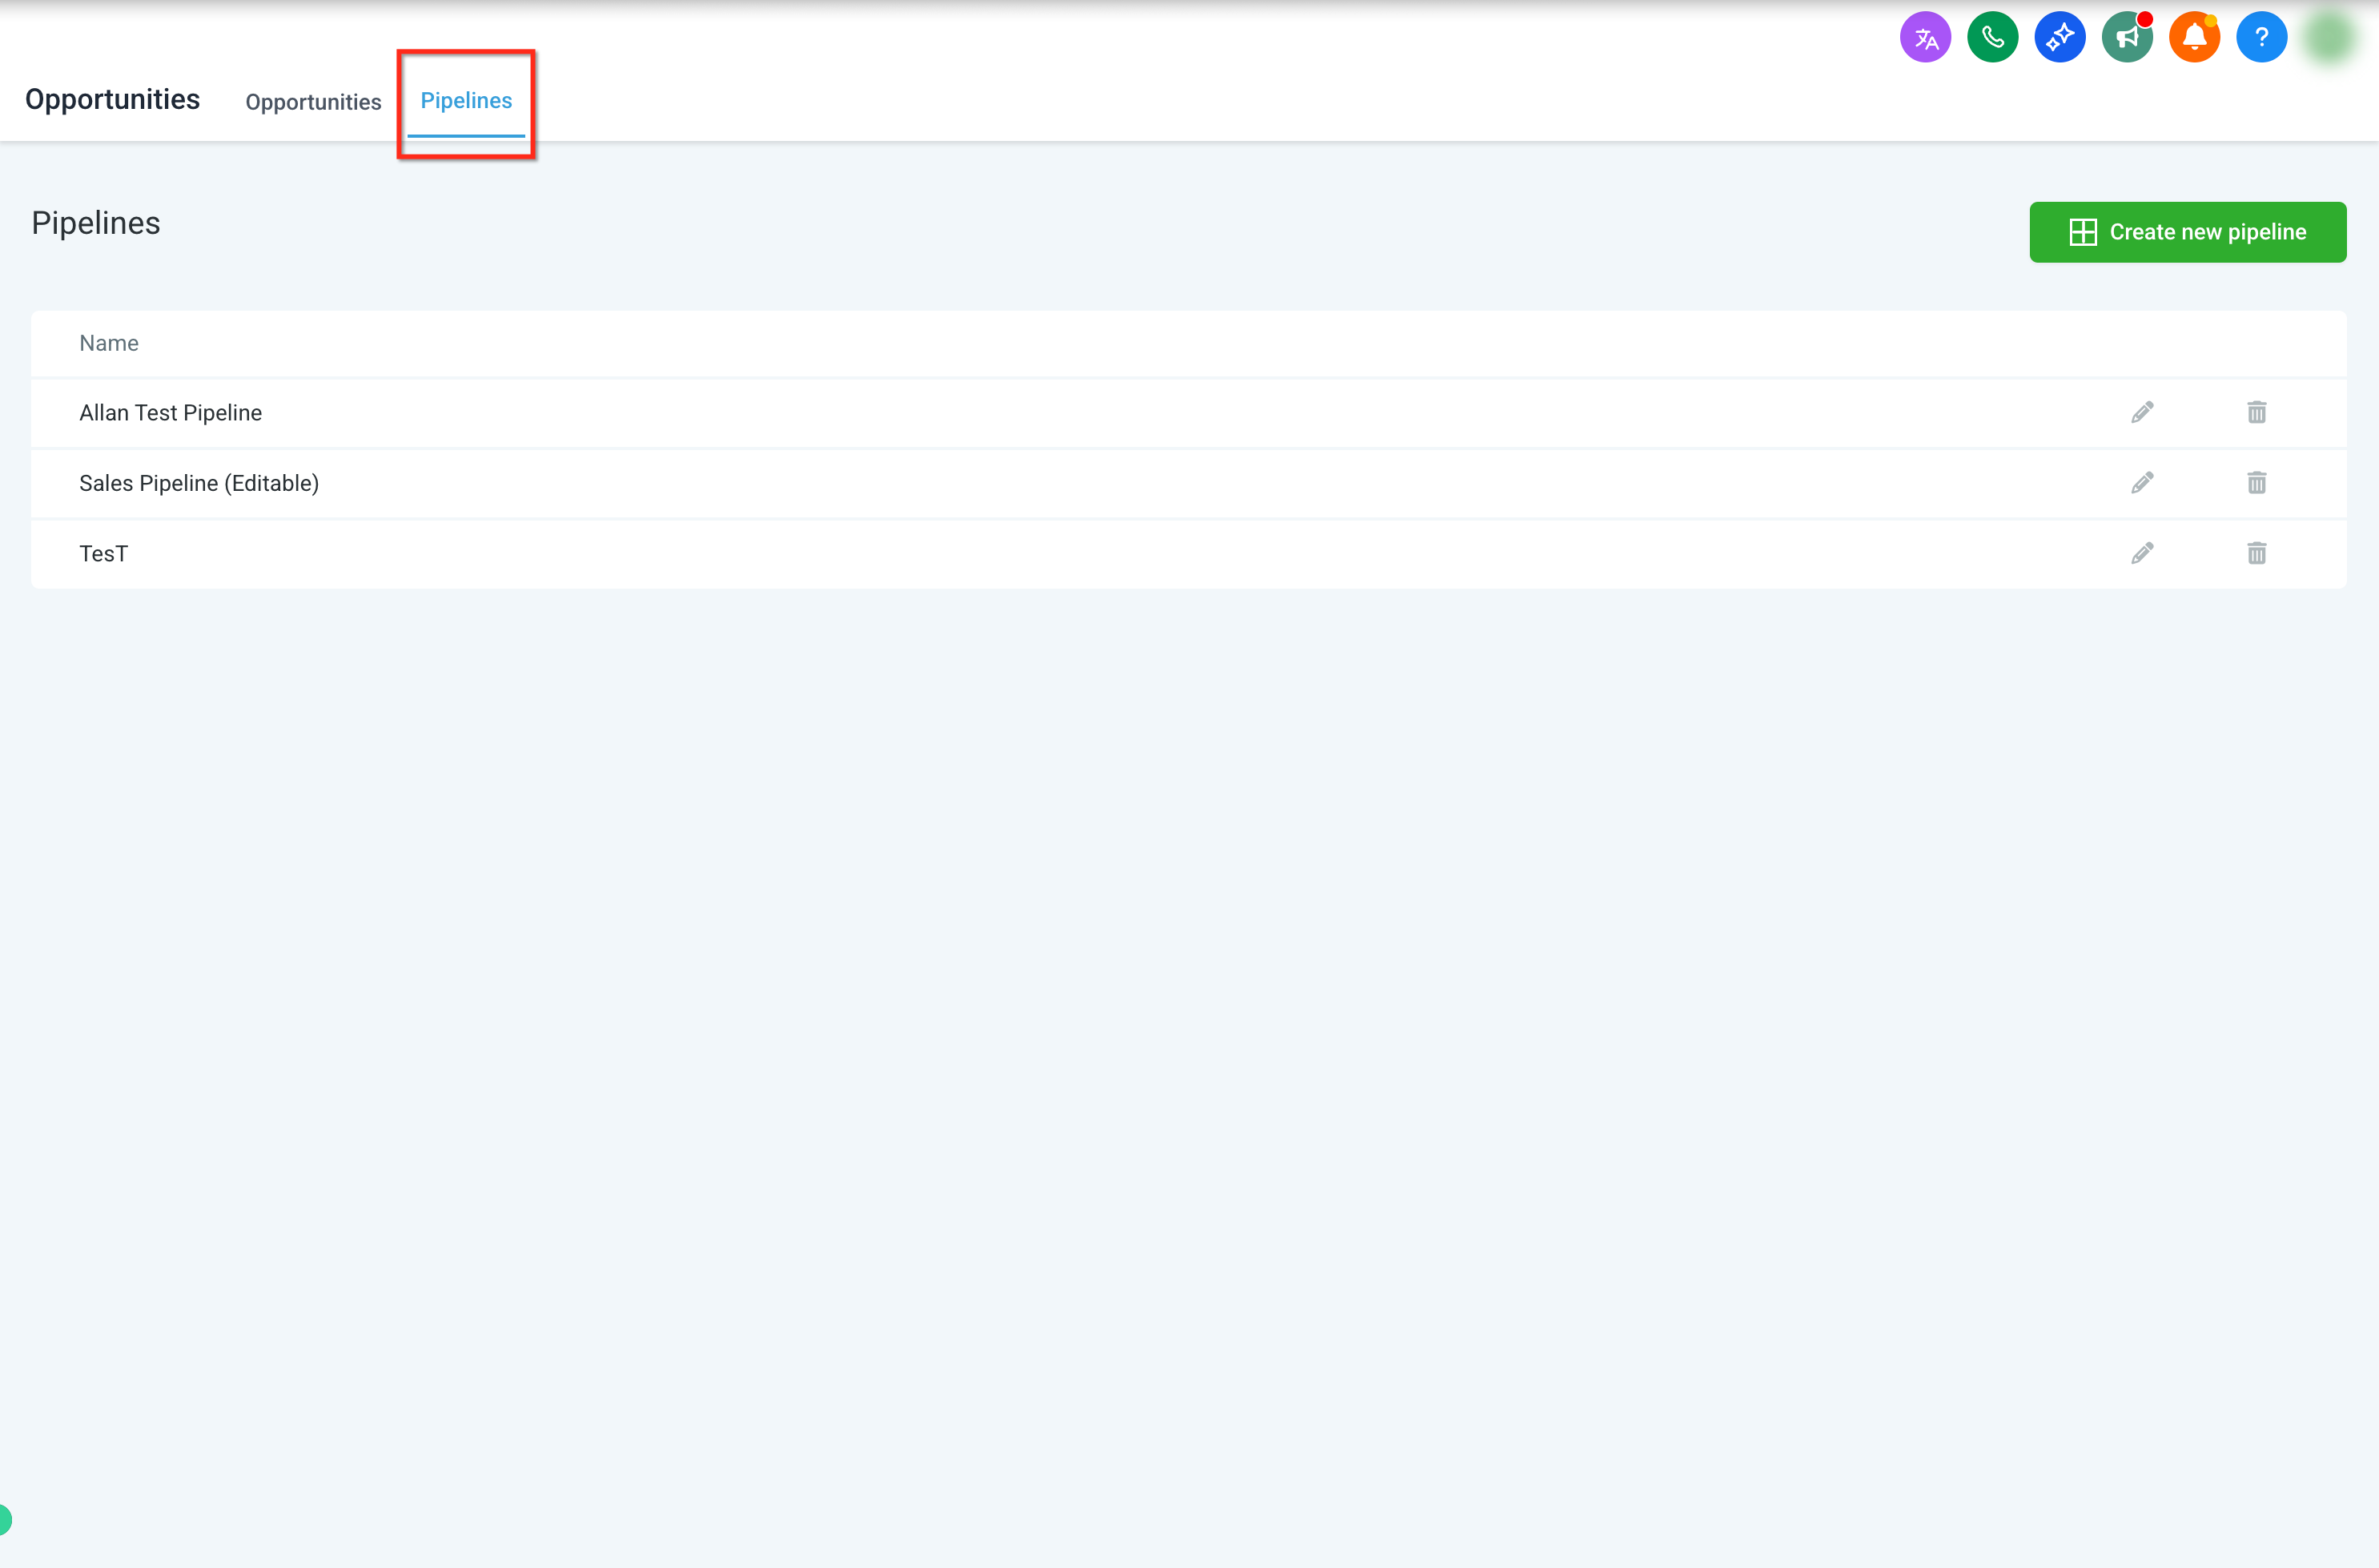
_
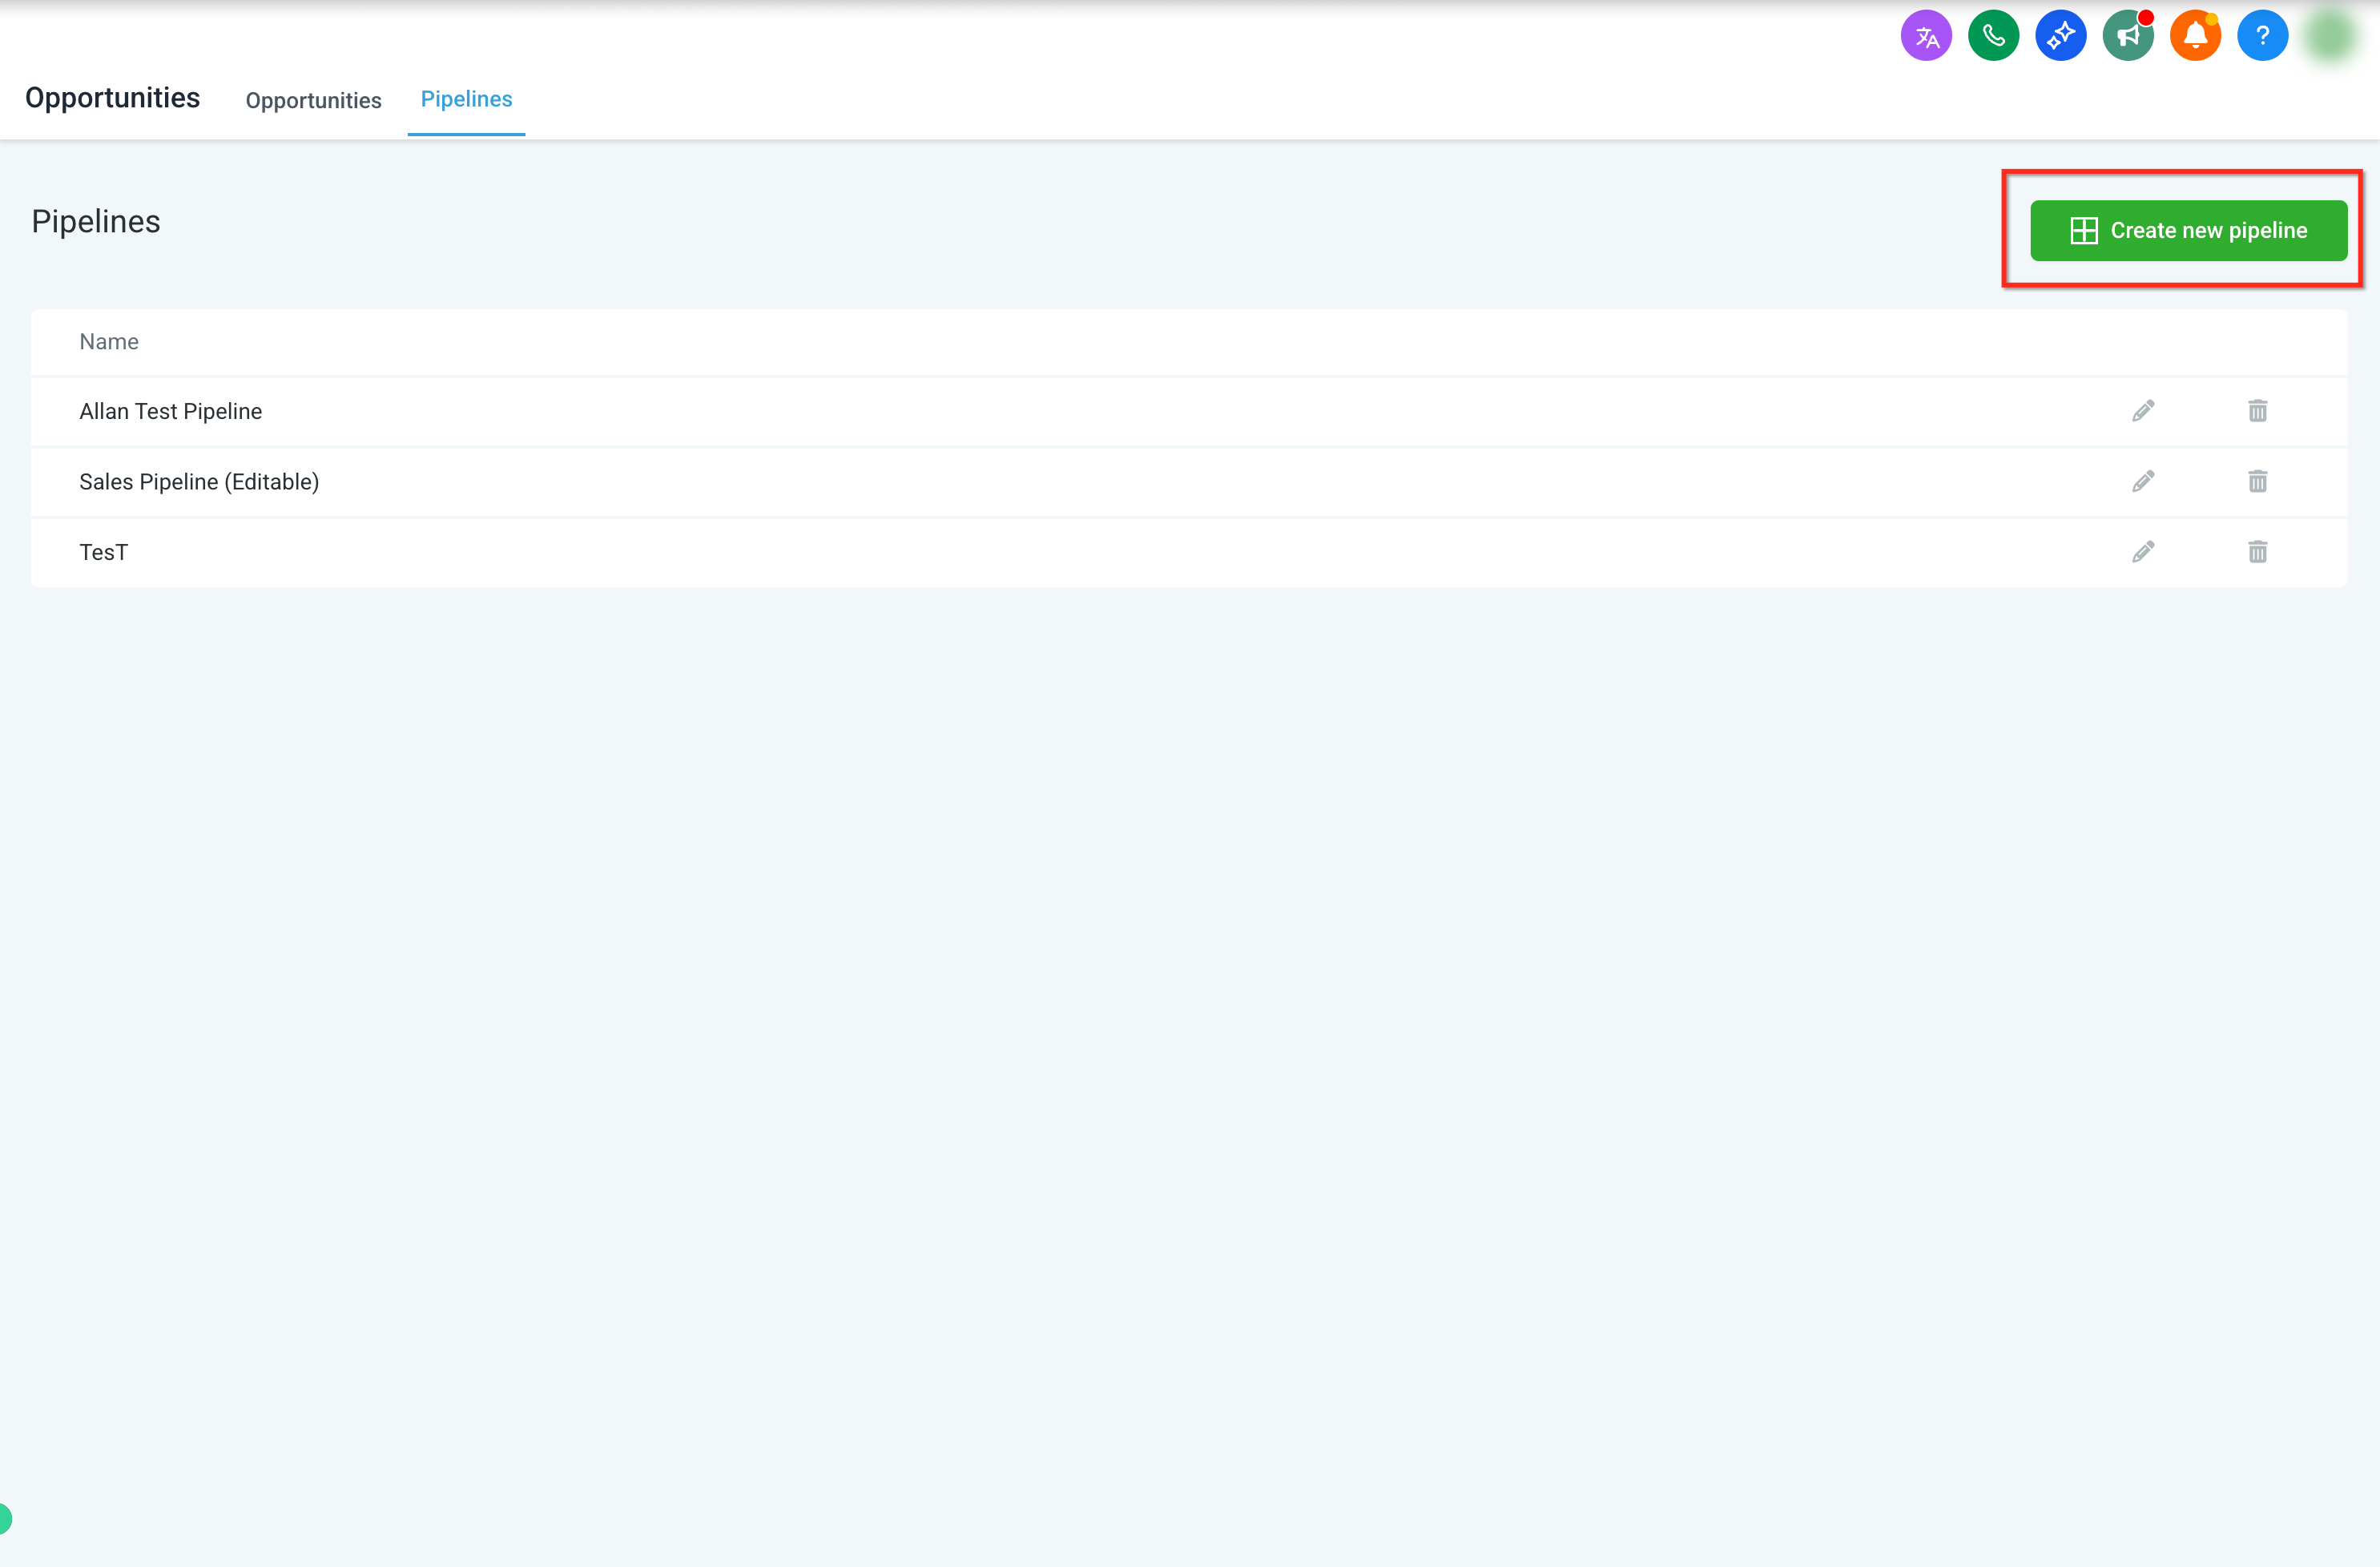
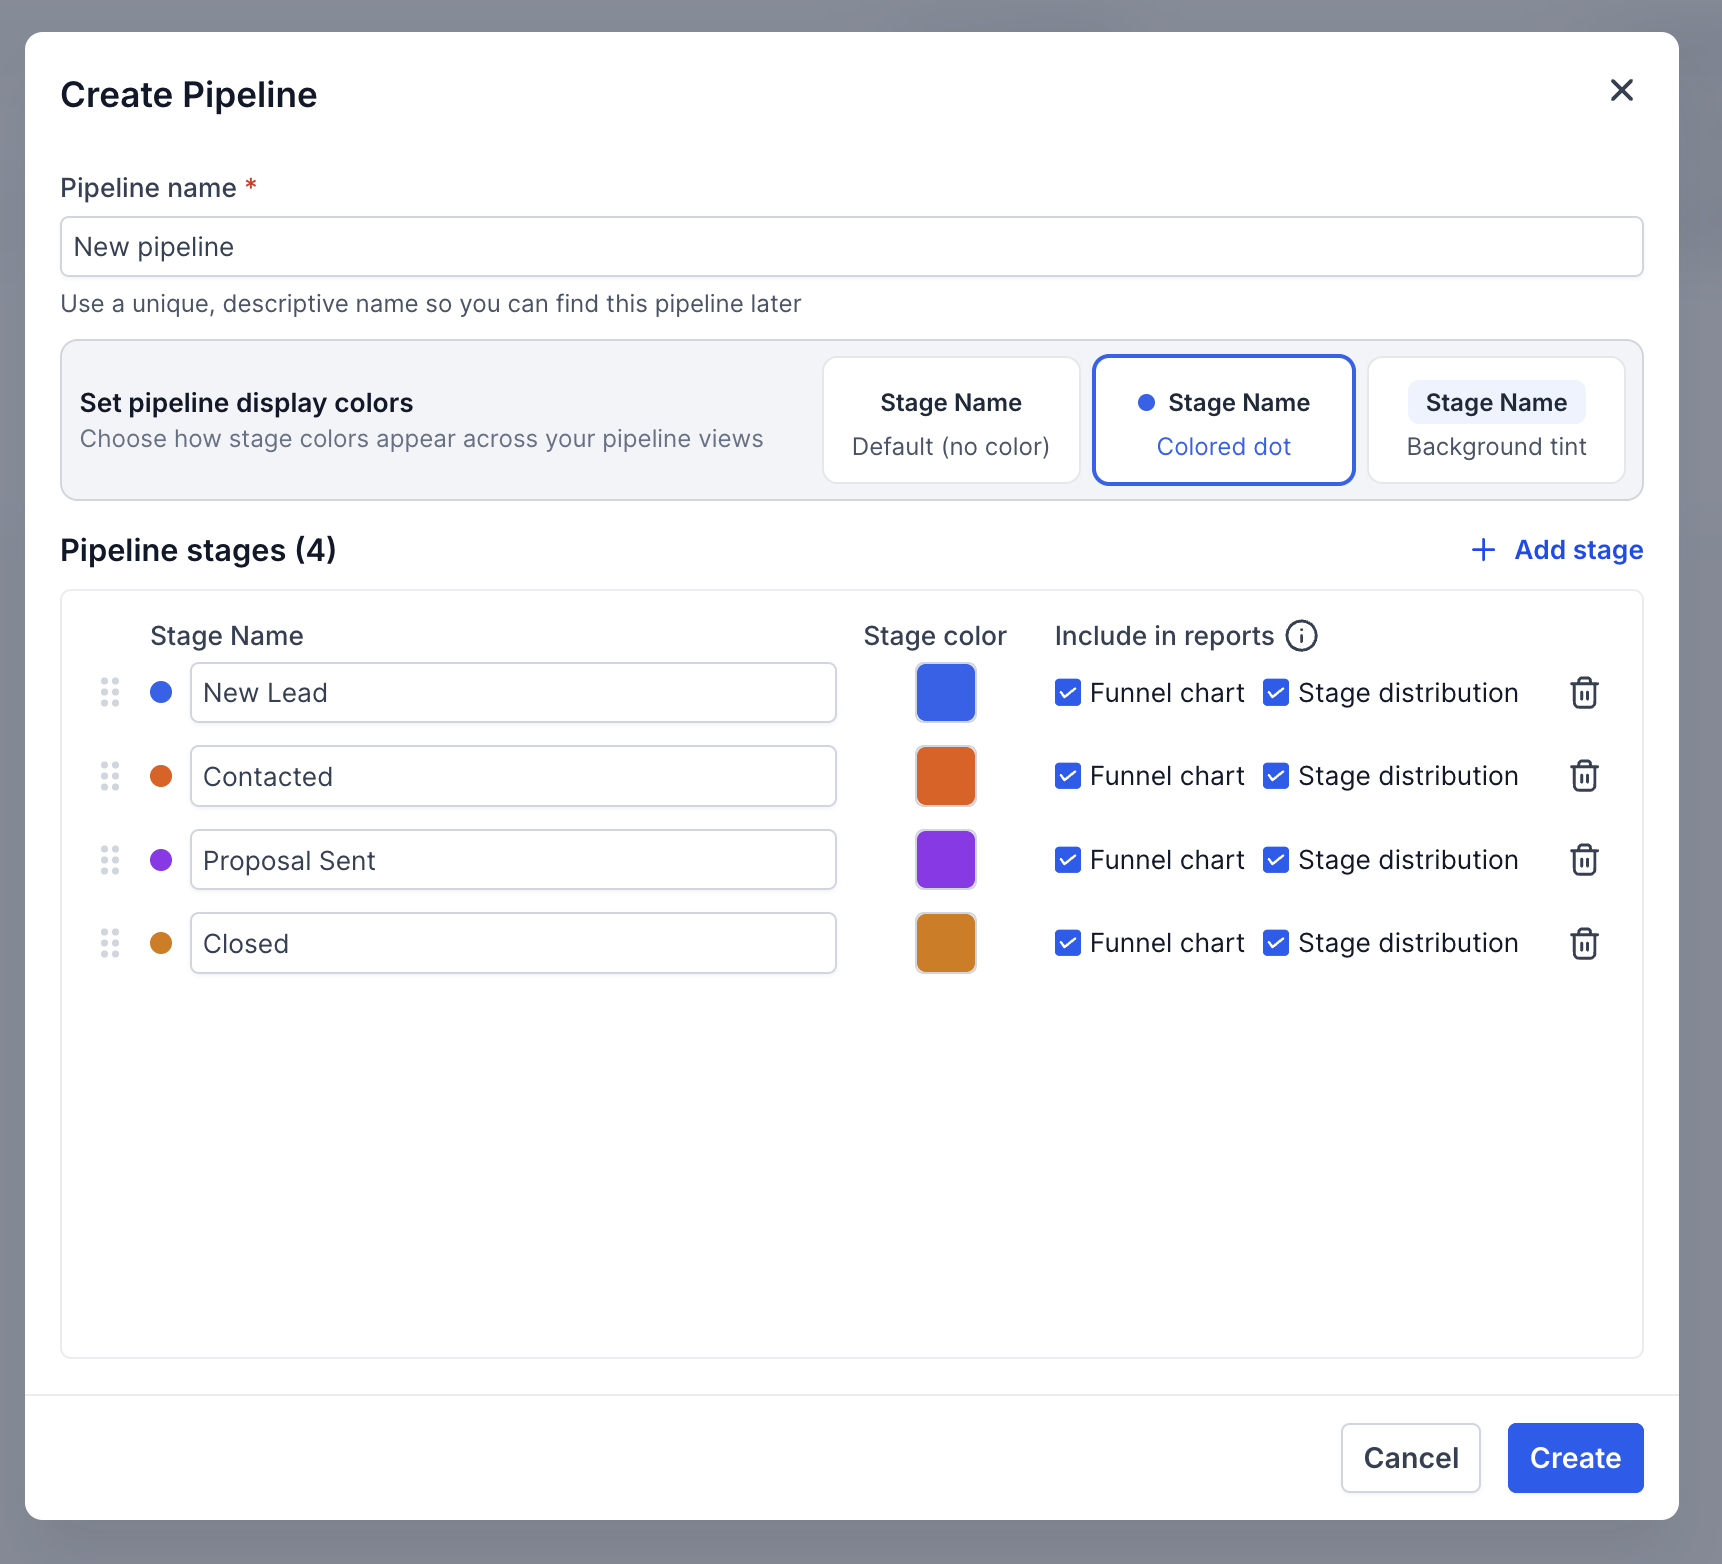
Step 2: Create a new pipeline. On the Pipelines page, click Create New Pipeline in the top-right corner.
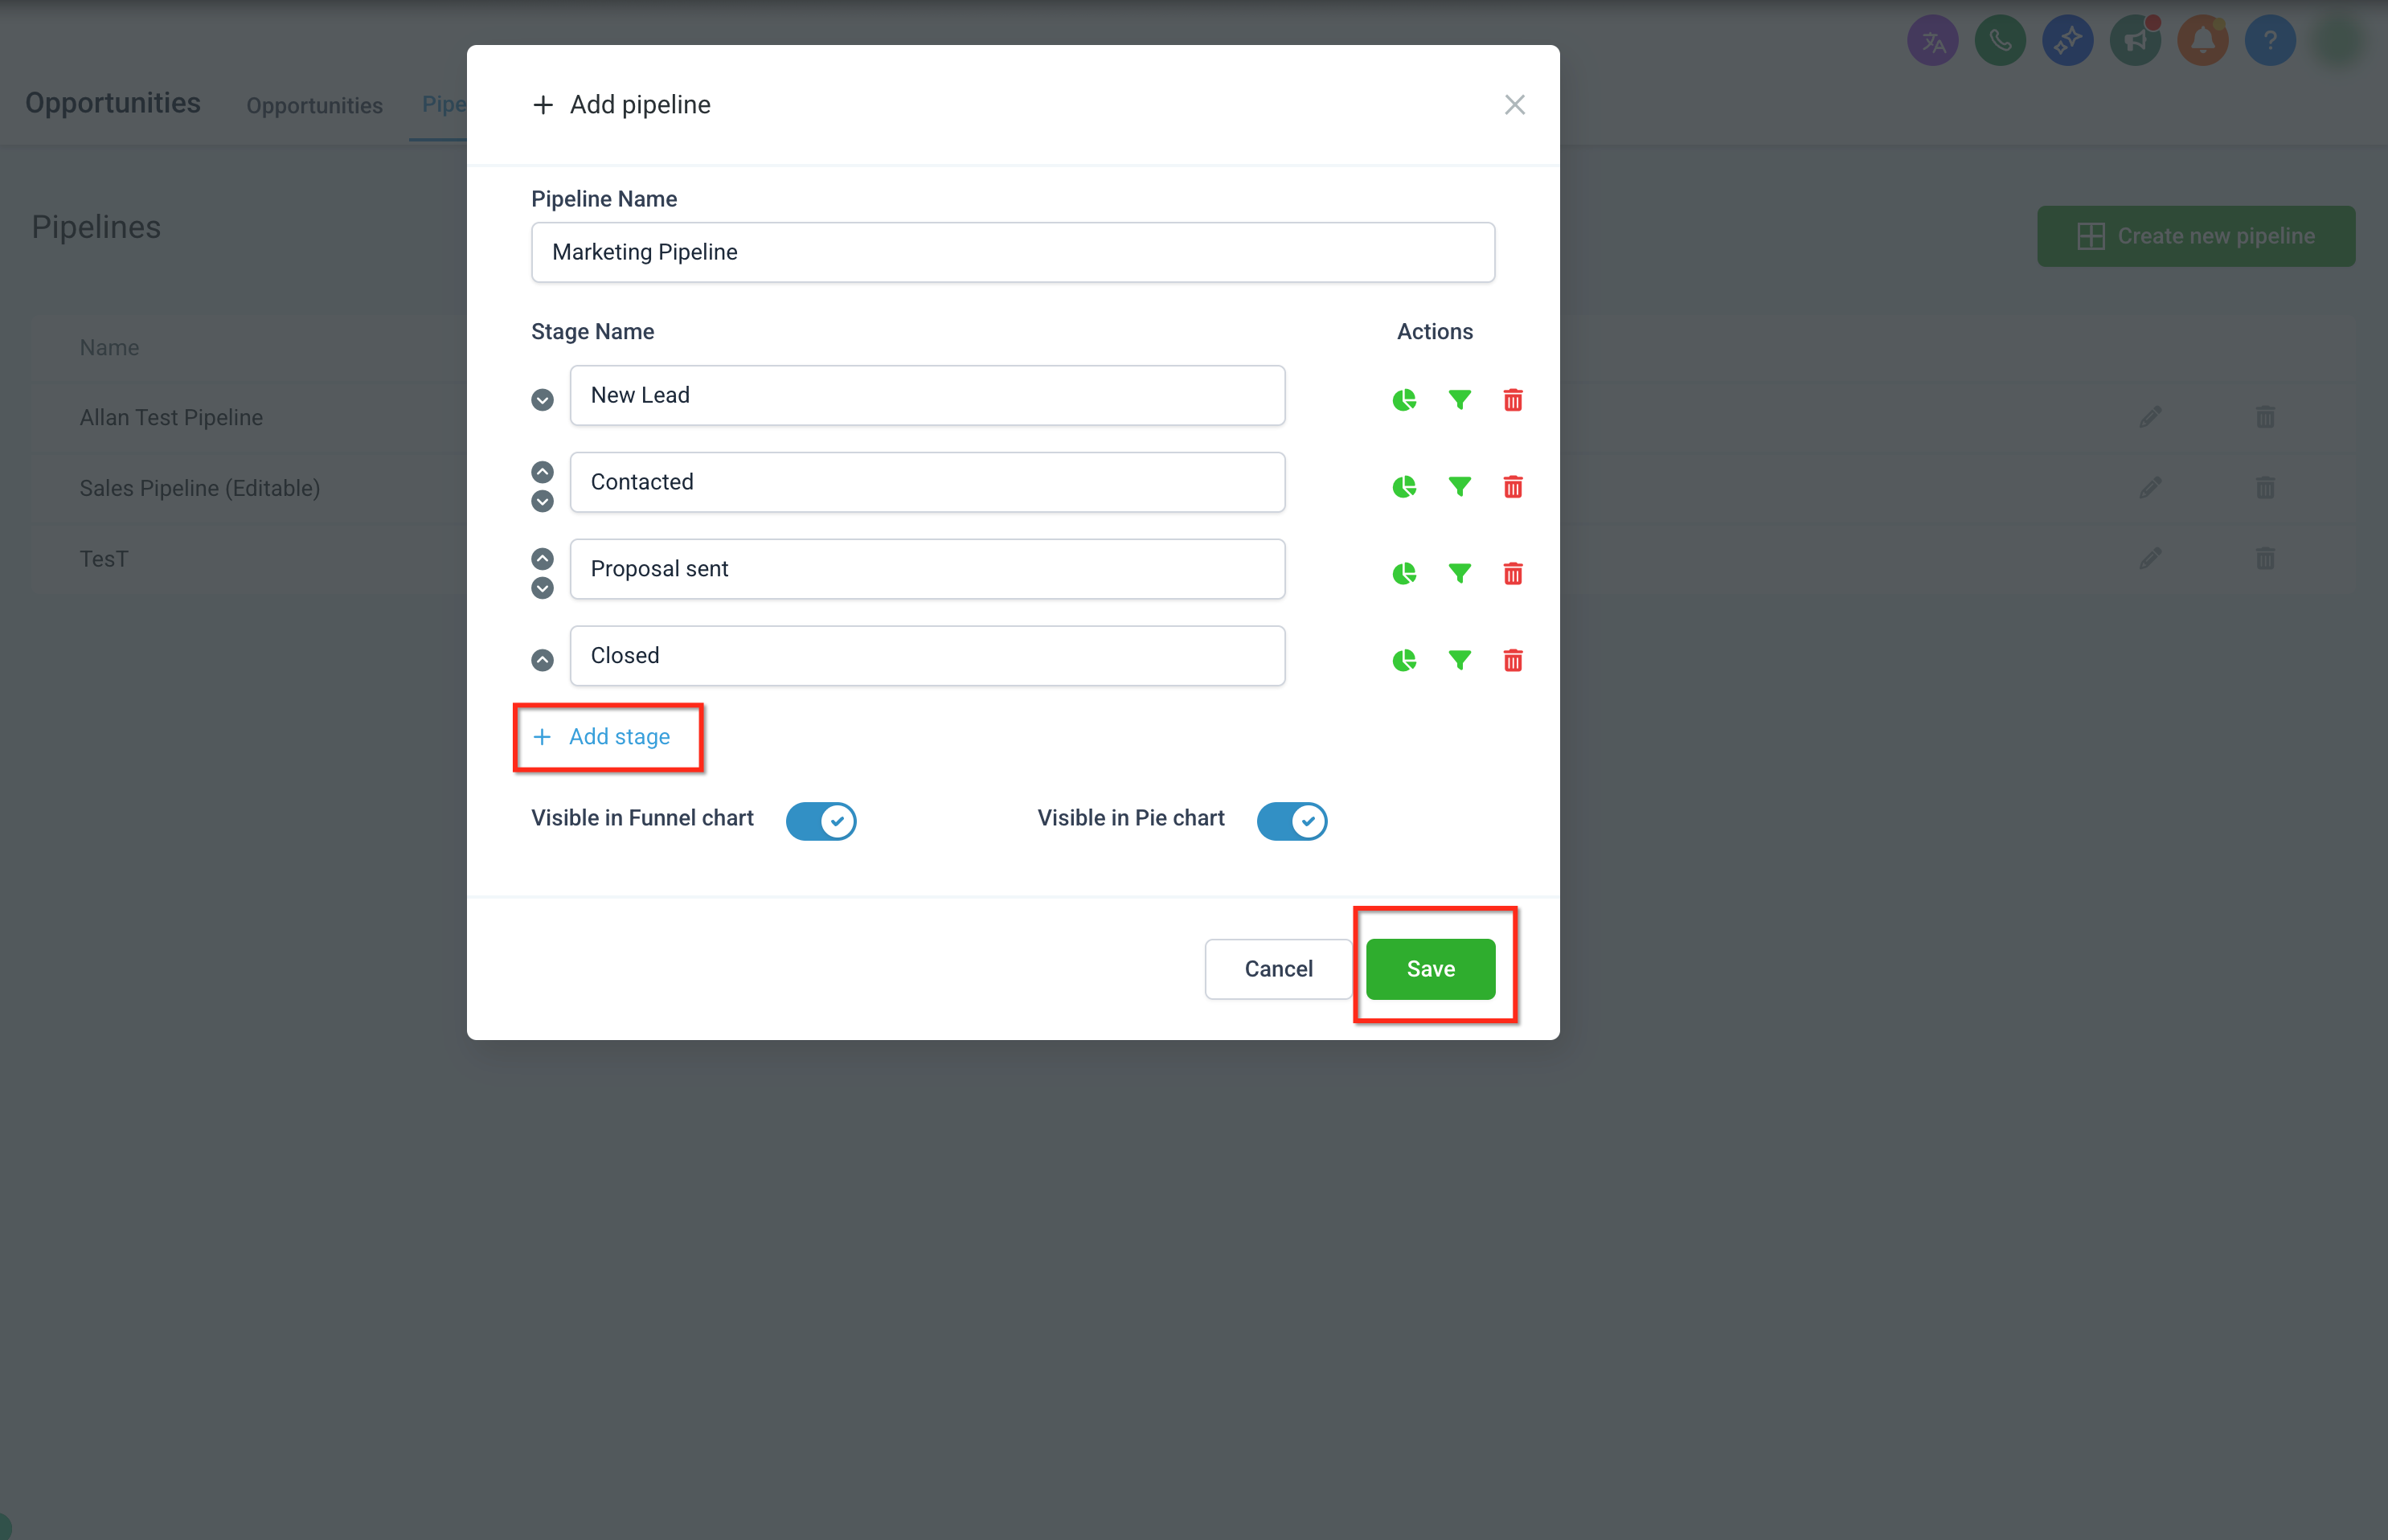
Step 3: Name the pipeline. Enter a descriptive name in the Pipeline Name field.
_
_
Pipeline names must be unique—you cannot create or update a pipeline using a name that already exists in your account.
Step 4: Add the first stage. Enter a Stage Name to define the first stage of your pipeline.
Step 5: Configure stage reporting visibility. Use the Pie Chart and Funnel Chart icons next to the stage to control whether it appears in each report:
Visible in Funnel Chart displays the stage in funnel views, which show stage-by-stage progression.
Visible in Pie Chart includes the stage in pie views, which show how opportunities are distributed across stages.
Step 6: Add more stages. Click Add Stage to include additional stages, and repeat until the full flow is defined. If you add a stage you don't need, use the delete (trash) icon to remove it.
Step 7: Save your pipeline. Click Save to finalize and store the new pipeline.
Won and Lost stages are created automatically for every pipeline, so you do not need to add them manually. Stage names must be unique within the pipeline.
Each pipeline is made up of stages that represent key steps in your process. After creating a pipeline, open it to define and refine those stages.
_
_
From the pipeline management page you can view existing pipelines, create new ones, and edit, delete, or restructure any pipeline. Selecting a pipeline opens the editor where you configure its stages and settings.
_
_
From the pipeline editor you can:
Rename the pipeline
Add new stages
Reorder existing stages
Delete stages that are no longer needed
To add stages, enter a Stage Name and click Add Stage. Repeat as needed to build the full flow.
To reorder stages so they reflect the real flow of your process:
Locate the stage you want to move.
Drag it up or down, or use the up and down arrows, to change its order.
Save your changes once the stages are arranged correctly.
You can also control reporting visibility for each stage using the funnel and pie chart icons, and remove a stage using the trash icon.
_
_
Stage names must be unique within the pipeline, and Won and Lost stages are created automatically.
You can assign colors to each stage to improve visibility across your pipeline.
To set stage colors:
Open a pipeline
Go to the Stages tab
Select a color for each stage
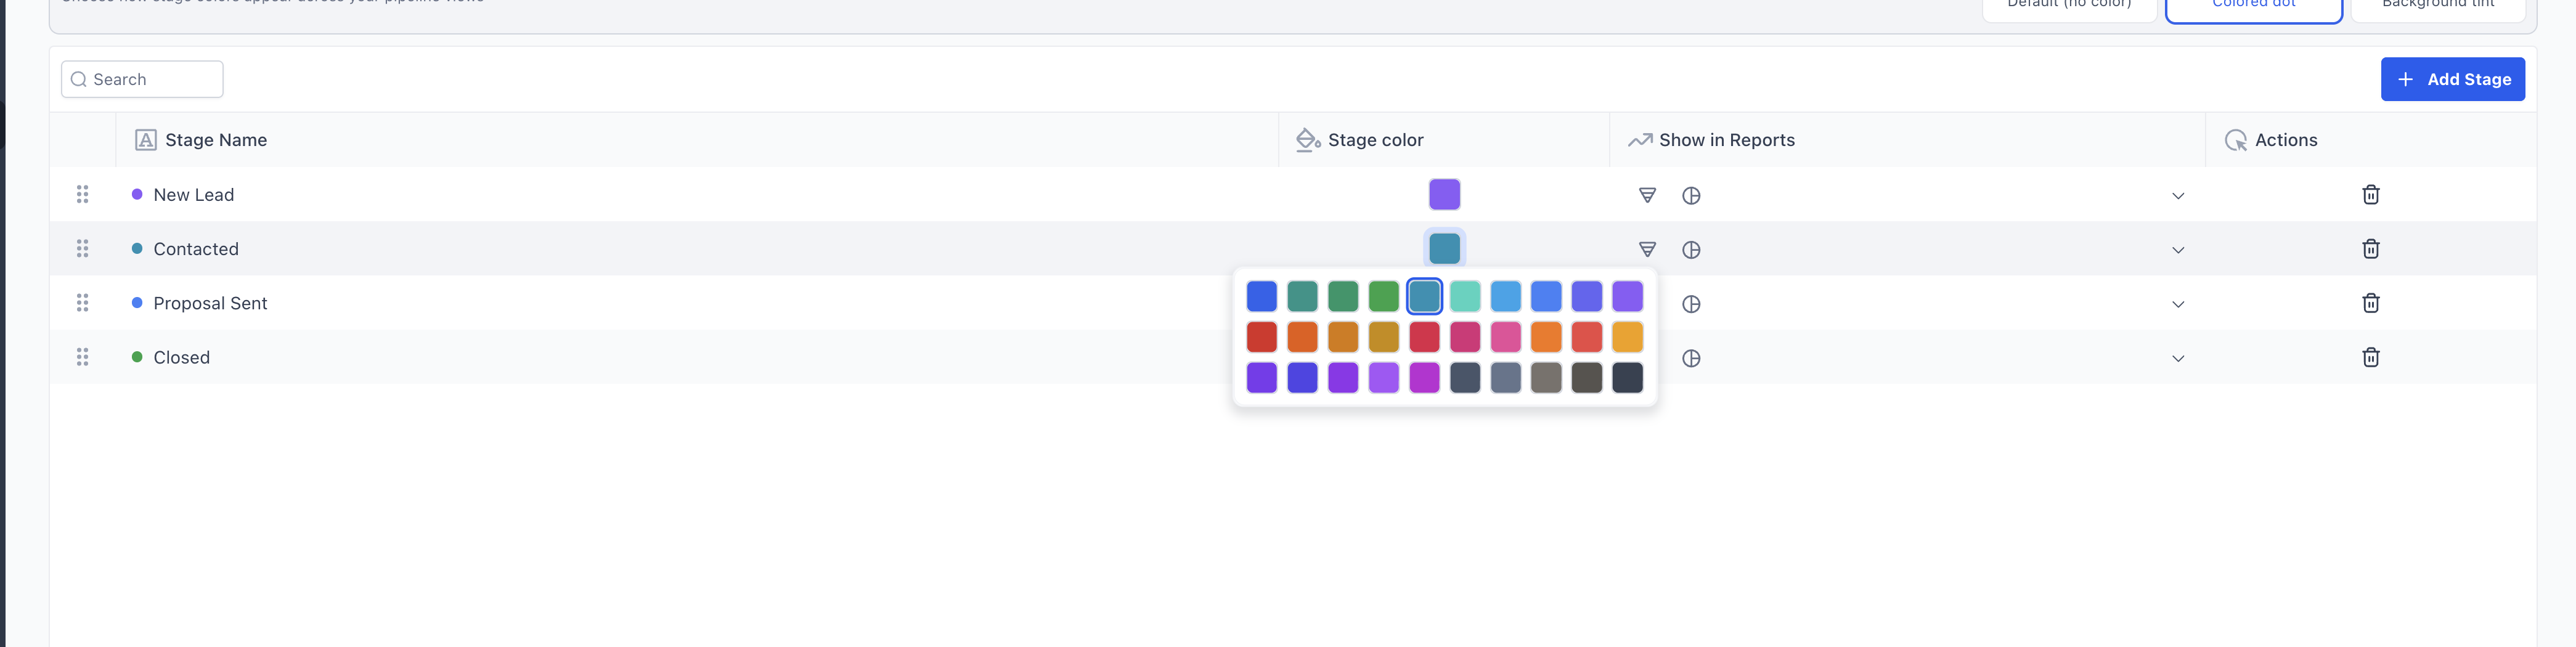
Choose how colors appear:
Default (no color)
Colored dot
Background tint
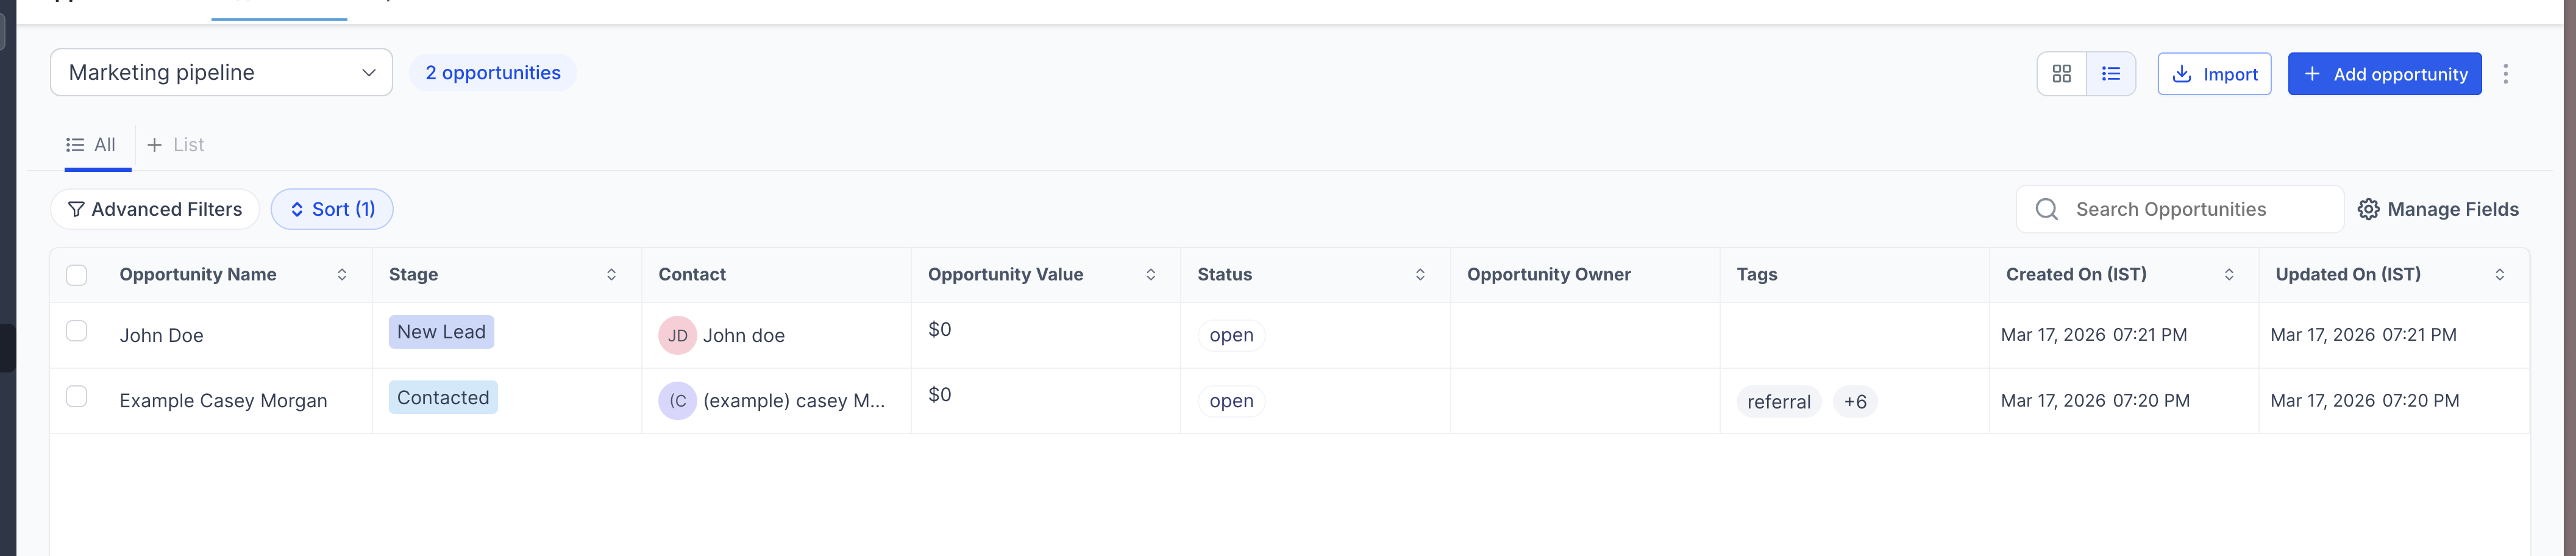
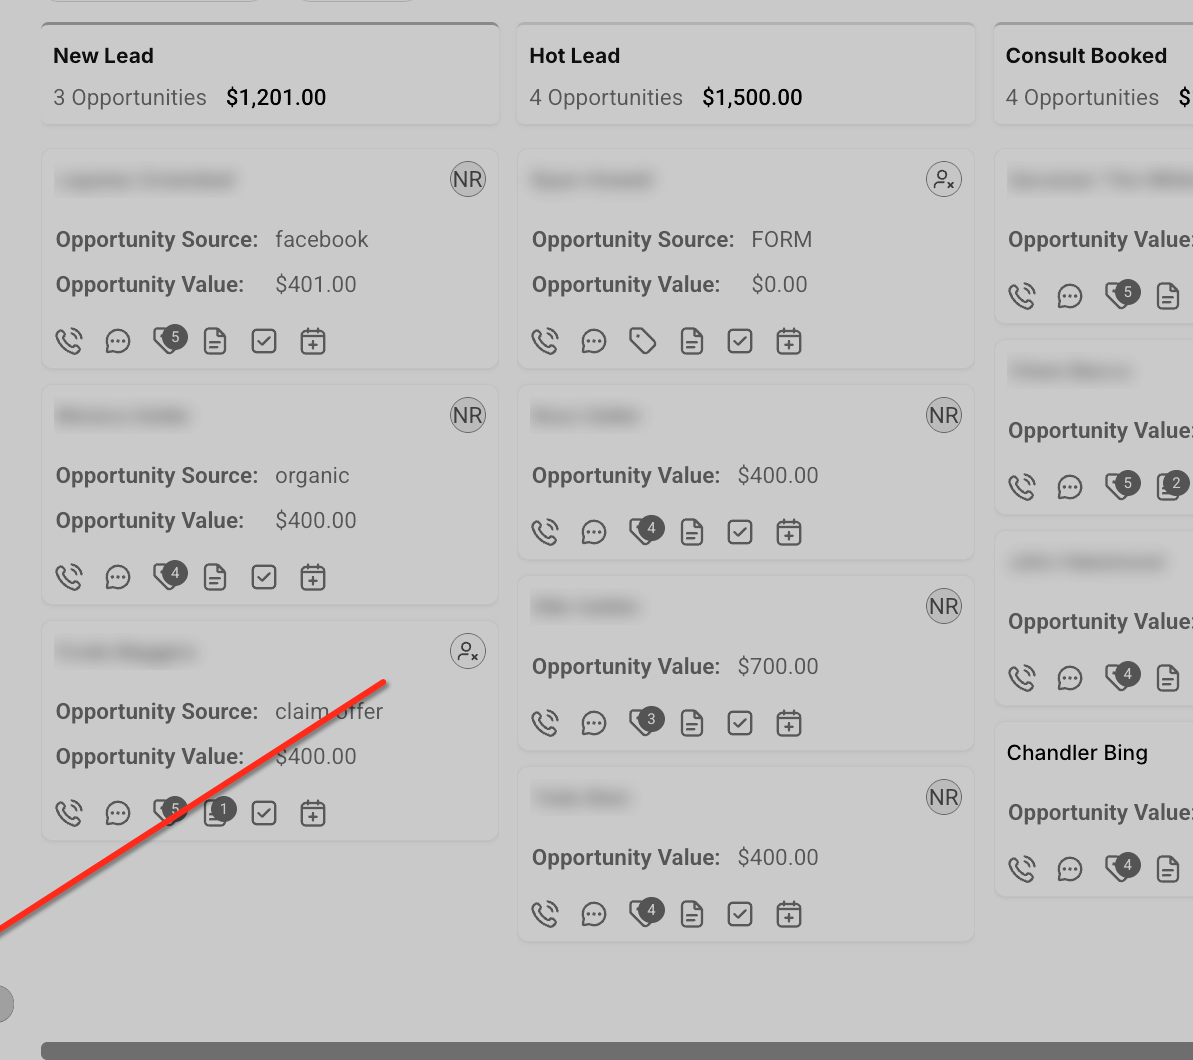
Stage colors are reflected across Kanban and List views, opportunity cards, and the contact details view.

Step 1: Open the Pipelines section. Click Opportunities in the left-hand sidebar, then select Pipelines.
Step 2: Choose the pipeline. Find the pipeline you want to edit and click the three-dots icon next to it.
Step 3: Make your changes. Rename the pipeline, add or remove stages, reorder stages, or adjust reporting visibility as needed.
Step 4: Save. Click Save to apply your changes.
You can rename a pipeline at any time, as long as the new name is unique within your account.
When you delete a stage, you can move its existing opportunities to another stage instead of losing them.
Step 1: Open the pipeline you want to edit.
Step 2: Delete the stage. Click the delete icon next to the stage you want to remove.
Step 3: Choose a destination. Select a destination stage for any existing opportunities.
Step 4: Confirm. Confirm the deletion. All opportunities from the deleted stage are automatically moved to the stage you selected.
You can control whether pipelines and stages appear in dashboards and reports:
Enable or disable pipeline visibility in funnel charts and pie charts.
Configure stage-level visibility using the icons next to each stage.
These settings determine how pipeline data appears in your opportunity dashboards. Funnel charts help you see stage progression, while pie charts show the distribution of opportunities across stages—both make it easier to identify where opportunities tend to slow down.
Only account admins have permission to delete and restore pipelines. Deleting a pipeline removes it and all associated stages and opportunities, but the data is retained and can be restored for up to 60 days.
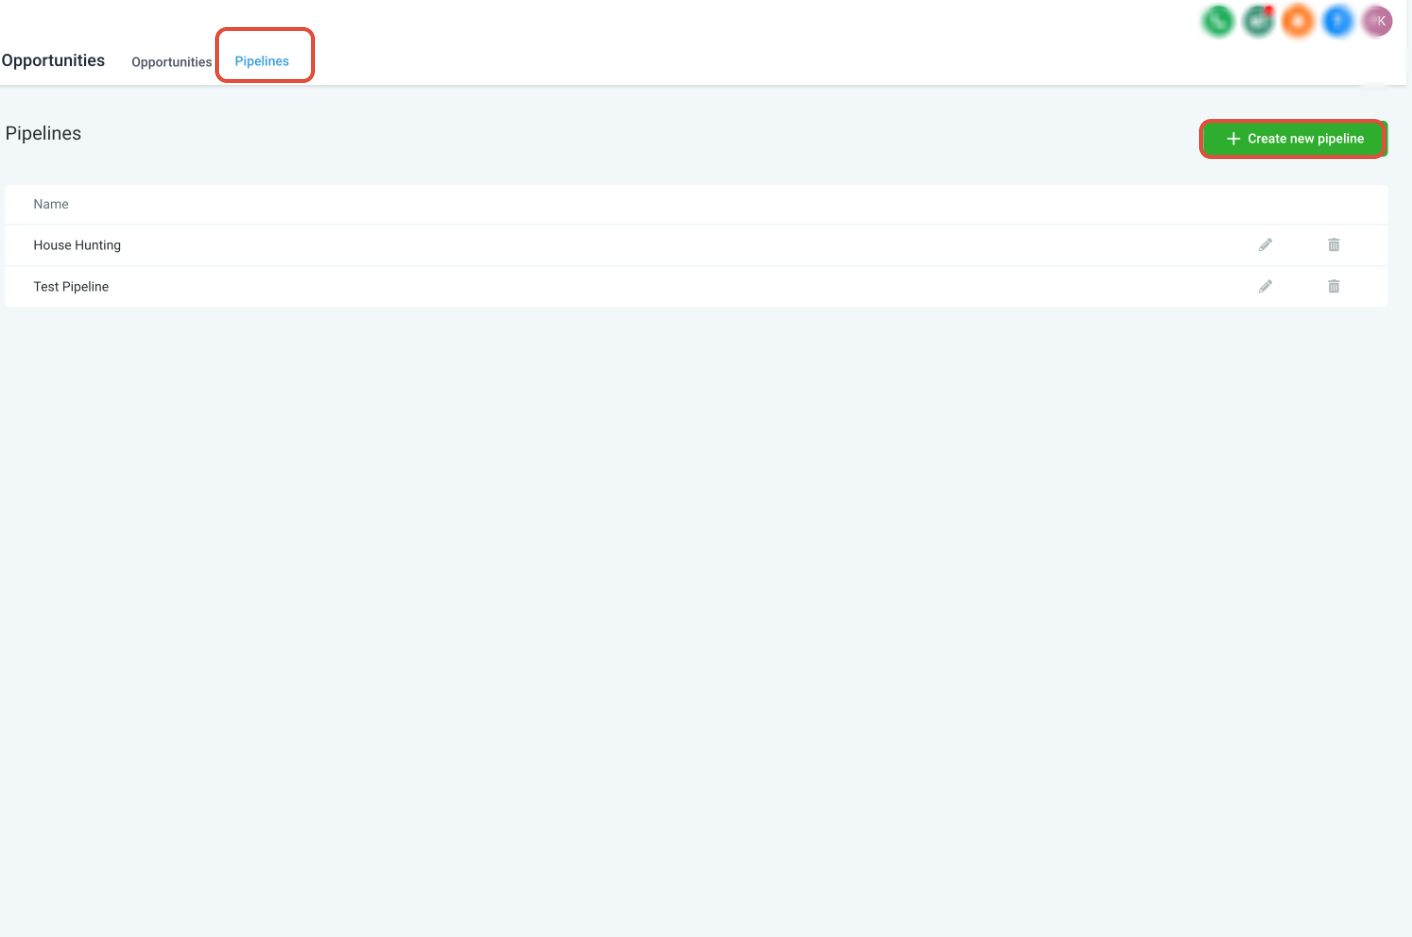
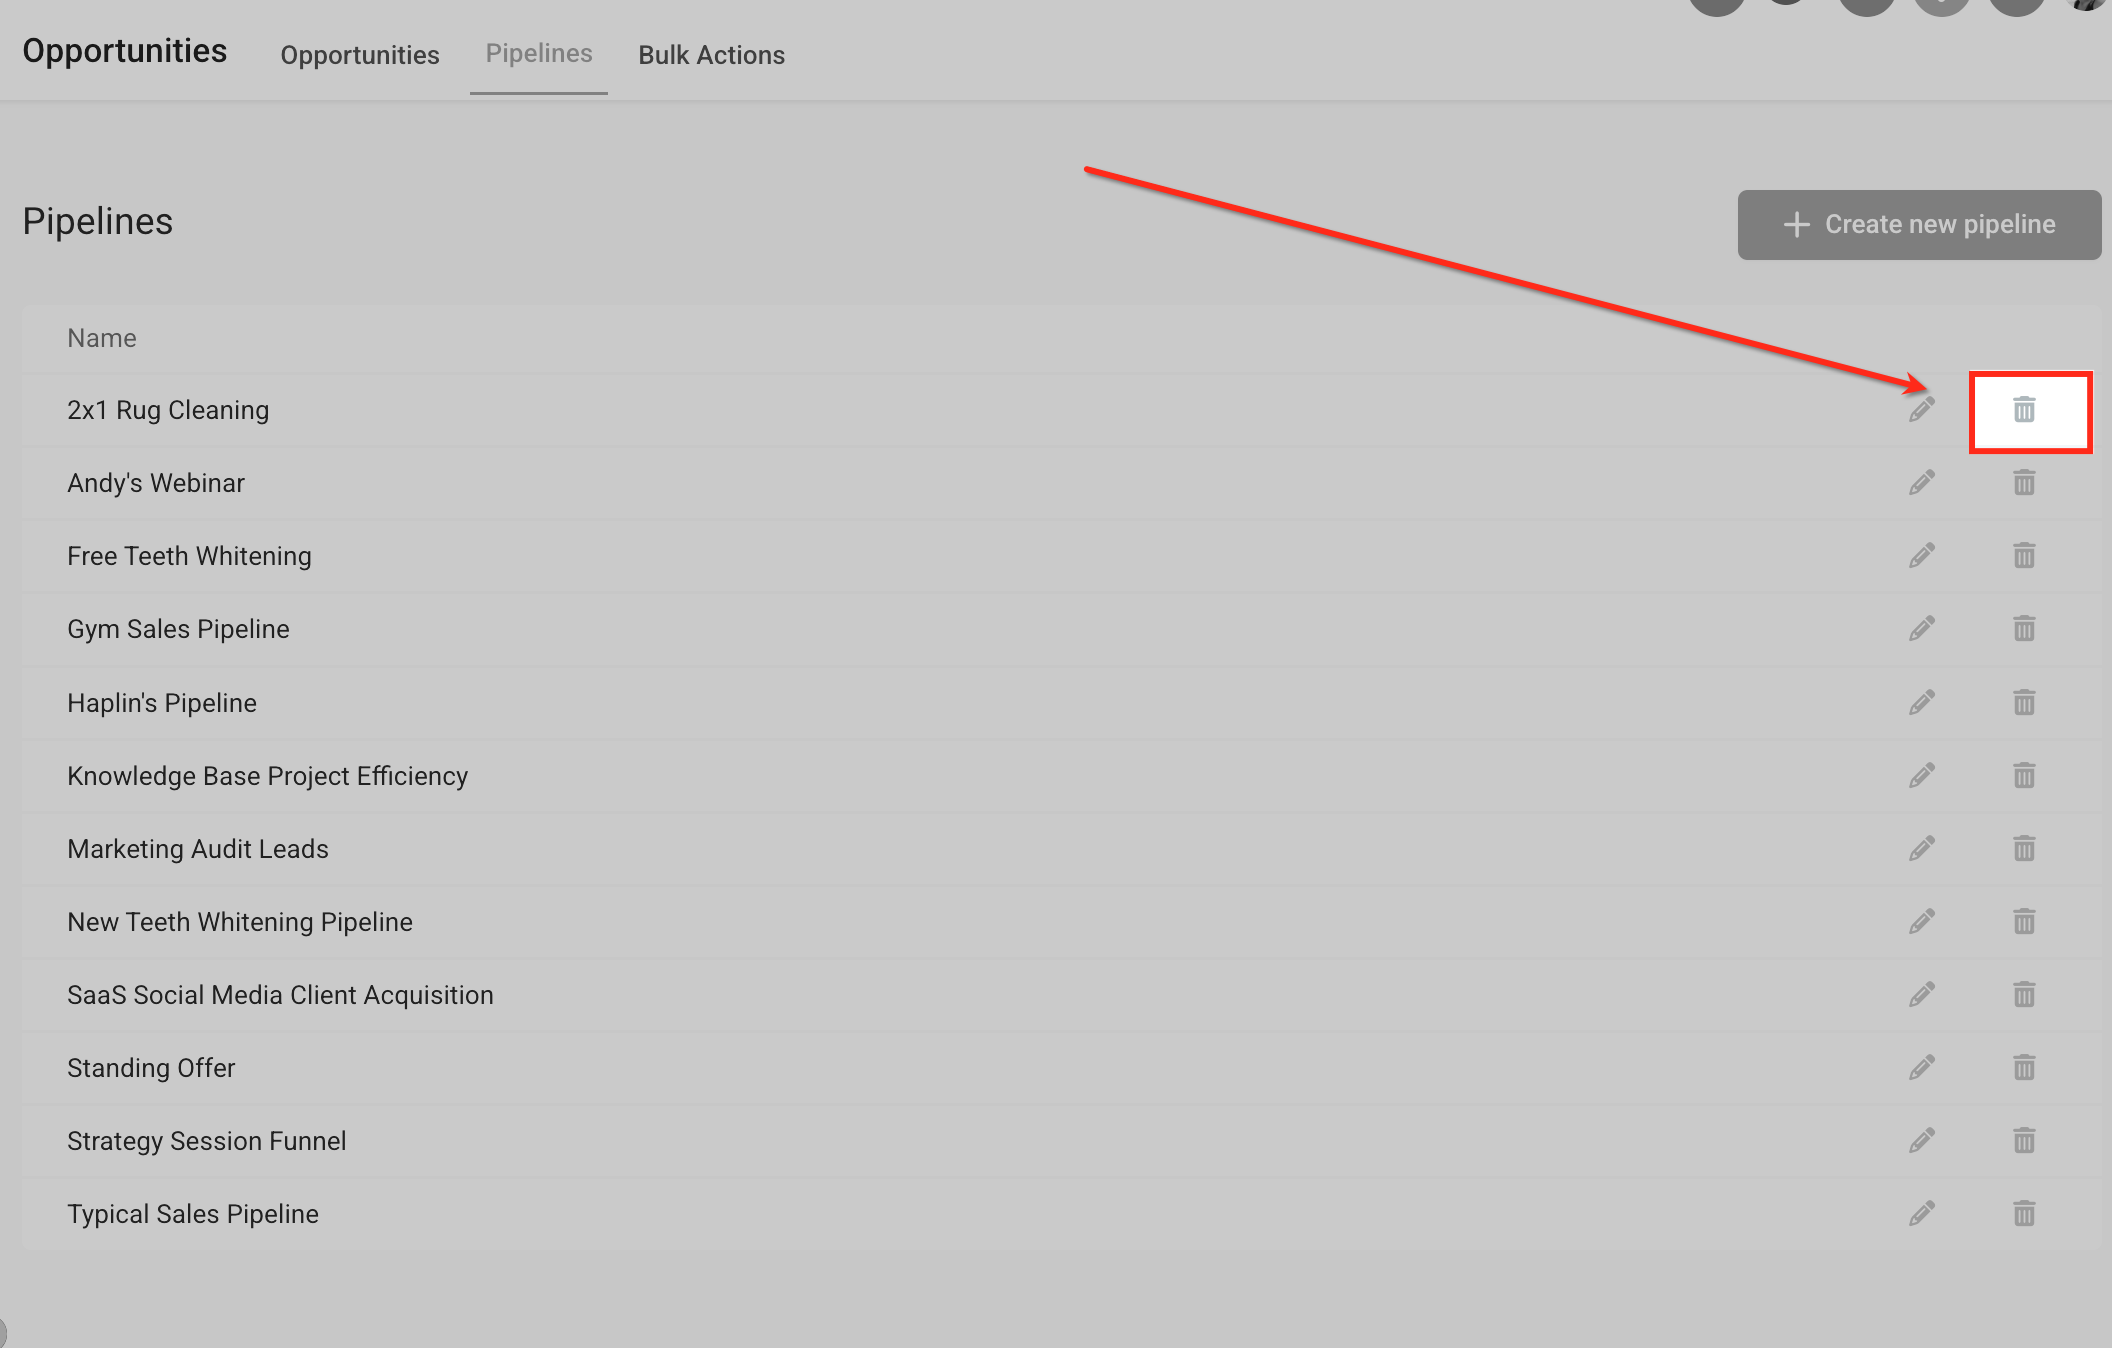
Step 1: Open the Pipelines tab. From the left-hand sidebar, go to Opportunities, then click the Pipelines tab to see every pipeline in your account.
_
_
Step 2: Delete the pipeline. Click the trash icon next to the pipeline you want to remove. A confirmation prompt appears—once confirmed, the pipeline and all associated stages and opportunities are removed.
_
_
If you delete a pipeline by mistake, you can restore it—along with its stages and opportunities—within 60 days using the Audit Logs.
Step 1: Go to Settings. Navigate to the Settings section from the left-hand sidebar to access the Audit Logs.
_
_
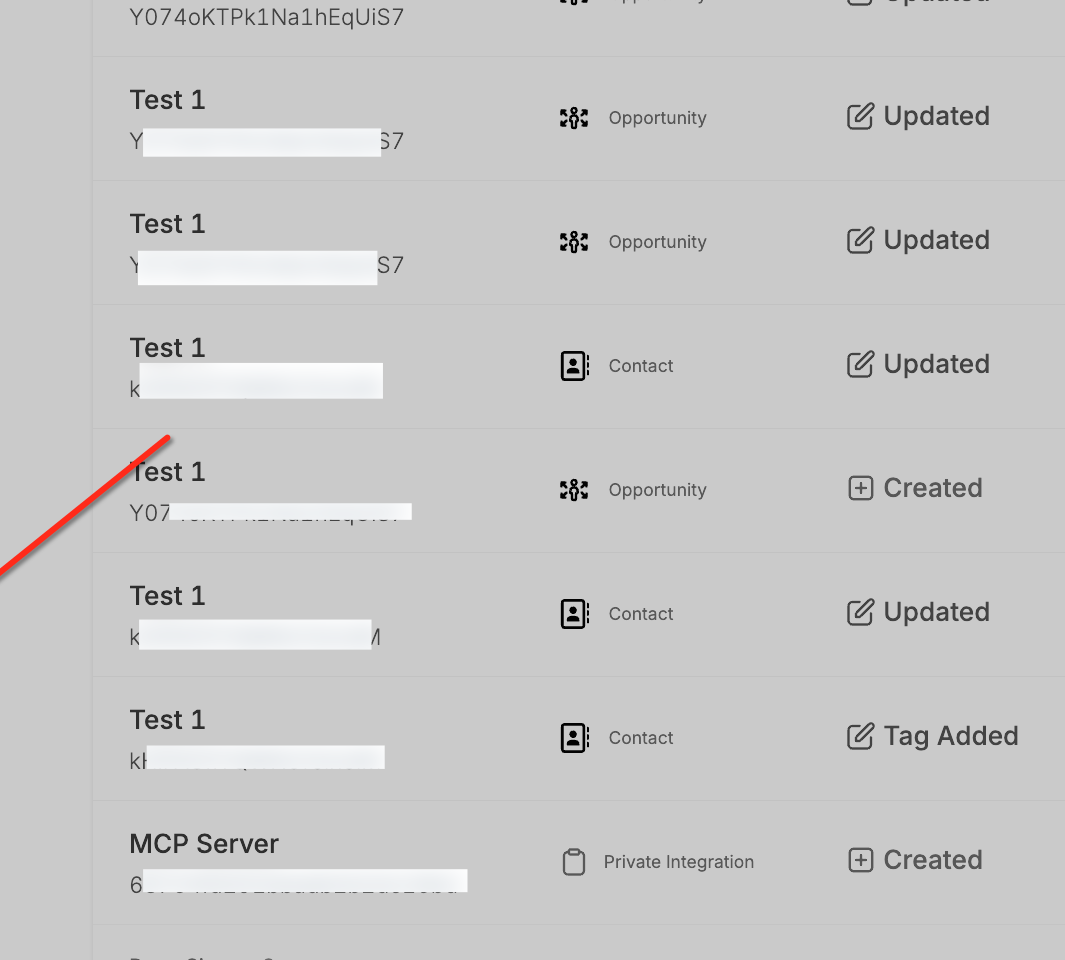
Step 2: Open the Audit Logs. In the Settings panel, click Audit Logs to view all recorded user activity, including deletions.
_
_
Step 3: Restore the pipeline. Locate the deleted pipeline in the Audit Logs, click the ellipsis (three dots) on the right side of the entry, and choose Restore. The pipeline, its stages, and all associated opportunities are returned to your account.
_
_
Restoring a pipeline restores the whole pipeline at once—you cannot restore just one opportunity from a deleted pipeline. After 60 days, deleted pipelines are no longer recoverable.
Well-structured pipelines make opportunity tracking much easier. Keep these guidelines in mind when designing yours.
Mirror your real client journey. Stages should match how patients actually move through your practice, from first inquiry to completed treatment.
Keep pipelines simple. Avoid unnecessary stages. A shorter pipeline is easier to manage and keeps your team focused on the key actions.
Use clear stage names. Each name should describe the action or milestone plainly, so anyone on your team understands it at a glance.
Review pipelines regularly. Business processes evolve—periodically check that your pipelines still match your current workflow.
Use data to improve processes. Review performance across your stages to spot bottlenecks and opportunities to increase conversions.
Q: What is a pipeline used for?
Pipelines organize opportunities into structured stages so your team can track progress and manage leads throughout a sales or service process.
Q: Can I create multiple pipelines?
Yes. You can create multiple pipelines to represent different workflows, services, or departments.
Q: Do I need to create Won and Lost stages manually?
No. Aesthetix CRM automatically adds Won and Lost stages to every pipeline.
Q: Can I rename a pipeline after creating it?
Yes, as long as the updated name is unique within your account.
Q: Can stages be reordered after creating a pipeline?
Yes. Stages can be rearranged at any time by dragging them into the desired order within the pipeline editor.
Q: What happens to opportunities if I delete a stage?
You can move all existing opportunities to another stage during deletion, so no data is lost.
Q: Do pipelines affect reporting and analytics?
Yes. Pipeline stages are used in reports and visual charts to track opportunity movement and performance.
Q: How long are deleted pipelines recoverable?
Up to 60 days from the time of deletion. After that, the data is no longer recoverable.
Q: Who can delete or restore a pipeline?
Only account admins have permission to delete and restore pipelines.
Q: Is there a log of who deleted or restored a pipeline?
Yes. The Audit Logs track all user actions, including who performed each delete or restore operation.
If you run into issues while creating or managing pipelines:
Confirm that you have permission to edit opportunity settings.
Verify that the pipeline contains the stages required for your workflow.
Refresh the page after saving to ensure your changes appear correctly.
If problems continue, contact the Aesthetix CRM support team with details about the pipeline configuration you were trying to update.
