Your Business Profile is the foundation of your Aesthetix CRM account. It is where you assign your company's core data and configure settings that apply across your entire account. Spending a few minutes here is critical to how your account operates, because the details you enter feed custom fields, compliance registrations, messaging, and more. This guide walks you through every section of your Business Profile: general information, your physical address, and your business (legal) information.
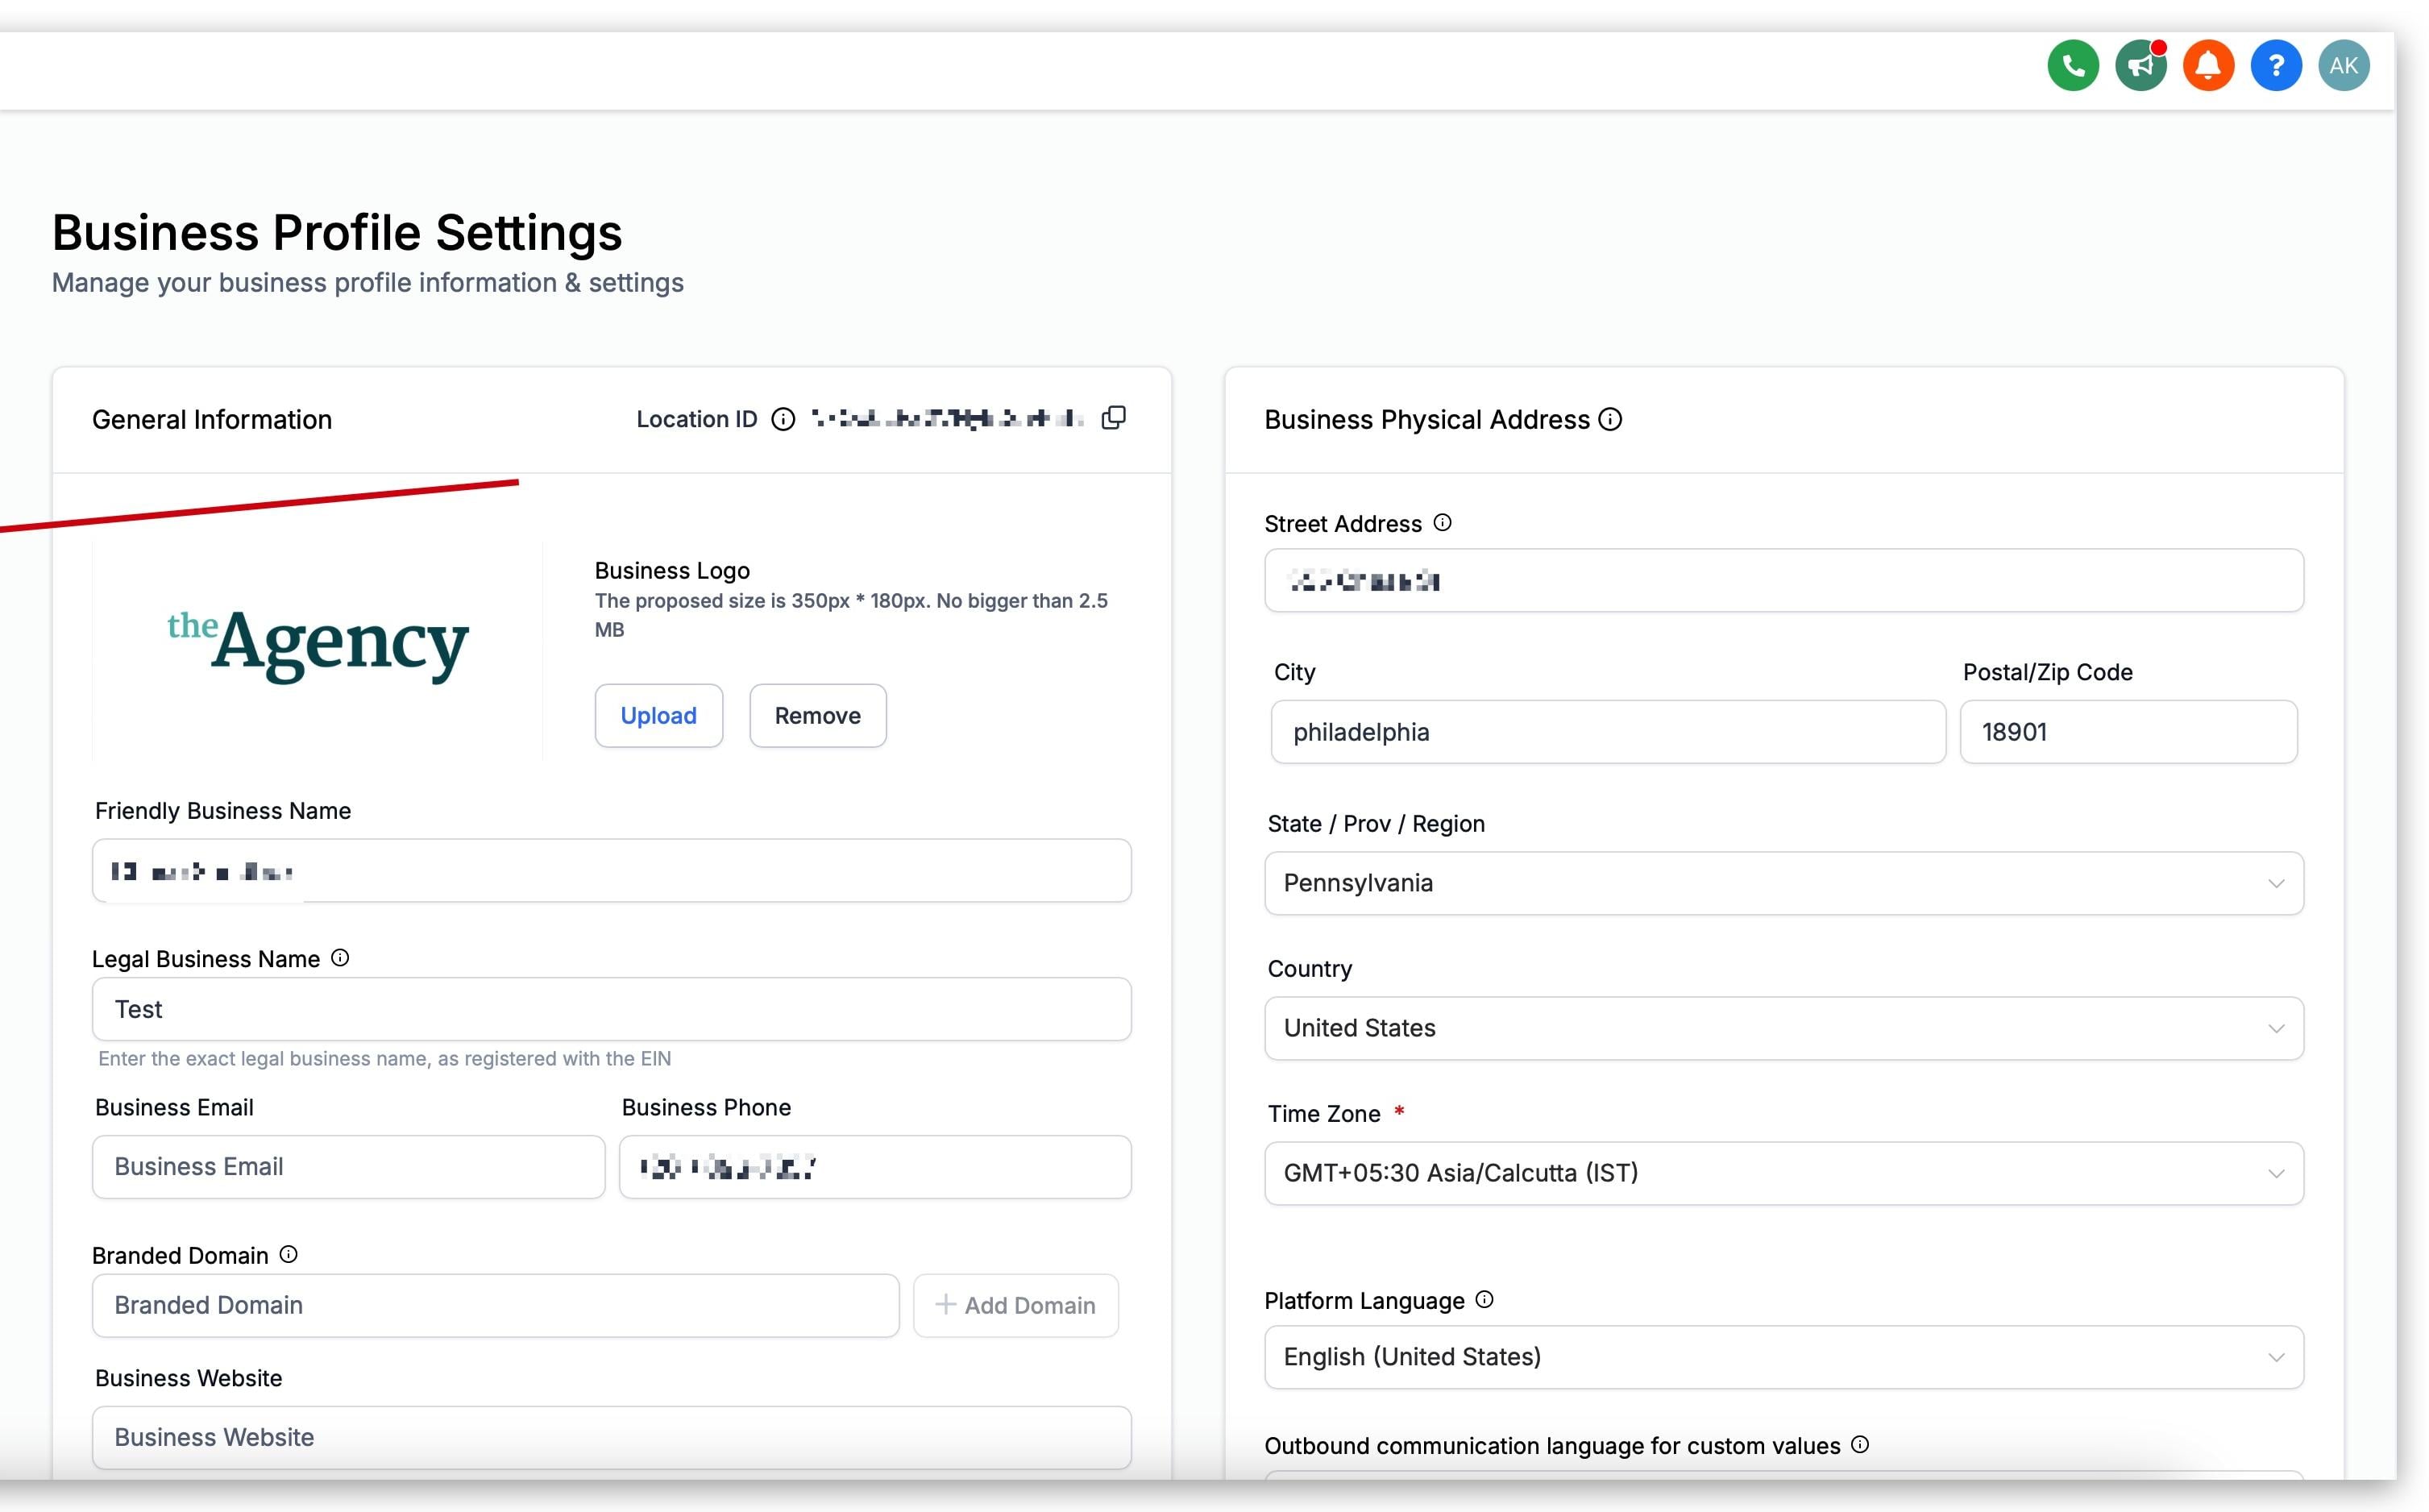
To open your Business Profile, click Settings in the left-hand navigation. Business Profile is the first item in the settings menu and the page you land on by default, so you will see it as soon as you open Settings.
Navigate to: Settings > Business Profile
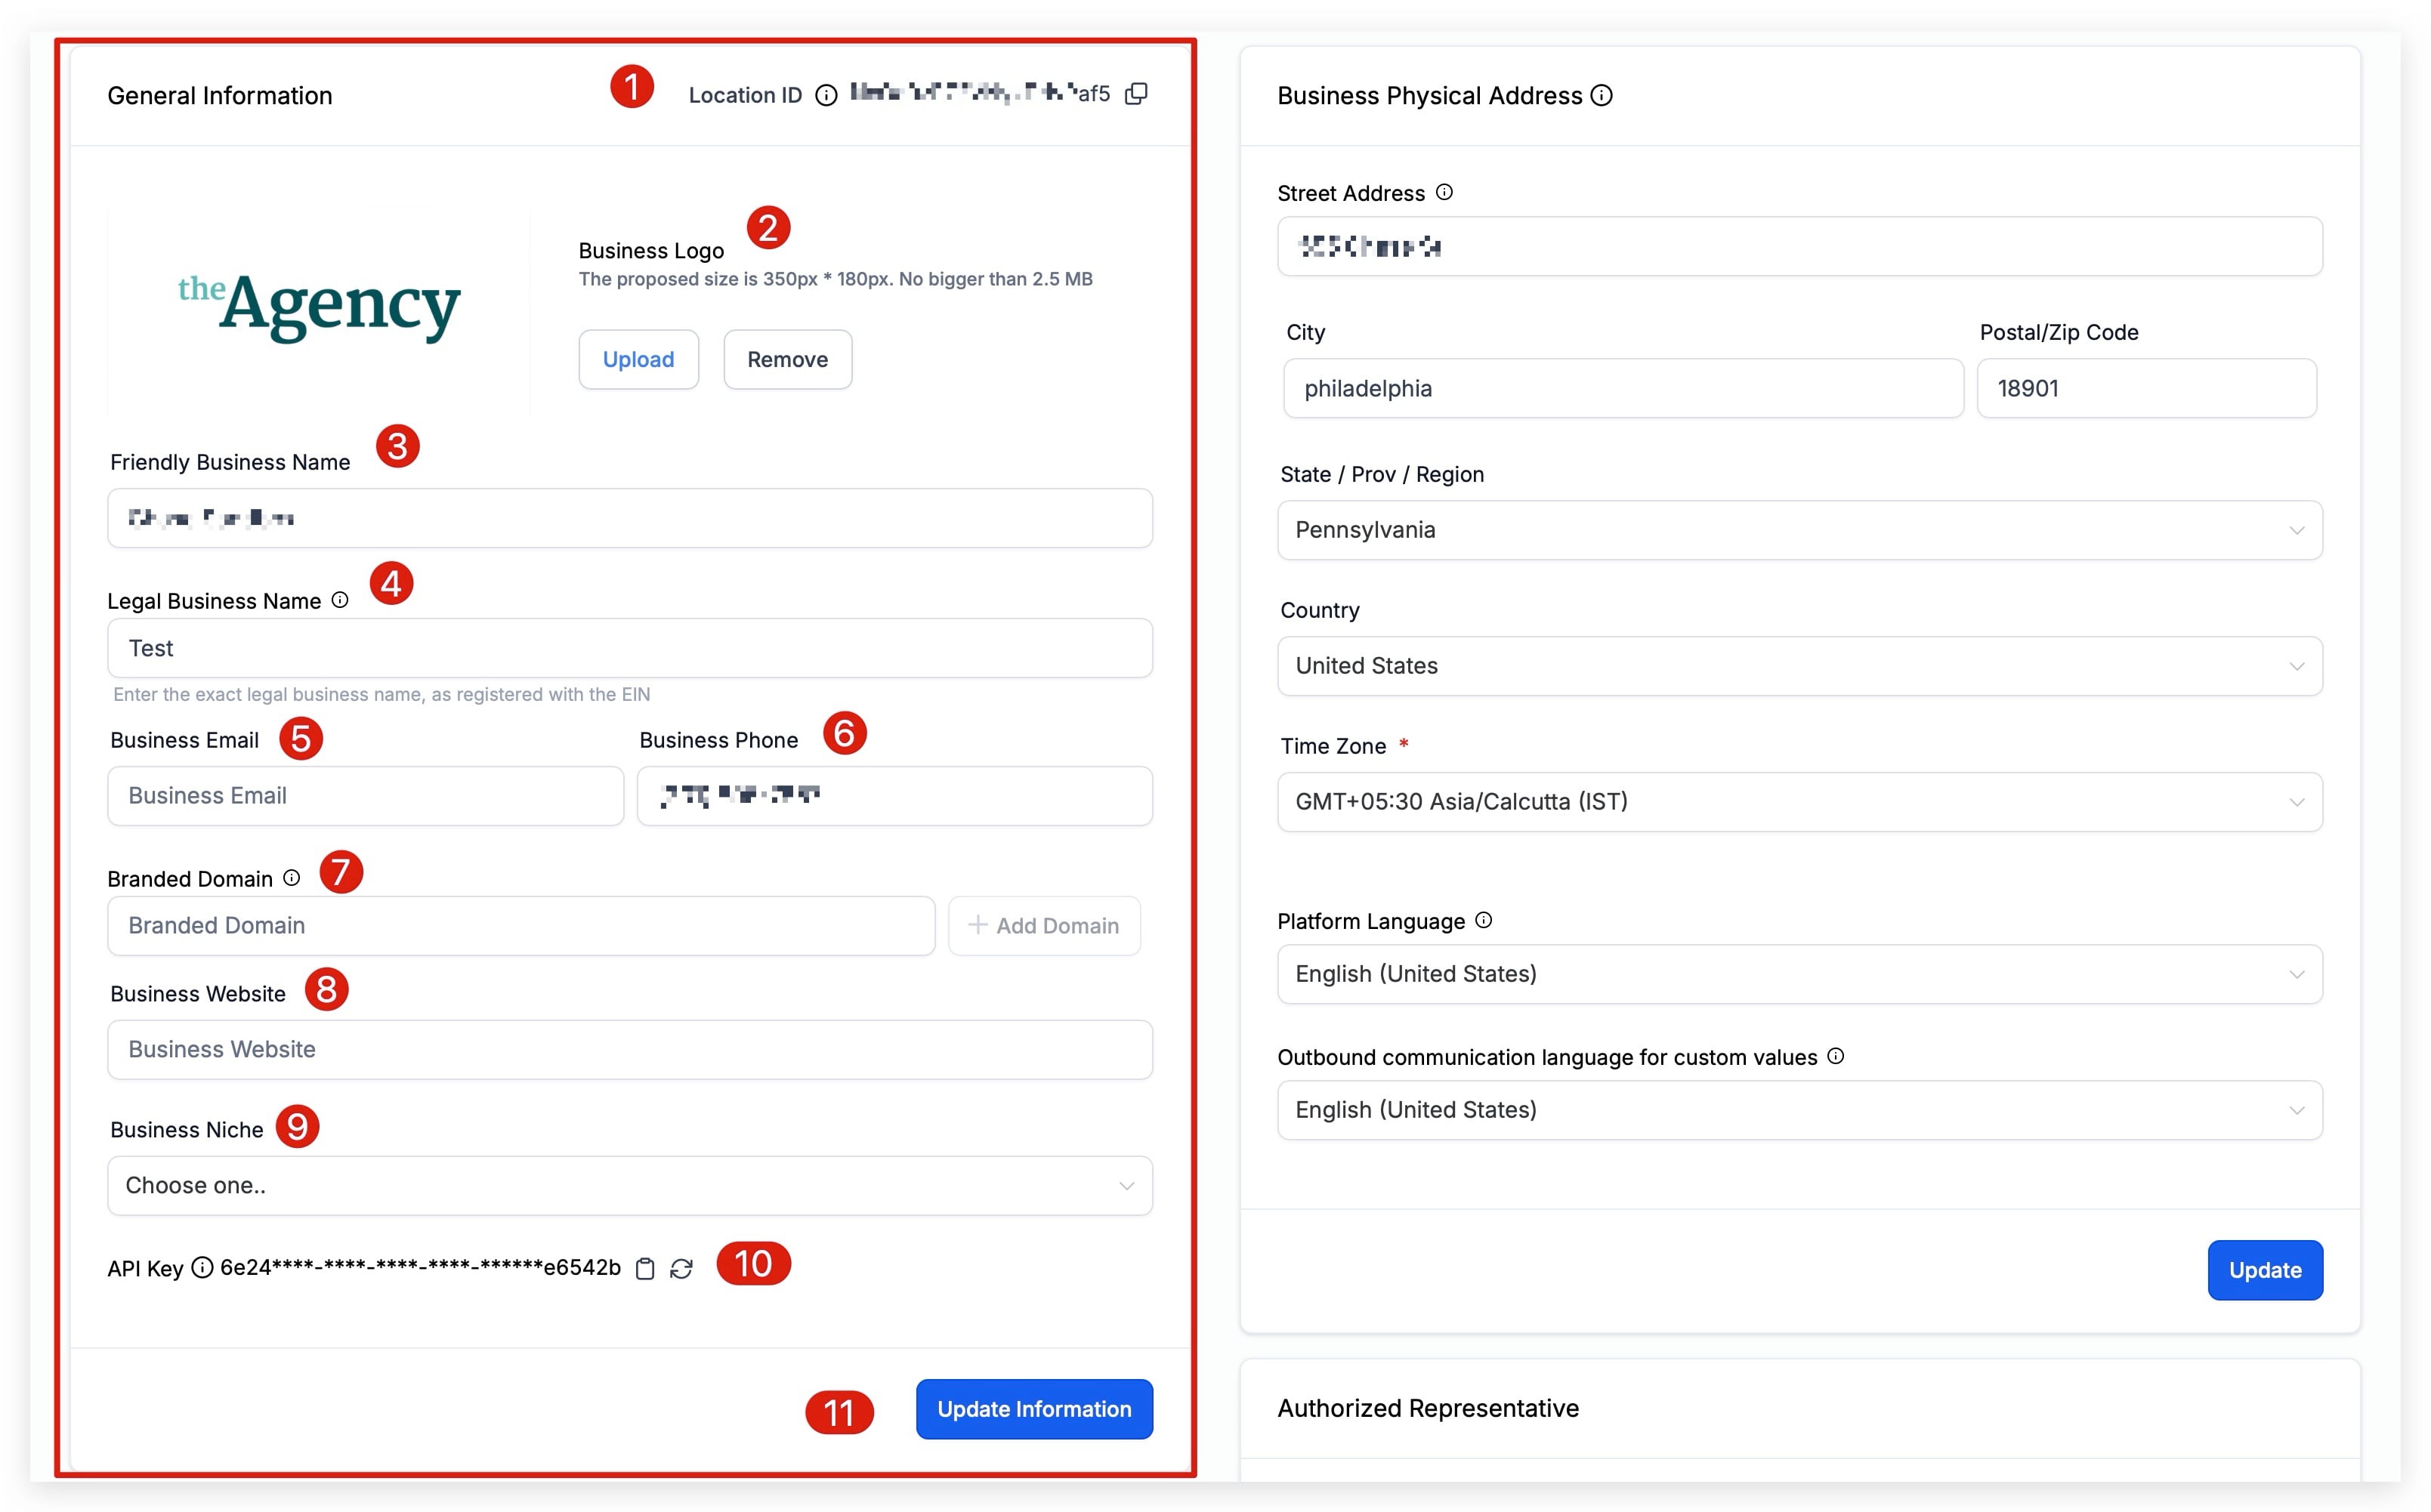
Your General Information establishes your business identity across the account. Adding accurate information here ensures that any custom fields or trigger links associated with your account send the correct details about your business.
Step 1: Open your Business Profile. Click Settings, then make sure you are on the Business Profile page and the General Information section.
Step 2: Copy your Location ID (optional). Click the copy icon next to the Location ID to copy it. This is a unique ID for your account. If you contact support, the team may ask for this ID to identify your account and speed up troubleshooting.
Step 3: Upload your company logo. Click Upload to add a logo, or use the options to change or remove it. Your logo represents your business across many features, including invoices and emails, and can be used as a custom field in messaging (for example, {{location.logo_url}}).
Step 4: Enter your Friendly Business Name. This is the display name used for your account when the "Account → Name" custom field appears in messaging, workflows, and other areas of the app (for example, {{location.name}}).
Step 5: Enter your Legal Business Name. Enter your exact legal business name as registered with your EIN. It should match the business name on your legal documentation, such as your business license and registration paperwork. This is used for future compliance registration.
Step 6: Add your Business Email. Enter your official business email address. This is used wherever the "Account → Email" custom field appears in messages, emails, and workflows (for example, {{location.email}}).
Step 7: Add your Business Phone. Enter your official business phone number. This is used wherever the "Account → Phone" custom field appears (for example, {{location.phone}}). If you want this number to match the number used for calling and messaging, first configure your phone number in the phone system, then copy and paste that purchased number into the Business Phone field.
Step 8: Add your Branded Domain (optional). A branded domain connects your account to a sub-domain in your hosting provider and is used as the URL for trigger links, calendars, forms, surveys, and more. Enter your branded domain, then click to add it.
Step 9: Add your Business Website. Enter your website URL. This is used wherever the "Account → Website" custom field appears (for example, {{location.website}}).
Step 10: Select your Business Niche. Choose the niche that best describes the industry your business operates in. If you target multiple niches, choose the one that best fits your primary target market.
Step 11: Locate your API Key (optional). Your API key connects Aesthetix CRM to other applications, such as Zapier or custom integrations, to share information or perform actions. Click the copy icon to copy the key, or click the refresh icon beside it to regenerate a new key.
Step 12: Save your changes. Click Update Information to save everything in this section.
Your Business Physical Address is a very important component of your Business Profile. It can be used to verify your business for features that require verification, and it is also used in custom fields and custom values across messages, social posts, email campaigns, websites, and funnels.
Your physical address is required for email and SMS compliance footers (sender information), so be sure to complete it. The address should match the address on your EIN listing, since it may be used to verify your business.
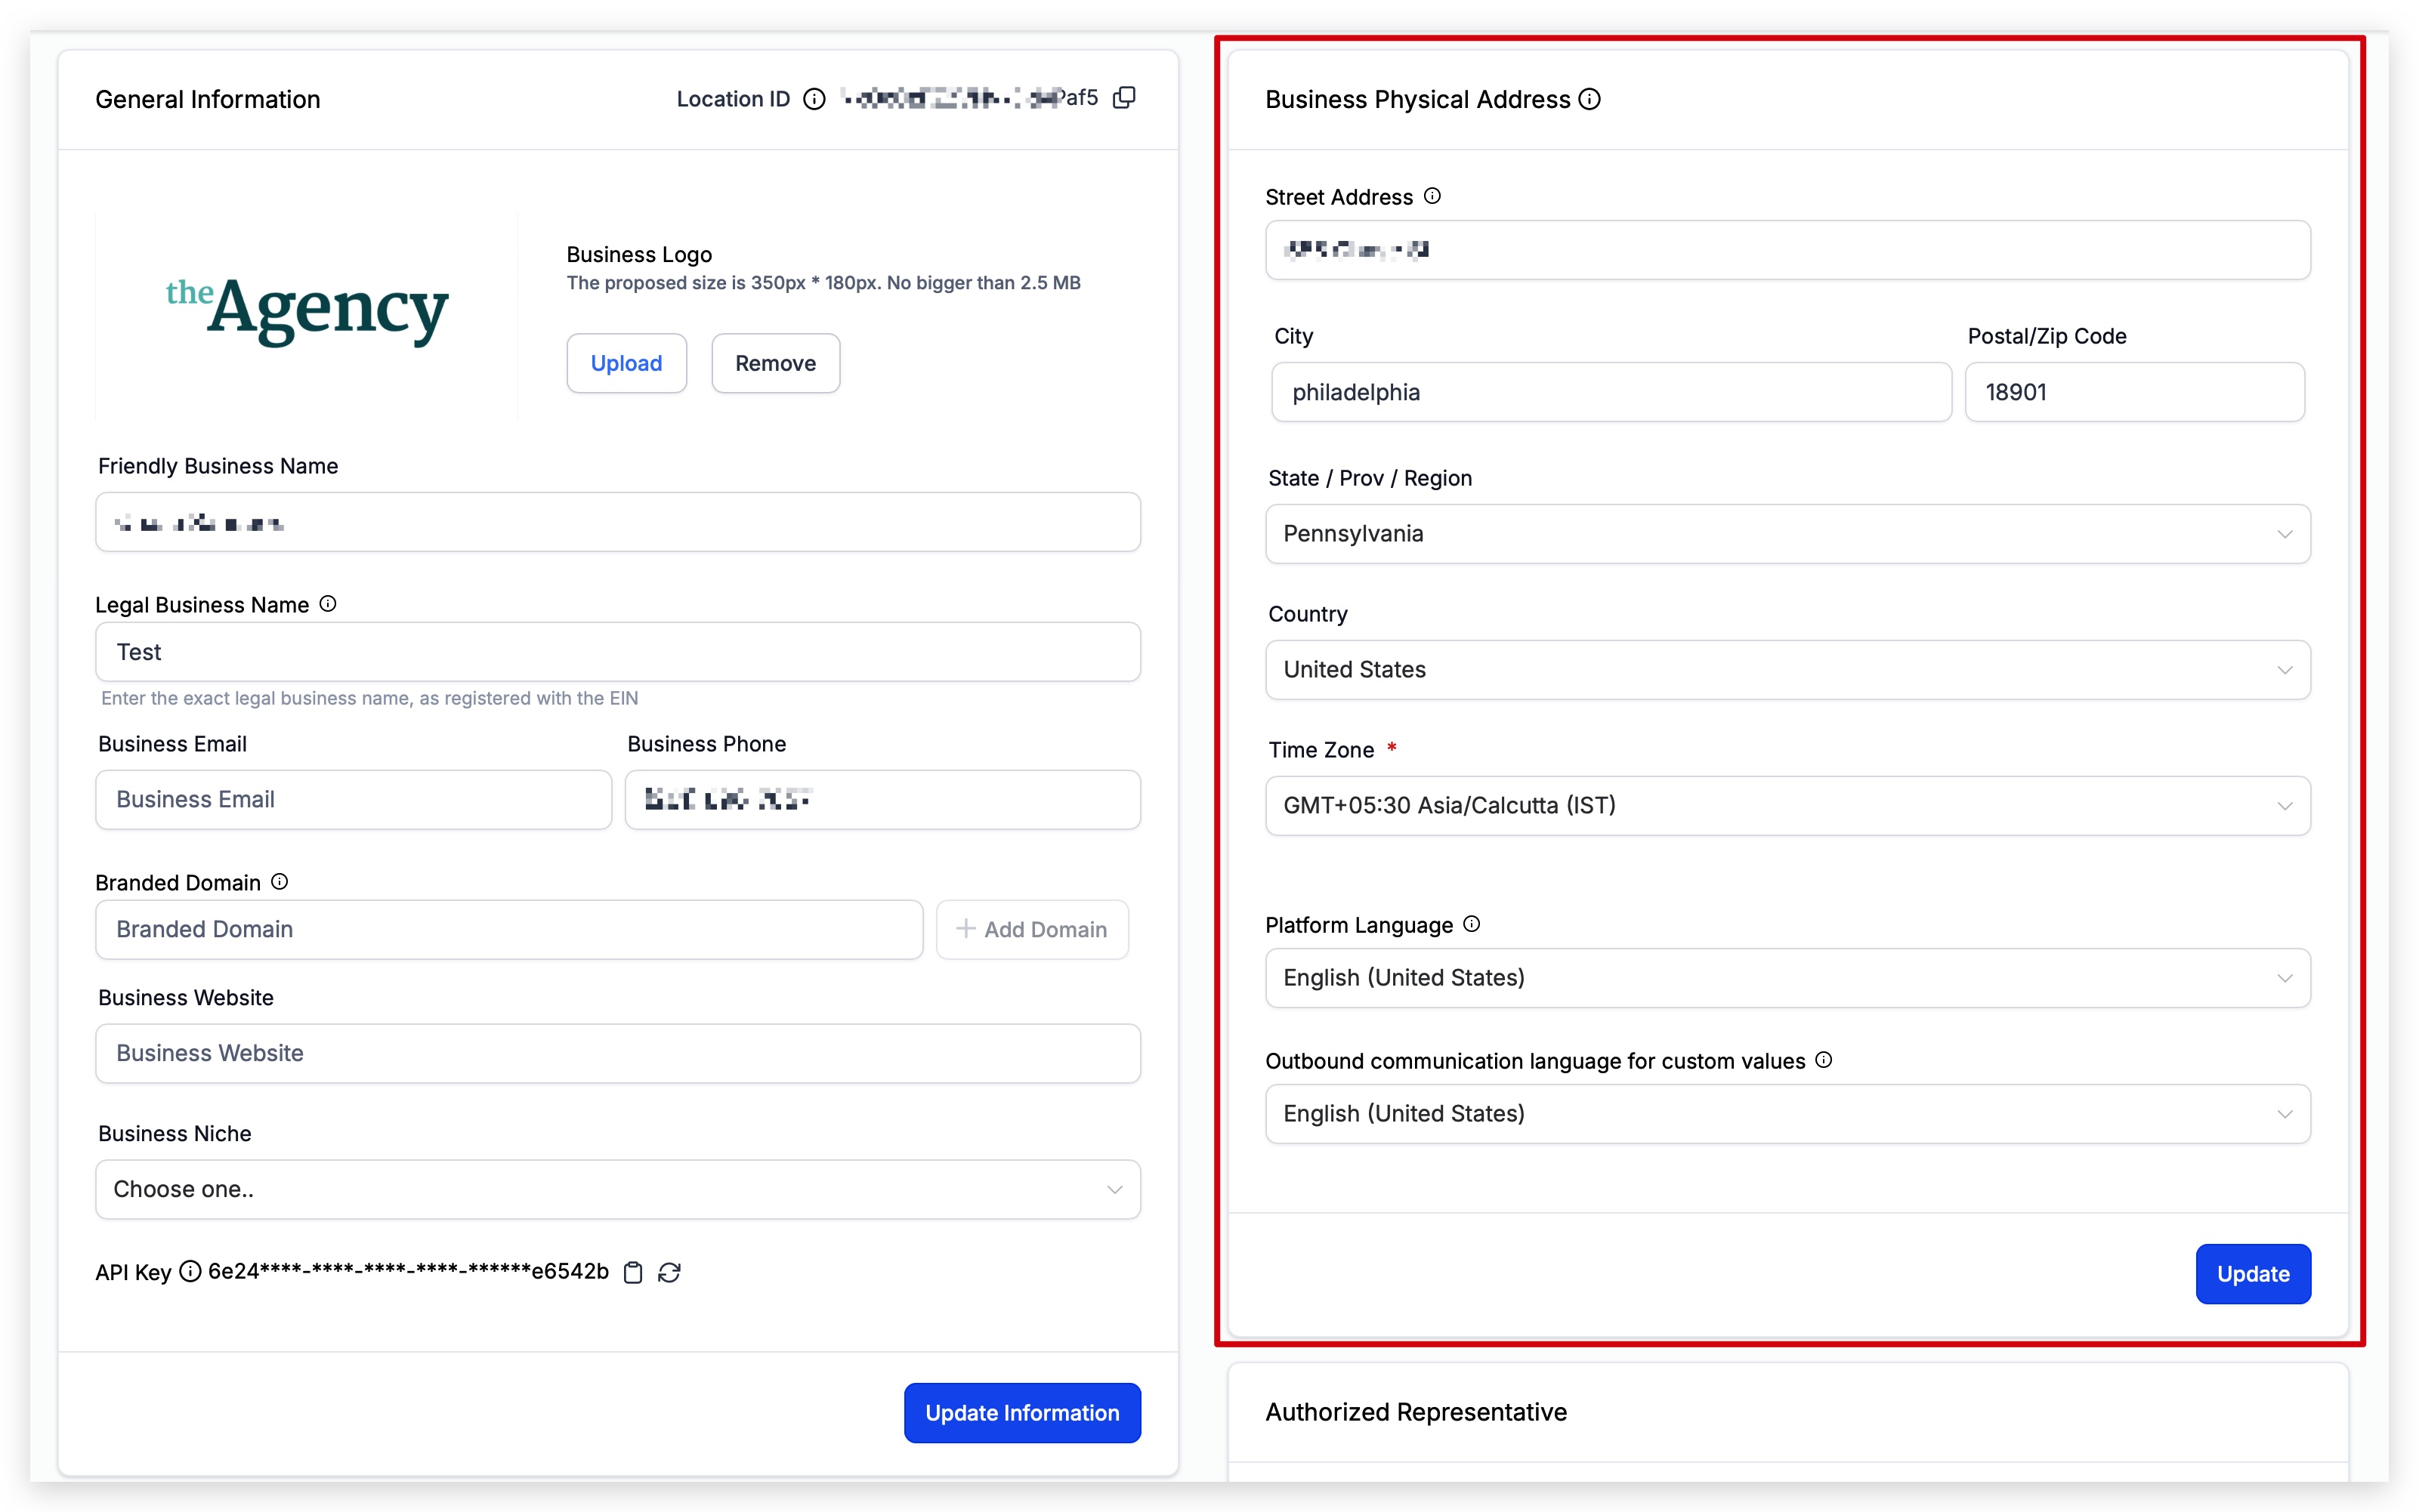
Step 1: Open the Business Physical Address section. In Settings > Business Profile, navigate to Business Physical Address.
Step 2: Enter your street address. Fill in the street address field.
Step 3: Enter your city.
Step 4: Enter your postal code.
Step 5: Select your state, province, or region from the drop-down menu.
Step 6: Select your country from the drop-down menu.
Step 7: Select your Time Zone from the drop-down menu. Automated events within campaigns use this field to determine when to send. You may be able to override this default time zone within individual features, such as workflows or email campaigns, so always check both your Business Profile and the feature's settings to confirm the correct time zone is selected.

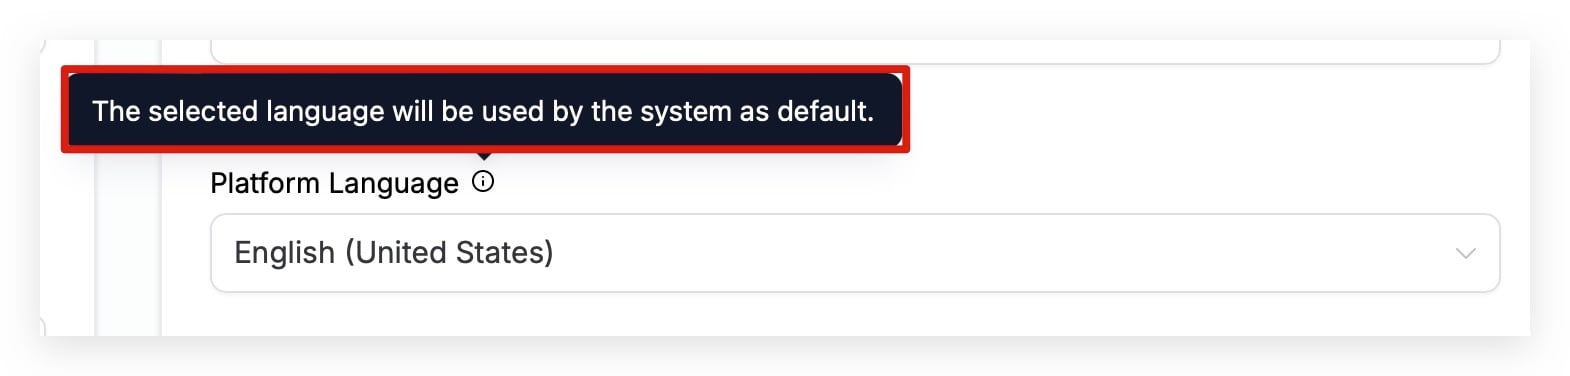
Step 8: Choose your Platform Language. This controls the language your account displays in. For example, if you read English, set this to English; if you read Spanish, set it to Spanish, and the text throughout the application will display accordingly.
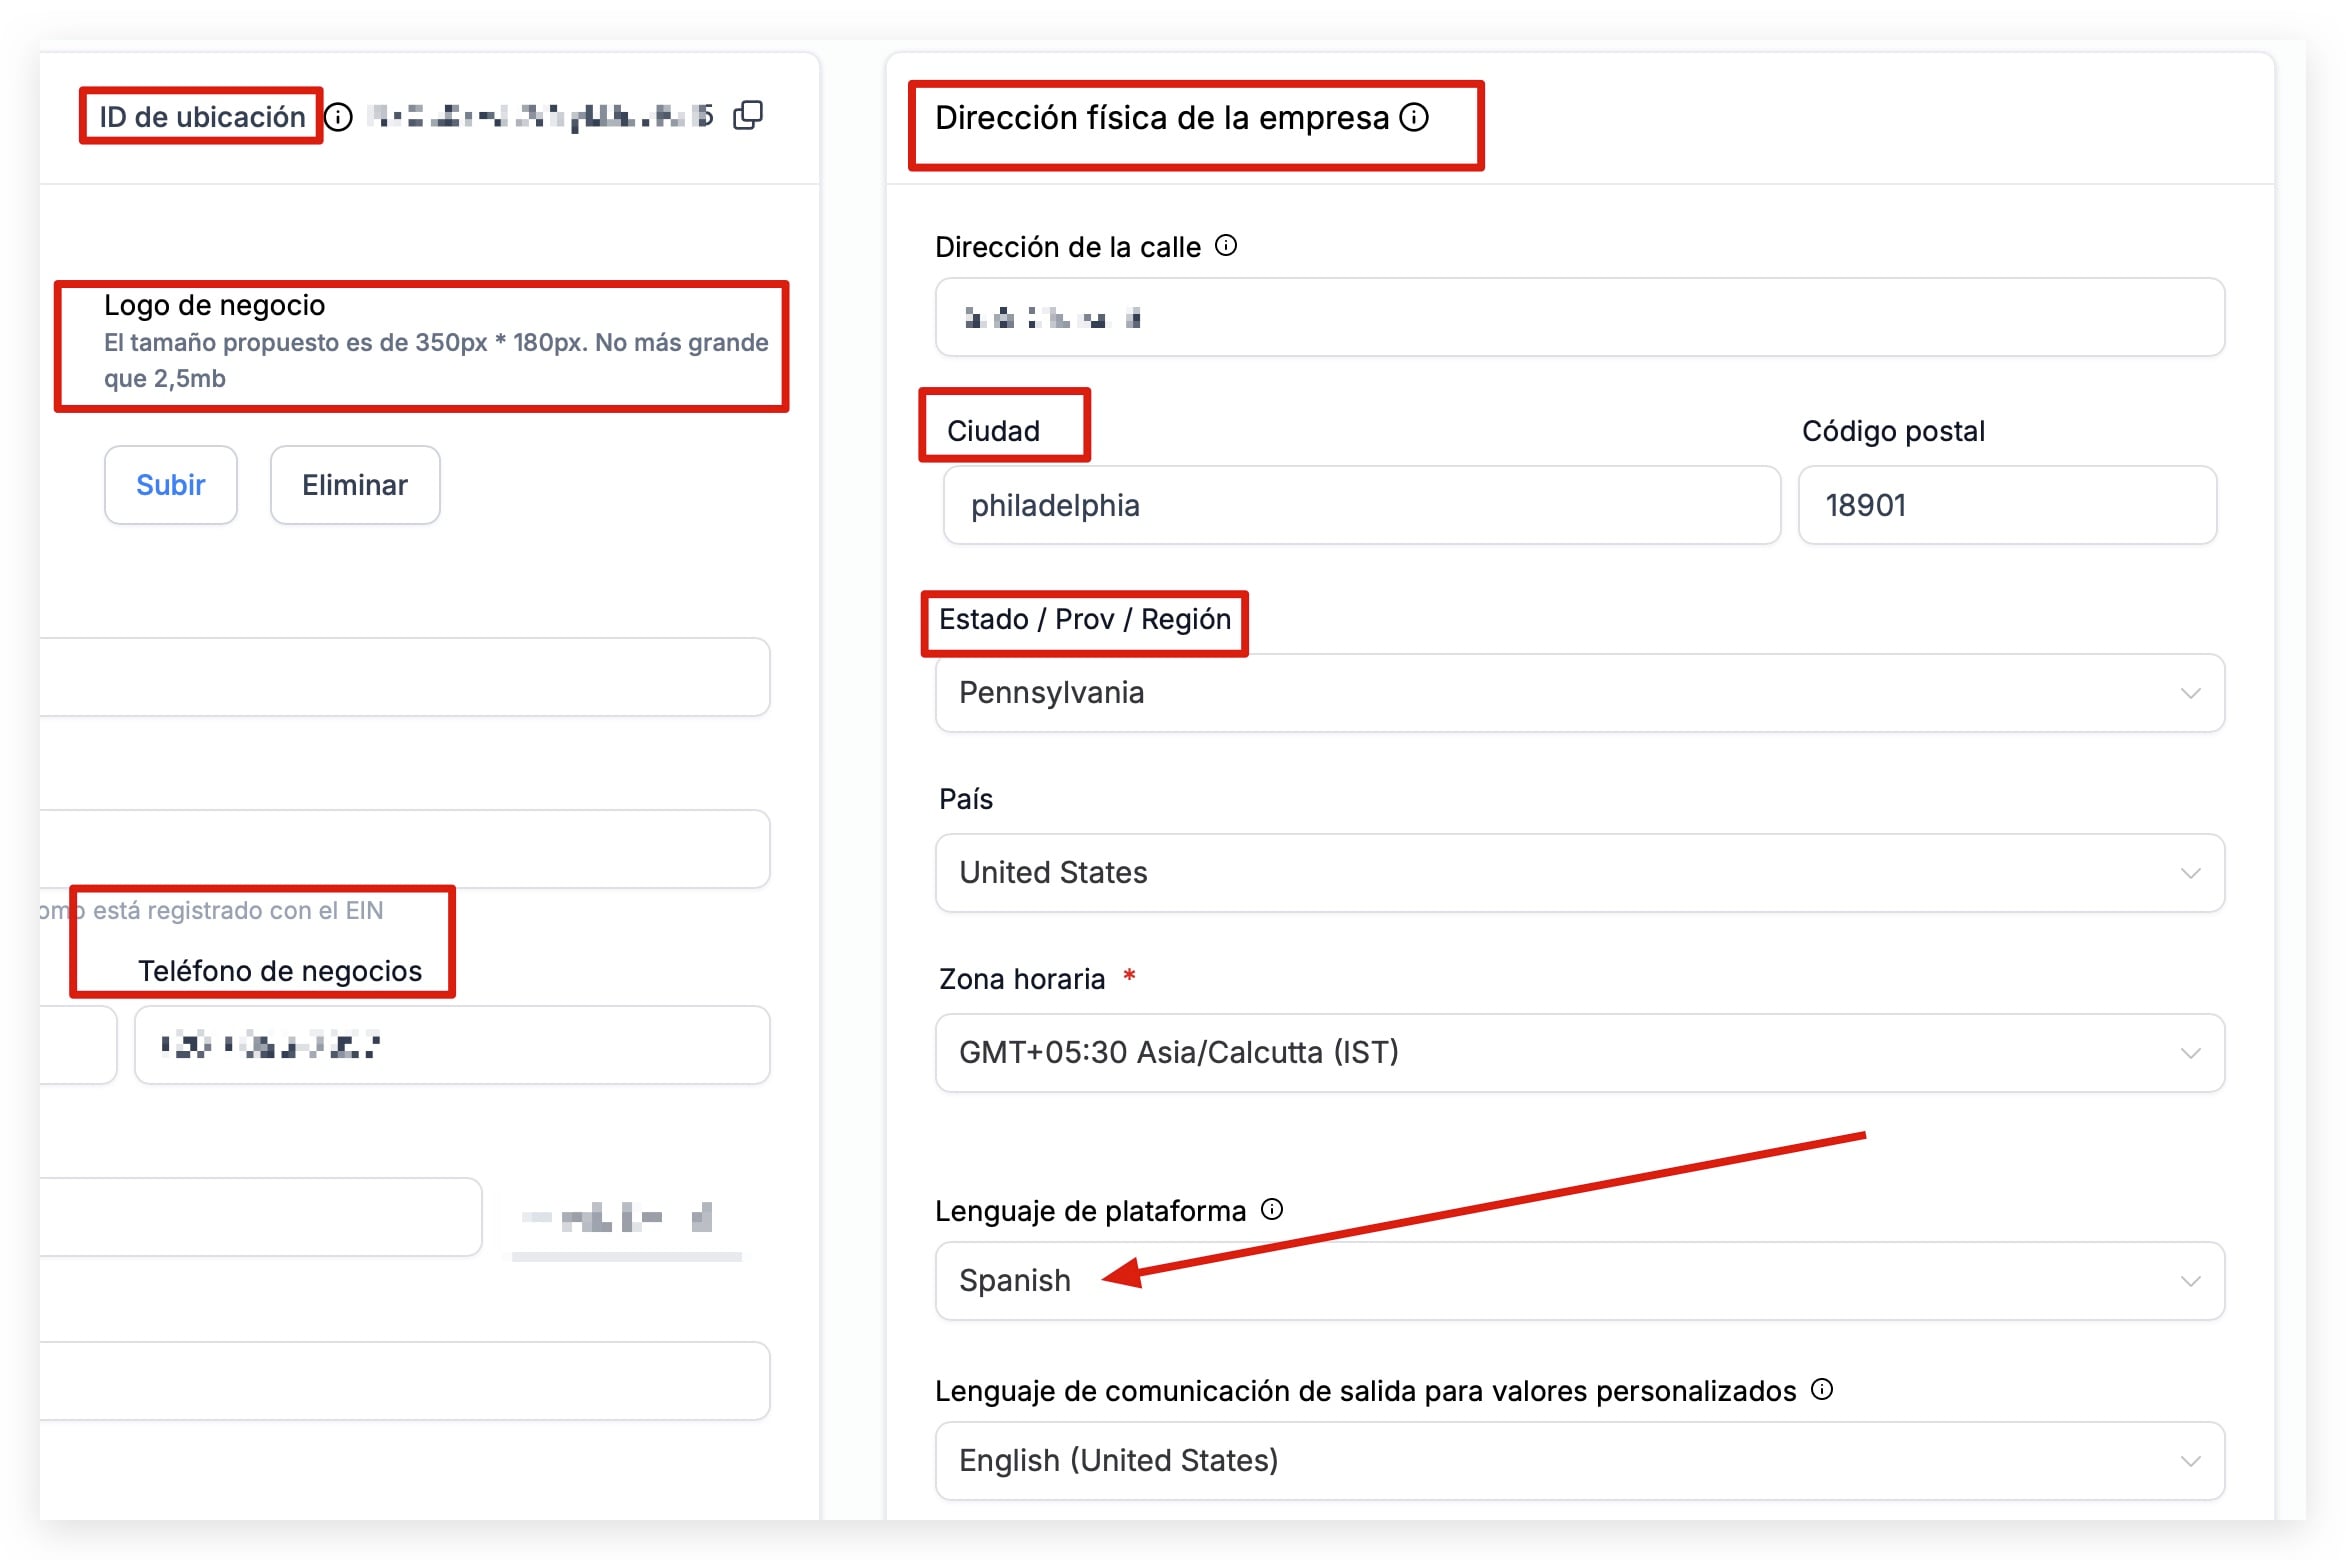
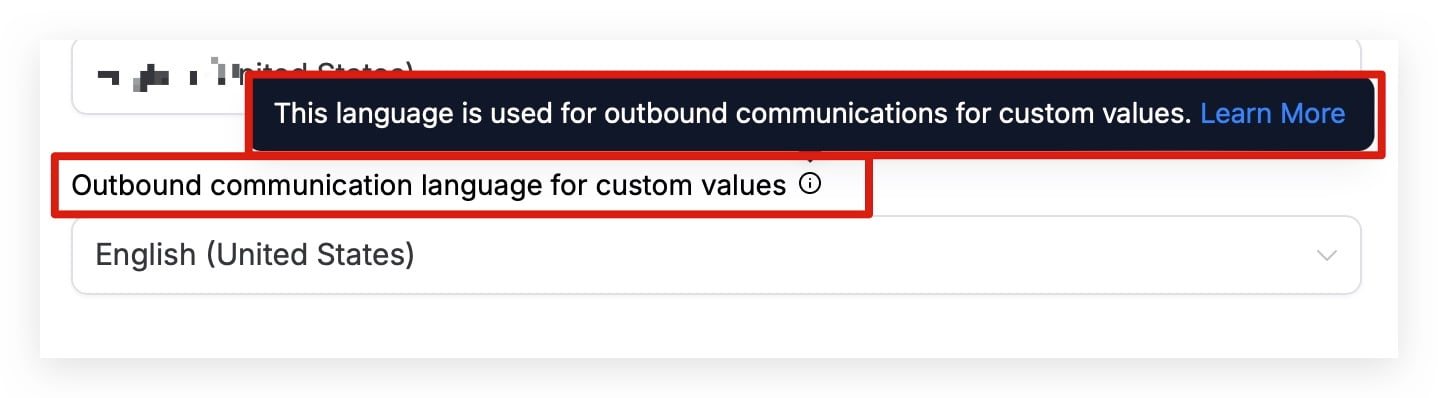
Step 9: Choose your Outbound Communication Language for Custom Values. When you send custom fields and custom values in messages, websites, or funnels, Aesthetix CRM needs to know which language to display them in. Selecting the correct language here ensures dates, times, and other dynamic values appear in the right language for your recipients.
Step 10: Save your changes. Click Update to save.
Checkout pages automatically localize labels, buttons, and system messages based on the Platform Language set here. Supported languages include:
English
Danish
German
Spanish
Finnish
French (may appear as regional variants)
Italian
Dutch
Norwegian
Portuguese (may appear as regional variants)
Swedish
The following custom fields and custom values are affected by the Outbound Communication Language setting. More may be added over time:
{{appointment.start_time}}
{{appointment.end_time}}
{{appointment.only_start_date}}
{{appointment.only_end_date}}
{{appointment.only_start_time}}
{{appointment.only_end_time}}
{{appointment.month}}
{{appointment.day_of_week}}
{{right_now.time}}
{{right_now.day}}
{{right_now.day_of_week}}
{{right_now.month}}
{{right_now.month_english}}
{{right_now.month_name}}
{{right_now.middle_endian_date}}
{{right_now.little_endian_date}}
{{right_now.hour}}
{{right_now.hour_ampm}}
{{right_now.second}}
{{right_now.date}}
Filling out your Business Information is very important, especially for SMS approval. This section captures your registration type and number (EIN, CCN, VAT, etc.) and your regions of operation. Running a legitimate, registered business can be the difference between approval and denial when submitting to send SMS messages.
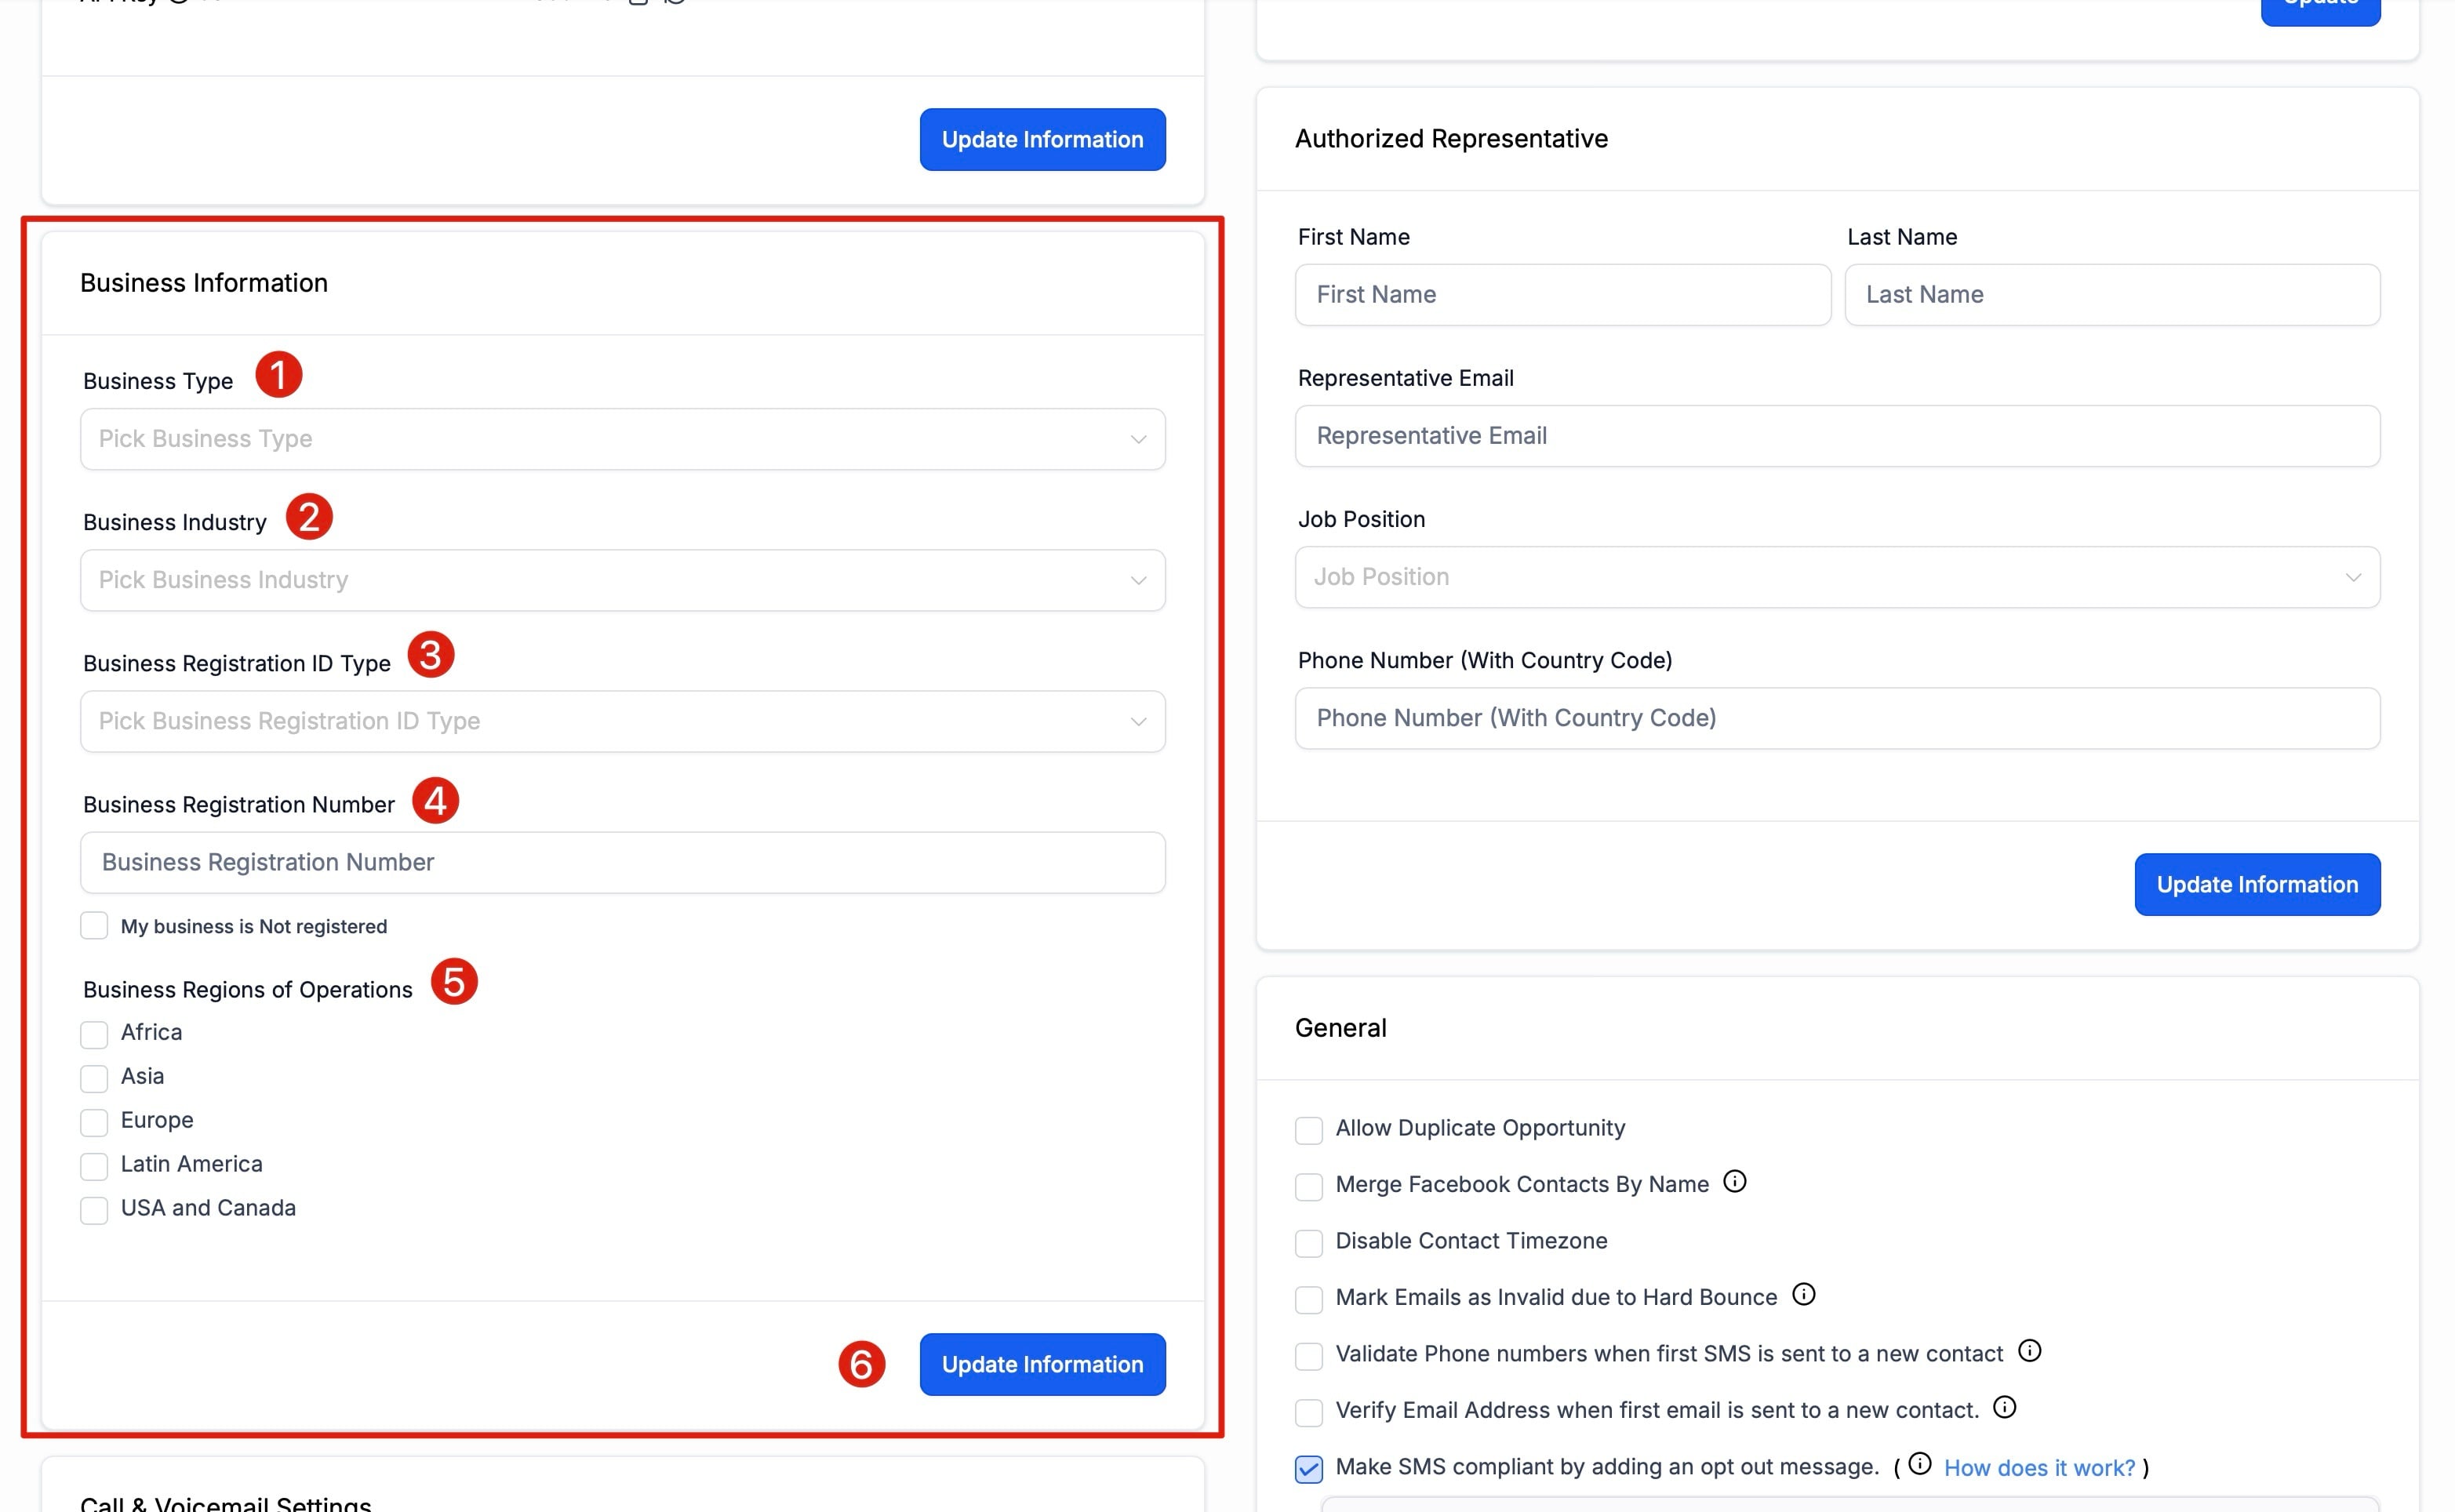
Step 1: Open the Business Information section. In Settings > Business Profile, navigate to Business Information.
Step 2: Select your Business Type. Choose the type of business you created. Options include:
Co-operative
Corporation
Limited Liability Company (LLC) or Sole-Proprietorship
Non-profit Corporation
Partnership
Step 3: Choose your Business Industry. Select the industry you primarily serve. If you serve several, choose the one that best describes your target market.
Step 4: Select your Business Registration ID Type. Choose your registration type. If you are in the United States, you most likely have an EIN unless you incorporated in another country.
Step 5: Add your Business Registration Number. After selecting your registration type, enter your registration number here.
Step 6: Check the box if your business is unregistered. If your business is not registered, check the box to indicate this instead of entering a registration number.
Step 7: Select your Business Regions of Operations. Choose the regions your business operates in. This is a multi-select setting, so you can choose more than one. If you are a global company, select the regions where you do most of your sales.
Step 8: Save your changes. Click Update Information to save.
Where is the Business Profile located? It is the first section under Settings. Click Settings in the left-hand navigation, and Business Profile opens by default.
What is the Location ID used for? It is a unique identifier for your account. When you contact support, the team may ask for it to quickly locate your account and assist with troubleshooting.
Why do I need to enter a Legal Business Name and physical address? Both are used for compliance registration. Your legal business name should match your EIN registration, and your physical address is required for email and SMS compliance footers and may be used to verify your business when enabling certain features.
Should the Business Phone match my texting and calling number? If you want your Business Phone custom field to match the number used for calling and messaging, configure your phone number in the phone system first, then copy and paste it into the Business Phone field.
What is the API Key for? It connects Aesthetix CRM to other applications, such as Zapier or custom integrations. You can copy it with the copy icon or regenerate it with the refresh icon if needed.
What does the Platform Language setting change? It controls the language the application interface displays in. The separate Outbound Communication Language setting controls the language of dynamic custom values, such as dates and times, in your outbound messages.
