Custom fields let you collect and organize information that goes beyond standard contact details like name, email, and phone number. They allow you to tailor records, forms, surveys, workflows, and pipelines to match your practice's process and improve how you manage leads, patients, and opportunities. This guide covers what custom fields are, where to find them in Aesthetix CRM, and how to create, edit, and delete them.
Custom fields store additional information about contacts or opportunities beyond the default fields already available in your account. They make it possible to capture business-specific details so you can build cleaner records, better segmentation, and more personalized automation.
Custom fields can be used across:
Forms
Surveys
Pipelines
Workflows
Automations
Smart Lists
Contact records
Opportunity records
Common examples include lead type, budget range, preferred contact method, referral source, treatment of interest, and timeline to close. In a med spa setting, a field like Treatment of Interest lets you record what a lead is most interested in (for example, Botox, fillers, laser, or a membership) so your follow-up messaging can be tailored to each person.
Custom fields provide flexibility and structure across your account and automation setup. Benefits include:
Collect business-specific data
Organize contact and deal information more efficiently
Personalize email and SMS automation using merge fields
Build better Smart Lists and workflow filters
Display important information directly inside records and pipelines
Group related fields together using folders for cleaner layouts
Choosing the correct field type is important because contact fields and opportunity fields behave differently inside the system. Aesthetix CRM lets you create two types of custom fields: Contact custom fields and Opportunity custom fields. While they may seem similar, they serve different purposes and appear in different parts of the platform.
Contact custom fields are attached directly to an individual person. Use them for information such as:
Lead or patient type
Birthday
Preferred contact method
Referral source
Treatment of interest
These fields can be used inside:
Contact records
Forms
Surveys
Contact workflows
Smart Lists
Email and SMS personalization (merge fields)
Opportunity custom fields belong to a specific deal or sales opportunity. Use them for information such as:
Budget range
Treatment package
Deal urgency
Timeline to close
Sales stage details
These fields appear inside:
Opportunity records
Pipeline views
Opportunity workflows
Deal reporting and automation
Note: Once a field is created as either a contact or opportunity field, it cannot be switched. To change the object type, you must recreate the field under the correct object.
For a complete breakdown of every available input type (Short Text, Long Text, Dropdowns, Date Pickers, Phone, Email, Radio Selects, Checkbox Groups, URLs, and more), see the Custom Field Types Reference guide.
Custom fields can also be grouped under Custom Objects for advanced record modeling. Custom Objects are covered separately in the Contacts collection — see that collection for setup details.
Folders help organize related fields into sections so records stay clean and easy to navigate. Folders appear directly inside record layouts and group related information together.
Examples of folders you might create:
Patient Information
Treatment Details
Lead Qualification
Appointment Preferences
To create a folder:
Step 1: Go to Settings > Custom Fields.
Step 2: Use the object selector at the top of the page to choose the object you want to manage.
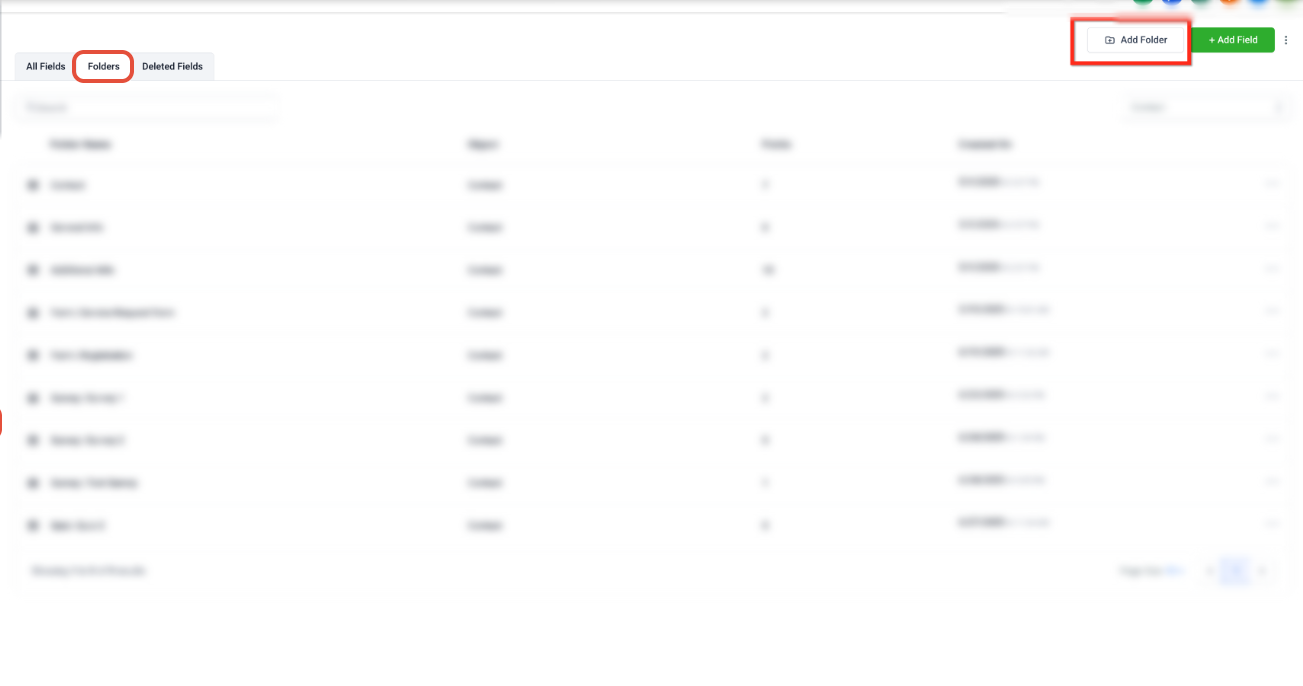
Step 3: Open the Folders tab.
Step 4: Click Create folder.
Step 5: Enter the folder name.
Step 6: Click Create.
After you create a folder, you can assign custom fields to it for better organization.
Follow these steps to create and organize custom fields in your account.
Step 1: Navigate to Settings > Custom Fields
In your account, click Settings, then click Custom Fields.
Step 2: Select the object
Use the object selector at the top of the page to choose the object you want to manage.
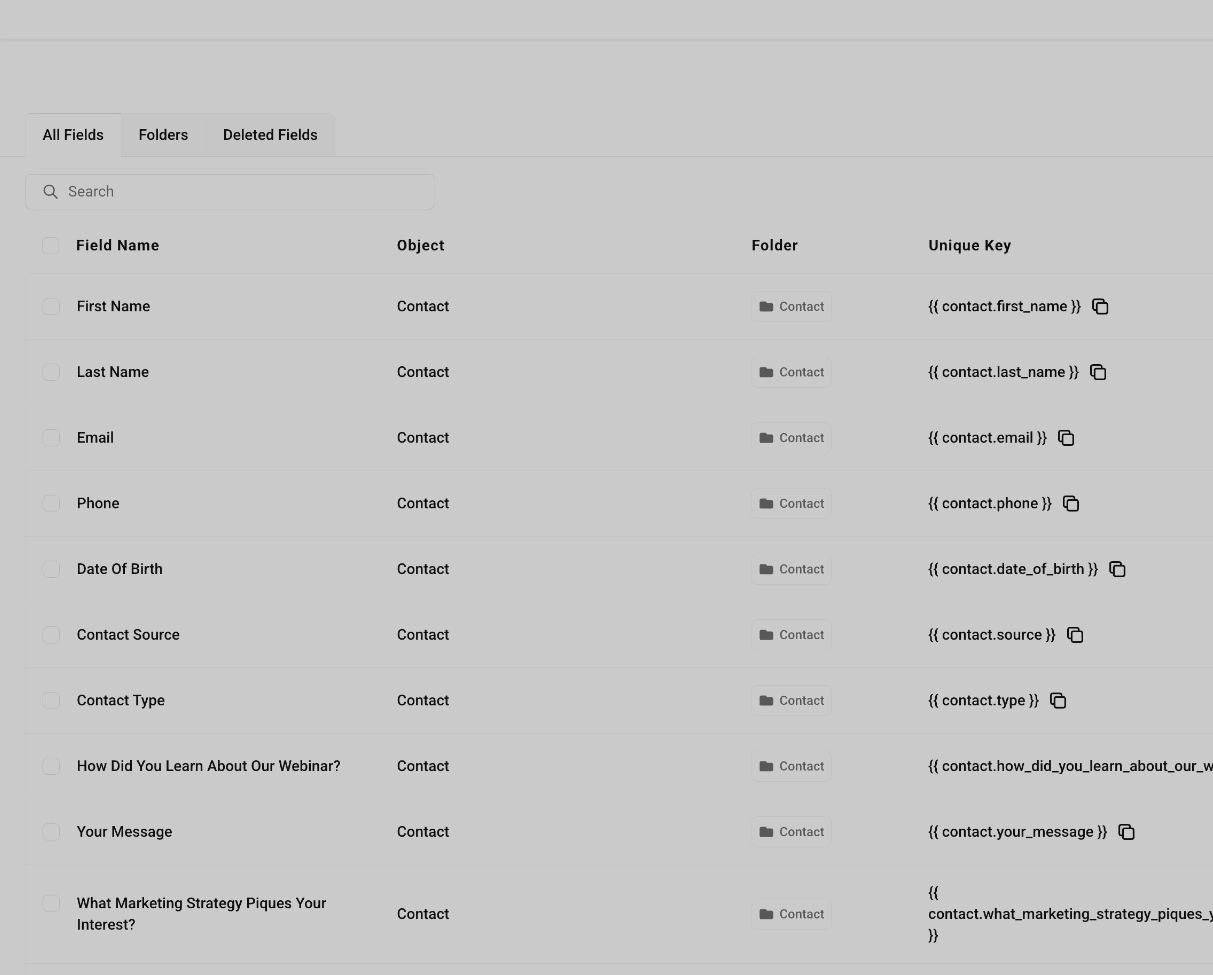
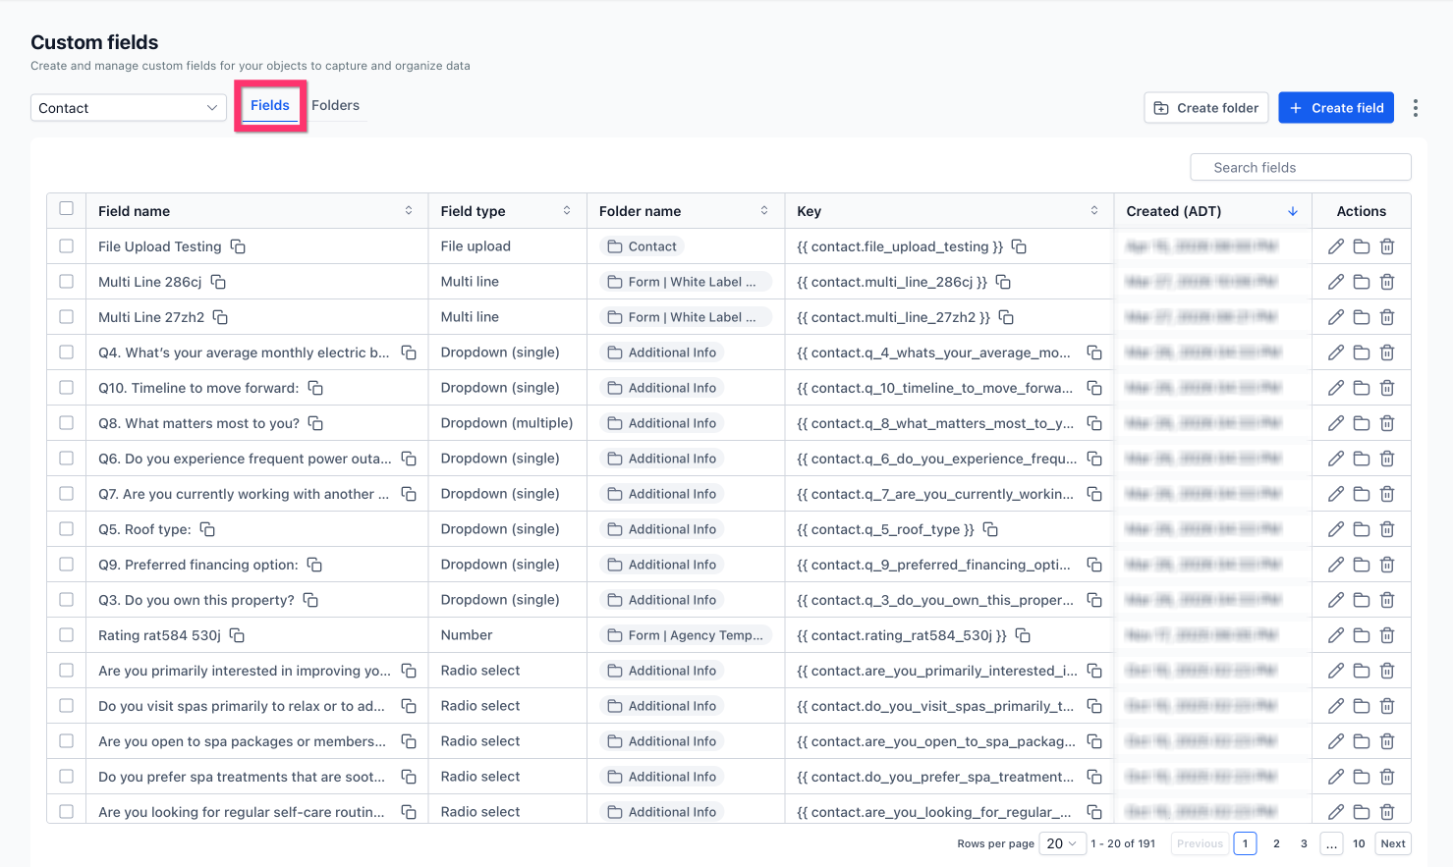
Step 3: Open the Fields tab
Stay on the Fields tab to view existing fields and create new ones.
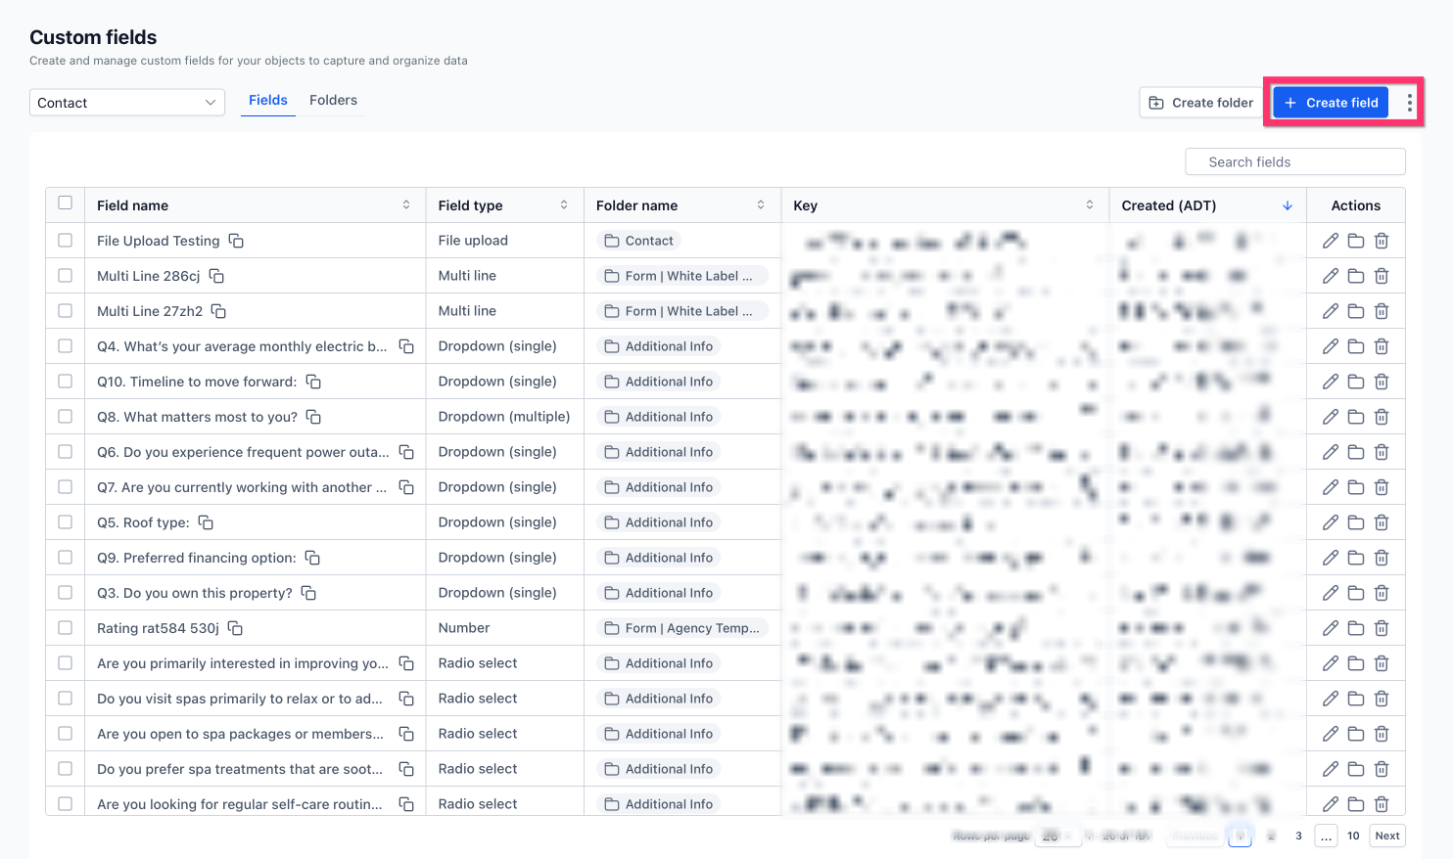
Step 4: Click Create field
Click Create field on the top right of the page.
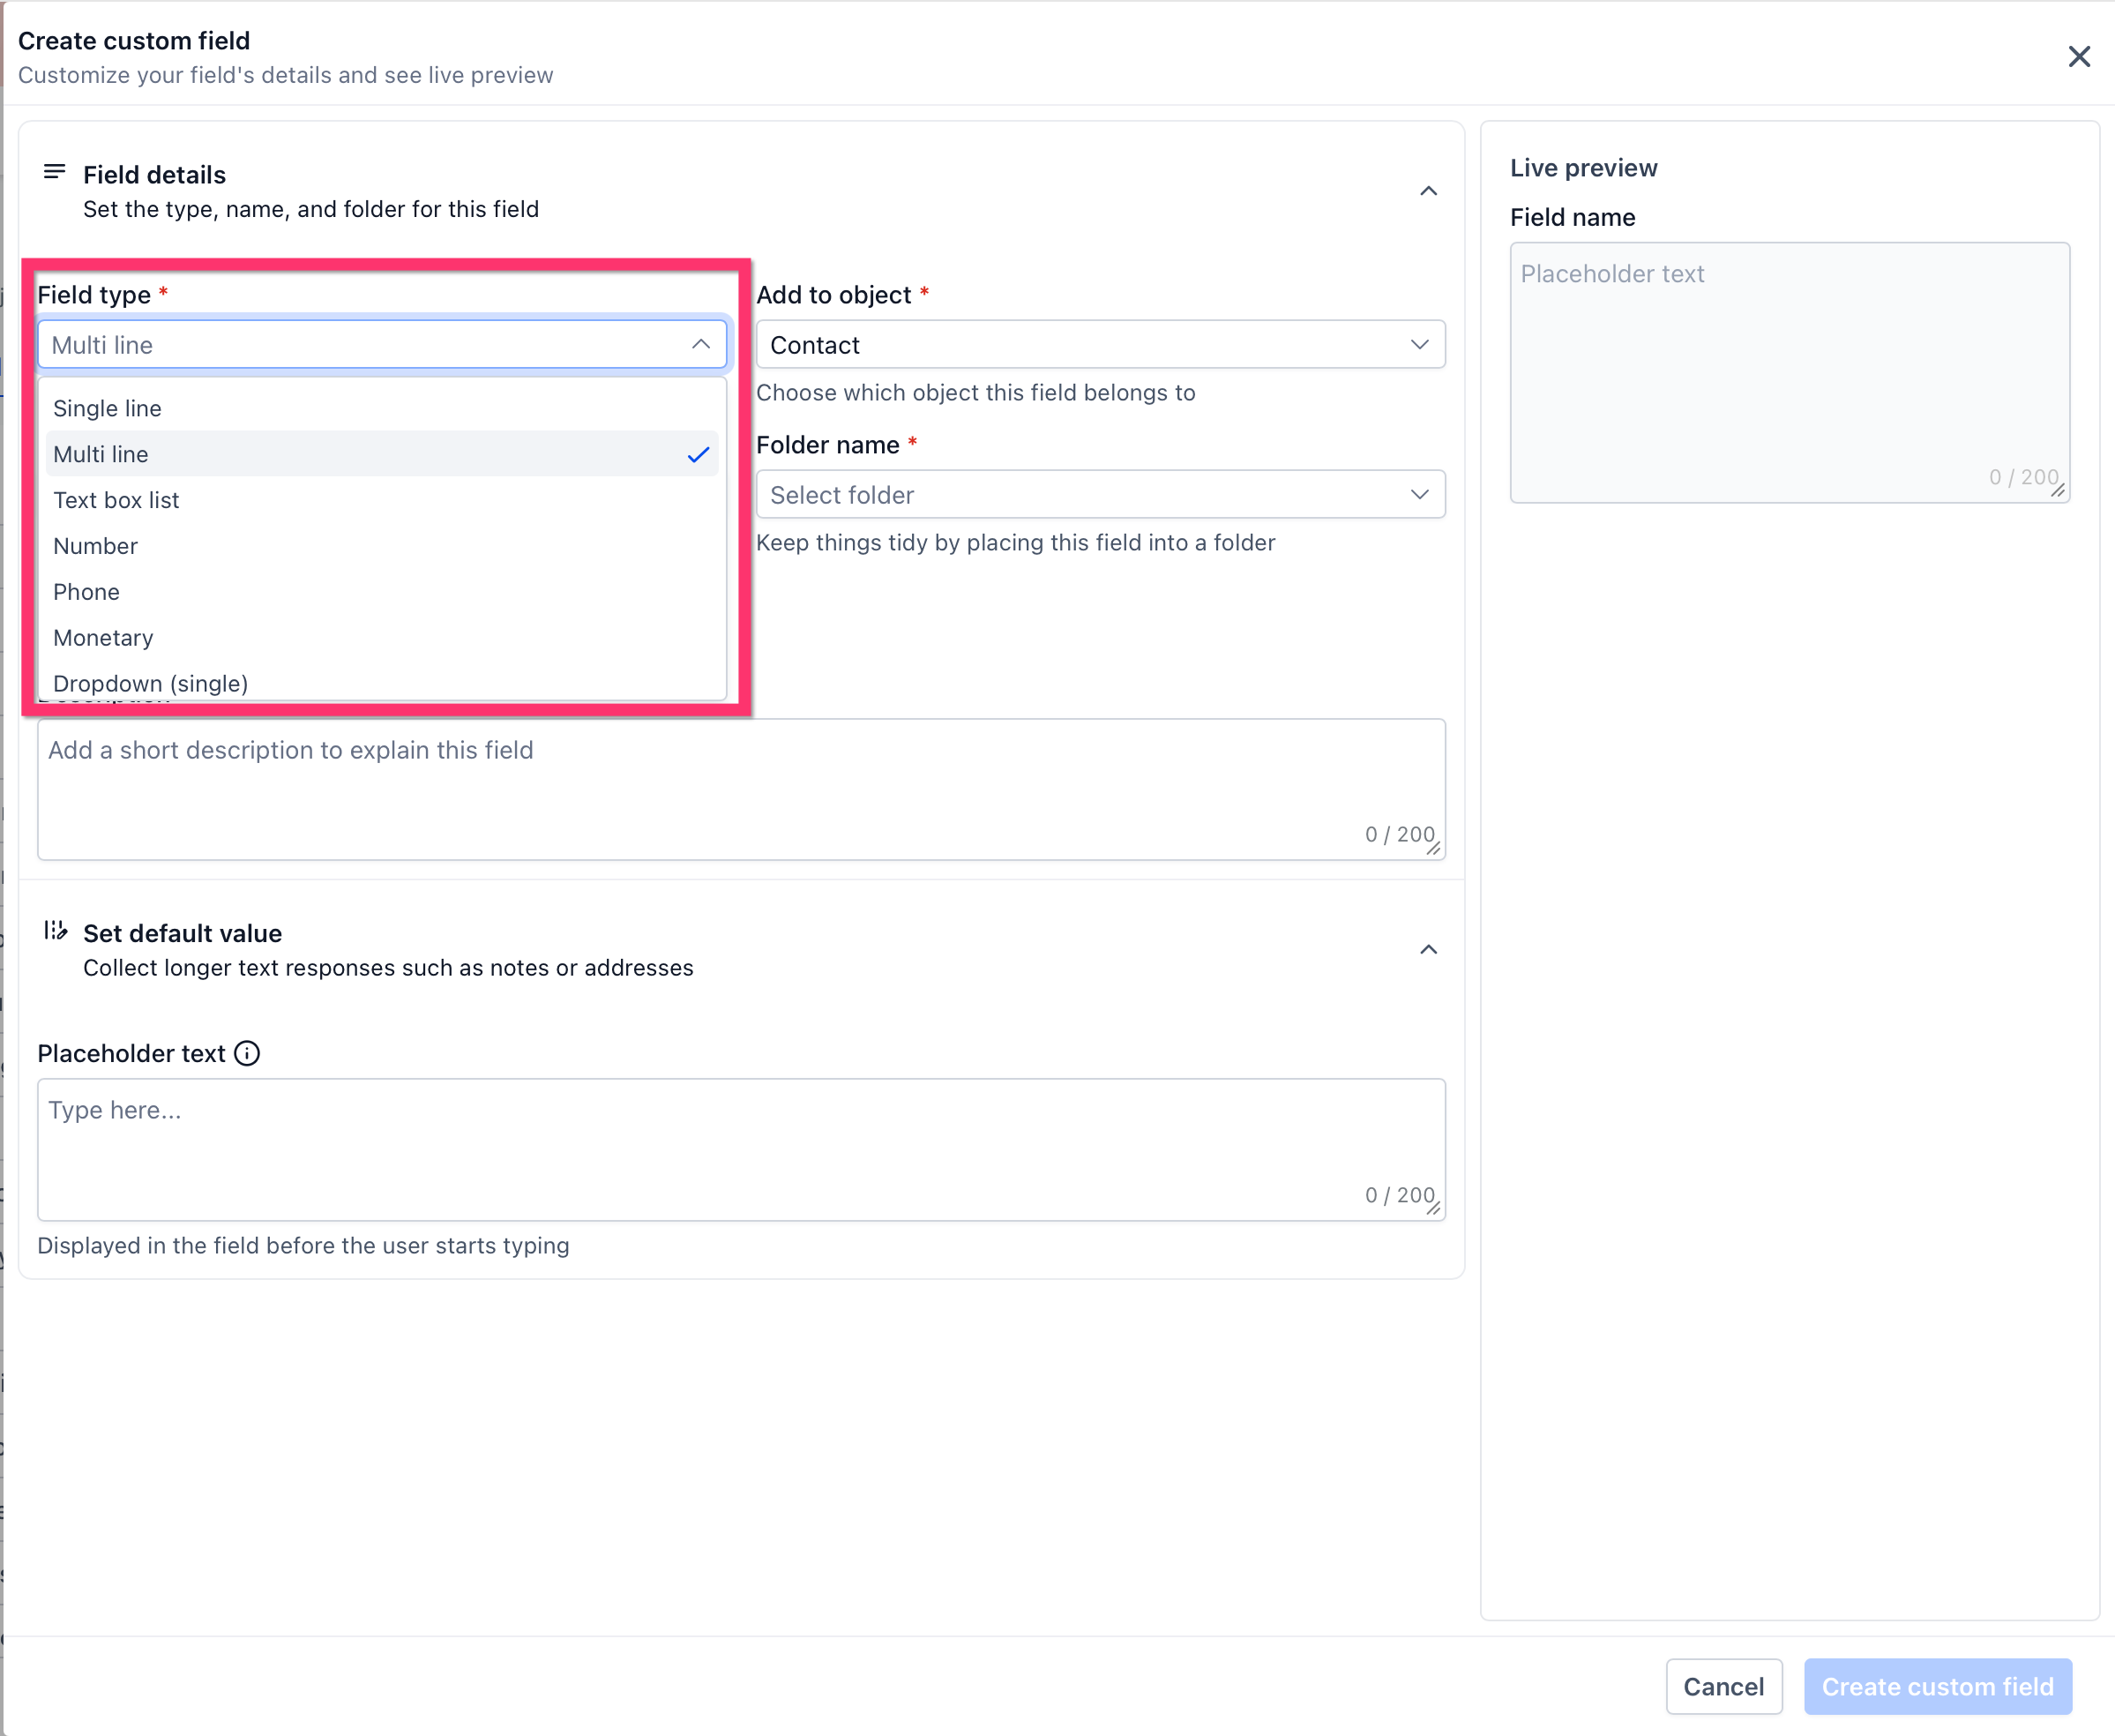
Step 5: Select a field type
Choose the field type you want to create. (See the Custom Field Types Reference guide for the full list of types.)
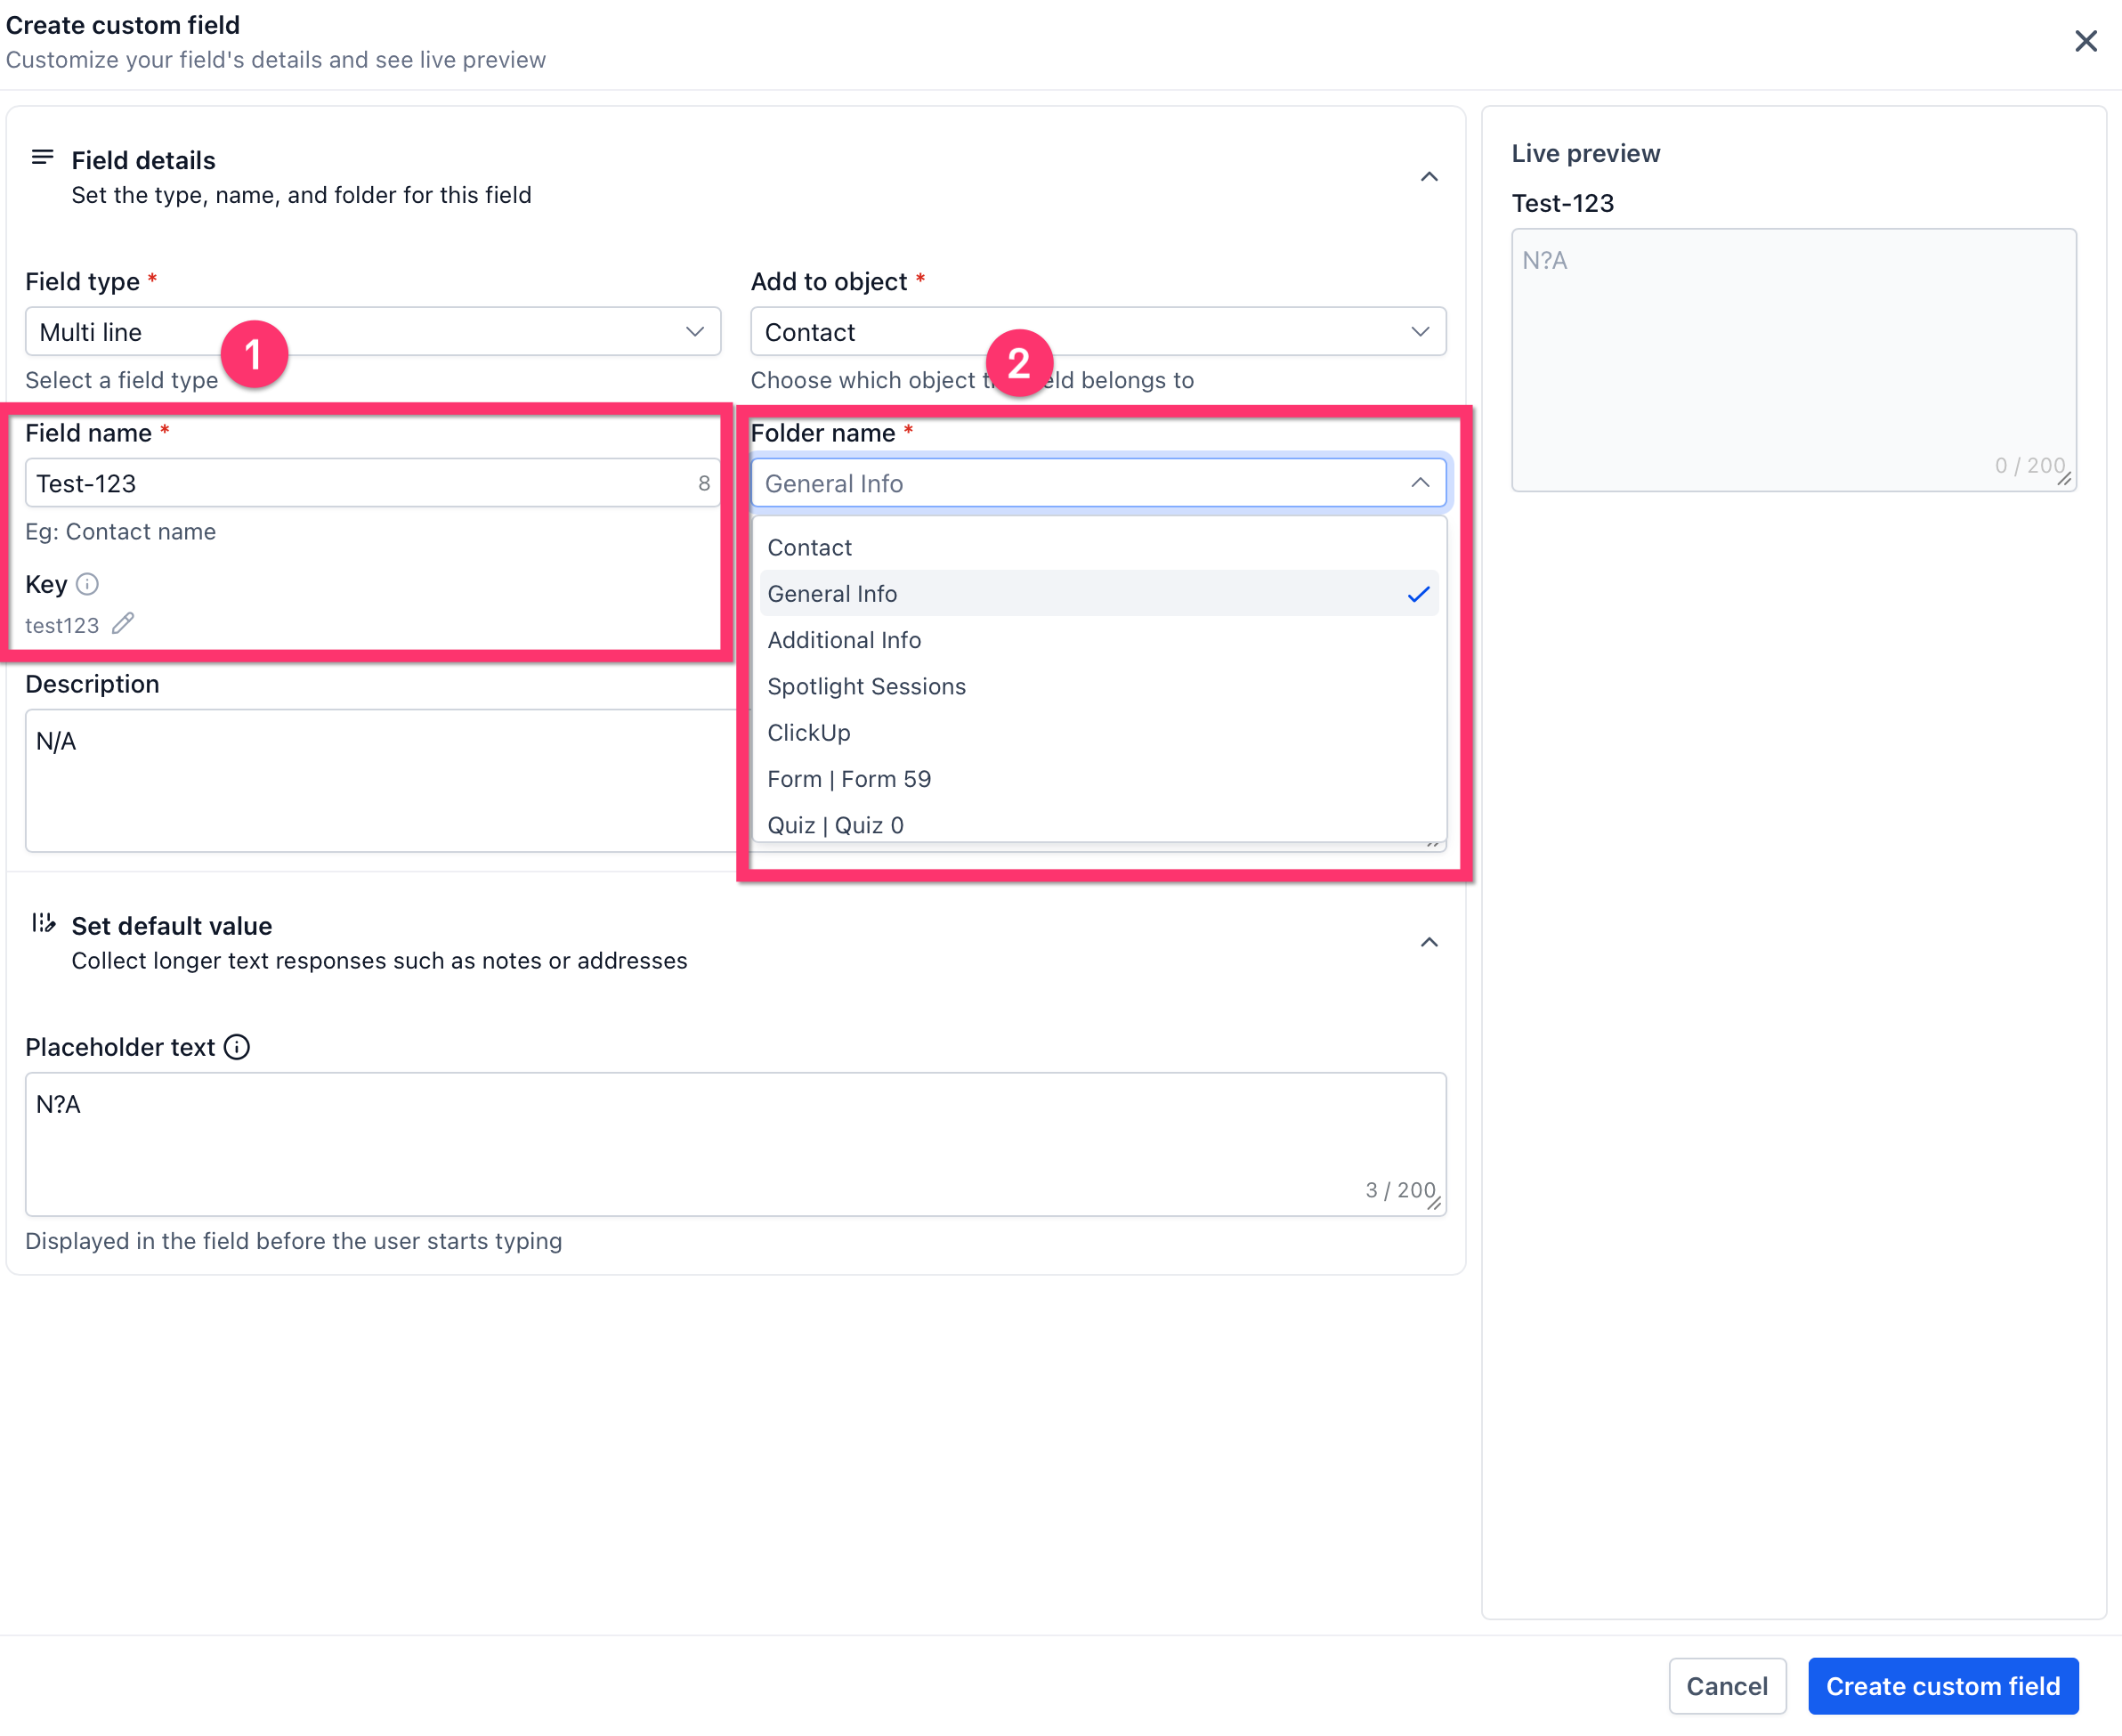
Step 6: Fill in the field details
Enter the field details, including the field name and the folder it should belong to, if needed.
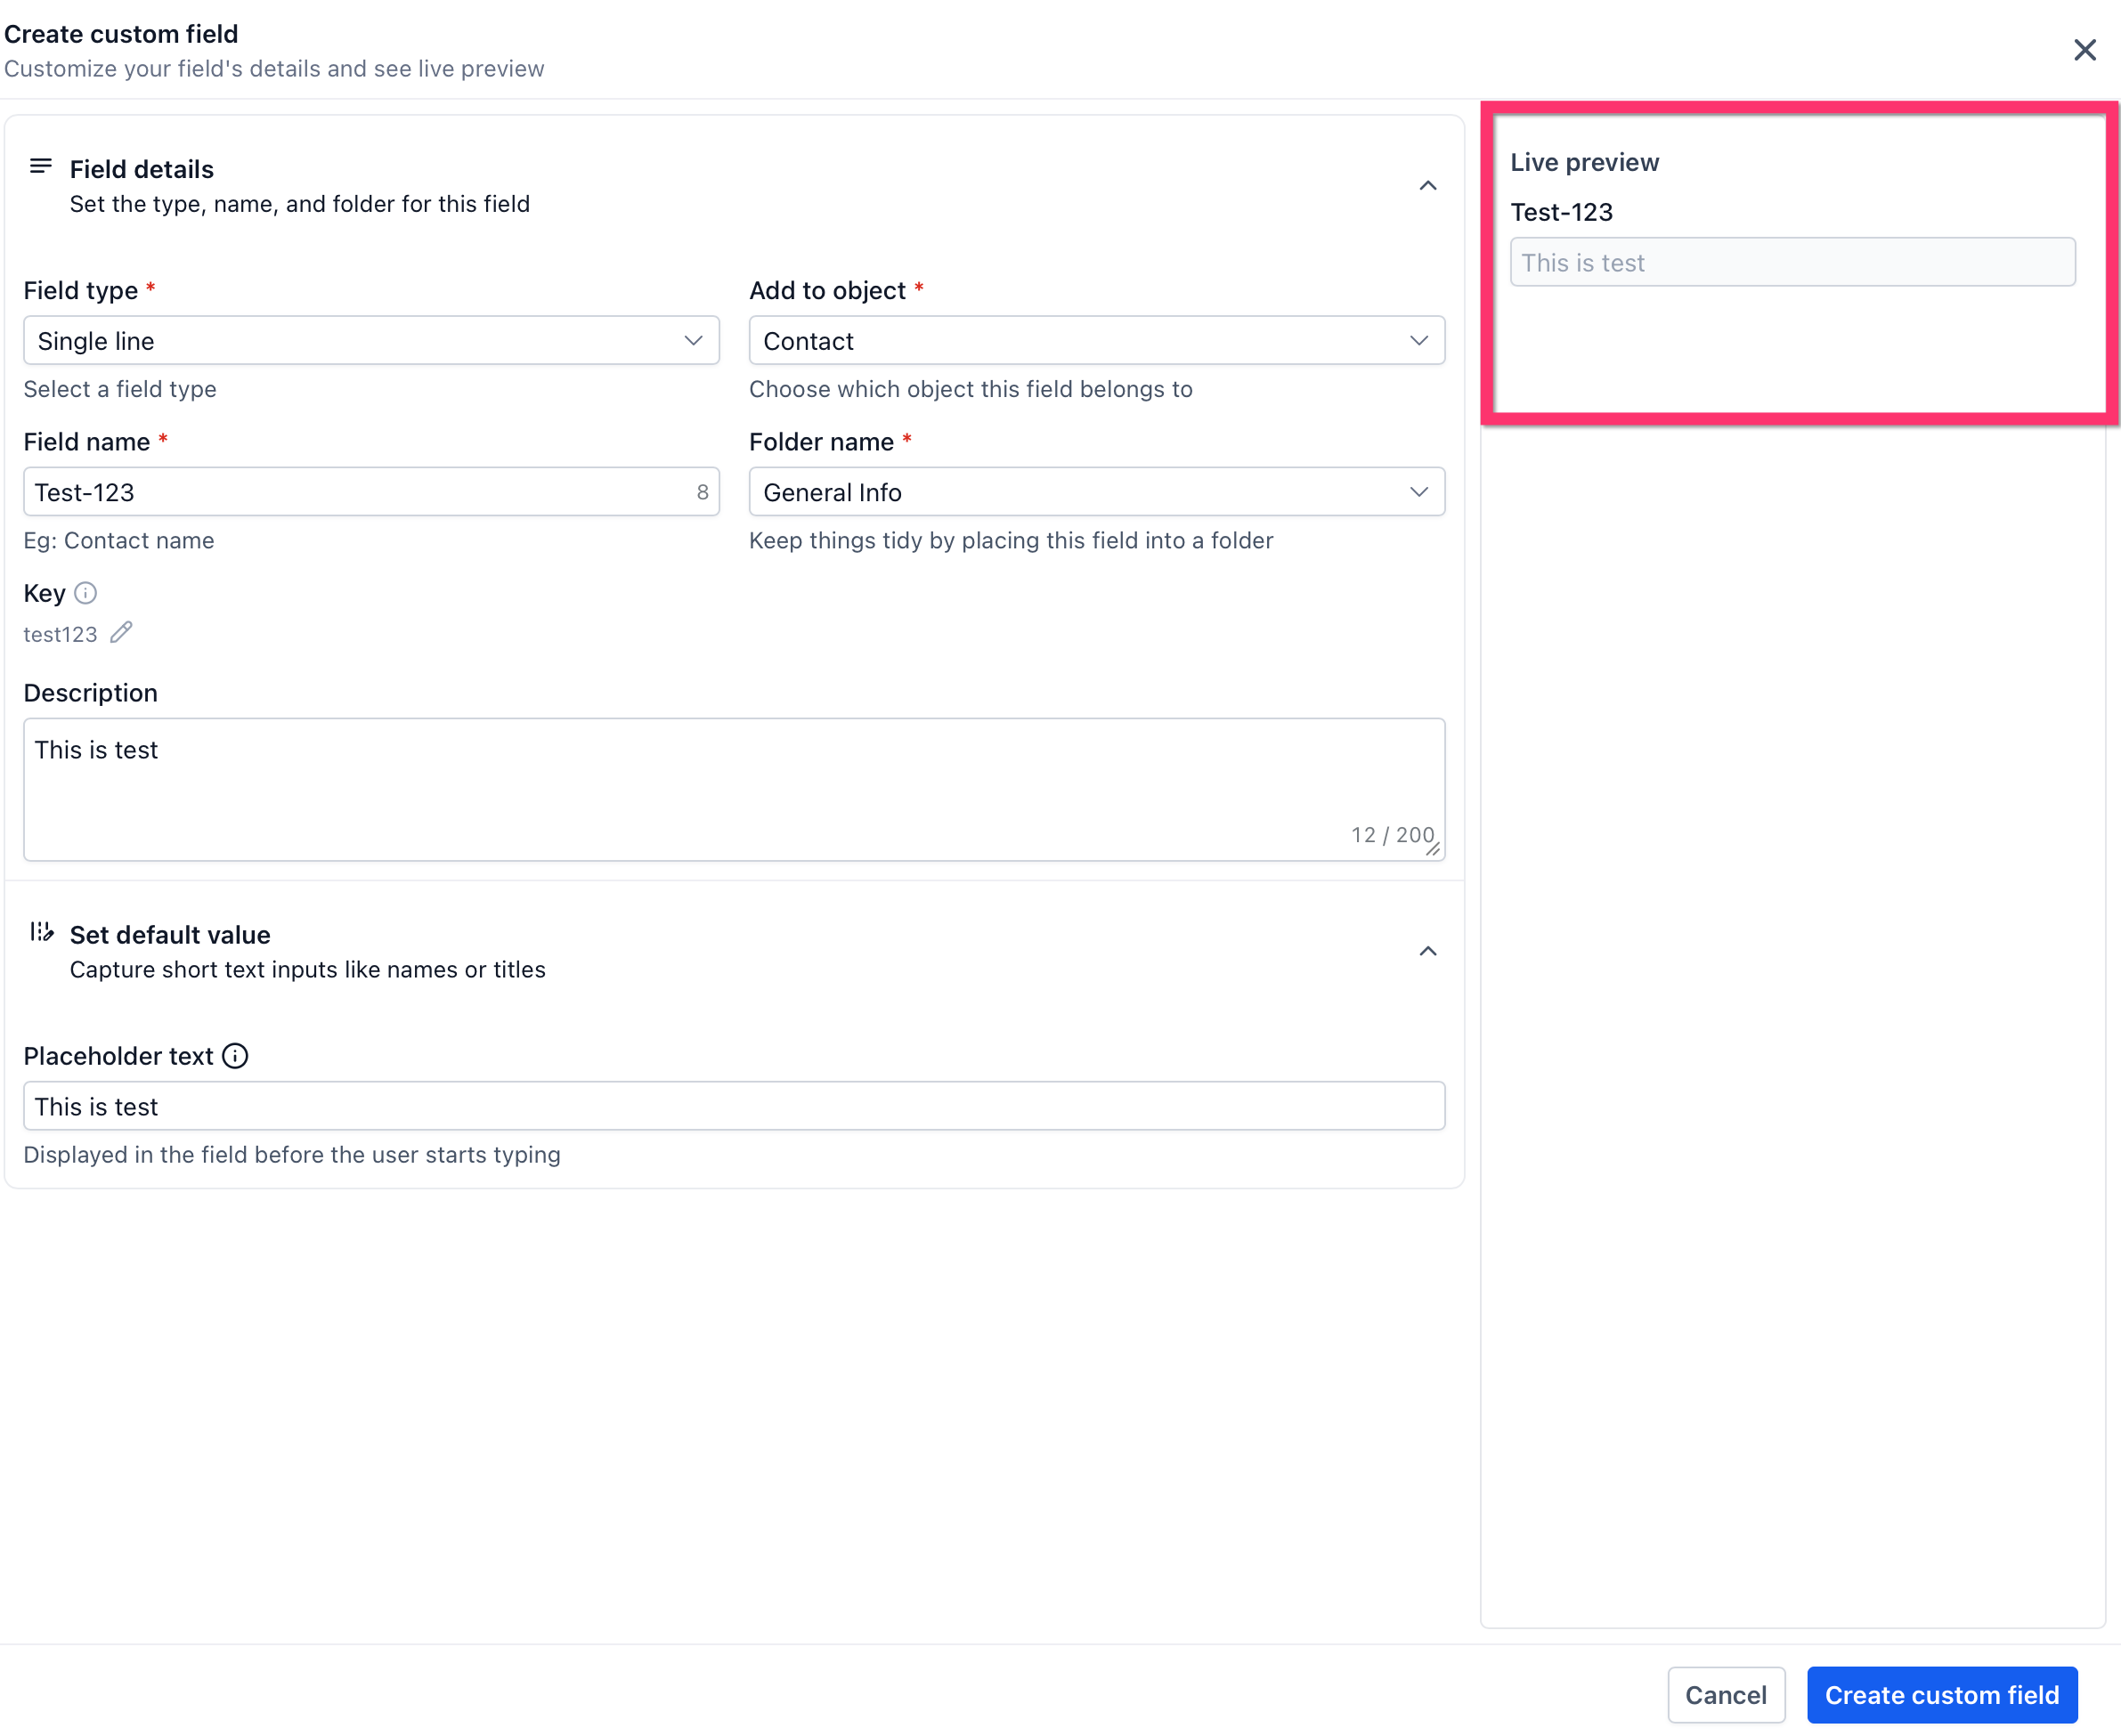
Step 7: Review the Live preview
Use the Live preview panel to confirm how the field will appear.
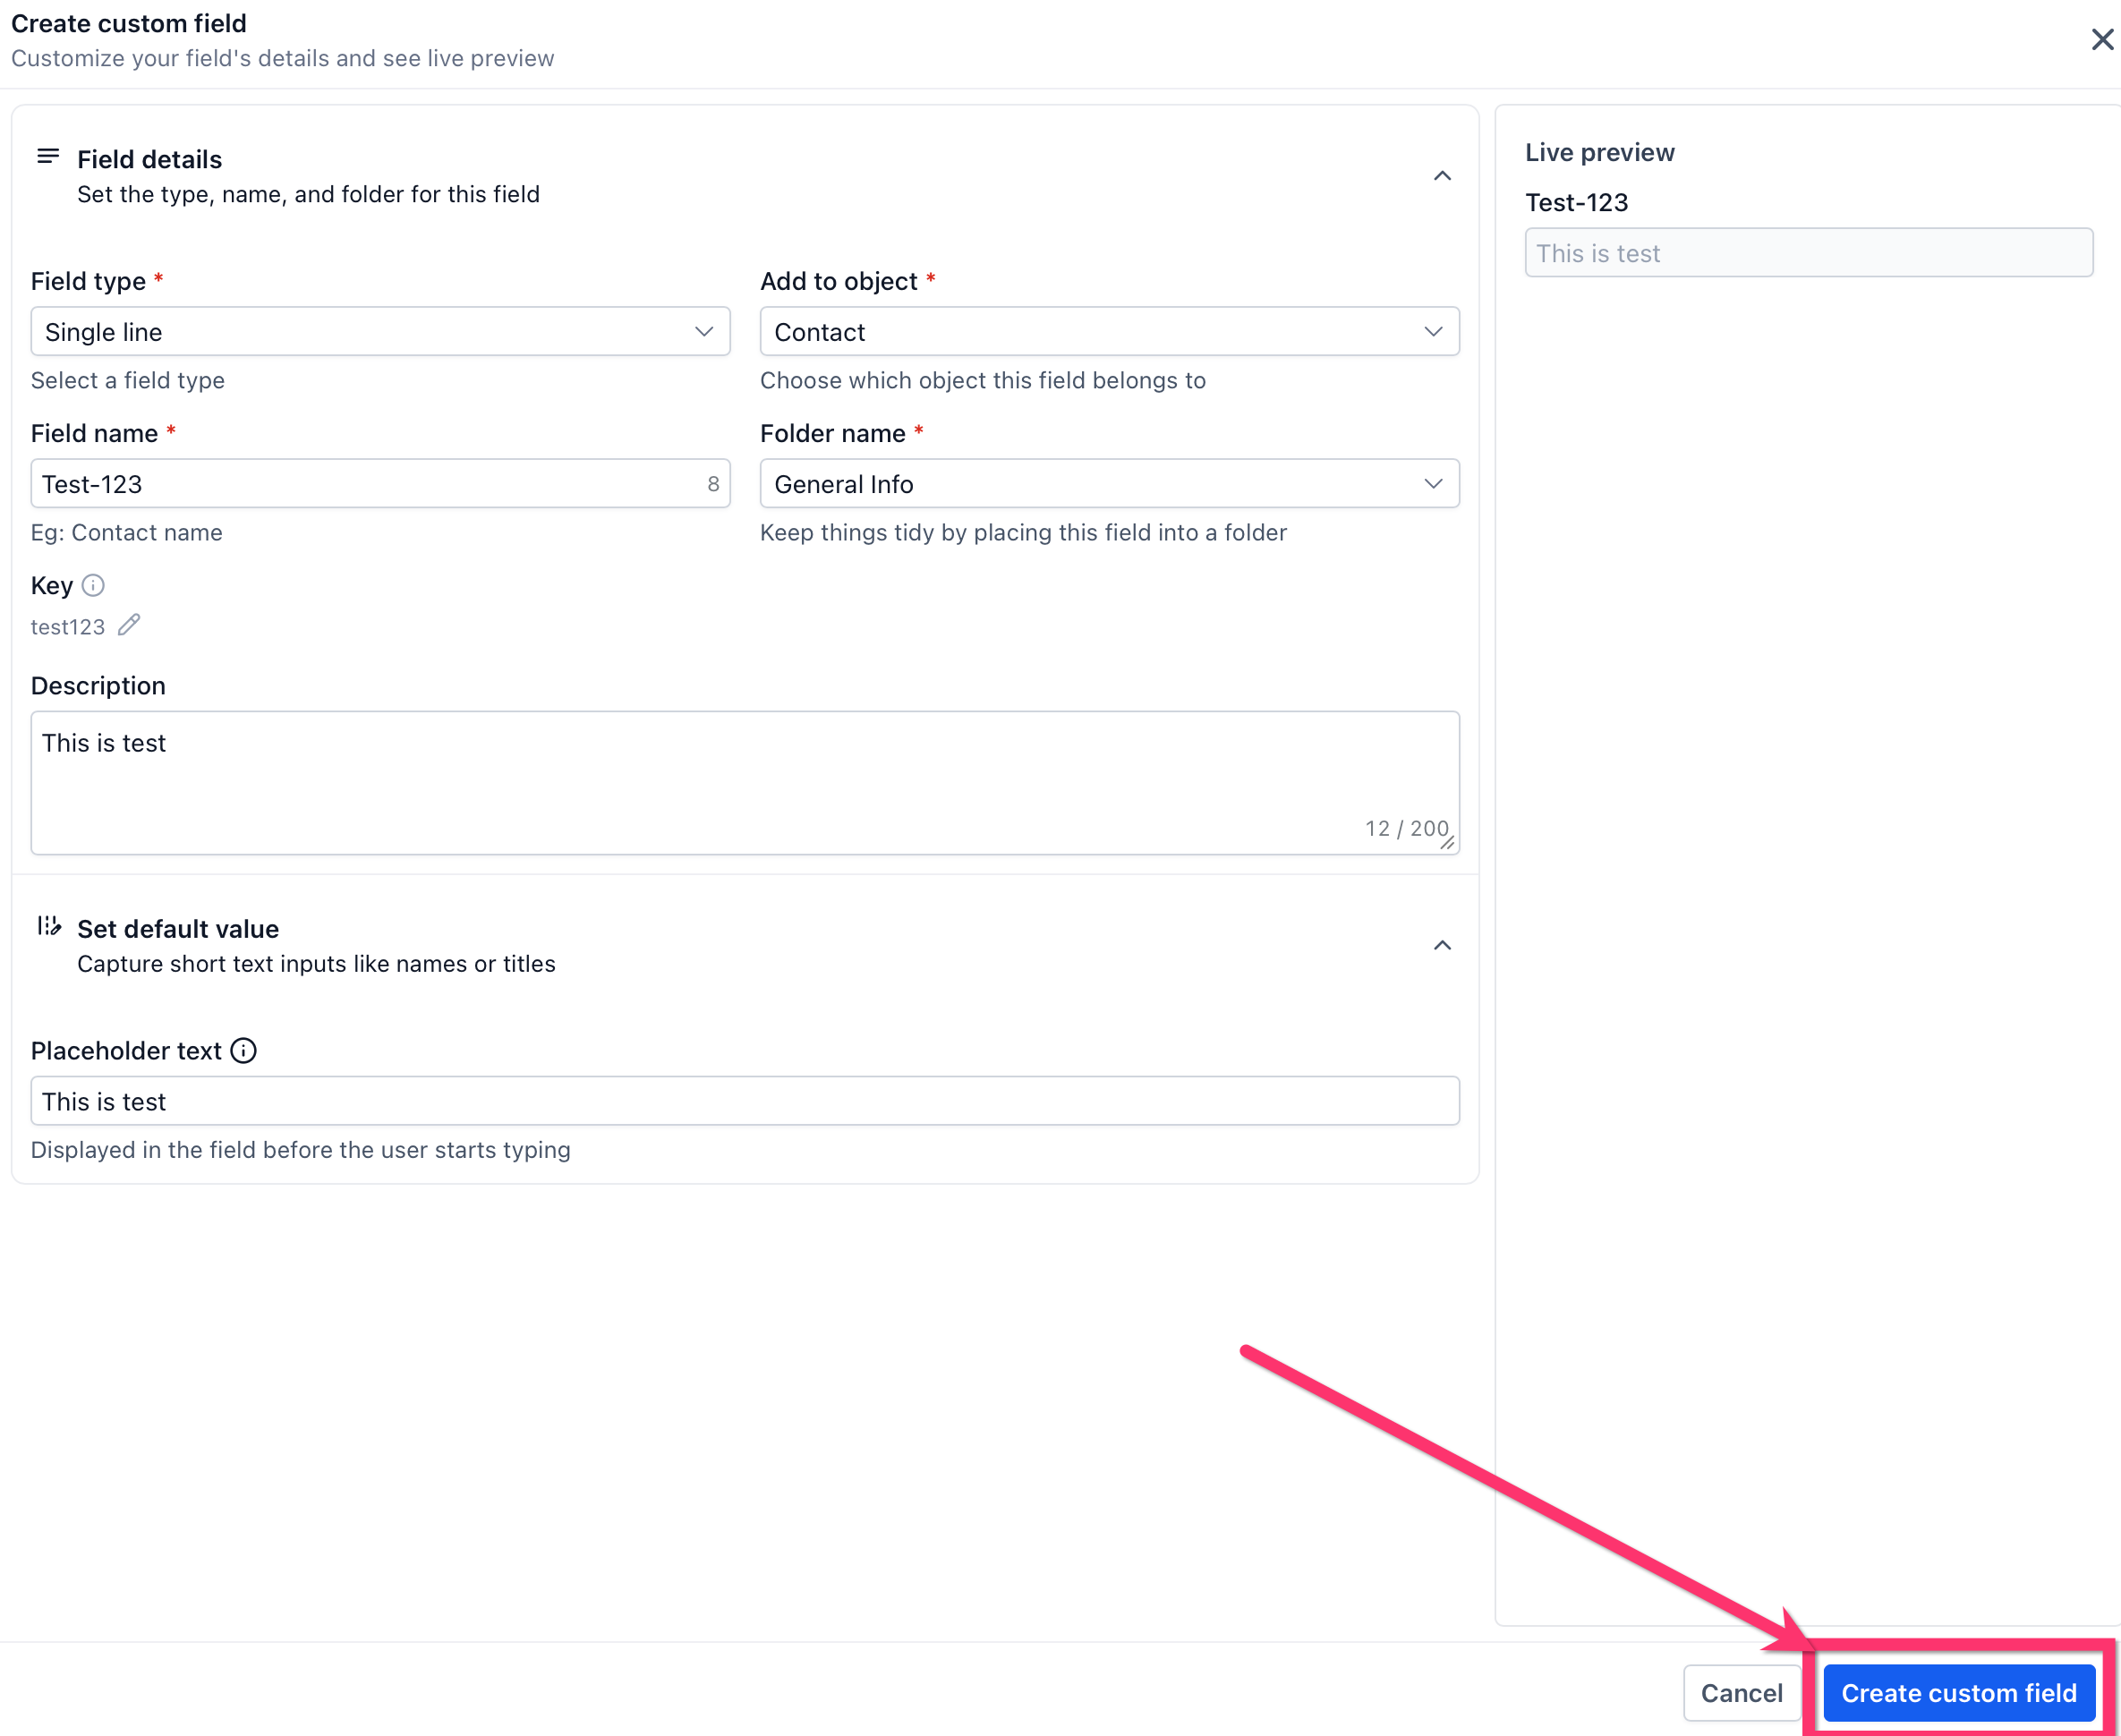
Step 8: Create the field
Click Create custom field to save the field.
The Custom Fields page uses a layout that helps you manage fields efficiently:
Use the object selector at the top of the page to switch between supported objects.
Use the Fields tab to view and manage custom fields.
Use the Folders tab to create and manage folders.
Sort the table by column to find fields faster.
Use the icons in the field list to identify special field states.
You can update a custom field at any time — for example, to rename it or to edit, reorder, add, or delete the options in a dropdown, radio, or checkbox field.
A real Aesthetix CRM example is the Treatment of Interest field. Editing its options lets you keep the list aligned with the treatments your practice currently offers, so potential clients receive tailored information based on their interests and your lead-nurture follow-up stays personalized.
Step 1: Go to Settings > Custom Fields.
Step 2: Use the object selector and the Fields tab to locate the field you want to change — for example, Treatment of Interest.
Step 3: Open the field and update its details. For a dropdown, radio, or checkbox field, you can edit existing options, reorder them, add new options, or delete options you no longer need.
Step 4: Save your changes. The field updates everywhere it is used.
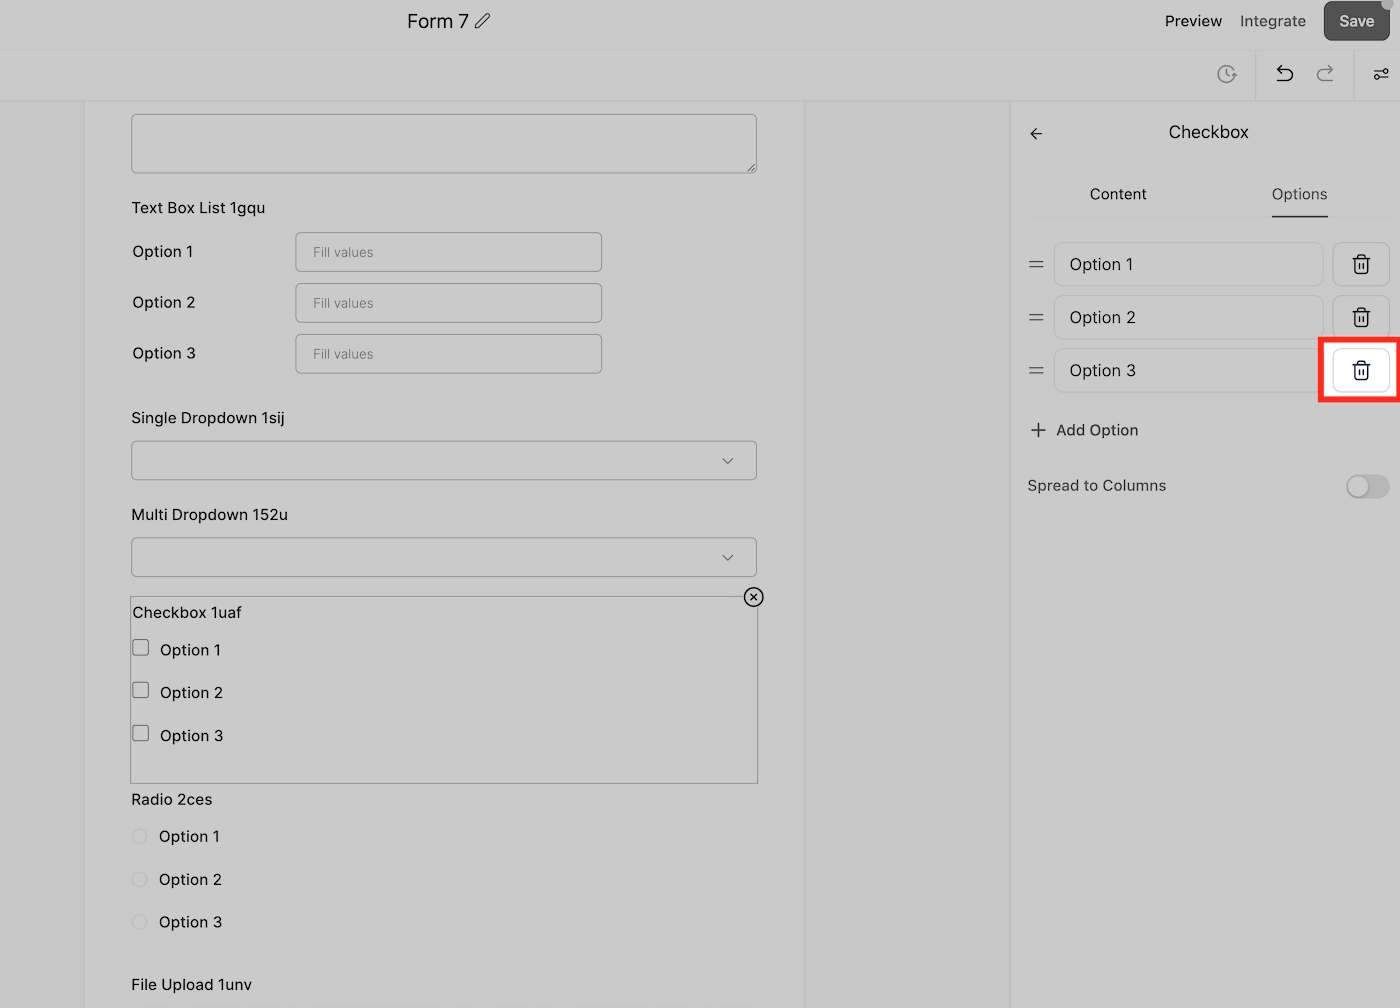
You can also add and adjust custom fields directly inside the form or survey builder without leaving the page.
To edit a custom field that is already placed on a form or survey:
Click the custom field within the form or survey builder.
A navigation bar appears on the right side.
Use the options in the General Settings and Advanced Settings dropdowns to make your changes.
A wide range of field types can be dragged directly into a form or survey, including Radio Select, Single and Multi Dropdown, Checkbox, File upload, Single line, Multi line, Textbox List, Date picker, Number, and Monetary.
When you save the form or survey, any new custom fields are saved as well and become available across the rest of the system. After saving, the custom field name and unique key are locked in the builder; to change those, edit the field from Settings > Custom Fields.
Please note: When a custom field contains the word "score" in its name, the system automatically interprets it as a numeric scoring element. This happens across Forms, Surveys, and Quizzes, and is built into how scoring elements are identified.
If you no longer need a custom field — or if an outdated field still appears in your form builder even after you removed it from the form — you can permanently delete it from the central Custom Fields list.
Step 1: Navigate to Settings > Custom Fields.
Step 2: Locate the outdated or unwanted field in the list.
Step 3: Click the Trash icon to permanently delete it.
Warning: Deleting a custom field from this section removes it from all forms, surveys, and contacts where it was used. This cannot be undone.
Can I convert a contact field into an opportunity field (or vice versa)? No. You must recreate the field under the correct object type. Field objects cannot be changed after creation.
What types of fields can I create? You can create Short Text, Long Text, Dropdowns, Date Pickers, Phone, Email, Radio Selects, Checkbox Groups, URLs, and more. See the Custom Field Types Reference guide for the complete list.
Why don't my fields show in a form or workflow? Ensure the object type matches the use case. Only Contact fields appear in forms and contact workflows.
How many options can the Dropdown (multiple) custom field have? The Dropdown (multiple) field can have a large number of options (50+), so there is no practical limit.
Why was my field deleted from a form I didn't touch? If you deleted the field from the central Custom Fields list, it is removed everywhere it was used, including forms, surveys, and contact records.
Custom Field Types Reference
