If you cannot measure it, you cannot improve it. That is especially true for email marketing. Aesthetix CRM tracks how your emails perform, from delivery and engagement all the way through to revenue, so you can understand what is working, fix what is not, and continuously optimize your campaigns. This guide is the complete reference for email statistics in Aesthetix CRM. It defines every metric precisely, explains how to enable click tracking and UTM tagging, covers engagement tracking and attribution settings, shows how conversion and ROI are calculated, walks through filtering contacts by their email behavior to build re-engagement or sunset segments, and finishes with troubleshooting for when the numbers look wrong.
Most metrics in this guide require Aesthetix CRM email (the built-in sending service) with a dedicated sending domain configured. Outside SMTP providers report a limited set of metrics. Where a metric or feature depends on your sending setup, that is called out in the relevant section.
Email statistics appear in different places depending on how the email was sent. There are three primary views.
Email Marketing Statistics (campaign dashboard). For one-time and scheduled campaign sends, go to Marketing > Emails and open the Statistics tab at the top of the Email Campaigns dashboard. Choose a date range to filter the data. This dashboard rolls up performance across your campaigns.
Workflow Email Statistics. For automated emails sent by a workflow, the stats live on the email step itself:
Go to Automation > Workflows.
Click into a workflow and select an Email action.
In the right-hand panel, click Statistics.
Workflow email statistics default to the Last 30 days to keep results consistent with the summary view. You will see Delivered, Opened, Clicked, Replied, Bounced, Unsubscribed, Complained, Accepted, and Rejected.
Bulk Email Statistics. For one-time bulk sends made outside of campaigns or automations, go to Contacts > Bulk Actions and locate the email send in your activity list. This view breaks down Total Attempts, Delivered, Opened, Clicked, Replied, Bounced, and Unsubscribed, and lets you see performance by individual recipient, which is useful for troubleshooting delivery or segmenting follow-up.
Because each sending method keeps its own statistics, the first troubleshooting question is always "how was this email sent?" An email sent from a workflow will not show stats in the campaign dashboard, and vice versa.
The campaign Statistics tab is organized into sections that together form a funnel from send to revenue. Choose a date range (for example, last 7 or 30 days) to scope every section.
Conversion Summary. A high-level view of how your email campaigns drive revenue. It shows the number of orders placed, total revenue earned, the order conversion rate (the percentage of recipients who made a purchase), and the average order value. Use this snapshot to understand how well your emails turn clicks into sales.
Engagement Summary. How recipients are interacting with your emails: Emails Sent, Emails Opened, Link Clicks, and Purchases Made. Read this section as a conversion funnel that shows where recipients drop off and where they take action. Aesthetix CRM counts unique opens and clicks here, meaning only one interaction per contact is counted no matter how many times that contact opens or clicks.
Performance Analysis. Track how key metrics evolve over time: Emails Sent, Opens, Clicks, and Unsubscribes. Use the dropdown to switch the charted metric and view the trend across your selected date range. This tells you whether performance is improving or needs adjustment.
Top Performing Emails. The top 5 campaigns ranked by revenue (or by open and click rates). Use this to recognize which messaging, layout, or send time resonated most and replicate it.
Recent Email Analysis. The 10 most recent campaigns in detail, so you can monitor current performance and spot immediate areas to improve.
This is the precise definition of every statistic Aesthetix CRM tracks, in roughly the order an email moves through the funnel. Rates are calculated per the formulas shown.
Metric | Definition |
|---|---|
Recipients | The number of contacts targeted by the send. |
Sent | The email was dispatched to the recipient's mail server. |
Delivered | Successfully accepted by the recipient's mail server. |
Opened | The recipient viewed the email at least once. Counted as unique opens. |
Clicked | The recipient clicked at least one tracked link. Counted as unique clicks. |
Replied | The contact responded directly to the email. |
Conversion (Ordered) | The recipient completed a tracked action, such as a purchase, within the attribution window. |
Soft Bounced | A temporary delivery failure, such as a full inbox or a temporary server problem. May still succeed if retried later. |
Hard Bounced | A permanent delivery failure, such as an invalid address or a blocked domain. Hurts sender reputation. |
Unsubscribed | The recipient opted out using the unsubscribe link in the footer. |
Complained (Spam) | The recipient marked the email as spam. |
Skipped | The email was ready but not sent to a specific contact, usually due to an internal issue during send or because the contact is set to Do Not Disturb (DND). |
Failed | A send error occurred before any delivery attempt, for example an invalid email address or a bad sending configuration. |
Accepted / Rejected | The SMTP-level acceptance outcome at the moment of handoff to the mail server. |
The Summary page presents the headline metrics as percentages. Use these formulas and benchmarks to interpret them.
Delivered rate = (Delivered / Total Sent) x 100. A delivery rate of 90% or higher indicates a good sender reputation and a clean contact list.
Open rate = (Unique Opens / Delivered) x 100. This measures how well your subject line and sender name grab attention.
Click rate = (Unique Clicks / Delivered) x 100. A higher click rate shows strong engagement and effective content or call-to-action placement.
Conversion rate = (Conversions / Delivered) x 100. When conversion tracking is set up, this is your clearest signal of campaign goal success and ROI.
Unsubscribe rate = (Unsubscribed / Delivered) x 100. Under 1% is normal. Higher numbers suggest irrelevant content or sending too frequently.
Hard bounce rate. Keep this below 2%. Clean your contact list regularly to stay under that threshold and protect deliverability.
Spam complaint rate. Keep this as low as possible. Avoid spam-triggering language and only send to audiences who expect to hear from you.
The difference between Bounced, Failed, and Complained matters for list hygiene: Bounced means the recipient's mail server rejected the message, Failed means a send error happened before any delivery attempt, and Complained means the recipient marked the message as spam.
After a campaign is sent, the Summary page gives an at-a-glance view of its performance, including engagement trends over time and recipient-level detail. Note that statistics only appear for emails that have actually been sent and delivered; drafts and scheduled campaigns will not show data until they go out.
To open the Summary page:
Navigate to Marketing > Emails.
Go to the Campaigns tab.
Locate your sent email campaign.
Click the three-dot menu next to the campaign name.
Select Statistics.
In the stats side panel that opens, click Load More Statistics.
On the full statistics page, select the Summary tab at the top.
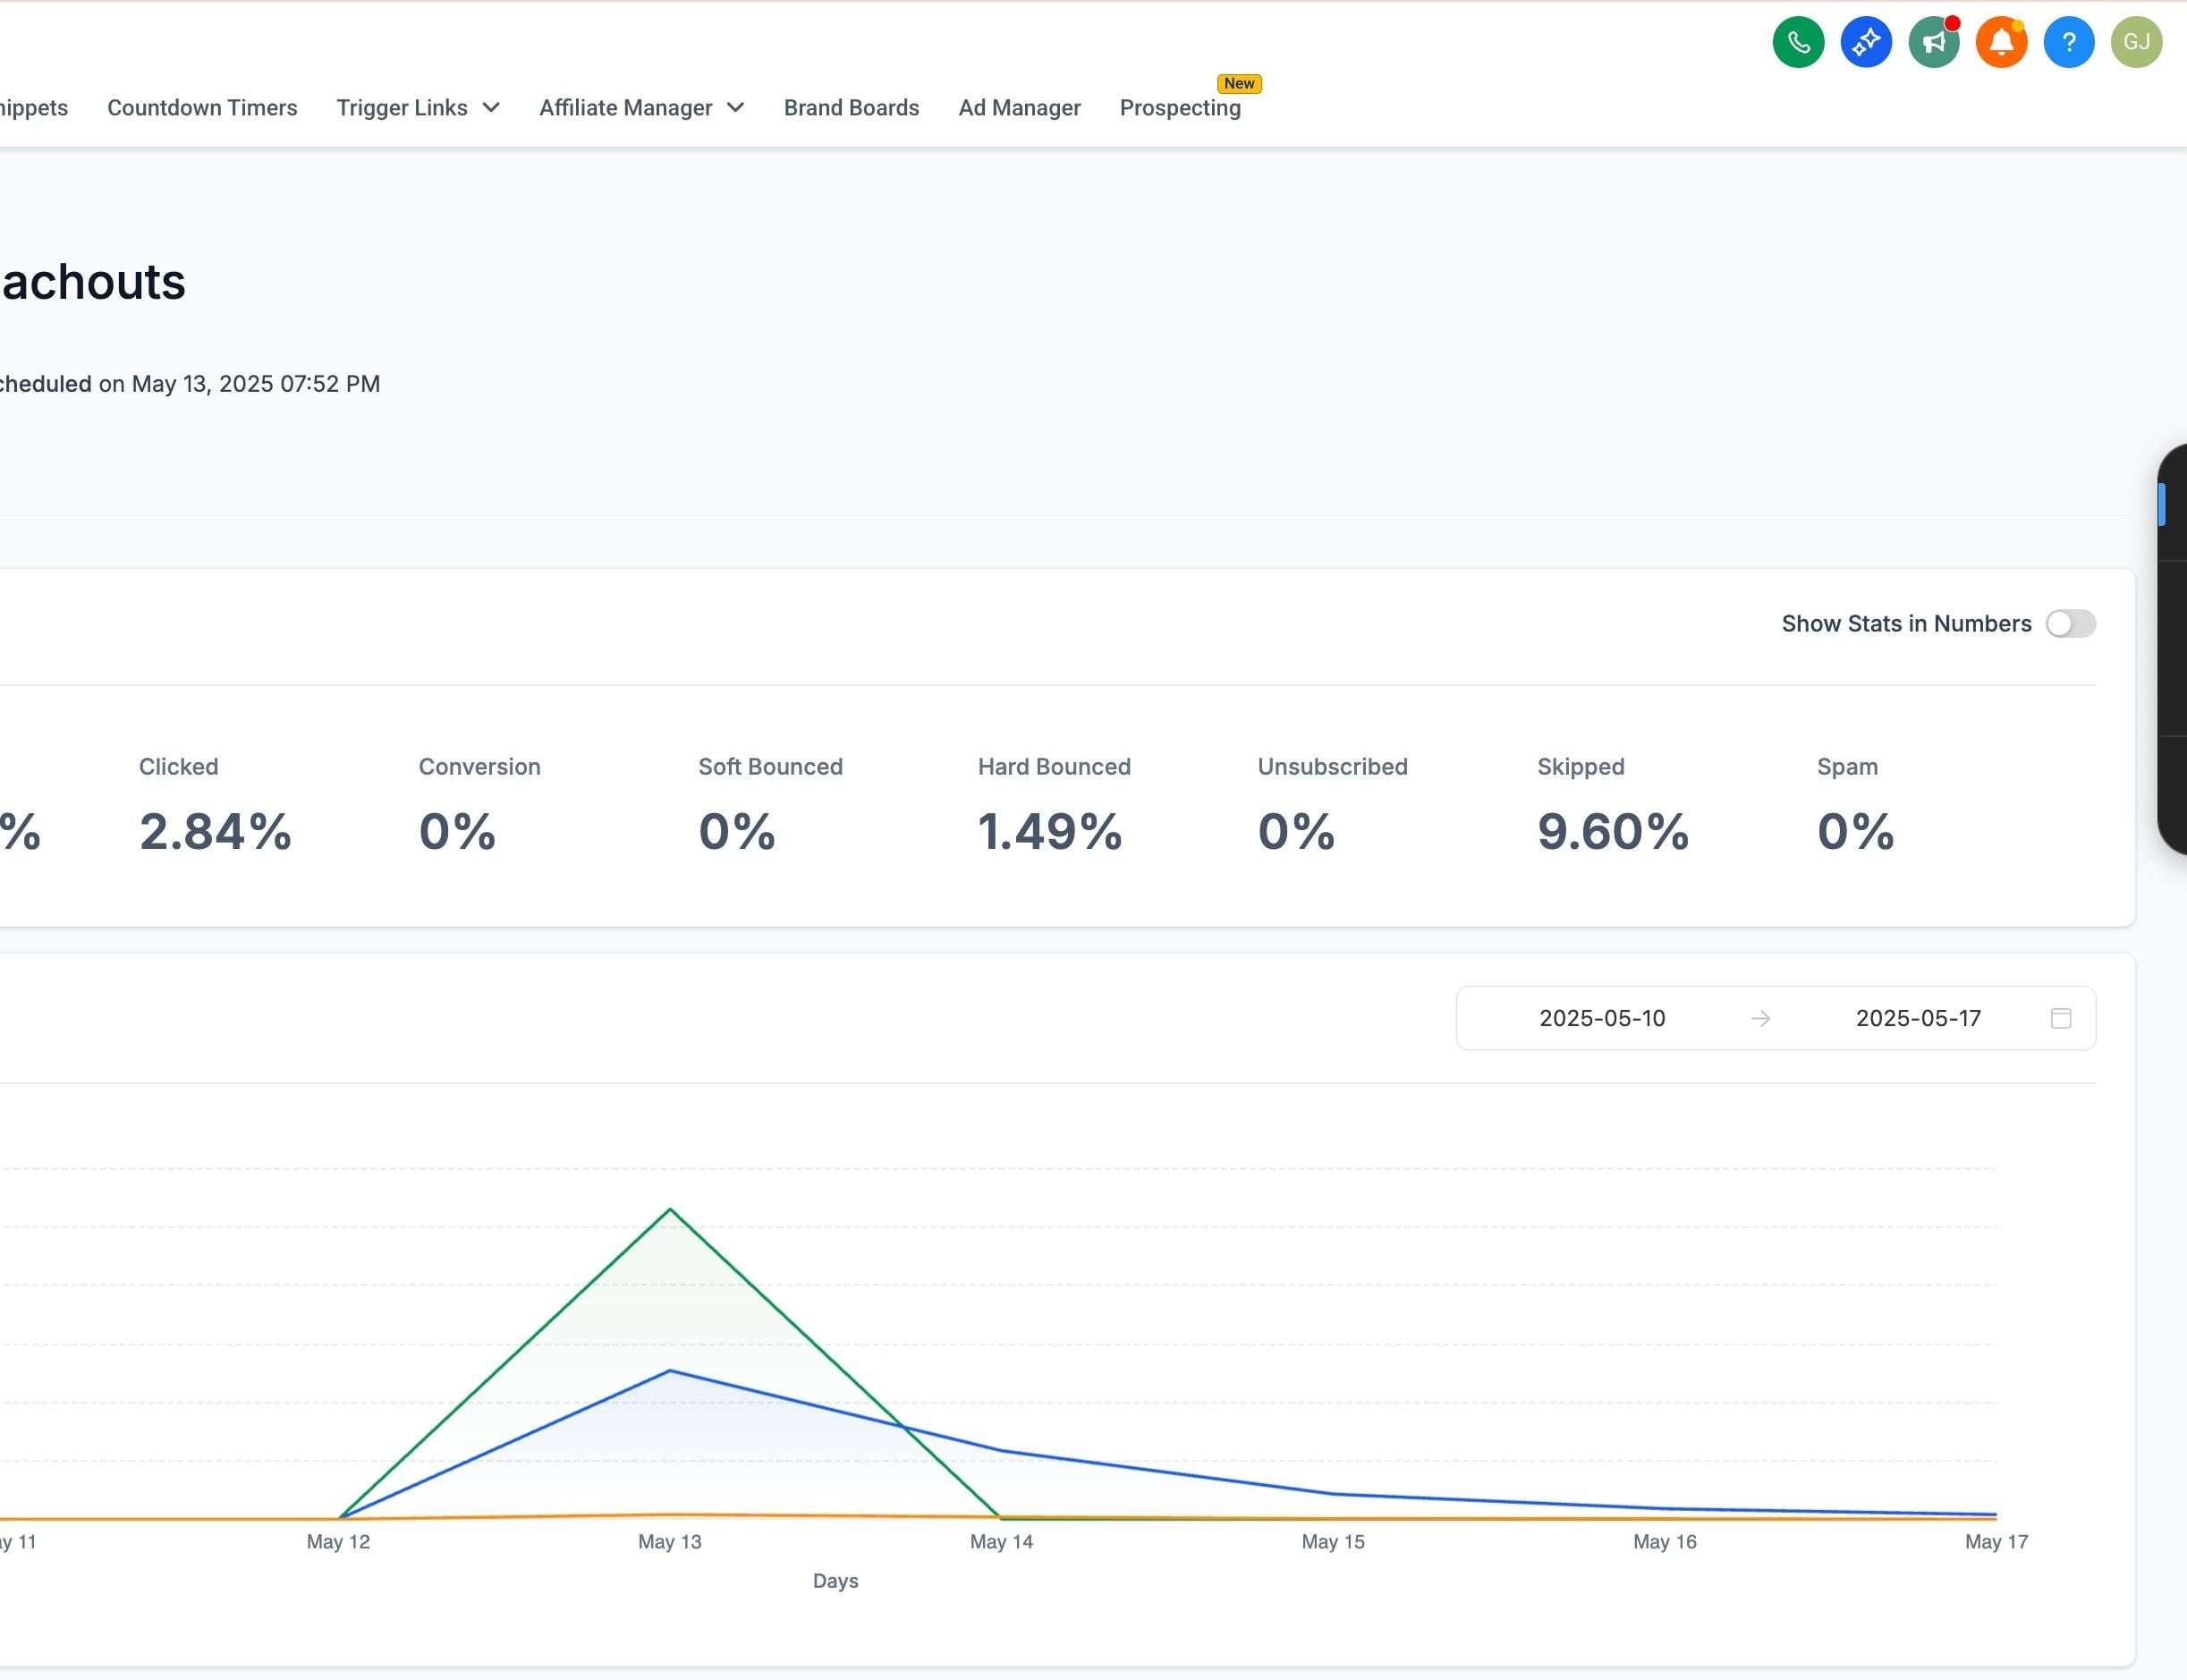
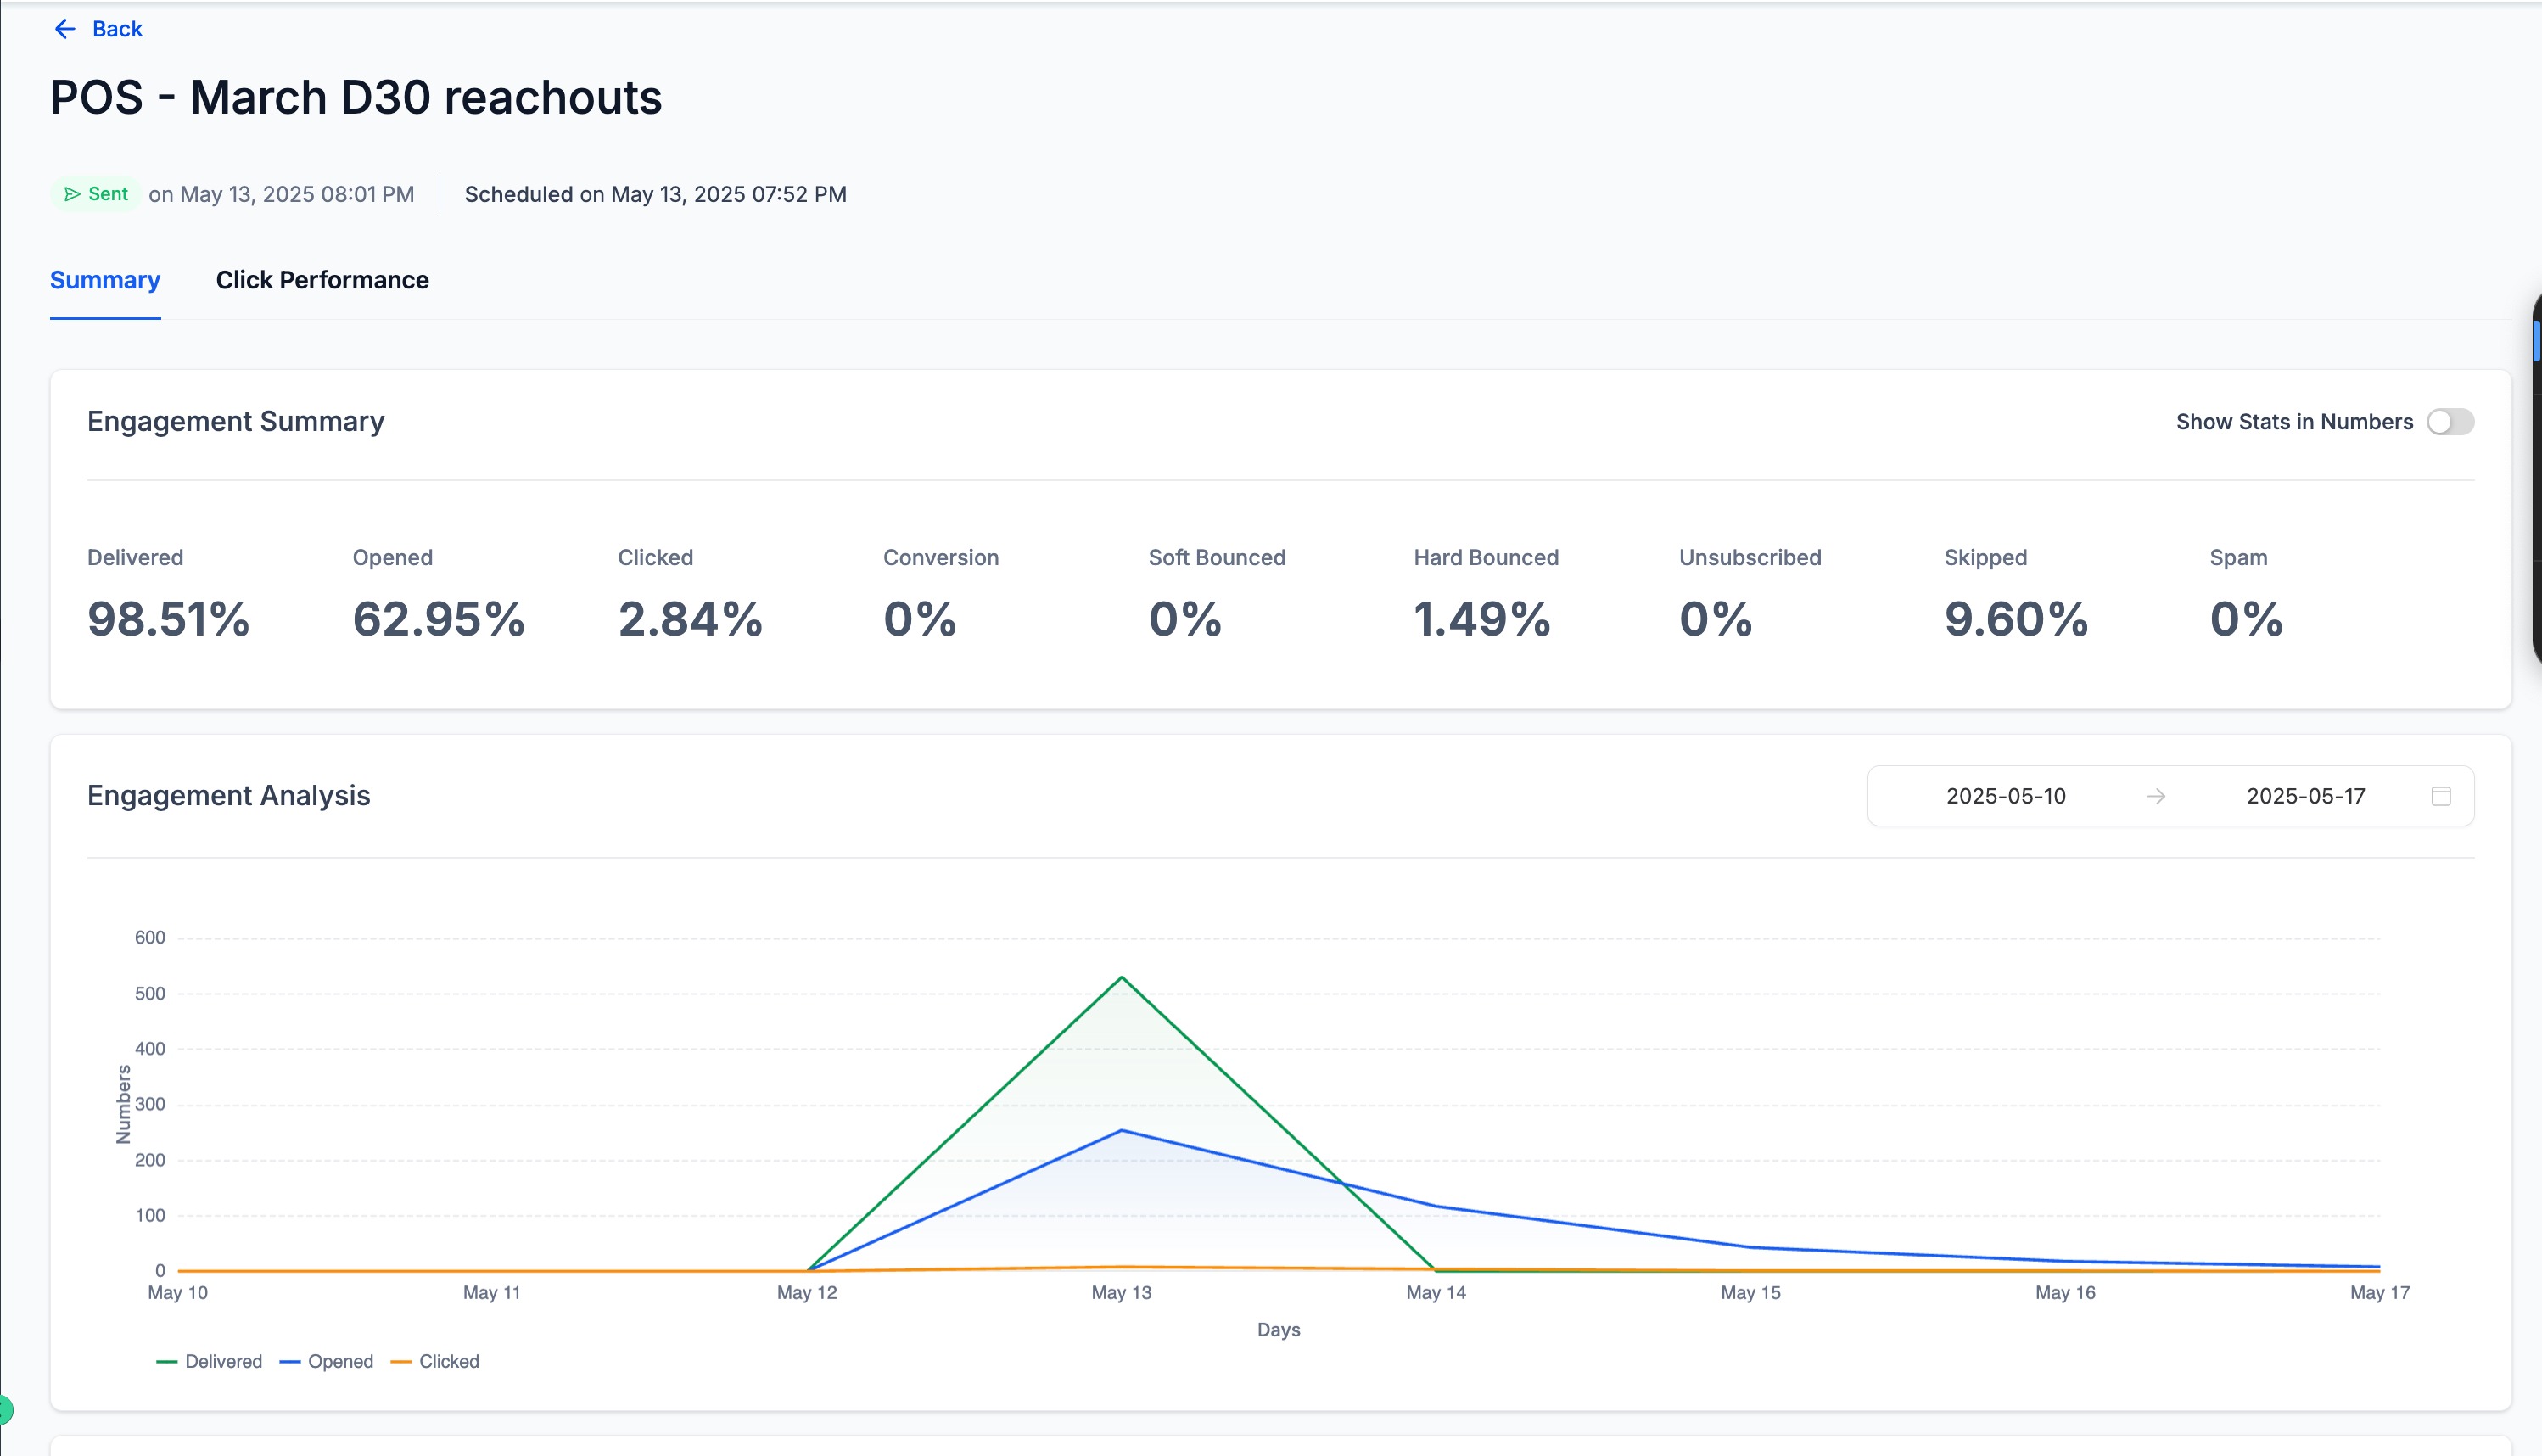
The Summary page presents Delivered, Opened, Clicked, Conversion, Soft Bounced, Hard Bounced, Unsubscribed, Skipped, and Spam, each as defined above.
Below the summary metrics, the Engagement Analysis graph plots your campaign's key performance trends over your selected date range:
Delivered (green line)
Opened (blue line)
Clicked (orange line)
Peaks in the chart often reveal the best-performing send days or hours for your audience.
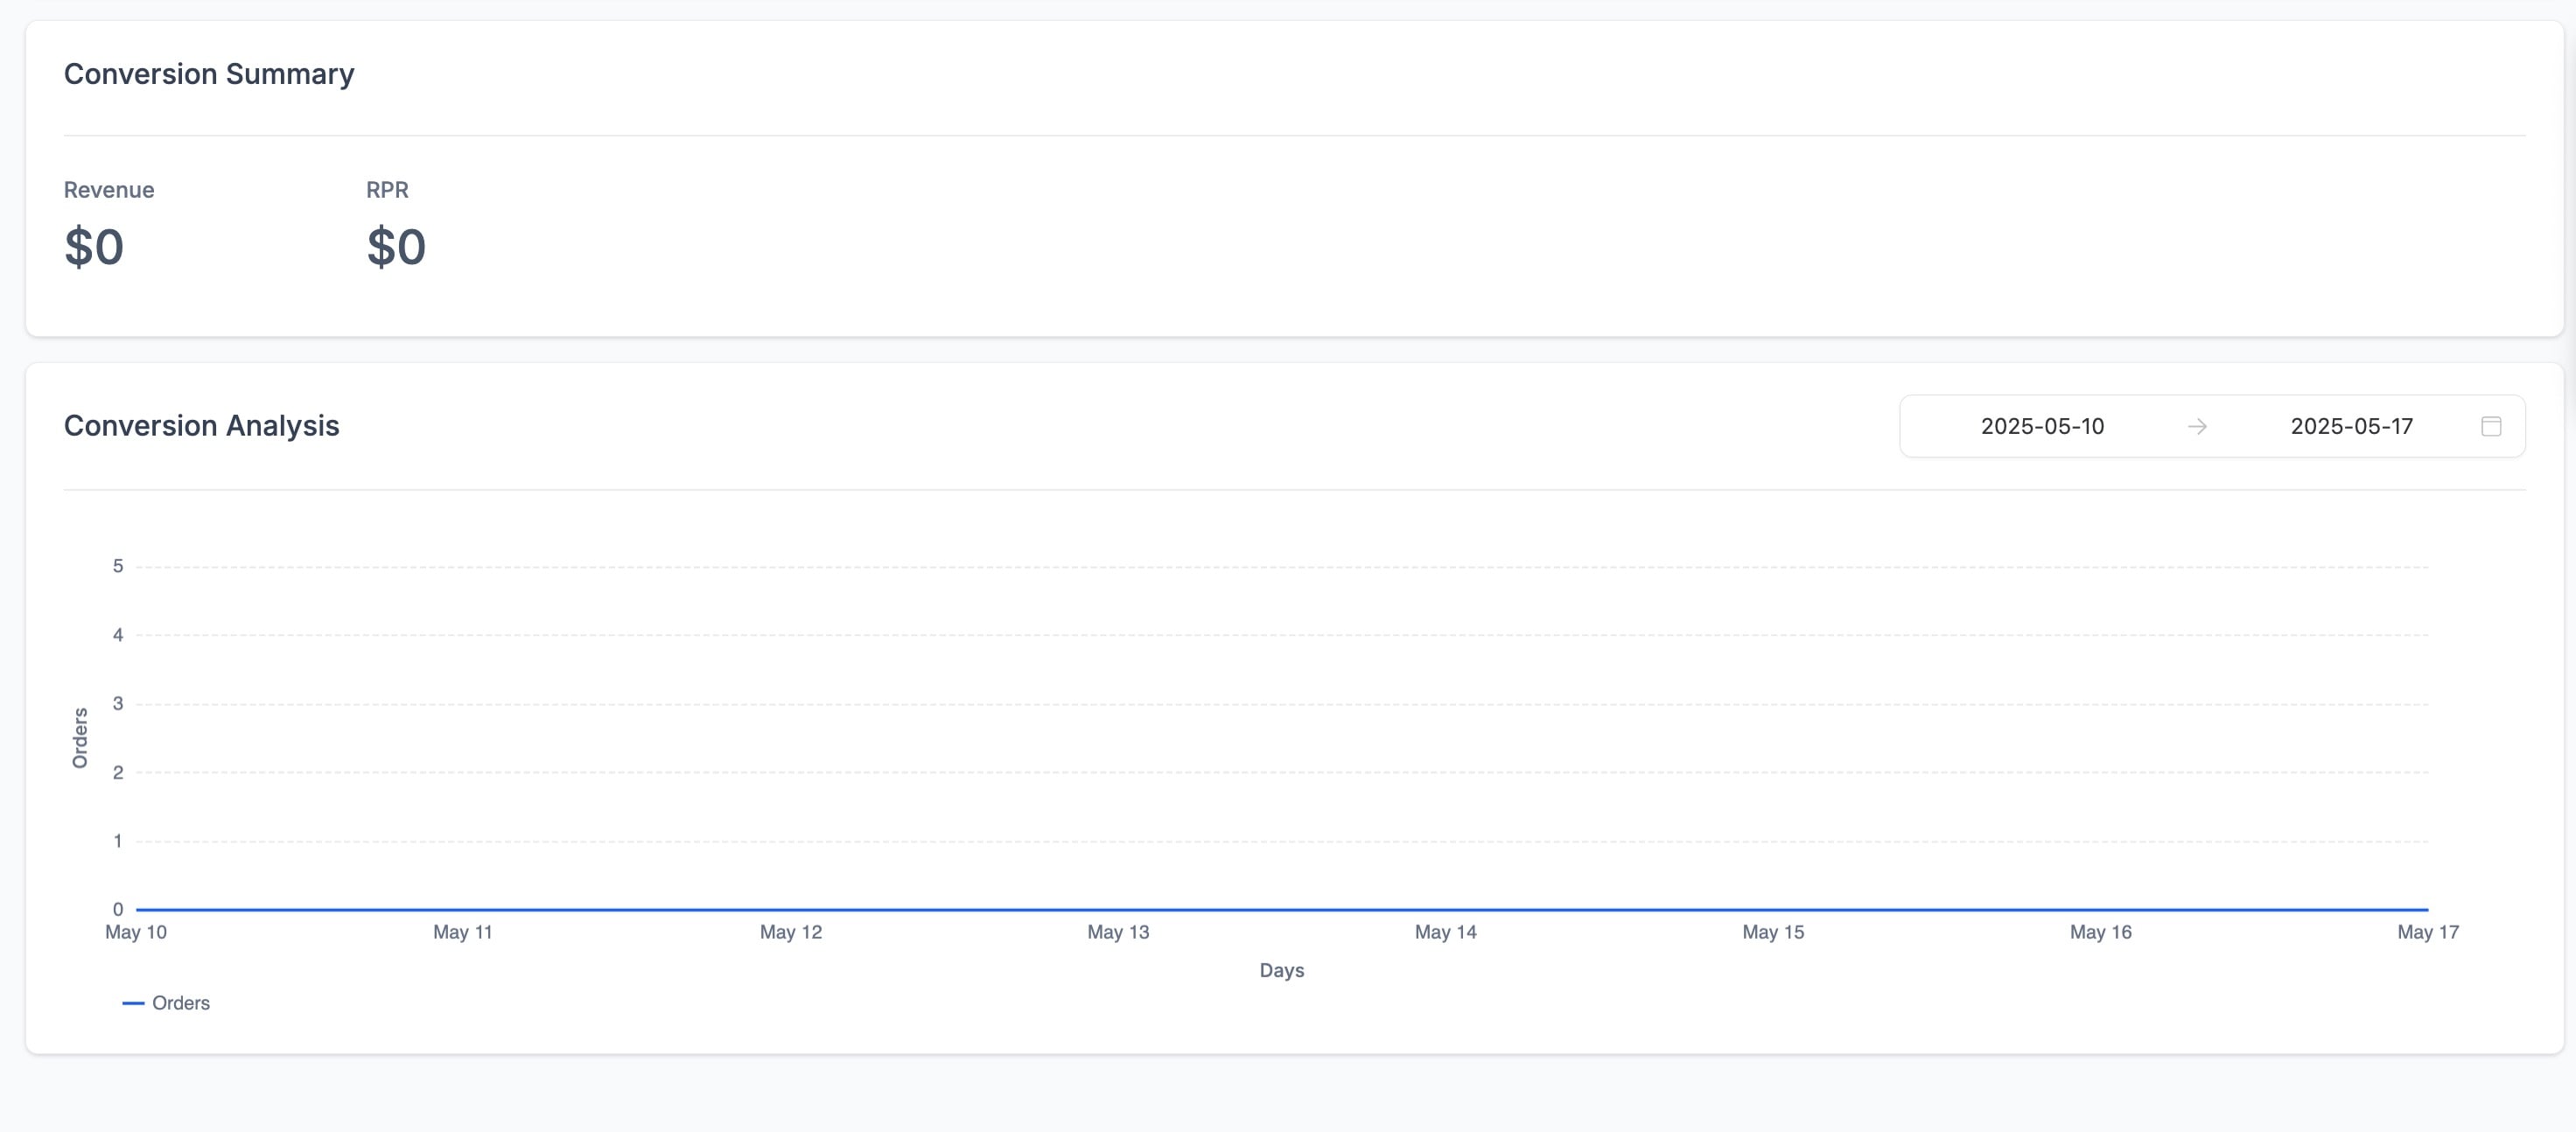
If the campaign includes e-commerce or goal tracking, this section shows Revenue (total income generated from the email), RPR (Revenue per Recipient, the average revenue earned per recipient), and a Conversion Analysis chart that tracks orders or conversions over time. If revenue tracking is not set up, these fields display as $0.
The Details section lists individual contact-level engagement with one tab per outcome: Delivered, Opened, Clicked, Ordered, Replied, Hard Bounced, Soft Bounced, Complained, Unsubscribed, Skipped, and Failed. Each row shows Full Name, Email Address, Status, and Last Updated Timestamp. You can Export any of these lists as a CSV for deeper analysis or record-keeping.
Engagement tracking is what records whether a recipient opened your email (open tracking) and whether they clicked a link inside it (click tracking). These two signals are the foundation of nearly every metric and segment in this guide, so it is worth understanding how they are controlled.
Engagement tracking is only available when you send through Aesthetix CRM email from a dedicated sending domain. It is not available for outside providers such as Gmail or a generic SMTP relay. You can still use an outside address as a "From Name," but you cannot track engagement unless Aesthetix CRM is the sending service.
When tracking is enabled, Aesthetix CRM attributes each engagement event to the contact who triggered it. For example, if you email a contact named Jane, Jane appears in your tracking data so you can see exactly how she engaged. The data collected per contact includes Email Sent, Email Delivered, Email Opened, Email Clicked, Email Bounced, Complained (marked as spam), Unsubscribed, and Email Failed to Send.
Open and click tracking are controlled at the dedicated-domain level in settings. You will need a dedicated sending domain configured first.
Go to Settings > Email Services, with your Aesthetix CRM email selected.
Click Dedicated Domain and IP.
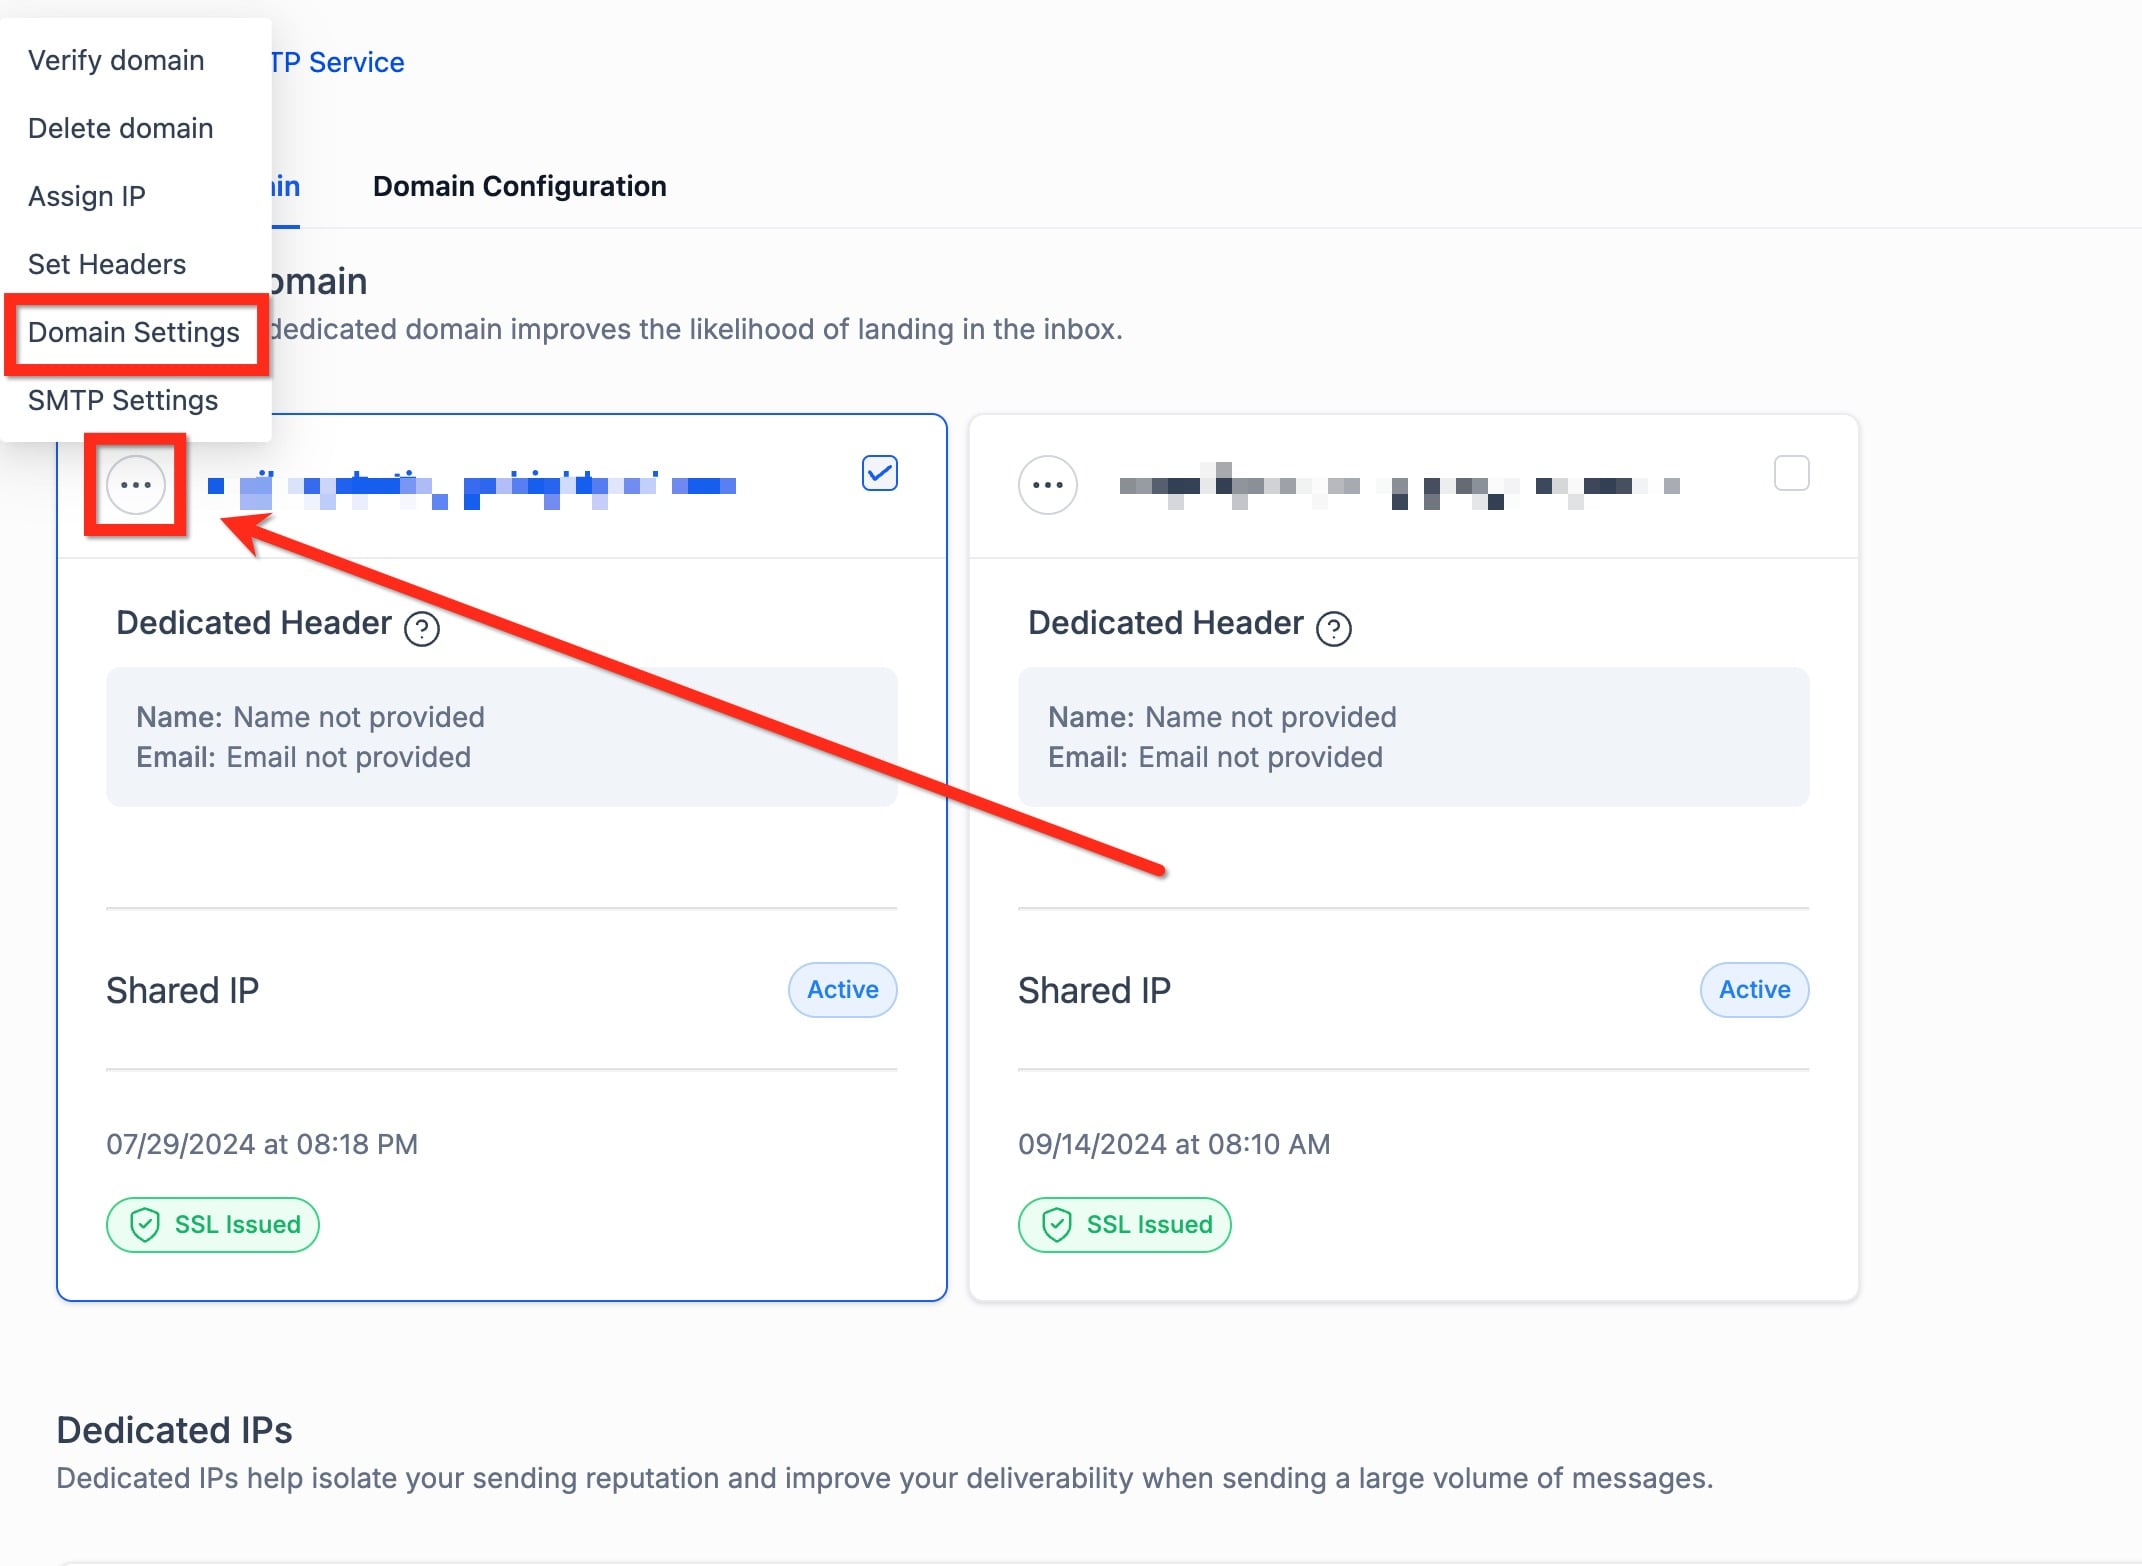
Click the three-dot button in the corner of your dedicated sending domain and choose Domain Settings.
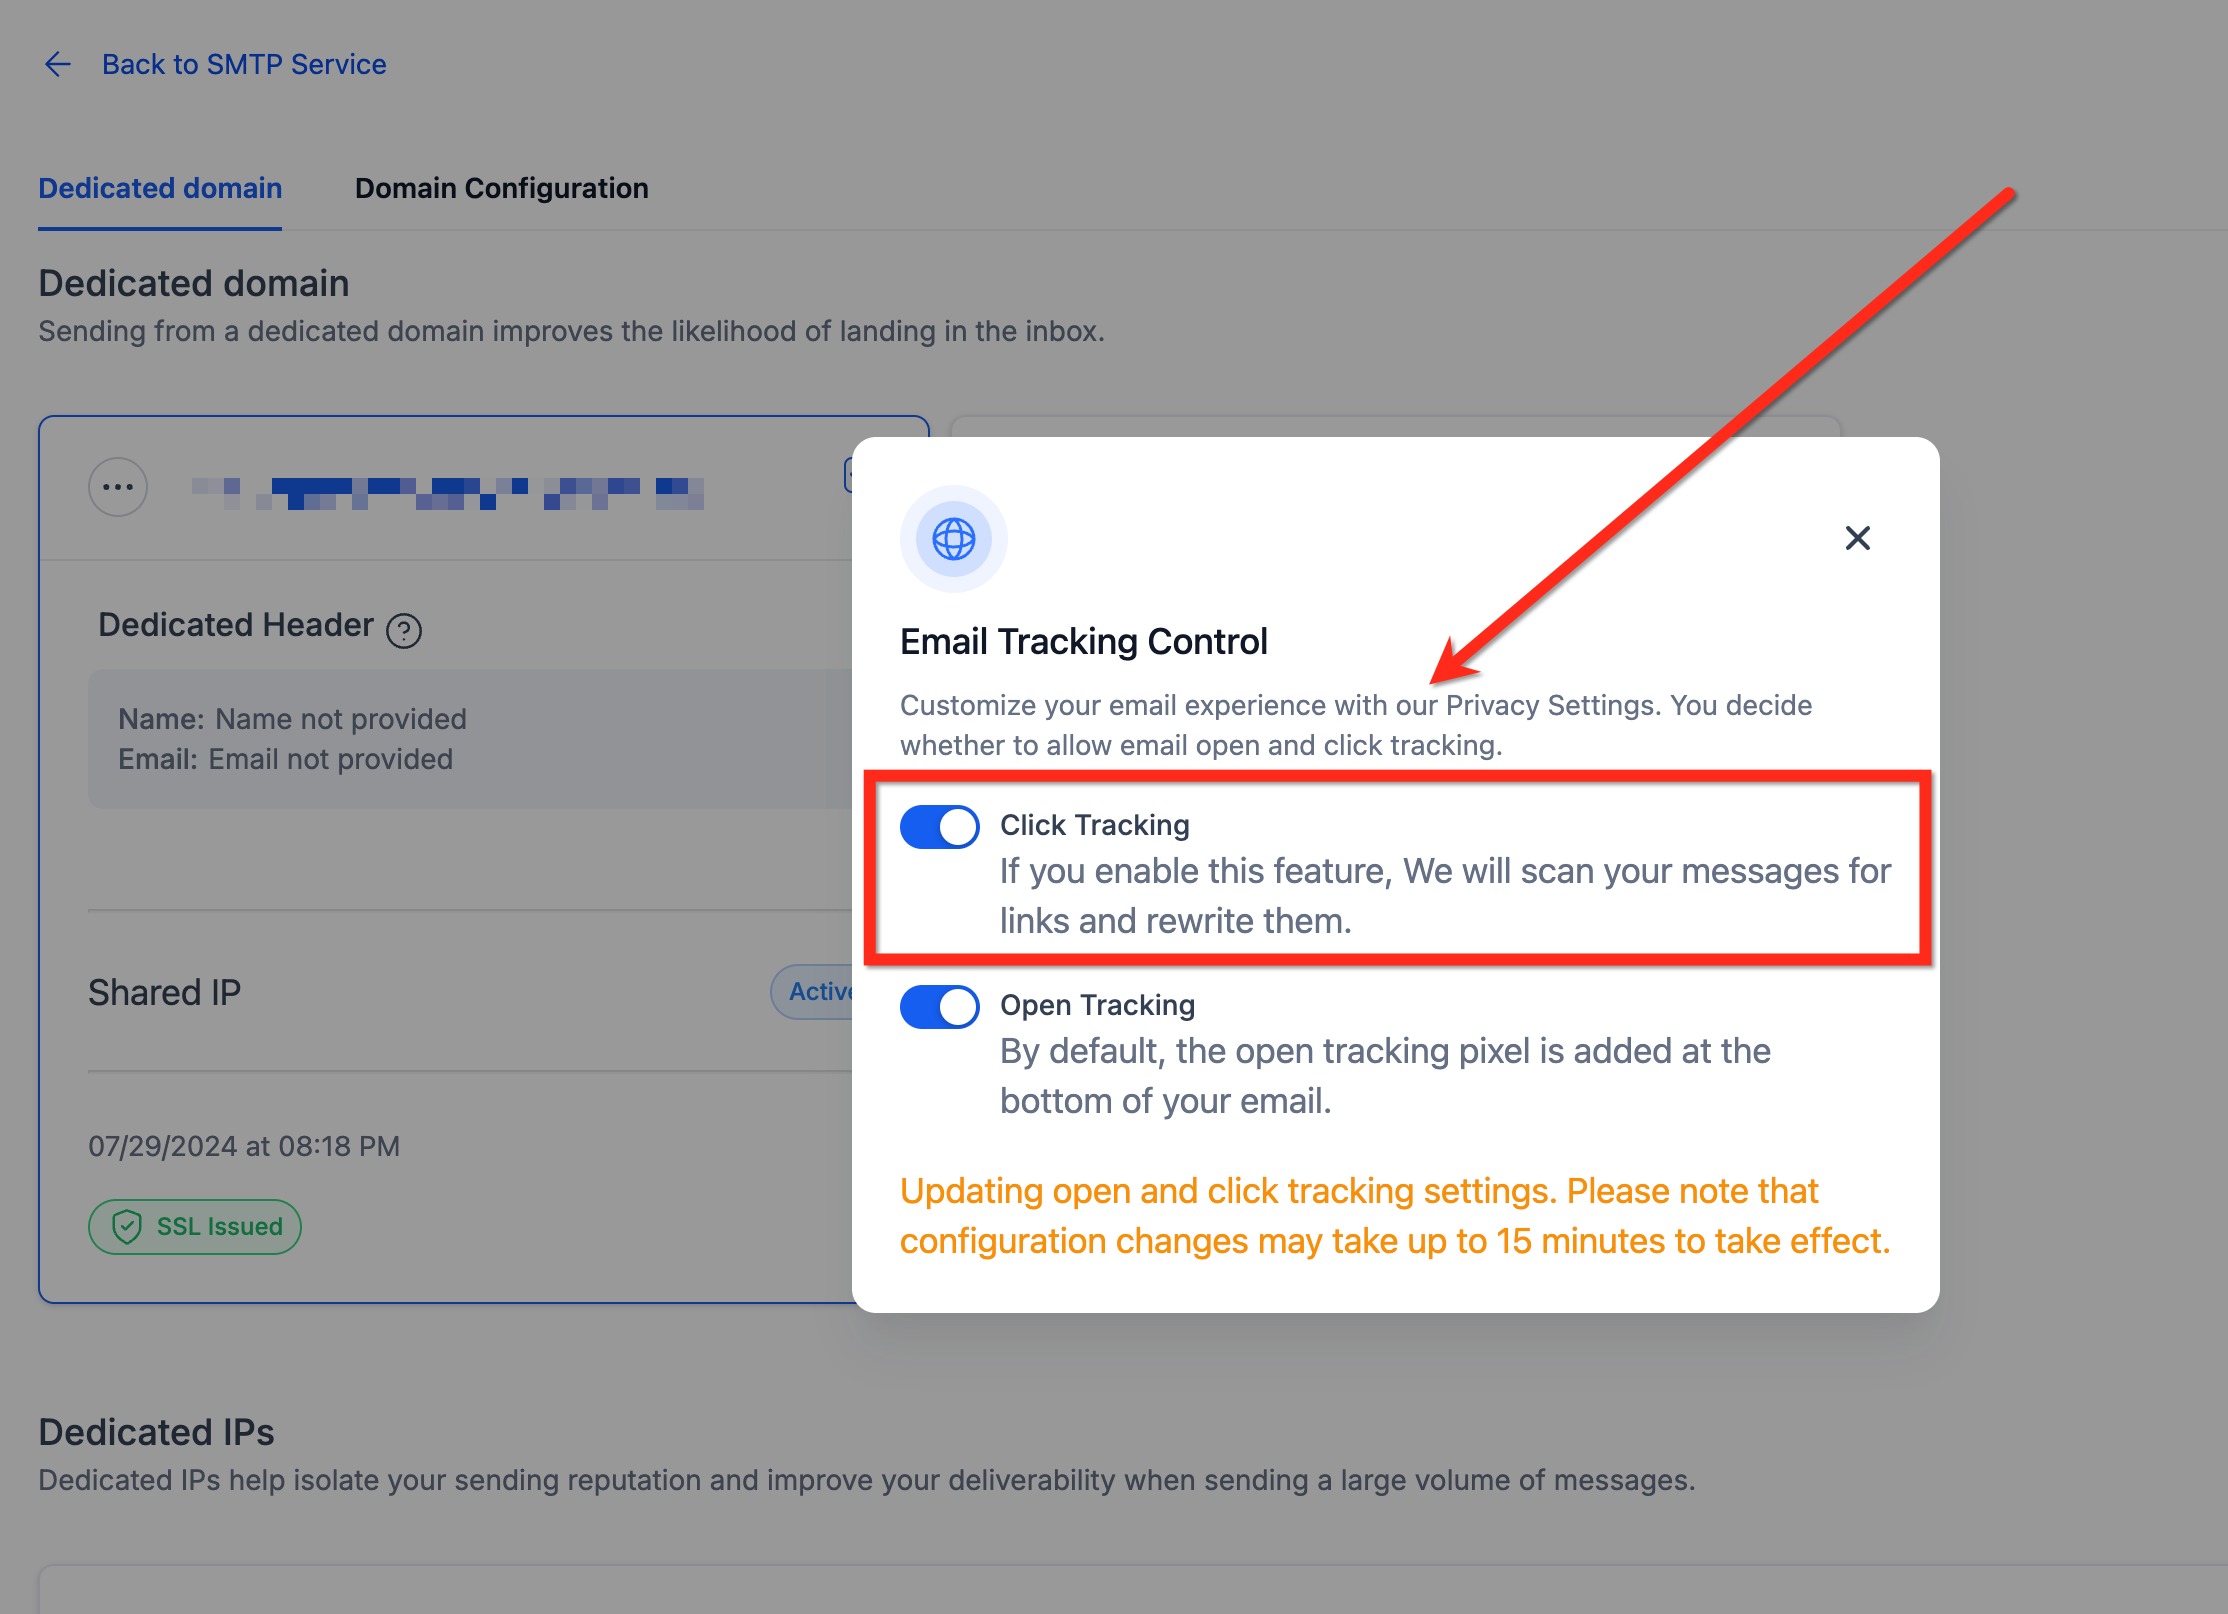
In the pop-up, Enable or Disable the Click and Open tracking options.
We recommend keeping both on. If you turn tracking off, you lose visibility into which prospects and patients are engaging with your campaigns, and your Opened and Clicked metrics will be incomplete or empty.
Click tracking provides detailed insight into how recipients interact with the specific links in your emails. With it enabled, you can see which links are being clicked, which recipients are engaging, and how many times each link is clicked. When click tracking is on, Aesthetix CRM adds tracking information to each click-through URL and records the click through redirection, which is what produces accurate link engagement data in your reports.
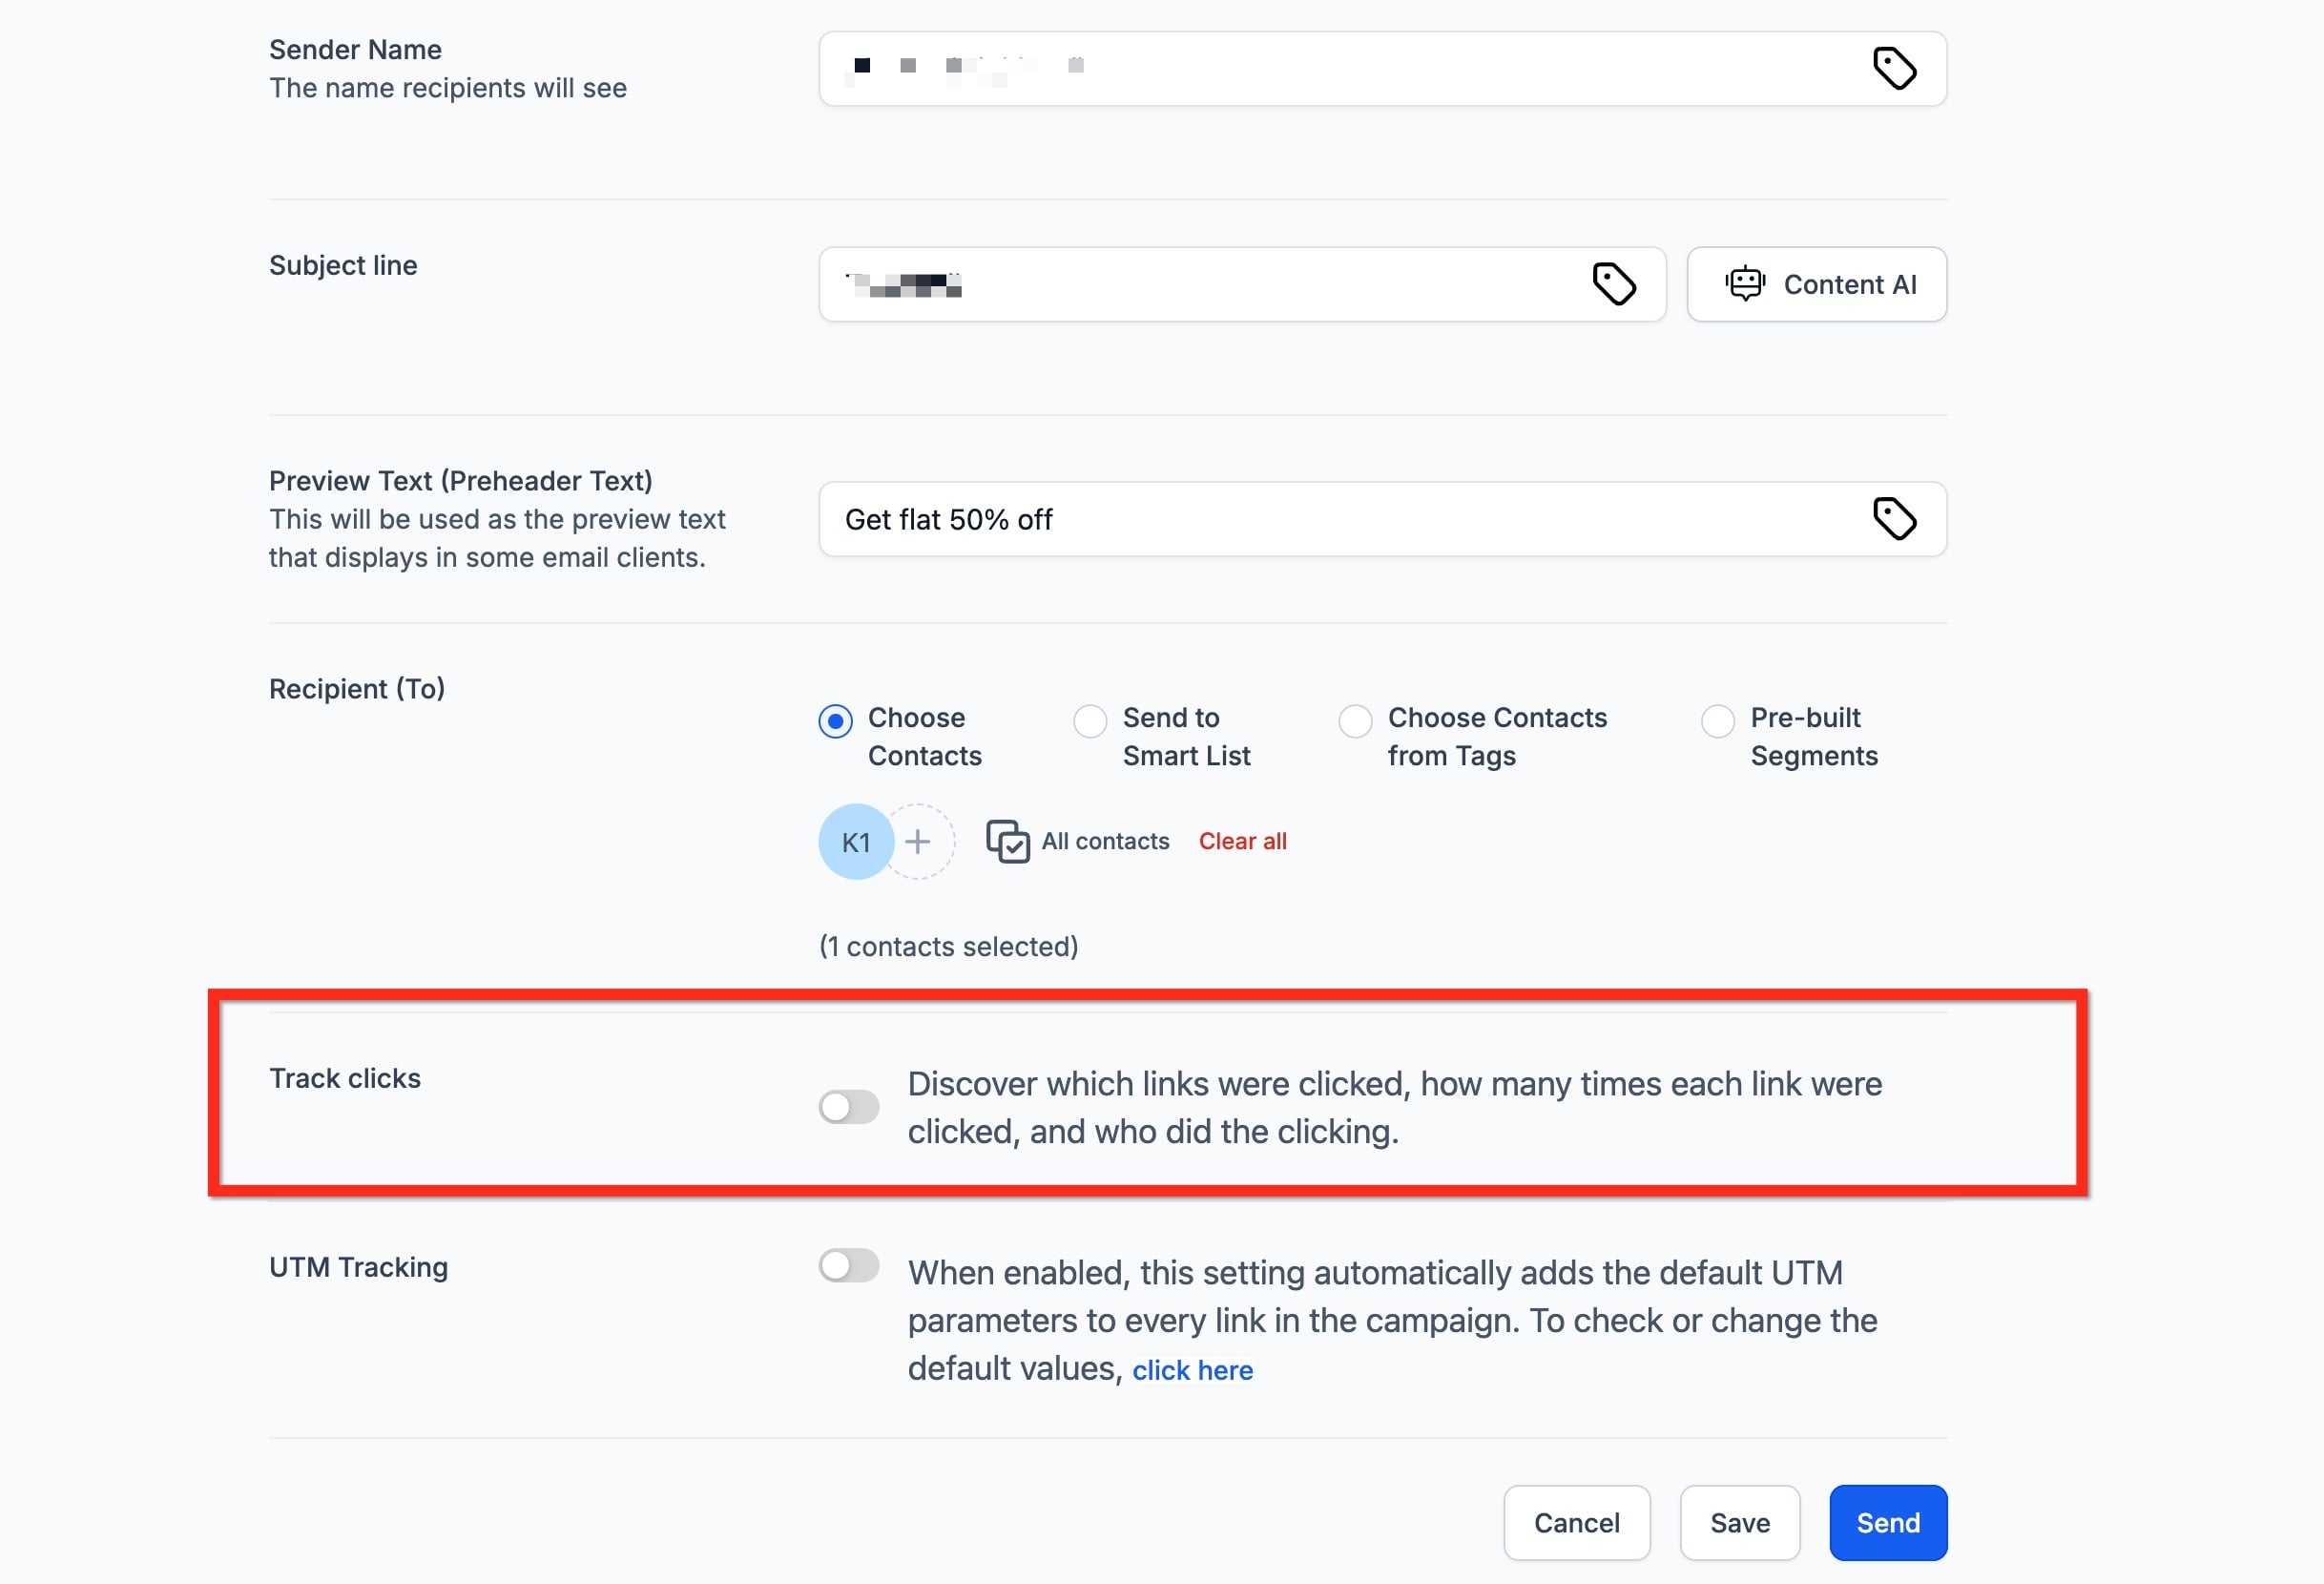
By default, click tracking is off. You enable it per campaign at send or schedule time. Beyond the domain-level setting above, each campaign has its own Track Clicks toggle, and the per-campaign toggle must be on for that campaign's click data to be collected.
Go to Marketing > Emails and create a new campaign, then proceed to send or schedule.
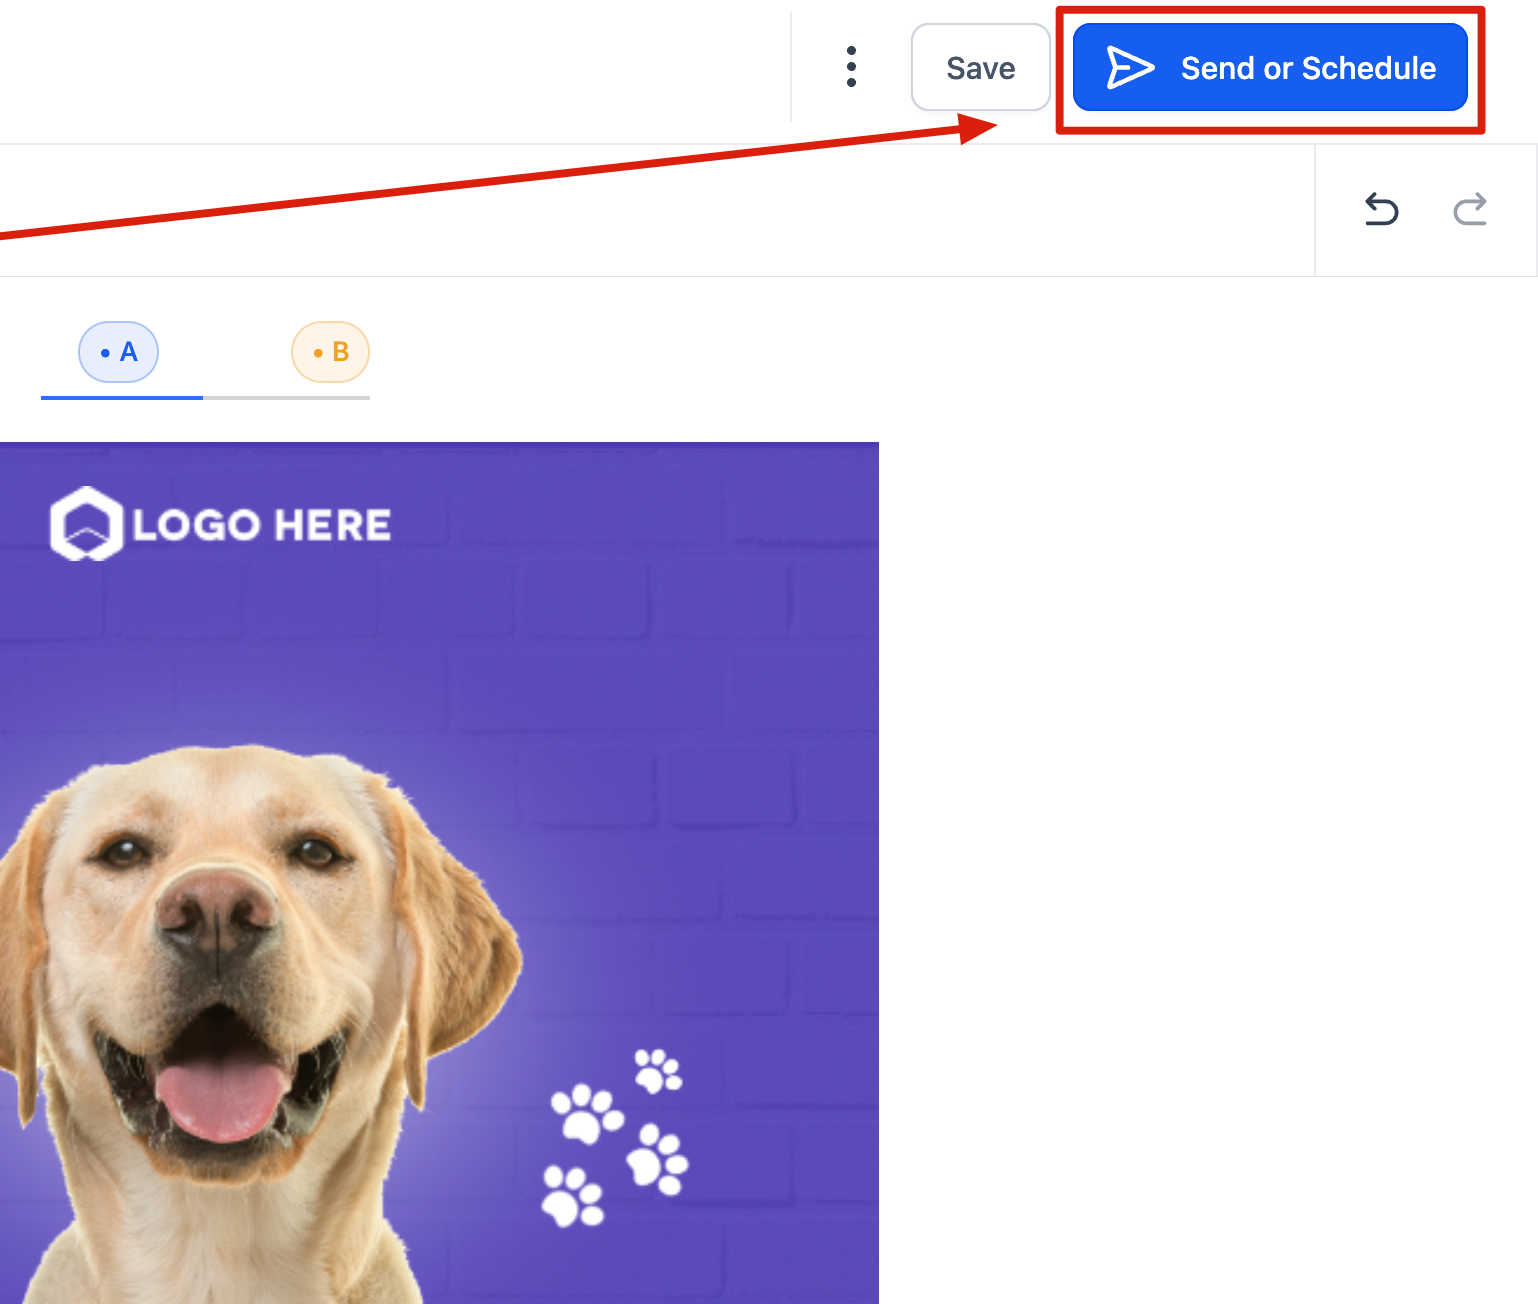
On the Send and Schedule page, scroll to Additional Settings and turn ON the Track Clicks toggle before sending. This records which links were clicked, how many times, and by whom.
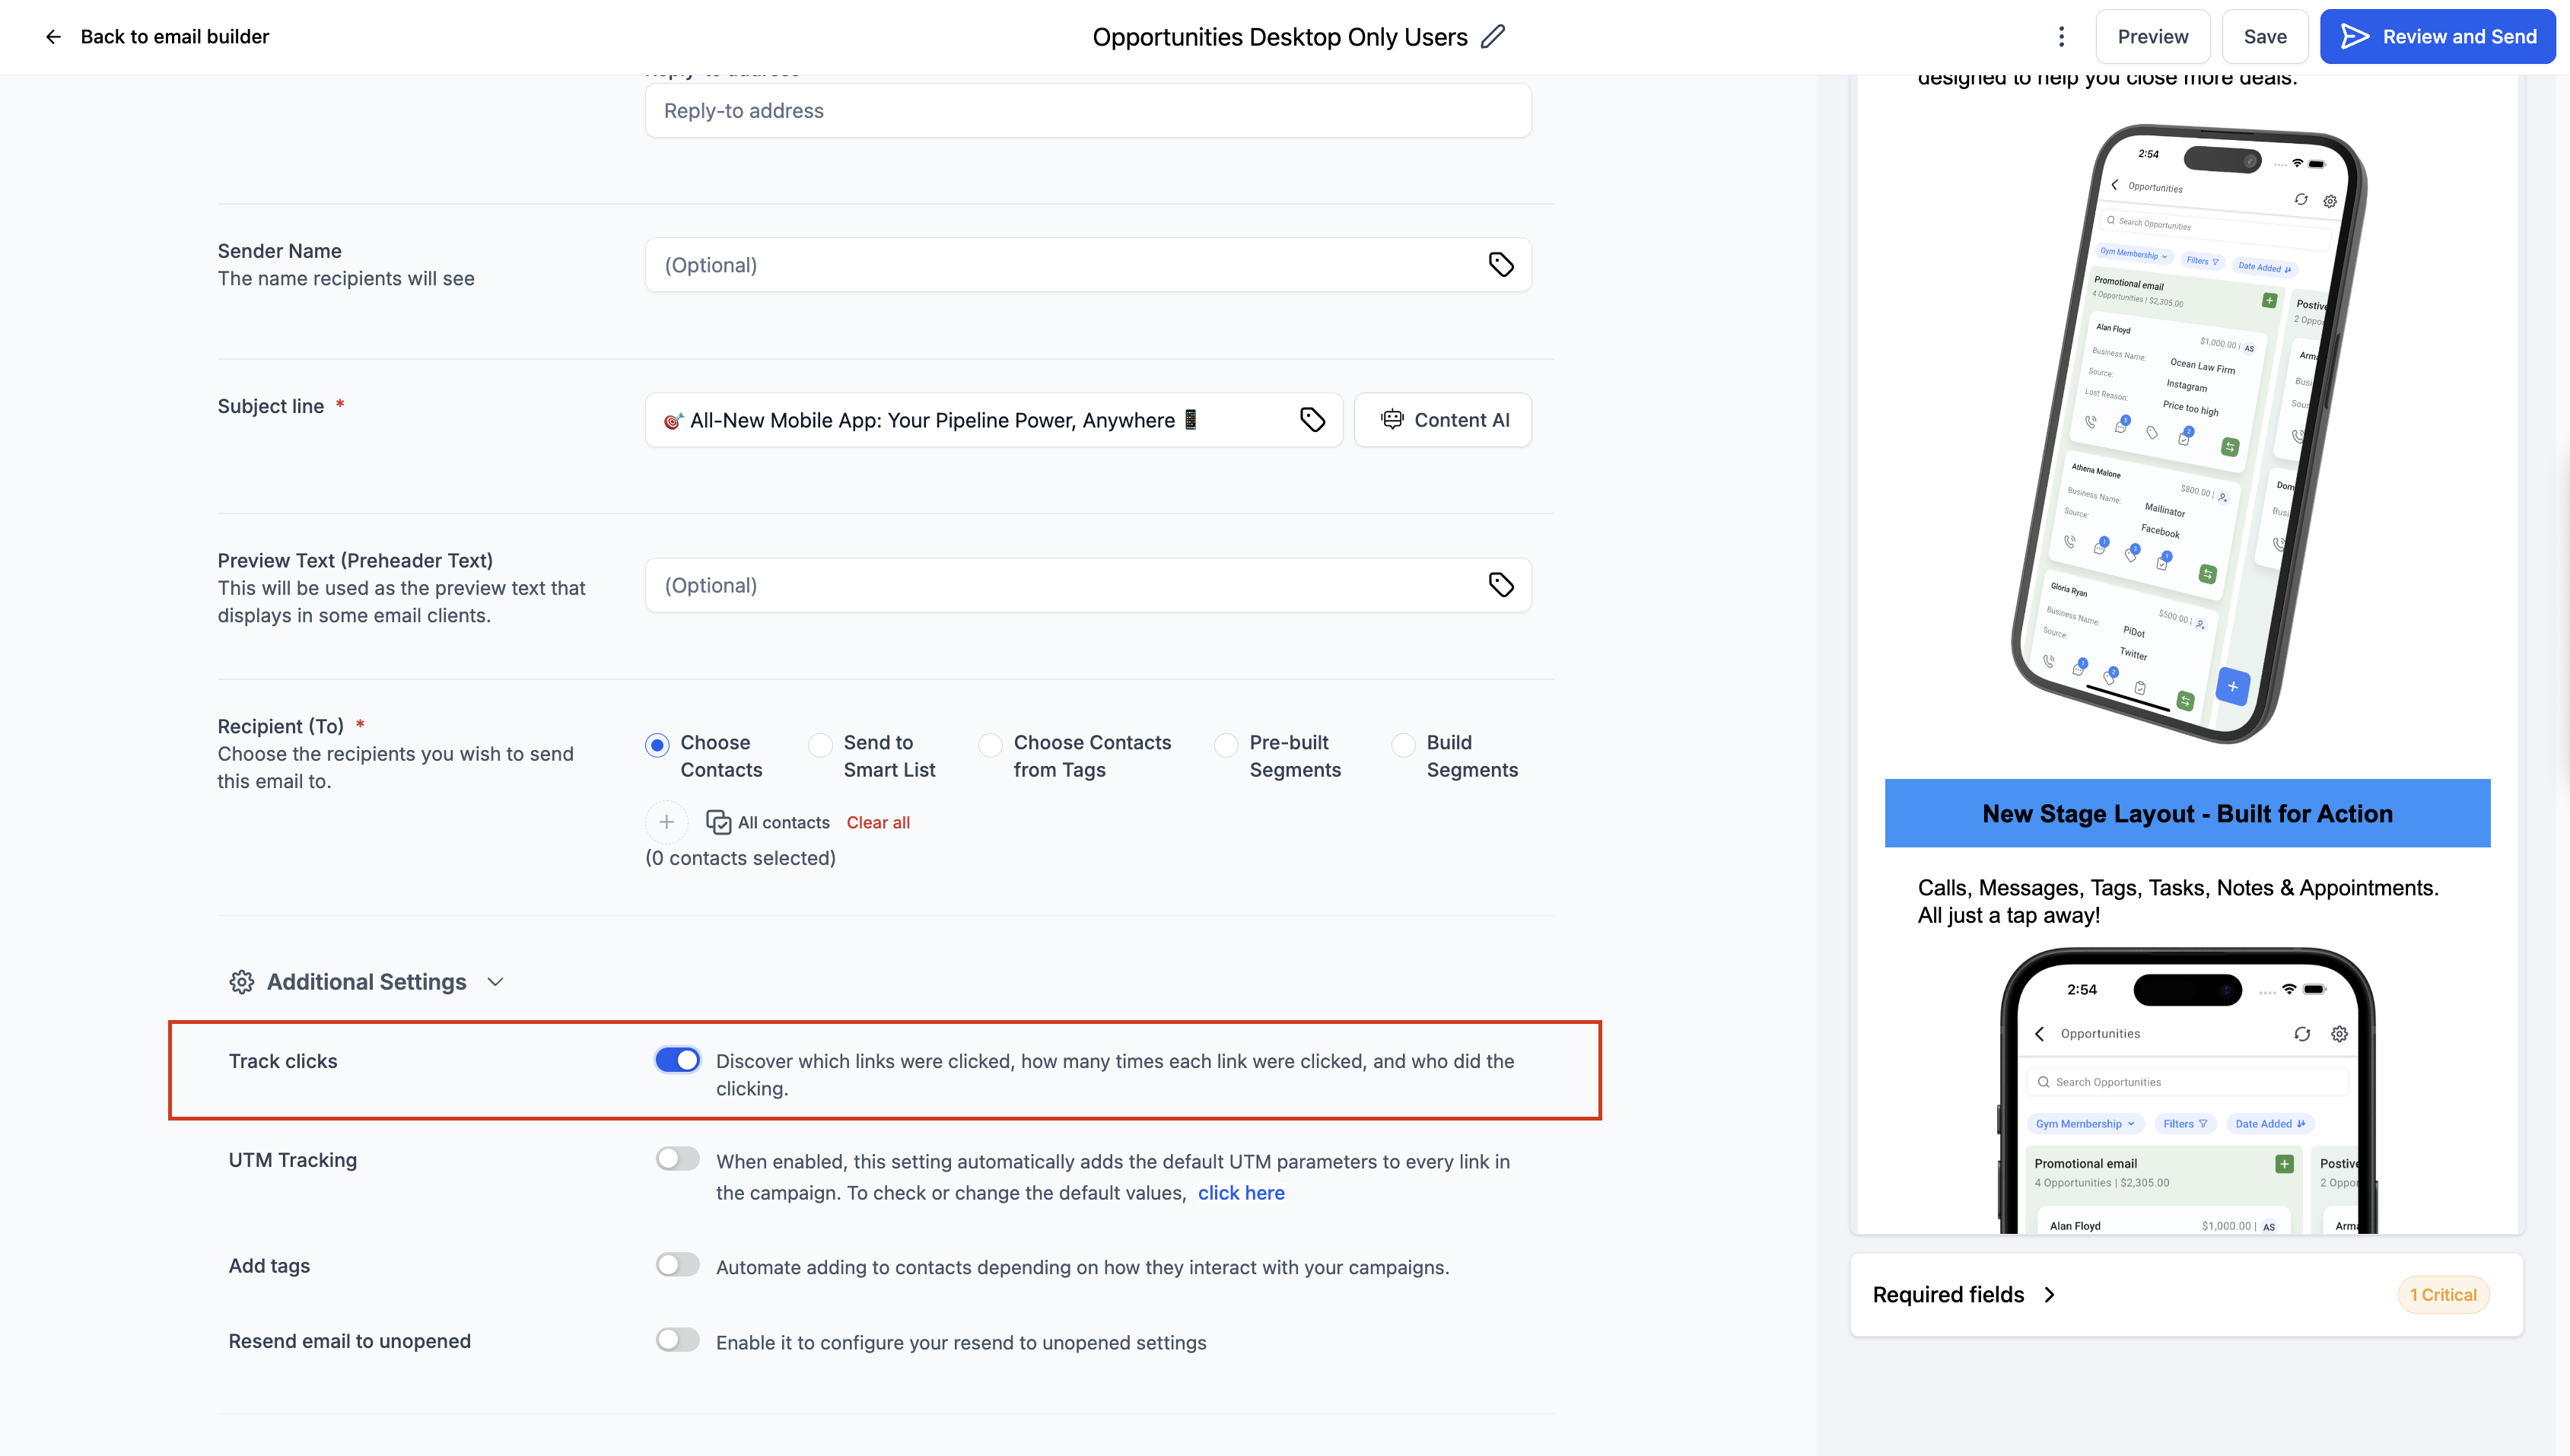
(Optional) Enable UTM Tracking here as well to tag every link with campaign data for external analytics tools.
Complete setup and send the campaign.
After sending, open Campaign Statistics by clicking the three-dot menu next to the campaign.
Click Load More Statistics, then select the Click Performance tab to analyze link performance. The report shows all individual links plus overview details.
Click any individual link to view contact-specific click details.
If you forget to turn on Track Clicks before sending, click data will not be collected for that campaign, and there is no way to recover it afterward. Always enable it before scheduling or sending.
The Click Performance report includes these metrics:
Total Clicks. Every click on every link in the email, including repeat clicks from the same recipient.
Total Unique Clicks. The number of individual recipients who clicked at least one link, each counted once.
Unique Engagements. The total number of recipients who interacted (clicked) with at least one link.
Clicks per Unique Open. The percentage of unique opens that resulted in at least one click. This is a key indicator of how compelling your content and calls to action are.
Links in This Email. A table of every link in the email showing the URL (destination), Source (the element type the link sat on, such as text, button, or image), Total Clicks, and Total Unique Clicks. Use this to find which specific buttons, product links, or social links perform best.
Click tracking will not collect data in these situations:
Track Clicks disabled. If the toggle was off during send or scheduling, no click data is collected.
Test emails. Click tracking does not apply to test sends. To test it, send a small dummy campaign to selected contacts instead.
Trigger links. Trigger links are not supported; they already use redirection and tracking through a separate centralized system.
Non-HTTP/HTTPS URLs. Only links beginning with http:// or https:// are tracked. Direct links or links stored in custom values without those prefixes cannot be tracked.
Unsupported links. Email-address links (mailto:) and anchor links are not tracked. Use absolute paths for all links you want tracked.
System-generated links. Preview links, unsubscribe links, and affiliate links generated by the system are not tracked.
Syntax errors or typos. A malformed URL can break the link and prevent tracking. Verify every URL.
Magic links. Links that contain custom values or fields may not resolve correctly. Test them with a small dummy send first.
Two further limits apply. Click tracking currently does not support A/B testing campaigns or RSS campaigns, and it does not apply to automated emails sent through workflows. It is for standard email marketing campaigns only. Custom values are supported, but trigger links are not.
UTM parameters are tags appended to your links that let external analytics tools (such as your website analytics) attribute traffic and conversions back to a specific email campaign. Aesthetix CRM can add UTM parameters to all campaign links automatically, and you can customize or extend them.
Go to Marketing > Emails.
Open the Settings page under Email Campaign.
Select the Tracking option to view and adjust the default UTM parameters.
Toggle the switch to apply UTM parameters by default to all campaigns.
Edit the default values for utm_medium or utm_campaign as needed.
Click Add Custom Parameter to include additional parameters and their values.
Check the boxes for the UTM parameters you want added to your campaigns.
Click Save to apply.
To exclude UTM parameters from a specific campaign, turn off tracking on that campaign's Send or Schedule page. You can also enable UTM Tracking on the Send and Schedule page alongside Track Clicks for a one-off campaign.
Attribution settings determine how purchases and other conversions get credited back to your email campaigns. The two controls are the attribution window and the attribution style.
The attribution window is the timeframe during which a customer's action is linked to an email campaign. Aesthetix CRM uses last touched logic, meaning the most recently opened or clicked campaign within the window receives credit for the conversion.
Default: a 5-day attribution window.
Customize: adjust the window in your email settings to match your business.
Why 5 days? Industry research suggests subscribers tend to forget emails after about 5 days, so this window gives a more accurate reflection of a campaign's real impact.
Example. You send an email on Day 1. The recipient opens it on Day 3 and returns to purchase on Day 4. Because the purchase falls inside the 5-day window, revenue is attributed to that email. If the same recipient had instead purchased on Day 10 or Day 12, the purchase would fall outside the window and would not be attributed to the email.
To change the window:
Go to Marketing > Emails > Campaigns.
Click the gear icon to open settings.
Adjust the attribution window value as desired.
You can also control which campaigns are eligible for conversion credit:
All Campaigns (Default). Attribute conversions across all campaigns for a comprehensive overview.
Product Element Specific. Attribute conversions only to product-centric campaigns.
All orders that appear under the Payments section are eligible for attribution, including Shopify orders. Toggle between the two styles in the same email settings based on the analysis you need.
A conversion is when an email recipient opens your message and then takes a specific action, such as making a purchase, within the attribution window. Conversion tracking is what connects your email program to actual revenue, so you can measure return on investment rather than just engagement.
Go to Marketing > Emails > Campaigns and find your campaign.
Click the three-dot menu to the right of the campaign and select Statistics.
Click Load More Statistics.
In the Conversion section, you will see Total Revenue Generated and Revenue per Recipient generated from the campaign.
For a detailed breakdown of which contacts purchased and how much they spent, open the Ordered tab.
Total Revenue (Revenue Generated). The total income attributed to the email within the attribution window.
Revenue per Recipient (RPR). Total attributed revenue divided by the number of recipients. This normalizes revenue so you can compare campaigns of different list sizes.
Order Conversion Rate. The percentage of recipients who placed an order.
Average Order Value. Total revenue divided by the number of orders.
Read these together with the Conversion Summary on the dashboard to judge which campaigns are genuinely profitable, not just which ones get opened. If revenue tracking is not configured, these values will read as $0.
Beyond campaign-level reporting, Aesthetix CRM lets you filter individual contacts by their email behavior. Instead of reading campaign summaries, you jump straight to the people who opened, clicked, bounced, or complained. This is the fastest way to build re-engagement segments (contacts who opened or clicked), sunset or suppression segments (contacts who never engaged), and list-hygiene lists (bounced, complained, or failed contacts that you should remove to protect your sender reputation).
Contact-level email analytics filtering requires sending through Aesthetix CRM email. It does not pull data for outside email providers.
Open Email Analytics. Navigate to Settings > Email Services > Email Analytics.
Review the email metrics shown across the top: Sent, Delivered, Opened, Clicked, Complained, Bounced, Unsubscribed, and Failed.
Set a date range using the Date Range picker so the metrics reflect the exact period you care about.
Choose an email source. Click Filters, select Email Source, and pick a sending type: Campaign (marketing sends from Campaigns), Workflow (automated emails from a workflow step), or Bulk Request (one-off bulk sends).
Select an email source name (the specific campaign, workflow, or bulk send). Source Name is required; if you skip it, no results return even after choosing a source type.
Click a metric box (for example, Delivered) to open the contact list that matches that metric for the selected source and date range.
Paginate, adjust, and refresh. Set pagination to 20, 50, or 100 per page, tweak the date range, and click Refresh to re-pull the list whenever you change a filter.
Drill into a contact by clicking any name to open the full contact record for notes or follow-up.
Build your segment from whichever metric matches your goal: filter on Opened or Clicked to create a warm re-engagement audience, or filter on Bounced, Complained, or Failed to find contacts to suppress or remove.
You can download email performance data from the Statistics dashboard as a CSV to analyze in a spreadsheet, share with stakeholders, or keep for records. Exports can include statistics from campaigns, workflows, and bulk actions, and the download link is delivered securely by email.
Export Type | What it includes |
|---|---|
All Campaigns | All email activity in Statistics, including campaigns, workflows, and bulk sends. |
Email Marketing Campaigns Only | Performance for campaigns created in Marketing > Emails > Campaigns. |
Workflows Only (Individual Email Action Level) | Performance for each individual email action inside workflows. |
Bulk Actions Only | Statistics for emails sent through Contacts > Bulk Actions. |
Go to Marketing > Emails > Statistics.
Choose the campaign type and click Export.
Add the email address or addresses where you want to receive the file and proceed.
Check your inbox for the message containing the download link to the exported CSV.
Every export includes key performance metrics such as deliveries, opens, and clicks.
To access past exports, go to Campaigns > Settings > Recent Exports.
Download links remain valid for 30 days. The Recent Exports area stores export records for up to 30 days and shows the file name or description, export type, the user who requested it, the date and time it was created, and the status. Exporting is a reporting action only; it never modifies your campaigns, workflows, contacts, or statistics.
If your statistics look wrong, empty, or incomplete, work through these checks in order.
Check how the email was sent. Statistics are stored separately for each sending method (campaign, workflow, or bulk action). An email sent from one place will only show stats in that place. If you sent from a workflow, look at the workflow email step, not the campaign dashboard, and the reverse for campaign sends.
Confirm the email was actually sent and delivered. Drafts and scheduled campaigns show no data until they go out. Statistics begin populating only after recipients start receiving and engaging with the email.
Check your sending service. An outside SMTP provider cannot report full statistics. With an outside SMTP integration you may only see opened and clicked, not delivered or bounced. For complete, accurate stats, send through Aesthetix CRM email with a dedicated sending domain. If a workflow previously used an outside SMTP provider and now shows broken or partial stats, duplicate the workflow and start sending from the fresh copy, then confirm the stats populate correctly.
Verify tracking is enabled. Open tracking and click tracking must be on at the domain level (Settings > Email Services > Domain Settings), and Track Clicks must have been toggled on for that specific campaign before it was sent. If either was off, those metrics will be incomplete or empty, and the data cannot be recovered retroactively.
Check for the known click-tracking exclusions. Review the "Where click tracking does not work" list above. A/B and RSS campaigns, workflow emails, trigger links, mailto: and anchor links, non-HTTP links, and malformed URLs all suppress click data by design.
Confirm your sending domain records. The domain records used by your sending service are essential for open tracking, click tracking, and unsubscribe handling. If these are misconfigured, links may rewrite incorrectly or fail to track. Re-verify your dedicated sending domain setup, and if your service uses webhooks for delivery and engagement events, confirm every relevant event type is configured.
When you cannot resolve a discrepancy, reach out to Aesthetix CRM support with the campaign name, the date range, and how the email was sent, and the team can trace the specific events.
Do I need Aesthetix CRM email to see full statistics? Yes. Full metrics like delivered, bounced, unsubscribed, and spam complaints require sending through Aesthetix CRM email with a dedicated domain. Outside SMTP providers typically report only opens and clicks.
What is the difference between soft and hard bounces? A soft bounce is temporary, such as a full inbox, and may succeed if retried. A hard bounce is permanent, such as an invalid address, and it harms your sender reputation, so remove hard-bounced contacts.
What is the difference between Bounced, Failed, and Complained? Bounced means the recipient's mail server rejected the email. Failed means a send error occurred before any delivery attempt. Complained means the recipient marked the email as spam.
How long do statistics take to update? Most stats update in near real time, though clicks, unsubscribes, and spam complaints can take a few minutes depending on recipient activity and mail-provider delays.
Why is there no Click Performance data for my campaign? The Track Clicks toggle was almost certainly off when the campaign was sent. Click data cannot be collected after the fact, so always enable it before scheduling or sending.
Why don't I see results when I filter contacts by a campaign? You must also select a Source Name (the specific campaign, workflow, or bulk send) and confirm that send actually ran. Without a Source Name, the filter returns nothing.
Can I export the data? Yes. Export any Details list as a CSV from the campaign Summary page, or export campaign, workflow, and bulk statistics from the Statistics dashboard. Export download links are valid for 30 days.
Can I see exactly who opened or clicked? Yes. Open the matching tab in the campaign Details section, or use Settings > Email Services > Email Analytics to filter contacts by metric and drill into individual records.
Why does my revenue or conversion show $0? Revenue tracking is not configured for the campaign, or no attributed orders fell inside the attribution window. Confirm conversion tracking is set up and review your attribution window length.
