The Email Builder in Aesthetix CRM is a drag-and-drop, what-you-see-is-what-you-get editor for designing email templates and campaigns. Its in-line editor lets you style text, arrange content, and preview exactly how a message will look before you send it. This guide walks through the builder as a whole: opening it, working with layouts and elements, fine-tuning the mobile experience, applying your brand, personalizing with conditional rules, and reusing your best work. For deep detail on each individual content element (text, image, button, divider, social, footer, code, video, and more), see the separate "Email Builder Elements" guide.
To open the builder, go to Marketing > Emails > Templates (or Campaigns). From there you can create a new template or open an existing one to edit. Blank templates start you with a clean canvas, and existing templates open in the same drag-and-drop editor.
Across the top of the builder you will find a toolbar with three primary controls:
Add Elements introduces new content into your email, from simple text and images to more complex structures.
Manage Elements gives you an overview of every element in your email so you can select, reorder, and adjust them quickly.
Appearance controls the global style of your email, including background color, body color, content width, dividers, button styling, and custom CSS.
The in-line editor follows the WYSIWYG principle: when you bold a sentence, recolor a heading, or insert an image, the change appears immediately, just as it will in the delivered email. To add content, drag an element onto the canvas; selecting it opens the in-line editor with options tailored to that element.
When you highlight text, the editor surfaces formatting controls so you can:
Change the heading type (H1, H2, H3, paragraph, and more).
Select a font, adjust the size (8px to 96px), and set the text color with a precise hex code.
Apply bold, italic, underline, and strikethrough.
Adjust alignment and line height, or add bullet and numbered lists (disc, circle, square, decimal, alpha, roman, and other marker styles).
Add or edit a hyperlink, controlling the link URL, the display text, an optional title tooltip, and whether the link opens in a new window. A link list keeps your frequently used links handy.
Advanced options include Clear Format, which strips existing styling (useful when pasting text from another source), Custom Values for inserting recipient details like first name, and Trigger Links for actions such as unsubscribing or accessing an offer. A built-in AI writing assistant can generate draft content from a context, title, description, keywords, and tone, producing up to five variations.
To keep your emails visually consistent, content uses a default padding of 12px top, 12px bottom, 24px left, and 24px right, which you can adjust per element.
Layouts determine the structure of your email. Add a layout block to define how many columns a section uses, then drop elements into each column.
Layout | Structure | Best for |
|---|---|---|
1 | Single column | The most readable, mobile-friendly option; great for letters and announcements |
2 | Two equal columns | Side-by-side content, such as an image next to text |
1/3 : 2/3 or 2/3 : 1/3 | Two unequal columns | Emphasizing one block over another, like an image with a description |
1/4 : 3/4 or 3/4 : 1/4 | Two very unequal columns | A small element (such as a menu) beside a large content area |
4 | Four equal columns | A grid of equally important items, like image thumbnails |
You can mix layouts throughout a single email to build headers, body sections, and footers that each suit their content.
Arrow controls let you move elements and layout sections up or down with a single click, so you do not have to rely on precise drag-and-drop. They speed up reordering, reduce the chance of misplacing a block, and make the builder easier for newcomers.
Open an existing template or create a new campaign in the drag-and-drop builder.
Hover over the element (such as a text block or image) or the layout section you want to move.
Click the up arrow or down arrow that appears near the top-left of the section.
The element or layout moves instantly to its new position.
Arrow controls work for both individual elements (which move within their current layout) and entire layout sections (which move up or down within the overall email). Drag-and-drop still works too; the arrows are an enhancement, not a replacement. Changes save automatically as you make them. Arrow controls are currently optimized for desktop. If the arrows do not appear, make sure your cursor is hovering directly over a movable element or layout, then refresh the editor if needed.
Use the preview icons in the builder toolbar to switch between Desktop and Mobile views and confirm how your email renders on each. Always send a test email as a final check, since email clients vary in how they display content.
You can control which content appears on each device using Visibility settings, available at both the element and layout level. Hiding content that does not display well on small screens keeps mobile emails clean and easy to read.
Element-level visibility: Select an element, then in Manage Elements (or the element's settings) choose whether it shows on desktop, mobile, or both. Editing an element's visibility on hover also exposes quick actions to hide it on mobile or desktop.
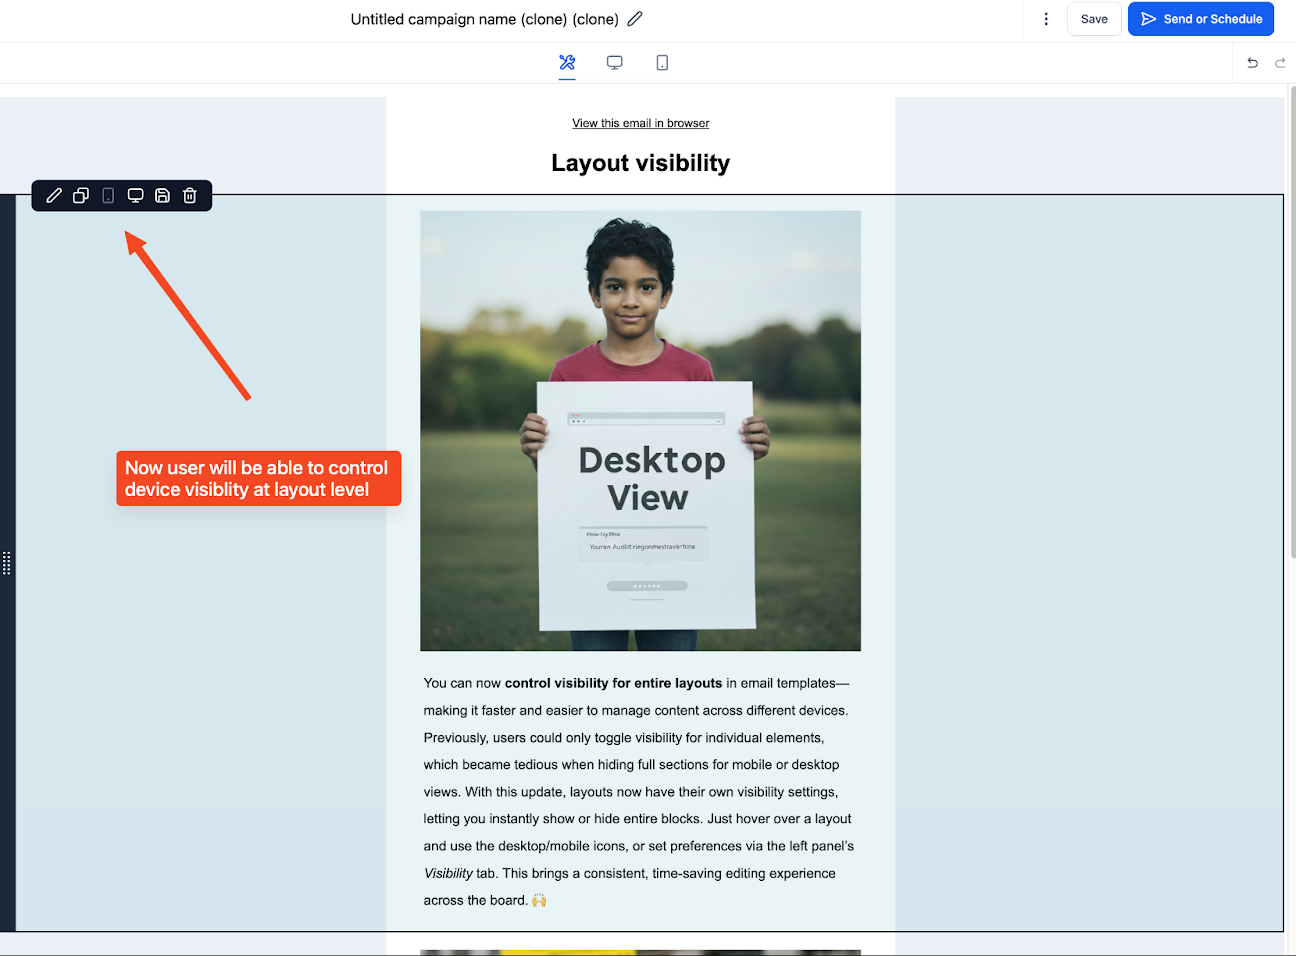
Layout-level visibility: You can show or hide an entire section based on device, which is far faster than toggling each element one by one.
Create or open an email template in the drag-and-drop builder.
Add a layout block to your design.
Hover over the layout to reveal desktop and mobile icons on the block. Click either icon to toggle visibility for that device. A grayed-out icon means the layout is hidden on that view.
Alternatively, click the layout block and use the Visibility tab in the left-hand panel.
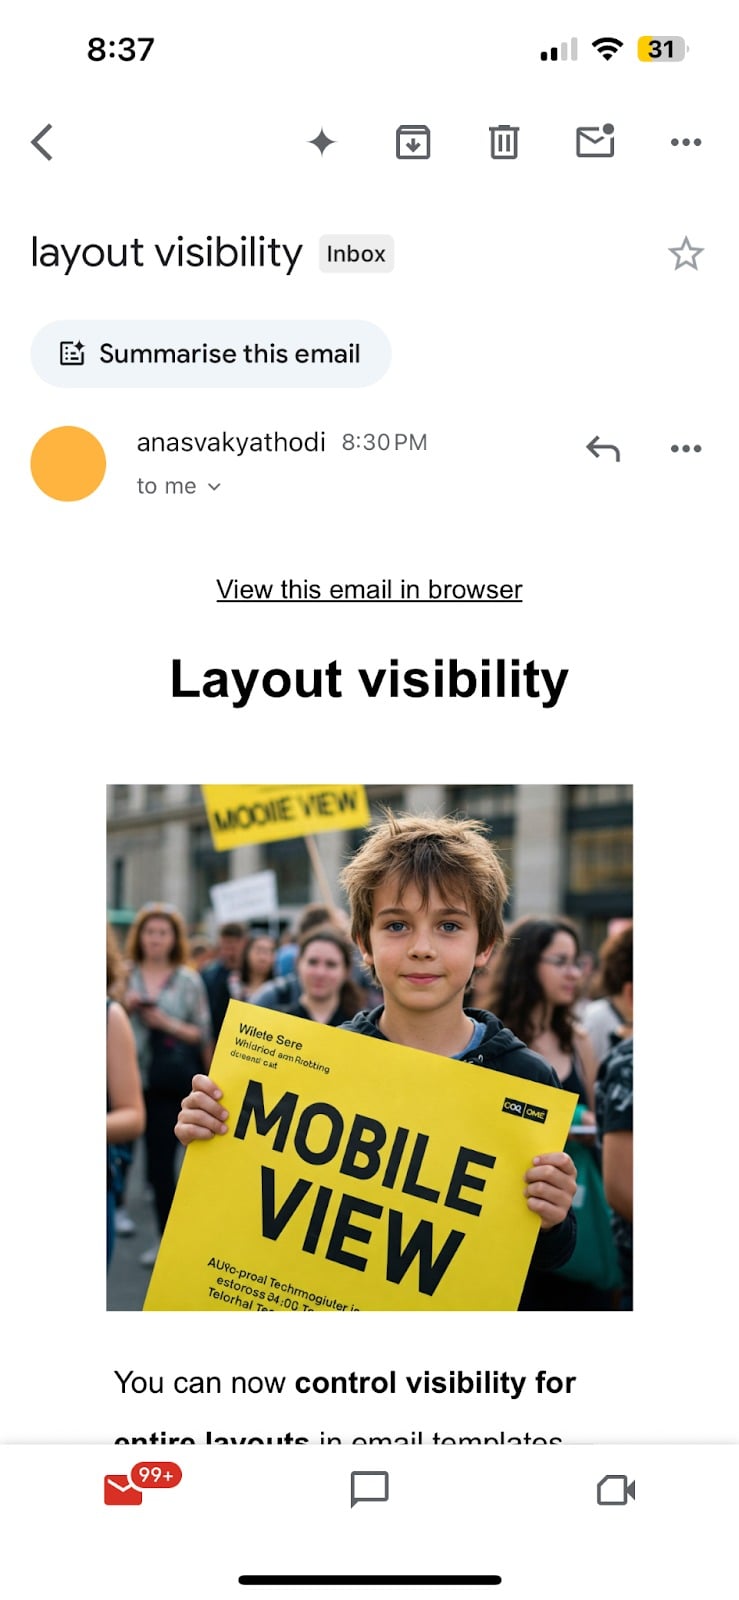
Switch between Desktop and Mobile views with the preview icons to test your logic.
Send a test email to confirm how visibility behaves in a real inbox.
The builder also includes mobile formatting controls so you can set device-specific font sizes, alignment, and line height for your H1, H2, H3, paragraph, and button styles. These settings affect only the mobile rendition and apply in email clients that support media queries.
A few mobile best practices: favor single-column layouts, keep buttons large enough to tap (at least 44px by 44px), use generous white space, optimize images and include alt text, and keep copy concise. If you hide a layout on both desktop and mobile, it will not be sent, so keep at least one view active.
You can extend the builder's font choices with custom and Google fonts to match your brand and website typography.
Adding a Google font:
Open an email campaign or template in the builder.
Select a text element and open the font selector, then click Add fonts.
Choose the desired font from the dropdown in the modal.
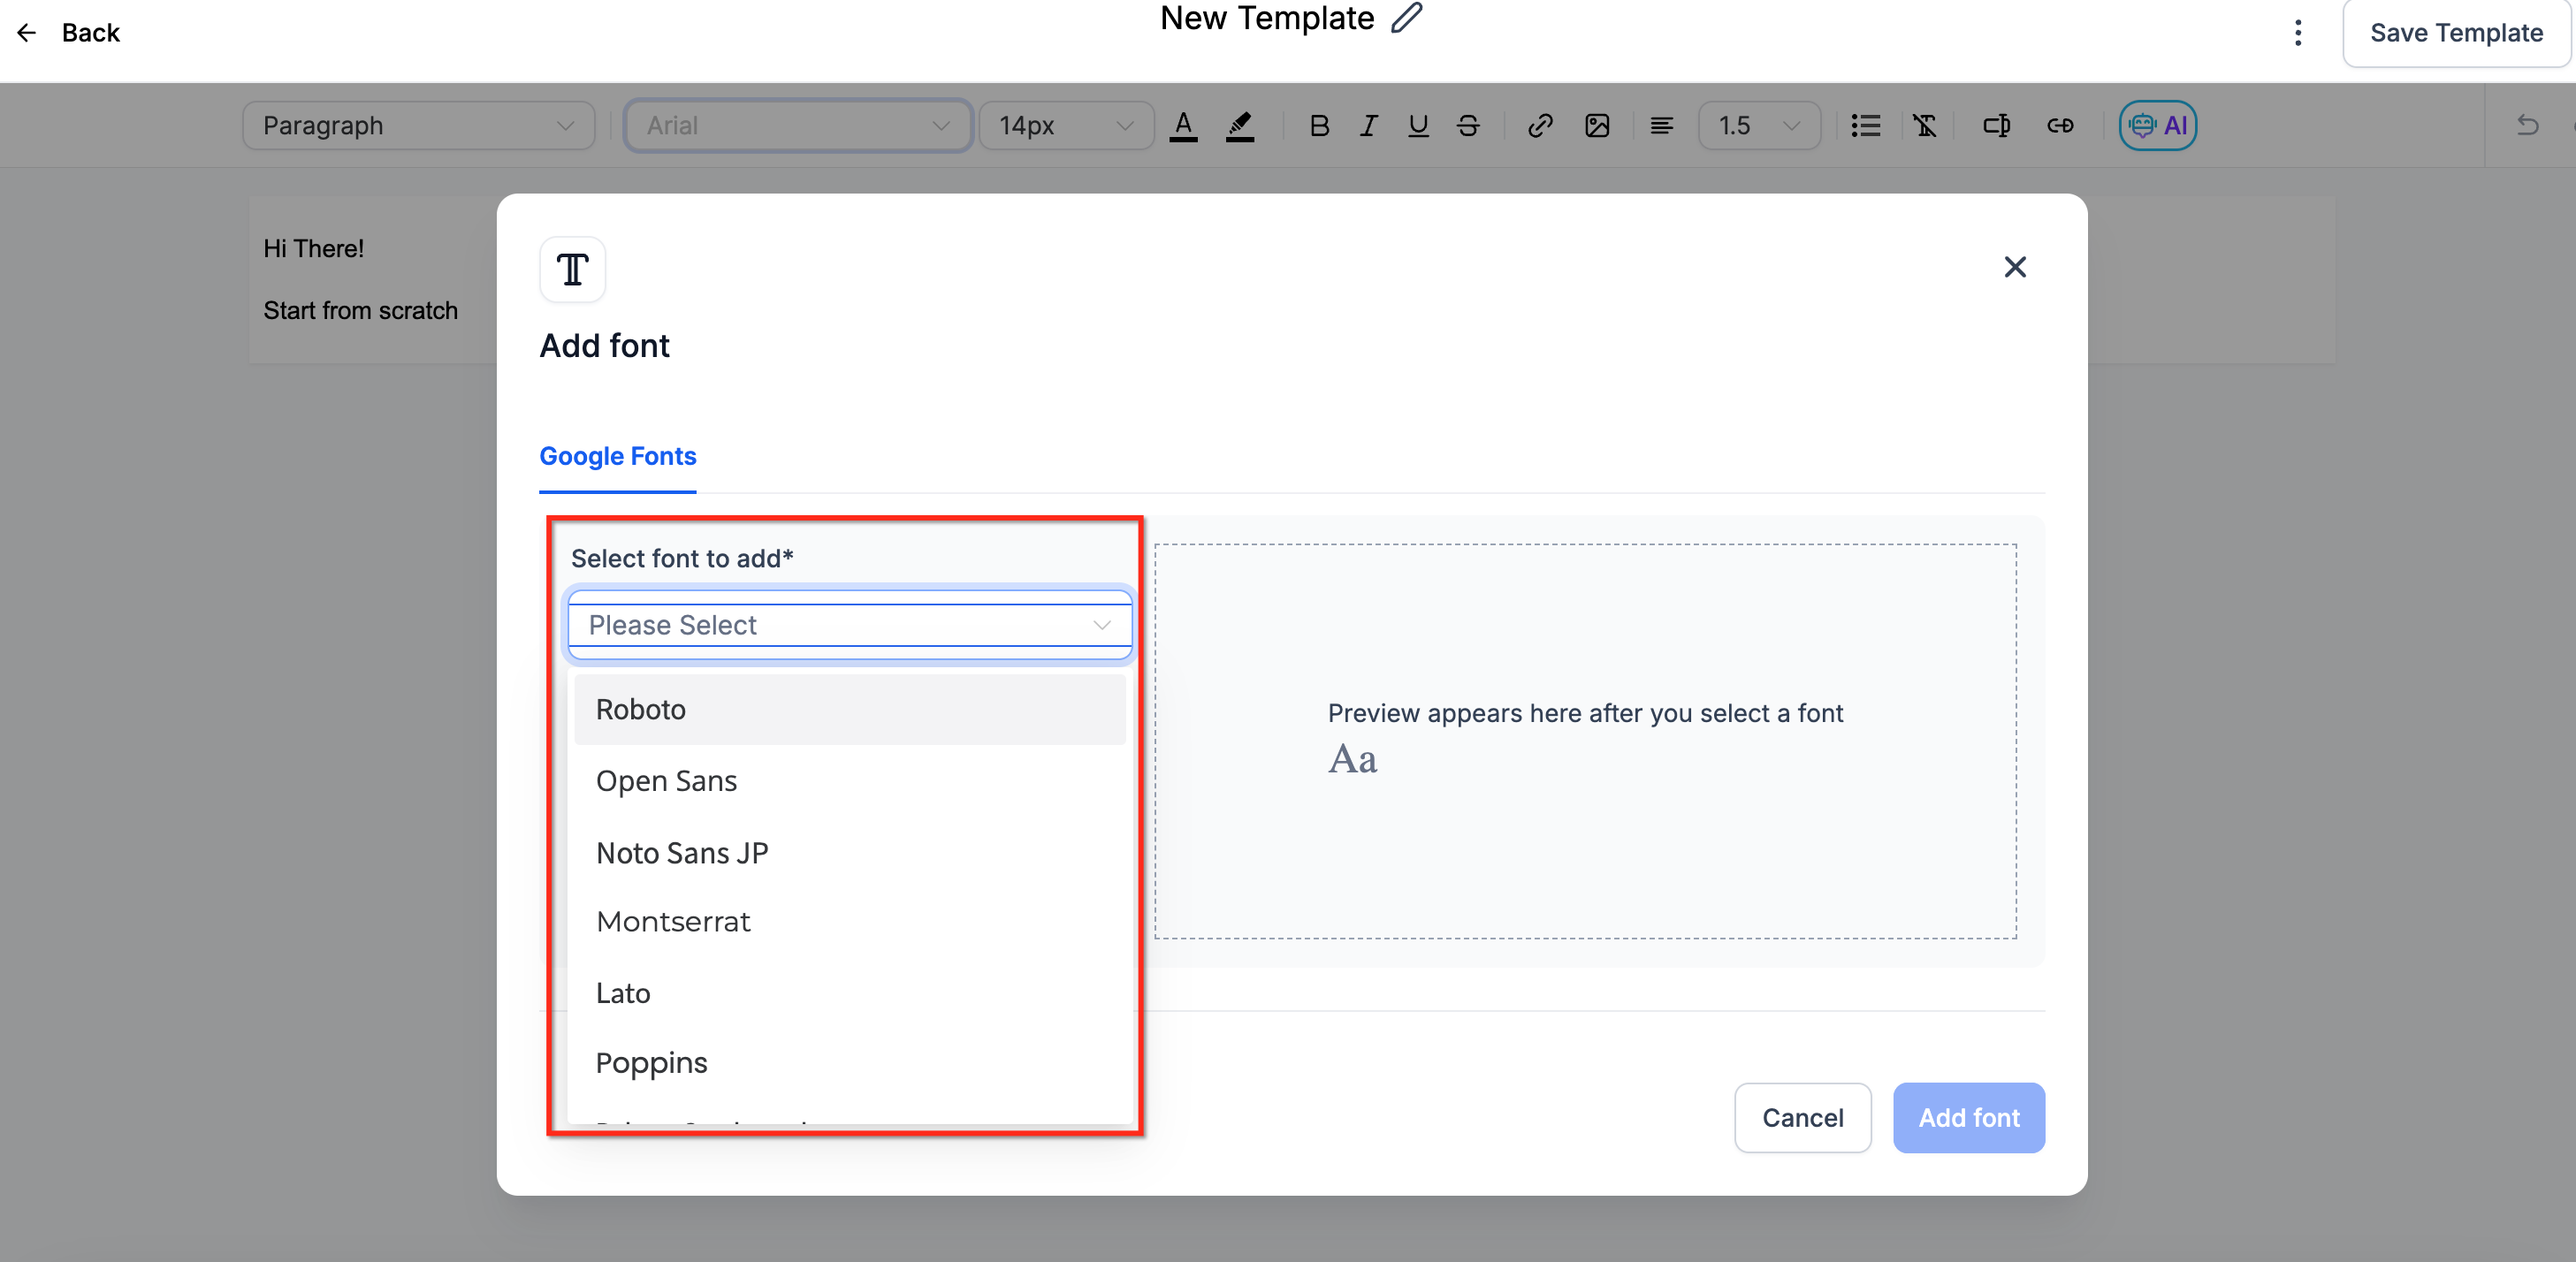
Click Add font to save it. The font is then available in the font selector for every builder.
You can also manage fonts from the Settings page, located under the Campaigns tab.
To remove a font, click Delete from Settings. To add one from Settings, use the Add font section and follow the same steps.
Things to know: Email client support for custom fonts is uneven. Clients such as Apple Mail, iOS Mail, Samsung Mail, and Outlook.com generally render custom fonts, while Gmail (web and mobile), Outlook on several platforms, and Yahoo Mail may fall back to a standard font. Because of this, always pair a custom font with a reliable fallback stack of common system fonts, for example 'OpenSansBold', Helvetica, Arial, sans-serif, so your email still reads cleanly where the custom font is not supported.
For advanced control, you can host fonts with a service such as Google Fonts or include them with @font-face in a Code element. When targeting Outlook, wrap the @font-face rule in a media query, since older Outlook versions do not support it.
Brand Boards put your brand's colors, fonts, and logos at your fingertips inside the Email Builder, so you do not have to remember hex codes or font names. Only the colors and fonts from your default Brand Board appear in the editor's pickers, and there can be only one default at a time. You can change which Brand Board is the default to surface a different palette.
To use Brand Boards in an email:
Open an email campaign or template from Marketing > Email Marketing.
Colors: Edit a text block, change a color in the appearance settings, or adjust a button color to open the color picker. Your brand colors appear at the top of the palette, labeled with the names set in the Brand Board. Hover over a swatch to confirm its name.
Fonts: Open the font picker. Your brand fonts appear at the top of the list for quick selection.
Logos: When adding an image or logo, open the media library. You can view and insert logos from all of your Brand Boards (use Home to navigate between folders).
Brand Boards mean no custom values or code blocks are needed to keep your emails on-brand, which strengthens recognition across every send.
Conditional Elements let you show or hide specific content in an email based on each contact's data, so a single campaign can adapt to many recipients. You can vary content by location (for example, different offers by region) or by contact field (for example, changing text based on a stored field).
Open your email in the builder (Marketing > Emails > Campaigns or Templates).
Select an element (such as Text, Image, or Button) and open the Visibility tab in its settings panel.
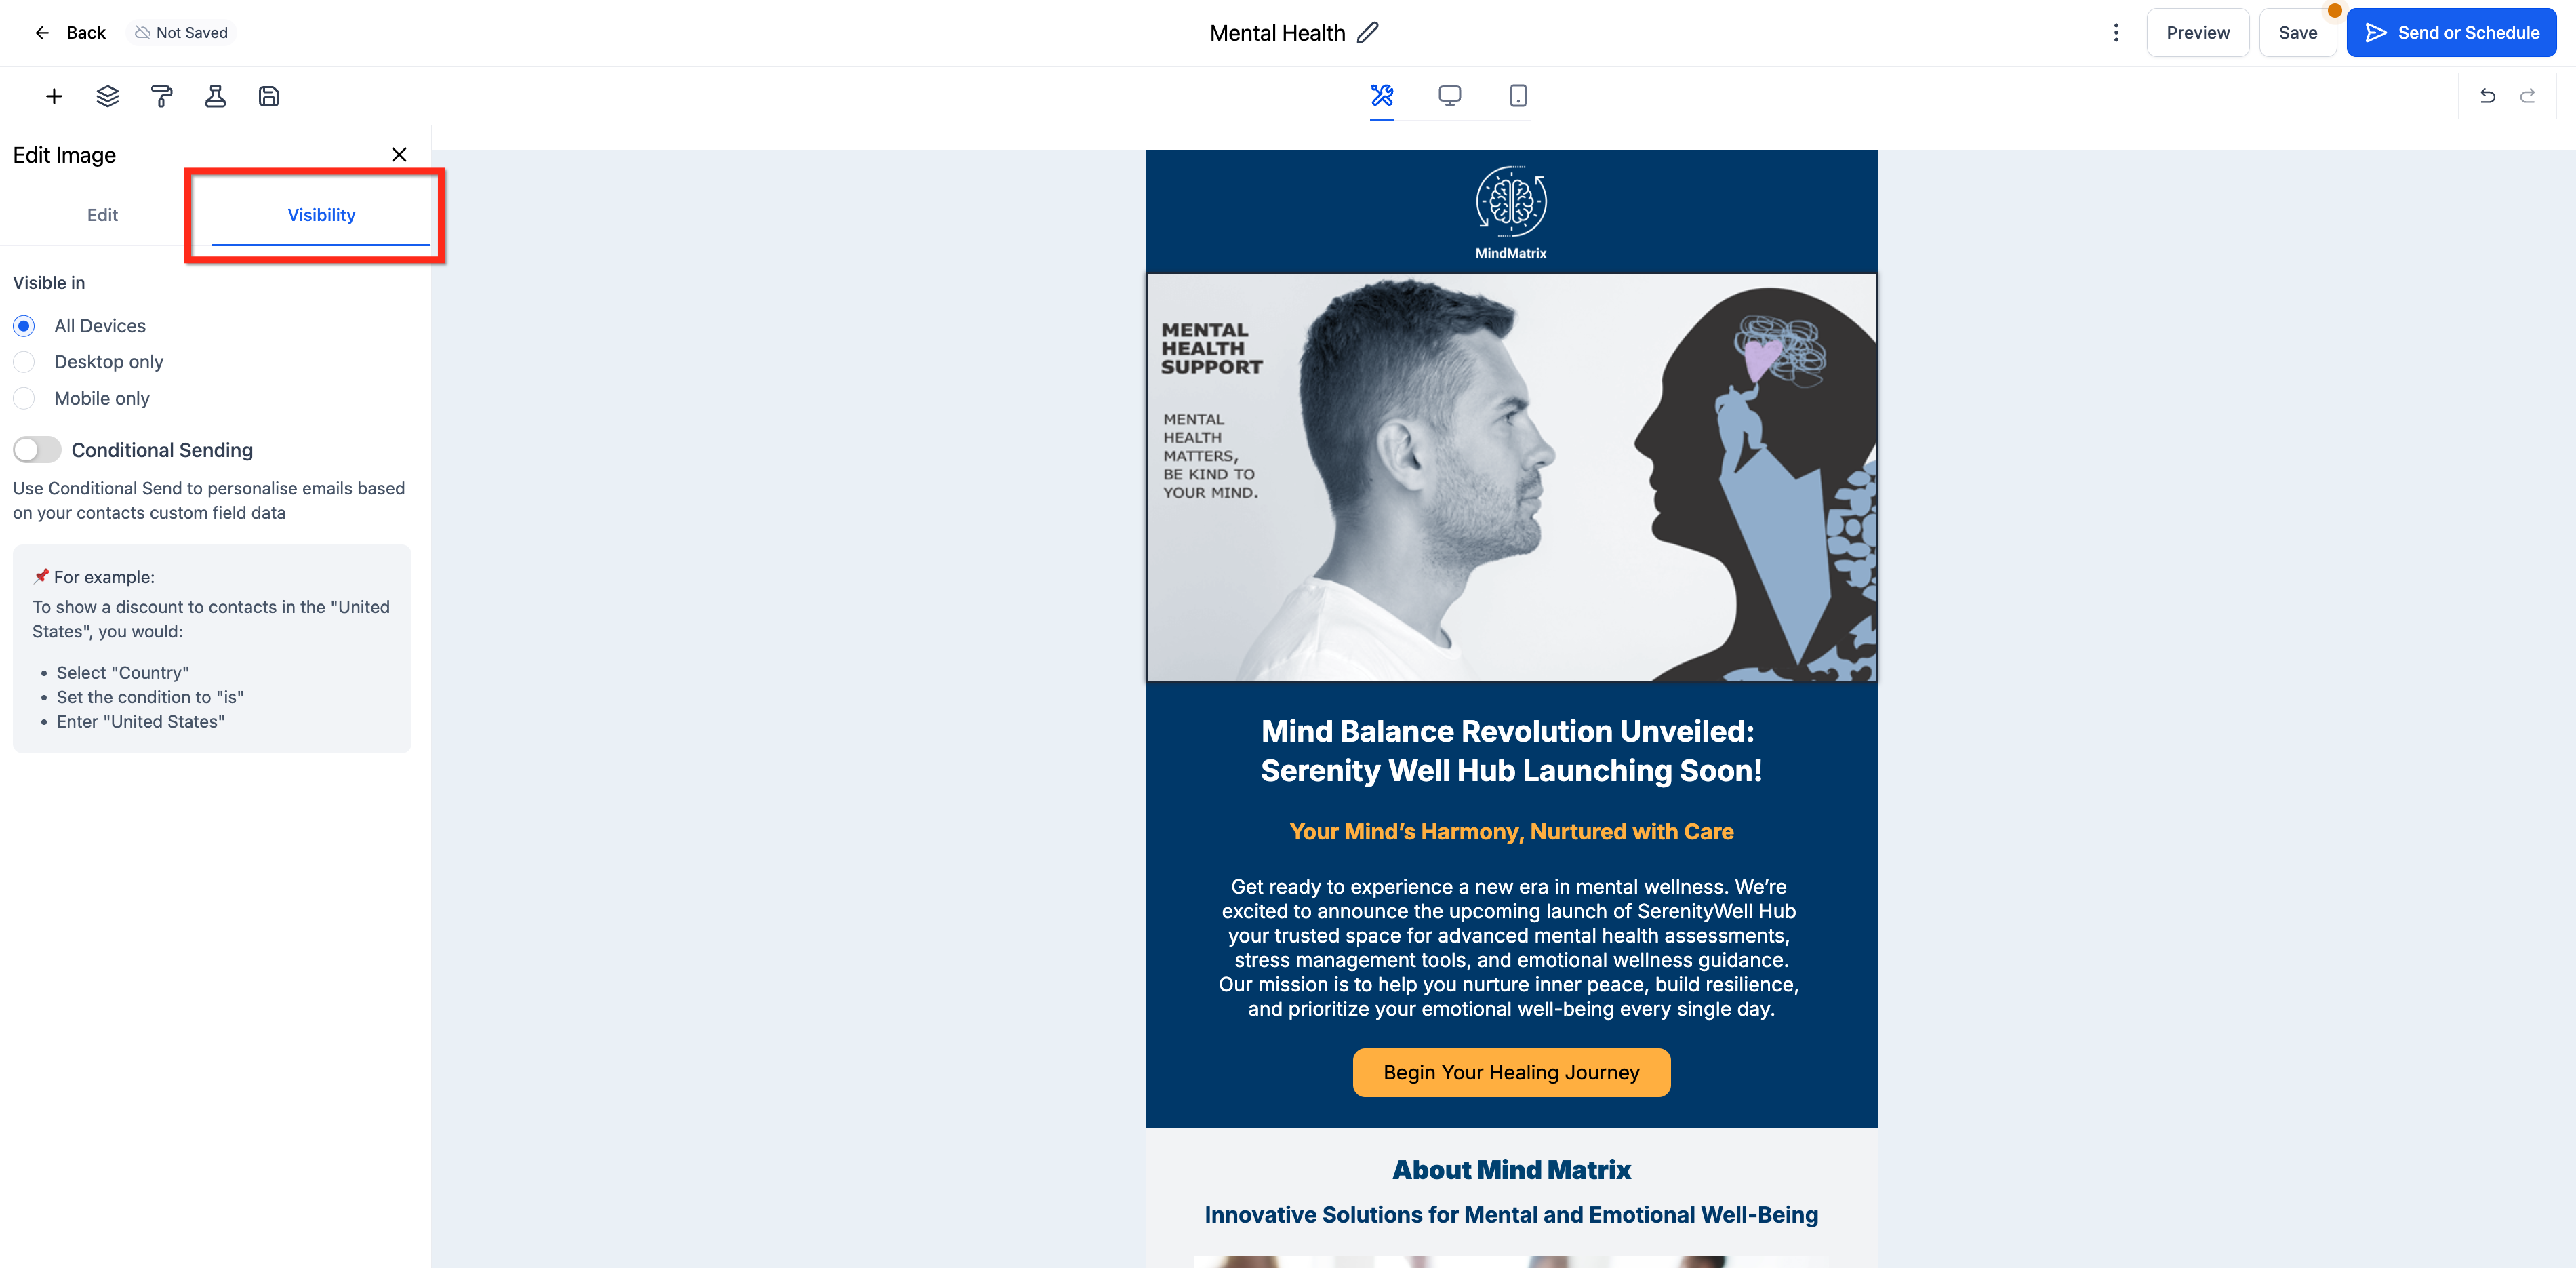
Alternatively, click the Conditional Element icon in the element overlay actions.

Toggle on Conditional Sending.

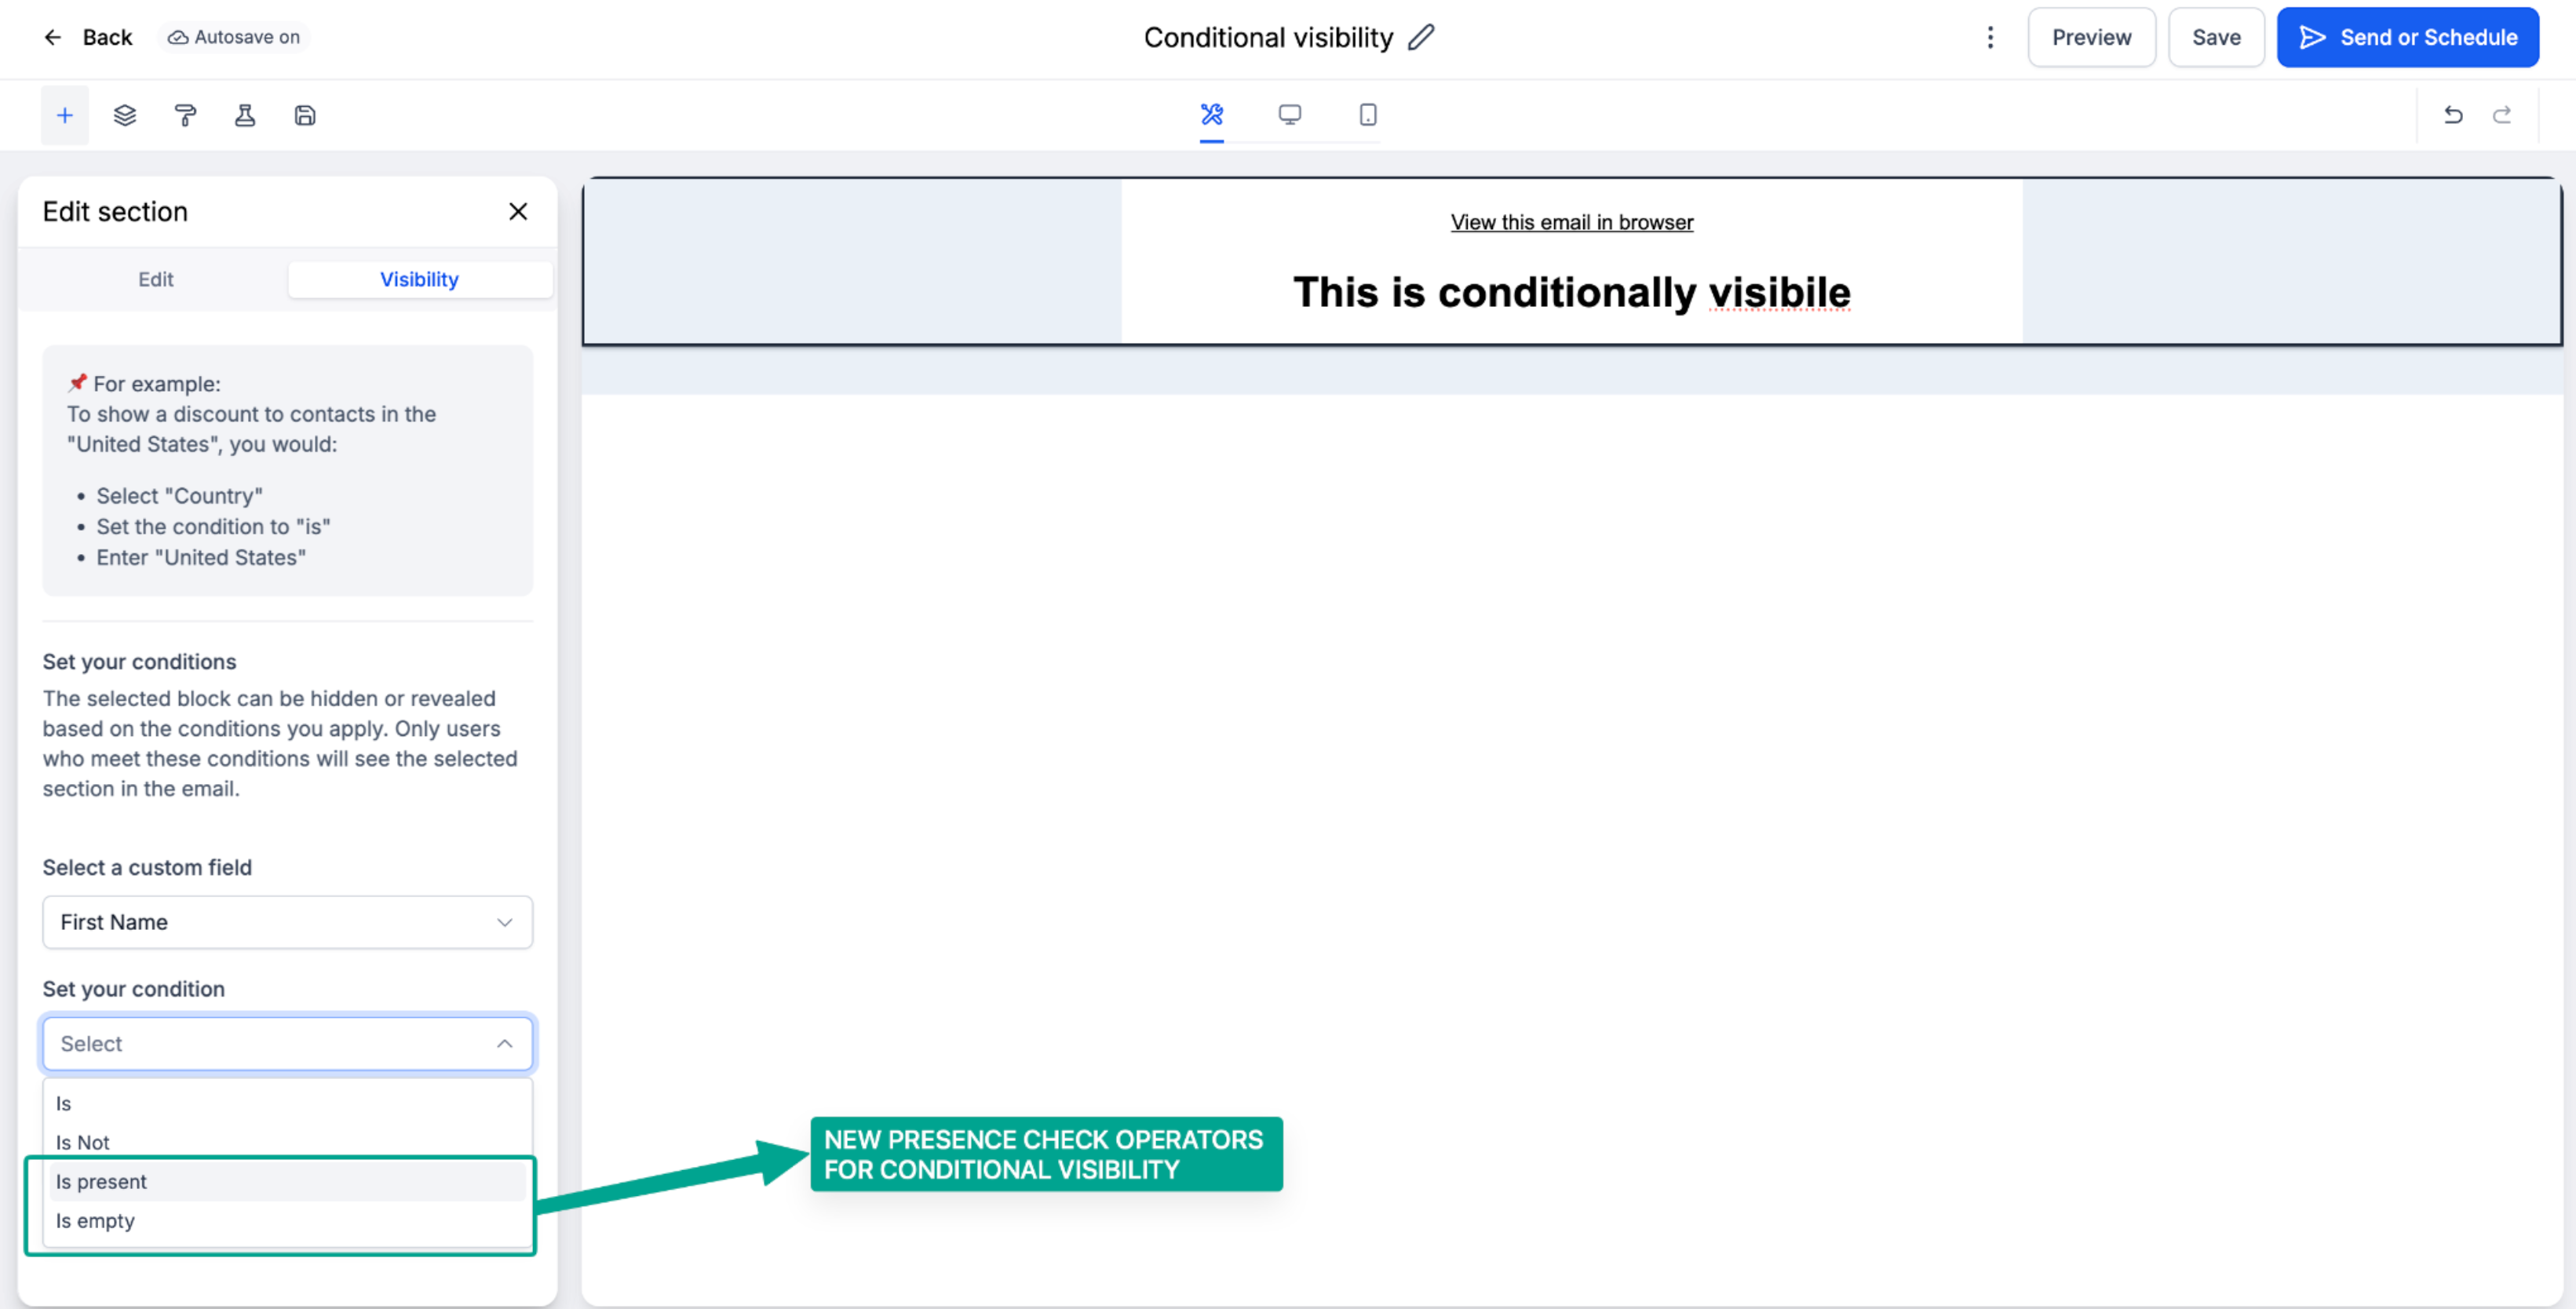
Choose a Field, set a Condition, and enter a Value. Leaving the value blank sets the condition to null, so the element renders only when that field is empty.
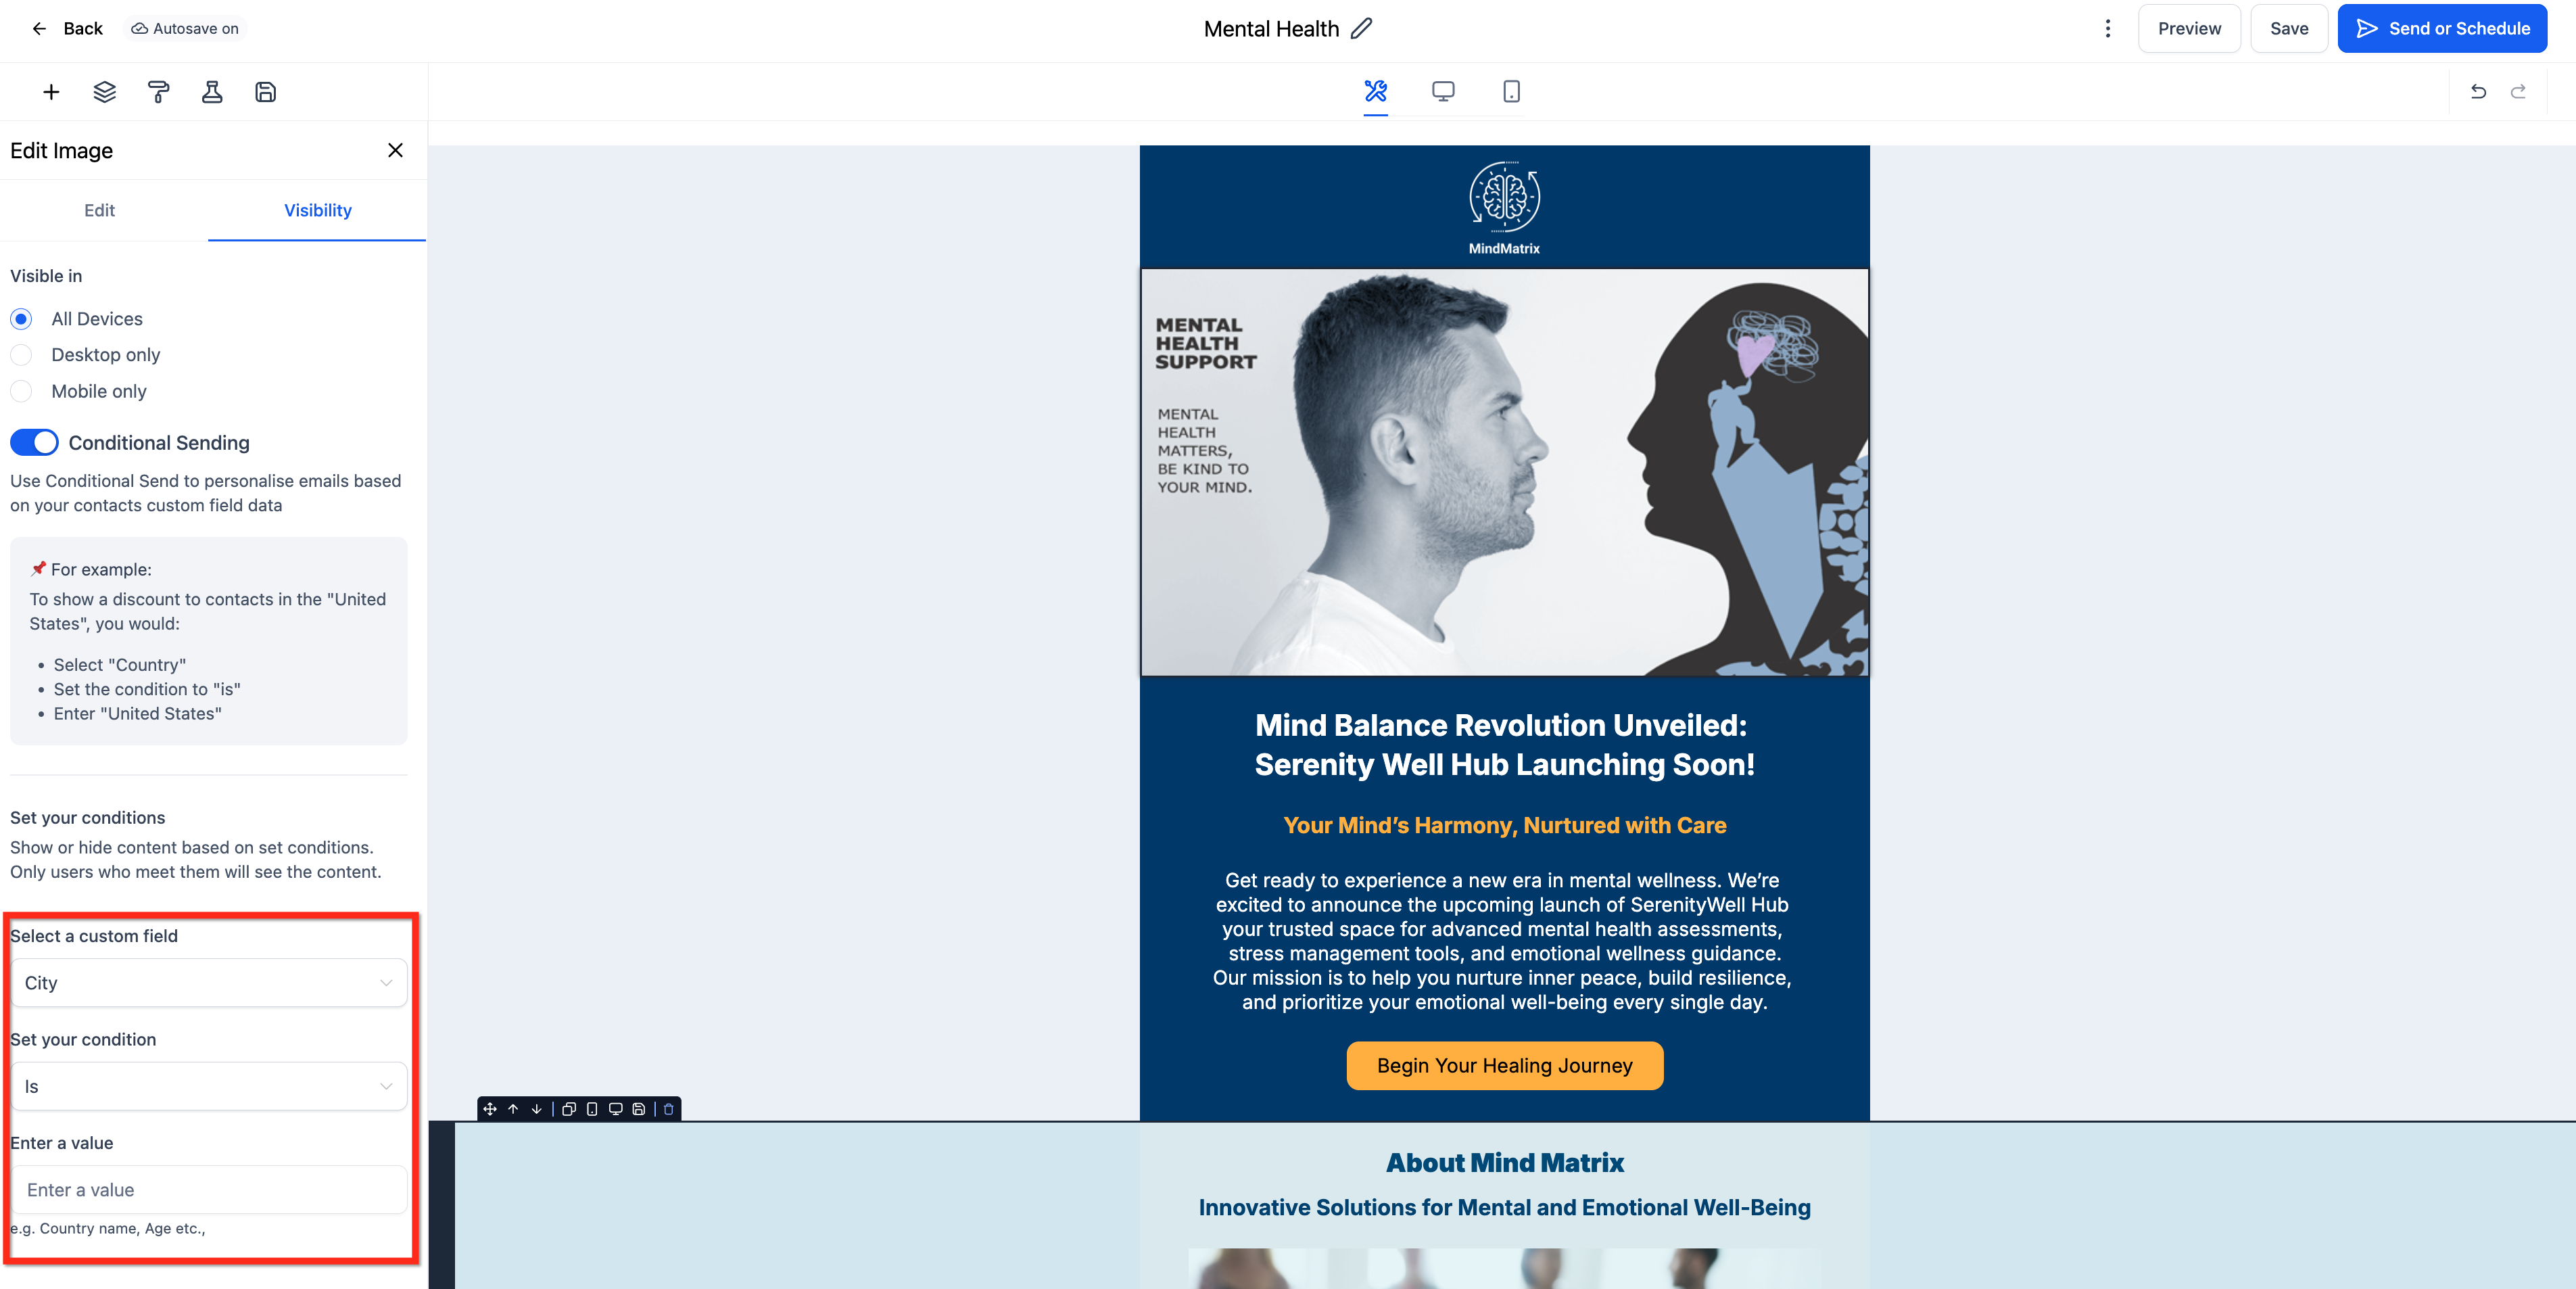
Conditional visibility supports the operators Is, Is Not, Is Empty, and Is Present, which work with custom fields (including attachment fields). For example, show a Download Invoice button only when an attachment field Is Present, or hide a personalized greeting when First Name Is Empty. Supported field types are single-line text, number, radio select, and single-select dropdown; for numbers use plain numeric values, and for radio or single-select fields match the exact stored option value.
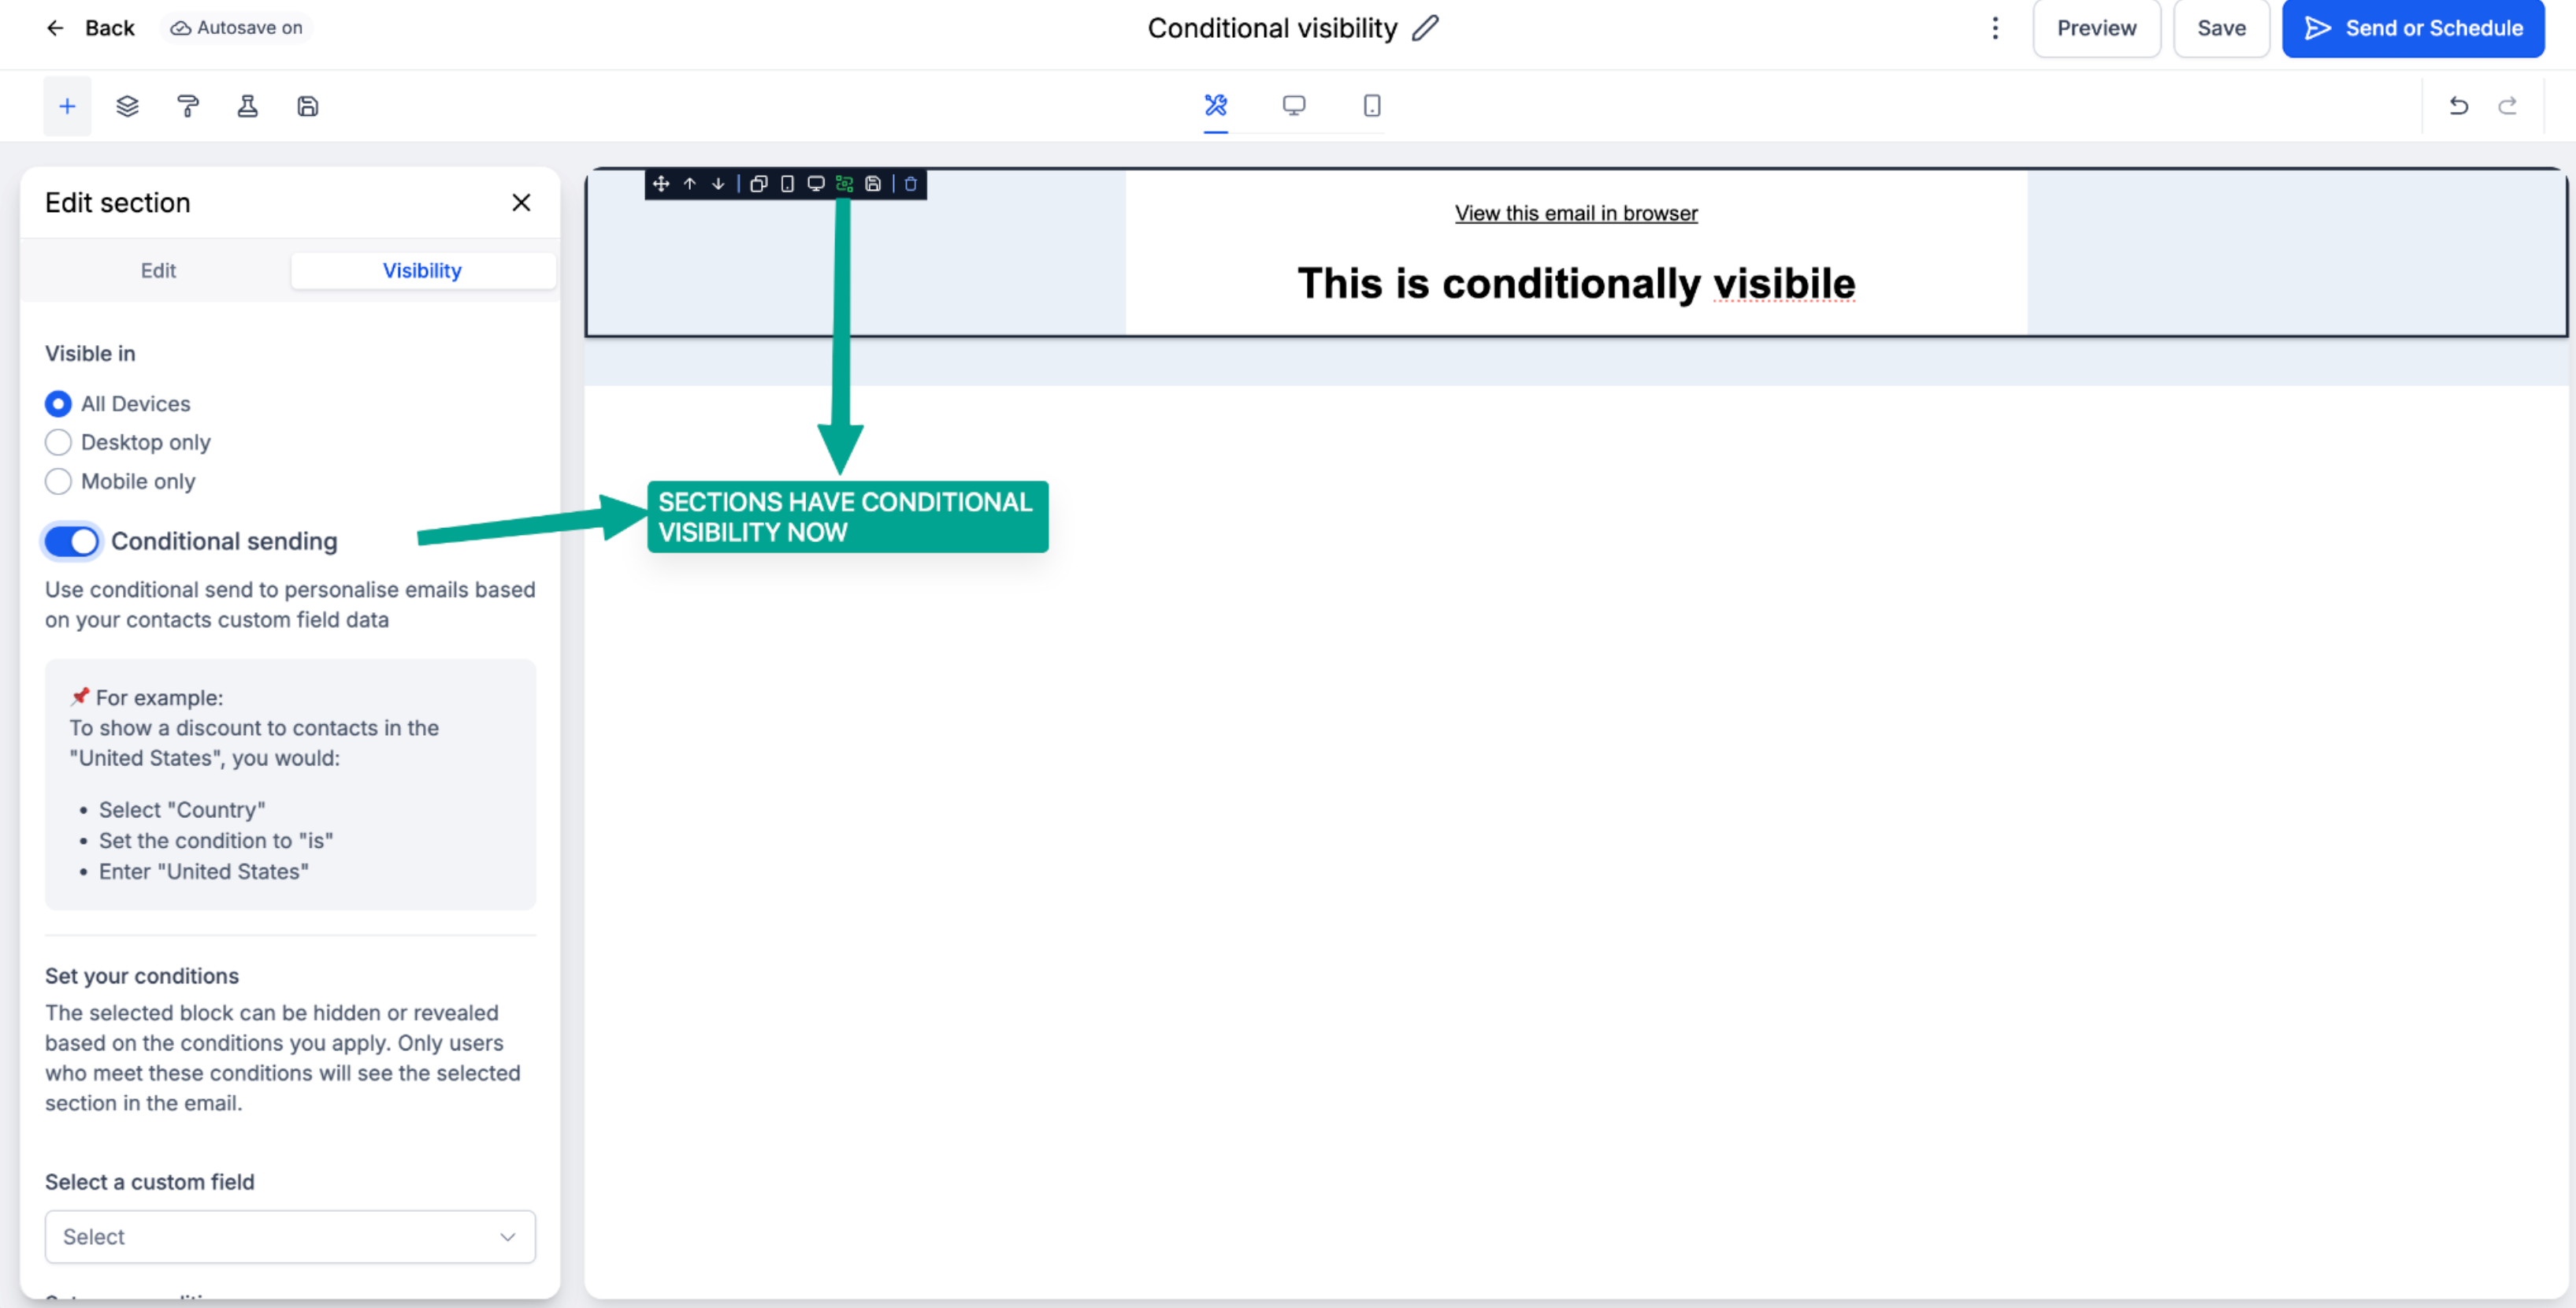
Conditional rules also apply to entire layouts. Select the layout, open the Visibility tab, turn on conditional visibility, pick the custom field and condition, enter a value if required, and save. This lets whole sections appear or disappear based on contact data without configuring each element individually.
Building polished, consistent emails is faster when you can reuse your best sections. The builder lets you save individual elements, columns, or whole layouts and pull them into any template or campaign.
Step 1: Open any campaign or template from Marketing > Email Marketing.
Step 2: Create the element or layout you want to save.
Step 3: Hover over the element or layout and click the Save icon.
Step 4: Access the saved item under the Saved Items section at the top right. Saved items are stored for your location and are available in every existing and new template and campaign.
Step 5: To keep saved items organized, rename them by clicking the three dots and selecting Rename (for example, "Weekly Update Body Content").
Step 6: Use the search bar in Saved Items to quickly find what you need.
Animated GIFs can make emails more engaging. You can use them in two places: as a standalone image, or as a video thumbnail.
As an image:
Open any campaign or template from Marketing > Email Marketing.
Drag and drop an Image element onto the canvas.
Edit the image and upload a GIF file (up to 10MB).
As a video thumbnail:
Drag and drop a Video element.
Edit the video thumbnail and upload a GIF file (up to 10MB).
Email signatures keep your team's outbound emails consistent and professional. Signatures are saved per staff user within a sub-account, so each team member can have their own name, title, contact details, and links. A signature can apply automatically to outgoing emails or be inserted manually with a custom value.
To set up or edit a signature:
Step 1: In your sub-account, go to Settings and select My Staff.
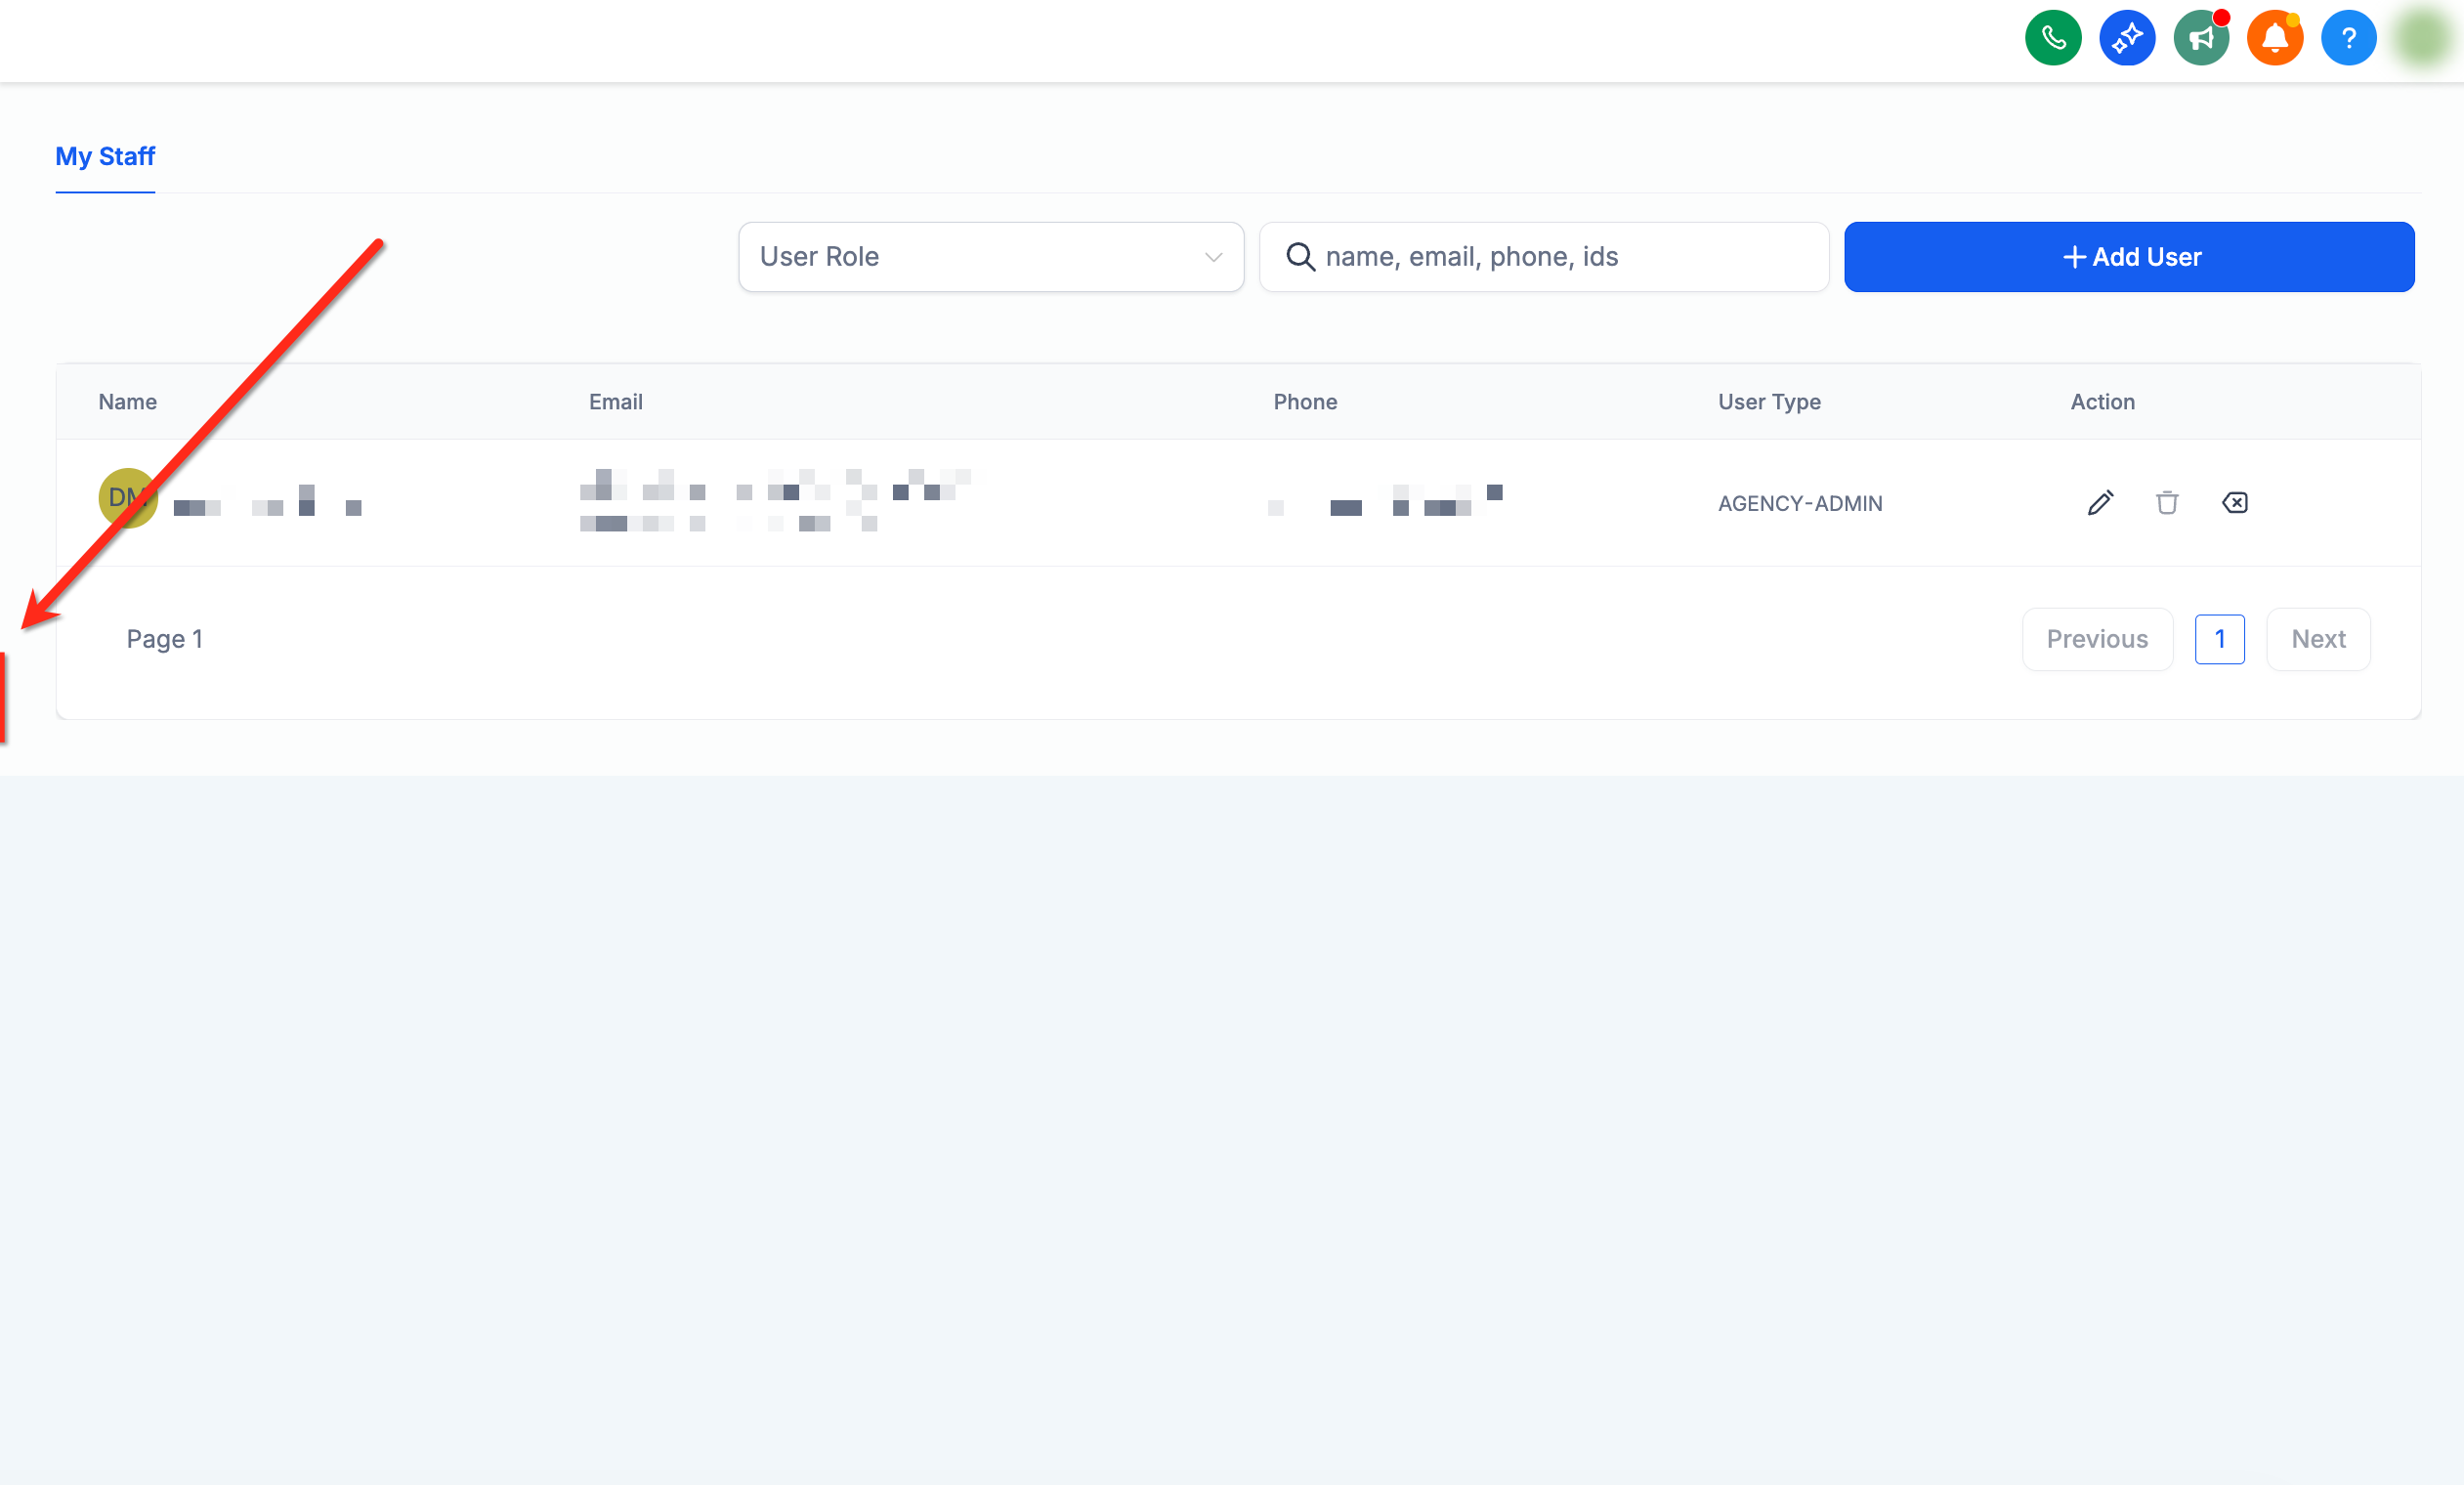
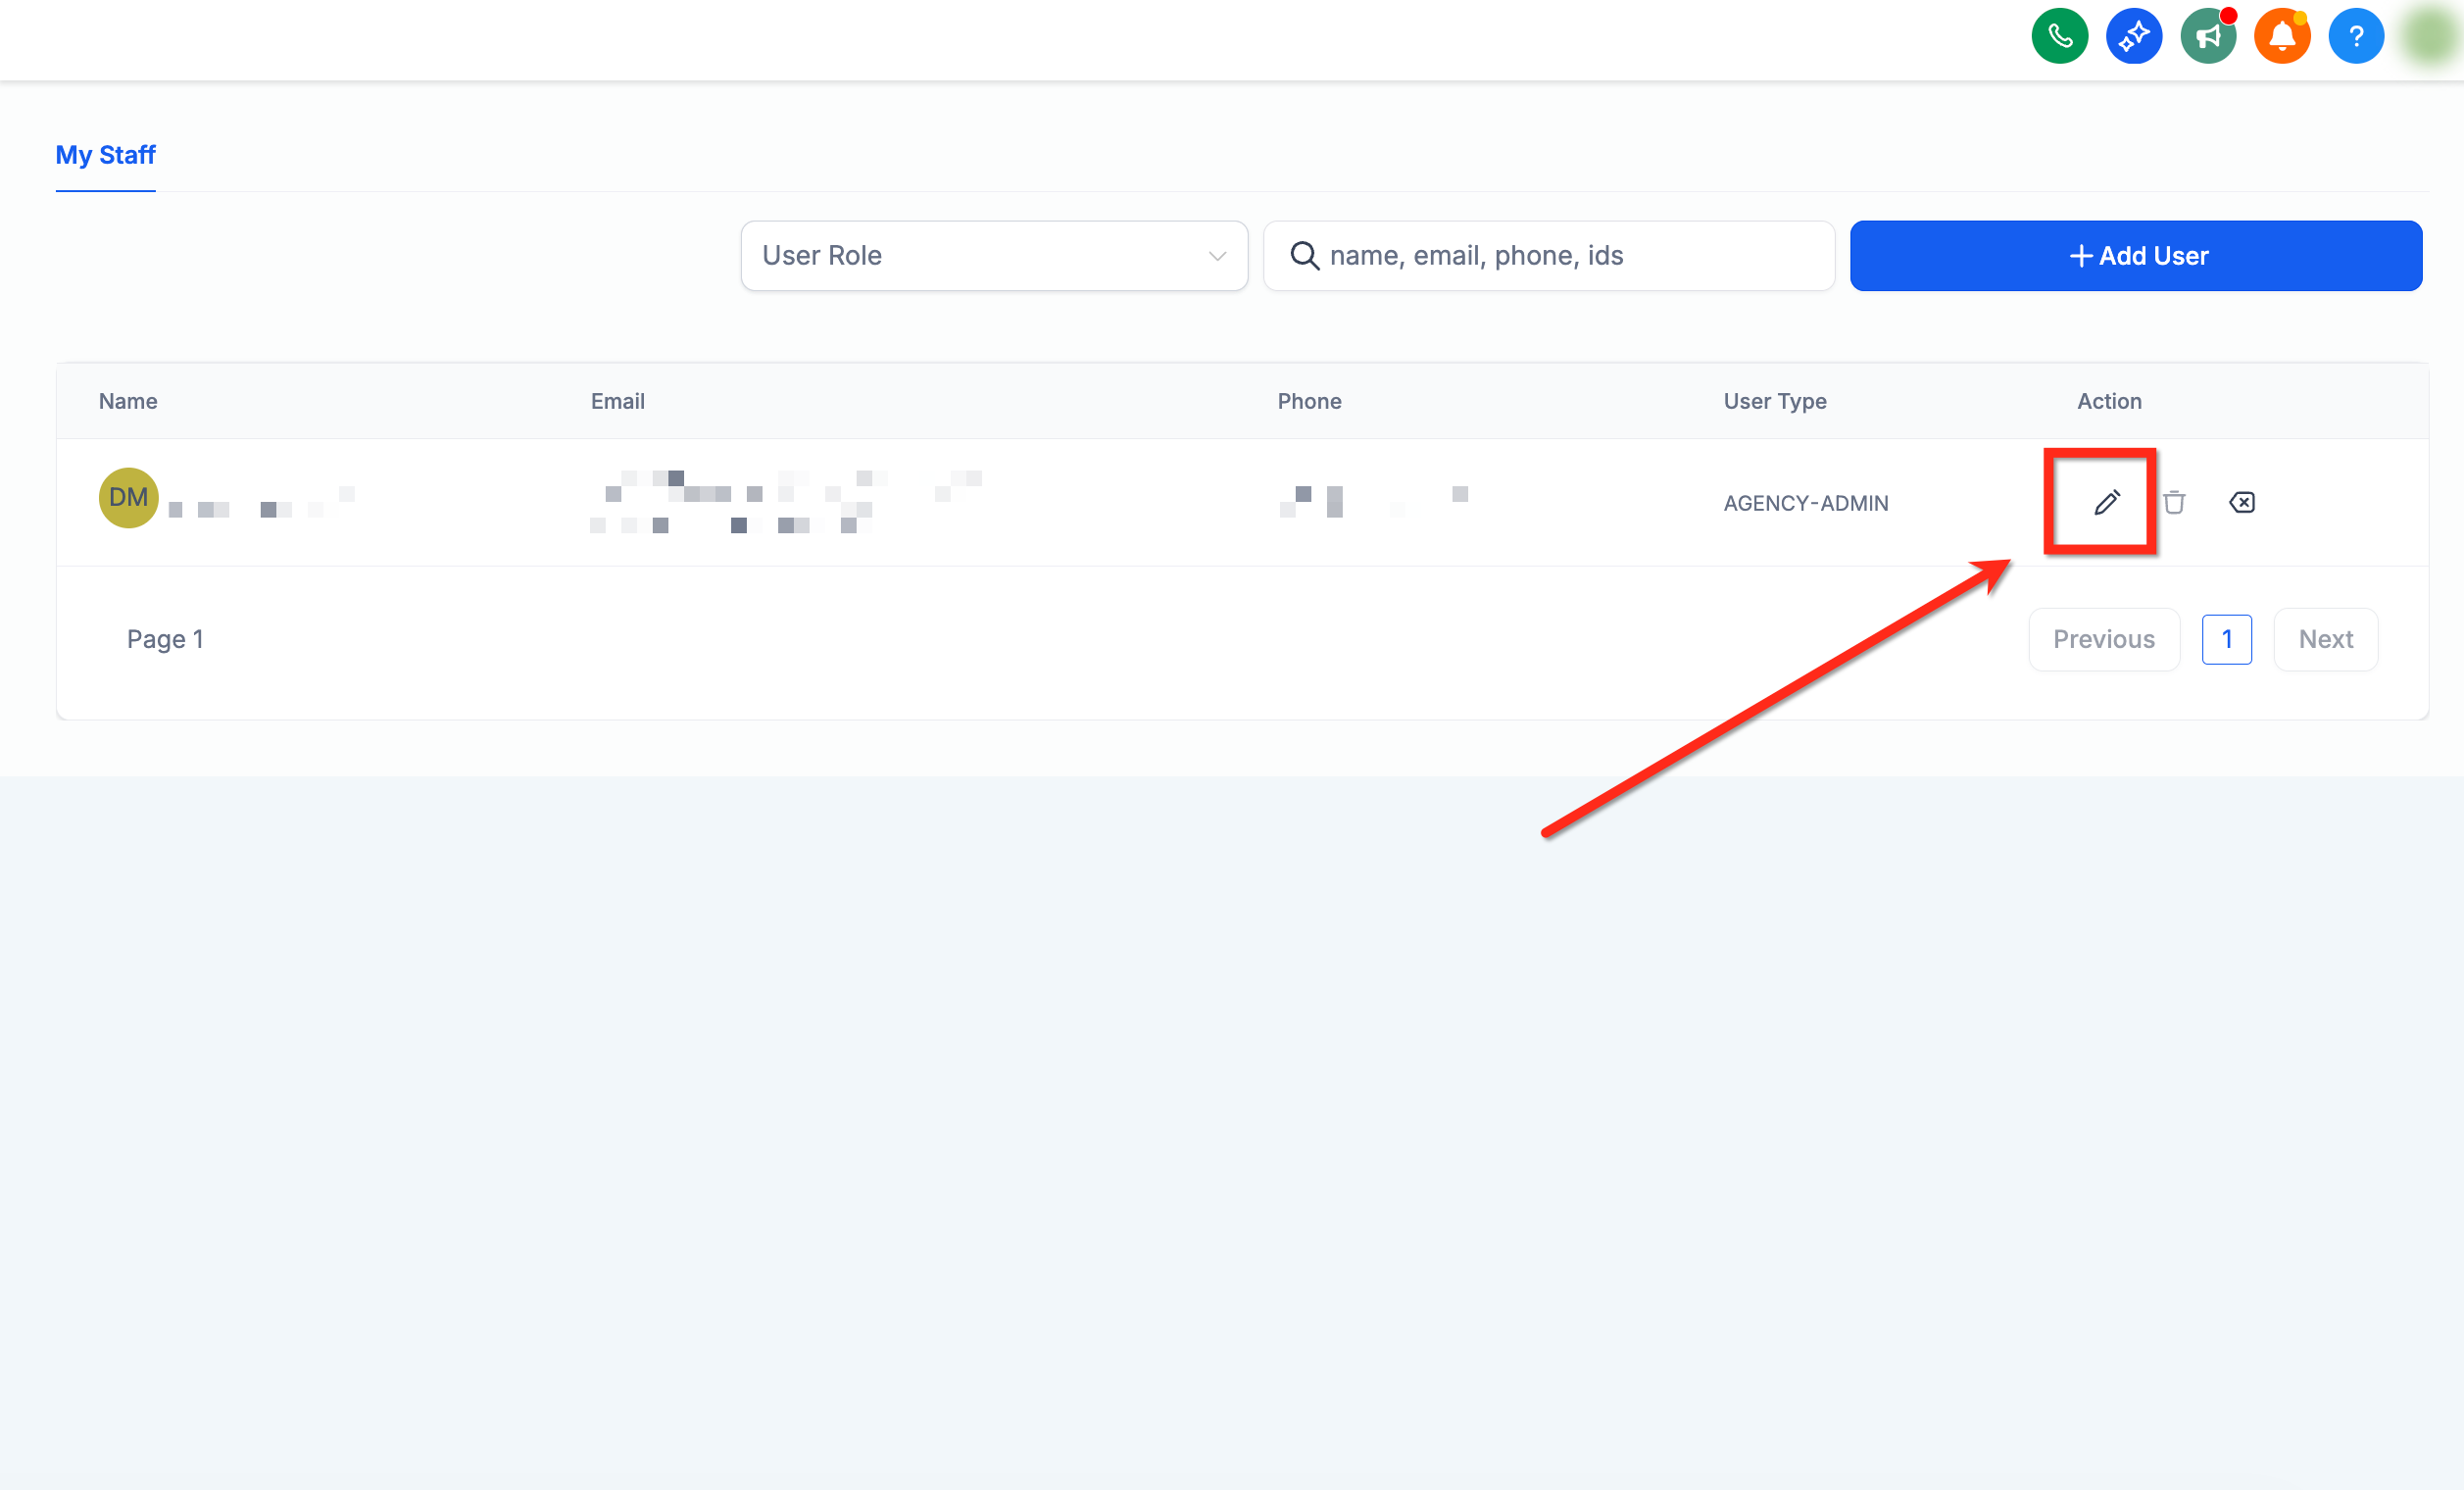
Step 2: Find the staff member and click Edit (the pencil icon).
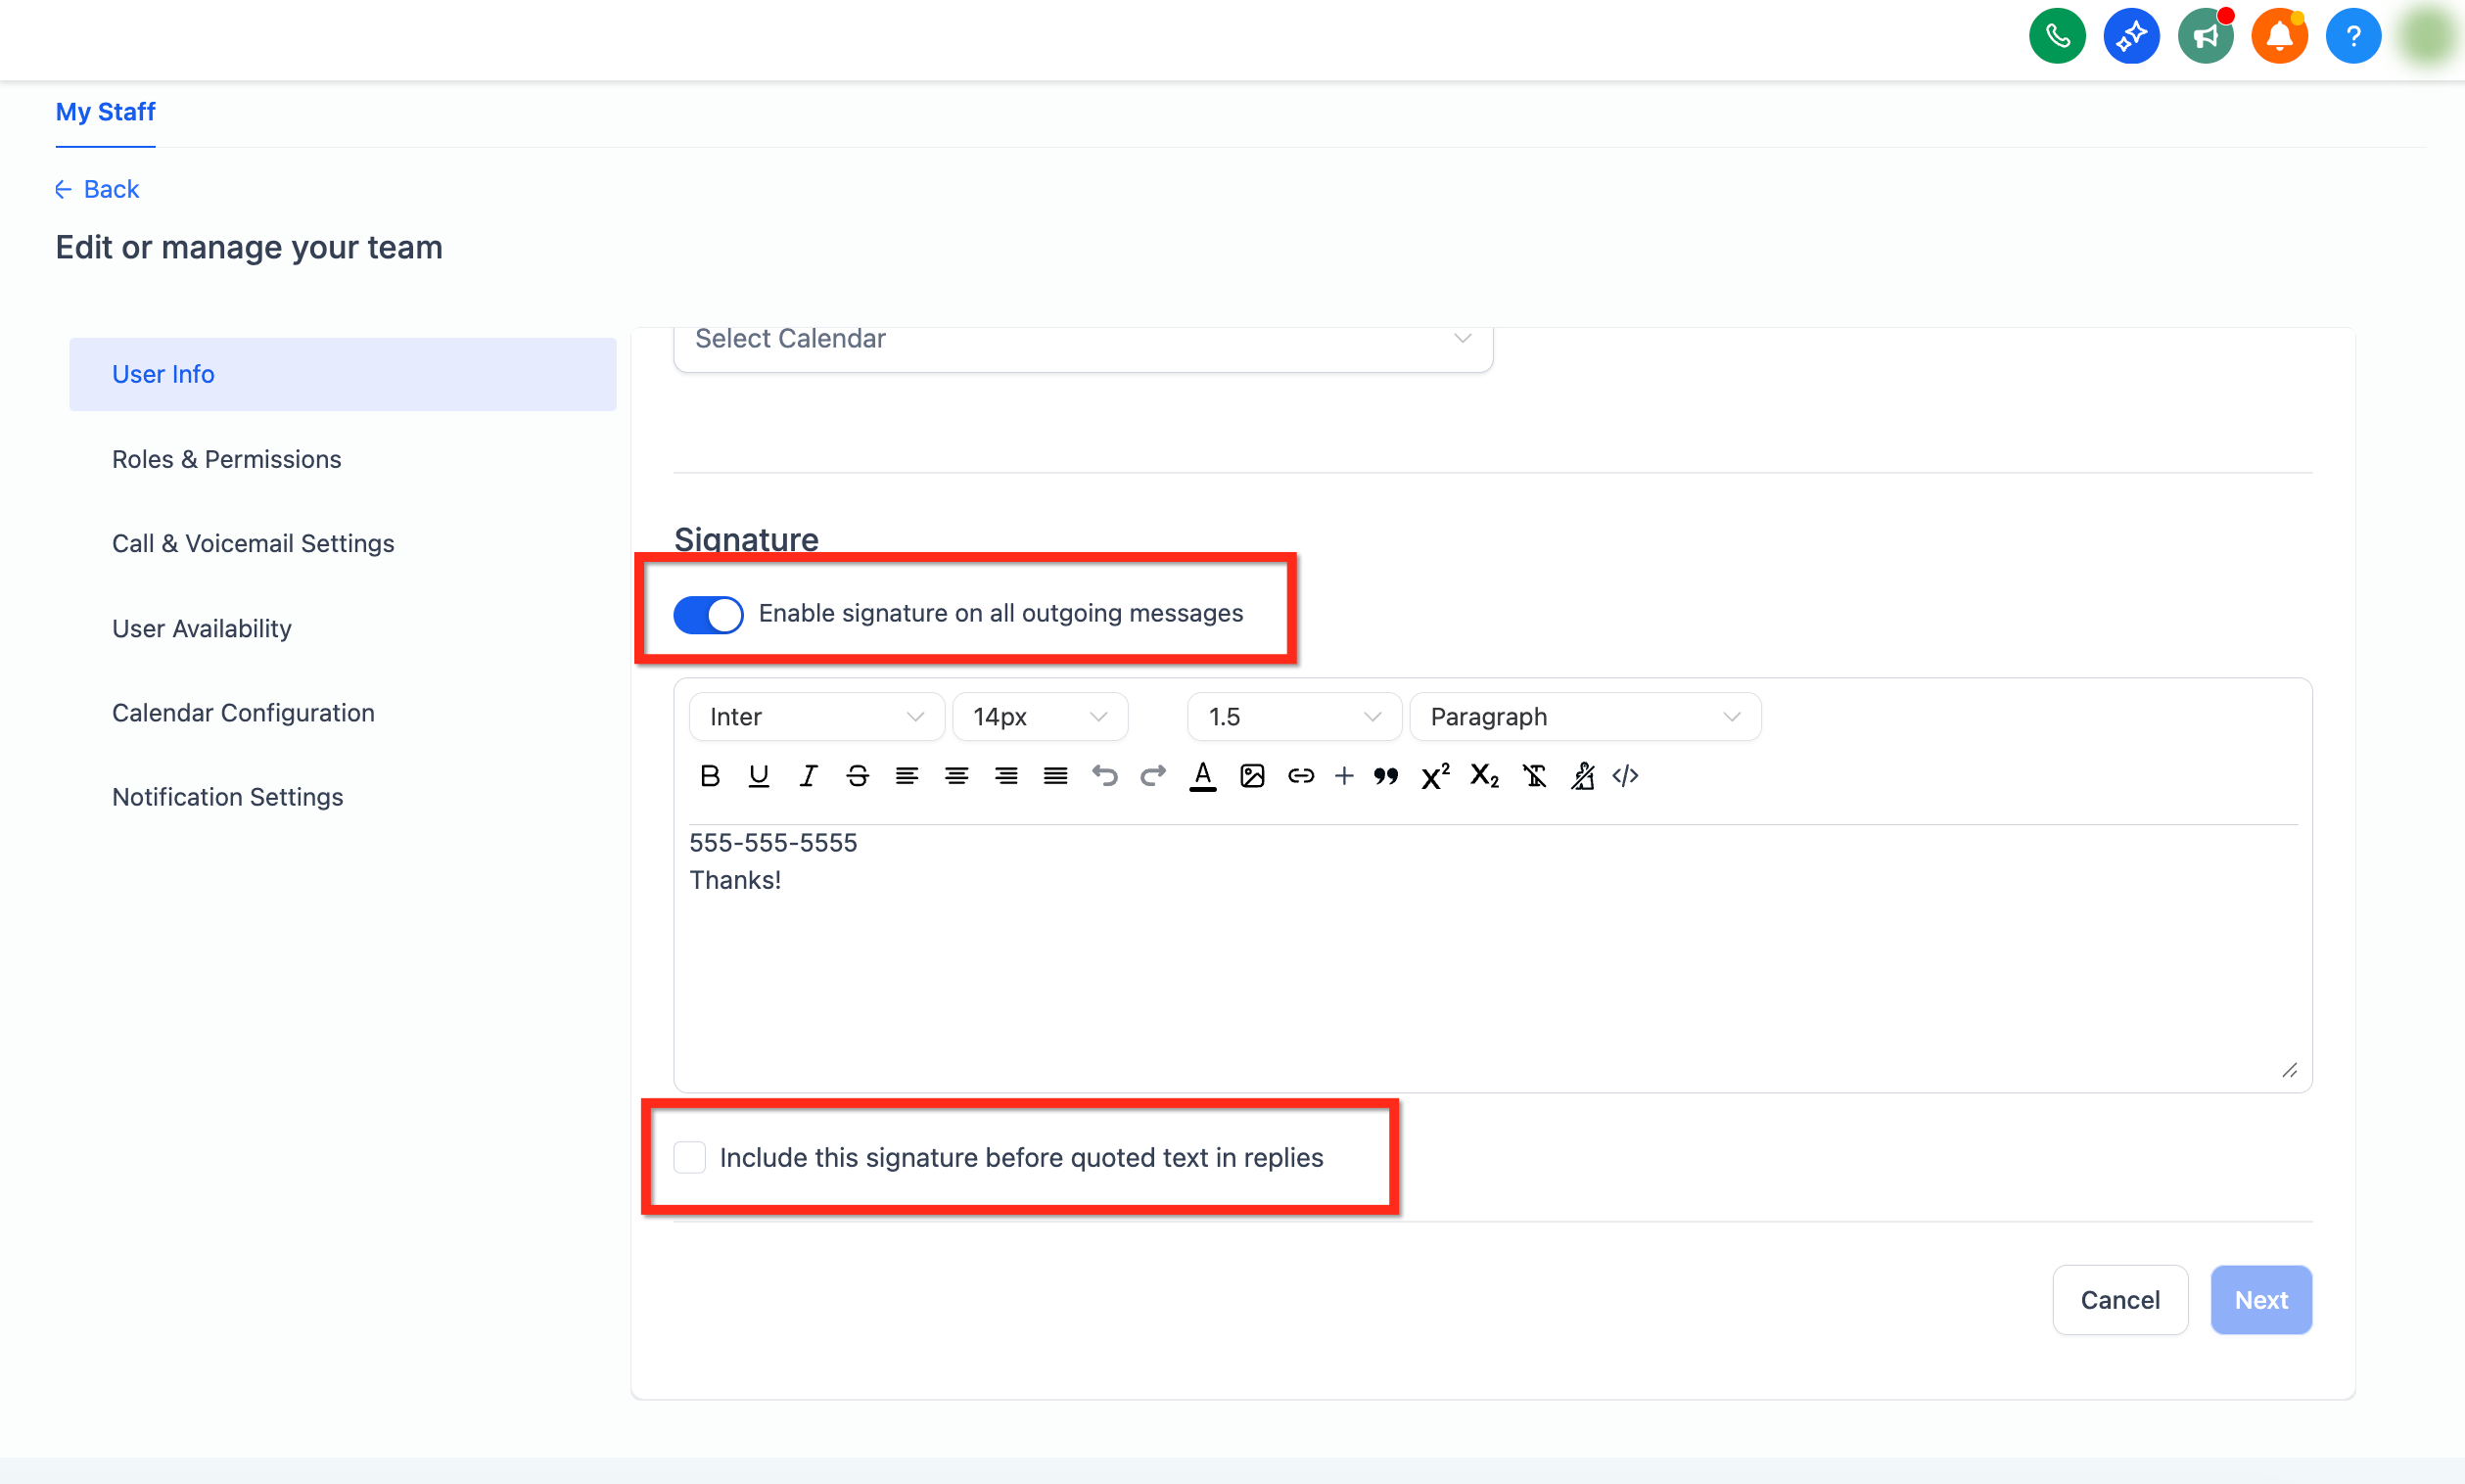
Step 3: Scroll to the Signature section and update the text and formatting in the editor. You can also insert code here for more customization.
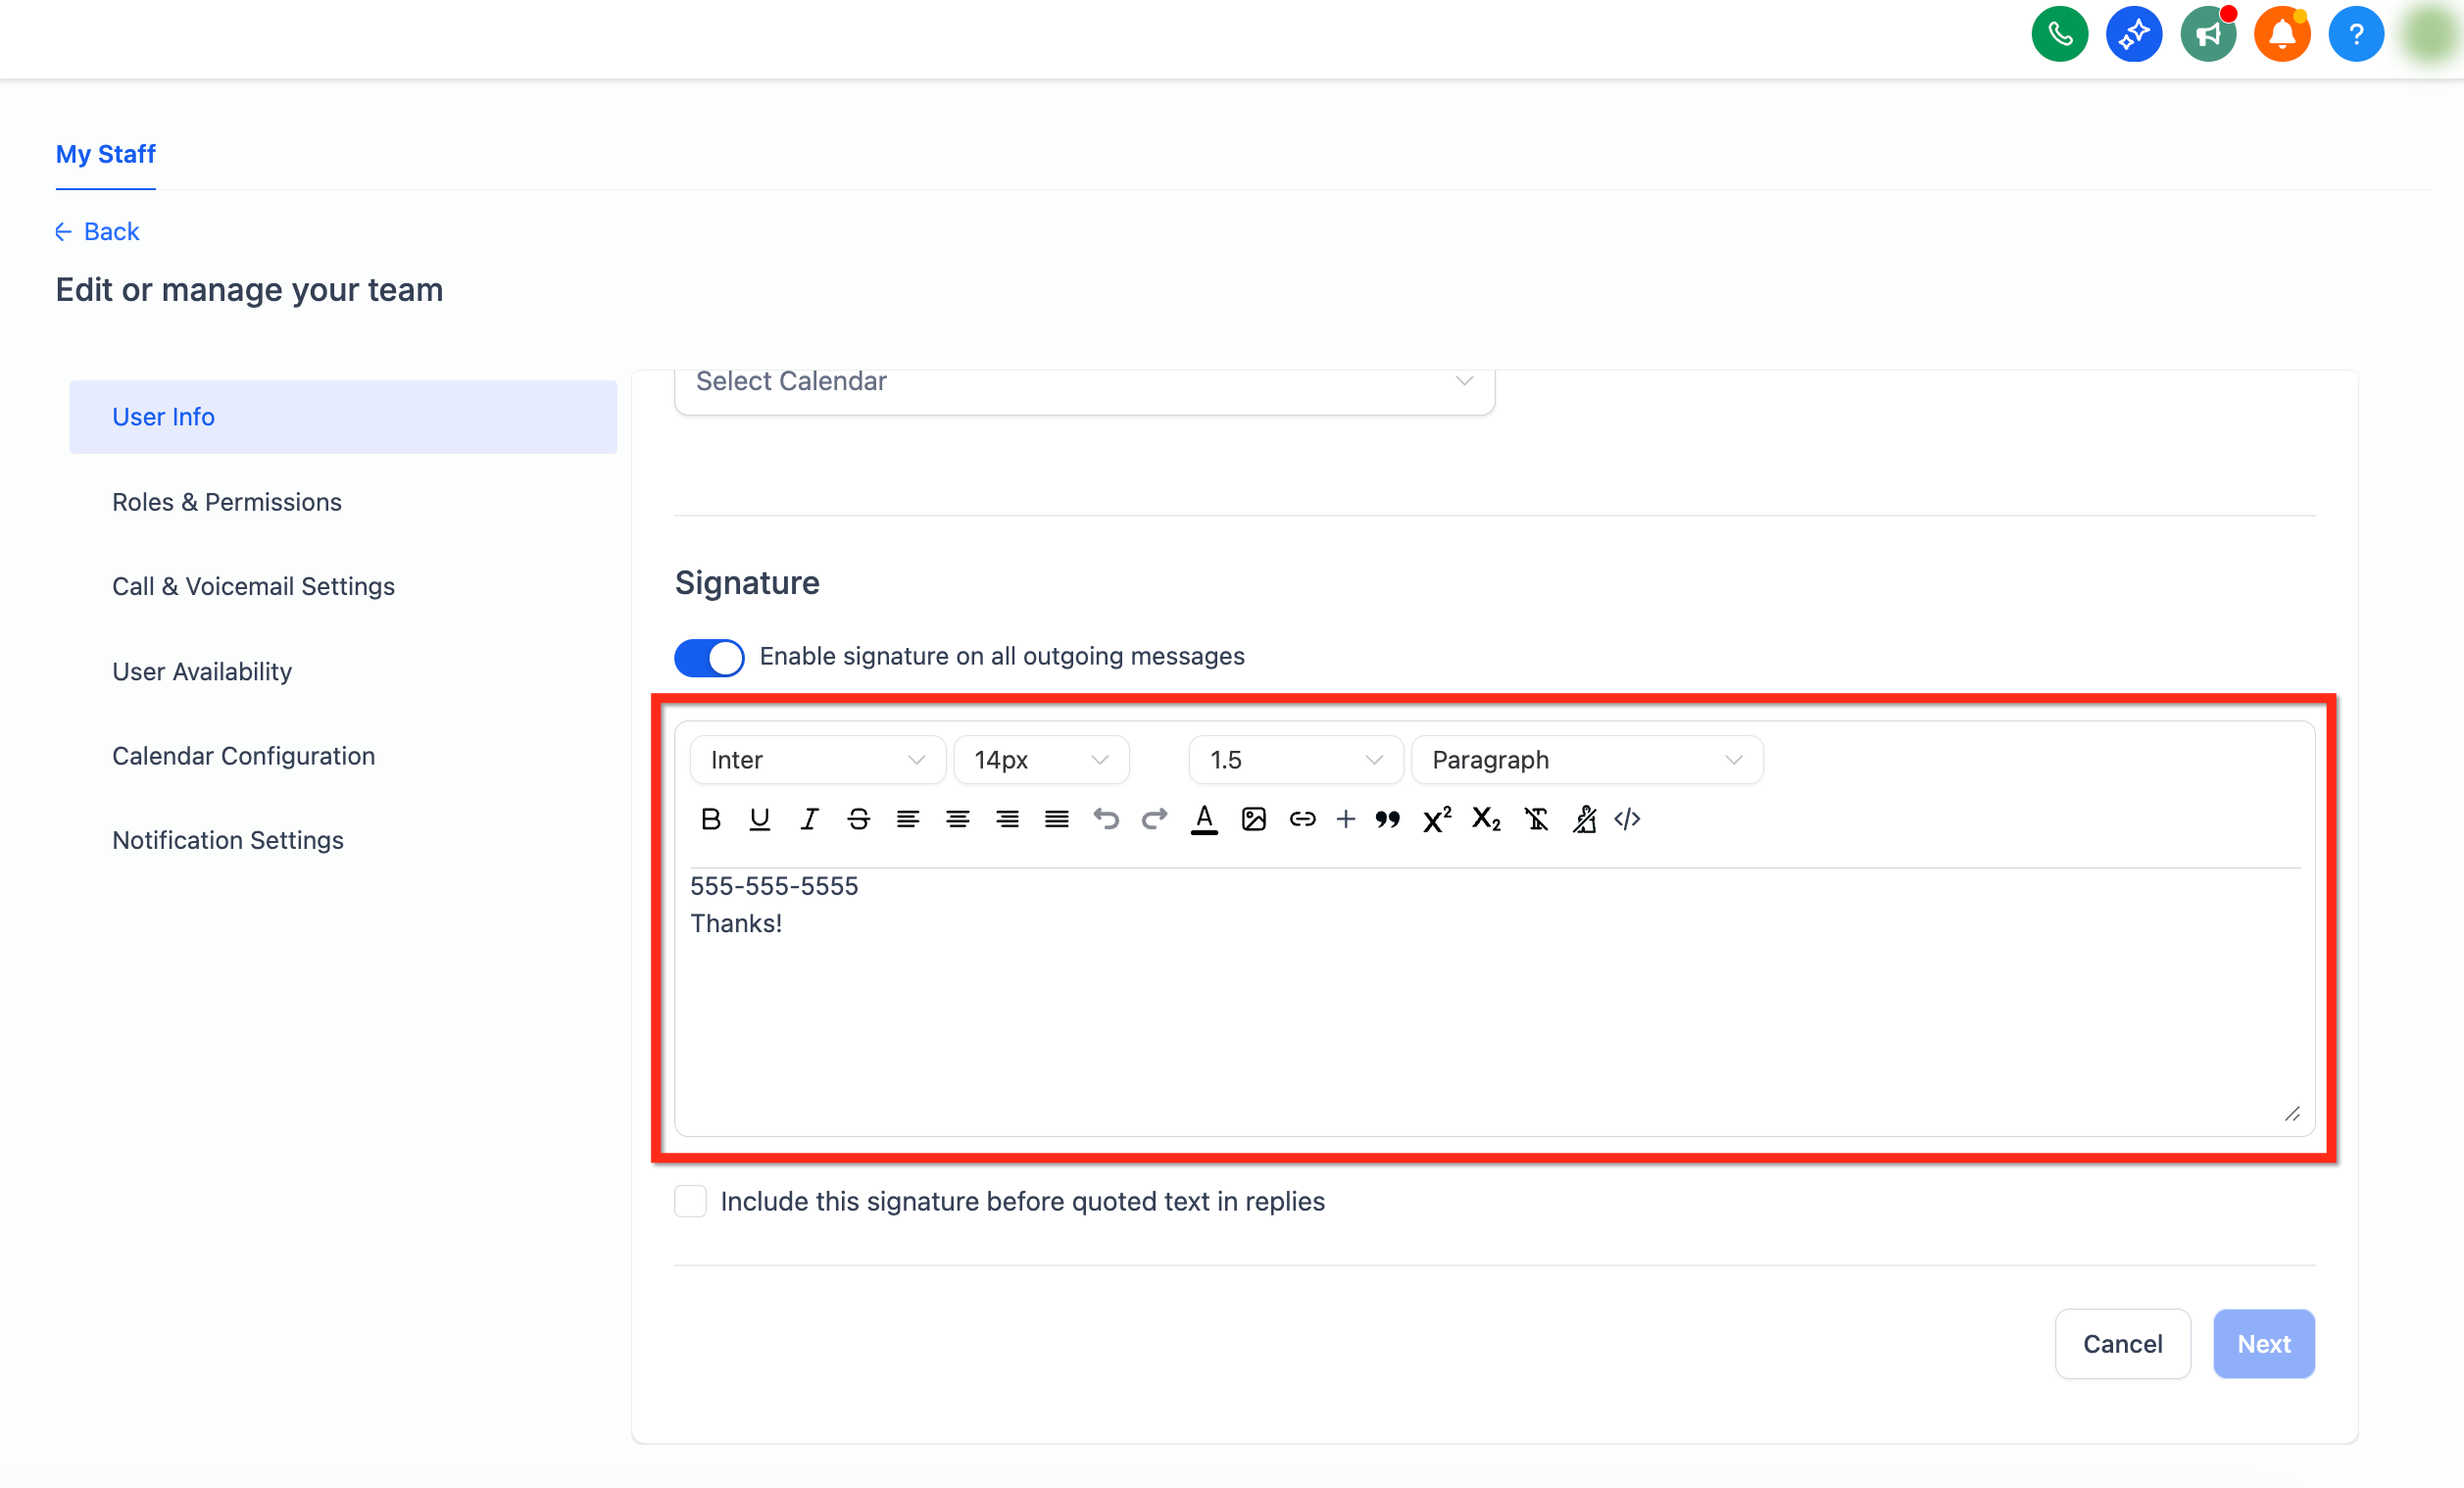
Step 4: Configure optional settings:
Turn on Enable Signature in All Outgoing Messages to apply the signature automatically to outgoing emails.
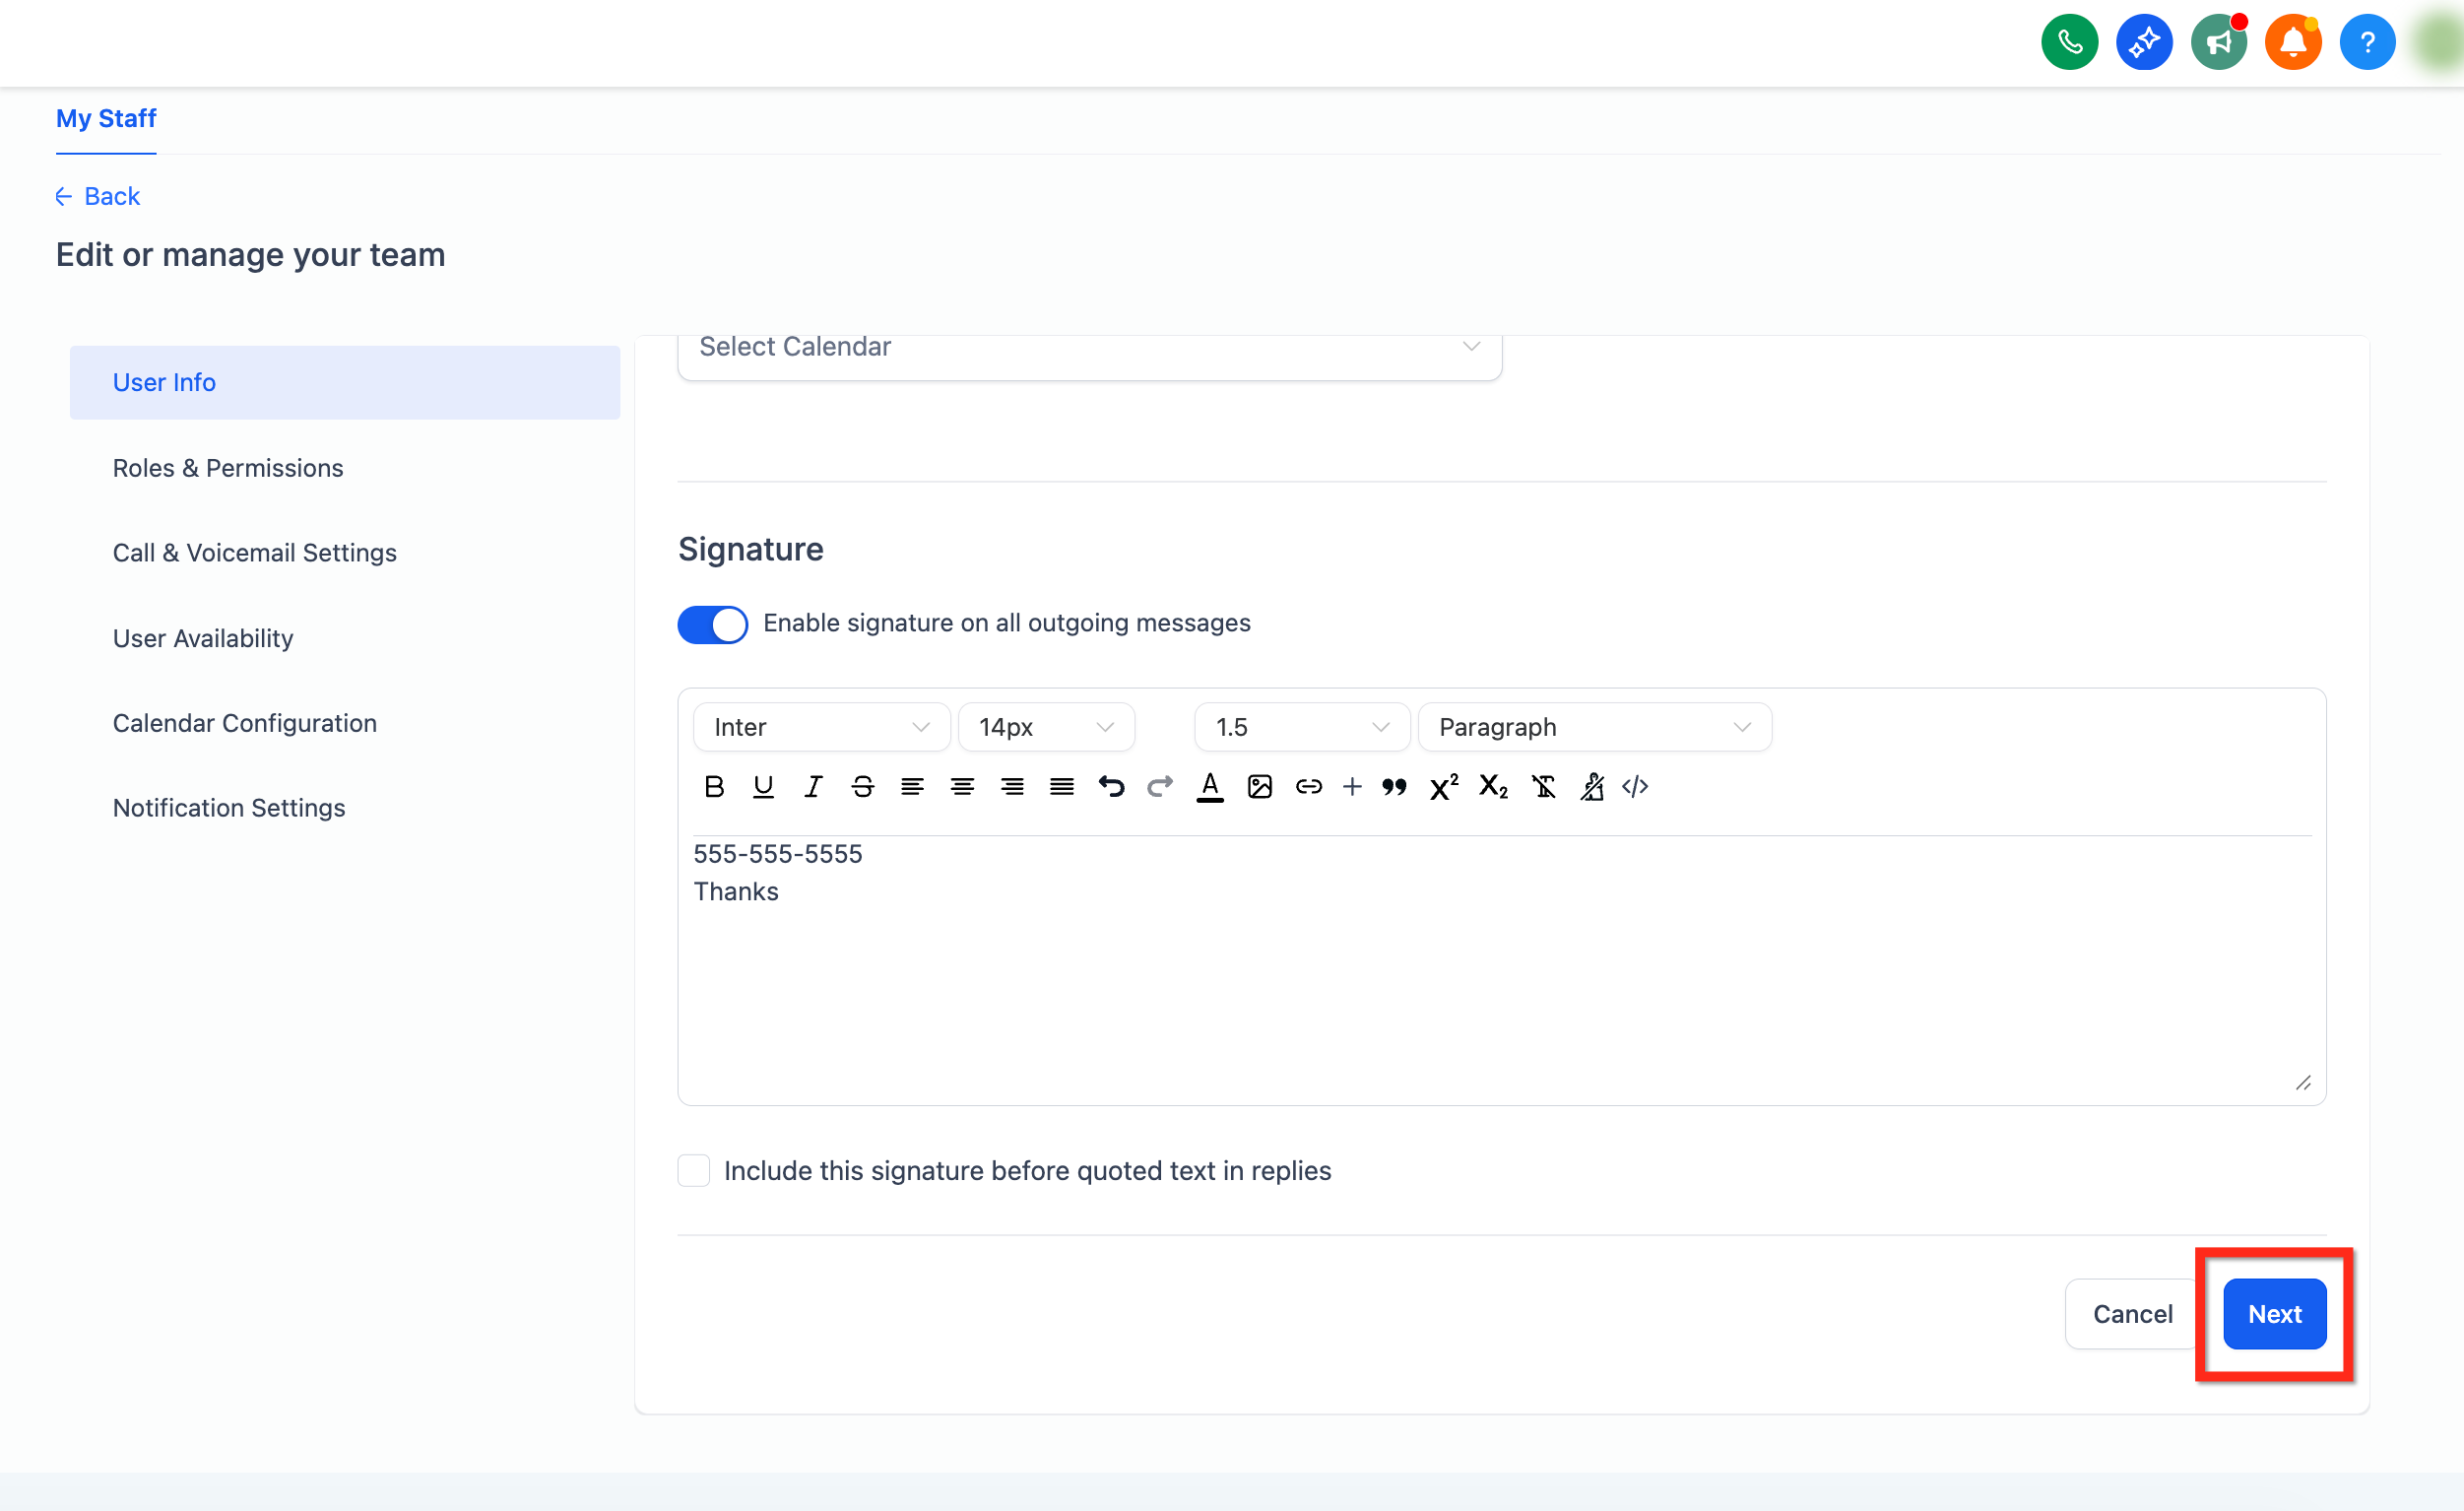
Check Include This Signature Before Quoted Text in Replies to place the signature above the quoted thread in replies.
Step 5: Click Next, then Save to apply your changes.
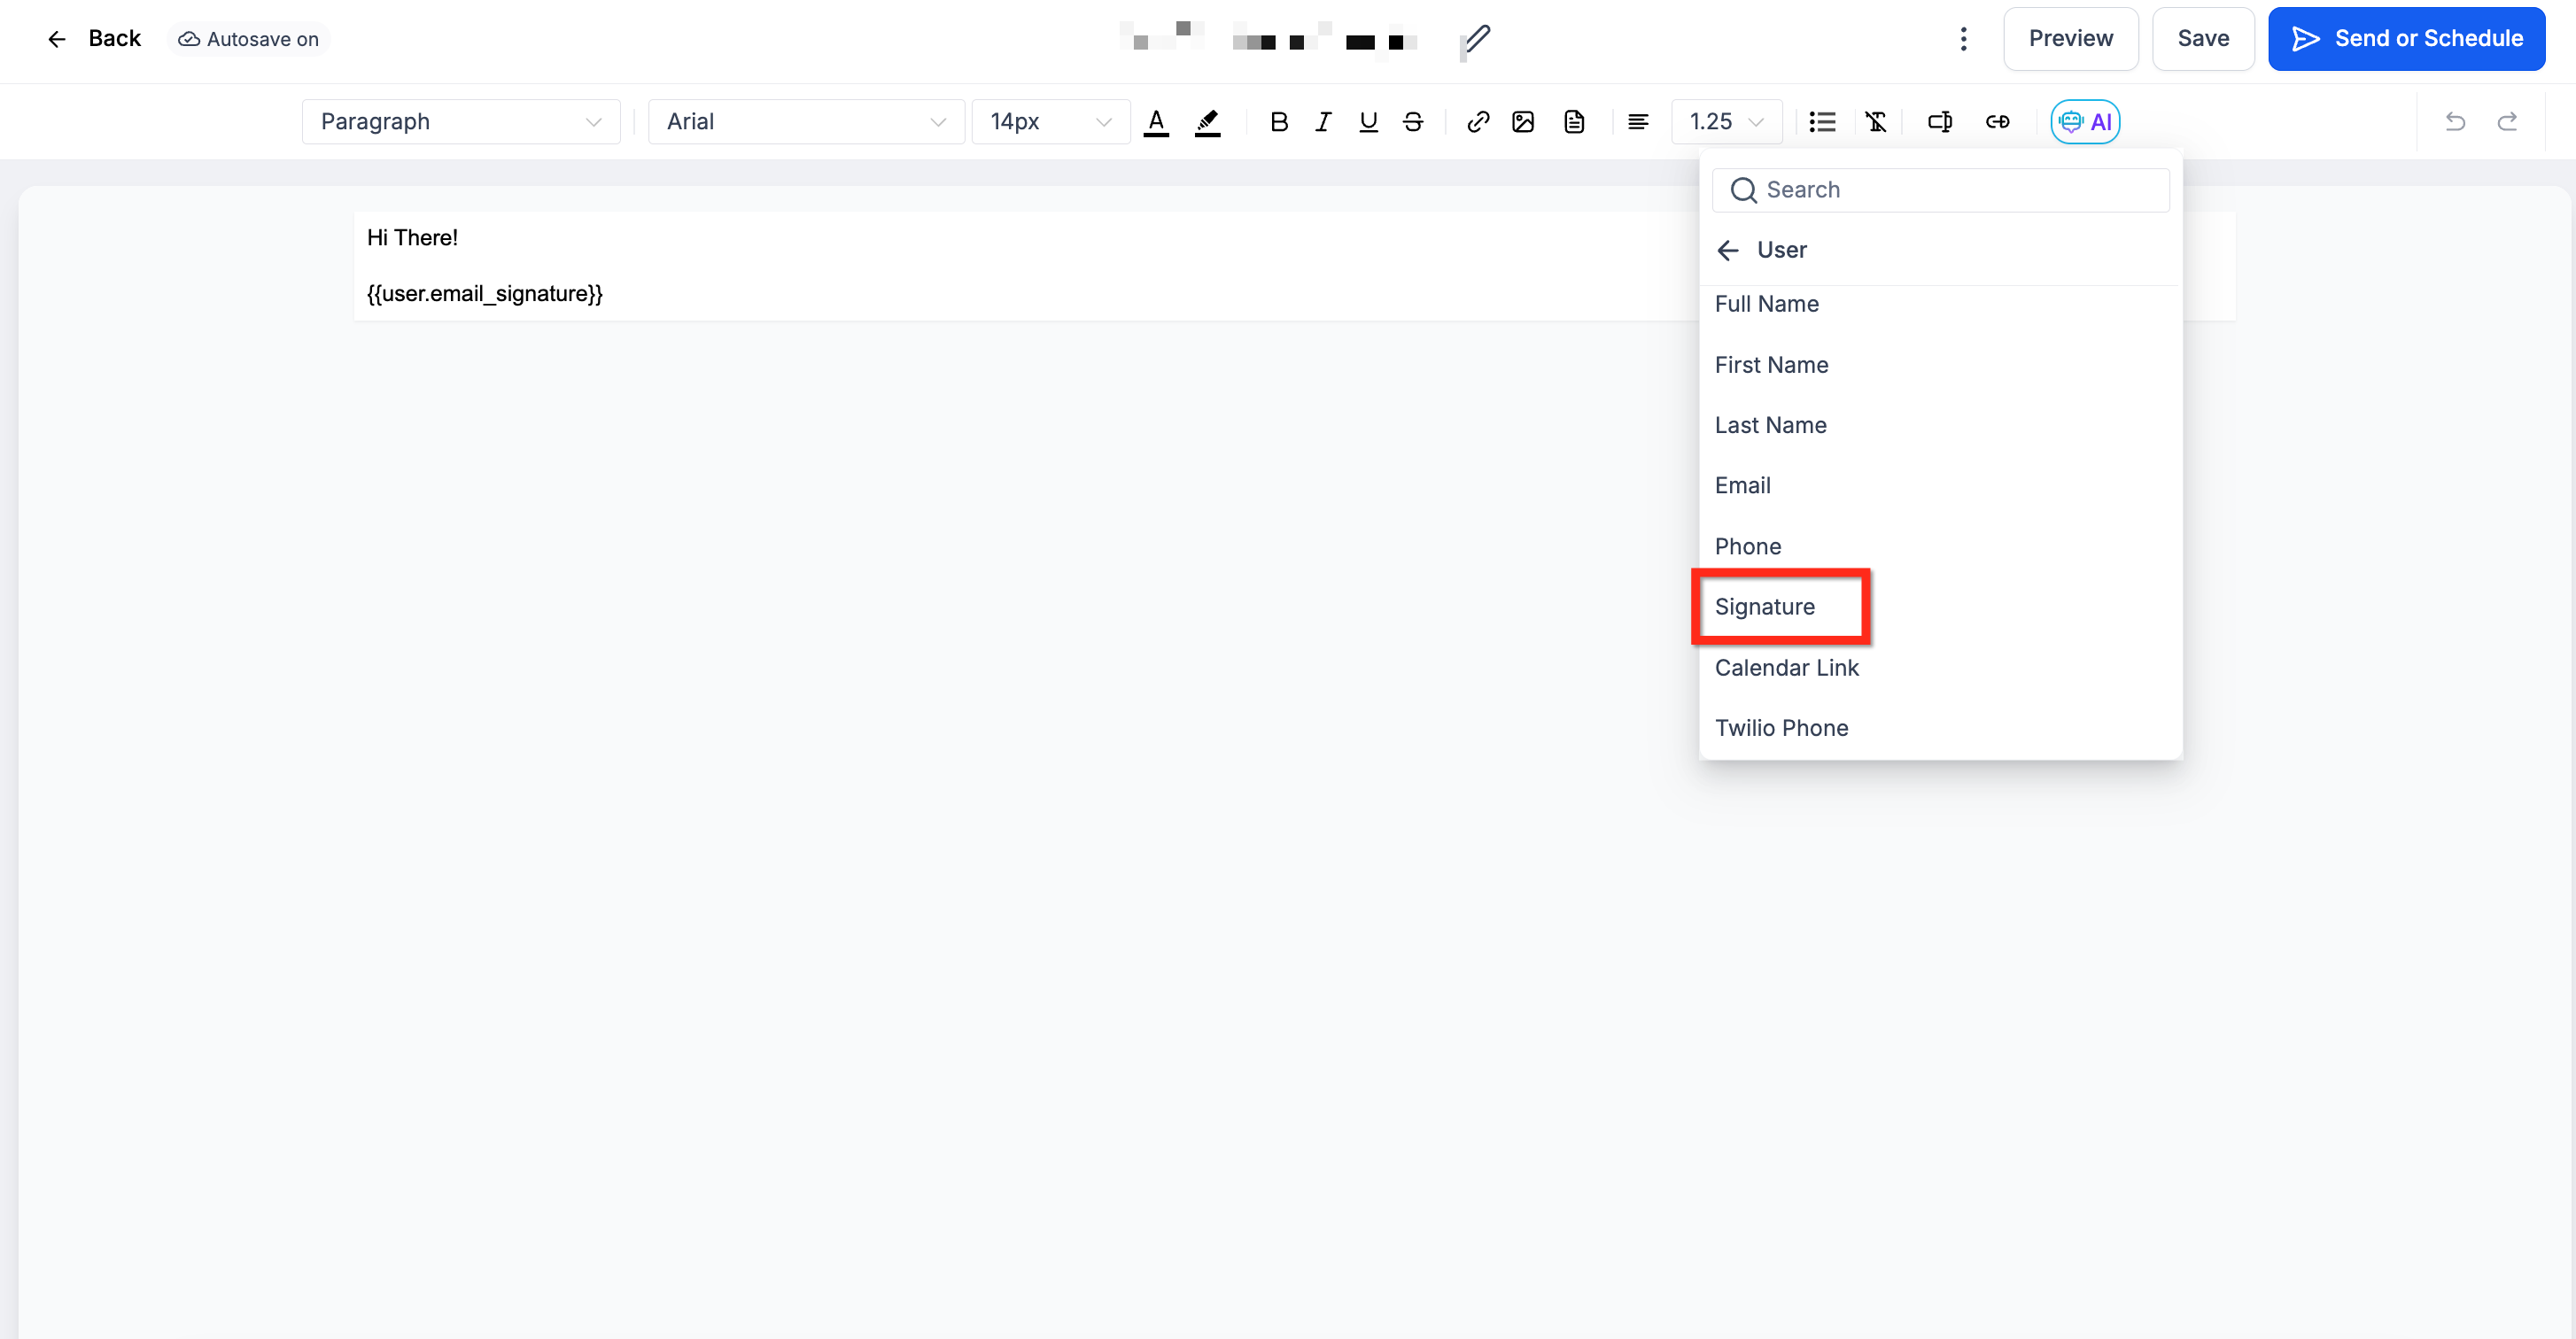
Inserting a signature with a custom value: To control exactly where the signature appears in an email (useful in templates and one-to-one emails), open the email editor, click Custom Values, go to User, and select Signature. The custom value is {{user.email_signature}}.
Countdown timers create urgency by counting down to a deadline, which can encourage recipients to act quickly. In emails, timers are rendered as GIFs that update based on when the recipient opens the message: the timer checks the current time on open and counts down for up to 60 seconds before pausing, then refreshes to the latest timestamp the next time the email is opened. This approach balances email size and reliability.
To add a countdown timer to an email:
Create the timer in Marketing > Countdown Timer and set its deadline.
Open or create a campaign or template in Email Marketing.
Insert the Countdown Timer element into your email.
Select your timer by viewing its design and details.
Open the timer settings to align it within your email.
Customize the appearance, including background color and padding.
Copy the redirection link and use it for your buttons or calls to action.
Note that Apple Mail caches GIFs, so a timer may appear to stop updating after the first open in that client.
Q: Do I need to save after rearranging elements with the arrow controls? No. Changes are saved automatically as you make them.
Q: Can I still drag and drop after the arrow controls were added? Yes. Arrow controls are an enhancement, and drag-and-drop continues to work alongside them.
Q: What happens if I hide a layout on both desktop and mobile? The layout will be hidden from all views and will not be sent. Keep at least one view active.
Q: Are visibility settings reflected in test emails? Yes. Both desktop and mobile visibility settings are preserved when sending test and live emails.
Q: Can I type "NULL" as a conditional value to target empty fields? No. Leave the contact's field blank and set the condition to Is Empty, and make sure there are no spaces or placeholder text in the field.
Q: Is an email signature set per user or per sub-account? Per staff user within a sub-account. Each staff member can have a different signature. If you do not see your signature on outgoing emails, confirm you edited the correct user and that Enable Signature in All Outgoing Messages is turned on.
Q: Why does my custom font look different in some inboxes? Email client support for custom fonts is uneven. Always include a fallback font stack so your email still reads cleanly where the custom font is not supported.
