Duplicate contacts clutter your database, split communication history across records, and skew your reporting. Aesthetix CRM gives you a full toolkit for keeping contact data clean: merge duplicates into a single master record, control whether duplicates are allowed at all, scan for and resolve existing duplicates, delete contacts and their associated data, and restore deleted contacts within the recovery window. This guide covers each task end to end, including exactly what is permanent and what is recoverable.
Interactive walkthrough
Merging combines two or more duplicate records into one accurate profile. You choose a master record (the contact that remains after the merge), and unique details from the other selected records are carried into it. You can merge up to 10 contacts at once.
What gets kept and combined
The master record keeps its core details such as name, primary email, and primary phone number.
For fields with conflicting values, you choose which value to keep during review. If you do not choose, the field defaults to the master record's value.
Unique information from the other records can be added or combined into the master record.
Custom field values from another contact are added only when that field is blank on the master record. Existing custom field values on the master record are never overwritten.
Related data such as notes, conversations, tags, tasks, opportunities, appointments, payments, orders, invoices, and products merges into the master contact. Courses, community groups, and products combine information from all selected records.
If a duplicate being deleted in the merge is enrolled in a workflow, Aesthetix CRM transfers that workflow execution to the master contact so the automation continues. If the master is already enrolled in the same workflow, the extra run is stopped and the existing run is kept.
To merge contacts manually from the contact list:
Go to Contacts and open your Smart Lists.
Use the Search Contacts box to find the records you suspect are duplicates. You can search by name, email, business name, tags, or phone.
Select the contacts you want to merge by checking the box next to each one.
Click More in the top action bar, then select Merge.
In the Merge Contacts window, choose which contact should remain as the Master record.
Review the fields that have different values across the selected records.
Use Show all fields to display every field, then click the radio button next to the value you want to keep for each one (primary email, phone number, business name, and so on).
Type confirm in the confirmation box to finalize your changes.
Click Merge Contacts (or Resolve) to complete the process.
Important: A merge cannot be undone. Once you confirm and resolve, the action is permanent. Review the selected contacts, the master record, and your field choices carefully before confirming.
You can also automate merging with the Merge Contact workflow action when you want duplicate merging to happen inside an automation.
By default, Aesthetix CRM does not allow duplicate contacts or opportunities. Preventing duplicates at the source saves significant cleanup time later. You can change this behavior and choose which fields the system uses to detect duplicates.
Open Settings.
Click the Business Profile tab.
Scroll down to the General section and open Contact Preferences.
Check the box to Allow Duplicate Contacts to permit duplicates, or leave it unchecked to block them.
Choose your primary and secondary deduplication fields (Email or Phone). These determine how the system matches incoming contacts.
Leave Allow Duplicate Contacts turned off when you do not want duplicate contacts created from matching form or calendar submissions.
When duplicates already exist, the Manage Duplicates tool scans your database for potential matches by email, phone, or name so you can review and merge them in groups.
Permissions
Role | Access |
|---|---|
Admin | Full access to find and merge duplicates |
Team Members / Users | No access |
Only Admins can use this feature. It works on both the classic and the new Contacts list views.
Click Contacts in your sub-account.
Click the ⋮ (three-dot menu).
Select Manage Duplicates.
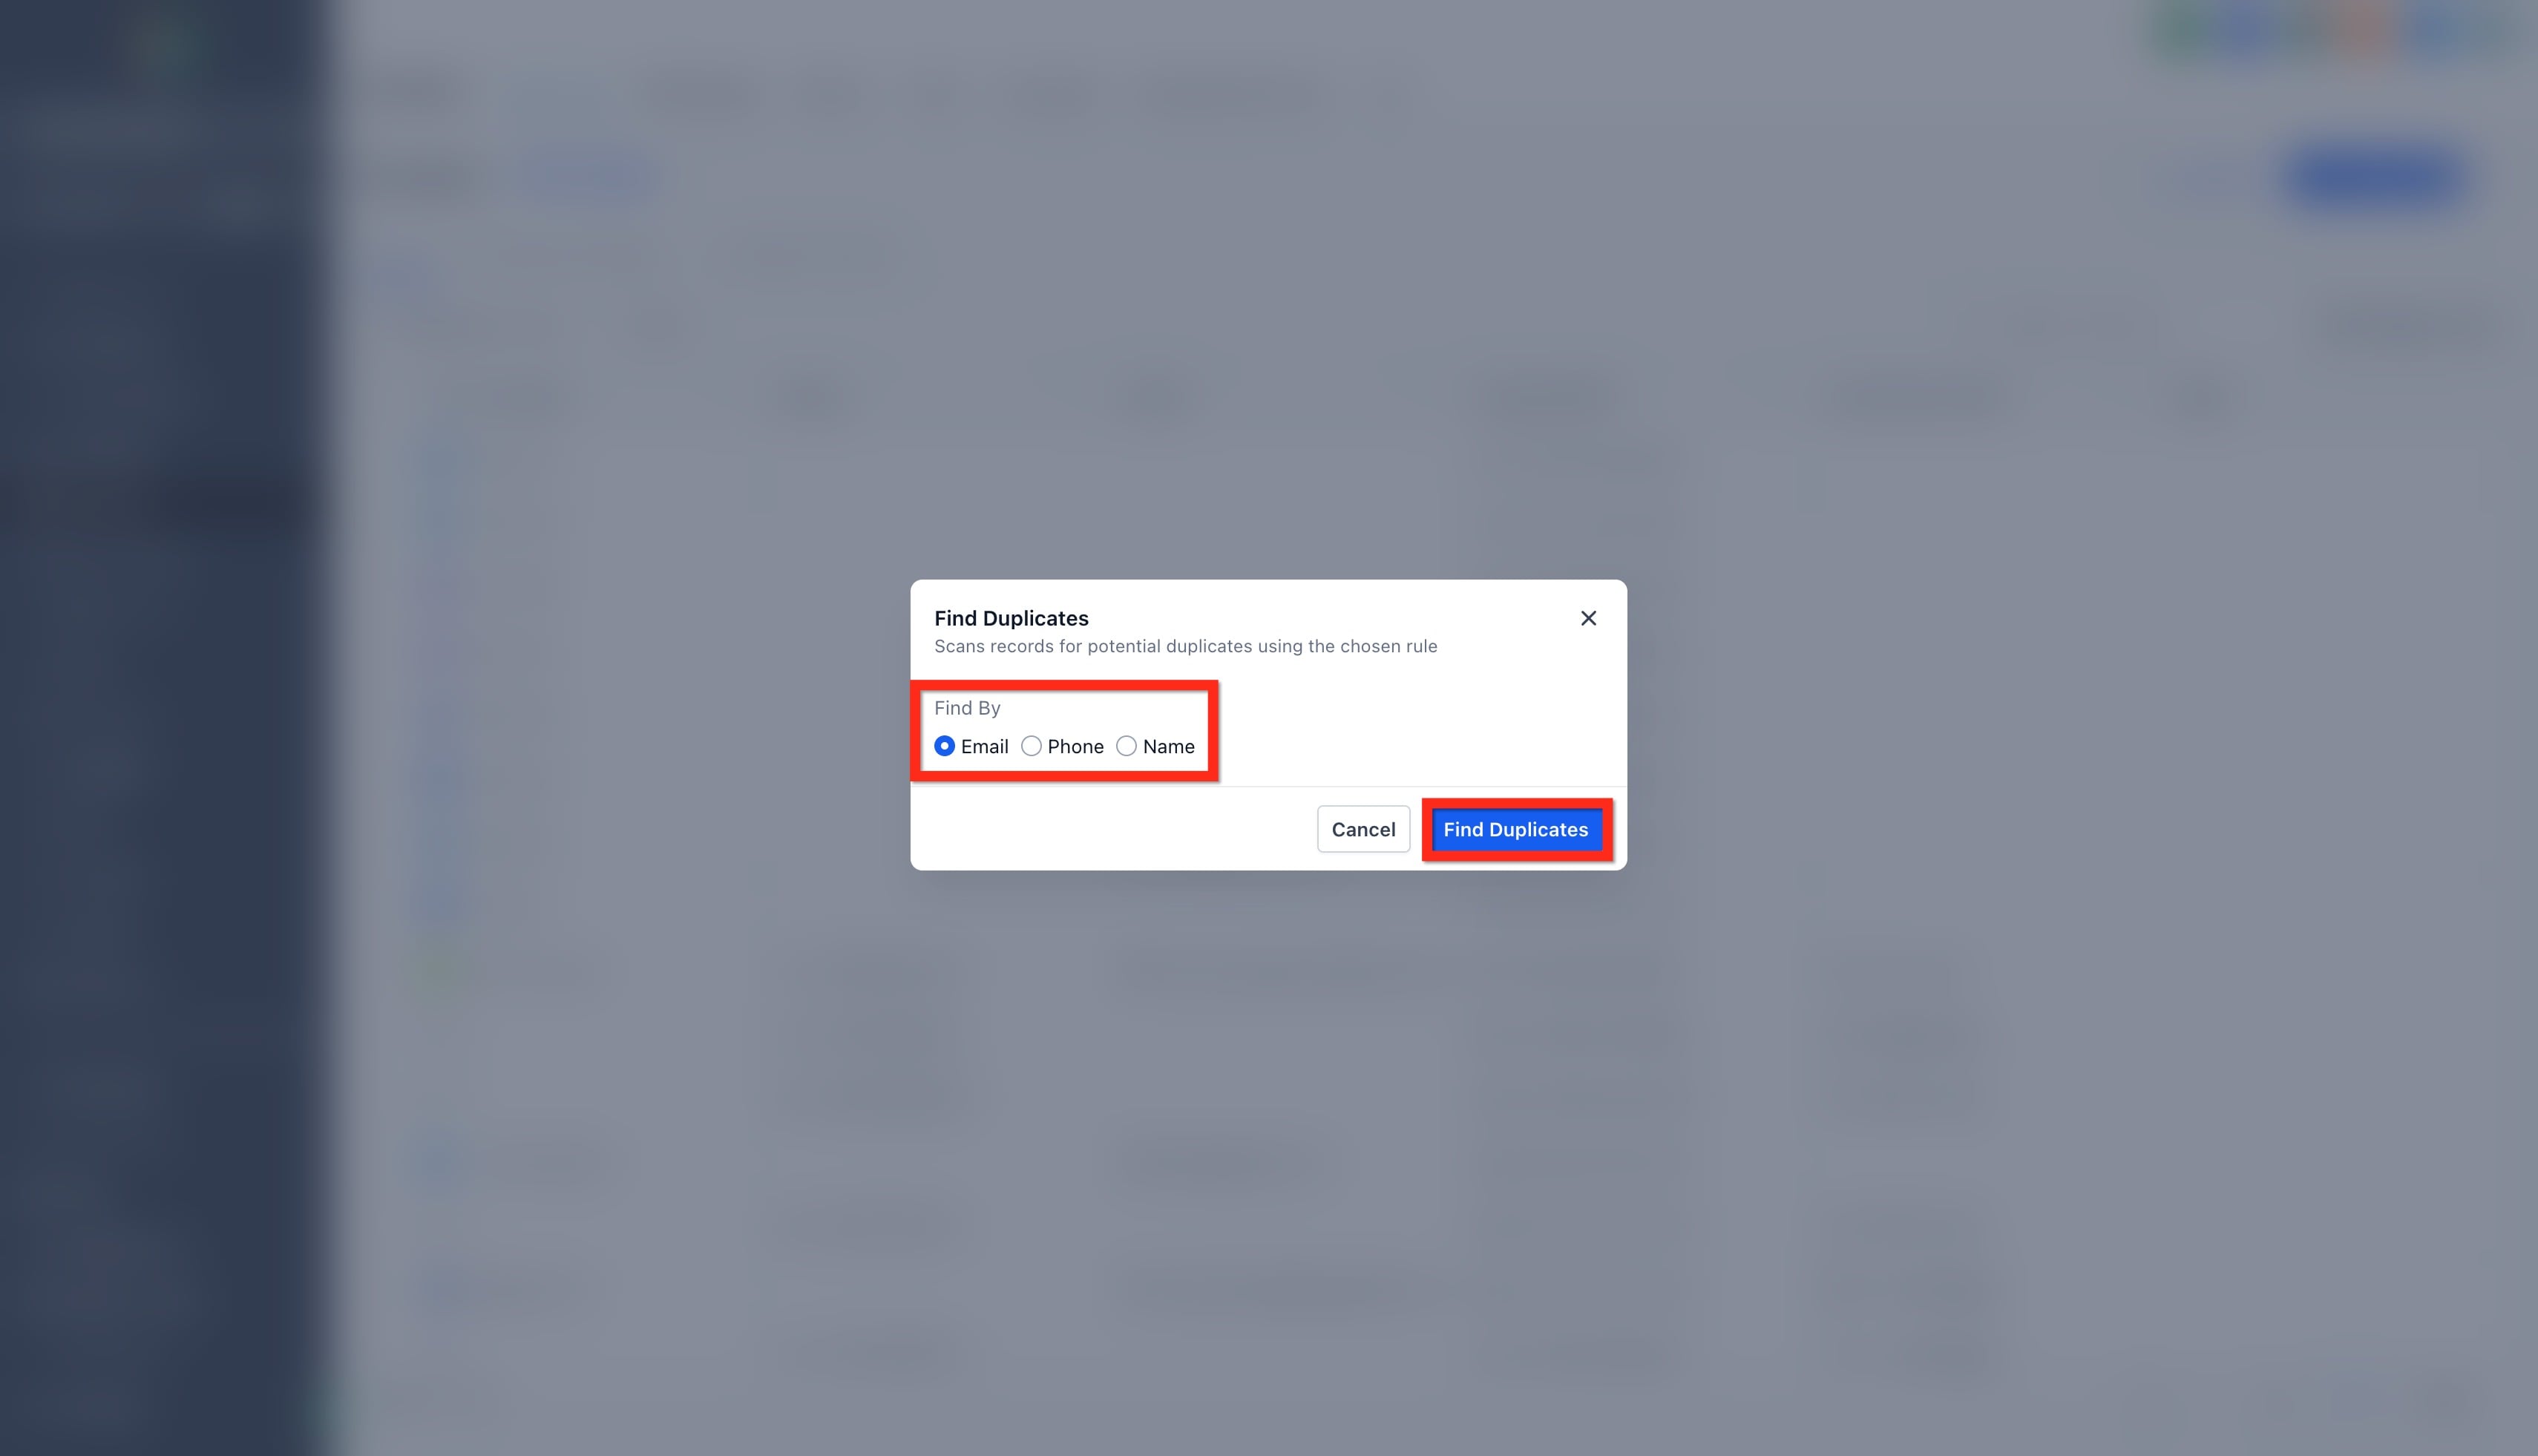
Choose a Find By criterion:
Email (recommended default)
Phone
Name
Click Find Duplicates.
The system scans your contact database and displays records that match the selected field.
Once duplicates are found, you will see a list of potential duplicate groups.
Click the down arrow beside a group to expand it.
Expanding a group shows all the contacts detected within it.
Click Review to see the changes in more detail.
Conflicting fields (such as phone number, tags, or country) are displayed side by side.
For each group you can:
Select which value to keep for each field.
Combine multiple tags or additional details.
Choose the primary email or phone number.
Ensure no duplicate opportunities are created.
Once reviewed, click Merge Contacts to proceed.
If a suggested group should not be merged:
Click Reject.
Confirm in the popup. You will see: "This email address will not be used to find duplicates again."
Rejected emails, phone numbers, or names are excluded from future duplicate scans. This action cannot be reverted.
Select up to 10 records to merge at once. The tool notifies you when the limit is reached ("Limit reached 10/10").
Choose one record as the Master. This record retains key details like name, main email, and main phone number.
All related data (tasks, opportunities, notes, products, and so on) from the other records combines into the master record.
Click Merge. A confirmation dialog appears showing:
A reminder that the action cannot be undone.
A note that emails, phone numbers, notes, opportunities, and tasks from all selected records will merge into one.
An acknowledgment box to confirm your understanding.
Check the acknowledgment box, then click Merge Duplicates to finalize.
Note: Once merged, the process cannot be reverted. Review carefully before confirming.
Best practices for duplicates
Run duplicate scans periodically to keep your CRM clean.
Always review field conflicts before merging.
Use Reject only when you are certain a record is not a duplicate.
Standardize how your team enters data to prevent future duplicates.
Deleting removes a contact from your active database. Only Admins can delete contacts, which protects against accidental data loss.
Before you delete: Once a contact is deleted, its associated data such as conversations, notes, tasks, and activity history is permanently lost. Restoring a deleted contact will not recover this associated data. Export important records to a CSV file before deleting.
Step 1: Open the Contacts page
Navigate to the Contacts section.
Step 2: Select contacts
Select contacts in one of two ways: check the box in the header of the contacts list to select all contacts on the page (or all contacts in your CRM), or check the box next to individual contacts to select them one by one.
Step 3: Delete contacts
Click the Delete button (trashcan icon) at the top of the contact list.
If you are in a Smart List view and do not see the trashcan icon, make sure you have selected one or more contacts first. The icon only appears after selection. If it still does not show, you may not have Admin permissions. Contact your account administrator to confirm.
Step 4: Confirm deletion
Confirm by typing DELETE in the confirmation text box.
Step 5: Monitor status
Track the deletion status on the Bulk Actions page.
Automating deletion with workflows
You can automatically delete contacts using a workflow, which is useful for removing unsubscribed, inactive, or invalid records:
Go to Automations > Workflows and create a new workflow.
Add the Delete Contact action.
Configure a trigger, such as a contact tag (for example, "Unsubscribed").
Test and activate the workflow.
Deleted contacts are not gone immediately. The Restore page is your safety net, centralizing recently deleted records so you can bring them back without re-importing CSVs. The refreshed Restore page adds multi-select checkboxes, clear columns for Name, Email, Phone, and Deleted On, and a confirmation modal that shows exactly how many records you are about to recover.
What you need to know about restoring
Time limit: A contact can be restored within 60 days of deletion. After that, the data is permanently removed and cannot be recovered.
HIPAA accounts: In HIPAA-compliant accounts, deleted contacts cannot be restored due to strict data security regulations.
What is restored: Restored contacts are reinstated with their associated data, including opportunities, notes and tasks, conversations, appointments, and workflow and campaign participation, unless that data was independently deleted. (Note that contacts deleted individually outside of a bulk delete may not recover associated data such as conversations, notes, and tasks; back up anything important before deleting.)
This method is ideal for recovering one contact or a small batch after a manual deletion.
Go to the Contacts section and select the Restore tab. If there are no deleted contacts, a message indicates this.
Locate the contacts you want to restore and check the box next to each one. You can select individual contacts or all contacts in the list.
Click Restore.
A confirmation modal appears showing the total number of selected contacts. Click Confirm to begin. Restoration starts immediately. If any contacts are beyond the retention window or otherwise ineligible, you are notified before completion.
If you accidentally deleted many contacts at once, you can reverse the entire bulk action and restore the contacts along with their associated data.
Go to the Contacts section and click Bulk Actions in the navigation menu. This page shows a history of every bulk operation in your account, including bulk deletes.
Scroll to find the specific bulk delete you want to reverse, then click the three dots > Restore.
Select Restore again in the popup to confirm.
Note: Restoration begins immediately. Monitor progress on the Bulk Actions page, where the status changes to "In Progress" and then "Completed." When it finishes, return to the Contacts section to verify the restored contacts.
Q: Can I undo a contact merge? No. Contact merges cannot be undone. Review the selected contacts, the master record, and the field values carefully before confirming.
Q: How many contacts can I merge at once? Up to 10 contacts at one time.
Q: What is the difference between a manual merge and the Manage Duplicates tool? Use a manual merge when you already know which contacts are duplicates. Use Manage Duplicates to find possible duplicate records automatically by email, phone, or name.
Q: Why don't I see the Merge Contacts button? The option appears when you select 2 or more valid contacts (up to 10). Make sure you have permission to manage contacts, the selected contacts are in the same sub-account, and they are visible in the current list view.
Q: What causes duplicate contacts? Duplicates can come from manual entry, CSV imports, form or calendar submissions, or third-party tools.
Q: Which contact should I choose as the master record? Choose the contact with the most accurate, up-to-date information, since the master record is what remains after the merge.
Q: Will custom fields be affected during a merge? Custom field values from another contact are added only when that field is blank on the master record. Existing values on the master record are never overwritten.
Q: What happens when I reject a duplicate suggestion? The rejected suggestion will not appear again for that matching rule. This action cannot be reverted.
Q: Can I automatically merge duplicate contacts? Yes. Use the Merge Contact workflow action to merge duplicates inside a workflow.
Q: Does deleting a contact remove them from all campaigns? Yes. Deleted contacts are removed from all campaigns, workflows, and lists.
Q: Why can't I delete a contact? You may not have Admin permissions, or the contact may be part of an active campaign or workflow. Remove them from the campaign or workflow first, or ask your administrator for access.
Q: What happens to associated data when I delete a contact? Associated data such as notes, conversations, and tasks is also deleted unless specified otherwise. Review the Bulk Actions page for detailed status.
Q: How long after deletion can I restore a contact? Up to 60 days. After that, the contact is permanently removed and cannot be recovered.
Q: Can I restore contacts deleted by someone else? Yes, as long as it is within the 60-day window and you have Admin access.
Q: Does "Select all" include contacts on every page of results? It includes all contacts in the current list view. If you have multiple pages, increase the rows per page or repeat your selection on each page before restoring.
Q: How long does a bulk restore take? It depends on the number of contacts. Large bulk restores may take several minutes.
Q: Can I restore contacts in a HIPAA-compliant account? No. HIPAA-compliant accounts do not permit restoring deleted contacts for data security reasons.
