Aesthetix CRM brings AI directly into the Workflow Builder so you can create and refine automations without configuring every trigger and action by hand. Describe what you want in plain language and the AI generates a complete workflow, edits it on request, explains how each piece works, and even writes custom code for you. This guide covers each AI capability built into the builder: how it works, how to use it, its options and limits, and a med-spa example for each.
These tools build and edit the workflow itself. They are different from AI Actions, which are AI steps that run inside a workflow when it executes. For those, see the AI Actions guide. For the broader suite of AI features, see the AI Employee collection.
The AI Workflow Builder turns a plain-language description of your goal into a complete, ready-to-review automation. Instead of dragging in triggers and actions one at a time, you describe the outcome you want, the AI generates the triggers, actions, and structure, and you review and customize from there. You can also keep editing conversationally, target specific steps visually, and brainstorm before anything is built. The Builder streams its progress live and shows a step-by-step progress view while it works.
Generate an entire workflow from a single prompt, typically in under 30 seconds.
Let you use everyday language instead of memorizing specific trigger and action names.
Make multi-step changes in one request, for example "rename, add a 24-hour wait, and turn off re-entry."
Remember the session for follow-up edits, so "make that 48 hours" works without repeating context.
Confirm before starting fresh on a canvas that already has a workflow, and keep your session if you close and reopen the AI panel.
There are three ways to open the AI Workflow Builder.
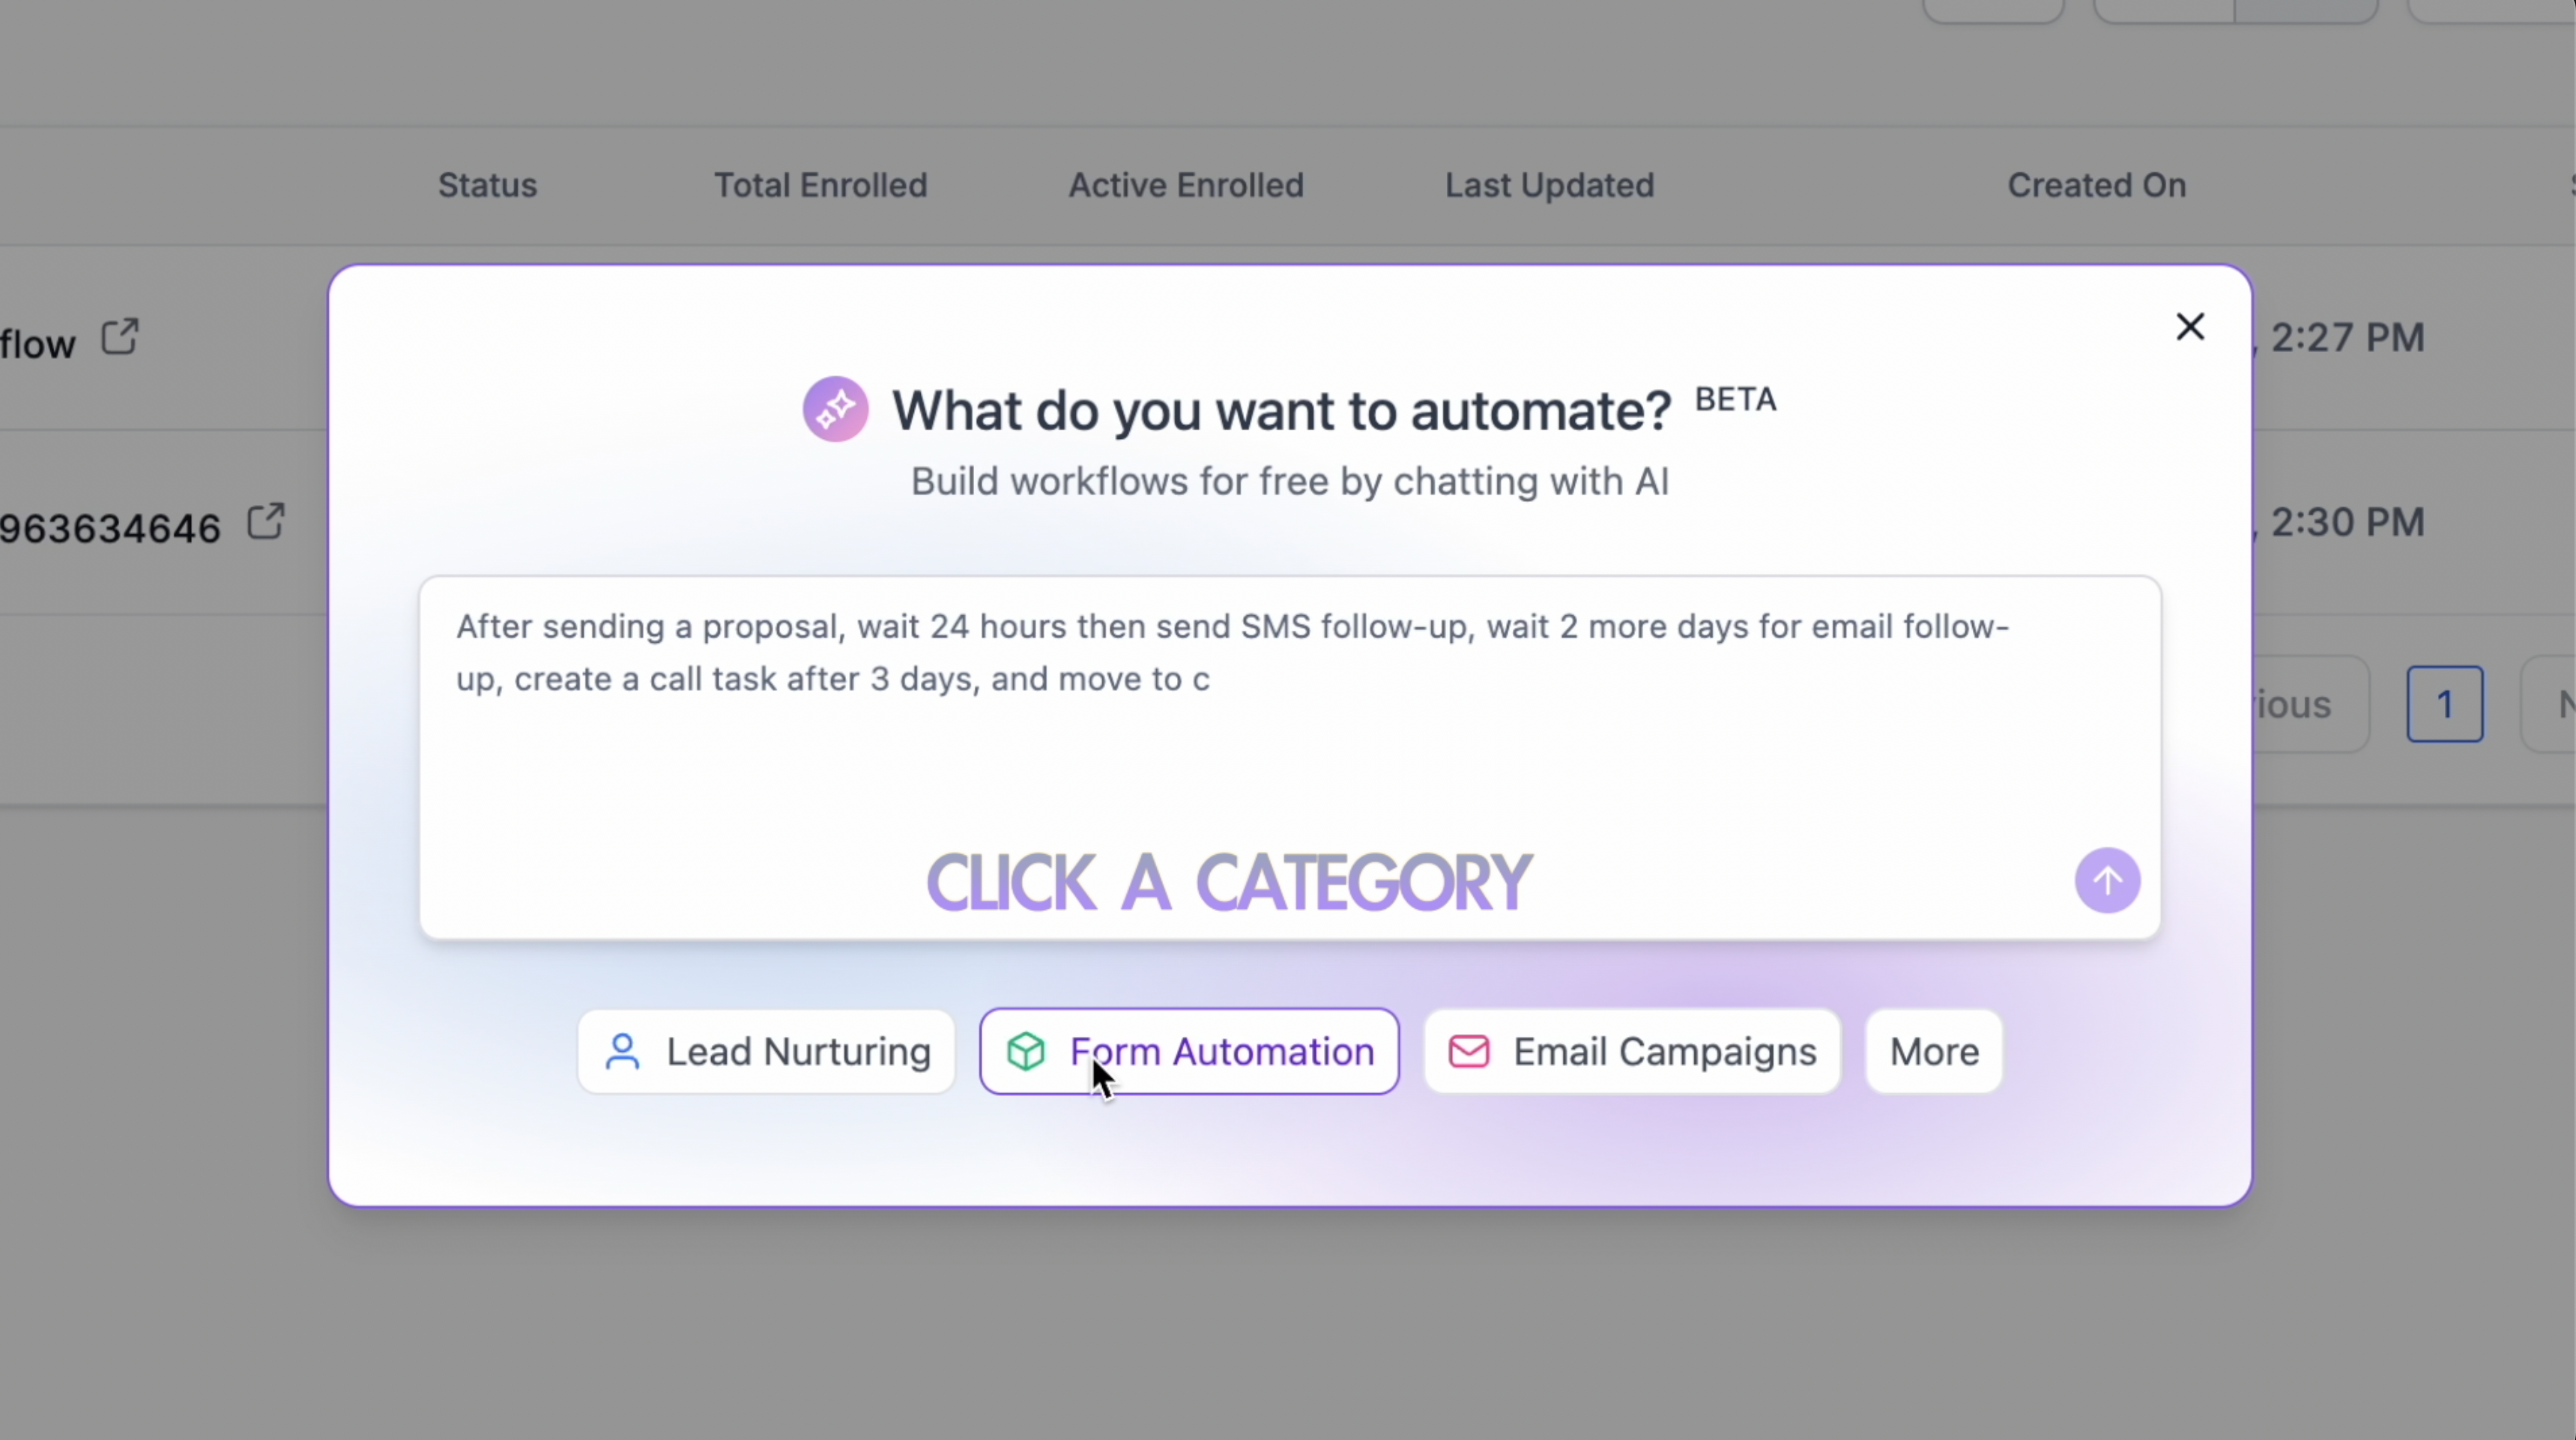
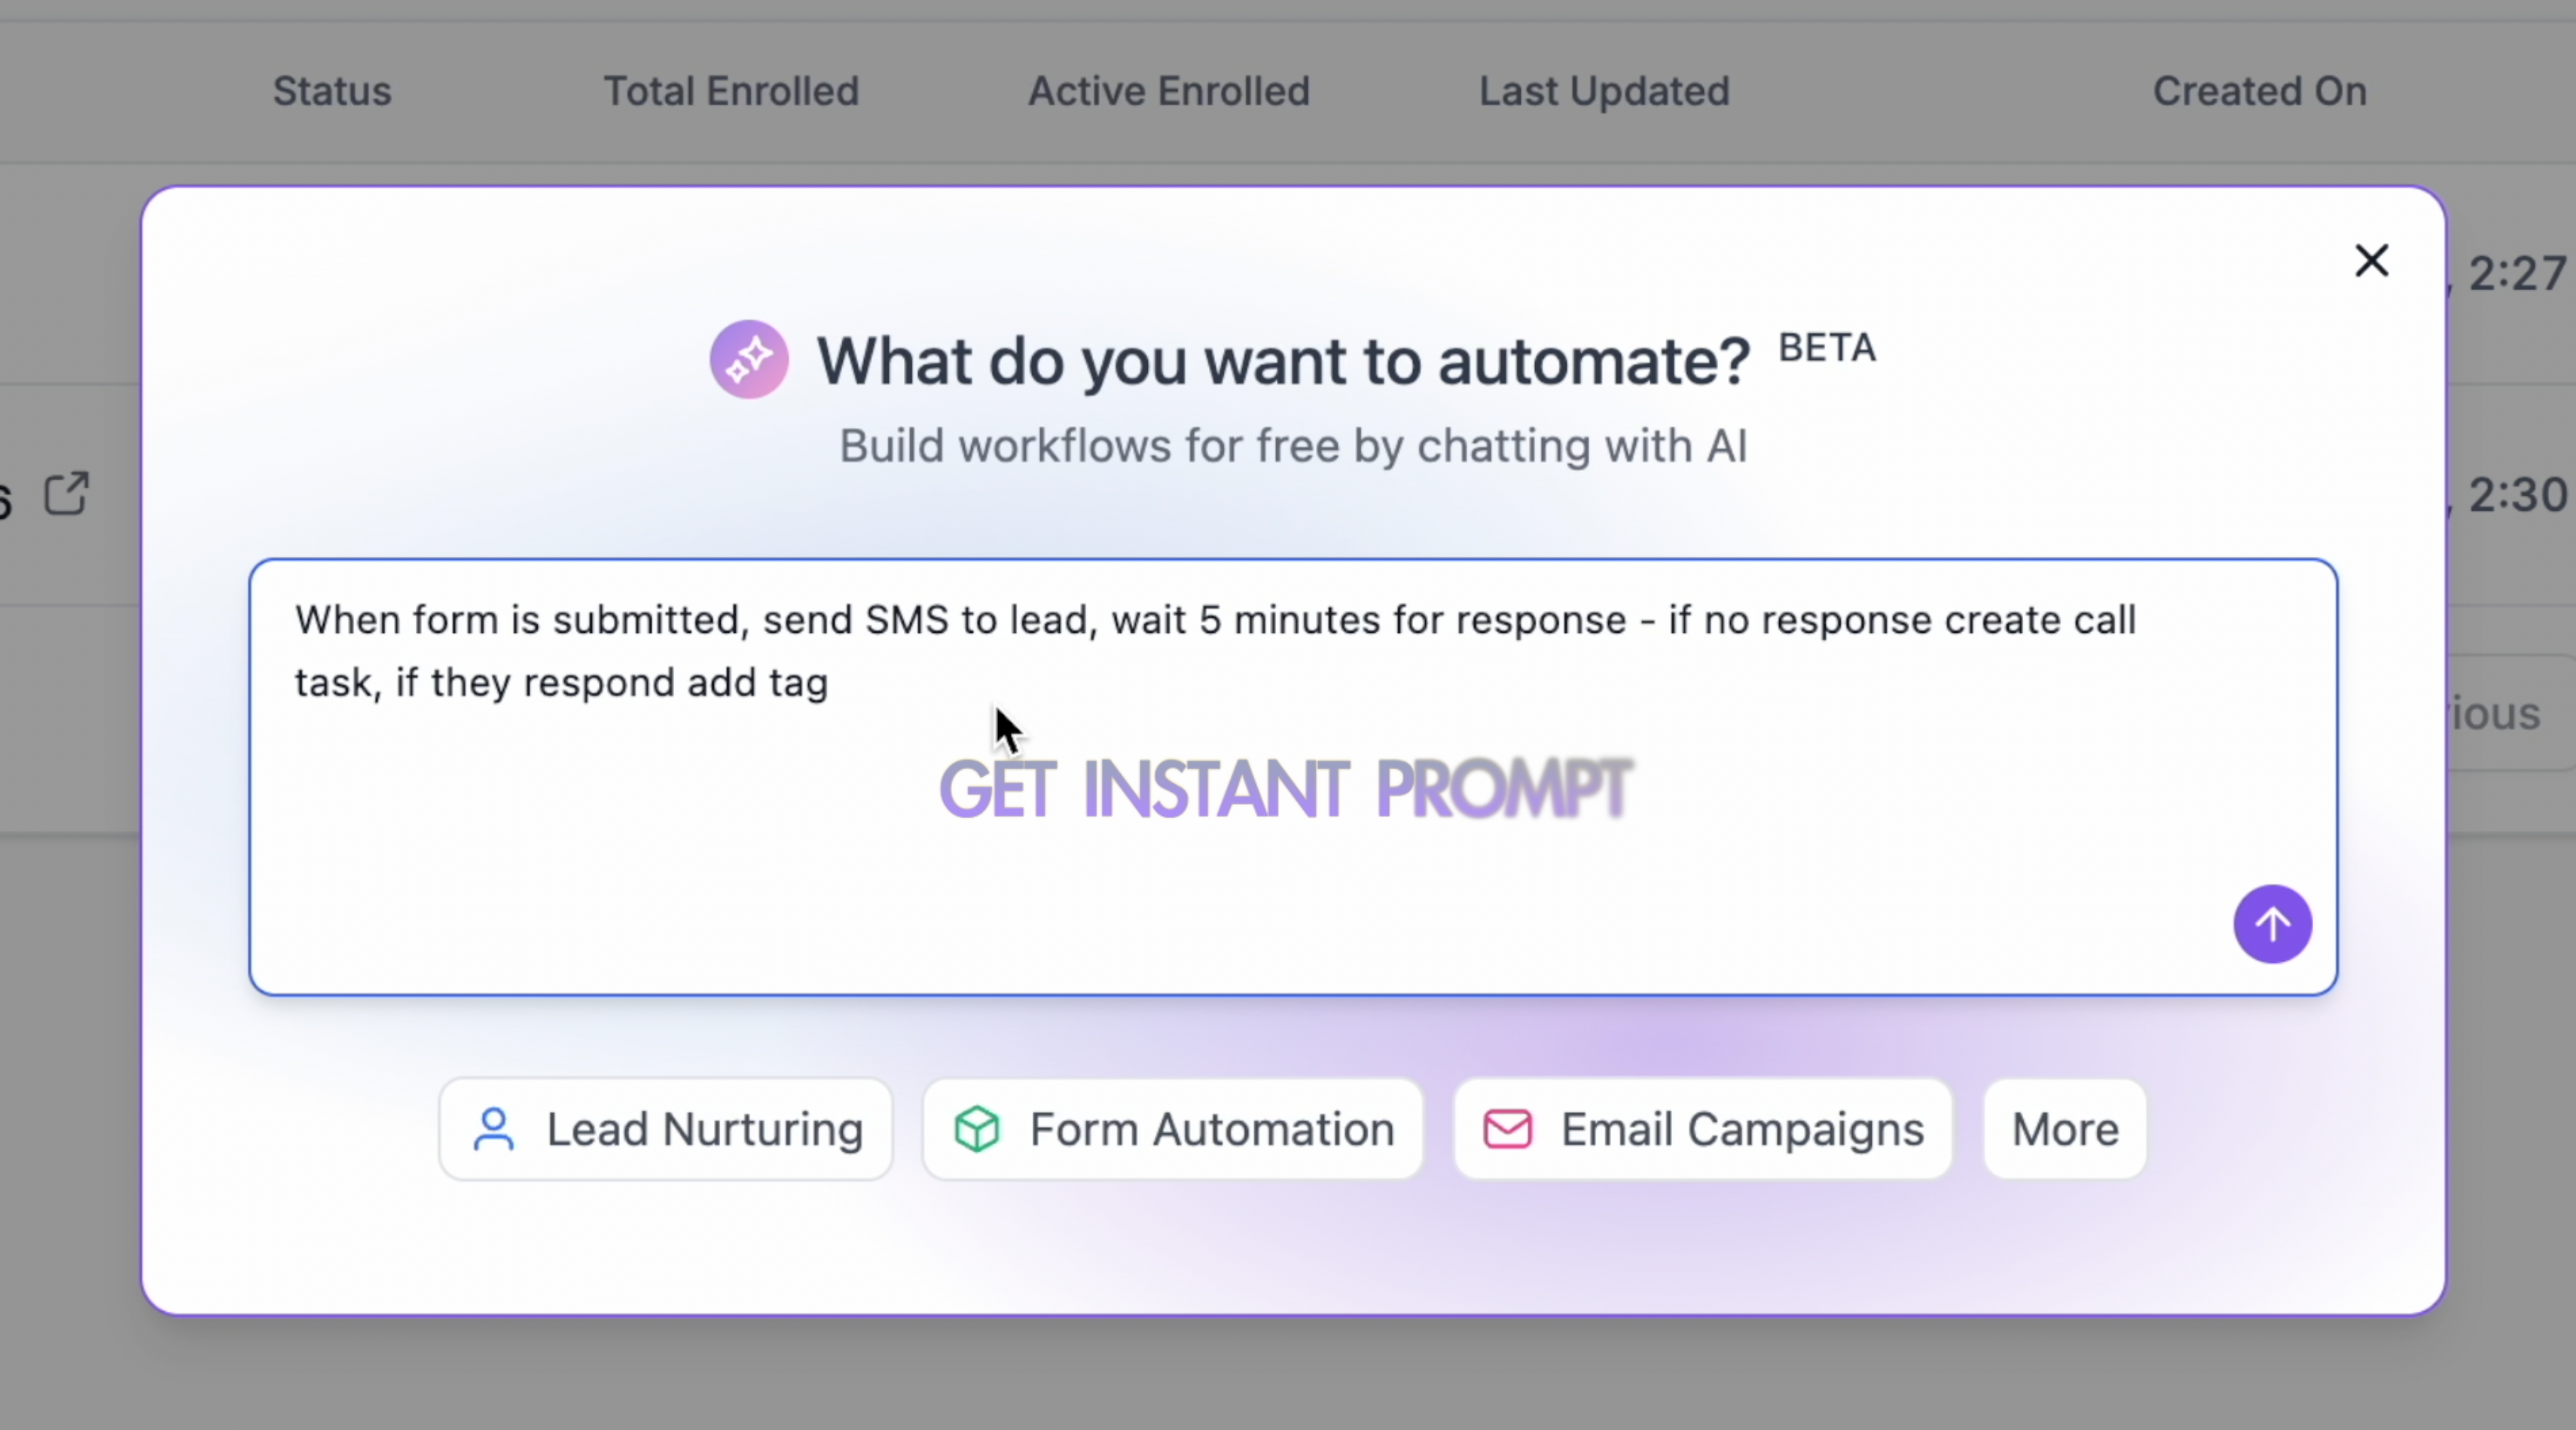
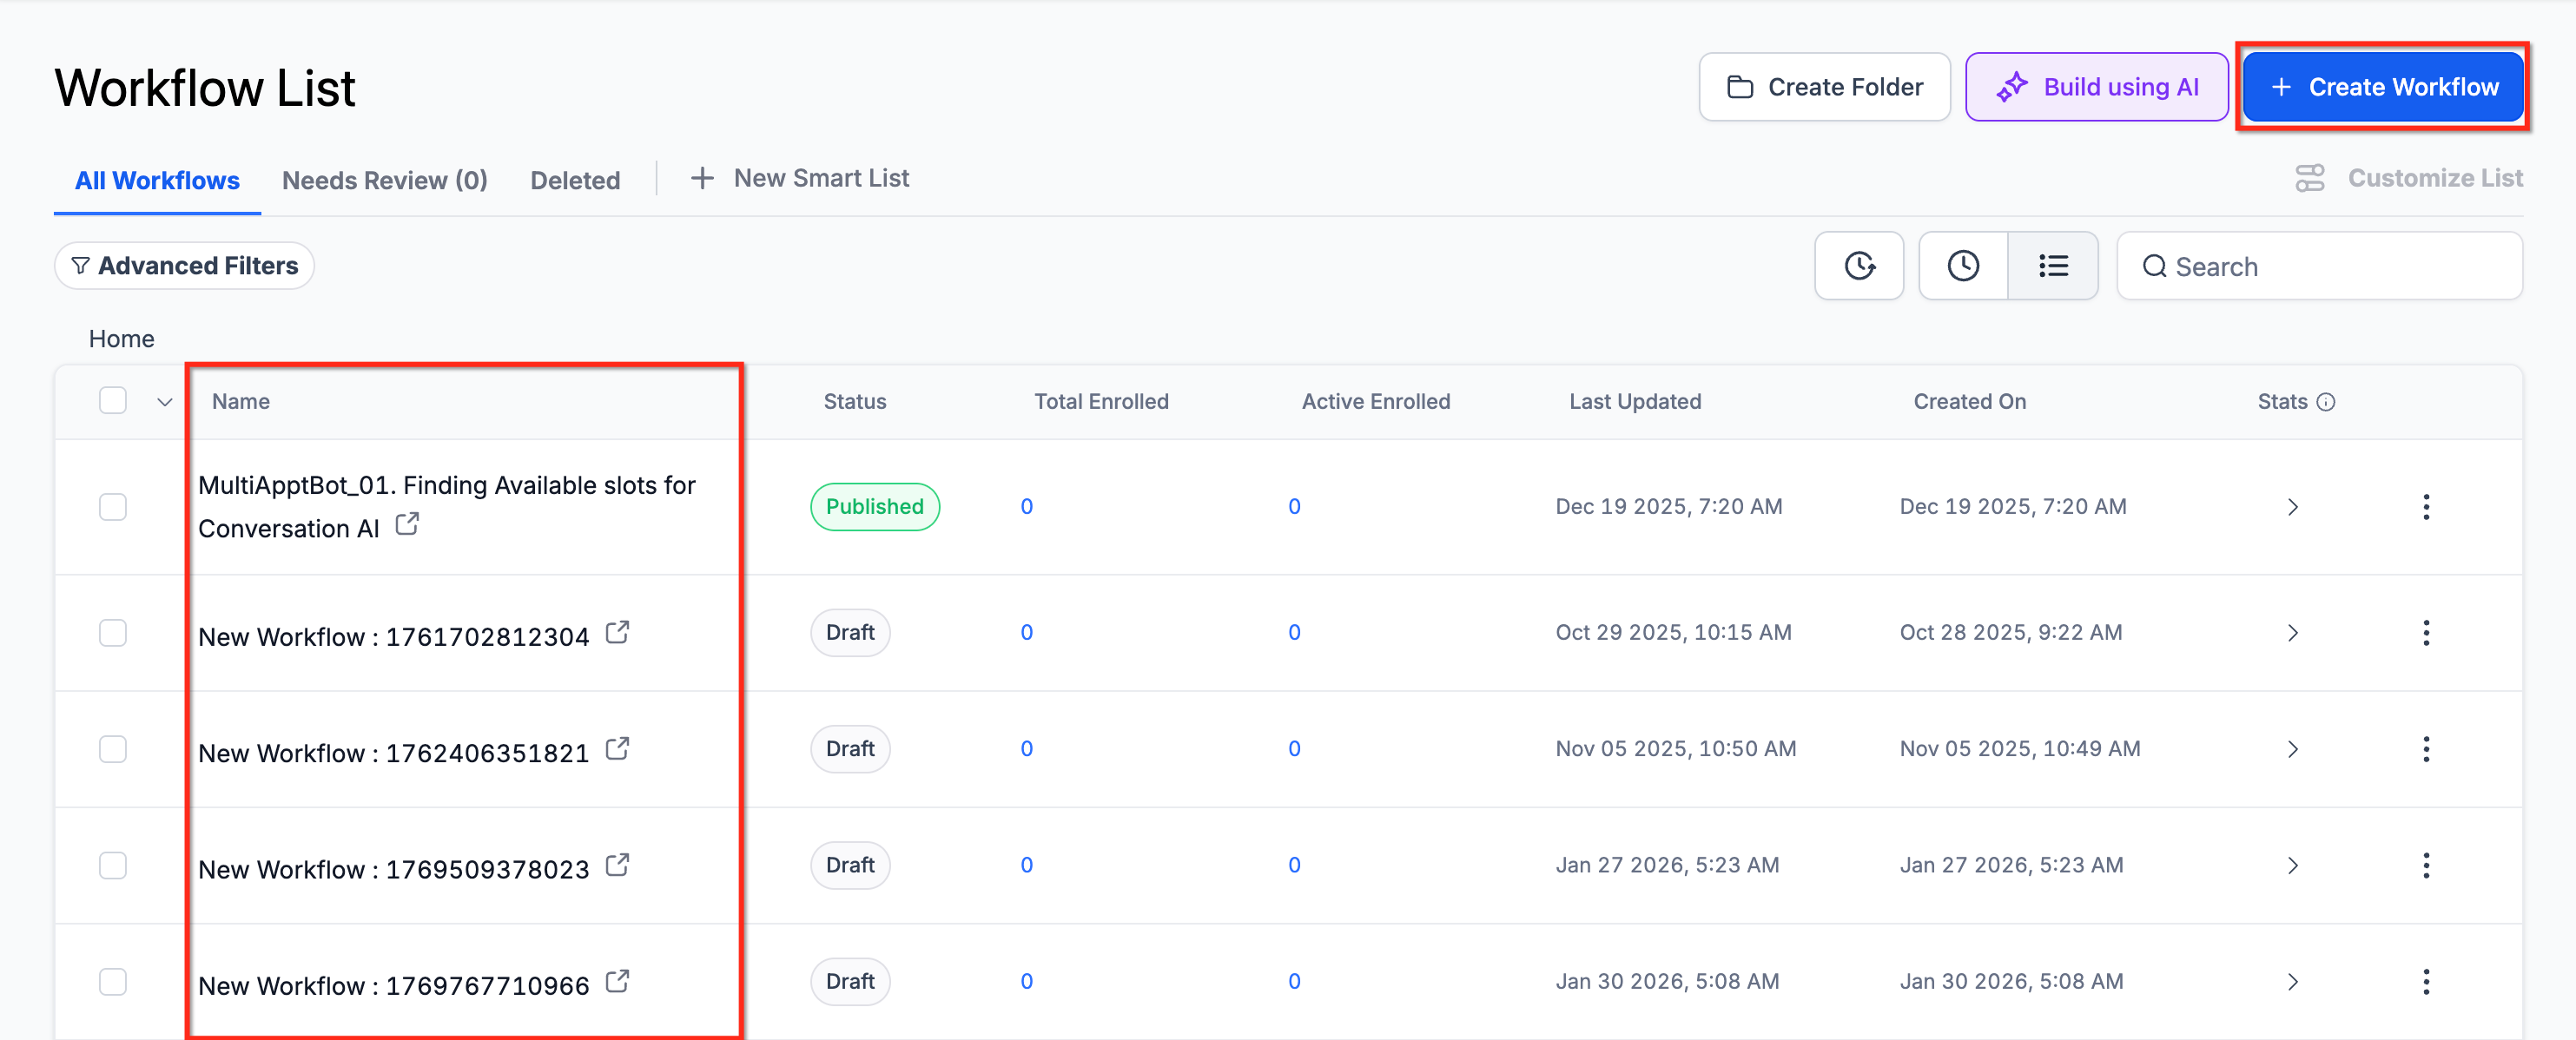
From the Workflow List Page: go to Automation > Workflows and click the Build using AI button. This opens a window where you enter your prompt. You can also click Create Workflow and Start from Scratch to go inside the Workflow Builder.
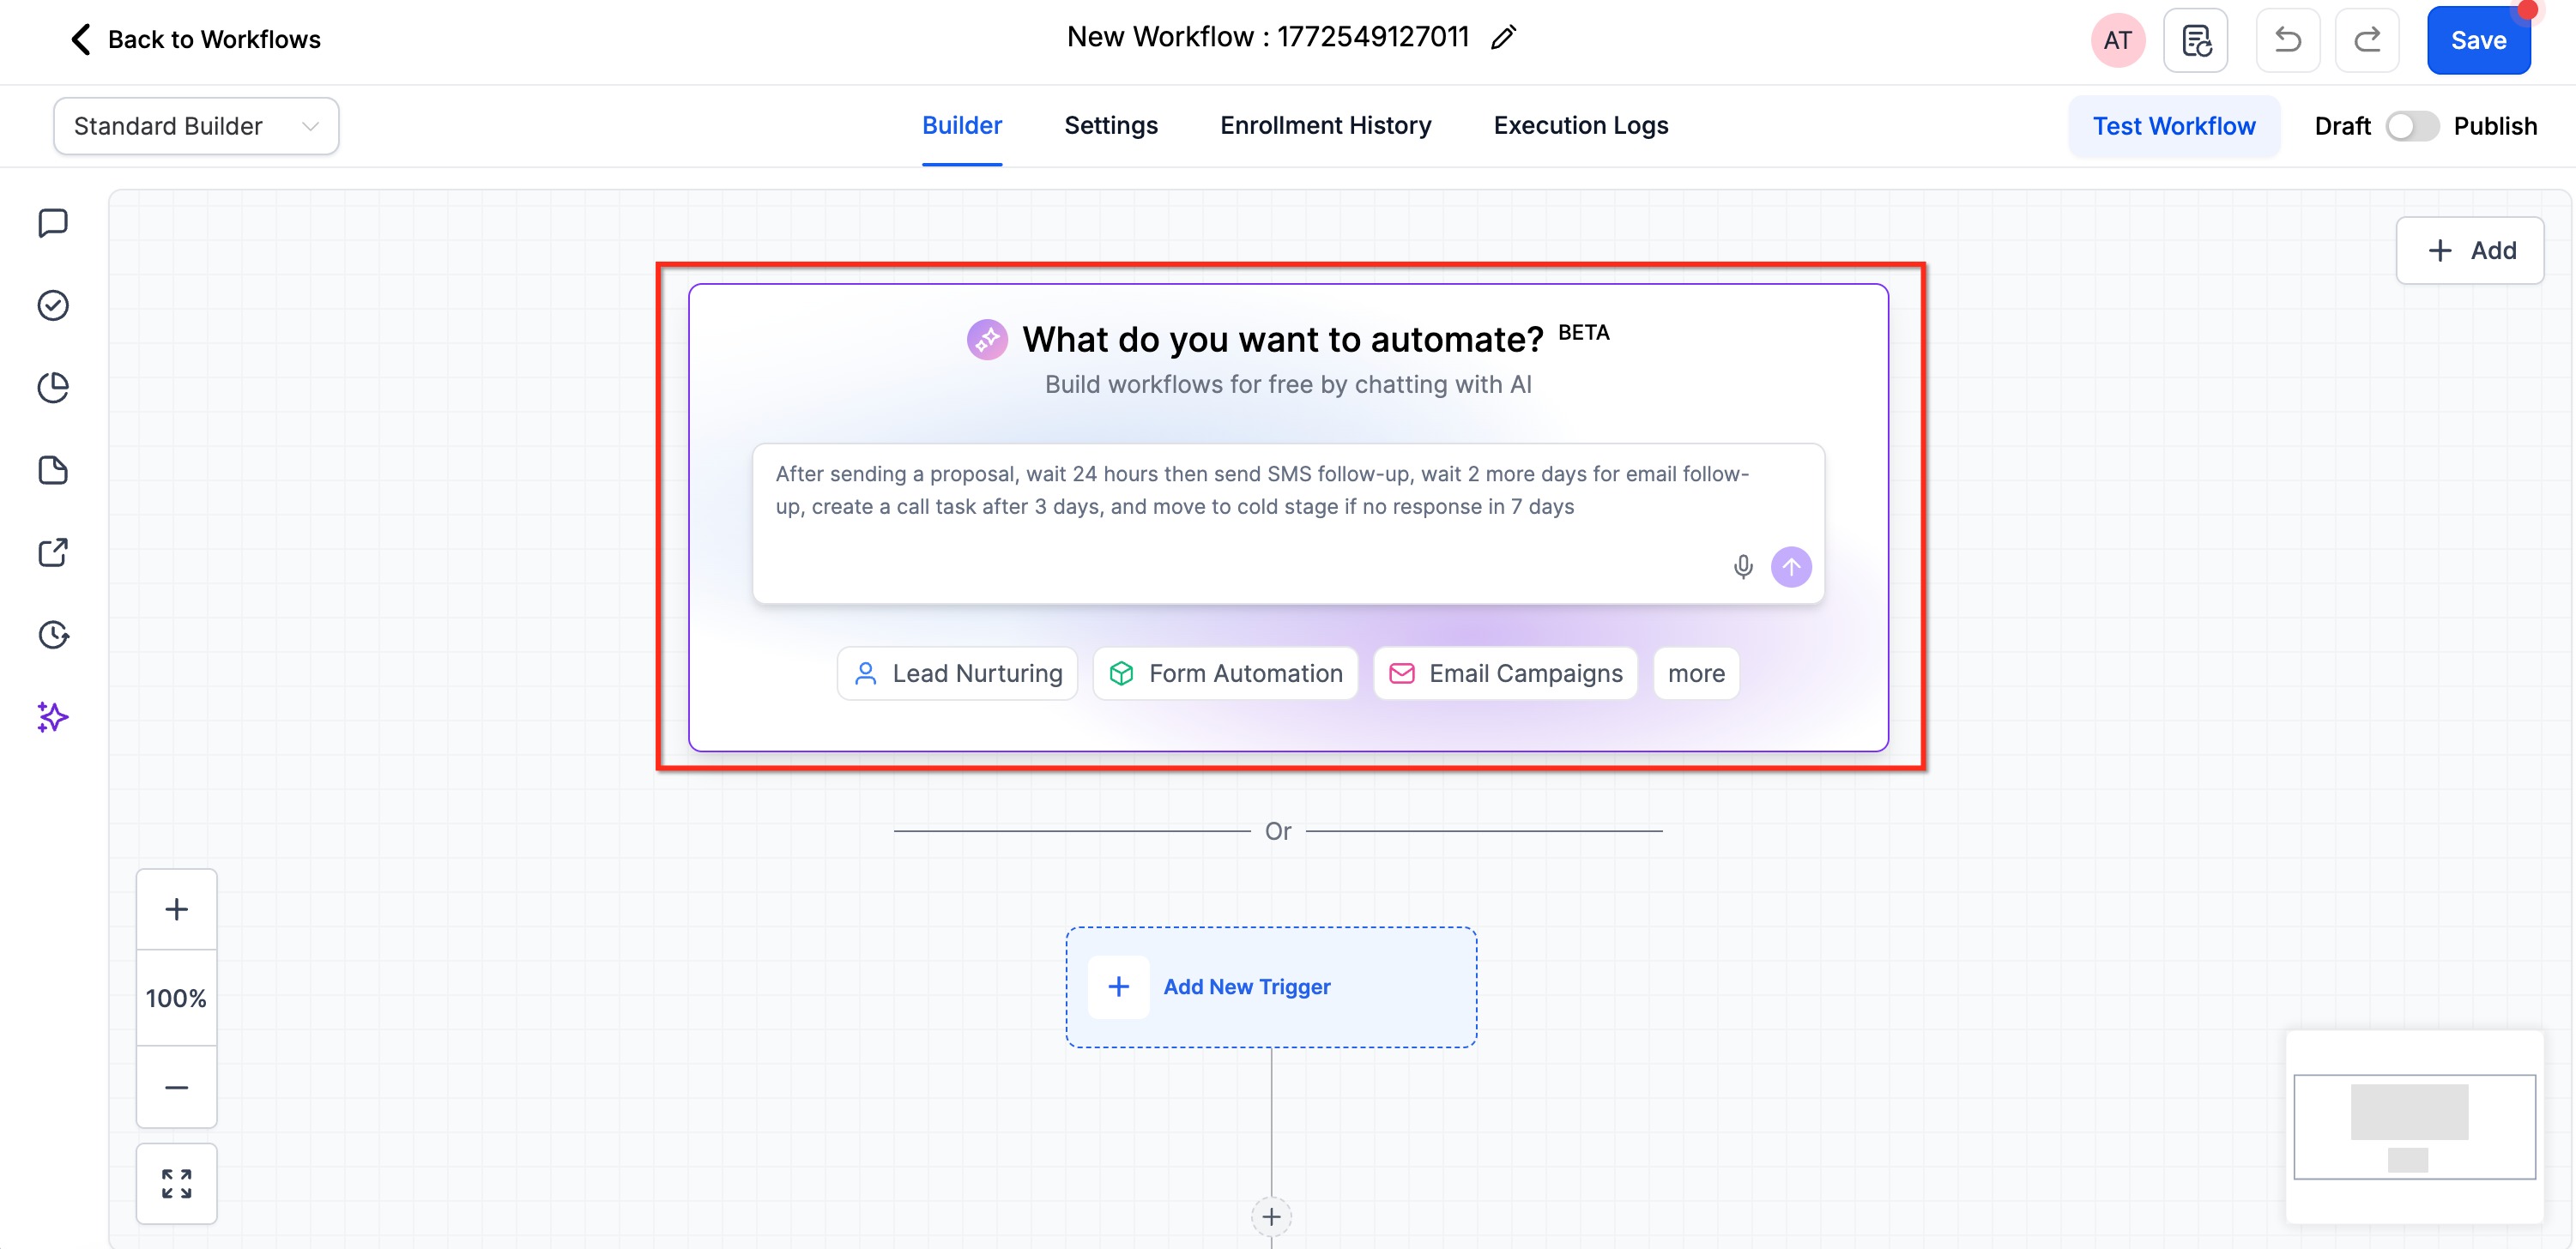
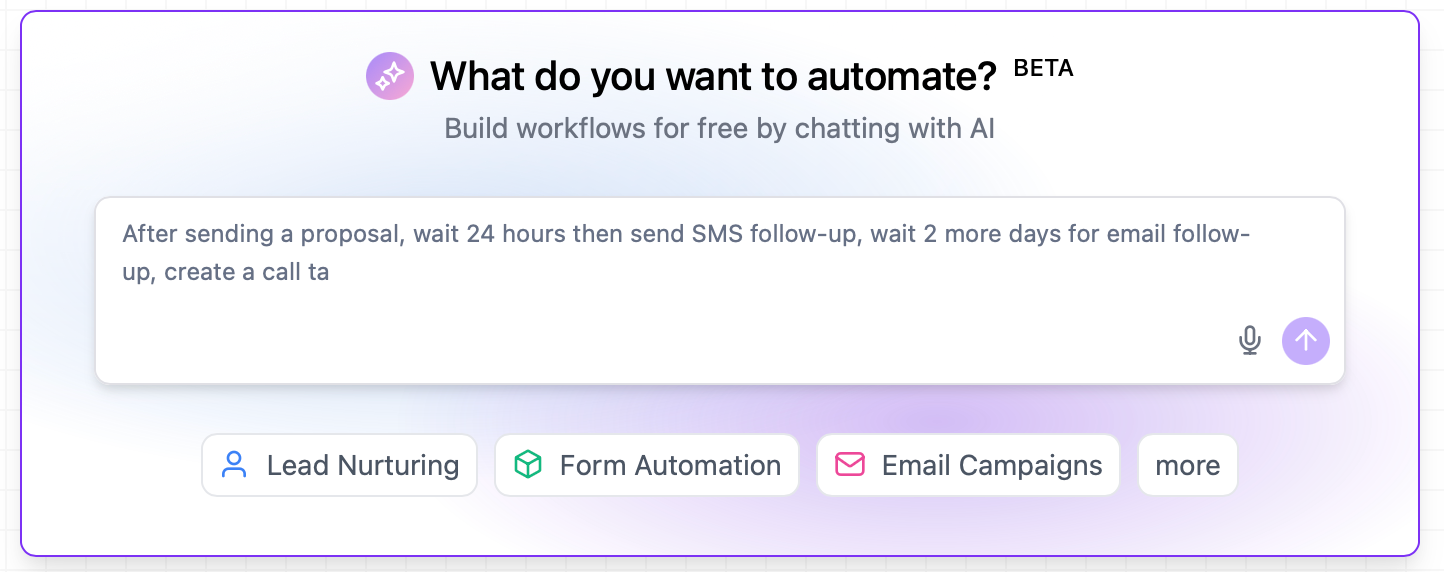
From the prompt box inside the Workflow Builder: when creating a new workflow from scratch, an AI prompt box appears in the builder. Type your automation requirements there, or use voice dictation to describe the workflow.
Using the AI chatbot assistant: inside the builder, you can open the AI chatbot and ask it to build your workflow.
Step 1: Enter your prompt. From any entry point, you have two options:
Write or dictate your own custom prompt describing your automation needs in your own words.
Use a provided template by selecting from the pre-written prompt templates in the interface.
Example prompts:
"Send a welcome email series when someone fills out my consultation request form."
"Create a birthday reminder workflow that sends SMS greetings."
"Notify my front desk team when a high-value treatment package opportunity is created."
"Follow up with event attendees 24 hours after a Botox open house."
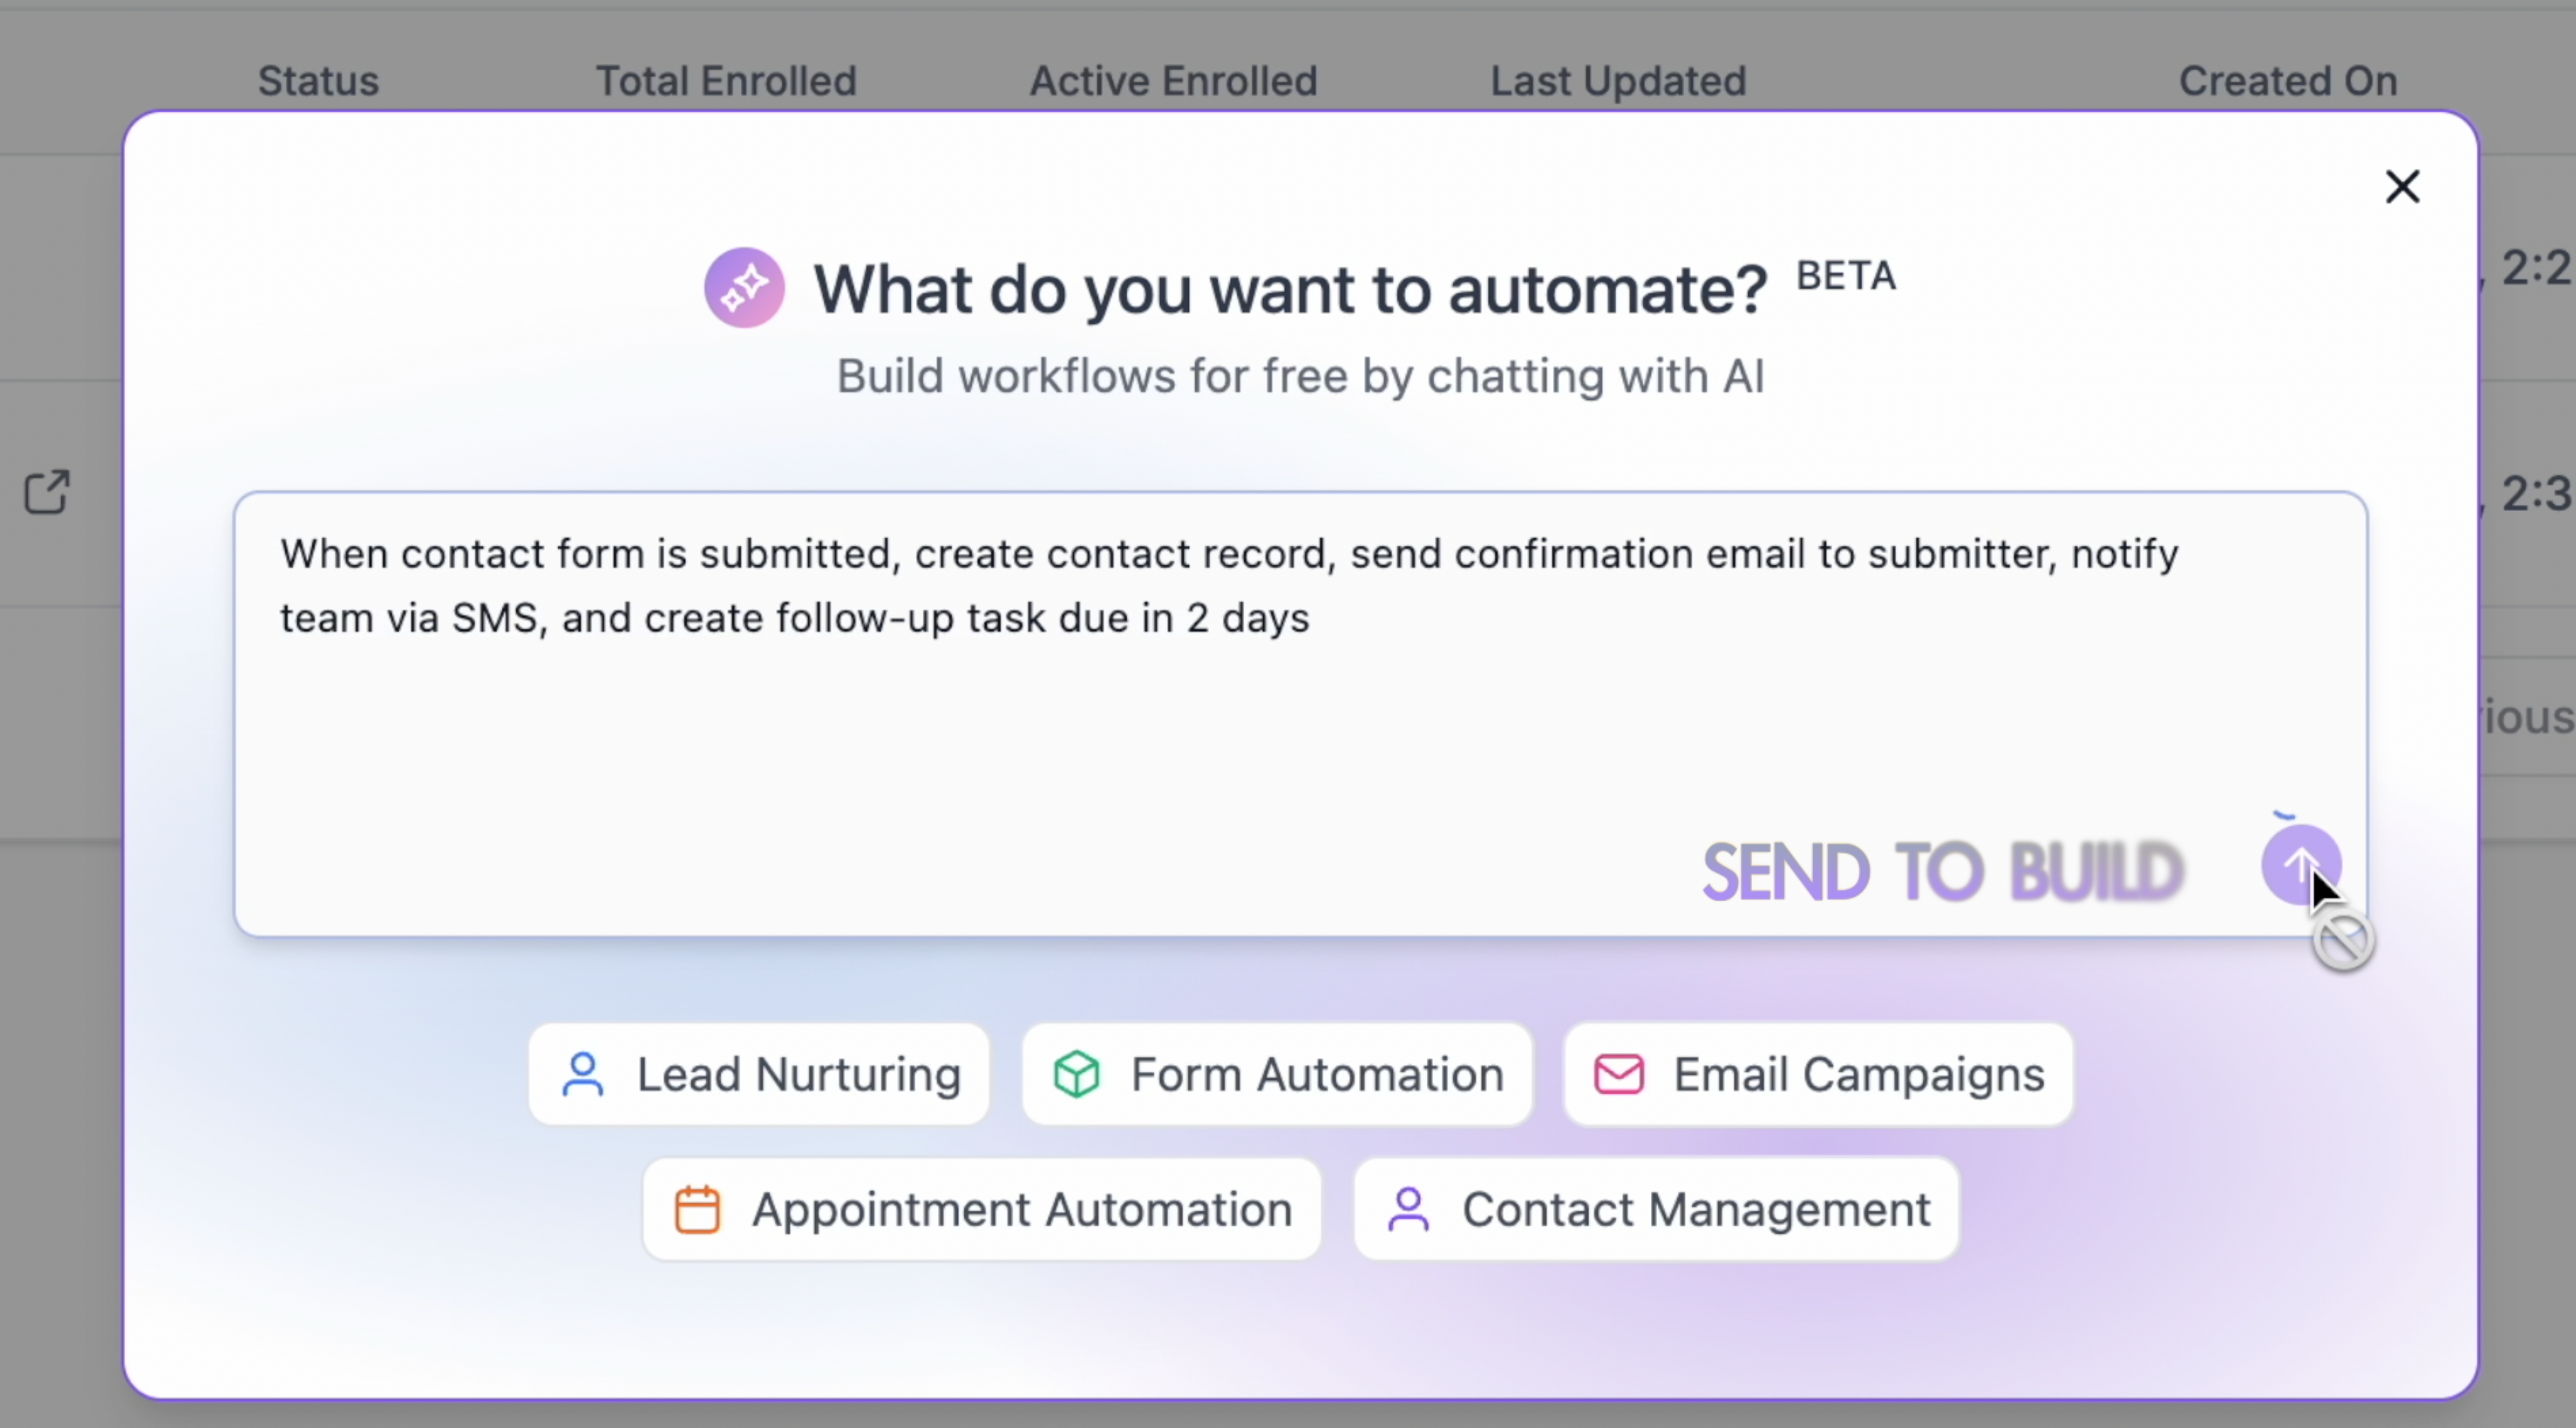
Optionally include the workflow name, any settings you want applied, the tools or apps to use, and how steps should use data from earlier actions. In your prompt you can ask the Builder to view, enable, disable, or update common workflow settings, including Allow Re-entry, Allow multiple Opportunities, Stop on Response, Timezone and Time Window (business hours), Sender Details (From Name, From Email, From Number), Conversations Mark as Read, and the workflow name. Example: "Rename this to New Patient Follow Up v2, update the sender email to [email protected], restrict messages to Monday through Friday 9 AM to 6 PM, and confirm re-entry is off."
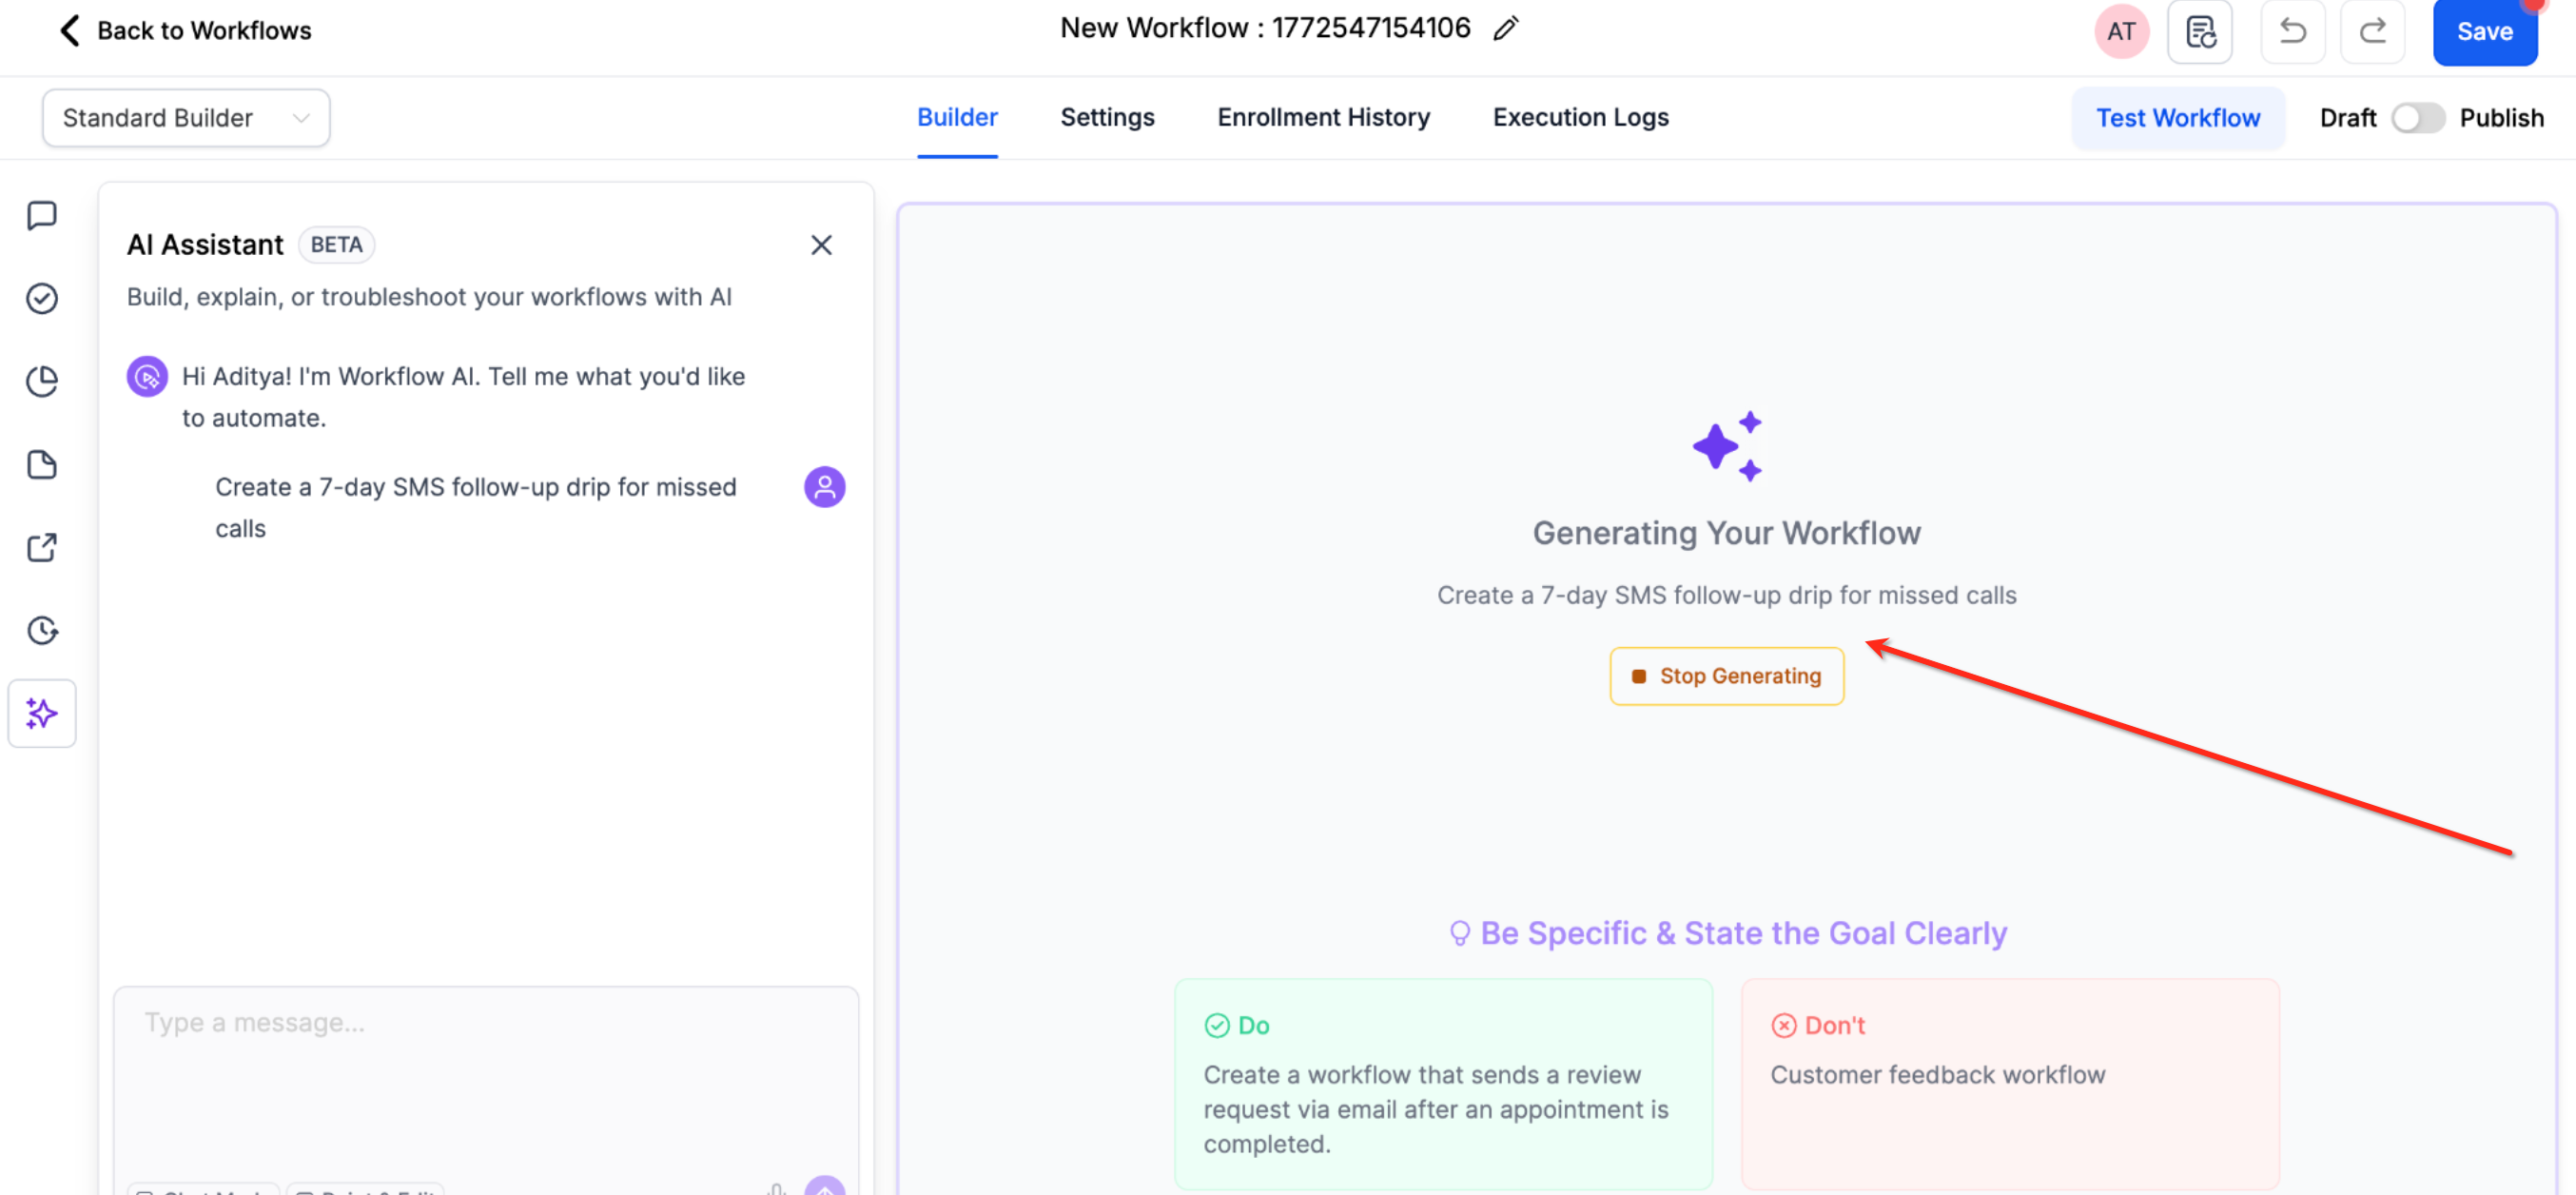
Step 2: Generate the workflow. Click Build Workflow or hit Send, depending on your entry point. A loader runs while the AI builds. Generation typically completes in under 30 seconds; if it takes longer, simplify the prompt and try again. When autosave is enabled, AI-generated workflows save the moment they are created, and every subsequent AI edit saves in the background.
Step 3: Review and customize. When the AI finishes, you get a summary of the workflow it created alongside the automation. If you used the first entry point, you are taken into the builder; with the second or third, the workflow is generated directly in your current view.
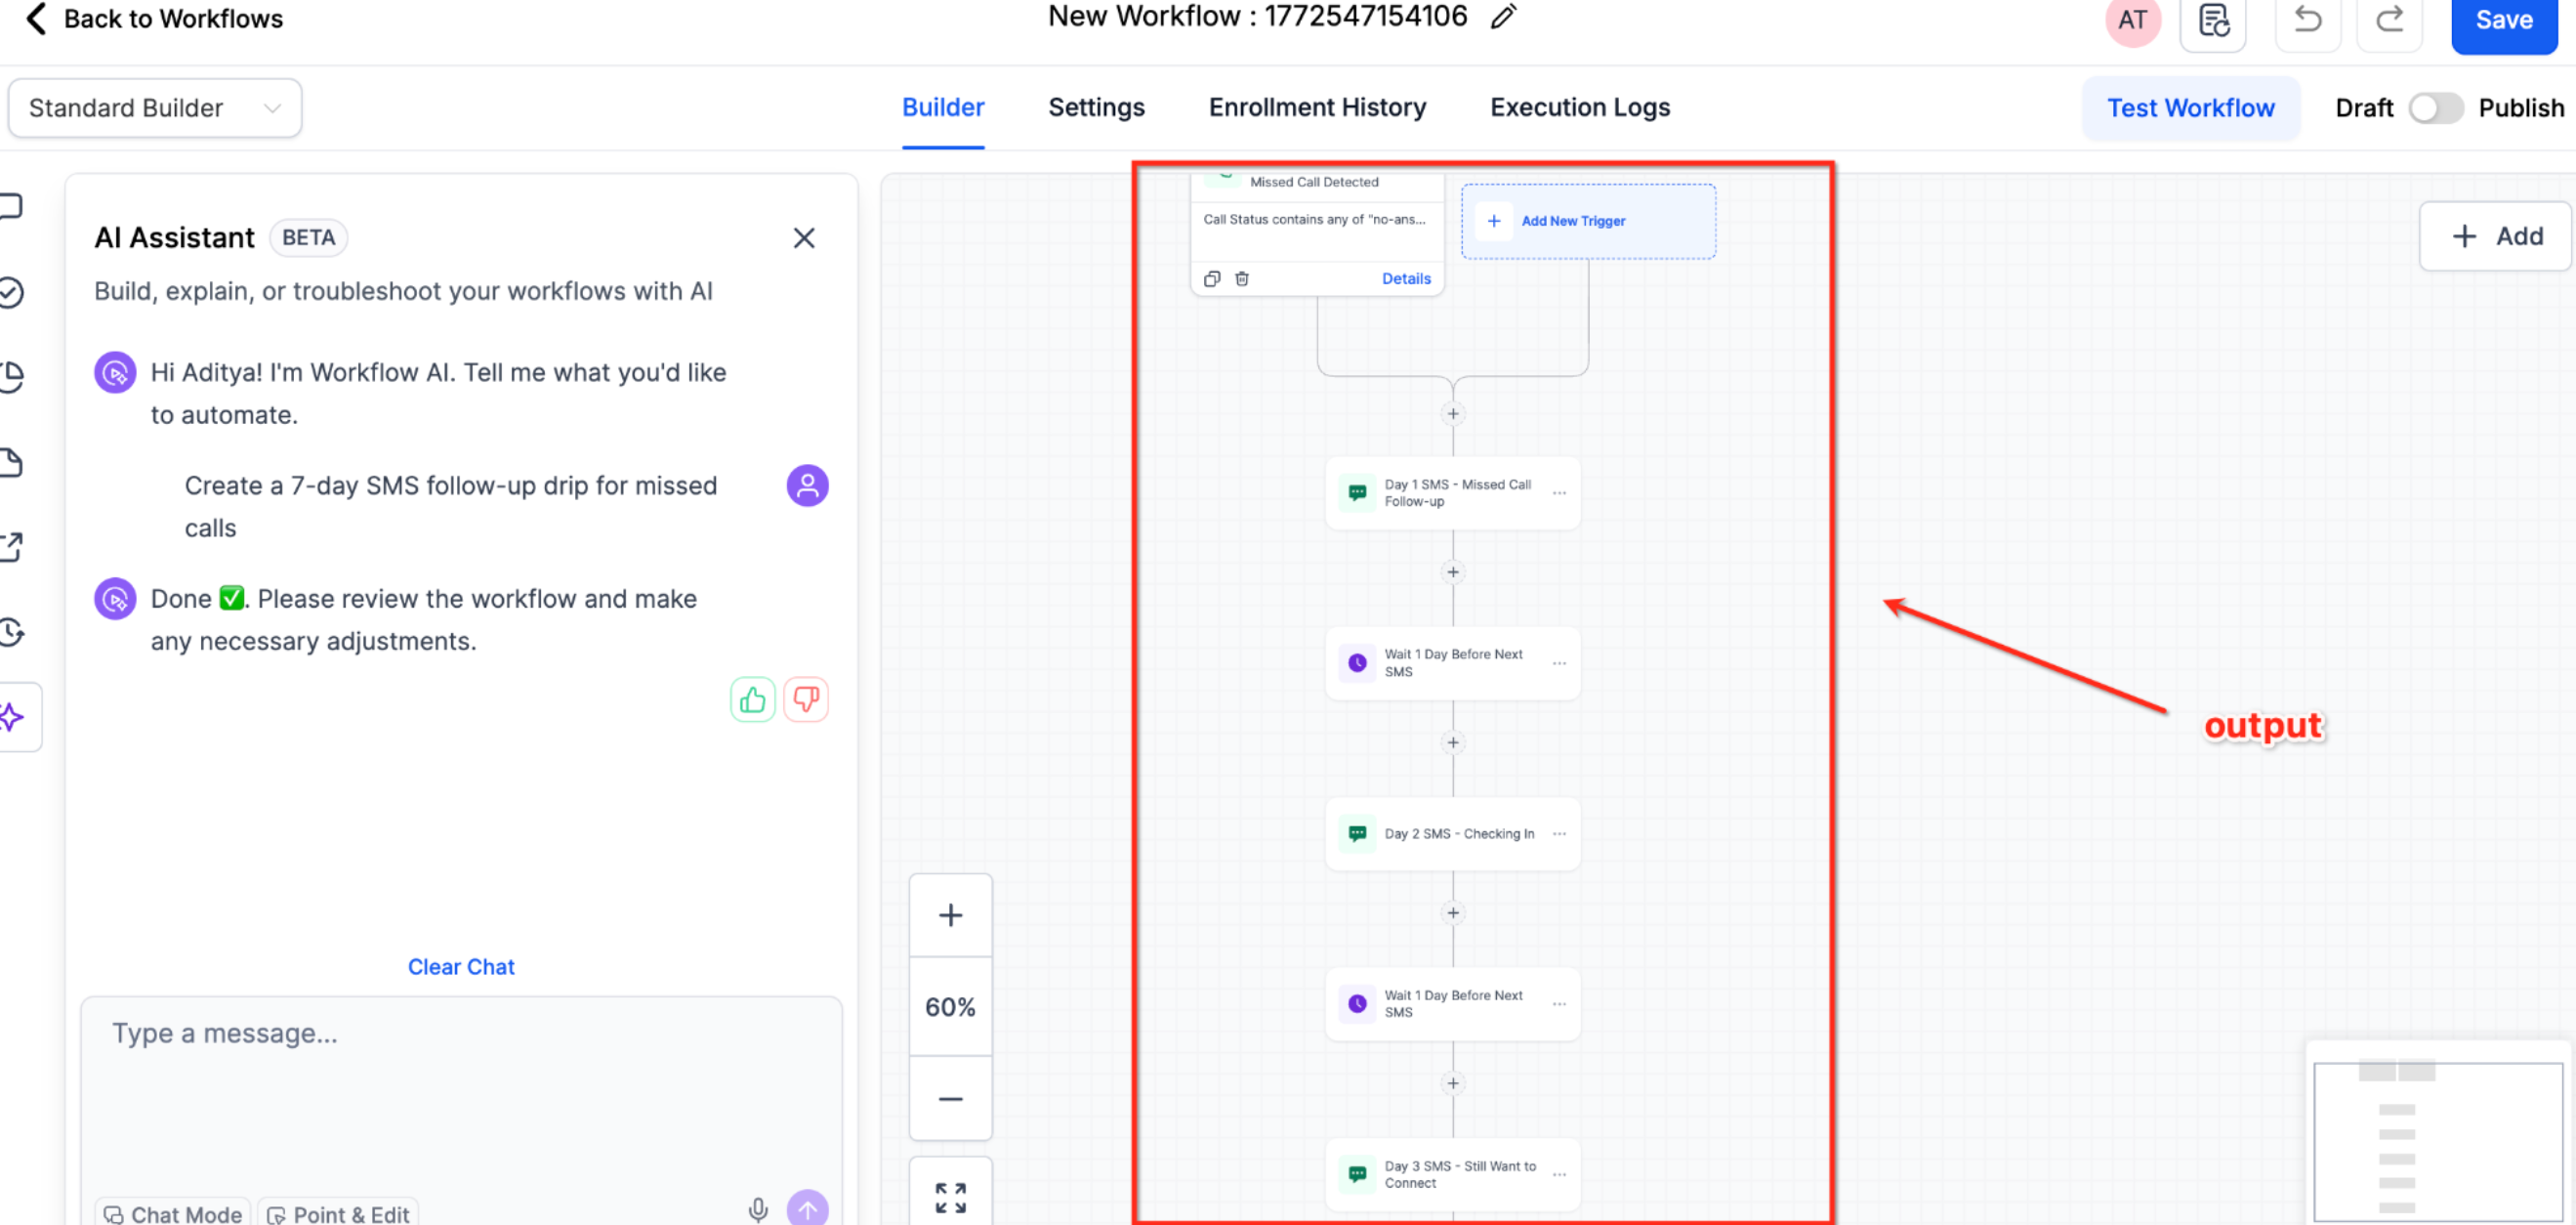
Then review the overall structure, check individual trigger configurations, and verify action settings and parameters.
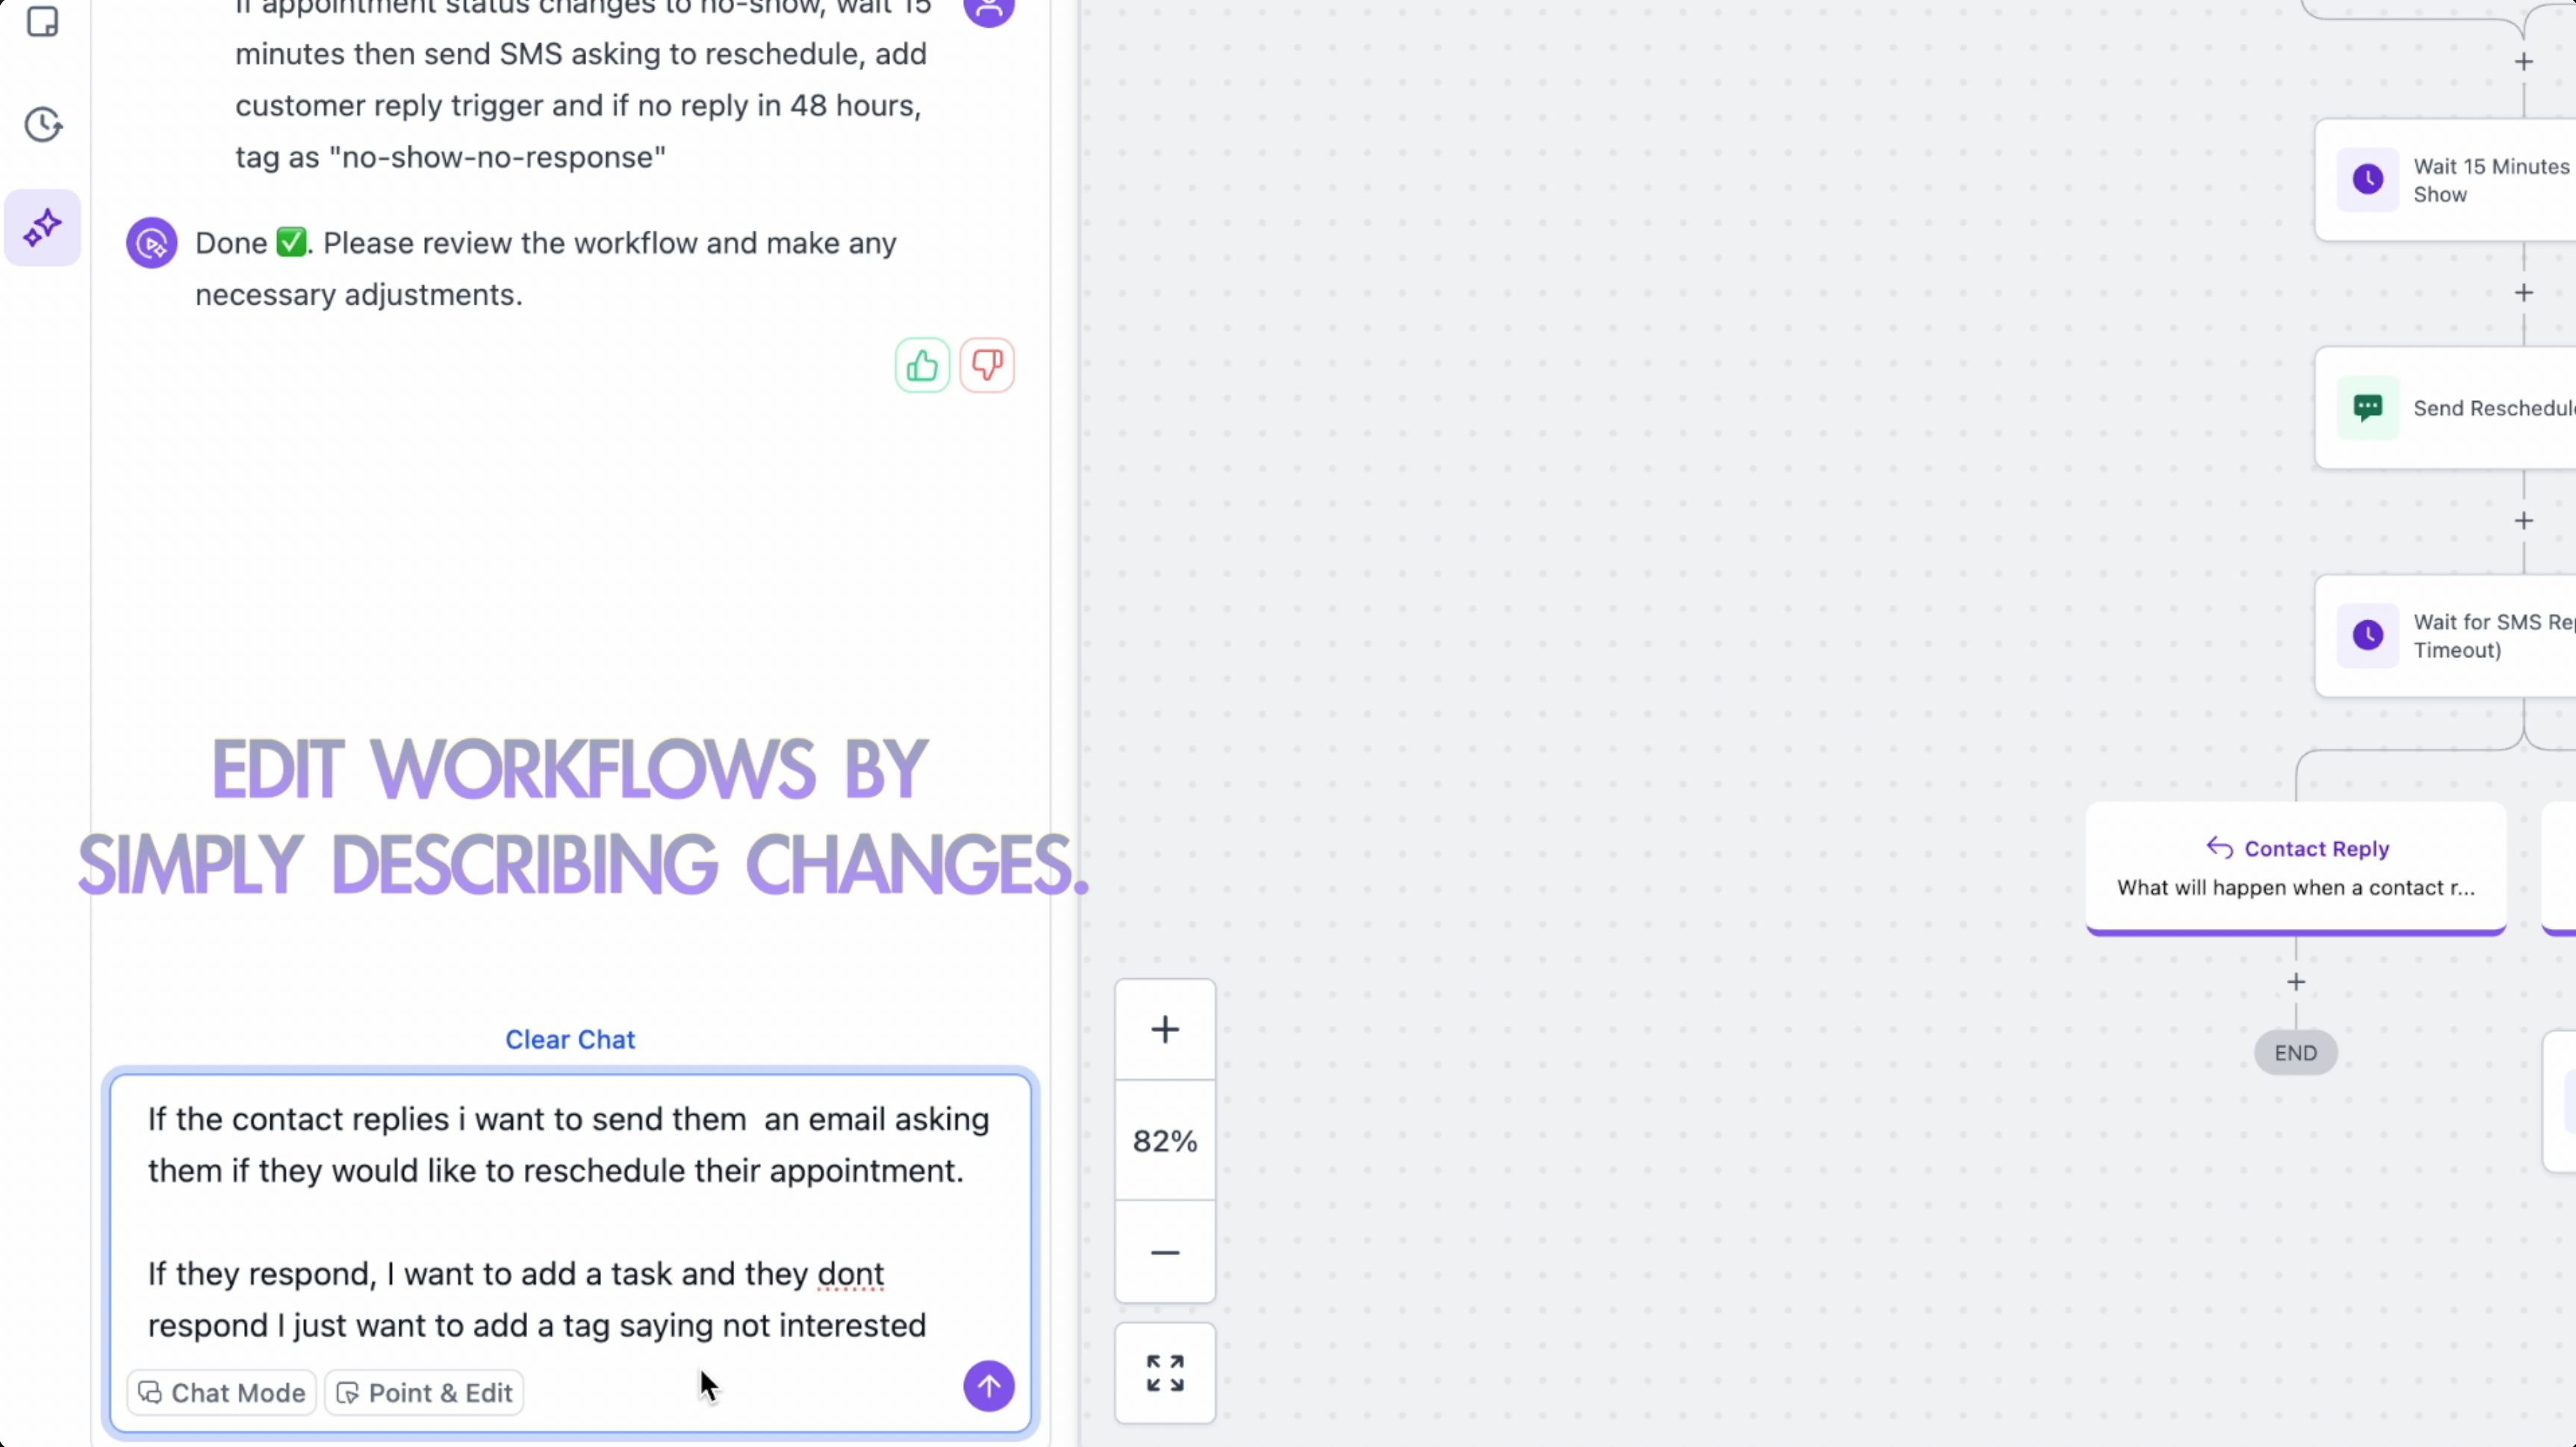
Step 4: Edit using AI. Refine the workflow with natural-language prompts in the AI chatbot. Describe the change and the Builder updates the workflow while keeping the surrounding structure intact. You can conversationally edit complex actions like If/Else and Wait steps, including updating conditions, adding or removing branches, changing wait settings, and refining logic. You can also ask the AI to rename the workflow, check or toggle settings, and update steps so later actions reference outputs from earlier steps.
Actions: add new actions anywhere, remove single or multi-path actions, replace actions with different ones, modify configurations and settings, update actions to use values from previous steps (data linking), add or update actions that use integration apps, and move actions to different positions.
Triggers: add, remove, replace, or modify triggers.
Complex edits: combine multiple changes in a single prompt. Edit If/Else actions by adding, removing, or updating segments within branches, changing AND/OR operators, and adding or removing branches. Edit Wait actions by updating wait attributes, adjusting reply or window settings, adding or removing timeout branches, or changing the wait type. For complex or multi-path requests, the Builder may ask clarifying questions to confirm which branch or segment to update.
Example edit prompts:
"Add a 3-day wait between the welcome email and the follow-up."
"Replace the SMS action with a front-desk notification."
"Remove the last email in the sequence."
"Move the tag action to happen before sending the first email."
"Change the trigger from form submission to contact created."
"Add an if/else condition to check if the contact has booked an appointment."
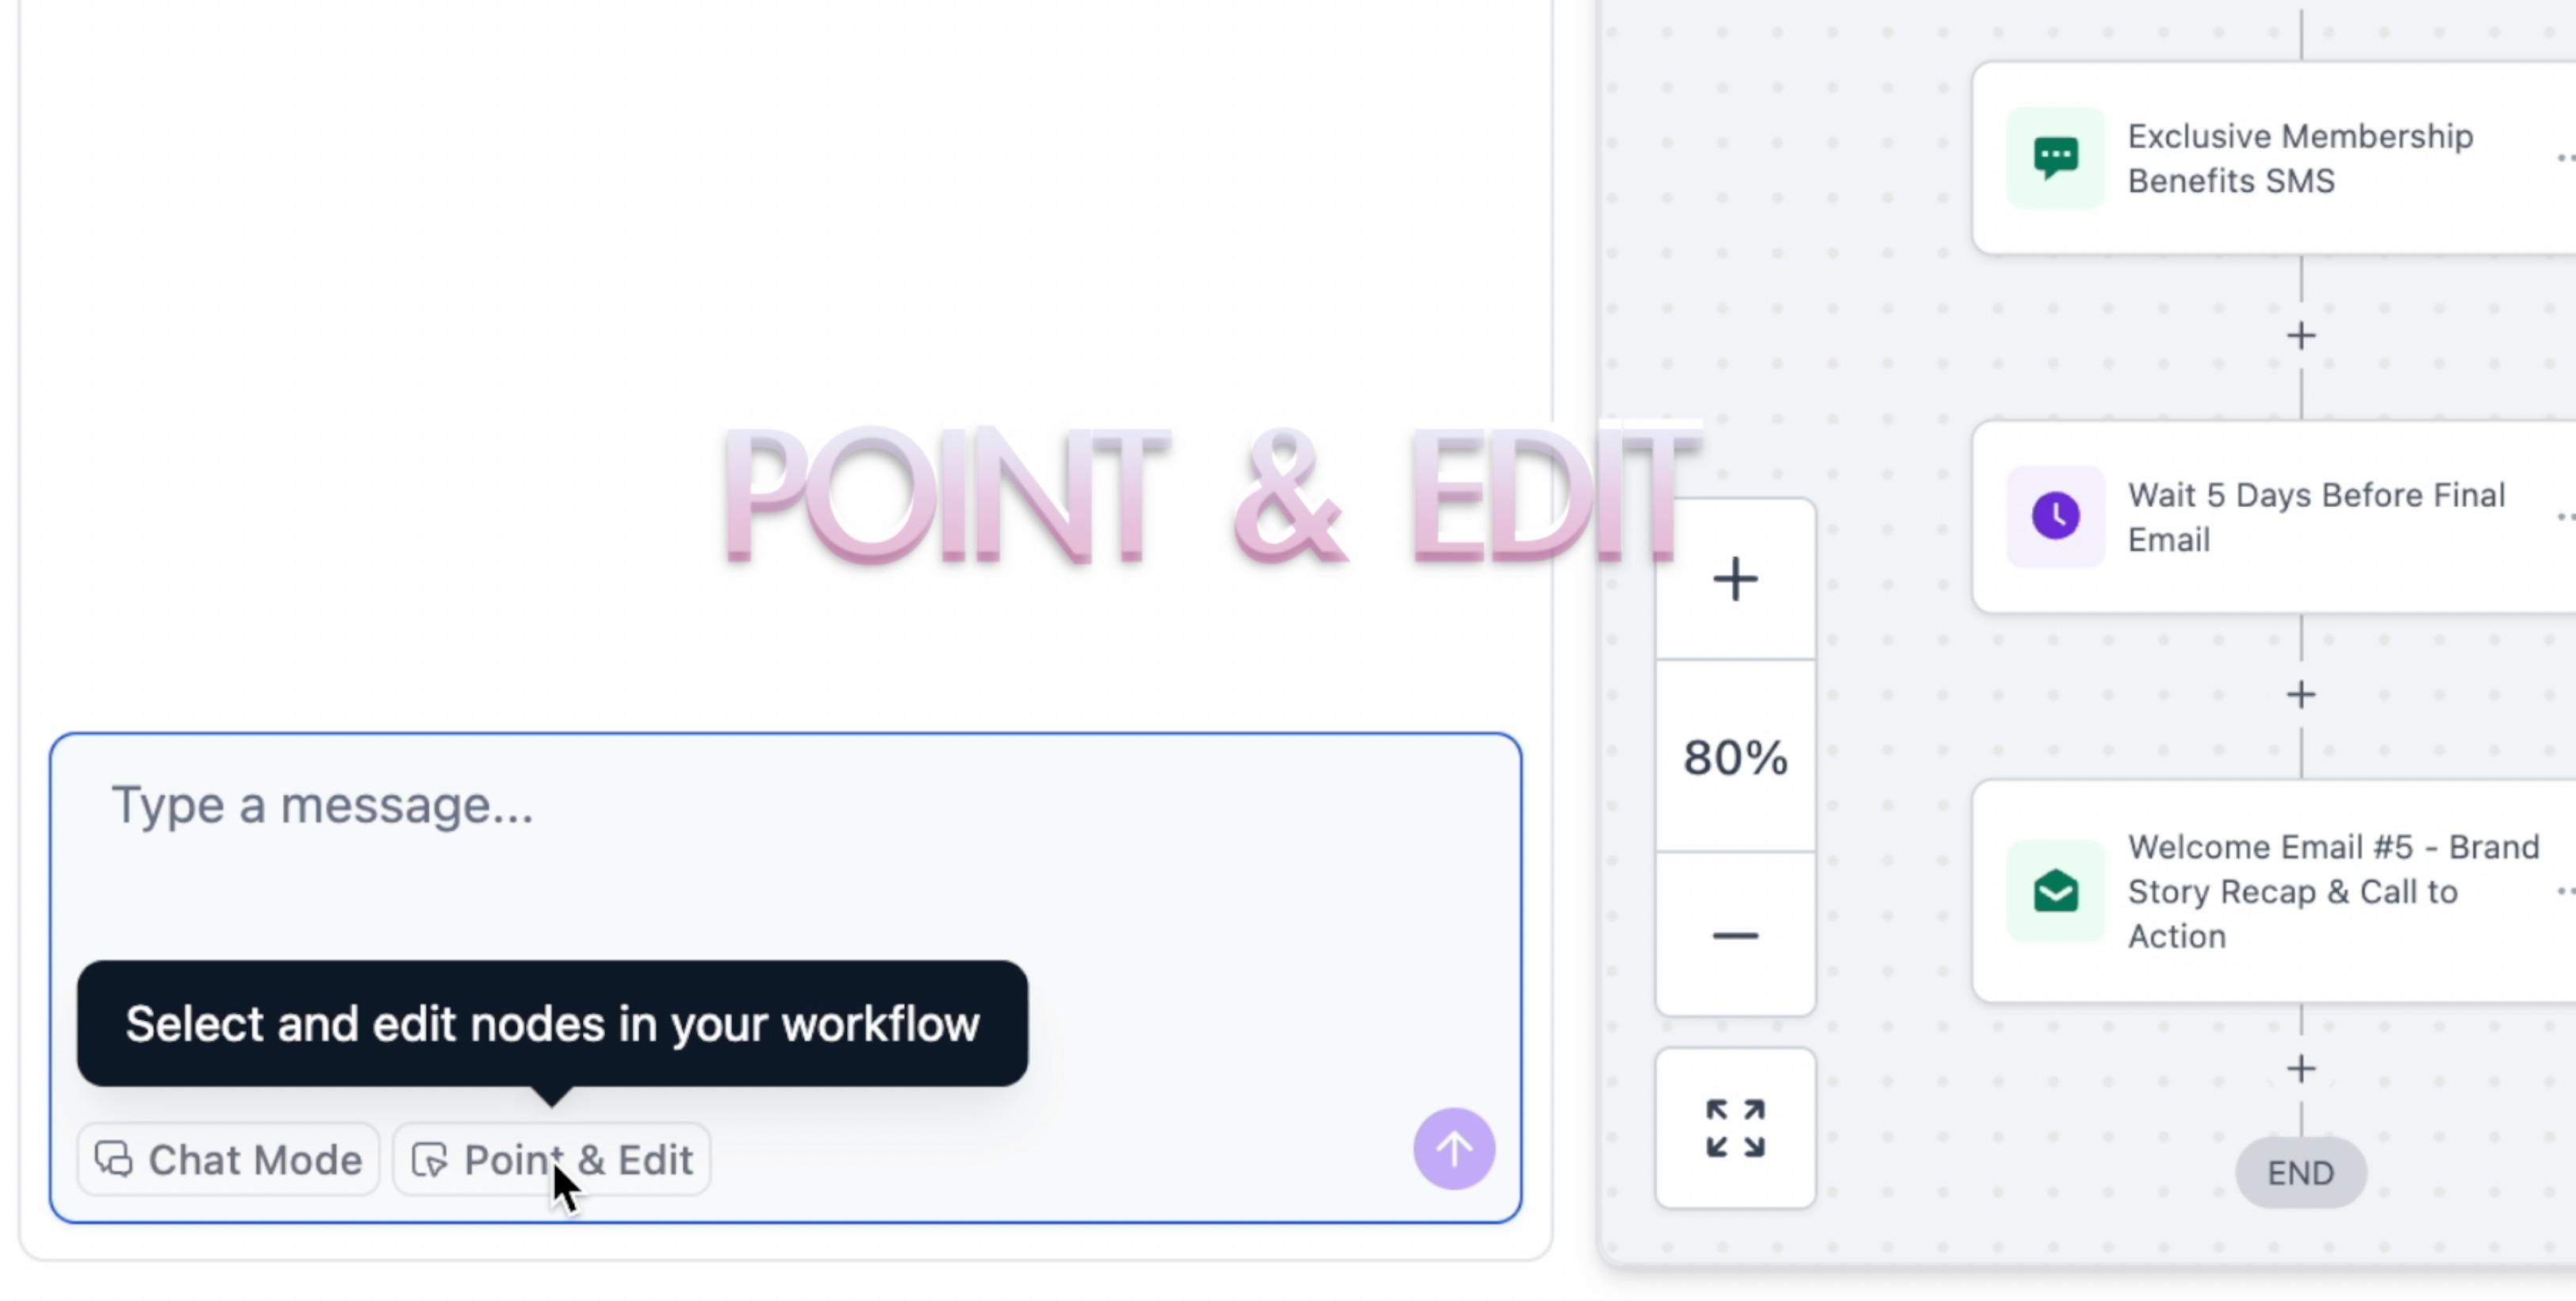
For larger workflows where identifying specific actions is hard, use Point and Edit to apply changes only to the steps you select.
Click Point and Edit in the AI chatbot interface to activate selection mode.
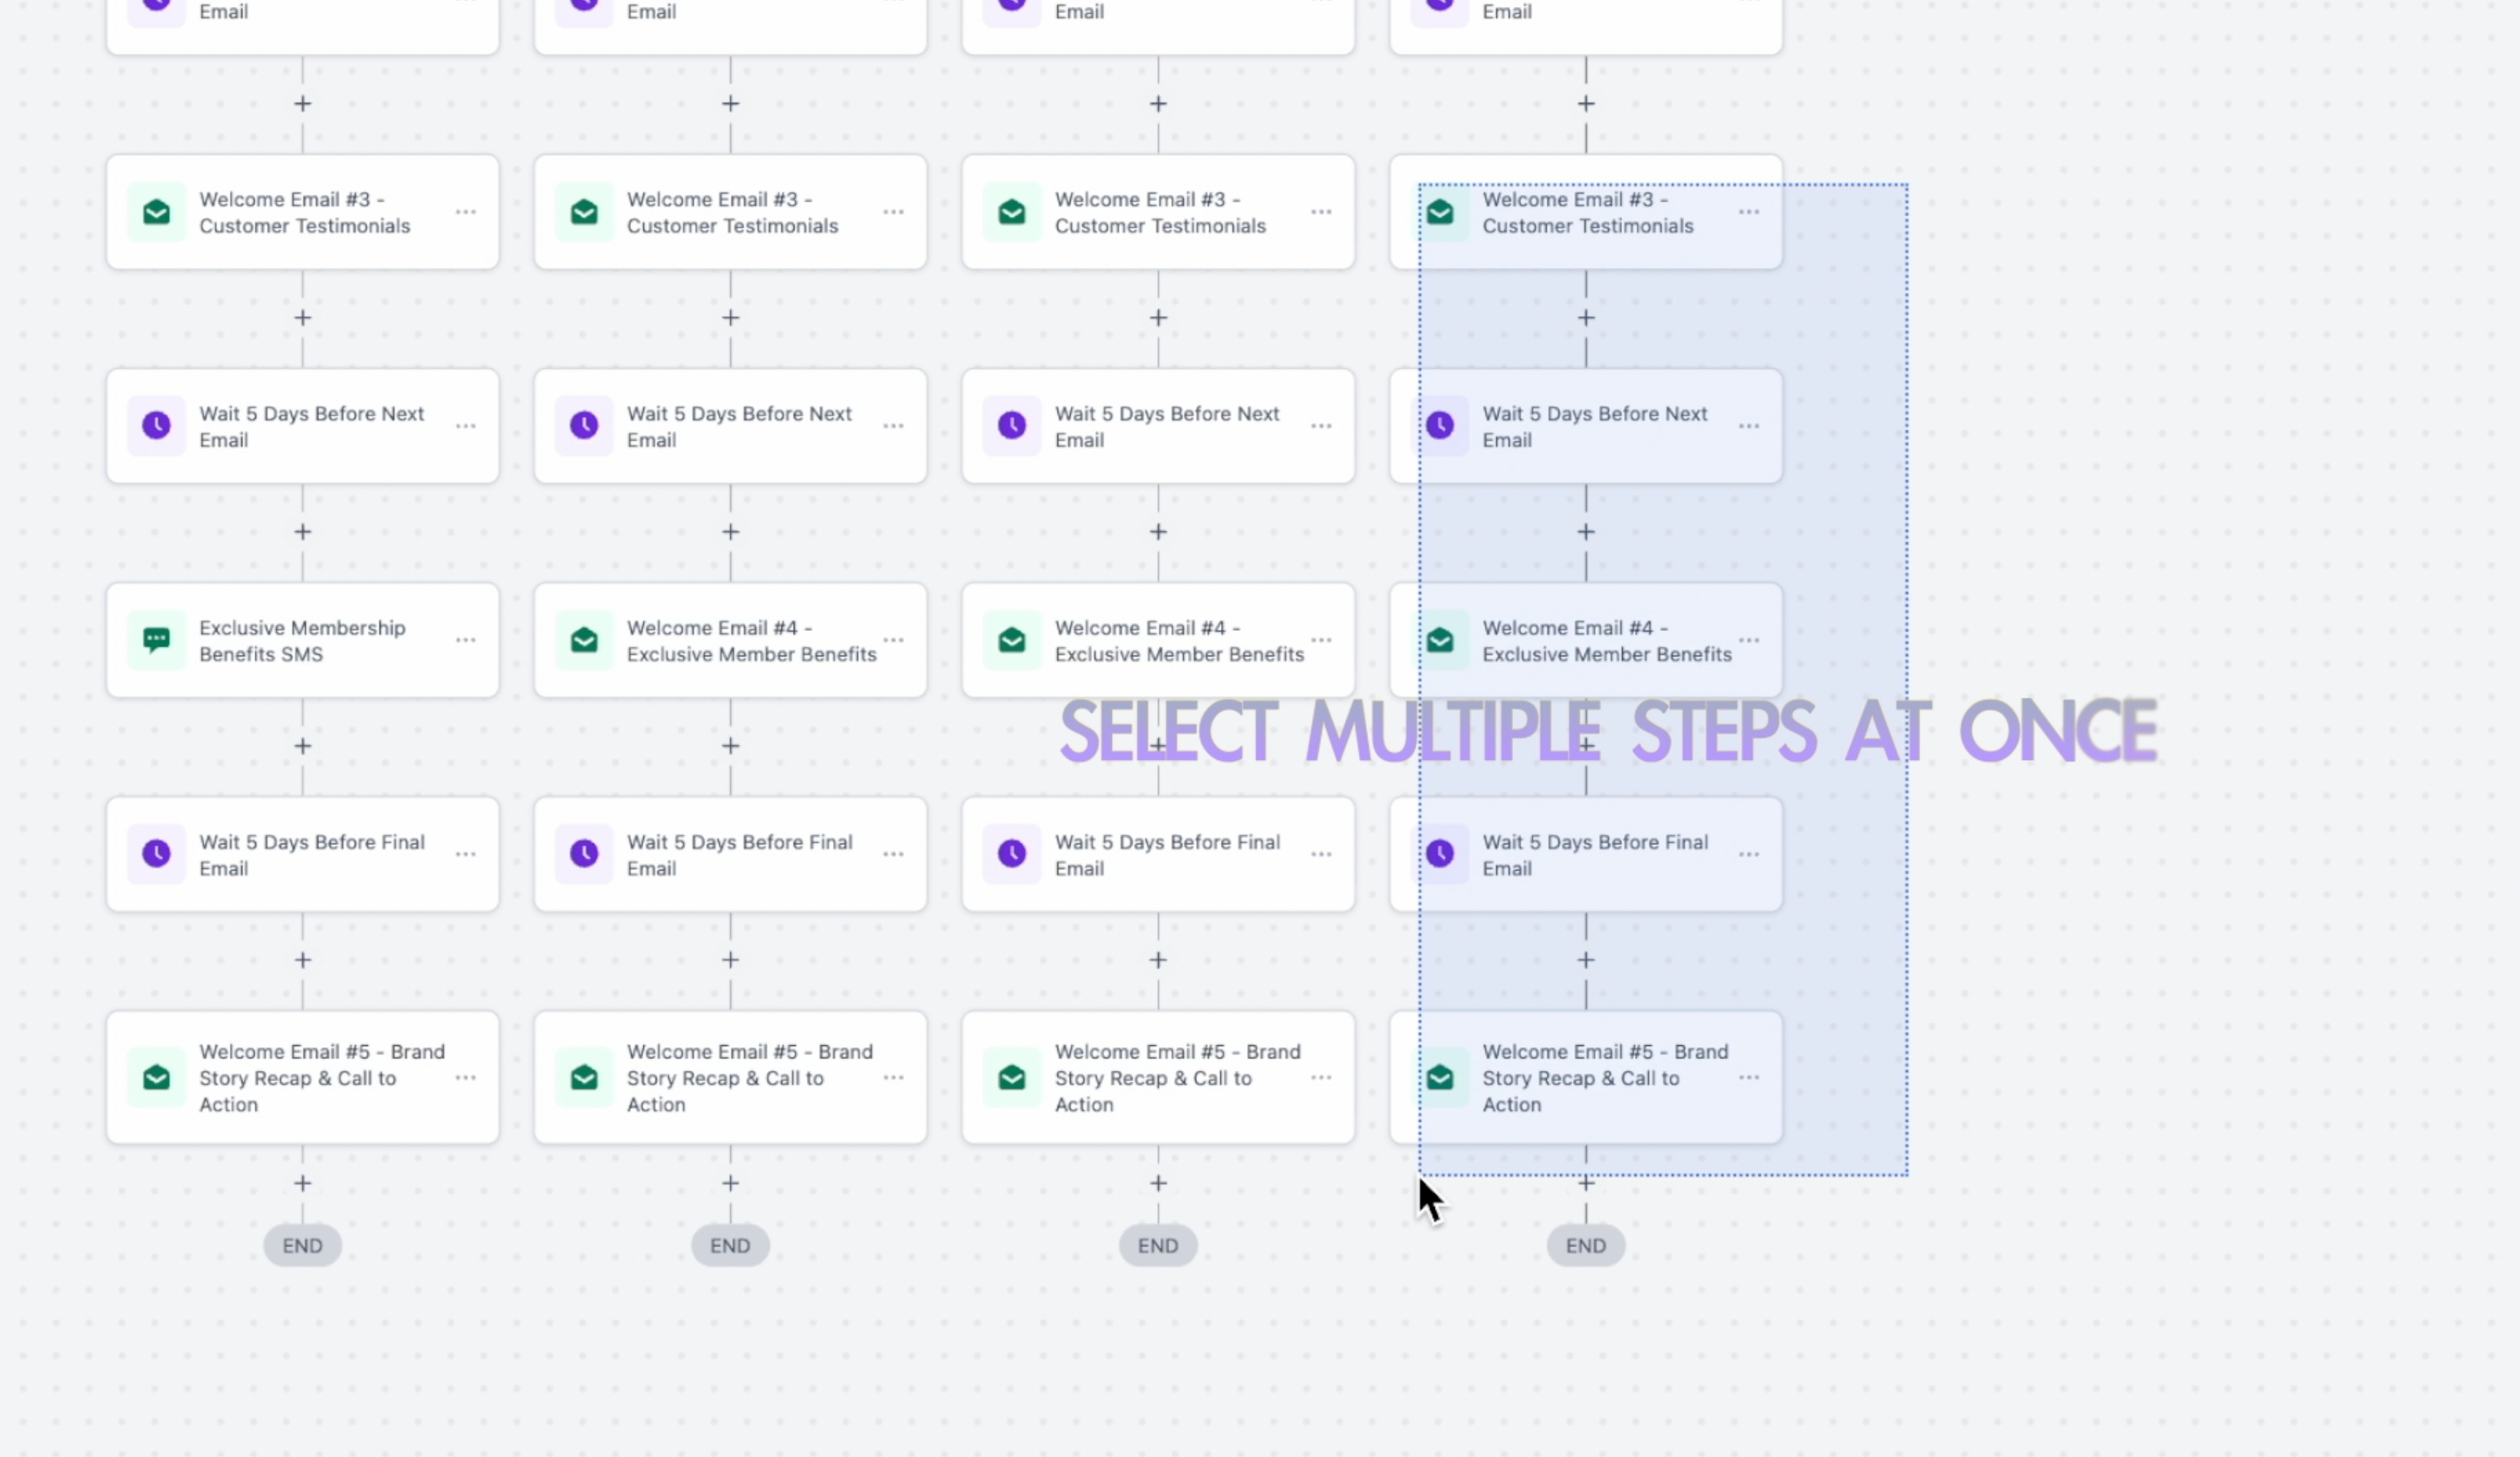
Select the actions to edit: click to select one, click multiple, or hold Shift and drag to select a range. Selected actions are highlighted.
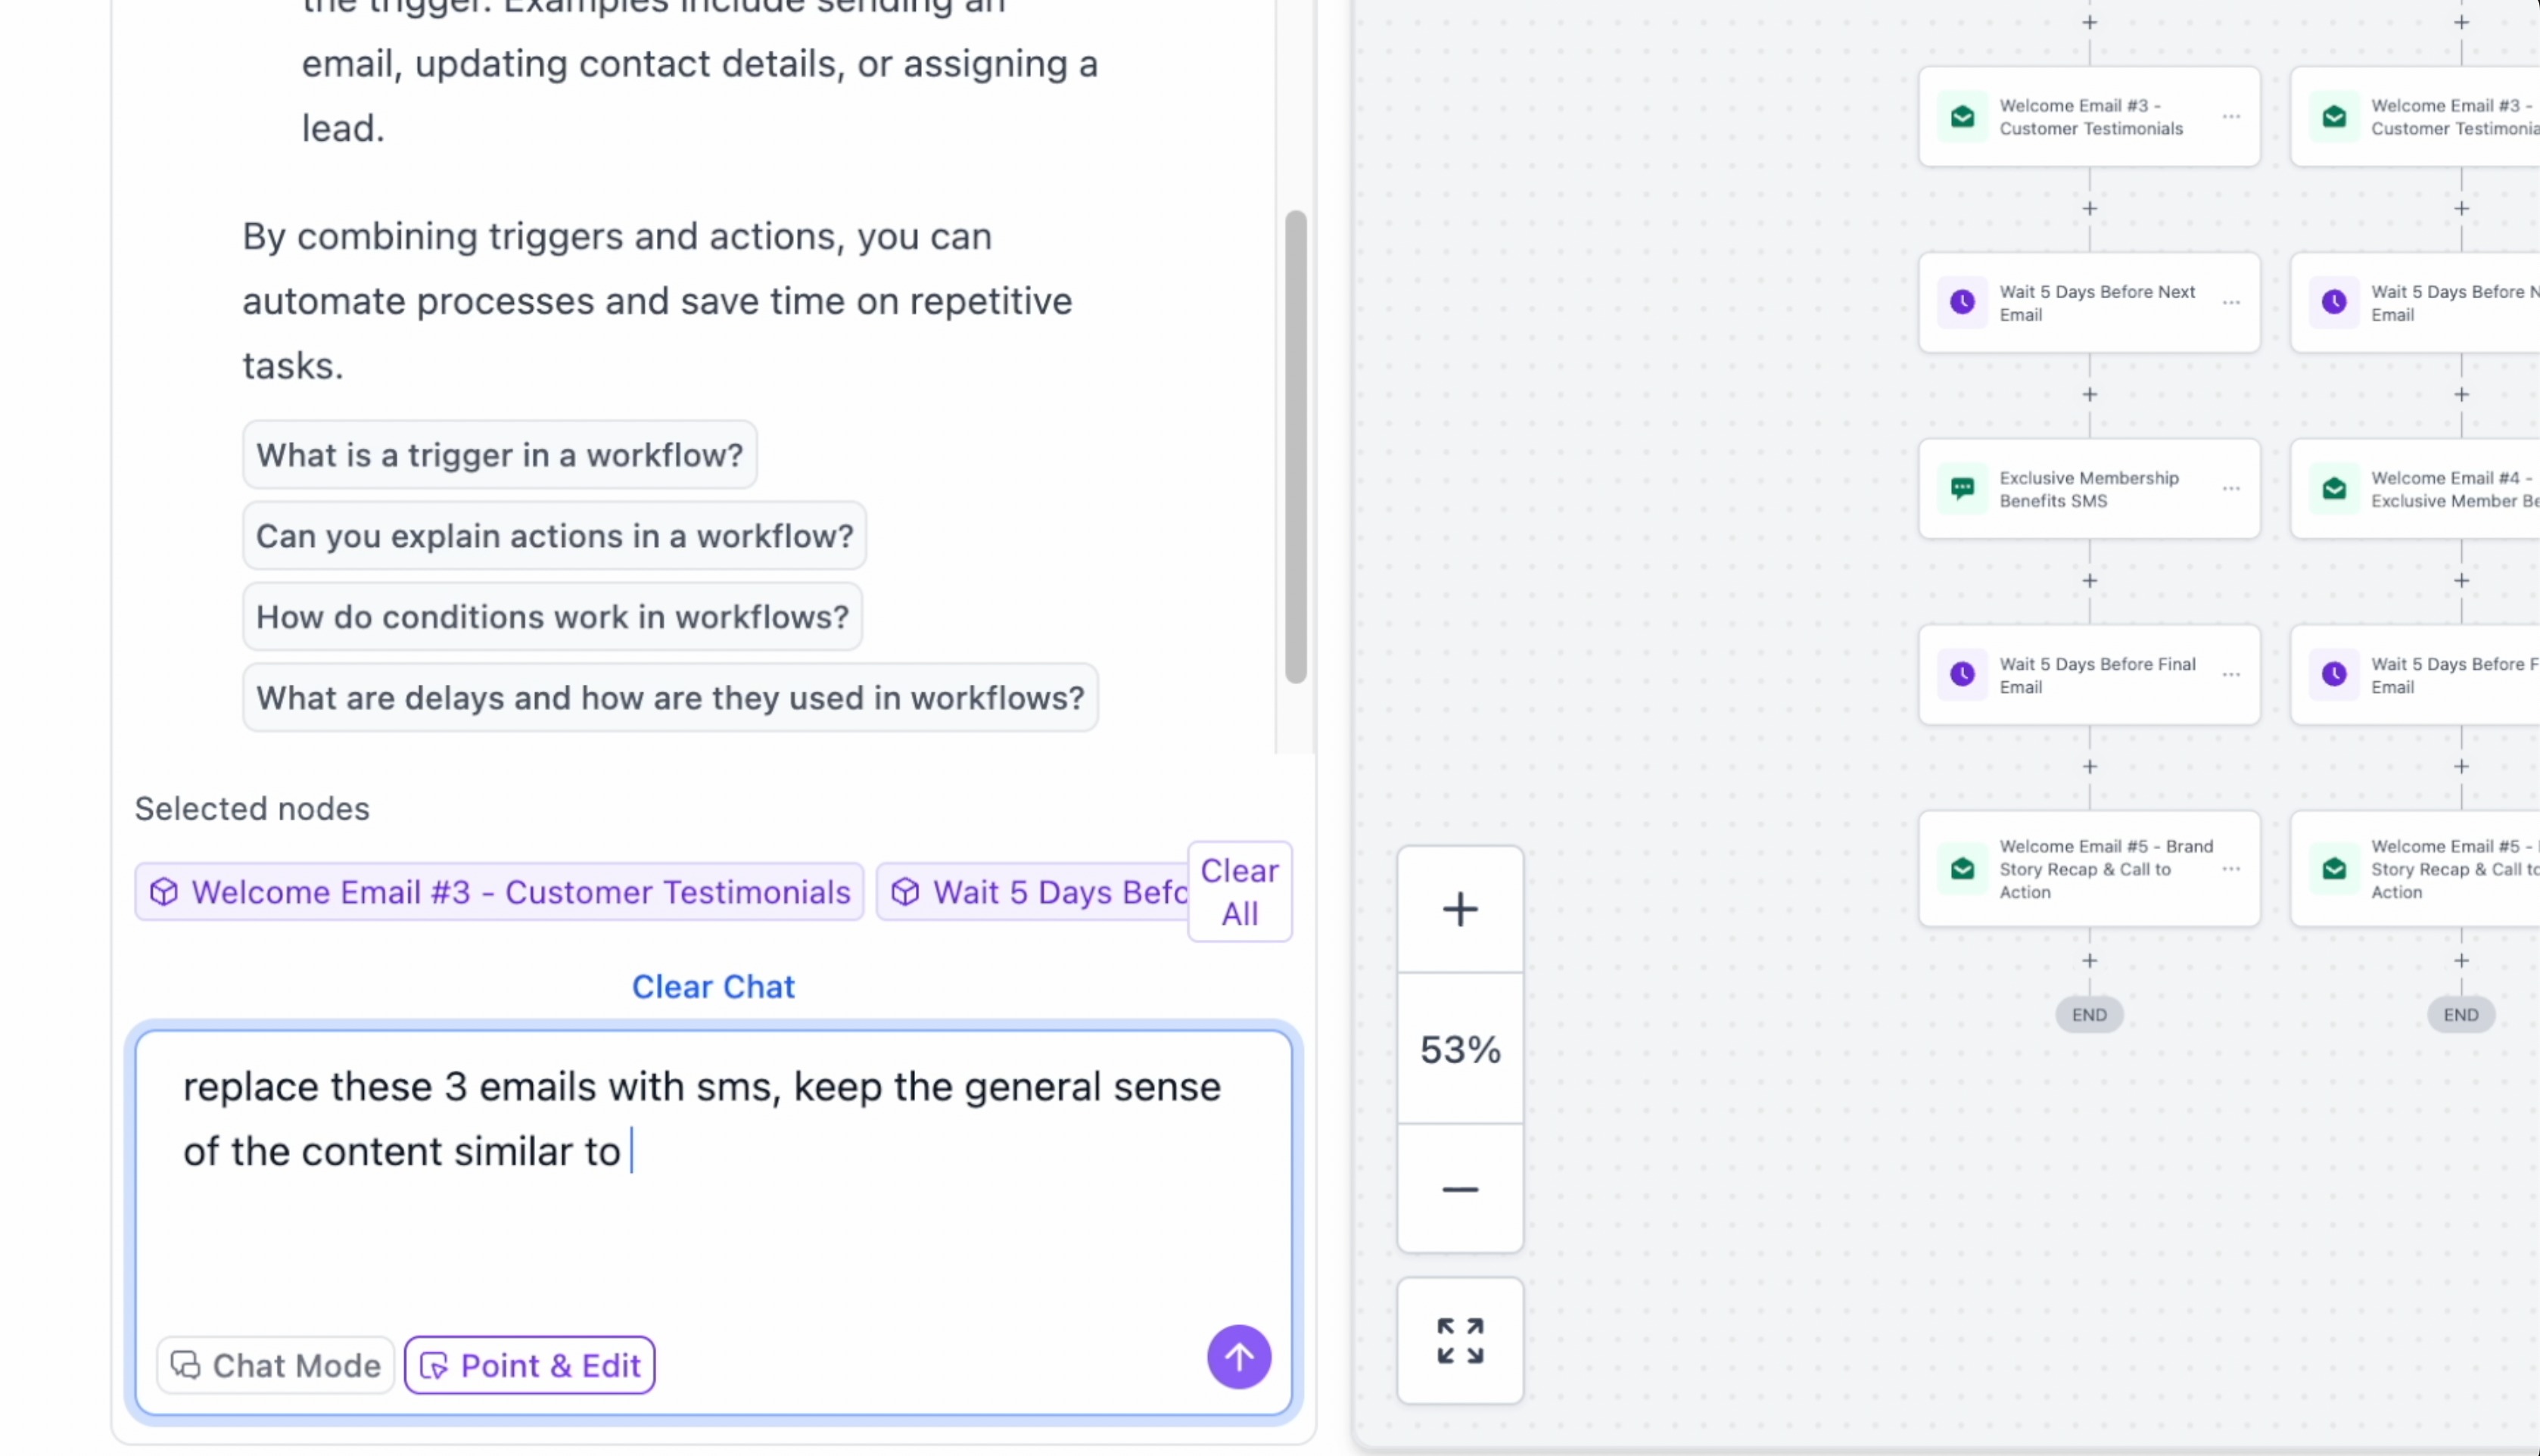
Describe your change in the chat, and the AI applies it only to the selected steps.
Example scenarios: select three email actions and say "Change all these to SMS messages"; select a task action and say "Change the text to be more urgent"; select actions in a branch and say "Move all of these after the tag action"; select a group and say "Delete these selected actions." Point and Edit is especially useful for workflows with 10 or more actions or multiple branches, where a verbal description alone might be ambiguous.
When your request is too broad or leaves out important details, the Builder may ask a short series of clarifying questions before it builds or edits. This improves first-pass accuracy and helps the AI avoid incorrect assumptions. It may appear when the trigger is not defined, the message channel is not specified, the timing is unclear, or an unsupported channel is requested. Review each question, then select an option or type your own response. You can continue through multiple questions, or skip any question to let the AI decide. The Builder asks up to three clarifying questions before continuing.
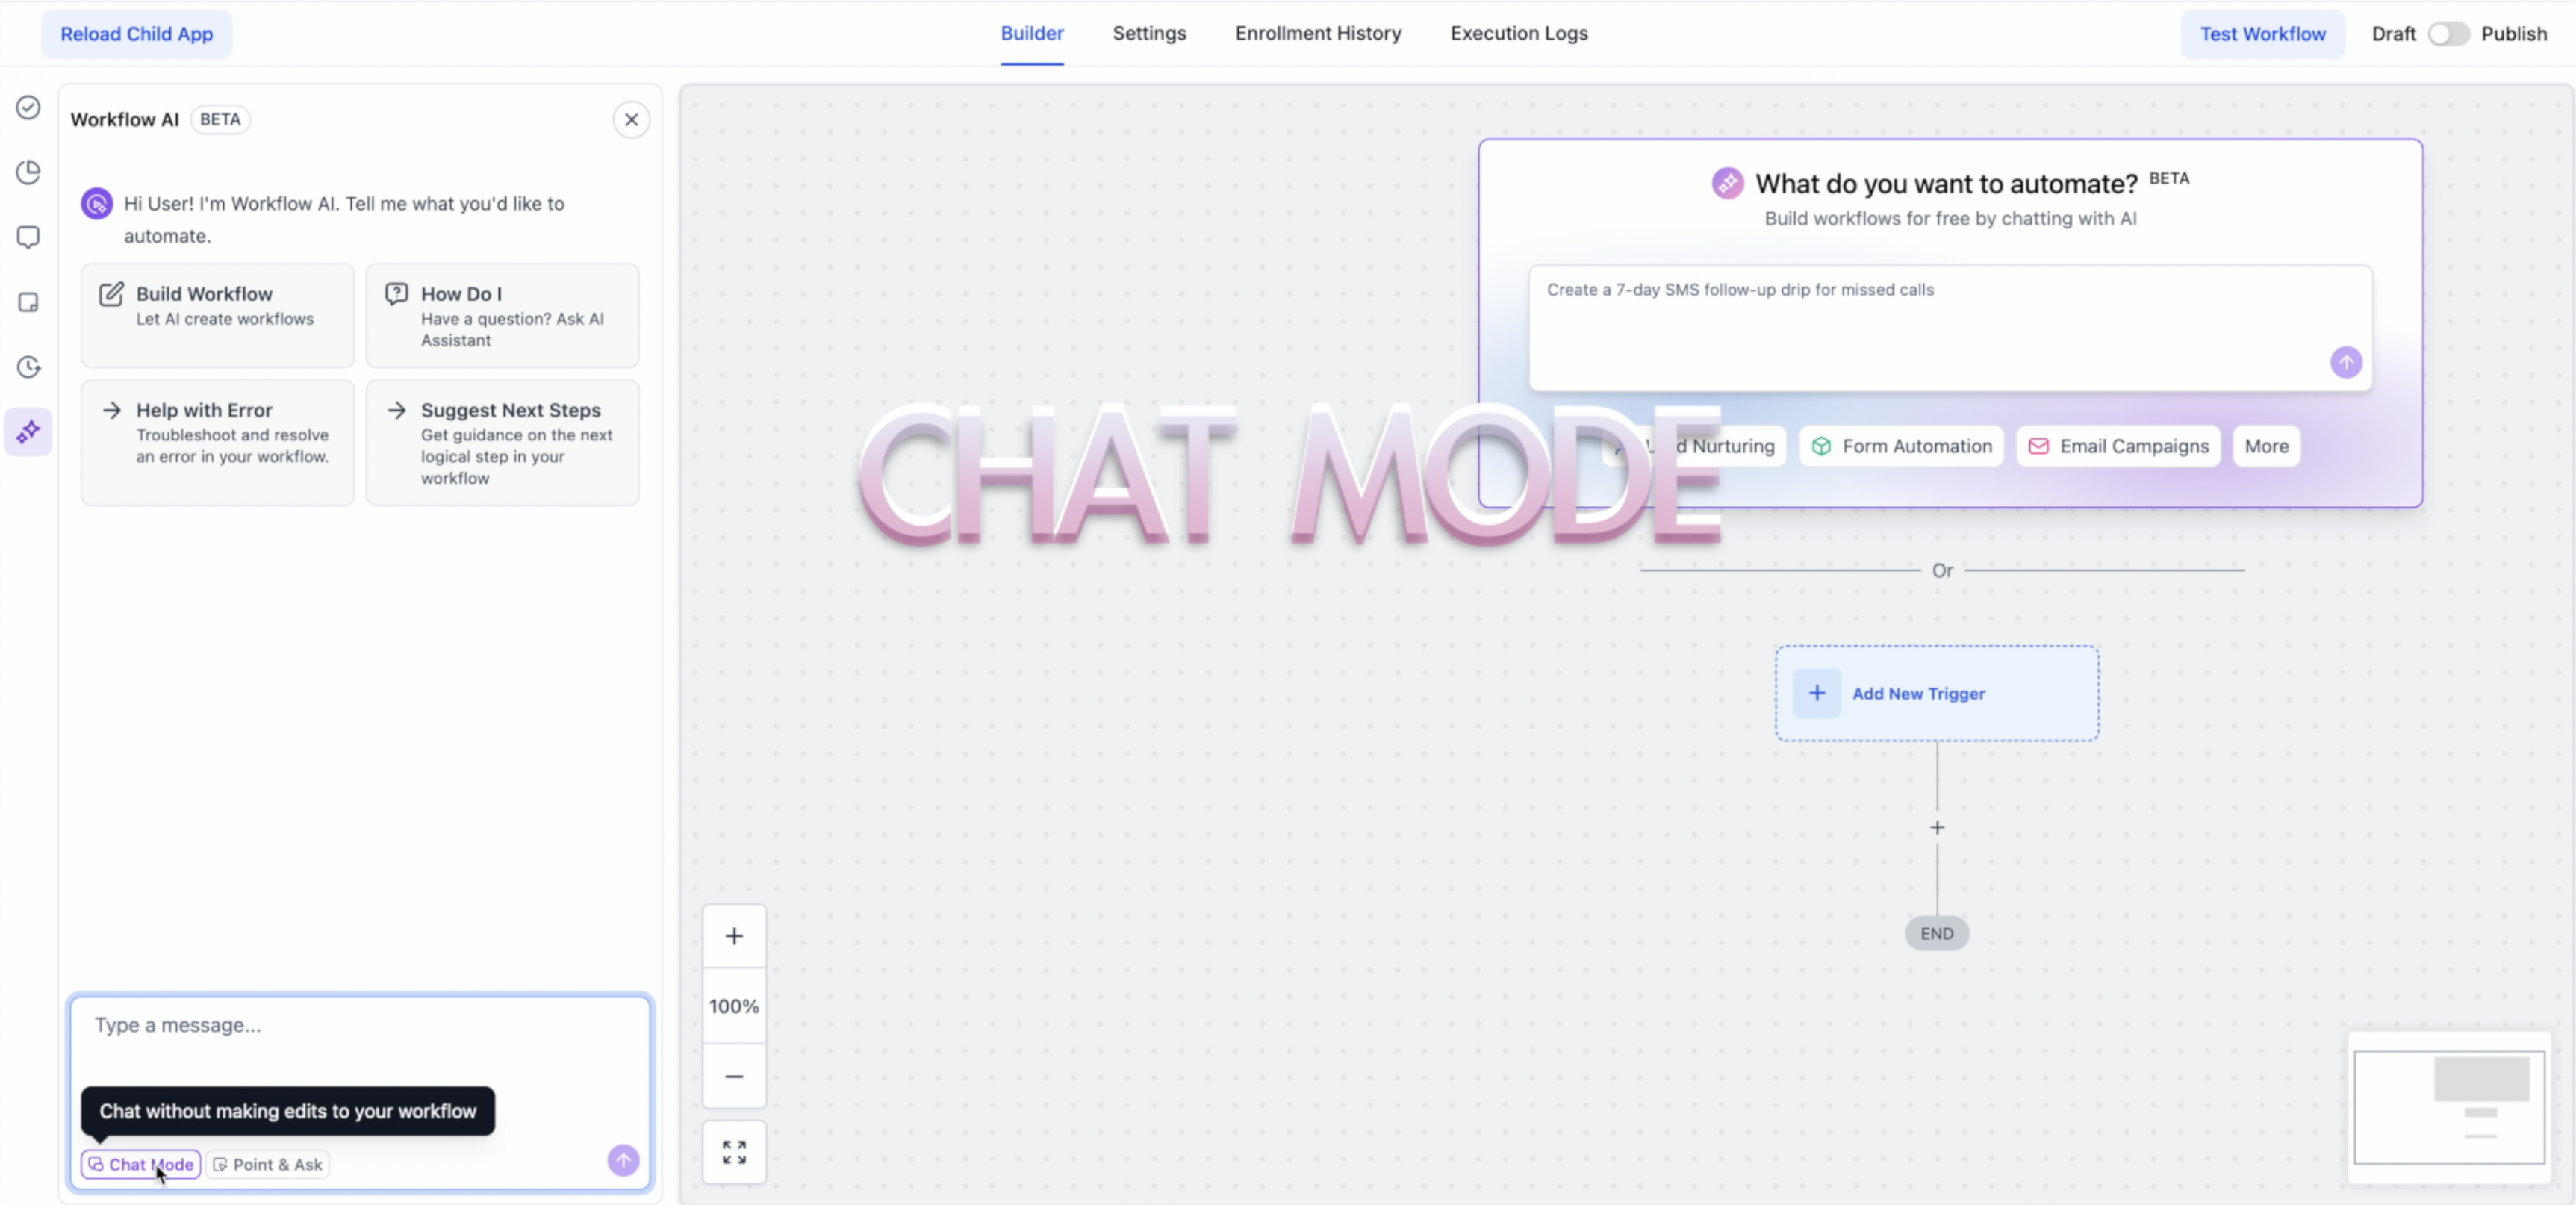
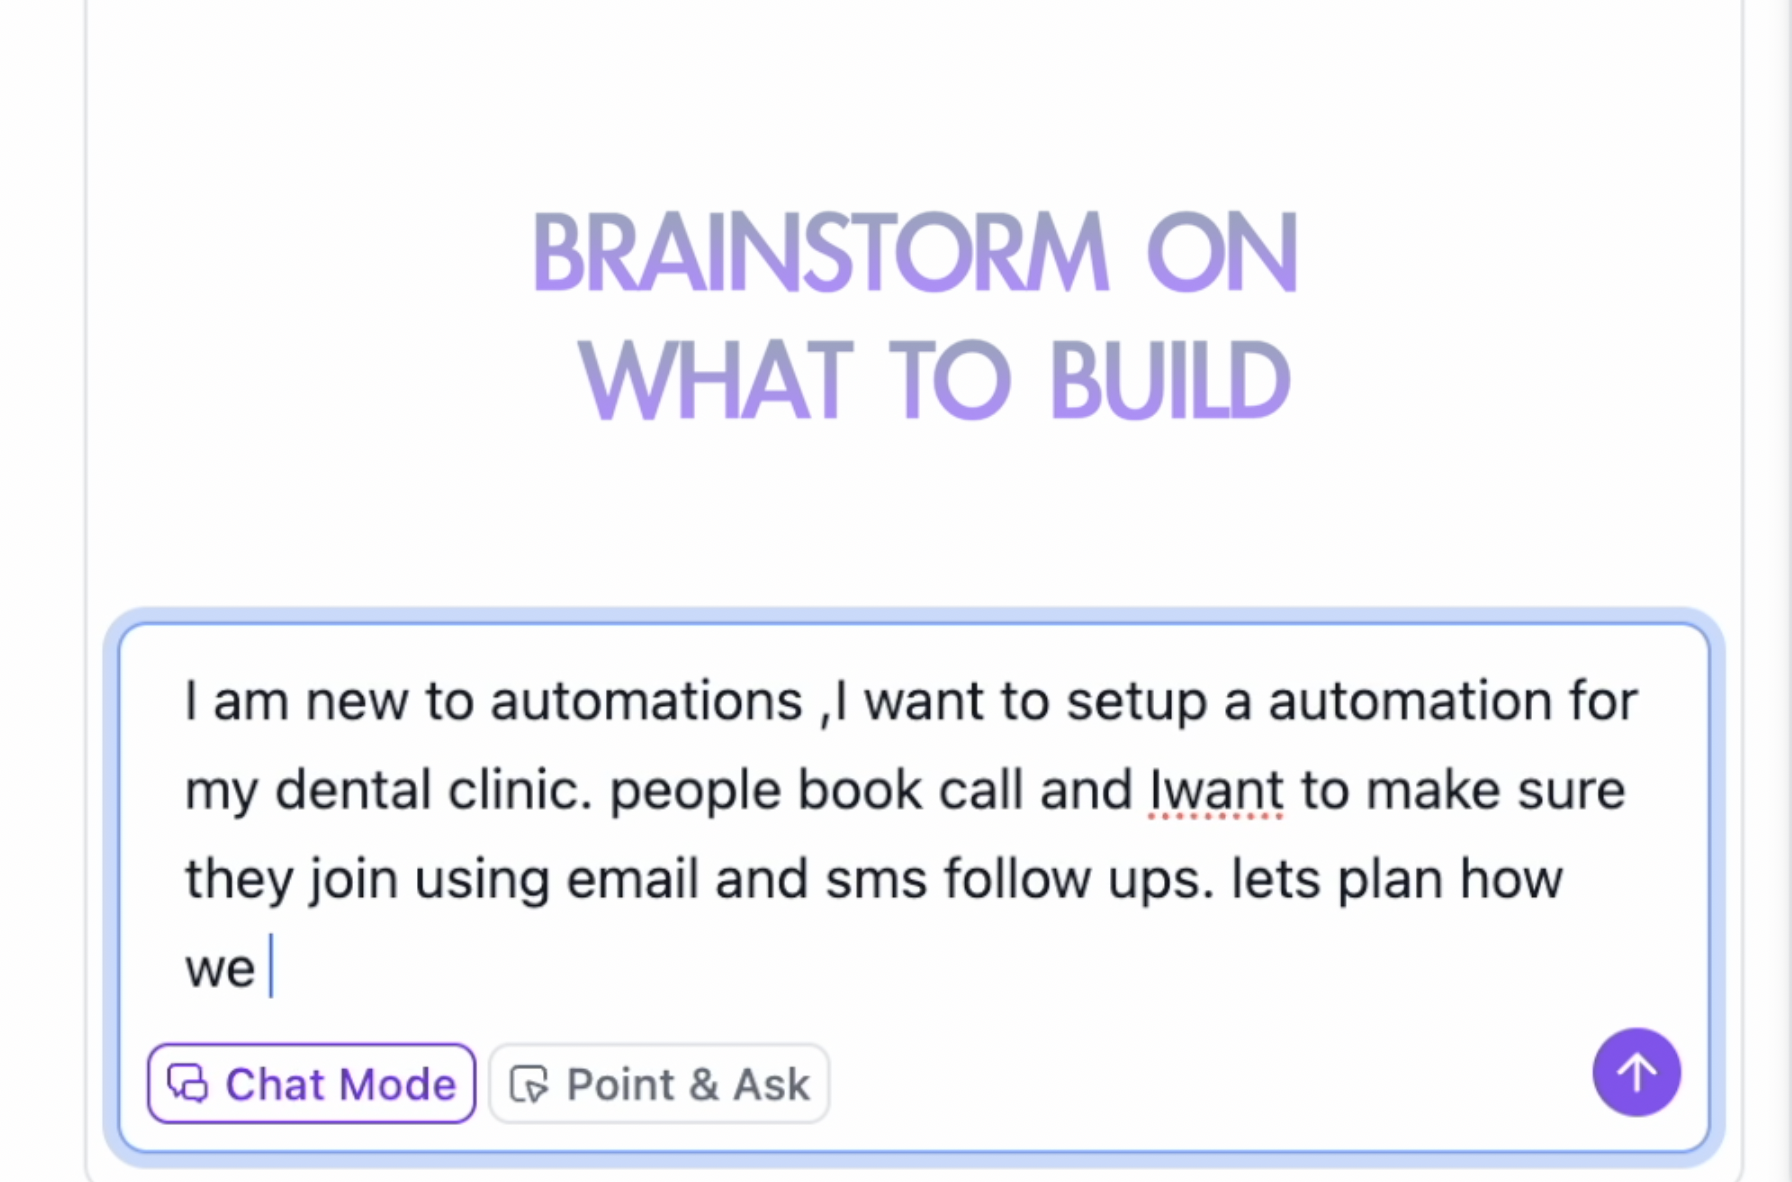
Chat Mode lets you plan without building, so you can co-design requirements with AI before committing changes.
Click Chat Mode in the AI panel to enable brainstorming mode.
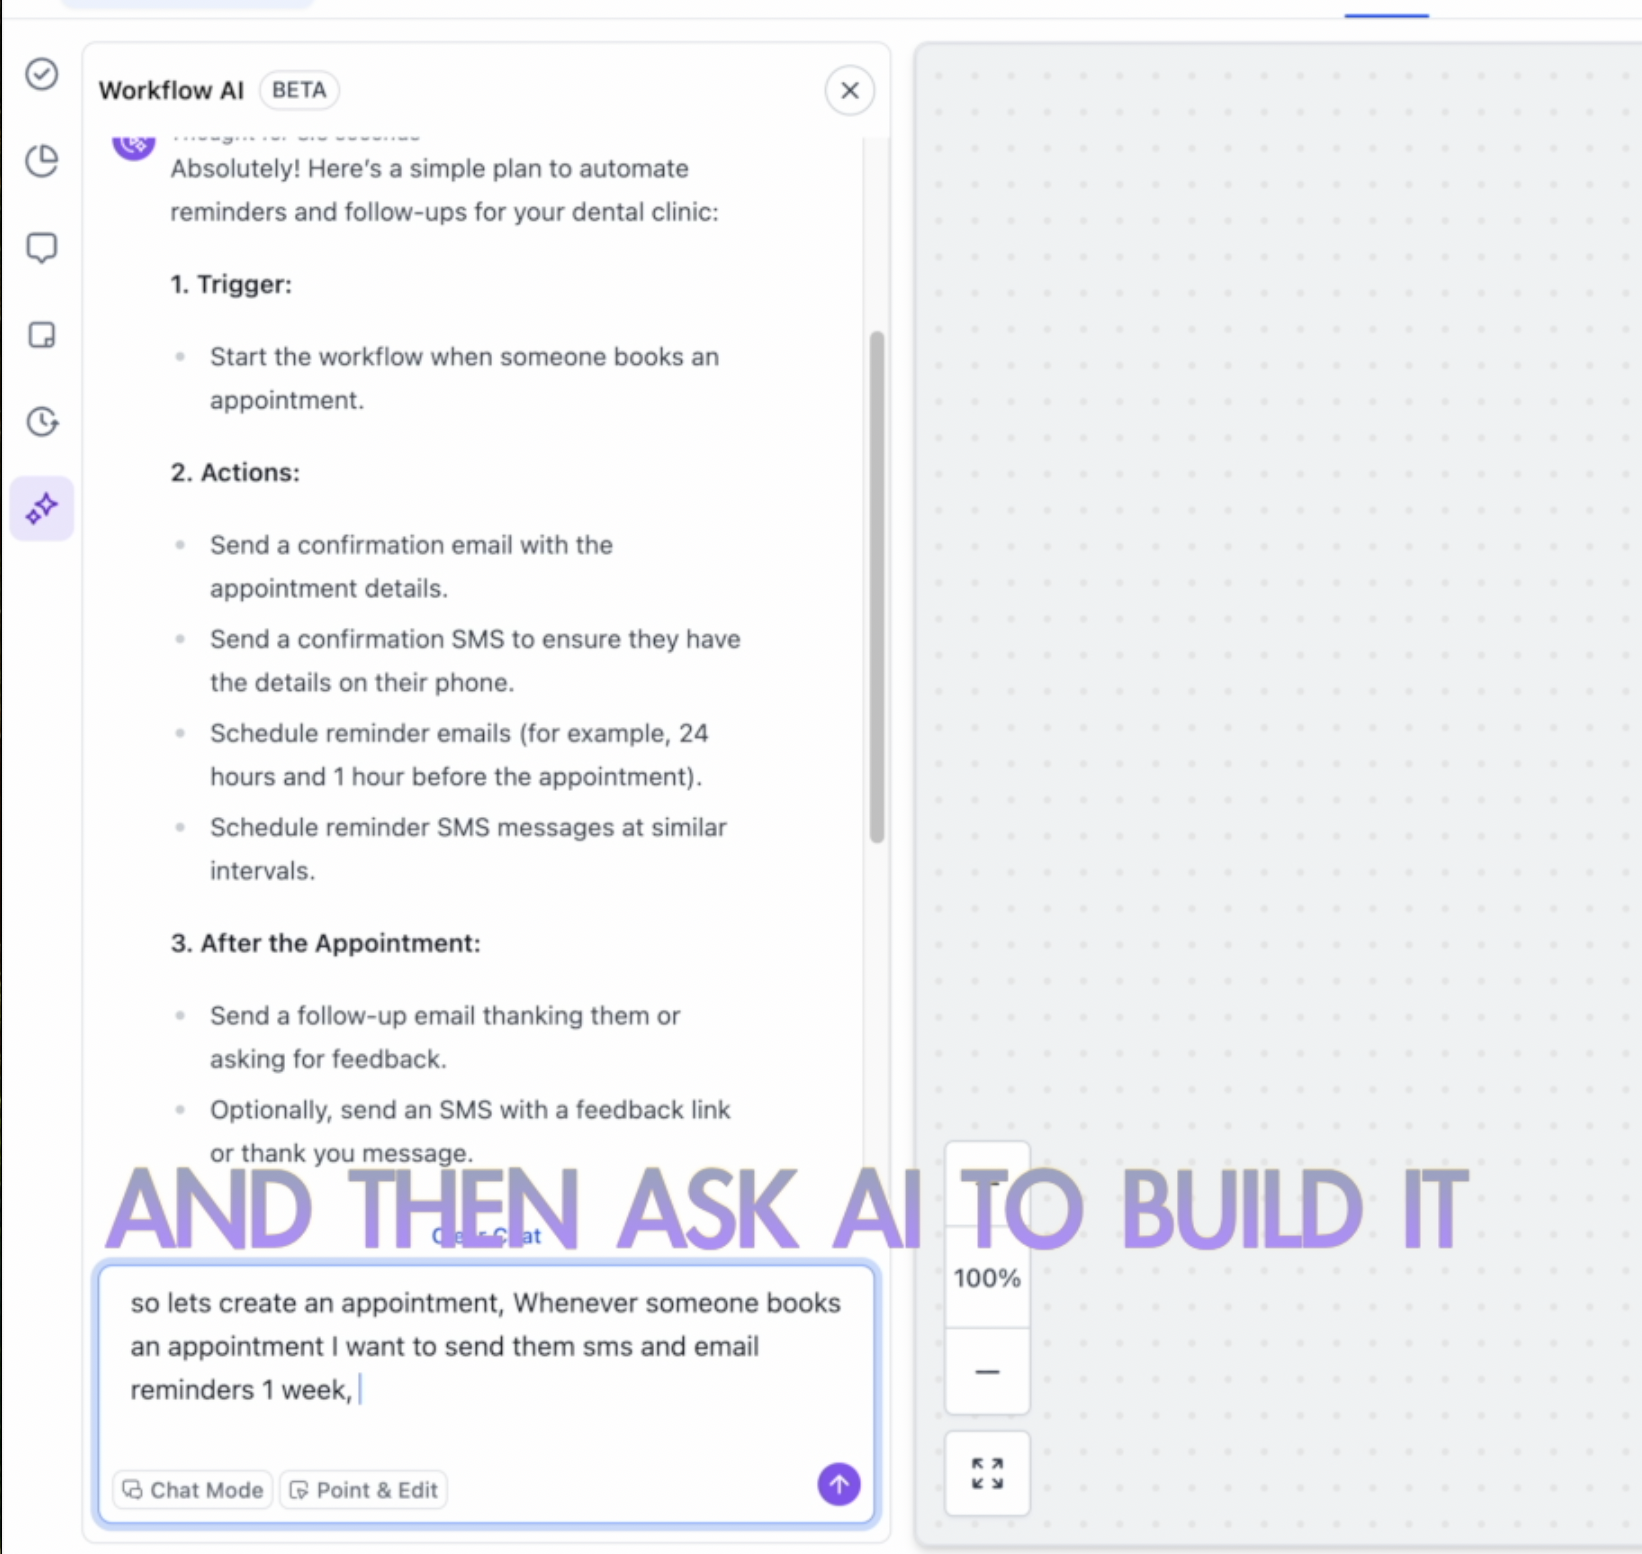
Brainstorm with the AI to plan triggers, actions, branches, and timing, going back and forth to create a plan.
When ready, disable Chat Mode and ask the AI to build the workflow.
After the AI generates a workflow, review the To-Do List ("Complete these steps before executing your workflow") for items that still need your input, such as credentials, required fields, or custom values. Select a To-Do item to jump directly to the related action, then complete the missing details before publishing. This helps prevent incomplete workflows from going live. Common items include connecting integration credentials, selecting the correct account, choosing a pipeline, adding required field values, and defining step-specific settings when multiple options exist.
Best practices:
Be specific and clear. Example: "When a contact books an appointment, wait 24 hours, then send a confirmation email and a reminder SMS one day before the appointment."
Include key details: timing, channels, conditions or filters, and content type.
Use action verbs such as Send, Notify, Create, Update, Wait, and Check if.
Start with simple workflows to learn the capabilities, then increase complexity.
Limits (BETA): the AI Workflow Builder is in Beta. Always manually review triggers, actions, and configurations before publishing. Some complex configurations may need manual adjustment. The AI cannot test workflows, so perform a live test before activating. A feedback chatbot opens when a workflow is created; use thumbs up or thumbs down to help improve generation quality.
You can disable the AI Workflow Builder at the agency level under Settings > Labs, or at the sub-account level under Automation > Global Workflow Settings > Workflow AI by toggling off AI Builder.
Med-spa example: A new patient submits your consultation request form. You type, "When someone submits the consultation request form, send a welcome email introducing our injectors, wait 1 day, then send an SMS inviting them to book a free consultation. If they have not booked after 3 days, notify the front desk." The Builder generates the full workflow in seconds. You then say "Restrict messages to Monday through Friday 9 AM to 6 PM," review the To-Do List to confirm the sender email, run a live test, and publish.
The Workflow AI Assistant is a conversational helper inside the builder that supports you as you create, optimize, and manage workflows. Type what you want to build and it returns the actions and triggers needed to achieve it and how to configure them. It also explains your existing workflow, suggests improvements, and answers questions without leaving the page.
Help you with your first workflow by turning a stated goal into the actions and triggers you need, and explaining what workflows are.
Break down your workflow by describing what an unclear part is doing.
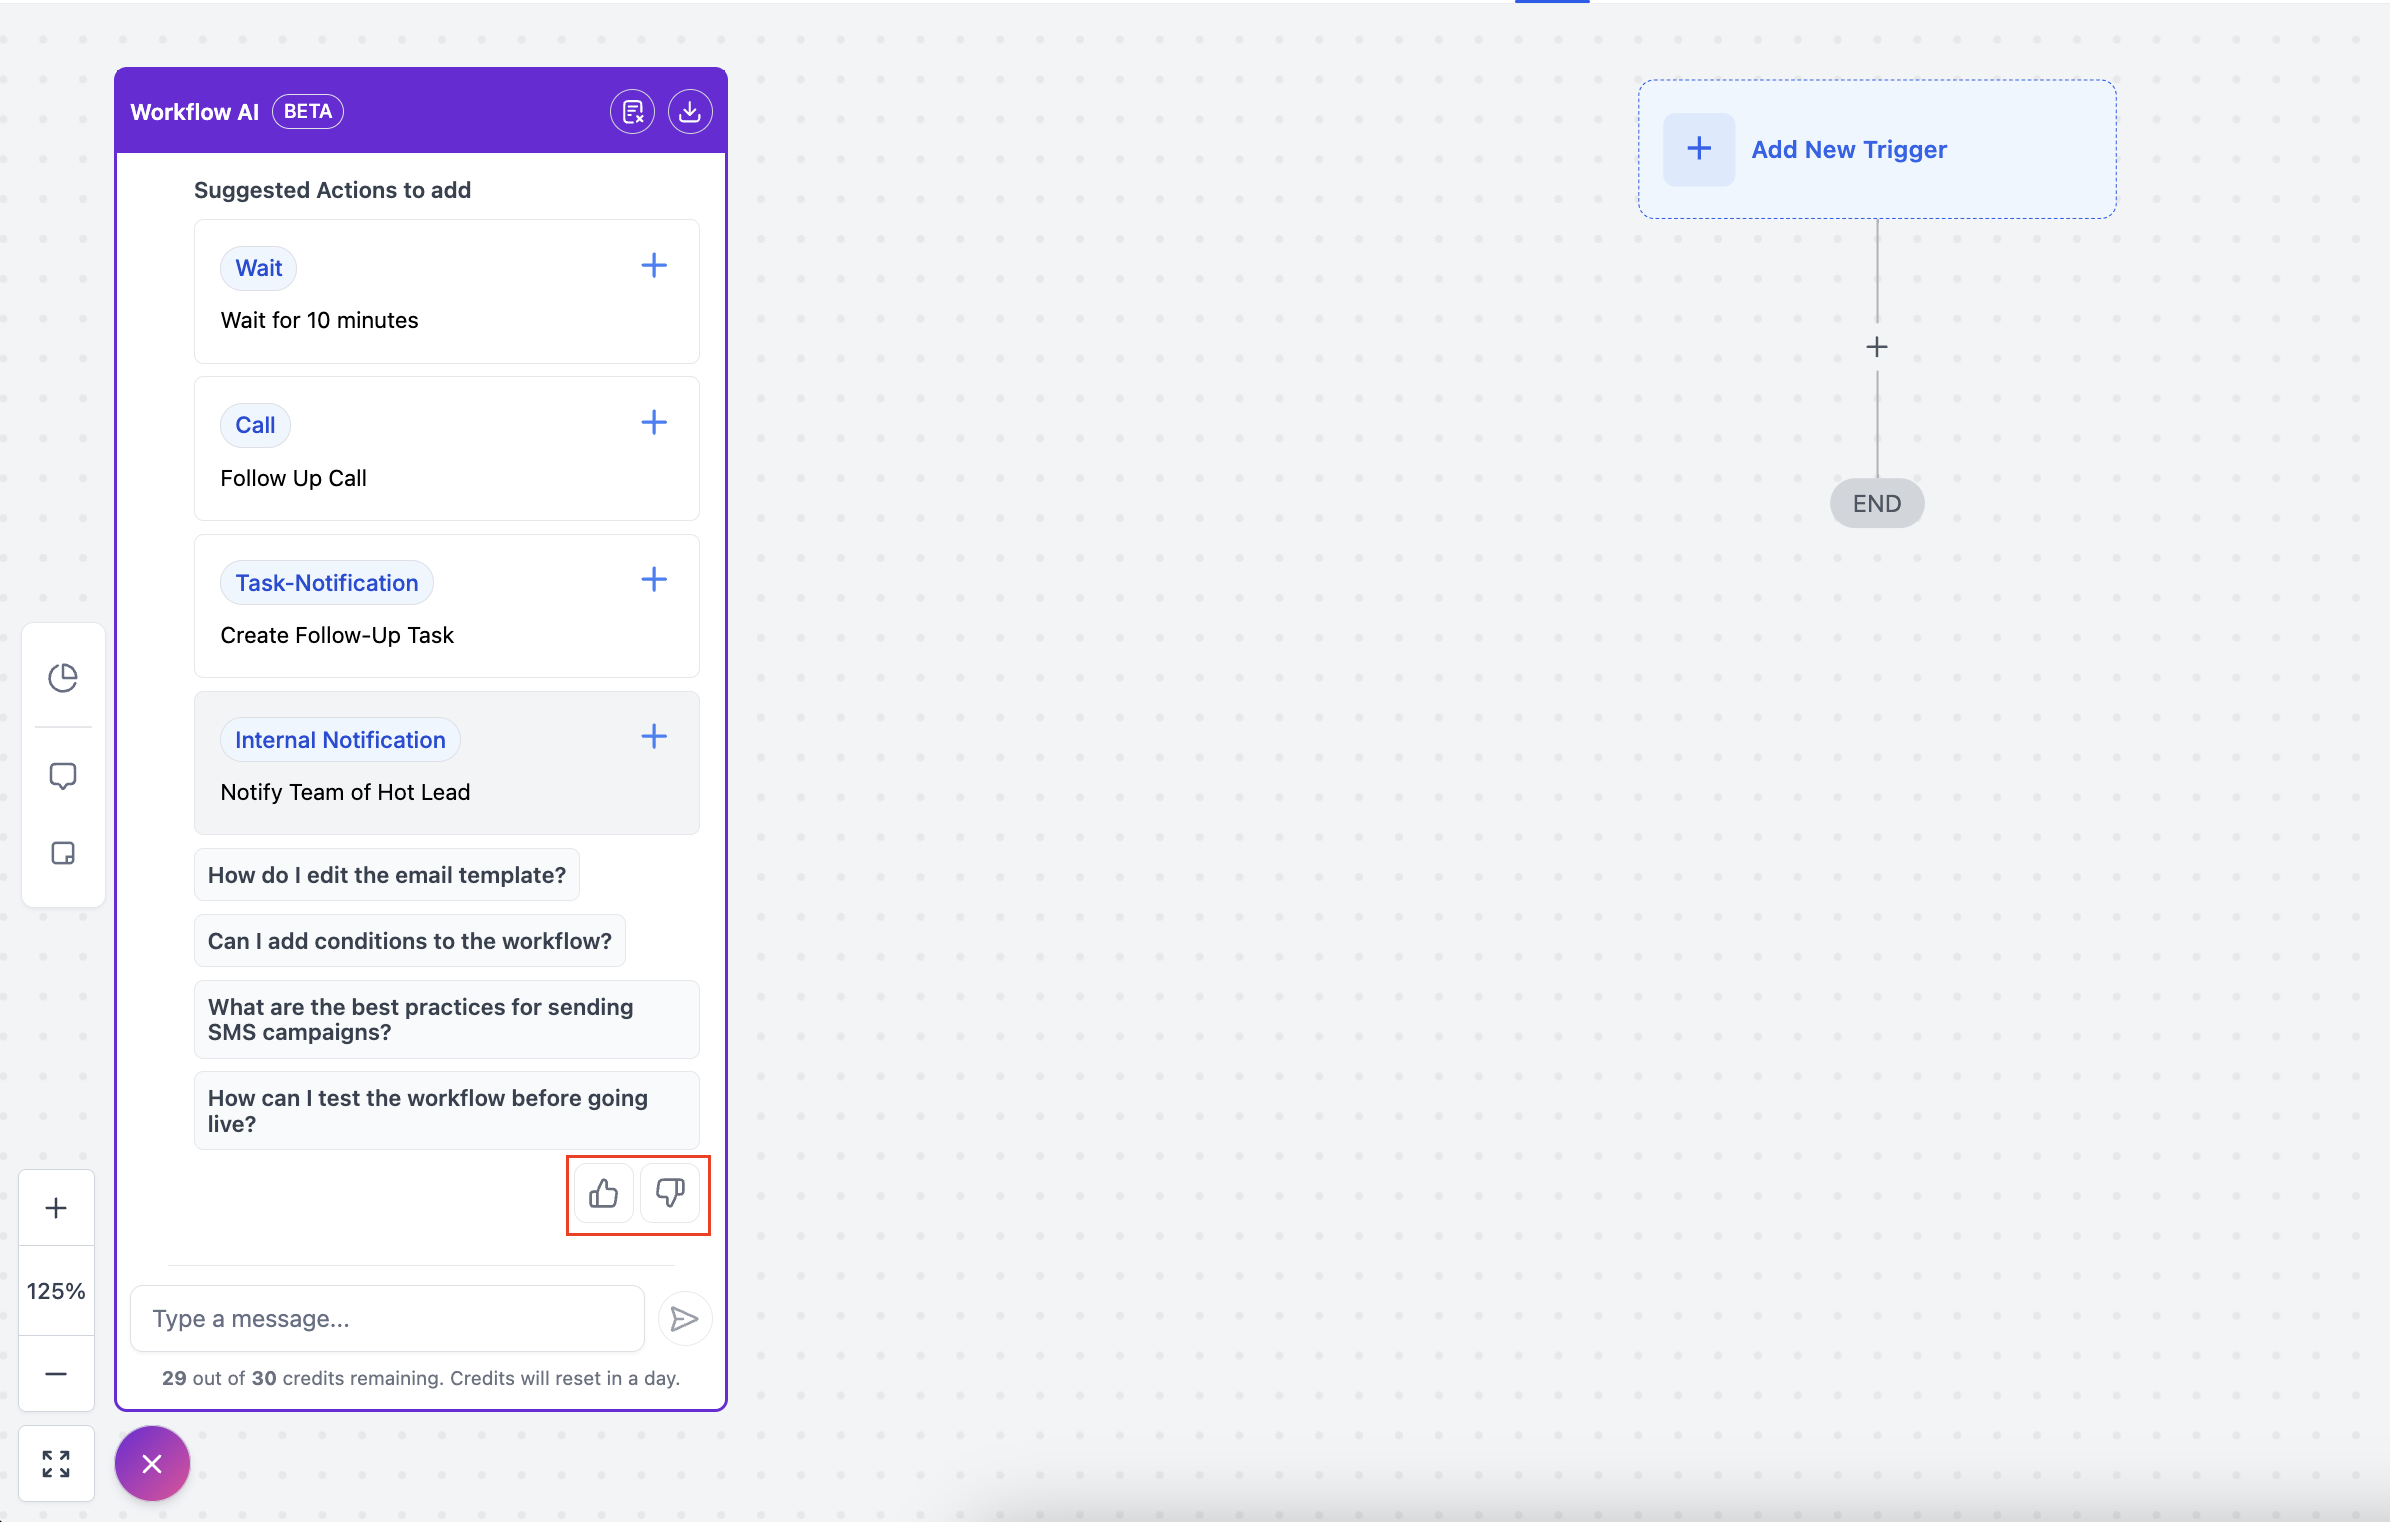
Make your workflows more efficient by scanning for improvements and suggesting actions to add.
Provide step-by-step guidance through setup, explaining each step.
Answer questions about specific actions or general best practices while you work.
Add specific actions for you, such as sending an SMS reminder, waiting for confirmation, updating an appointment status, or tagging contacts based on activity.
Suggest next steps so you can move forward with confidence.
Manage workflow settings and naming through natural-language prompts, including re-entry, multiple opportunities, stop on response, timezone and time windows, sender details, and mark conversations as read.
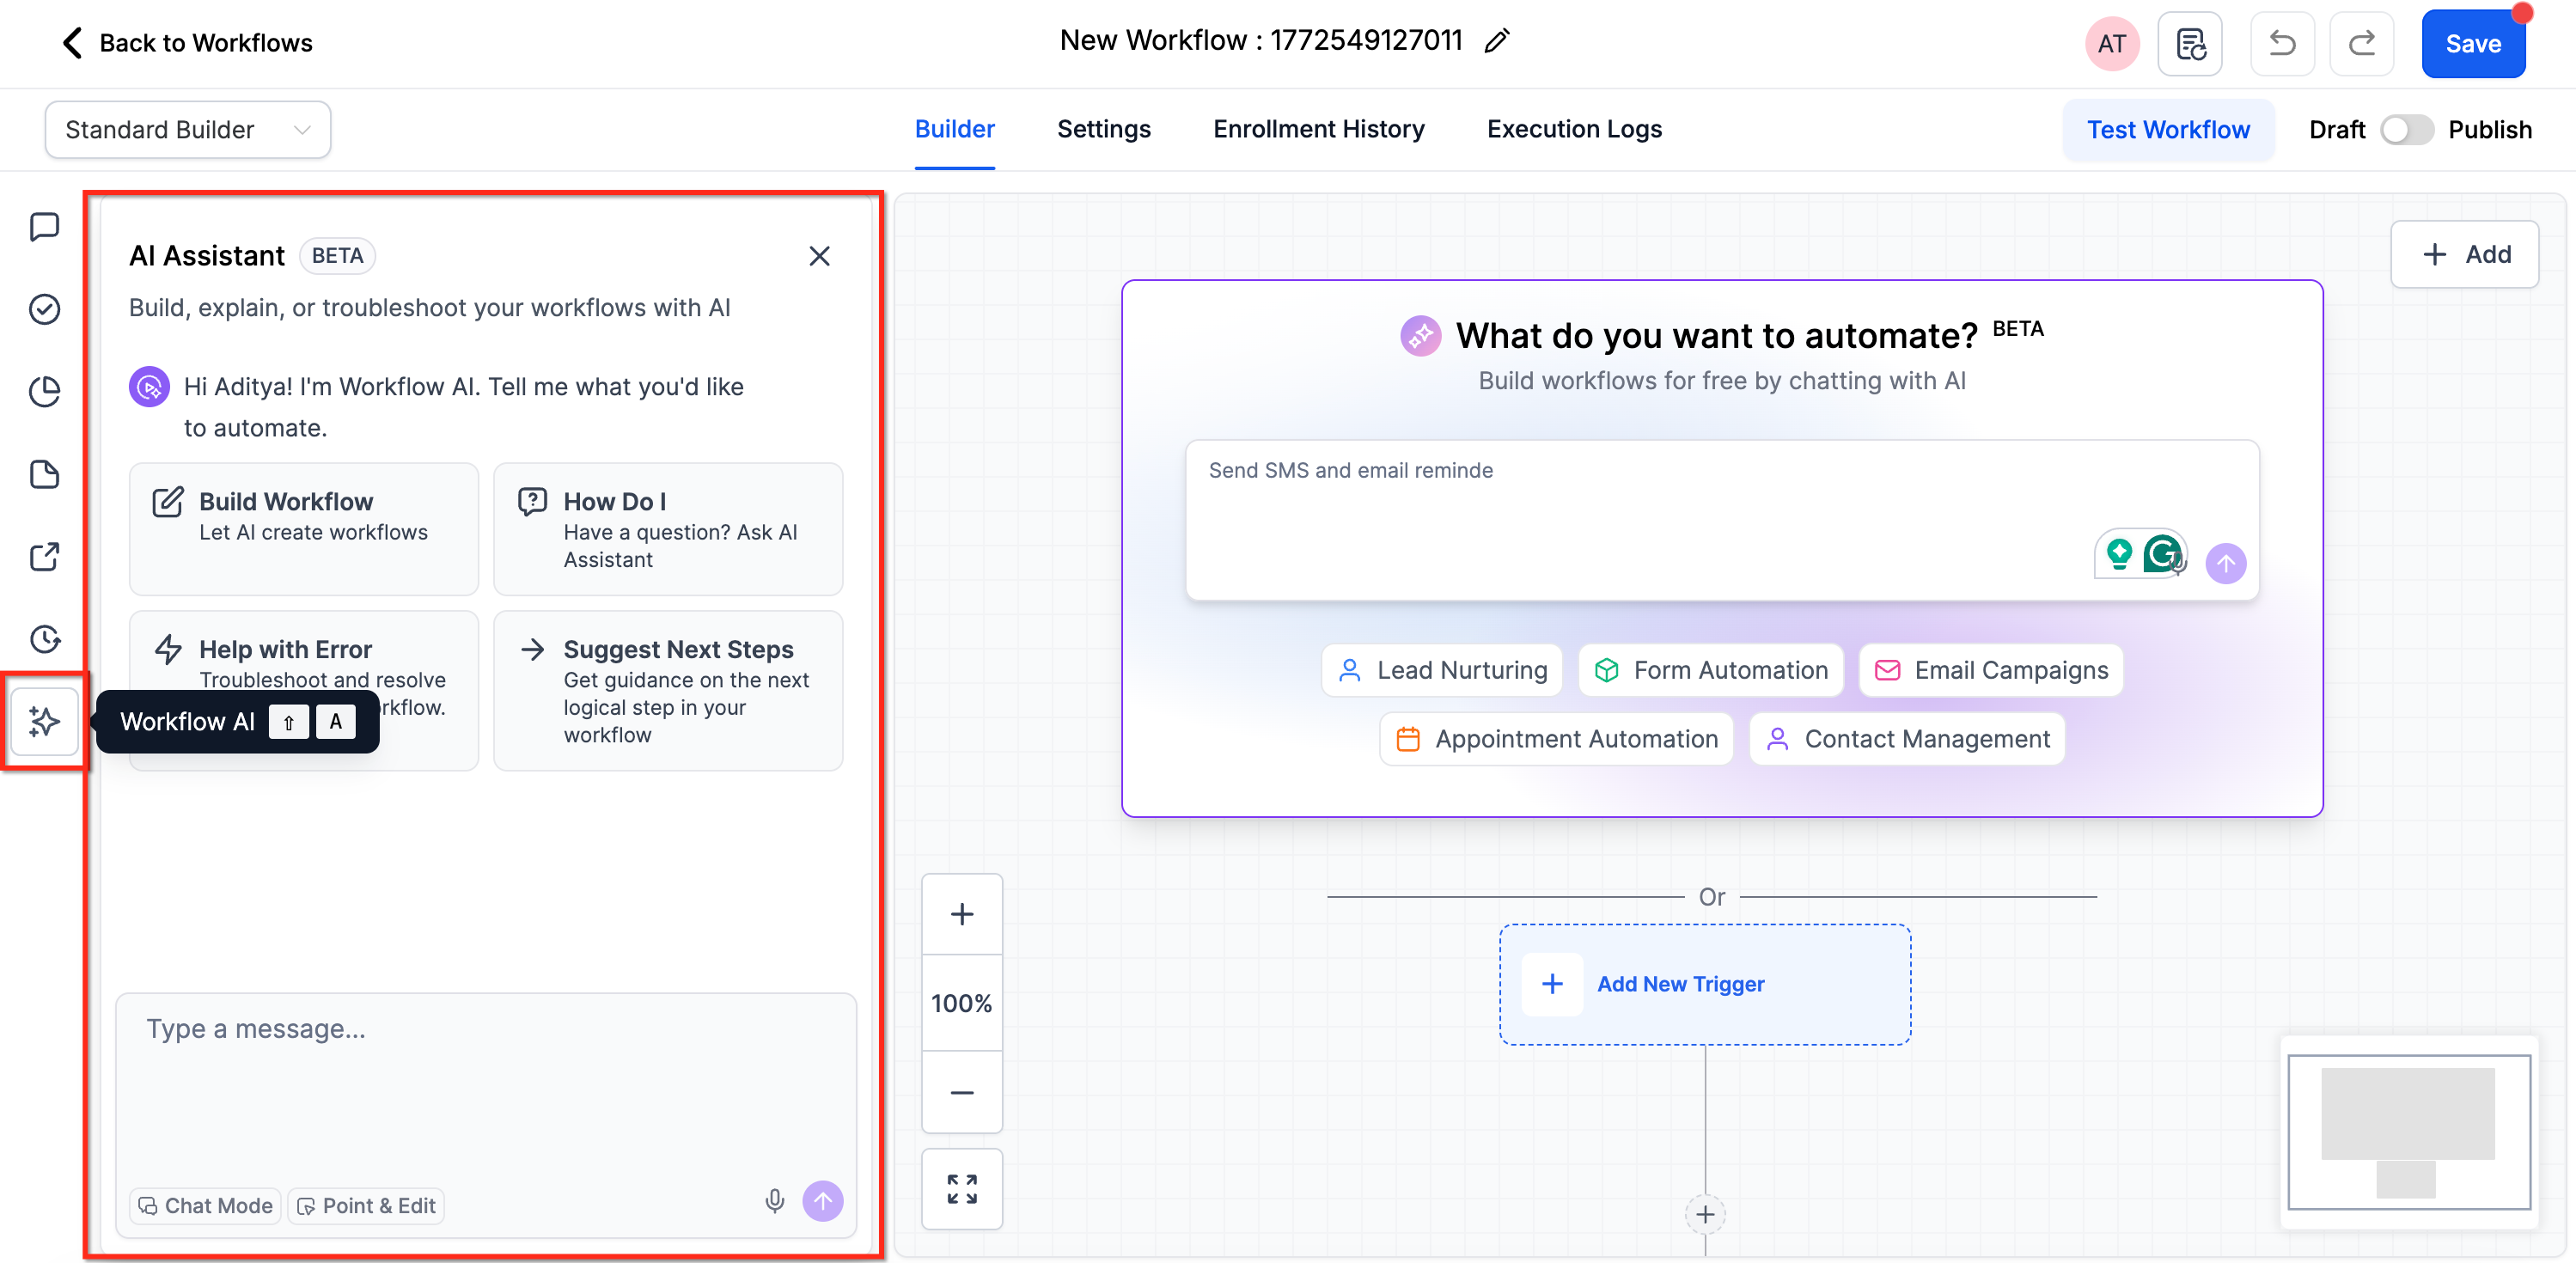
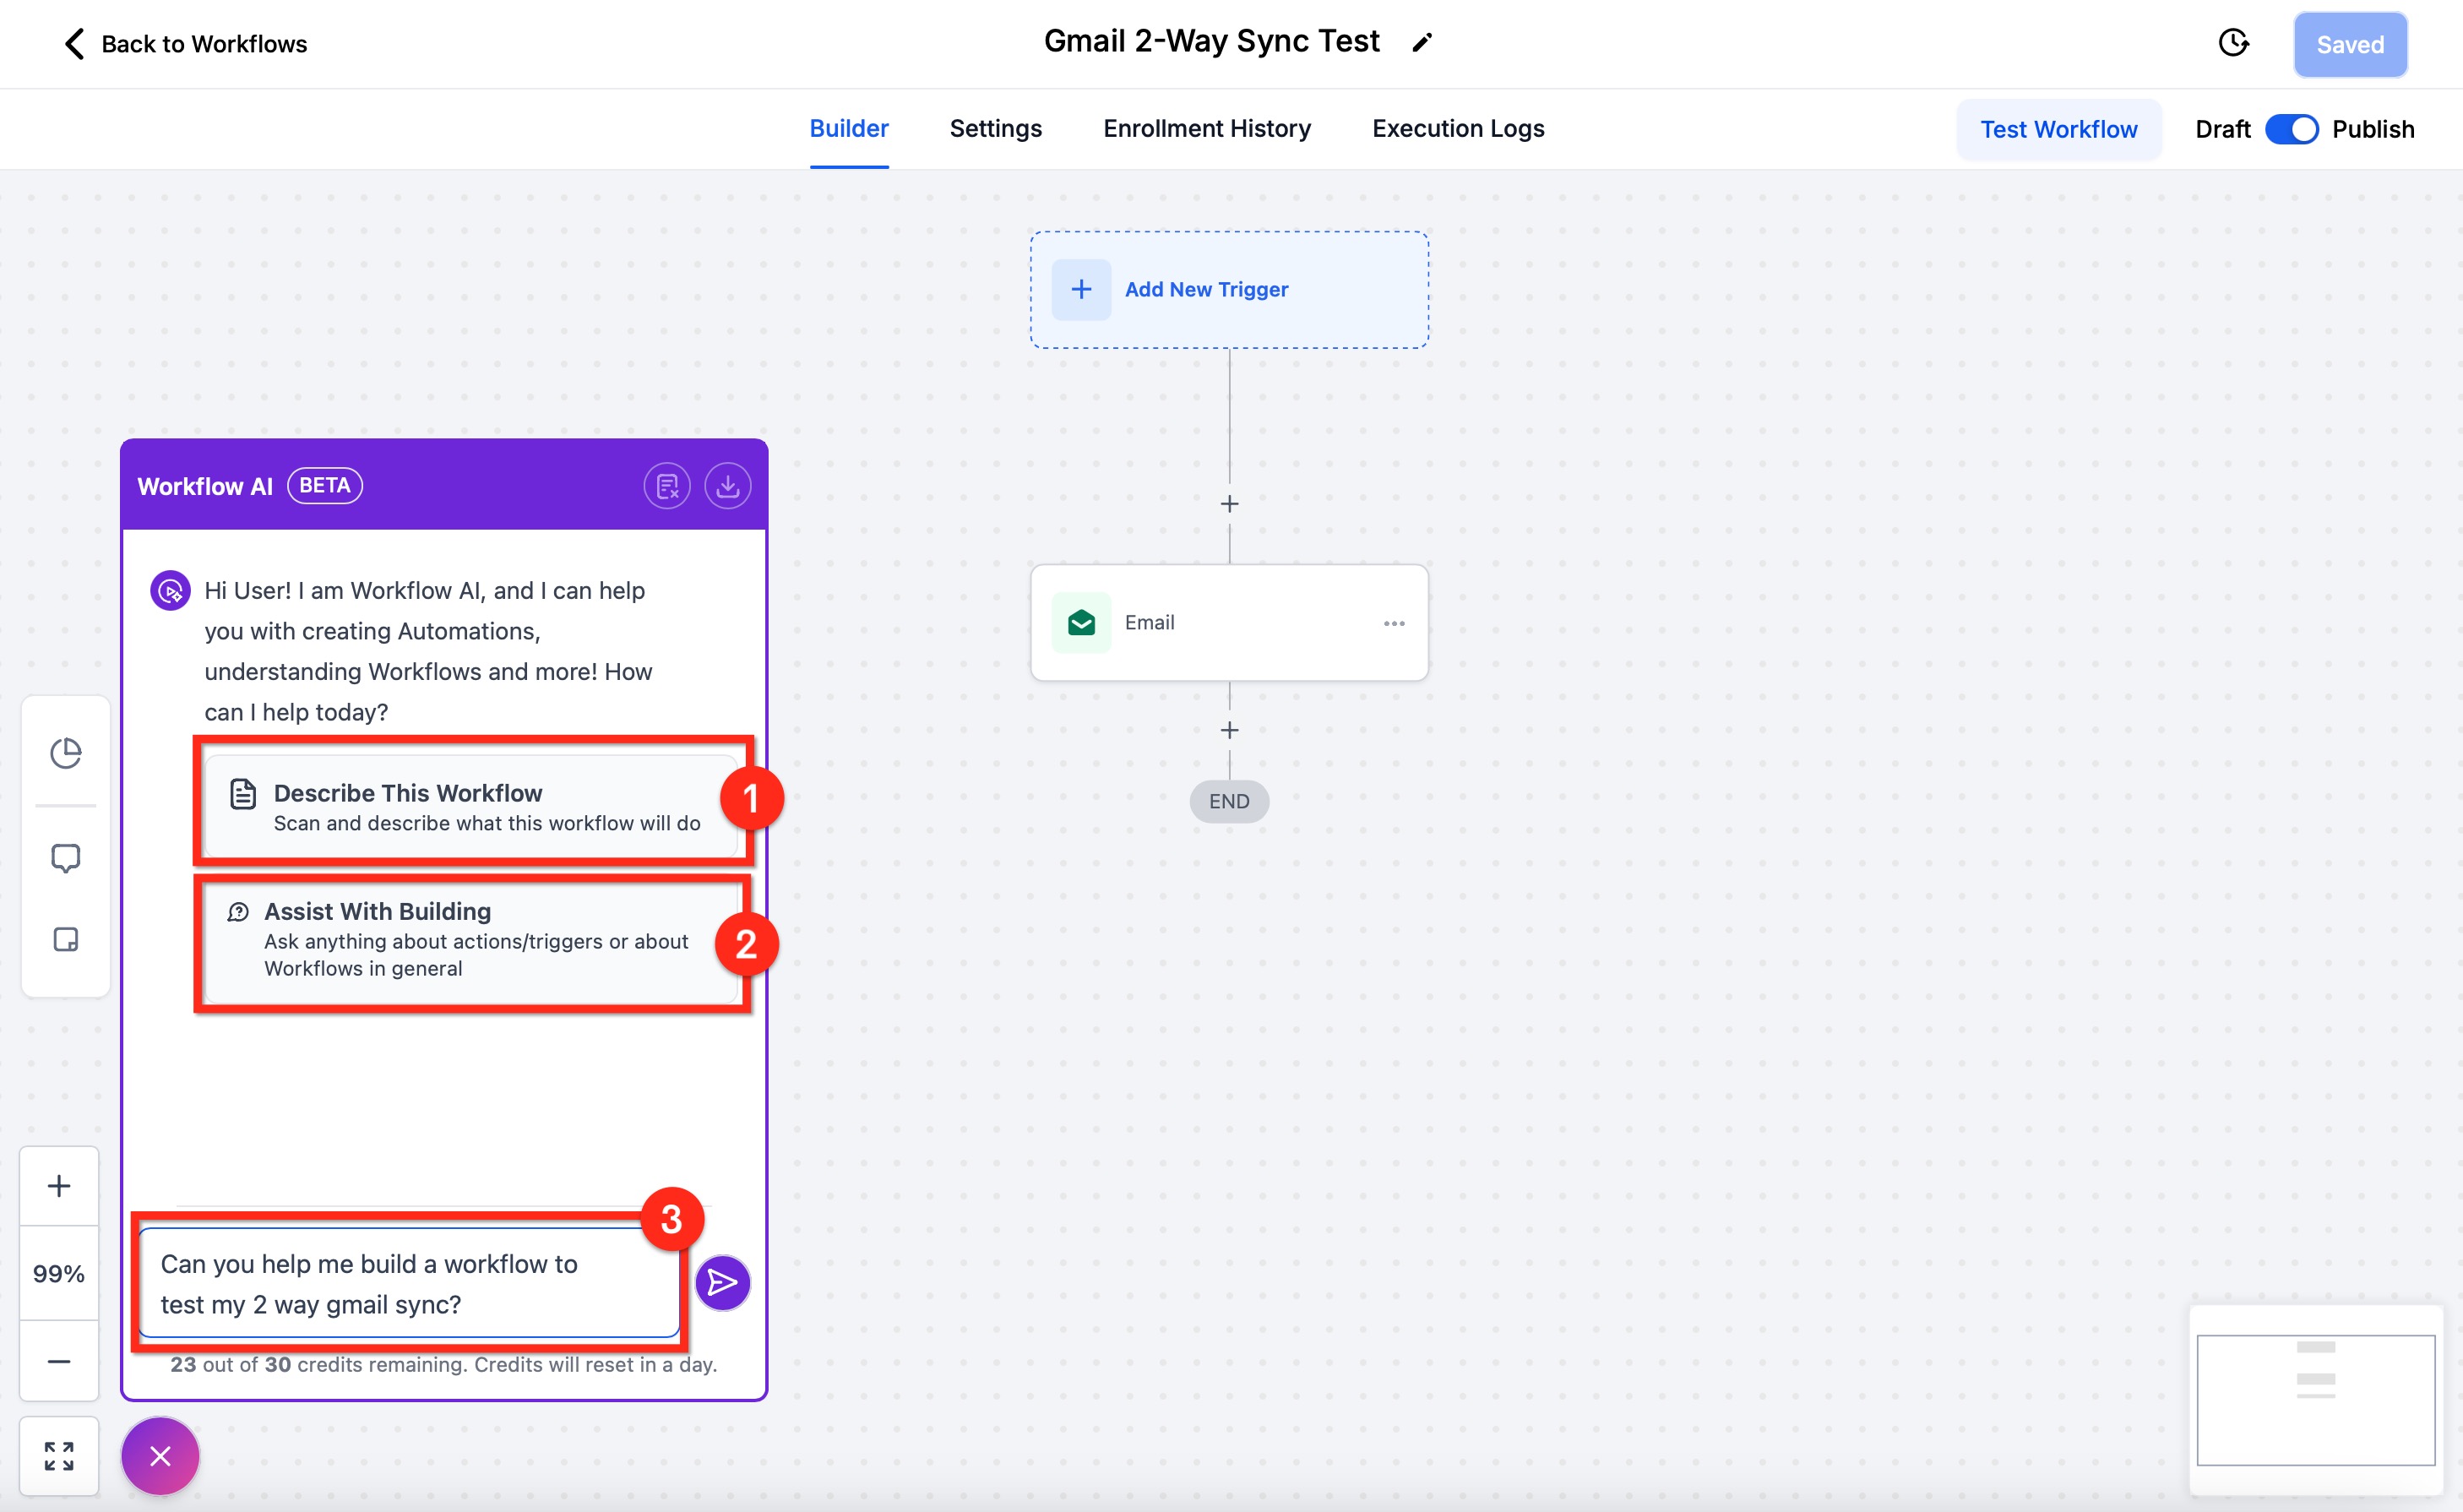
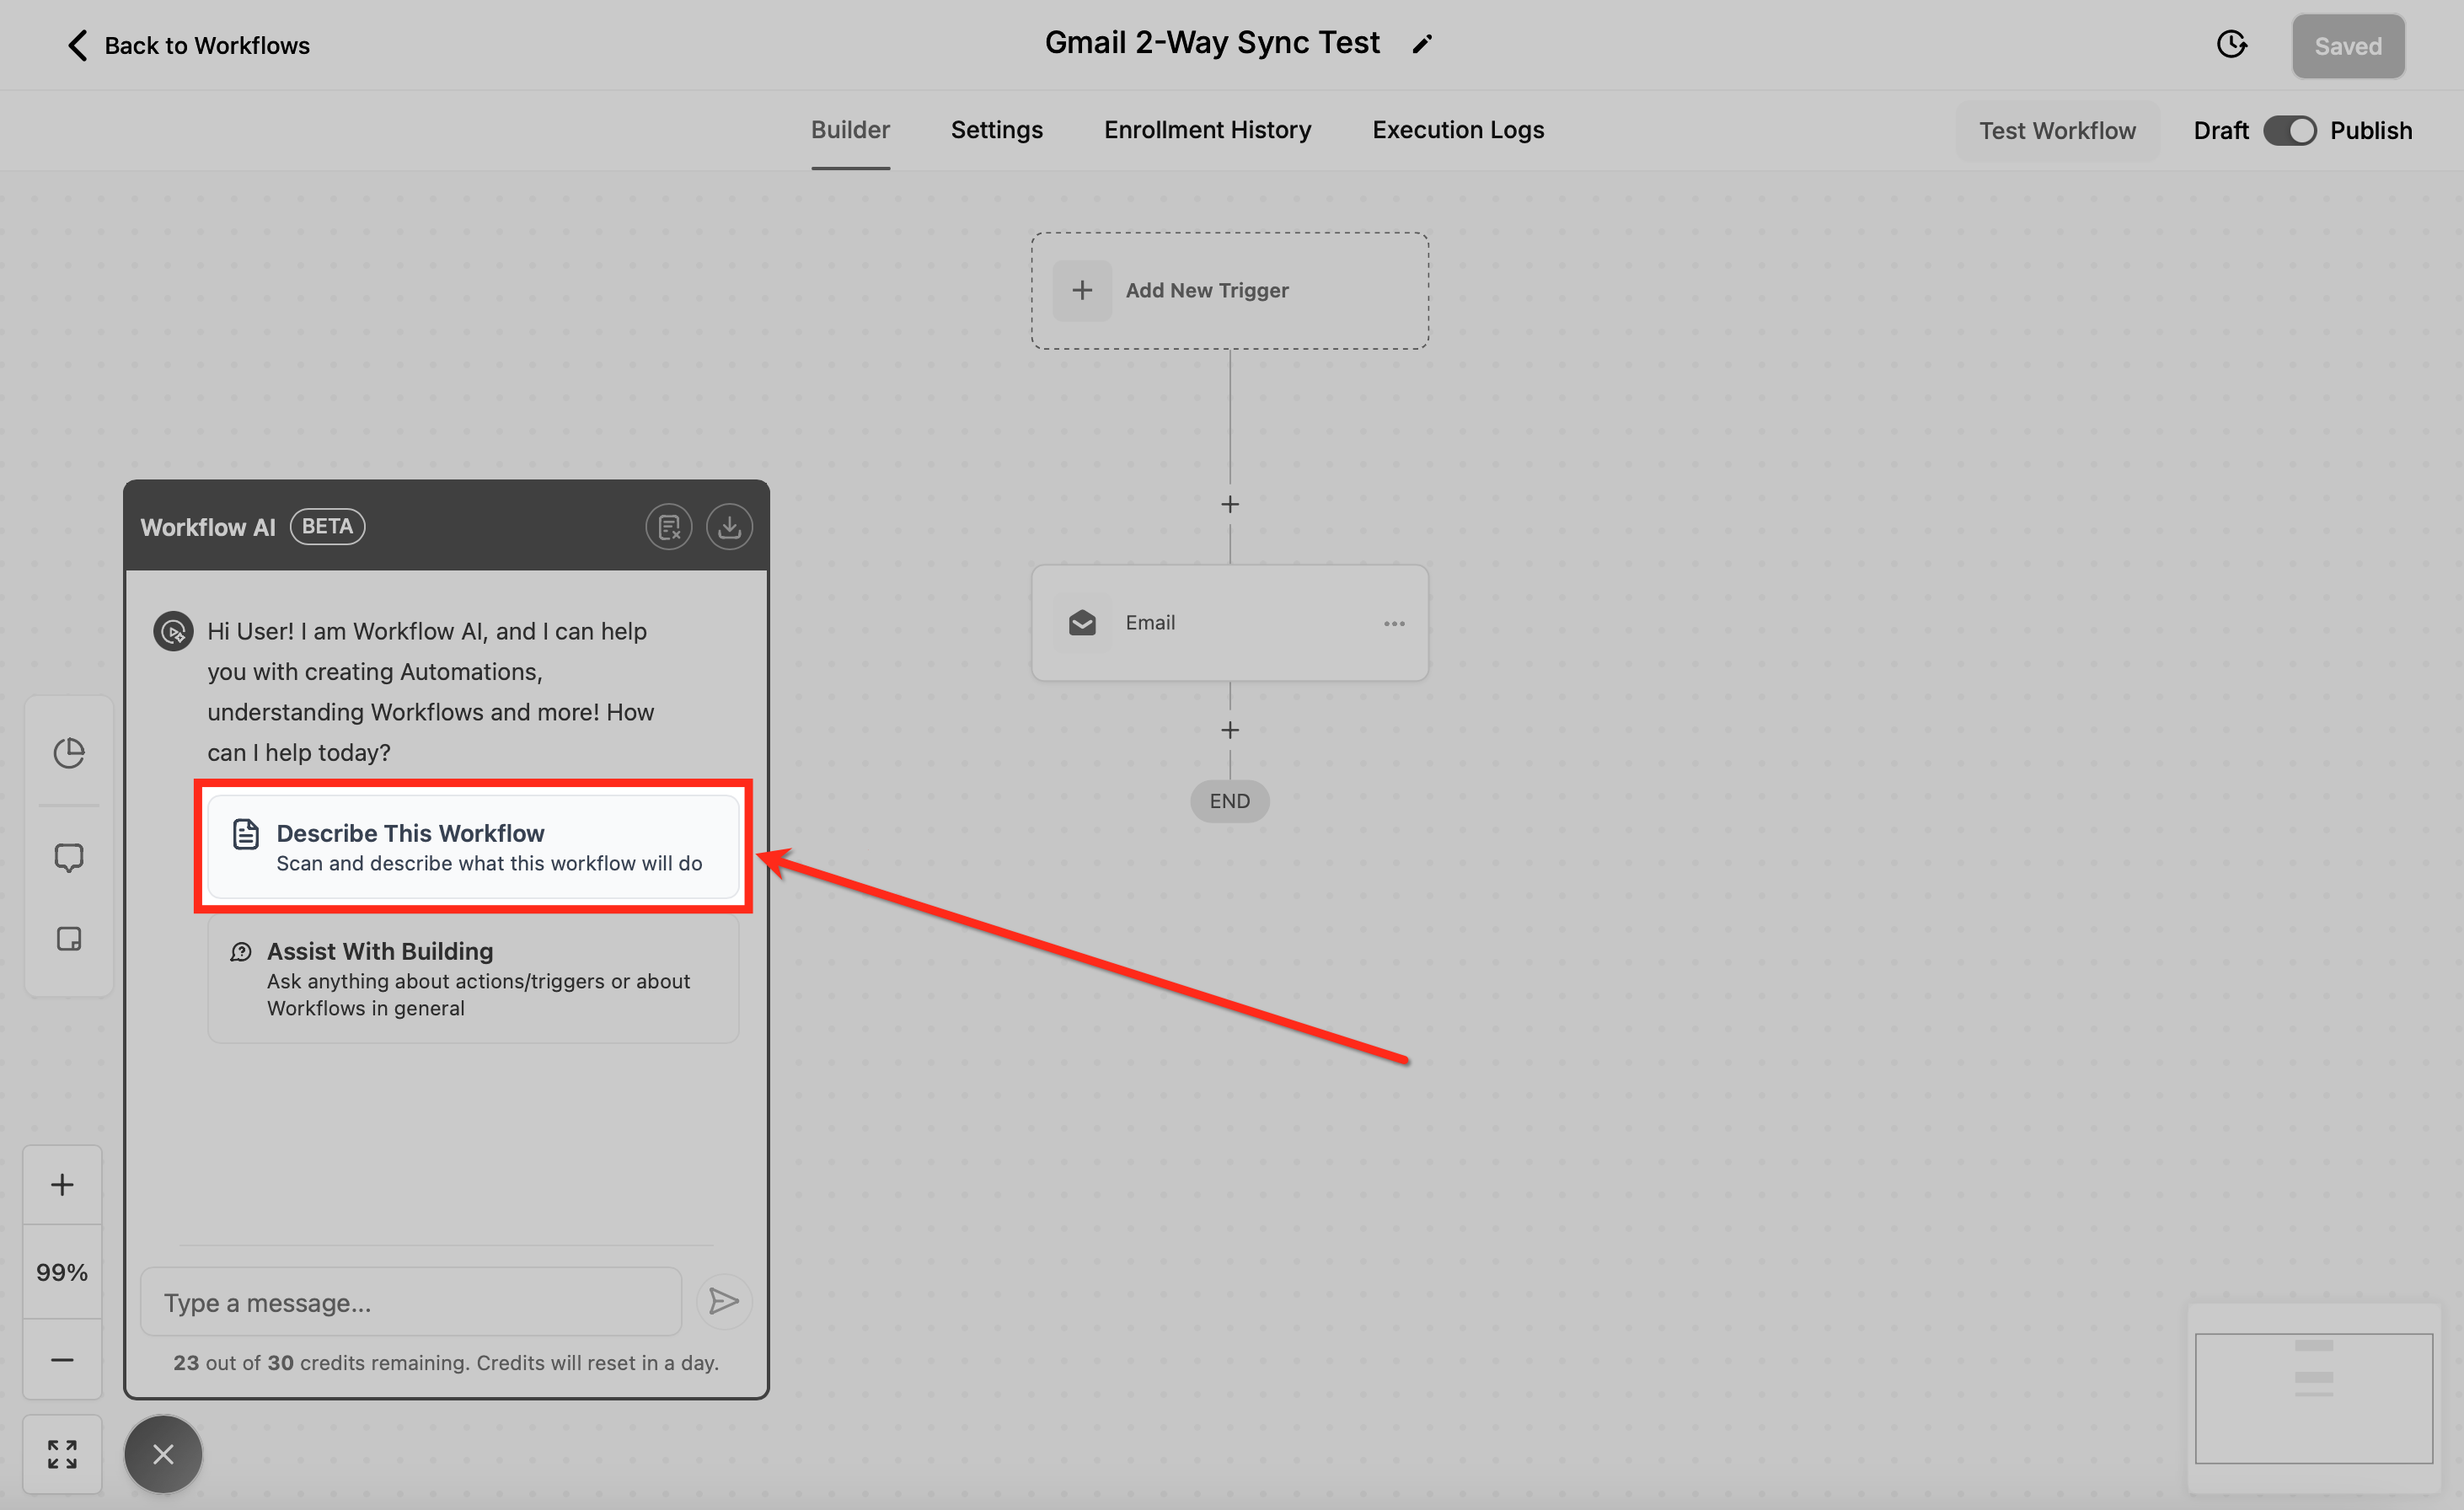
Open the builder and find the Workflow AI icon in the bottom-left corner. Click it to open the chat box. There are three ways to chat:
Analyze Workflow: click "Describe this Workflow" to have the Assistant analyze your workflow.
Help Building: click "Assist with Building" to get suggestions.
Standard Chat: start typing in the text box and ask it anything.
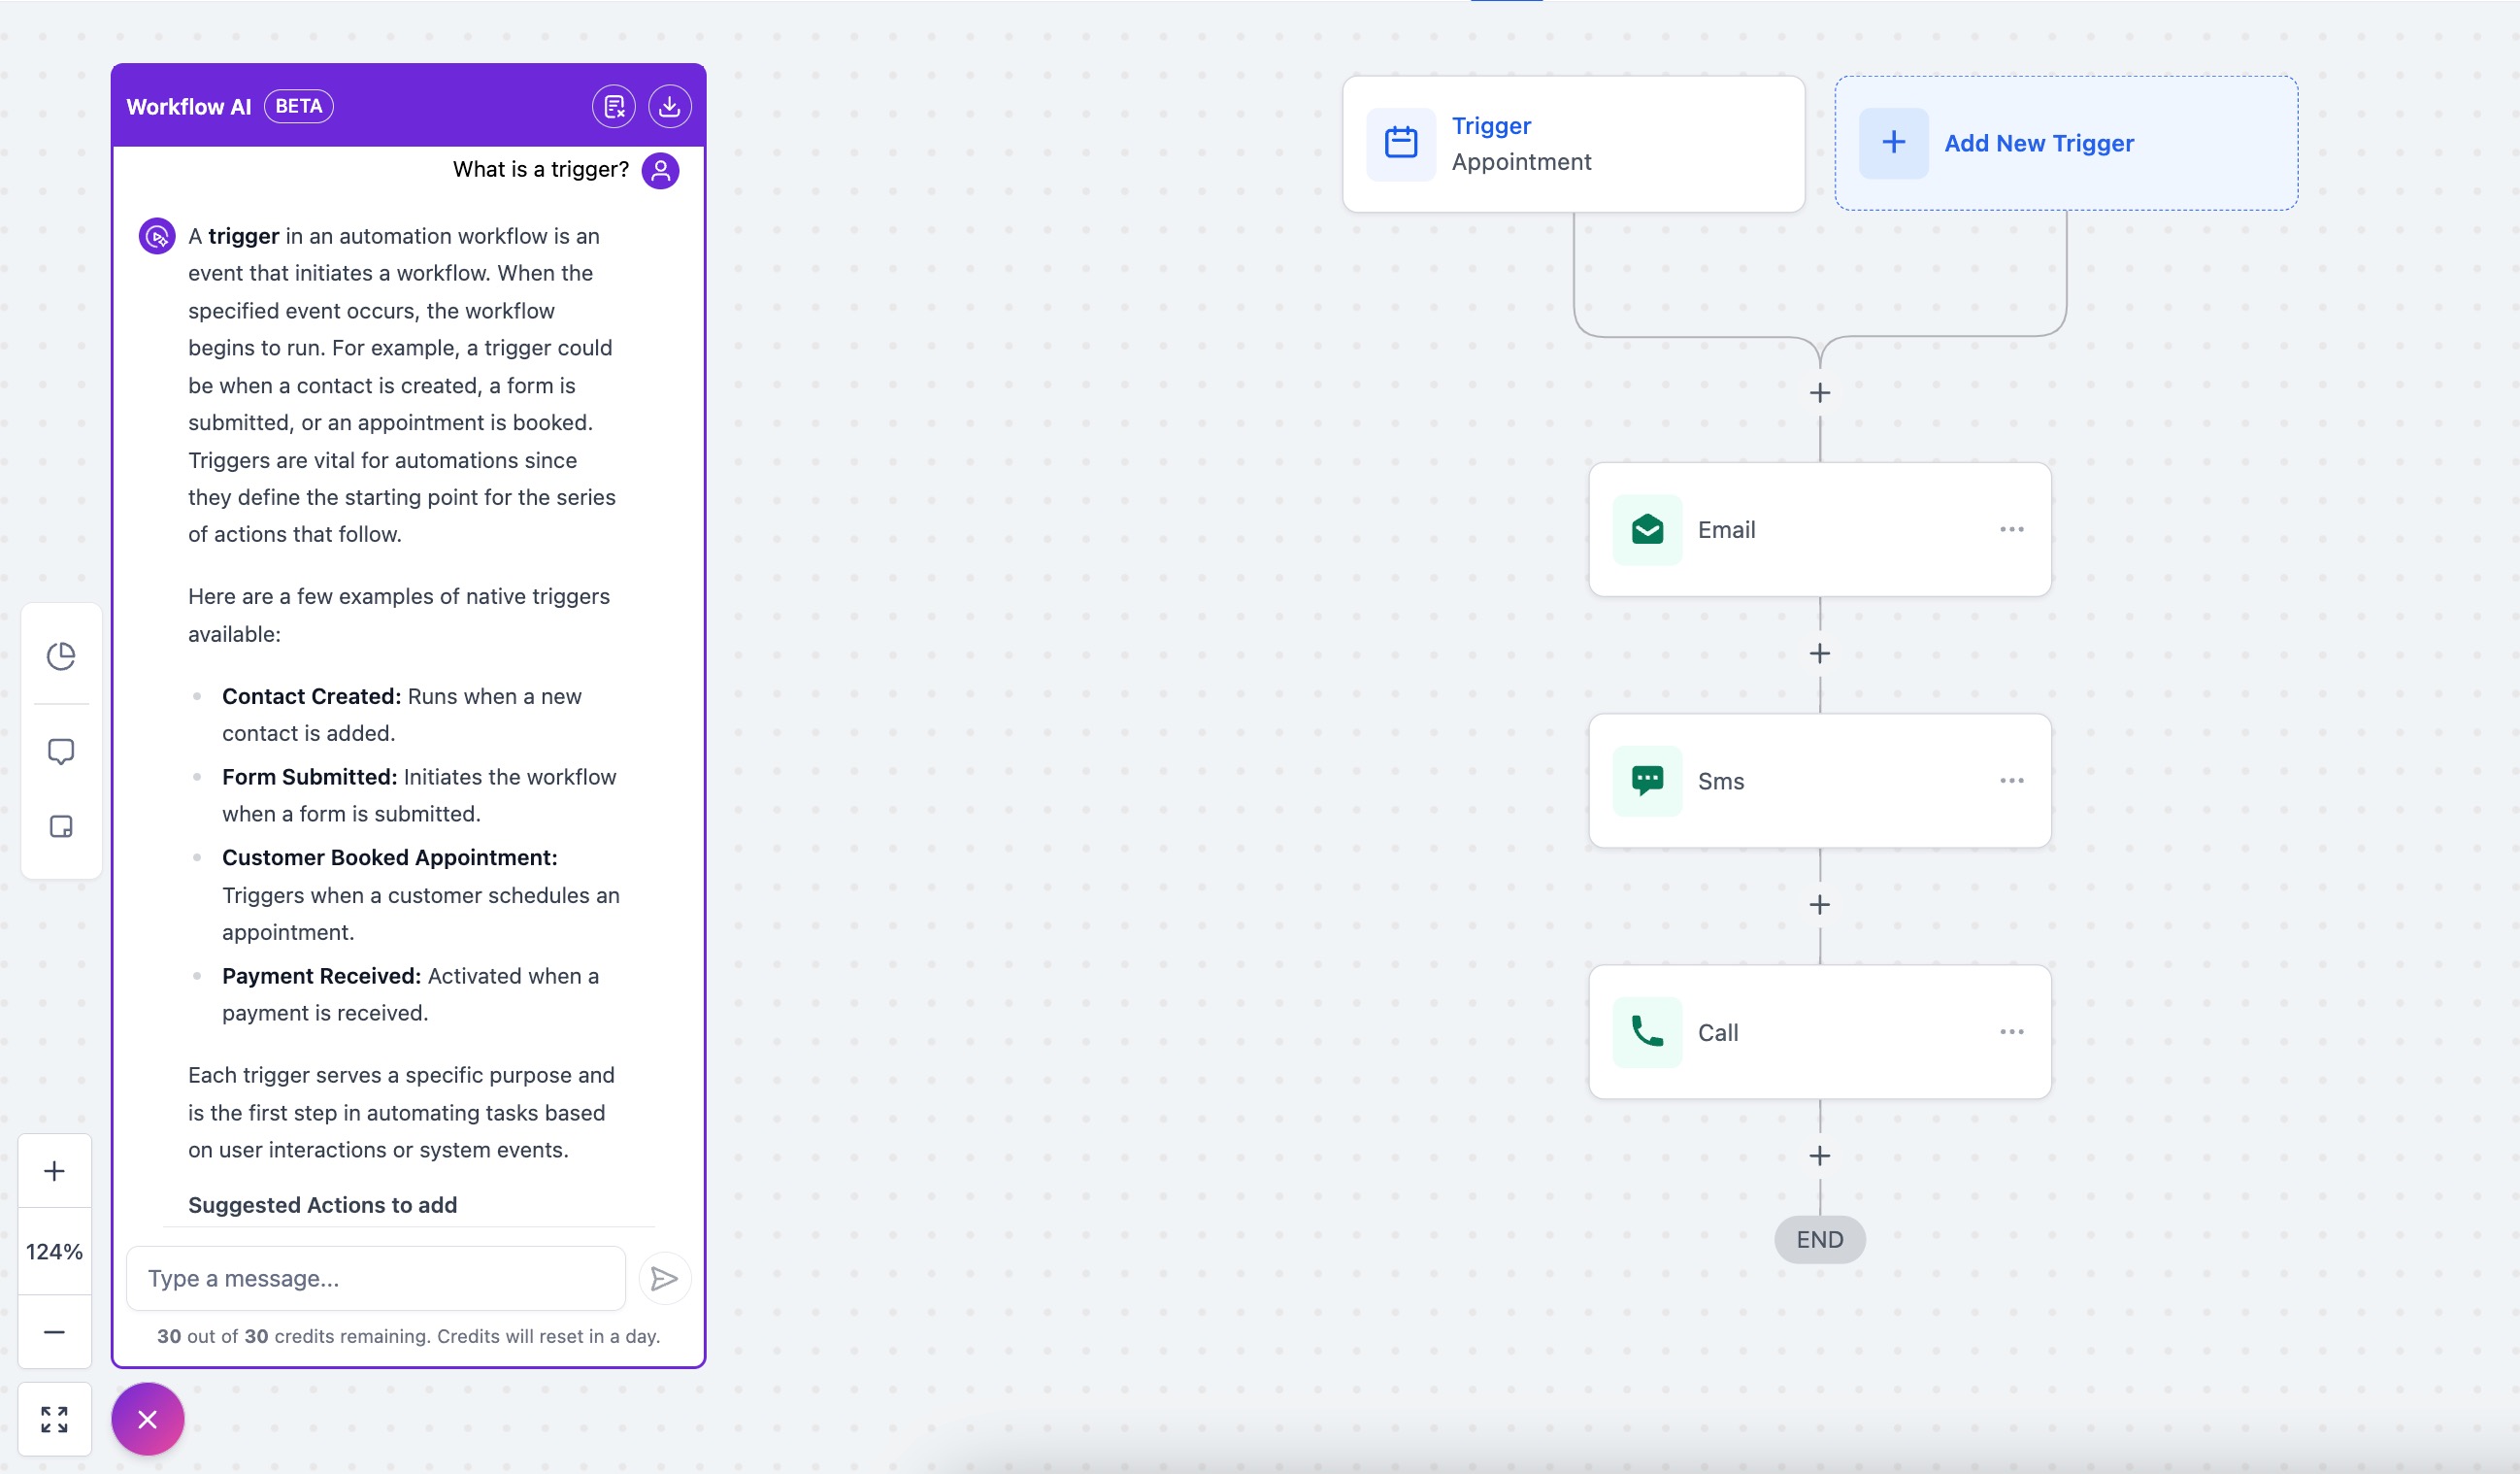
The Assistant is not only for building or analyzing; you can also learn anything you need about workflows by chatting with it. If you do not know what an action or trigger is, just ask. For example, asking "What is a trigger" returns a detailed explanation with examples of different workflow triggers.
To start over, click "Clear Chat" in the top-right corner of the chat box. Your previous chat clears and you return to the first step where you choose what you would like the Assistant to do.
To keep a record of a conversation, click "Export Chat" to download a copy. Exporting only saves the current conversation; it does not export previous conversations.
Click "Describe This Workflow" and the Assistant gives a detailed overview from start to finish, including details about different steps. This is useful when you forget why you built a workflow, when new team members are learning your processes, or when you want to explain a workflow to others.
Step 1: Ask for help. Start typing in the chat box and ask for help building your workflow. Mention the use case and the Assistant shares detailed explanations of the best actions and triggers, plus step-by-step configuration instructions.
Step 2: Choose from the suggestions. Pick the best option from the suggestions provided.
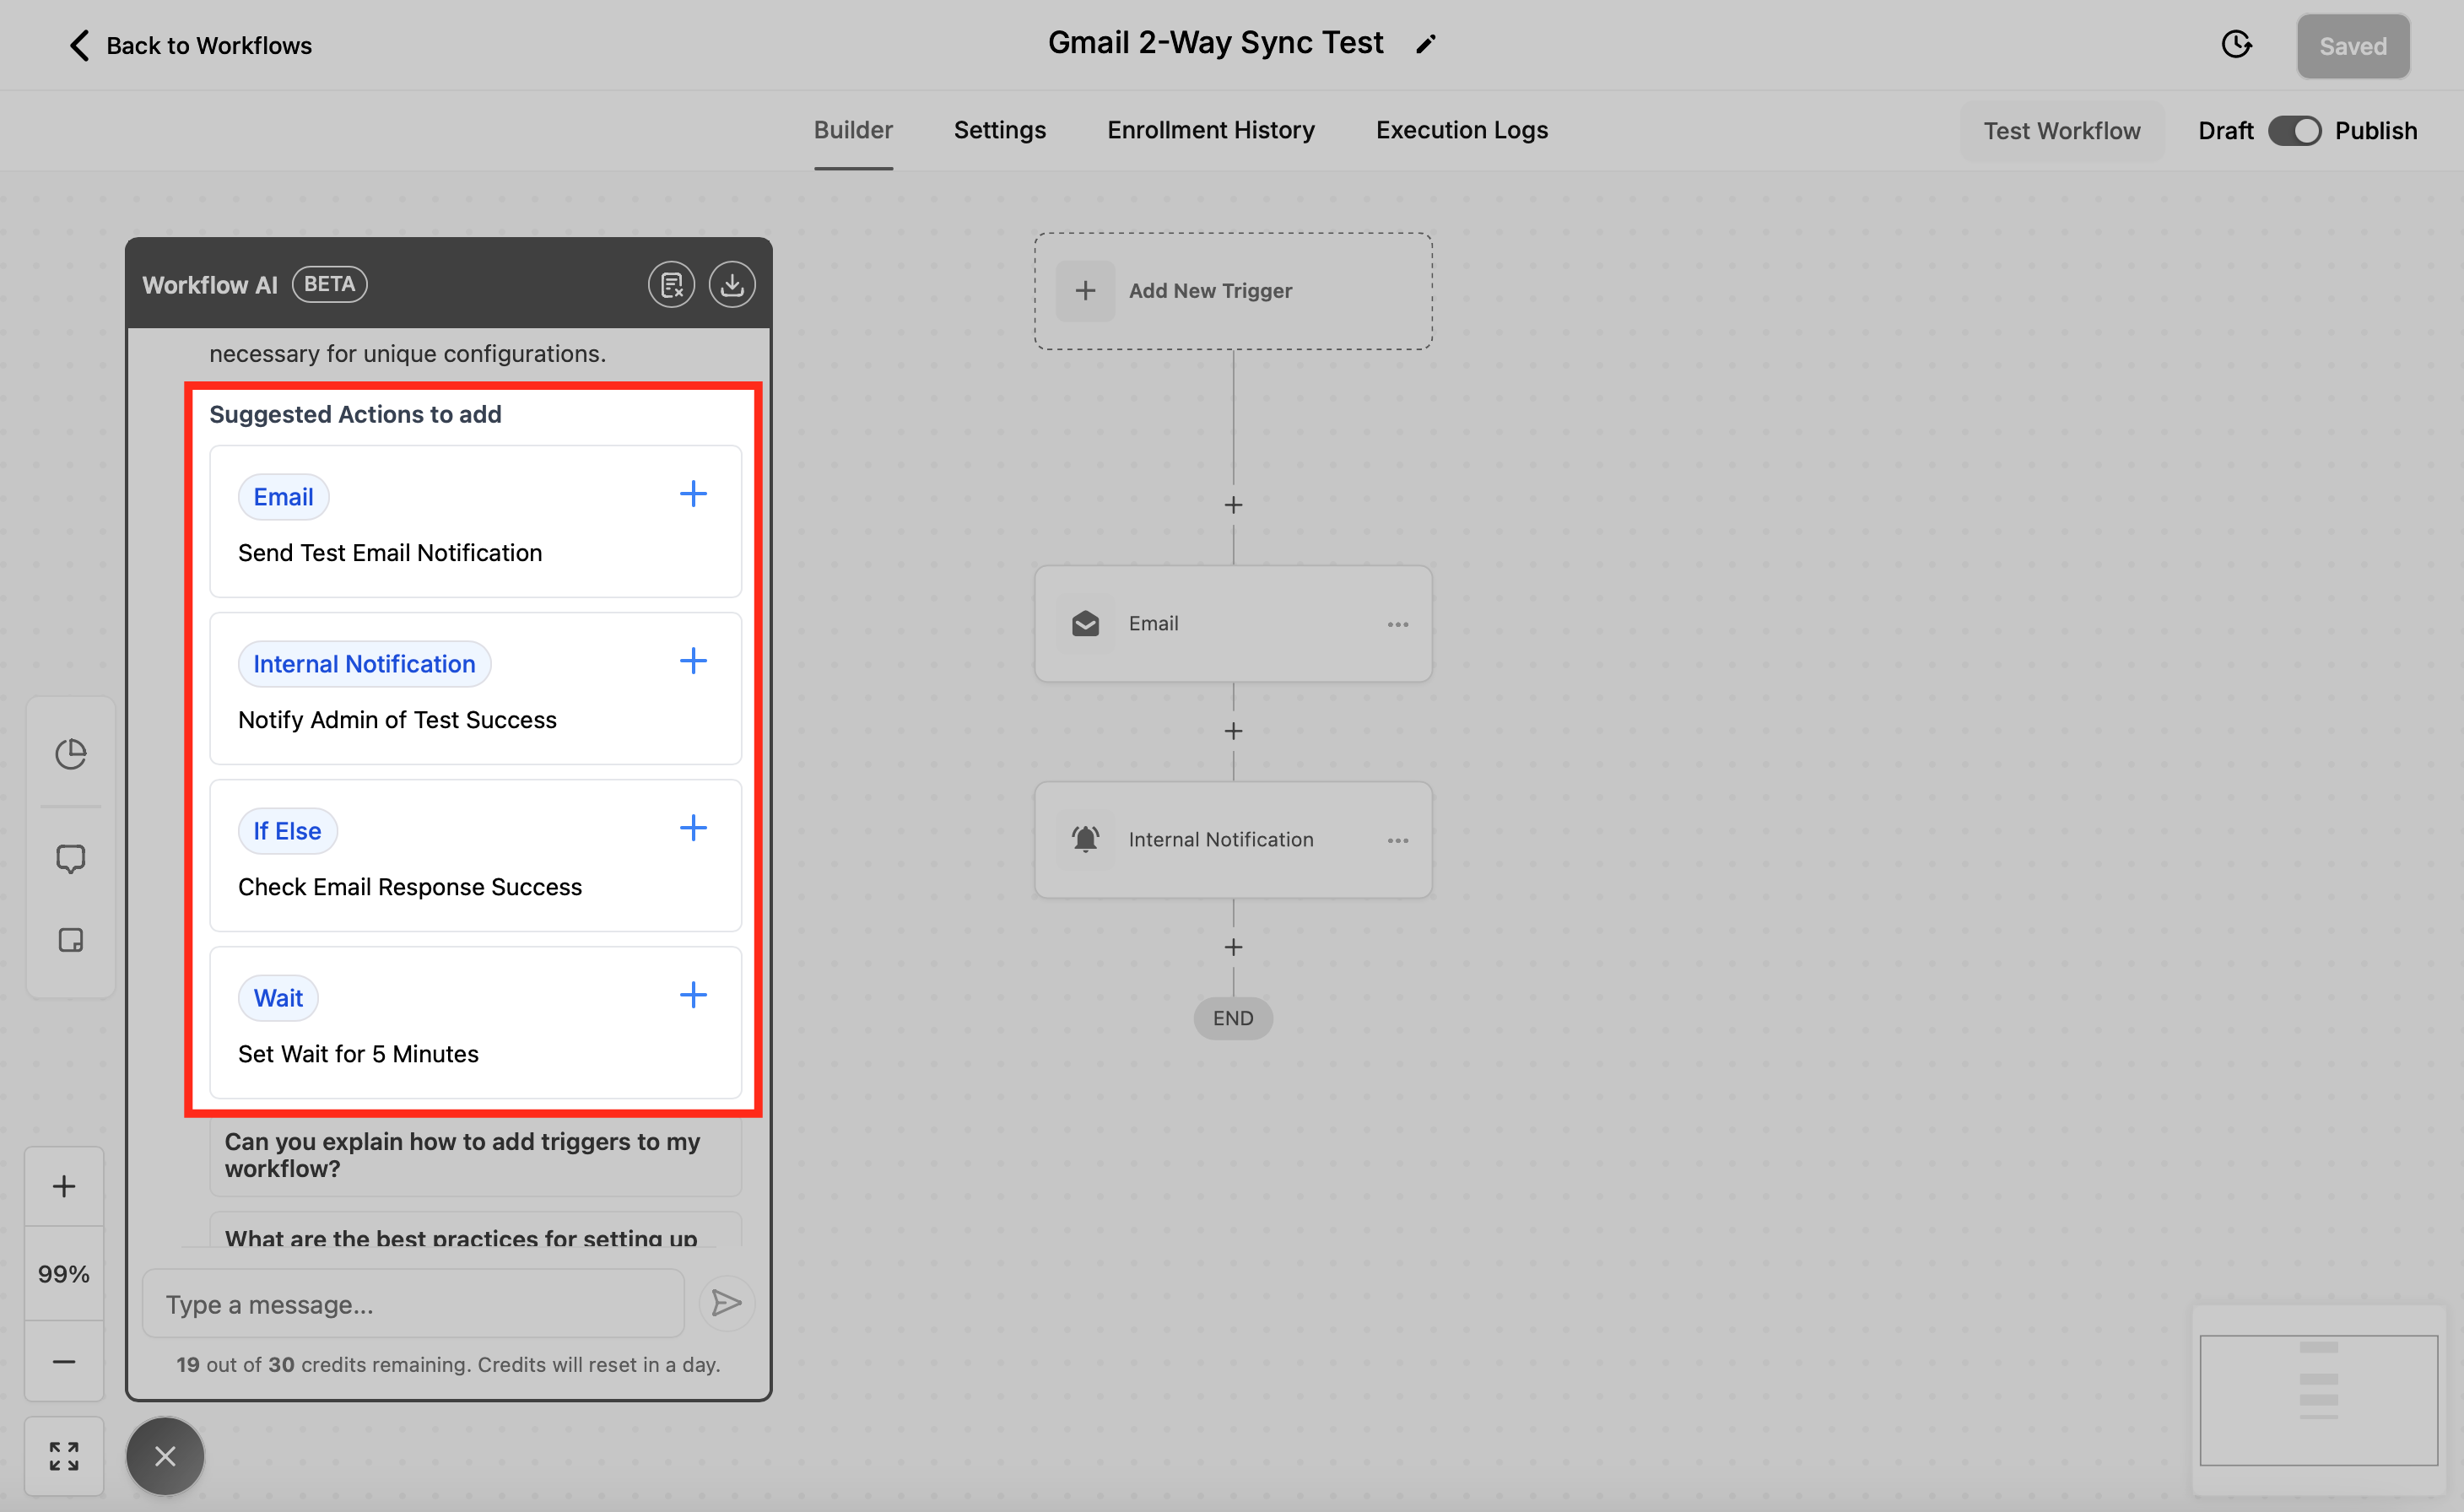
Step 3: Add the trigger or action. Select where you want it added. The action is inserted and the sidebar opens so you can configure it. The Assistant will also help you configure the triggers and actions you add; just tell it your end goal.
Step 4: Next steps. As you chat, the Assistant offers suggested follow-up questions to help you build the next steps or better understand what is being implemented.
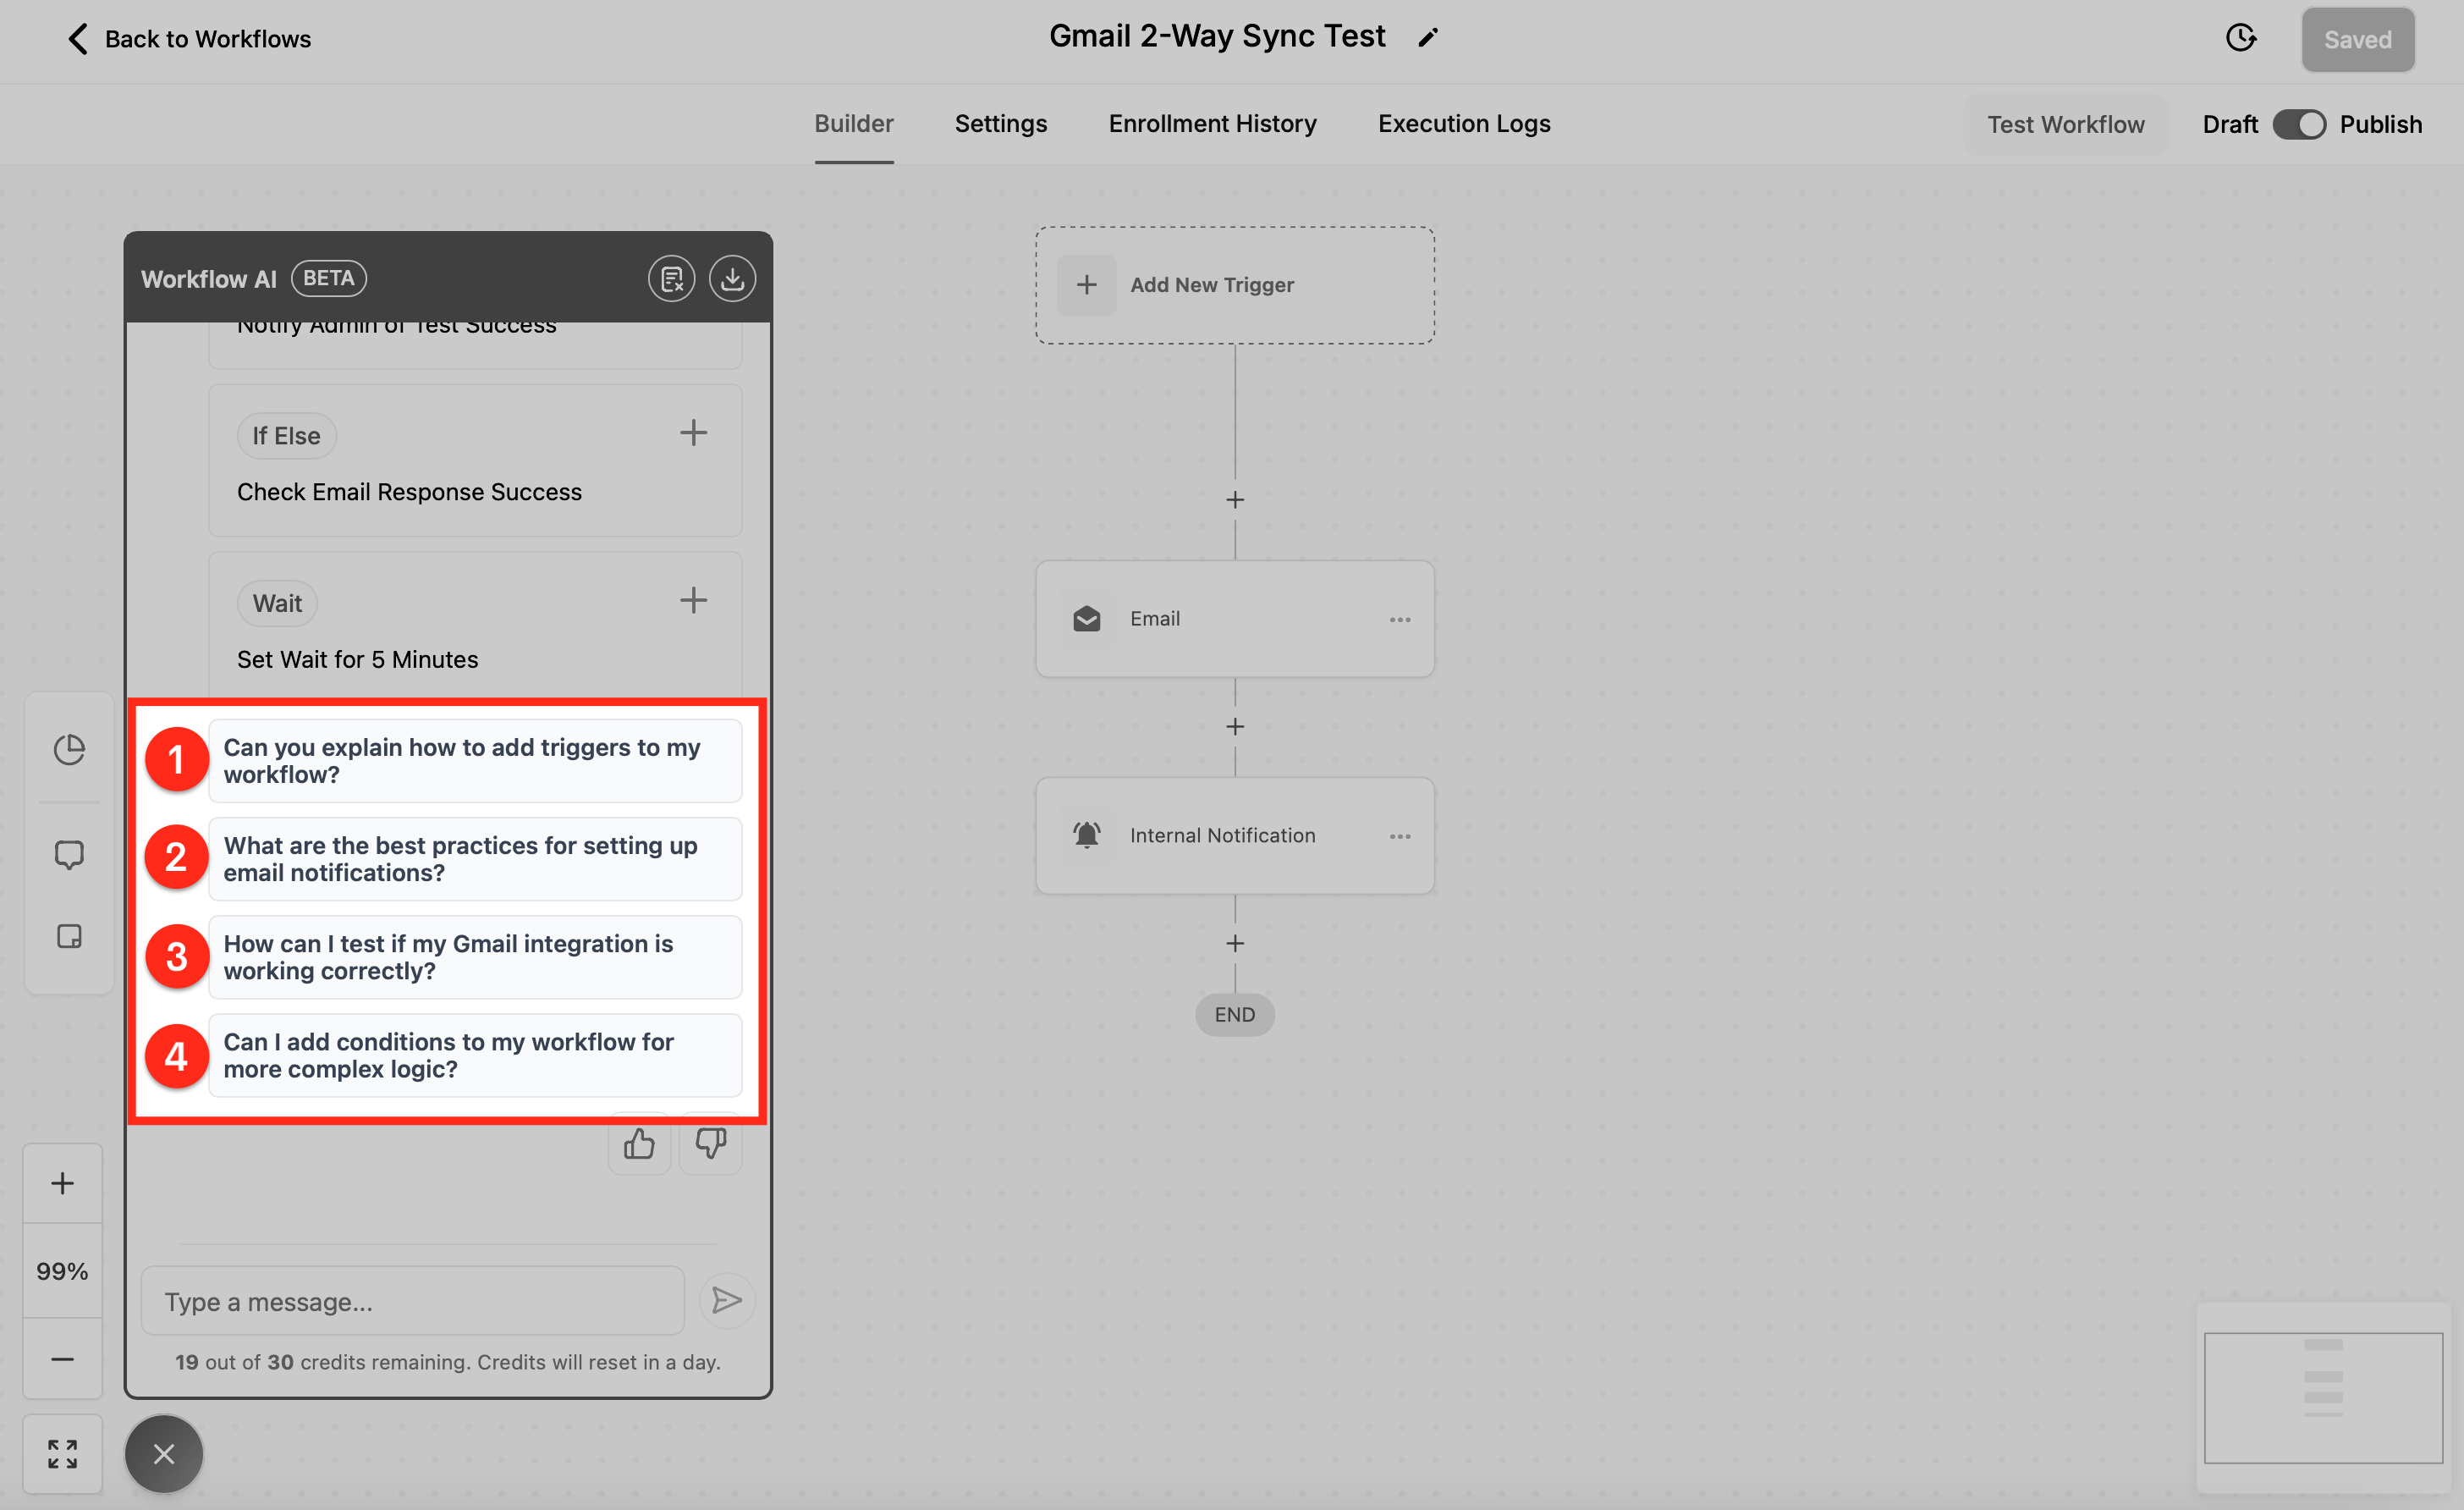
Step 5: Rate the answers (optional). Mark whether you liked an answer to help improve the Assistant over time.
The Workflow AI Assistant no longer uses AI credits. You can use features such as Generate with AI (SMS, emails, code, and more) without tracking credit consumption. To keep performance fast for everyone, a fair usage limit may apply; if you reach the daily limit, access resets in 24 hours. The Assistant is available to anyone with access to workflows.
Med-spa example: You inherited a complex re-engagement workflow from a teammate and are not sure what it does. You open the Assistant, click "Describe this Workflow," and get a plain-language summary of every step. You then ask, "How can I make this more efficient?" and the Assistant suggests consolidating two wait steps. Finally you type "Add an SMS reminder 24 hours before the appointment," pick the suggested action, and place it in the workflow.
Learn More Using AI is an in-context help feature that gives real-time, AI-powered guidance for the specific trigger or action you are configuring. It explains what a component does, how it works, how to configure it, and shows real-world examples, all without leaving the builder. This reduces errors and speeds up setup.
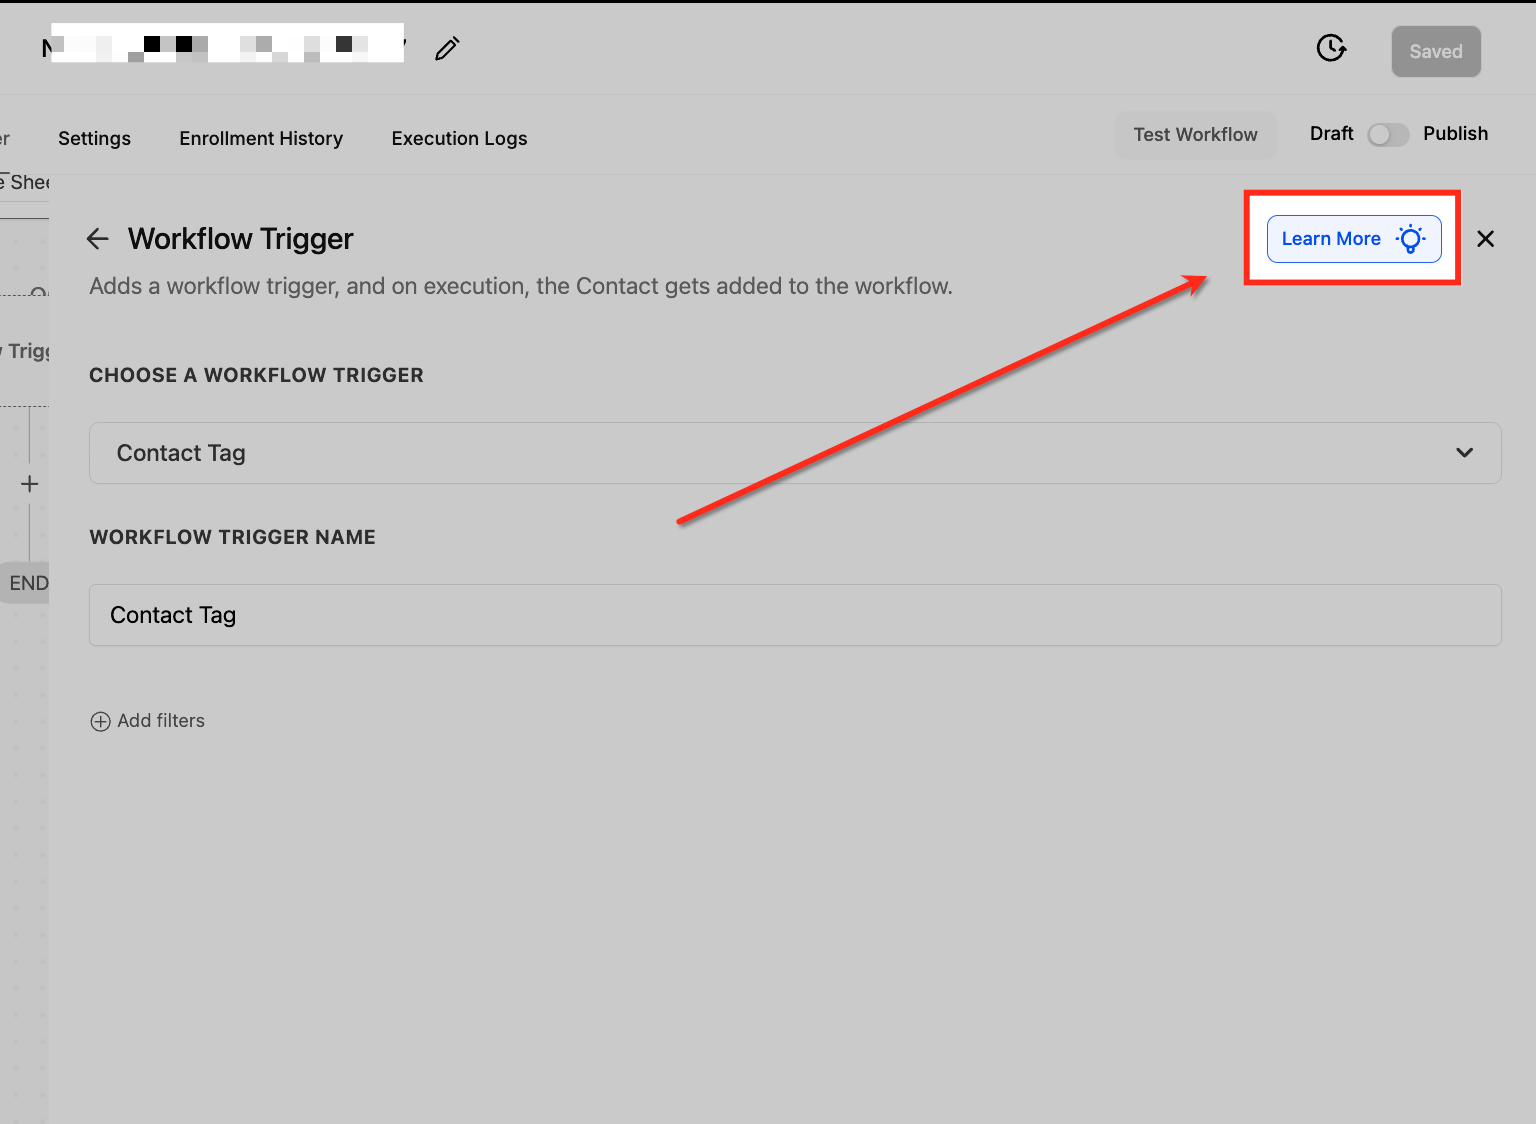
A blue "Learn More" button with a lightbulb icon appears at the top-right corner of every trigger and action configuration panel. One click opens the Workflow AI Assistant sidebar with detailed contextual insights for that exact component.
Once opened by the Learn More button, the sidebar provides targeted help for the specific trigger or action. It details configuration instructions, explains validation rules and constraints, and offers real-world examples. You can ask follow-up questions for a personalized experience. With Learn Mode, answers stream in real time and the Assistant suggests follow-up questions at the end of each response. When you ask a build question in Learn Mode, you can switch to Build Mode using the Continue in Build Mode button, which keeps your request and submits it in Build Mode without retyping.
Access the Workflow Builder. From the left-hand menu, click Automation, then select the Workflows tab. Click + Create Workflow in the top-right to start from a recipe, template, or scratch.
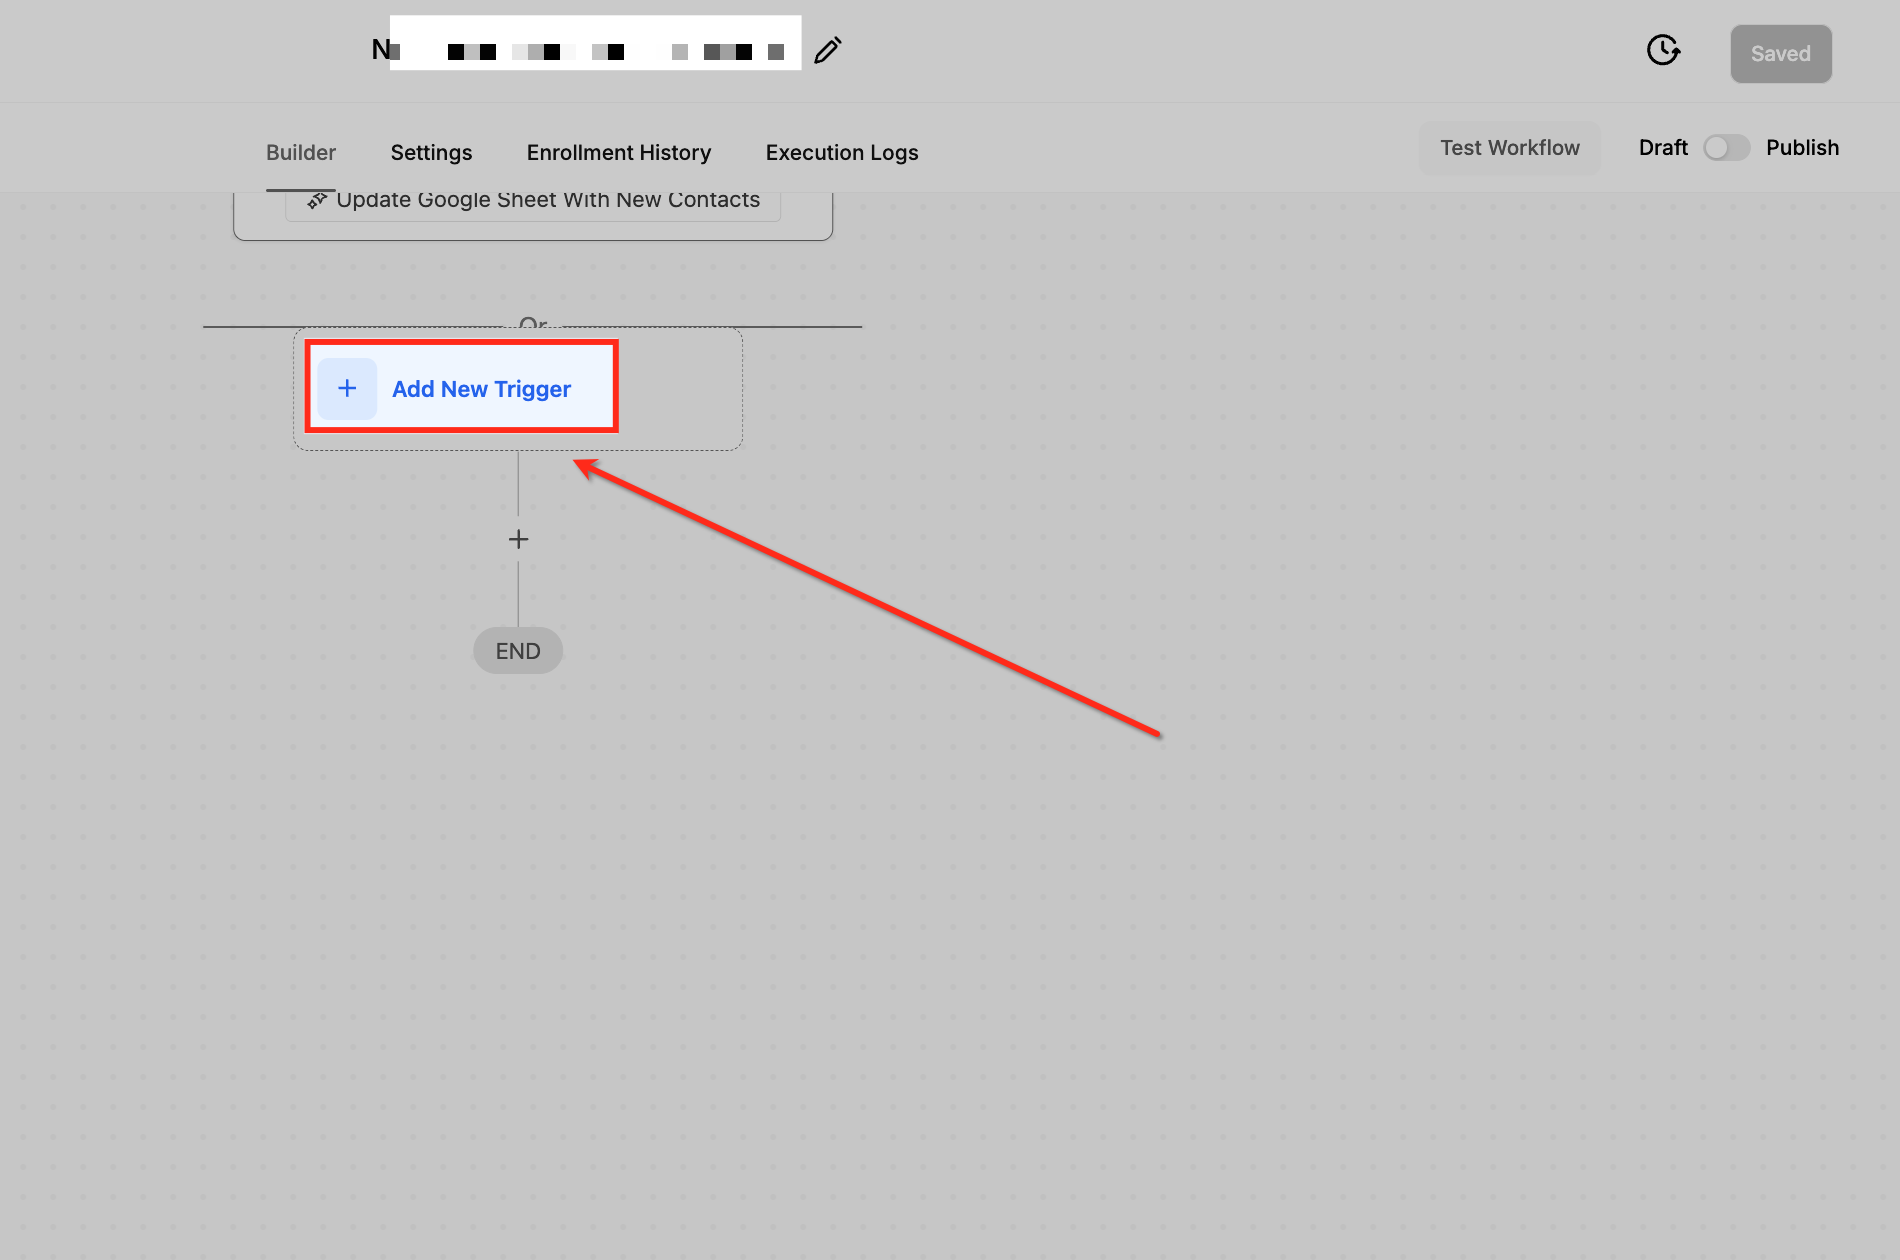
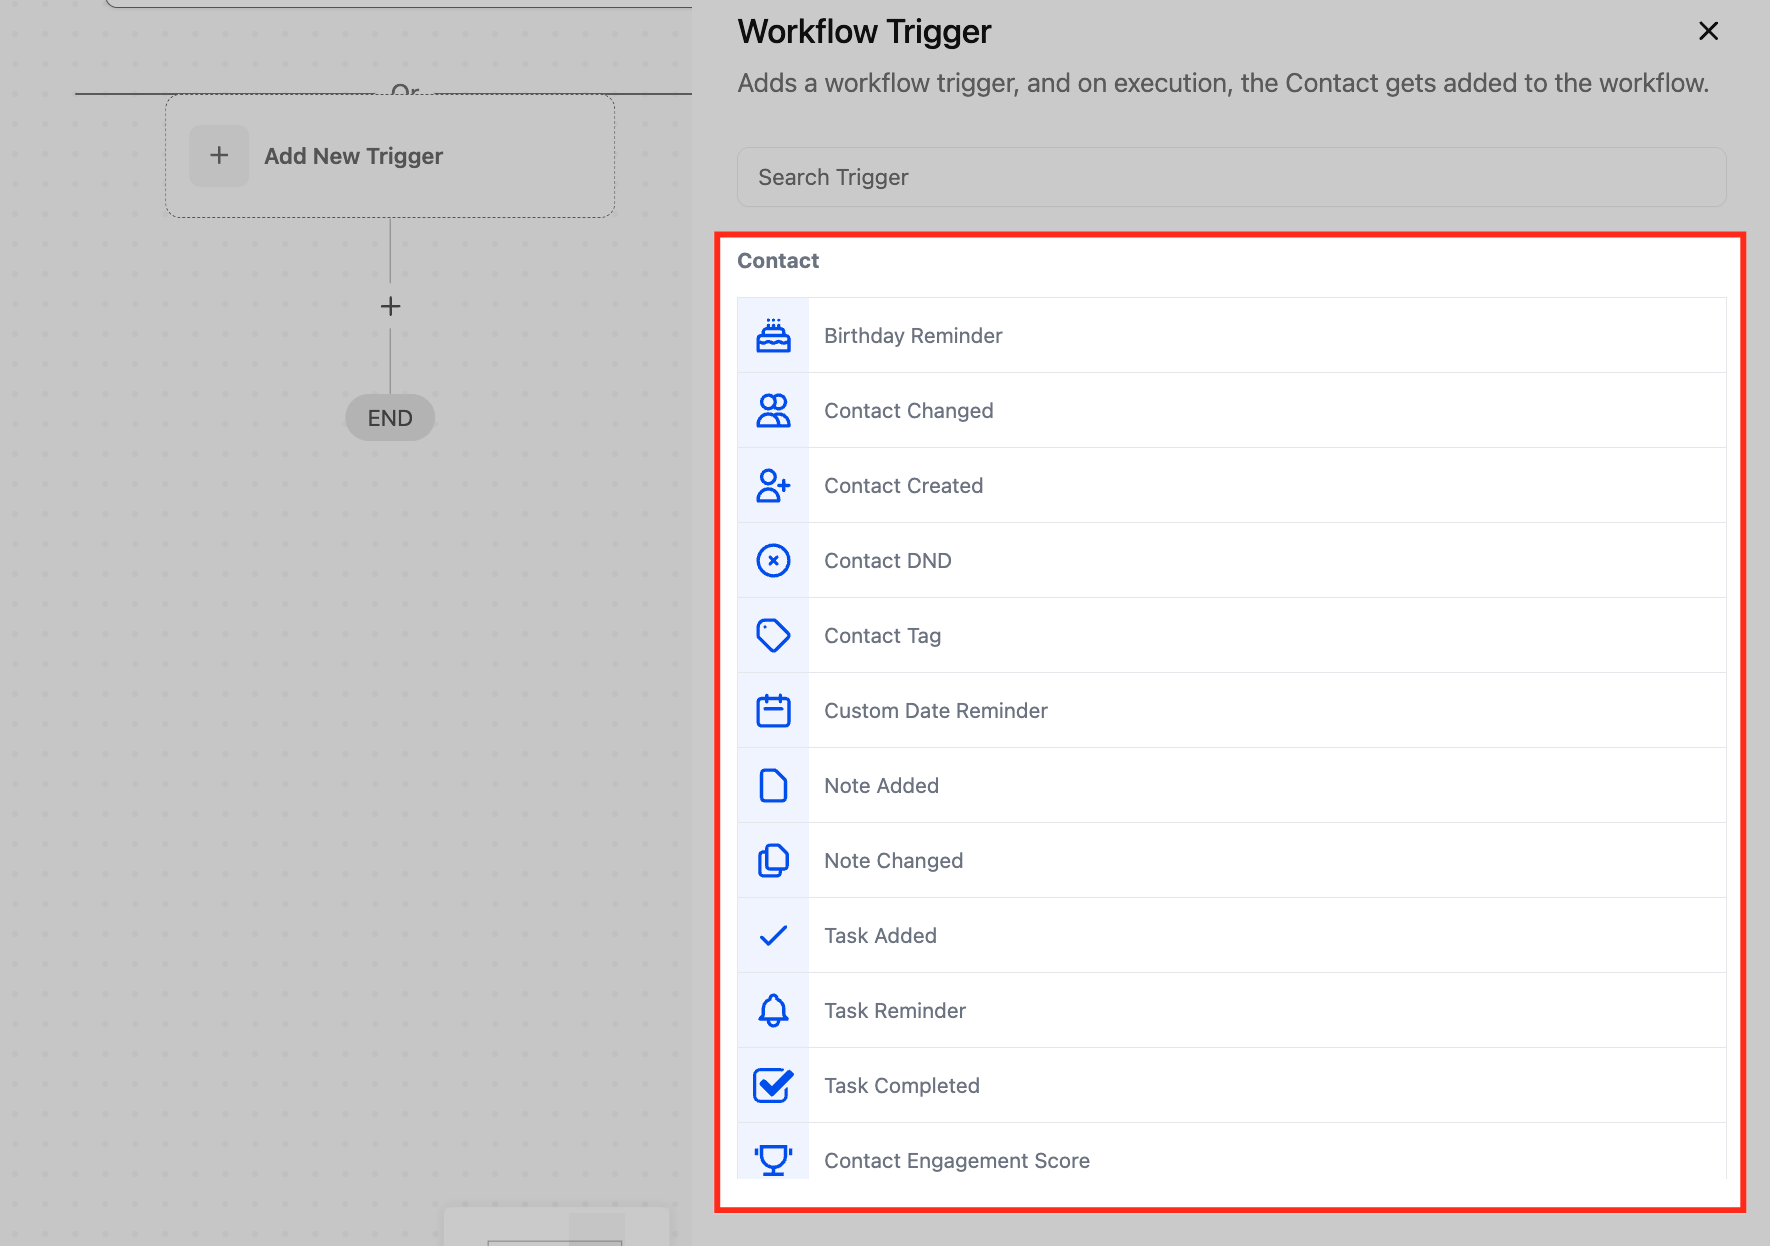
Open a trigger or action. Click into any trigger or action configuration panel. In this example, start by selecting + Add New Trigger.
Select a trigger type. Choose a trigger from the list. Any standard trigger or action will display the Learn More button.
Click the Learn More button. In the upper-right corner of the configuration panel, click the blue Learn More button with the lightbulb icon. This launches the Workflow AI Assistant with contextual guidance.
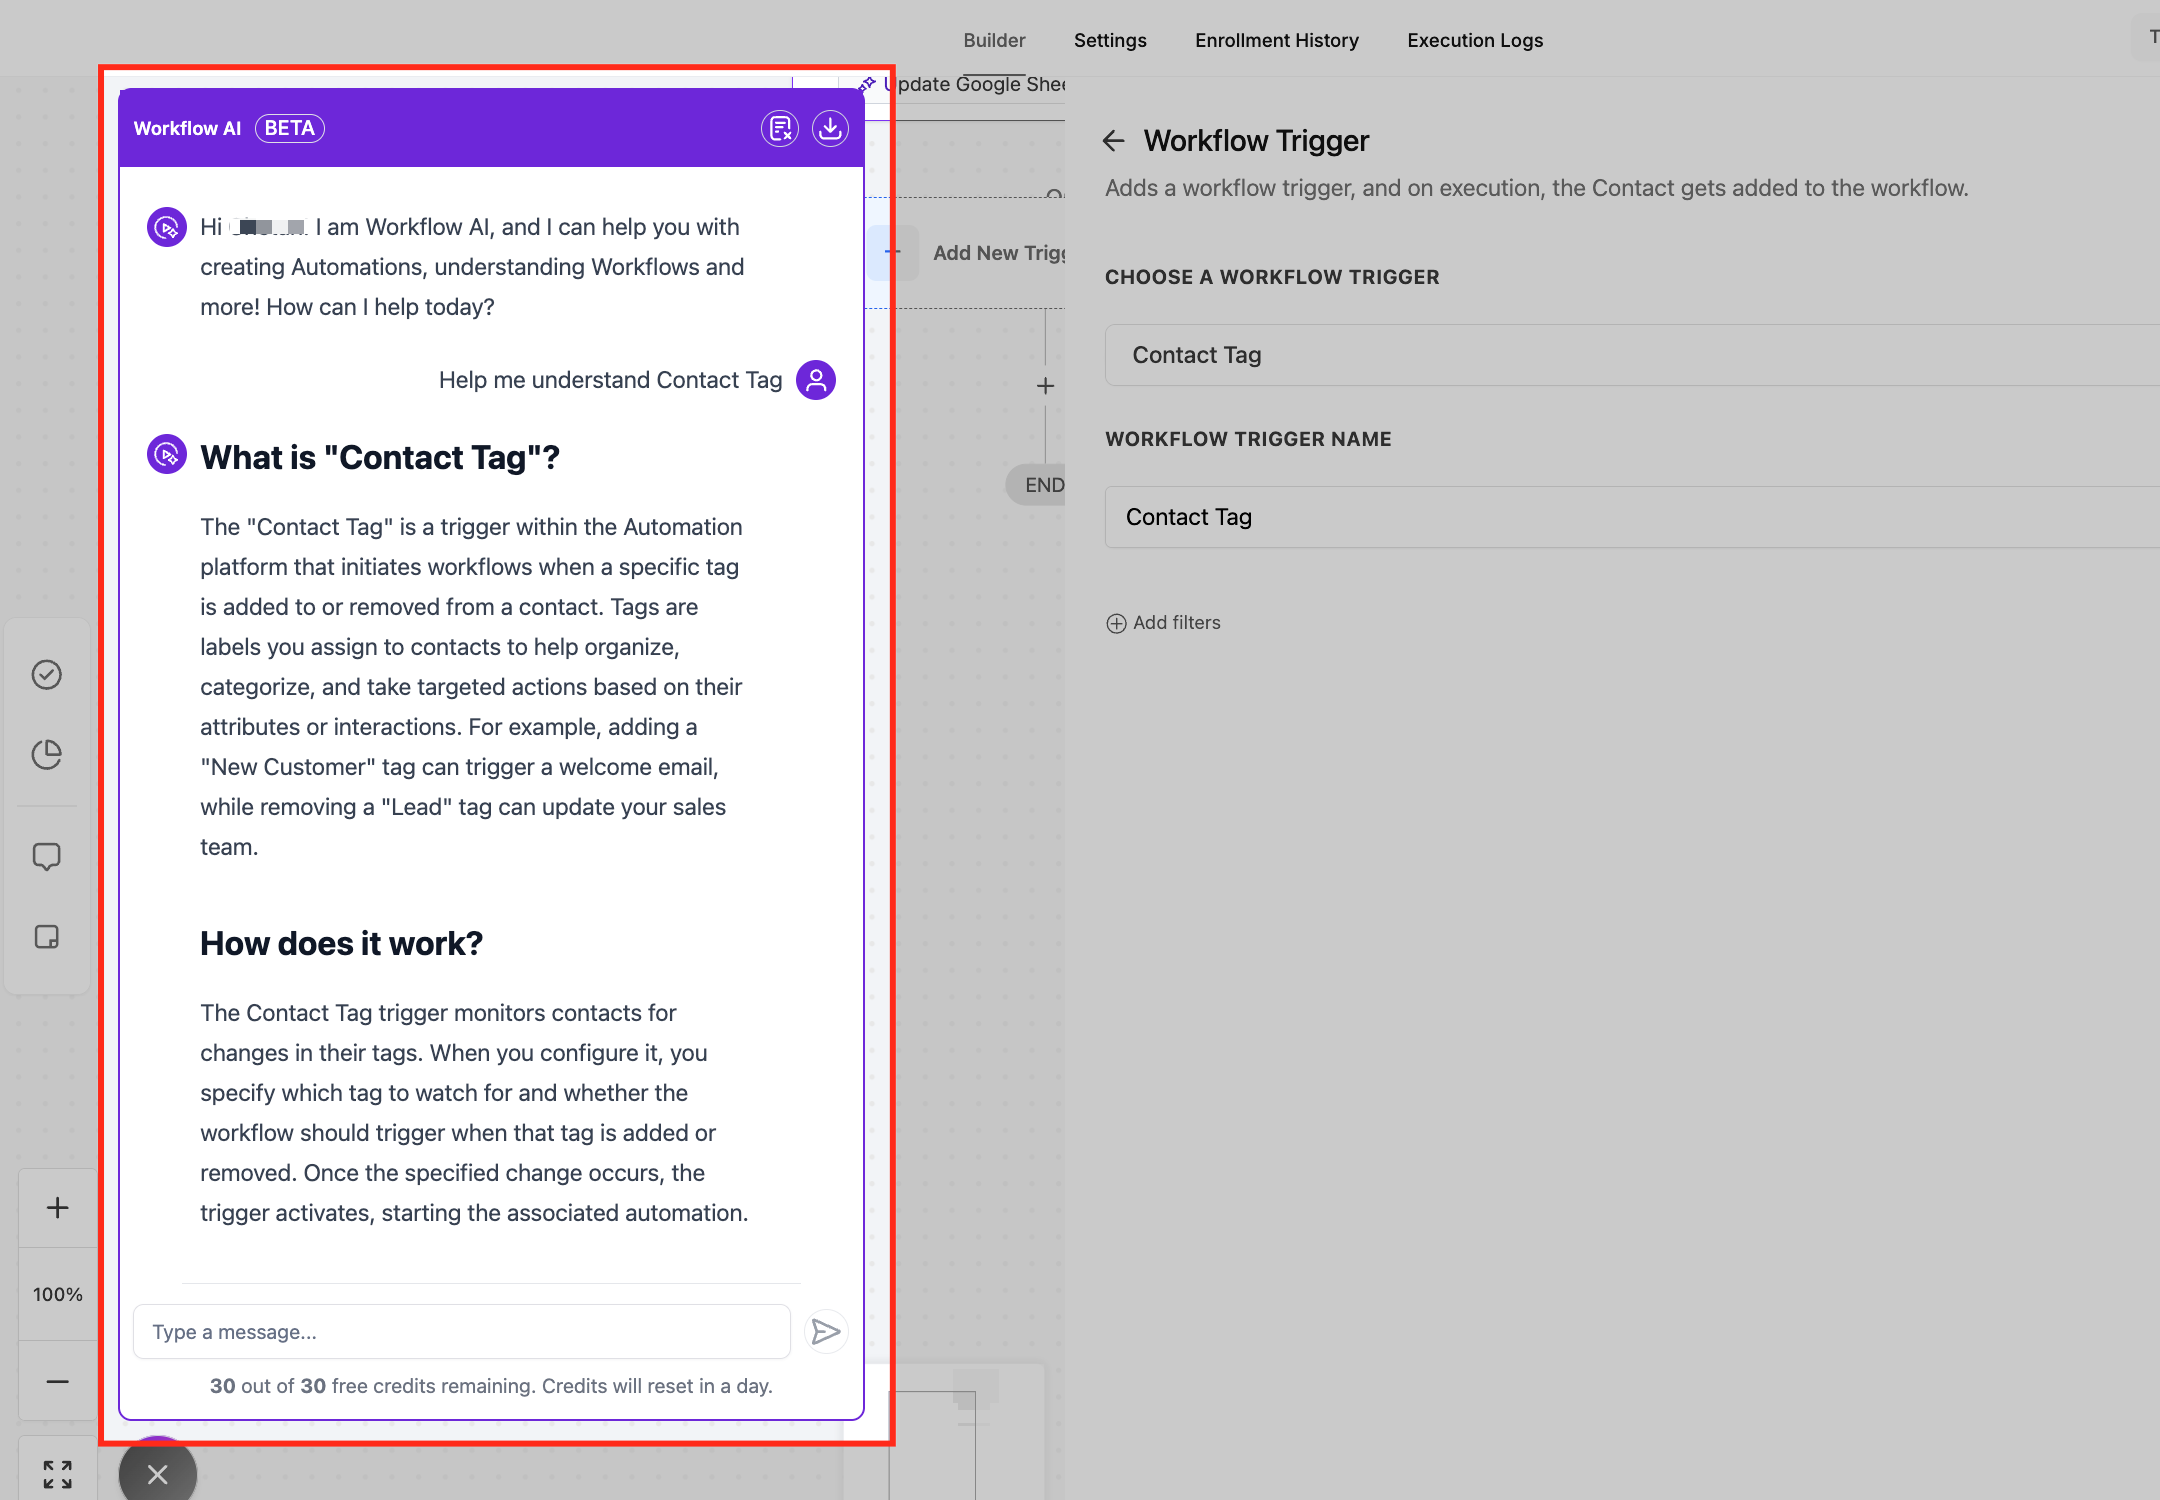
View contextual guidance. The Assistant sidebar opens with detailed information based on the exact trigger or action you are configuring. You will see what the feature does, how it works, step-by-step configuration guidance, and real-world use cases. Type follow-up questions directly into the chat box for personalized answers.
Learn More Using AI is available for all standard triggers and actions, but marketplace actions and triggers are not supported. It does not change any settings on its own; you still control and save all configuration manually.
Med-spa example: While building a no-show recovery workflow, you add a Wait action but are not sure how the timeout branch behaves. You click Learn More on the Wait action, read the streamed explanation of wait types and timeout branches, then ask "What happens if the patient replies during the wait?" The sidebar explains how the reply branch works so you configure it correctly the first time.
AI-Powered Field Tooltips bring smart, contextual help to individual fields inside the Workflow Builder. Instead of guessing what a setting does, you hover an info icon for a quick definition and open the AI assistant for a deeper, conversational explanation. This makes advanced configuration easier to understand and helps teams build with more confidence and fewer mistakes.
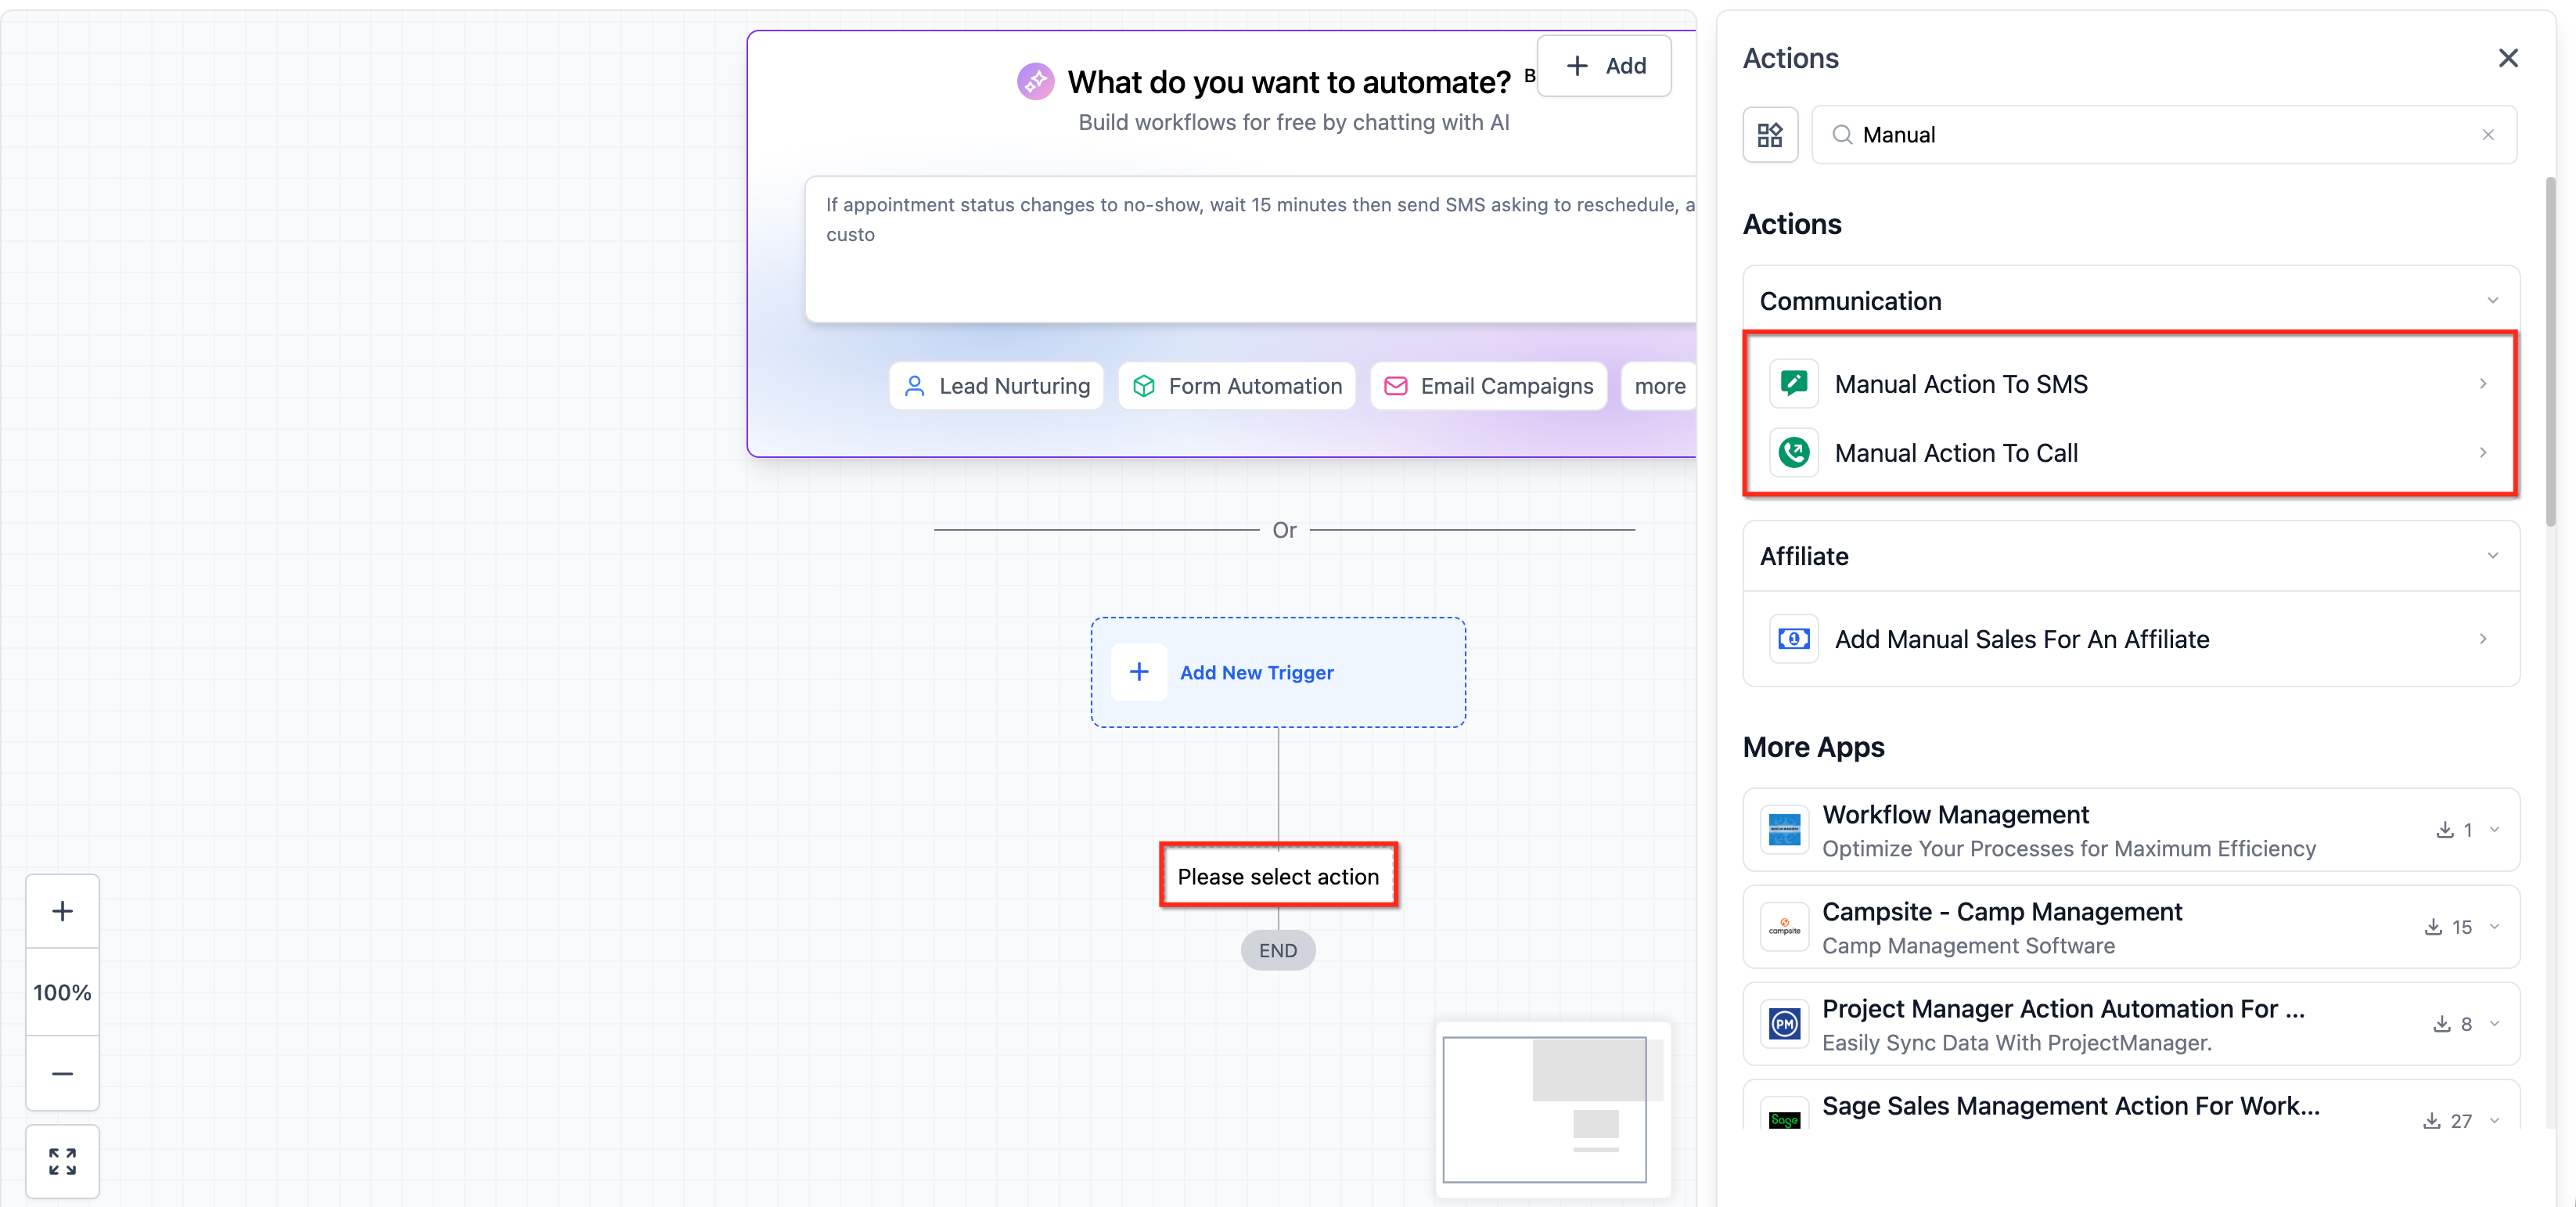
Field Tooltips add AI-assisted explanations at the field level inside workflow actions. This matters most when configuring advanced settings, where a small change can affect timing, assignments, or outcomes, and you want to understand a field without leaving the builder or searching the Knowledge Base. The feature is currently experimental (BETA) and is live on two fields inside Advanced Settings for the Manual SMS action and the Manual Call action.
Go to Automation > Workflows.
Open an existing workflow, or create a new one.
Add or select one of the supported actions: Manual SMS or Manual Call.
Open Advanced Settings in the action configuration panel.
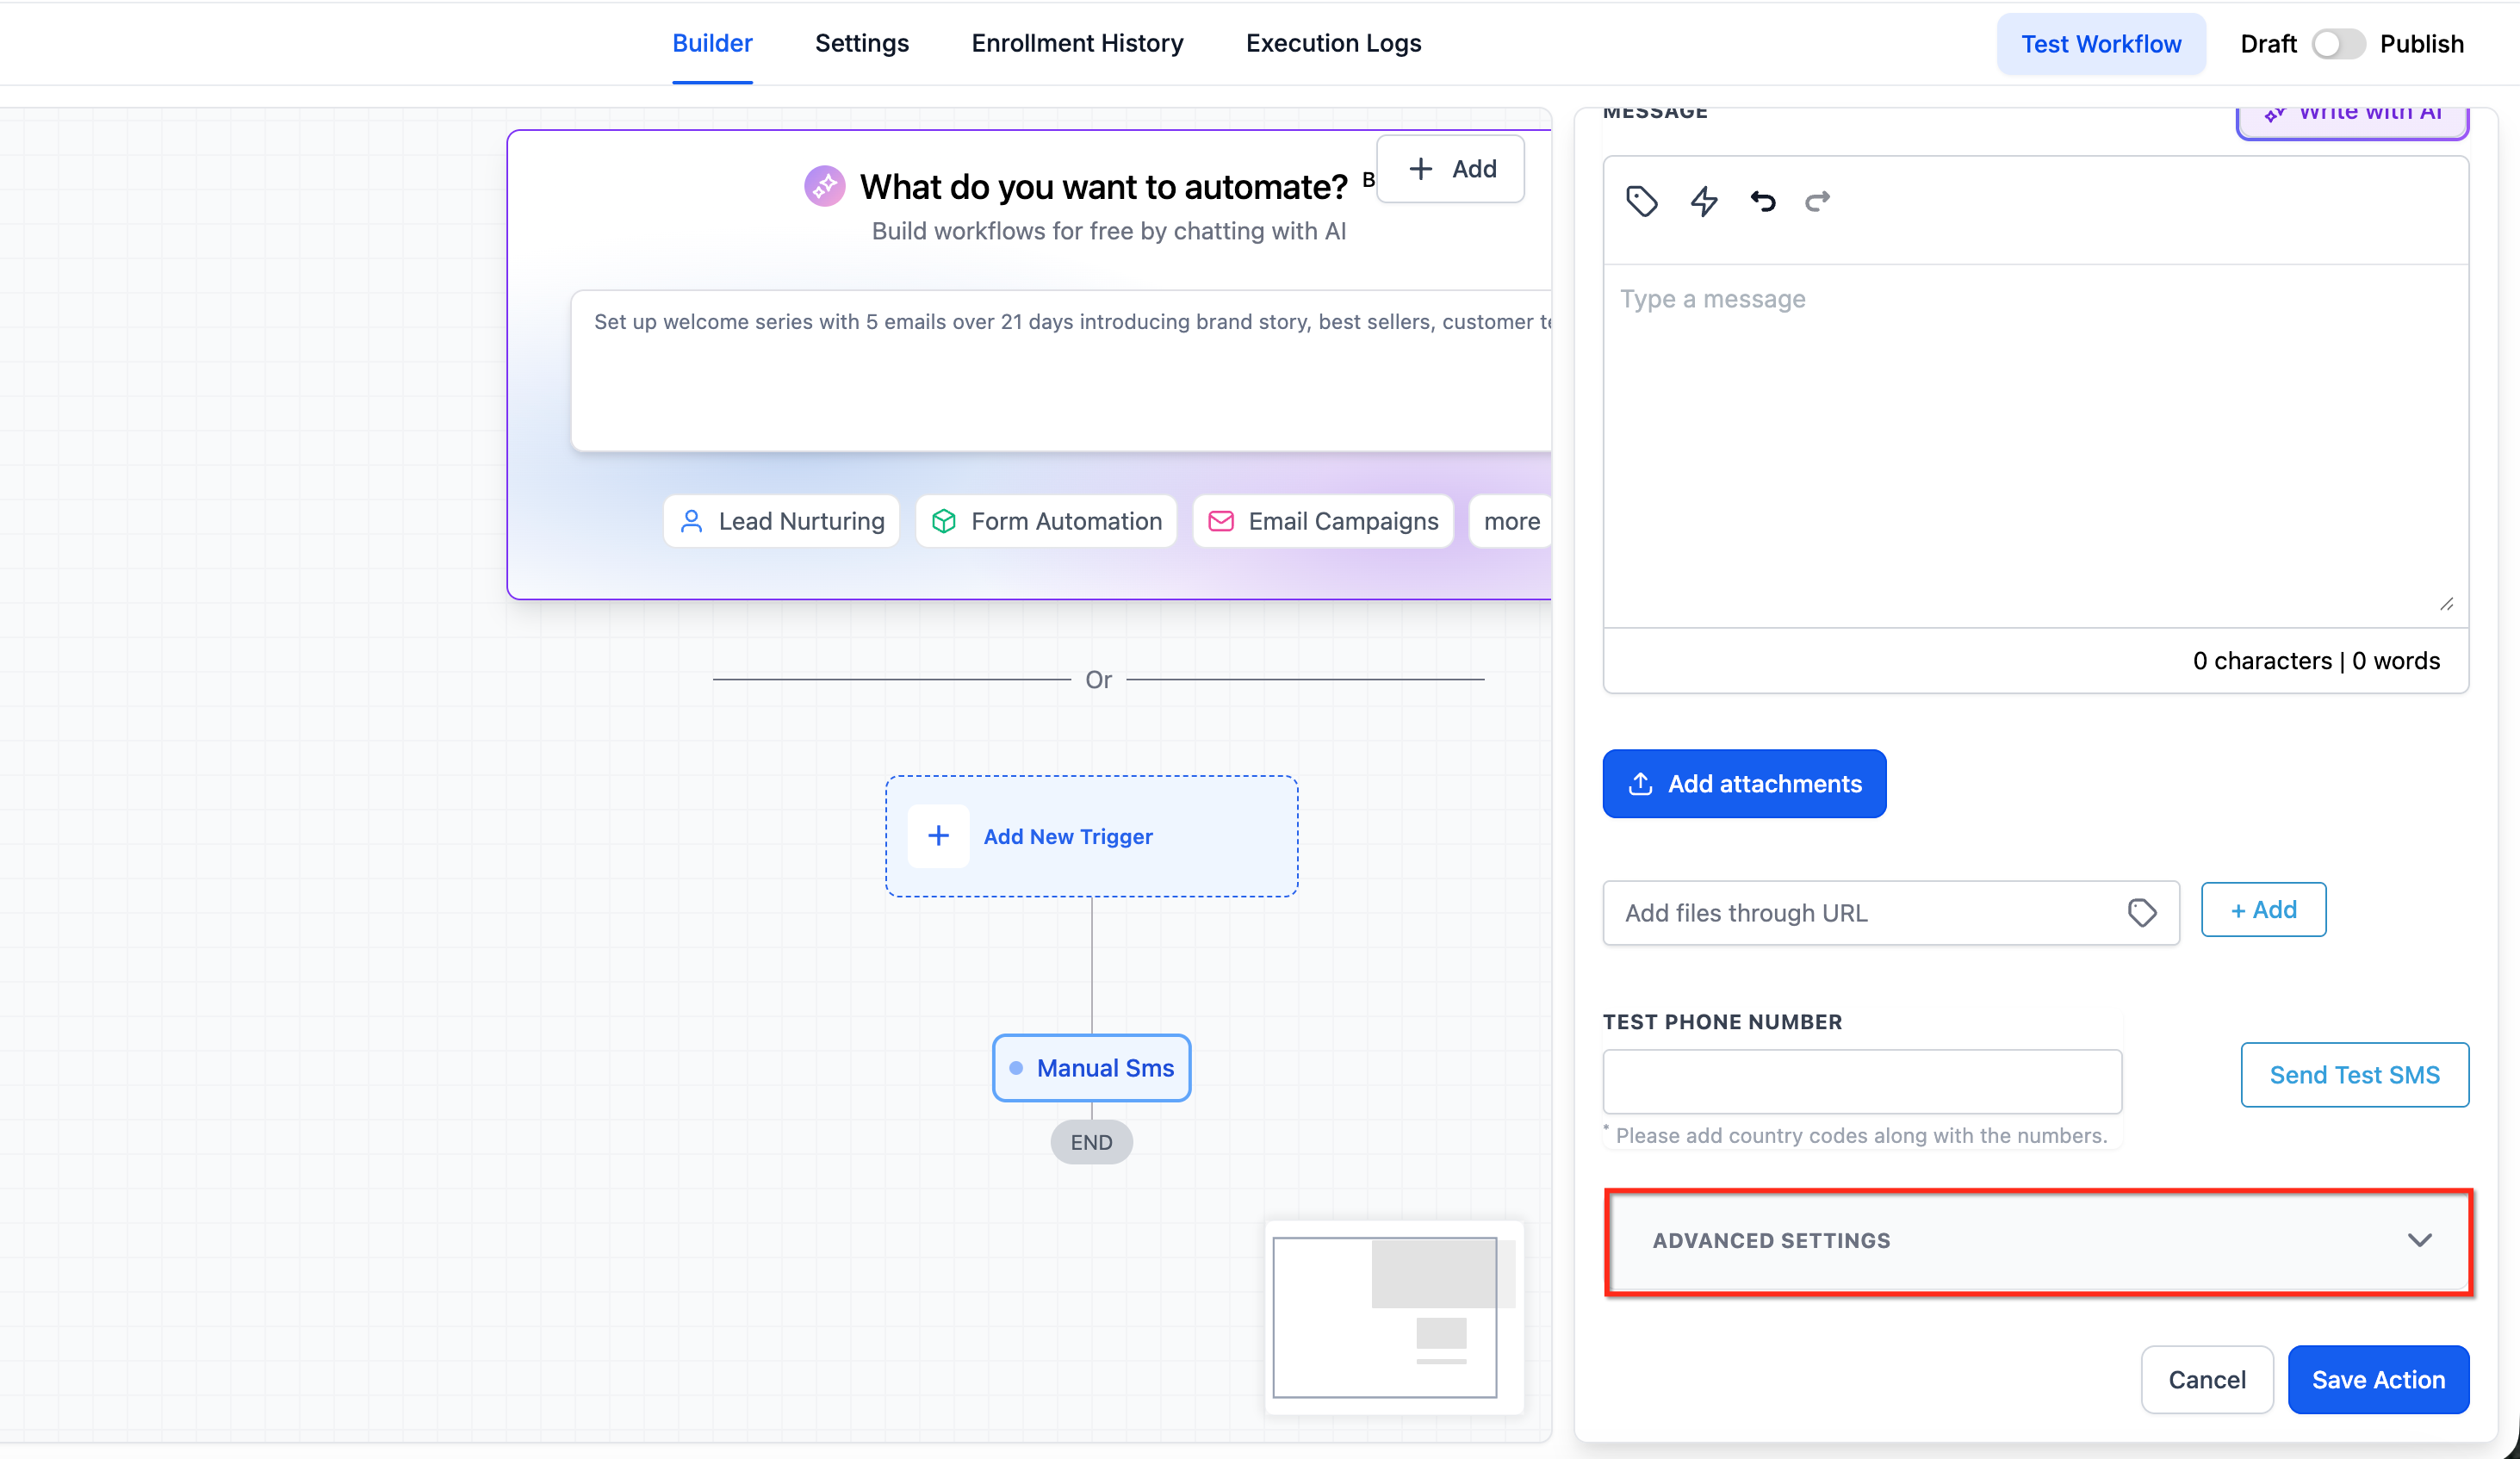
Look for the info icon next to a supported field. Hover over it to read the short tooltip description, then click Explain Field to open the AI assistant.
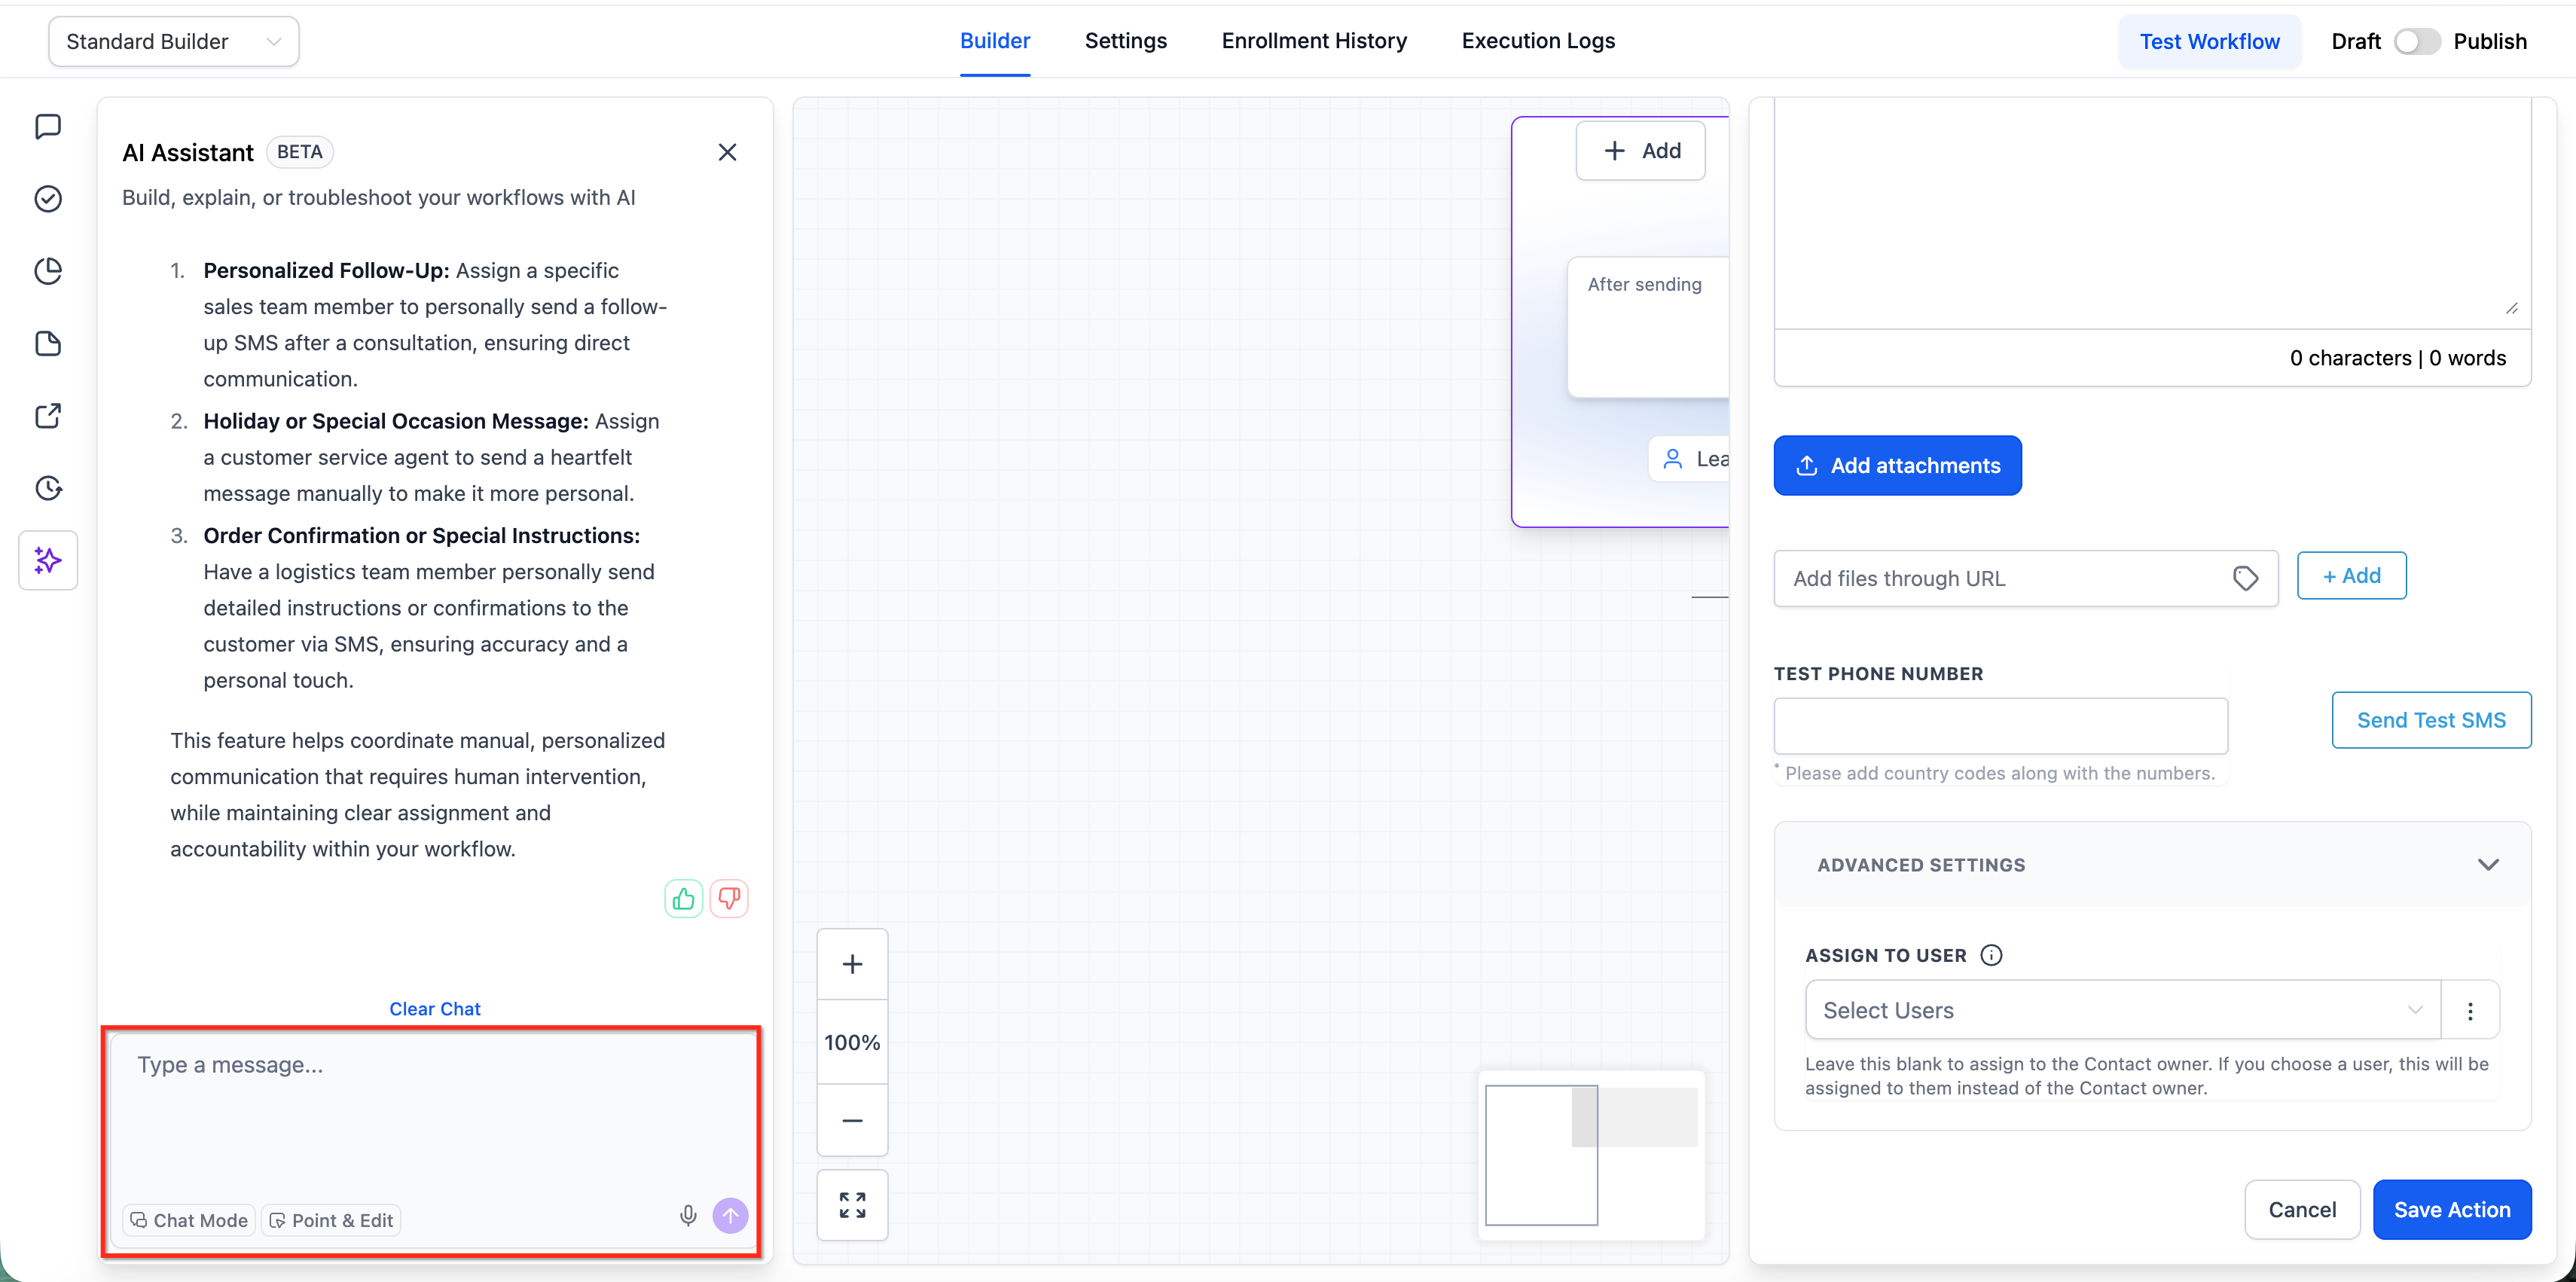
Ask follow-up questions in the assistant to confirm your understanding.
Because the feature is experimental, the info icon and the Explain Field button may appear only for specific fields and eligible accounts, and may not be on every account yet. Explain Field only explains what a field does; it does not change any settings automatically. This is related to but distinct from Learn More Using AI: Learn More explains entire actions and triggers, while Field Tooltips focus on individual fields inside action configuration. The experiment currently focuses on field-level help in the Workflow Builder, starting with Manual SMS and Manual Call Advanced Settings, and may expand if results are strong. Treat the action documentation as the source of truth and validate behavior before publishing major changes.
Med-spa example: You are setting up a Manual Call task so a coordinator phones every new filler lead. In Advanced Settings you see an unfamiliar field with an info icon. You hover for a quick definition, then click Explain Field and ask, "If I assign this to a specific user, what happens when they are off that day?" The assistant explains the assignment behavior so you configure the task correctly.
AI-Powered Custom Code Generation lets you create JavaScript code snippets for the Custom Code action by describing what you need in plain language. This reduces manual coding and debugging, so you can add custom logic to a workflow without writing code yourself. The feature is currently in BETA.
Generates JavaScript code from a plain-language description of the functionality you want.
Automatically maps input properties from previous workflow steps.
Lets you review and insert the generated code in one click.
Lets you regenerate for a different version if the first result is not quite right.
Select the Custom Code action within your workflow.
Click "Code with AI" to open the AI-powered coding assistant.
Describe the functionality you need. Example: "I have an API that returns a date in MM-DD-YYYY format. Convert it to YYYY-MM-DD."
Click Generate, and the AI creates the JavaScript snippet.
Review the output and click Use Code to insert it into your workflow.
The more specific your prompt, the better the generated code will be.
Data formatting: convert phone numbers or dates into a standardized format.
API integration: generate code to fetch data from external services via HTTP requests.
Mathematical calculations: compute values such as package discounts in real time.
String manipulation: extract details from text, such as pulling an email address from a subject line.
Conditional logic: implement custom decision-making, such as routing leads based on specific criteria.
You do not need to know JavaScript to use this feature; describe what you need and the AI writes the code. You can review and edit the generated code before inserting it. If the result is not what you need, click Generate again or refine your description. Code with AI is currently available for the Custom Code action. Because the feature is in Beta, always review and test the output before deploying it in a live workflow.
Med-spa example: Your booking integration returns appointment dates as MM-DD-YYYY, but your reminder email needs YYYY-MM-DD. In a Custom Code action you click Code with AI, type "Convert the appointment date from MM-DD-YYYY to YYYY-MM-DD," click Generate, review the snippet, and click Use Code. The reminder now shows the date in the correct format with no manual coding.
Q: What is the difference between the AI tools here and AI Actions? The tools in this guide build and edit the workflow for you. AI Actions are AI steps that run inside a workflow when it executes. See the AI Actions guide for those.
Q: Can I edit a generated workflow using AI? Yes. Use conversational edits to add, remove, replace, move, or modify actions and triggers, including multi-path If/Else and Wait configurations.
Q: Can I target only certain steps when editing? Yes. Use Point and Edit to select specific actions (single, multiple, or drag-select) and apply changes only to those selections.
Q: What if the workflow does not match my intent? Refine your prompt with more detail, perform conversational edits, or plan in Chat Mode before building.
Q: Do I still need to test AI-built workflows? Yes. Always validate triggers, actions, timing, and outcomes with a live test before activating.
Q: Do these AI features use AI credits? The Workflow AI Assistant no longer uses AI credits. A fair usage limit may apply, resetting 24 hours after you reach the daily limit.
Q: Why do items appear in the Post-Generation To-Do List? Some settings need a human decision, such as choosing credentials, selecting an account, picking a pipeline, or defining a step-specific setting before the workflow can be finalized.
Q: Do I need to know JavaScript to use Custom Code Generation? No. Describe what you need in plain language and the AI generates the JavaScript for you. You can still review and edit it.
Q: Why don't I see the info icon or Explain Field button on my fields? AI-Powered Field Tooltips are experimental and may appear only for specific fields and eligible accounts. Confirm you are viewing Advanced Settings in the Manual SMS or Manual Call action.
Q: How do I disable the AI Workflow Builder? Disable it at the agency level under Settings > Labs, or at the sub-account level under Automation > Global Workflow Settings > Workflow AI by toggling off AI Builder.
