Formatters and Data Tools are the data-manipulation actions inside the Aesthetix CRM workflow builder's Internal category. Unlike actions that send a message or move a contact through a pipeline, these actions take a piece of data, transform it, and hand back a clean output value that you reference in any step that runs after them. That output is what makes them powerful: a formatter on its own does nothing visible, but the formatted result can feed an SMS, an email, an If/Else branch, a field update, or an outbound webhook later in the same workflow.
This article covers seven actions: Date/Time Formatter, Number Formatter, Text Formatter, Array Formatter, Math Operation, Update Custom Value, and Custom Code. Each one reads from fields you already have (contact fields, custom fields, custom values, trigger data, appointment data, or inbound webhook data) and produces a result you can chain forward.
The flow for adding any of these actions is the same:
Open Automation and create a new workflow or edit an existing one.
Make sure the workflow has a trigger in place, since the trigger usually supplies the data you want to format.
Click the plus (+) icon where you want the action to run, then either scroll to the Internal category or type the action name into the search bar.
Select the action, give it a clear, descriptive name (this name becomes part of how you reference its output later), and configure the fields described in that action's section below.
Save the action. For Custom Code you must also test the code before its output becomes available.
A formatter only transforms data; it does not store anything permanently unless you follow it with an action that writes the result somewhere (for example, Update Contact Field or Update Custom Value). Add formatters in the order the data needs to flow, and remember that each one's output is available only to steps that come after it.
A note on referencing outputs: every action you add can expose its result as a workflow variable. When you are in a later step and click the merge-field or variable picker, you will see the formatter actions you placed earlier listed by the name you gave them, and you select the result from there. The token patterns shown in this article (for example, the number formatter result token) reflect how those variables are structured under the hood, but in practice you insert them through the variable picker rather than typing them by hand.
What it does: Reshapes a date or a date and time from one format into another, and can also compare two dates to return the difference in days. Use it whenever a date arrives in a format you cannot use directly, or when you need to drive logic off how far apart two dates are.
Three modes:
Format Date converts a date from one structure to another (for example, 2026-06-25 to June 25, 2026).
Format Date and Time converts a date that also carries a time component.
Compare Dates takes two dates and returns the difference between them in number of days.
Configuration for Format Date:
Field: The source date. You can pick a Specific Date, the Current Date, a contact's standard date fields, date-type custom fields, an appointment start or end date, a Custom Value, or a value from an Inbound Webhook trigger.
From Format: The format the source date is currently in. When you choose a system field (Specific Date, Current Date, a contact standard date field, a date custom field, or an appointment start/end date), the builder auto-detects and preselects the matching format. When the source is a Custom Value or an Inbound Webhook value, you must select the exact format that matches the incoming data yourself.
To Format: The format you want the date converted into, chosen from the format list.
Configuration for Format Date and Time:
Field: A date-and-time source. You can pick a Specific Date and Time, the Current Date and Time, an appointment start or end date-time, a Custom Value, or an Inbound Webhook value.
From Format: Auto-detected and preselected for system fields; you set it manually for Custom Values and Inbound Webhook values.
To Format: The desired output format from the list.
Configuration for Compare Dates:
Start Date and Start Date Format: The first date and its format (same source options and auto-detect behavior as above).
End Date and End Date Format: The second date and its format.
The action returns the difference between the two dates as a number of days.
Inputs and output: The inputs are the source date field(s) plus their formats. Format Date and Format Date and Time output the reformatted date string. Compare Dates outputs a number (the day difference). You reference the result in any later step through the variable picker, selecting this action's output by the name you gave it. The day-difference output is especially useful as the input to an If/Else condition or a Math Operation.
When to use it (med spa example): A patient books a consultation through an external scheduling tool that pushes the appointment date into your workflow as "06/25/2026" via webhook. Use Format Date to convert it to "June 25th, 2026" before inserting it into a confirmation SMS so the message reads naturally. Or, use Compare Dates with Start Date = the patient's last treatment date and End Date = Current Date to get the number of days since their last visit, then branch with If/Else to re-engage anyone past 90 days with a touch-up offer.
Notes and gotchas:
For Custom Value and Inbound Webhook sources, the From Format must match the incoming data exactly, or the conversion will fail or produce wrong results.
Contact custom fields do not currently support a Date Time structure, so use Format Date (not Format Date and Time) when pulling from a date-type custom field.
What it does: Formats and generates numeric values. It can convert text that looks like a number into an actual number, reformat numbers, standardize phone numbers, format currency to a locale, and generate random numbers. Cleaning numeric data this way lets you compare values in If/Else conditions with number operators and present figures professionally in messages.
Five action types:
Text to Number converts a text representation of a number into a true numeric value (for example, "$12,345.67" becomes 12345.67).
Select Field: The field holding the text version of the number (Contact fields, Custom fields, Custom Values, or Inbound Webhook trigger).
Input Decimal Mark: The character used to mark the decimal portion in the input (for example, a period).
Format Number reformats a number according to a chosen output format, controlling decimal and thousands separators.
Select Field: The field holding the number.
Input Decimal Mark: The decimal mark currently used in the input number.
To Format: The desired output format, selected from the list.
Format Phone Number standardizes a phone number into a chosen format (for example, (123) 456-7890 or E.164 like +15551234567).
Select Field: The field holding the phone number. When this action type is selected, only phone-number-related fields can be chosen.
To Format: The target phone format from the list.
Country Code: The country code to apply, selected from the list.
Format Currency formats a numeric value as currency using locale-specific rules for symbol, thousands separator, and decimal separator.
Select Field: The field holding the numeric value.
Currency: The currency type (for example, USD, EUR, GBP).
Currency Locale: The regional format (for example, en-US). The locale controls presentation: en-US shows $1,234.56, while a German locale shows €1.234,56. Choosing the right locale ensures values appear in the format your audience expects.
Random Number generates a random number within a range.
Lower Range: The minimum possible value.
Upper Range: The maximum possible value.
Decimal Points: How many decimal places the generated number may have (optional).
Inputs and output: Inputs are the source field plus the type-specific settings above. Every Number Formatter type returns a single result value. You reference it in later steps through the variable picker by selecting this action's result; under the hood the result follows the pattern {{number_formatter.1.result}} (the number reflects which Number Formatter instance it is). Insert it into an SMS, email, If/Else condition, field update, or webhook downstream.
When to use it (med spa example): A lead form collects a budget as free text like "$2,500". Run Text to Number to convert it to 2500, then use an If/Else with a number operator to route anyone over 2000 to a VIP consultation sequence. Separately, use Format Phone Number with E.164 and the US country code on every new contact's phone before passing it to an outbound call or external system, so the number always dials correctly.
Notes and gotchas:
Always match the field type to the operation. Feeding a phone field into Format Currency, for example, produces errors or junk output.
The Number Formatter is built for the Arabic numeral system (0-9). It does not format non-Arabic numeral systems.
It does not format dates. Use the Date/Time Formatter for dates.
Random Number does not guarantee uniqueness. The wider the range, the lower the collision odds; if you need guaranteed-unique codes, add your own tracking logic to reject repeats.
You can place multiple Number Formatter actions in one workflow to perform several operations in sequence.
What it does: Manipulates and transforms text. It can change case, trim, replace, split, measure, and extract pieces of text so that data is clean and correctly shaped before it is used or stored. This is a free action.
Action types:
Action Type | What it does | Example | Extra fields |
|---|---|---|---|
Upper Case | Converts all characters to uppercase | "text" to "TEXT" | none |
Lower Case | Converts all characters to lowercase | "TEXT" to "text" | none |
Title Case | Capitalizes the first letter of each word | "text formatter" to "Text Formatter" | none |
Capitalize | Capitalizes the first letter of the first word only | "text formatter" to "Text formatter" | none |
Default Value | Returns a fallback value when the input is empty; returns the text unchanged when present | "" to "Default Value" | Default Value |
Trim | Shortens the text to a set length | "applesauce" to "apple" | Max Length; Remove Characters From Beginning; Ellipses toggle |
Trim Whitespace | Removes leading and trailing whitespace | " hello " to "hello" | none |
Replace Text | Replaces every instance of an exact character, word, or phrase with another | "this ain't it" to "this is not it" | Find; Replace |
Find | Returns the position of the first occurrence of a value, or -1 if not found | "lorem ipsum dolor sit" finding "ipsum" returns 7; "cat" returns -1 | Find |
Word Count | Counts the number of words | "lorem ipsum" returns 2 | none |
Length | Counts the number of characters | "cat" returns 3 | none |
Split Text | Splits text on a delimiter and returns one segment | "lorem ipsum dolor sit" split on space, second segment, returns "ipsum" | Separator; Segment (First, Second, Second to Last, or Last) |
Remove HTML Tags | Strips HTML tags, leaving plain text | "<p>Hello world!</p>" to "Hello world!" | none |
Extract Email | Grabs the first email address in the text | "my email is [email protected]" to "[email protected]" | none |
Extract URL | Grabs the first URL in the text | "my homepage is example.com" to "example.com" | none |
Trim details: Select the input text, set the Max Length to trim to, optionally set Remove Characters From Beginning (strips that many characters off the front), and optionally toggle Ellipses to append "..." to the end.
Split details: Select the input text, enter the Separator (delimiter), then choose which Segment you want returned: First, Second, Second to Last, or Last.
Select Field options: The text source can come from a wide set of fields, including Contact (Full Name, First Name, Last Name, Email, Phone, Phone raw format, Company Name, address parts, Timezone, Source, Website, ID), User (the staff member, including Signature, Calendar Link, and phone fields), Message (Body, Subject, Attachments), Account (your practice's business details and Owner), Phone Call (direction, duration, from/to details, answered-by details, start/end time, status), Client Portal Contact (Login Magic Link), Attribution (first and latest session source, URL, campaign, UTM parameters, ad IDs), and any Custom Fields or Custom Values unique to your account.
Inputs and output: The input is the selected text field plus any type-specific fields. The action returns the transformed text (or a number, for Find, Word Count, and Length). Reference the result in later steps through the variable picker by selecting this action's output. Chain multiple Text Formatter actions together for multi-step transformations.
When to use it (med spa example): New patients often type their names inconsistently ("JANE doe", "john SMITH"). Add a Text Formatter with Title Case on the First Name and Last Name right after the New Contact trigger, then write the cleaned values back with an Update Contact Field action so every record and every personalized message reads "Jane Doe". Or use Split Text on a comma-separated "treatments of interest" field to pull out the first interest and tag the patient accordingly.
Notes and gotchas:
Text Formatter works on text. If your numbers are stored as text they can be manipulated here, but true numeric values belong in the Number Formatter.
If you cannot find your field, drill deeper into the field categories above; most missing fields are simply nested.
Combine with custom values and merge fields to build personalized, correctly formatted messages.
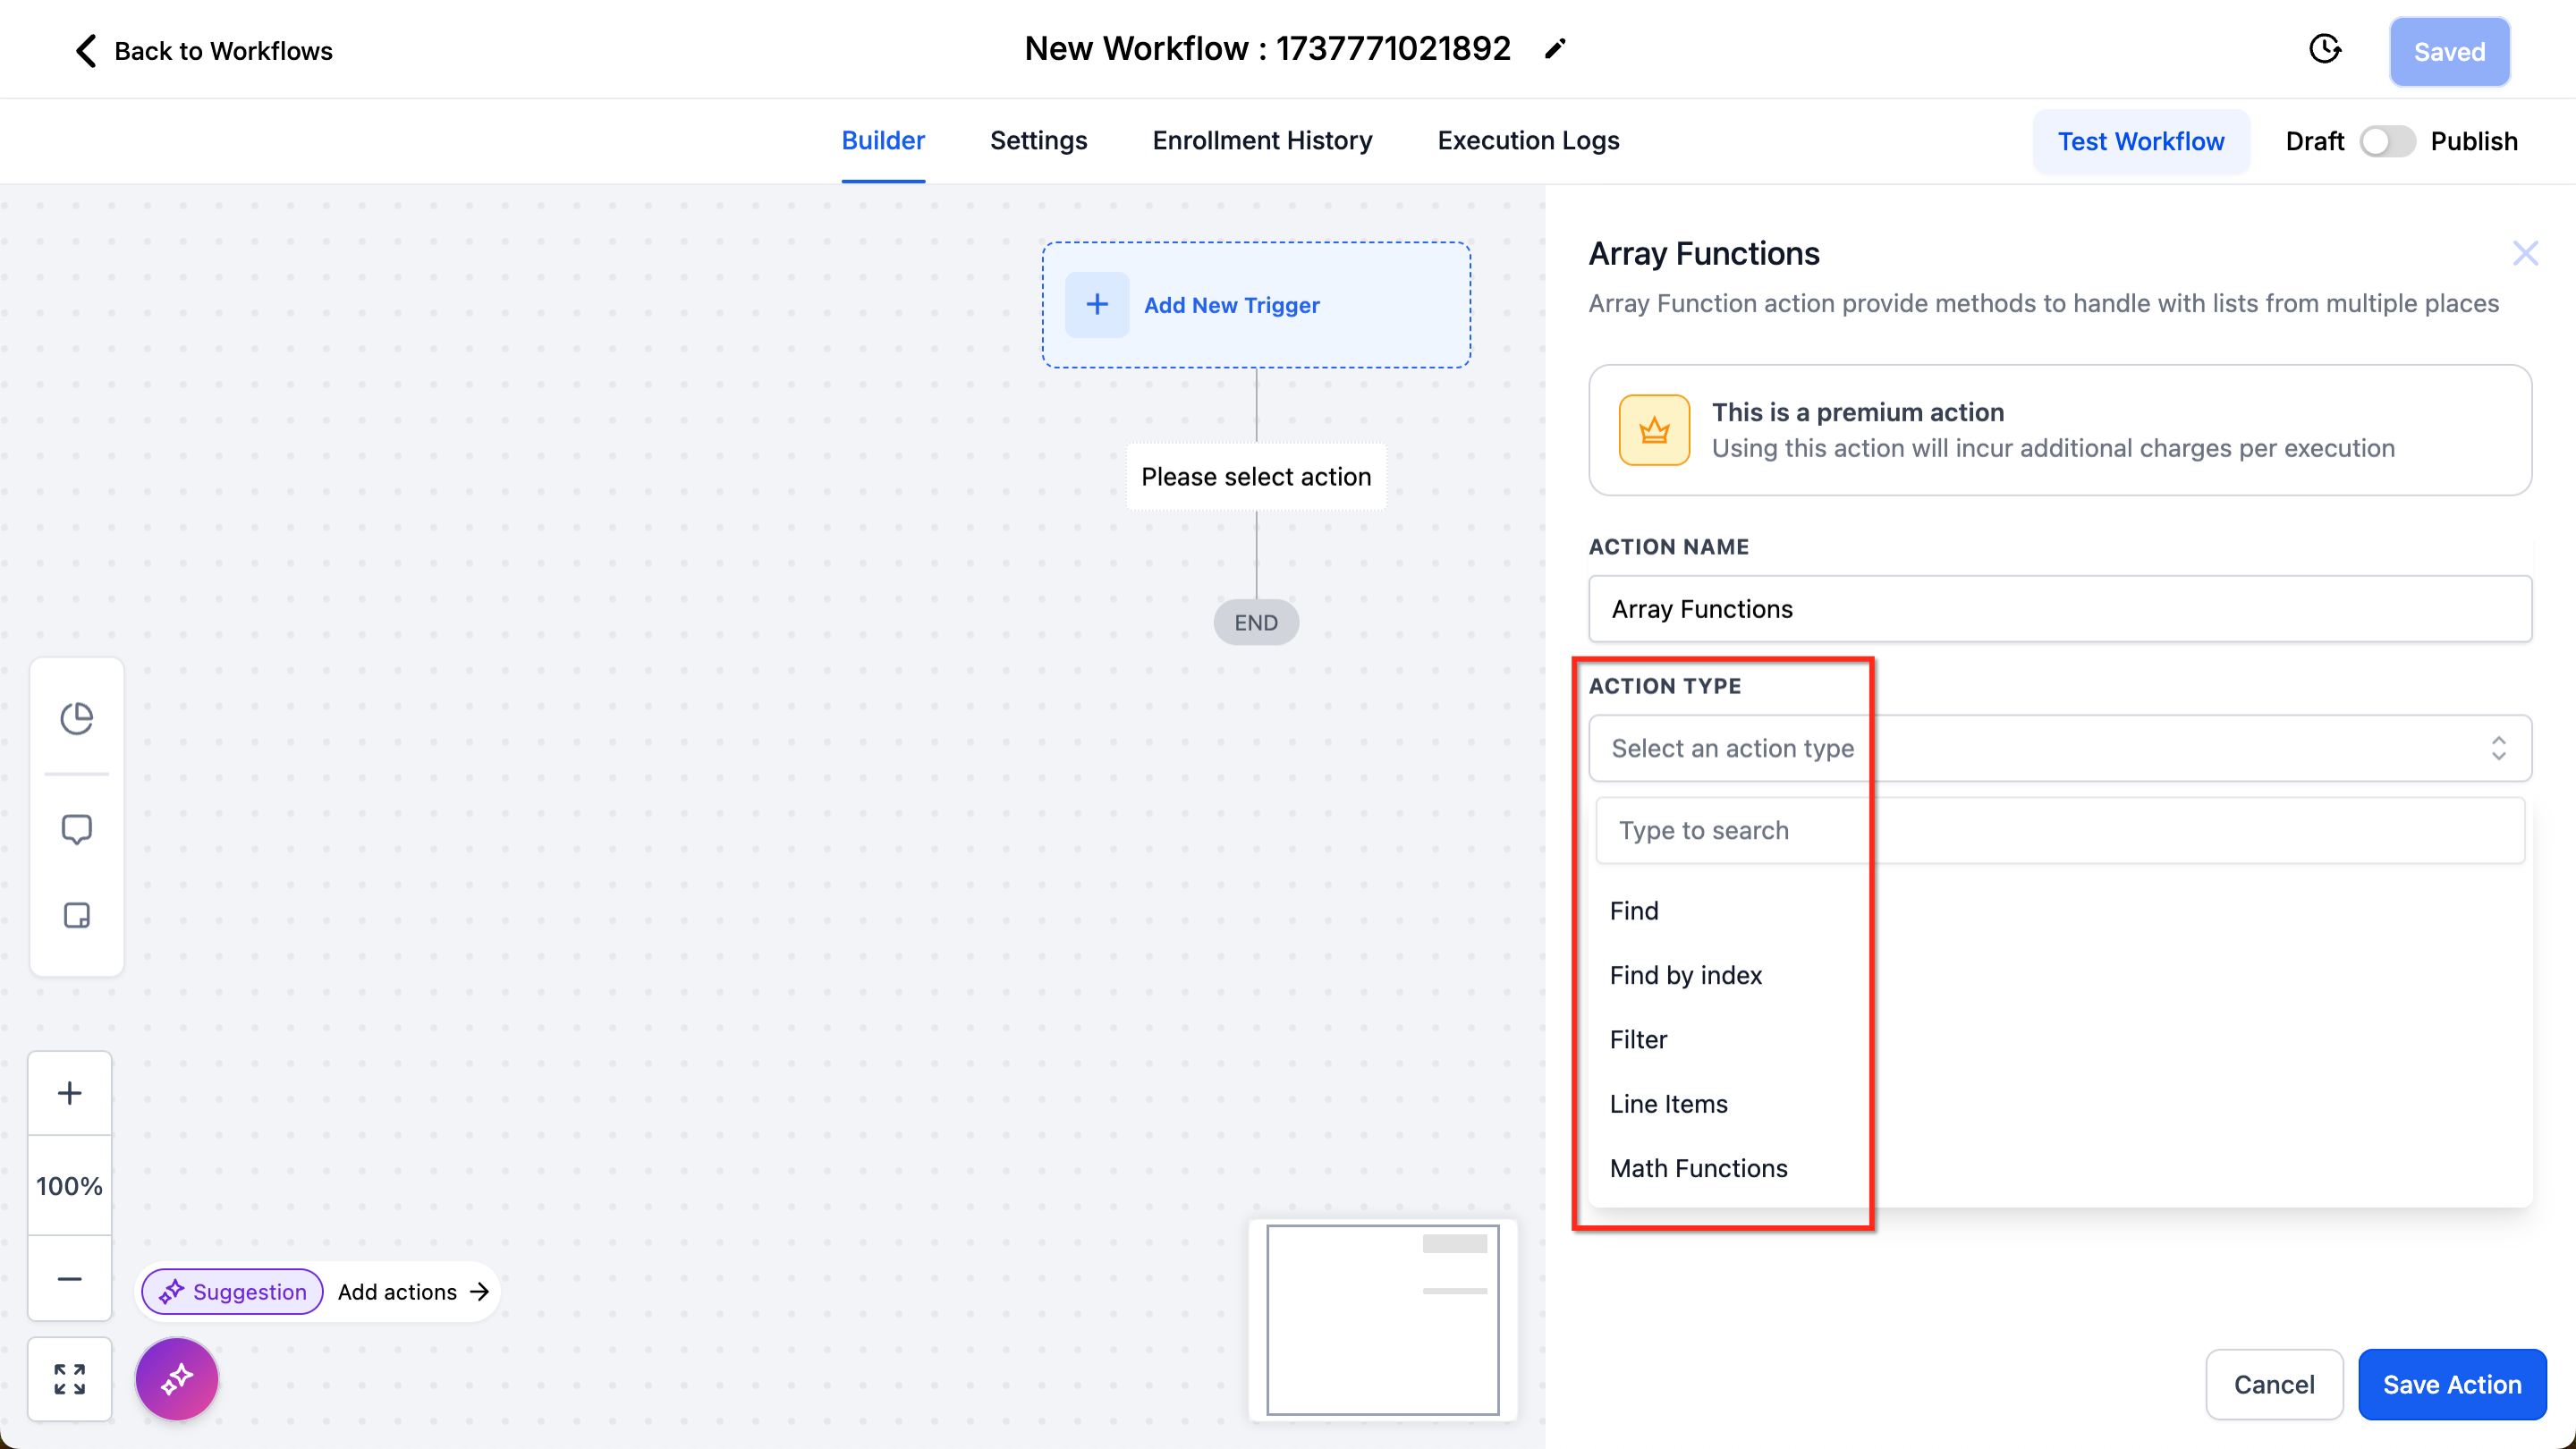
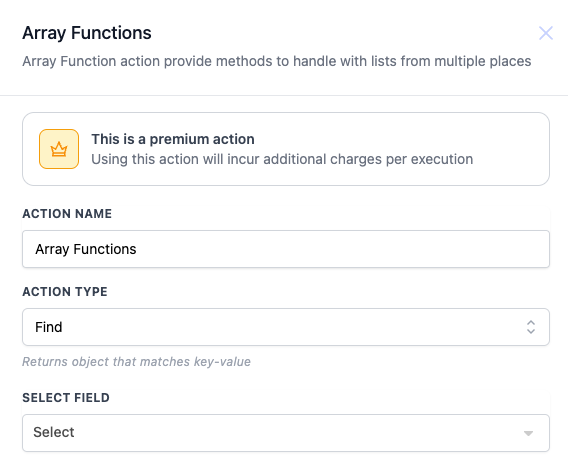
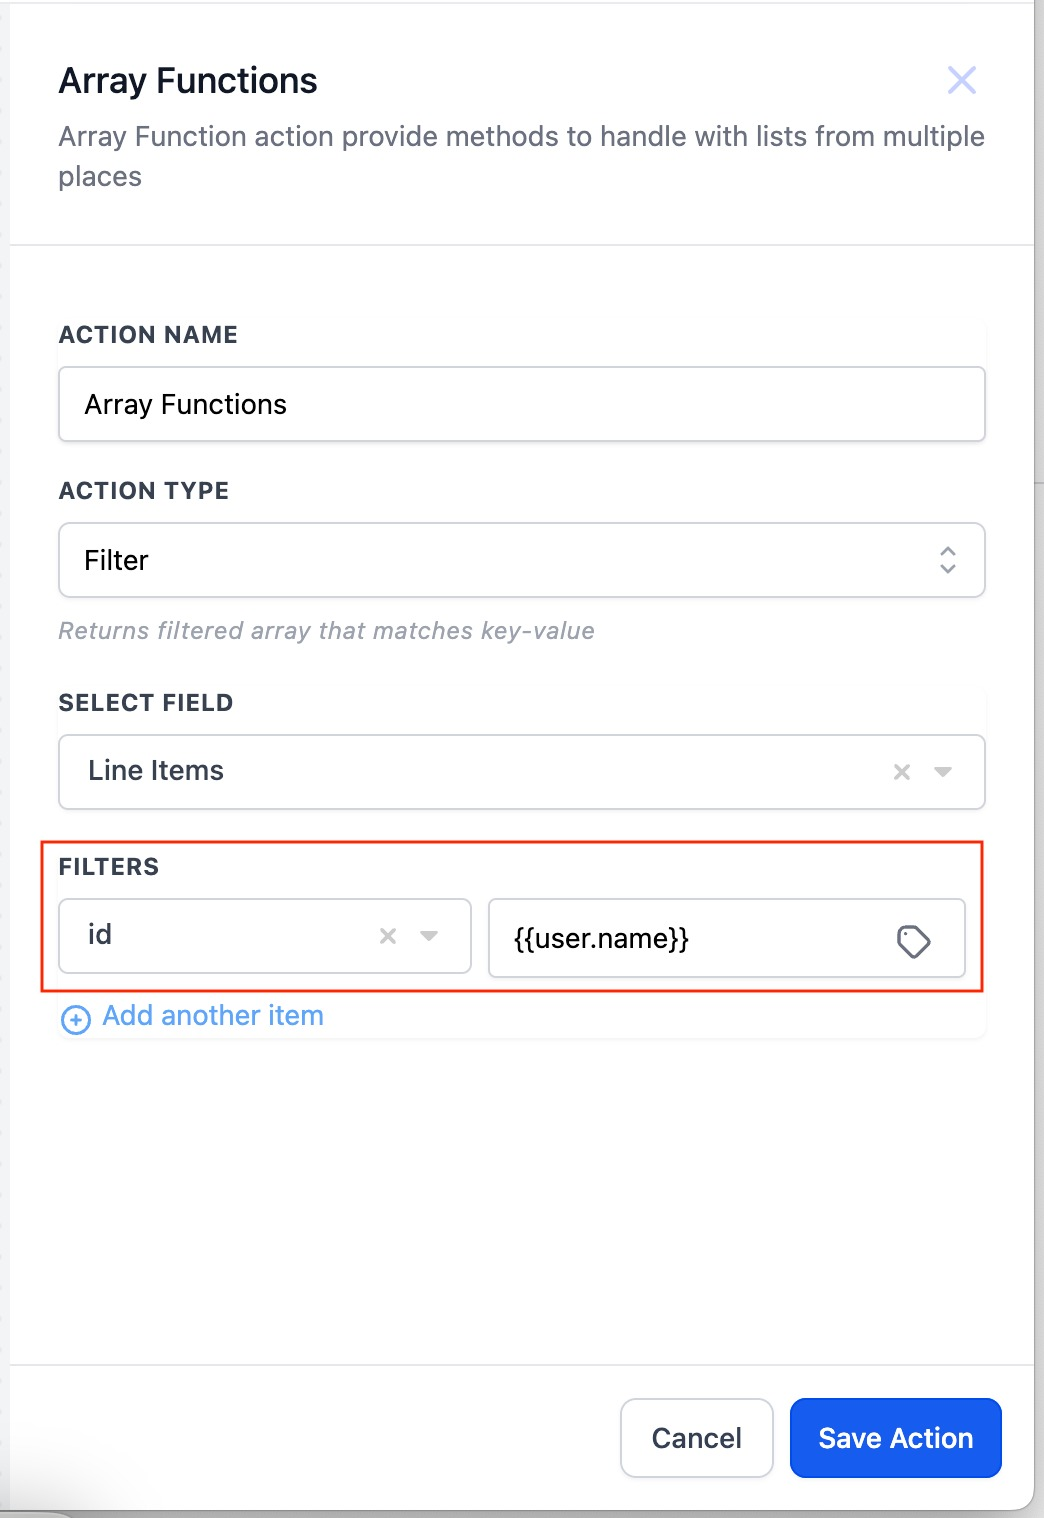
What it does: Performs operations on arrays (lists of data), such as order line items or other repeating objects, so you can extract, filter, reconstruct, or calculate across the list without exporting to an outside tool. Arrays in workflows come from sources like e-commerce order triggers, the Inbound Webhook trigger, and Custom Webhook action responses. This action is free to use.
Setup flow:
Step 1: Access the workflow builder. Open the Automation tab and create or select a workflow.
Step 2: Add the Array Formatter action. Click Add Action and select Array Formatter.

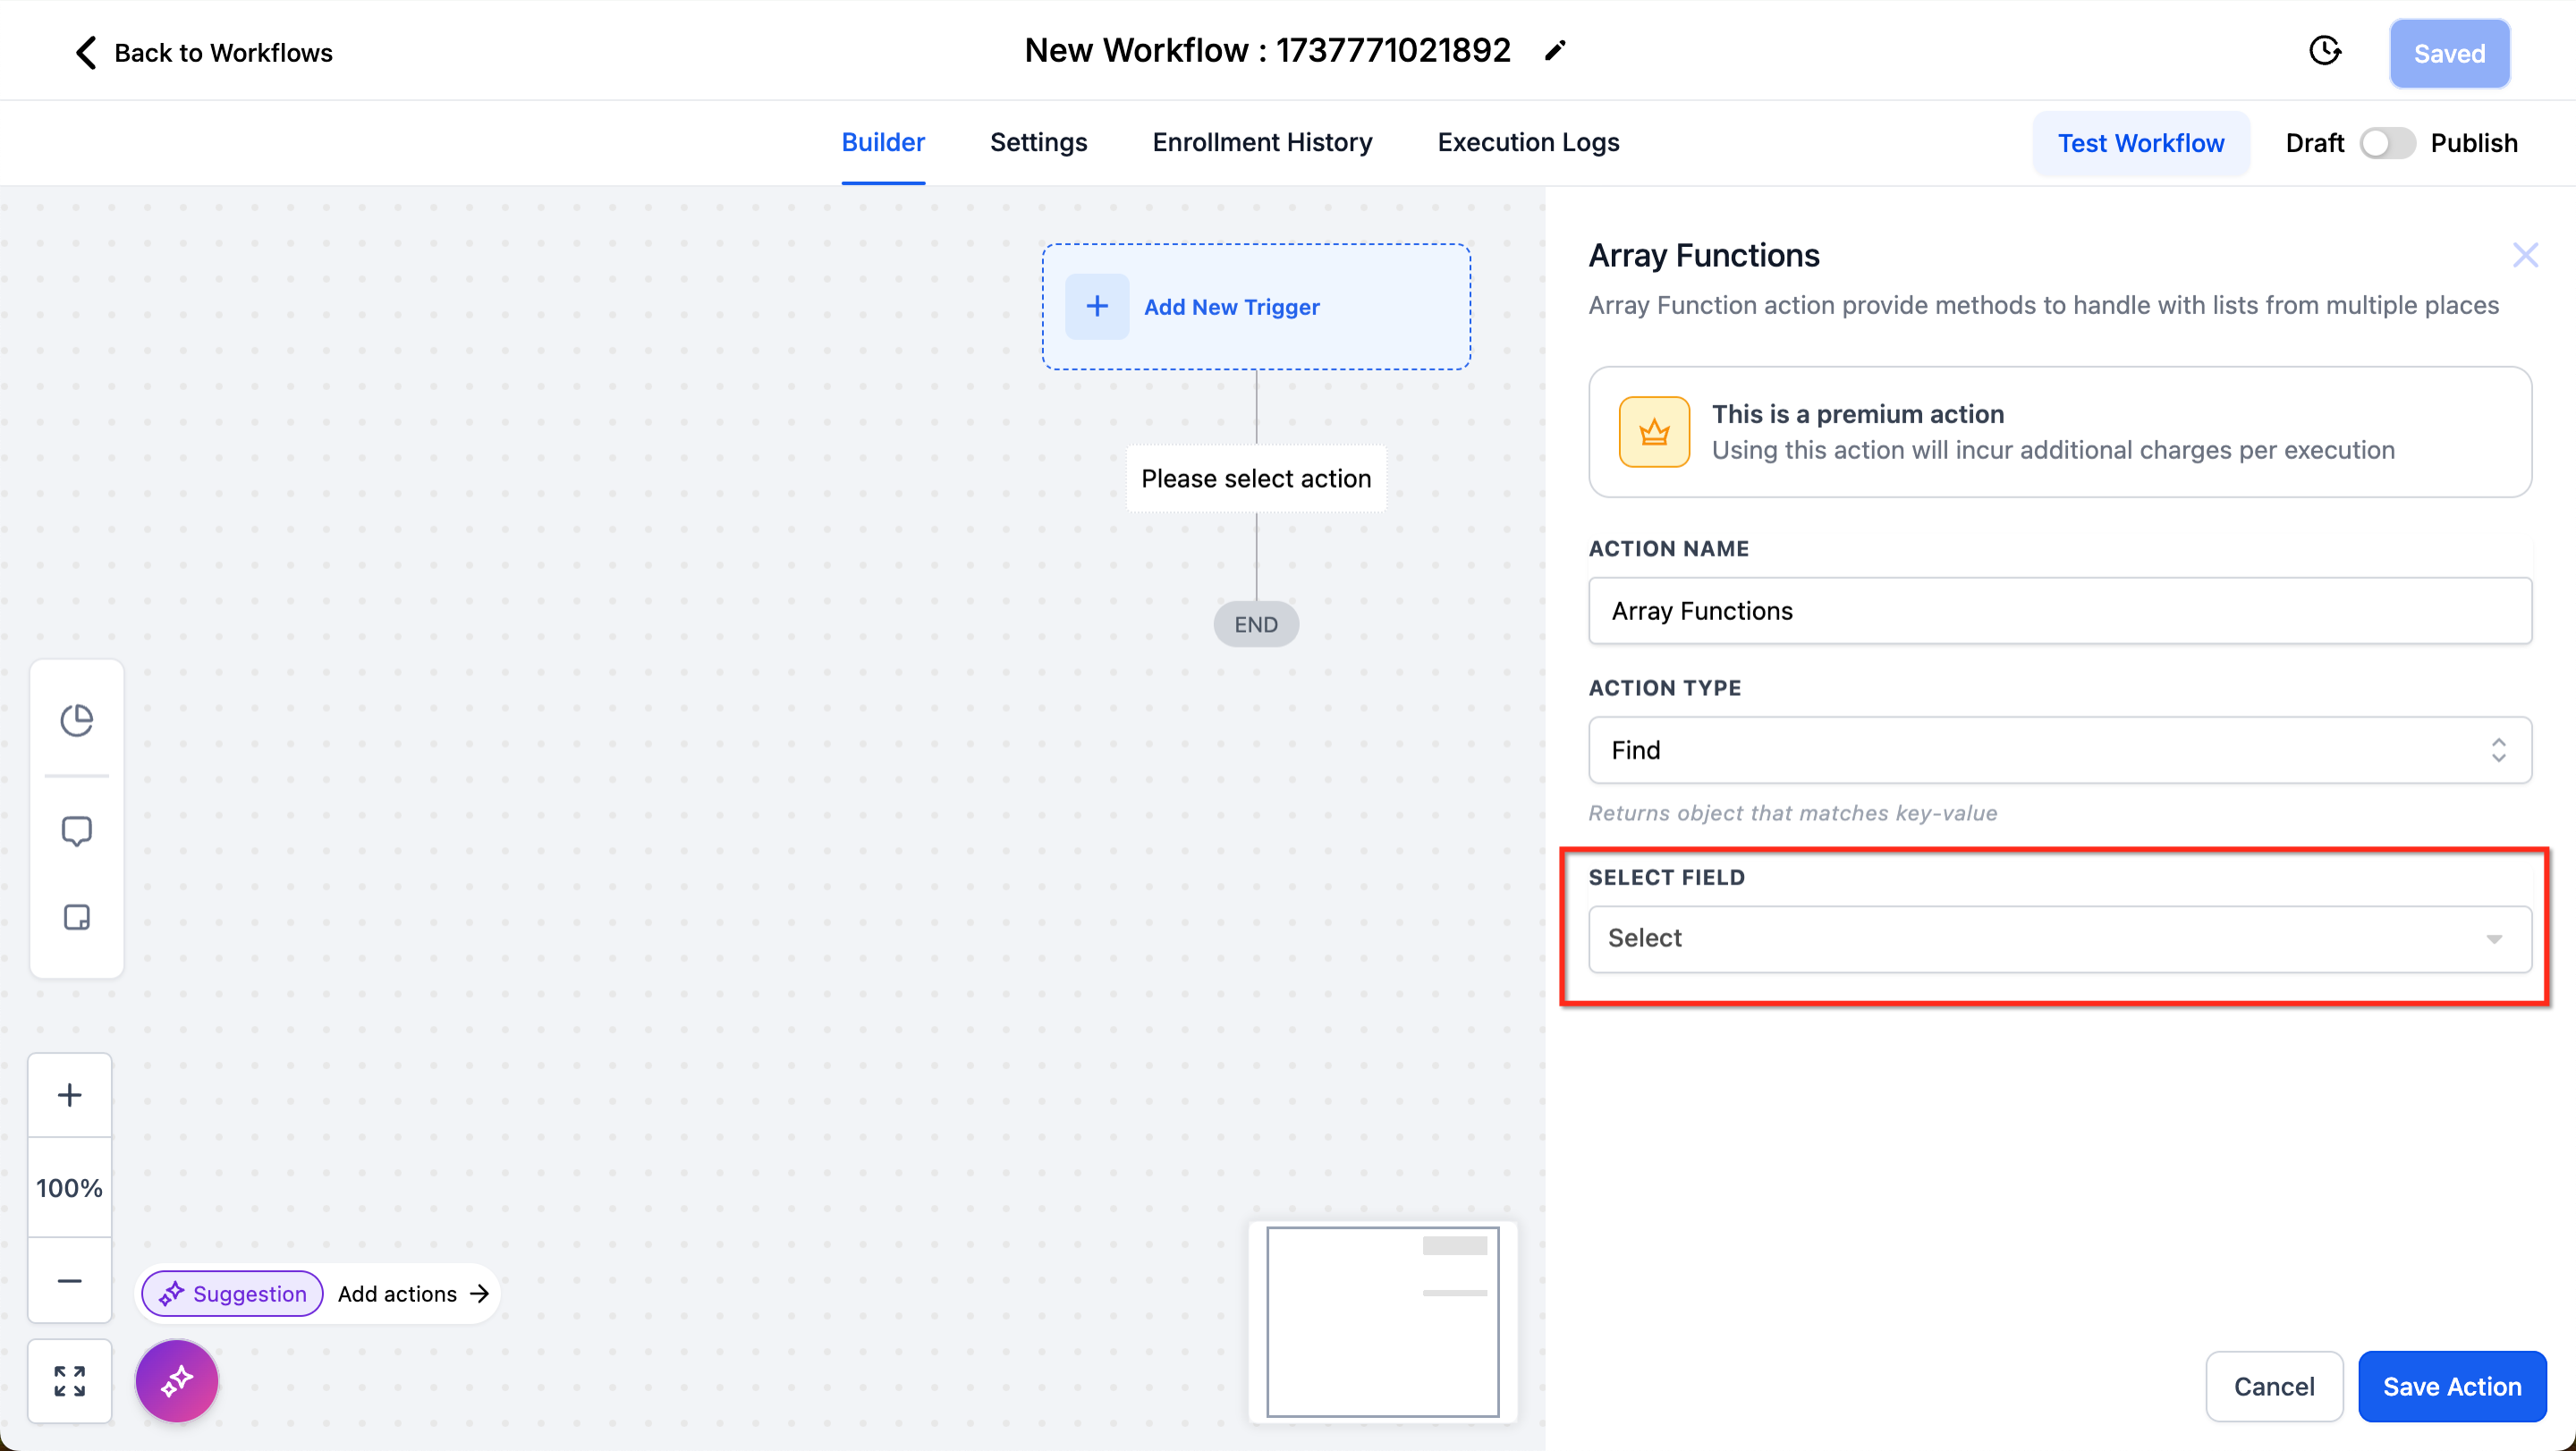
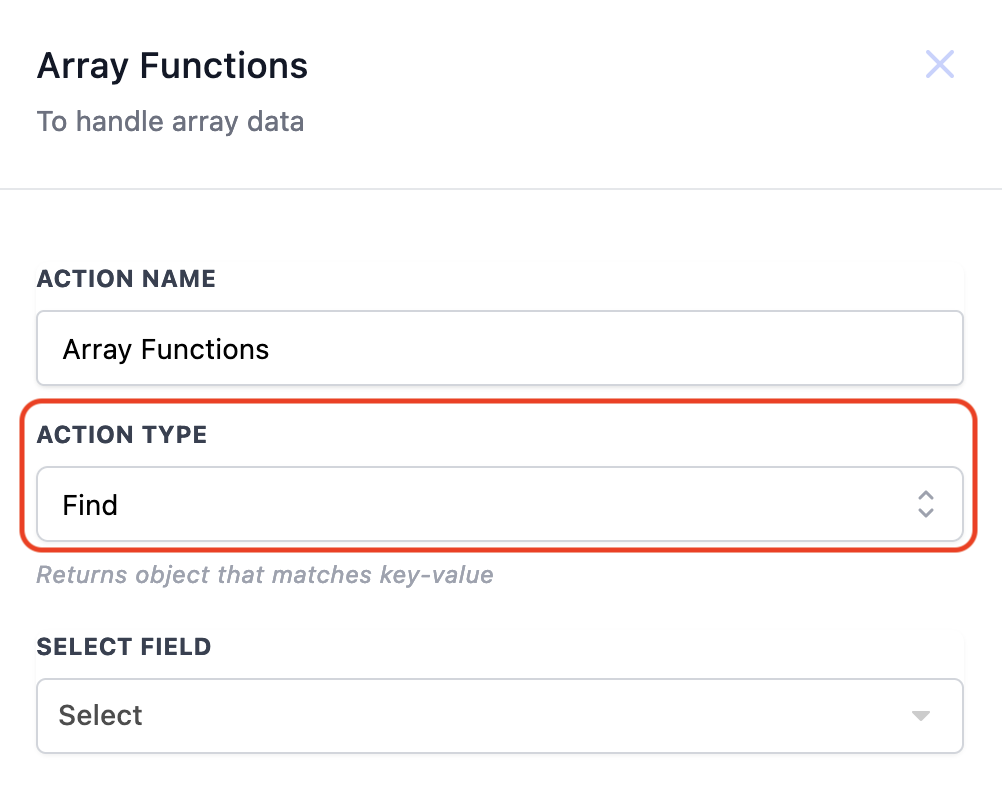
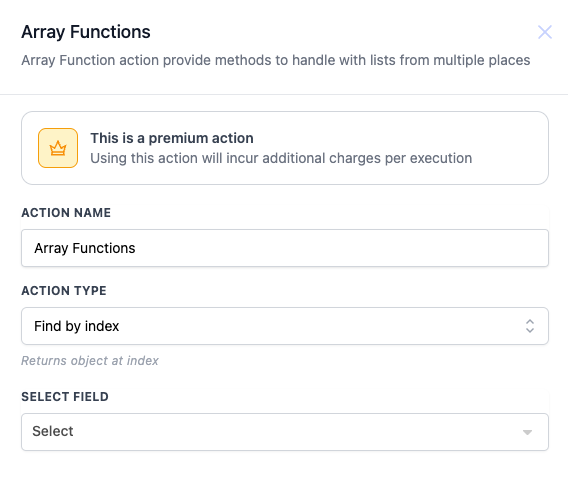
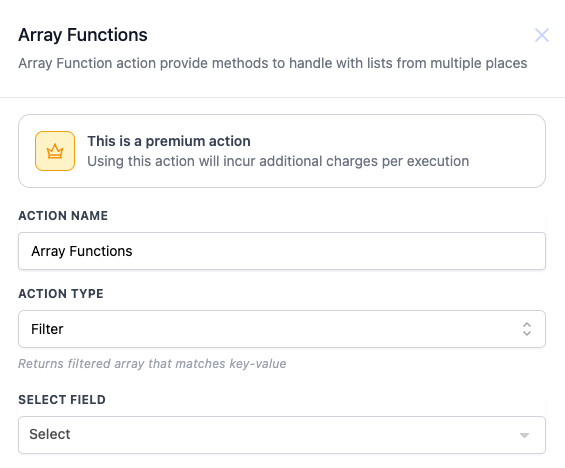
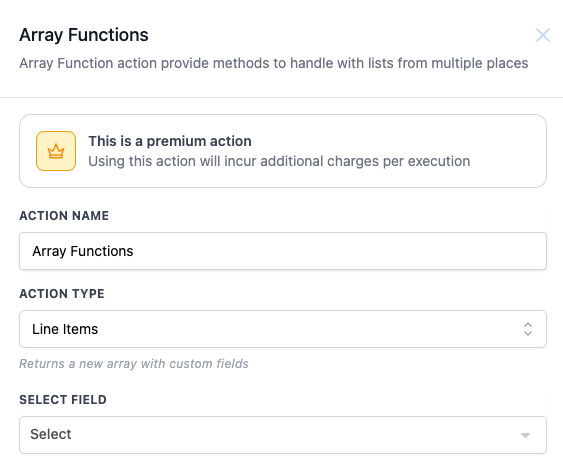
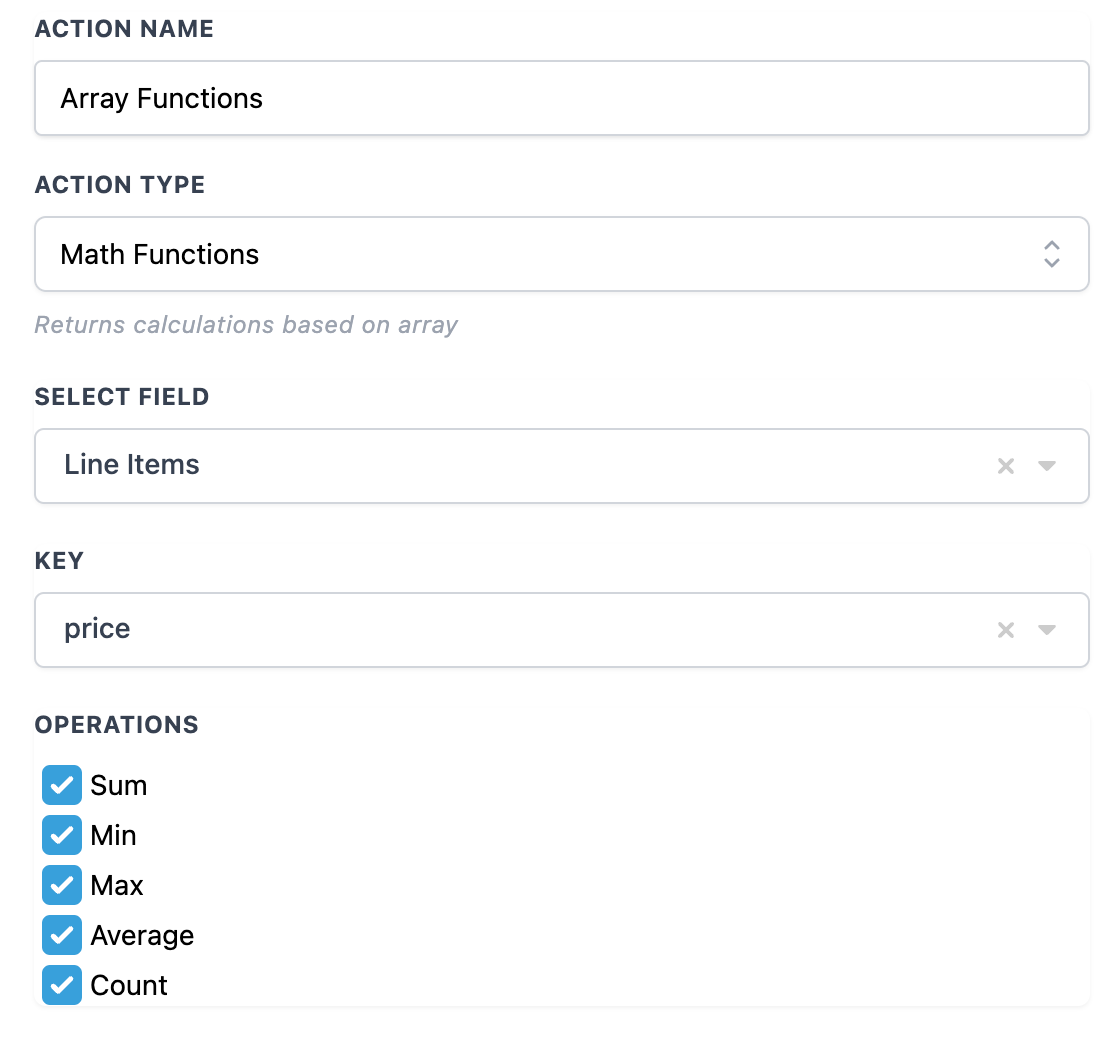
Step 3: Choose the function type. Pick Find, Filter, Find by Index, Line Items, or Math.
Step 4: Configure inputs. Specify the input array, then define the keys, values, or criteria the chosen function needs.
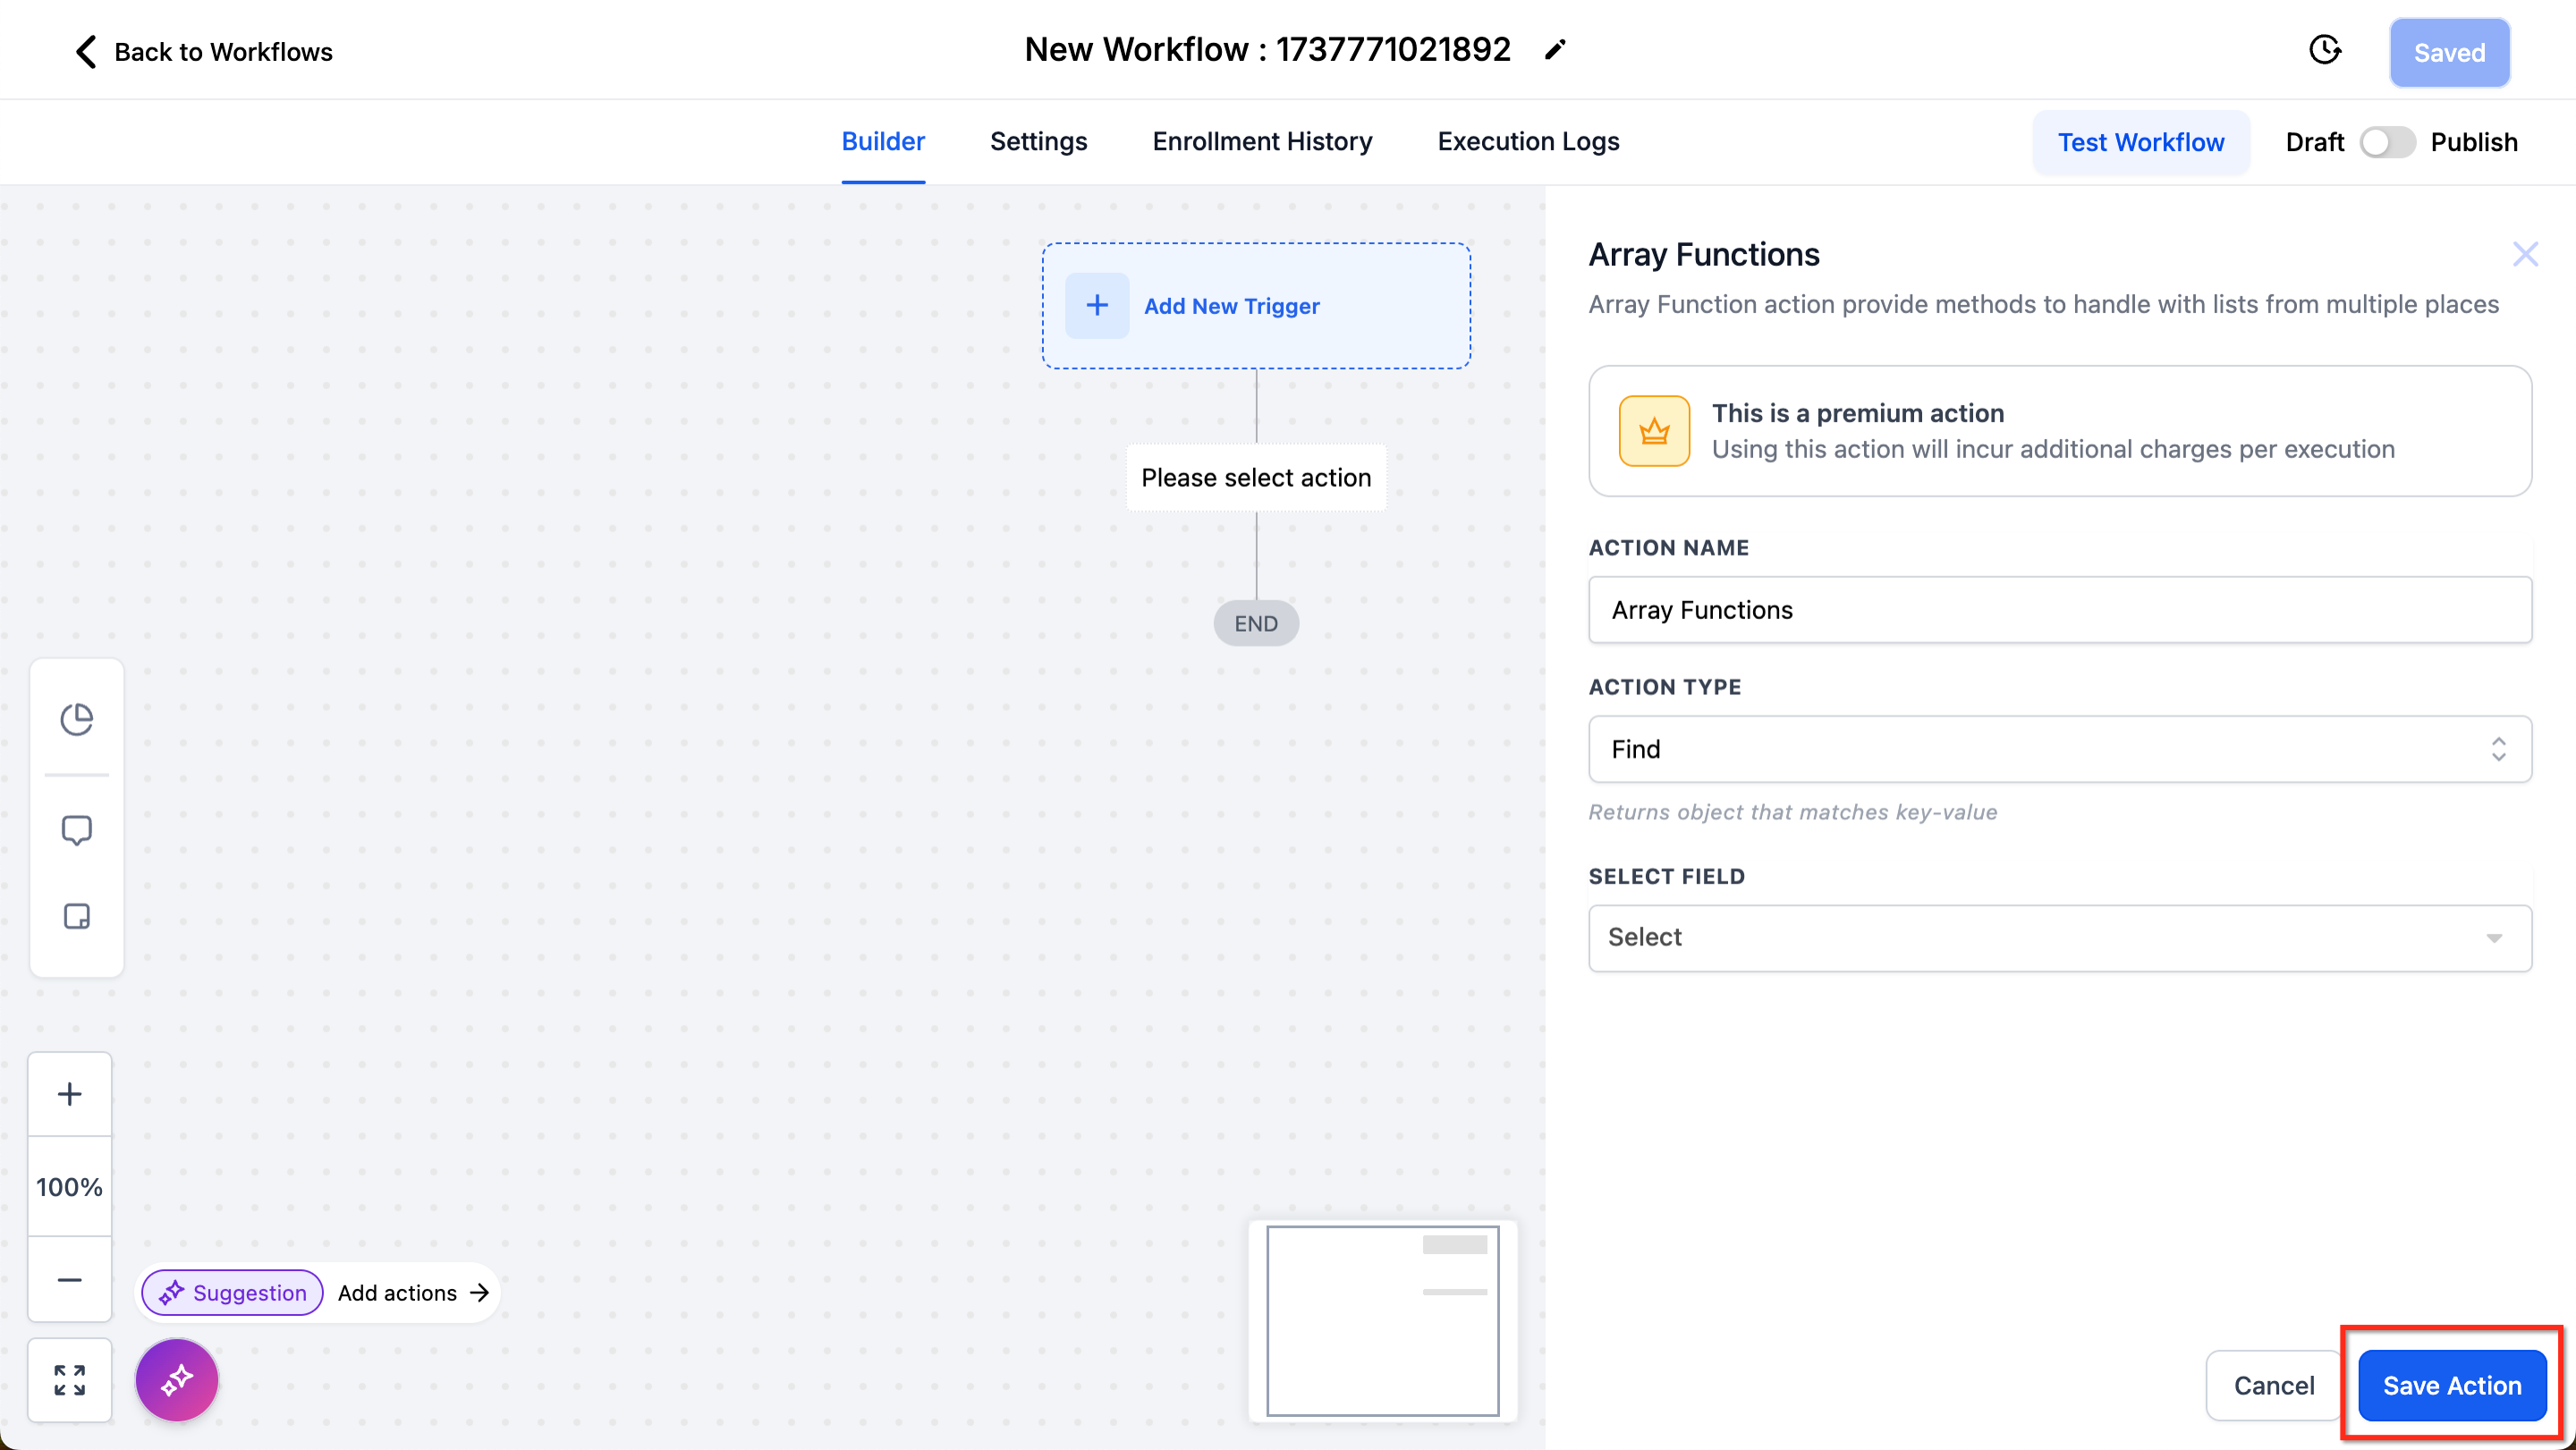
Step 5: Save and test. Save the workflow and test the action to confirm it returns what you expect.
Step 6: Use the value. Once the action works, it creates a variable you can reference in other actions.
The configuration panel shows action-type descriptions, the return type, and an output preview, so you can see what each option will return before saving.
Function types:
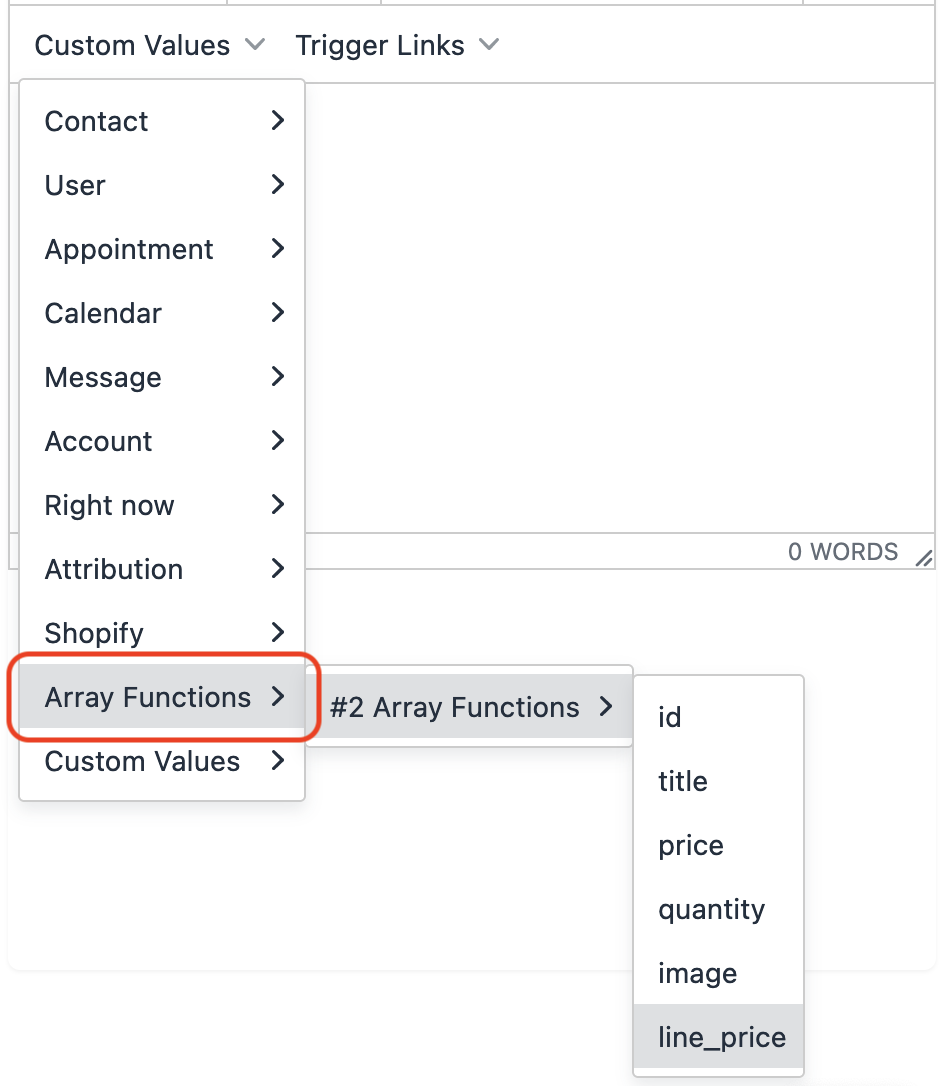
Find locates a single object in the array by matching a key-value pair and returns the first match. For example, check whether a product with a specific ID exists in a list of purchased items.
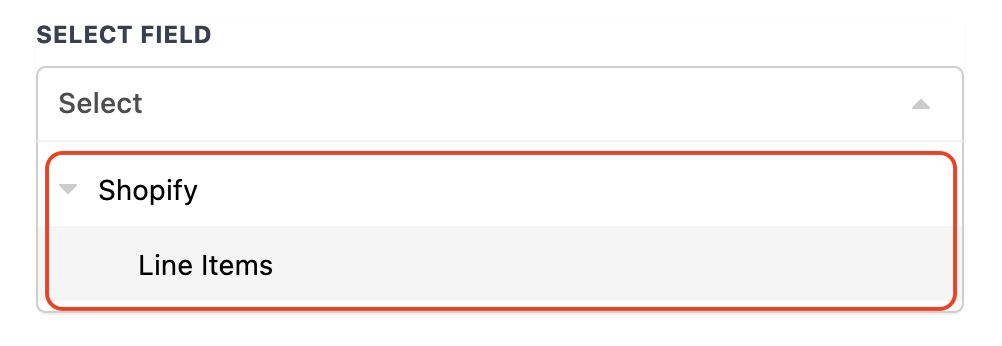
For example, using an order-placed trigger and checking whether a product with product id "zGhad23wfadfa" is in the order line items.Step 1: Select Action Type Find |
| | Step 2: Select the order Line Items array |
| | Step 3: Pick the Key and input the Value to match. |
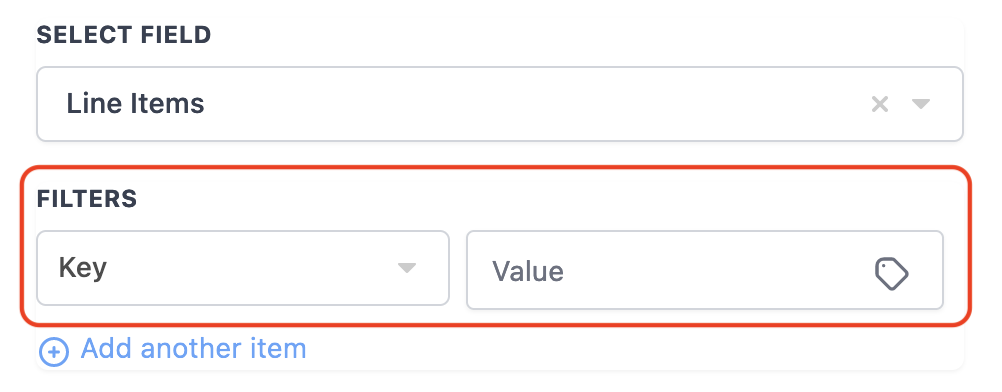
| | Step 4: Review the available Line Item Keys. |
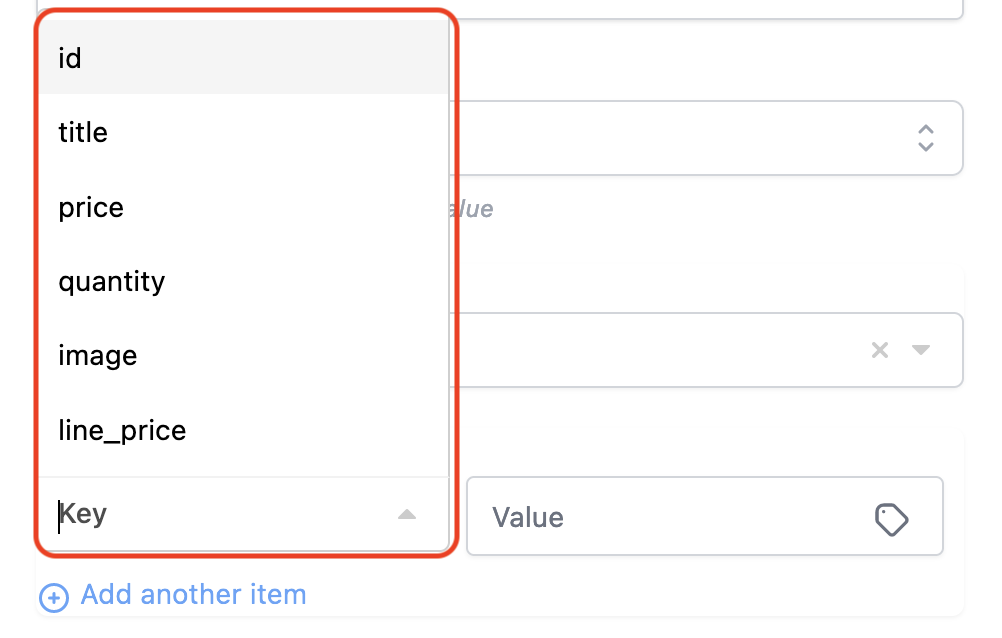
| | Step 5: In this example, select the "id" Key and paste in the specific product id as the Value. |
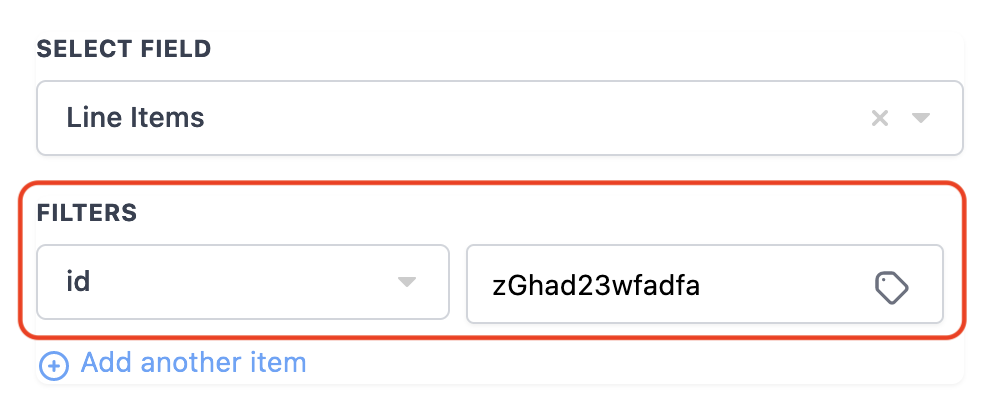
|
You can match on multiple key-value pairs by clicking Add Another Item.
Find by Index returns one item by its position in the array. Arrays start at zero, so a list of (0) Apple, (1) Banana, (2) Cherry returns Cherry when you request index 2.
Filter returns an array of every object that matches a filter or set of filters, for example all objects with color "blue" or all objects in category "home". You can filter dynamically, such as setting Key to "id" and Value to a dynamic contact reference to return only that person's items.
Line Items rebuilds an array into a different structure to fit a target action, such as a custom webhook payload, a spreadsheet row, or an email-builder cart structure. You define the key-value pairs for each item; the action takes one array in and outputs the same data reshaped. Add more key-value pairs with Add Another Item.
Math runs a calculation across the numbers in the array and returns the result. Operations:
Sum: add all values and return the total.
Min: return the smallest value.
Max: return the largest value.
Average: return the mean of all values.
Count: return how many values there are.
Inputs and output: The input is the selected array plus the keys, values, or criteria for the chosen function. Find returns a single object (whose properties you can then reference individually), Find by Index returns one item, Filter returns a smaller array, Line Items returns a reshaped array, and Math returns a single number. After the action works, its output appears as a variable you select through the picker in later steps (email, SMS, If/Else, webhook, and so on).
When to use it (med spa example): A patient places an online order for several retail skincare products through your store, and the order trigger delivers the line items as an array. Use Array Formatter Math with Sum on the line-item prices to get the order total, then branch with If/Else to send a thank-you plus a loyalty reward whenever the total clears a threshold. Or use Find to confirm a specific high-margin product was in the order before triggering a targeted follow-up.
Notes and gotchas:
Array Formatter handles one-dimensional (flat) arrays. Nested arrays are not supported and need a custom solution.
Available arrays are collected from supported triggers, the Inbound Webhook trigger, and Custom Webhook responses, so an array source must exist earlier in the workflow.
You can chain multiple Array Formatter actions together for complex operations. Use the workflow test feature to inspect outputs and confirm the configuration.
What it does: Performs calculations on numeric, monetary, and date fields and writes the result to a field you choose. It handles arithmetic on numbers and date arithmetic (adding or subtracting time), which makes it the engine behind lead scoring, renewal date calculations, age verification, and other automated math.
Configuration:
Action Name: Rename it descriptively so it is easy to identify in complex workflows.
Select Field: The input field the calculation runs on. The dropdown offers Date Fields (including Current Date, which is the date the workflow runs, and Date of Birth), Custom Fields (your account's stored fields such as a treatment-package expiry date), and Custom Values (a static value you type in). Only Numeric, Monetary, and Date field types are supported.
Operation Type: The calculation. For numeric and monetary fields you can use Addition, Subtraction, Multiplication, or Division. For date fields you can Add or Subtract Days, Months, or Years.
Operation Value: The number to apply. Type a static number, use the plus and minus icons to nudge it, or click the tag icon to pull a dynamic value from a custom field or trigger value so the math adapts to real-time data. A delete (trash) icon removes an operation you no longer need.
Add Operator: Adds another operation in sequence within the same action (for example, add a value, then multiply the result), so you can chain steps without separate actions.
Update Field: Where the result is written. Choose from Standard Fields, Custom Fields, or Custom Values. The Select Field and Update Field can be the same field or different, but they must be the same field type.
Inputs and output: The input is the selected field and the operation value(s); the output is the calculated result written into the Update Field you chose. Because the result lands in a real field, you reference it downstream like any other field, including inside If/Else conditions to branch on the calculated value.
When to use it (med spa example): When a patient buys an annual membership, add a Math Operation that takes the purchase date (or Current Date) and Adds 1 Year, writing the result into a "Membership Renewal Date" custom field. A later workflow can compare that date to today and send renewal reminders two weeks out. For lead scoring, increment a numeric "Engagement Score" field by a set amount each time a patient opens an email or books, then route high scorers to your front desk for a personal call.
Notes and gotchas:
Each Math Operation action performs simple operations only; it does not apply order of operations (PEMDAS/BODMAS) automatically. For complex formulas, break the calculation into multiple Math Operation steps in the correct sequence and store intermediate results in custom fields.
Monetary fields cannot go below zero: if an operation produces a negative result, it is stored as zero. Guard subtractions with an If/Else check if a negative is possible.
Numeric fields accept both positive and negative values.
Negative values are not supported for Date or Current Date fields.
Numeric, Monetary, and Date are the only supported input types, and the Select Field and Update Field must share the same type.
What it does: Updates a custom value at the account level. Custom values are account-wide placeholders (not per-contact custom fields), so changing one updates that value everywhere it is referenced across your account, not just for a single patient. This lets a workflow keep a shared piece of information current and trigger other automations off the new value.
Configuration:
Action Name: A descriptive name for the step.
Custom Value: The specific account custom value you want to revise, chosen from the list of available custom values.
Current Value: The existing value, shown for reference.
New Value: The value to set. You can set a predetermined static value, a value you assign within the workflow, or a dynamic value built from other data flowing through the workflow (including the output of a formatter or Math Operation earlier in the same workflow).
Save the action once configured.
Inputs and output: The input is the chosen custom value plus the new value you supply. The action's effect is the update itself: the custom value now holds the new data account-wide. You do not reference a per-step result token here; instead, every later step and message that uses that custom value automatically reflects the updated content.
When to use it (med spa example): You run a rotating monthly promotion and reference it through a custom value like "Current Special" inside many email and SMS templates. On the first of each month, a scheduled workflow uses Update Custom Value to set "Current Special" to the new offer text. Every template that references it instantly shows the new promotion with no manual edits to individual messages.
Notes and gotchas:
This changes an account-level value for everyone, which is different from updating a single contact's custom field. Use a contact-field update action when you only mean to change one patient's data.
Because the change is global, double-check the new value before publishing a workflow that runs frequently.
What it does: Runs custom JavaScript inside your workflow so you can build logic that the pre-built actions do not cover, process data, call external services, and return an output for later steps. This is a premium action. It is the most flexible Data Tools action and is intended for advanced use.
Configuration:
Action Name: Name the step for its purpose.
Language: JavaScript, selected by default. No other language is currently supported.
Property to Include in Code: This is how you bring data from earlier steps into your code. Add key-value pairs, where the Key is the name you will use in code and the Value is either hardcoded or mapped dynamically from a previous trigger or action through the value picker. Add as many as you need with Add Property. Inside the code you read them from an inputData object, for example inputData.number1 or inputData['number1'].
Code Editor: Write your JavaScript here. A sample is pre-populated. Your code must set an output, and the output must be a JavaScript object or array of objects, for example output = { result: sum }.
External HTTP Request: Click the HTTP Request button above the editor to insert a request scaffold for GET, POST, PUT, PATCH, DELETE, HEAD, or OPTIONS. The selected request is added into the editor so you can call external APIs.
Format Code: The Format Code button cleans up indentation and spacing for readability.
Enhanced console support: All console.log output from your code is captured and logged so you can debug and monitor execution, and you can review input values in the workflow's execution logs.
Test your Code: Testing is mandatory. The output of a Custom Code action is not available to later steps until the code has been tested. Click Test your Code; if you added properties, enter sample values in the Test Setup tab and run it. A pass shows "Test Result Success"; a failure shows "Test Result Failed" and must be corrected before use.
Code with AI (Beta): Instead of writing JavaScript yourself, click Code with AI (also labeled Build with AI) to open the AI assistant, describe the functionality in plain language (for example, "I have a date in MM-DD-YYYY format, convert it to YYYY-MM-DD"), and click Generate. The assistant writes the JavaScript and maps relevant input properties for you. Review it, click Regenerate or refine your description if it is not right, then click Use Code to insert it. You do not need to know JavaScript to use this, and you can always edit the generated code before saving.
Inputs and output: The inputs are the properties you mapped into inputData. The output is the JavaScript object (or array of objects) your code assigns to output, for example output = { result: sum }. After a successful test, you reference each output property in later steps through the variable picker, the same way you reference any action result, to feed emails, conditions, field updates, or webhooks.
Example: With two mapped properties number1 and number2, the code const sum = inputData.number1 + inputData.number2; output = { result: sum }; returns their sum as result.
When to use it (med spa example): An external lab or device integration sends a patient result payload through an inbound webhook in a structure none of the built-in formatters can parse cleanly. Map the relevant fields into inputData, write (or generate with Code with AI) a snippet that extracts and reshapes exactly what you need, output it as an object, and then use those properties to update the patient record and trigger the right follow-up.
Notes and gotchas:
Testing is required. Untested code produces no usable output downstream.
When testing, only contact information is passed. Custom values and other mapped properties are not passed during the test, so account for that while validating.
Output must be a JavaScript object or array of objects. Returning a bare value will not work as expected.
This is a premium action, so factor that in before adopting it for high-volume workflows where a standard formatter would do the job.
Do formatter actions change my stored data automatically? No. A formatter only produces an output value for use later in the same workflow. To save the result, follow it with an action that writes the value somewhere, such as Update Contact Field or Update Custom Value. Math Operation and Update Custom Value are the exceptions, since they write to a field or custom value as part of the action.
How do I use a formatter's result in a later step? After you add and configure the formatter, open the variable or merge-field picker in any later step and select that action's output by the name you gave it. Outputs are only available to steps that run after the formatter.
Can I chain multiple formatters together? Yes. You can place several formatter actions in one workflow and feed one action's output into the next, building up multi-step transformations (for example, Text to Number, then a Math Operation, then an If/Else).
Which action should I use for dates versus numbers versus text? Use the Date/Time Formatter for dates and times, the Number Formatter for true numeric values (currency, phone, rounding, random numbers), and the Text Formatter for anything stored as text. If a number is stored as text, the Text Formatter can manipulate it as text, but convert it with Text to Number before doing math.
Can these actions read data from an external API or webhook? Yes. The Inbound Webhook trigger and Custom Webhook responses can supply data to these actions. For Custom Value and webhook sources in the Date/Time Formatter, remember to set the From Format manually so it matches the incoming data.
What is the difference between Update Custom Value and updating a contact's custom field? Update Custom Value changes an account-wide placeholder that affects everywhere it is referenced. Updating a contact's custom field changes data for a single patient only. Choose based on whether the change should be global or per-patient.
Why is the Math Operation giving me zero instead of a negative number? Monetary fields cannot store negative values, so a result below zero is saved as zero. Numeric fields do allow negatives. Date fields do not support negative values at all.
Why can't I use my Custom Code output in the next step? Because the code has not been tested yet. Testing is mandatory, and the output stays unavailable until a test succeeds. Note that custom values are not passed during testing, only contact information.
If you get stuck configuring a Data Tools action or need help chaining formatter outputs through a larger automation, reach out to Aesthetix CRM support. For advanced logic that requires Custom Code or a tailored integration beyond the standard formatters, contact support about a Custom Build Request so our team can scope it with you.
