Payment actions let your Aesthetix CRM workflows collect money and send billing documents automatically, without anyone in your practice opening the Payments area by hand. When a workflow reaches a payment action, the platform charges a saved card, builds an invoice or estimate from a template, or generates a document or contract, then delivers it to the patient through the channel you choose. All payment processing in Aesthetix CRM runs on AX Pay, our built-in payments engine, so invoices, estimates, and charges all settle through the same connected gateway you already use across the platform.
This reference covers each action in the builder's Payments category: Stripe One-Time Charge, Send Invoice, Send Estimate, Send Documents & Contracts, and Send Recurring Invoice. Use one action per billing moment, and combine them with conditions and triggers to bill the right patient at the right step of their journey.
Every payment action is added to a workflow the same way. The steps below apply to all five actions in this article, so each section that follows picks up at the action's own configuration fields.
Go to Automations > Workflows.
Create a new workflow or open an existing one.
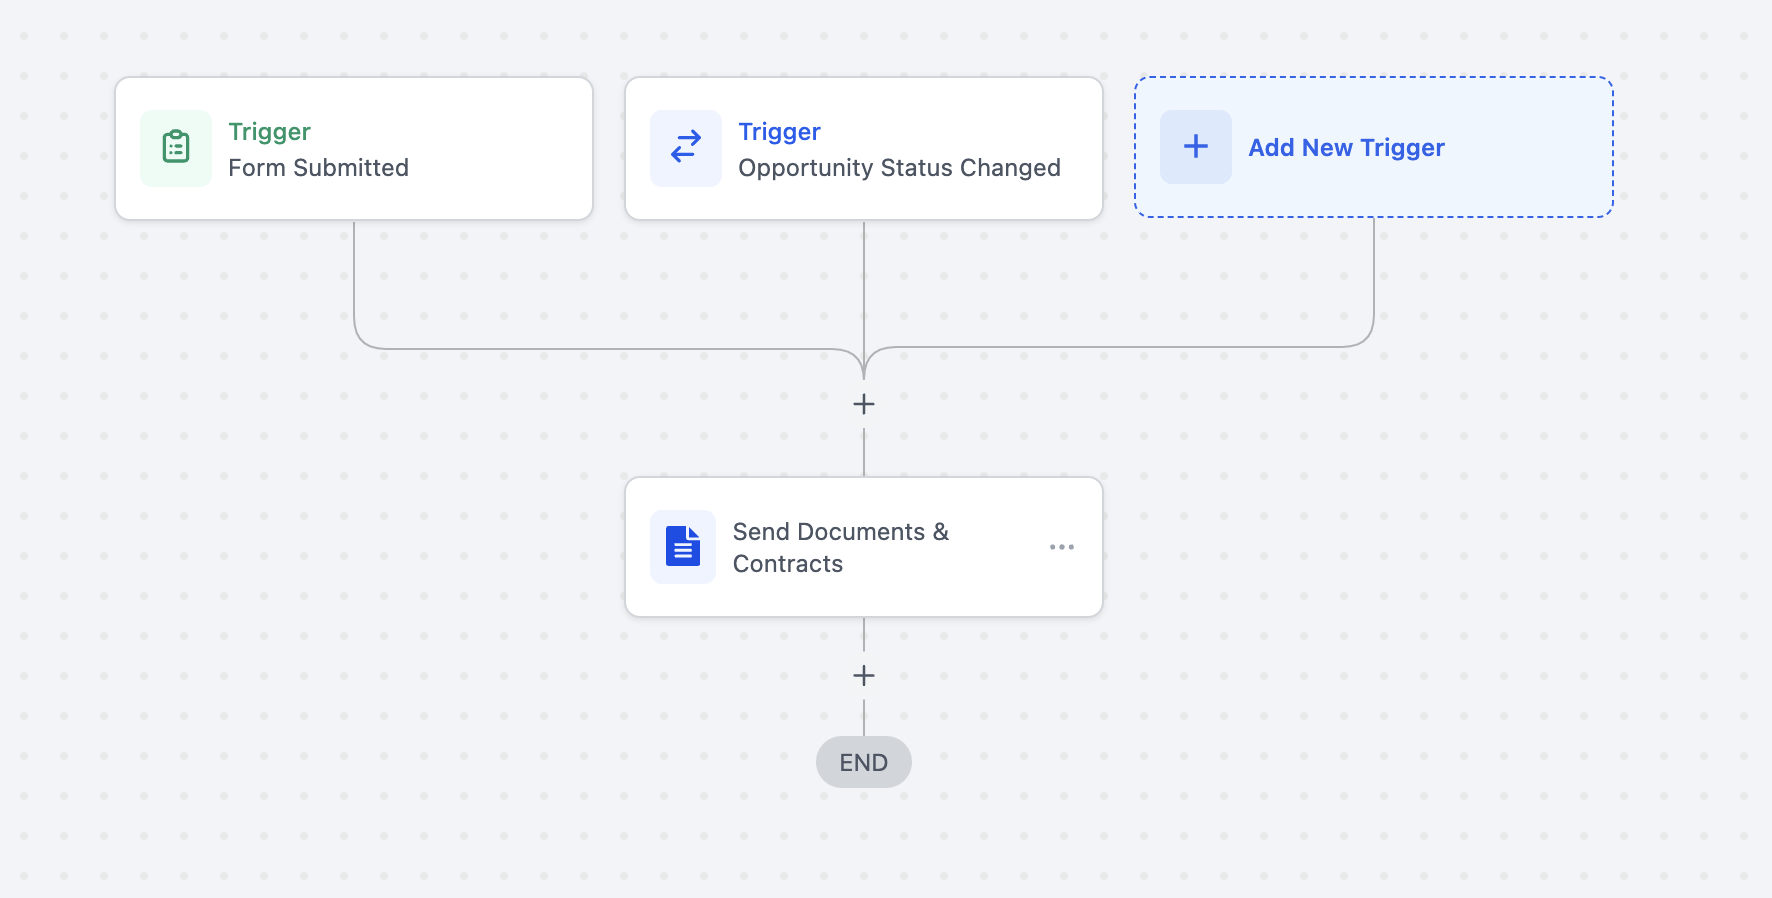
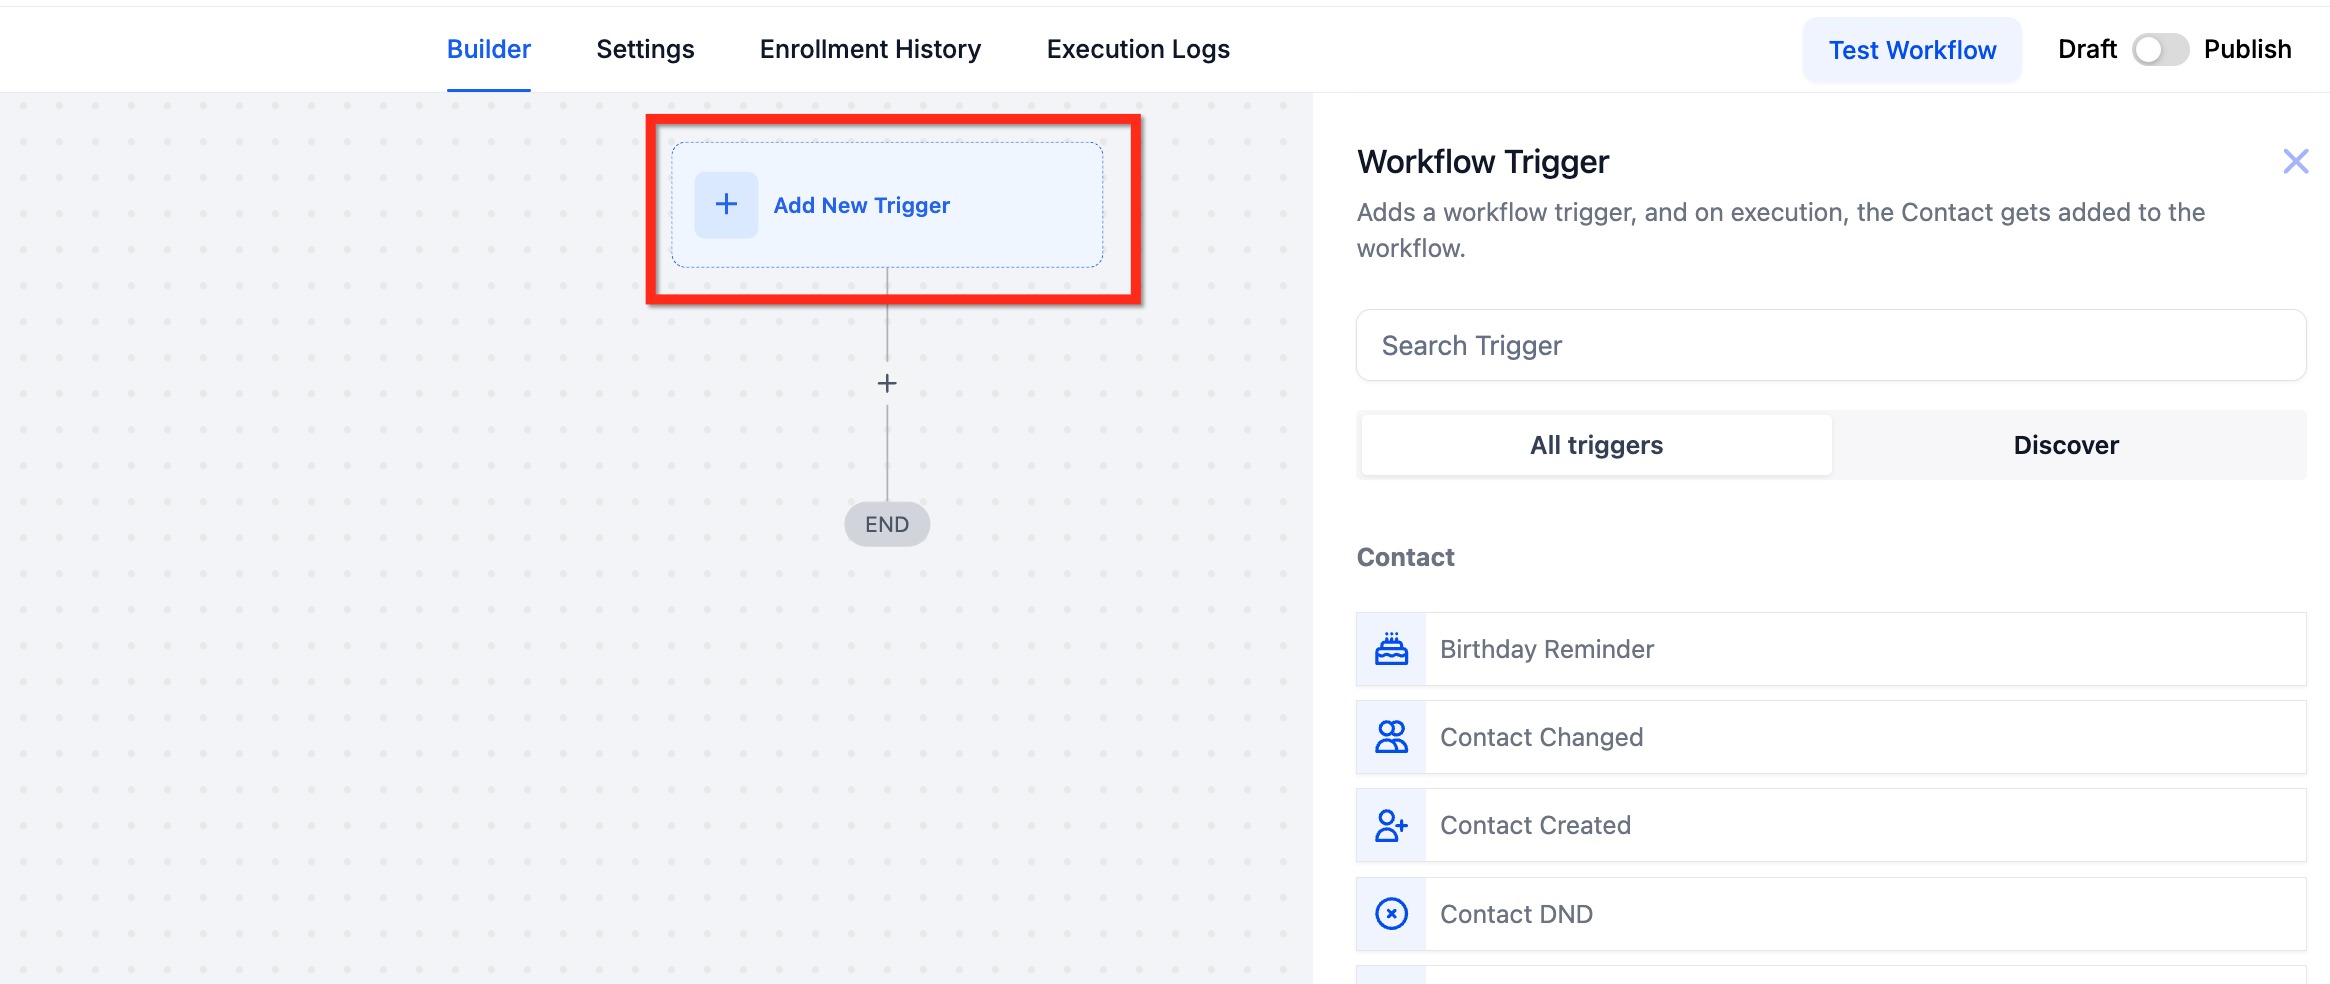
Add a Trigger that should start the billing. Common choices include Opportunity Status Changed, Pipeline Stage Changed, Form Submitted, Appointment Booked, or Contract Signed. Save the trigger.
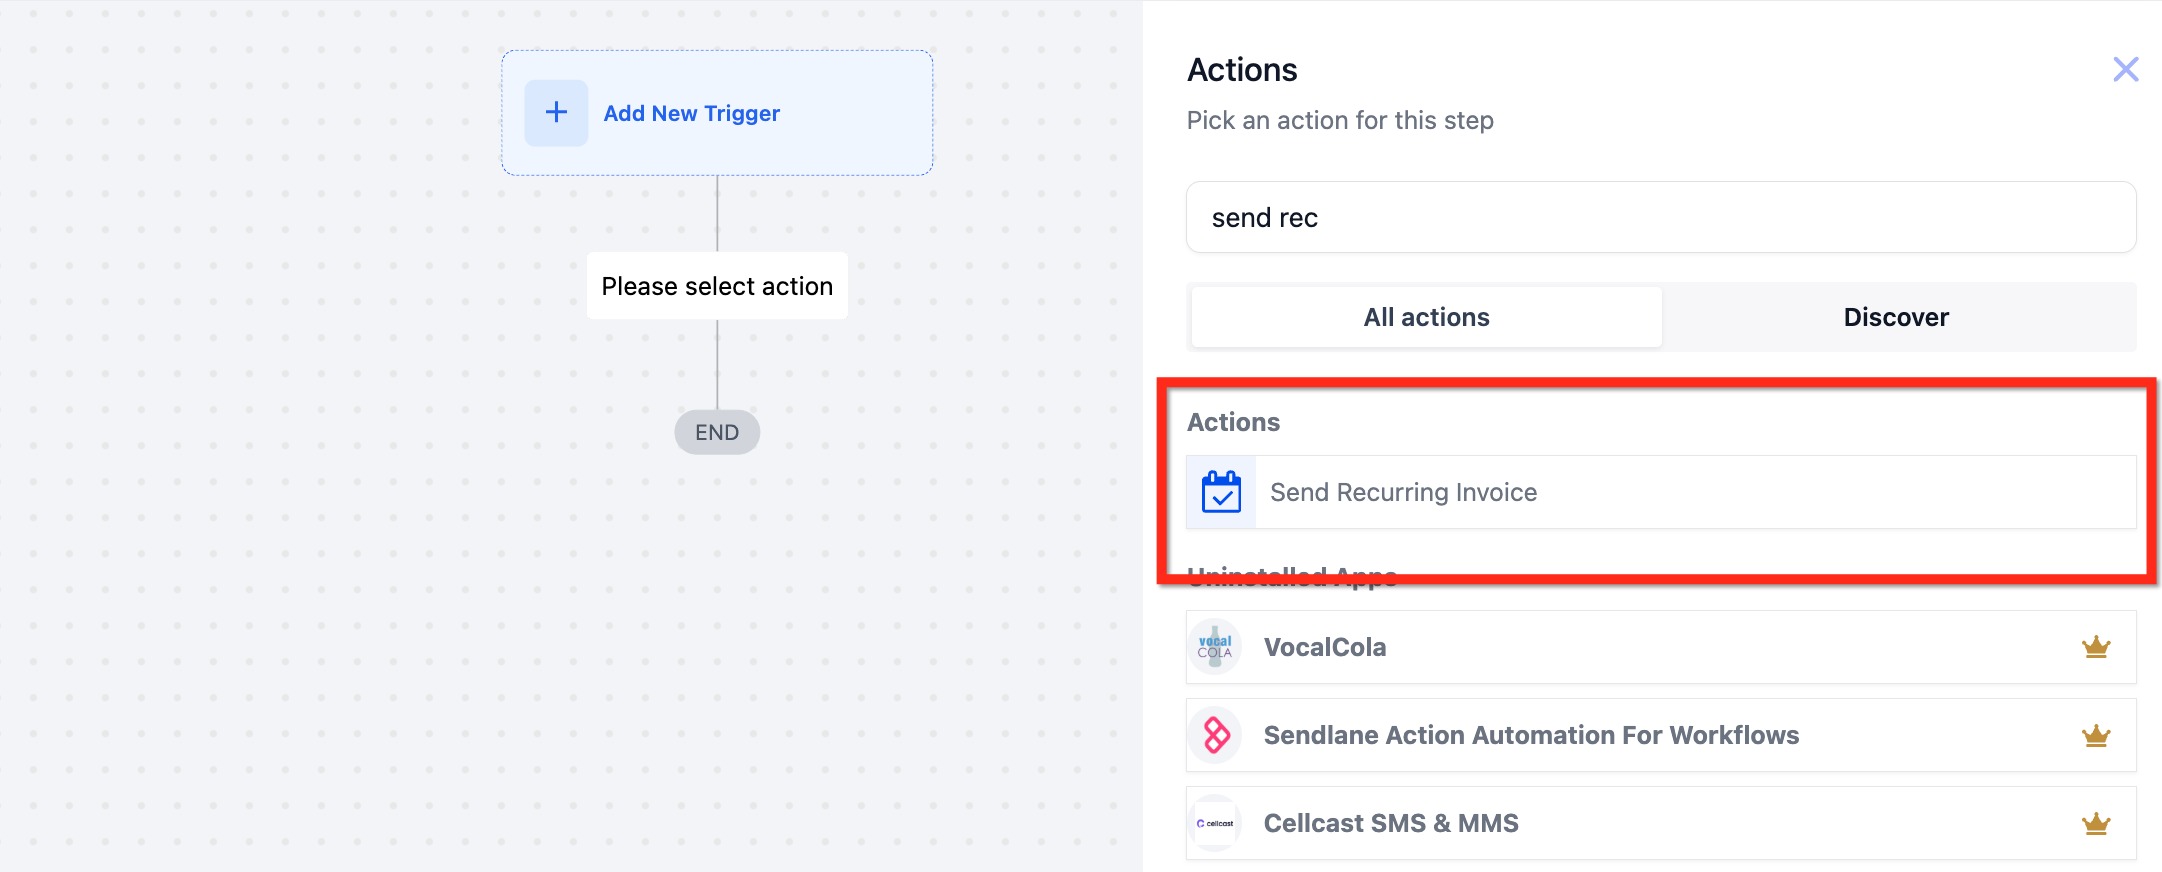
Click the + below the trigger (or Add Action) to add an action.
Use the search bar to find the payment action you want, then select it.
Configure the action's fields (covered per action below).
Click Save Action.
Test the workflow, then Publish and Save to activate it.
A note on modes: most billing actions offer a Live and a Test mode. Live creates real, payable charges and invoices through your connected gateway. Test is for non-chargeable, sandbox validation so you can confirm copy, merge fields, and delivery against a seed contact you control before any patient is billed. The Live/Test choice only affects records created after you change it, so existing schedules are not retroactively switched.
What it does. The Stripe One-Time Charge action initiates a single charge for a fixed amount against a specific customer's saved card. Unlike the invoice and estimate actions, this charge happens immediately and silently when the workflow reaches the step. There is no document for the patient to open and no payment link to click. The card on file is charged directly. This action is named for Stripe specifically because it charges the saved card through your connected Stripe customer record, which is why it requires a Stripe customer ID and a card already on file.
Configuration fields.
Action Name: A label for this step so other staff can identify it inside the workflow (for example, "Charge Botox Deposit").
Stripe Customer ID: The patient's customer ID in your connected Stripe account. This ensures the charge is applied to the correct contact's saved card.
Description: A short explanation of the contact and the payment being collected. This helps other assigned users understand what the charge is for.
Amount: The fixed amount to charge the patient.
Currency: The currency the charge is processed in. Select the currency that matches your account and gateway.
Inputs needed.
A connected Stripe integration on your account (this action is always tied to your Stripe connection).
A valid Stripe customer ID for the patient.
A card set as the default payment method on that Stripe customer. A card must be saved and set as default for the one-time charge to succeed.
Data and output produced. A completed (or failed) charge against the patient's saved card, recorded in your gateway. Because the charge runs immediately, pair it with a notification or follow-up action if you want the patient or staff to receive confirmation.
When to use it. Reach for this action when you already have a card on file and want to charge it automatically without sending a document or asking the patient to take action again. It is ideal for deposits, no-show fees, or pre-authorized balances.
Med-spa example. A patient books a filler appointment and saves a card during intake. When their opportunity moves to the "Booked" stage, a workflow fires a Stripe One-Time Charge for the agreed deposit, securing the slot before they ever arrive. If the appointment is later canceled outside your window, a separate workflow can charge a cancellation fee against the same saved card.
Notes, limits, and gotchas.
A card must be set as default on the Stripe customer, or the charge will not process.
This action charges silently. There is no patient-facing invoice or receipt generated by the action itself, so build in your own confirmation message if patients expect one.
Confirm the Stripe customer ID maps to the right patient. A mismatched ID charges the wrong card.
Because the amount is fixed in the action, use separate actions or conditional branches when deposit amounts vary by service.
What it does. The Send Invoice action creates and delivers a single, one-time invoice to the patient when the workflow reaches this step. It connects your saved invoice templates to workflow automation so billing goes out consistently and on time. You choose which template to send, who it appears to come from, and which channel delivers it. The patient receives an invoice they can pay through AX Pay.
Configuration fields.
Action Name: A label for the step.
From User: The staff member the invoice appears to be sent from.
Invoice Template: The saved invoice template to send. The template controls line items, branding, taxes, and totals. It is best practice to select a template explicitly rather than relying on a default.
Payment Mode: Live for a real, payable invoice through your connected gateway, or Test for non-chargeable sandbox validation.
Channel: How the invoice is delivered: Email, Text, or Email & Text. The default is Email & Text. The platform only delivers through channels the patient actually has on file.
Inputs needed.
Sufficient account permissions to edit workflows and access Payments and Invoices.
At least one saved invoice template.
A connected payment gateway, ready for Live transactions (or Test if you are validating).
Patient contact data for the chosen channel: a valid email and/or phone number.
Data and output produced. A one-time invoice record (Sent, Viewed, Paid, and so on) attached to the patient, plus an execution log entry for the workflow step. Track invoice status under Payments > Invoices, and confirm the step ran in the workflow's Execution Logs.
When to use it. Use it whenever a single charge needs to go out automatically at a specific moment: a won opportunity, a completed intake form, a finished consultation, or an onboarding step.
Med-spa example. When a consultation opportunity is marked Won, a Send Invoice action delivers the "Treatment Plan Invoice" template by Email & Text. The patient pays online before their first session, and your front desk never has to chase the balance manually.
Notes, limits, and gotchas.
If you select Email & Text but the patient only has an email on file, only the email is sent. Confirm contact records have the fields you need.
To bill different services with different invoices, branch the workflow with conditions and add a separate Send Invoice action for each template.
This action sends a one-time invoice. For repeating billing, use the Send Recurring Invoice action covered below.
What it does. The Send Estimate action automatically builds an estimate from a saved estimate template and delivers it to the patient through the channel you choose. It is designed for pipeline-driven sales motions where proposals and treatment quotes need to go out consistently, with correct branding, taxes, and totals, and no manual assembly. When the workflow reaches the action, the platform fills in available contact and opportunity details, then sends the estimate from your selected user and channel.
Configuration fields.
Action Name: A label for the step.
From User: The staff member the estimate appears to be sent from. If that user is later deactivated, update the action to an active sender.
Estimate Template: The saved estimate template to send. It controls line items, branding, taxes, currency, and totals.
Payment Mode: Live for a real, payable estimate, or Test for non-chargeable sandbox validation.
Sending Mode:
Create as Draft: The estimate is saved as a draft for staff to review before it is sent.
Send Directly: The estimate is sent immediately when the workflow executes.
Channel: How the estimate is delivered: Email, Text, or Email & Text. The default is Email & Text.
Inputs needed.
Payments enabled on the account with a connected payment processor.
At least one active estimate template, with branding, taxes, and currency set.
A valid patient email and/or phone for the chosen channel.
A verified, compliant email sending domain, and an opted-in patient for SMS.
Data and output produced. An estimate record with a delivery and status history (Sent, Viewed, Accepted, Declined, or Paid), visible from the patient's record or the estimates area.
When to use it. Use it for proposal and quote delivery the moment a patient signals interest: a new opportunity, a completed pricing request form, or a reached pipeline stage.
Med-spa example. A prospective patient submits a "Request a Quote" form for a body-contouring package. An Opportunity Created trigger fires a Send Estimate action that delivers the "Body Contouring Package" estimate template by email from their assigned coordinator. The patient reviews and accepts it online, and the accepted estimate can convert to an invoice for payment.
Notes, limits, and gotchas.
Use Create as Draft when a coordinator should review pricing before the patient sees it. Use Send Directly when speed to proposal matters most.
Test mode does not notify real patients. Validate copy and merge fields against a seed contact before going Live.
If the From User is deactivated, reassign the action to an active sender so estimates continue to send.
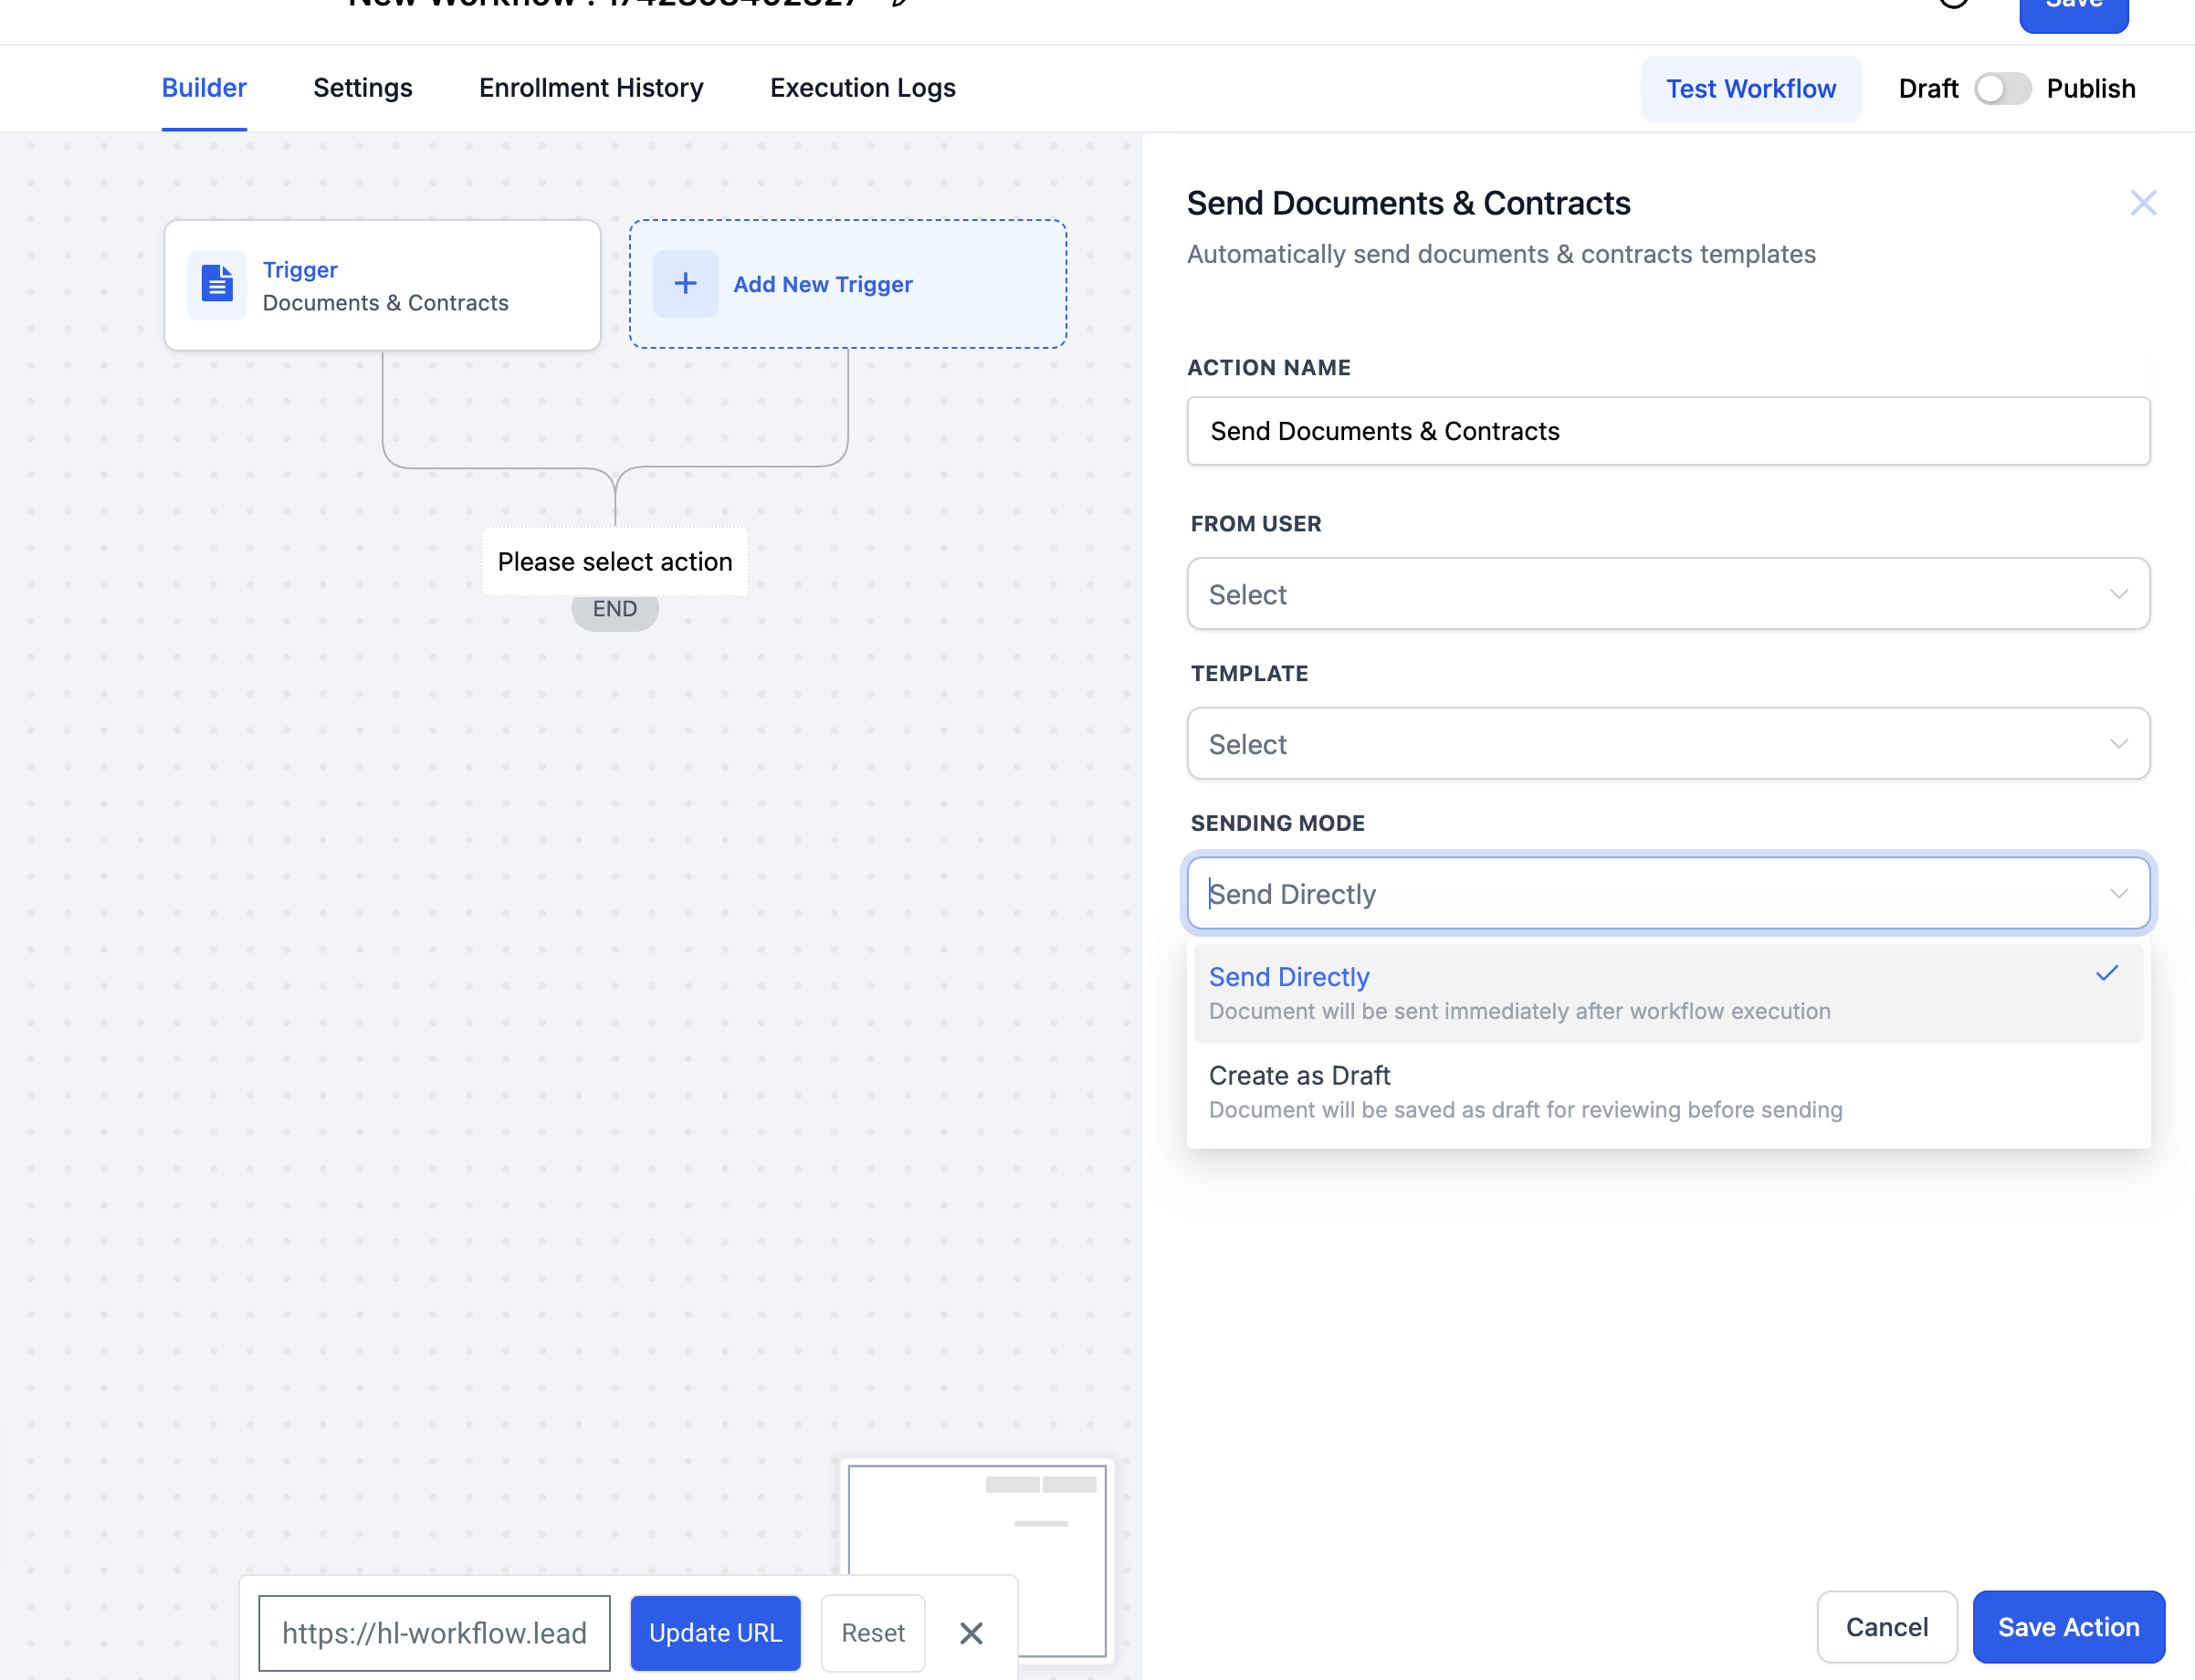
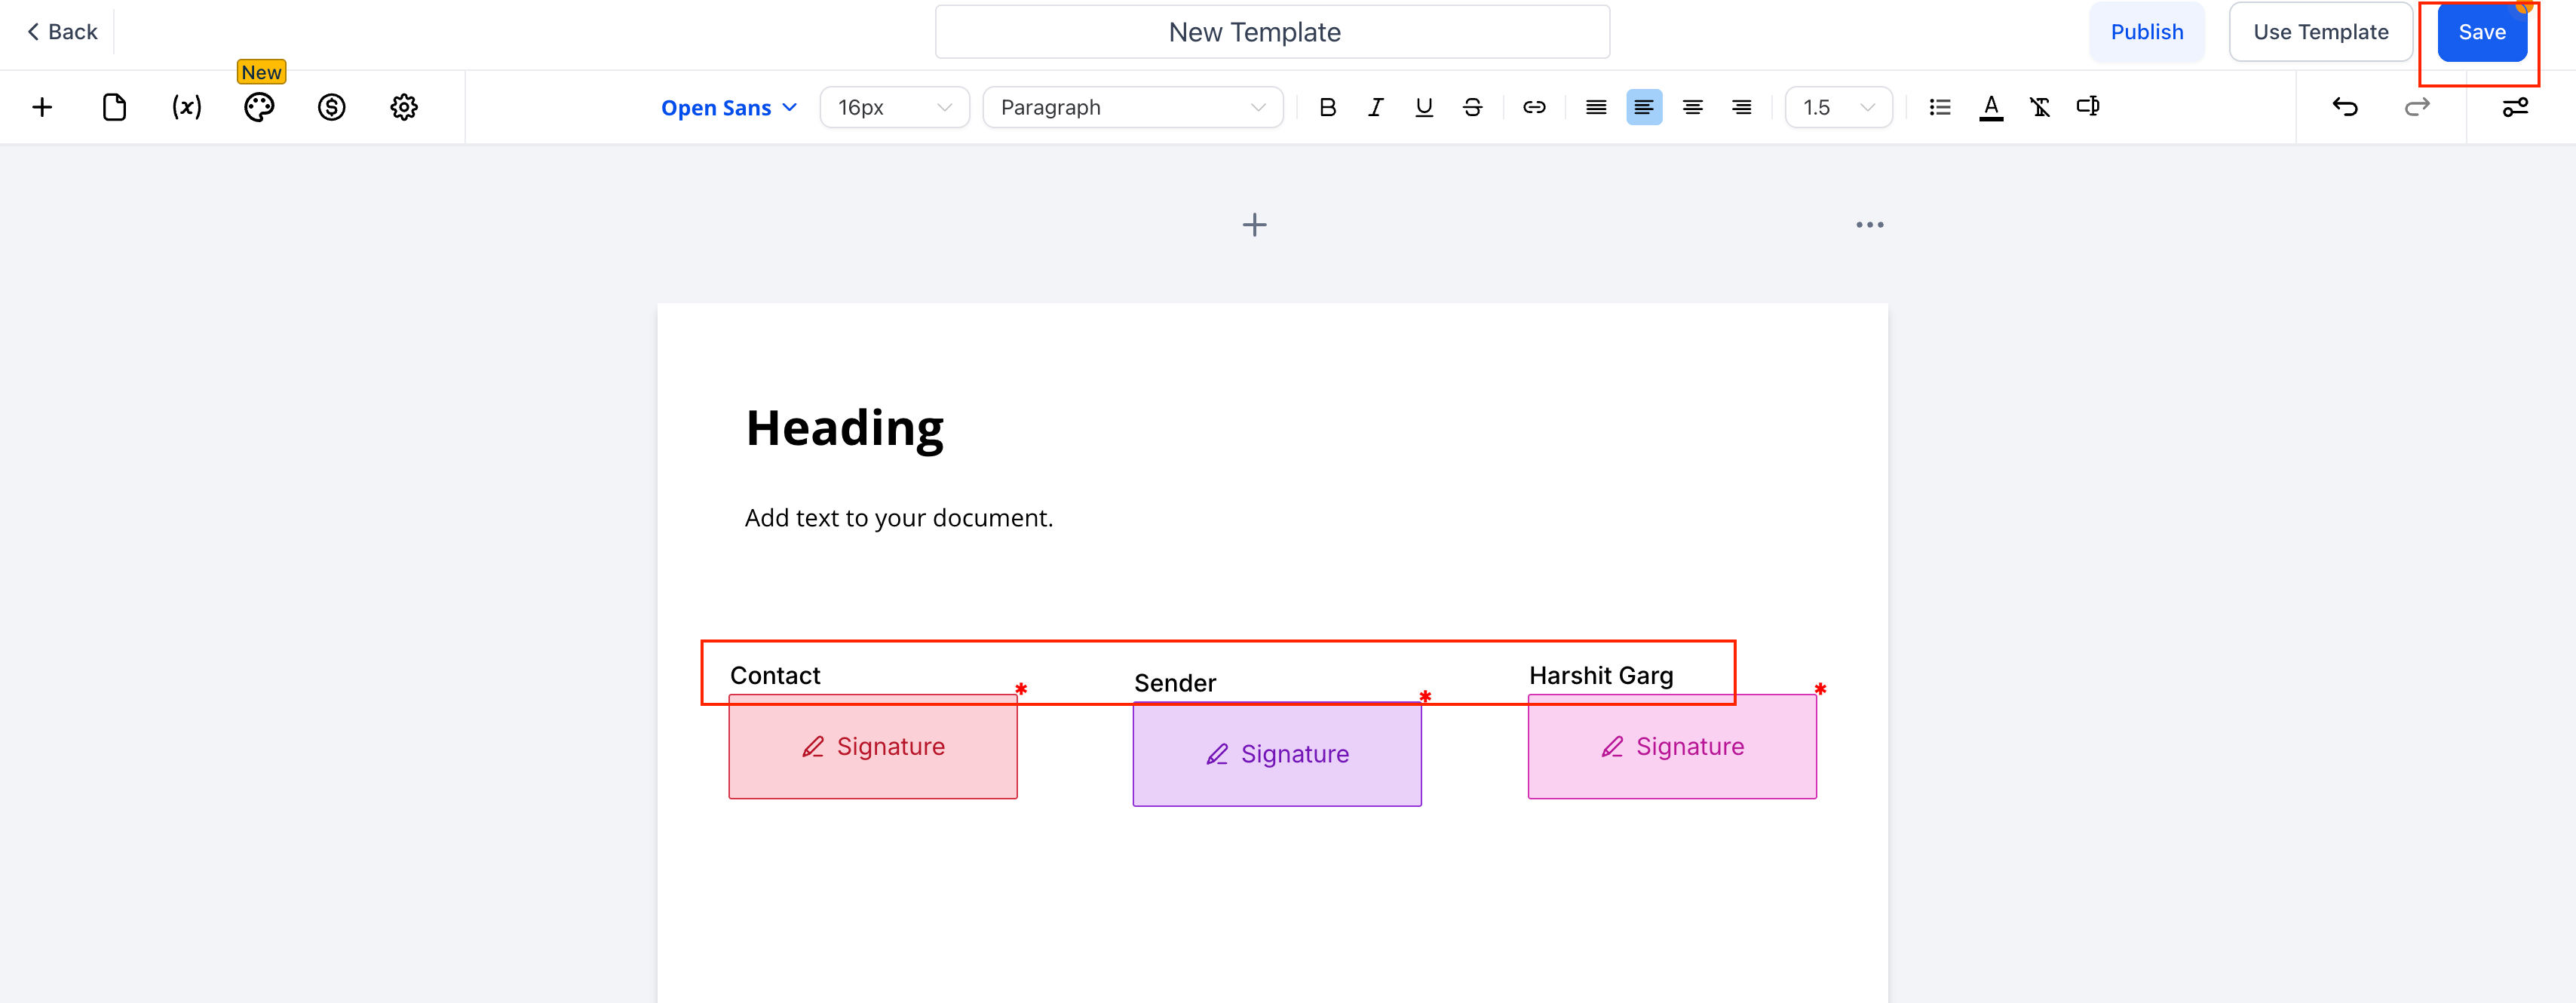
What it does. The Send Documents & Contracts action generates a document or contract from a saved template and either sends it to the patient for signature or saves it as a draft for internal review first. This is useful when many staff create deals but only one person is responsible for sending final agreements. By generating contracts as drafts, you ensure only the designated sender reviews and releases them. The action also supports dynamically assigning signer fields, so the correct internal user is bound to template "Sender" fields automatically on each run.
Configuration fields.
Action Name: A meaningful label (for example, "Draft Consent Form Creation").
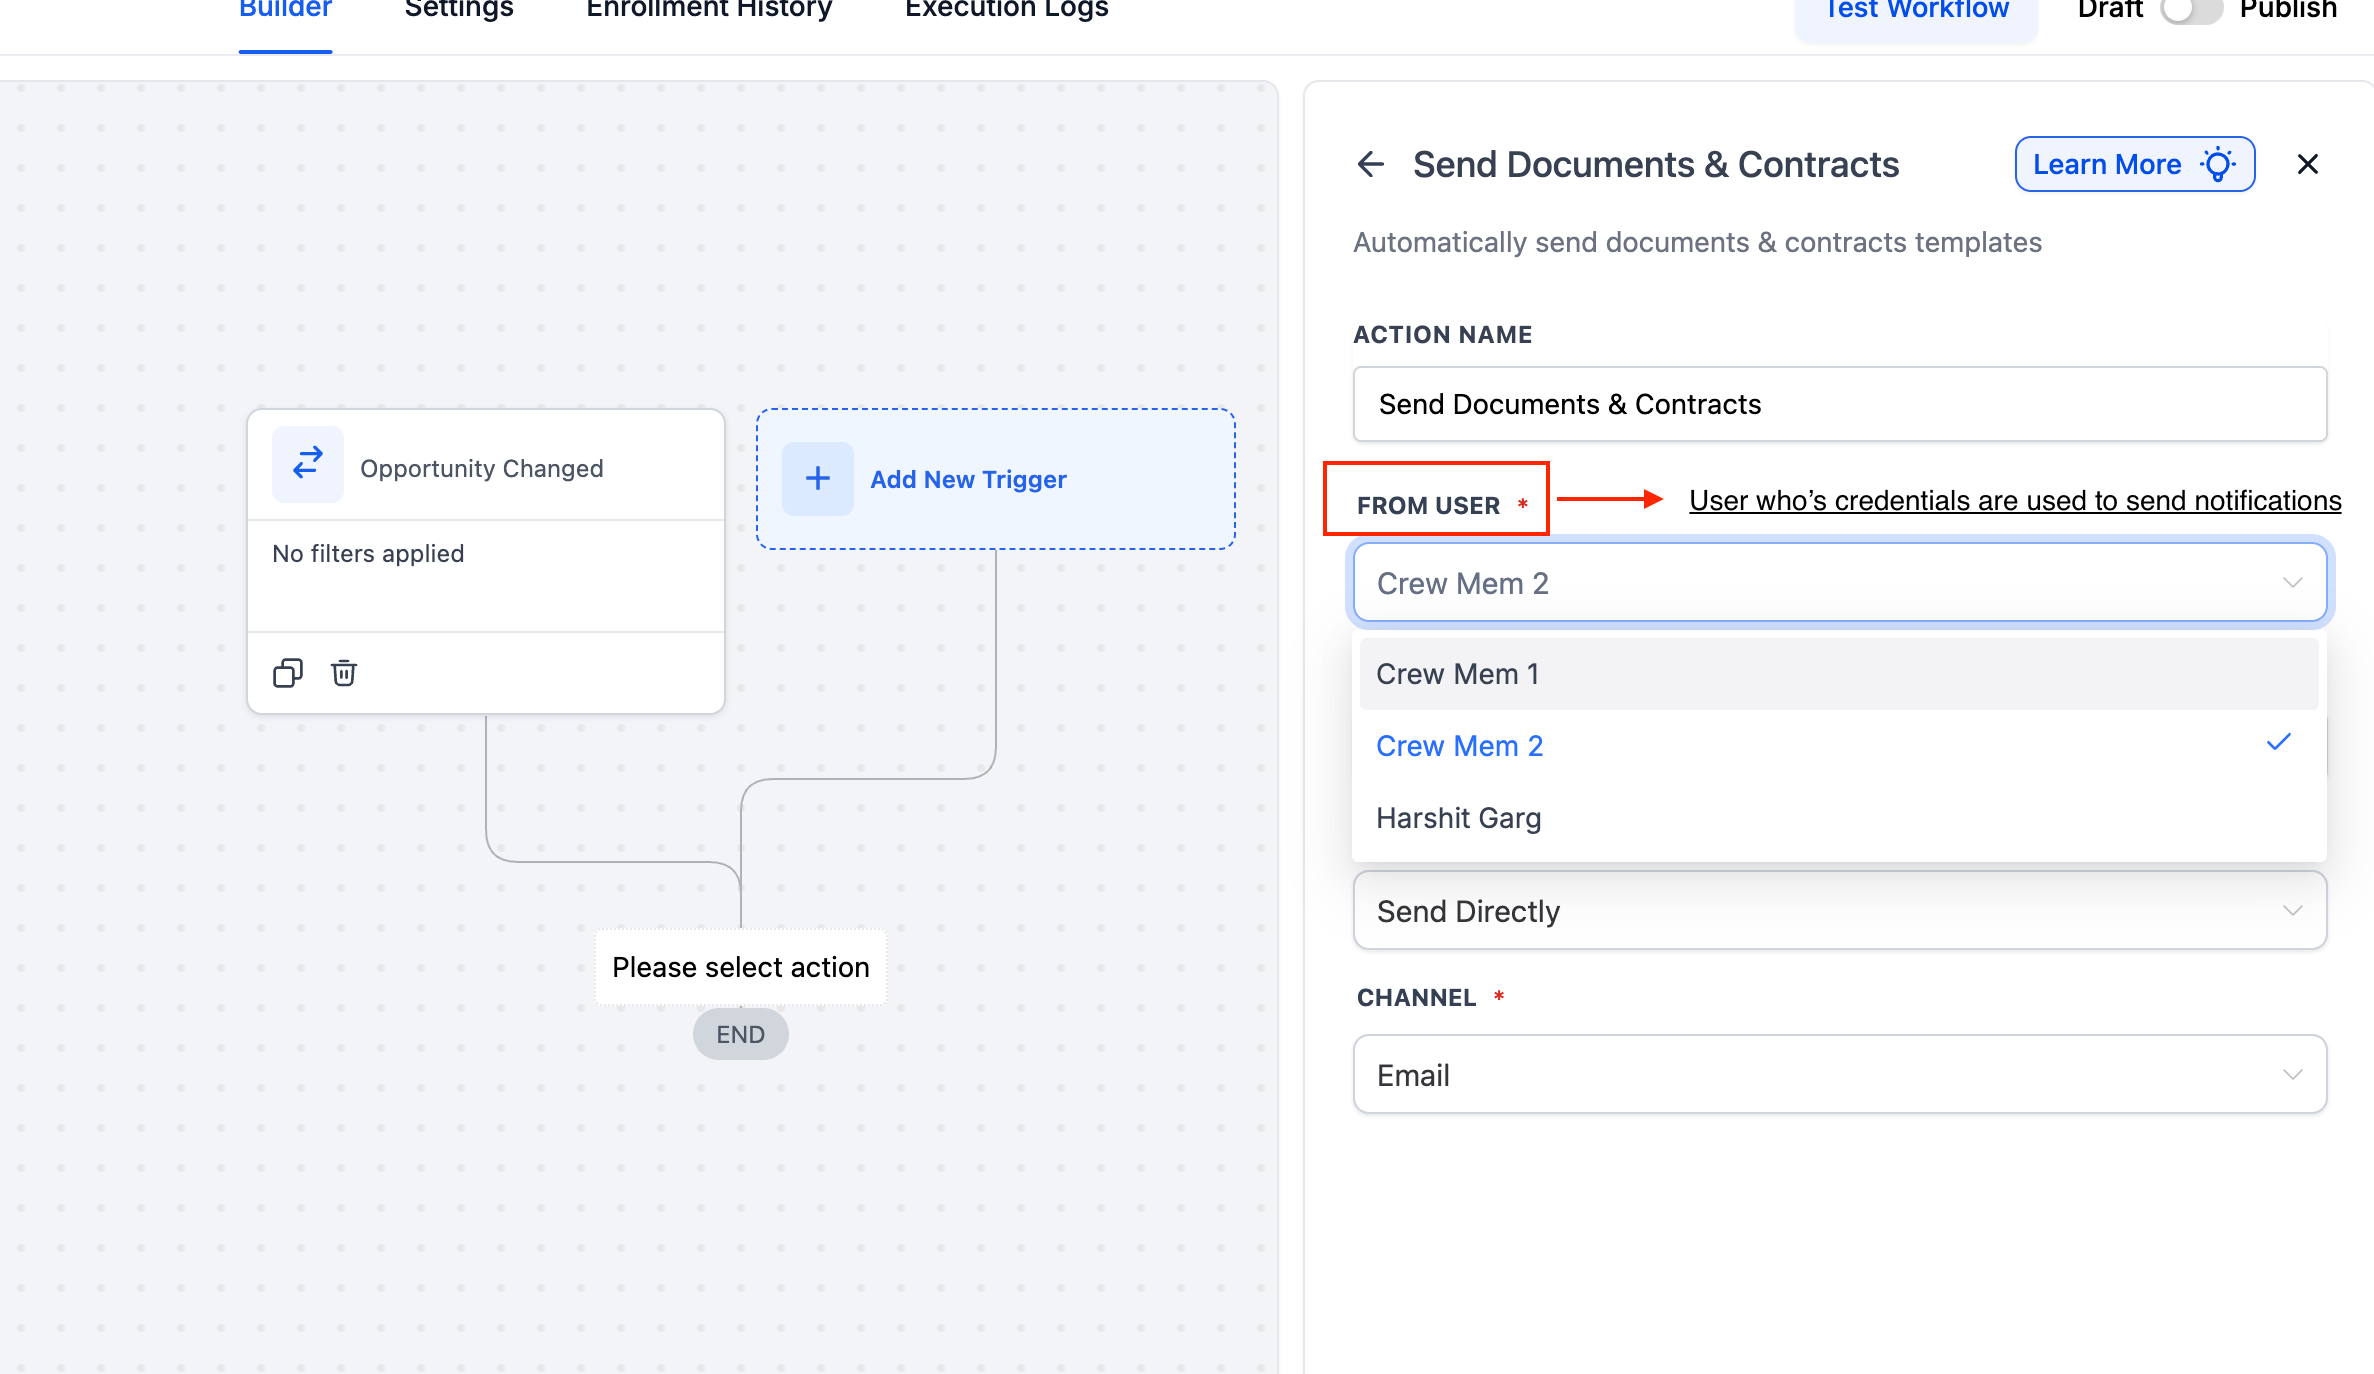
From User: The user who appears as the sender on the document.
Template: The document or contract template to send.
Sending Mode:
Create as Draft: The document is generated but not sent. A designated reviewer sends it later from the Documents & Contracts area.
Send Directly: The document is sent to the patient immediately, with no review step.
Assign Sender Fields To: Controls who is bound to template fields marked To be signed by → Sender. This applies to all Sender fields in the template for that send.
From User: Assigns Sender fields to the workflow's From User (the user sending the document).
Template Owner: Assigns Sender fields to the user who last updated the template.
Channel: How the document is delivered: Email or Direct.
Configuring dynamic sender fields.
Select the From User at the top of the action.
Choose a Template that uses To be signed by → Sender on its fillable field(s).
Set Assign Sender Fields To to From User or Template Owner.
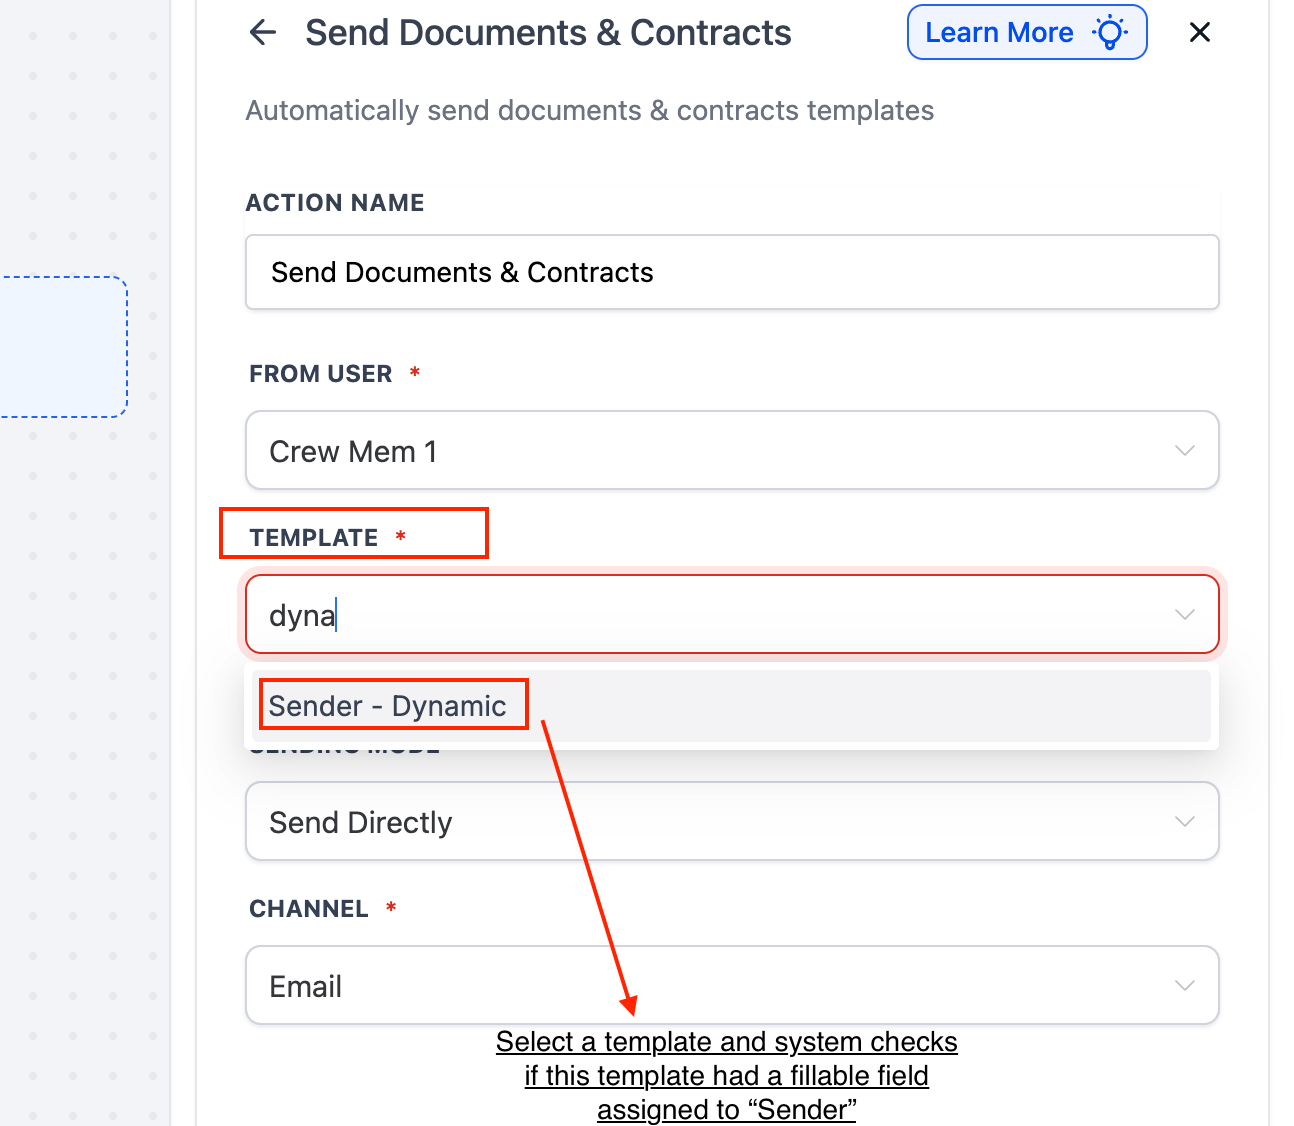
Choose the Sending Mode and Channel (Email or Direct), then Save.
Inputs needed.
At least one document or contract template, with any Sender fields configured if you plan to use dynamic assignment.
A valid sender (From User) and, for direct sends, patient contact details for the chosen channel.
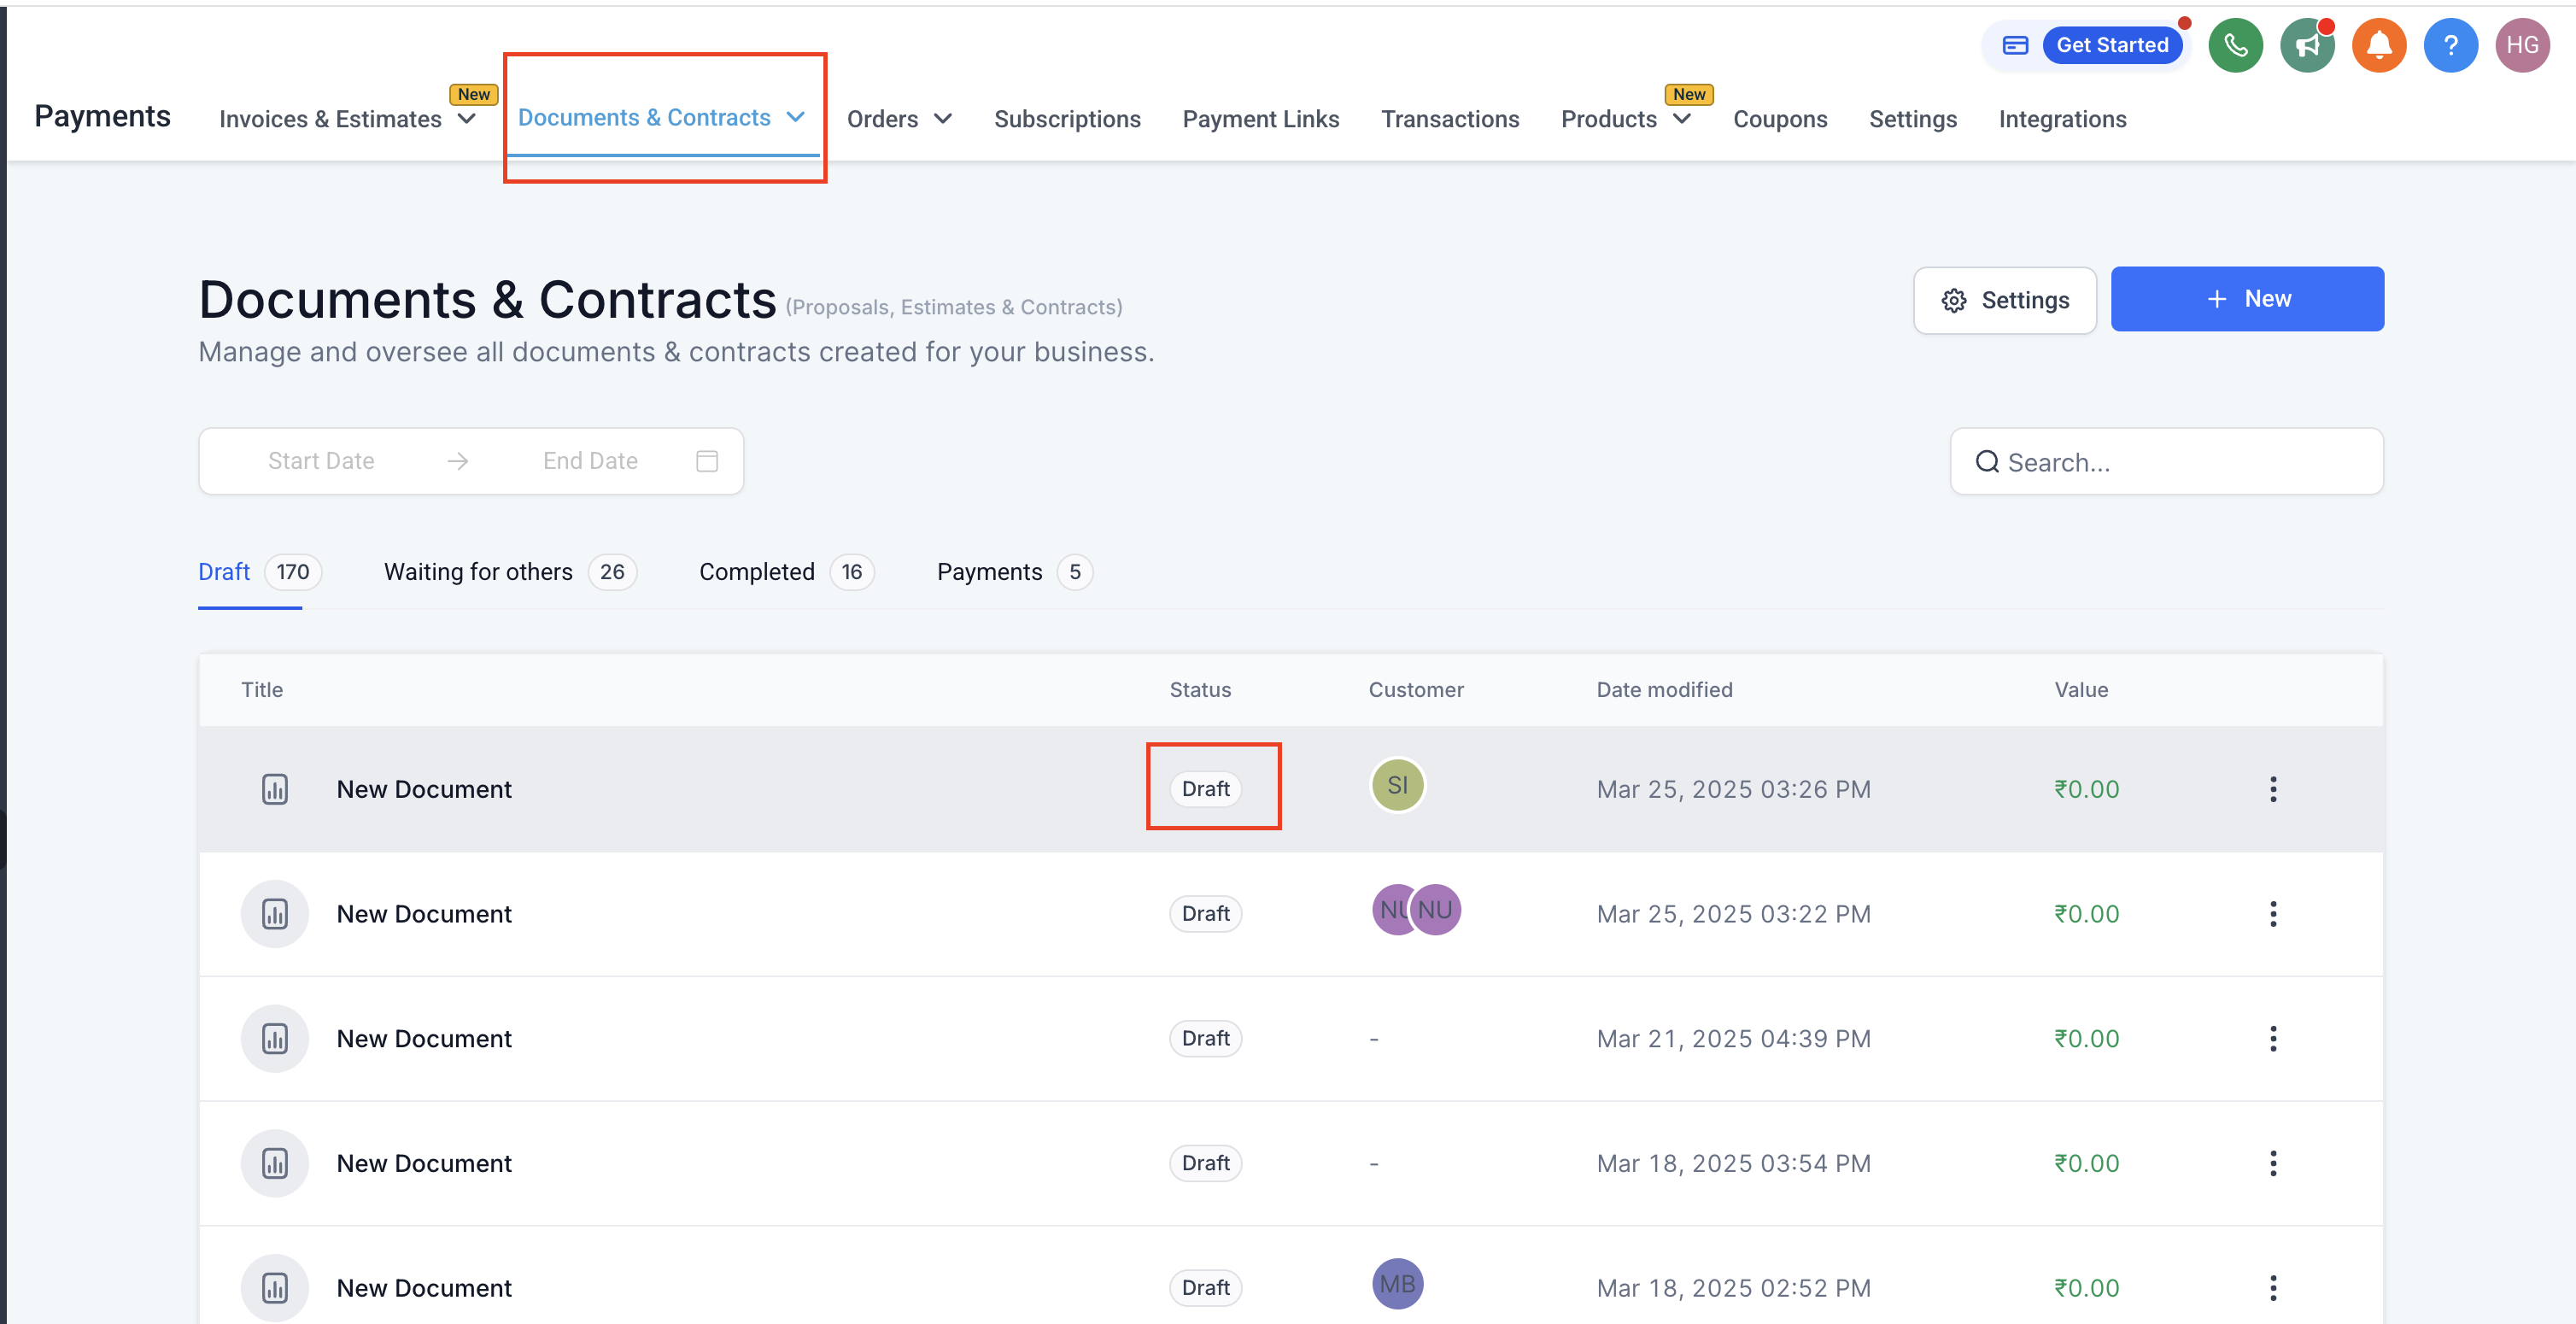
Data and output produced. A document or contract in Draft, Sent, or Completed status, trackable under Payments > Documents & Contracts. When Create as Draft is used, the document waits in the Documents (or Contracts) area for a reviewer to send it.
Sending out draft contracts. After a workflow creates contracts in draft, the designated person sends them:
Go to the Documents or Contracts section.
Locate the drafted contracts.
Review and make any final edits or personalizations.
Click Send. The contract is delivered to the patient, and you can track its status from there.
When to use it. Use it to auto-generate consent forms, treatment agreements, financing contracts, or membership agreements whenever a patient reaches a step that warrants paperwork, while keeping a human review gate if you need one.
Med-spa example. When a patient's opportunity reaches "Consult Complete," the workflow generates a "Laser Treatment Consent" contract as a draft, with Sender fields assigned to the treating provider via Template Owner. The provider reviews each draft in the Documents & Contracts area and sends it for signature before the patient's first session.
Notes, limits, and gotchas.
Workflows evaluate document or contract status only at the moment the contact enters the workflow. Status updates that happen outside the workflow are not tracked or re-evaluated. If a contact enters on "Document Sent" and you later add a condition for "Status is Completed," that branch will not update when the document is completed afterward.
For real-time responses to status changes, build a second workflow triggered by events like Document Signed or Document Completed, and route contacts using the updated status there.
Any user with the necessary permissions can open and review a draft before it is sent, so team review is supported.
Use Create as Draft for a review gate, or Send Directly when no review is needed.
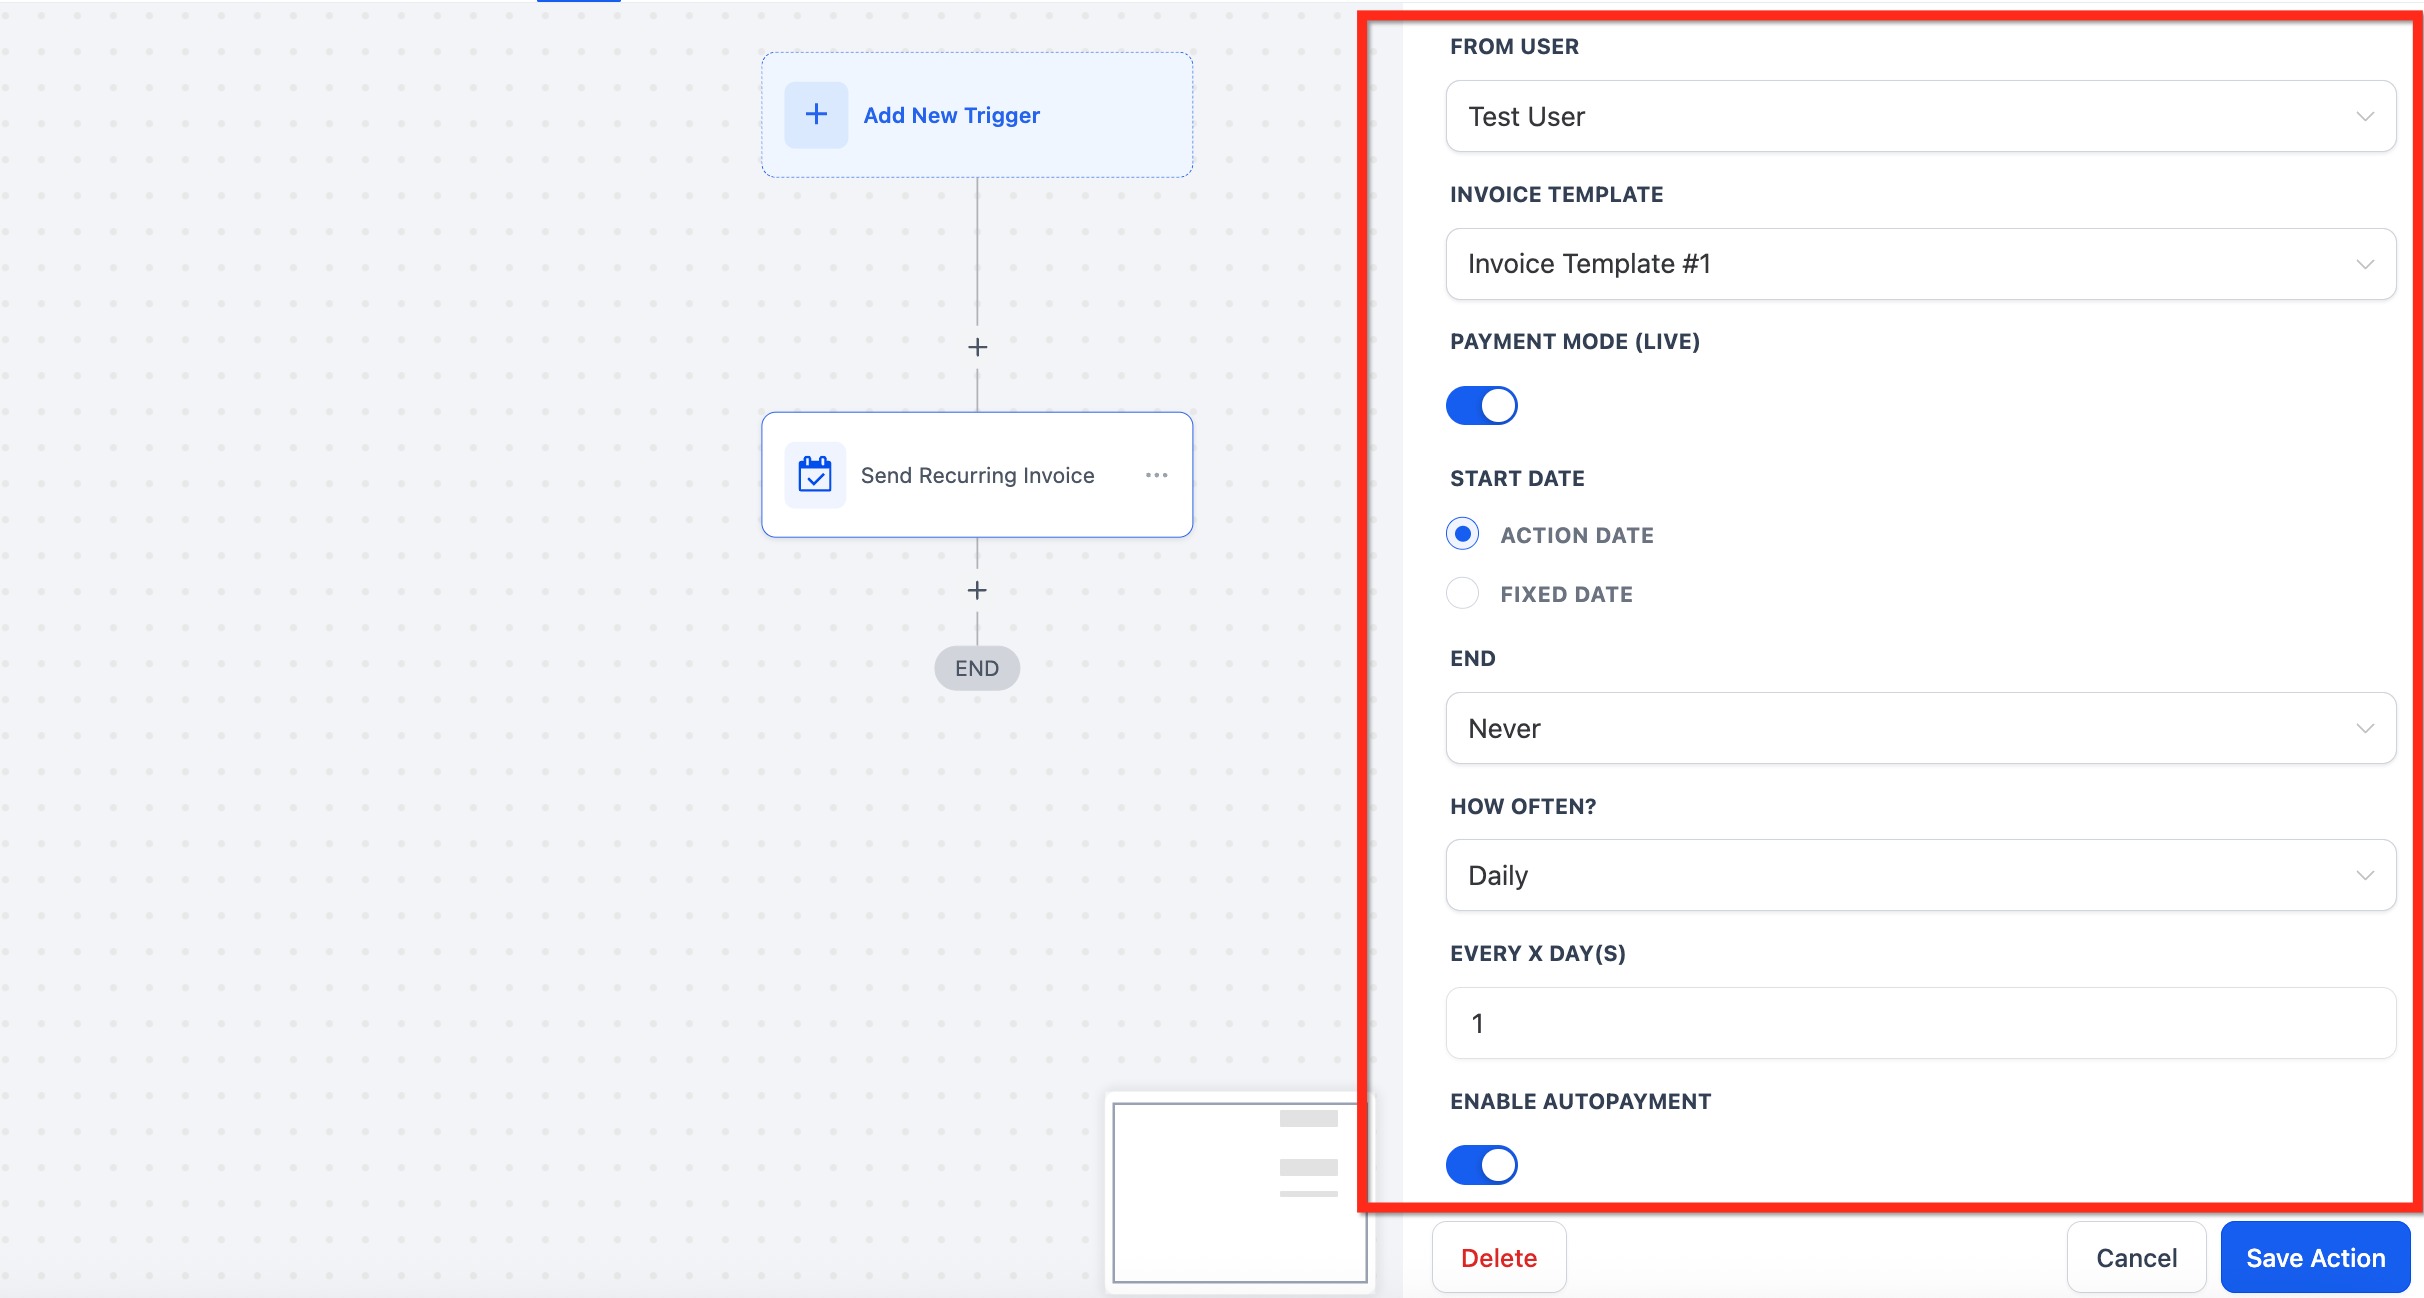
What it does. The Send Recurring Invoice action automates scheduled billing inside a workflow. Instead of a single invoice, it sets up a recurring series with a start date, a stop rule, a frequency, and optional automatic payment. Once configured, invoices generate and send on schedule with no manual effort, keeping cash flow predictable. This is the right action for memberships, retainers, treatment packages billed in installments, and subscriptions.
Configuration fields.
Action Name: A label so the schedule is easy to identify (for example, "Monthly Membership: Gold").
From User: The staff member the invoices appear to be sent from.
Invoice Template: The saved template to bill from.
Mode: Test for trial runs, or Live for real billing.
Start Date:
Action Date: Begins the schedule as soon as the contact hits the workflow trigger.
Fixed Date: Aligns billing with a specific calendar day.
Stop:
Never: Continues until you manually stop it.
After X Occurrences: Ends after a set number of invoices, ideal for installment plans (for example, 12 monthly payments).
Frequency: How often invoices repeat. The selectors that appear depend on your choice:
Daily: Every N days, for high-frequency billing.
Weekly: On a specific weekday or on the action date.
Monthly: By date or by week (for example, the 2nd Wednesday), common for memberships and retainers.
Yearly: A chosen month and day, every N years, ideal for annual renewals.
Days in Advance: Send the invoice N days before its due date.
Enable Auto-Payment: When on, the patient's card is stored after the first successful payment and subsequent invoices are charged automatically.
Channel: How the invoice is delivered: Email, Text, or Email & Text. The default is Email & Text.
Inputs needed.
At least one saved invoice template.
A connected payment gateway. Auto-Payment is currently supported on Stripe-connected accounts.
Valid patient billing details and a delivery channel on file.
Data and output produced. A recurring invoice schedule plus an individual invoice record for each cycle, all logged under the patient's record. If Auto-Payment is enabled, the stored card is charged automatically once the first manual payment succeeds.
When to use it. Use it for any billing that repeats on a cadence: memberships, treatment-plan installments, product subscriptions, or maintenance packages.
Med-spa example. A patient enrolls in a monthly skincare membership. A Contract Signed trigger fires a Send Recurring Invoice action using the "Membership: Monthly" template, set to Monthly frequency, Start Date of Action Date, Stop set to Never, and Enable Auto-Payment on. After the patient pays the first invoice, the card is stored and every following month bills automatically until they cancel.
Notes, limits, and gotchas.
Auto-Payment requires a connected gateway and only activates after the first successful manual payment, because the card is stored only on that first success.
If a card fails during Auto-Pay, the invoice stays unpaid. Build a companion workflow on a Payment Failed trigger to retry and notify the patient.
The Live/Test toggle only affects invoices created after you change it. Existing schedules are not switched.
All generated invoices appear in the patient's invoice history.
To bill different patients with different templates, use conditional branches with multiple Send Recurring Invoice actions.
What is the difference between Live and Test mode? Live creates real, payable invoices, estimates, and charges through your connected gateway. Test is for dry runs and link validation without charging anyone. Validate in Test against a seed contact before relying on results.
What happens if I choose Email & Text but the patient only has an email on file? Only the email is sent. The platform can only deliver through channels the patient actually has, so make sure contact records have the email and/or phone you need before selecting both.
Do I need to pick a template every time? Yes, it is best practice to select a template explicitly in each invoice, estimate, or document action. If you rely on a default, confirm which template is set as default to avoid sending the wrong one.
Where do I track whether an invoice was sent or paid? Check the workflow's Execution Logs for the action step, and Payments > Invoices for status such as Sent, Viewed, or Paid. Estimates and contracts show their own status history (Sent, Viewed, Accepted, Completed) on the patient's record.
Why does the Stripe One-Time Charge action need a card on file? That action charges a saved card directly instead of sending a payment link, so the patient's Stripe customer must have a card saved and set as default. Without a default card, the charge will not process.
Do I need a payment gateway to send recurring invoices? Yes. Connect your gateway before activating Auto-Pay or sending invoices. Auto-Payment specifically is supported on Stripe-connected accounts.
What happens if a patient's card fails during Auto-Pay? The invoice remains unpaid. Set up a workflow with a Payment Failed trigger to retry the charge and notify the patient.
Can I send different templates based on patient details? Yes. Branch the workflow with conditions and add a separate payment action for each branch, pointing each one at the appropriate template.
Why didn't my document workflow branch update after the contract was signed? Workflows only evaluate document and contract status at the moment the contact enters the workflow. Later status changes are not re-evaluated. For real-time reactions, build a second workflow triggered by Document Signed or Document Completed.
Does Test mode notify real patients? No. Use Test mode with a seed contact you control to validate copy, merge fields, and delivery before switching to Live.
If you need help setting up a payment action or troubleshooting automated billing, reach out to support. For complex billing logic that spans multiple workflows or requires custom configuration, submit a Custom Build Request so our team can scope it with you.
