Communication actions are the workflow steps that reach out to a contact, a team member, or an outside channel on your behalf. They live under the Communication category in the Automation workflow builder and cover everything from automated emails and texts to live calls, internal alerts, and review requests. This guide documents each Communication action, the fields you configure, the data each one produces, and a med spa example for every action.
Two actions that also appear under Communication are documented elsewhere: Book Appointment is covered in the Appointment Actions guide, and Conversation AI is covered in the AI Employee collection. This article covers the core messaging and call actions only.
Every action below is added the same way inside the workflow builder.
Go to Automation in the left navigation and open an existing workflow or click + Create Workflow.
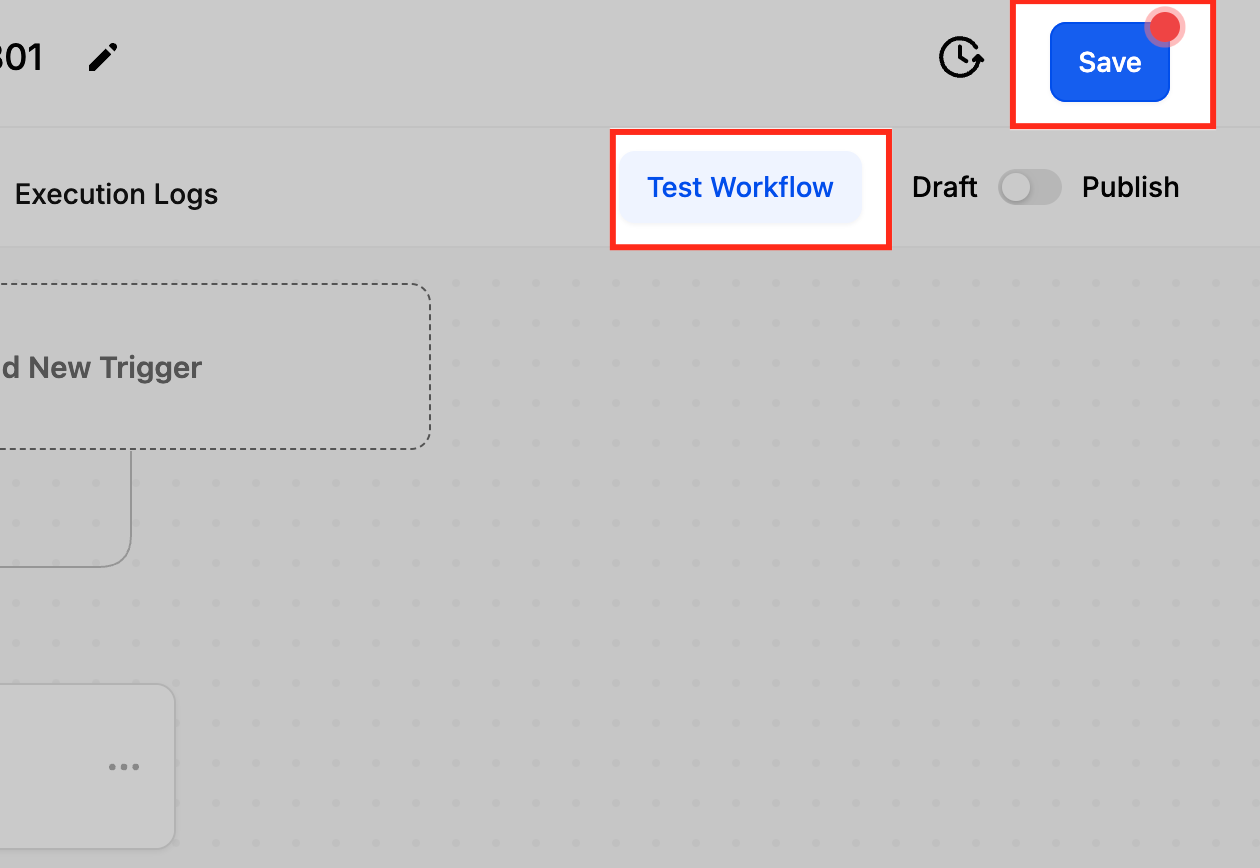
Make sure your workflow has at least one Trigger. A workflow needs both a trigger and an action before it can be published.
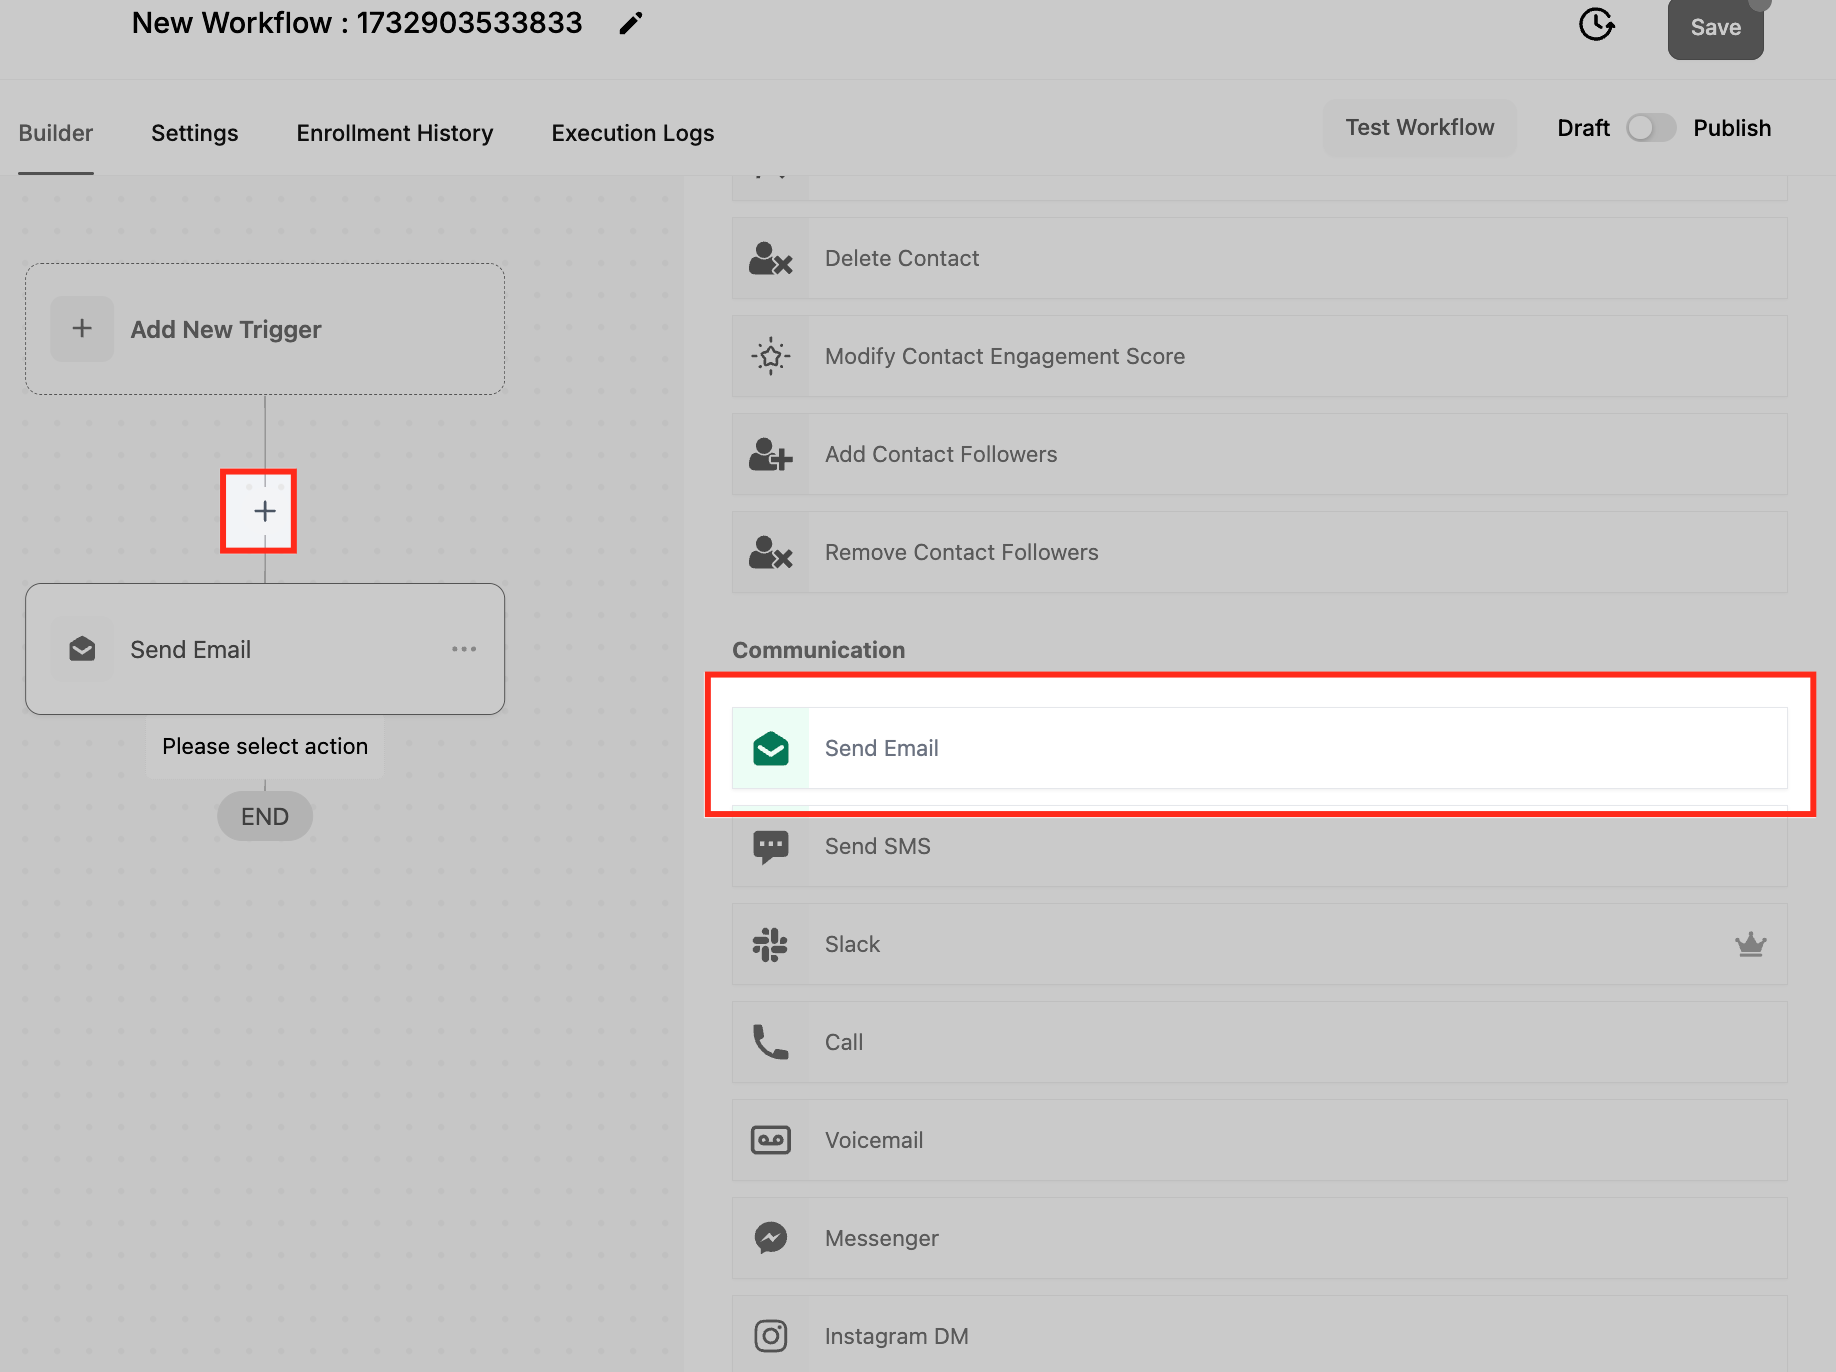
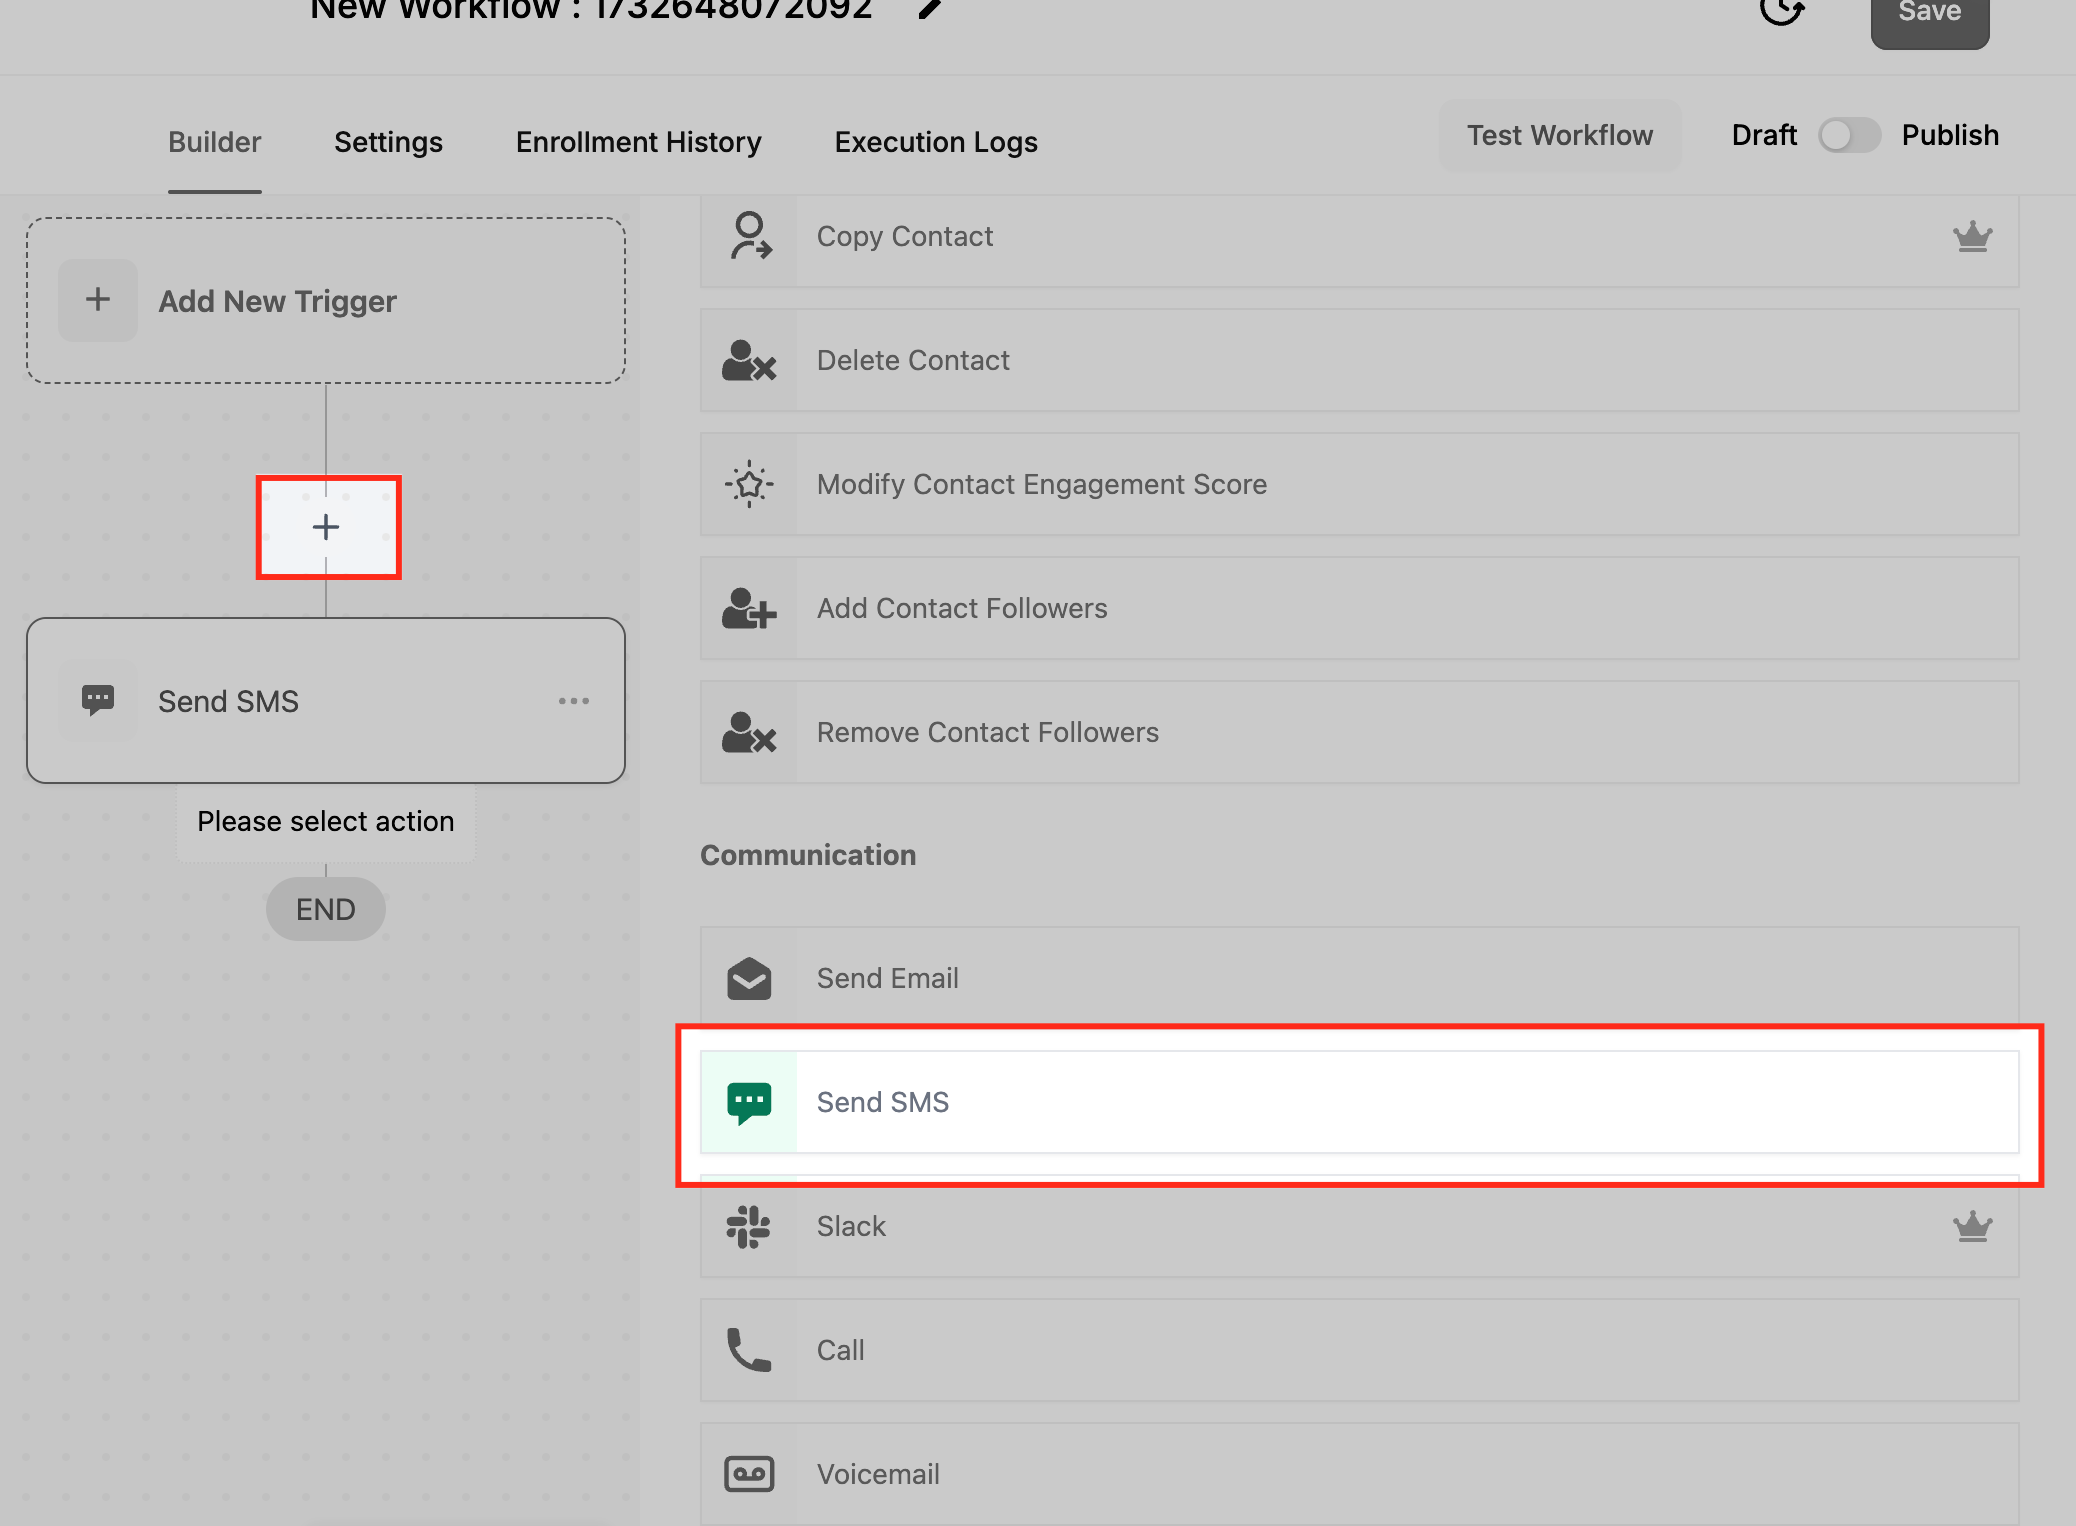
Click the + icon at the point in the flow where the action should run.
In the action panel, open the Communication category and select the action you want.
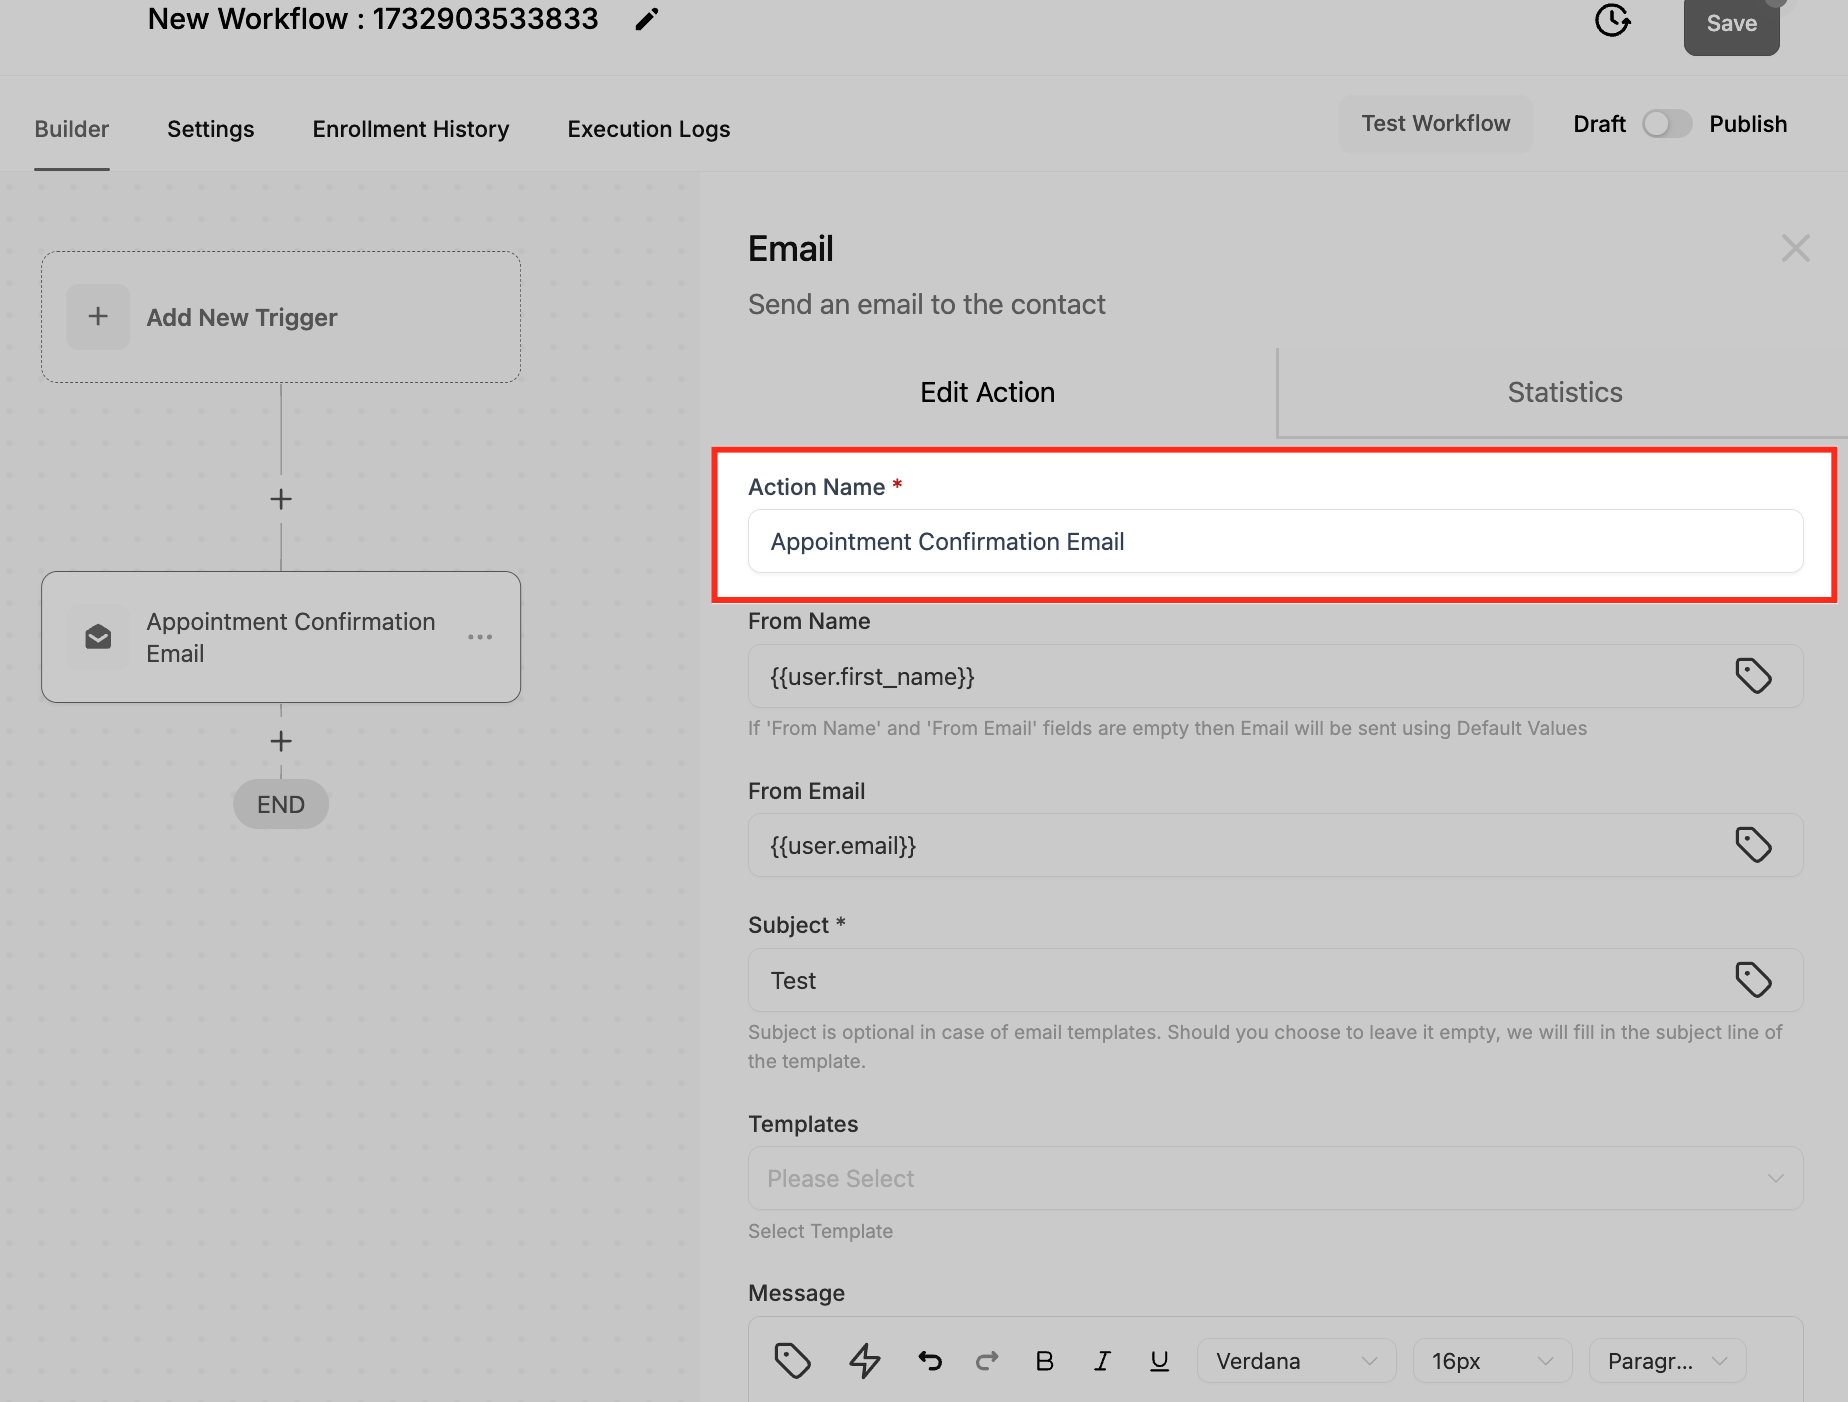
Give the action a clear, descriptive Action Name (for example, "Booking Confirmation Email") so it is easy to find later.
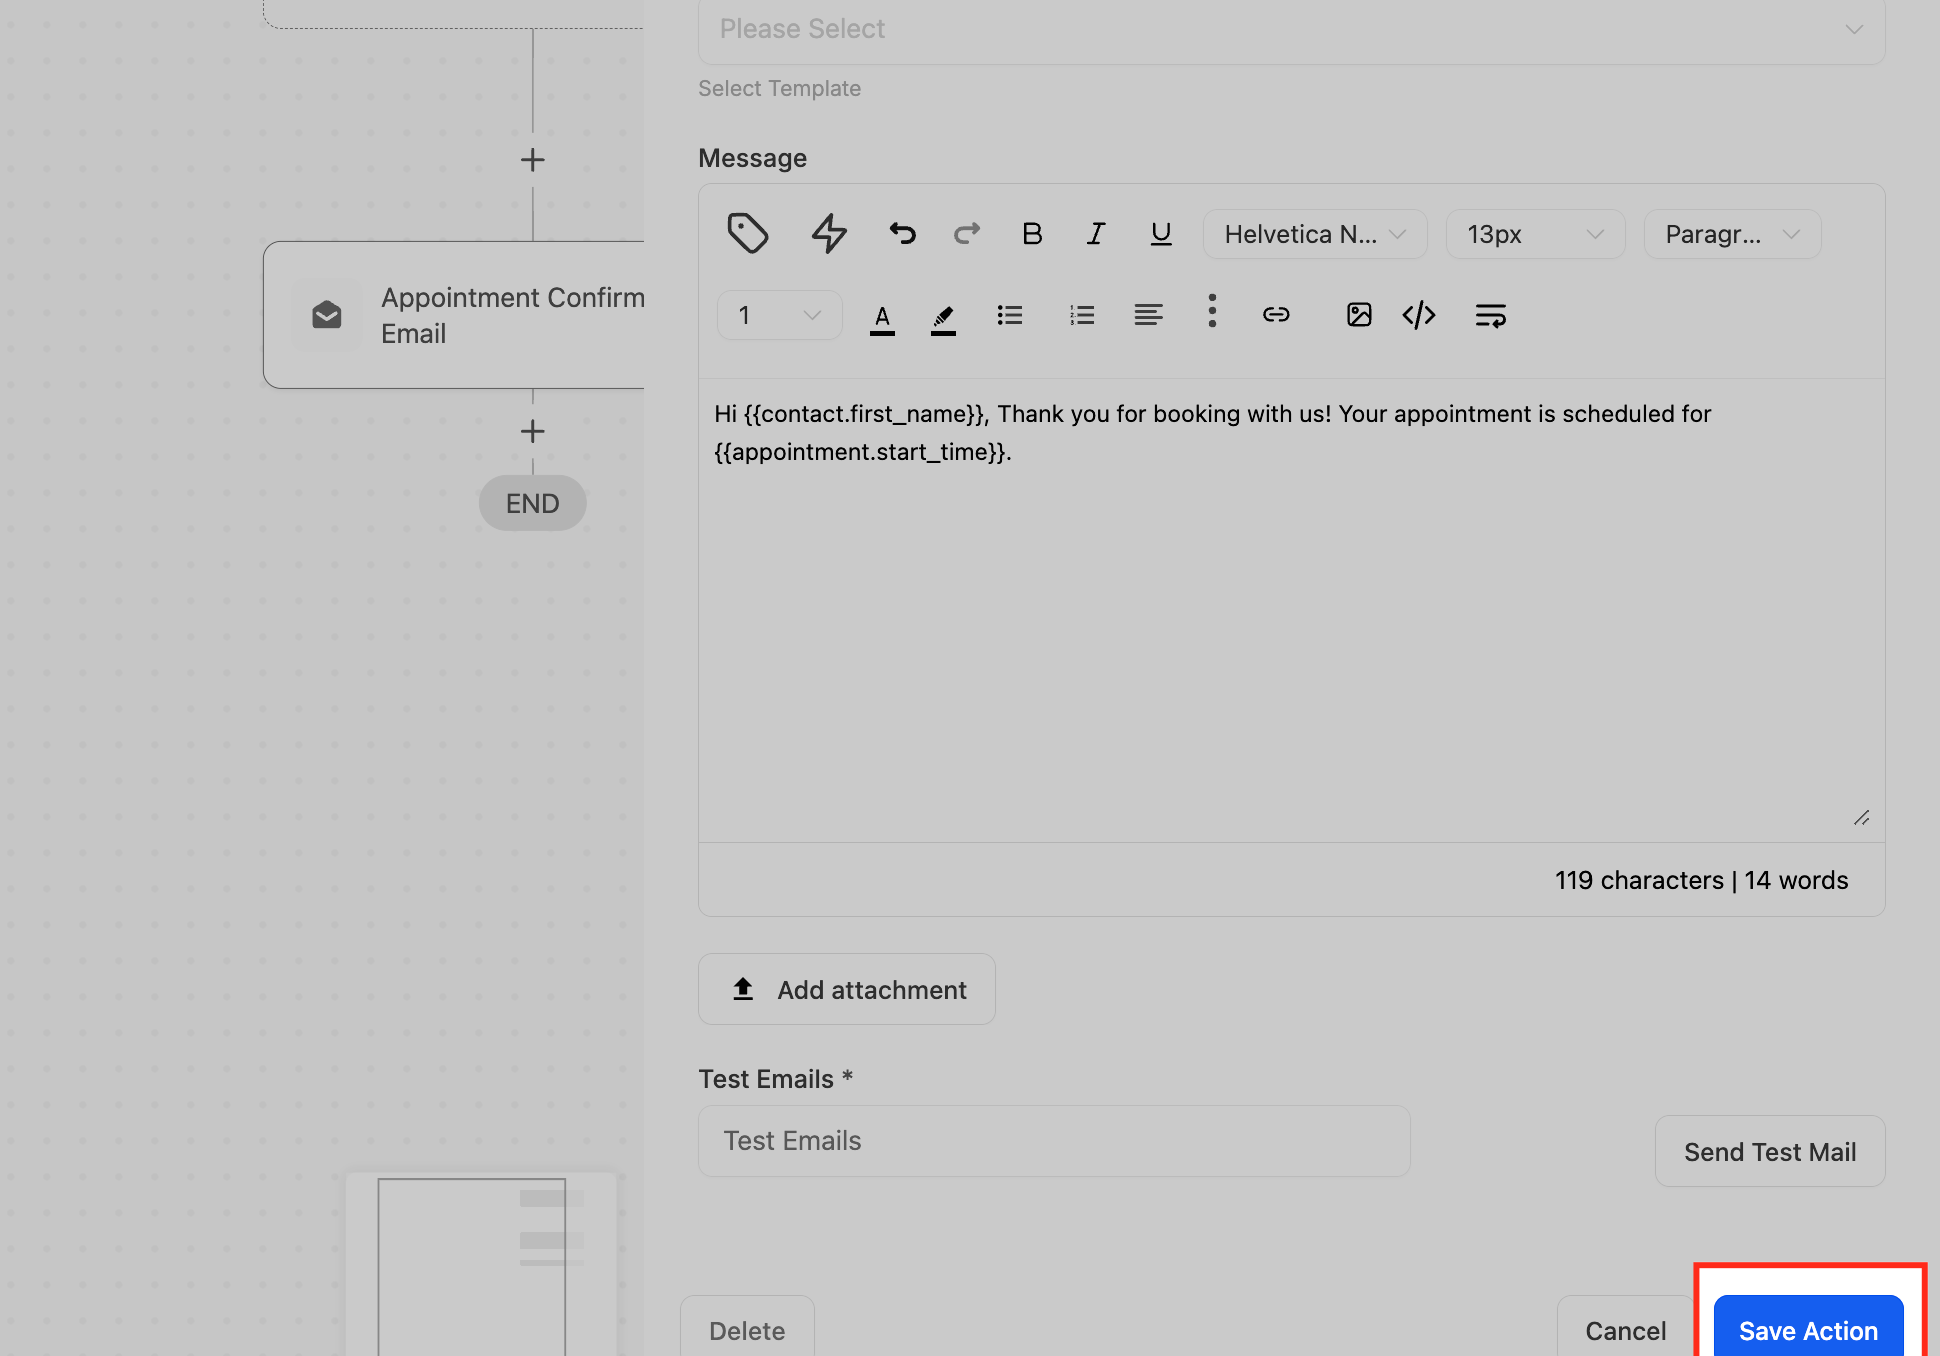
Configure the action's fields, then click Save Action.
Throughout these actions you can personalize content with custom values (merge fields such as {{contact.first_name}} or {{appointment.start_time}}) by clicking the tag icon. Custom values only populate when the trigger or contact record actually supplies that data.
What it does: Sends an automated, personalized email to the contact in the workflow when the action is reached.
Configuration and fields:
Action Name: A descriptive label for this step (for example, "Booking Confirmation Email").
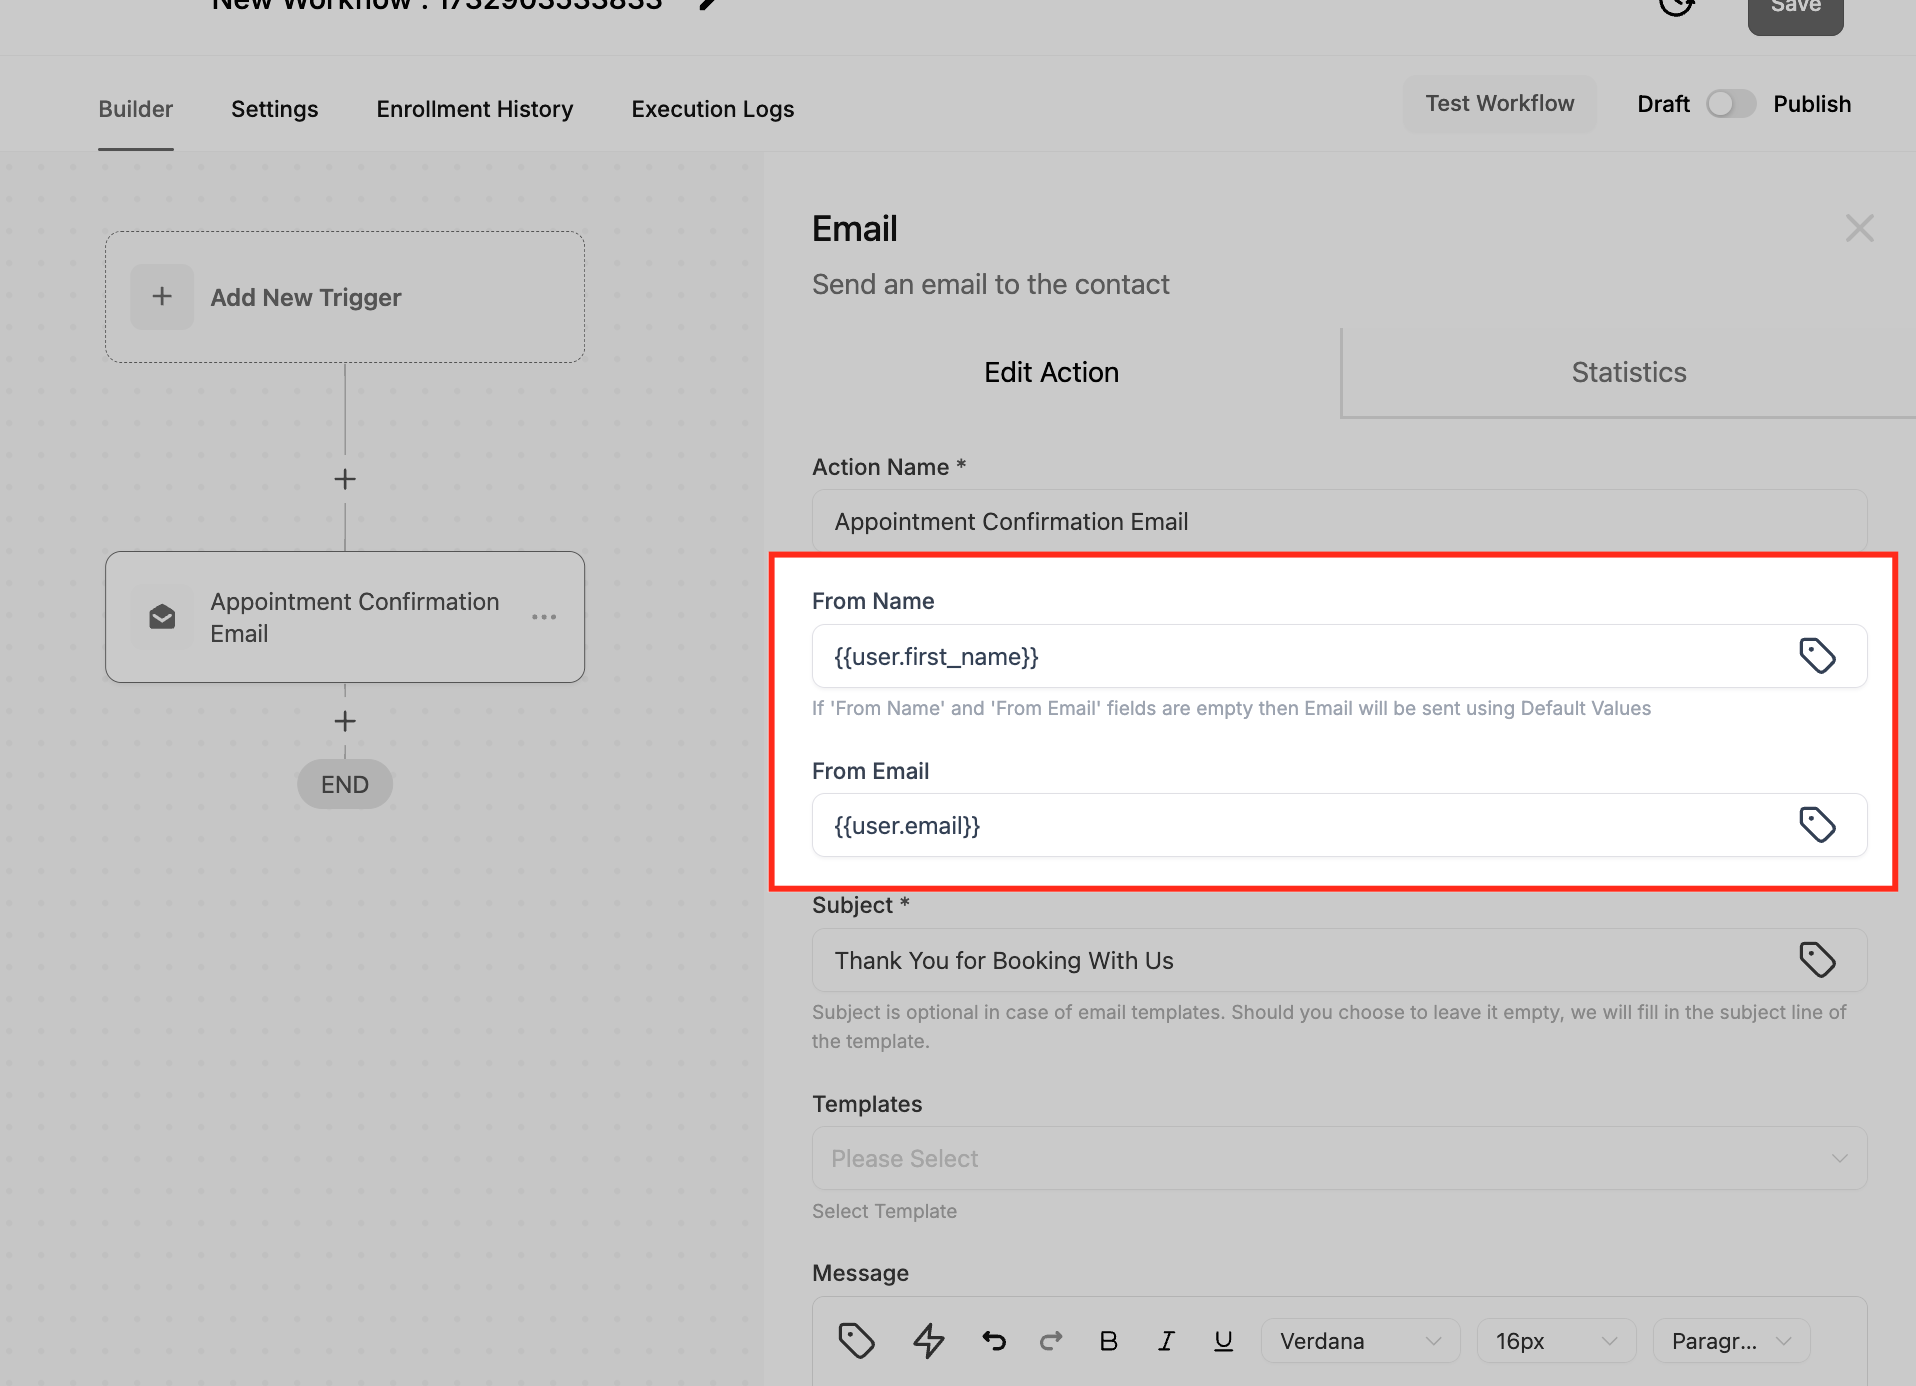
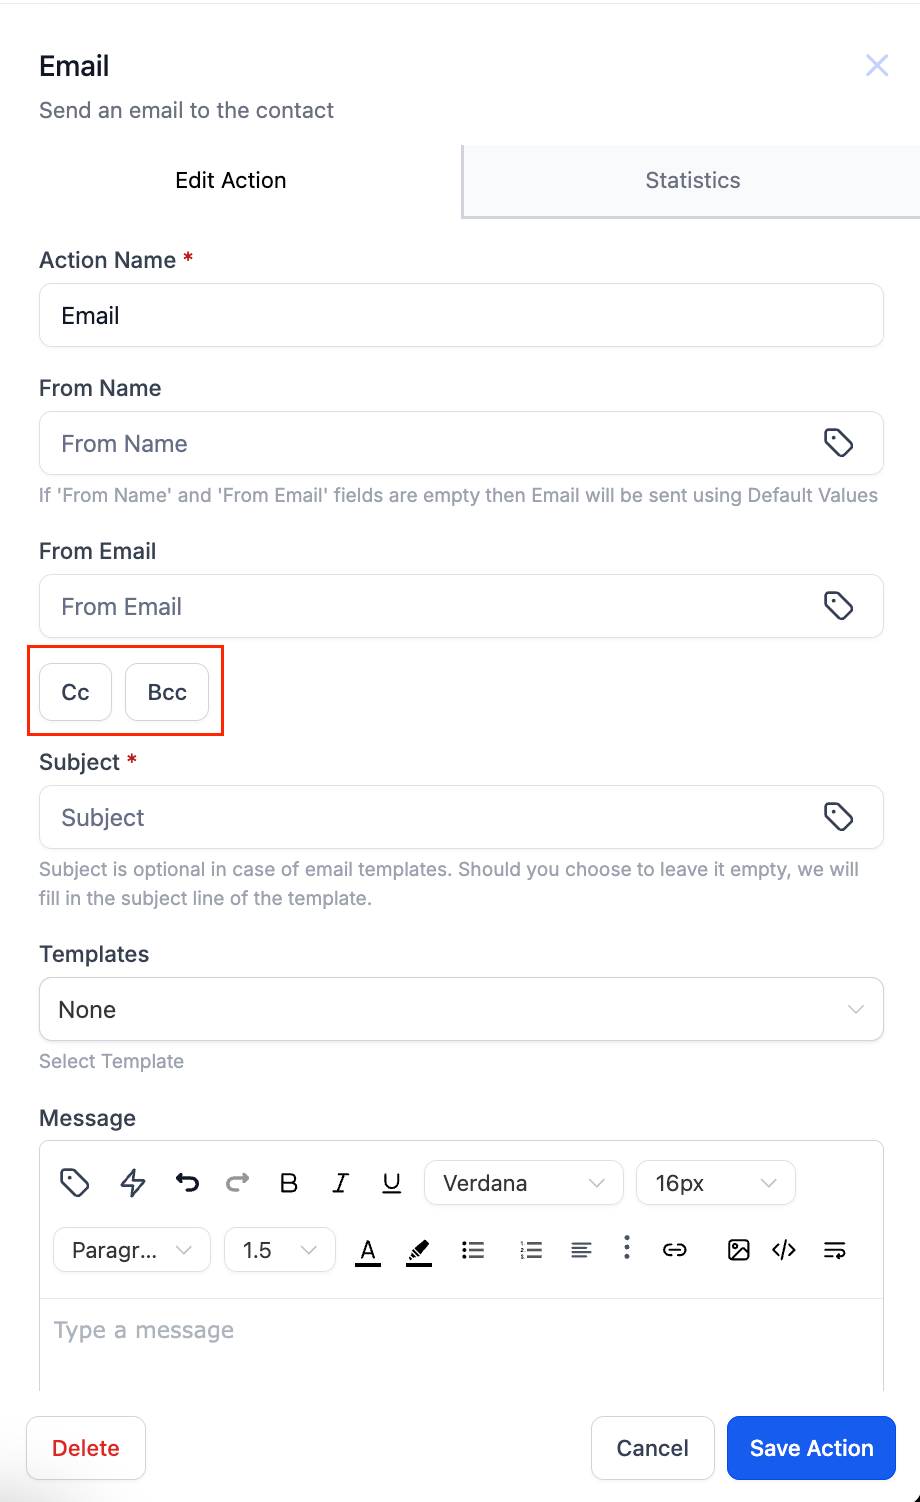
From Name: The sender name that appears in the recipient's inbox. Supports custom values via the tag icon.
From Email: The address the email is sent from. Use a verified sending address on your connected domain.
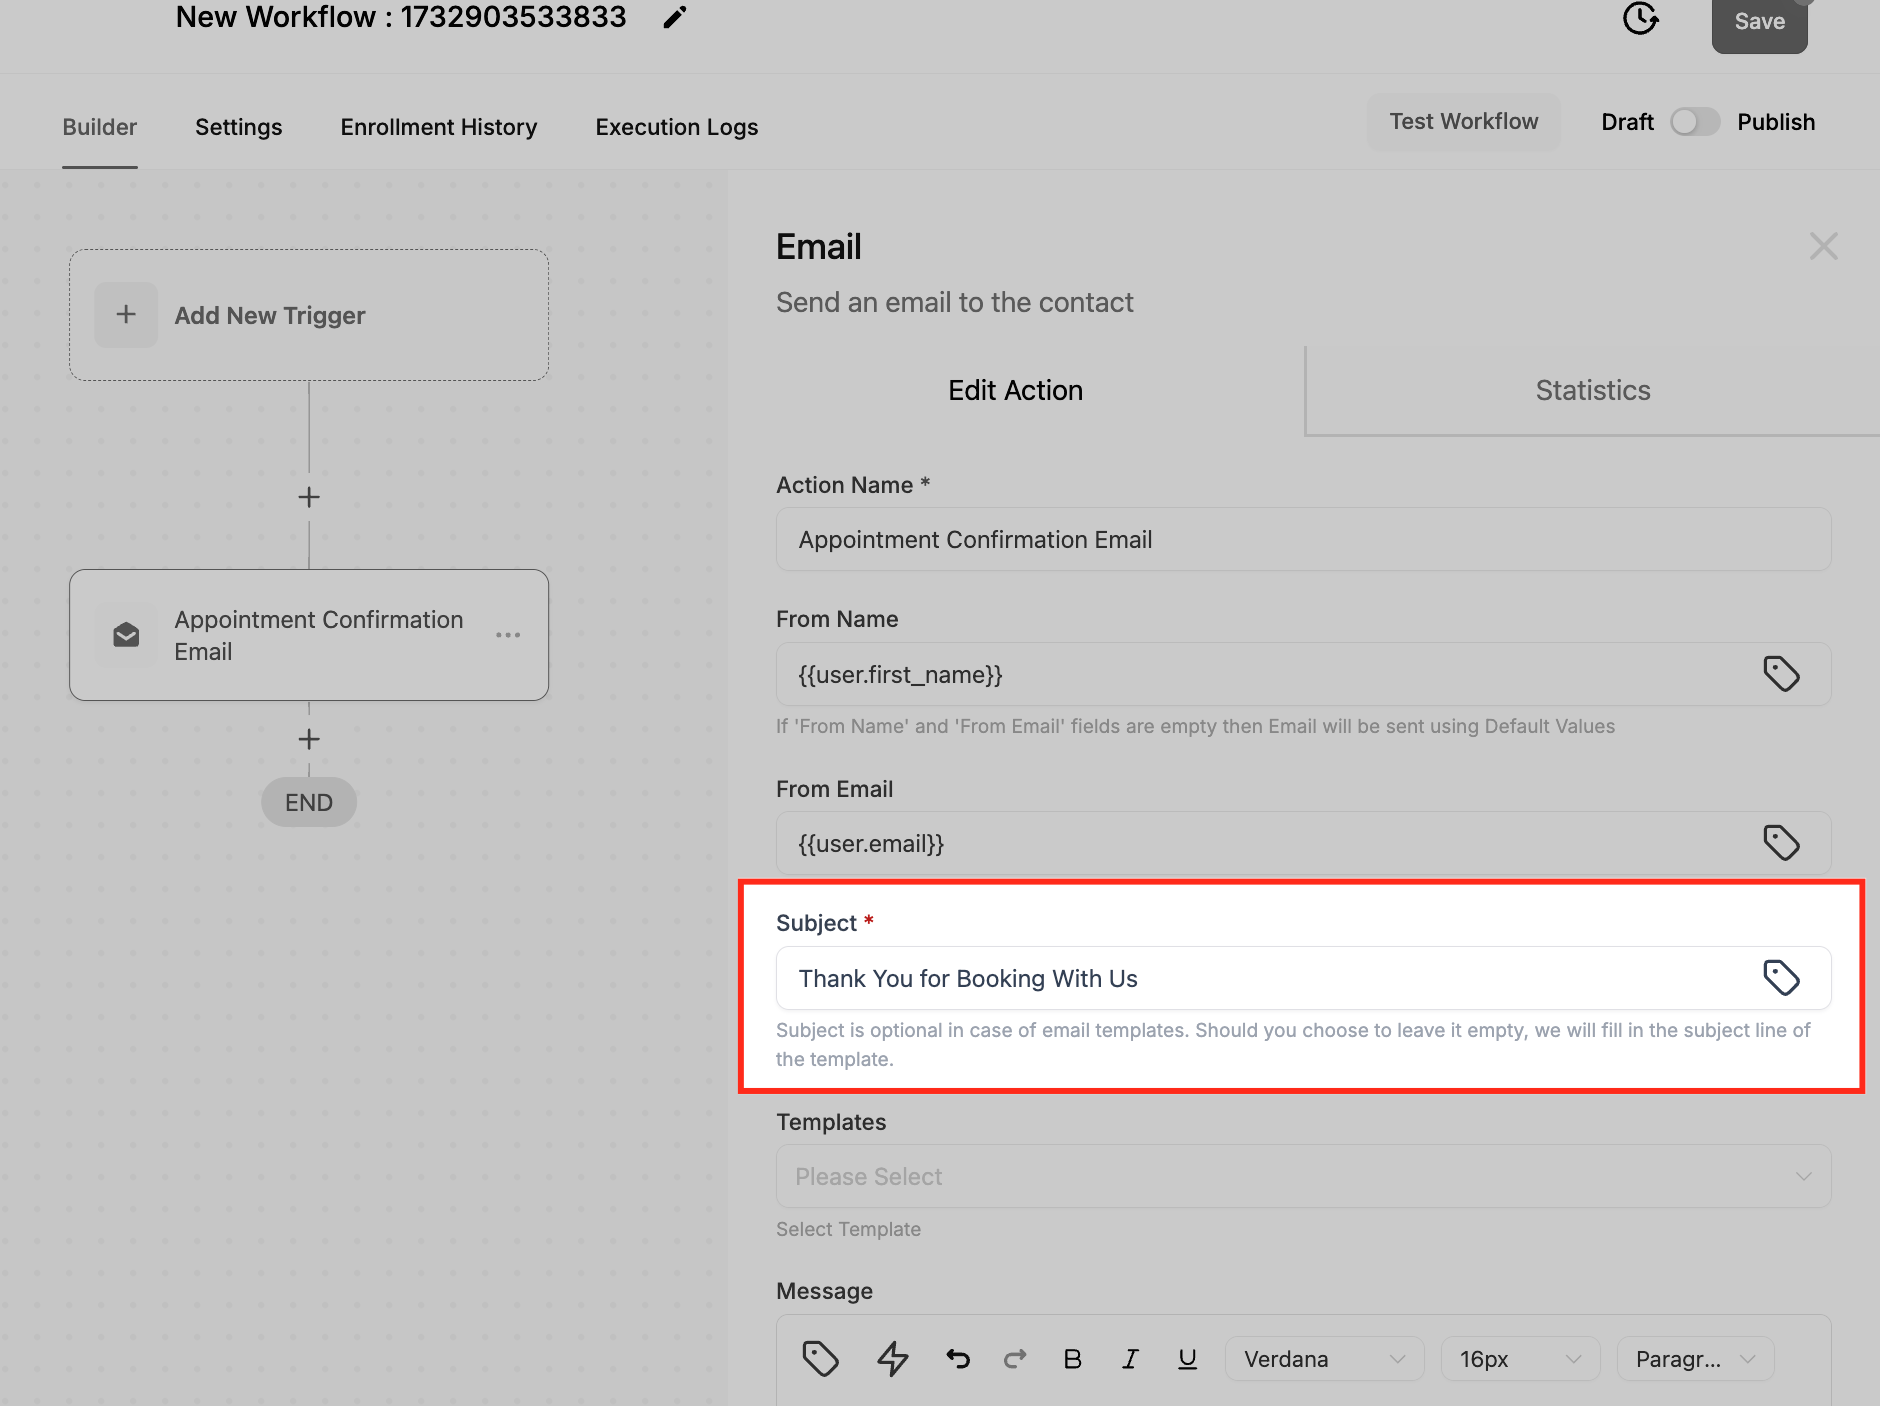
Subject: The subject line. Supports custom values.
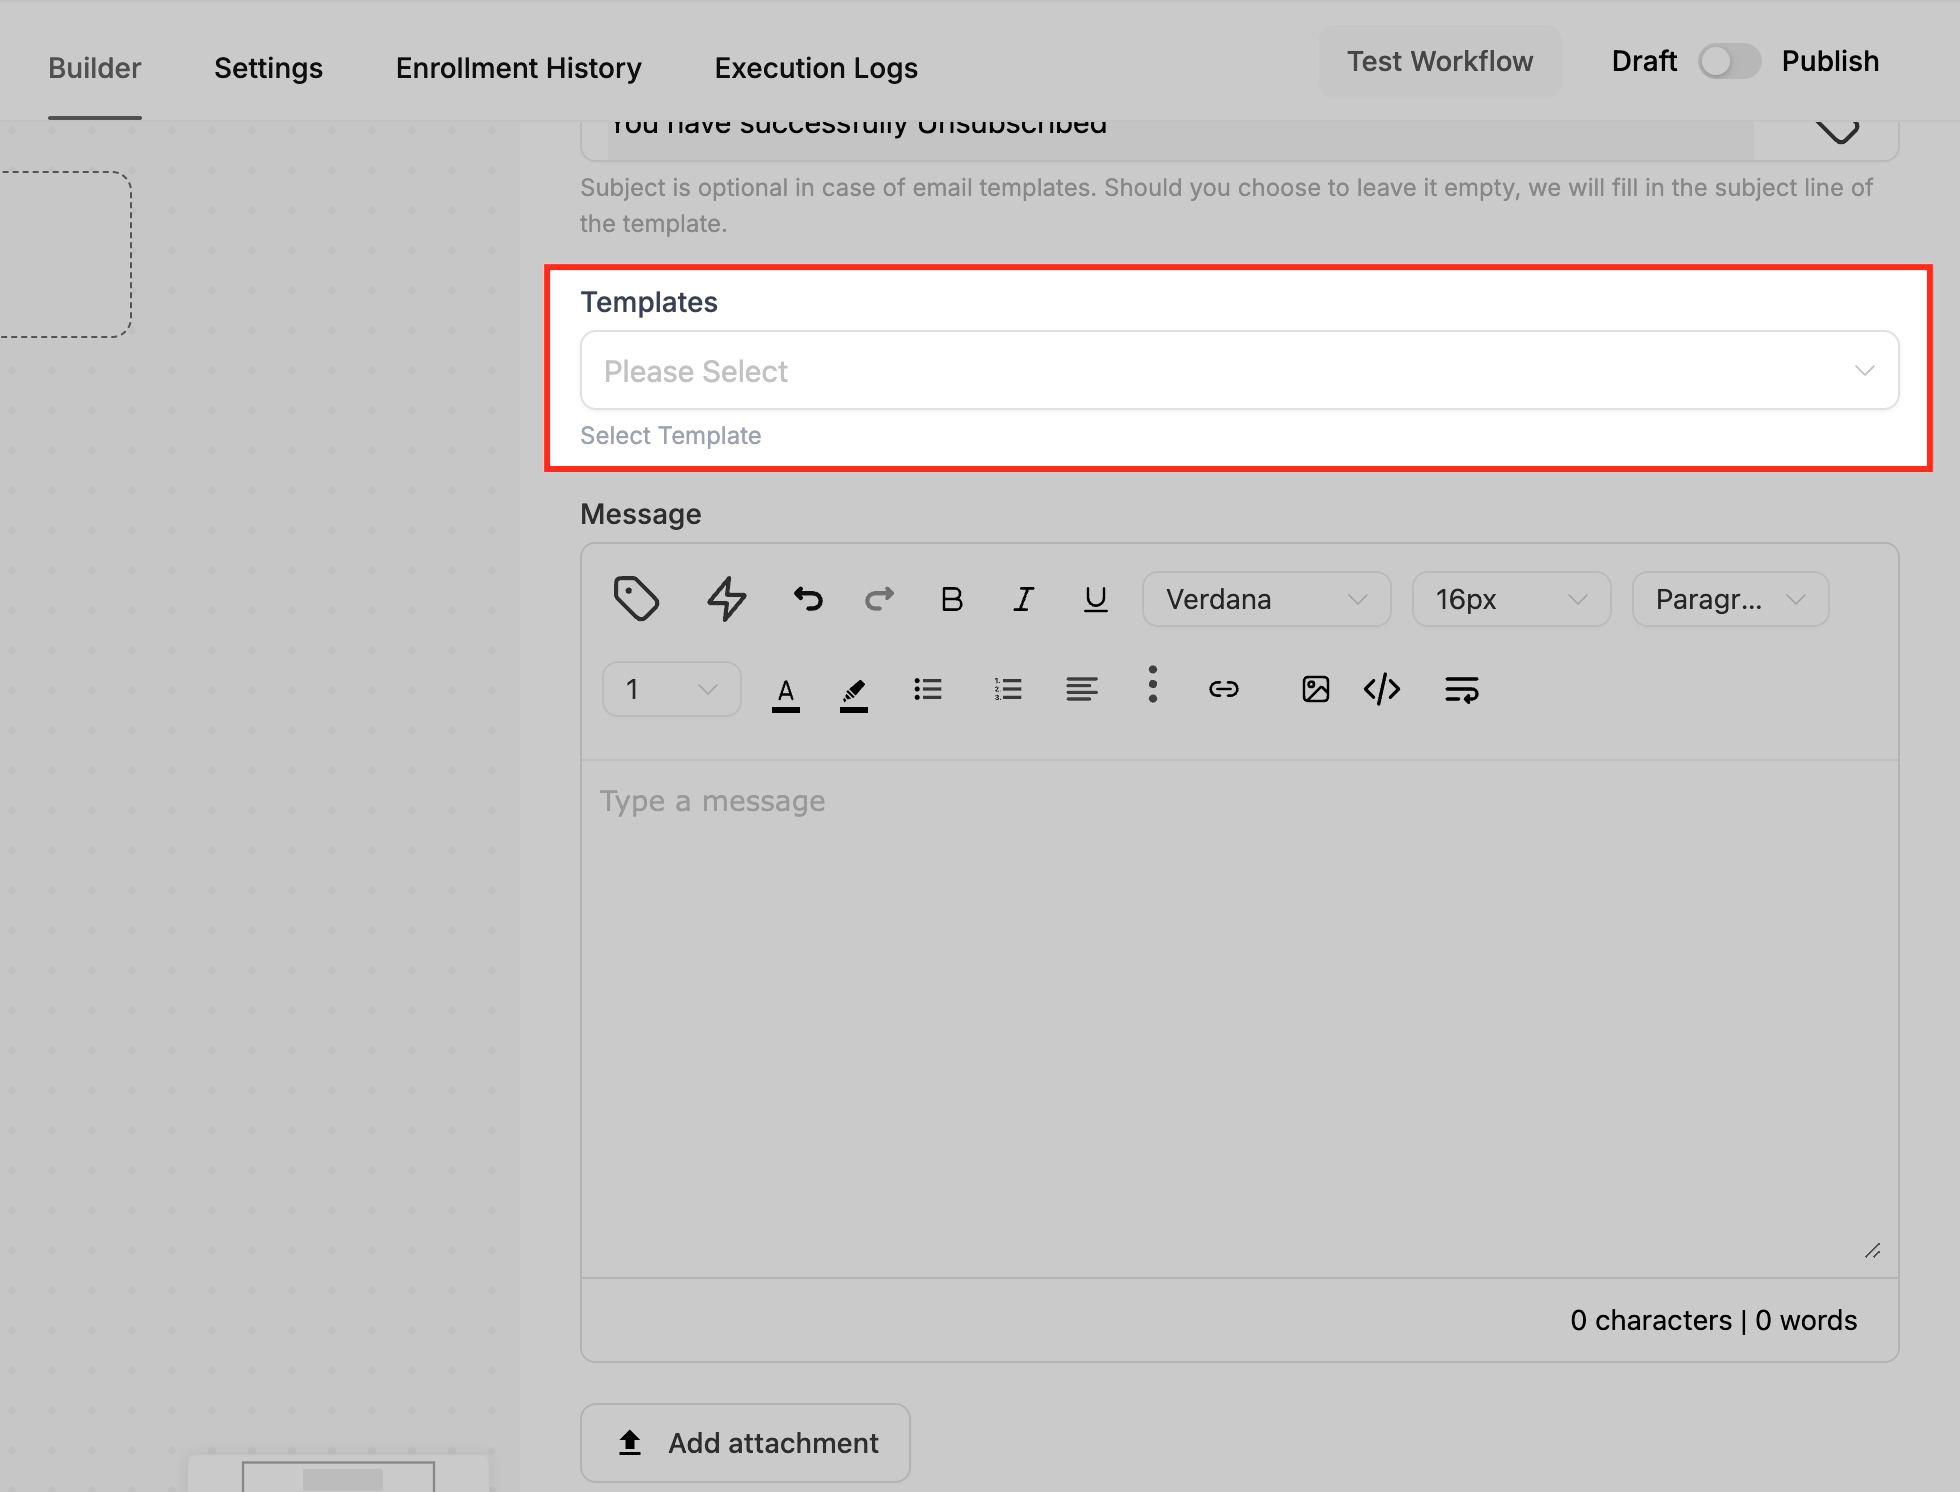
Template: Optionally select a saved email template from the dropdown. If you select an existing template, a Sync Edits to Template checkbox may appear. When sync is ON, edits made in the workflow and edits made to the original template update each other; when sync is OFF, they stay independent.
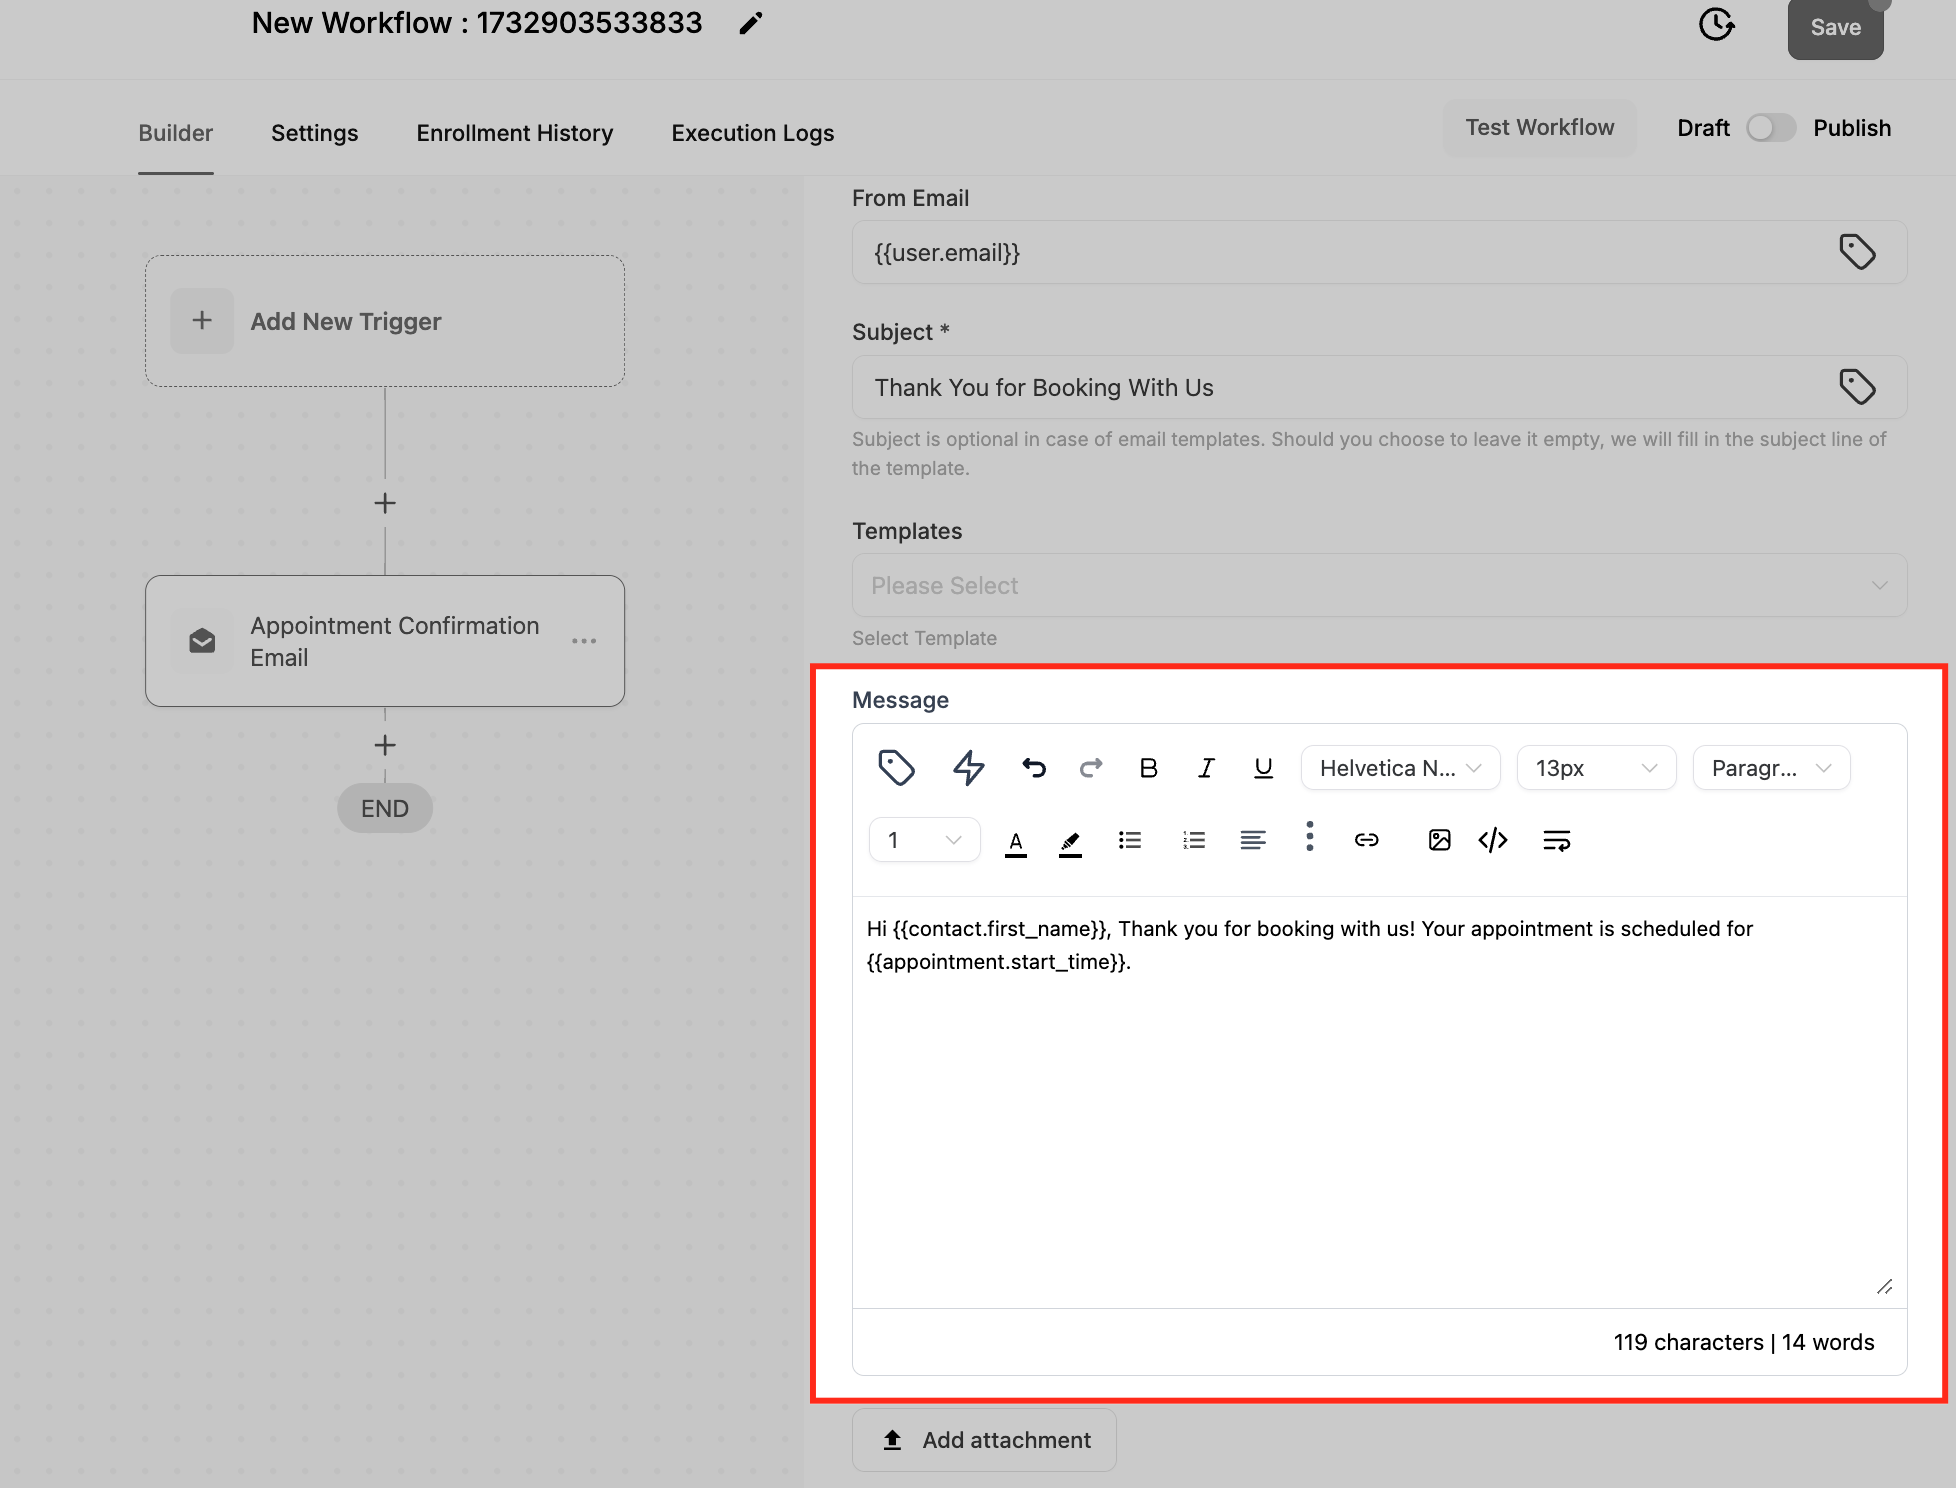
Message (Email Body): Write or edit the email body here. Use custom values to personalize, for example: "Hi {{contact.first_name}}, your appointment is scheduled for {{appointment.start_time}}."
Write with AI: Open the AI generator, describe the email you want (for example, "Write a promotional email offering 20% off a first HydraFacial"), optionally pick a tone (Neutral, Friendly, Professional, Casual, and more), then click Generate. Use the Use Subject checkbox to apply the AI subject line, Re-generate with a follow-up prompt to refine, and Use Email to insert the result. AI generates generalized copy, so add personalization tags yourself.
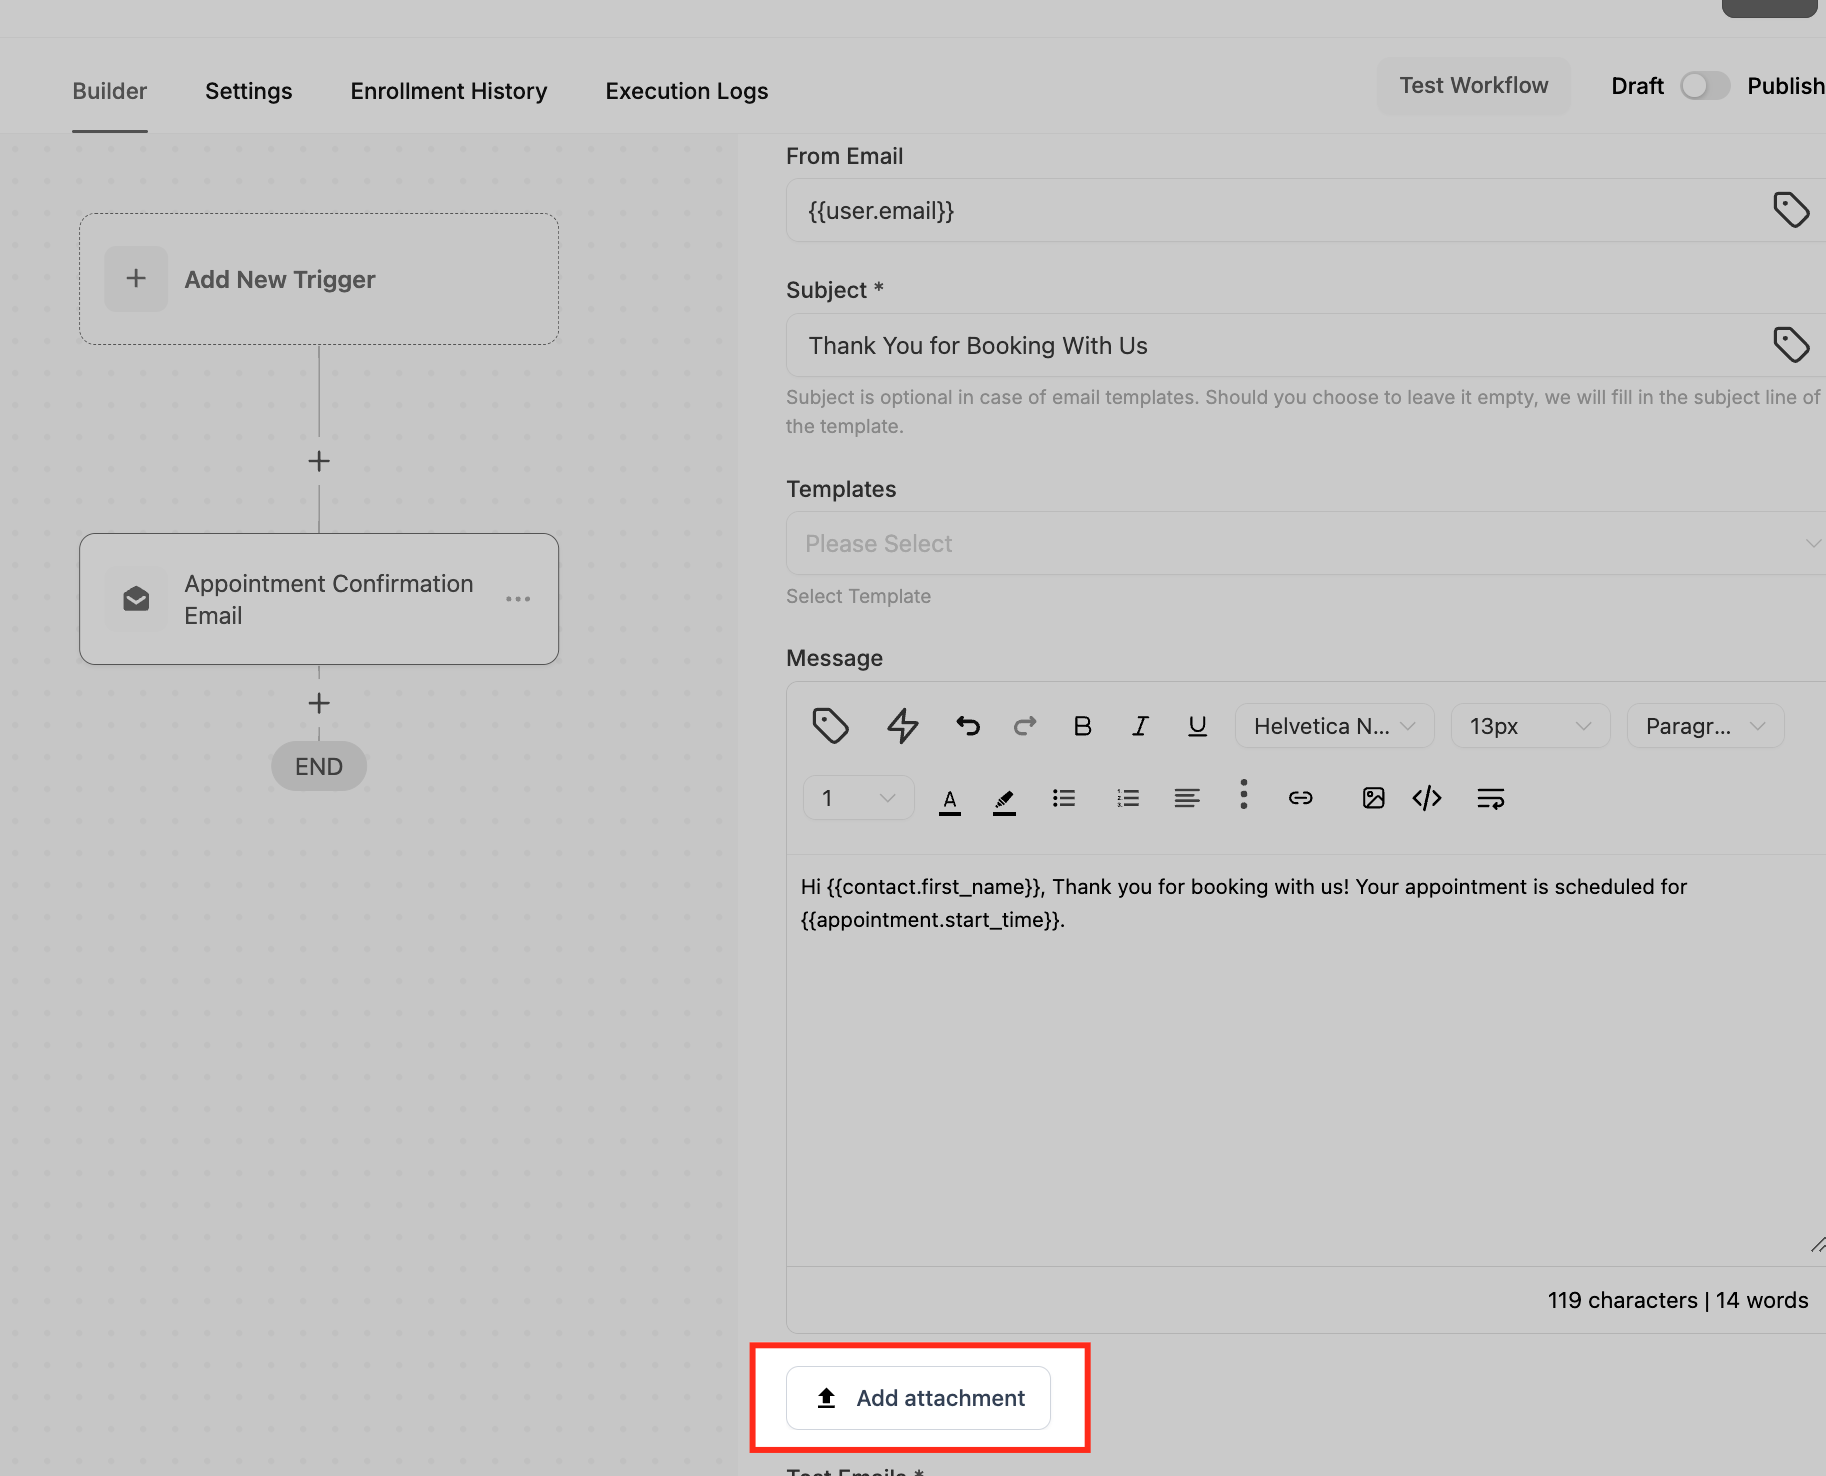
Add Attachments: Attach files or images by selecting from the Media Library or uploading from your device.
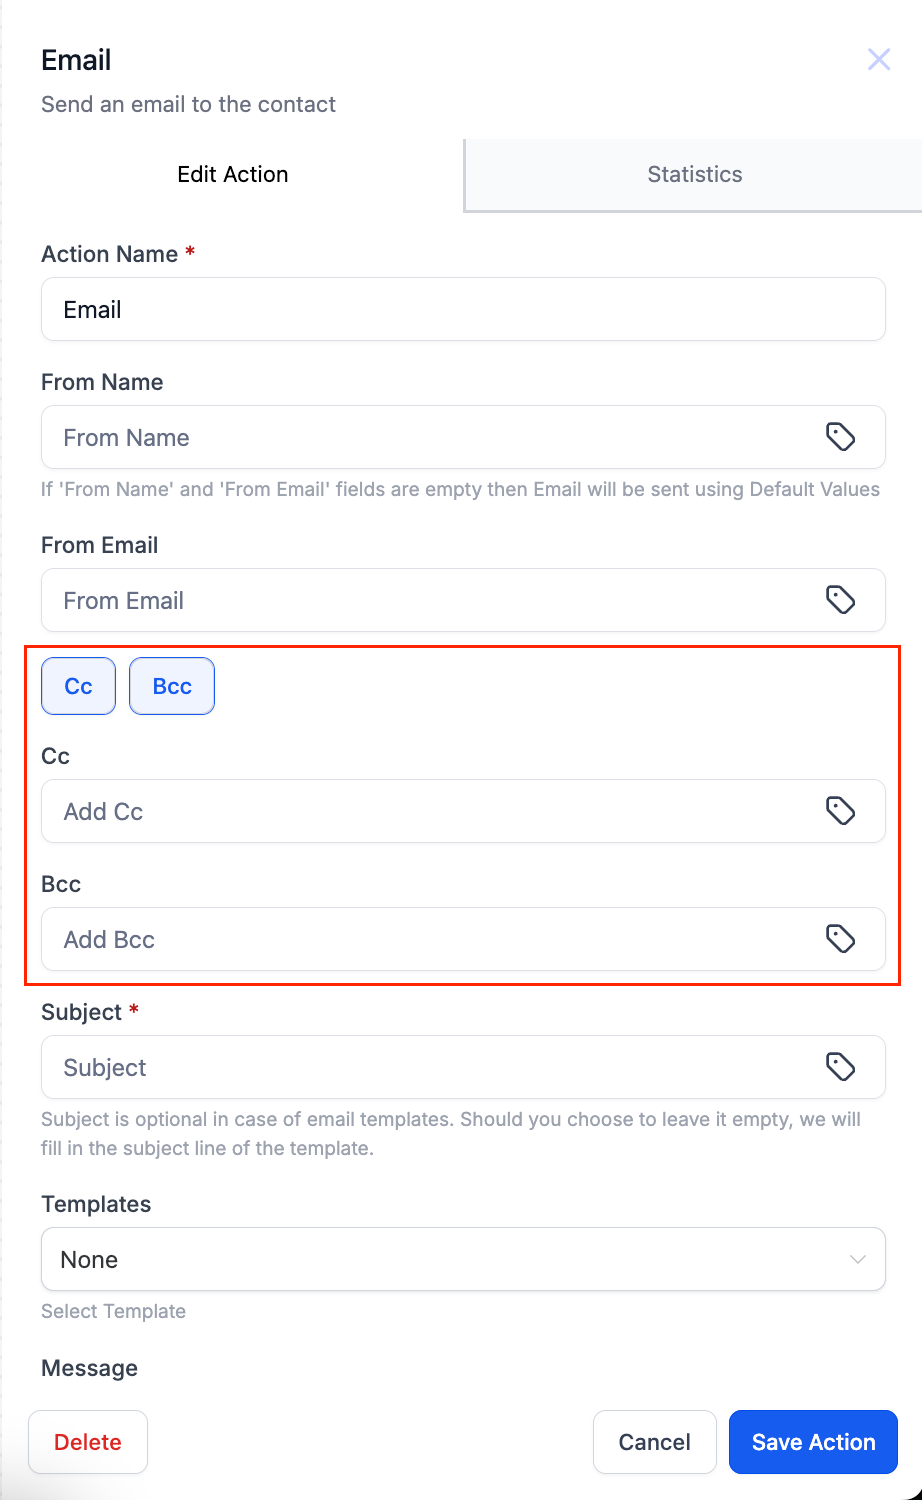
Cc / Bcc: Click the Cc or Bcc buttons to reveal those fields and copy additional recipients. Separate multiple addresses with commas.
Test Emails: Enter a demo address and click Send Test Mail to preview formatting before going live.
Inputs needed: A contact with a valid email address, and a verified sending domain.
Data produced: After the action runs, the step shows Email Delivery Statistics, including Delivered, Opened, Clicked, Replied, Bounced, Accepted, Stored, Rejected, and Complained counts, each with recipient details. Cc/Bcc recipients are not counted in these stats, and send success or failure is judged on the primary contact email only.
When to use it / example: Send a booking confirmation when a contact books an appointment. Trigger on Appointment Booked, set From Name to your practice name, Subject to "Thanks for booking with us," and a body that confirms the date and time using {{appointment.start_time}} and {{appointment.only_start_date}}. Send a test, then save.
Add the Send Email action into your workflow after the appropriate trigger.
Configure the Action Name.
Fill in From Name and From Email.
Enter the Subject line.
Choose a Template or write a custom body.
Compose the Email Body with custom values.
Add any Attachments.
Send a Test Email to confirm formatting.

Save the action.
Use the Cc/Bcc buttons to add copied recipients if needed.
Notes and gotchas:
If an email does not send, confirm the contact has a valid address and your sender domain is configured.
Blank merge fields usually mean the trigger does not supply that data (appointment fields require an appointment-related trigger) or the contact record is missing the value.
Invalid Cc/Bcc addresses are skipped; valid recipients still receive the email. Test emails validate formatting only, not Cc/Bcc delivery.
Keep subject lines short and specific, and test across multiple inbox providers to check deliverability.
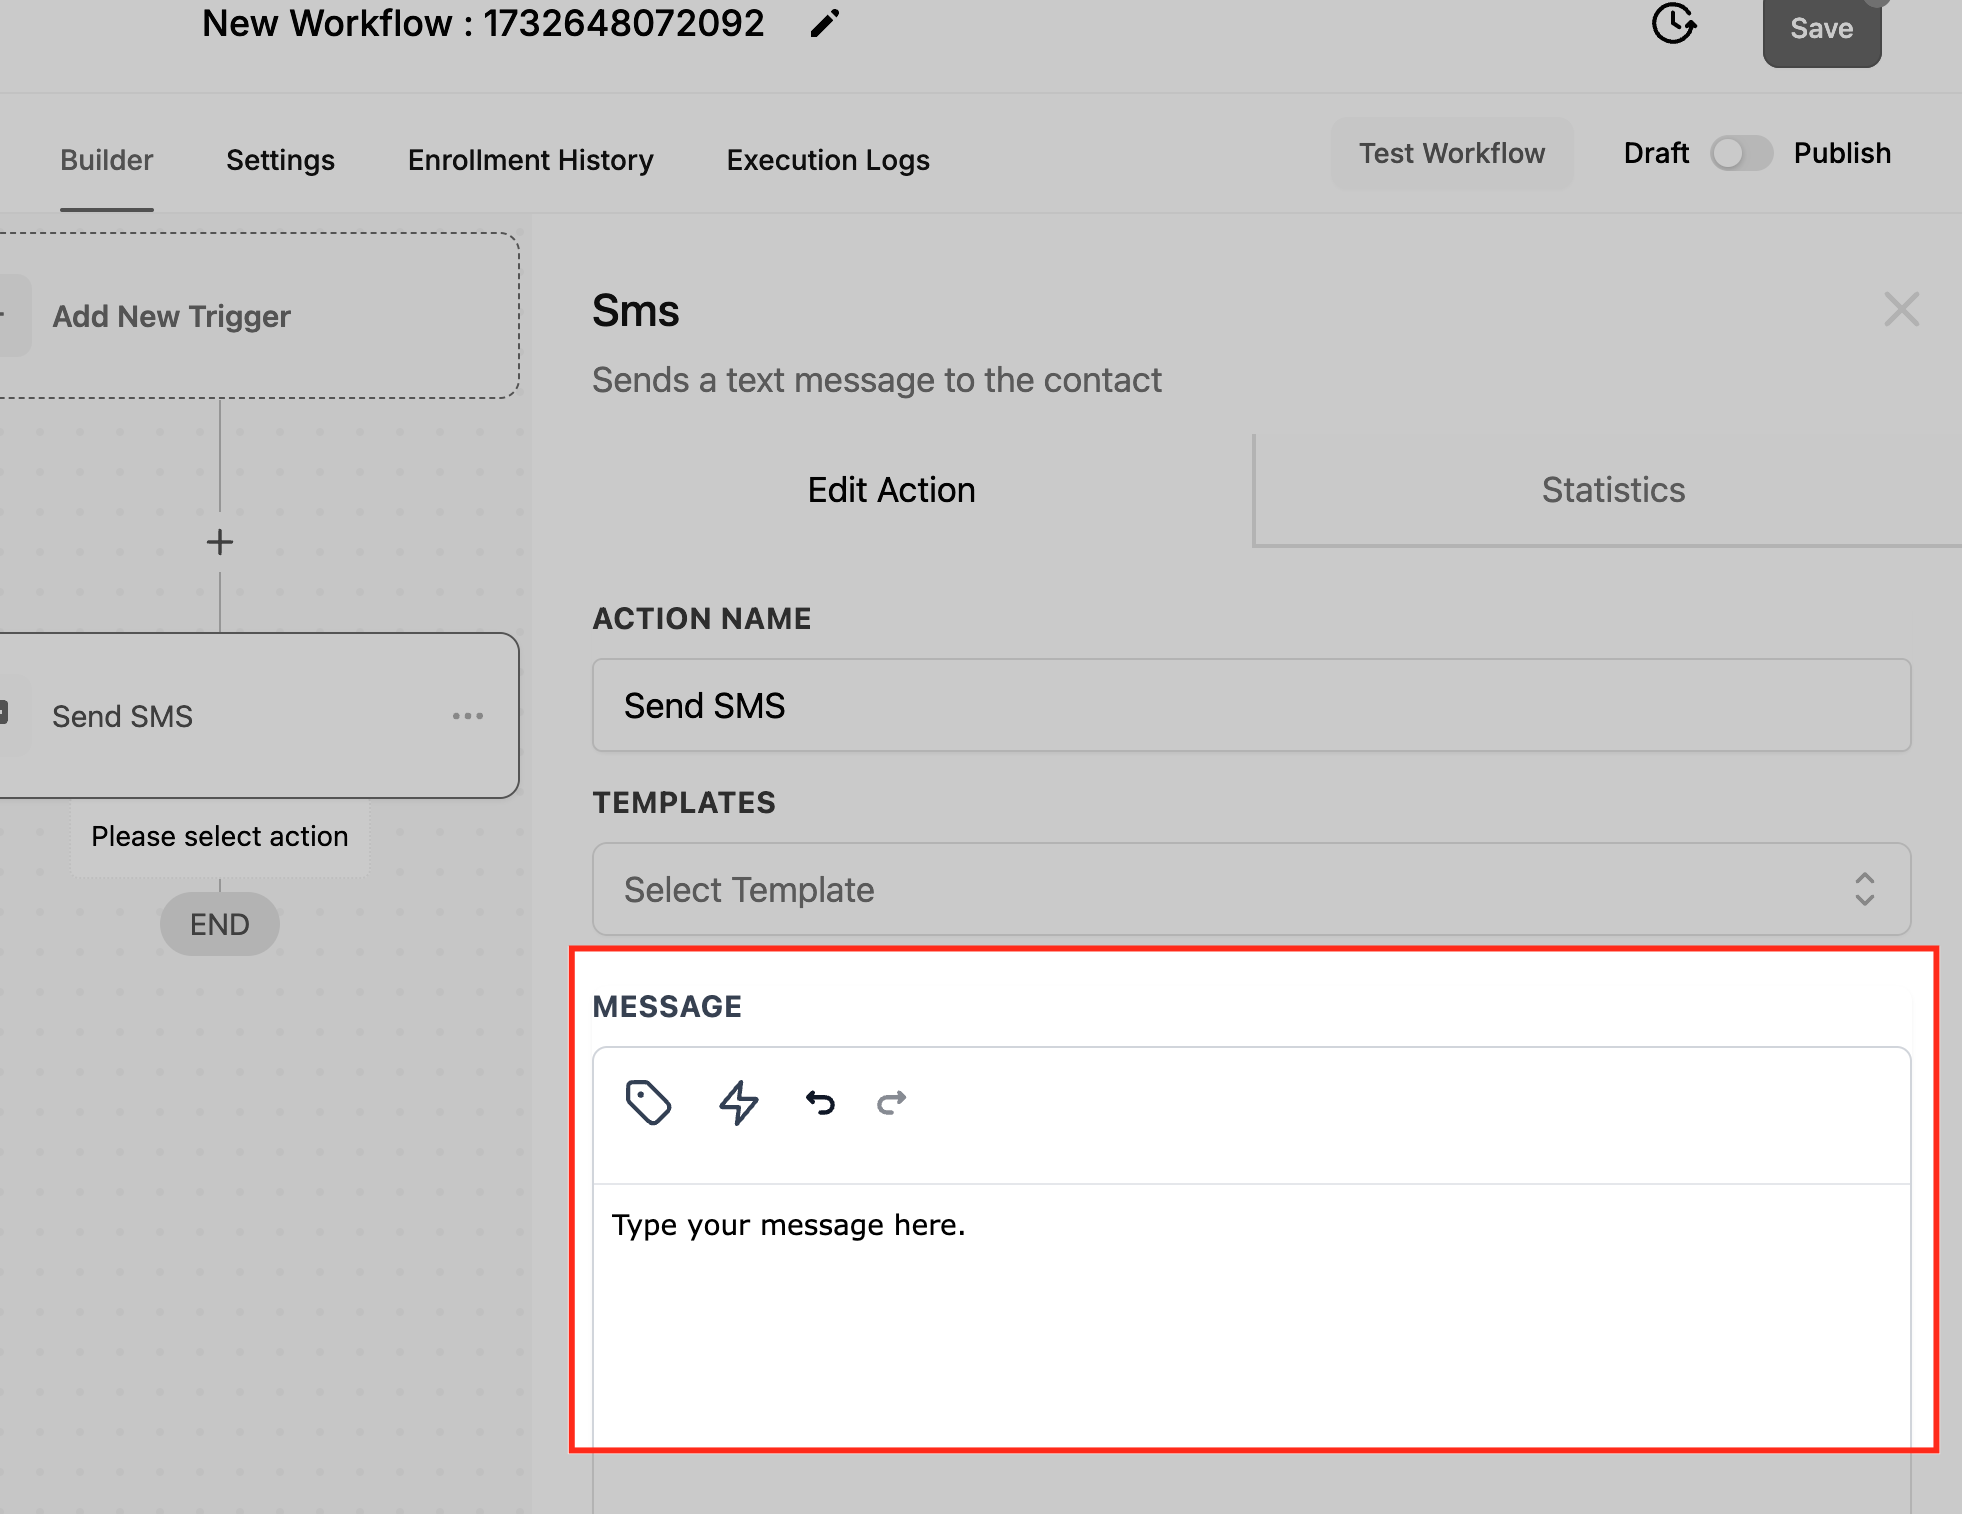
What it does: Sends an automated text message to the contact when the action is reached.
Configuration and fields:
Action Name: A descriptive label (for example, "Appointment Reminder SMS").
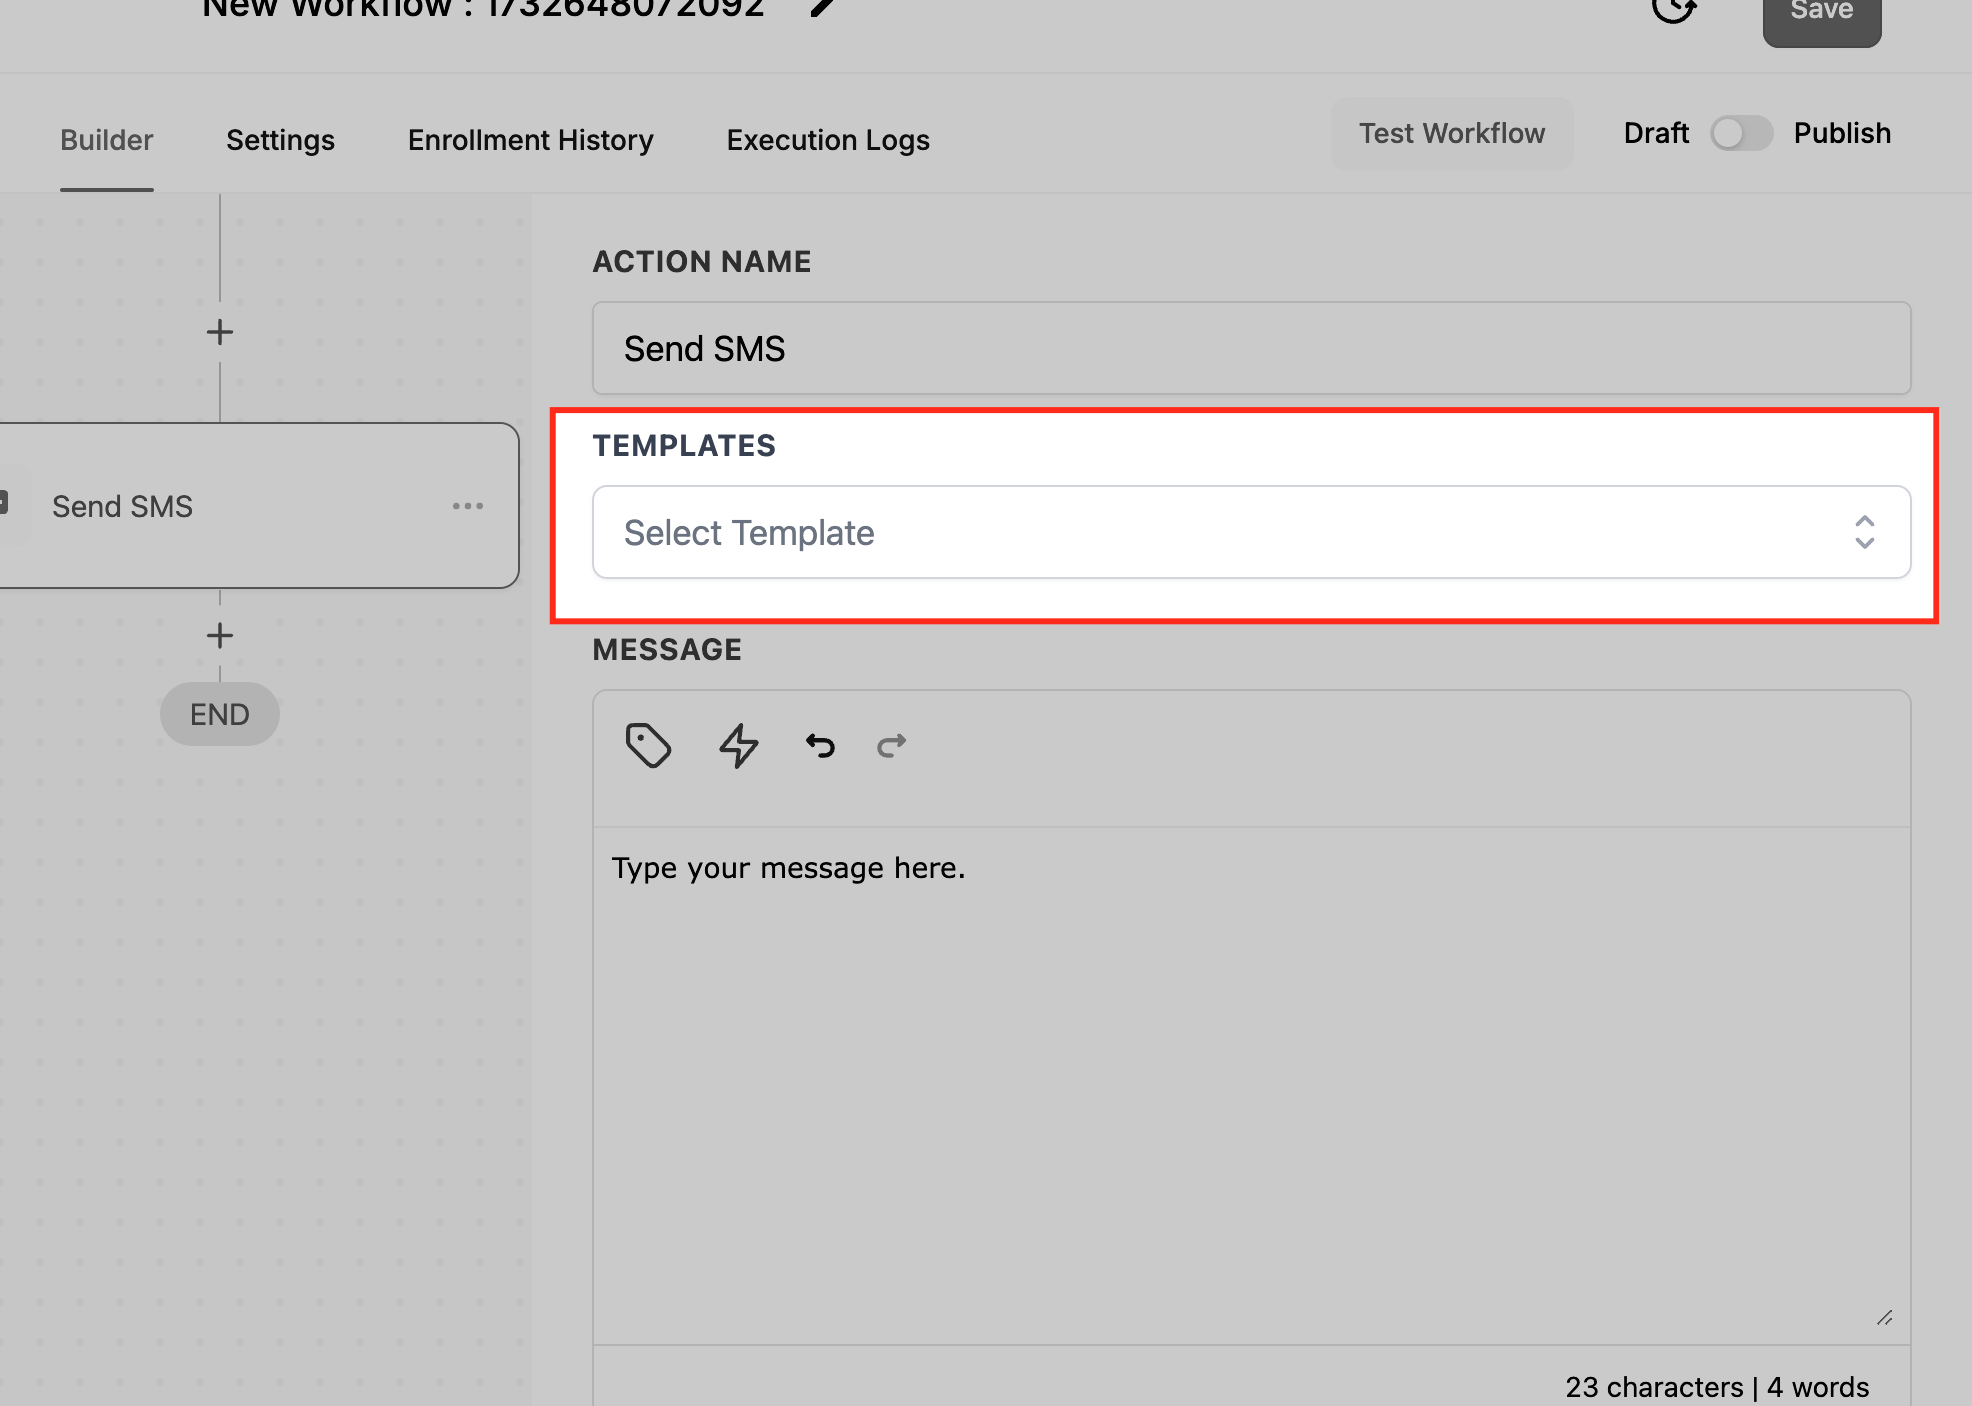
Templates: Optionally select a saved SMS template to prefill the message.
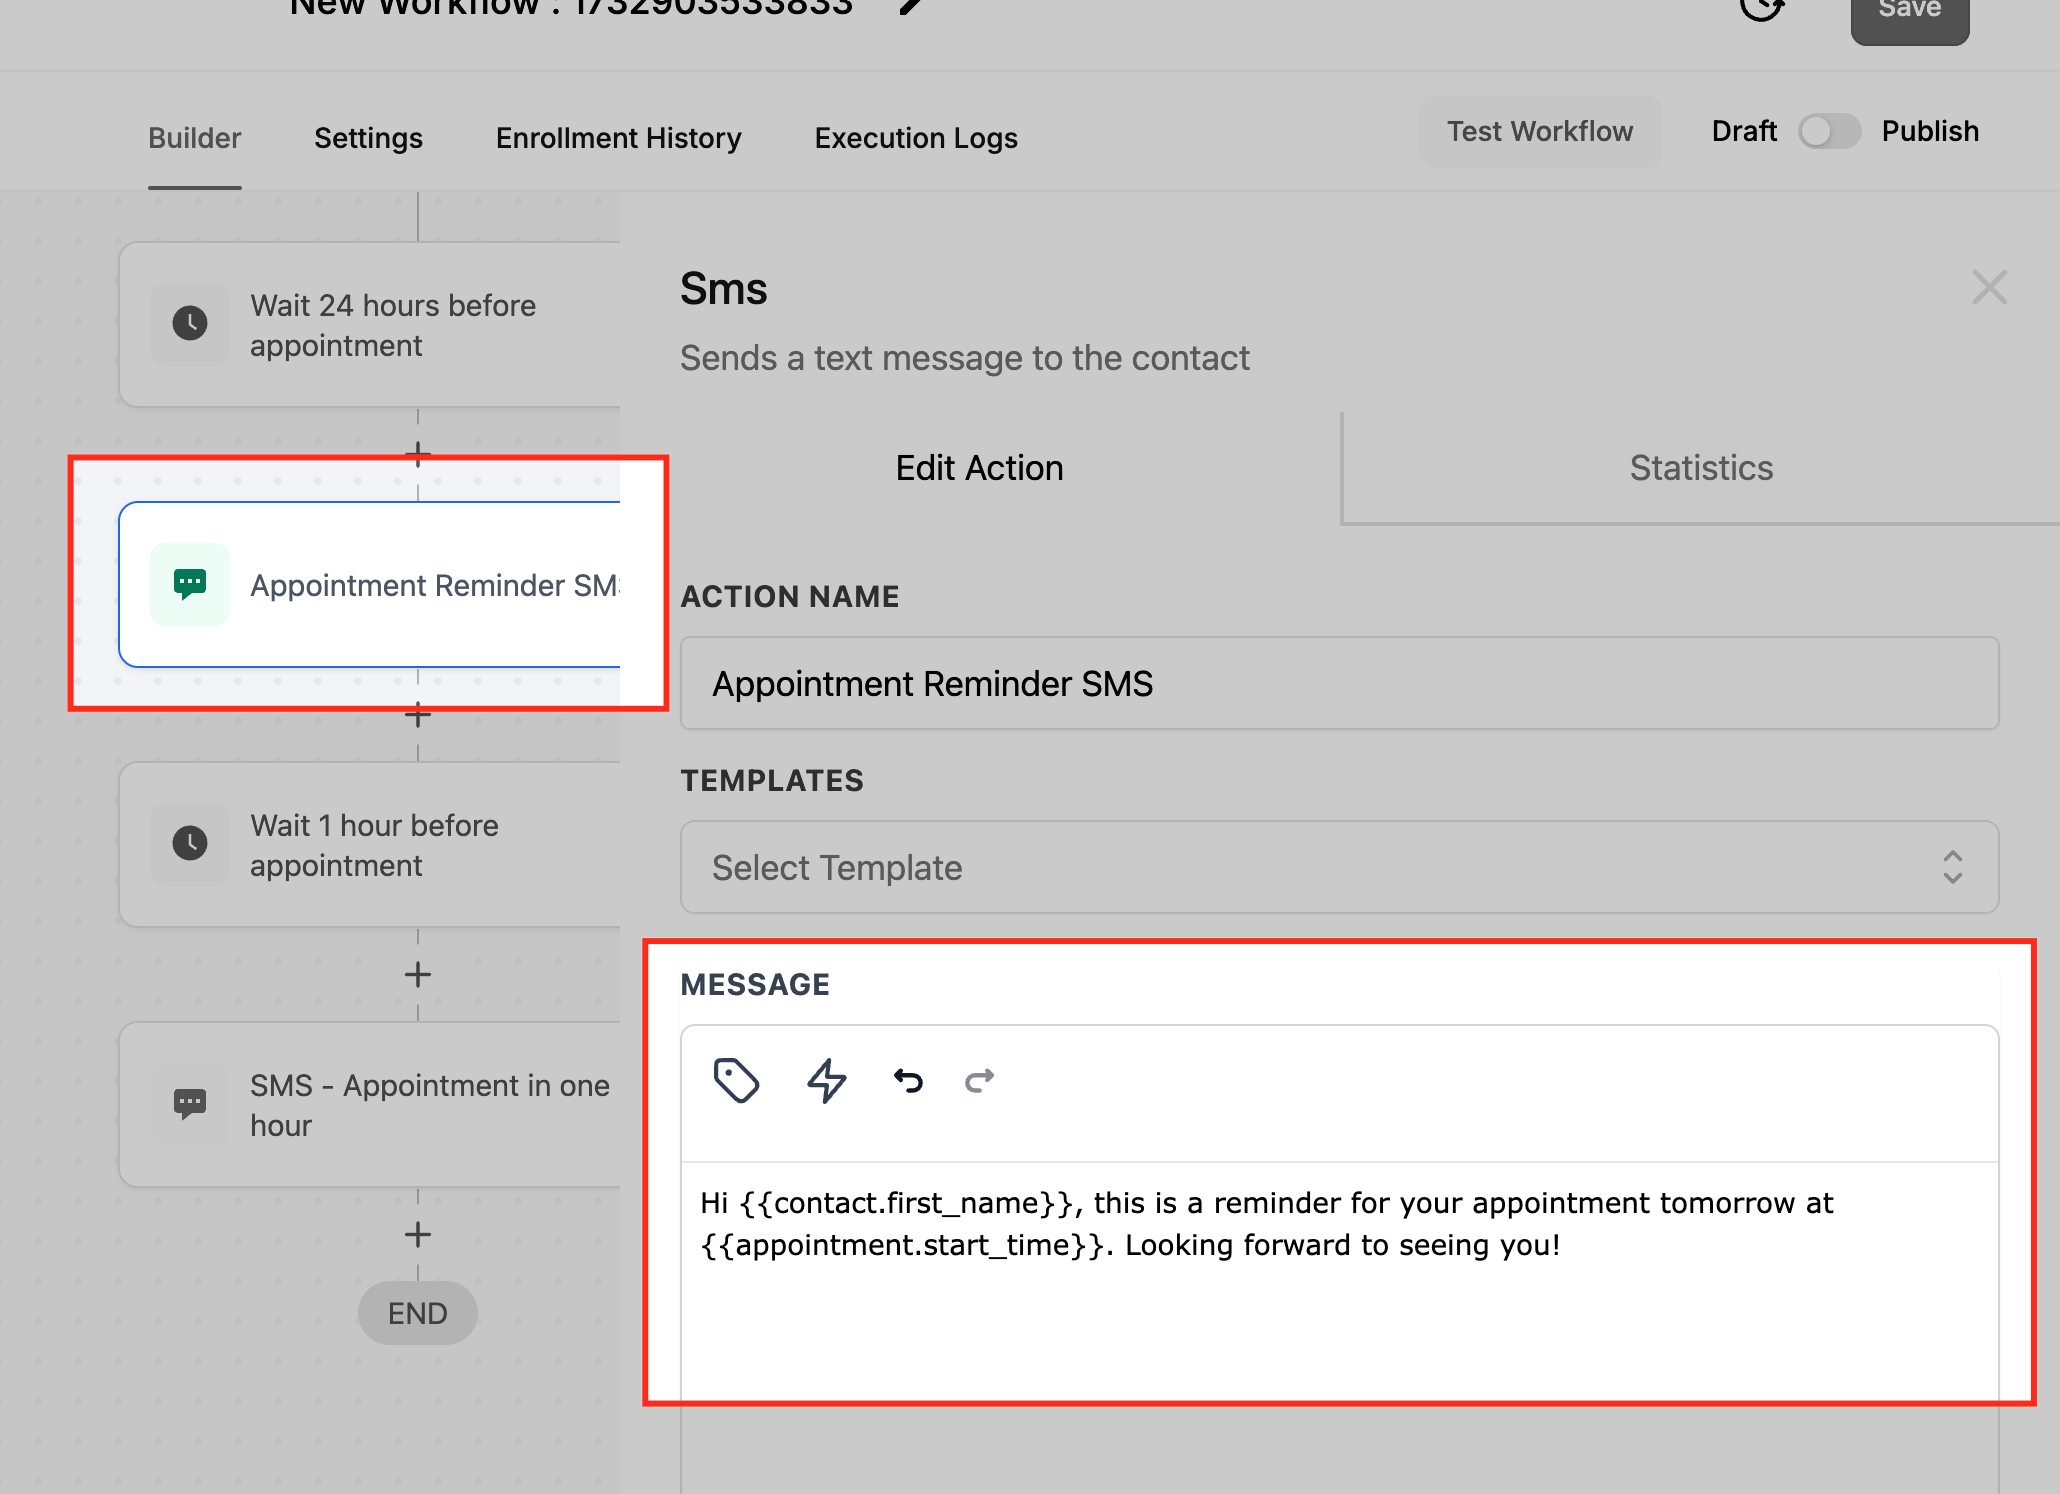
Message: The body of the text. Use custom values like {{contact.first_name}} to personalize.
Custom Values: Insert merge fields to personalize the message dynamically.
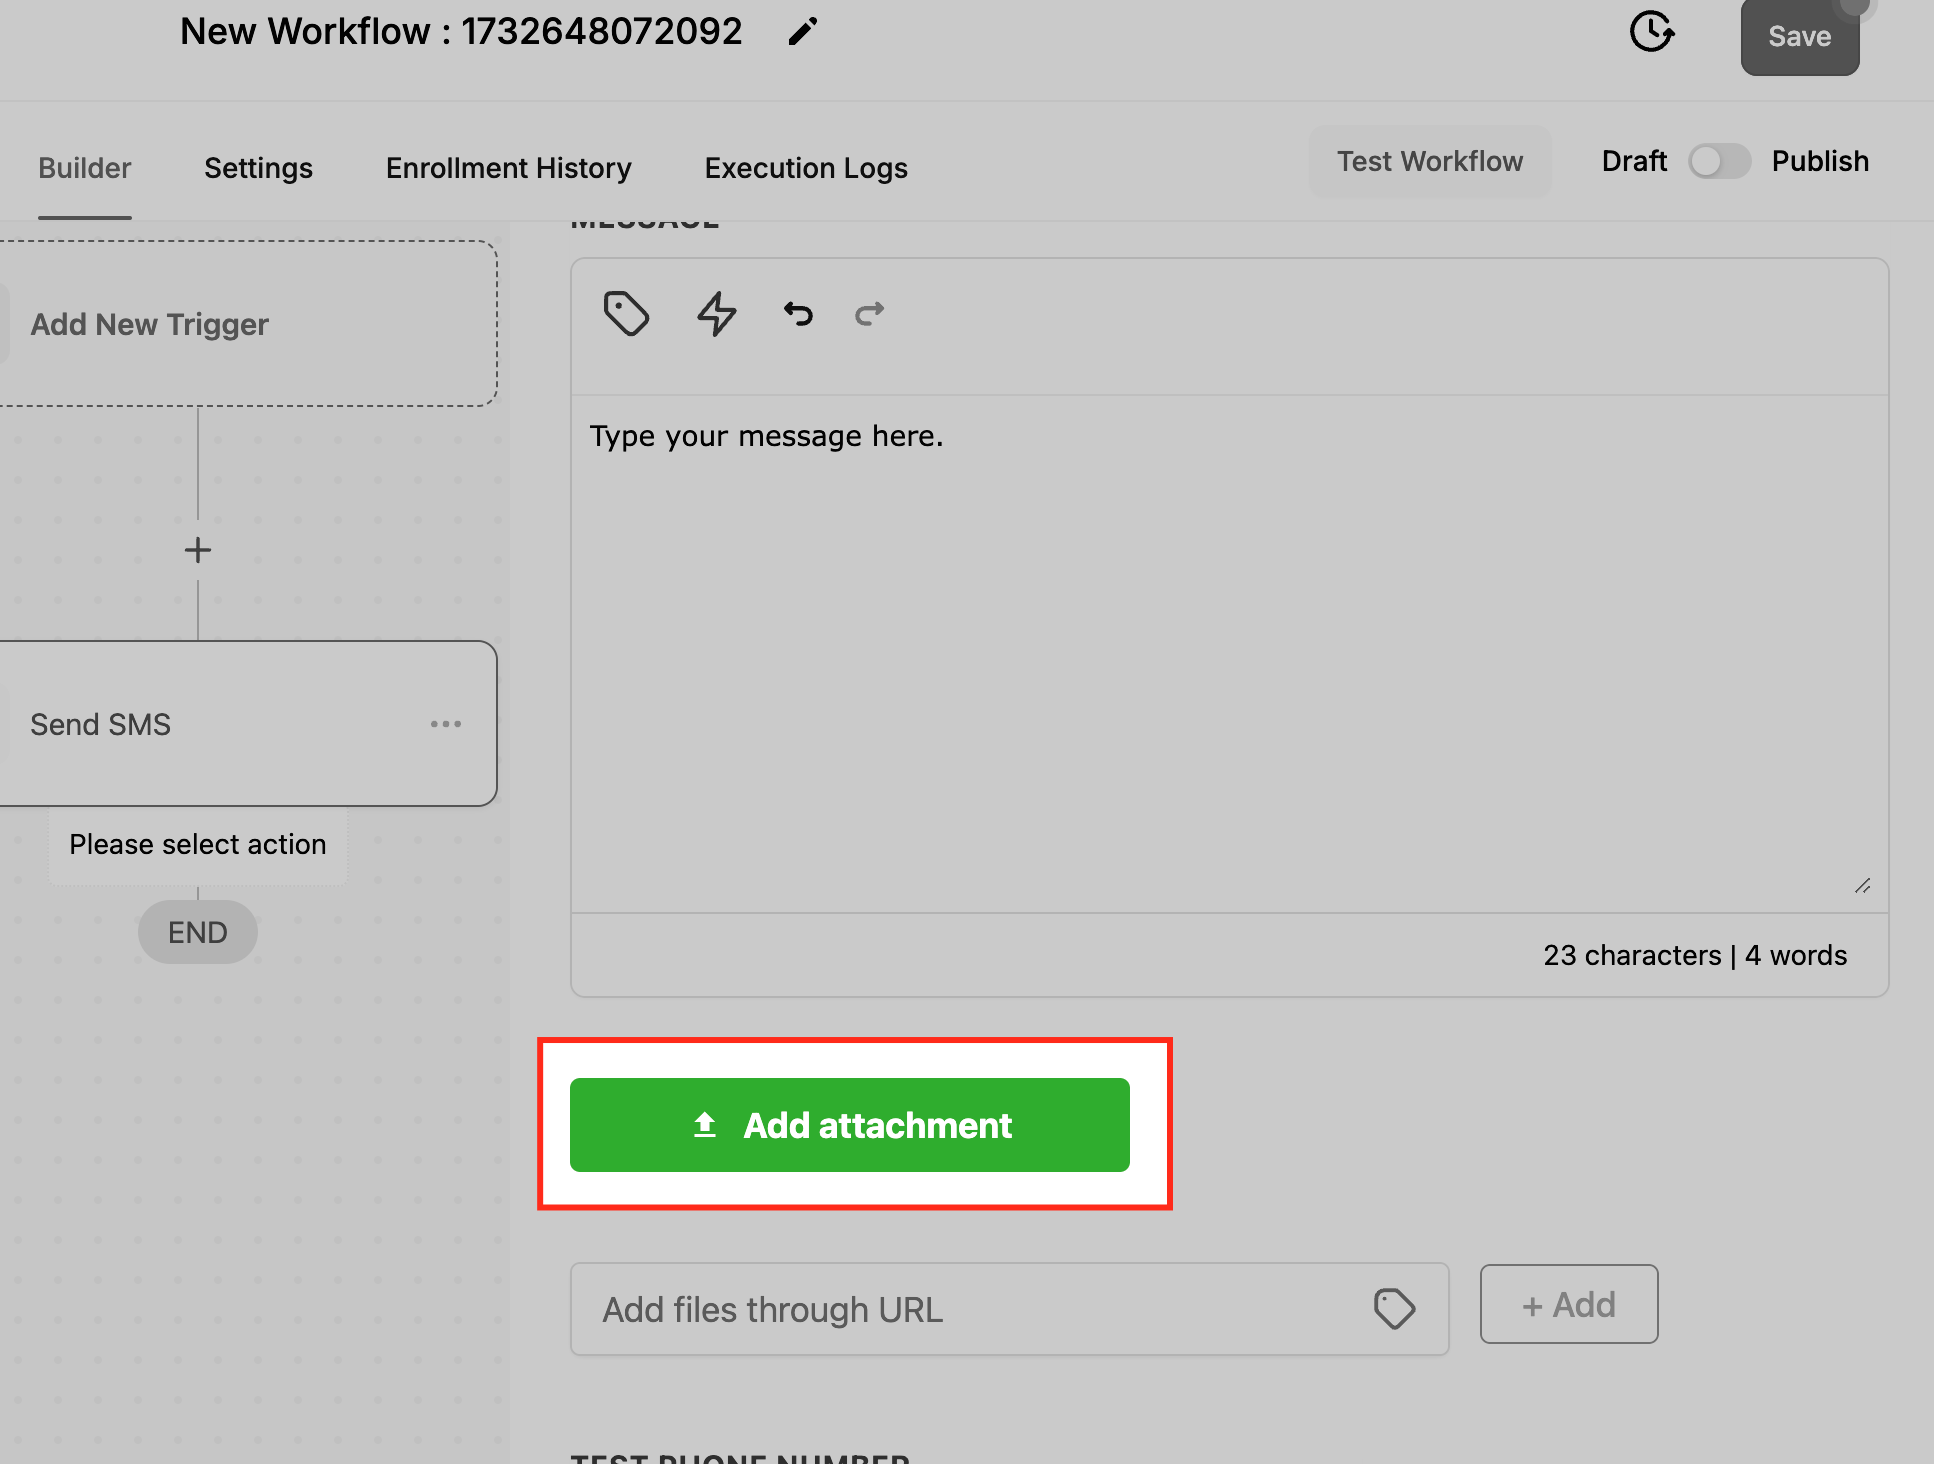
Add Attachments: SMS does not support direct file attachments, but you can include a file by adding its URL in the attachment field and clicking + Add. The link is sent in the message.
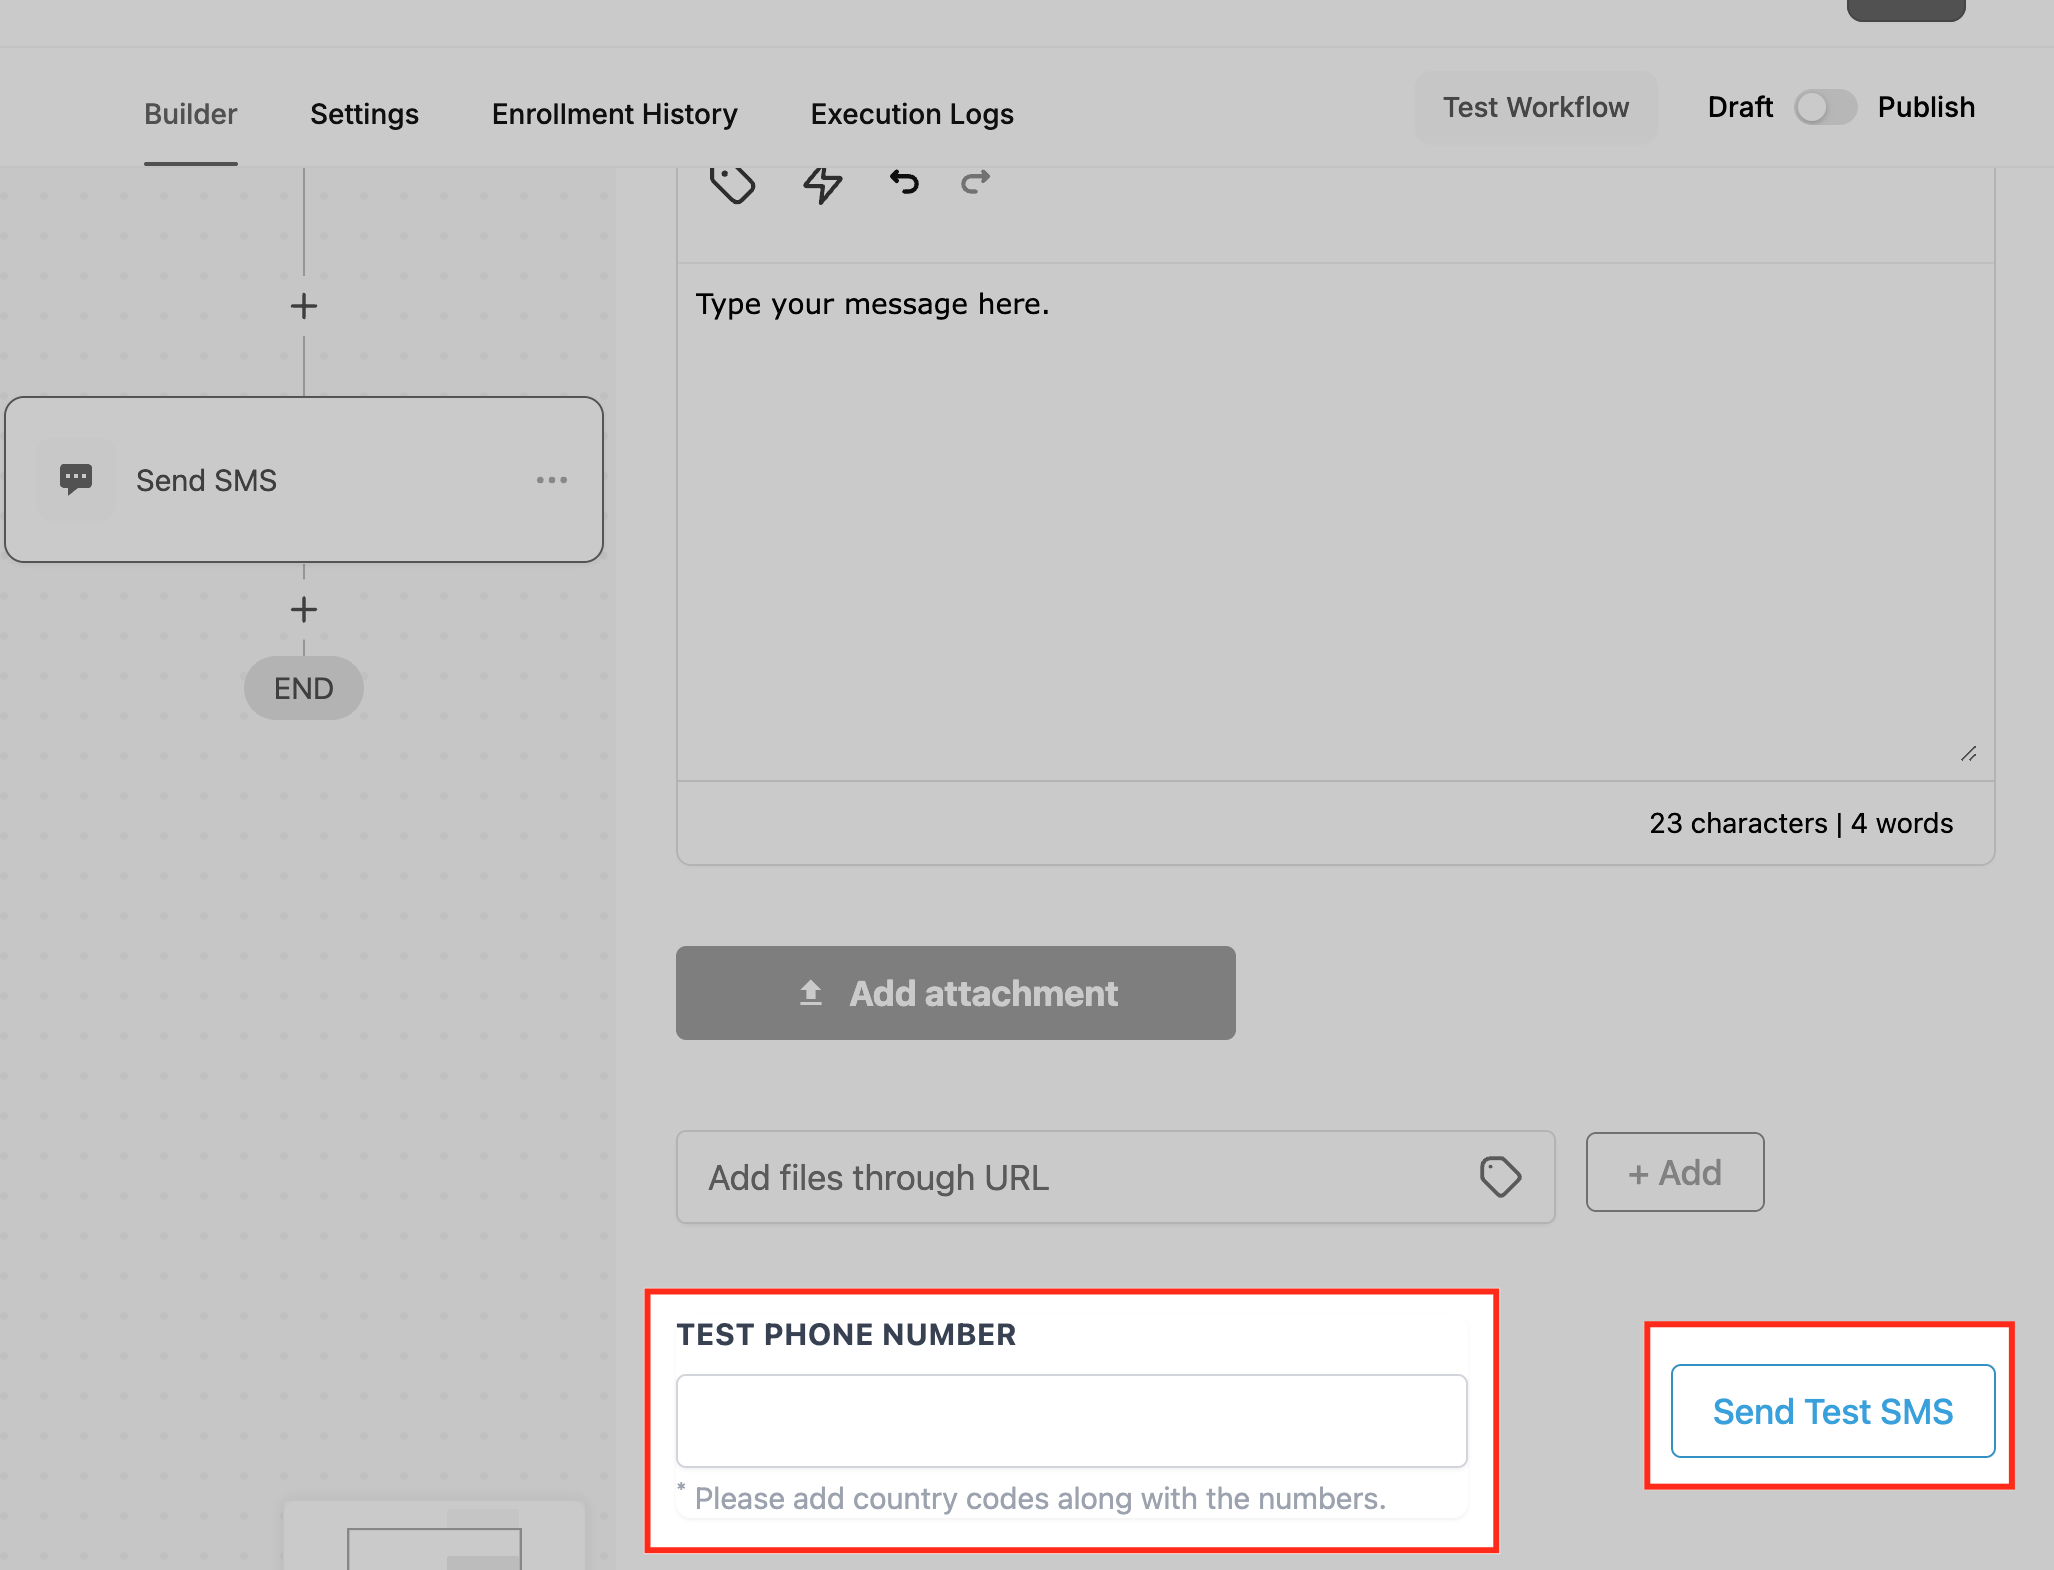
Test Phone Number: Enter a demo mobile number and click Send Test SMS to preview the message.
Inputs needed: A contact with a valid mobile number and a connected sending phone number.
Data produced: The action shows Statistics after running, including Delivered, Clicked, and Failed counts.
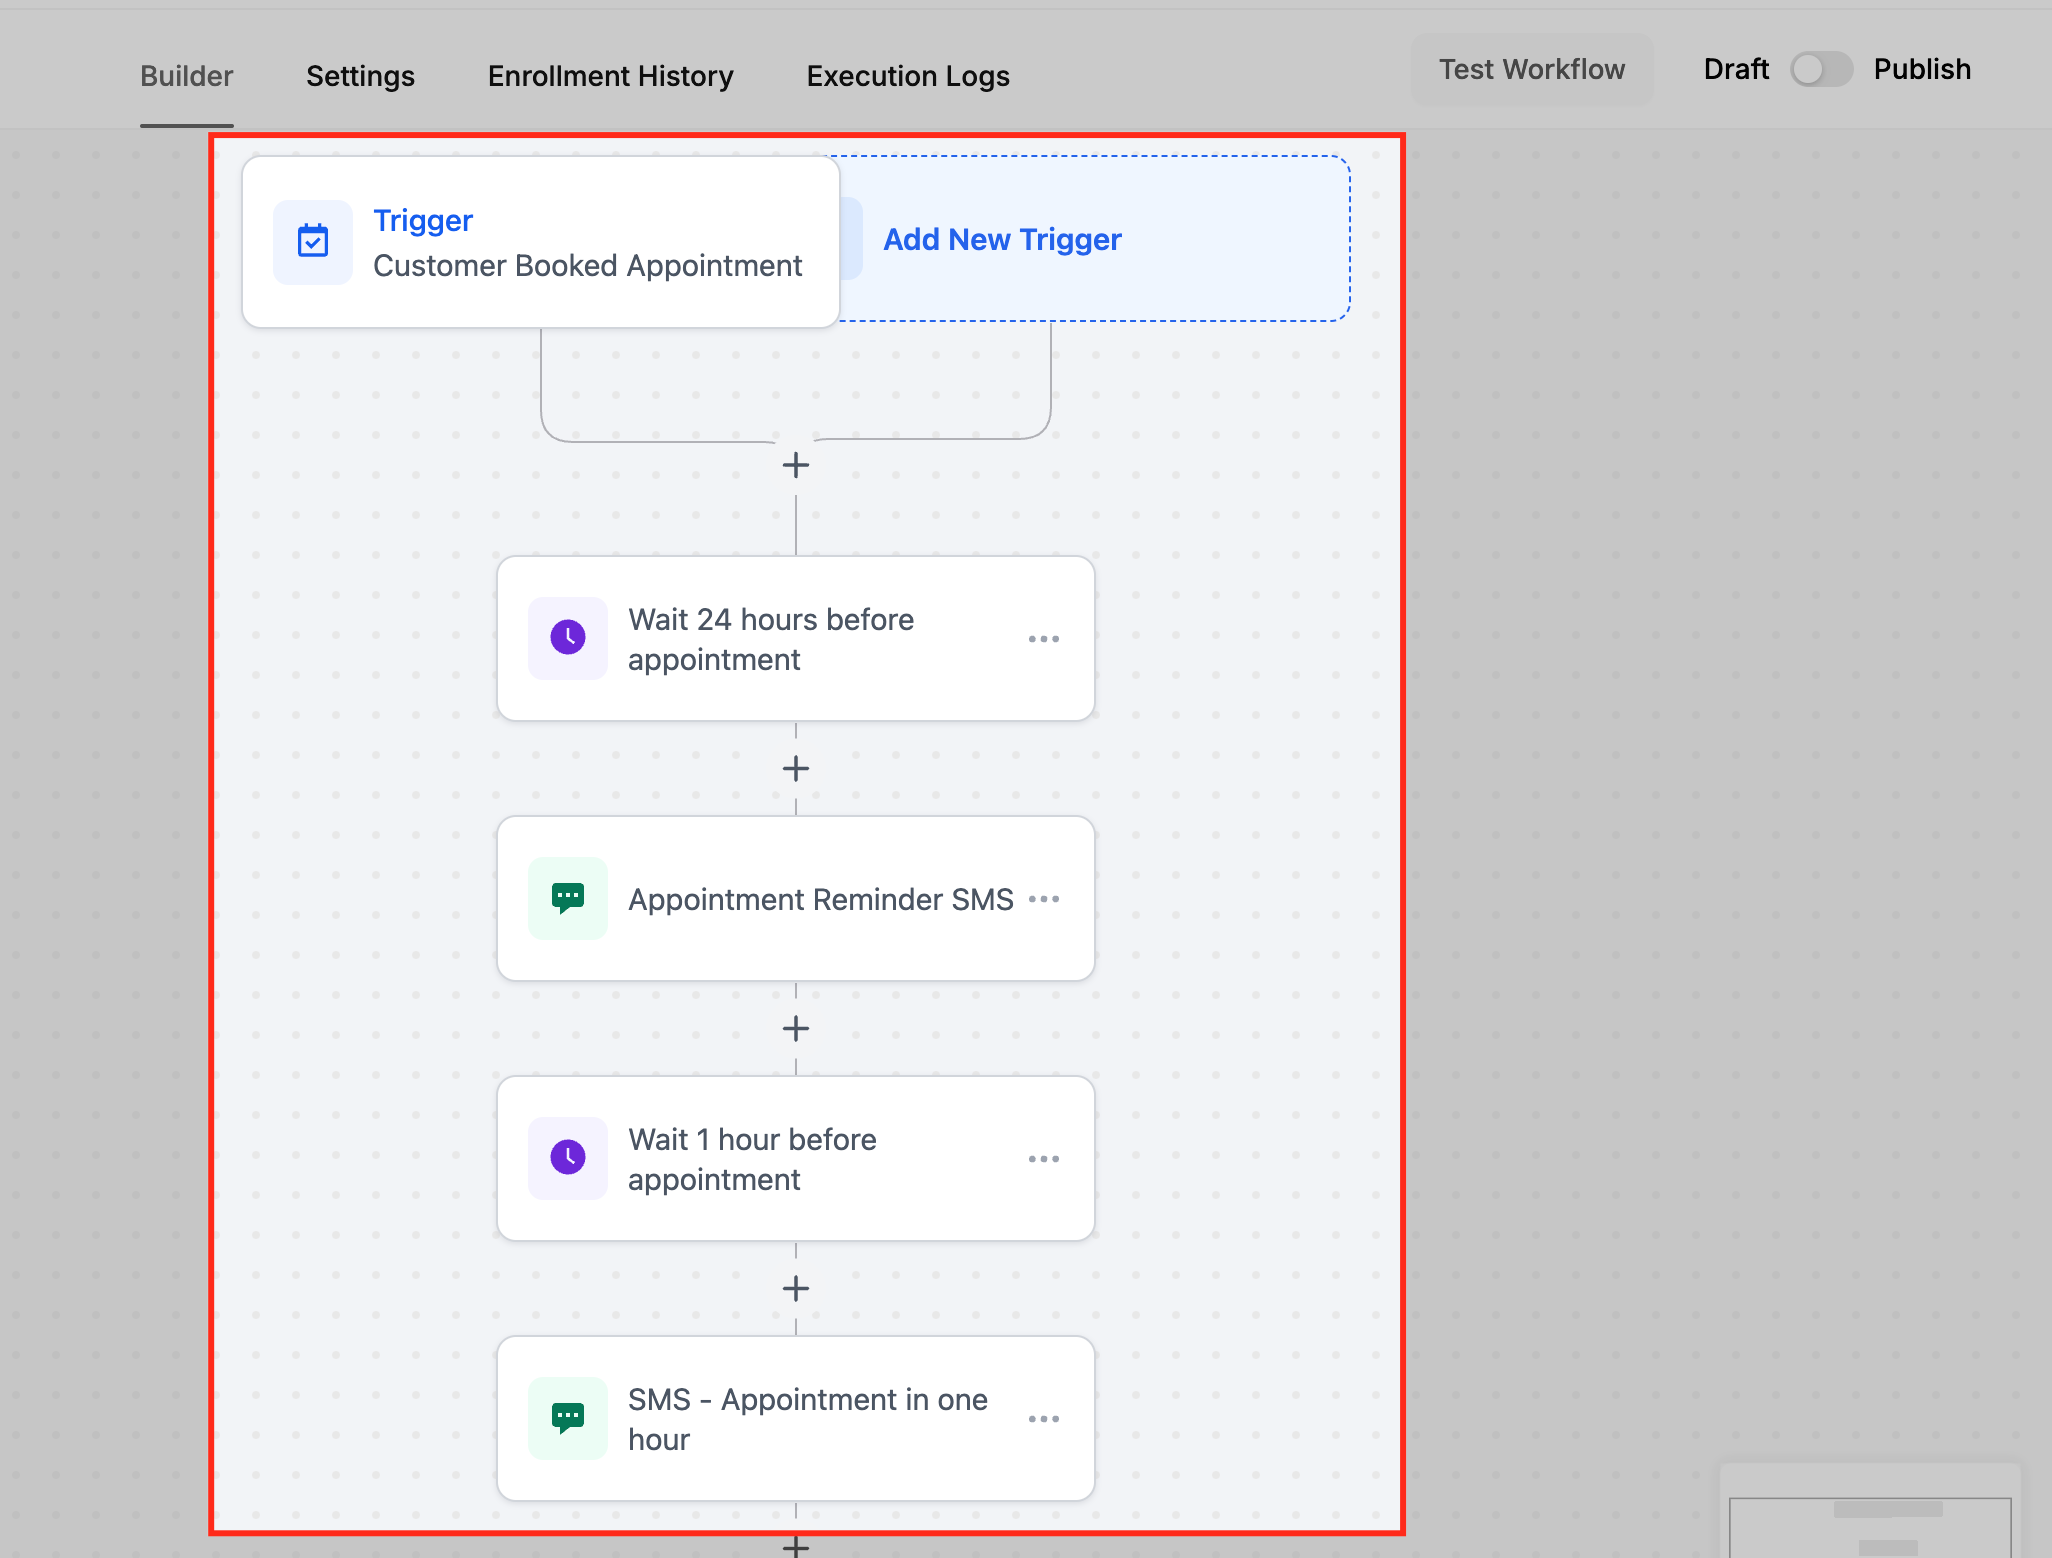
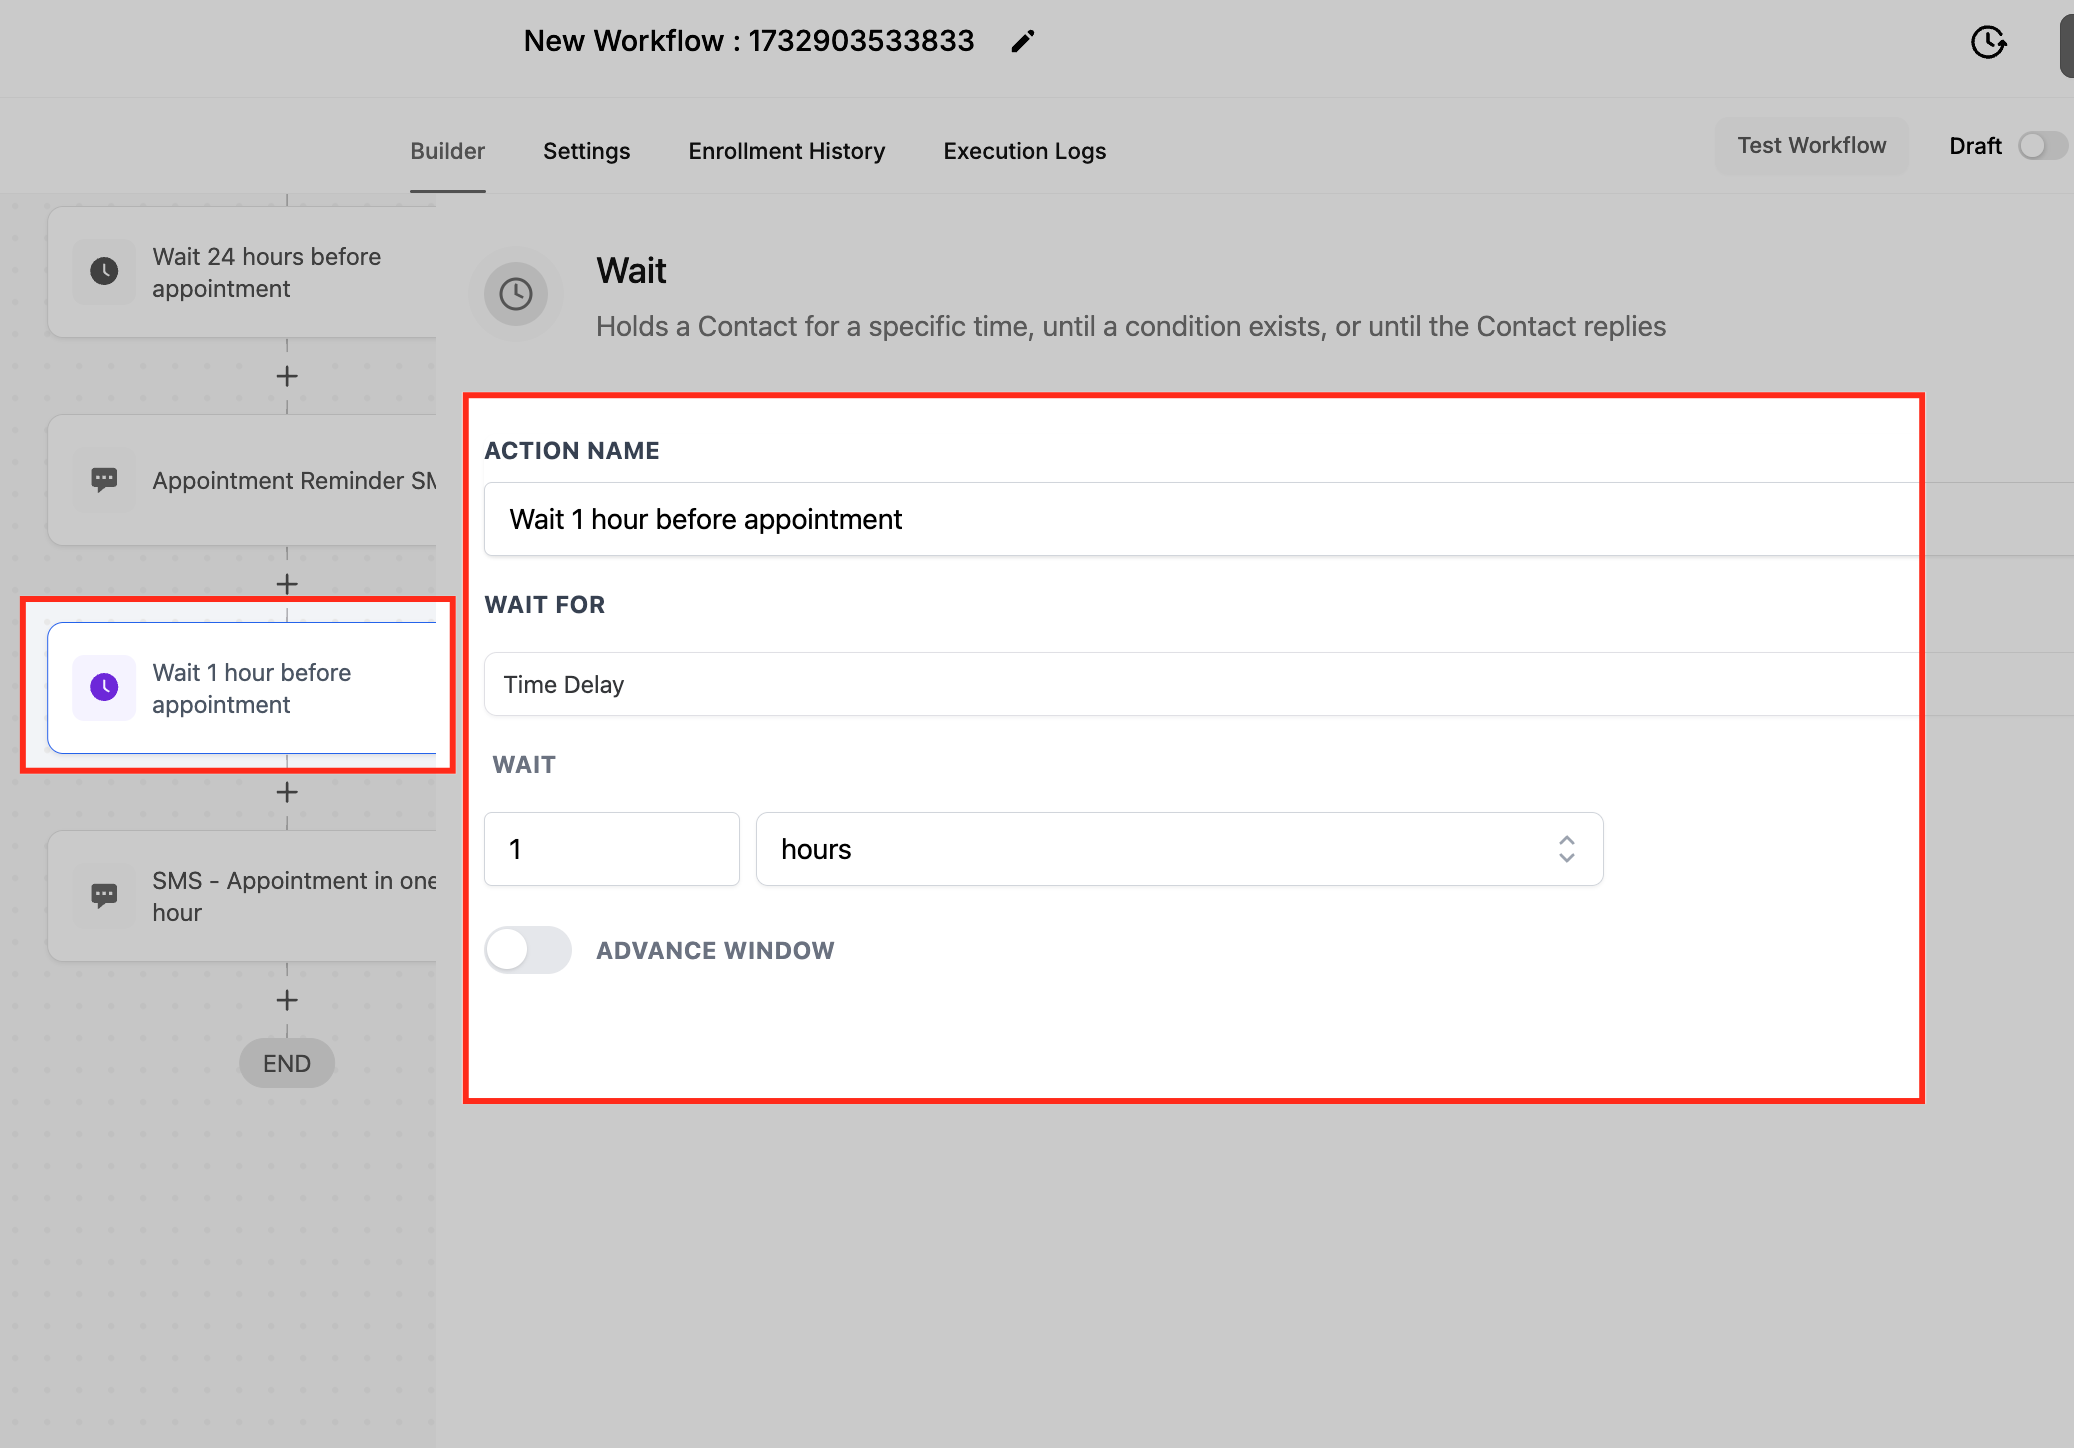
When to use it / example: Reduce no-shows with a multi-stage reminder. Trigger on Appointment Booked, wait until 24 hours before the appointment, then send: "Hi {{contact.first_name}}, this is a reminder for your appointment tomorrow at {{appointment.start_time}}. Looking forward to seeing you!" Add a second wait and a one-hour reminder for an extra touch.
Open the workflow editor.
Add the Send SMS action after your trigger or condition.
Name the action.
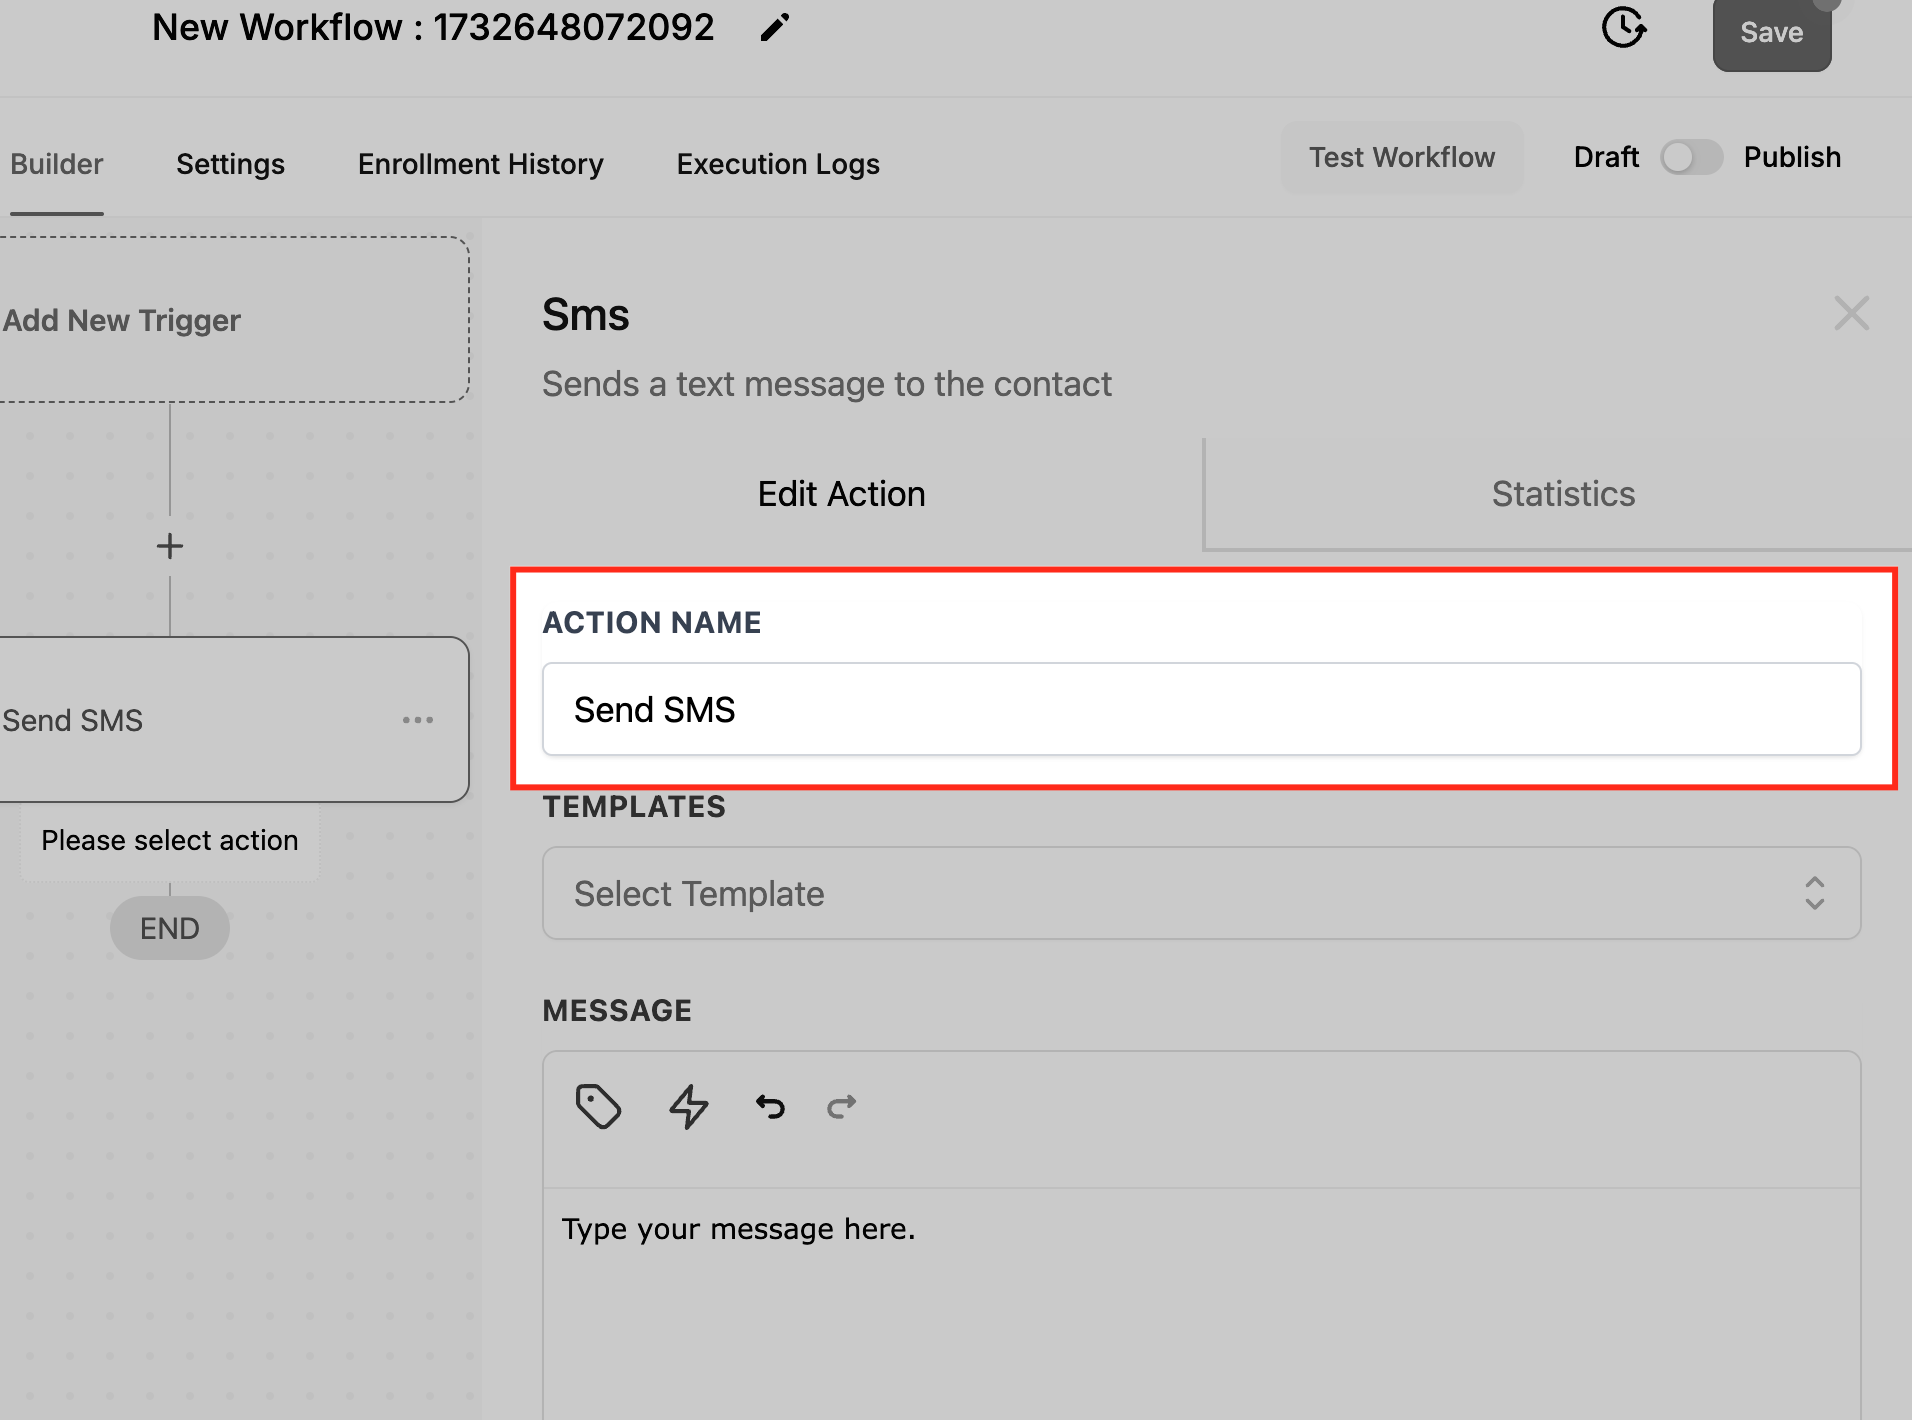
Compose the Message with custom values.
Optionally select a Template.
Add an attachment by URL if needed.
Test the SMS with a Test Phone Number.
Save and test the workflow.
For a multi-stage reminder, your flow looks like this.
Notes and gotchas:
SMS is sent when the workflow reaches the action, governed by the triggers, conditions, and wait steps before it.
Links can be included in the body, but direct file attachments are not supported; link to hosted files instead.
Keep messages concise and always honor opt-out and consent requirements for text messaging.
What it does: Sends an automated message into your connected Slack workspace, either as a direct message to a user, to a private channel, or to a public channel. This is a premium action that requires your account to have premium actions enabled.
Prerequisites: Connect Slack first under Settings > Integrations and ensure premium actions are enabled for your account.
Configuration and fields:
Choose an Account: Select the connected Slack workspace to send to (required).
Event: Choose the message destination (required):
Send Direct Message to a User
Send Private Channel Message
Send Public Channel Message
User Source (for direct messages): When the event is a direct message, pick how the recipient is identified:
Assigned User: The user assigned to the contact. Their account email is matched to the corresponding Slack user.
Custom Email: A specific or dynamic email (typed in or pulled from a custom value) used to find the matching Slack user. Use this when the recipient is not predefined.
Internal User: A user from your account, selected by name. Useful for routing specific notifications to a department lead.
Slack User: Search your Slack workspace users directly by name.
Channel (for channel messages): Select the public or private channel to post in.
Message Content: Write the message. Use the custom variable picker to insert contact or CRM data. Slack formatting syntax is supported.
Inputs needed: A connected Slack workspace and a valid recipient (user or channel).
Data produced: A Slack message delivered to the chosen destination. Messages to a private channel are sent as the user who created the Slack integration, so they appear as if sent manually by that person rather than by a bot.
When to use it / example: Notify your front-desk channel the moment a high-priority lead comes in. Trigger on Contact Added filtered to the tag "High Priority," choose the Send Public Channel Message event, pick your front-desk channel, and write: "A new high-priority lead has been added. Please check the details."
Notes and gotchas:
This is a premium action and consumes premium executions when it runs.
If you do not see a user or channel in the dropdown, use the Load More button. Very large workspaces (over 1,000 users or channels) may require several loads before the name appears.
Good pairings include Task Added, Opportunity Status Changed, and Form Submitted triggers.
What it does: Initiates an automated outbound call that bridges a contact to a user (or a fallback number) and plays a whisper message before connecting.
Configuration and fields:
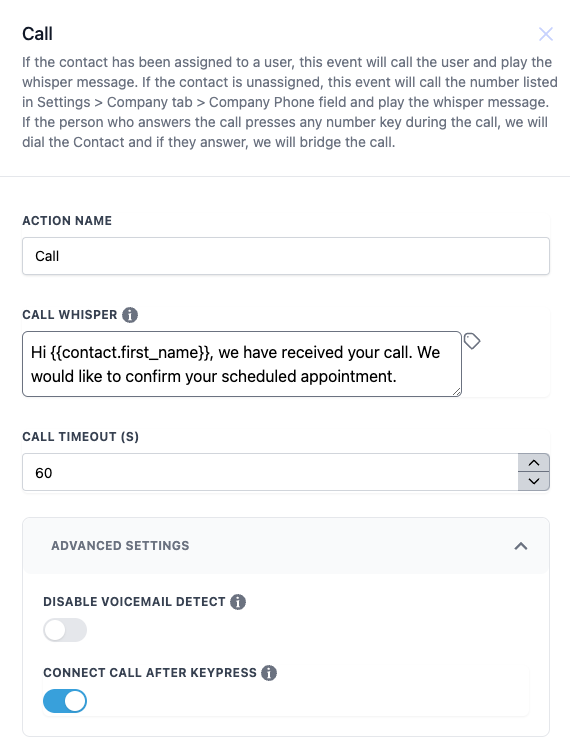
Action Name: A label for this call step (for example, "Customer Support Call").
Assign to User: Add an Assign to User step earlier in the workflow if you want the call routed to the assigned user's phone number. If the contact is assigned to a user, the call rings that user; if the contact is unassigned, it rings the number in Settings > Company > Company Phone.
Call Whisper: A short message played to the person who answers before the call connects, up to three times. Supports custom values. The default is "You have a new lead, [Lead's Name]. Press any button to connect." When the recipient presses any key, the contact is dialed and the calls are bridged if they answer.
Call Timeout (s): The maximum seconds to wait for a connection before ending the attempt. Adjust with the up/down controls (required).
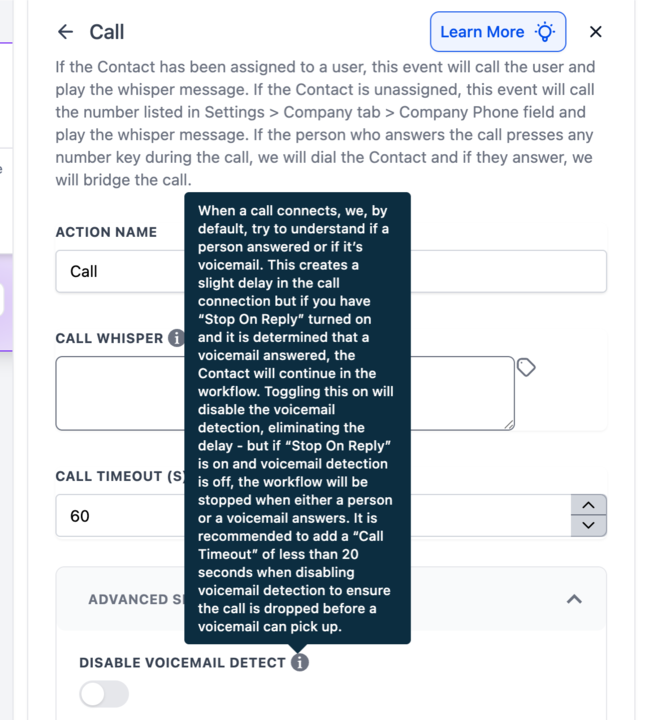
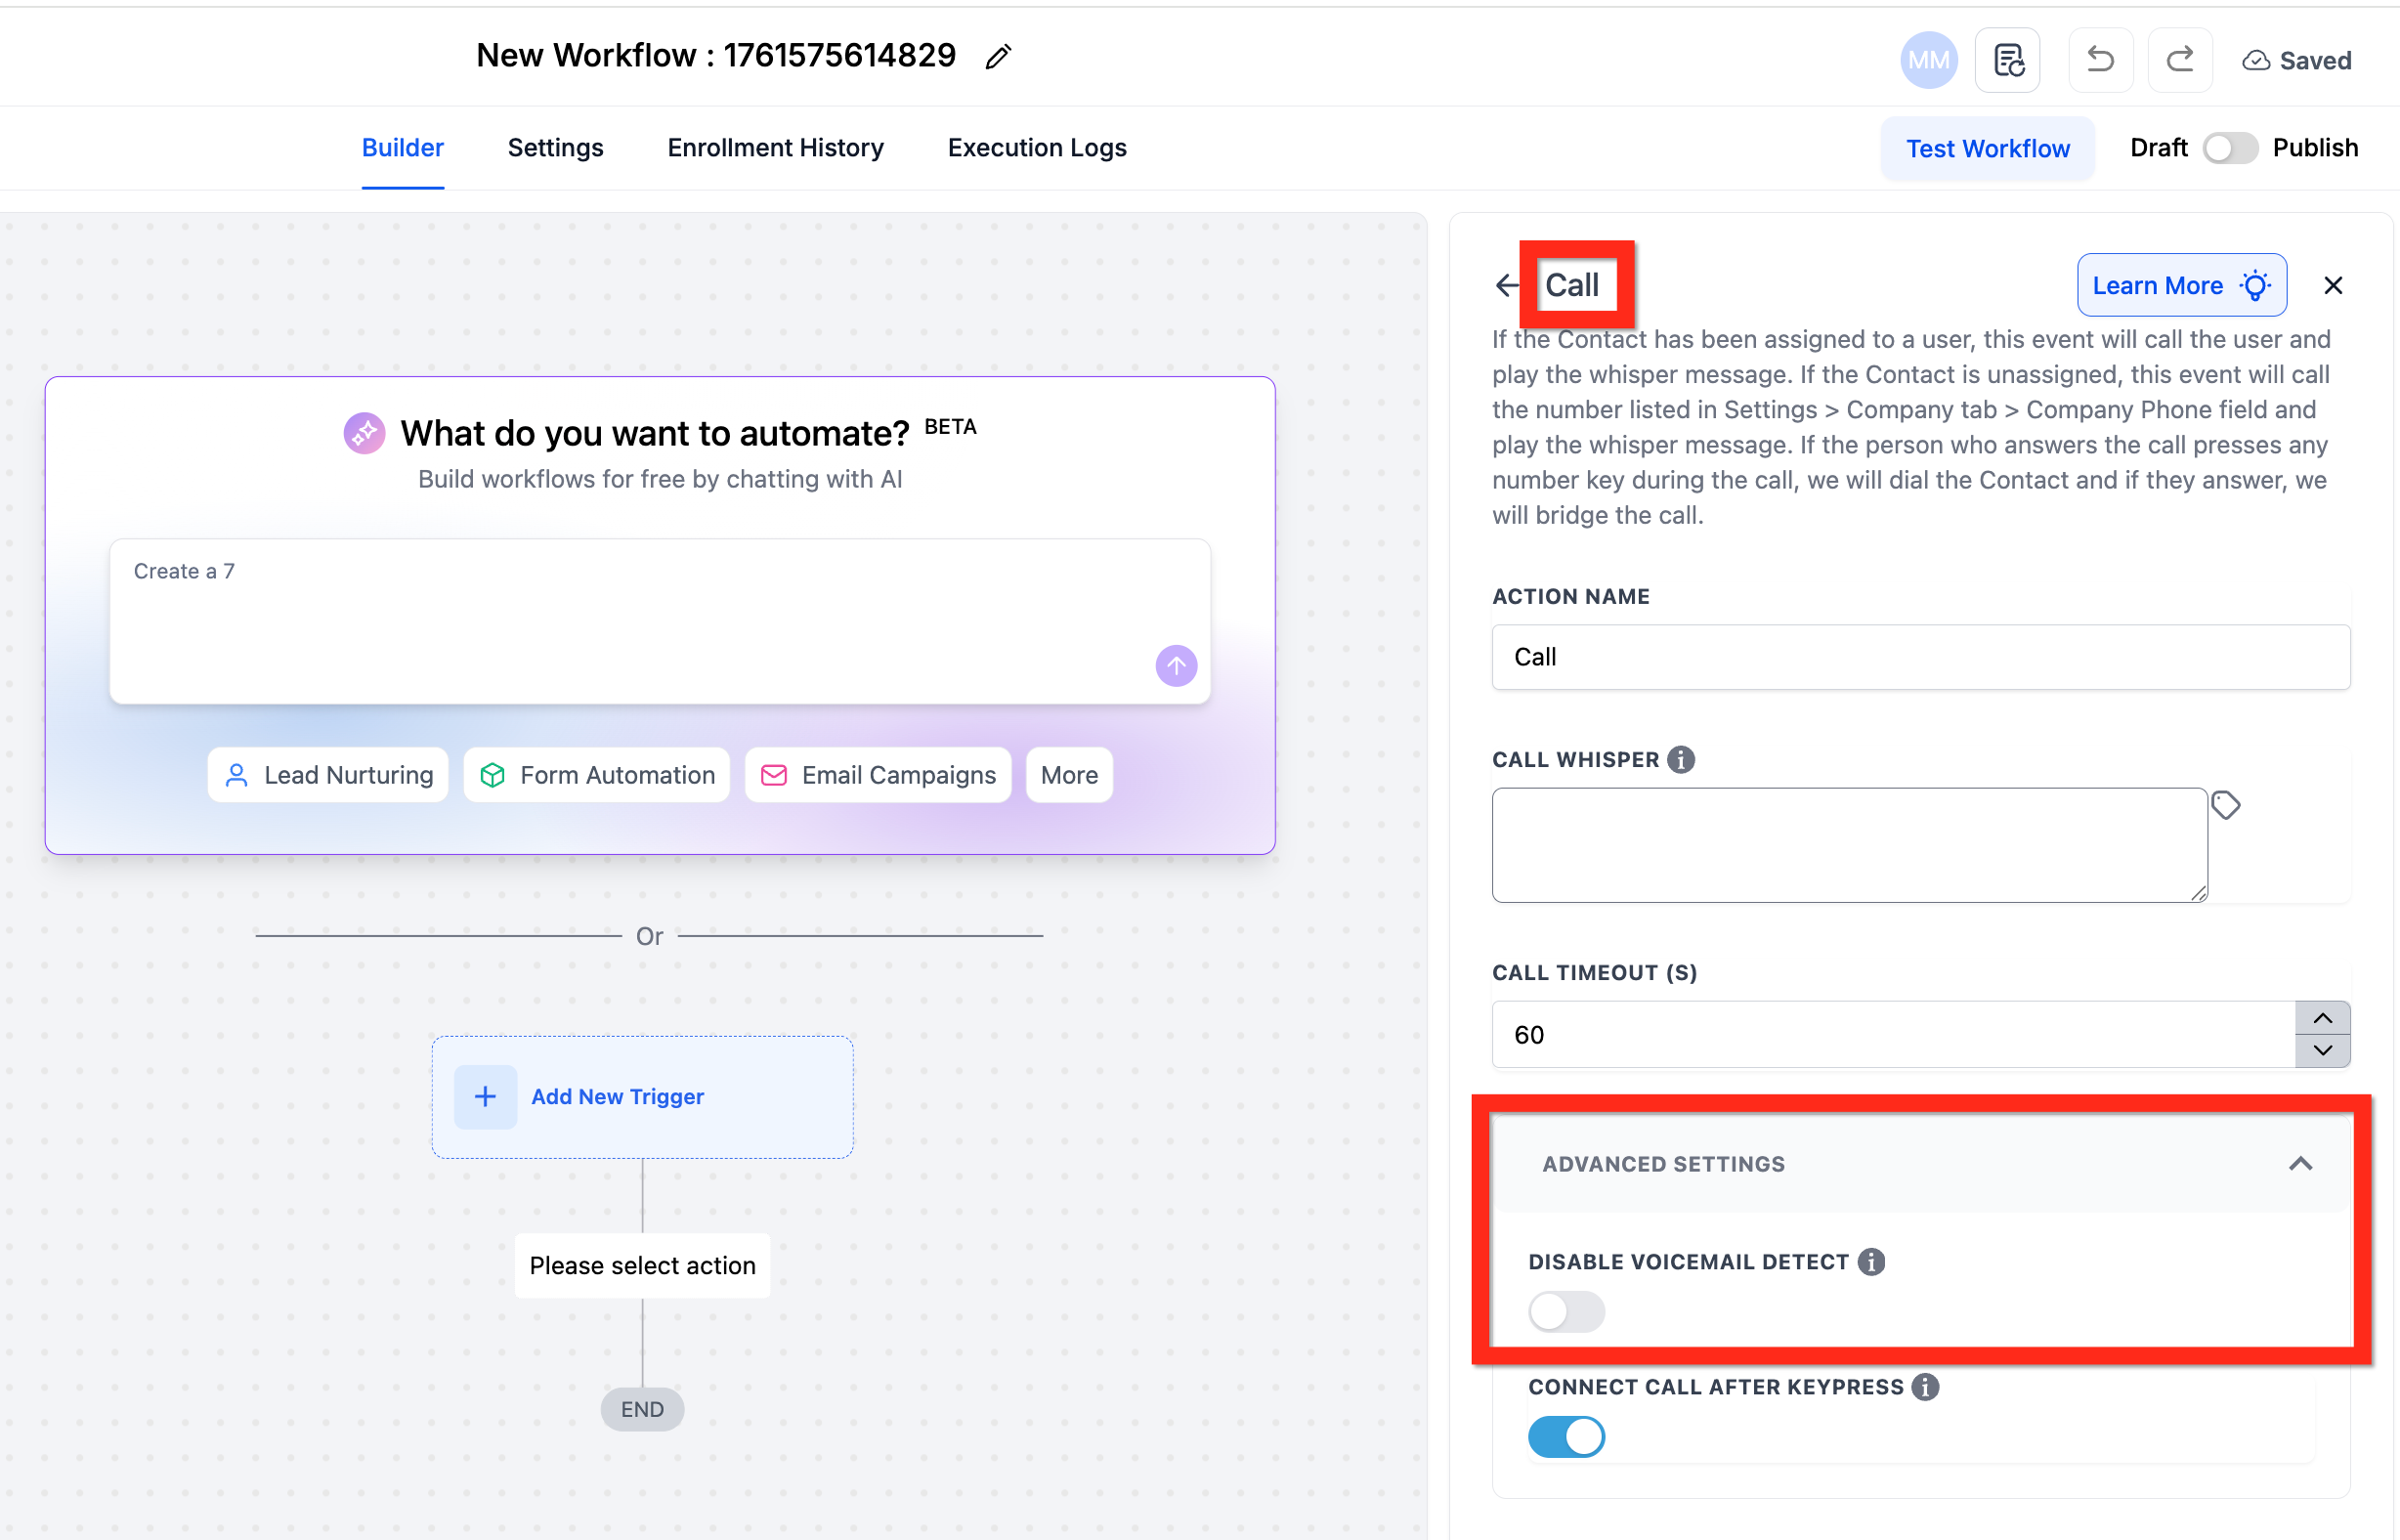
Disable Voicemail Detect: By default the system listens to decide whether a person or a voicemail answered, which adds a slight delay. Toggle this ON to skip detection for a faster connection; recommended for shorter timeouts.
Connect Call After Keypress: When enabled, the call only connects after the recipient presses a key, confirming a live person answered.
Inputs needed: A connected calling number and a contact with a valid phone number. The whisper message uses text-to-speech, which carries standard usage charges.
Data produced: A live bridged call, plus the call record in the contact's Conversations.
When to use it / example: When an appointment status changes to confirmed, call the assigned provider to remind them. Name it "Appointment Call Reminder," set the whisper to "You have an appointment with [Contact Name] at [Appointment Time]. Press any key to confirm," timeout 30 seconds, with voicemail detection disabled and keypress required.
Configure the Call action's name, whisper, timeout, and advanced settings, then save.
Stop on Response interaction: The workflow-level Stop on Response setting and the Call action's Disable Voicemail Detect setting interact. Only the contact (or the contact's voicemail) matters for Stop on Response; whether the assigned user answers is irrelevant to it.
Stop On Response | Disable Voicemail Detect | Result |
|---|---|---|
ON | ON | The workflow stops if the contact's voicemail answers. Set the timeout under 20 seconds so the call does not reach voicemail. |
ON | OFF | Voicemail is detected, so voicemail pickups do not trigger Stop on Response and the contact continues in the workflow. |
OFF | OFF | The workflow continues regardless of response or voicemail. Slightly slower, since detection runs by default. |
OFF | ON | The workflow continues regardless of response or voicemail. Slightly faster, since detection is off. |

Notes and gotchas:
A timeout of 20 seconds or less generally prevents reaching voicemail, since most carriers ring longer than that before forwarding.
The delay before connection comes from voicemail analysis; disabling detection removes it.
Stop on Response applies only to automated actions inside that workflow, not to manual calls you place from Inbox.
What it does: Delivers a pre-recorded voicemail file directly to the contact without a live call. Useful for follow-ups and reminders that do not require a conversation.
Configuration and fields:
Action Name: The action label (defaults to "Voicemail").
Assign to User: Add an Assign to User step first if you want the voicemail routed through the assigned user's connected number.
Upload File (Drop Your File): Upload the pre-recorded audio file. After uploading you can play it back to confirm it is correct.
Inputs needed: A contact with a valid mobile number and a compatible pre-recorded audio file.
Data produced: A voicemail dropped to the contact, logged in their Conversations.
When to use it / example: When an appointment status changes to No-Show, drop a friendly "we'd love to get you rescheduled" voicemail so staff do not have to call manually.
Notes and gotchas:
If the voicemail file will not play, convert it to a 64 kbps MP3 (lower bitrates are better) using an online audio converter, then re-upload.
Keep the message short and clear, and always respect contact preferences.
What it does: Creates a task for a team member to manually send an SMS to the contact, rather than sending it automatically. The task appears under Inbox > Manual Actions. Use this when a message needs a human touch, approval, or review before it goes out.
Configuration and fields:
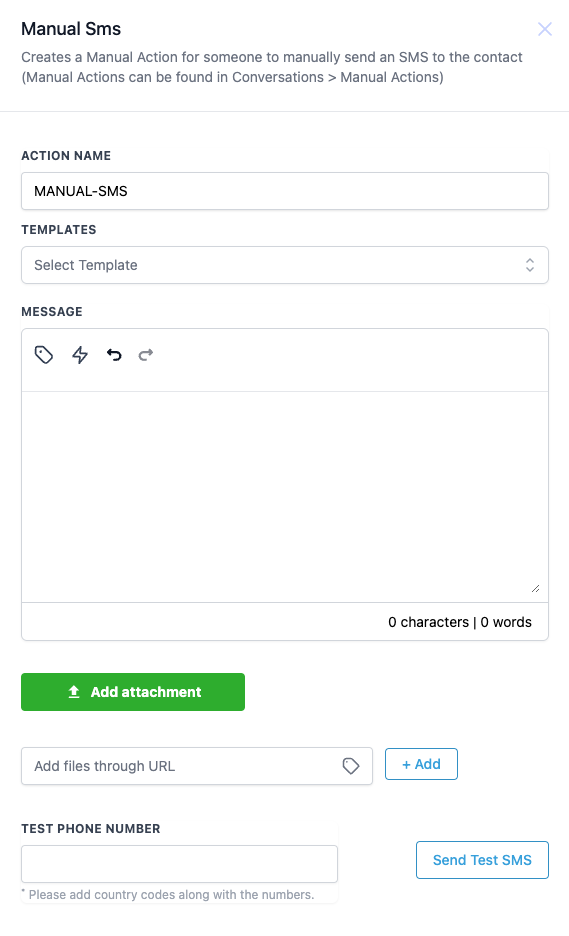
Action Name: A label to identify the task in the workflow (for example, "Welcome Follow-Up SMS").
Templates: Optionally select a saved SMS template to prefill the message.
Message: The body of the SMS. Supports custom values and trigger links (for example, a calendar booking link or a form link). Required.
Custom Values: Insert merge fields such as contact name or appointment details.
Add Attachment: Add a file to the SMS via URL.
Test Phone Number: Enter a number (with country code) to preview the SMS.
Assign To (Advanced Settings): Optionally assign the task to a specific user instead of the default contact owner.
Assign To logic:
If a user is selected and has contact access, the task goes to that user.
If the selected user lacks contact access, it falls back to the contact owner.
If no user is selected, it defaults to the contact owner.
If neither is available, the task is marked Unassigned.
Inputs needed: A contact with a valid mobile number.
Data produced: A pending task in Inbox > Manual Actions for a user to review and send.
When to use it / example: When a lead fills out your website consultation form, create a manual SMS task for the assigned coordinator: "Hi {{contact.first_name}}, thanks for your interest. Click here to book your consultation: [Calendar Link]." The coordinator personalizes and sends it from the Manual Actions queue.
Configure the Manual SMS task, including Advanced Settings for assignment.
Notes and gotchas:
The contact only advances to the next step after the task is completed and sent from the Manual Actions queue.
Manual actions are found in Inbox > Manual Actions on both desktop and the mobile app.
What it does: Creates a call task for a team member to manually call the contact. The task appears under Inbox > Manual Actions. Ideal for sales and support follow-ups that need a personal call.
Configuration and fields:
Action Name: A descriptive label (for example, "Lead Follow-Up Call").
Assign To (Advanced Settings): Optionally assign the call task to a specific user instead of the contact owner. The same Assign To fallback logic applies as with Manual SMS (selected user with access, then contact owner, then Unassigned).
Inputs needed: A contact with a valid phone number.
Data produced: A pending call task in Inbox > Manual Actions. The execution log shows "Manual Call added to the manual queue." Call notes and results are logged on the contact record after the call.
When to use it / example: Ensure a coordinator follows up with every new lead within 24 hours. Trigger on Contact Created, add a Manual Call task named "Lead Follow-Up Call," and the assigned rep works the call from the queue.
Notes and gotchas:
The workflow only advances when the task is explicitly deleted (marked complete) from the Manual Actions tab. Calling the contact from the contact record or anywhere else does not complete the task.
To start a queued task, click Let's Start next to it. On mobile, open Manual Actions and tap the blue Play button; for a call, a pop-up lets you record the outcome, which feeds call reporting.
What it does: Sends an automated alert to your own team members (not the contact) through Email, in-app Notification, SMS, or WhatsApp. Use it to keep staff instantly informed about new leads, completed forms, high-value purchases, or pipeline changes.
Configuration and fields:
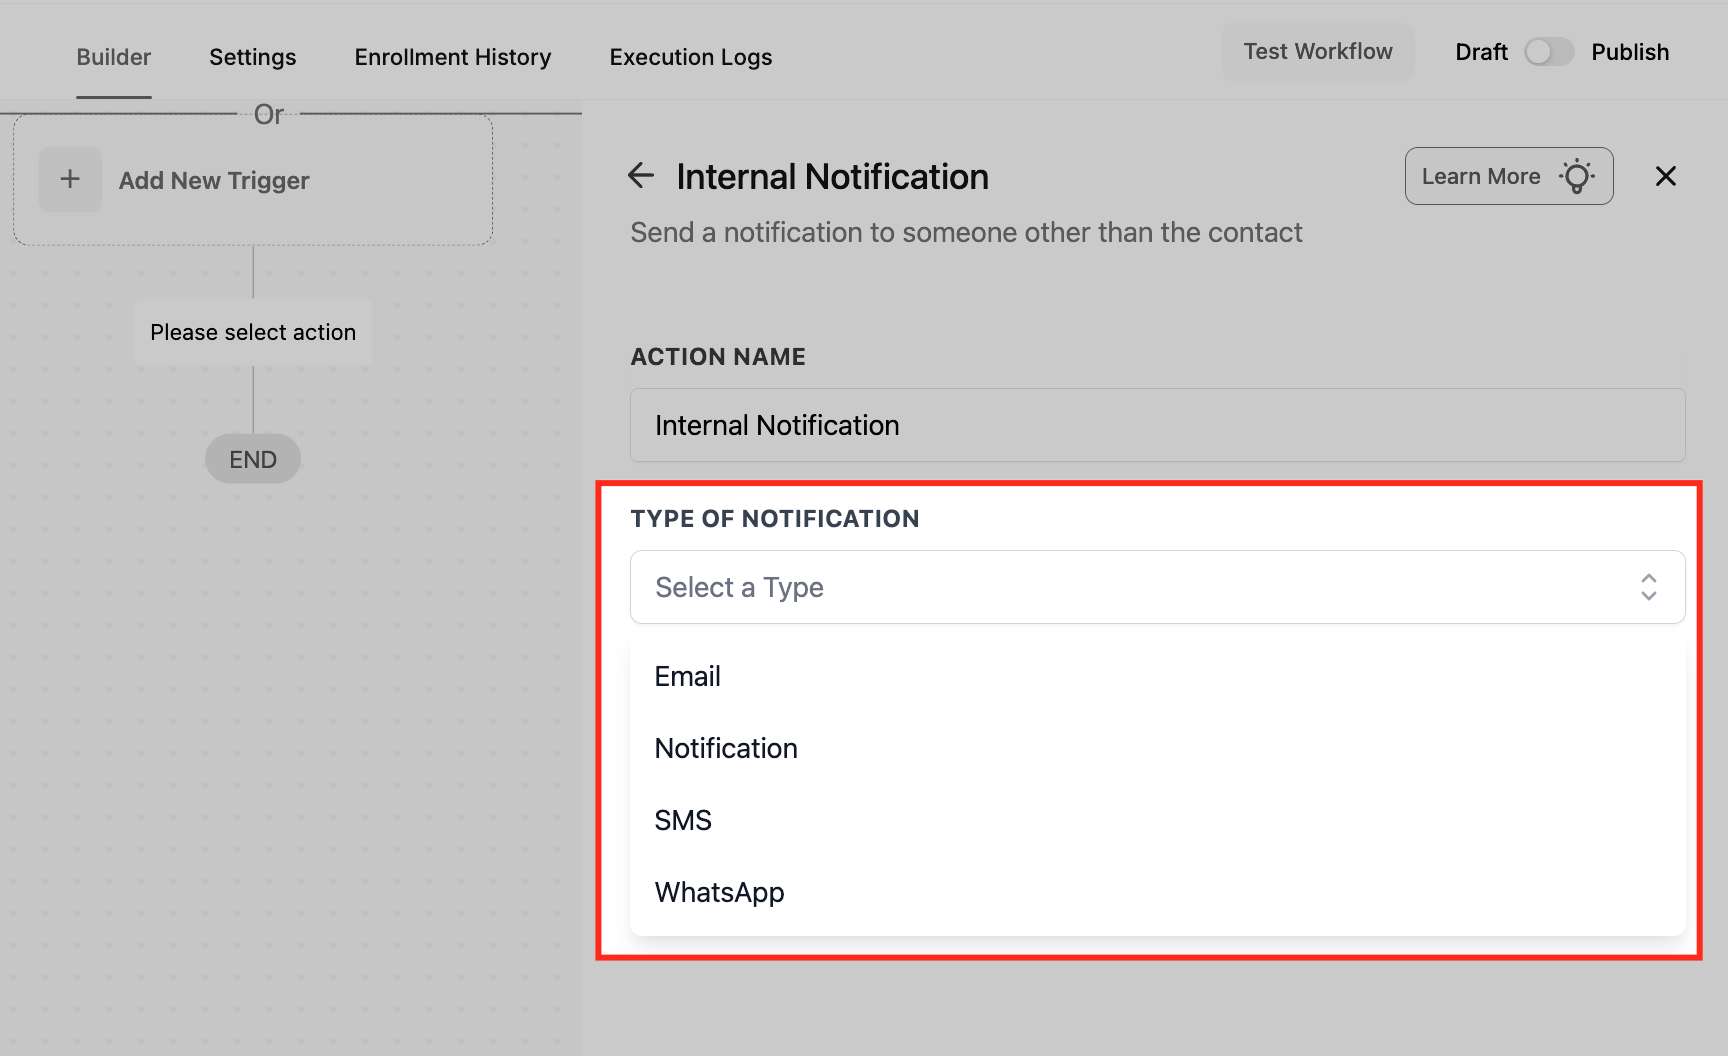
Start by selecting a Type of Notification: Email, Notification (in-app), SMS, or WhatsApp.
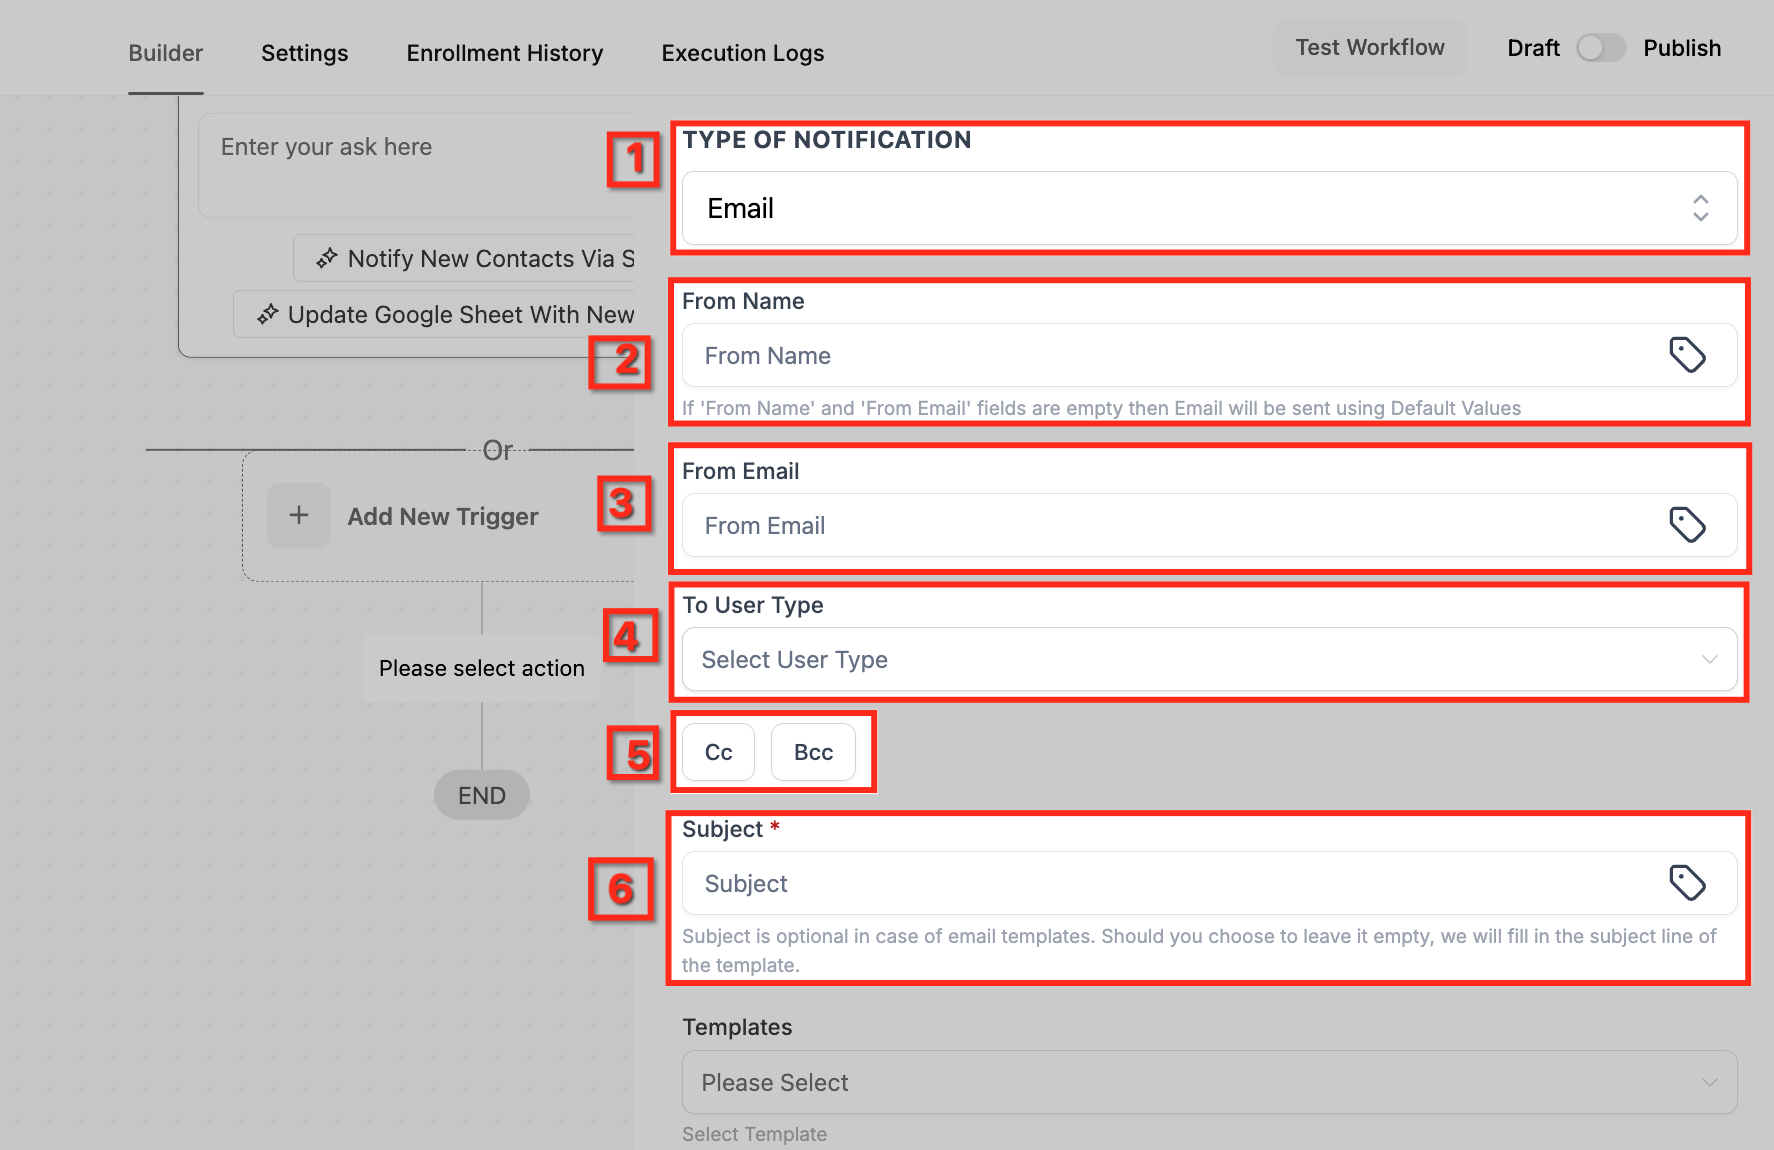
Email notification fields:
From Name and From Email: The sender details; both support custom values.
To User Type: Who receives it, for example All Users, Assigned User, Particular User, or Custom Email.
Cc / Bcc: Copy additional recipients. Each Cc/Bcc entry counts as a separate email.
Subject: The subject line (can be left blank if your template includes one).
Template: Optionally select a pre-built email template.
Message: Write or edit the body; use the tag icon for custom values and Write with AI for drafting help.
Add Attachment: Include files in the email.
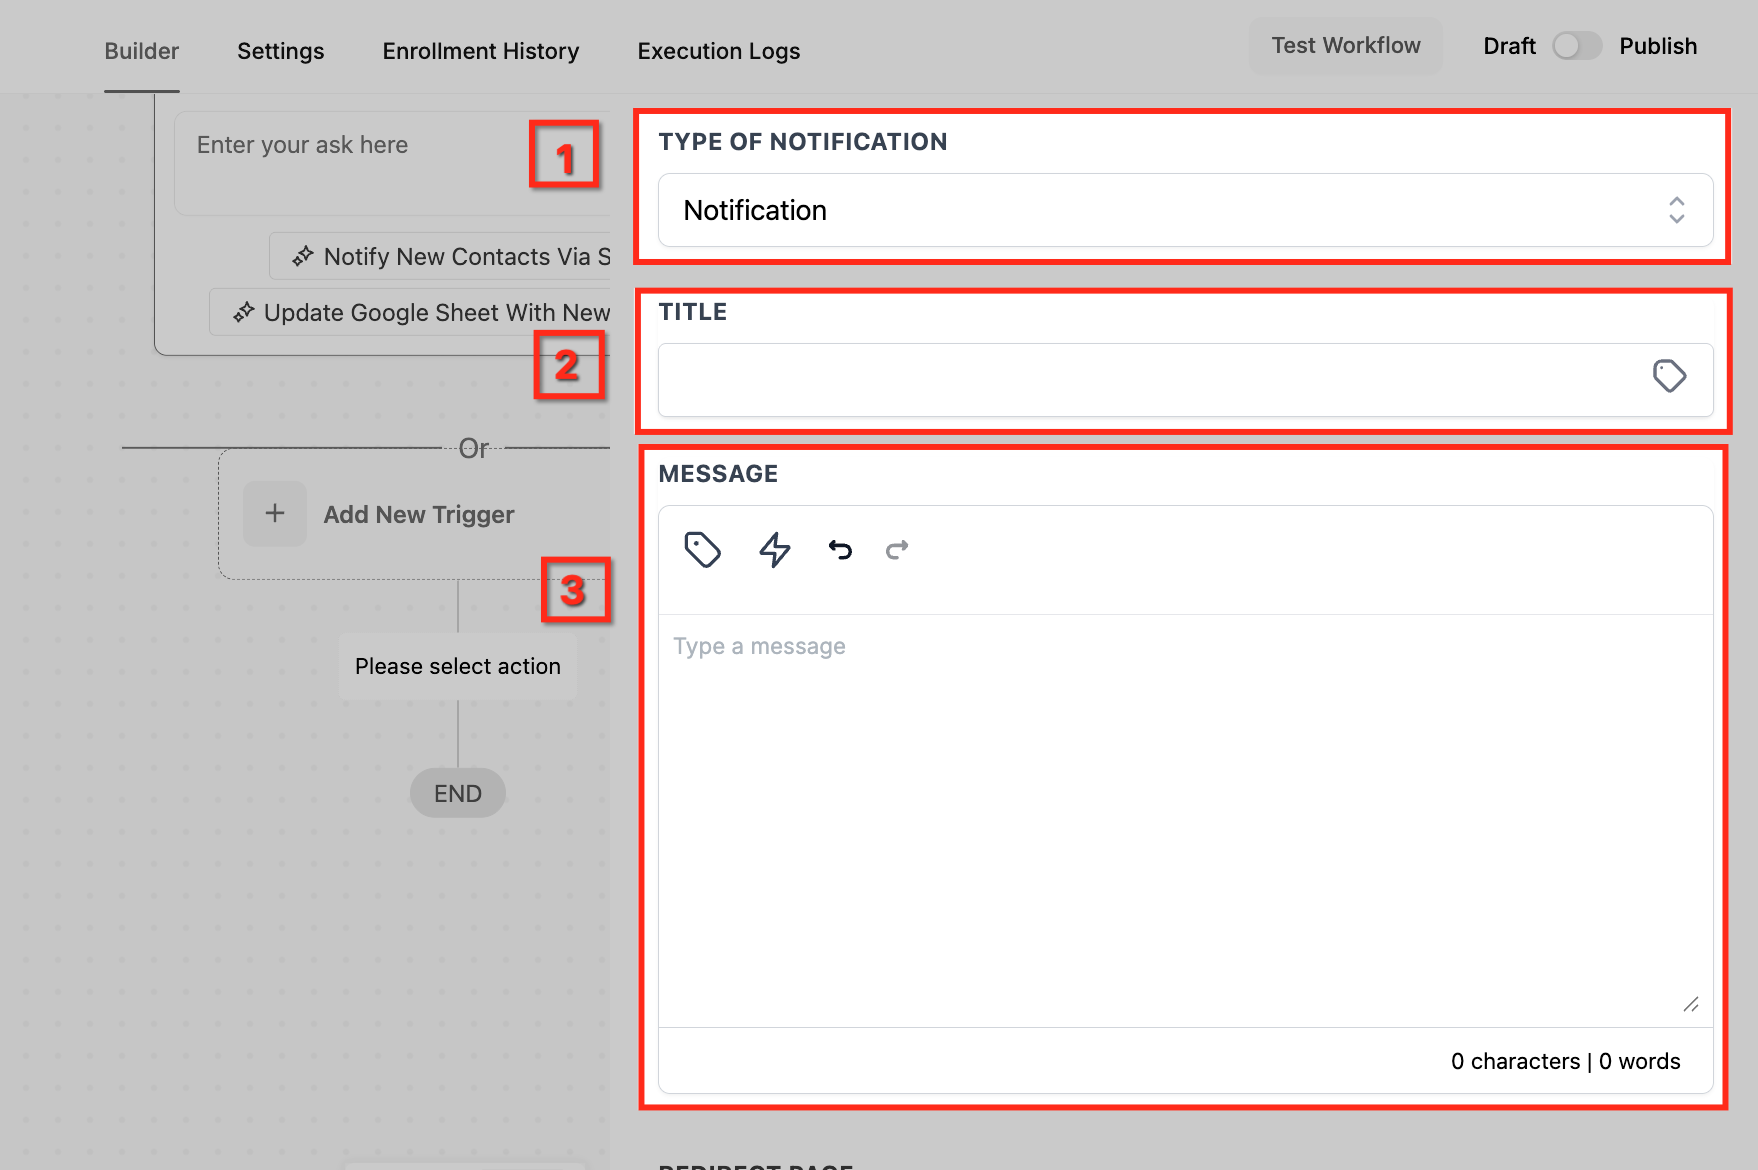
Notification (in-app) fields:
Title: The heading shown in the notification; supports custom values.
Message: The body of the alert; keep it brief and actionable.
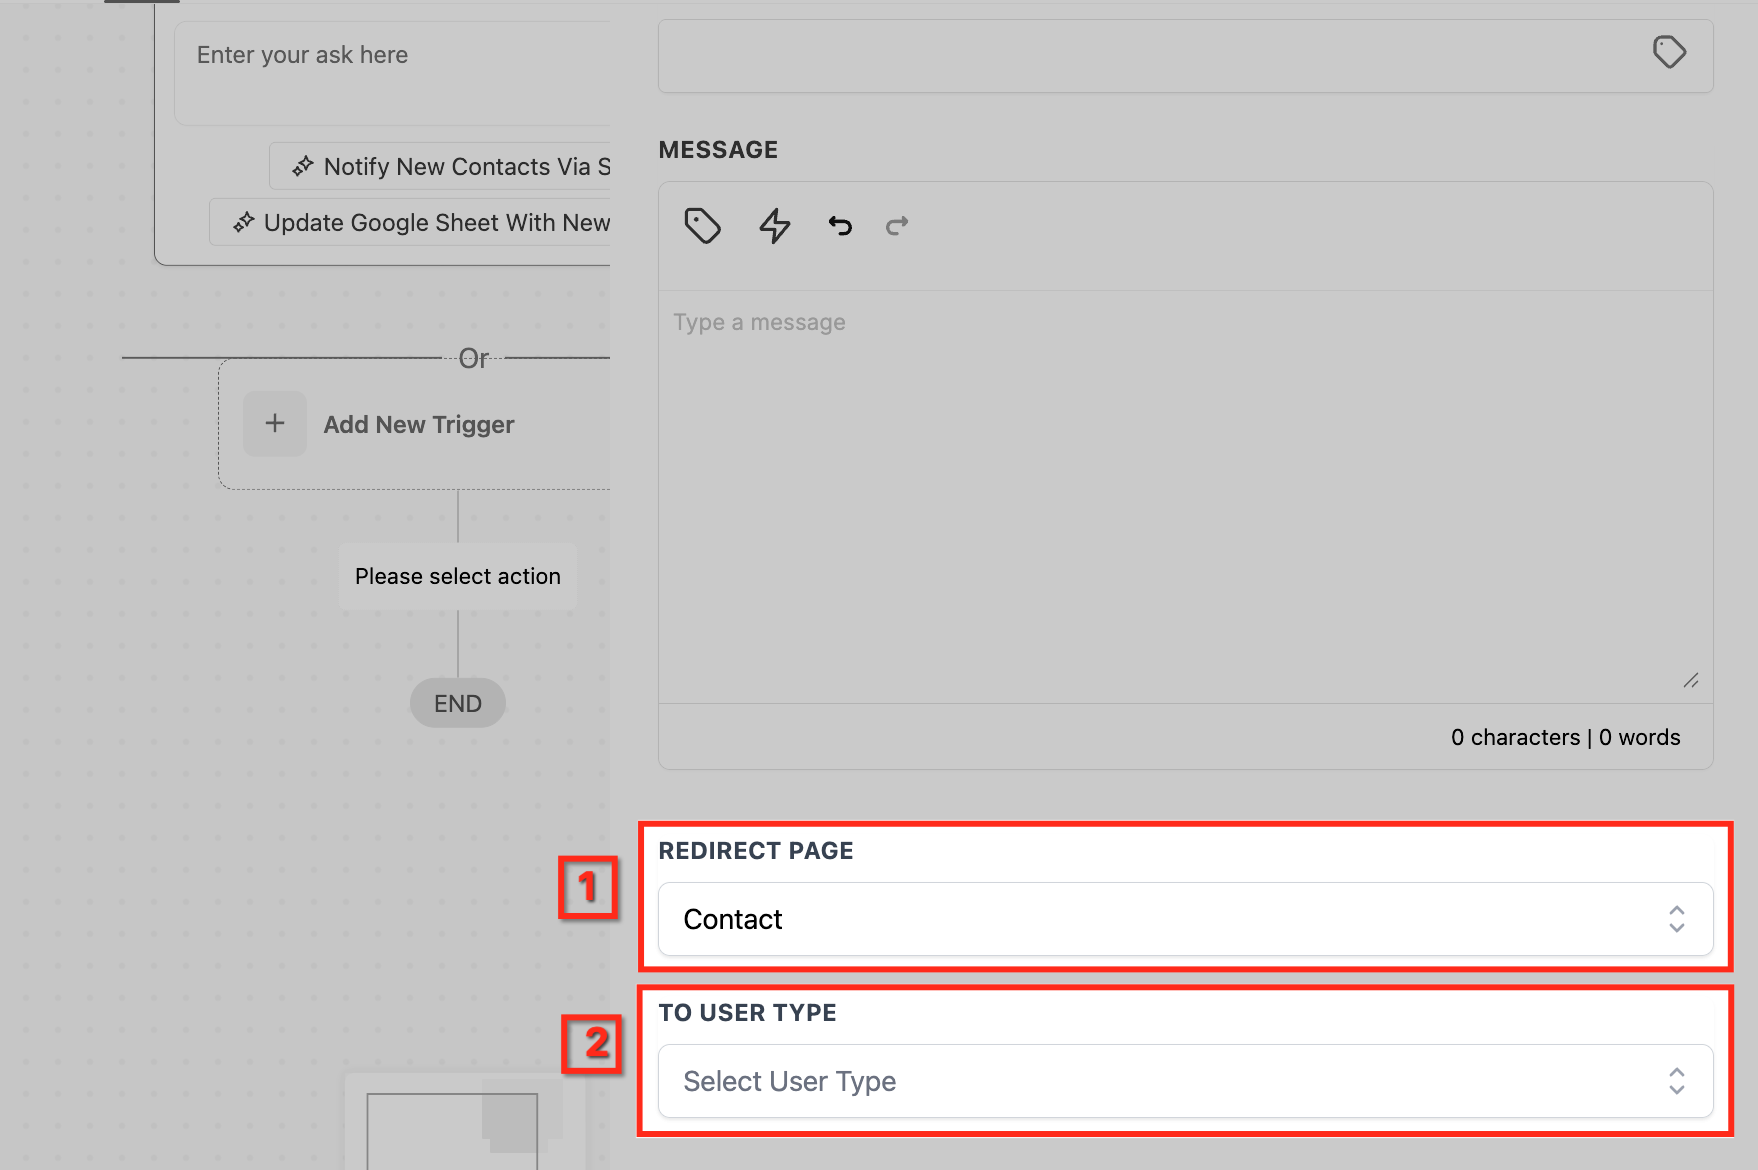
Redirect Page: Where the user lands when they click the alert, such as the contact record or opportunity.
To User Type: Which users, roles, or teams receive it.
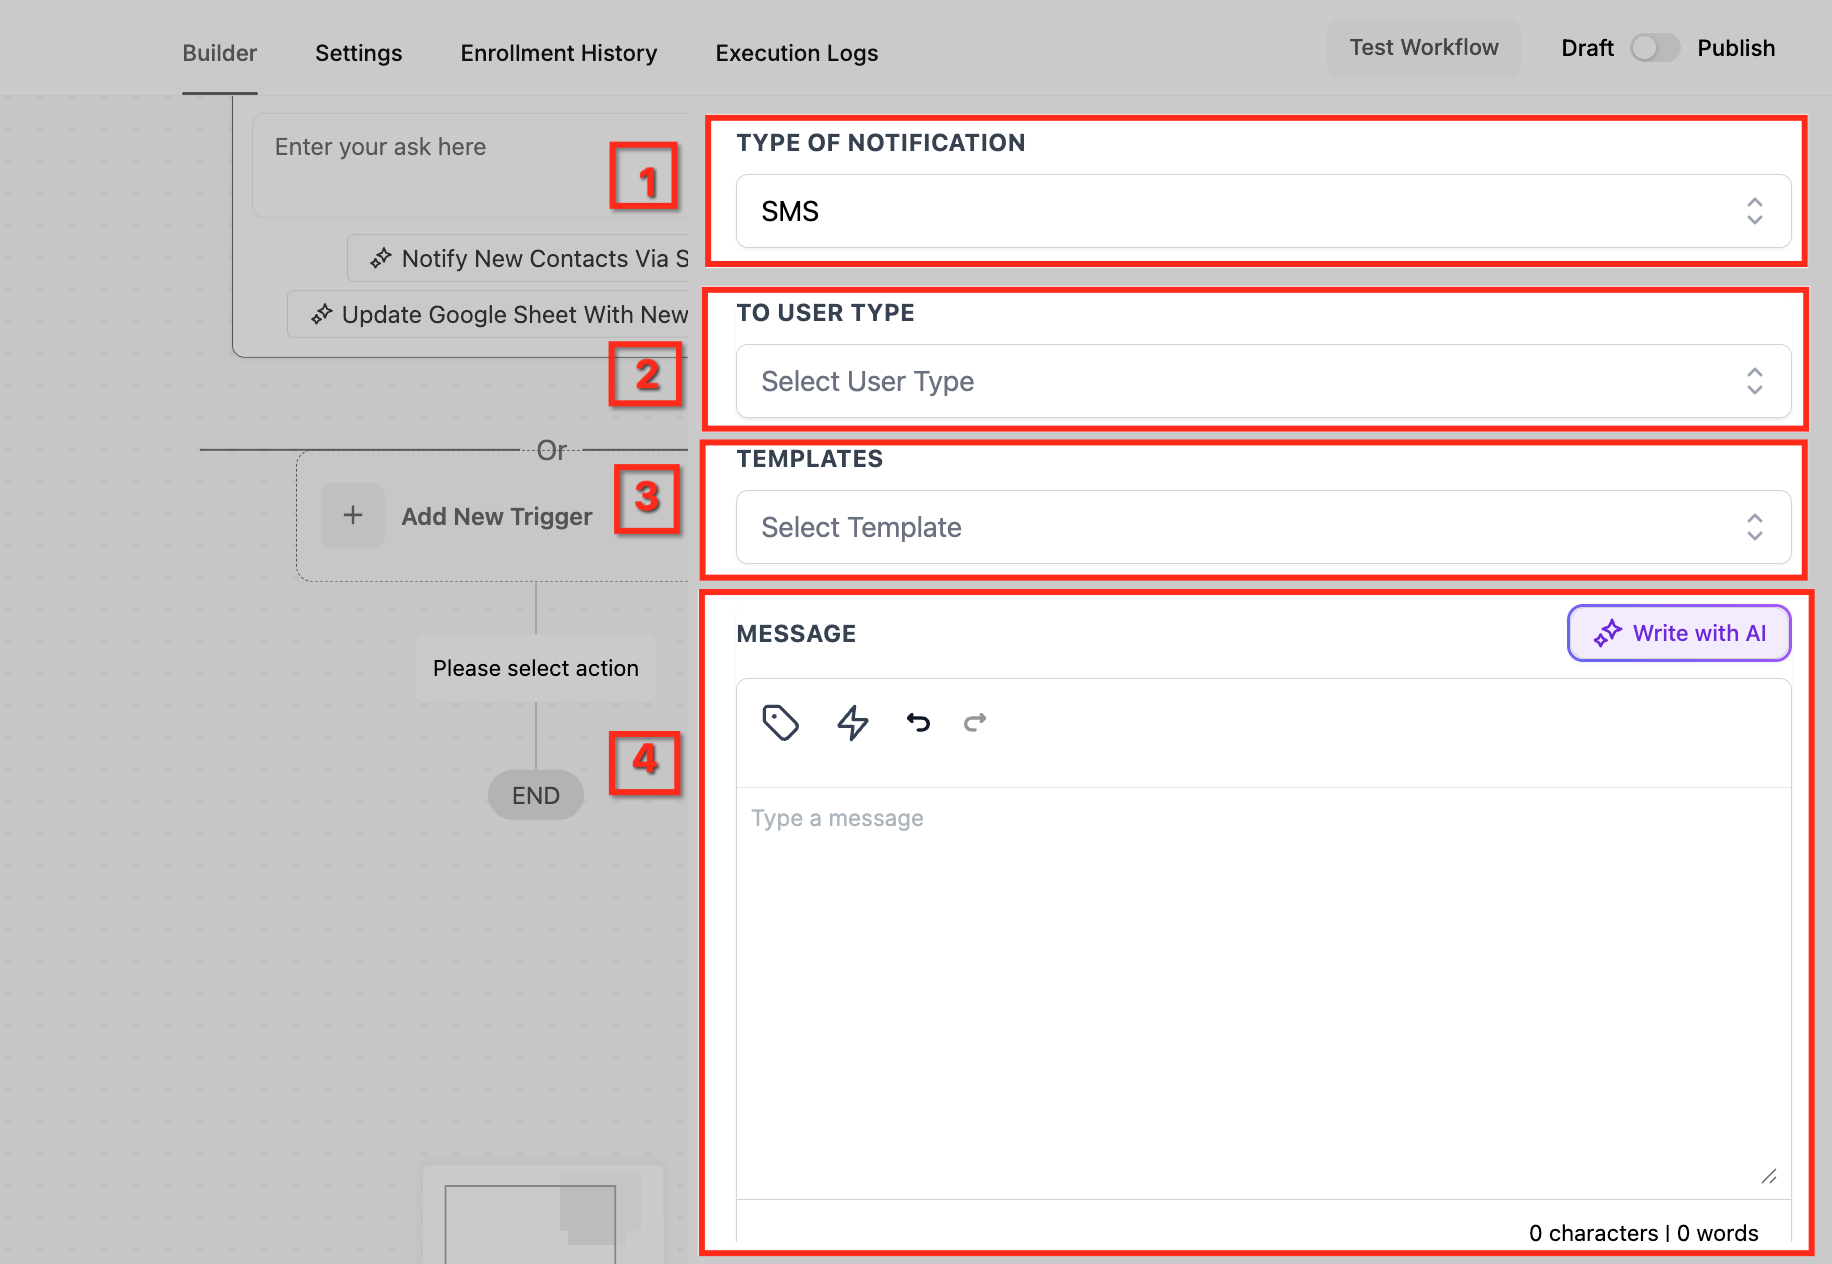
SMS notification fields:
To User Type: Which internal users receive the text.
Templates: Optionally use a saved SMS template.
Message: The text body; supports custom values and Write with AI.
Add Attachment / Add Files via URL: Attach files directly or by URL.
Test Phone Number: Send a test (with country code) to preview.
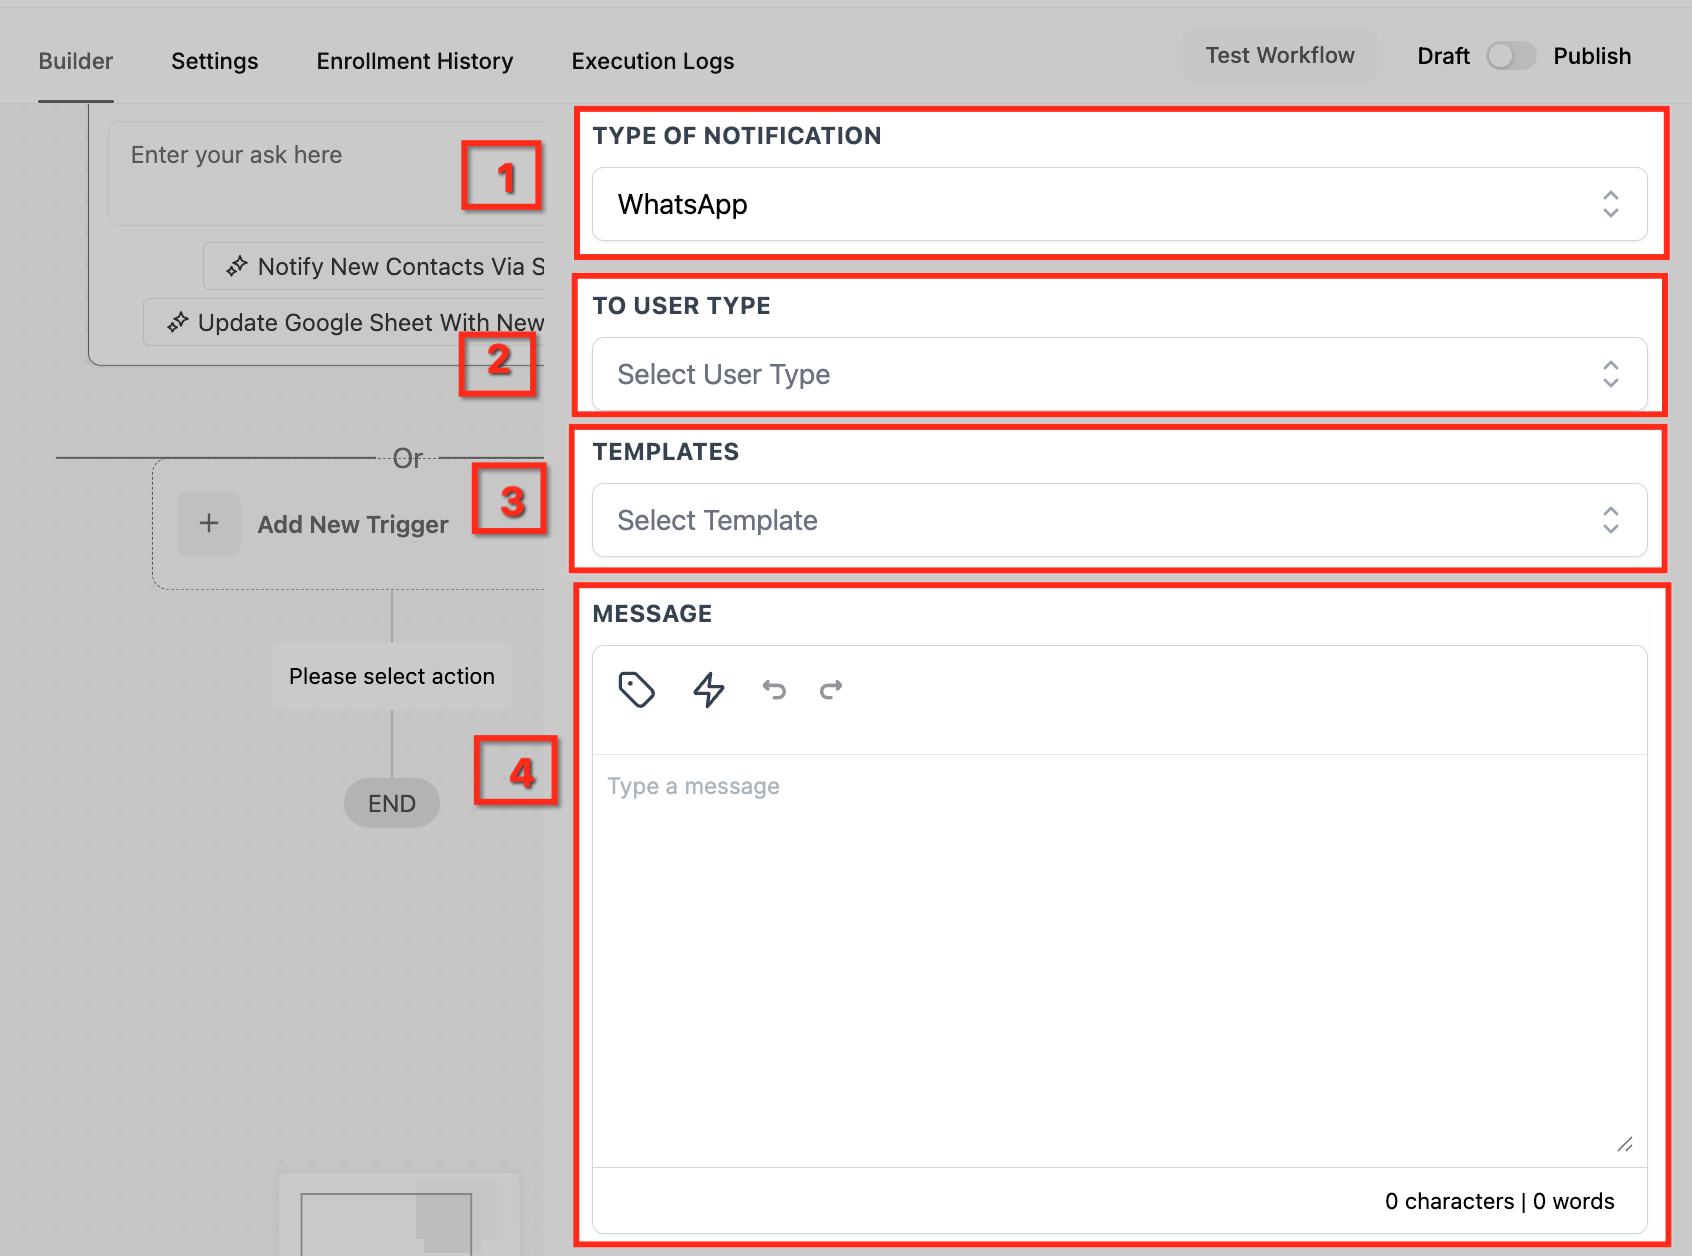
WhatsApp notification fields:
To User Type: Which users receive the WhatsApp message.
Templates: Pick an approved WhatsApp template to meet messaging requirements.
Message: Your custom message; supports custom values.
Inputs needed: Team members with the relevant channel configured (valid email, phone number, or connected WhatsApp). SMS and WhatsApp require proper setup for the recipient.
Data produced: An alert delivered to the selected internal users on the chosen channel; in-app alerts appear under the bell icon.
When to use it / example: When a new high-value package is purchased, send an in-app notification to the owner and an SMS to the lead esthetician so they can prepare for the appointment.
Open the workflow builder and create or edit a workflow.
Click + and select Send Internal Notification.
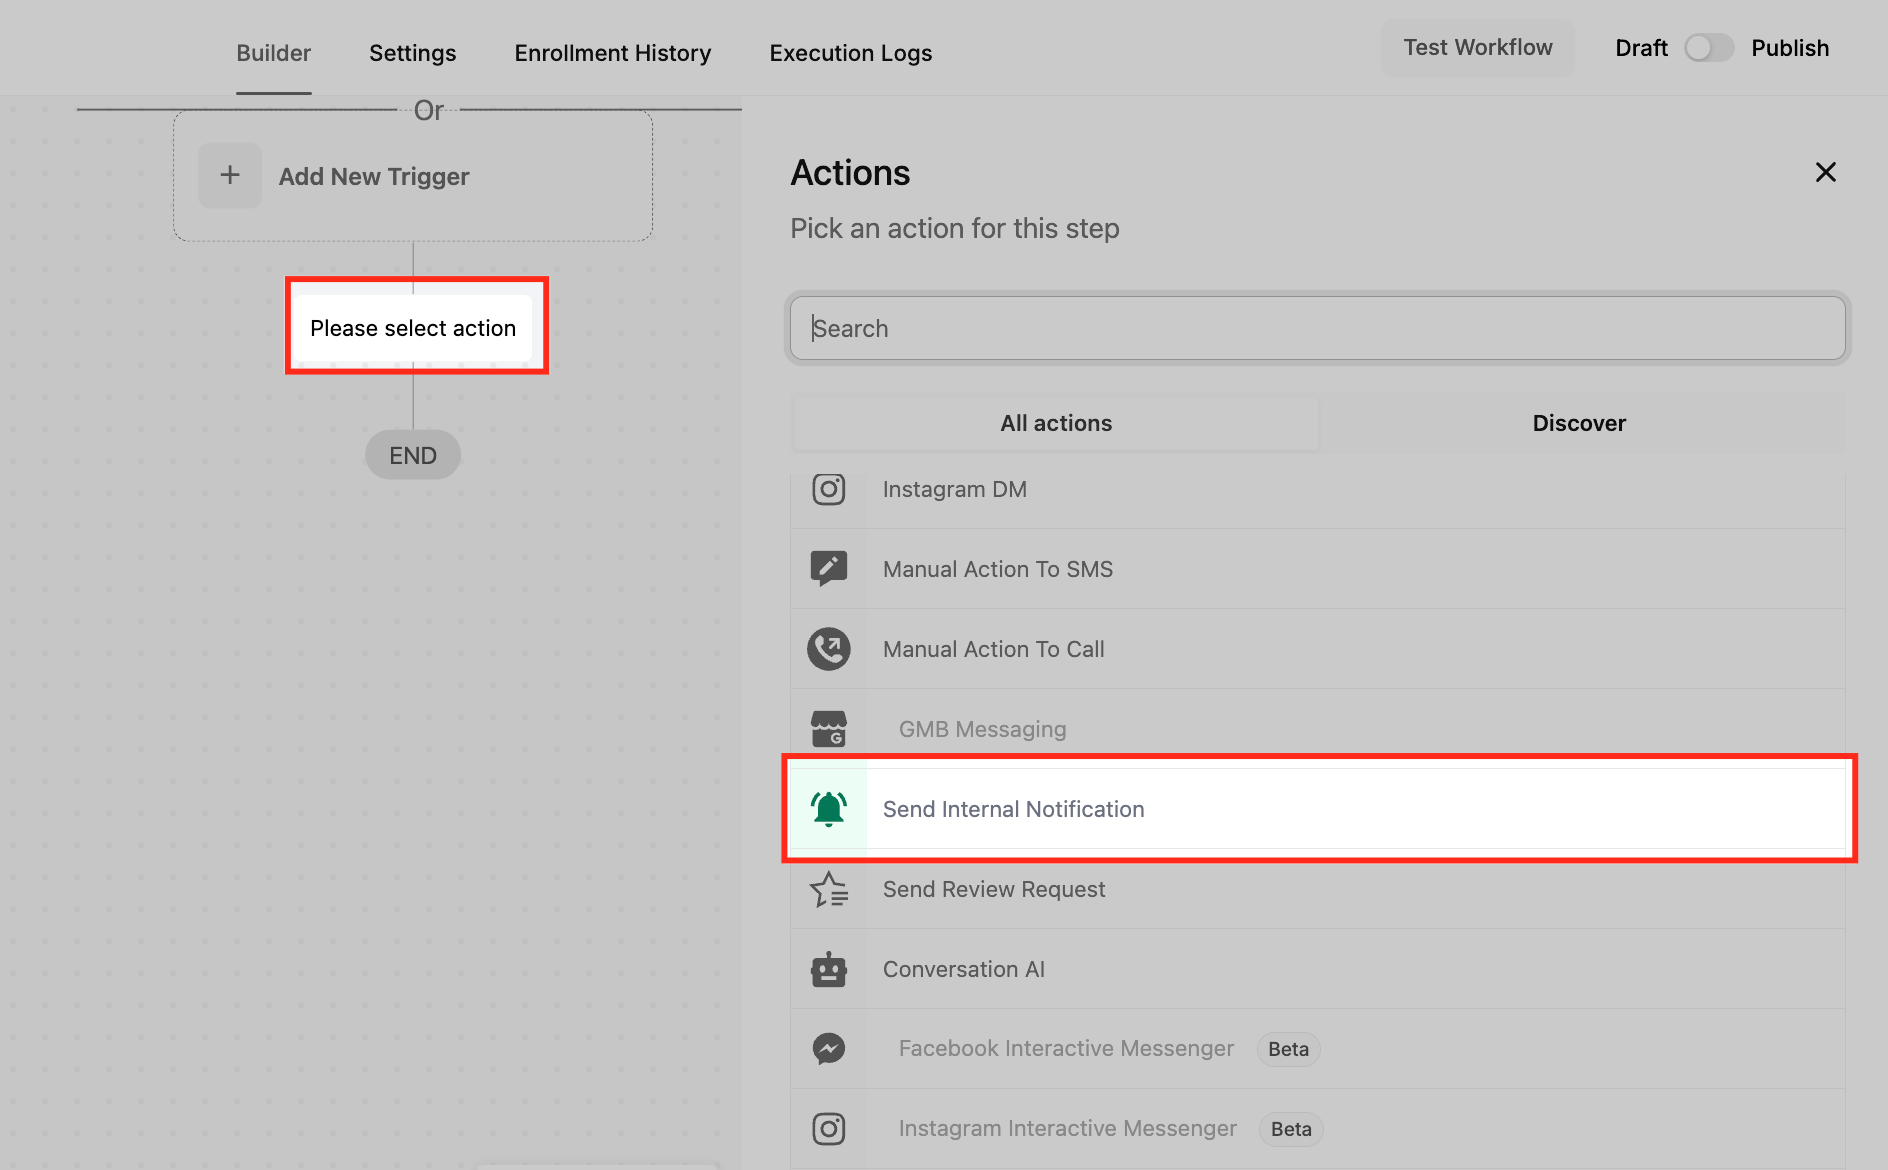
Name the action descriptively.
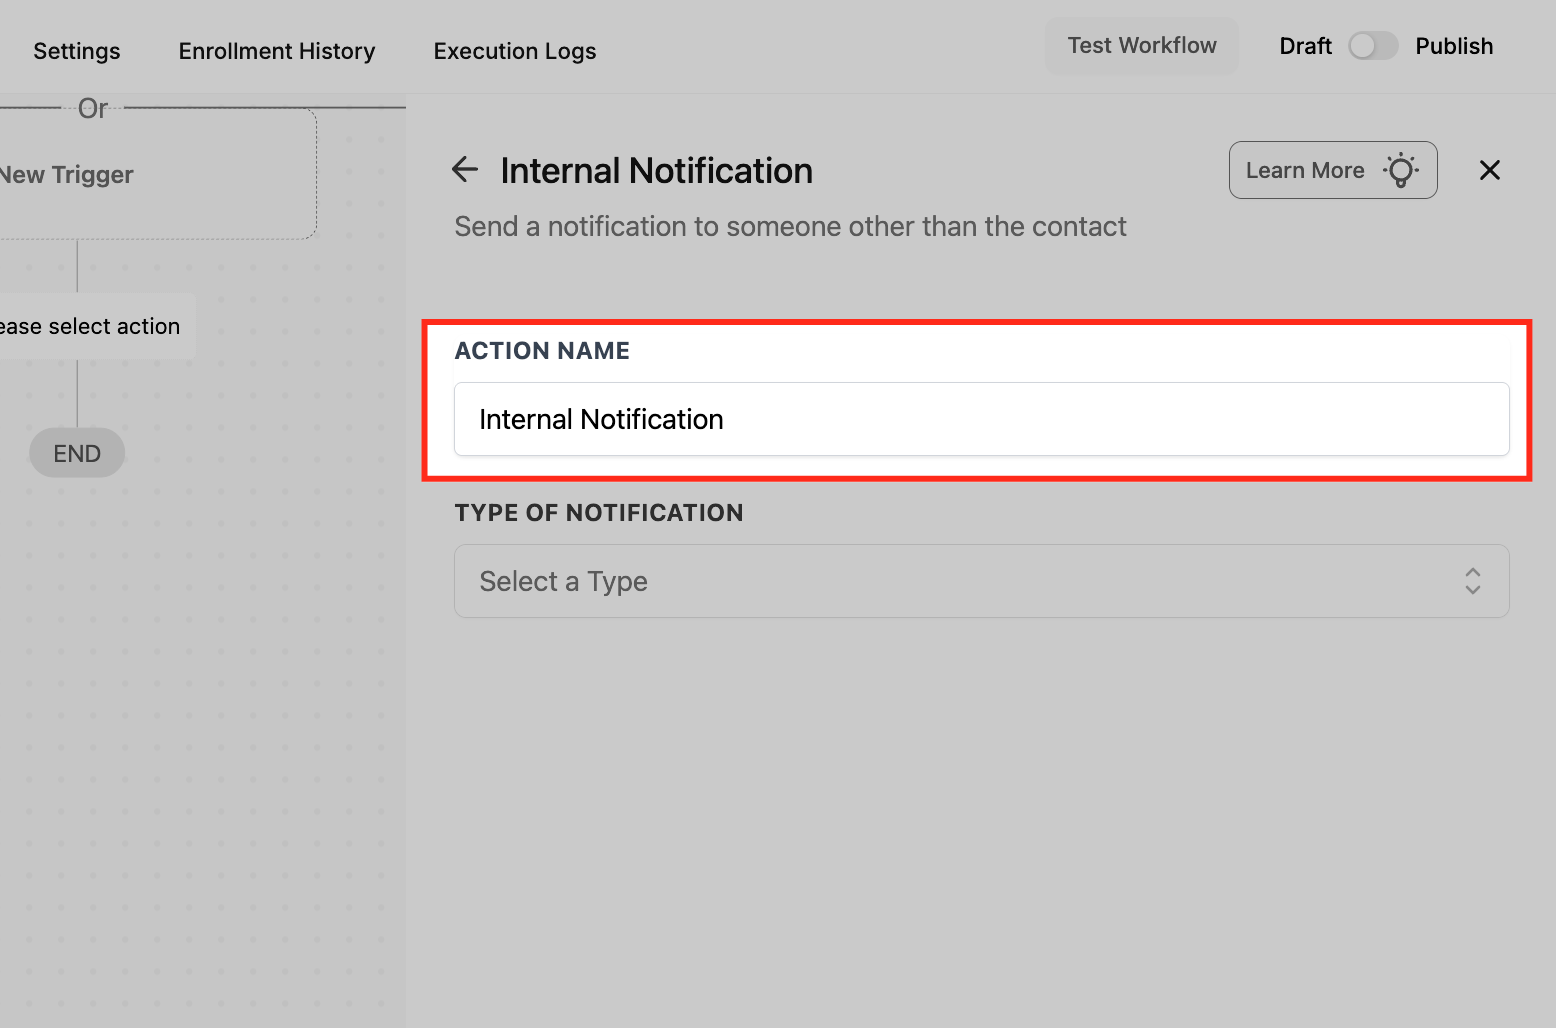
Choose the Type of Notification.
For Email, configure From Name, From Email, To User Type, Cc/Bcc, and Subject.
Set up the email content: Template, Message, and Attachments.

For an in-app Notification, set the Title and Message.
Configure the Redirect Page and recipient User Type.
For SMS, choose the User Type, Template, and Message.
Add SMS attachments and test with a phone number.

For WhatsApp, choose the User Type, approved Template, and Message.
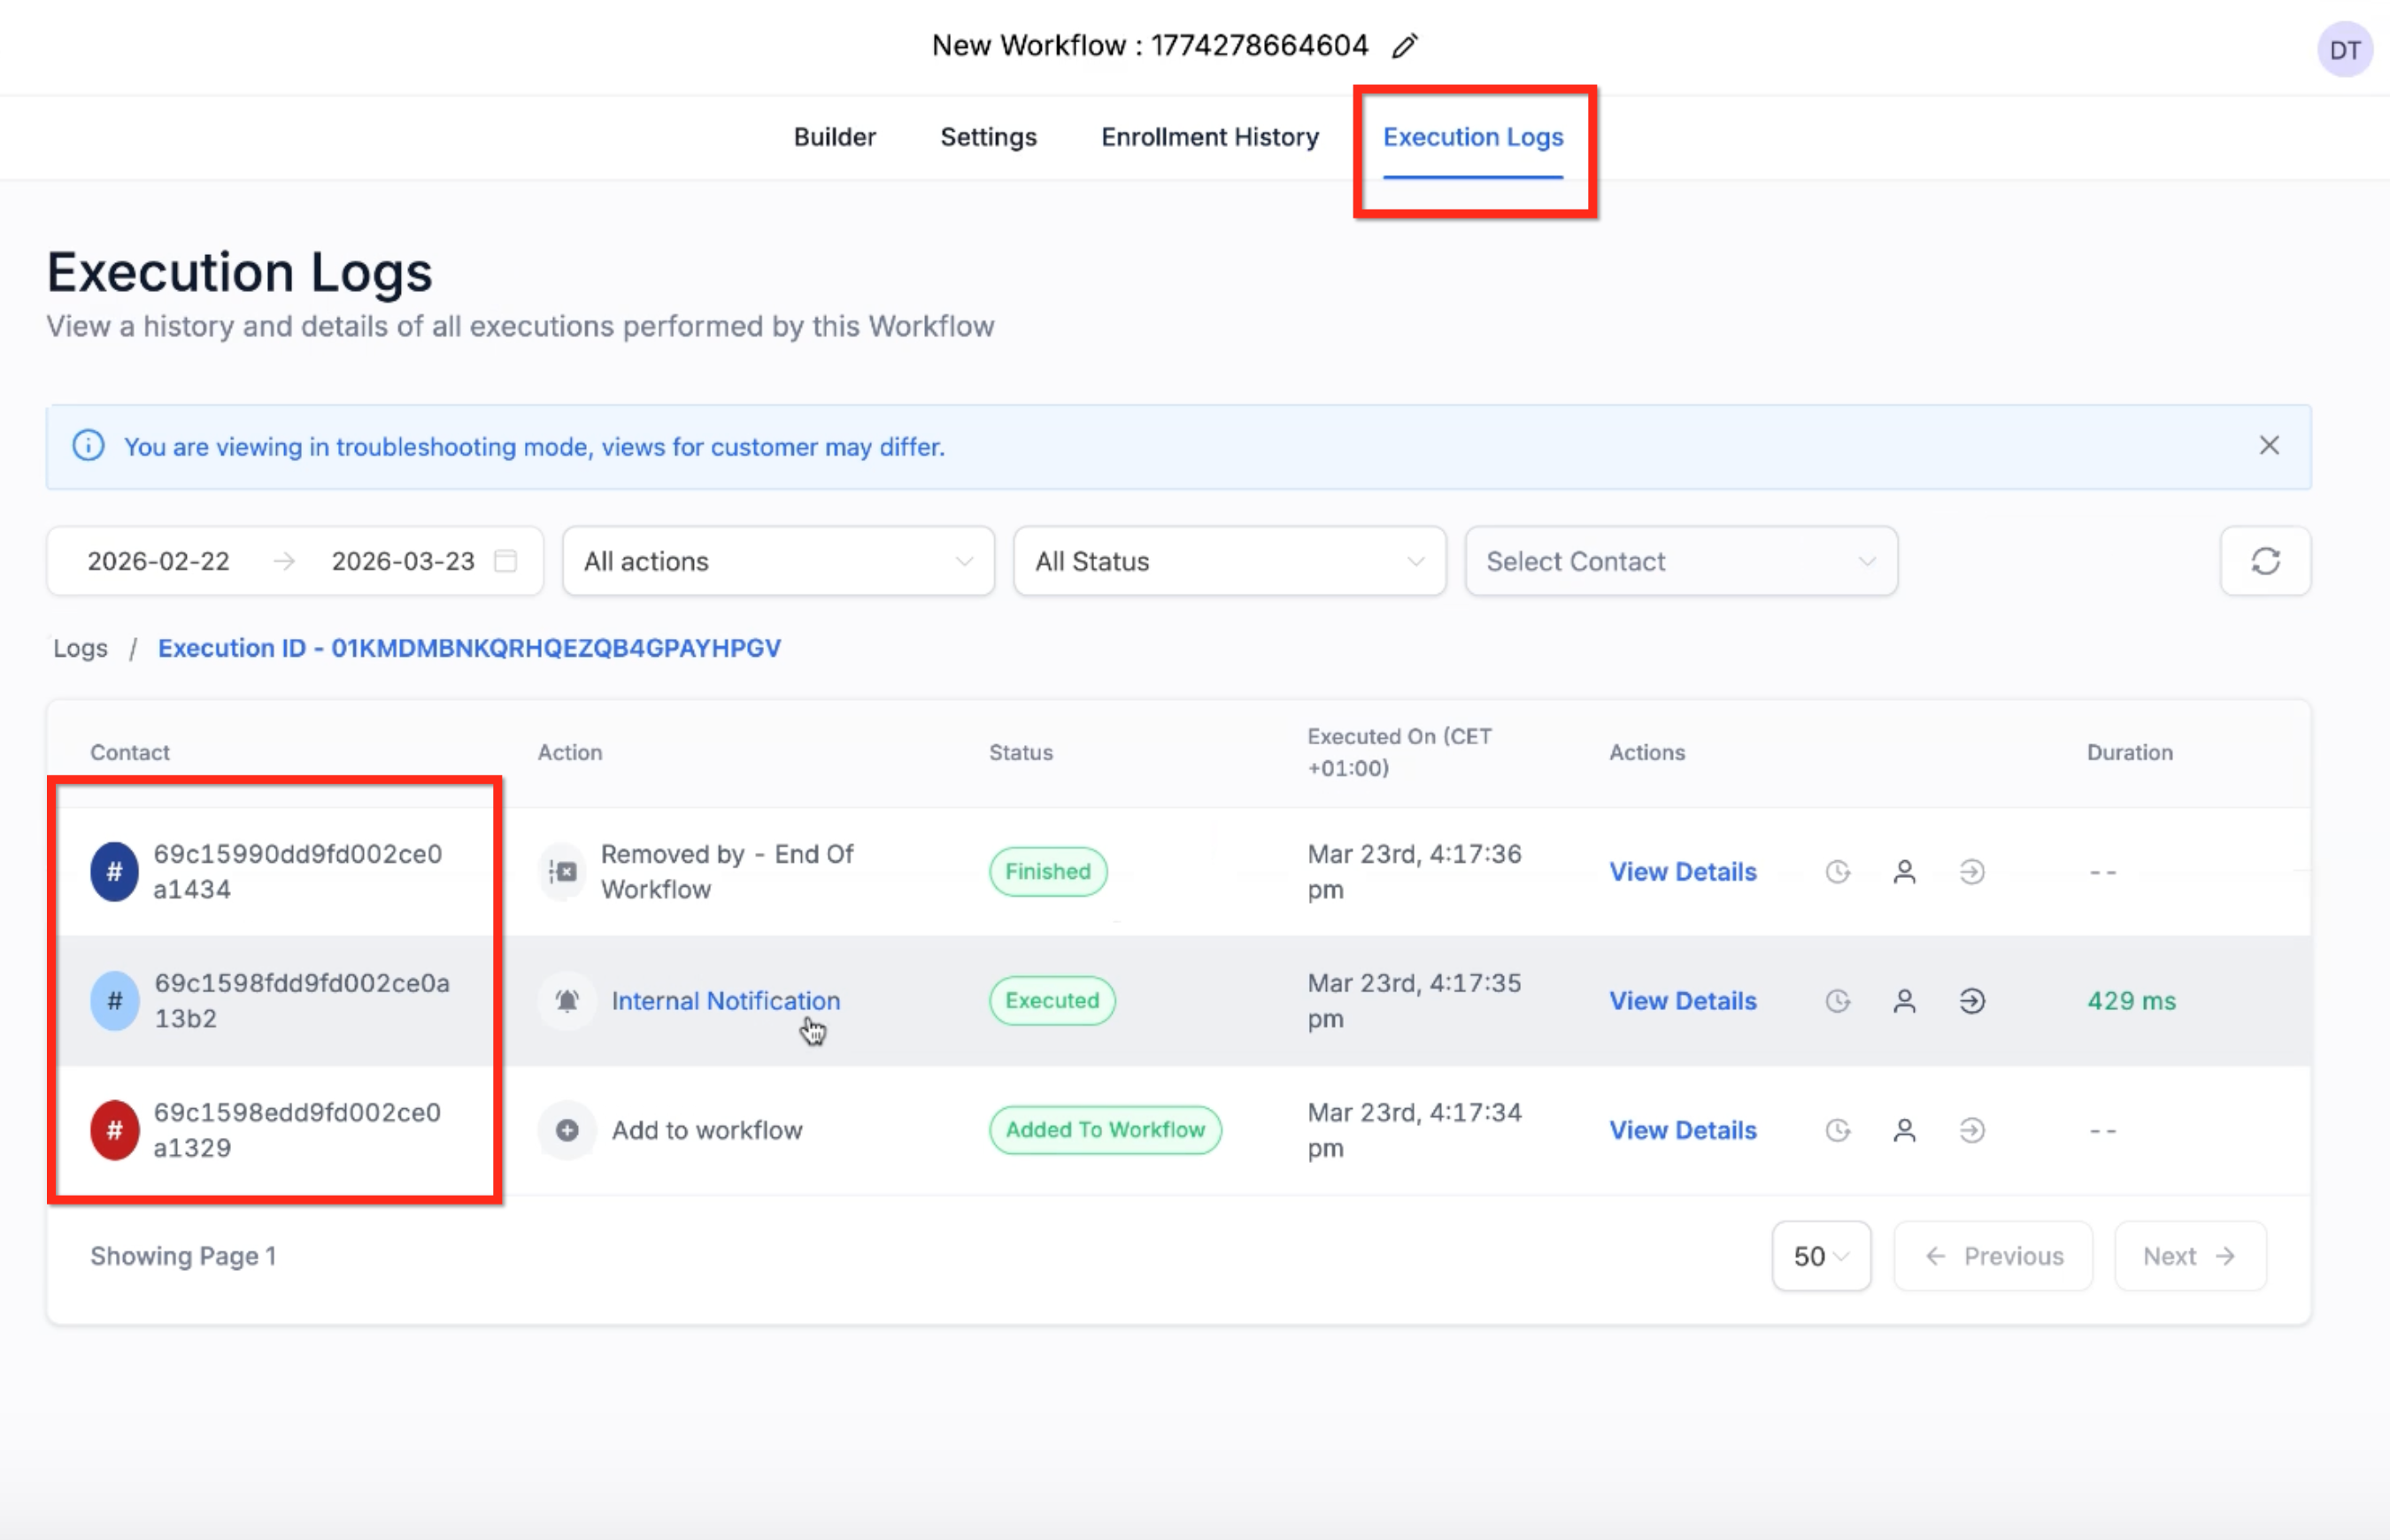
Running without a contact: Internal Notifications can run in contactless scenarios depending on the type and recipient. In-app notifications can run with or without a contact, and simple internal messages that do not rely on contact fields execute fine. If the content depends on contact-specific data (assigned user, contact fields, custom fields), those values may not populate in a contactless flow, and the entry may show an alphanumeric identifier instead of a contact profile.
Email/SMS recipient handling:
Recipient option | Behavior |
|---|---|
All Users | Sends to each user's configured email or phone number. |
Particular Users | Sends to the selected users. |
Assigned User | Sends only when a contact exists with an assigned user (and a valid phone for SMS). If none exists, the step is skipped and the workflow continues. |
Notes and gotchas:
Internal notifications go only to your team members, never to contacts or clients.
Rate limiting: each user can receive up to 500 notifications (email, SMS, or in-app) every 5 minutes; bulk runs above this are queued or dropped if conditions expire.
Recipients are deduplicated across categories, so a user listed in multiple fields gets only one alert.
Cc/Bcc is Email-only, and each Cc/Bcc recipient adds to email usage.
If a channel is not configured for a recipient (no valid phone for SMS, WhatsApp not connected), only that channel fails; the workflow continues.
If a notification shows as executed but the user did not receive it, the user's profile may be in Do Not Disturb. Open the contact, toggle DND off and back on, then re-test.
What it does: Automatically sends a review request to the contact, asking them to leave feedback, via Email or SMS. The message content is controlled in your Reputation settings.
Prerequisites: Connect your Google Business Profile (or a third-party review link), enable review requests in settings, and optionally customize the outbound review messaging in Reputation settings.
Configuration and fields:
Action Name: Defaults to "Send Review Request."
Review Type: Choose the channel, Email or SMS.
The actual message wording is configured in Reputation Settings, not in the action itself. When sent from a workflow, the request comes from the contact's assigned user.
Inputs needed: A contact with a valid email or mobile number, a connected review profile, and review requests enabled in settings.
Data produced: A review request sent to the contact. Each request carries a status: Queued, Sent, Delivered (SMS delivery confirmation only), or Failed.
When to use it / example: When an appointment is marked Completed, automatically email a review request thanking the client and linking to your Google review page, sent on behalf of their provider.
Notes and gotchas:
Review requests can also be sent manually from Quick Actions or the Reputation tab, but only the workflow action sends on behalf of the assigned user. Manual sends list the signed-in user as the sender.
A Delivered status is confirmed for SMS only; email does not report a delivered status.
If you use a custom SMTP integration, the user email matching that integration must be the sender.
What it does: Posts calls made in a third-party calling system into Aesthetix CRM so every interaction is centralized in the contact's Conversations, optionally including the call recording.
Configuration and fields:
This action is designed to work with the Inbound Webhook Trigger, which gives you a webhook URL your calling system posts call details to. A typical setup:
Configure an Inbound Webhook Trigger to receive call data.
Add an If/Else branch on the direction field (available from the Inbound Webhook Trigger) to separate inbound and outbound flows.
Add a Create Contact action to identify the contact by phone number, mapping Phone to From Number in the inbound branch and To Number in the outbound branch.
Add the Log External Call action and map each field, Direction, Date, To, From, Call Status, and Attachment, to the matching custom values from the Inbound Webhook Trigger.
Inputs needed: A configured Inbound Webhook Trigger and a third-party calling system that can post call data (and optionally a recording URL) to the webhook.
Data produced: A logged call entry, with recording if passed, visible in the contact's Conversations.
When to use it / example: Your front desk uses an external dialer for consult calls. Use Log External Call so those calls and their recordings appear on the patient's record alongside texts and emails, giving staff full context.
Notes and gotchas:
Map the Phone field to the correct number per direction (From for inbound, To for outbound) so the call attaches to the right contact.
Call recordings can be passed through and will display within Conversations.
Where are Book Appointment and Conversation AI documented? Book Appointment is covered in the Appointment Actions guide, and Conversation AI is covered in the AI Employee collection. They are not part of this article.
What is the difference between Call and Manual Action to Call? Call places an automated outbound call immediately and bridges the contact to a user. Manual Action to Call creates a task for a person to place the call themselves from the Manual Actions queue.
Where do manual SMS and call tasks show up? Under Inbox > Manual Actions, on both desktop and the mobile app. The workflow only advances once the task is completed.
Can I personalize emails, texts, and Slack messages?
Yes. Use custom values (merge fields) such as {{contact.first_name}} via the tag icon or custom variable picker. They only populate when the trigger or contact record supplies the data.
Why are my merge fields blank? The trigger does not provide that data (for example, appointment fields need an appointment trigger) or the contact record is missing the value.
Do internal notifications go to my contacts? No. Internal Notifications reach only your team members. To message contacts, use Send Email or Send SMS.
Why did my Call workflow stop even though no one answered? With Stop on Response ON and Disable Voicemail Detect ON, a voicemail pickup counts as a response and stops the workflow. Set the Call Timeout to 20 seconds or less to avoid reaching voicemail.
Is the Slack action free to use? Slack is a premium action and consumes premium executions when it runs. Connect Slack under Settings > Integrations and enable premium actions first.
