Payment triggers let your Aesthetix CRM workflows react automatically to money-related events: an invoice gets paid, a membership renews, a refund is issued, a coupon is applied at checkout, and more. Each trigger starts a workflow the instant a matching event occurs, so you can send confirmations, alert your team, update records, or kick off follow-up without lifting a finger.
In Aesthetix CRM, all payment processing, invoices, subscriptions, estimates, documents, and coupons run through AX Pay, the built-in payments engine. Every trigger in this article lives under the Payments category in the workflow trigger list.
The starting flow is the same for every trigger below. You will only choose a different trigger name and configure different filters.
From the left navigation, open Automation > Workflows.
Click + Create Workflow (or open an existing workflow) and choose Start from Scratch.
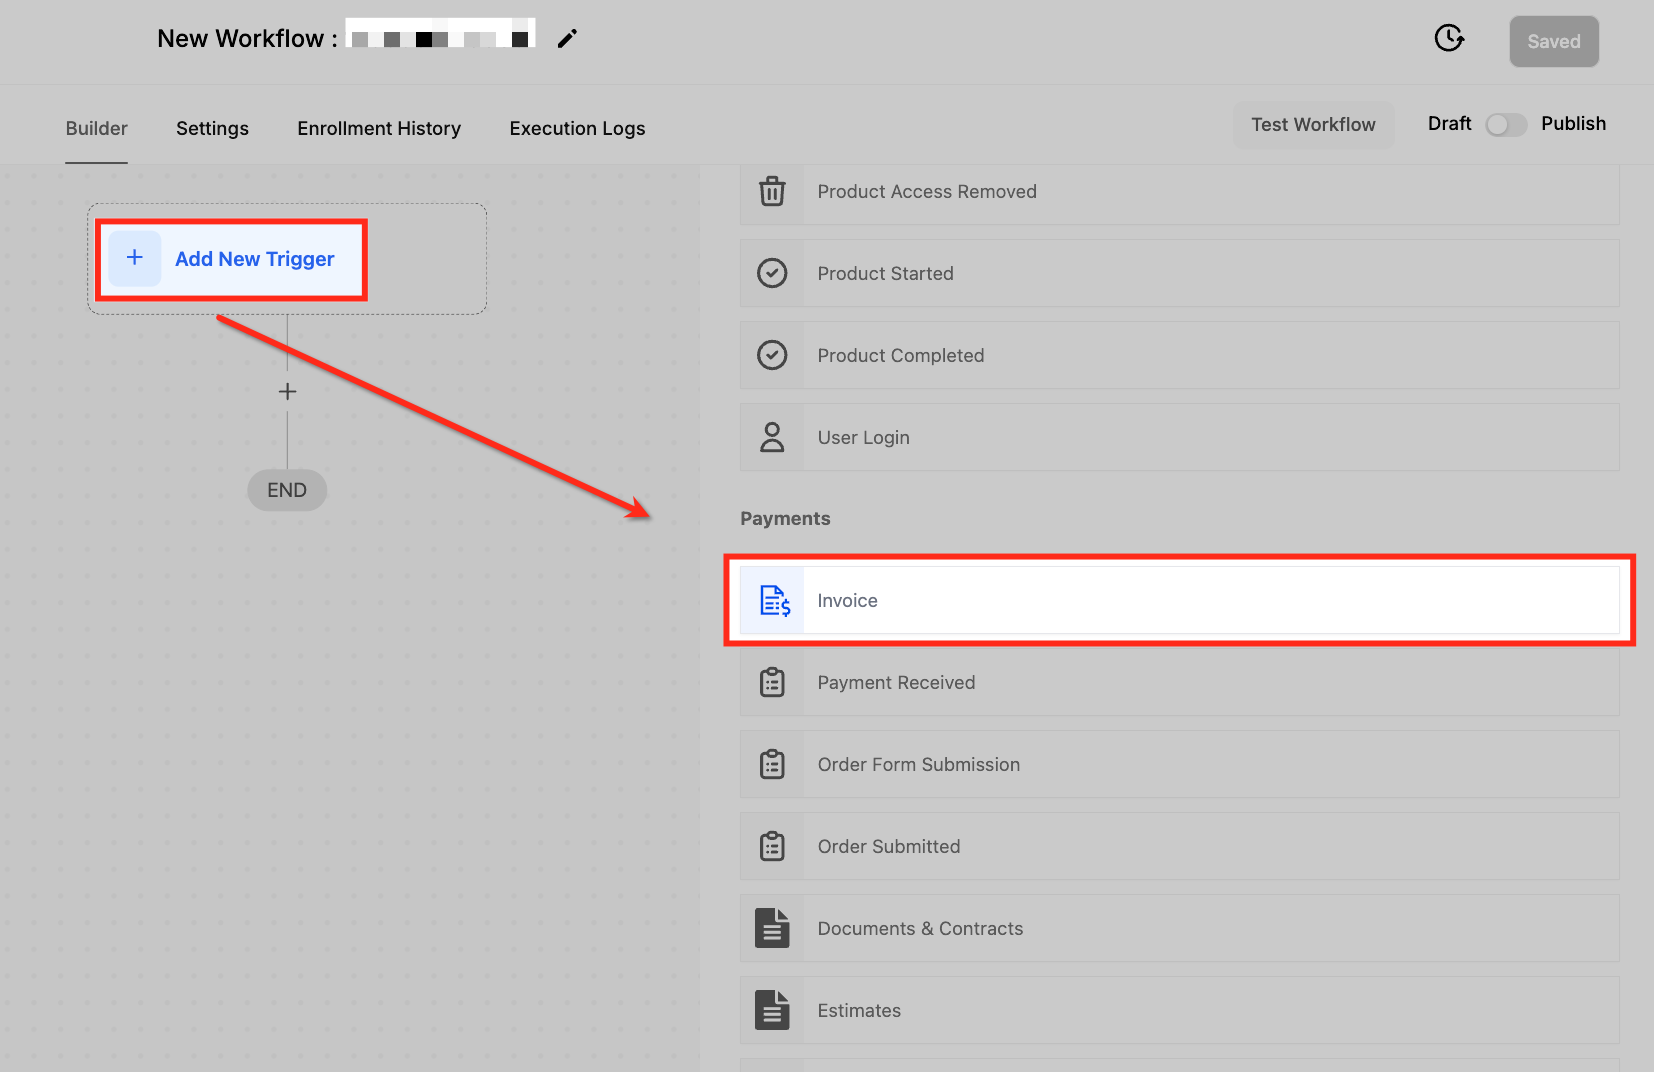
In the workflow builder, click + Add New Trigger.
Scroll to the Payments section and select the trigger you need.
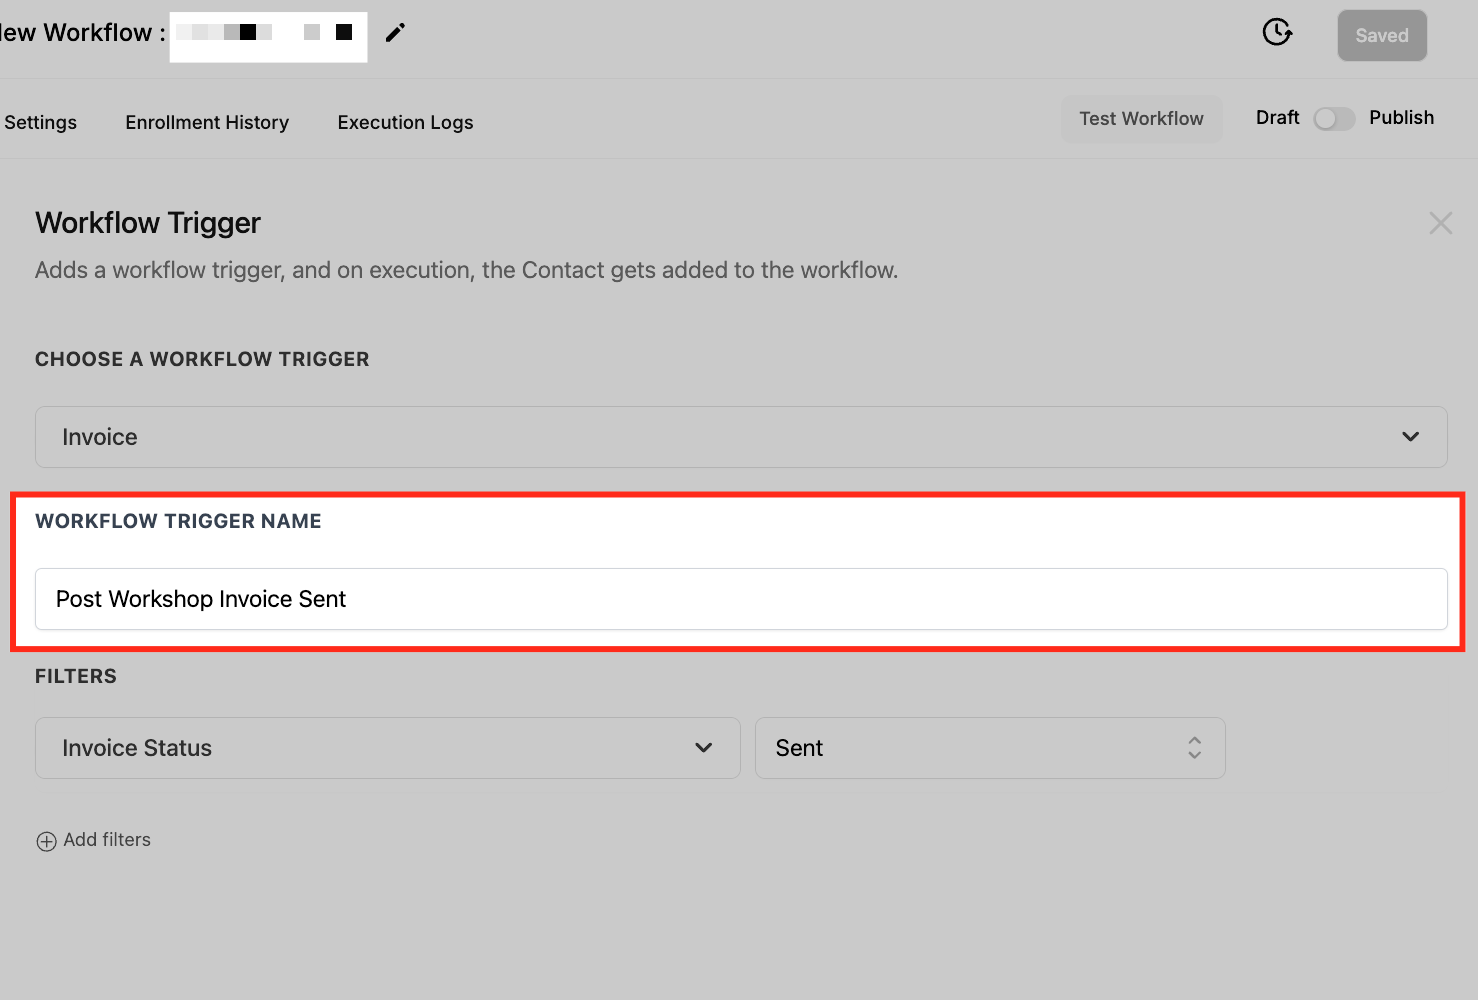
Give the trigger a clear, descriptive name in the Workflow Trigger Name field (for example, "Post-Treatment Invoice Paid").
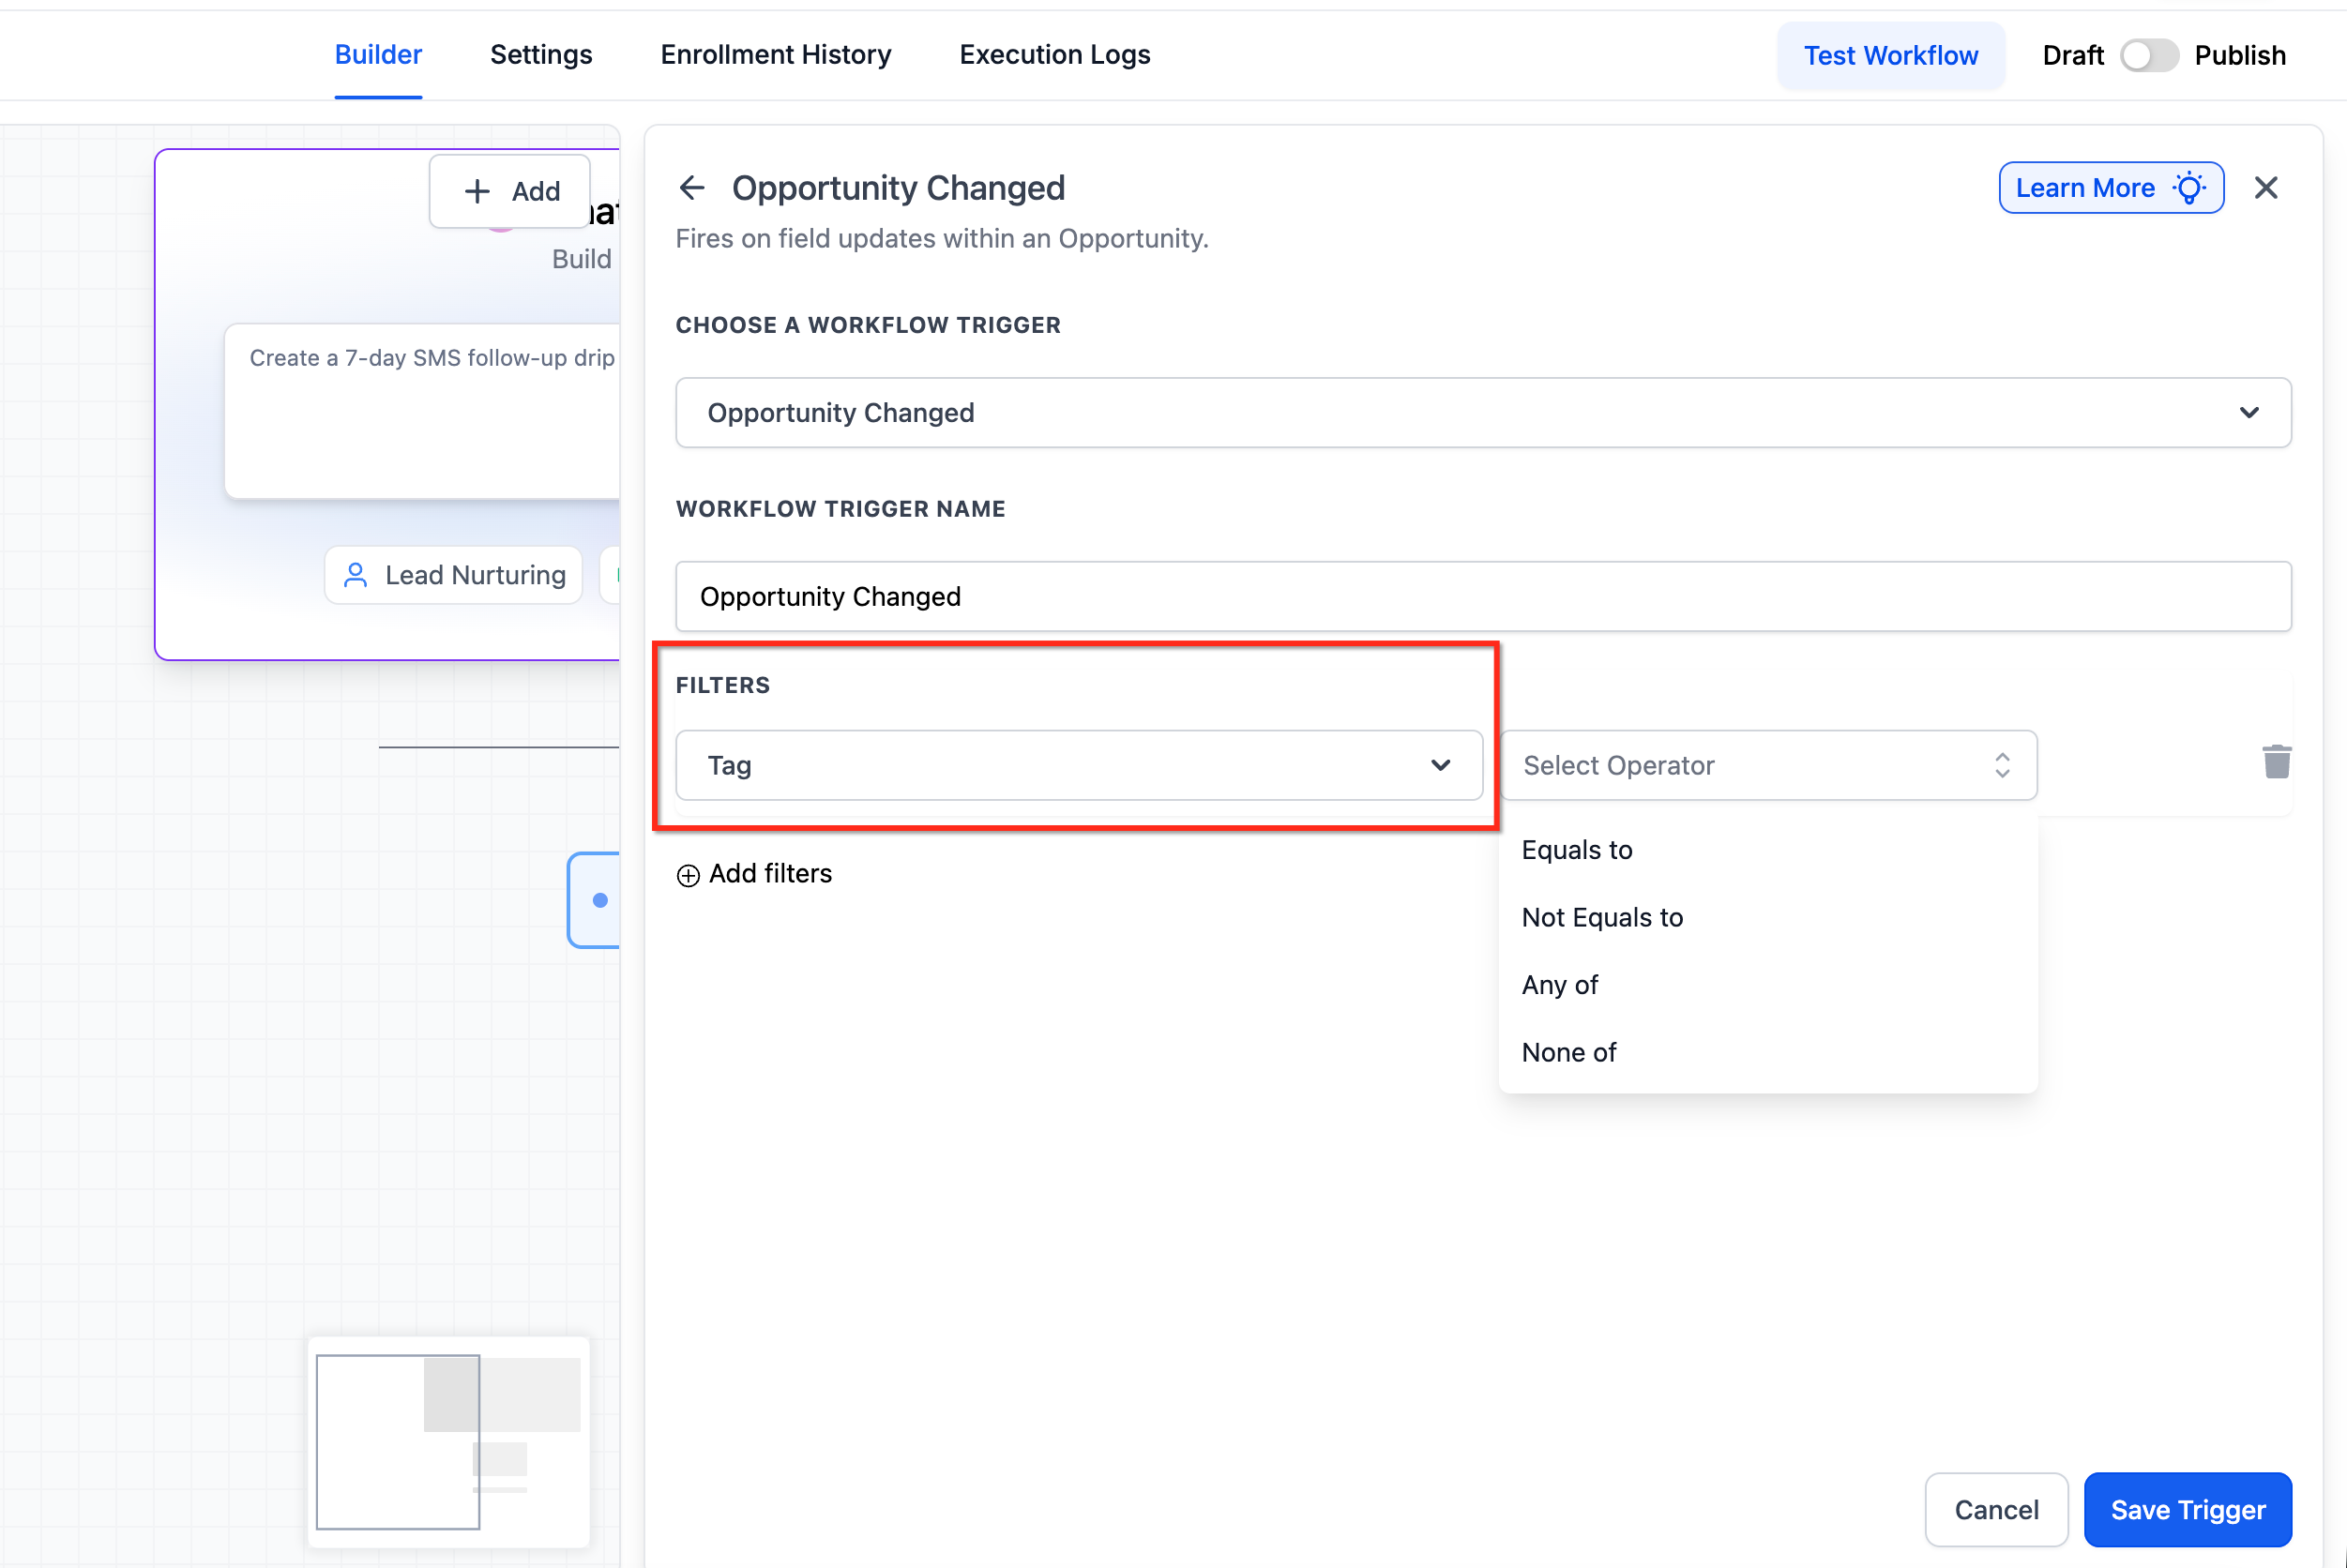
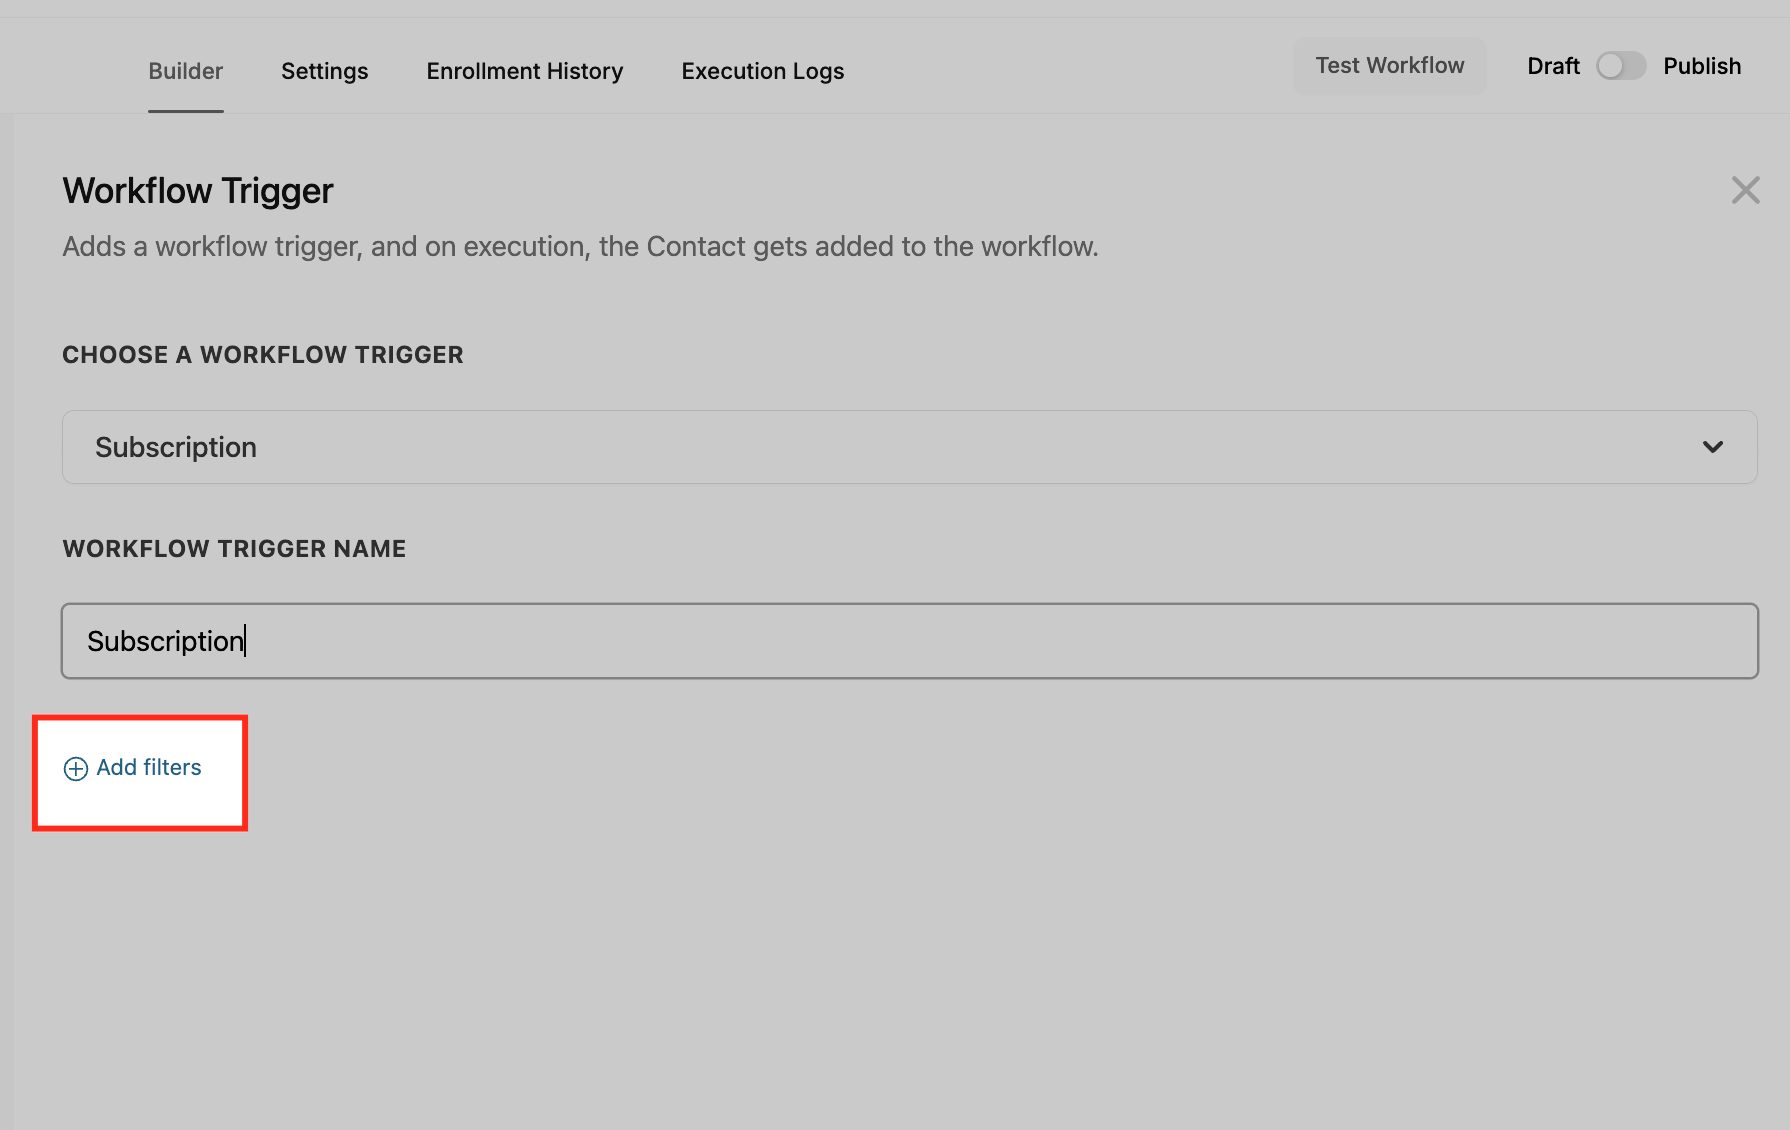
Click + Add Filters to narrow exactly when the workflow should fire, then configure each filter and its operator.
Click Save Trigger, build out your actions, then Save and Publish the workflow.
Most payment triggers expose Custom Values (merge fields) once they are added to a workflow. These let you drop live payment, customer, and invoice details into emails, SMS, and internal notifications. See the merge field tables in each section for the fields available.
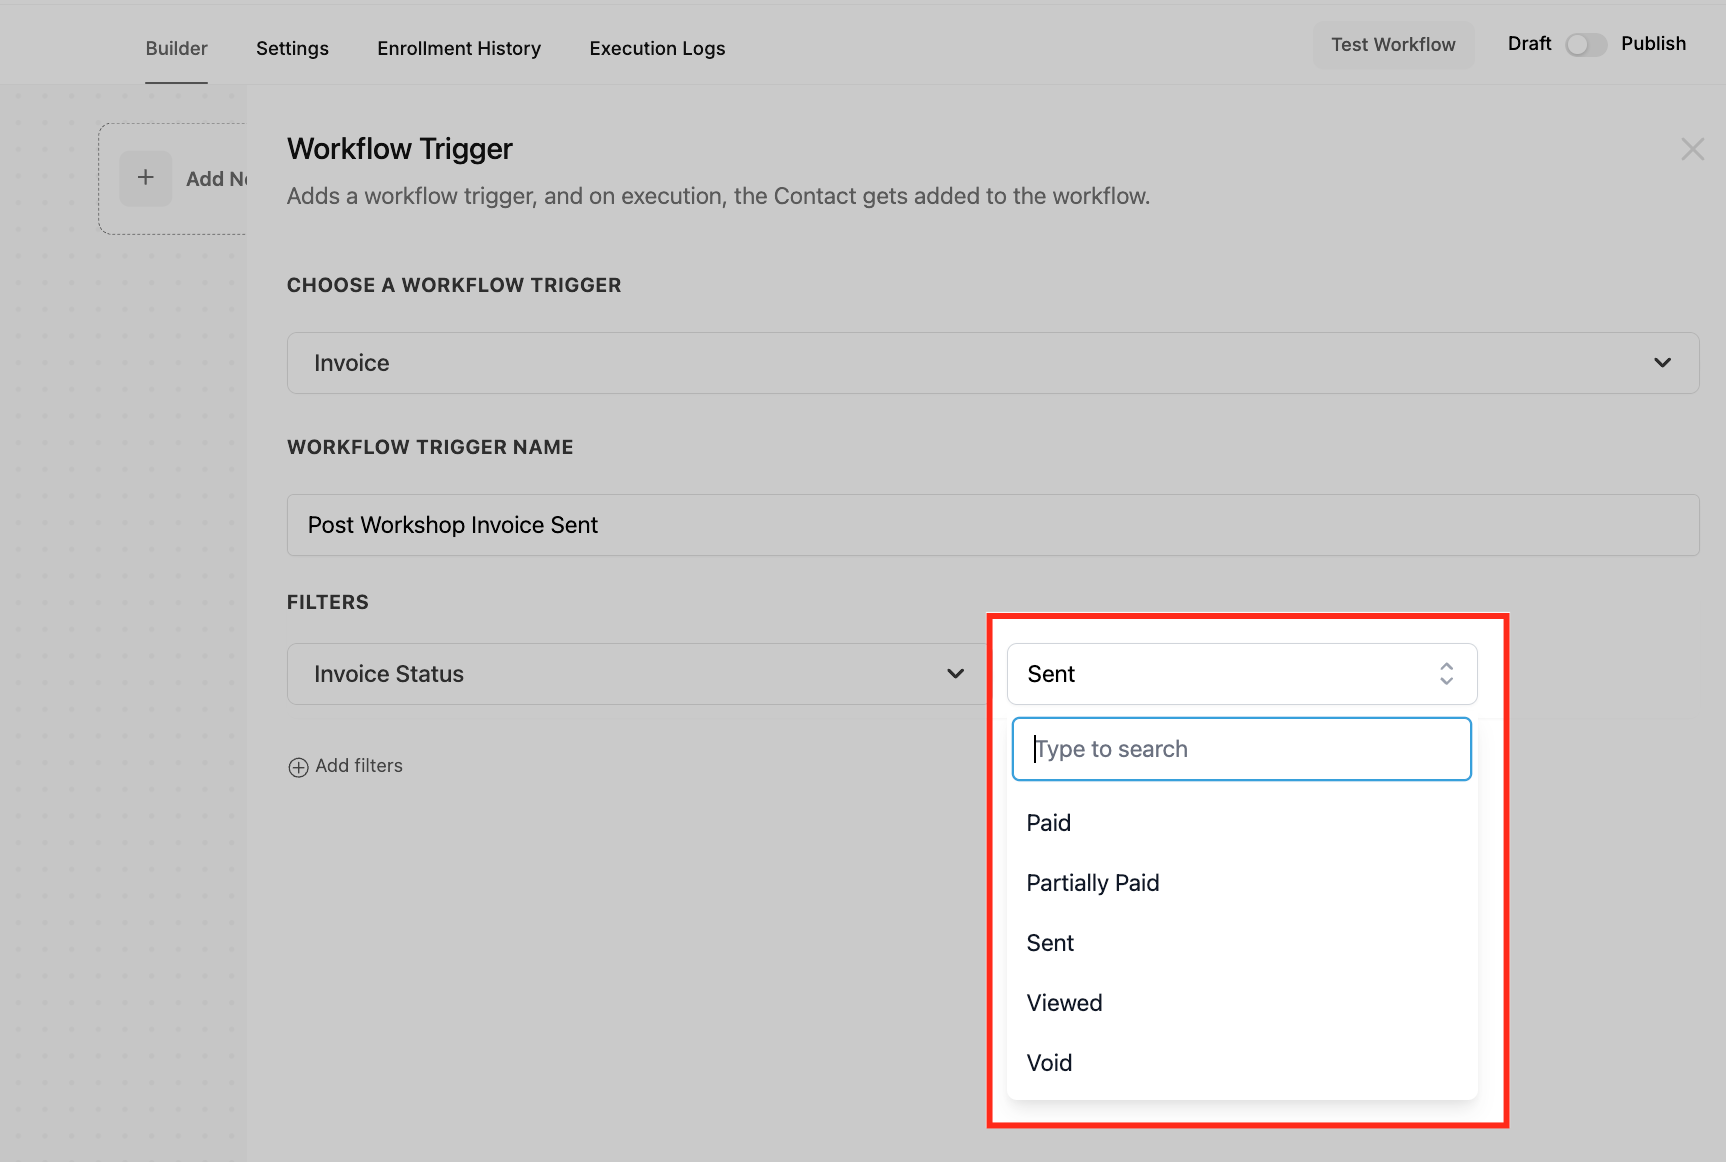
The Invoice trigger activates whenever an invoice changes status. You choose which status change should start the workflow, so a single invoice can drive several different automations across its lifecycle.
Available Invoice Status values:
Sent - the invoice has been sent to the client. Useful for follow-up reminders or logging the send.
Viewed - the client opened the invoice. Useful for tracking engagement and timing a nudge.
Paid - the invoice was paid in full. Useful for thank-you messages, record updates, or notifying your front desk.
Partially Paid - a partial payment was made. Useful for practices that allow deposits or installment plans and want to track partial settlements.
Void - the invoice was voided. Useful for keeping records clean and making sure no further reminders go out on a cancelled invoice.
After choosing the status, you can refine the trigger further:
Invoice Amount - filter by the invoice total. Operators include the standard comparisons, plus a Between operator that takes a minimum and a maximum. The range is inclusive of both values, and the system blocks invalid ranges where the minimum is greater than the maximum. Example: fire only when the invoice amount is between a low and high value you set.
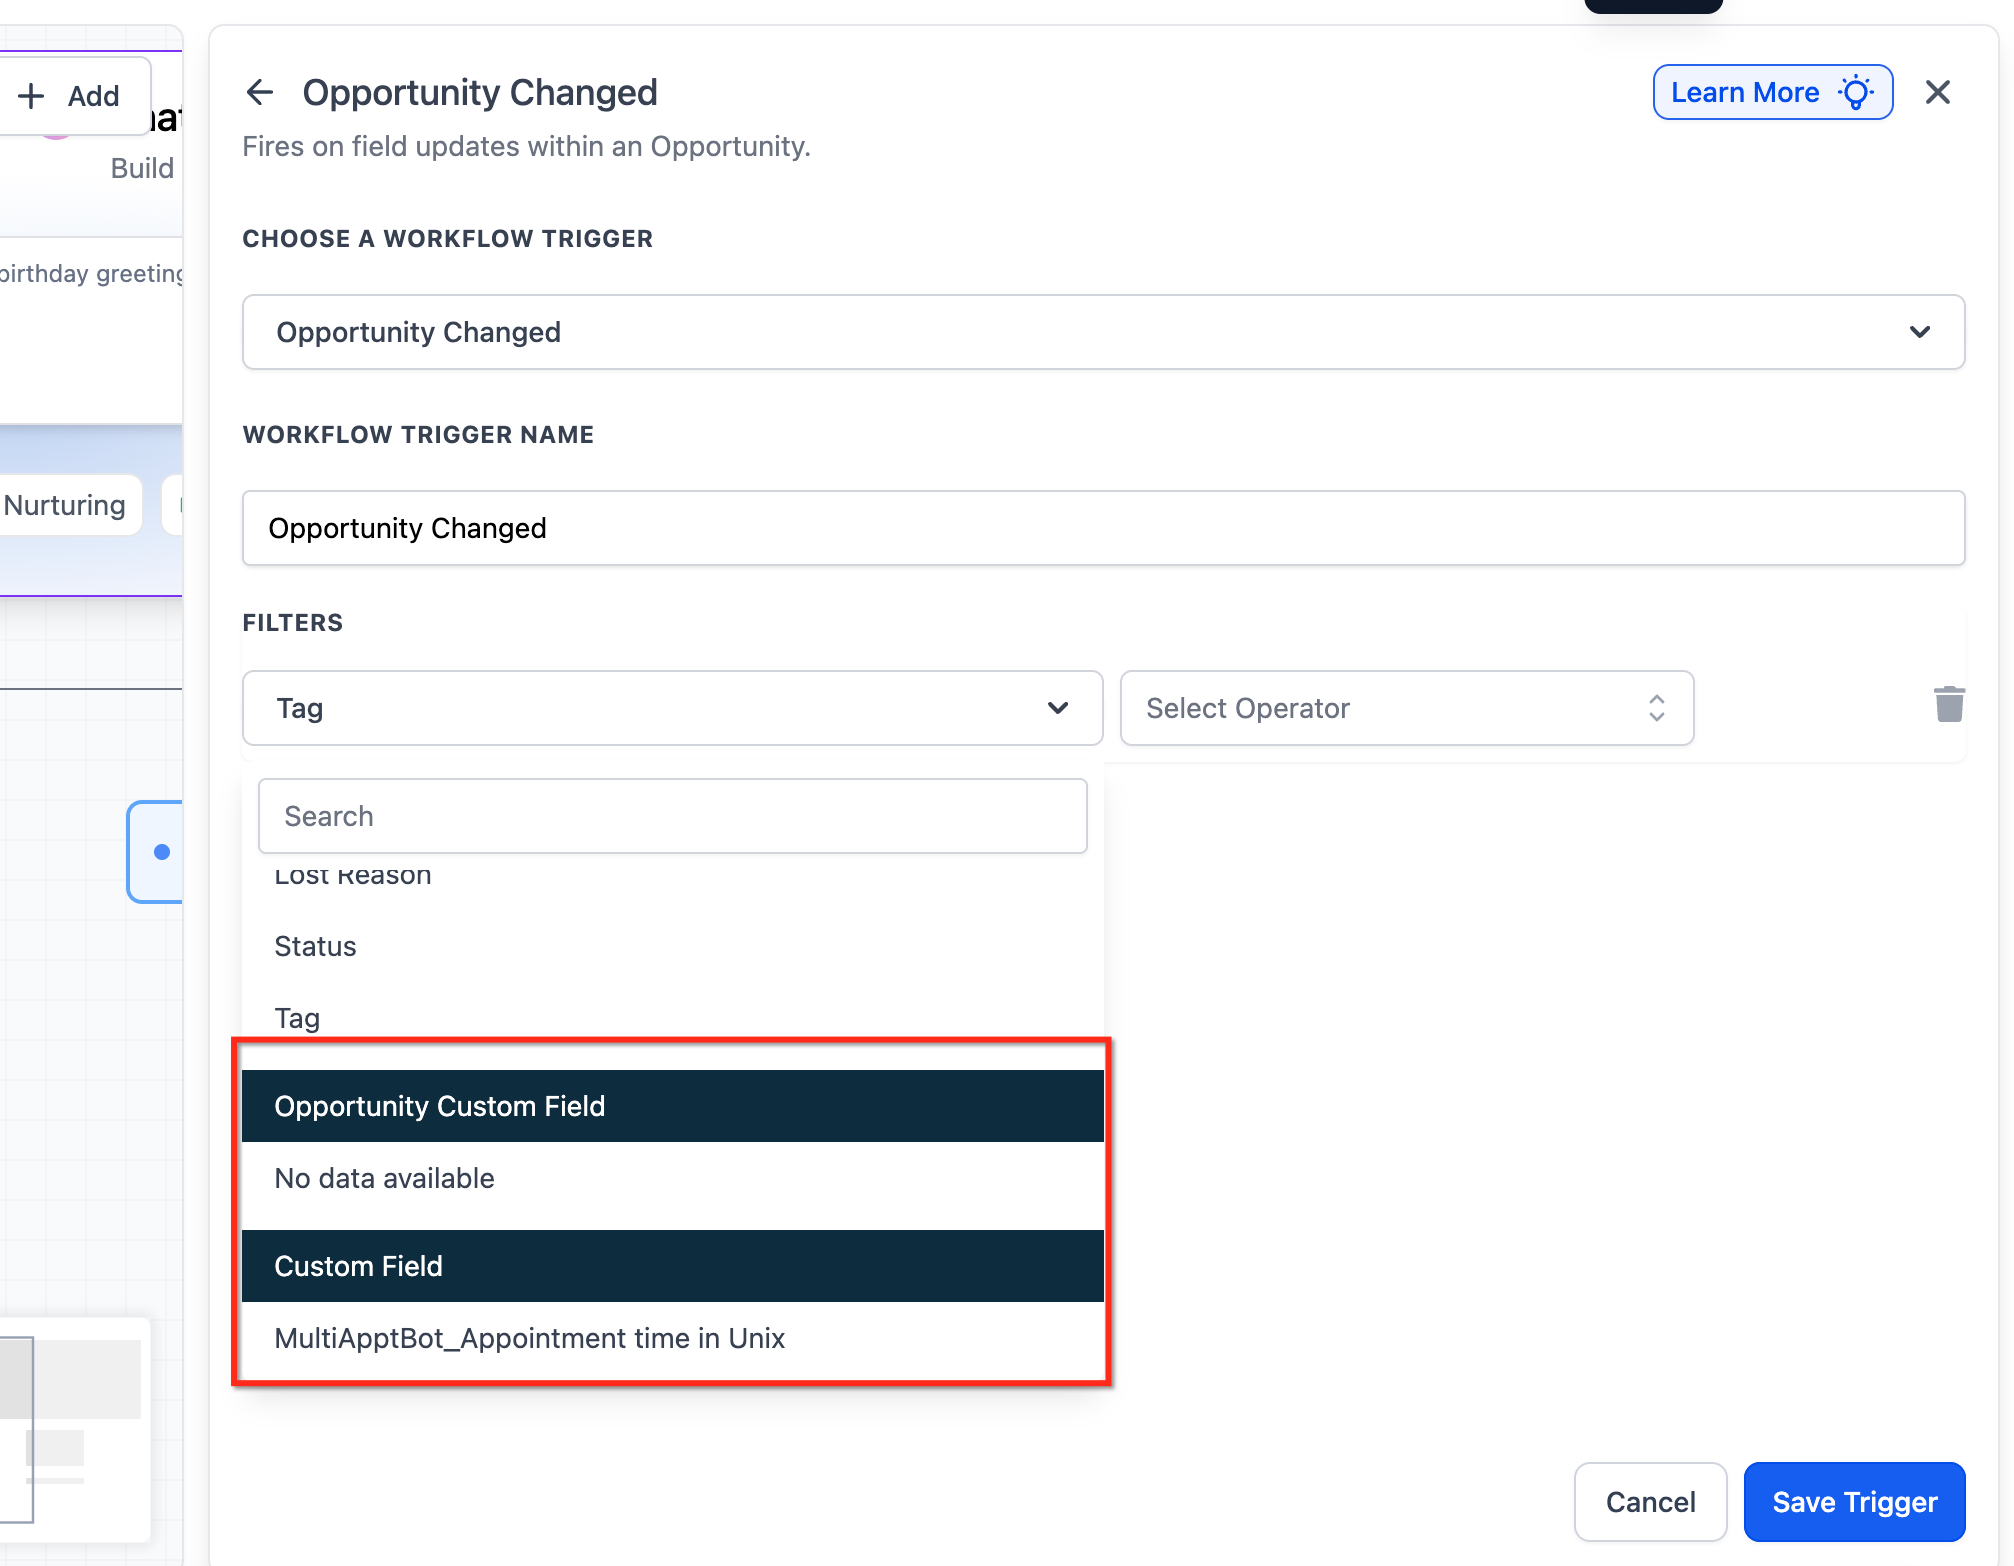
Tag (formerly "Has Tag") - fire only when the contact carries a specific tag.
Custom Fields - fire based on unique data stored in your custom fields, such as a payment-terms field or a client-type field.
You can stack multiple filters (status, amount, tag, custom fields) on one trigger to tighten the conditions.
Use the Invoice trigger to automate the billing lifecycle around treatments and packages. Example for a med spa: when an aftercare invoice reaches Paid, send the client a thank-you email with prep instructions for their next visit and clear them from the "unpaid balance" reminder sequence. Pair it with a second workflow on Sent status that schedules a polite reminder a few days later.
Build a separate workflow per status when you want different actions for Sent, Viewed, Paid, Partially Paid, and Void.
To avoid sending reminders after payment, add a second workflow on the Paid status that removes the contact from your reminder workflow, or enable a stop condition so a paid contact exits follow-up automatically.
The Payment Received trigger is the catch-all for incoming money. By default, without any filters, it fires on every payment event across AX Pay, including one-time purchases, subscription charges, invoice payments, and both successful and failed attempts. Add filters to narrow it to specific scenarios.
It fires both when a client pays directly (for example, submitting an order form) and when a subscription is charged in the background.
Filters and their sub-filters let you target a precise origin and outcome:
Filter | Filter-level option | Sub-filter | Sub-filter options | Operators |
|---|---|---|---|---|
Payment Source | Invoice | Sub-Source | Text-to-Pay link, One-time invoice, Recurring template | is / is not |
Payment Source | Funnel / Website | Sub-Source | One-step order form, Two-step order form, Upsell | is / is not |
Payment Source | Calendar | Calendar | Calendar names | is / is not |
Transaction Type | Customer present / first transaction | - | - | is / is not |
Transaction Type | Customer not present / subscription transaction | - | - | is / is not |
Global Product | Product names | Price | Price names for the selected product | is / is not |
Payment Status | Success | - | - | is / is not |
Payment Status | Failed | - | - | is / is not |
Choosing a filter unlocks its related sub-filters the next time you add a filter to the same trigger. Example: to fire only on a two-step order form, set Payment Source is Funnel/Website, then add a sub-filter Sub-Source is two-step order form.
Transaction type explained:
Customer present / first transaction - the client is on-session entering payment details. Covers all one-time purchases and the first charge of a subscription (including a trial charge).
Customer not present / subscription transaction - background charges that run after a subscription already exists, such as a renewal after a trial ends.
Once the trigger is configured you can branch the workflow with If/Else conditions on payment details:
Condition | Operator | Options |
|---|---|---|
Product | is / is not | Product names |
Funnel / Website | is / is not | Funnel or website names |
Calendar | is / is not | Calendar names |
Source | is / is not | Invoice, Funnel, Website, Calendar |
Payment Status | is / is not | Success / Failed |
Amount | Equal to, Not equal to, Greater than, Greater than or equal to, Less than, Less than or equal to, Is empty, Is not empty | Amount paid |
Group | Field | Merge value |
|---|---|---|
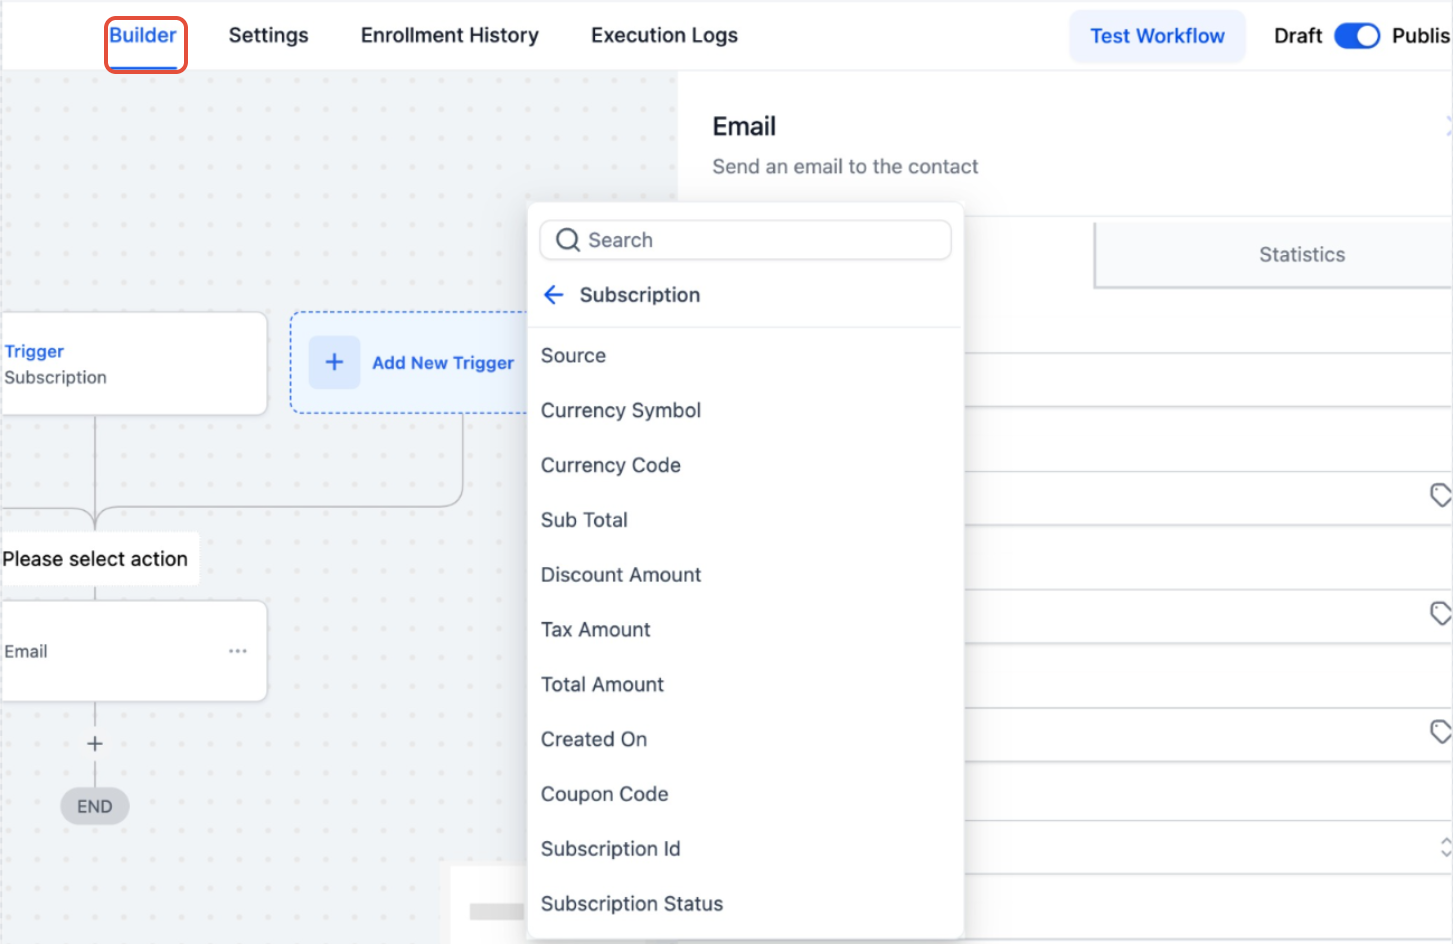
Payment | Source | {{payment.source}} |
Payment | Currency Symbol | {{payment.currency_symbol}} |
Payment | Currency Code | {{payment.currency_code}} |
Payment | Sub-Total | {{payment.sub_total_amount}} |
Payment | Discount Amount | {{payment.discount_amount}} |
Payment | Coupon Code | {{payment.coupon_code}} |
Payment | Tax Amount | {{payment.tax_amount}} |
Payment | Created On | {{payment.created_on}} |
Payment | Total Amount | {{payment.total_amount}} |
Payment | Transaction ID | {{payment.transaction_id}} |
Payment | Status | {{payment.payment_status}} |
Payment | Gateway | {{payment.gateway}} |
Payment | Method | {{payment.method}} |
Payment | Card Last 4 Digits | {{payment.card.last4}} |
Payment | Card Brand | {{payment.card.brand}} |
Customer | ID | {{payment.customer.id}} |
Customer | First Name | {{payment.customer.first_name}} |
Customer | Last Name | {{payment.customer.last_name}} |
Customer | Name | {{payment.customer.name}} |
Customer | {{payment.customer.email}} | |
Customer | Phone | {{payment.customer.phone}} |
Customer | Full Address | {{payment.customer.address}} |
Customer | City | {{payment.customer.city}} |
Customer | State | {{payment.customer.state}} |
Customer | Country | {{payment.customer.country}} |
Customer | Postal Code | {{payment.customer.postal_code}} |
Invoice | Name | {{payment.invoice.name}} |
Invoice | Number | {{payment.invoice.number}} |
Invoice | Issue Date | {{payment.invoice.issue_date}} |
Invoice | Due Date | {{payment.invoice.due_date}} |
Invoice | URL | {{payment.invoice.url}} |
Invoice | Recorded By | {{payment.invoice.recorded_by}} |
This is the trigger for any "money just came in" automation. Example for a med spa: when payment is received for a membership product, send a branded welcome email, add a "Member" tag, and notify the front desk. For failed background charges (Transaction Type is customer-not-present, Payment Status is Failed), start a dunning sequence that nudges the client to update their card before their membership lapses.
Because it captures both successes and failures by default, add a Payment Status filter when you only care about one outcome.
A product filter only fires when that product is sold through funnels, websites, or invoices.
Supports Text-to-Pay links as a payment source, so SMS-collected payments can drive workflows too.
The Order Form Submission trigger activates each time an order form on one of your funnels or websites is submitted. Unlike the Order Submitted trigger, it can fire multiple times in one checkout session: once for the primary purchase and again for an upsell or bump, capturing product information at each step.
In funnel/website - choose the specific funnel or website whose order form should fire the trigger.
Submission type - target the kind of purchase:
Primary - applies when a primary product is purchased at checkout.
Bump - applies only to bump-product purchases; will not fire if no bump was purchased.
Upsell - applies only to upsell purchases; will not fire on a primary or bump purchase.
To configure: add the trigger, click Add filters, choose In funnel/website and select your funnel, then add Submission type and pick the submission type from the dropdown. Click Save Trigger.
Use it when you want to react to e-commerce-style purchases on your funnels, including upsell flows. Example for a med spa: when a client buys a skincare product through your online store funnel, send order confirmation and shipping details; if they accept an upsell on the same checkout, fire a second confirmation for the add-on item.
Enable the Allow Multiple setting in Workflow Settings if you want the same contact to re-enter the workflow for an upsell after buying a primary product.
Avoid Wait steps in this workflow if you sell upsells or bumps for the same products. A contact still sitting in a Wait step cannot re-enter for the upsell, so the upsell event will be missed.
The Order Submitted trigger fires once per completed order, using a single checkout object that sends order information just once, no matter how many products were bought in that session. It is fully supported and fires across all three order sources: the native eCommerce Store, the Shopify integration, and the WooCommerce integration.
This differs from Order Form Submission in three ways: it fires only once per order (not per product or upsell), it can filter directly on global product and price, and it exposes order-level custom values.
Order Source - target where the order originated: native (the eCommerce Store), Shopify, WooCommerce, or Calendar (for service bookings). Select a single source to scope the trigger to one origin.
Global product / price - filter the trigger directly on a specific product and its price option.
Submission Type - target the purchase type within an order:
Primary - applies when a primary product is purchased at checkout.
Bump - applies to bump-product purchases on the order form.
Upsell - applies only to upsell purchases.
Order-level custom values can be inserted into the workflow, including customer-specific information, order details, coupon data, and payment gateway information. These values appear in the merge-field dropdown only when the Order Submitted trigger is part of the workflow. You can also use If/Else conditions on order or product details (cart value, products purchased, or the originating funnel) to branch the workflow.
Use it when you want one clean event per order regardless of how many items or upsells were in the cart. Example for a med spa: when a client completes an order in your native store or via your Shopify shop, create a fulfillment task, tag the client by product collection, and send a single branded order-confirmation email. Scope it with Order Source = Calendar instead to react specifically to paid service bookings.
Because it sends once per order, it is the right choice for order-confirmation messaging where Order Form Submission would otherwise send duplicates.
For per-product or per-upsell reactions, use Order Form Submission instead.
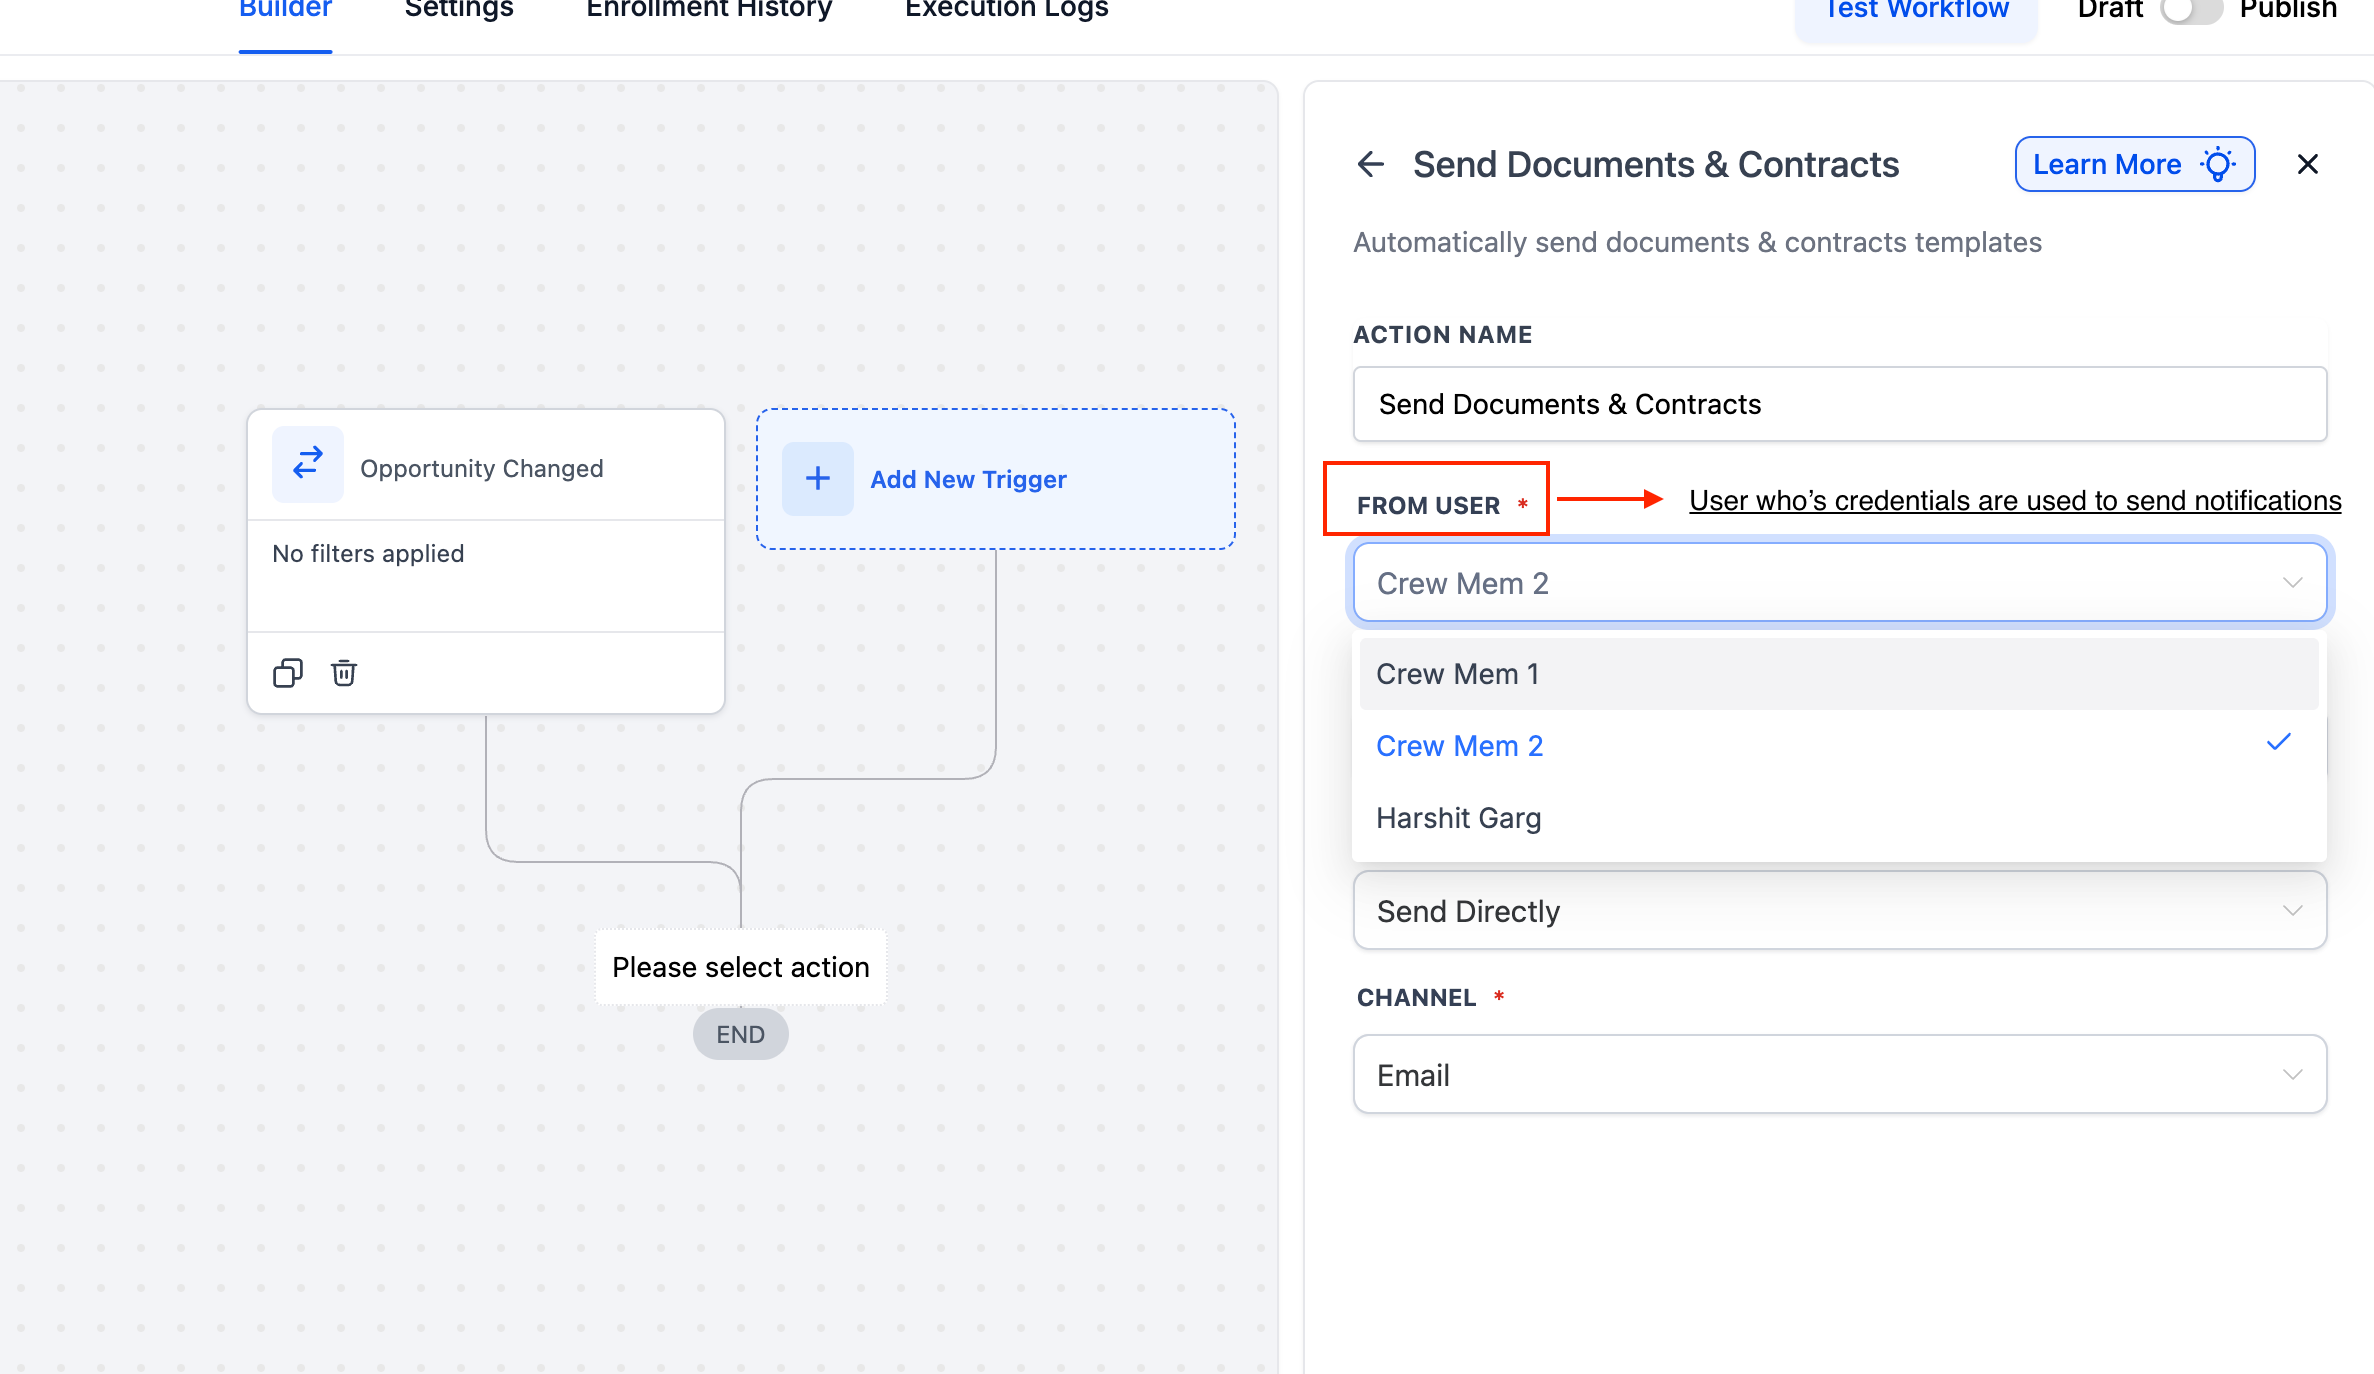
The Documents & Contracts trigger activates when a document or contract changes status. It connects the document lifecycle to your automations so you can act the moment a recipient interacts. Status values:
Sent - the document was sent to the recipient.
Viewed - the recipient opened the document.
Signed / Accepted - the recipient signed or accepted it.
Completed - the document reached completed status.
Each status change is a separate event. If you configure triggers for both Viewed and Signed/Accepted, the same document can fire the workflow more than once as it moves through those stages.
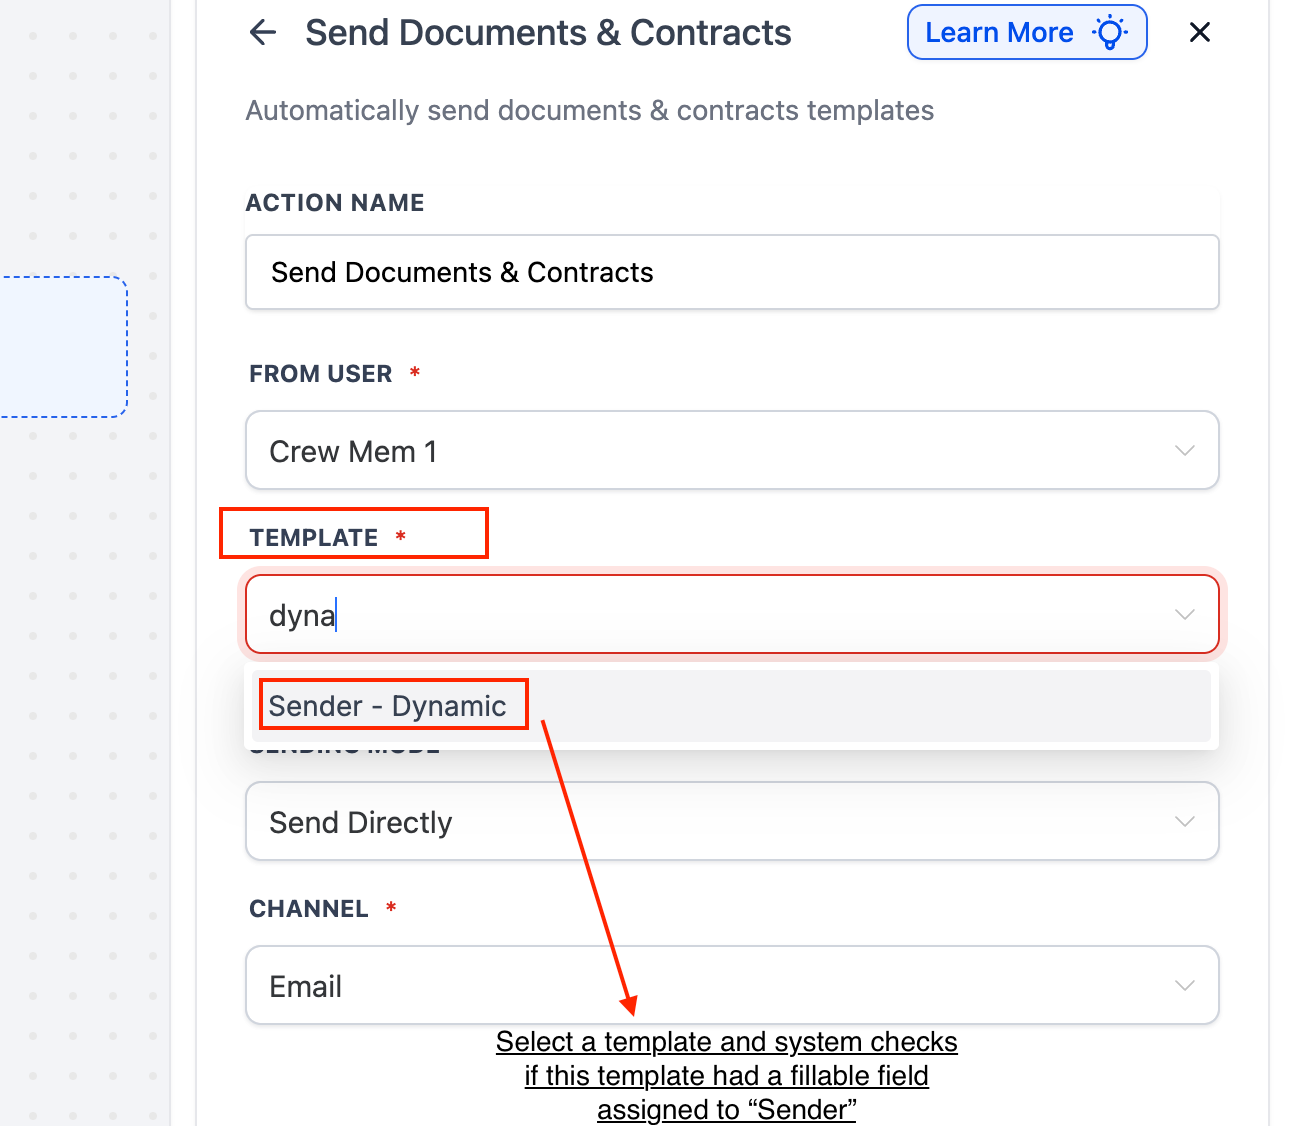
Add the trigger from the Payments section, name it (for example, "Consent Form Signed"), then click Add Filters. Available filters:
Recipient Type - Contact (clients or leads) or Business User (your staff). Scopes the trigger to actions taken by the intended recipient type.
Status - Sent, Viewed, Signed/Accepted, or Completed.
Template - a specific document or contract template, so automations run only for certain agreements (for example, a consent form versus a membership agreement).
Value - the numeric value assigned to a document, with operators like Greater than or Equals to, useful for high-value agreement handling.

Use it to keep document and consent workflows moving automatically. Example for a med spa: when a new client's treatment consent form reaches Signed / Accepted, tag them as "Consent on file," notify the treating provider, and advance their onboarding pipeline. Use the Recipient Type filter to run a different internal-approval flow when a staff member signs an internal document.
Workflows evaluate document status only at the moment the contact enters the workflow. If a contact enters on "Document Sent" and you later add a branch checking "Status is Completed," that branch will not re-evaluate when the document is completed afterward; status updates outside the workflow are not tracked retroactively.
For real-time reactions to later status changes, build a second workflow triggered directly by the new event (for example, Signed/Accepted or Completed) and route contacts there.
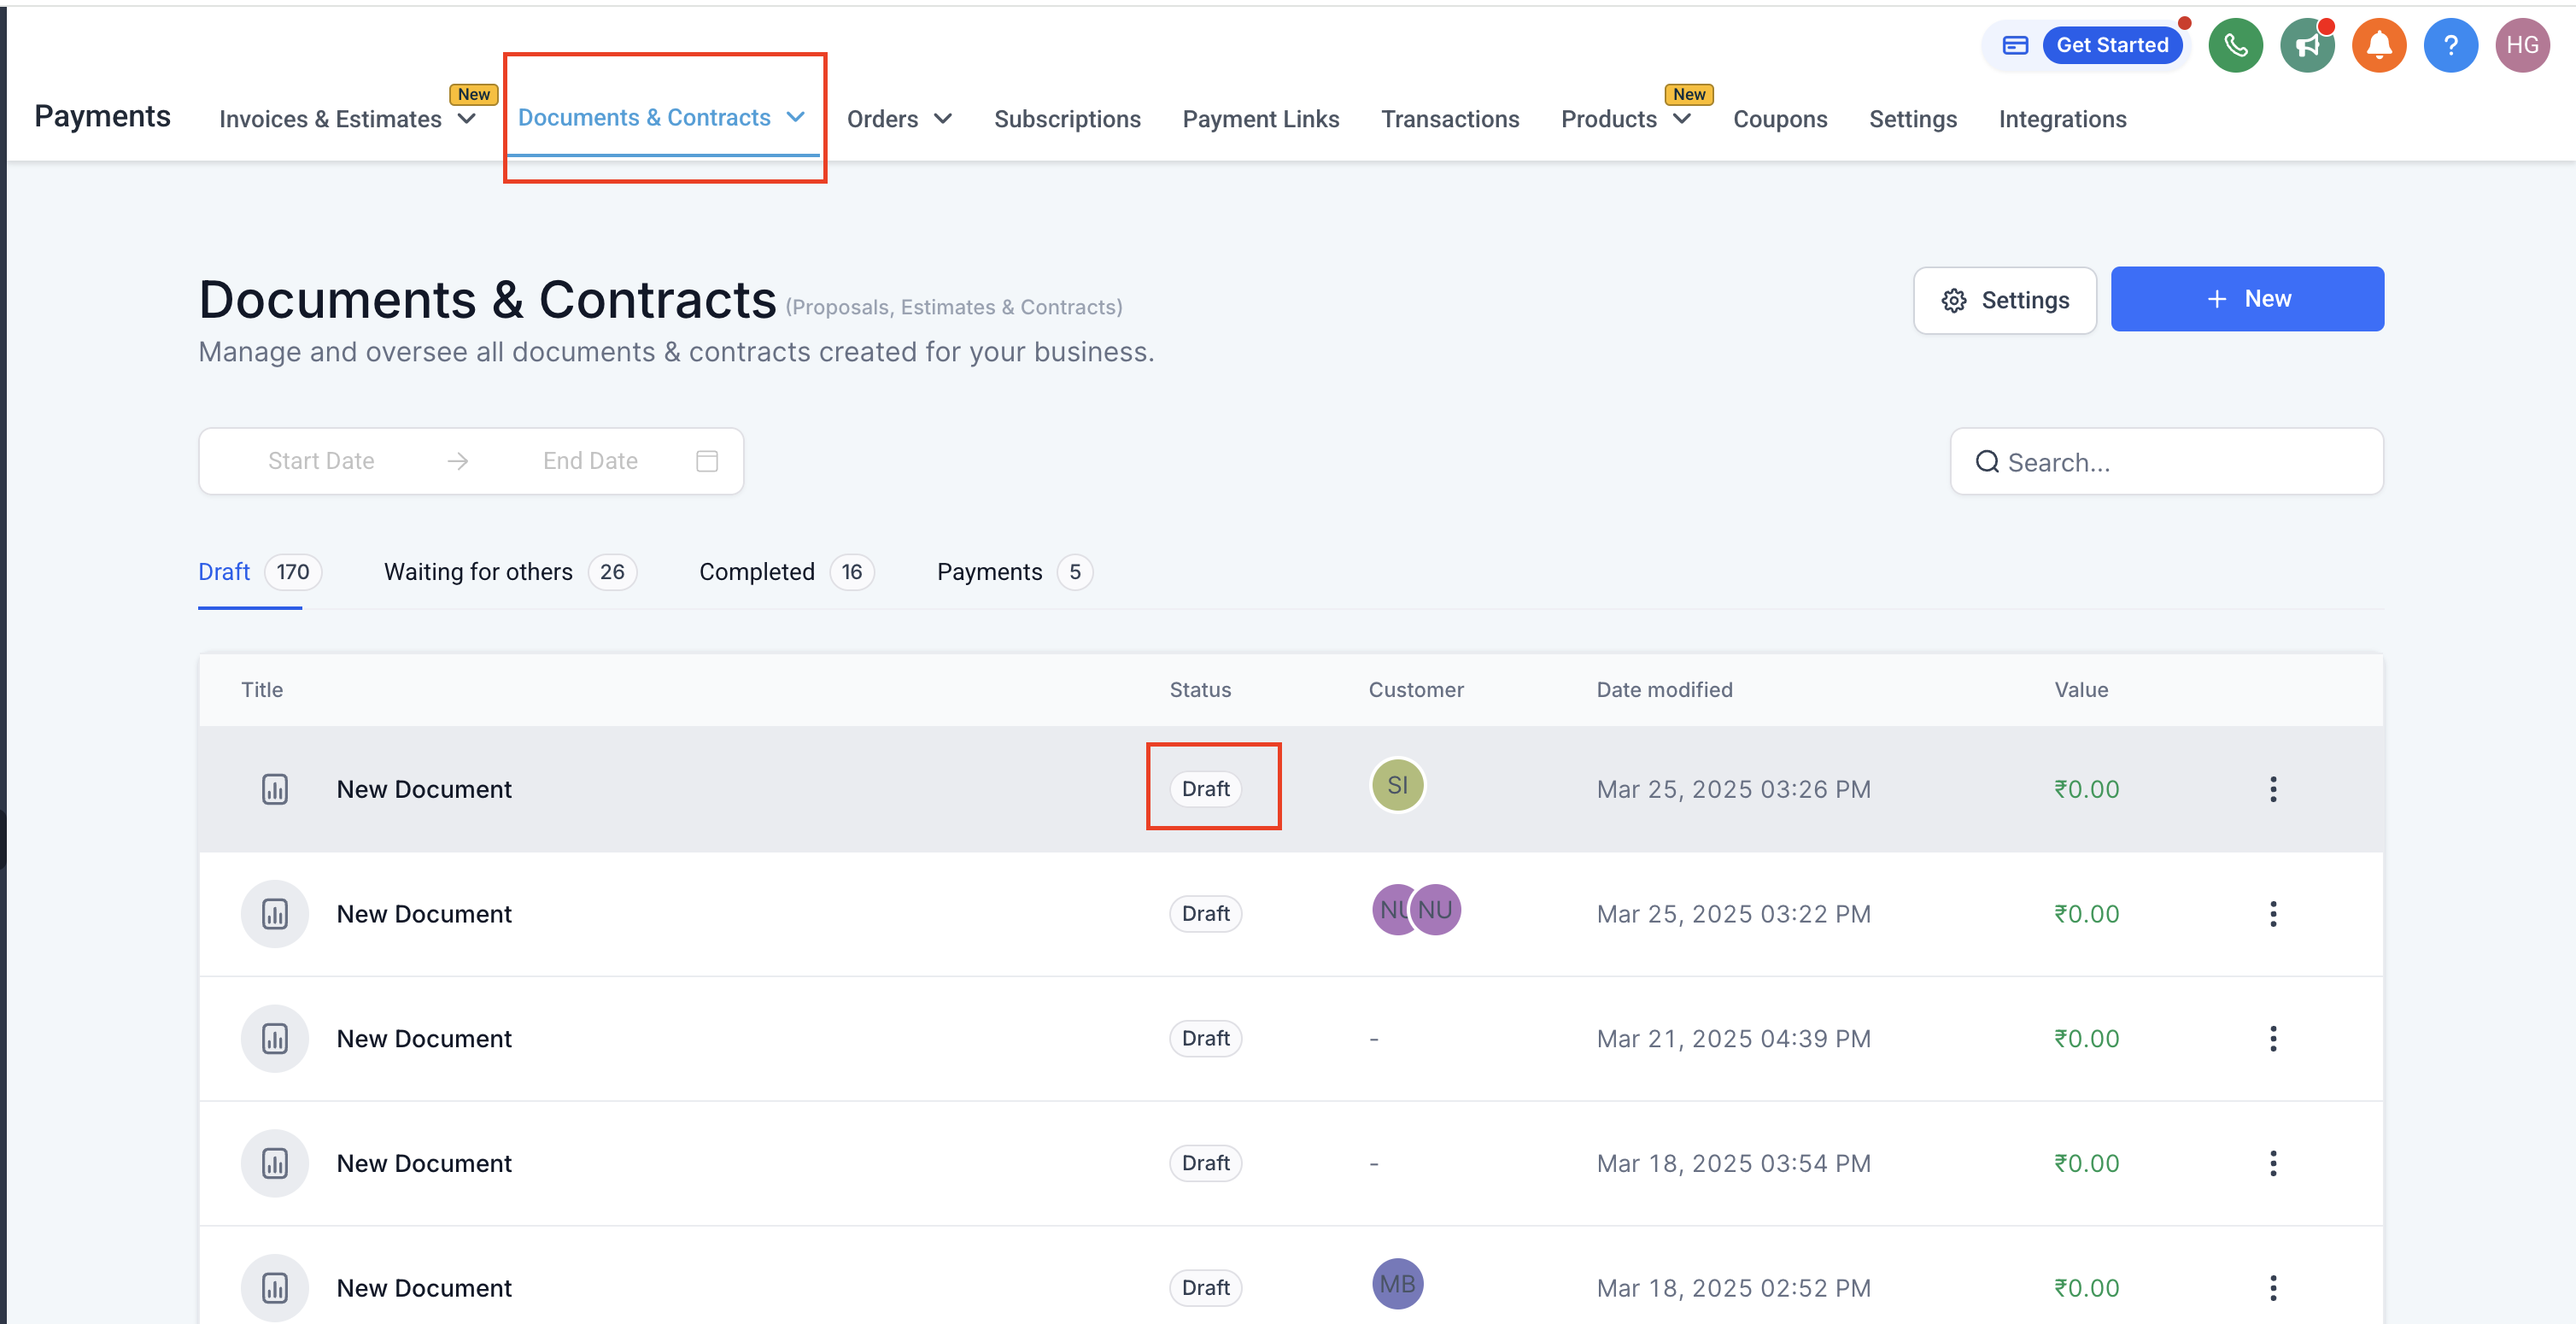
You can find document statuses (Draft, Sent, Completed) any time under Payments > Documents & Contracts.
The Estimates trigger fires on events in an estimate's lifecycle. After an estimate is created and delivered (by email or text) from an estimate template, it moves through status events you can automate against, including Sent, Viewed, Accepted, Declined, and Paid.
Add the trigger from the Payments section and name it. Scope it to the estimate event and template that matters to your automation. The estimate's status events let you tailor follow-up to exactly where the client is in the proposal process.
Use it to keep proposals moving without manual chasing. Example for a med spa: when a treatment-package estimate is Sent, wait and then send a gentle reminder if it has not been viewed; when it is Accepted, notify your coordinator and move the client into the booking pipeline; when it is Declined, start a win-back sequence with an alternative package.
You can see whether an estimate was Sent, Viewed, Accepted, Declined, or Paid by opening the contact or the estimates area.
An estimate can be delivered by Email, Text, or both; choose the channel on the matching Send Estimate action when you pair this trigger with automated delivery.
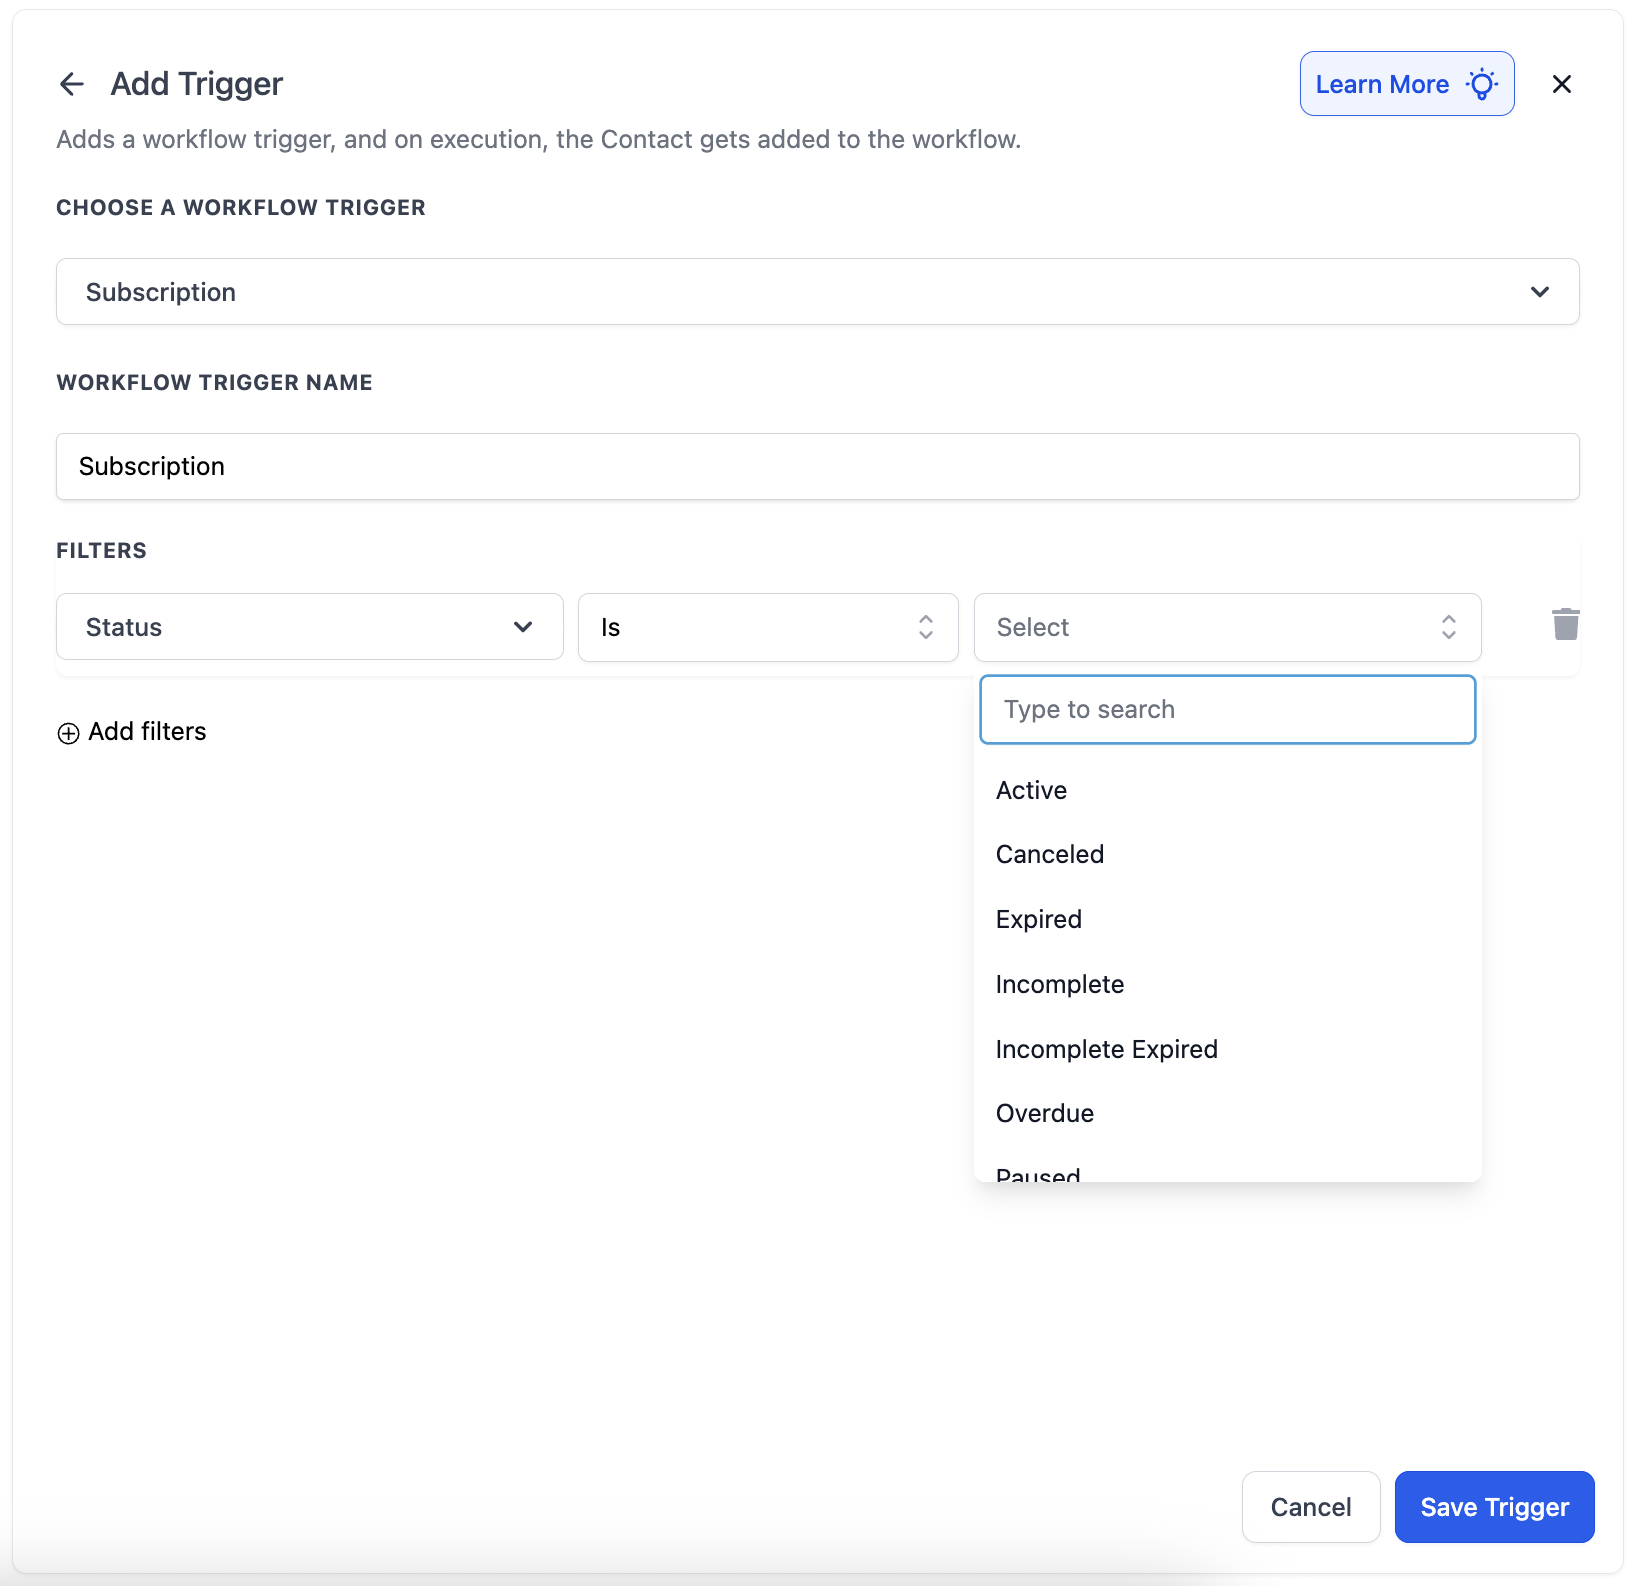
The Subscription trigger activates on subscription lifecycle events, including:
A new subscription being created for a client.
A subscription transitioning from trial to active.
A subscription being cancelled.
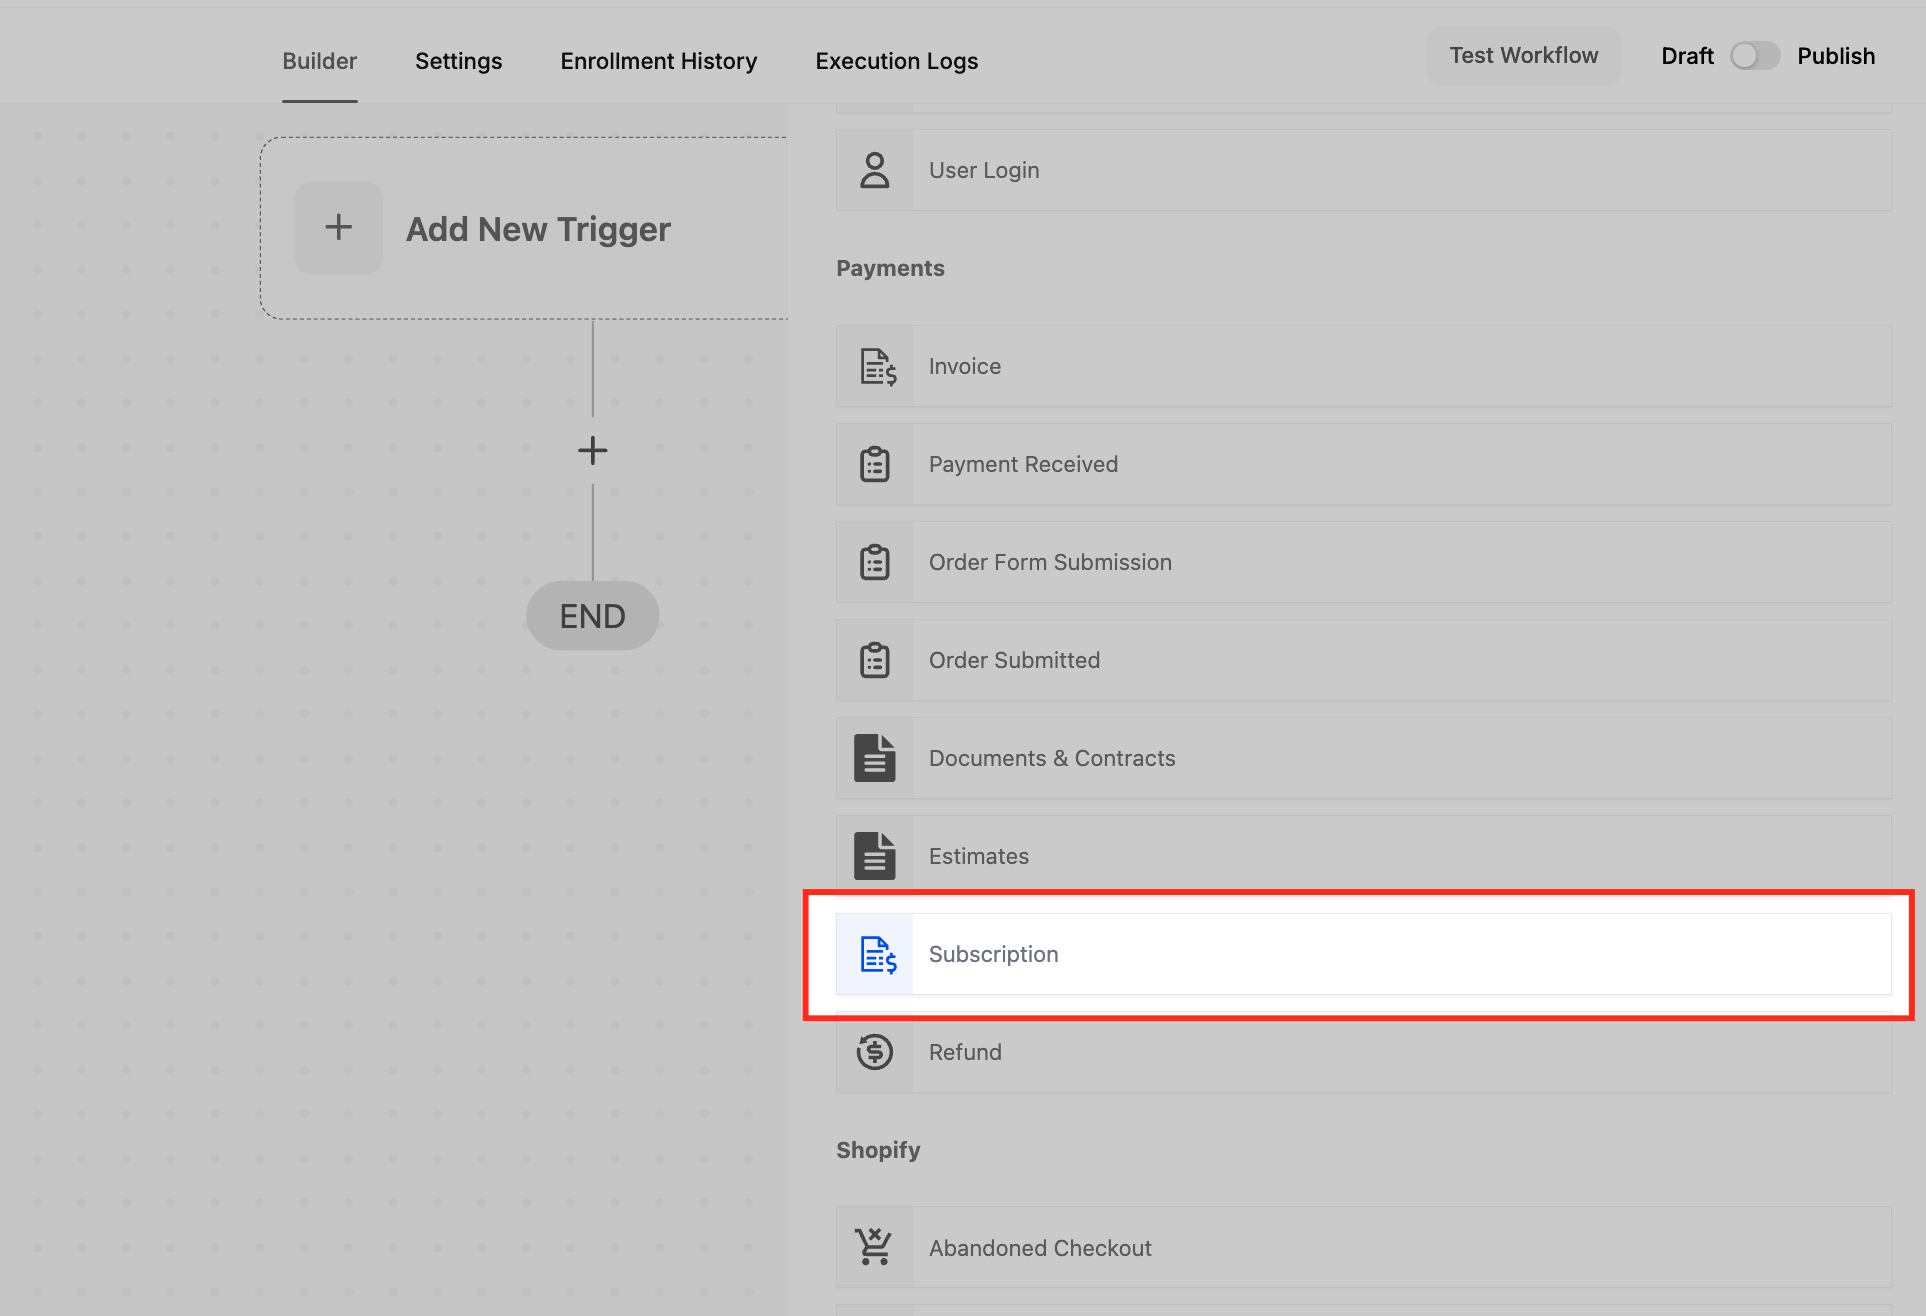
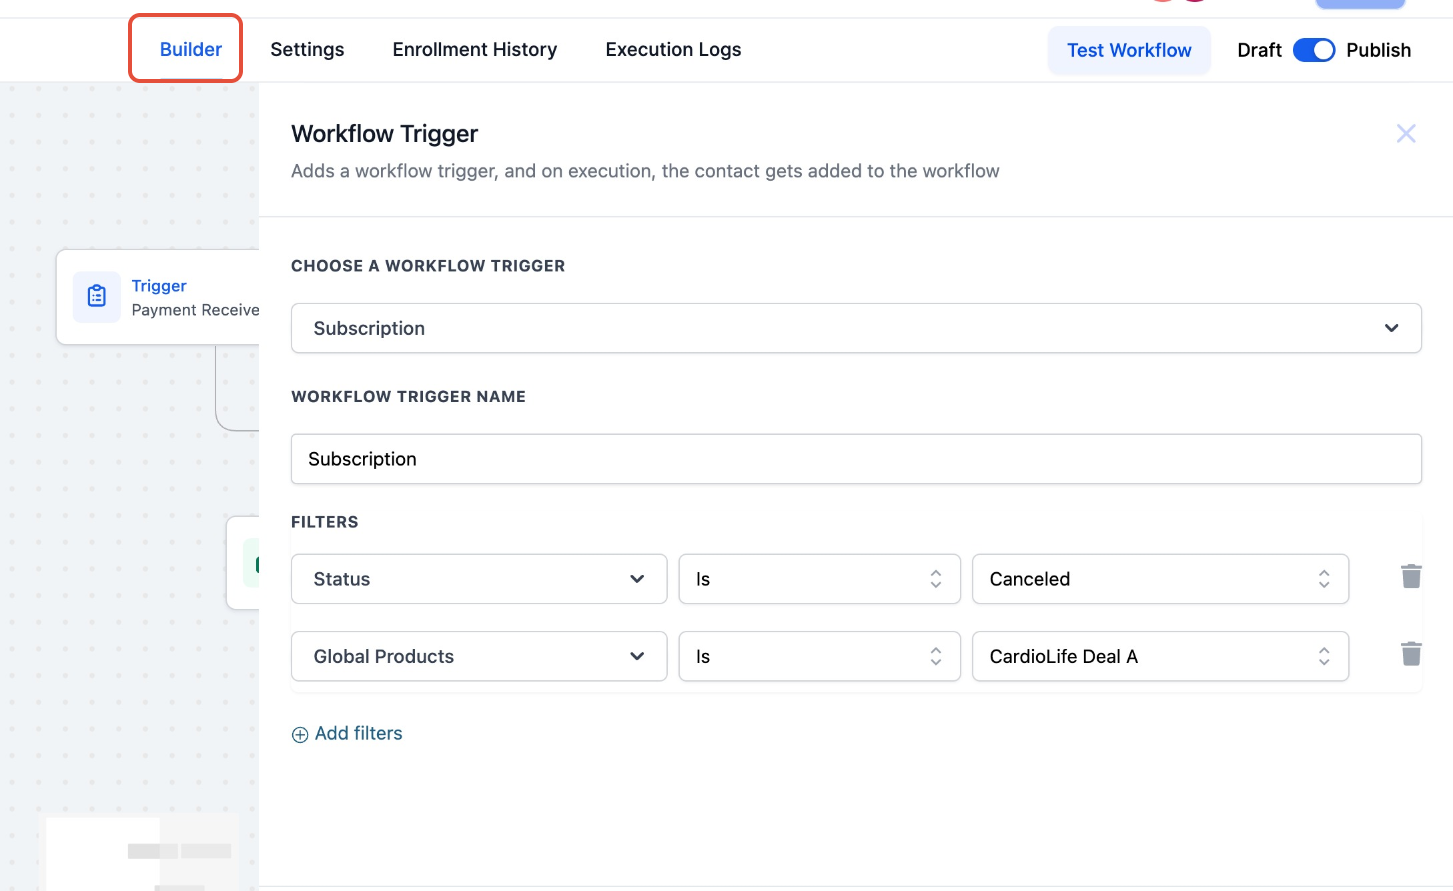
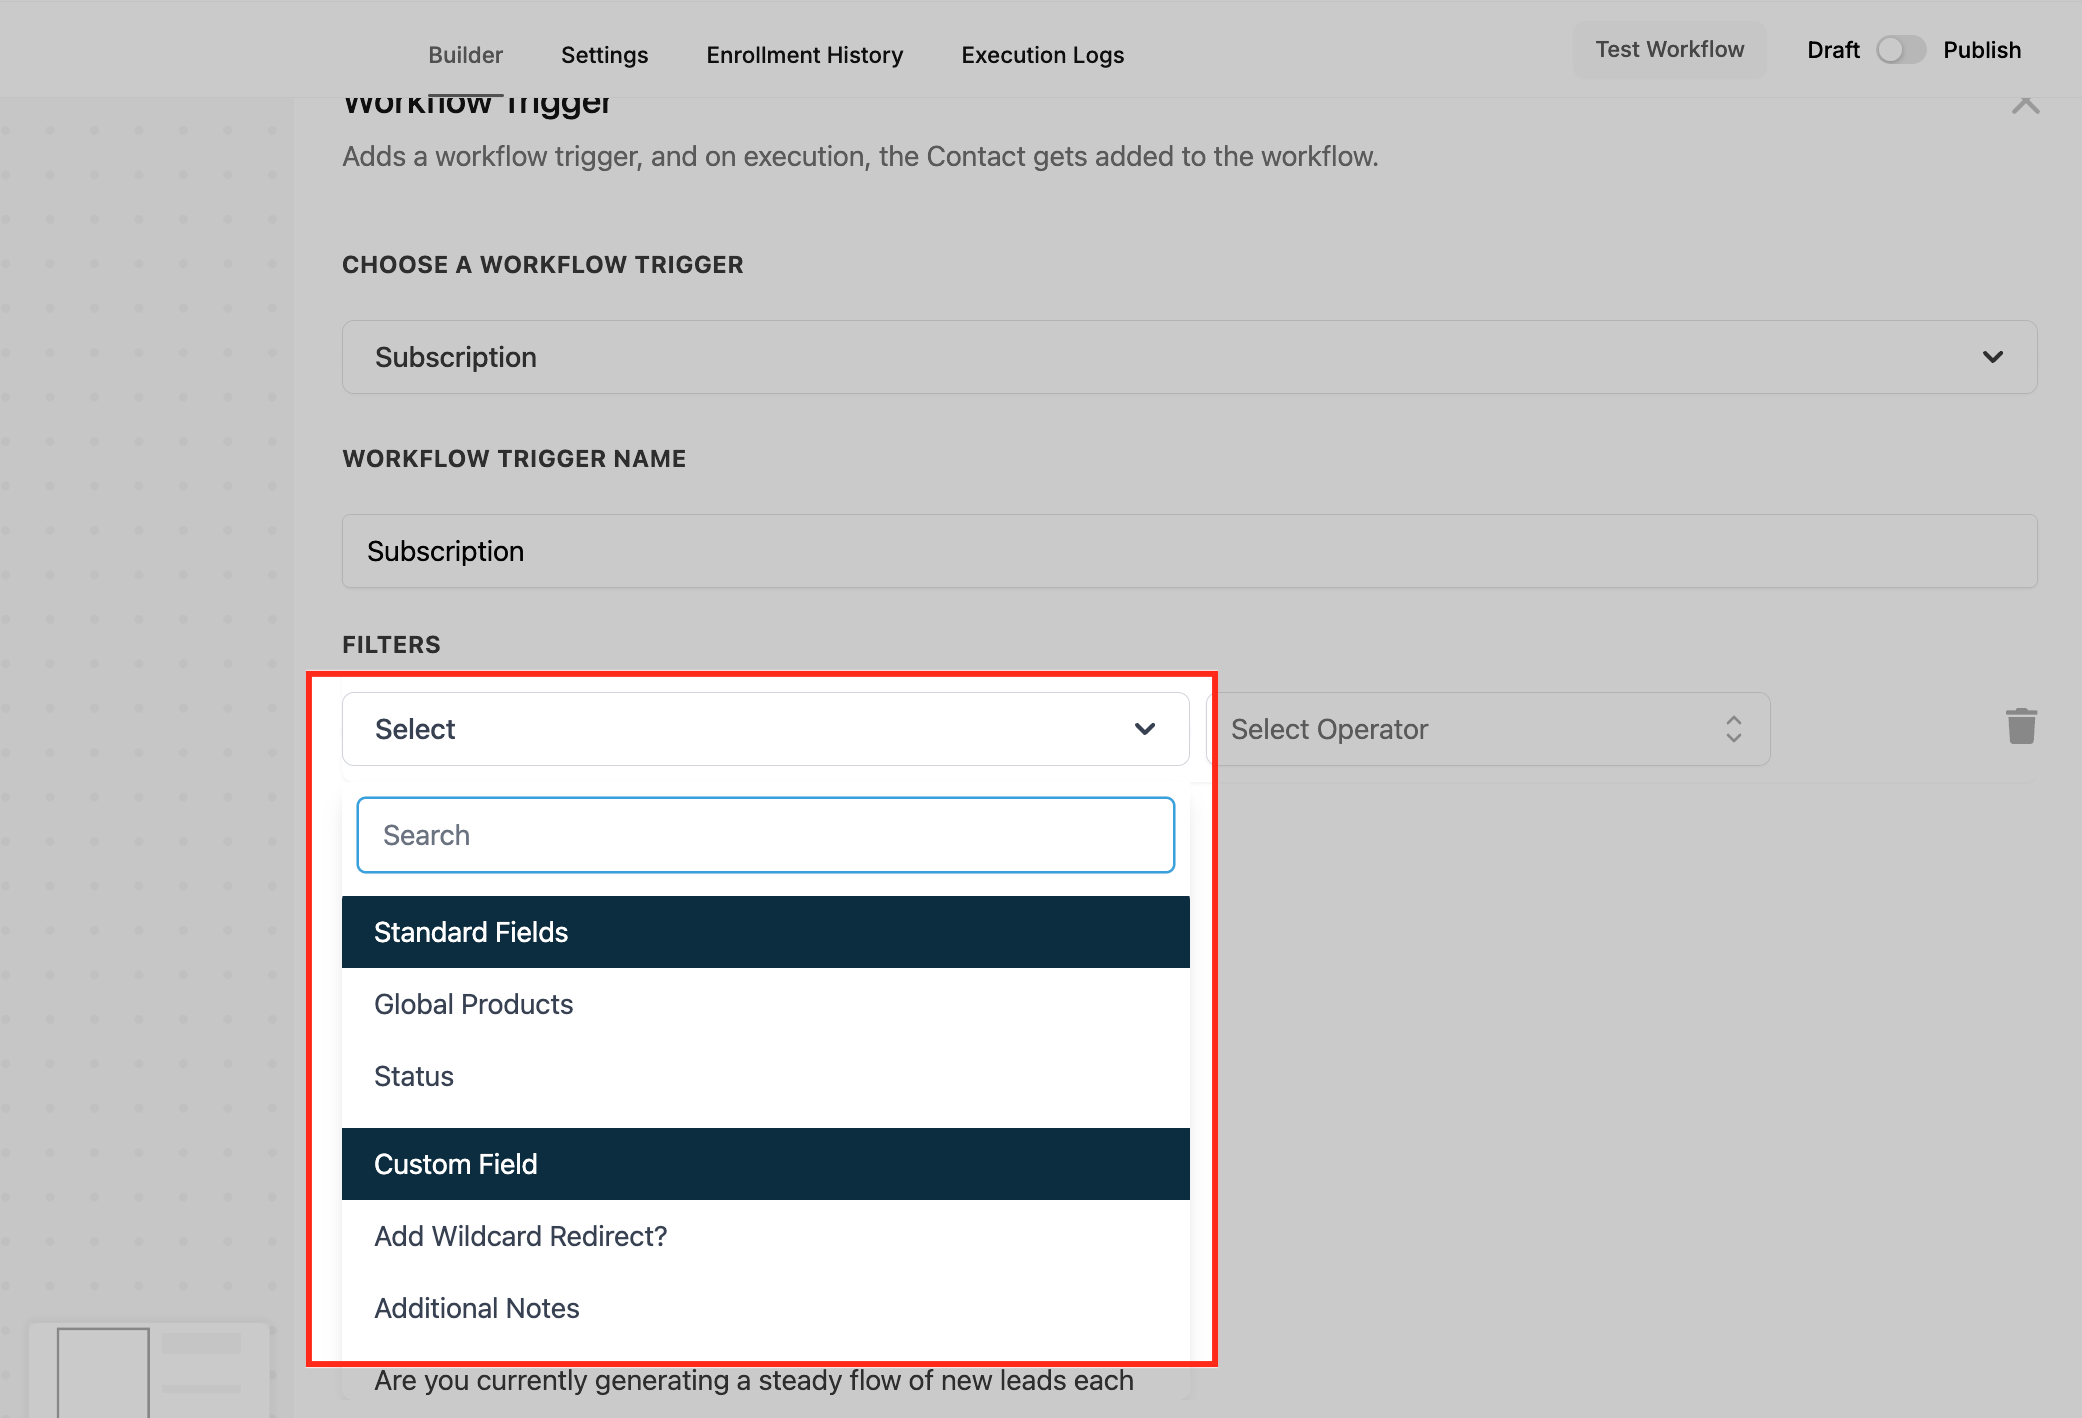
Add the trigger from the Payments section, name it, then click Add filters. Filters fall into two groups:
Standard Fields - built-in options such as Global Products (the product tied to the subscription) and Status.
Custom Fields - your own fields for details like membership tier or client segment.

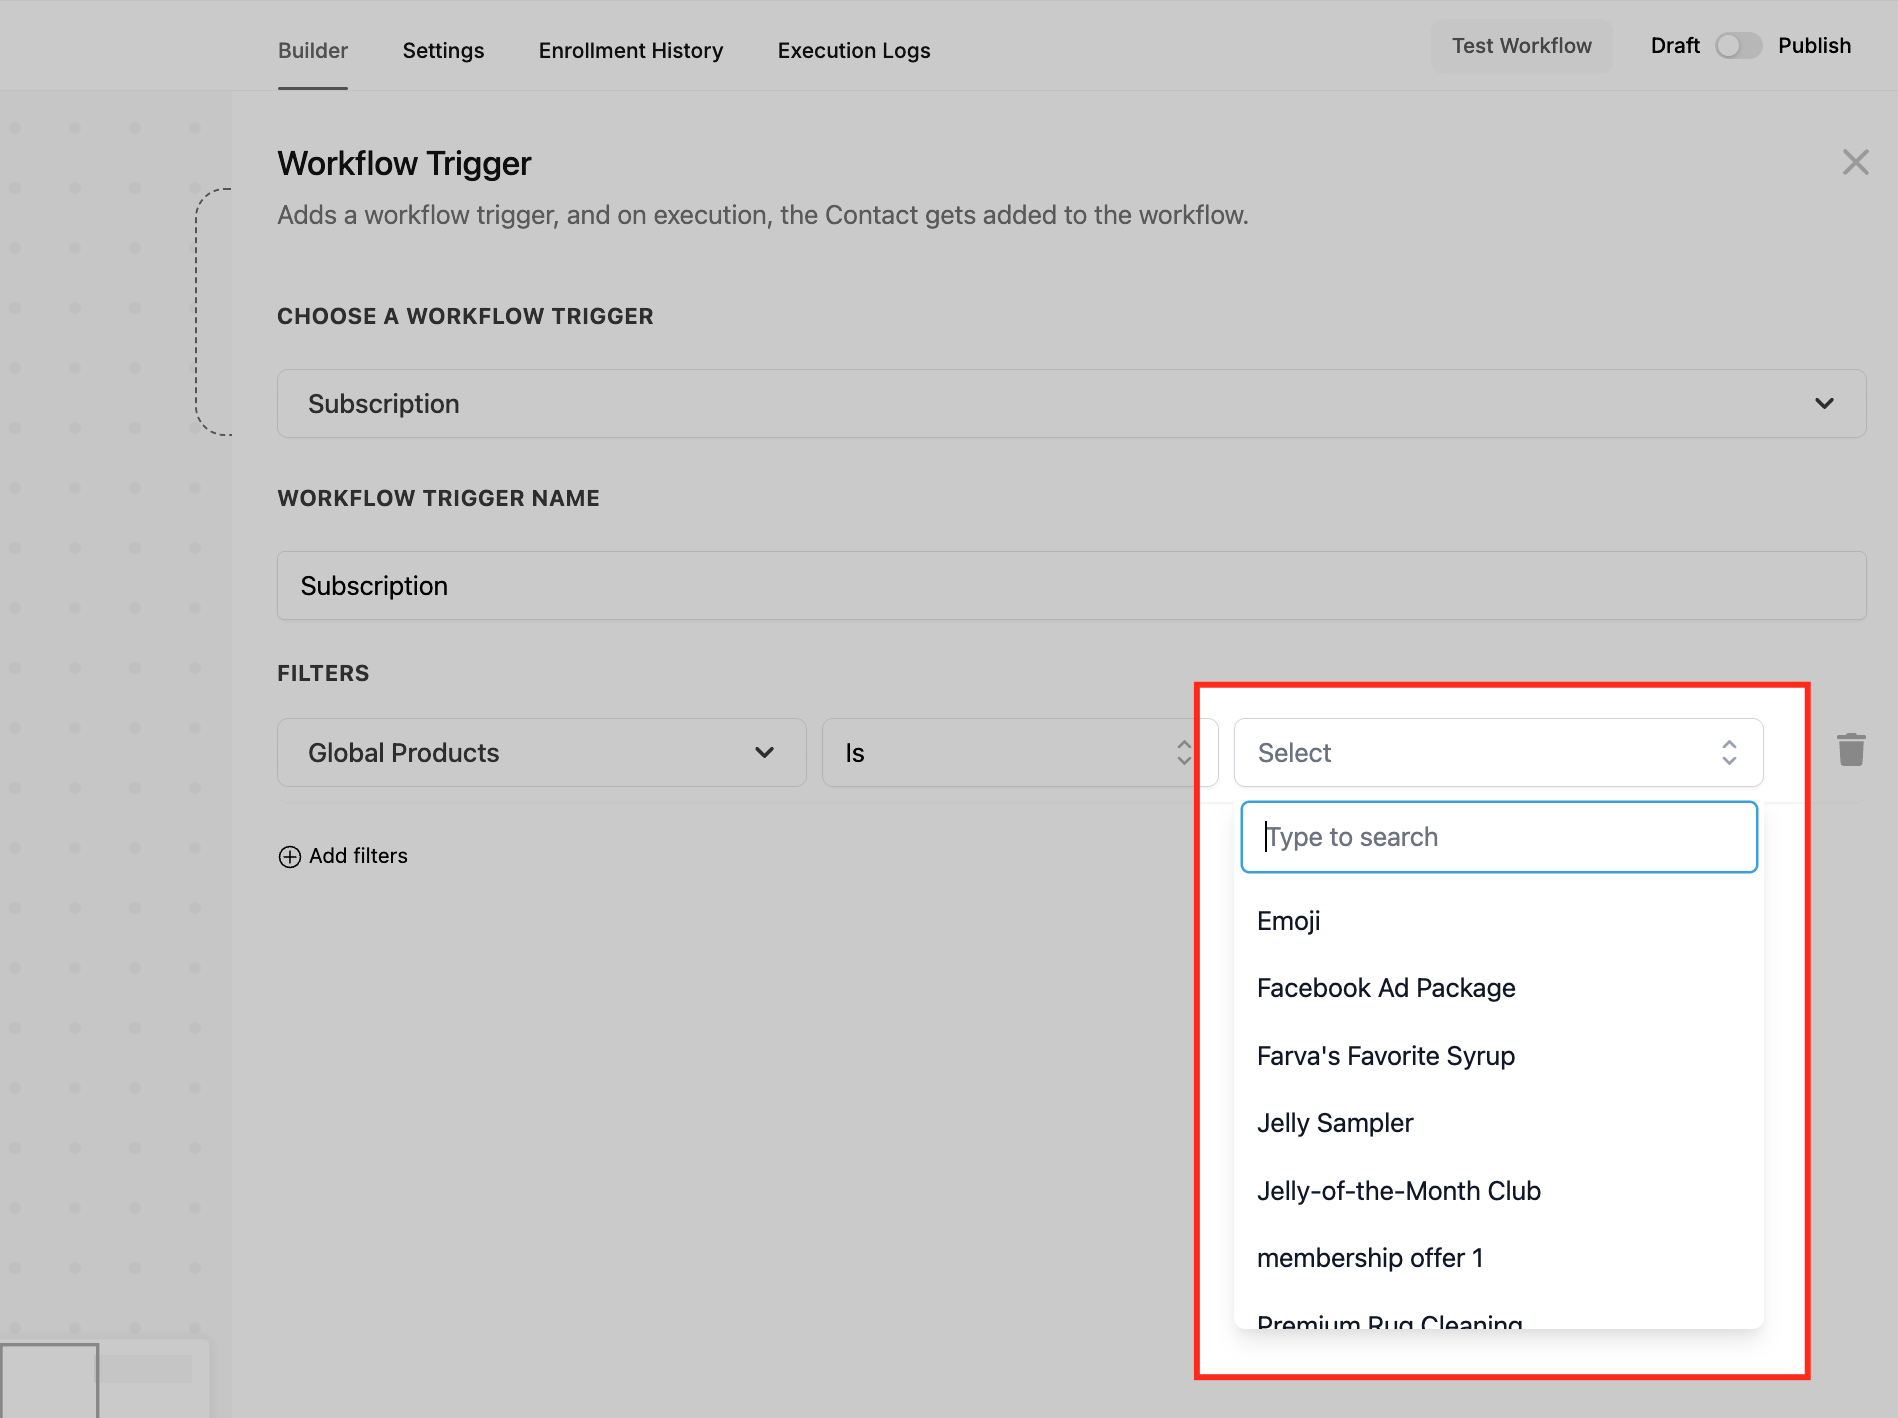
Global Products filter - operators Is, Is not, Is empty, Is not empty, with a searchable dropdown to pick one or more products so the workflow runs only for selected items.
Status filter - operators Is / Is not. Available statuses:
Active - live and billing successfully. Good for fulfillment, onboarding, or access logic.
Canceled - cancelled manually or automatically. Good for re-engagement or internal follow-up. (For Stripe subscriptions, Canceled is also used when a subscription completes its term.)
Expired - ended at the completion of its billing term, not due to cancellation or failure. Good for renewals or feedback. (Not applicable for Stripe subscriptions.)
Incomplete Expired - the first payment failed while creating the subscription, so it never became Active even once. (Previously "Failed.")
Incomplete - the client started but did not finish setting up the subscription (for example, an abandoned checkout). Good for recovery nudges.
Overdue - payment is past due but the subscription is still technically active. Applies to subscriptions that became Active at least once, then had a later payment fail. Good for grace-period messaging.
Scheduled - a future-dated subscription that has not started billing yet. Good for prep emails before activation.
Trial - currently in a trial phase. Good for nurture sequences before the trial ends.
Unpaid - active but with pending or missed payments. Good for flagging staff or prompting the client to update payment details.
Dynamic subscription values are available for messages, including Subscription ID, Total Amount, Discount, Tax Amount, and Subscription Status, alongside the Payments custom values.
Use it to automate membership communication around billing status. Example for a med spa: when a client's membership moves from Trial to Active, send a welcome email and member perks; when Canceled, trigger a feedback request and a win-back offer; when Overdue or Unpaid, alert the front desk and prompt the client to update their card.
Works with the Stripe, Authorize.net, and NMI integrations available under Payments > Integrations.
For PayPal, the trigger only fires when a subscription is created, not on later events.
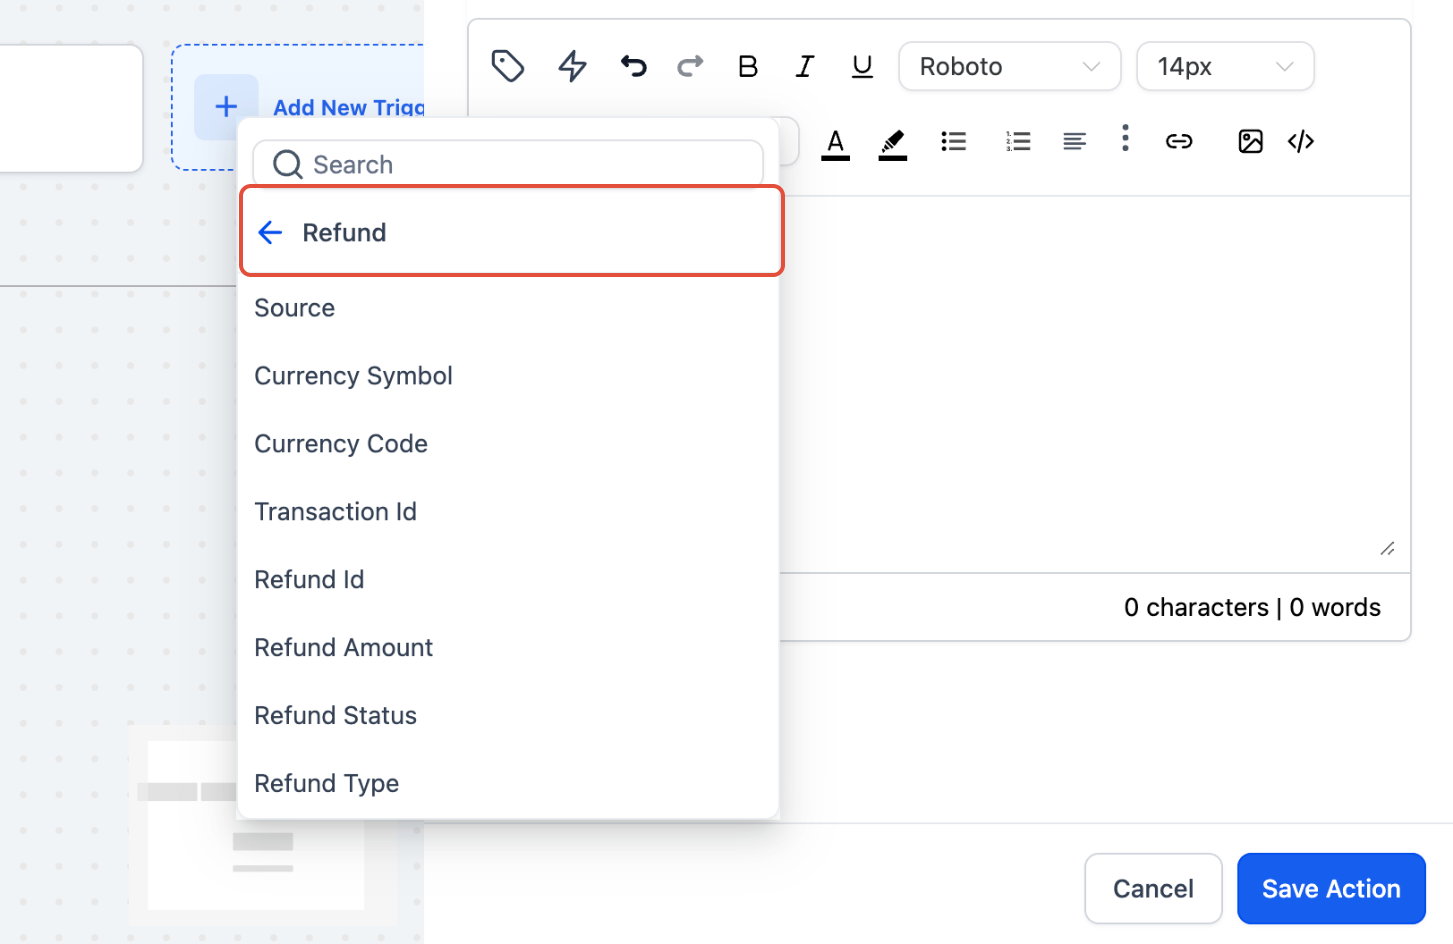
The Refund trigger activates whenever a refund is processed in AX Pay by you or a staff member. It fires on both successful and failed refund attempts, and each refund is treated as a new event, so multiple refunds for the same contact each fire the workflow again.
Add the trigger from the Payments section, name it, then click Add Filters. Filters can be used alone or stacked:
Status - Successful (a completed refund) or Failed (a refund attempt that failed).
Amount - filter by refund value using Greater than, Less than, or Equal to.
Source - where the refund originated, including Calendar, Communities, Payment Link, Invoices, Manual, and more.
Type - Full Refund or Partial Refund.
Refund dynamic values are available in the Payments section of Custom Values, including Refund ID, Transaction ID, Refund Amount, and Refund Status, so you can personalize notifications by scenario.
Use it to handle refunds gracefully and keep your team informed. Example for a med spa: when a refund is Successful, send the client a branded confirmation explaining the refund and timing; when Failed, notify your billing staff with an internal task so they can resolve it quickly. Add a Type = Partial filter to message partial refunds differently from full ones.
Works with the Stripe, Authorize.net, and NMI integrations under Payments > Integrations.
The refund must be issued inside Aesthetix CRM for the trigger to fire. Refunds made directly in an external processor's own dashboard will not fire it.
Use a Failed filter to build a dedicated path for failed refunds, such as an internal alert.
Aesthetix CRM provides four separate coupon triggers in the Payments section, each firing at a different point in a coupon's life. They share a common setup (add the trigger, name it, add filters, save, then build actions) but fire on different events and expose slightly different filters.
Fires on: the moment a coupon code is applied to an order at checkout, regardless of whether the order is completed. It does not fire for scheduled orders; only on an active application at checkout.
Filters:
Filter | Operators | Input |
|---|---|---|
Coupon Code | Is Any Of / Is None Of / Is Empty / Is Not Empty | Multi-select of coupon codes |
Coupon Name | Is Any Of / Is None Of / Is Empty / Is Not Empty | Multi-select of coupon names |
Coupon Type | Is / Is Not / Is Empty / Is Not Empty | Amount / Percentage |
Coupon Value | Equals To / Greater Than / Greater Than or Equal To / Less Than / Less Than or Equal To / Is Not Equal To / Is Empty / Is Not Empty | Numeric |
Order Value (Before Discount) | Same numeric operators as above | Numeric |
Product Collection | Contain Any / Is None Of / Is Empty / Is Not Empty | Multi-select of product collections |
Product Type | Contain Any / Is None Of / Is Empty / Is Not Empty | One Time / Recurring |
Product(s) In Order | Contain Any / Is None Of / Is Empty / Is Not Empty | Multi-select of products |
Source | Is / Is Not / Is Empty / Is Not Empty | Single-select |
When to use it: abandoned-cart recovery and real-time targeting. Example for a med spa: when a client applies a "NEW-CLIENT" coupon at checkout but does not finish, wait and then send a reminder nudging them to complete their first treatment purchase. Tag the contact by the coupon they applied so you can segment later.
Fires on: a coupon being successfully redeemed in a completed transaction (order finalized and payment complete). Unlike Coupon Code Applied, it does not fire on application alone. Each coupon in a multi-coupon purchase is evaluated independently.
Filters: all of the Coupon Code Applied filters, plus:
Contact Email ID - Contains Phrase / Is Not Empty (text input)
Contact Tag - Contains Phrase / Is Not Empty (text input)
Redemption Count (per coupon) - numeric operators, to act when usage reaches a specific number
When to use it: post-purchase engagement and loyalty. Example for a med spa: when a client redeems a "VIP" coupon on a completed package purchase, send a thank-you, tag them as a high-value client, and route them into a loyalty sequence.
Fires on: a coupon reaching its scheduled expiration date and automatically becoming inactive. It fires only on the active-to-expired transition, not when someone tries to redeem an already-expired coupon.
Filters:
Filter | Operators | Input |
|---|---|---|
Coupon Code | Is Any Of / Is None Of / Is Empty / Is Not Empty | Multi-select of active coupon codes |
Coupon Name | Is Any Of / Is None Of / Is Empty / Is Not Empty | Multi-select of active coupon names |
Coupon Type | Is / Is Not / Is Empty / Is Not Empty | Amount / Percentage |
When to use it: promotional wrap-ups and re-engagement. Example for a med spa: when a "SummerGlow" coupon expires, alert your marketing coordinator, then email shoppers who missed the window with a fresh limited-time offer.
Fires on: a coupon hitting its maximum allowed number of redemptions, activating after the last qualifying transaction completes.
Filters:
Filter | Operators | Input |
|---|---|---|
Coupon Code | Is Any Of / Is None Of / Is Empty / Is Not Empty | Multi-select of active coupon codes |
Coupon Name | Is Any Of / Is None Of / Is Empty / Is Not Empty | Multi-select of active coupon names |
Coupon Type | Is / Is Not / Is Empty / Is Not Empty | Amount / Percentage |
Redemption Limit | Equals To / Greater Than / Greater Than or Equal To / Less Than / Less Than or Equal To / Is Not Equal To / Is Empty / Is Not Empty | Numeric |
When to use it: controlling limited-quantity promotions. Example for a med spa: when a "First 50 Bookings" coupon reaches its cap, notify your team and tag the campaign so you can retire the offer cleanly and avoid disappointing later clients.
For any coupon trigger, leaving filters empty fires the workflow for every matching coupon event. Best practice is to filter by Coupon Code or Coupon Type so each workflow targets one campaign.
Coupon Code Applied and Coupon Code Redeemed both support Order Value (Before Discount) filtering, so you can fire only above or below a spend threshold.
Can I set different actions for different invoice statuses? Yes. Build a separate workflow for each status (Sent, Viewed, Paid, Partially Paid, Void) so each can run its own actions.
Does the Payment Received trigger include subscription renewals? Yes. It fires on the first charge when the client is present and on later background subscription charges. Use the Transaction Type filter to target one or the other.
Will failed payments fire the Payment Received trigger? Yes, by default it fires on both successful and failed attempts. Add a Payment Status filter to narrow it to one outcome.
What is the difference between Order Form Submission and Order Submitted? Order Form Submission can fire multiple times in one checkout (primary, bump, upsell) and cannot filter on global product or price. Order Submitted fires once per order, can filter on global product/price and Order Source, and exposes order-level custom values.
Which order sources does Order Submitted support? All three: the native eCommerce Store, Shopify, and WooCommerce. The Order Source filter can also target Calendar for service bookings.
Will the Documents & Contracts trigger fire twice if a document is viewed and then signed? Yes. Each status change is a separate event. Add conditional logic inside the workflow to prevent duplicate actions.
Which payment integrations support the Subscription and Refund triggers? Stripe, Authorize.net, and NMI are fully supported. PayPal supports only subscription creation.
Will the Refund trigger fire if I refund directly in an external processor? No. The refund must be issued inside Aesthetix CRM for the trigger to fire.
Does Coupon Code Applied require the order to be completed? No. It fires the moment the coupon is applied at checkout, even if the client never finishes. Use Coupon Code Redeemed to act only on completed purchases.
What happens if I add no filters to a coupon trigger? The workflow fires for every matching coupon event. Add a Coupon Code or Coupon Type filter to scope it to a specific campaign.
