Appointment triggers start a workflow when something happens to a patient's appointment: a new booking, a status change, a confirmation, a no-show, or a cancellation. They are the foundation of automated reminders, post-treatment follow-ups, no-show recovery, and internal staff alerts in Aesthetix CRM. This article covers the three triggers in the workflow builder's Appointments category: Appointment Status, Customer Booked Appointment, and Service Booking.
Each trigger fires once for every matching appointment event, then enrolls the patient (and, where supported, their guests) into the workflow so your actions can run. You can layer filters on any trigger to narrow exactly which appointments qualify, and combine triggers and filters to build precise automation.
Important: these triggers fire on the built-in calendar, not on EMR appointments. Today, most Aesthetix CRM practices manage their core appointments in their EMR, and that appointment data is stored in the Last Visit Date and Next Visit Date contact fields rather than the built-in calendar. The triggers below will not fire for EMR-managed appointments. They do apply wherever you use the built-in Aesthetix calendar directly, such as pre-qualification or consultation calls booked ahead of the surgical pipeline. Native calendar integrations with EMRs that support them are planned for the future. To segment or automate based on EMR appointment dates today, filter on the Last Visit Date and Next Visit Date fields in a Smart List instead.
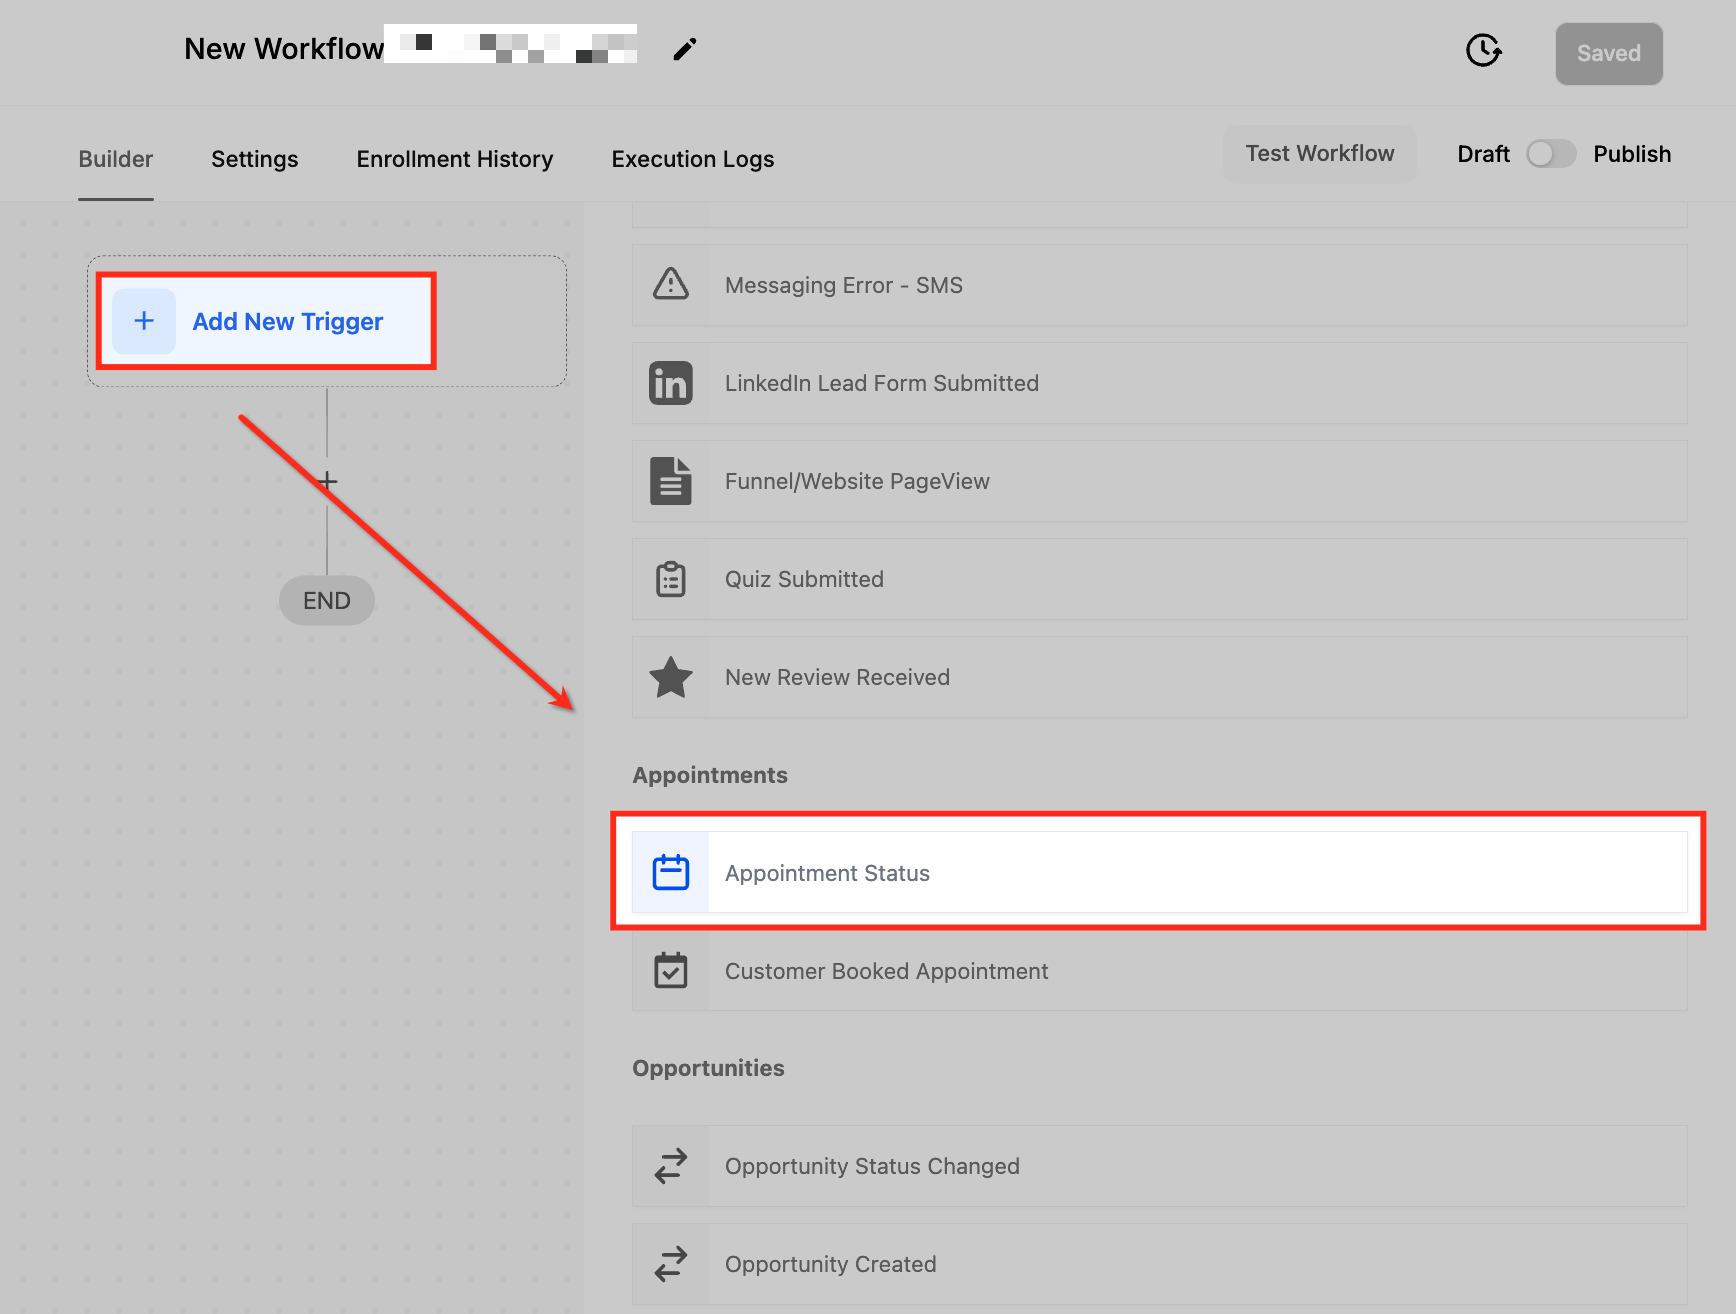
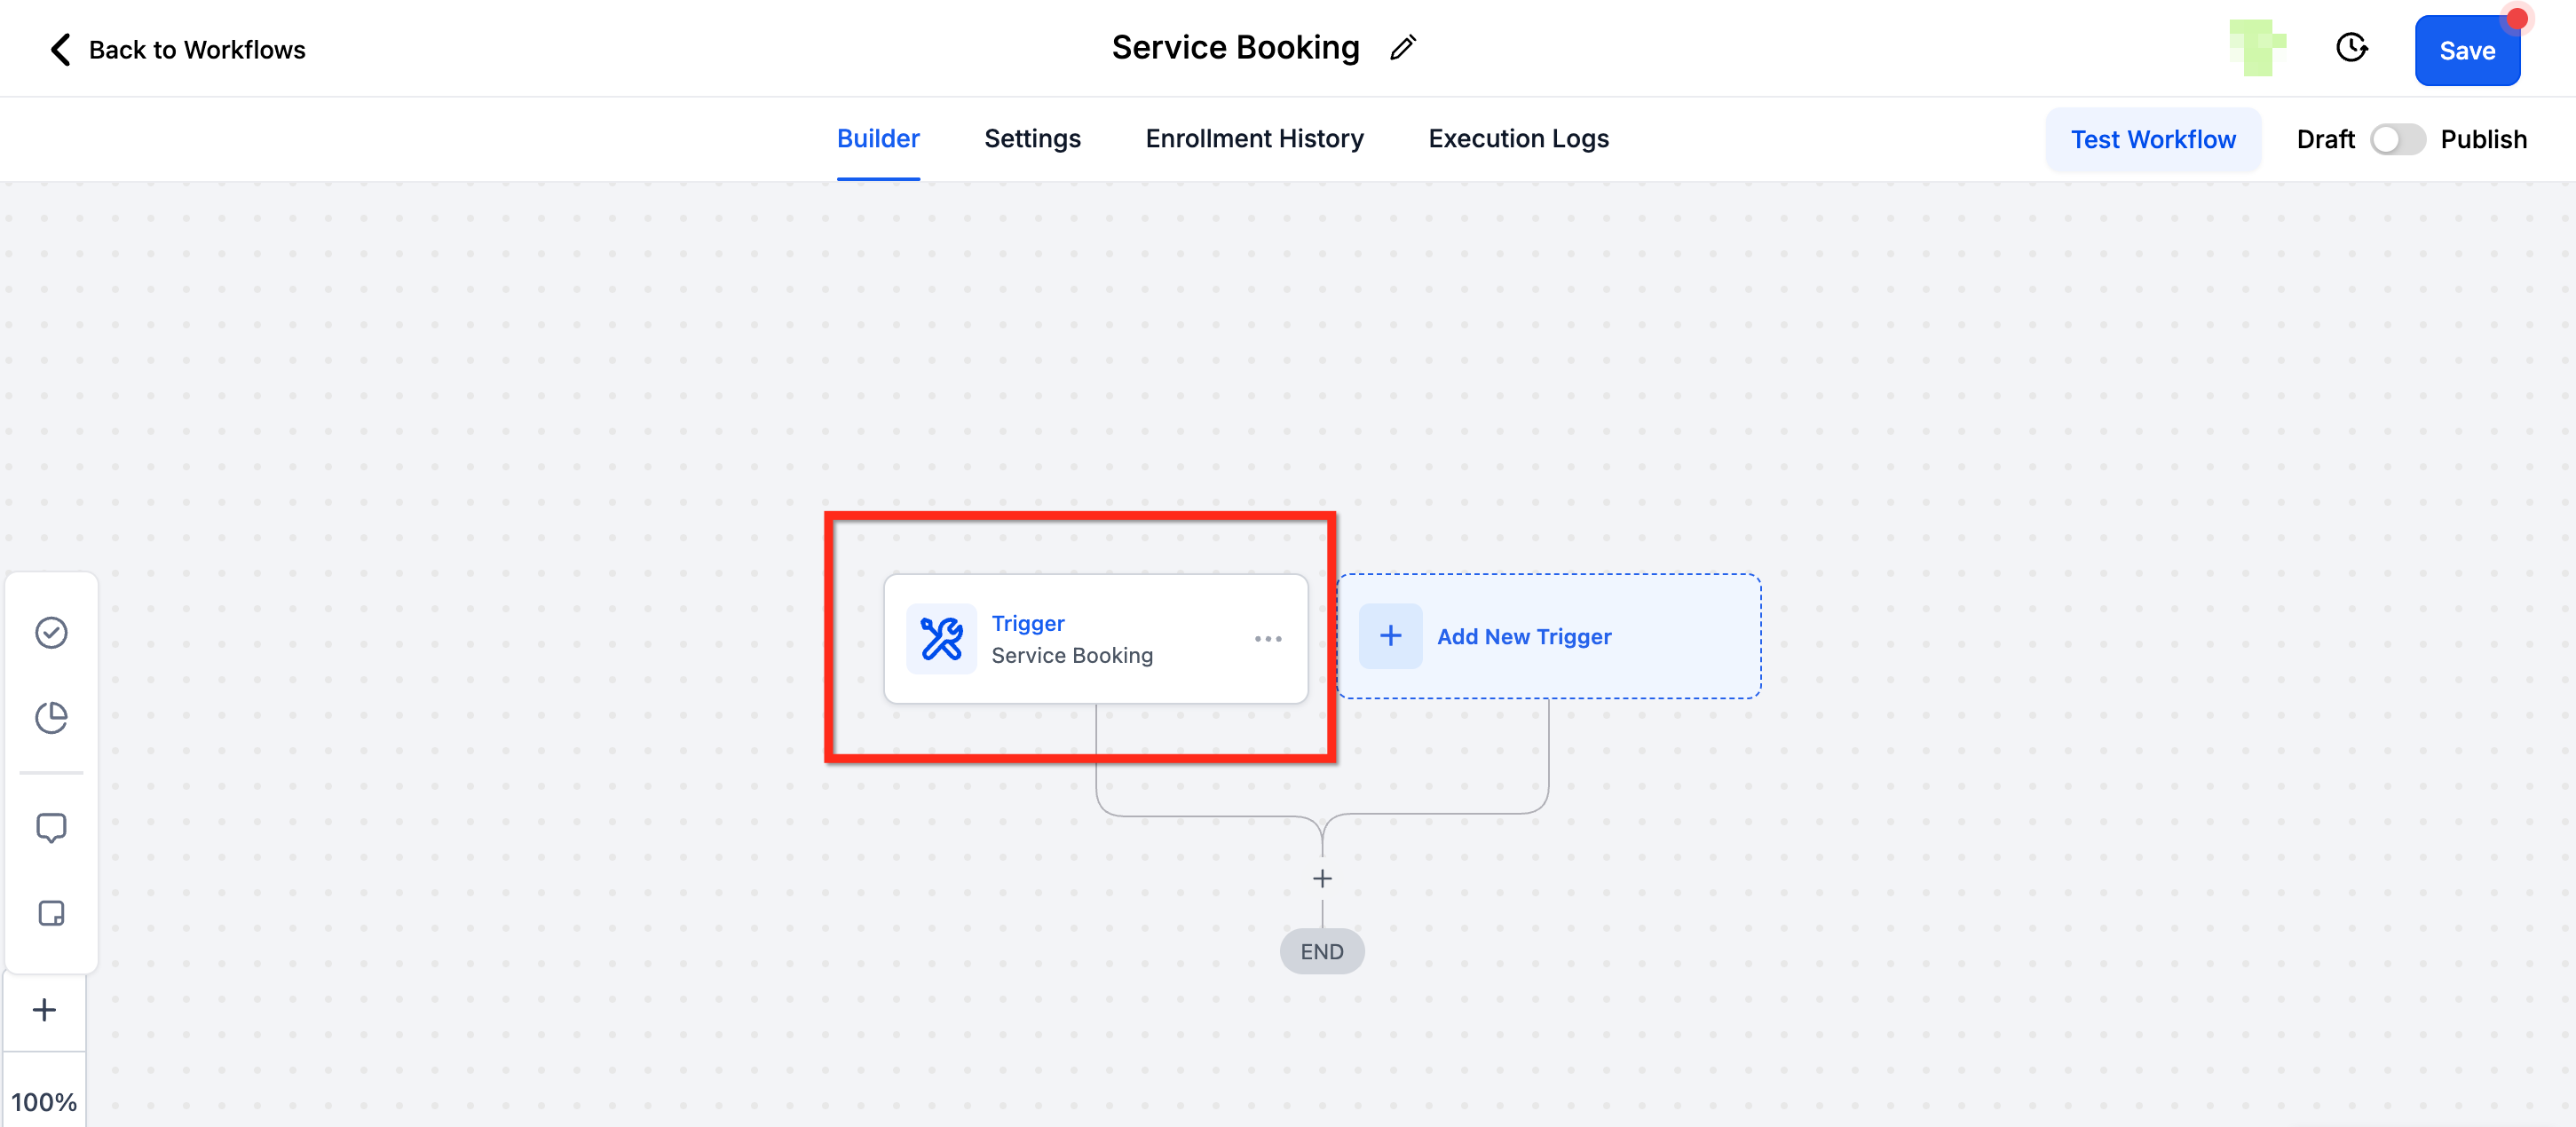
Every appointment trigger is added the same way. You only do this once per workflow, then configure the trigger's filters.
In the left navigation, open Marketing, then click Workflows.
Click Create Workflow, then choose Start from Scratch (or open an existing workflow to edit it).
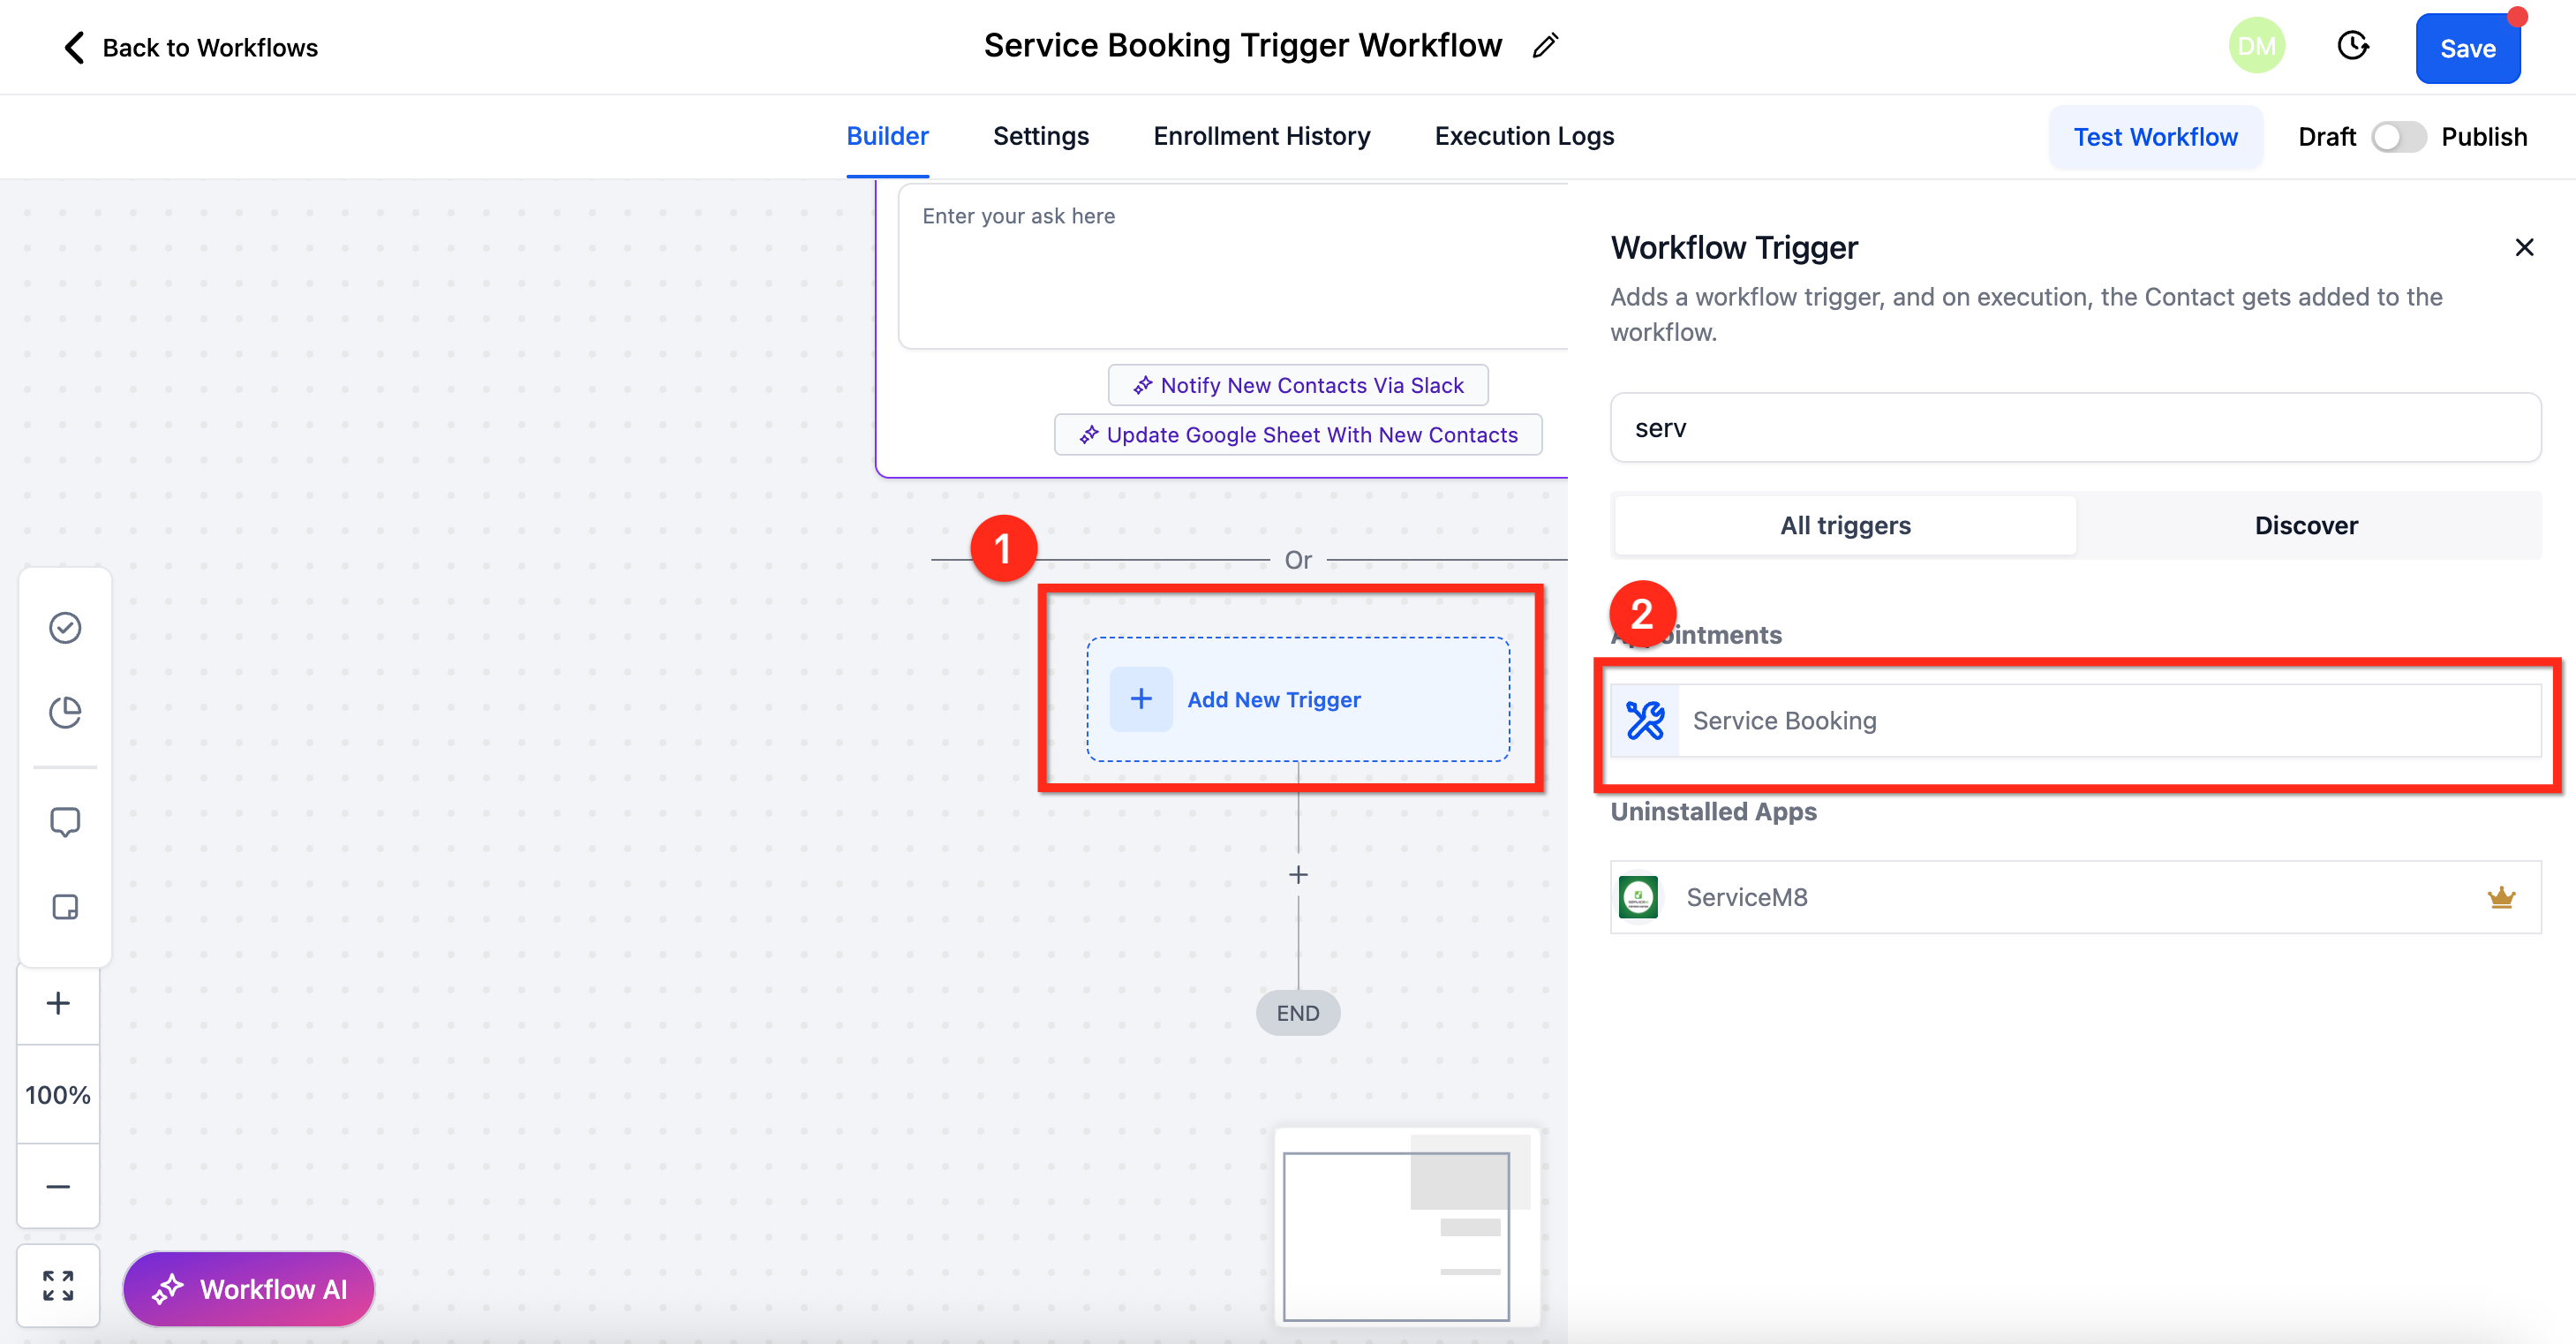
Click Add New Trigger.
Search for and select the appointment trigger you want (Appointment Status, Customer Booked Appointment, or Service Booking).
Give the trigger a clear, descriptive name so the workflow stays easy to manage. Instead of leaving the default name, name it for its purpose, for example "Post-Treatment Follow-Up" or "No-Show Recovery Alert."
Click Add filters to refine which appointments qualify (each trigger's filters are described in its section below).
Click Save Trigger.
Build out your actions, then save and publish the workflow to activate it. Test by booking or updating an appointment and confirming the workflow runs as expected.
The Appointment Status Trigger fires when an appointment is scheduled or when its status changes on a calendar. It is the most common appointment trigger and powers reminders, confirmations, follow-ups, and no-show recovery for individual calendar appointments.
The trigger activates when a calendar appointment is created or its status is updated. Without filters, it fires on every status change for every calendar. Use the Appointment Status filter to limit it to the specific statuses you care about. The available statuses are:
New: a new appointment is scheduled.
Confirmed: the appointment is confirmed.
Cancelled: the appointment is cancelled.
Showed: the patient attends the appointment.
No-show: the patient does not attend.
Invalid: the appointment is marked invalid.
When an appointment is rescheduled, it is treated as a new appointment, so the patient re-enters the workflow from the beginning.
Open the workflow builder, add the trigger, and name it (see "Adding a Trigger to a Workflow" above).
Search for Appointment Status and select it.
Name the trigger for its purpose so workflows stay organized.
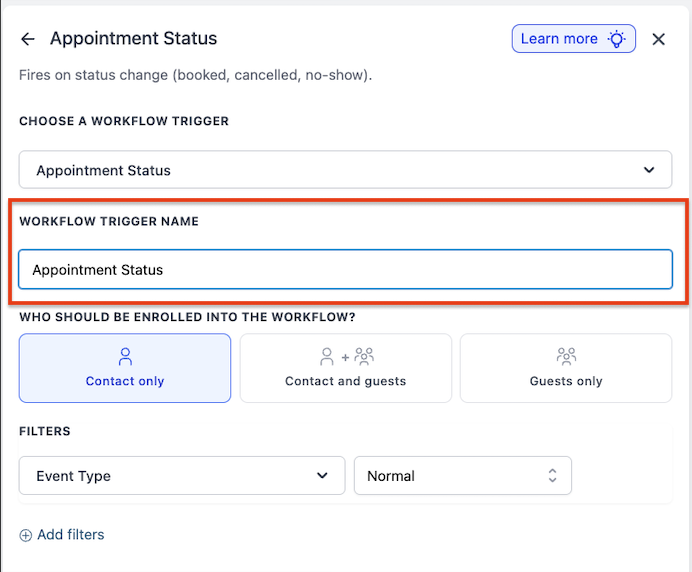
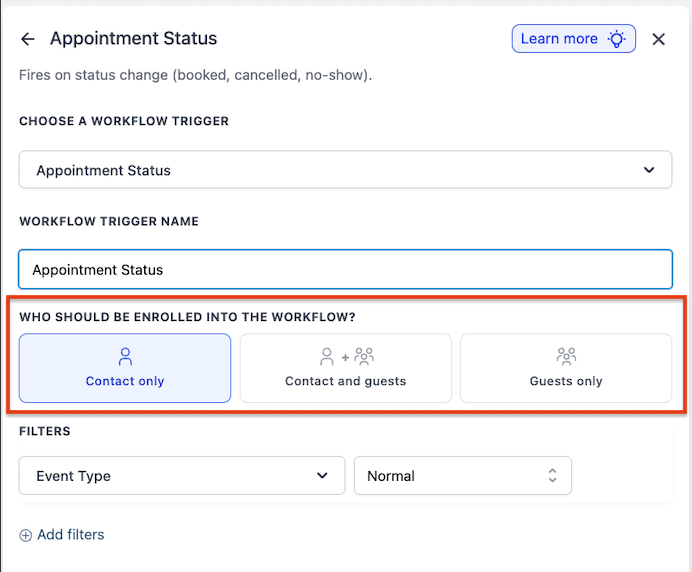
Under Who should be enrolled into the workflow?, choose who enters the workflow when the trigger fires:
Contact only: the default. Only the primary appointment contact is enrolled.
Contact and Guests: both the primary contact and all guest contacts are enrolled. The workflow runs separately for each person.
Guests only: only guest contacts are enrolled; the primary contact is excluded.
Click Add filters to refine when the trigger activates. The available filters are:
Event Type: limits the trigger to a scheduling pattern. Any includes all appointments, Normal triggers only for non-recurring appointments, and Recurring triggers only for repeating appointments.
Appointment Status is: restricts the trigger to one or more of the statuses listed above (New, Confirmed, Cancelled, Showed, No-show, Invalid).
Has Tag: triggers only for patients who carry a specific contact tag. Choose the tag from the dropdown.
In Calendar: triggers only for appointments booked in a specific calendar (for example, your Botox calendar or a specific provider's calendar).
In Calendar Group: triggers only for appointments booked within a specific calendar group, useful when you manage multiple calendars under one group such as injectors or laser services.
Only for Grouped Calendar: Yes triggers only for grouped calendars; No triggers for both grouped and individual calendars.
Modified By: triggers based on who changed the appointment status. API fires on updates made through the API, Customer fires when the patient changes the appointment, User fires on manual updates by a staff member (you then pick the specific user in the next step), and Workflow fires when another workflow changes the status.

Once all filters are set, click Save to store the trigger, then save and publish the workflow.
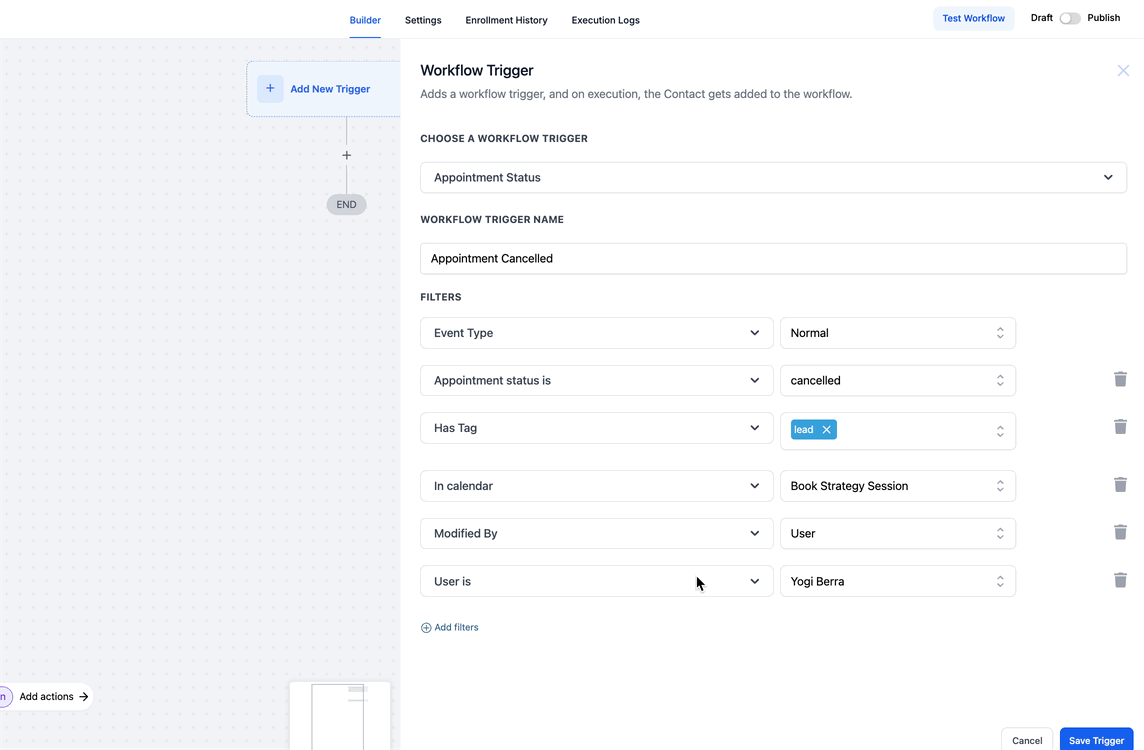
You can combine multiple filters with AND/OR conditions to build highly specific rules, for example "Appointment Status is No-show AND In Calendar is Filler Consultations."
When this trigger fires, the appointment and patient details are available as merge fields in your emails, texts, and internal notifications, including:
{{appointment.title}}, {{appointment.status}}, {{appointment.start_time}}, {{appointment.end_time}}
{{appointment.calendar_name}}, {{appointment.assigned_user}}
{{contact.first_name}}, {{contact.last_name}}, {{contact.phone}}, {{contact.email}}
Use the Appointment Status Trigger for the everyday automation around a single calendar appointment: confirmation texts when a patient books, a reminder the day before, a "we missed you" message after a no-show, and a post-treatment check-in after a Showed status.
Med spa example: create a workflow with this trigger, filter to Appointment Status is No-show and In Calendar is Injectables, and send the patient a text offering to rebook plus an internal Slack-style notification to the front desk so they can follow up personally.
Rescheduling counts as a new appointment, so the patient restarts the workflow.
Choosing Contact and Guests runs the workflow once for the primary contact and once per guest; each run is independent, so contact-specific merge fields resolve correctly per person.
This trigger acts on individual calendar appointments only. For multi-service bookings made through Services, use the Service Booking Trigger described below.
The Customer Booked Appointment Trigger fires specifically when a patient books an appointment themselves through one of your booking widgets or booking pages. It isolates self-scheduled appointments from those created by staff, so you can send a different experience to patients who book online.
The trigger activates when a patient self-schedules an appointment through a booking page, calendar widget, or other public booking link. It does not fire for appointments your team enters manually on the patient's behalf. This is the key difference from the Appointment Status Trigger, which fires on any creation or status change regardless of who booked it.
Add the trigger and name it (see "Adding a Trigger to a Workflow" above), then click Add filters to narrow which self-booked appointments qualify. The available filters include:
Has Tag: triggers only for patients who carry a specific contact tag. Choose the tag from the dropdown.
In Calendar: triggers only for self-booked appointments in a specific calendar. Select your preferred calendar.
Once your filters are set, click Save Trigger and publish the workflow.
The same appointment and patient merge fields available to the Appointment Status Trigger are available here, including {{appointment.title}}, {{appointment.start_time}}, {{appointment.calendar_name}}, {{appointment.assigned_user}}, and the {{contact.*}} fields such as {{contact.first_name}} and {{contact.phone}}.
Use this trigger when you want automation that applies only to online self-bookings: an immediate confirmation, a "what to expect at your first visit" sequence for new patients who book online, or an intake form request before the appointment.
Med spa example: a prospective patient books a consultation through your website booking widget. This trigger filtered to In Calendar is Consultations sends an instant confirmation text, emails a pre-visit intake form, and adds the patient to a nurture sequence, all without front-desk involvement.
This trigger fires only for patient self-bookings. Appointments created by staff will not enroll patients here; use the Appointment Status Trigger for those.
Combine it with the Appointment Status Trigger in separate workflows when you want both online and staff-created bookings handled, with different messaging for each.
The Service Booking Trigger fires when a Service Booking is created or updated. A Service Booking can contain multiple services or appointments purchased together, and this trigger works at the booking level rather than the individual appointment level. If a patient books several services in one checkout, the workflow runs once for the whole booking instead of once per service.
The trigger activates when a new Service Booking is created through:
Booking Page: when a patient self-books services online.
User: when staff manually create a booking.
Because it operates at the booking level, a single booking that includes five services triggers the workflow once, not five times. If your action is "Send Email," only one email is sent, containing all booked services, provided you use Service Booking merge fields.
Add the trigger and name it (see "Adding a Trigger to a Workflow" above).
Search for and select the Service Booking trigger.
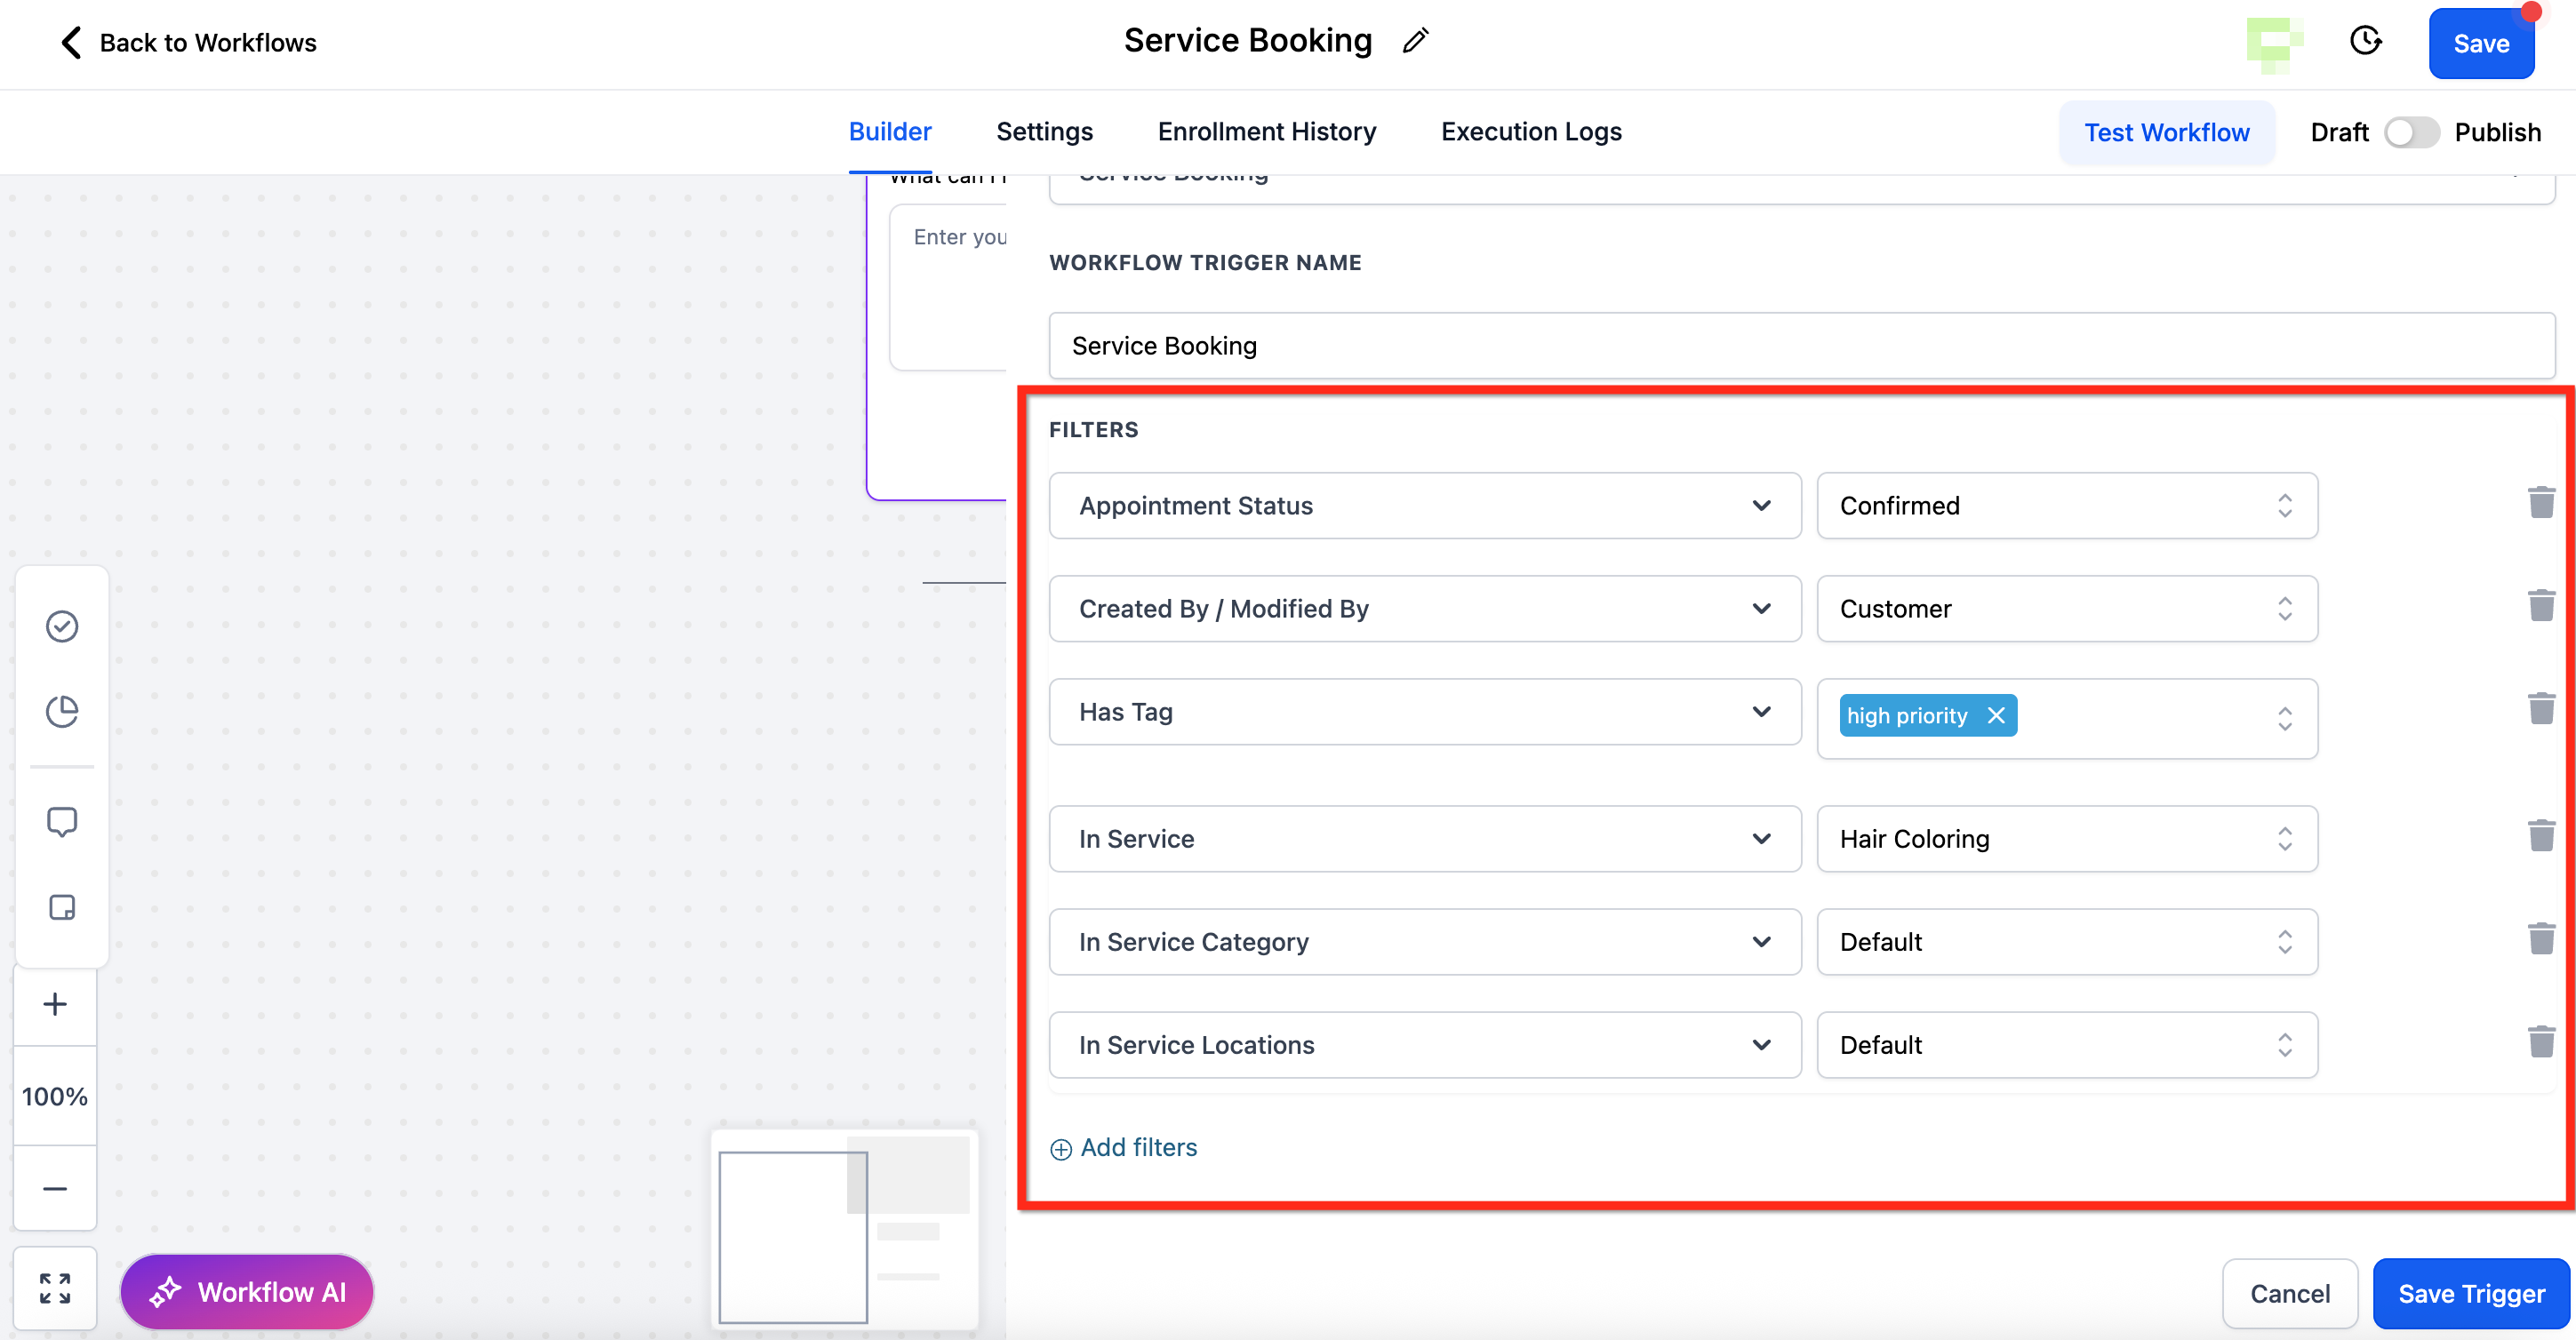
Click Add filters to narrow which bookings start the workflow, then save with the Save Trigger button. The available filters are:
Appointment Status: Unconfirmed, Confirmed, Showed, No Show, Cancelled, Invalid.
Created By / Modified By: narrows by who created or changed the booking.
Has Tag: triggers only for patients with a specific contact tag.
In Service: triggers only for a specific service.
In Service Category: triggers only for a grouping of services.
In Service Location: triggers only for bookings at a specific location.

Service Booking merge fields let you list every booked service and its details in one message. For each booked service you can display the service name, price, duration, date and time, timezone, assigned staff member, and any add-ons the patient selected (with prices). If multiple services are booked together, each service and its add-ons are listed one after another.
Use a repeating block to render every service in the booking:
{{#each serviceBooking.services}}
  {{this.name}} - {{this.duration}} | Price: {{this.price}}
  Date: {{this.startDate}} at {{this.startTime}} ({{this.timezone}})
  With: {{this.assignedUser}}

  {{#if addOns}}
    Add-ons:
    {{#each addOns}}
      - {{this.addonName}} ({{this.addonPrice}})
    {{/each}}
  {{/if}}
{{/each}}
The {{#each serviceBooking.services}} ... {{/each}} block repeats everything inside it for each booked service, so a booking of three services renders three times. To show additional details such as a staff member's full name, place your cursor inside the block and add the extra placeholder, for example Staff User: {{this.user.name}}.
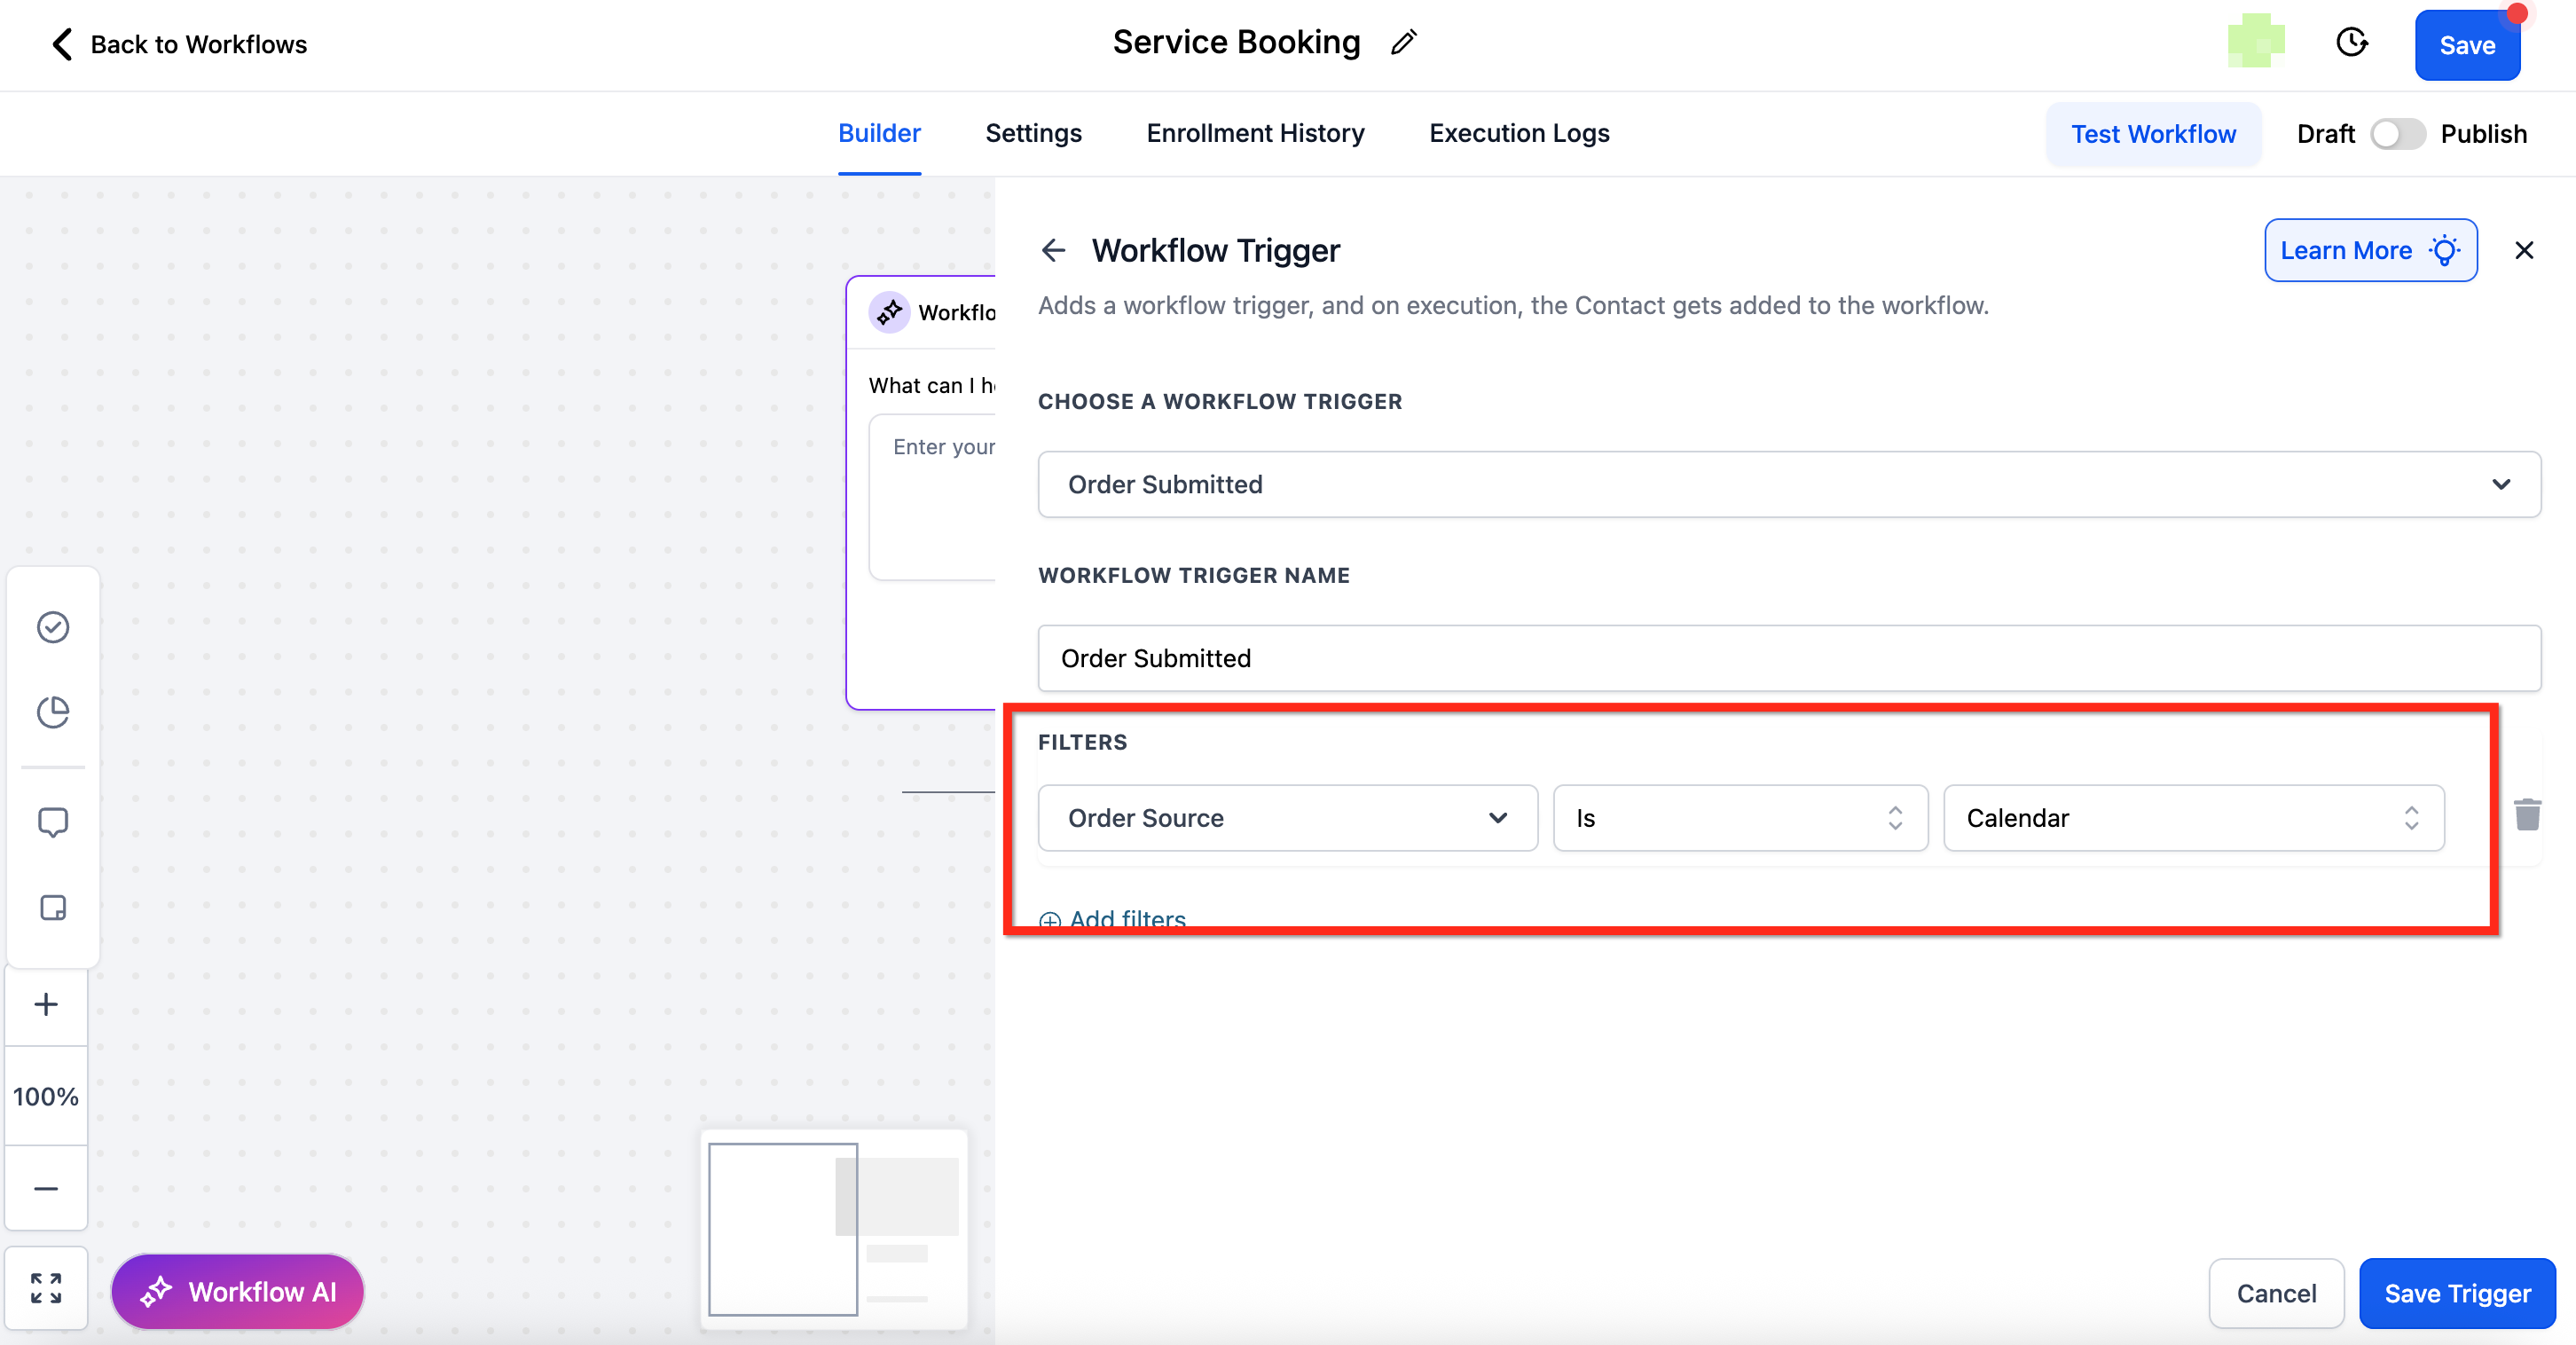
By default, creating a Service Booking automatically generates an Order. To prevent duplicate automations, the Order Submitted trigger does not fire for orders created through Service Bookings. If you want Order-based workflows to also run for these bookings, add the filter Order Source = Calendar to the Order Submitted trigger so it runs only when you explicitly want it to.
Action | Status | Notes |
|---|---|---|
Update Appointment Status | Supported | Based on Service Booking ID |
Create Appointment Note | Supported | Based on Service Booking ID; the note applies to the whole booking |
Book Appointment | Not supported | NA |
Conversational AI Booking Bot | Not supported | NA |
Automated booking actions | Not supported | NA |
Use the Service Booking Trigger when patients buy multiple services in one transaction and you want a single clean confirmation that summarizes everything, instead of separate messages per service.
Med spa example: a patient books a facial, a chemical peel, and an add-on LED session in one checkout. This trigger sends one confirmation email that lists all three services with dates, durations, the assigned provider, and the LED add-on price, so the patient sees their full visit in one place and the front desk avoids three duplicate confirmations.
This trigger only works for Services bookings. For standalone calendar appointments, use the Appointment Status Trigger.
The trigger is only visible when Services is enabled for your account. If Services is disabled, the trigger cannot be added to new workflows. For existing workflows that already use it, new bookings are blocked from firing the trigger, but status updates on existing bookings will still trigger as expected.
One run per booking is intended behavior to avoid duplicate messages; make sure you use Service Booking merge fields so the single message includes every service.
Can I trigger a workflow when an appointment is cancelled or rescheduled? Yes. Use the Appointment Status Trigger with the Appointment Status filter set to Cancelled. A reschedule is treated as a new appointment, so the patient re-enters the workflow from the beginning.
What is the difference between the Appointment Status Trigger and the Customer Booked Appointment Trigger? The Appointment Status Trigger fires on any creation or status change for a calendar appointment, no matter who made it. The Customer Booked Appointment Trigger fires only when the patient books the appointment themselves through a booking page or widget.
What is the difference between the Appointment Status Trigger and the Service Booking Trigger? The Appointment Status Trigger works on individual calendar appointments. The Service Booking Trigger works at the booking level for Services, so a single booking with multiple services runs the workflow once instead of once per service.
Why don't I see the Service Booking trigger? It is only visible when Services is enabled for your account. If Services is disabled, the trigger is not available for new workflows.
How do I track who changed an appointment? On the Appointment Status Trigger, use the Modified By filter to fire based on whether the change was made by a user, the patient, the API, or another workflow.
What is the difference between In Calendar and In Calendar Group? In Calendar filters to one specific calendar. In Calendar Group applies to an entire group of calendars managed together.
Can I enroll appointment guests, not just the primary patient? Yes, on the Appointment Status Trigger. Set Who should be enrolled into the workflow to Contact and Guests or Guests only. The workflow runs once per person, and each run is independent so contact-specific merge fields resolve correctly.
Can I combine multiple filters on one trigger? Yes. You can combine filters with AND/OR conditions to build precise rules, such as a specific status in a specific calendar.
If you need help building appointment automations or want a workflow configured for your practice, reach out to support. For automation that goes beyond standard configuration, you can submit a Custom Build Request.
