Event triggers start a workflow the moment something happens in your Aesthetix CRM account: a patient submits a form, clicks a link, replies to a message, watches a video, leaves a review, or sends an inbound email. Each trigger listens for one specific event and enrolls the contact (or, for contactless triggers, simply starts the run) so your follow-up actions fire automatically.
Every Event trigger is added the same way:
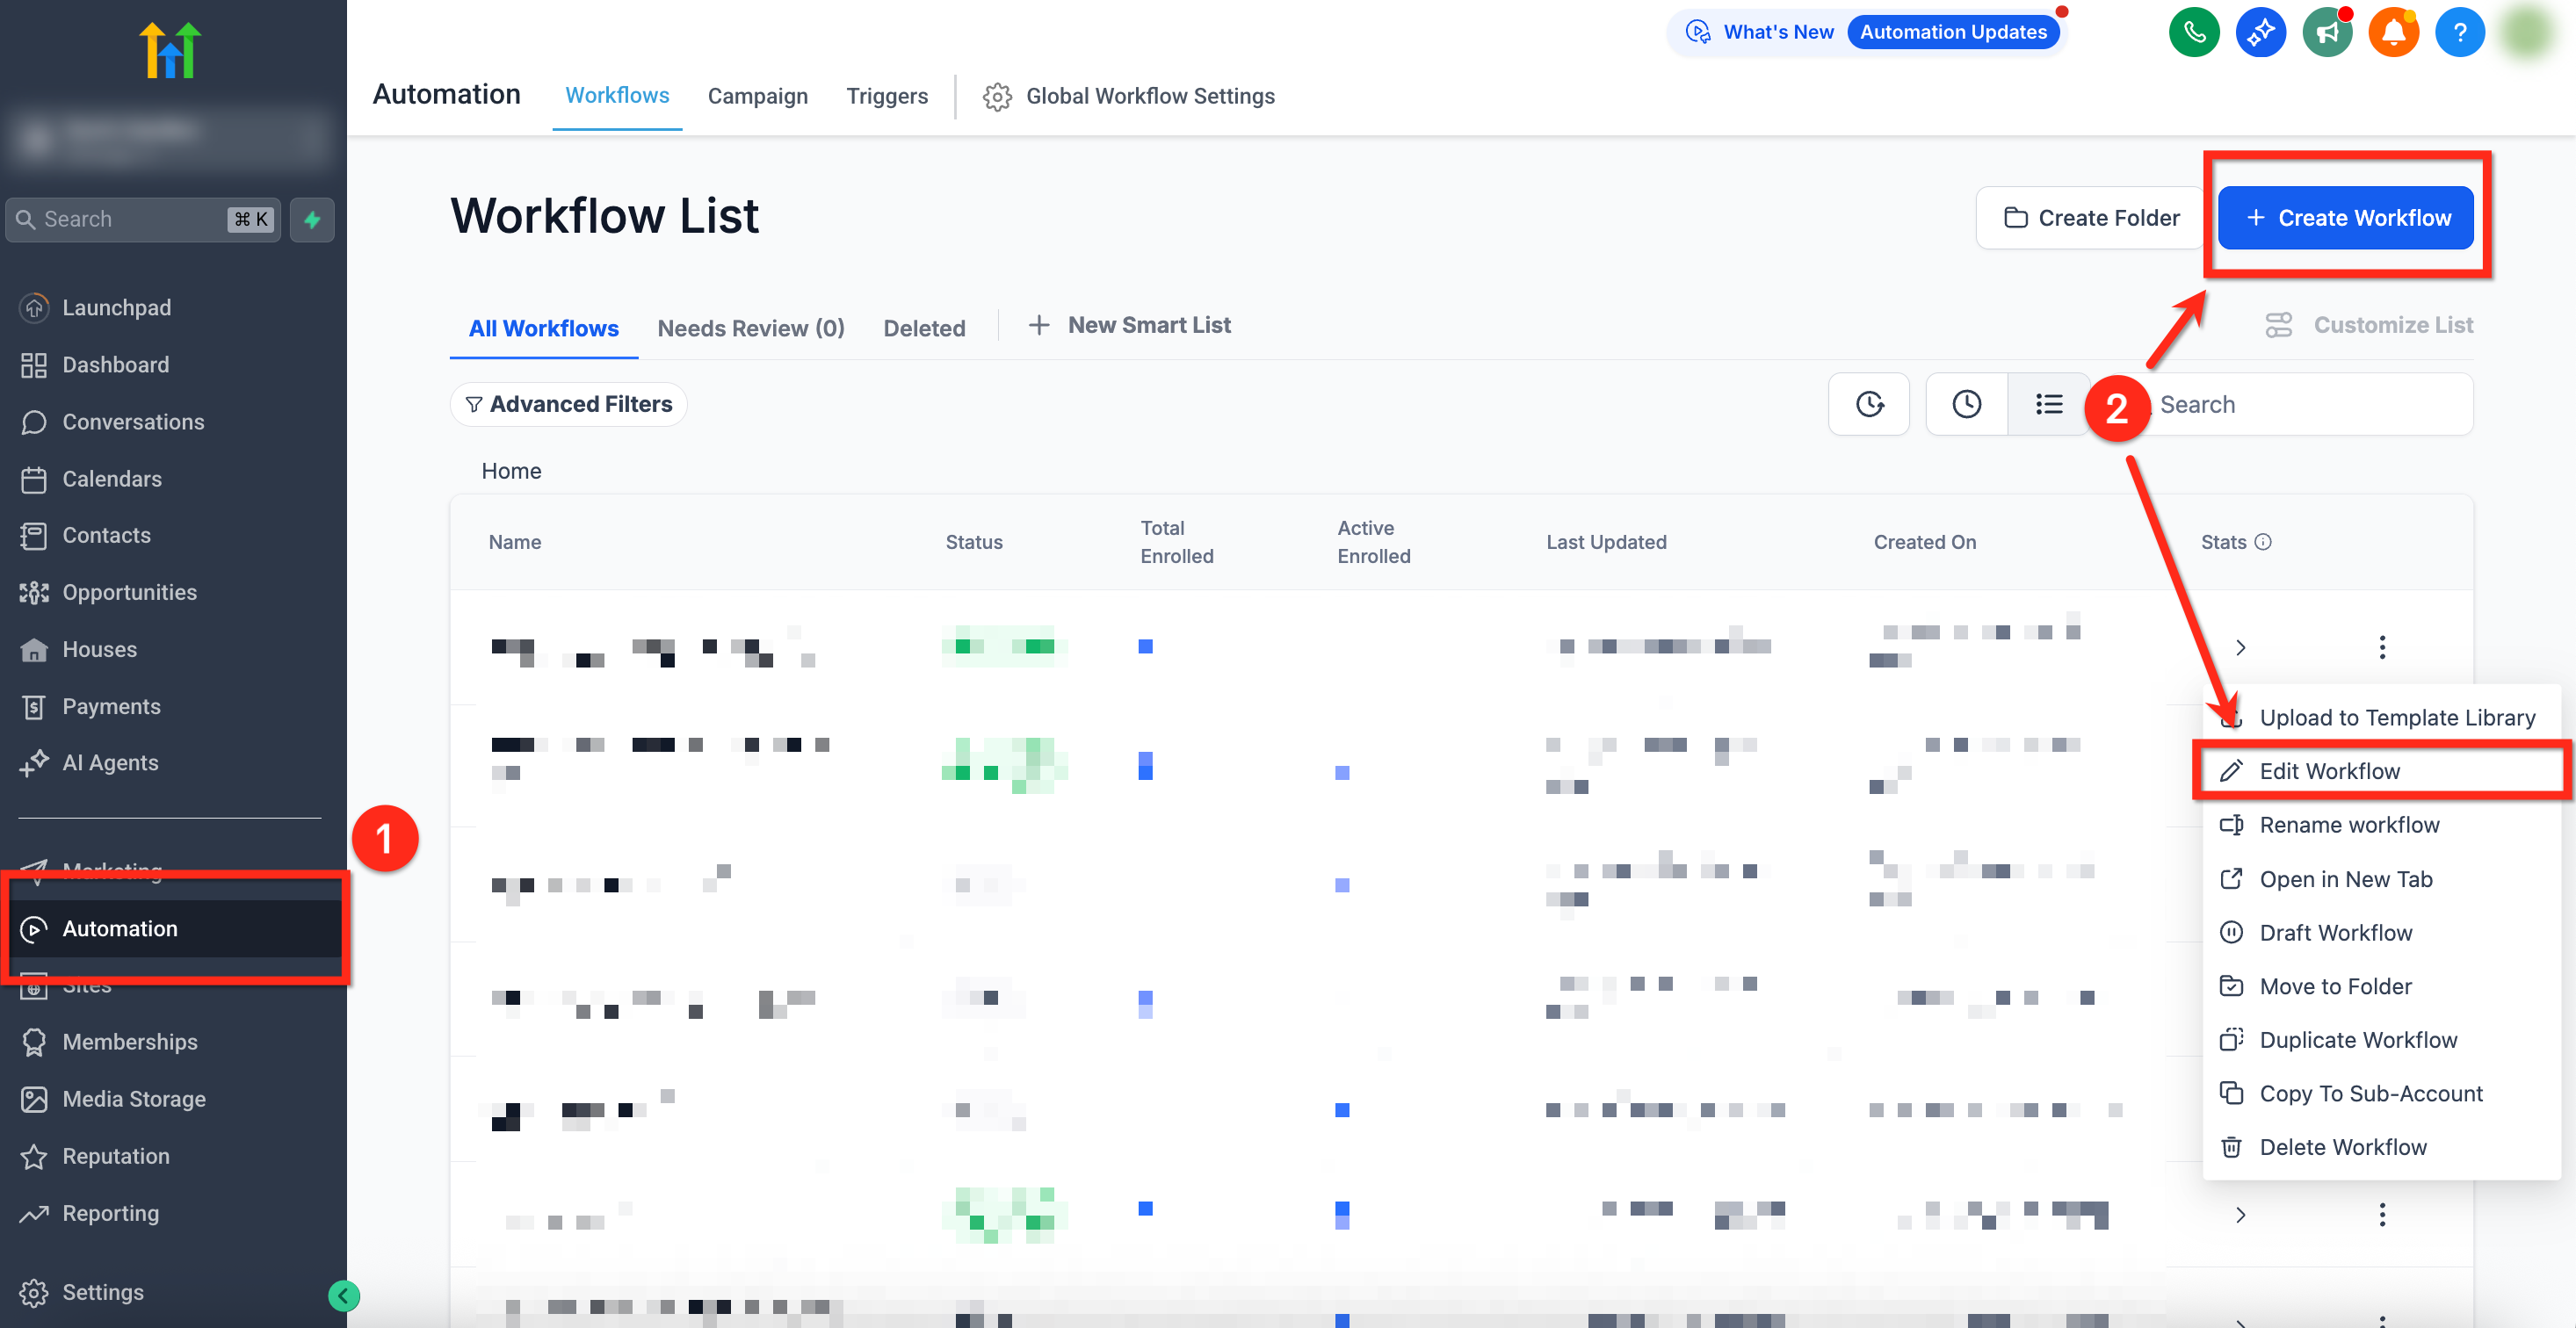
Go to Automation > Workflows.
Create a new workflow (Start from Scratch) or open an existing one.
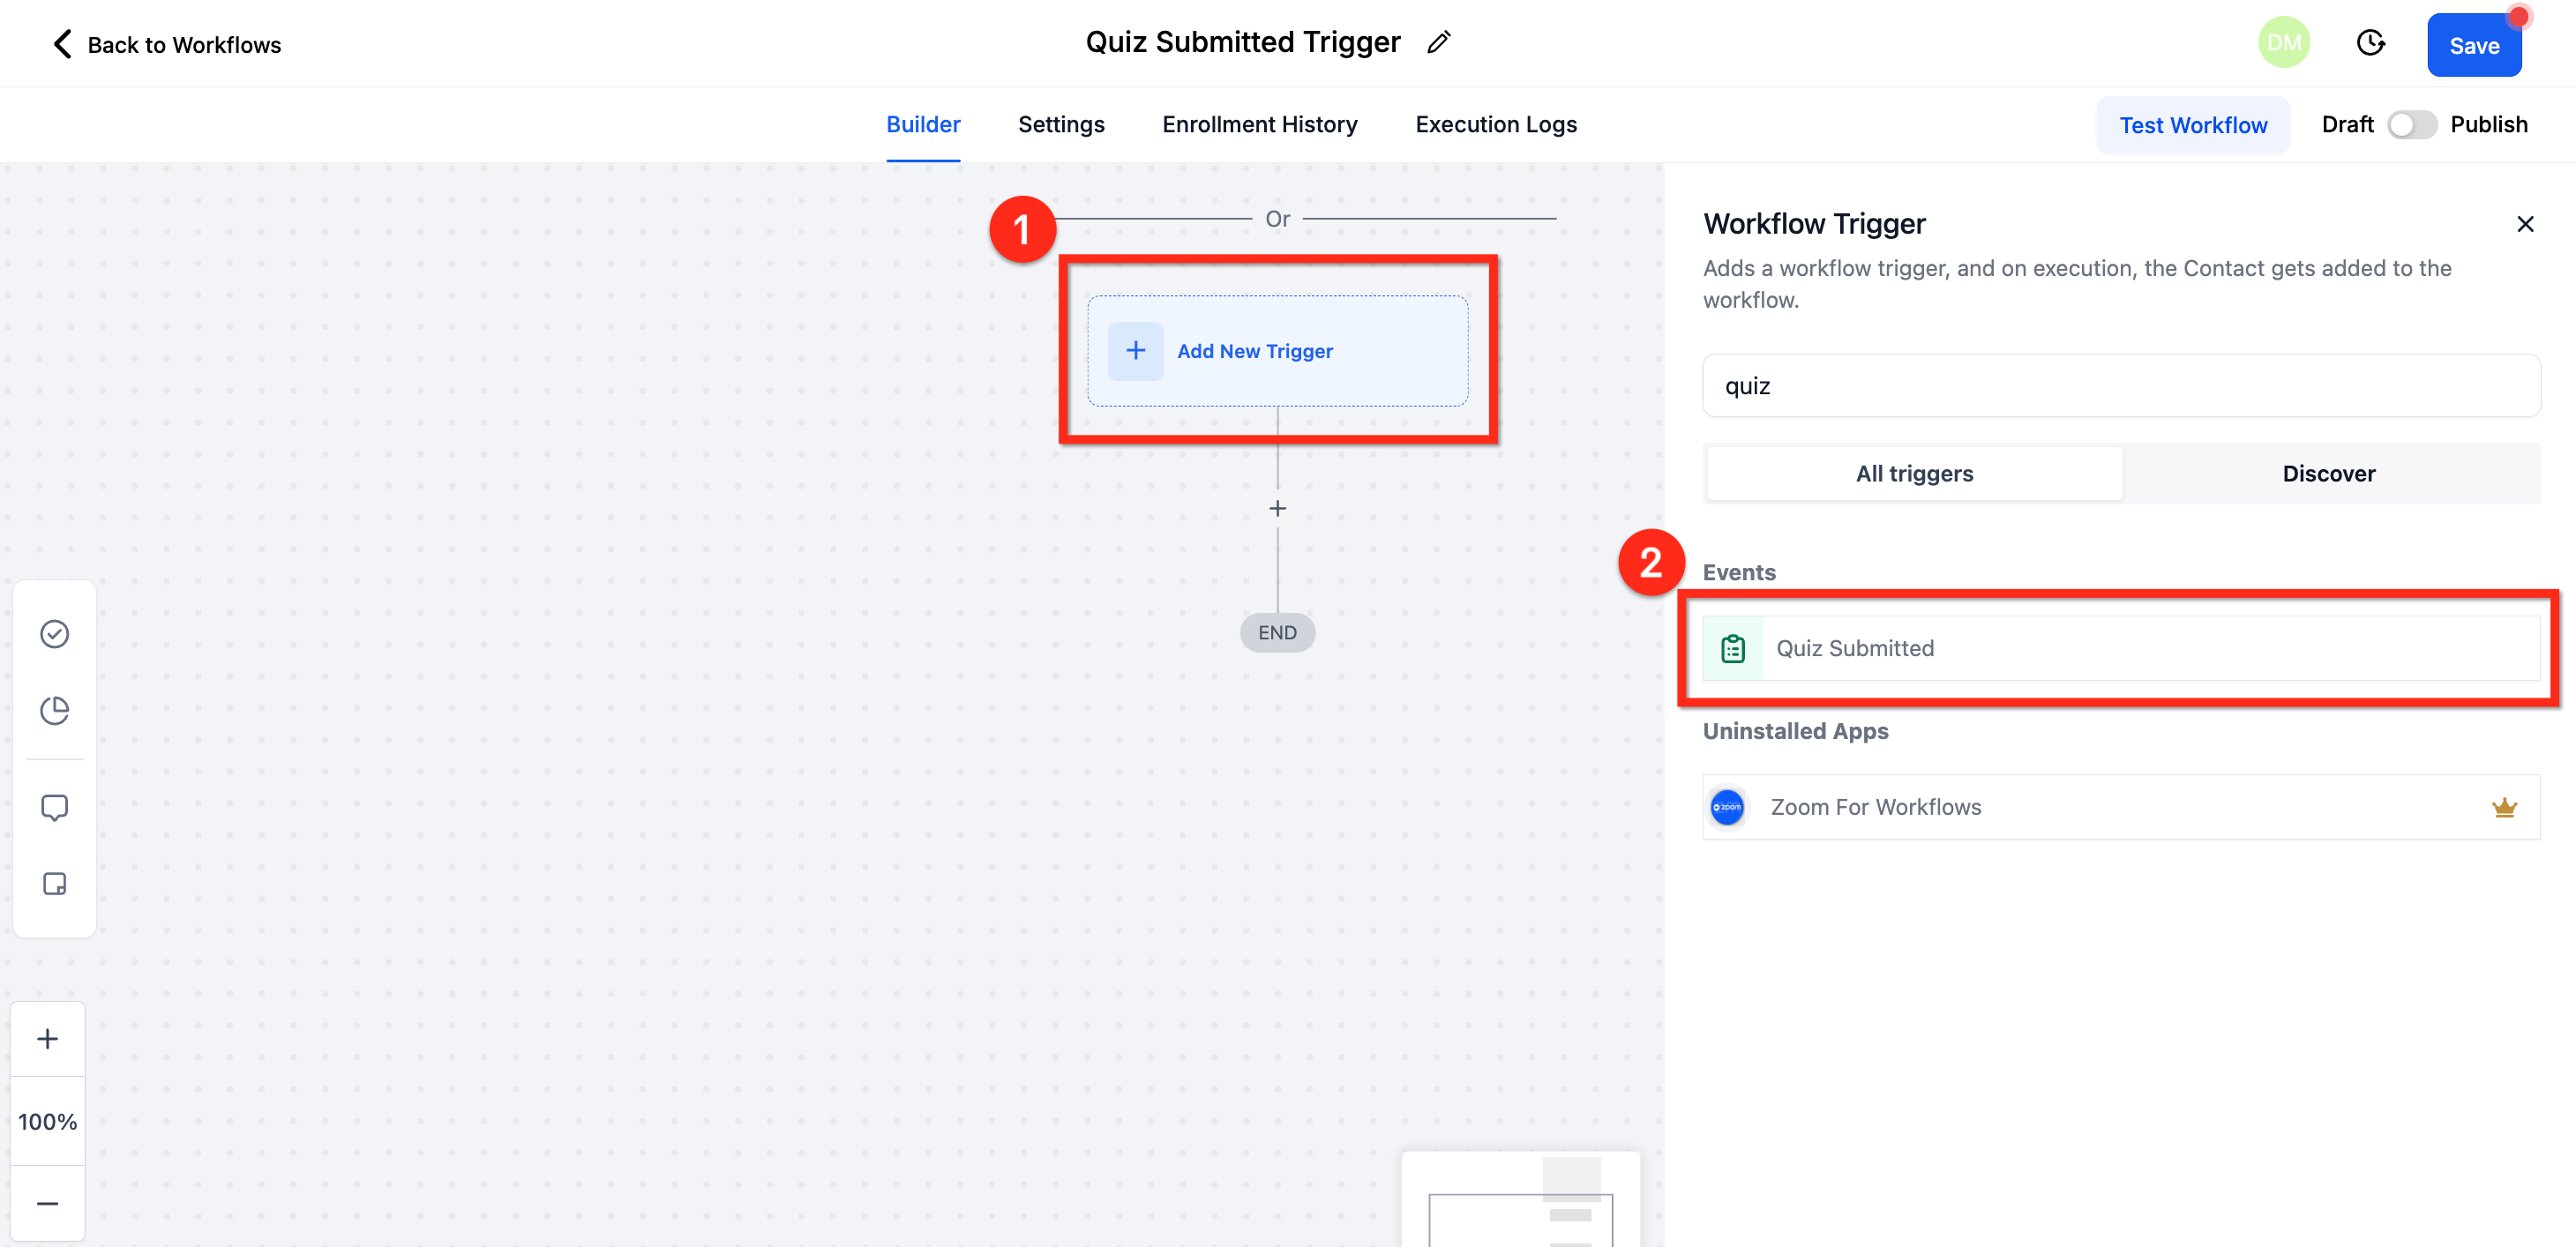
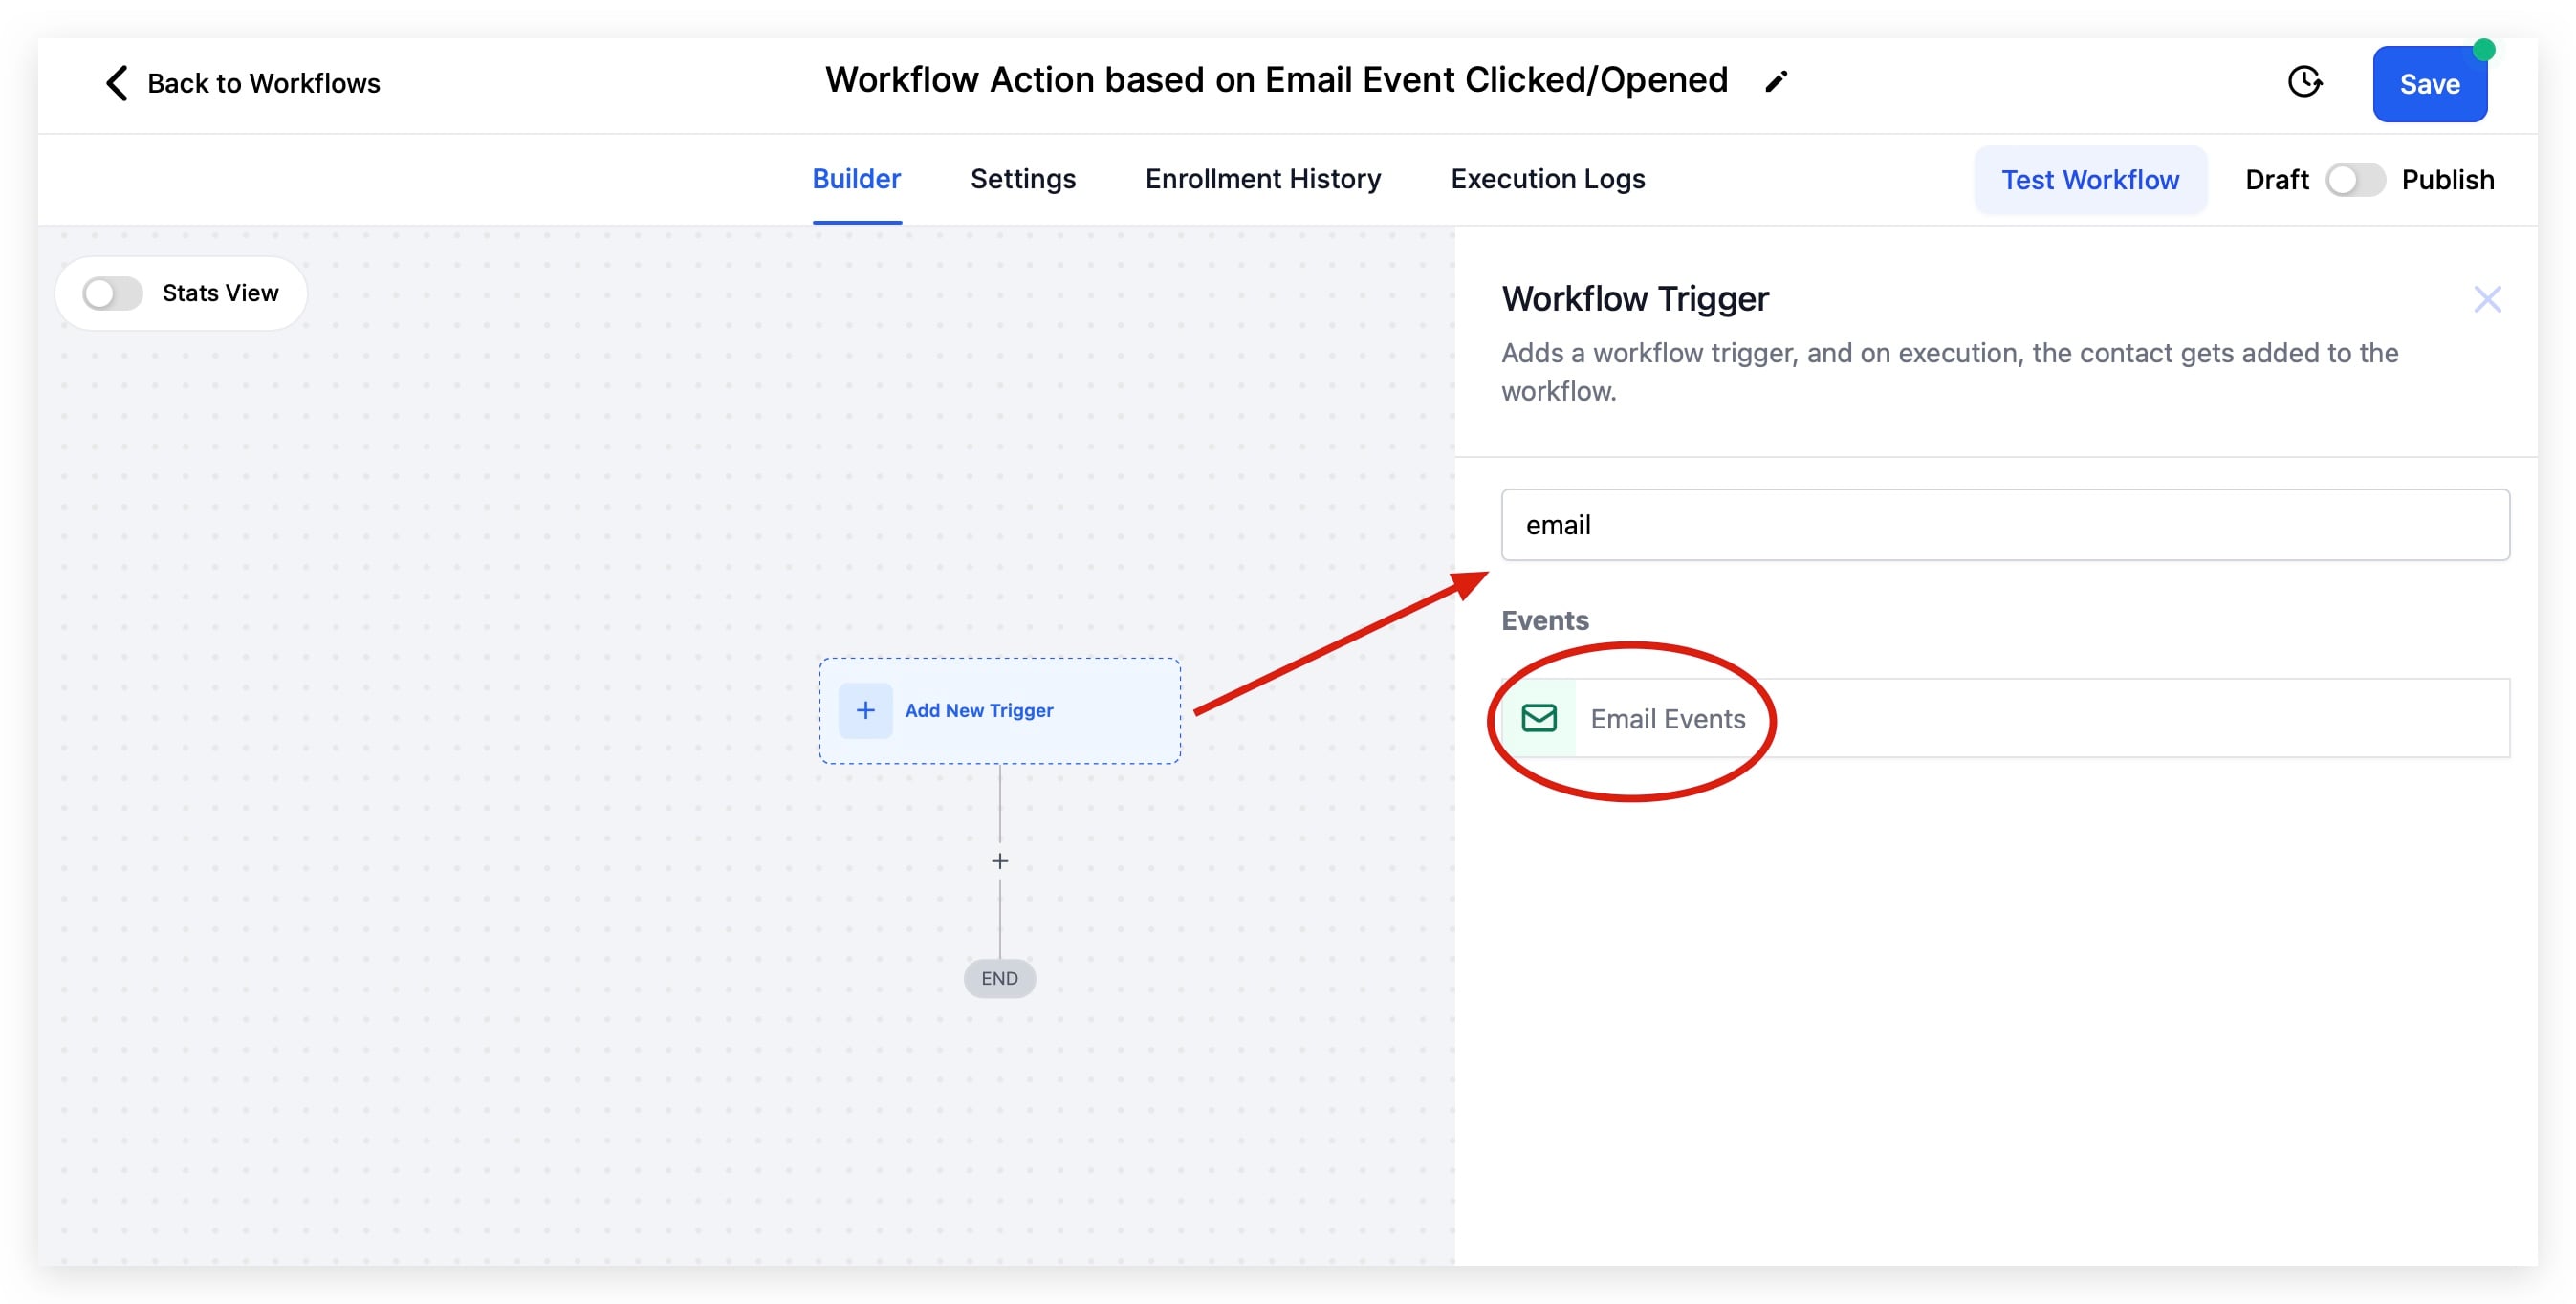
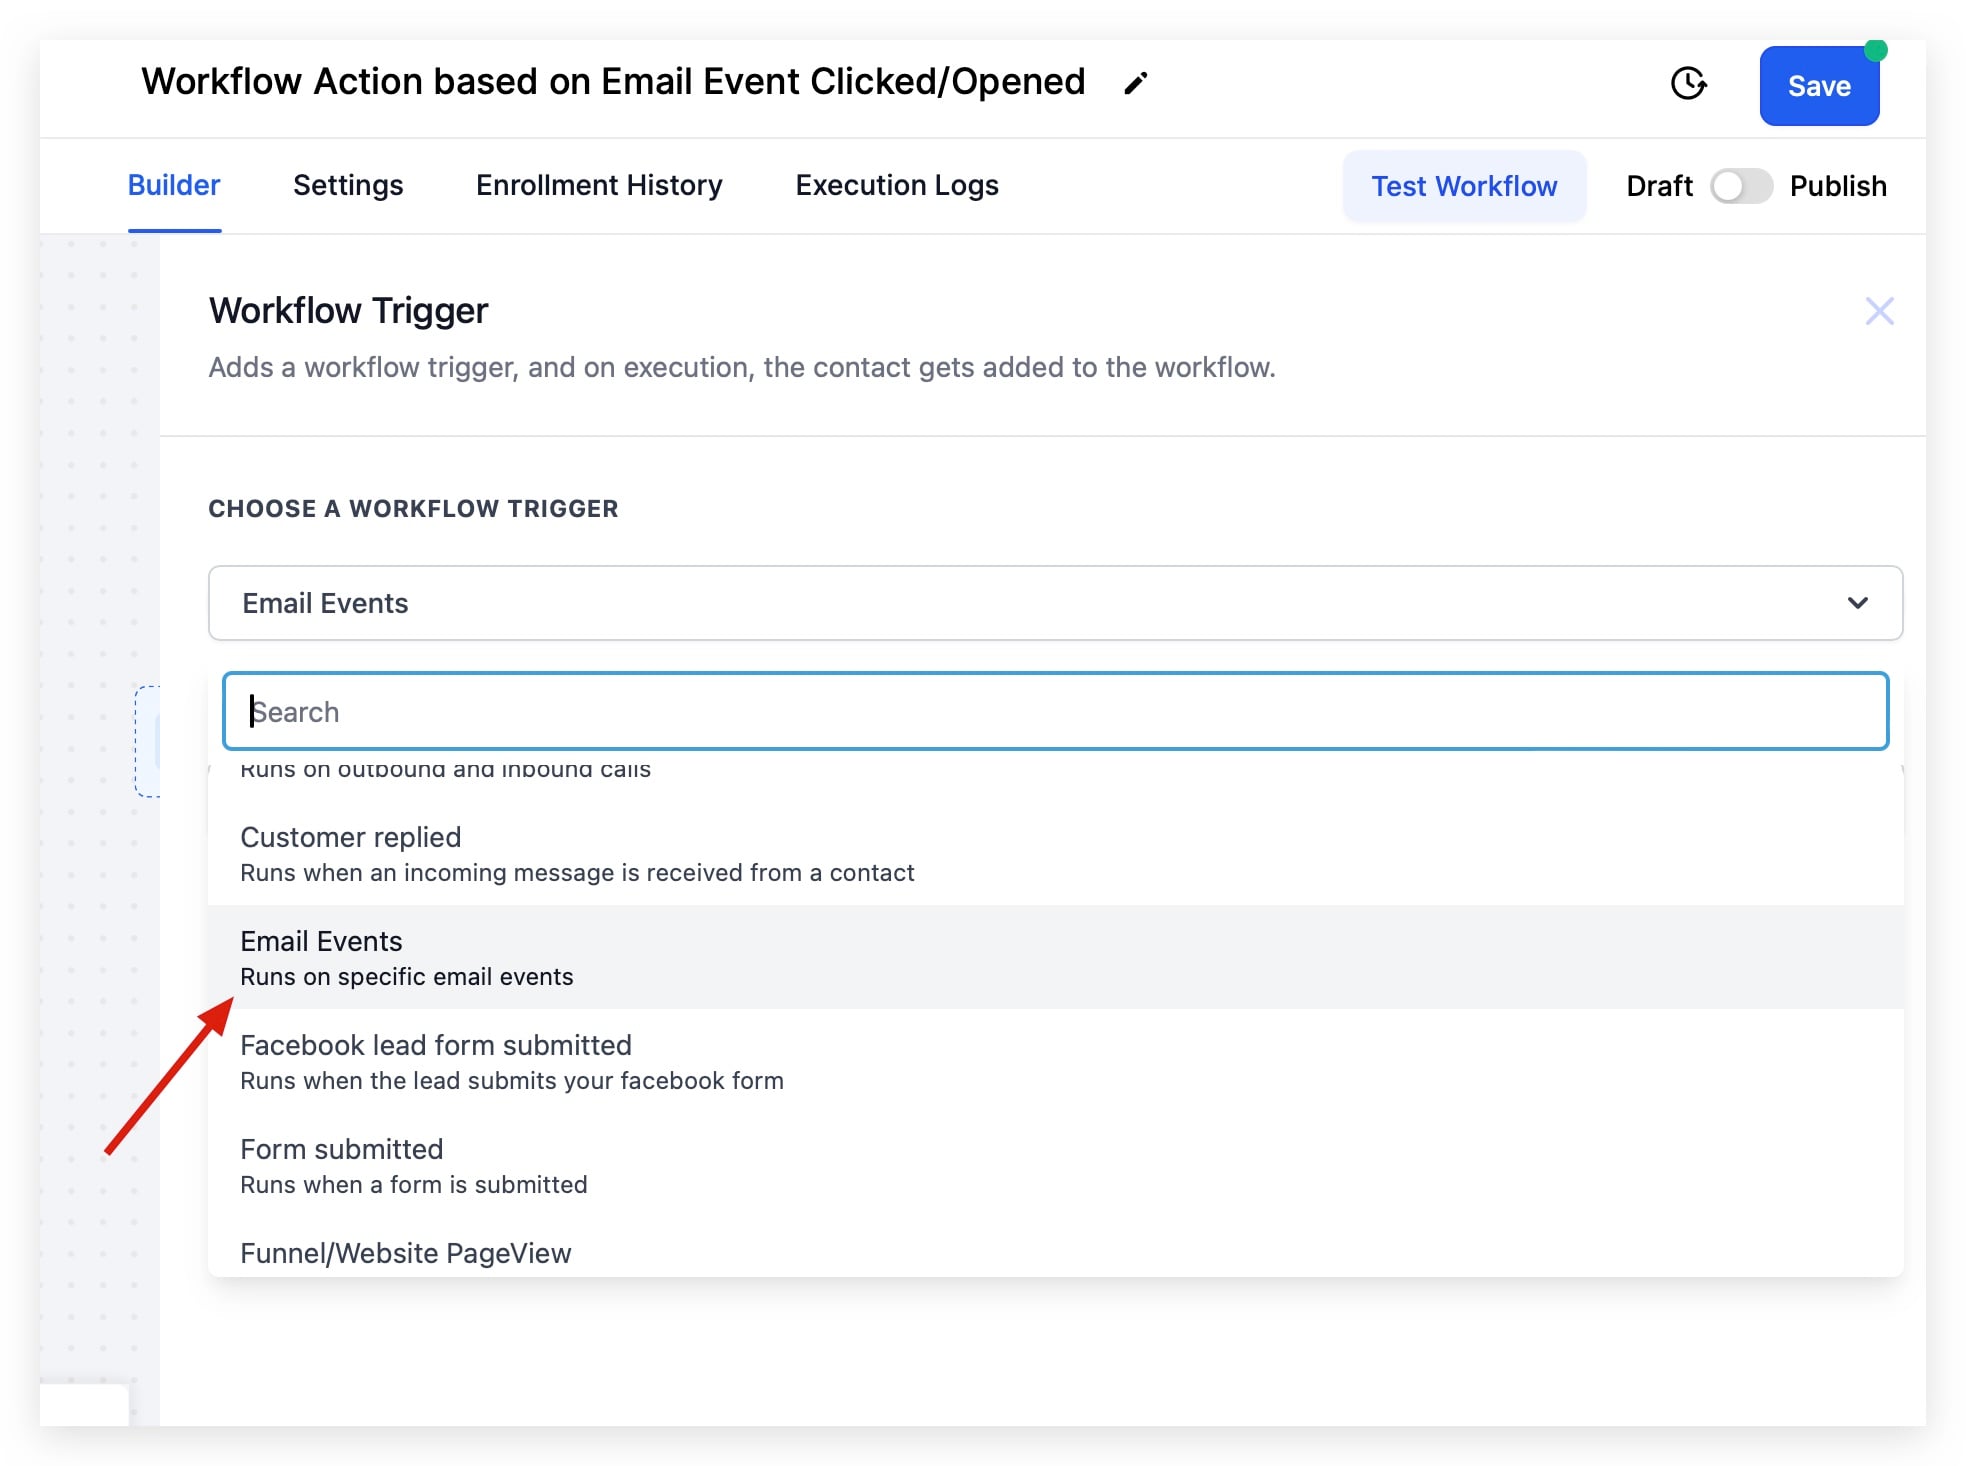
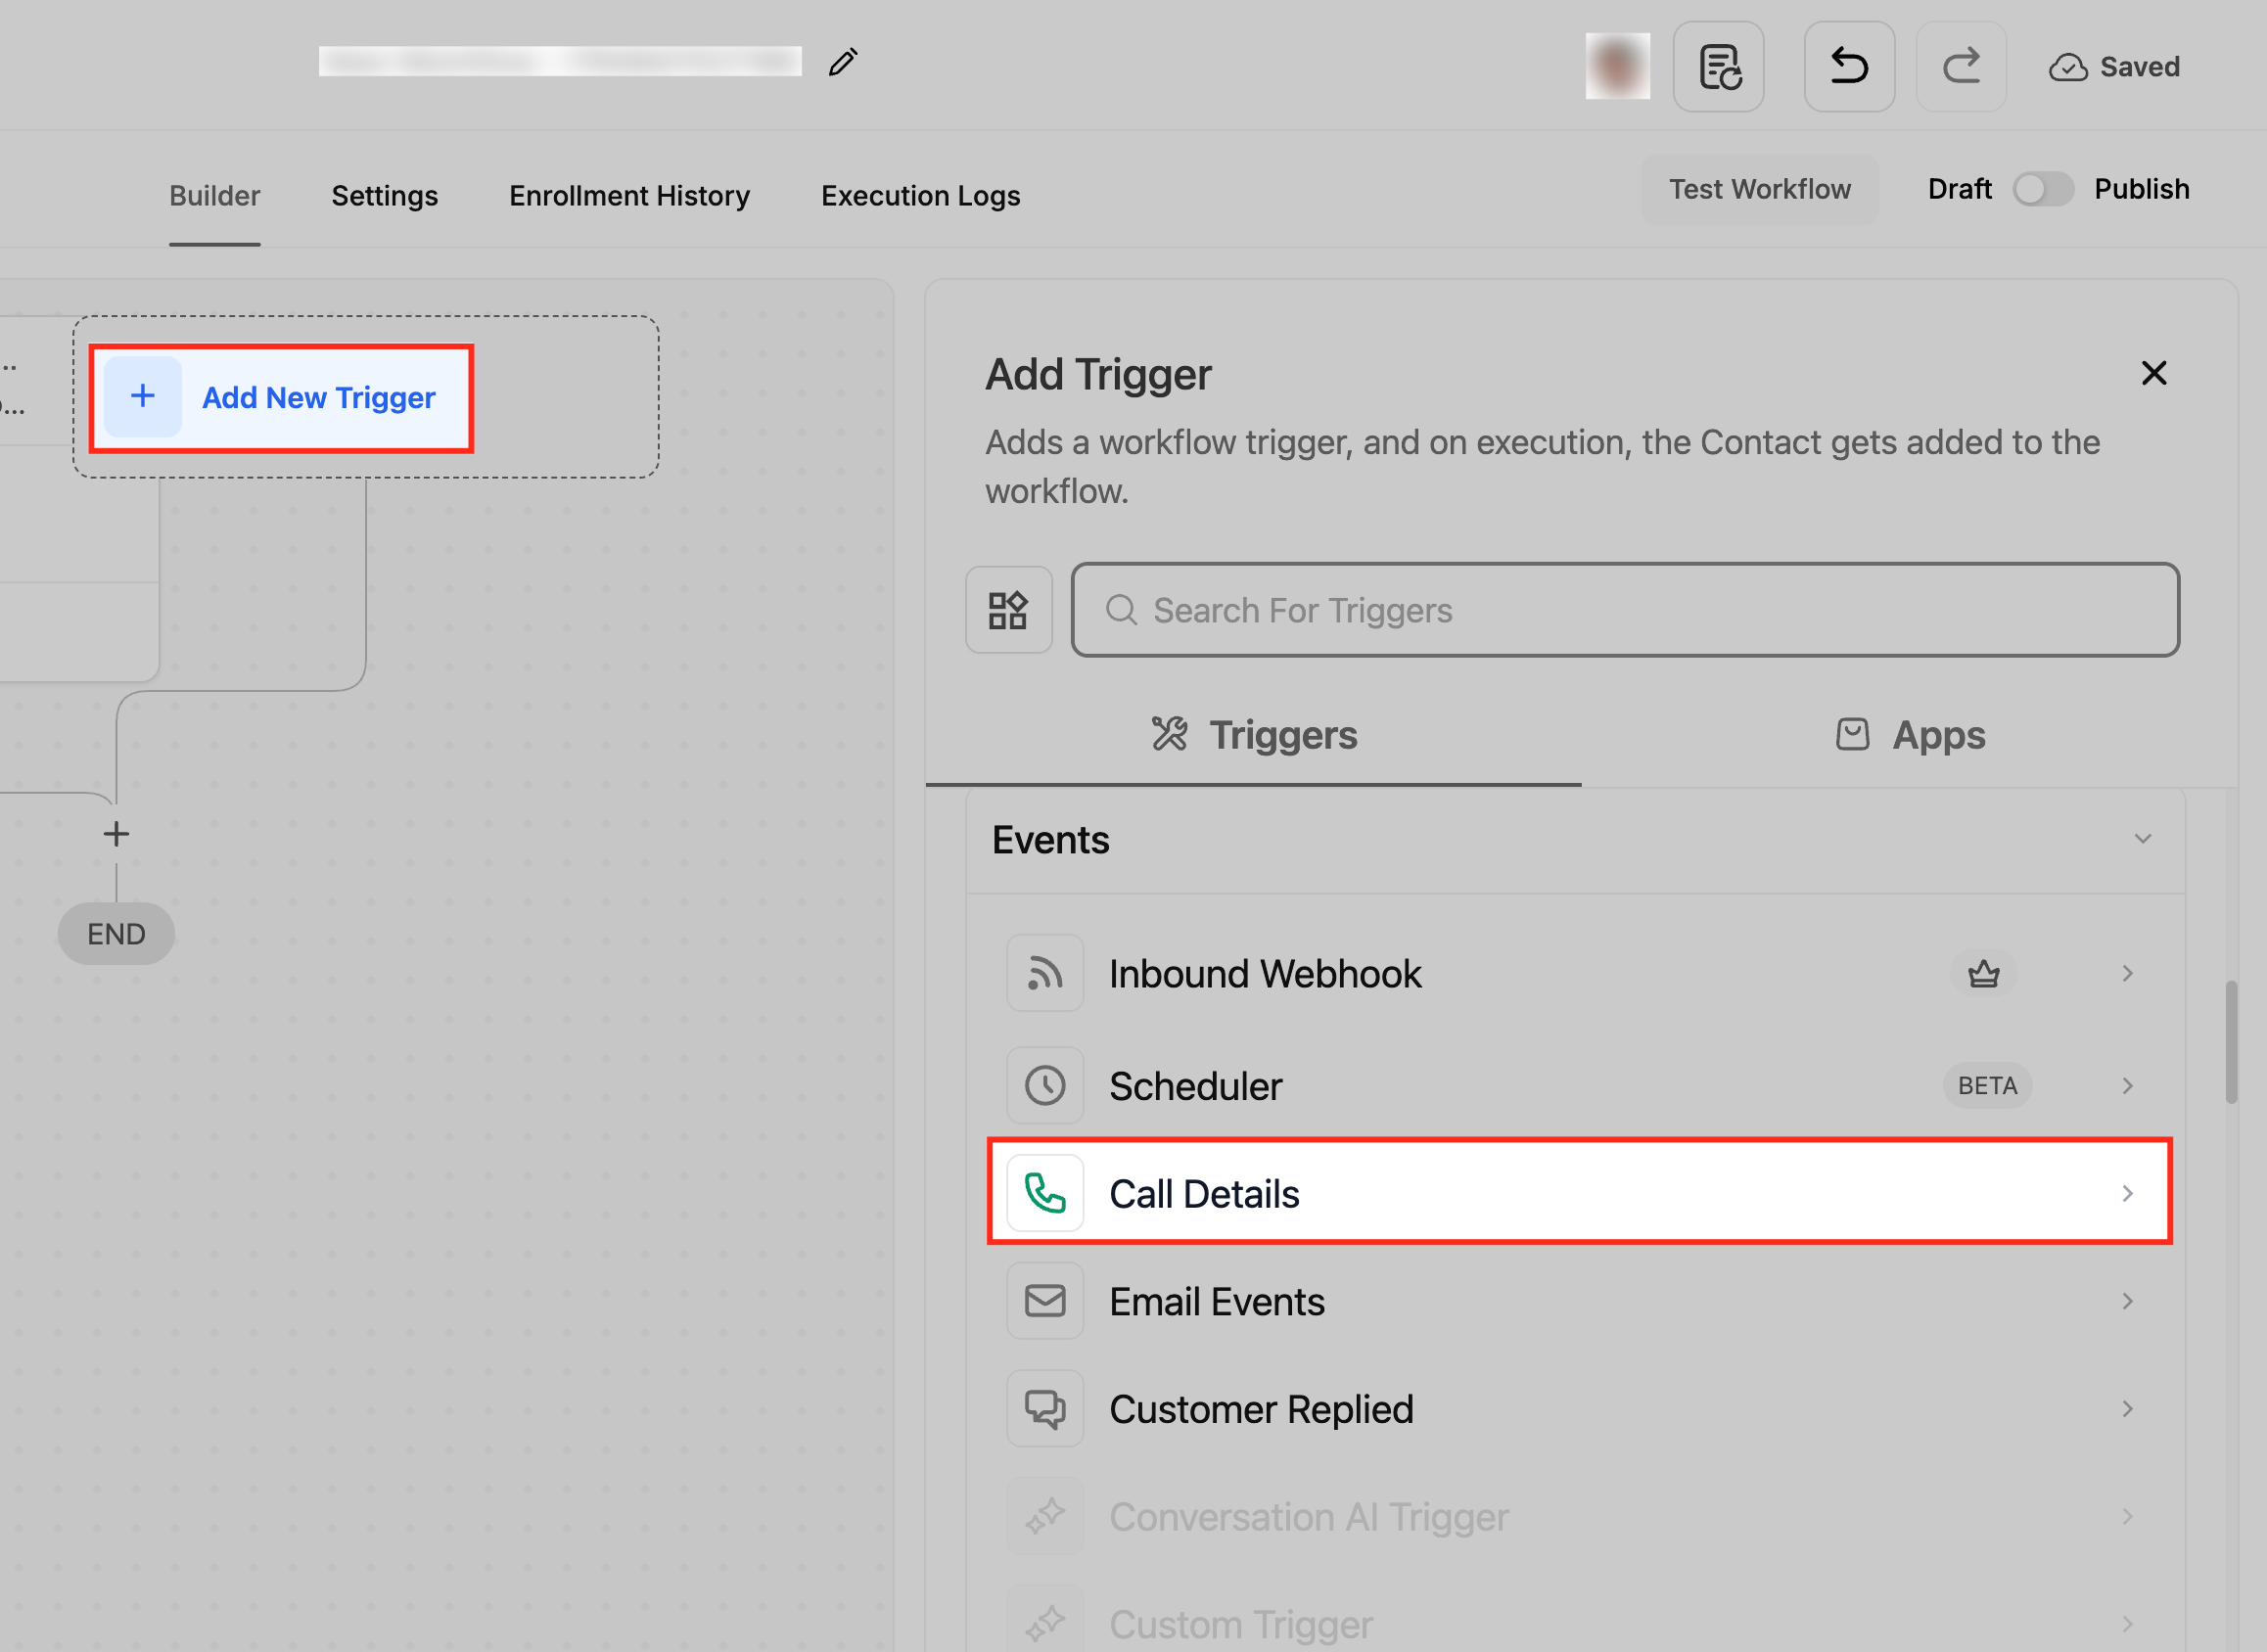
Click Add New Trigger (the + on the canvas).
Use the search field to find the trigger you want, then select it.
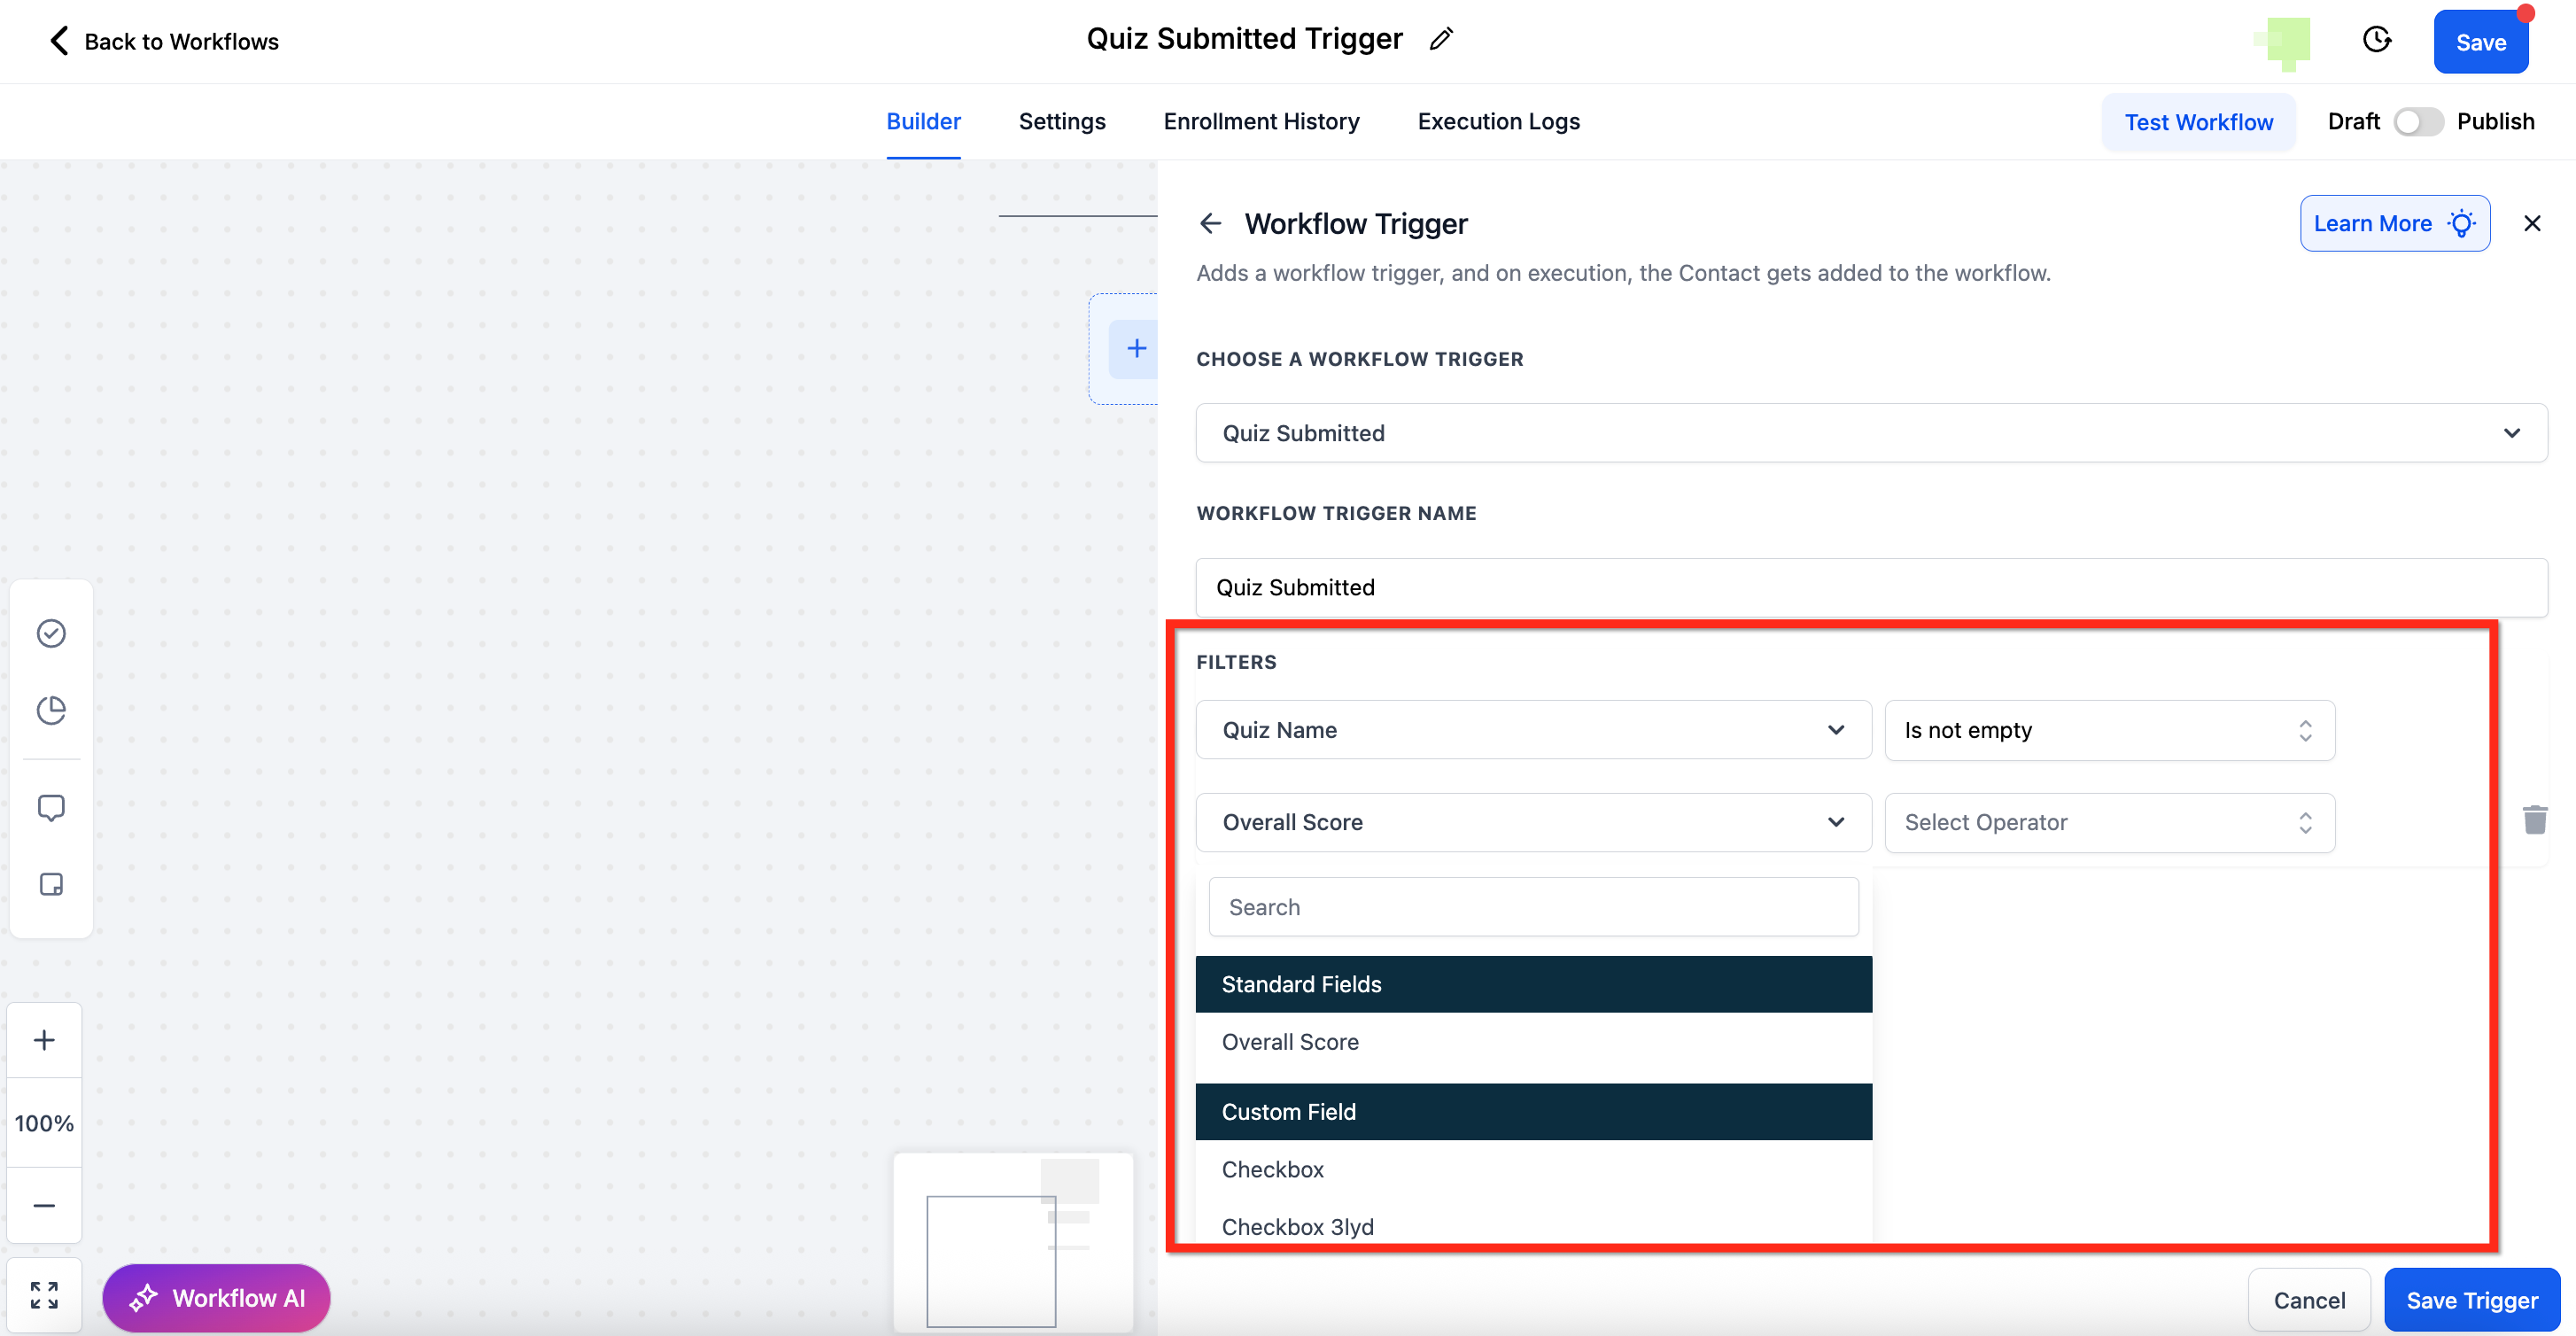
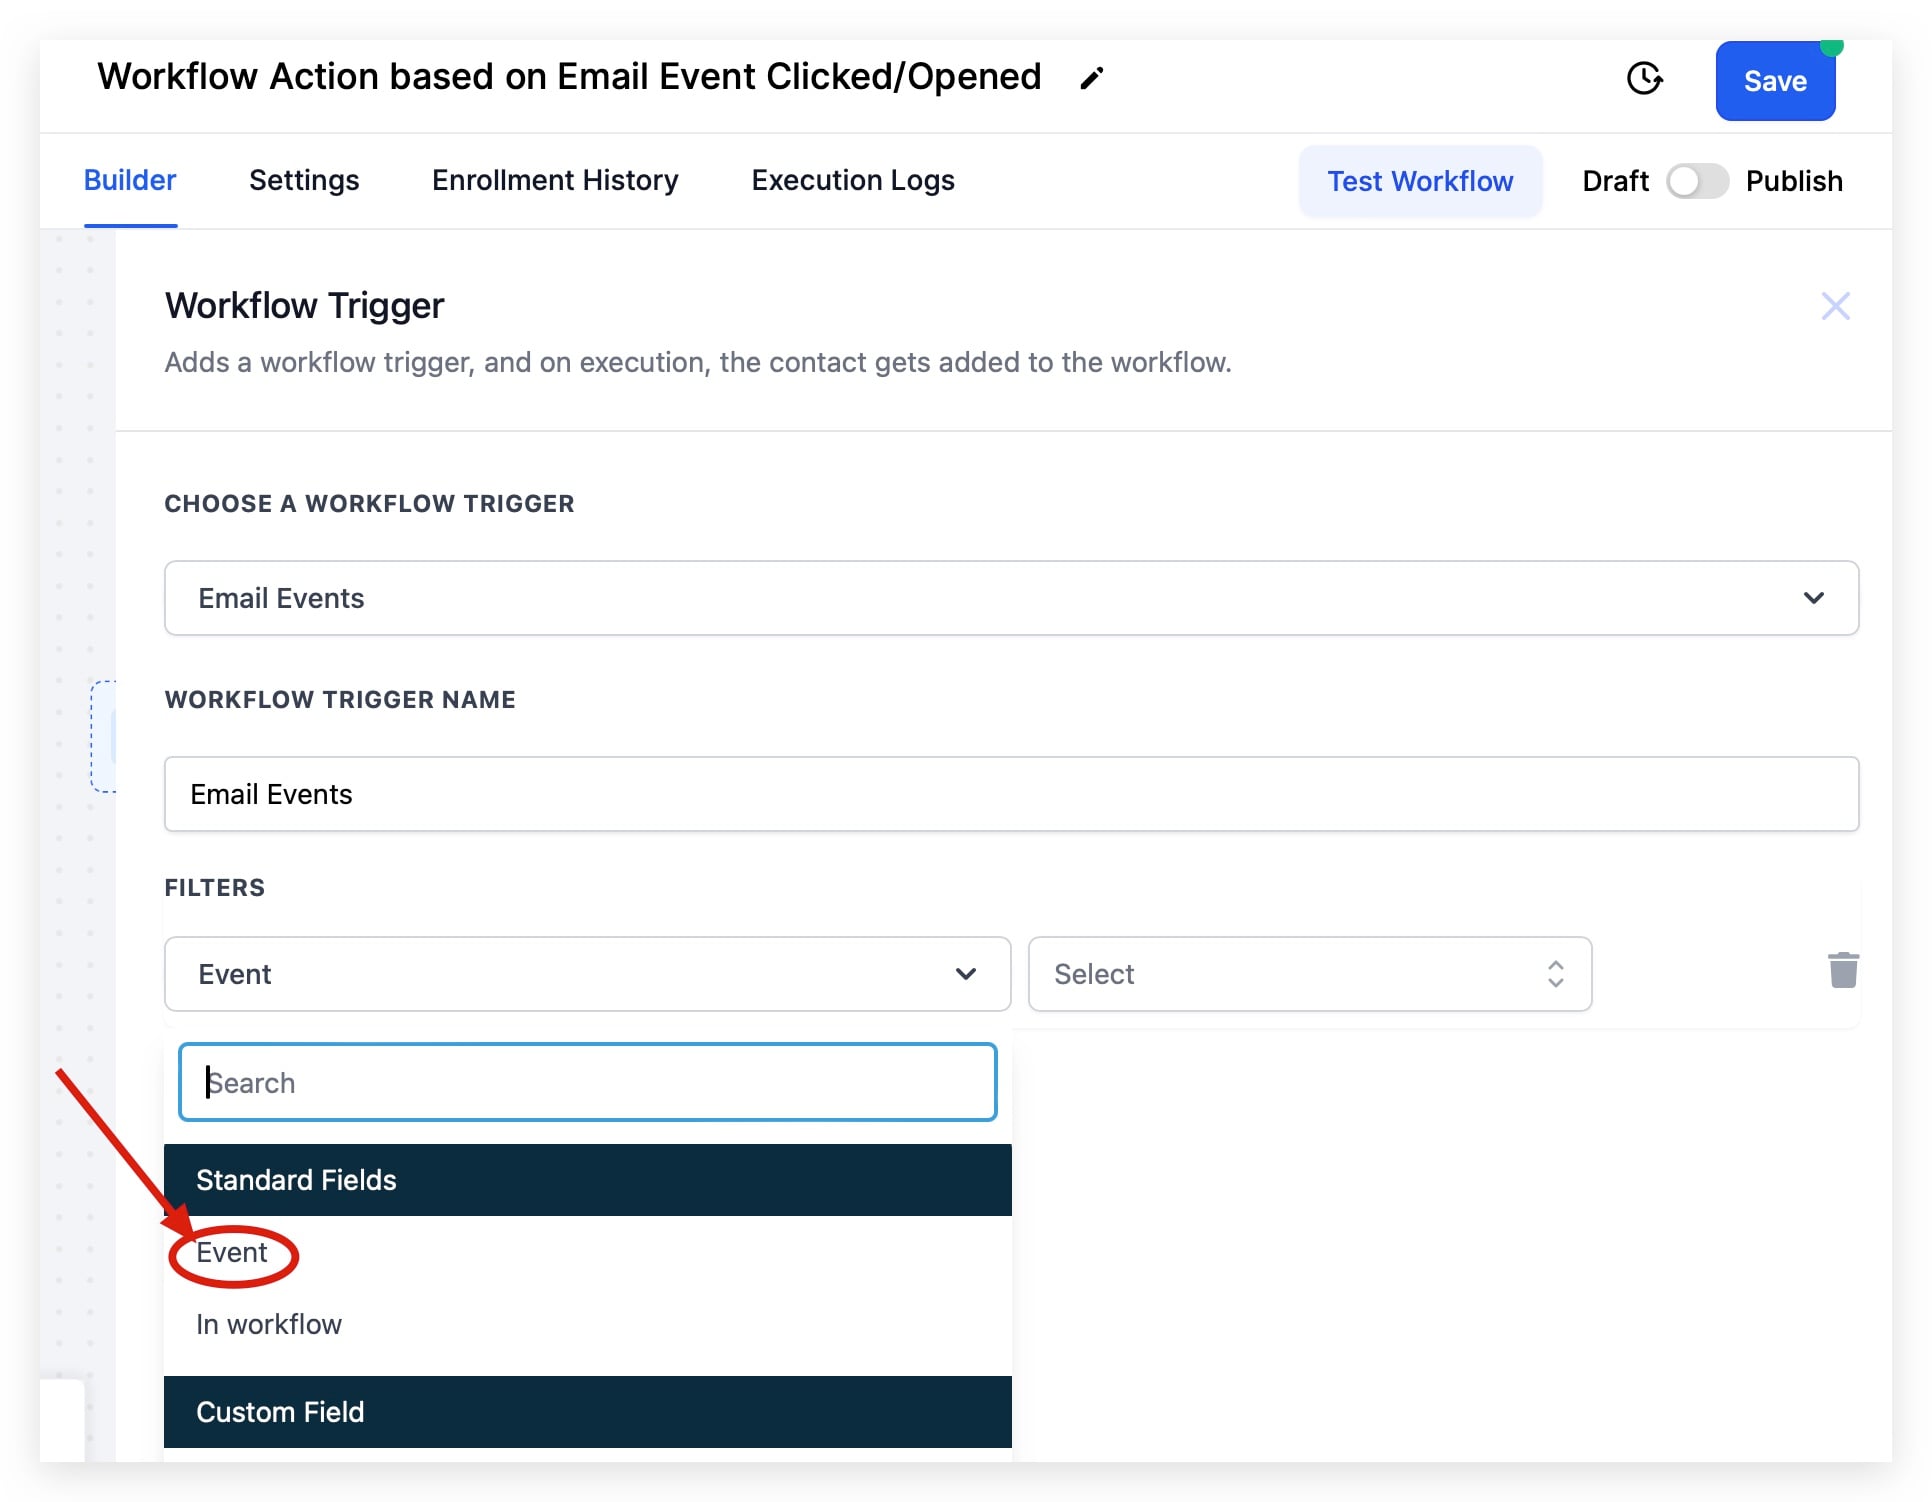
Give the trigger a clear Trigger Name so it is easy to identify later. The name does not affect how the trigger runs.
Click + Add Filters to narrow exactly when the workflow should run. You can stack multiple filters, and all filters must be satisfied for the workflow to fire.
Click Save Trigger.
Add your actions, then toggle Publish and save the workflow.
The rest of this article documents each Event trigger: what it fires on, every filter and option, the data it makes available to downstream actions, and a concrete example for a medical aesthetics practice.
Fires on: A contact submitting any form built in Aesthetix CRM, whether the form is embedded on a funnel, a website page, a survey step, or sent as a standalone link. The trigger fires once per submission. If the same contact submits the same form again, it can fire again (subject to your workflow re-entry settings).
Configuration and filters:
Form is: Select a specific form from the dropdown so the workflow runs only for that form. Leave it unset to fire on any form submission.
T&C Filter (Terms and Conditions): Filter contacts by whether they agreed to the Terms and Conditions checkbox on the form. Options are Agreed and Not Agreed. Contacts who never interacted with the T&C field are treated as Not Agreed. Use this to keep consent-gated automations compliant.
You can stack the T&C filter with the Form is filter and other filters for precise targeting.
Data made available: Every field captured on the form maps to the contact record (name, email, phone, and any custom fields on the form), so all of those values are available to downstream actions as standard contact custom fields.
When to use it: Any time you want to react instantly to a new lead or an existing patient completing a form: consultation requests, new-patient intake, treatment interest forms, event RSVPs.
Example: A prospective patient submits your "Botox Consultation Request" form. Trigger on Form Submitted with Form is = Botox Consultation Request, then send an instant confirmation text, create an opportunity in your New Leads pipeline stage, and notify the front desk to call within five minutes.
Notes and limits: Form fields must be mapped to contact fields for the data to carry into actions. Submitting a form requires at least an email or phone so the contact can be found or created.
Fires on: A contact completing and submitting a survey built in Aesthetix CRM. Surveys differ from forms in that they can span multiple steps and support qualification logic, so this trigger reacts to the full submission.
Configuration and filters:
Survey is: Select a specific survey from the dropdown, or leave it unset to fire on any survey.
Disqualified: Filter on the survey's qualification logic. Choose whether the workflow should run for contacts who were Disqualified or Not Disqualified based on the answers they gave. This lets you route qualified and disqualified respondents down different paths.
T&C Filter (Terms and Conditions): Same as Form Submitted. Filter by Agreed or Not Agreed; no interaction counts as Not Agreed.
Data made available: All survey answers mapped to contact fields, plus the contact's standard fields, are available to downstream actions.
When to use it: Lead qualification and segmentation. Surveys with branching questions are ideal for sorting prospective patients by interest, budget, or treatment area.
Example: Your "Skin Concerns Survey" disqualifies respondents who are outside your service area. Trigger on Survey Submitted with Survey is = Skin Concerns Survey and Disqualified = Not Disqualified, then add qualified respondents to a nurture sequence recommending the right treatment. Build a second workflow filtered to Disqualified = Disqualified that simply sends a polite "we are not in your area yet" email.
Notes and limits: Disqualification is driven by the logic configured inside the survey itself. If a survey has no qualification rules, every respondent is treated as Not Disqualified.
Fires on: A contact finishing and submitting a published quiz. The trigger fires the instant the quiz score is recorded, so you can react in real time.
Configuration and filters:
Quiz Name: Select a specific quiz, choose Any to include all quizzes, or use Is Not to exclude specific quizzes.
Overall Score: Build score rules against the total score, for example is greater than 80, or a range using the Between operator (for example Between 30 and 60). With Between, enter the lower score in the first field and the higher score in the second; both endpoints are included, and the system blocks invalid ranges where the minimum is greater than the maximum.
Category Score: Target contacts based on their score within a specific quiz section, so you can react to people who excelled or struggled in one area.
Custom Field: Reference any custom score fields you created when designing the quiz.
Data made available: Quiz scores and any mapped custom fields flow directly onto the contact record, available to emails, SMS, If/Else conditions, and other actions without manual exports.
When to use it: Scoring and segmenting quiz takers, sending personalized results, and routing high-intent respondents to your team.
Example: A "Which Treatment Is Right for You?" quiz scores interest in injectables. Trigger on Quiz Submitted with Quiz Name = Which Treatment Is Right for You? and Overall Score is greater than 70, then email a tailored treatment guide and assign a coordinator to follow up. Pair with a wait step and If/Else for lower-scoring takers.
Notes and limits: The trigger works with any quiz built in the platform. Combine it with wait times and If/Else logic to build multi-branch nurture sequences. A quiz can be embedded on a website page or funnel step using its embed code.
Fires on: A contact clicking a tracked Trigger Link that you placed in an email, SMS, WhatsApp template, or other communication. Each click is logged on the contact record and can launch this workflow.
Configuration and filters:
Trigger link: Select the specific Trigger Link that should activate the workflow from the dropdown. This is the link you created and inserted into your message.
Data made available: The click is recorded against the contact, so standard contact fields are available to downstream actions. The trigger tells you which link was clicked, which you can use to branch.
When to use it: Measuring real intent and reacting to it. Trigger Links turn a click into an automation, so you can branch follow-ups based on what a patient actually engaged with rather than just opens.
Example: You send a reactivation campaign with a "Book My Appointment" Trigger Link. Trigger on Trigger Link Clicked with Trigger link = Book My Appointment, then send the patient your scheduling link, apply a "Reactivation Interested" tag, and notify the front desk.
Notes and limits: You create and manage Trigger Links under Marketing > Trigger Links, where you can name a link, set its destination URL, and use the custom value picker (the {} button) to insert dynamic fields into the destination. Trigger Links work across email, SMS, and WhatsApp V2 templates (as a button or inline link, with a combined limit of two buttons per WhatsApp message). Keep destination URLs under roughly 2 KB for email-client compatibility.
Fires on: A contact reaching a defined point of completion in a tracked video embedded on a funnel or website page. The trigger evaluates how much of the video the viewer watched.
Configuration and filters:
Funnel: Select the specific funnel that contains the video, choose none to leave it open, and set the operator for the match.
Video: Select the specific video to monitor, or leave it open. Set the operator for the match.
Video duration (%): Set the percentage of the video the viewer must reach to fire the workflow (for example, fire at 50% or 90% watched). Set the operator (such as is greater than or equal to) alongside the percentage.
Data made available: The contact record is updated with the tracked engagement; standard contact fields are available to downstream actions.
When to use it: Measuring deep engagement with educational or sales videos and reacting to viewers who watched enough to signal intent.
Example: You publish a "What to Expect From Your First Laser Session" video on a landing page. Trigger on Video Tracking with Video = First Laser Session and Video duration (%) is greater than or equal to 75, then send a booking link and a new-patient offer, since a viewer who watched three quarters of the video is a strong prospect.
Notes and limits: For accurate tracking, disable Show Progress Bar in the Video Element settings so viewers cannot manually scrub through the video, which would distort the percentage watched. The video must be encoded properly to appear in the filter dropdown. Setting up a redirect for unregistered visitors is also recommended so views are attributed to a contact.
Fires on: A specific engagement event on an email you sent, such as an open, a click, a bounce, a spam complaint, or an unsubscribe. The trigger can listen across your whole account or be scoped to a specific workflow's sends.
Configuration and filters:
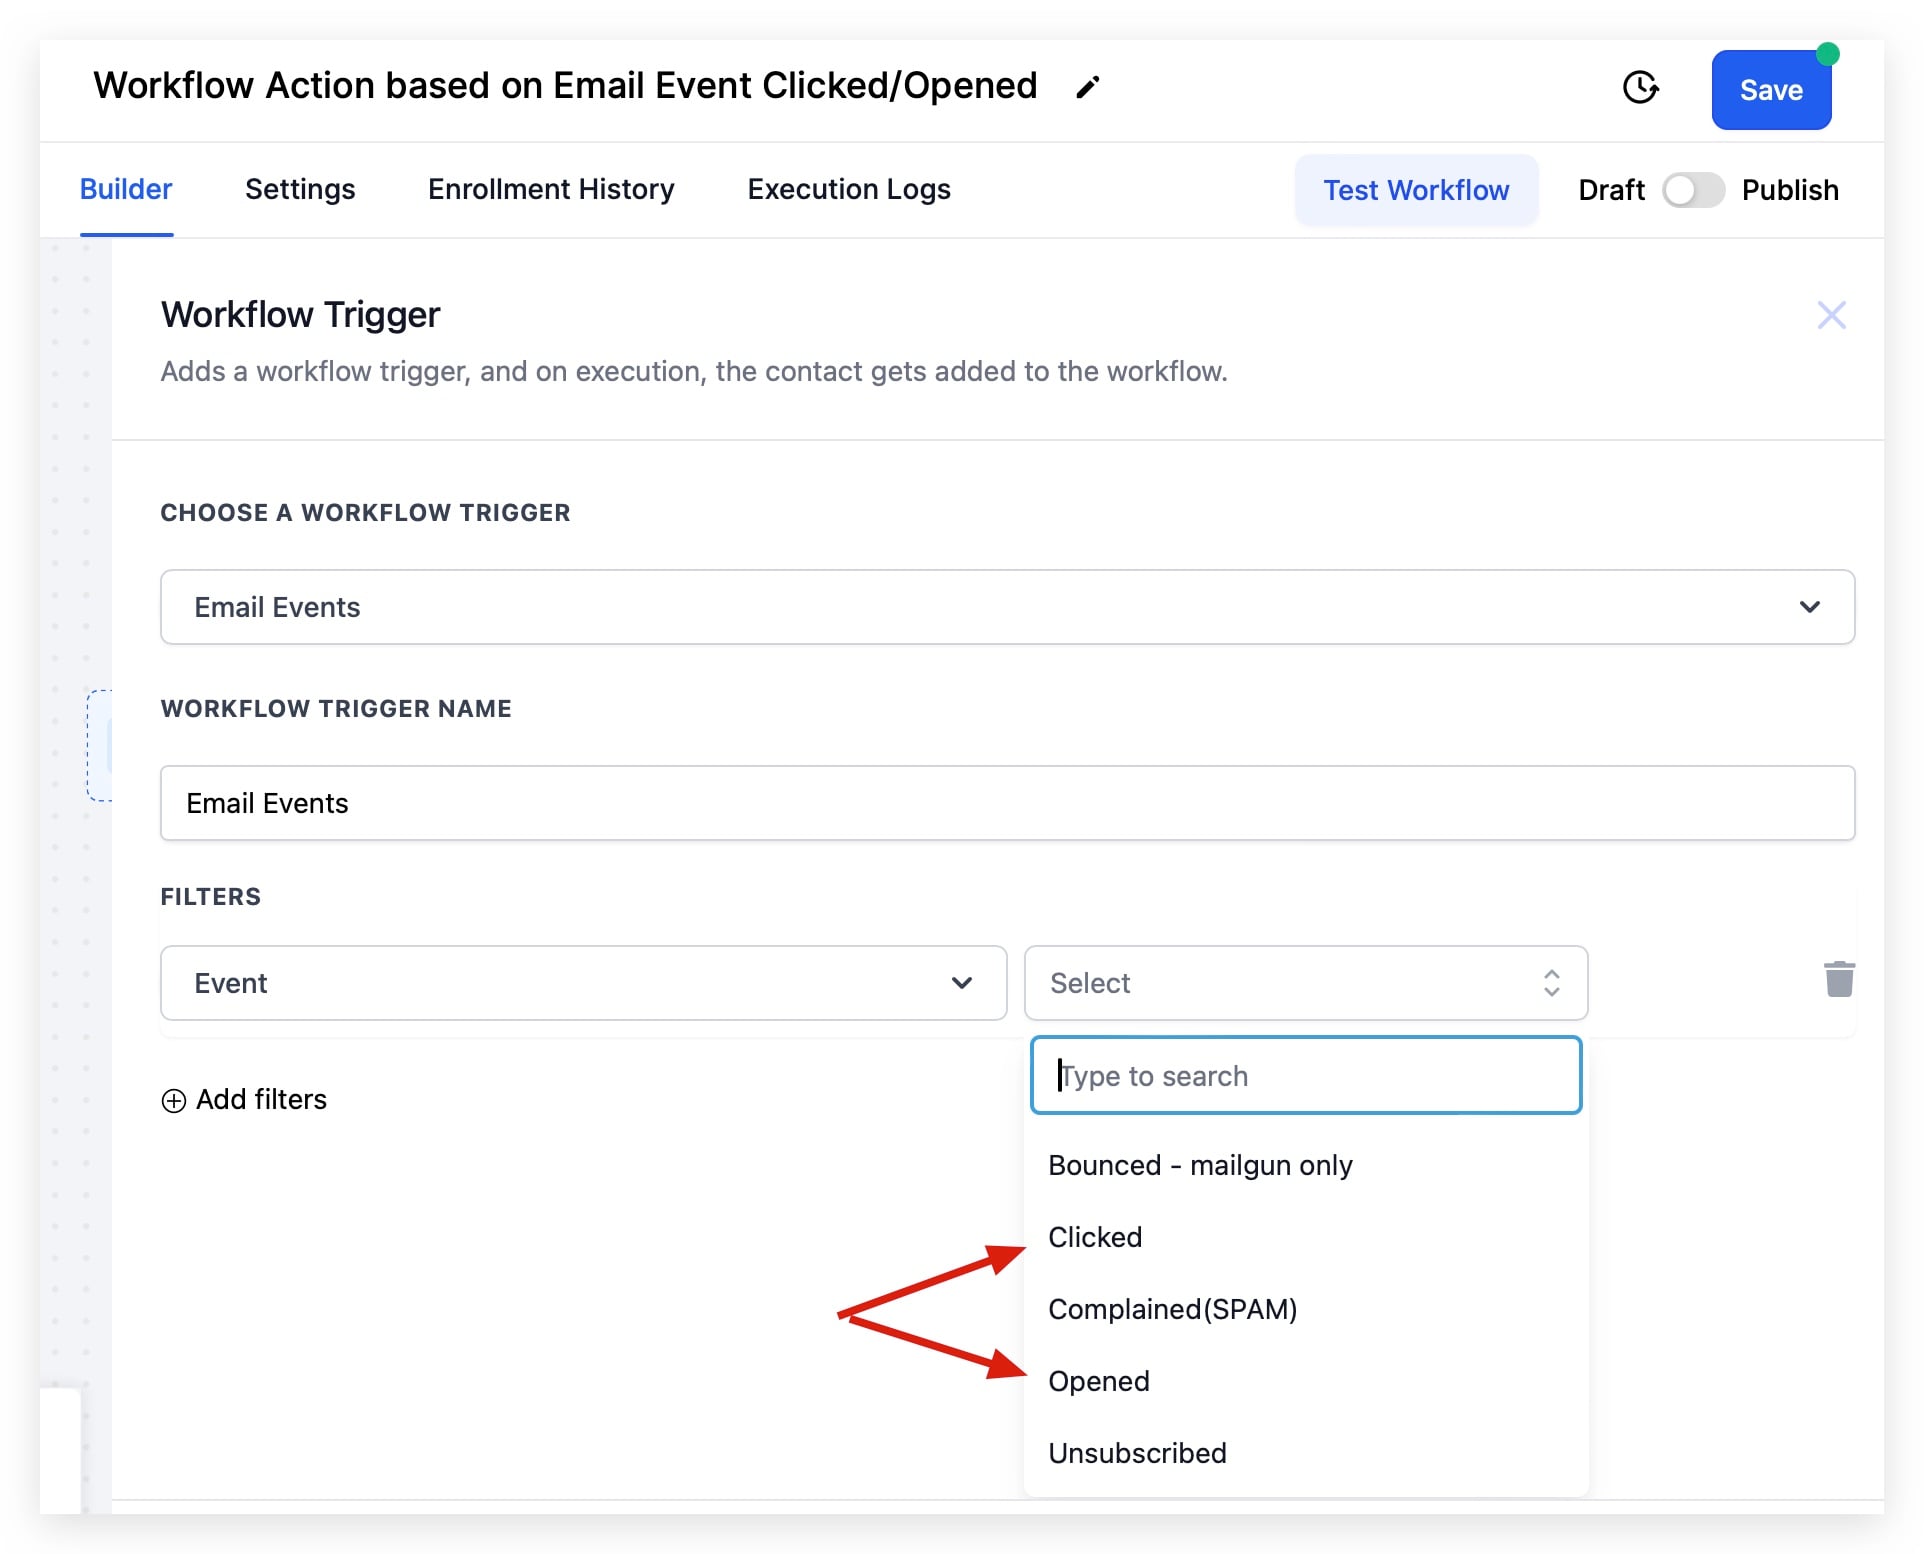
Event: Choose which email event activates the trigger. Available events:
Bounced (email bounced; mailbox-provider dependent)
Clicked (a tracked link in the email was clicked)
Complained (SPAM) (the recipient reported the email as spam)
Opened (the email's tracking pixel loaded)
Unsubscribed (contact unsubscribed and is set to Do Not Disturb status)
In Workflow: Scope the trigger to look for the event only within a specific workflow's sends, for precise attribution.
You can layer additional filters such as campaign or source so the trigger fires only for the sends you care about.

Data made available: The contact record reflects the engagement event; standard contact fields are available to downstream actions.
When to use it: Reacting to engagement (re-engaging clickers, escalating high-intent openers) and protecting your sender reputation by automatically handling bounces, spam complaints, and unsubscribes.
Example: A patient clicks the offer link in your monthly newsletter. Trigger on Email Events with Event = Clicked, then send a treatment-specific follow-up and create a task for a coordinator. Build a second workflow on Event = Bounced or Complained (SPAM) that removes the contact from active sends and marks them Do Not Disturb to safeguard deliverability.
Notes and limits: For accurate tracking, make sure open and click events are enabled on your sending domain, since mailbox providers use that engagement data for deliverability. Opened fires when the tracking pixel loads; Clicked requires a deliberate click and is the stronger signal. If Bot Detection Prevention is enabled in your Business Profile, bot-driven opens and clicks are filtered out and will not trigger the workflow. If your trigger is not firing, confirm tracking is enabled, the workflow is published, and the filter matches the actual event and source.
Fires on: A contact replying to a message you sent. This trigger reacts to replies from known contacts and is one of the strongest intent signals available. (To capture first-contact emails from people who are not yet in your CRM, use the Inbound Email Trigger instead.)
Configuration and filters:
Contains Phrase: Runs only when the reply includes specific words or phrases.
Exact Match Phrase: Runs only when the reply exactly matches what you specify.
Has Tag: Includes only contacts who have the selected tags.
Doesn't Have Tag: Excludes contacts who have the selected tags.
Intent Type: Uses natural-language intent detection to categorize replies (for example, positive response, complaint, question).
Replied to Workflow: Runs only if the contact replied to a specific workflow's messages.
Reply Channel: Runs only when the reply came from a selected channel (for example Email, SMS, WhatsApp, or All-in-One Chat).
When Reply Channel = All-in-One Chat, an additional Chat Type is filter appears with options Chat Widget or Live Chat.
A third-level filter then appears based on Chat Type: Chat Widget is (lists only All-in-One Chat widgets) or Live Chat is (lists only All-in-One Live Chat configurations).
Data made available: The reply is associated with the contact, so standard contact fields and the reply context are available to downstream actions and routing.
When to use it: Faster follow-up and routing. React the instant a patient replies, direct conversations to the right team, and avoid duplicate automations by narrowing with phrases, tags, intent, and channel.
Example: A patient texts back "interested" after a promo. Trigger on Customer Replied with Contains Phrase = interested, book, pricing and Reply Channel = SMS, then create an opportunity, notify the sales coordinator, and send a scheduling link.
Notes and limits: The All-in-One Chat options are specific to this trigger's Reply Channel filter. Existing Chat Widget triggers continue to work as before. Use separate triggers or workflows for Chat Widget versus Live Chat replies if you need different handling.
Fires on: A new inbound email arriving at your mailboxes. Unlike Customer Replied (which needs an existing contact and an outbound message to reply to), this trigger can capture cold emails from brand-new senders. It handles three email types:
Cold Emails: New emails from unknown senders not yet in your contacts.
Warm Emails: New emails from existing contacts.
Customer Replies: Replies from known senders to an existing thread (optional, controlled by an Advanced setting).
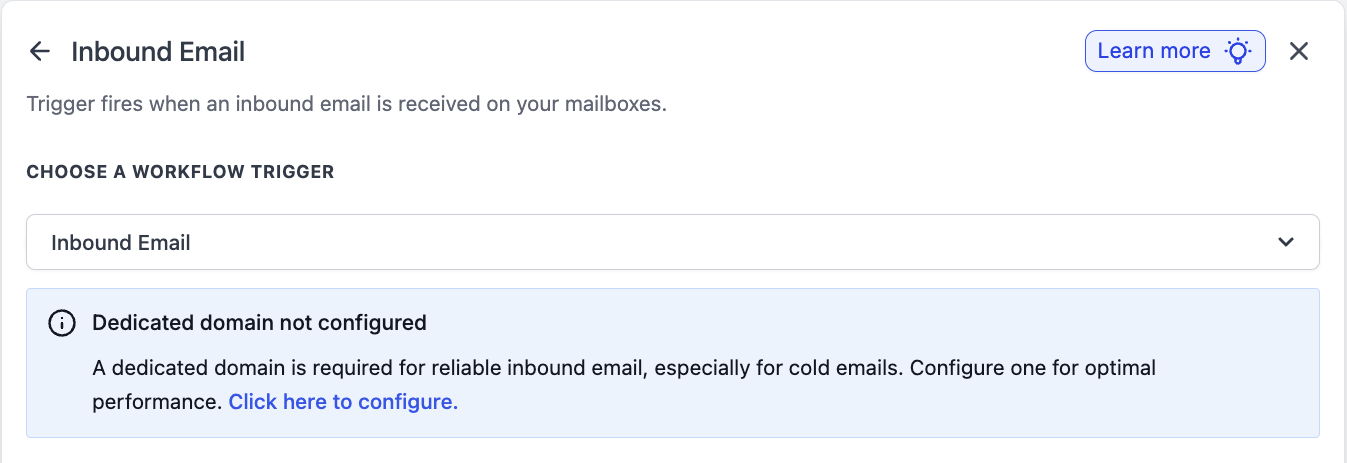
Prerequisites: Full inbound capture (including cold emails) requires a dedicated sending domain on the platform's email system or a Mailgun dedicated domain. Shared domains, two-way sync (Gmail/Outlook), and other SMTP setups capture emails only from existing contacts, not cold inbound. A banner appears in the trigger UI based on your configuration.
Email Setup Type | Cold Inbound Captured | Inbound From Existing Contact Captured |
|---|---|---|
Shared domain (platform email) | No | Yes, for replies to emails you sent |
Dedicated domain (Mailgun or platform email) | Yes | Yes |
Two-way sync (Gmail / Outlook) | No | Yes |
Other SMTP (SendGrid, custom SMTP, etc.) | No | Yes |
Configuration: After selecting the trigger and naming it, add filters and configure the Advanced settings.
Filters:
Filter | Operators | Notes |
|---|---|---|
Email Sent To / Mailbox | Equals, Is any of, Contains, Does not contain | Matches the To / Mailbox field. Is any of supports comma-separated values. Contains is a substring match per address. |
From | Equals, Contains, Does not contain | Single value. Matches the extracted email address (not the display name). Case-insensitive. |
CC | Equals, Is any of, Contains, Does not contain | Matches the CC field. Is any of supports comma-separated values. |
Subject | Equals, Contains, Does not contain | Case-insensitive; whitespace trimmed before comparison. |
Body (plain text) | Contains, Does not contain | Matches the plain-text body by default. |
Has Attachments | Is true, Is false | Set to true to enable attachment-specific downstream actions. |
Replied to Workflow | Is, Is not | Filters on whether the message came from a specific workflow. |
Contact Tag | Has tag, Does not have tag | Segments by audience tag. |
Advanced Settings (collapsible):

Trigger Only for New Email Conversations (toggle, default Off): When Off, the trigger fires for all inbound emails, including replies within existing threads. When On, it fires only when a brand-new email conversation starts. Turn this On for first-touch scenarios so you do not fire on every back-and-forth reply.
Custom Value Picker fields (data made available):
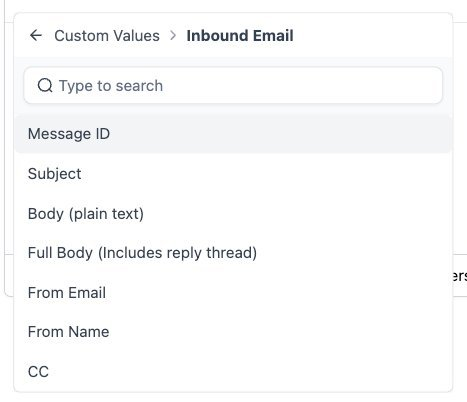
Custom Value | Description |
|---|---|
{{inboundEmail.messageId}} | Unique message ID of the inbound email |
{{inboundEmail.subject}} | Subject line |
{{inboundEmail.bodyPlain}} | Plain-text body content |
{{inboundEmail.bodyFullPlain}} | Full plain-text body including the entire reply thread |
{{inboundEmail.fromEmail}} | Sender's email address |
{{inboundEmail.fromName}} | Sender's display name |
{{inboundEmail.cc}} | CC recipients |
Use these in emails, If/Else conditions, and AI actions to personalize replies and route conversations.
When to use it: Capturing leads from cold inbound email, routing inbox traffic (sales@, support@, billing@) to the right path, escalating support requests, and starting intake workflows when an email includes attachments.
Example: A prospective patient emails [email protected] directly. Trigger on Inbound Email with Email Sent To / Mailbox = [email protected], automatically create the contact, send an acknowledgement reply, and start a new-patient nurture sequence.
Notes and limits: Any email sent to your dedicated domain is captured regardless of the name before the @ symbol. Each account should use a unique dedicated email subdomain; reusing the same domain across accounts can route inbound mail unpredictably. An email can match both the Inbound Email and Customer Replied triggers if both are configured in separate workflows; use the new-conversation toggle to control overlap.
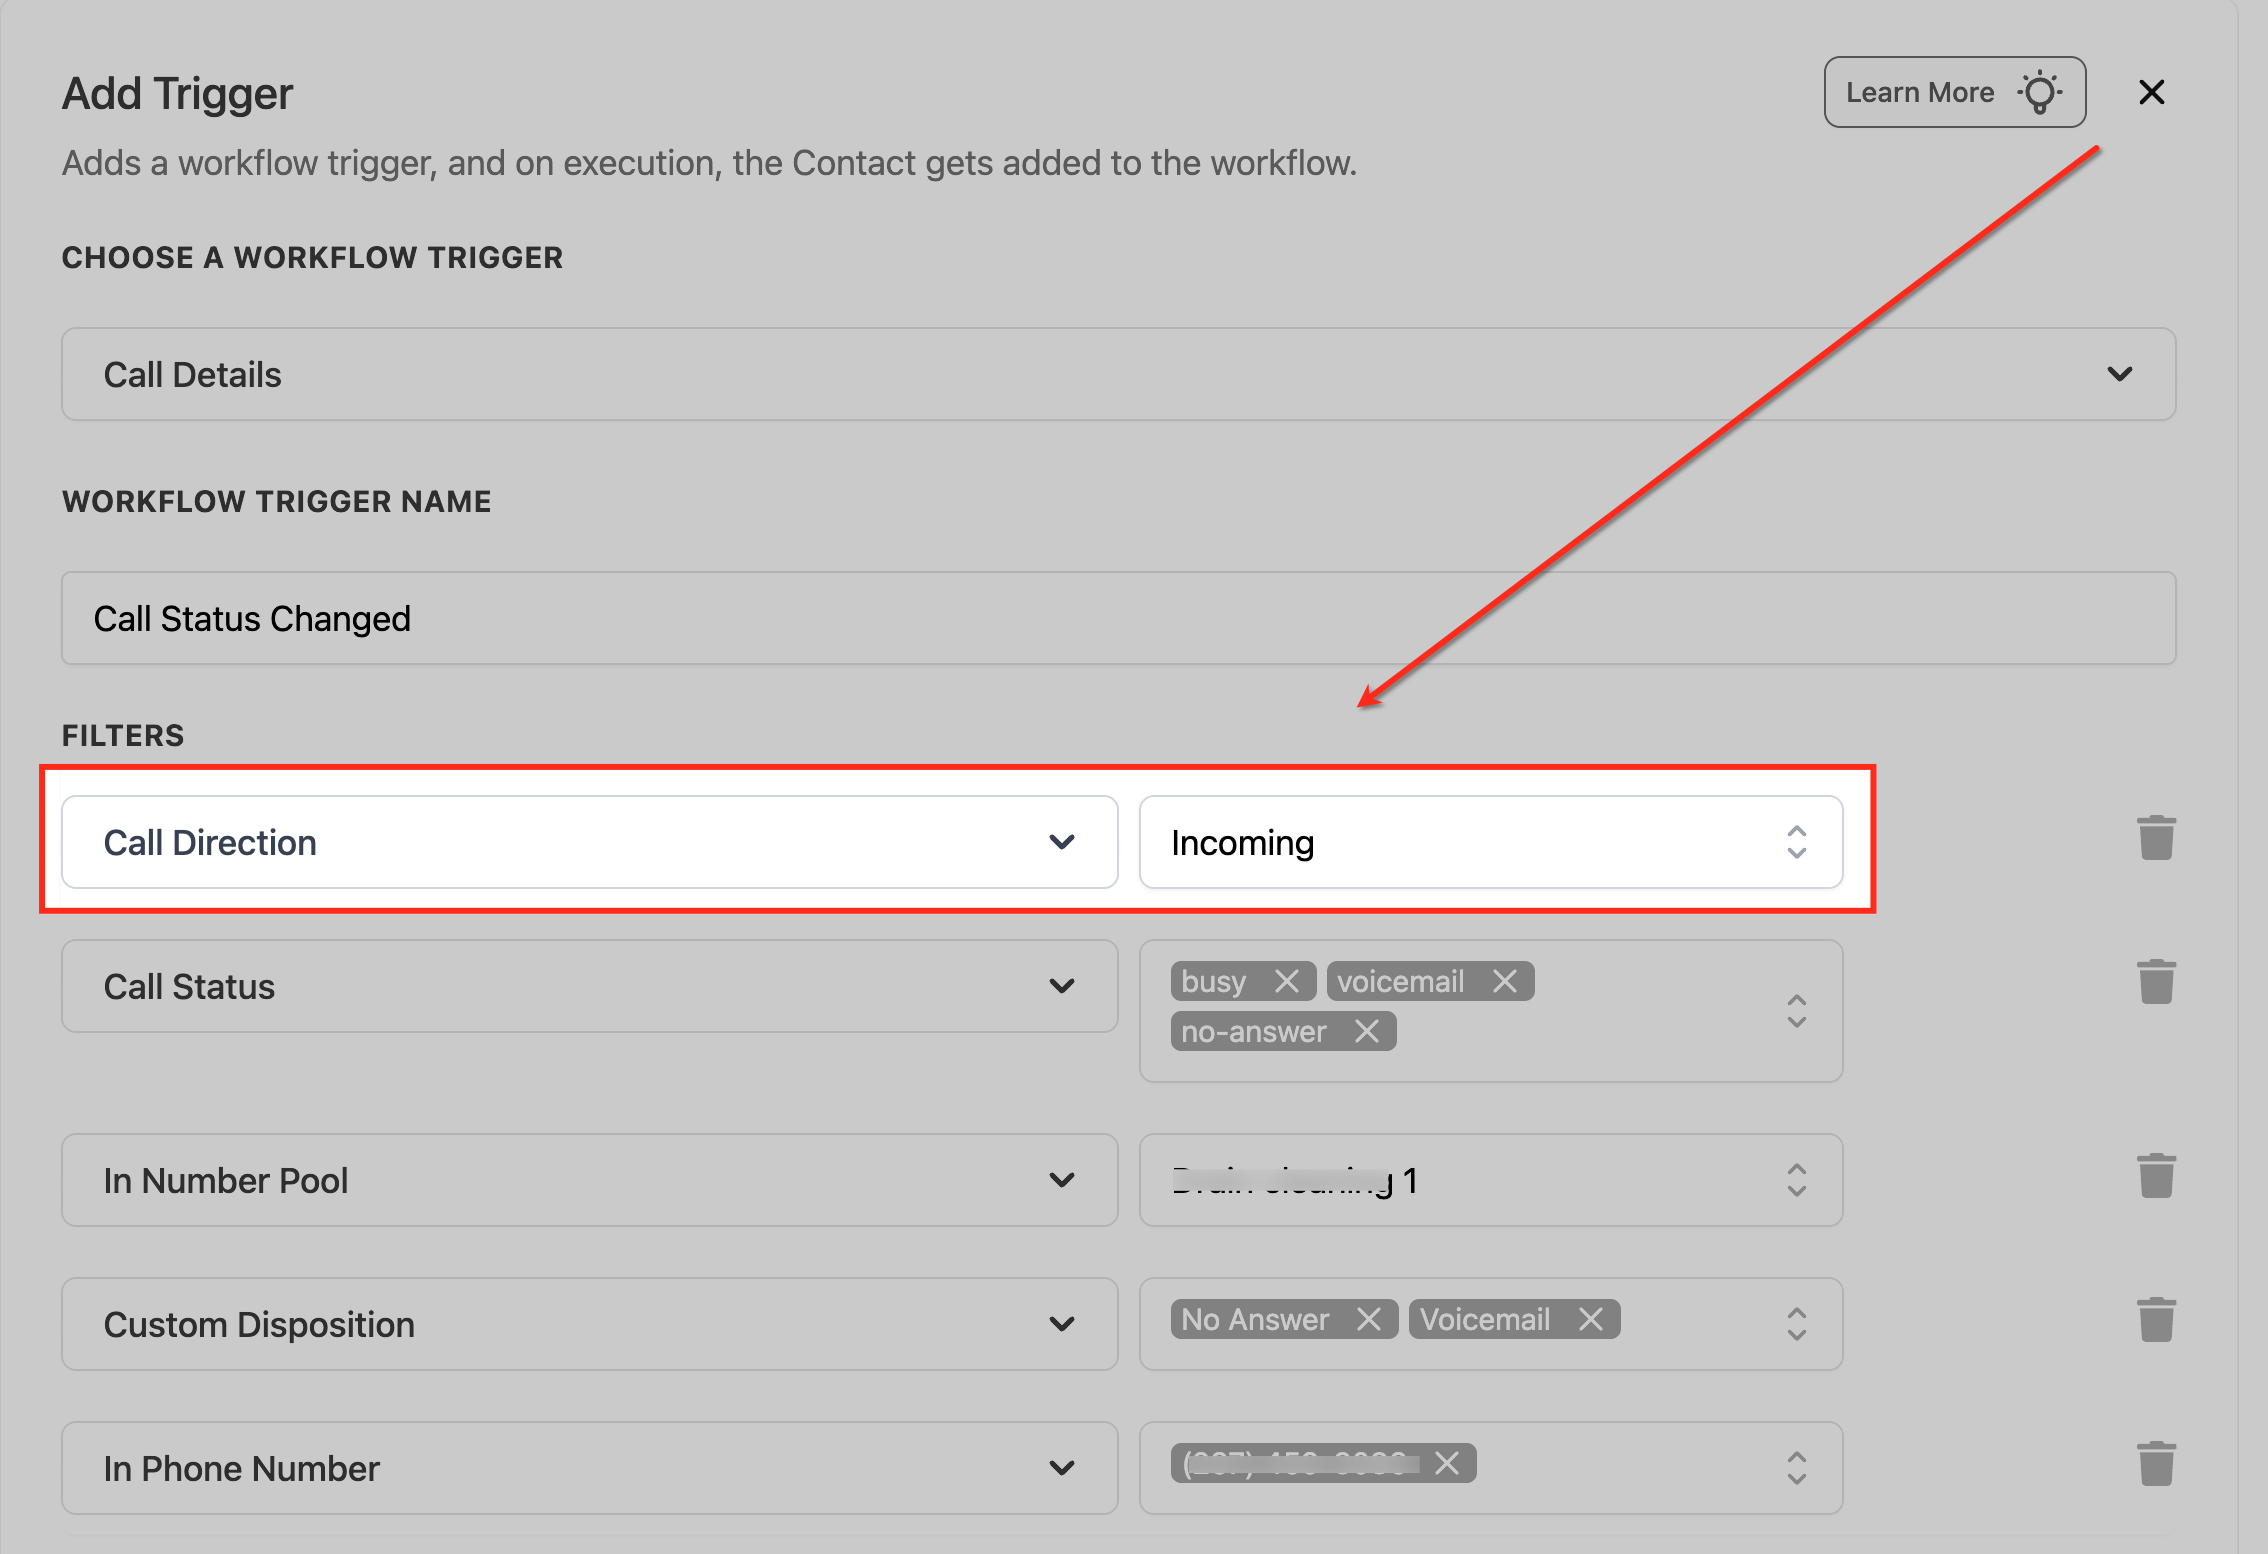
Fires on: Call-related information being updated for a phone call: a change to call status, call direction, the associated phone number or number pool, or a custom disposition. The trigger fires only when the call details you filtered for are met, not for every call.
Configuration and filters: Open the workflow builder, add the trigger, choose Call Details, and name it. Use Add Filters to combine conditions (all selected filters must be met).
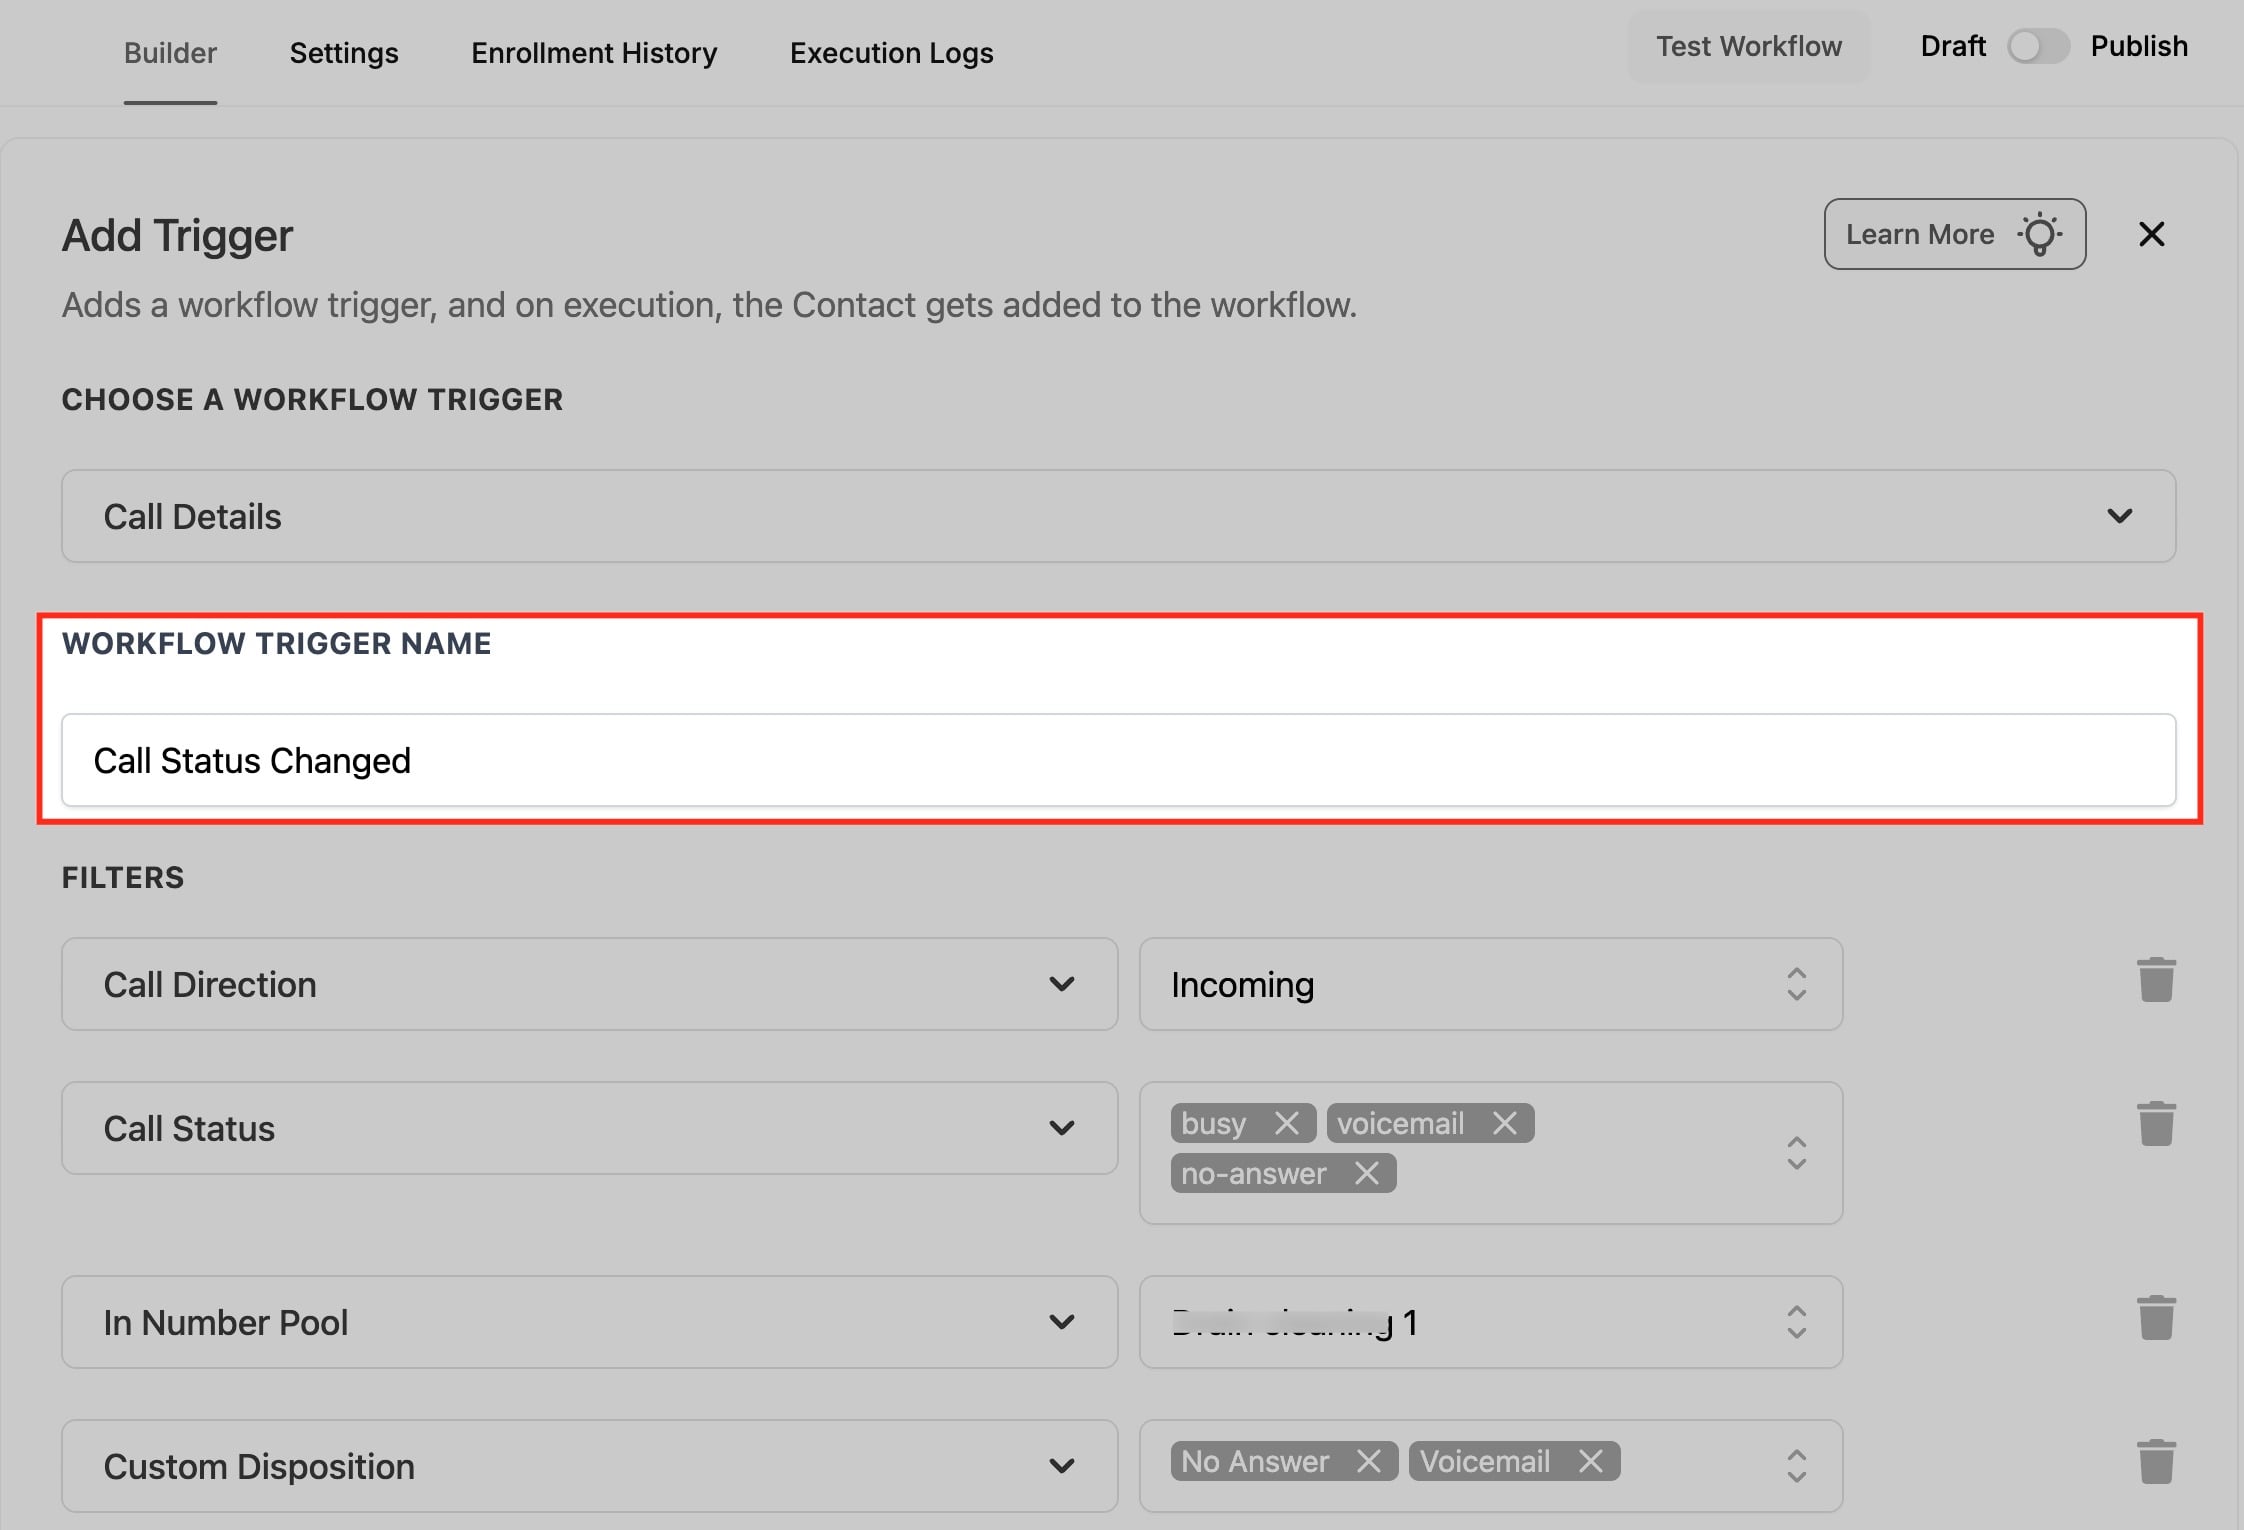
Call Direction: Respond to incoming calls, outgoing calls, or both. Useful for separating inbound lead handling from outbound call processes.
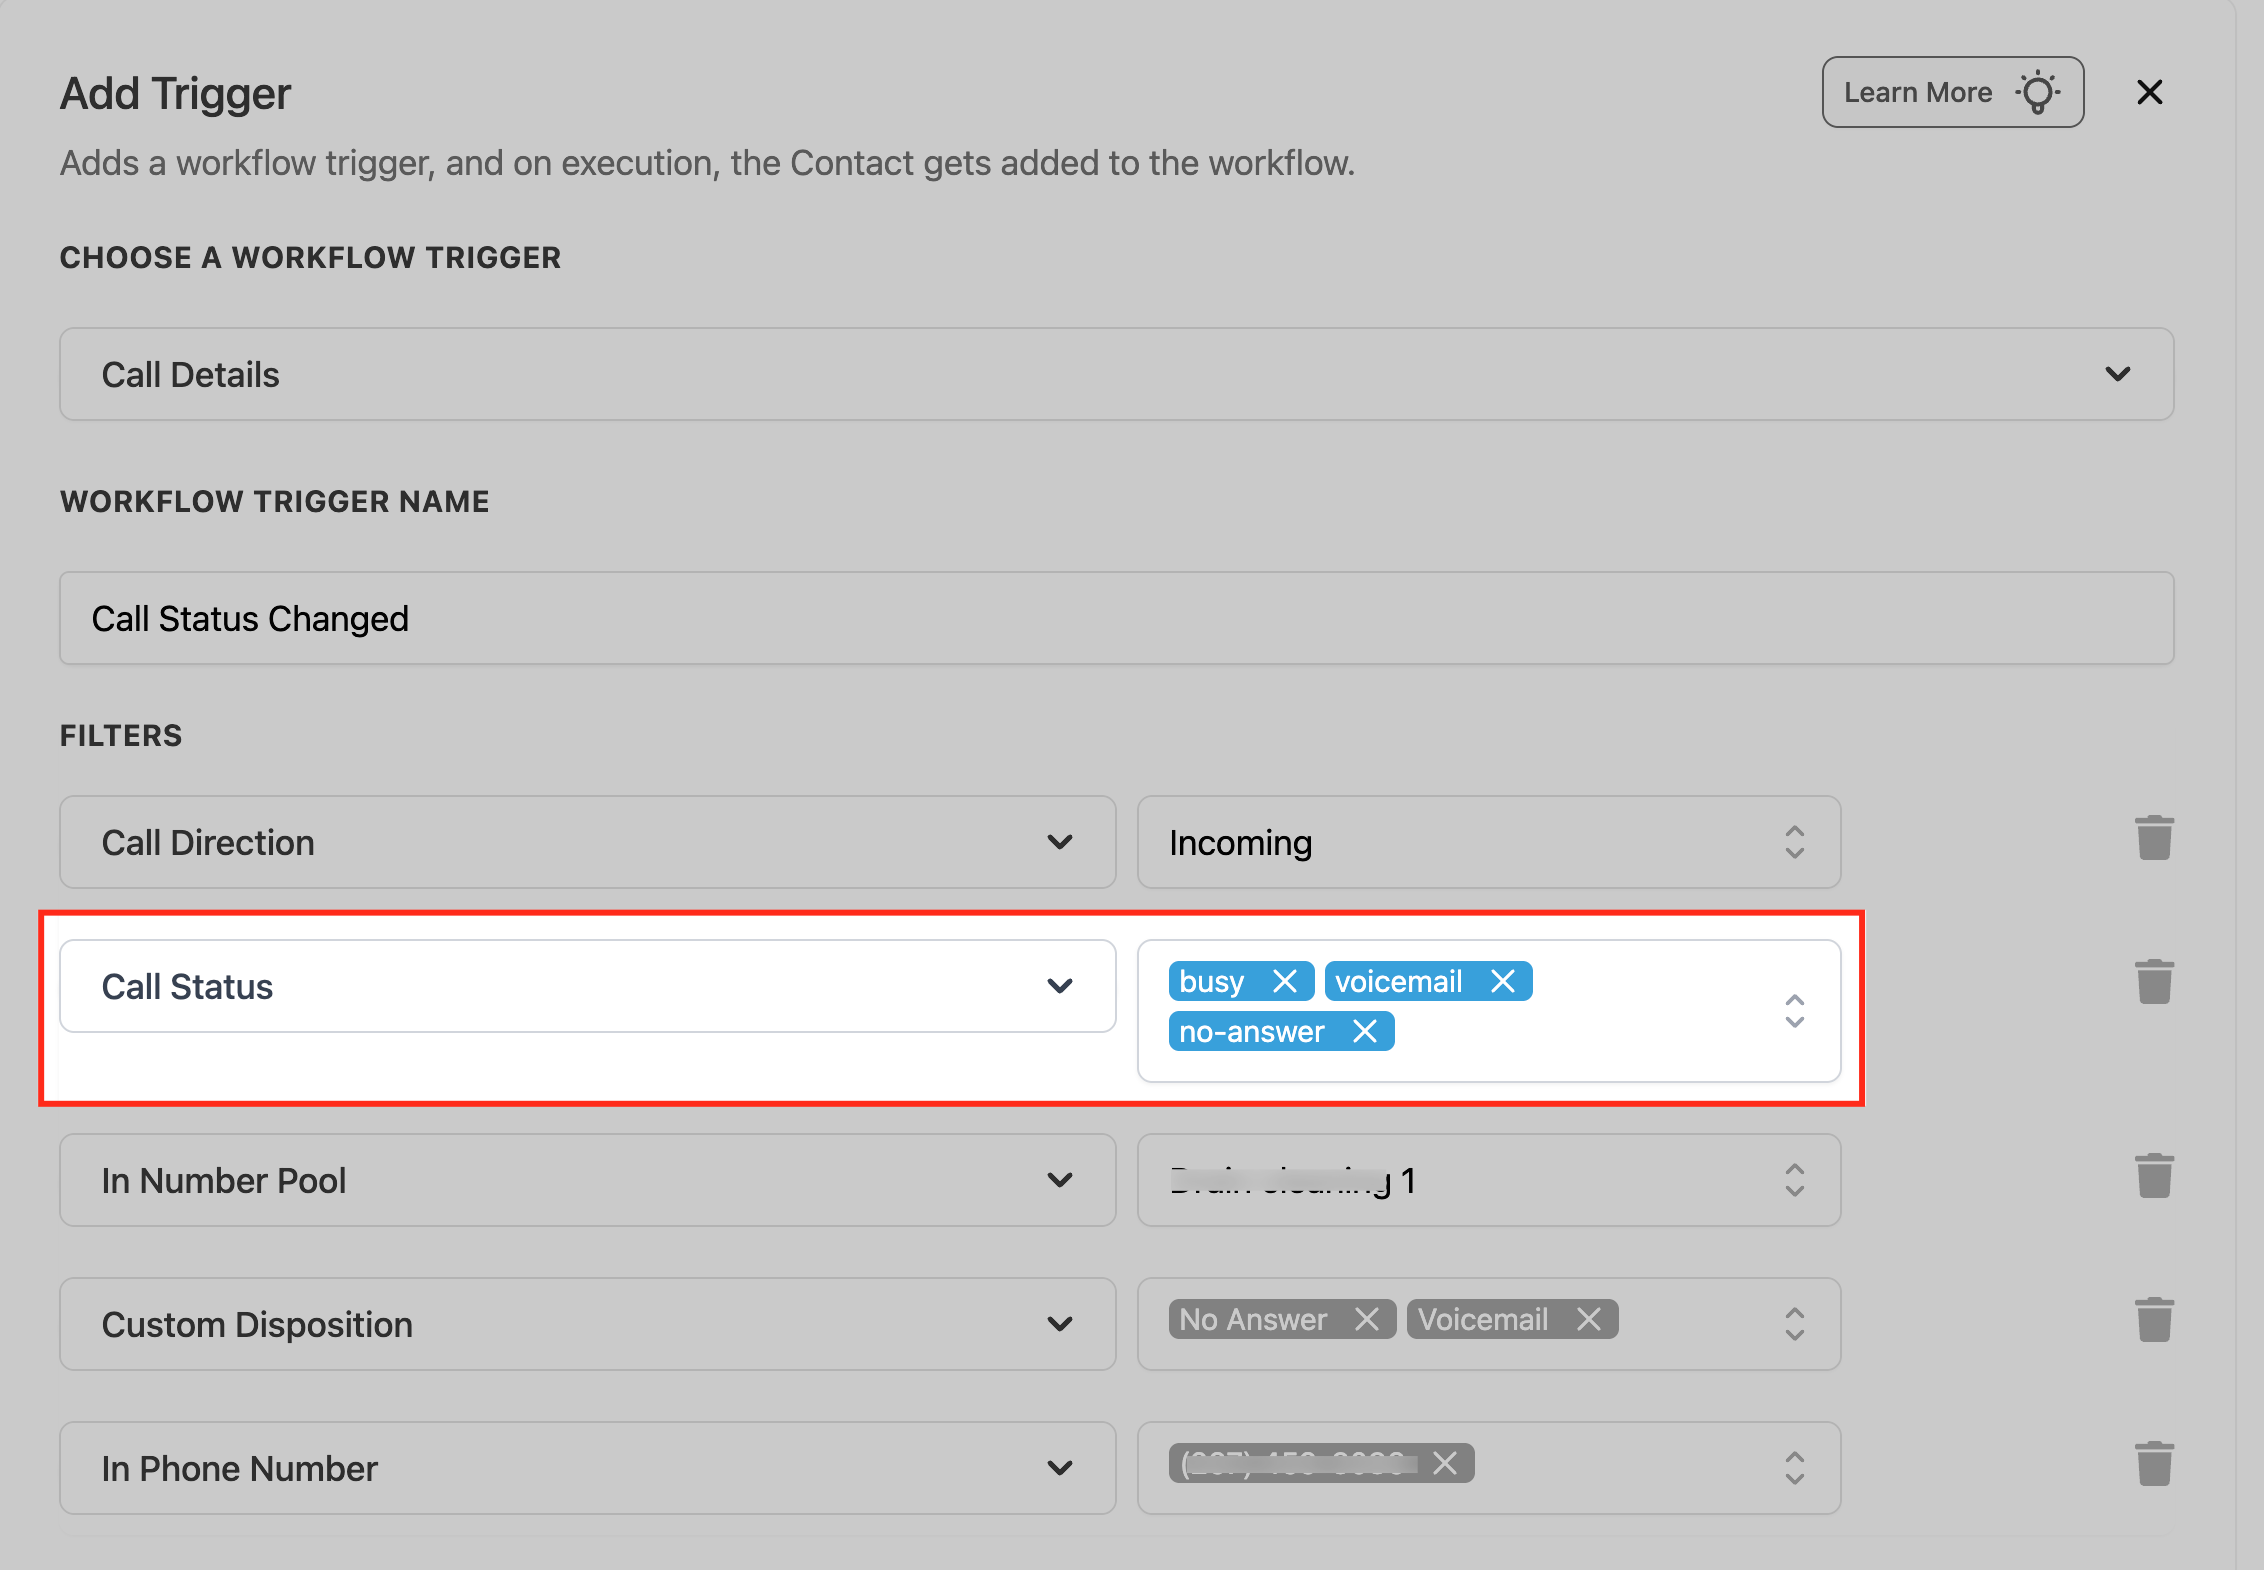
Call Status: Choose which outcomes activate the trigger, such as no answer, voicemail, or busy. The workflow runs only when a call updates to a selected status.
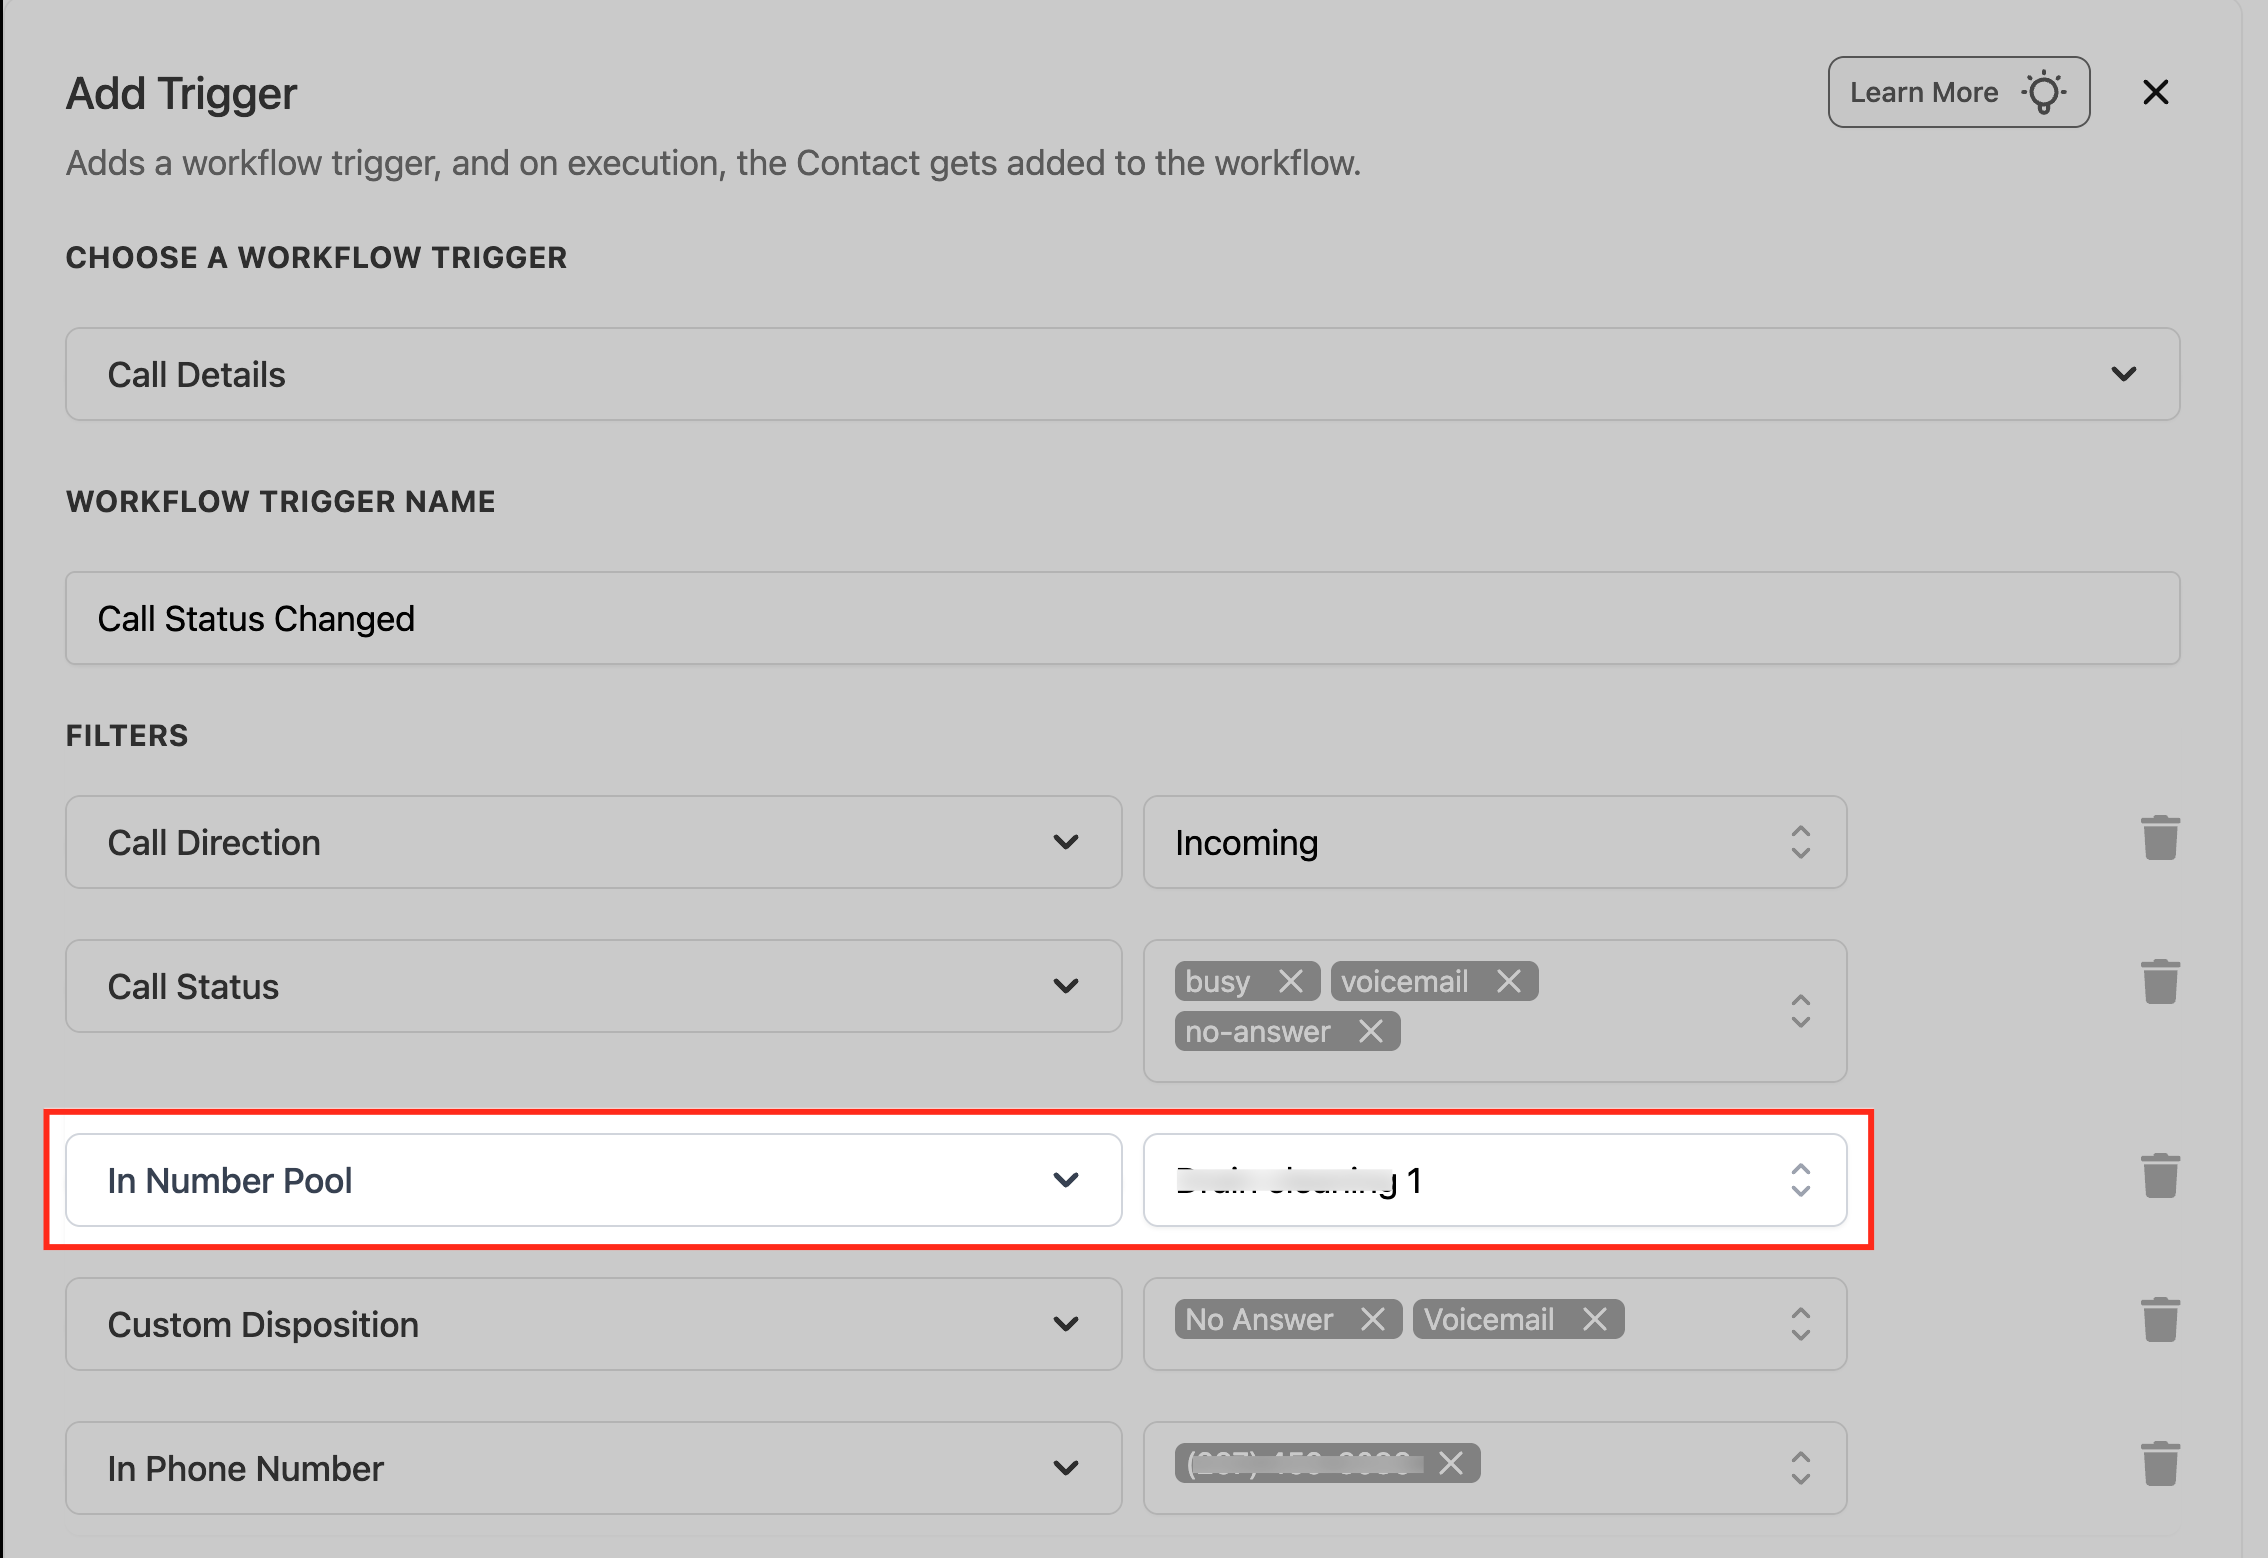
In Number Pool: Limit the trigger to calls associated with a specific number pool, helpful when different pools serve different campaigns or teams.
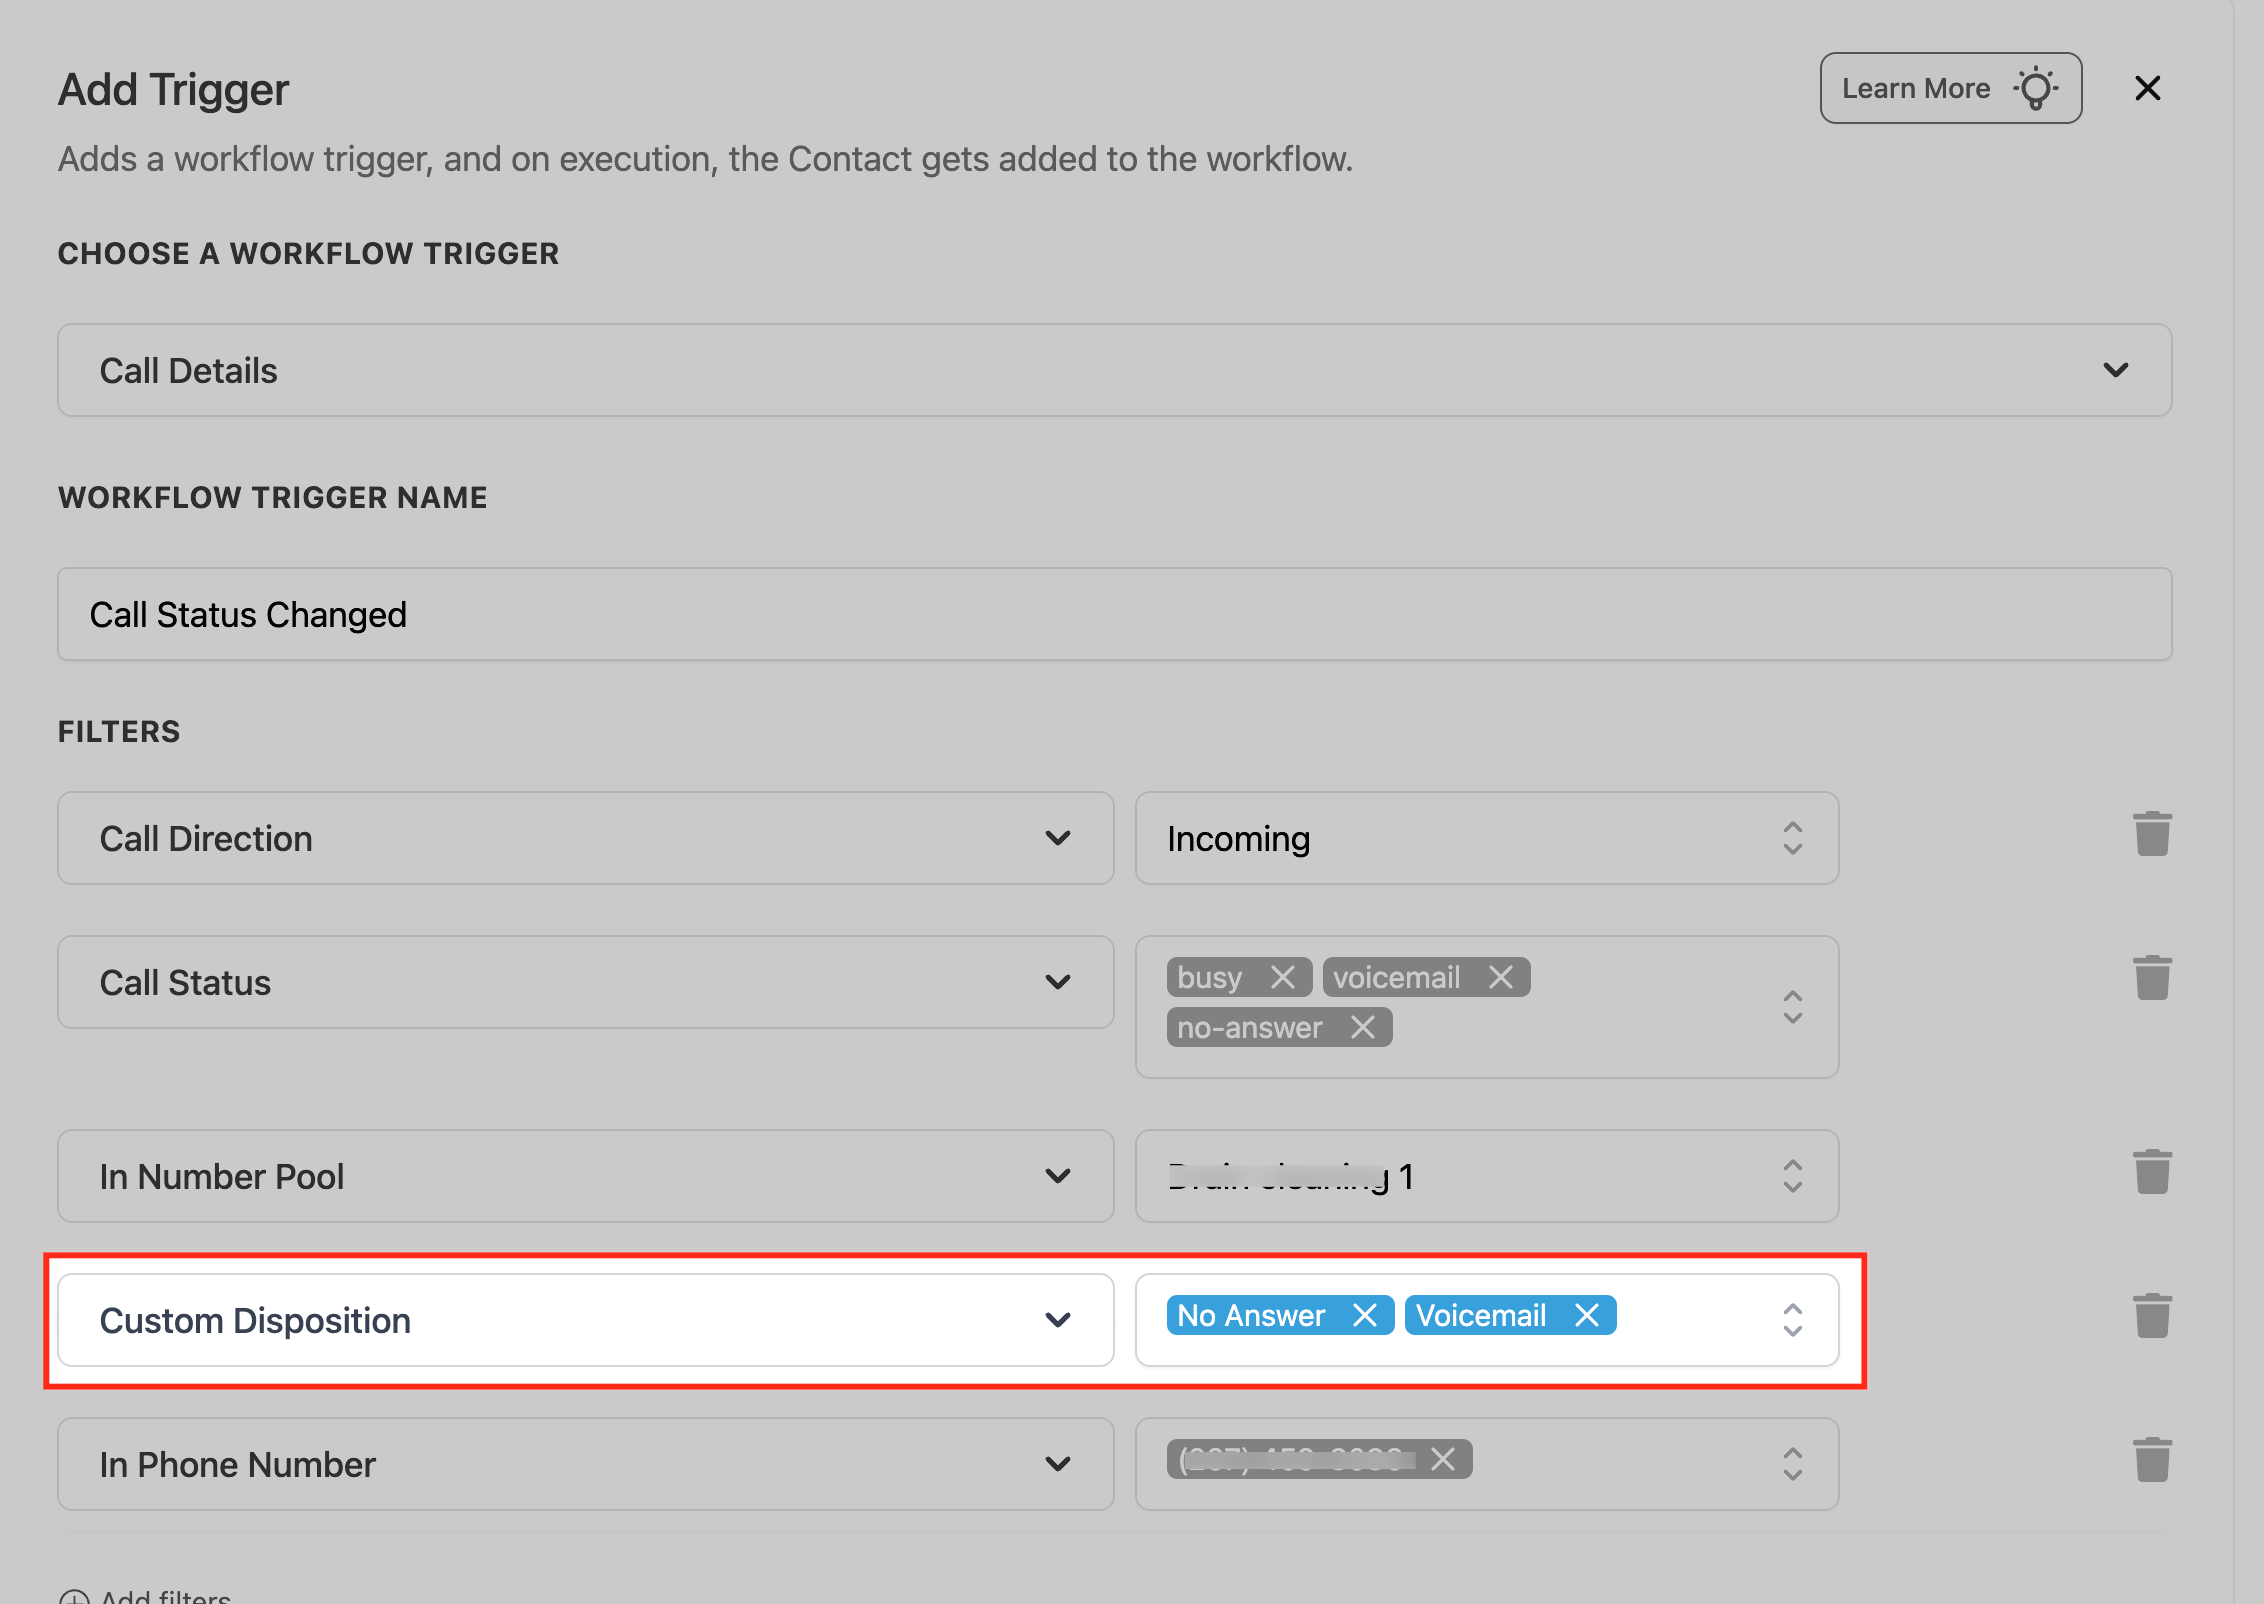
Custom Disposition: Respond to call classifications applied after a call ends, beyond standard statuses, for internal outcomes marked by users or systems.
In Phone Number: Restrict the trigger to calls on specific phone numbers, useful when individual numbers serve different business functions.

Data made available: Call attributes (direction, status, number, pool, disposition) are available to downstream actions for tagging, routing, and notifications. The trigger is contact-aware, so it can fire multiple times for the same contact across separate qualifying calls.
When to use it: Automating follow-ups based on how a call ended: handling missed calls, voicemails, and no-answers consistently, and reacting to internal dispositions.
Example: A prospective patient calls your main line and the call goes to voicemail. Trigger on Call Details with Call Direction = Incoming and Call Status = voicemail, then immediately text the caller "Sorry we missed you, here is our booking link" and create a callback task for the front desk.
Notes and limits: The trigger runs only when the selected details match; it does not fire on every logged call by default. Each workflow evaluates calls independently, so a single call can enroll a contact in multiple workflows if their filters all match. Careful filter design prevents overlapping automations. Use re-entry rules to control repeat enrollment.
Fires on: A contact being created, when number validation runs against that contact's phone number in the CRM and returns a status (for example mobile, landline, or invalid). It checks whether the number is a landline or invalid before the first message is sent. It does not fire based on carrier error codes after sending (use the Messaging Error (SMS) Trigger for that).
Configuration and filters:
Number is: Pick the validation status you want to fire the trigger on (for example, valid/SMS-capable, landline, or invalid). This filter is optional.
Data made available: The validation result is recorded on the contact, available to downstream actions for tagging and branching.
When to use it: Keeping your contact list clean and your SMS spend efficient by reacting to a number's deliverability before you ever message it.
Example: A new patient submits a form with a landline number. Trigger on Number Validation with Number is = landline (or invalid), then tag the contact "No SMS" and route them into an email-only or call-only follow-up path so you do not waste sends on an undeliverable number.
Notes and limits: Number validation must be enabled in your account's phone integration settings for this trigger to operate. The trigger evaluates on contact creation; it is not a real-time per-message check. Validation can distinguish mobile, landline, and VoIP numbers and whether they are SMS-capable.
Fires on: An outbound SMS ending in an undelivered state and returning a carrier error code. This lets you react to delivery failures, clean your list, and protect your sending reputation.
Configuration and filters:
Error Code is: Narrow the trigger to specific error codes. Common codes:
Code | Description |
|---|---|
30007 | Carrier Violation |
30034 | A2P Registration Pending on Number |
30032 | Toll-Free Number Not Verified |
30005 | User Inactive / Number Does Not Exist |
30003 | Unreachable / Out of Service Number |
30004 | Do Not Want SMS / DND Enabled |
30006 | Landline / Incapable of Receiving SMS |
30023 | A2P 10DLC Daily Message Cap Reached |
21408 | Permission to Send SMS Not Enabled for Region |
30008 | Unknown Error |
21606 | Invalid From Phone Number |
21211 | Invalid To Phone Number |
21614 | To Number Is Not a Valid Mobile Number |
21610 | User Replied With STOP (Opted Out) |
30011 | MMS Not Supported by Recipient Number or Region |
30033 | A2P Campaign Suspended or Deleted |
21661 | From Number Is Not SMS-Capable |
21635 | To Number Cannot Be a Landline |
30037 | Outbound Messaging Disabled |
30002 | Account Suspended |
Data made available: The error code is available to downstream actions, so you can branch with If/Else on the specific failure type.
When to use it: Automated list hygiene and compliance. Remove or re-tag contacts who repeatedly fail delivery, and react differently to a hard failure (invalid number) versus a soft one (temporary cap reached).
Example: During an SMS reactivation campaign, a message returns 30006 (Landline). Trigger on Messaging Error (SMS) with Error Code is = 30006, then tag the contact "Landline, No SMS," remove them from active SMS sends, and add them to an email follow-up instead. Use If/Else to handle 21610 (Opted Out) by setting Do Not Disturb.
Notes and limits: The trigger fires on the returned carrier error for an undelivered message, not on contact creation. Pair it with the Number Validation Trigger (which acts before sending) for full coverage on both sides of a send.
Fires on: An HTTP POST request arriving at the unique Webhook URL generated for this trigger. This lets an external system push data into your CRM and start a workflow in real time, for events like payment confirmations, third-party form submissions, or other system updates.
Configuration:
After selecting Inbound Webhook as the trigger, copy the unique Post URL the platform generates.
Configure your external application or automation tool to send a POST request with a JSON body to that URL.
Send a test request, then click Test Trigger to capture sample data.
Choose the incoming request to save as the sample (mapping reference). Click Load More to see additional recent requests; the most recent request is always at the top. Select the correct reference and verify the body, then save.
On saving, you are taken to a Create/Update Contact action where you map the incoming fields. To find or create a contact, the payload must include either an email or a phone field.
Once mapped, the webhook data is available as custom values throughout the workflow (in email, SMS, If/Else, and other actions), treated like other contact custom fields or account custom values.
Data made available: Every mapped key from the JSON payload becomes a custom value you can reference in downstream actions.
When to use it: Bringing real-time data from outside systems into your automations: a payment processor confirming a deposit, a booking tool confirming an appointment, or any tool that can send a webhook.
Example: Your payment processor sends a webhook on a successful consultation deposit. The JSON payload might look like:
{
  "customer_id": "CUST_001",
  "amount": 100,
  "currency": "USD",
  "status": "successful"
}
Trigger on Inbound Webhook, map the email/phone and status fields, then update the contact's status to "Deposit Paid," send a confirmation email, and start your pre-appointment prep sequence.
Notes and limits:
Only POST requests are supported.
Data must be a JSON object. Keys must be single strings without spaces; use camelCase or snake_case rather than separating key names with spaces.
An email or phone in the payload is mandatory, since the workflow must find or create a contact.
Arrays are not supported in custom values. You can send them, but you cannot use them inside actions.
If your data structure changes, re-select the mapping reference inside the trigger so fields resolve correctly.
If the Webhook URL is leaked, delete the existing Inbound Webhook Trigger and add a new one. A new URL with a different ending ID is generated; update your integrations to the new URL and save. Requests to the old URL will no longer enter your workflow.
Fires on: A clock-based schedule you define, with no contact required. The Scheduler is a contactless trigger that starts a workflow at set times in your account timezone, ideal for operations, reporting, data hygiene, and integrations that do not need a contact.
Configuration and options: After adding the trigger, choose an interval type:
Custom: An Nth weekday such as the 2nd Friday or 4th Monday; supports multiple times.
Daily: One or more times per day.
Weekly: Select days of the week plus a time.
Monthly: Choose a day from 1 to 31, or Last, plus a time.
Every N days: For example every 2 days at 9:00 AM.
One-off date/time: Run once.
Advanced (cron-style): For complex cadences.
Then set the time(s) for the chosen interval.
Advanced Settings (optional):
Skip Weekends: Removes Saturday and Sunday occurrences from applicable schedules (Daily, Weekly, Every N days, and cron patterns that include weekends).
Stop On: Sets a final date/time after which future executions stop.
Advanced (cron) scheduling: Standard cron format is minute hour day month weekday. Examples:
0 9 * * 1 runs Mondays at 9 AM.
30 14 1 * * runs the 1st of the month at 2:30 PM.
0 */2 * * * runs every 2 hours.
Expressions that run more than once per hour are not allowed.
Preview: Use Check Trigger Schedule to preview the next five executions before publishing. Skip Weekends and Stop On are reflected in the preview.
Contactless behavior: Steps that require a contact context are automatically skipped, and the run continues to the next supported step. Skipped steps are noted in execution logs. Good fits include outbound webhook, Google Sheets, Airtable, Slack, internal email/SMS to teammates, updating custom values, and creating tasks. Steps like "Send SMS to Contact" are skipped.
When to use it: Recurring operational jobs that are not tied to a patient: nightly data syncs, scheduled reports, timed internal reminders, and webhook pings.
Example: Send your practice manager a daily 8:00 AM operations summary. Trigger on Scheduler with Daily at 8:00 AM, enable Skip Weekends, then add a Slack or internal-email action that posts yesterday's bookings and no-shows. Preview the next five runs before publishing.
Notes and limits: Schedules run in your account timezone. The Scheduler does not backfill missed executions; it fires upcoming times only while the workflow is published. Daily and Custom intervals support multiple times per day.
Fires on: A contact viewing a specific page on a funnel or website you built in Aesthetix CRM. Tracking the pageview lets you automate based on page-specific behavior.
Configuration and filters:
Field | Description | Required |
|---|---|---|
Funnel/Website | Which funnel or website to monitor | Yes |
Page | The specific page within the funnel/website | No |
UTM Campaign | Visits tied to a specific UTM campaign | No |
UTM Source | Visits tied to a specific UTM source | No |
UTM Medium | Visits tied to a specific UTM medium | No |
UTM Content | Visits tied to a specific UTM content value | No |
Page Path | A specific page path for refined tracking | No |
Available operators for these fields:
Operator | Description |
|---|---|
Is | Must exactly match the input |
Is any of | Can be one of the listed options |
Is none of | Must not be one of the listed options |
Is empty | The field must be empty |
Is not empty | The field must not be empty |
Add multiple filters with Add filters to combine page, path, and UTM conditions.
Data made available: The pageview is associated with the contact; standard contact fields and the matched page/UTM context are available to downstream actions.
When to use it: Behavior-based follow-up and ad attribution, for example re-engaging visitors who reached a high-intent page or segmenting by the campaign that brought them in.
Example: Track visitors who reach the "Book a Consultation" page of your new-patient funnel. Trigger on Funnel/Website Pageview with Funnel/Website = New Patient Funnel and Page is = Book a Consultation, then, after a short wait with no booking, send a follow-up email offering help scheduling.
Notes and limits: Pageviews are attributed to known contacts, so the visitor must be identifiable for the trigger to enroll them.
Fires on: A new review arriving from Google or Facebook. This trigger is contactless: reviews are not linked to a specific contact.
Configuration and filters:
Is Review SPAM: Choose Yes or No to handle reviews flagged as spam separately.
Review Source: Distinguish between Google and Facebook so you can map different actions per platform.
Review Rating: Filter by star rating from 1 to 5, so you can react differently to praise versus criticism.
Data made available: Review details (source, rating, spam status, and review content) can be mapped to downstream actions, including sending the data to a webhook or other automated response systems.
When to use it: Reputation management. Thank happy patients automatically and route negative feedback to a manager for fast, private resolution.
Example: Trigger on New Review Received with Review Source = Google and Review Rating = 4 or 5, then post a thank-you reply and notify your marketing channel. Build a second workflow filtered to Review Rating = 1 or 2 that immediately alerts the practice manager to respond and address the concern.
Notes and limits: Because the trigger is contactless, actions that require a contact will not run; design the workflow around internal notifications, webhooks, and review responses. Test by leaving or simulating a review to confirm the automation fires as expected.
Fires on: Activity captured by the Aesthetix CRM External Tracking script on a page you do not host inside the platform, such as a third-party website, an externally hosted landing page, or a form built in another tool. There are two distinct events you can react to:
A page view: the trigger fires when a visitor lands on any page that has the tracking script installed, even anonymously before they are a known contact.
An external form submission: the trigger fires when a form the script detects on the page is submitted. On submission, the visitor's mapped details are captured into a contact so the rest of your workflow has someone to act on.
The script watches for standard <form> elements in the page DOM and reads their fields on submit, so this trigger lets you treat forms built outside Aesthetix CRM as if they were native form submissions.
Configuration and filters: Add the External Tracking Event trigger, give it a clear name, choose whether you are reacting to a page view or a form submission, and use Add Filters to narrow it. Available filters:
Domain: Restrict the trigger to a specific website domain, so the workflow runs only for tracked pages on the site you choose.
Page Path: Restrict the trigger to a specific URL path, so it fires only on the page that matters (for example your booking page or a single landing page).
External Form Name: For form submissions, scope the trigger to a specific detected form by its name, so only that form starts the workflow.
UTM Parameters: Filter by the campaign tracking parameters (such as UTM source, medium, or campaign) on the page, so you can react only to traffic from a given ad or campaign.
Stack these filters to target an exact page, form, and campaign combination; all stacked filters must match for the workflow to fire.
Data made available: When an external form is submitted, captured fields are mapped onto the contact record automatically wherever names, labels, or custom fields match. Fields that do not map to an existing contact field are stored safely so you can reference them later. The trigger also captures UTM parameters, the page URL, and session data, all of which are available to downstream actions for tagging, routing, attribution, and branching.
When to use it: Connecting forms and pages that live outside Aesthetix CRM to your automations, so a submission on a third-party site or a view of an externally hosted page can drive timely in-CRM follow-up without rebuilding the page in the platform.
Example: Your practice runs a separately hosted campaign landing page with its own "Request a Consultation" form. Install the External Tracking script on that page, then trigger on External Tracking Event with the form-submission event, External Form Name = Request a Consultation, and Domain set to your campaign site. On submit, the patient's name, email, and phone map onto a new contact; from there, send an instant confirmation text, create an opportunity in your New Leads stage, and notify the front desk to call within five minutes.
Notes and limits: Each account gets its own unique External Tracking script. Install it under Settings > External Tracking and paste it before the closing </body> tag (globally, or inside the form's HTML block), and make sure it loads on every page that contains a form you want to capture. For form capture to work, the form must be a real <form> element that is visible in the page DOM, must include a name attribute, and must contain an email field so a contact can be found or created. Iframe-based forms are not supported. If events are not arriving, confirm the script is installed and loading on the correct pages before troubleshooting the workflow.
Fires on: A conversation crossing one of the response-time thresholds defined in your Conversations SLA settings. An SLA (service-level agreement) puts a clock on how long an unanswered patient message can sit before your team is considered behind. The trigger reacts as the conversation's SLA timer changes state:
The conversation enters Due Soon (the warning window before the deadline, where the timer turns orange), or
The conversation goes Overdue (the maximum allowed response time is exceeded and the timer turns red).
You meet an SLA when a qualifying reply goes out before the timer runs down; you breach an SLA when the Overdue threshold passes with no qualifying reply. The timer is calculated from the oldest unanswered customer message in the conversation, and it clears the moment an agent replies or the conversation is marked read, so the trigger reflects a genuinely unanswered patient.
How SLAs are set up: SLAs are configured in the Conversations area, not in the workflow builder. Go to the Conversations module, open the Settings tab, and turn on SLA Settings. From there you define:
SLA model: Choose Common SLA to apply the same response-time rule to every channel, or Channel-Specific SLA to set different response-time targets per channel (for example a tighter target on SMS than on email).
Due Soon: The warning window before a breach. When the conversation enters this window, its timer turns orange.
Overdue: The maximum allowed response time. When it is exceeded, the timer turns red and the SLA is breached.
Workflow messages count as a response: Choose whether automation-sent messages satisfy the SLA. Options are to count all automation messages as valid responses, to not count automation messages, or to count messages only from specific workflows.
AI Agent messages count as a response: Choose whether replies sent by your AI agent satisfy the SLA. By default AI replies count as valid responses; you can turn this off so only a human reply stops the clock.
Once SLA Settings are saved, the SLA states (Active, Due Soon, Overdue) are what this workflow trigger listens for.
Configuration and filters: Add the Conversations SLA trigger, name it, and use Add Filters to scope which SLA state and which conversations should start the workflow. You can filter by SLA Status (Active, Due Soon, or Overdue) so the workflow fires on the state you care about, typically Due Soon for an early warning or Overdue for a breach.
Data made available: The conversation context and its associated contact are available to downstream actions, so you can escalate, reassign, notify a manager, or message the patient, and reference the conversation's SLA state for branching.
When to use it: Enforcing responsiveness on patient conversations so no inquiry sits unanswered, and escalating automatically when your response-time target is at risk or already missed.
Example: A prospective patient messages your practice on SMS and no one replies. As the conversation enters Due Soon, trigger a workflow that pings the assigned coordinator to respond. Build a second workflow on SLA Status = Overdue that notifies the practice manager, reassigns the conversation, and sends the patient an automated holding message acknowledging their request so they are not left waiting.
Notes and limits: SLAs require the redesigned Conversations experience to be enabled in Labs, and they operate only on the new Conversations page. SLAs apply only to new messages created after you enable them; existing conversations are not retroactively tracked. They cover patient (customer) conversations only, not internal messages. Response-time calculation is currently based on calendar hours rather than business hours. This trigger reacts to response-time state, not to the content of a reply, so pair it with reply-based triggers if you also need to react to what the patient said.
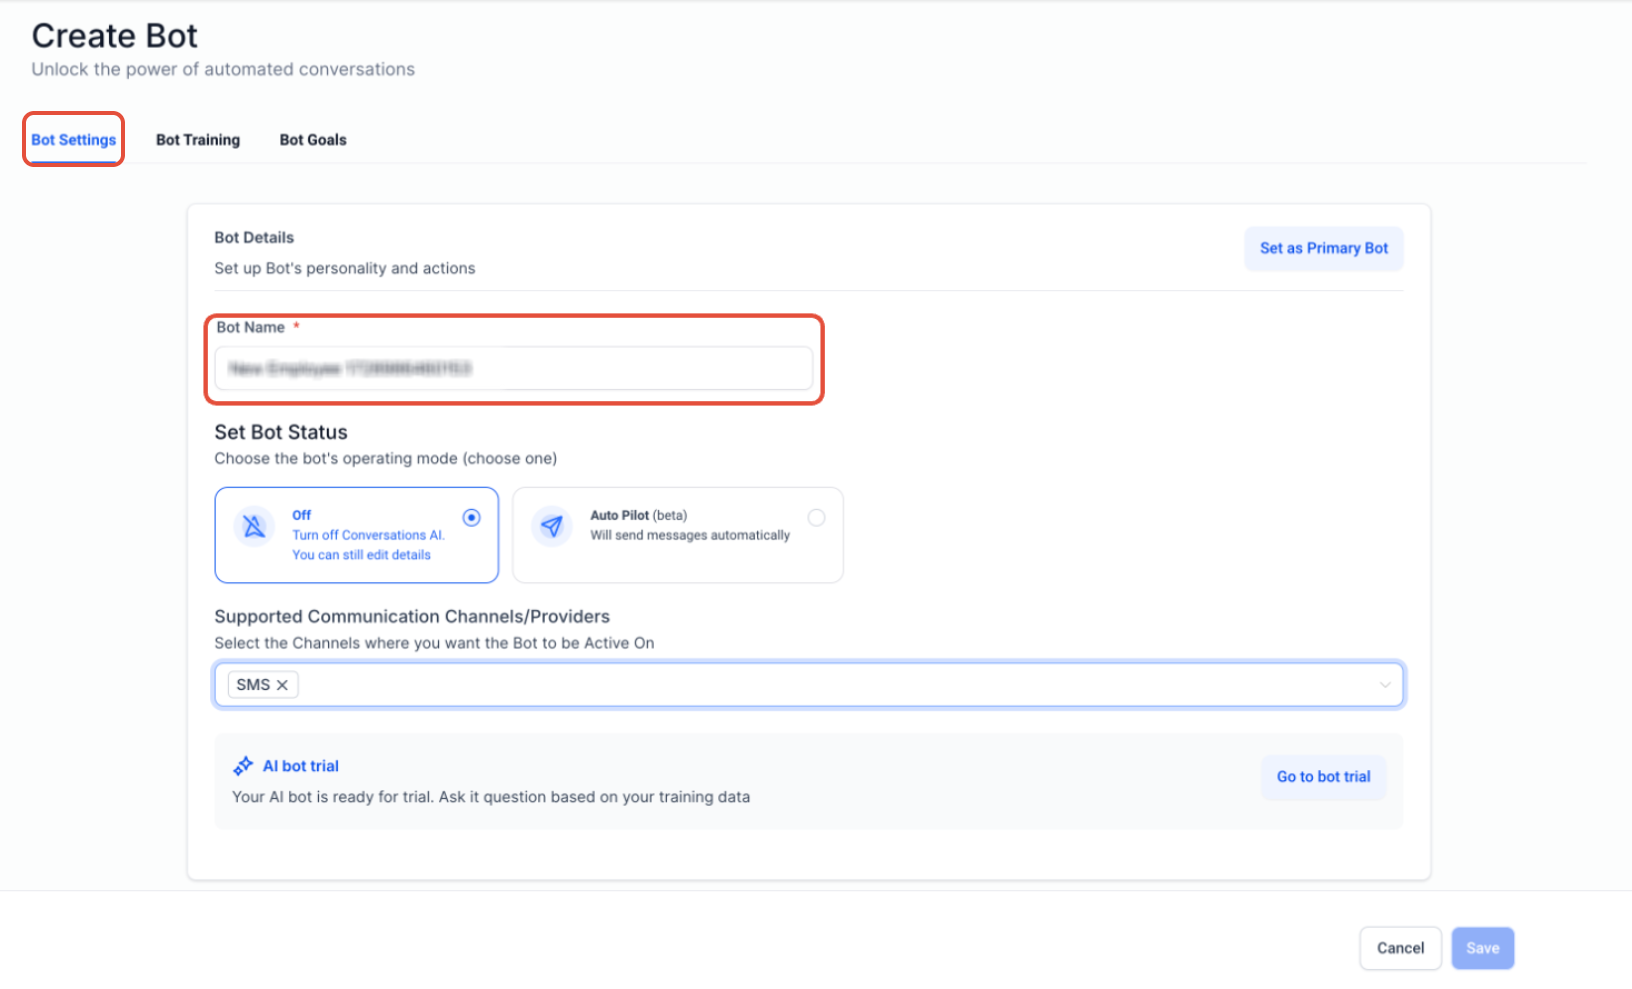
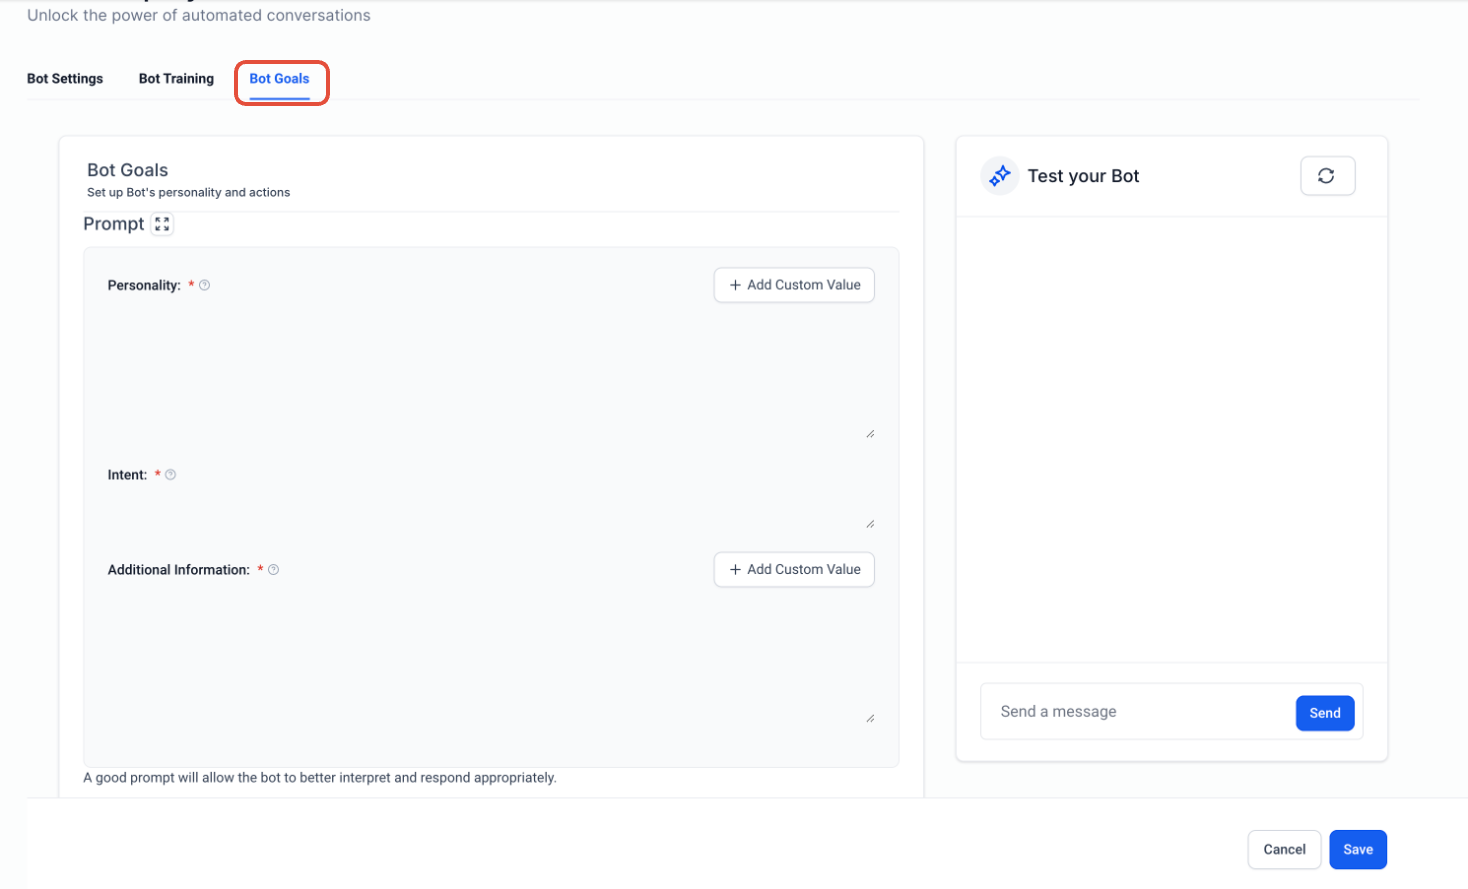
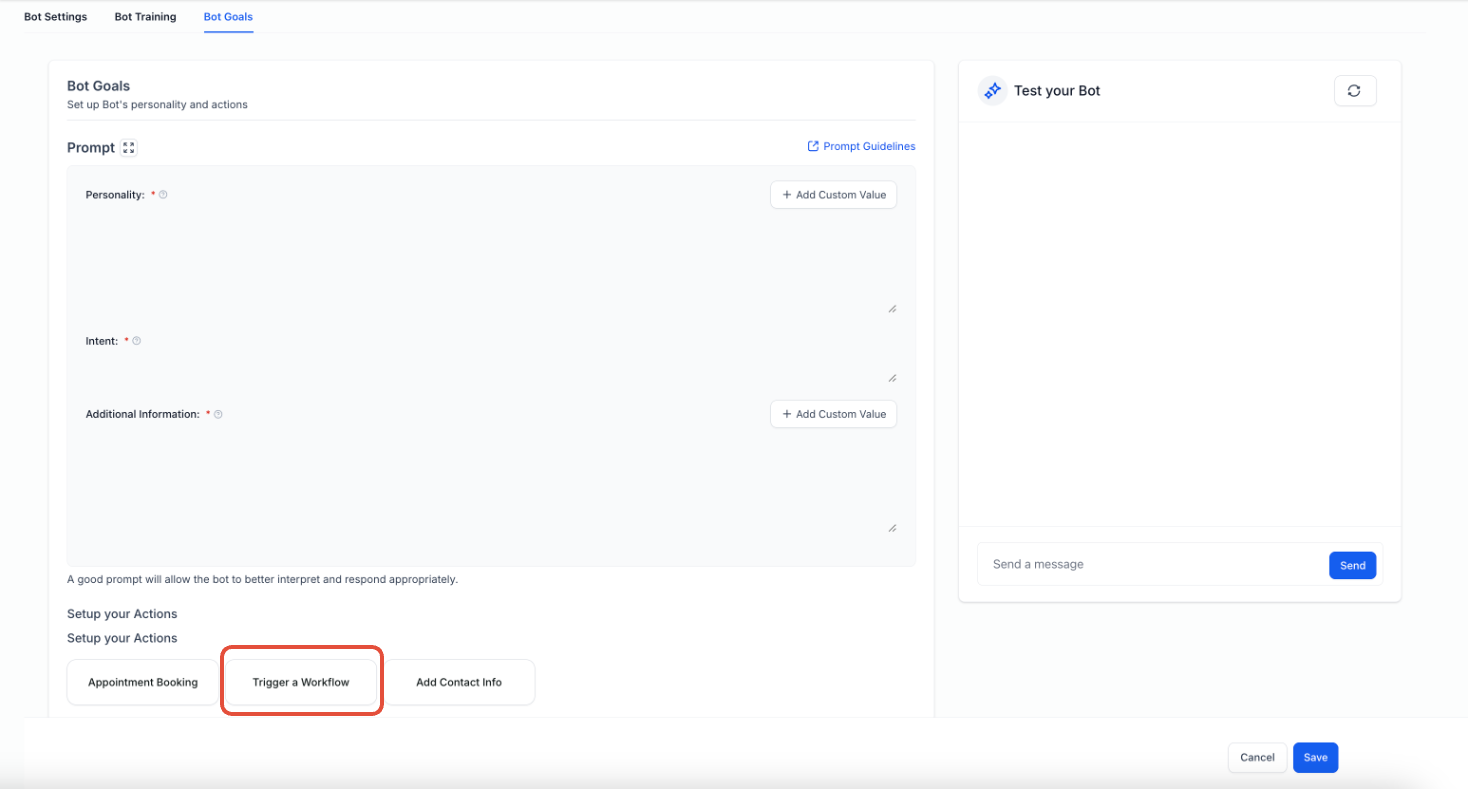
The Conversation AI Trigger lets a workflow start (or an action run) based on what your AI agent detects during a conversation, so the AI can hand off to automation when it recognizes a patient's intent, such as wanting to book an appointment or asking about pricing. Inside the AI agent's Bot Goals, you configure a Trigger a Workflow action: name the action, select a published workflow, and describe the trigger condition in plain natural language (for example, "Customer wants to book an appointment"). The AI matches real conversations against that description and starts the selected workflow when the condition is met.
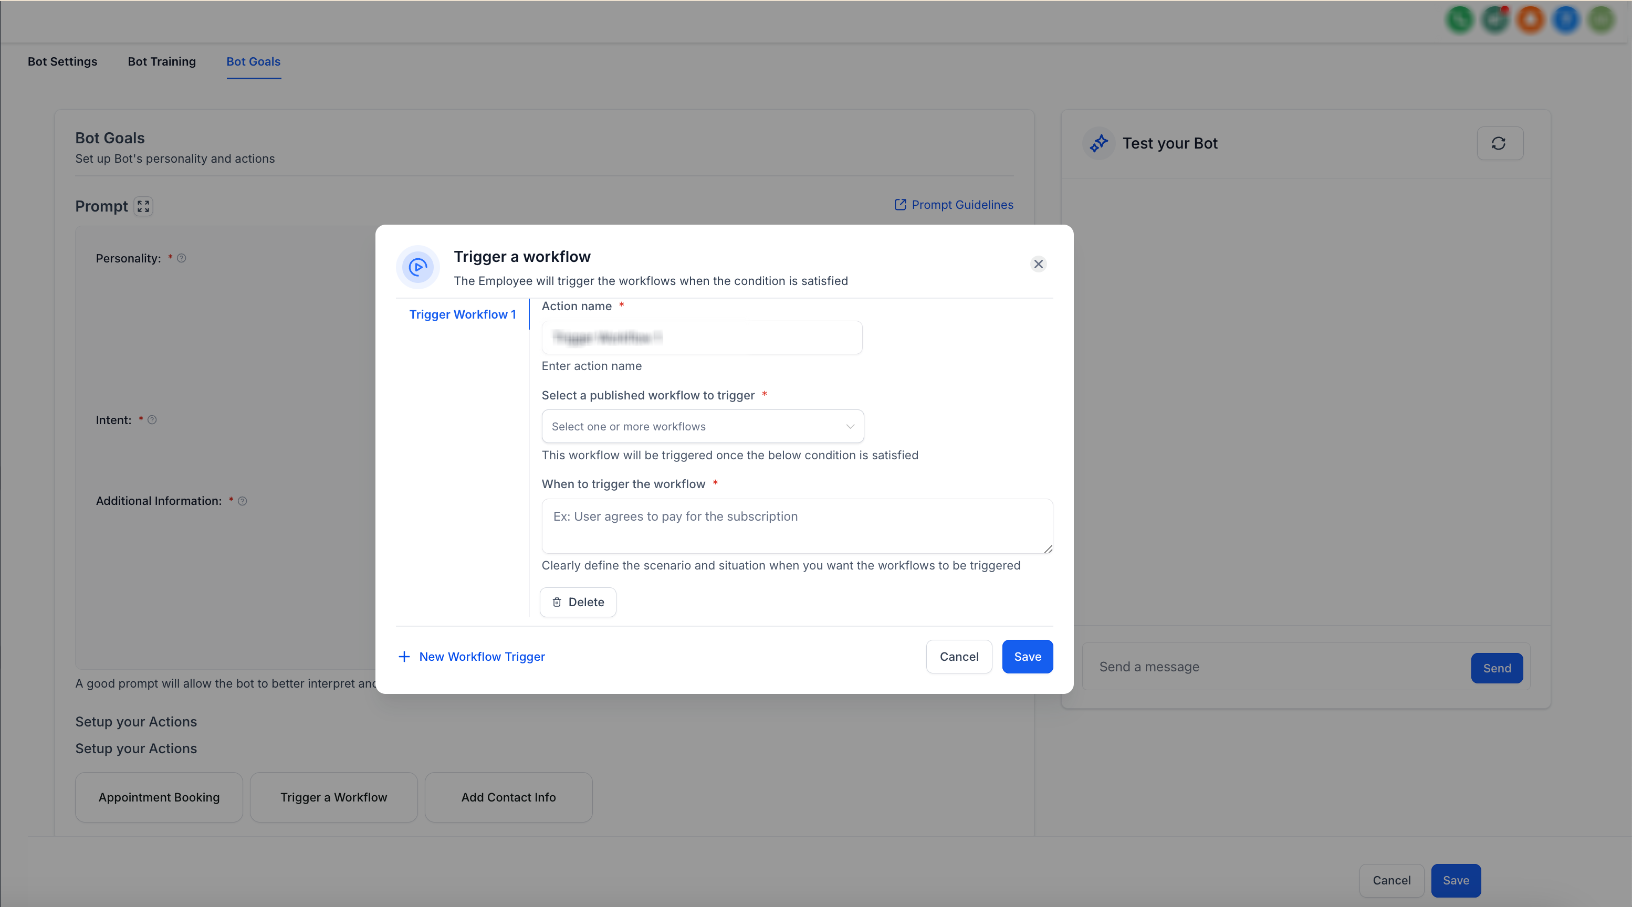

Keep conditions in clear natural language, avoid duplicate conditions on the same bot, and limit a bot to a maximum of five workflow triggers. Workflows must be published before they can be selected. Note that a given scenario re-triggers at most once per 20 messages, which prevents the same workflow from firing on every new message. Full configuration of AI agents lives in the AI collection; see those articles for prompt design, bot goals, and conversation setup.
The Custom Trigger is an advanced entry point for scenarios the standard Event triggers do not cover, letting technical users start a workflow from a custom or programmatic signal rather than a built-in event. Because its configuration depends on how the custom signal is defined in your account, set the trigger name clearly and confirm the available options and required parameters in the live builder before relying on it. For data-push integrations from outside systems, the Inbound Webhook Trigger is usually the right choice; reach for the Custom Trigger only when an advanced or bespoke setup specifically calls for it. Full detail lives in the advanced documentation; confirm the exact behavior against the live builder and contact support if you need a custom build.
Can I combine multiple filters on one trigger? Yes. You can stack filters on most Event triggers, and all of them must be satisfied for the workflow to run. This lets you target very specific events.
Which Event triggers are contactless? The Scheduler Trigger and the New Review Received Trigger are contactless: they do not enroll a contact. Actions that require a contact are skipped, and the run continues to the next supported step.
What is the difference between the Customer Replied Trigger and the Inbound Email Trigger? Customer Replied fires when an existing contact replies to a message you sent. Inbound Email fires on any inbound email, including cold emails from people not yet in your CRM (with a supported dedicated domain). Use Inbound Email to capture first-contact emails.
What is the difference between the Number Validation Trigger and the Messaging Error (SMS) Trigger? Number Validation runs when a contact is created and checks the number before any message is sent. Messaging Error (SMS) fires after a send, when a message returns a carrier error code. Use them together for coverage before and after sending.
Why isn't my Email Events Trigger firing? The most common cause is that open and click tracking is disabled on your sending domain. Confirm tracking is enabled, the workflow is published, and the filter matches the actual event and source. Bot-filtered opens and clicks will not fire the trigger.
Can the same event start more than one workflow? Yes. Each workflow evaluates events independently, so a single event (such as one call or one email) can enroll a contact in multiple workflows if each workflow's filters match. Design filters carefully to avoid conflicting automations.
Do I need a special email setup for the Inbound Email Trigger? To capture cold inbound emails you need a dedicated sending domain on the platform's email system or a Mailgun dedicated domain. Shared domains, Gmail/Outlook two-way sync, and other SMTP setups capture only emails from existing contacts.
How do I keep a video's tracking accurate for the Video Tracking Trigger? Disable Show Progress Bar in the Video Element settings so viewers cannot scrub through the video, which would distort the percentage-watched calculation. Make sure the video is encoded properly so it appears in the filter dropdown.
What happens if my Inbound Webhook URL is leaked? Delete the existing Inbound Webhook Trigger and add a new one. A new URL with a different ending ID is generated. Update your integrations to the new URL and save; requests to the old URL will no longer enter your workflow.
Where do I configure the Conversation AI Trigger? Inside your AI agent's Bot Goals, using the Trigger a Workflow action. Full AI agent setup is documented in the AI collection.
