The Form Builder in Aesthetix CRM is a powerful drag-and-drop tool that lets you create lead capture forms, intake questionnaires, consent forms, and more — without any coding required. Forms automatically create or update contact records when submitted, making them one of the most important tools in your CRM workflow.
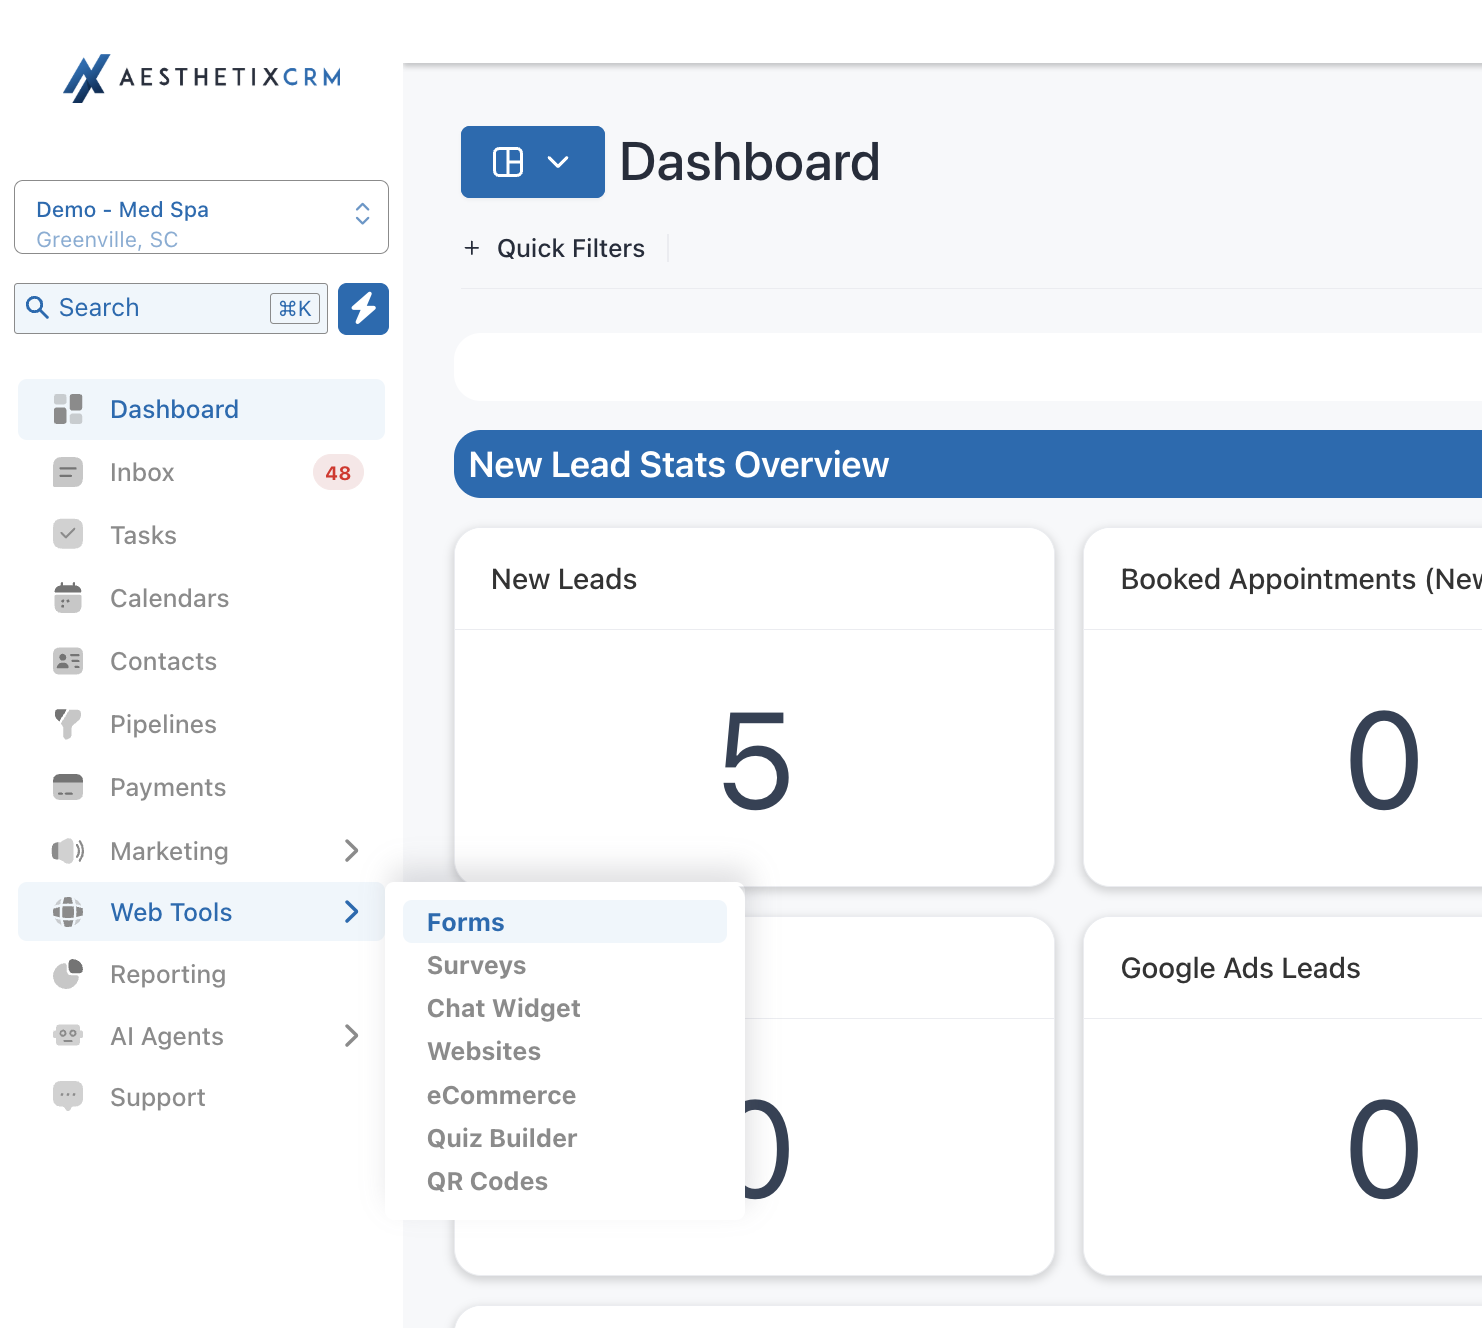
From the left-hand navigation menu, click Web Tools.
Click Forms.
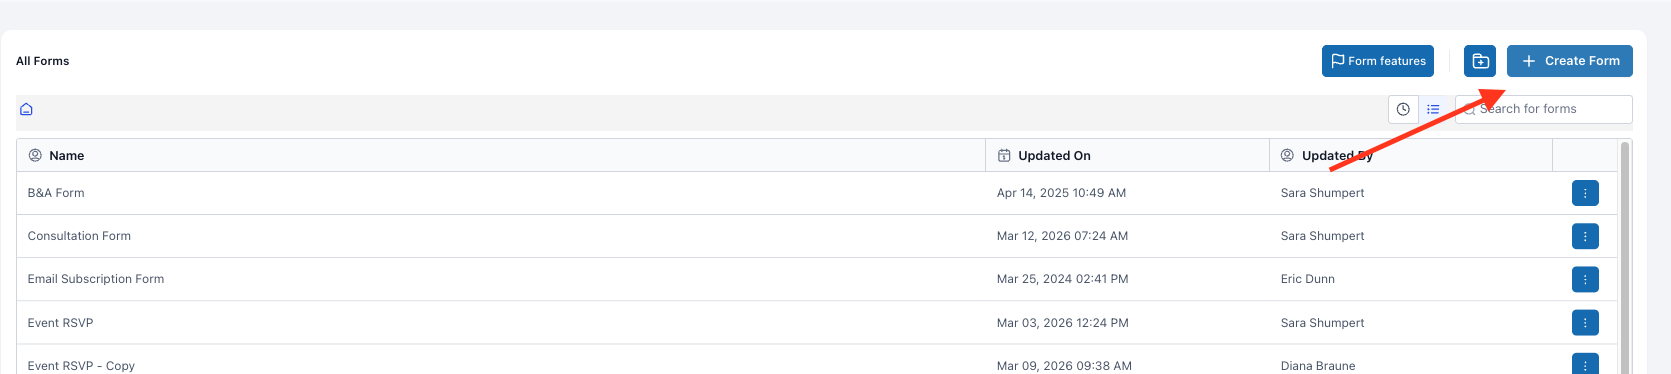
You will see a list of all existing forms in your account.
To create a new form, click the + Add Form button in the top-right corner.
To edit an existing form, click on it in the list to open the builder.
Tip: You can also access the Form Builder directly from inside a Funnel or Website page. When a form element is placed on a page, click the Edit Form button in the right-side panel to open the builder in a pop-up without leaving the page editor.
When adding a new form, you can start with a blank form or select from pre-built templates. Available template categories include: Application, Contact, Donation, Order, Registration, Request, and Subscribe.
Templates give you a head start with common field layouts already configured. Once selected, every element can be fully customized.
Aesthetix CRM offers three layout styles:
Single Column — The classic layout. All fields are stacked vertically, one below the other. Best for longer forms.
Two Column — Fields are placed side-by-side for a compact, balanced layout. Ideal for shorter forms on wider pages.
Single Line — Up to 5 fields displayed in a single horizontal row. Great for simple newsletter or inquiry forms.
You can also set Field Width as a percentage of the available form width, giving you precise control over how each field scales across screen sizes.
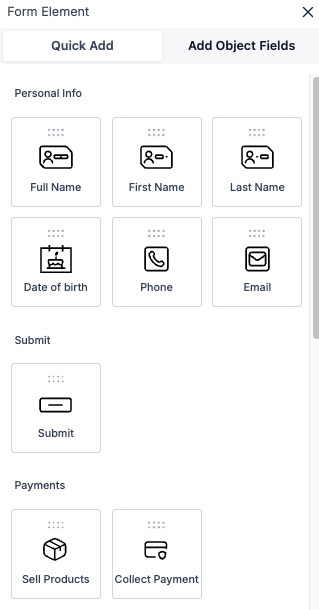
Drag and drop any of the following into your form:
First Name, Last Name, Full Name
Email, Phone
Date Picker, Address
Single Line Text, Multi Line Text
Number, Dropdown (Single or Multi-Select), Radio Select, Checkbox
File Upload, Signature
Terms & Conditions
Payment
Text, HTML, and Image content blocks
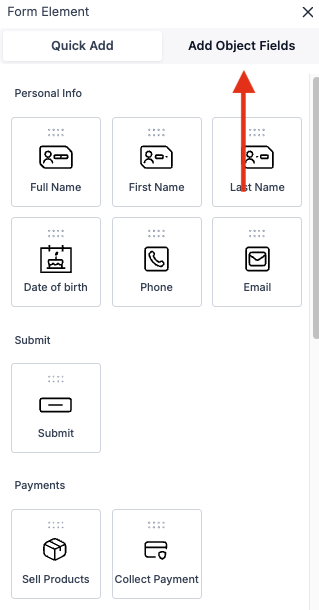
Custom Fields in Aesthetix CRM are managed under Object Fields in your form settings. These fields are tied to specific contact properties and can be added directly to any form.
To add a custom field to your form, drag it from the custom fields panel into the form builder. The Quick Add feature lets you do this without navigating away. When configuring custom fields you can set the field name and unique key, and customize dropdown, radio, or checkbox options.
Note: If a custom field name contains the word "score," the system automatically treats it as a numeric scoring element. This behavior applies across forms, surveys, and quizzes.
Treatment of Interest is the single most critical custom field in Aesthetix CRM. It tells your workflows, pipelines, and automations exactly what a lead is interested in — driving the right follow-up, routing, and nurture sequences from the moment a form is submitted.
Any form where a contact could be interested in more than one treatment must include the Treatment of Interest field and it must be set to required. This ensures no lead enters your system without proper treatment attribution.
Best practices for the Treatment of Interest field:
Always set it as required on multi-treatment forms
Use a single-select dropdown or checkbox field type so contacts can select everything that applies to them
Place it early in the form — ideally within the first few visible fields — so it captures intent even if the contact doesn't complete the rest of the form
Confirm that your lead capture workflows are filtering or branching on this field so the right automation fires for each treatment
The Inline Editor lets you click directly on any label, placeholder, or button text in the form preview and edit it immediately — no side panel required. Changes appear in real time.
Inline editing supports bold, italic, underline, font size, and color formatting. Use the device toggle to switch between Desktop and Mobile views — text for each is managed separately, so you can write shorter labels for small screens without affecting the desktop layout.
The Spread to Column option lets you expand a field to span across multiple columns in a two-column layout, giving you even more structural flexibility.
Themes are ready-made design presets that apply a cohesive look to your entire form in one click.
Open your form in the builder.
Click Styles & Options (top-right) to open the right sidebar.
Select the Themes tab and choose your preferred theme.
After applying a theme, go to Styles > Colors & Backgrounds to adjust background color and image, text and input field colors, and input border colors.
Tip: If your selected theme has a default background image and you want to upload your own, you must delete the existing image first. The upload button remains inactive until it's removed.
Button Themes give you curated presets for your submit button — Filled, Border, and Text Only styles. After selecting a preset, use the Button Styling Panel to fine-tune colors, typography, padding, border radius, and shadow.
For advanced styling, Aesthetix CRM supports adding Custom CSS directly to forms. If you need custom CSS applied to your forms, submit a Custom Build Request for a quote from our build team.
Conditional Logic creates dynamic, intelligent forms that show or hide fields, redirect users, display custom messages, or disqualify leads — all based on how a contact answers.
Inside the form builder, click Conditional Logic in the top bar.
Click Add New Condition.
Choose an action type (see below).
Build your rule using the 3-step flow: Select Field → Select Field State → Provide a Value.
Add additional conditions using AND or OR connectors as needed.
Define the result of the action, then click Save.
Redirect to URL — Sends the contact to a specific webpage after submission.
Display Custom Message — Shows a personalized message based on how the contact answered.
Disqualify Lead — Automatically stops submission and rejects the contact when conditions are met.
Show / Hide Fields — Dynamically reveals or hides specific fields based on prior answers.
Rules execute in top-down order. For Redirect, Message, and Disqualify actions, the first matching rule wins. For Show/Hide, later rules override earlier ones.
Conditional Logic supports: all personal info fields (First Name, Last Name, Email, Phone), input fields (Single Line, Multi Line, Number, Monetary, Score, Date Picker), choice fields (Dropdown Single & Multi, Radio, Checkbox), and special fields (Terms & Conditions, File Upload, Signature, Payment, Text, HTML, Image).
Note: Calendar fields are not yet supported in Conditional Logic.
SMS Verification — Sends a one-time code to the contact's phone before the form can be submitted. Ideal for high-value leads and intake forms where data accuracy is critical.
Email Validation — Checks that an email address is properly formatted and belongs to a real domain before submission. Reduces junk submissions and protects your sender reputation.
Address Auto-Complete — Uses address lookup to suggest valid addresses as the contact types, improving data accuracy for address fields.
GDPR Consent Checkboxes — Adds custom opt-in checkboxes for marketing consent. Consent status is stored on the contact record — important for practices treating international patients or maintaining clear compliance records.
Aesthetix CRM supports payment collection directly within forms — useful for consultation deposits, treatment packages, or donations.
Use the Order template when creating your form, or drag a Payment element into any existing form.
Connect your payment processor in your account's payment settings.
Configure your products or a custom amount within the Payment element.
Optionally, add Order Bumps — additional product offers shown at checkout within the form.
Payment collection requires a connected payment processor. Contact your Aesthetix CRM account team if your payment integration needs to be set up.
Once your form is built and saved, you have several options for getting it in front of leads.
Go to Web Tools > Forms from the left-hand navigation.
Locate your form in the list and click on it to open it in the builder.
In the top toolbar, click the Integrate button (sometimes shown as < > Integrate or an embed/share icon).
A panel will appear with your embed options. You will see:
Inline Embed — pastes the form directly into a webpage so it renders as part of the page content
Fullpage Embed — loads the form as a full-page experience
Popup Embed — triggers the form to appear as a popup overlay when a visitor clicks a button or link
Select your preferred embed type, then click Copy Code.
Paste the copied code into your website's HTML where you want the form to appear.
Tip: If you are embedding on a third-party website (WordPress, Wix, Squarespace, etc.), paste the embed code into an HTML block or custom code widget on the page. Most website builders have a dedicated block for this.
Funnel or Website Page — Drop the Form element directly onto any page in the Aesthetix CRM site or funnel builder. No embed code needed — the form links automatically.
Standalone Link — In the same Integrate panel, you'll find a direct URL for the form. Copy and share this link via email, SMS, or anywhere else — no website required.
Email Campaigns — Forms can be embedded inline within email campaigns sent from Aesthetix CRM.
Go to Web Tools from the left-hand navigation.
Click Forms, then select the Submissions tab.
Use the search and filter tools to find specific submissions.
Click any individual submission to view the full response details.
If your form uses Custom Fields, those values also appear on the contact's record. Navigate to Contacts > [Contact Name] to view all data associated with that person.
Form submissions can be exported to Google Sheets for reporting or sharing with team members. Set up the export connection from within the form's settings area.
The Analytics tab inside the form builder shows submission volume and conversion performance over time, helping you identify which forms are performing well and which may need optimization.
Treatment of Interest is required on multi-treatment forms. This is the most important field in the system — never leave it off a form where more than one treatment may be relevant.
Keep intake forms concise. Patients complete shorter forms more often. Use conditional logic to only show additional questions when relevant.
Always include a consent checkbox on intake and marketing forms to maintain clear records for compliance purposes.
Use Email Validation and SMS Verification on high-value forms (consultations, VIP events) to ensure data quality.
Test every form on mobile before publishing. Use the device toggle in the Inline Editor to preview and optimize the mobile experience.
Name your forms clearly and descriptively, especially if you manage multiple campaigns or locations.
All follow-up and notifications are handled through your lead capture workflows — not the form itself. Make sure every form has a corresponding workflow trigger set up so no lead falls through the cracks.
For step-by-step guidance, visit help.aesthetixcrm.com.
For more complex work — custom workflow automation triggered by form submissions, advanced CSS styling, or payment integrations — submit a Custom Build Request for a quote from our build team.
