1. How to Add an Attachment to an Invoice in Aesthetix CRM
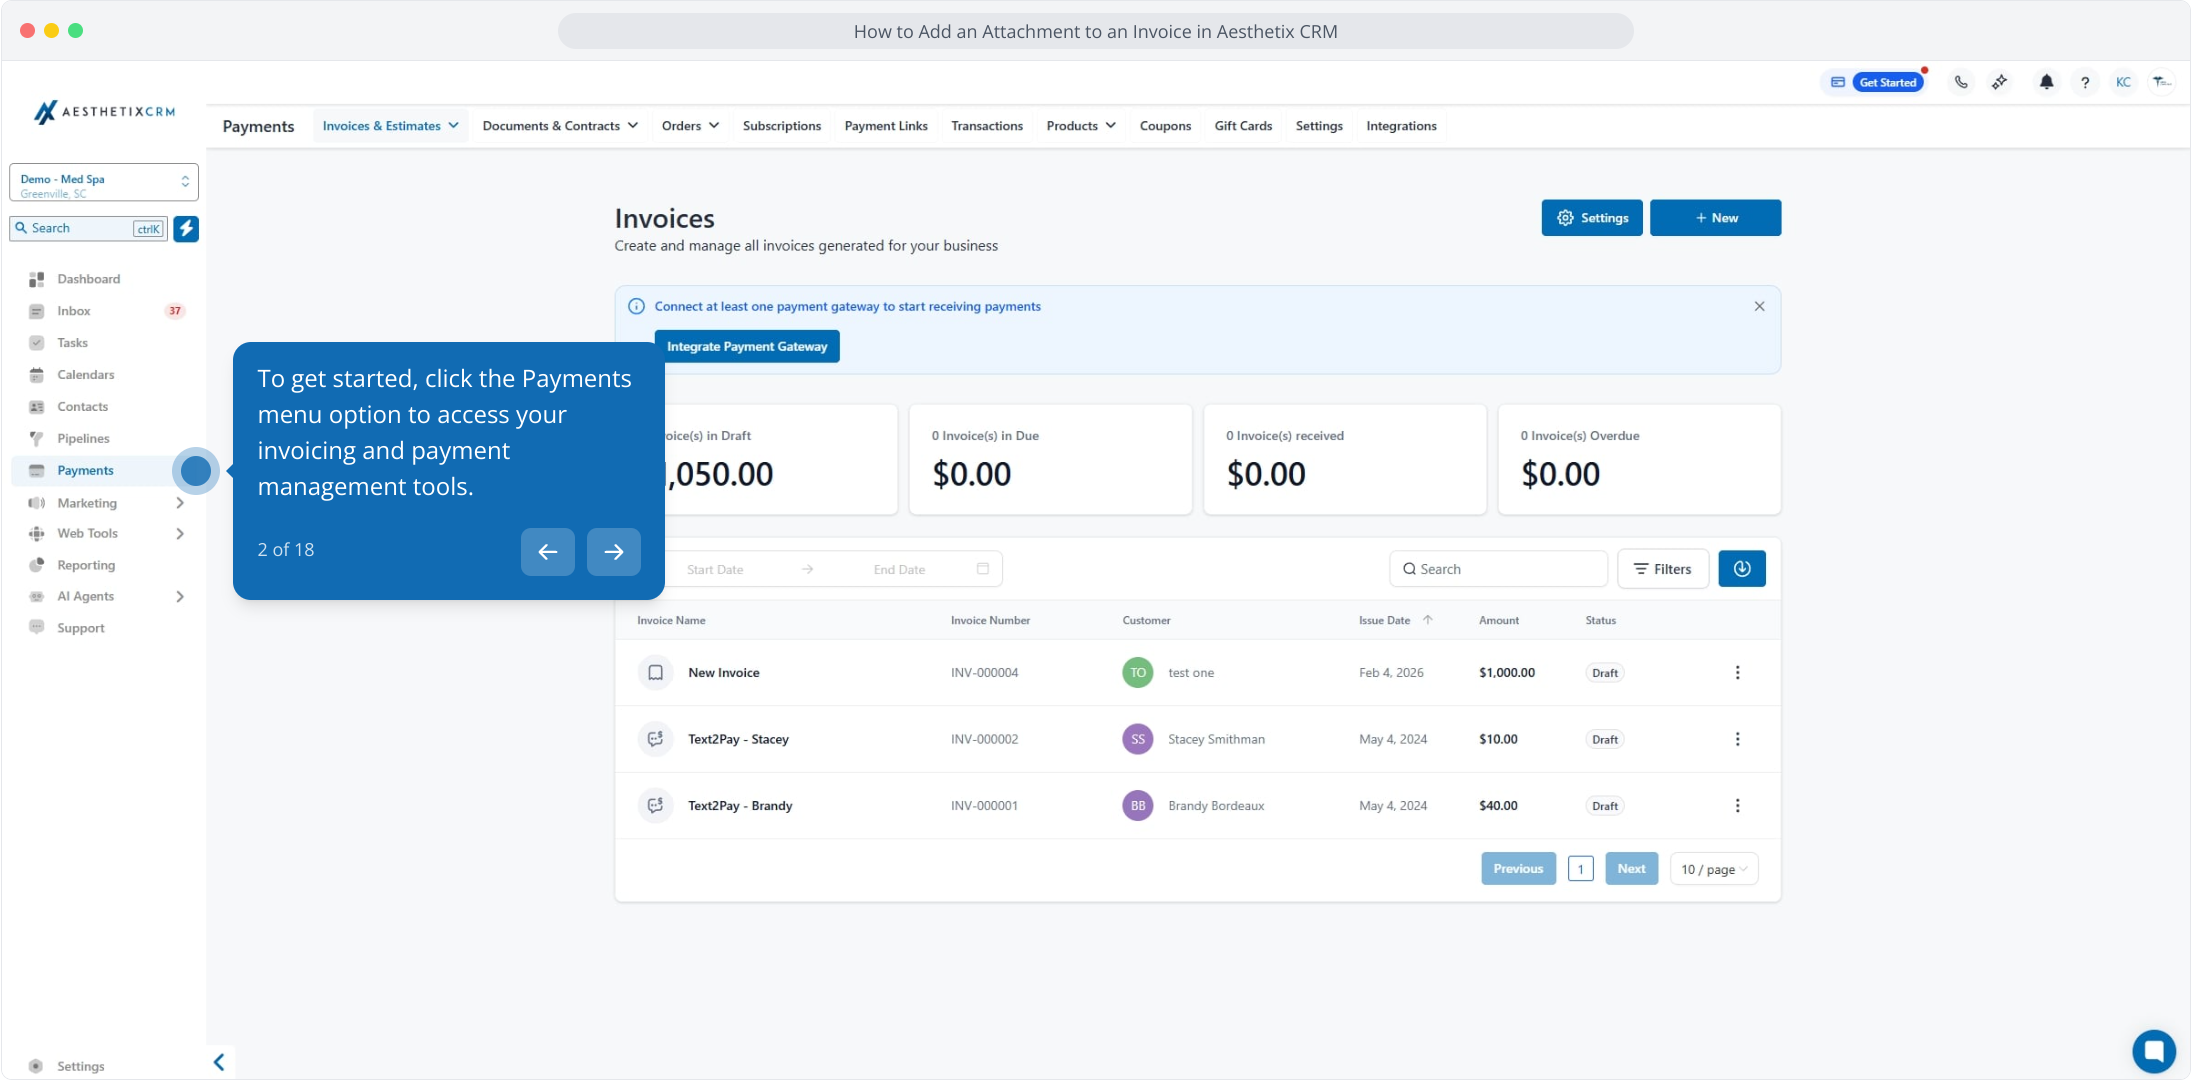
2. To get started, click the Payments menu option to access your invoicing and payment management tools.
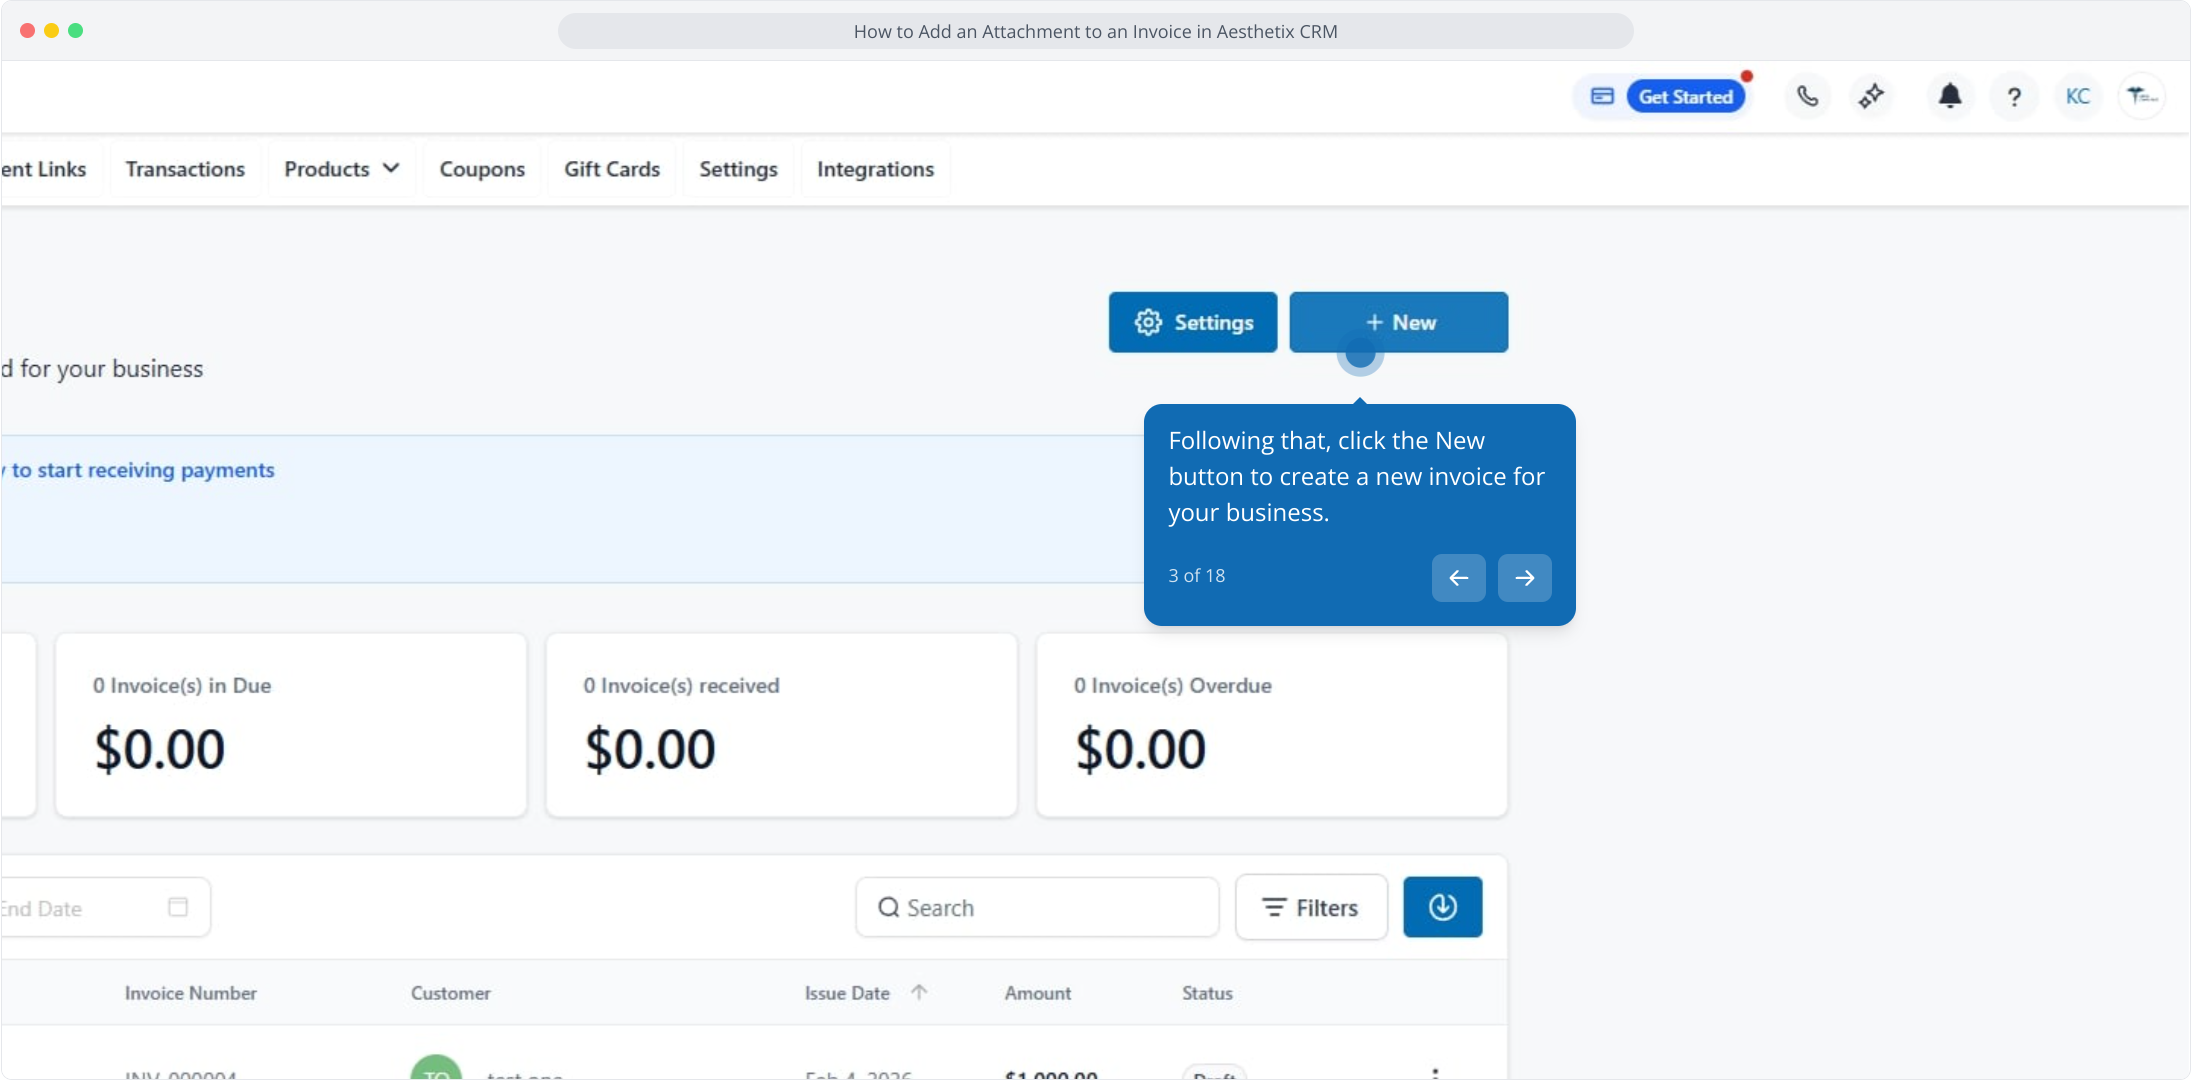
3. Following that, click the New button to create a new invoice for your business.
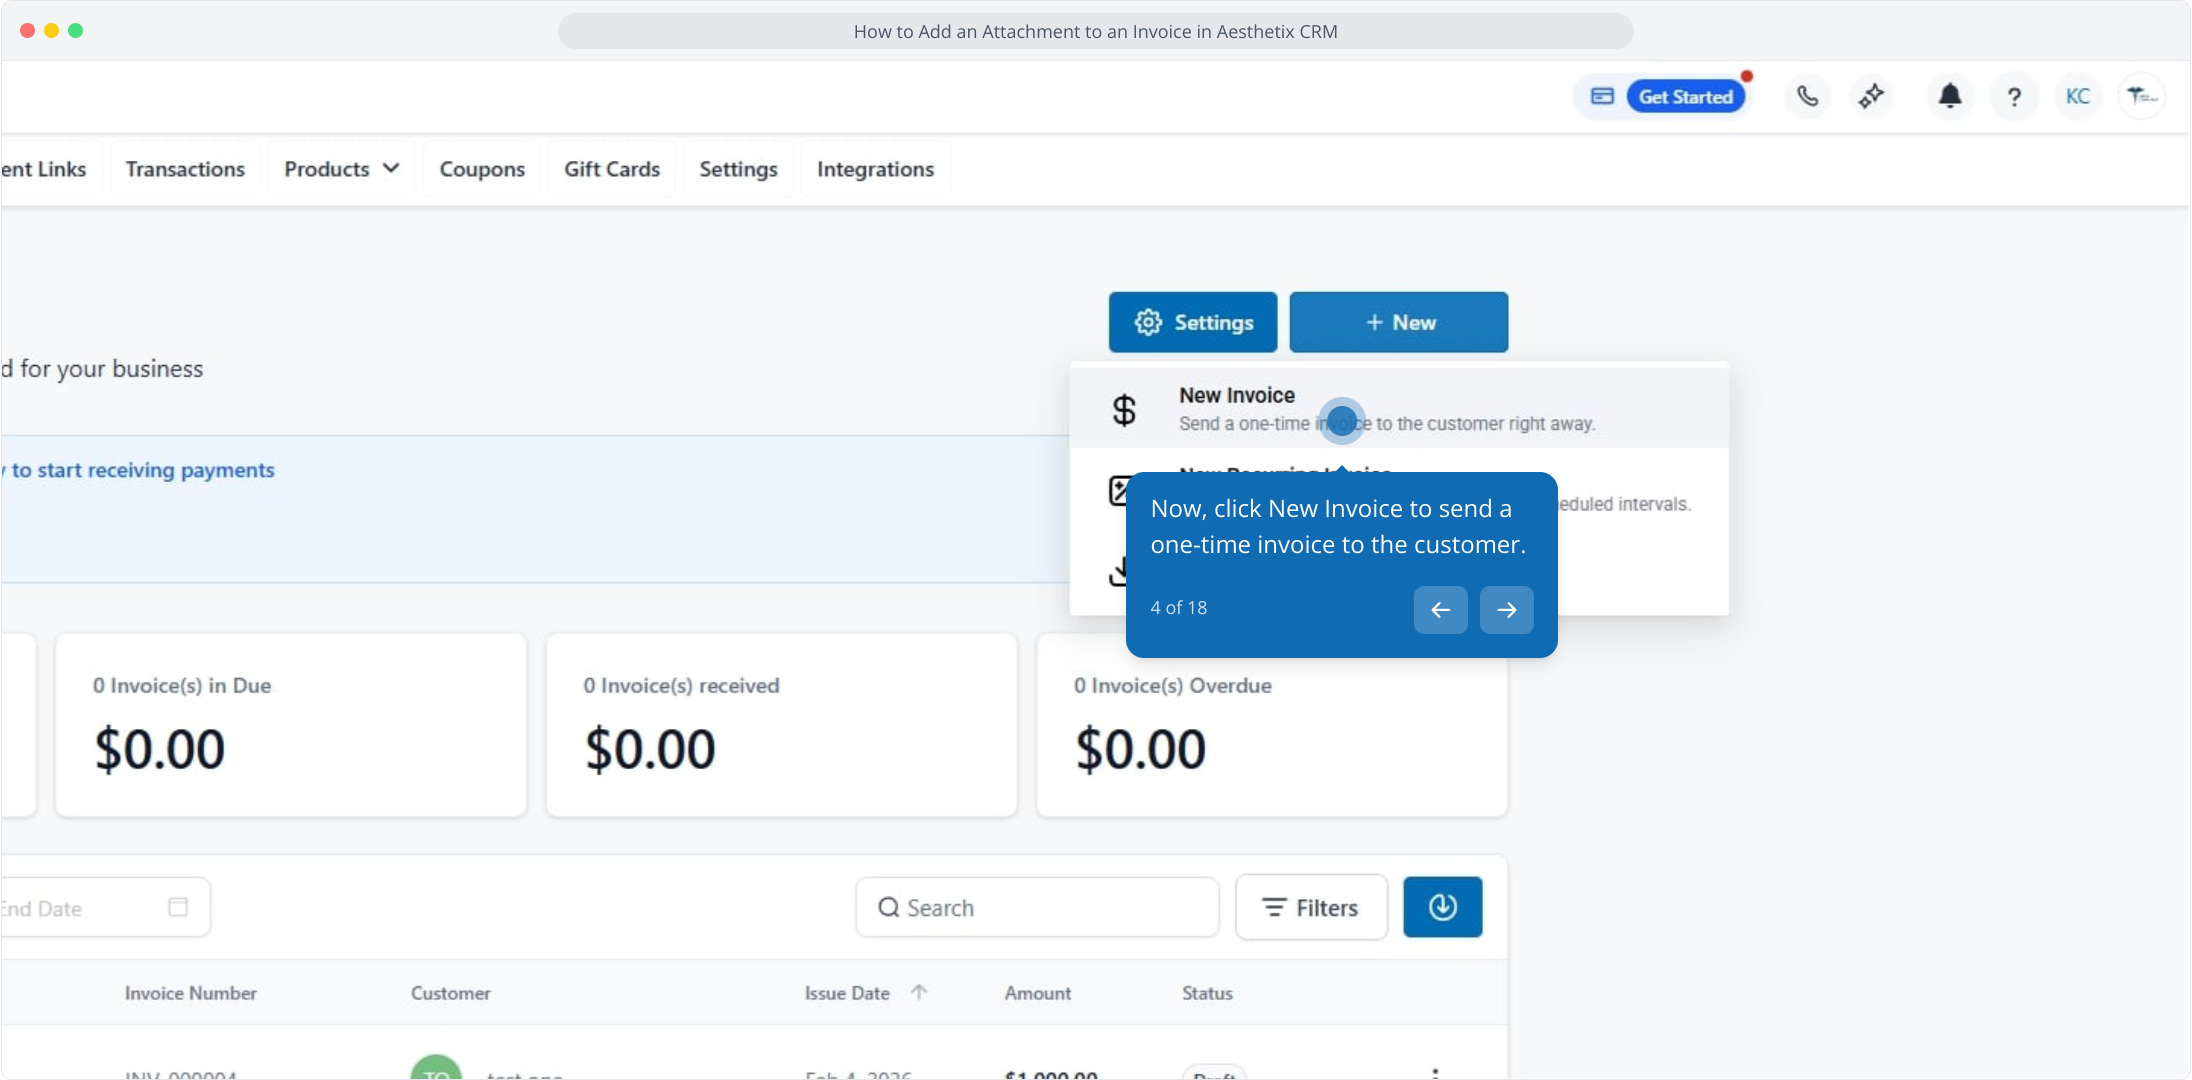
4. Now, click New Invoice to send a one-time invoice to the customer.
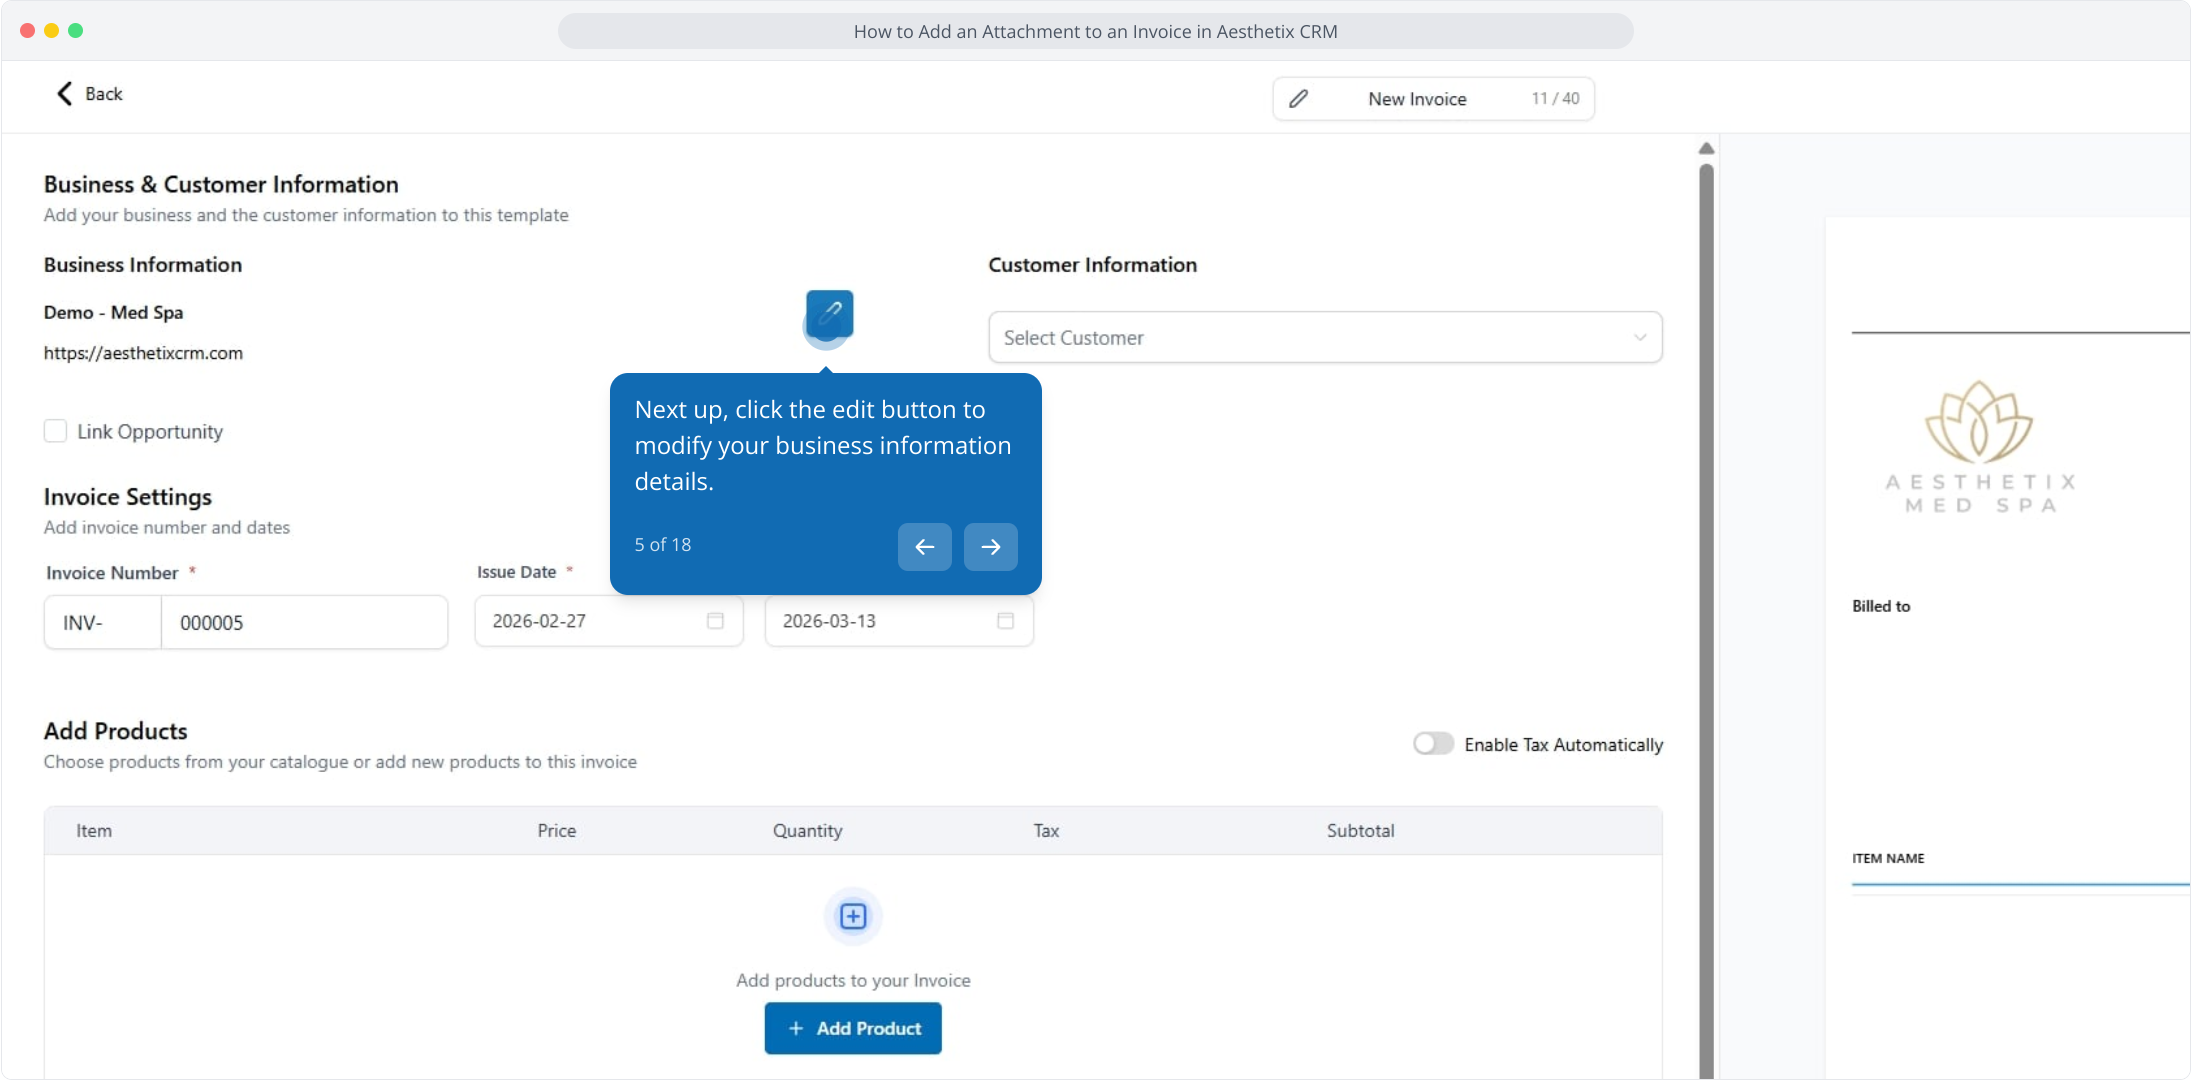
5. Next up, click the edit button to modify your business information details.
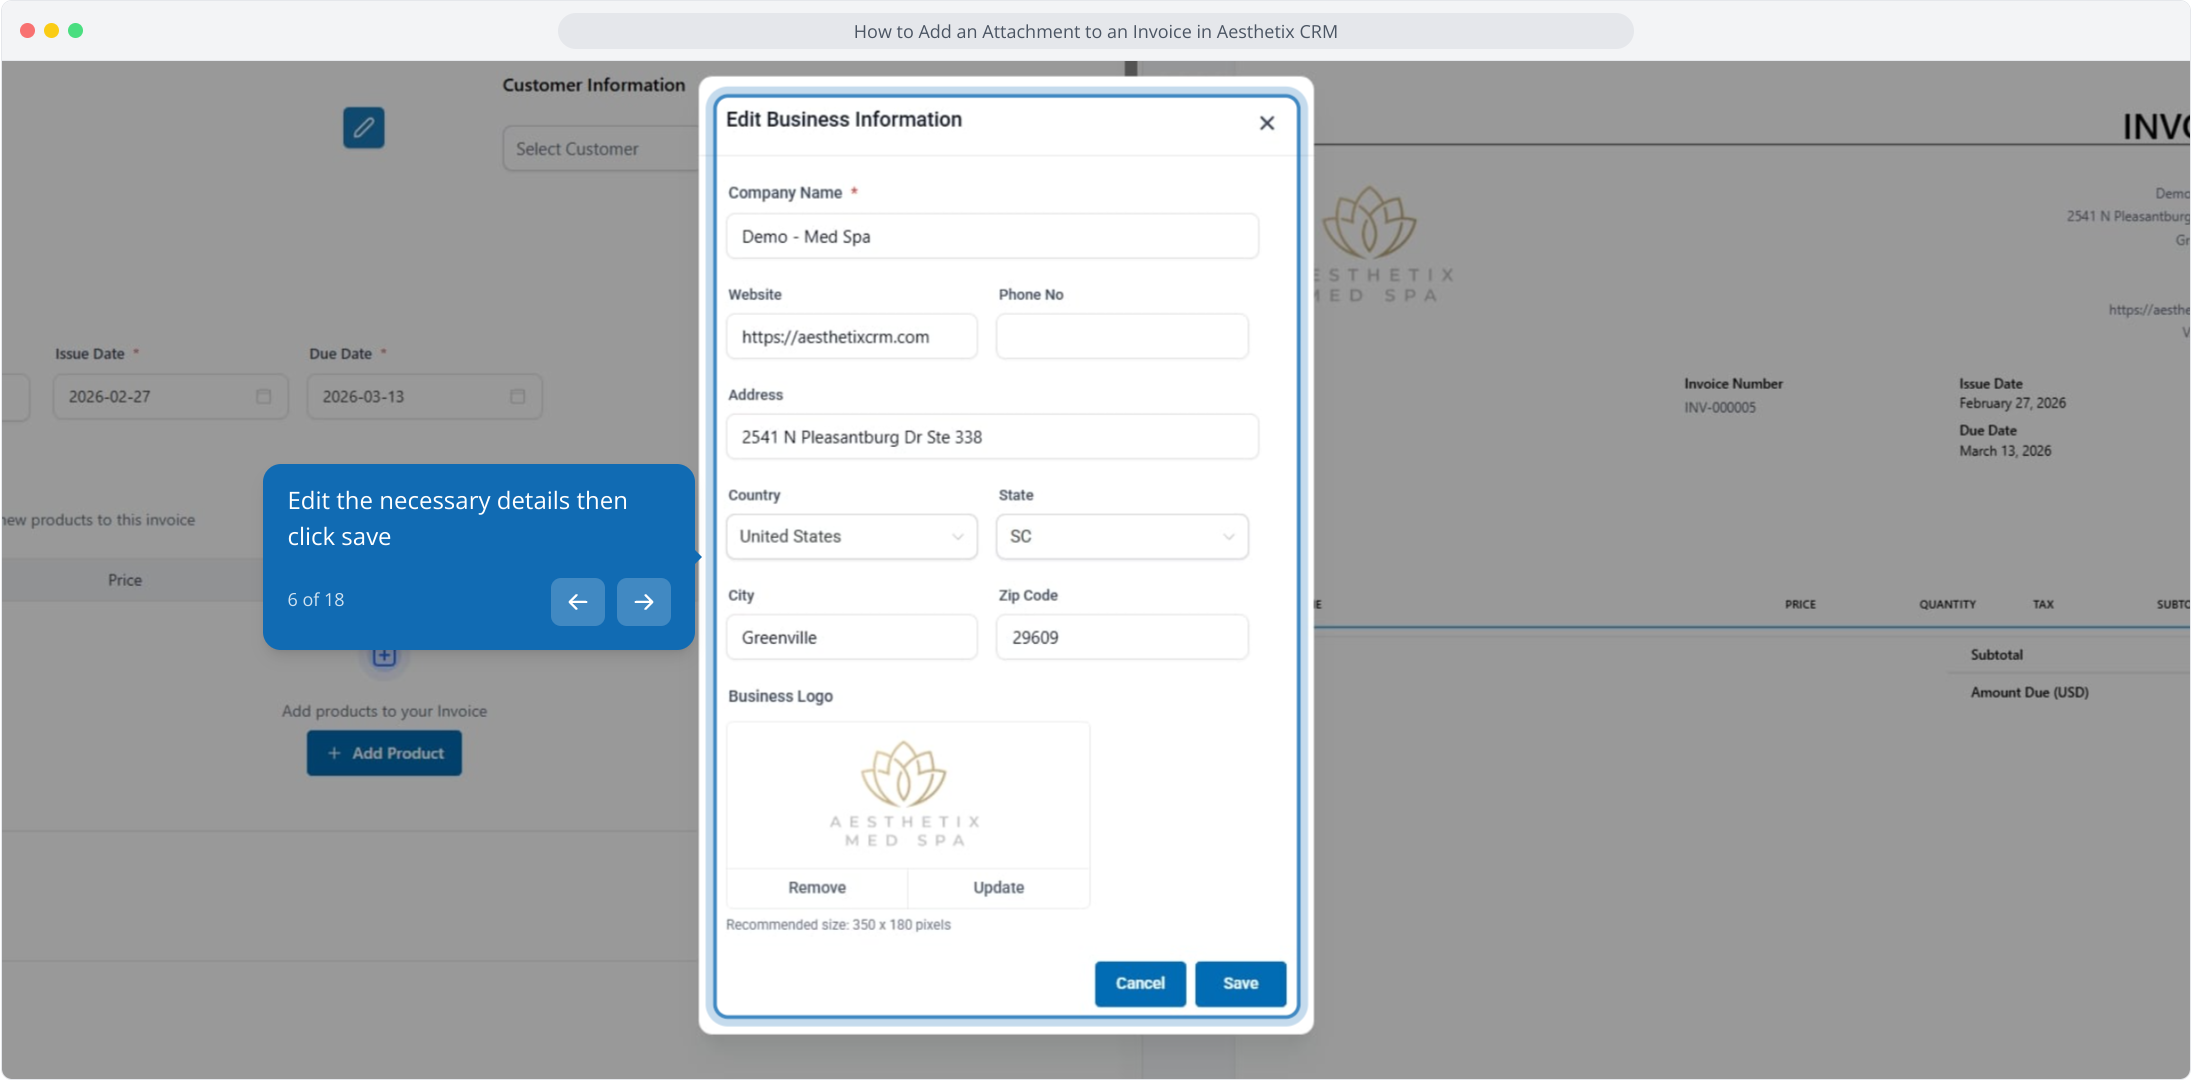
6. Edit the necessary details then click save
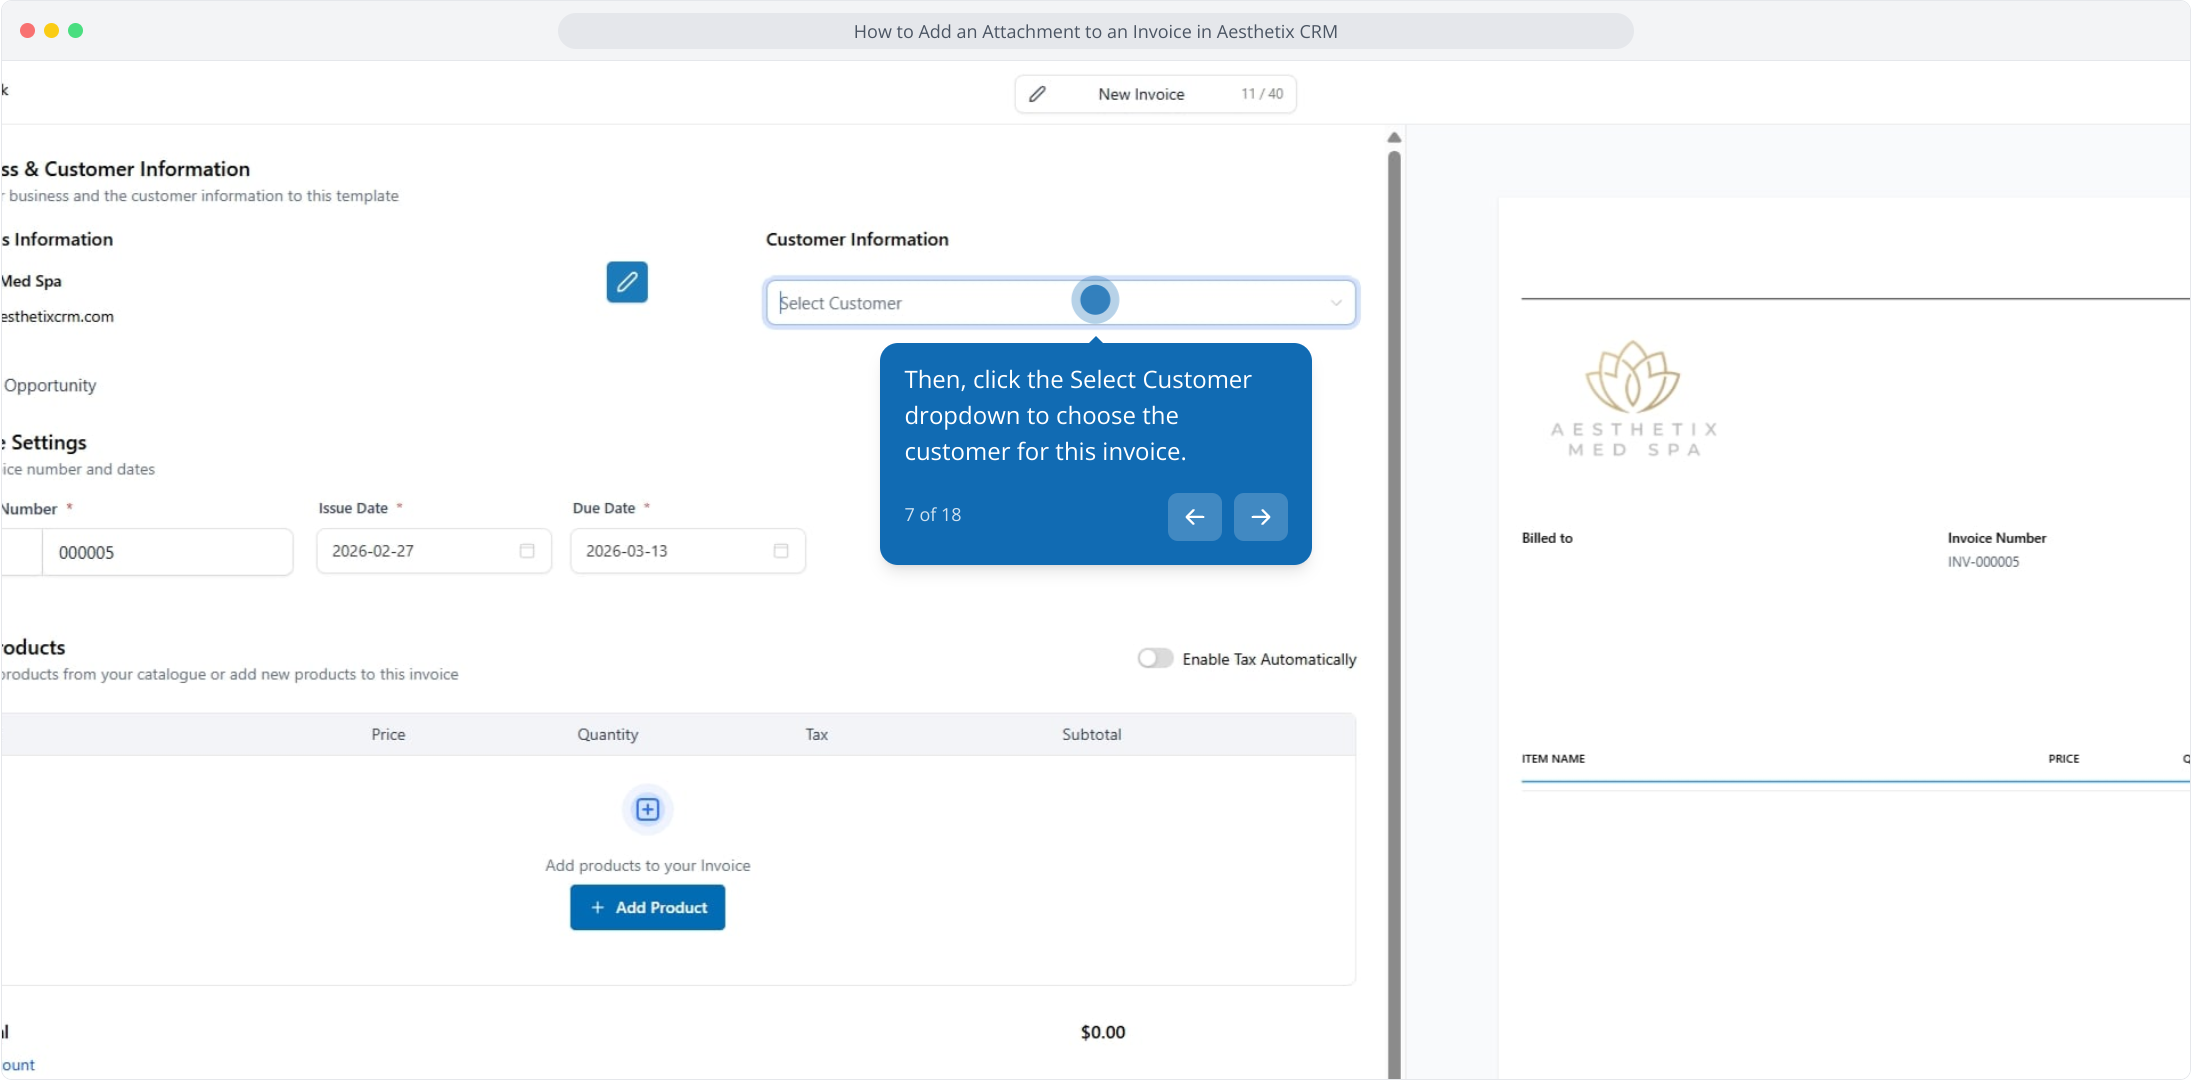
7. Then, click the Select Customer dropdown to choose the customer for this invoice.
8. From here, enable Link Opportunity to associate this invoice with a specific opportunity record.
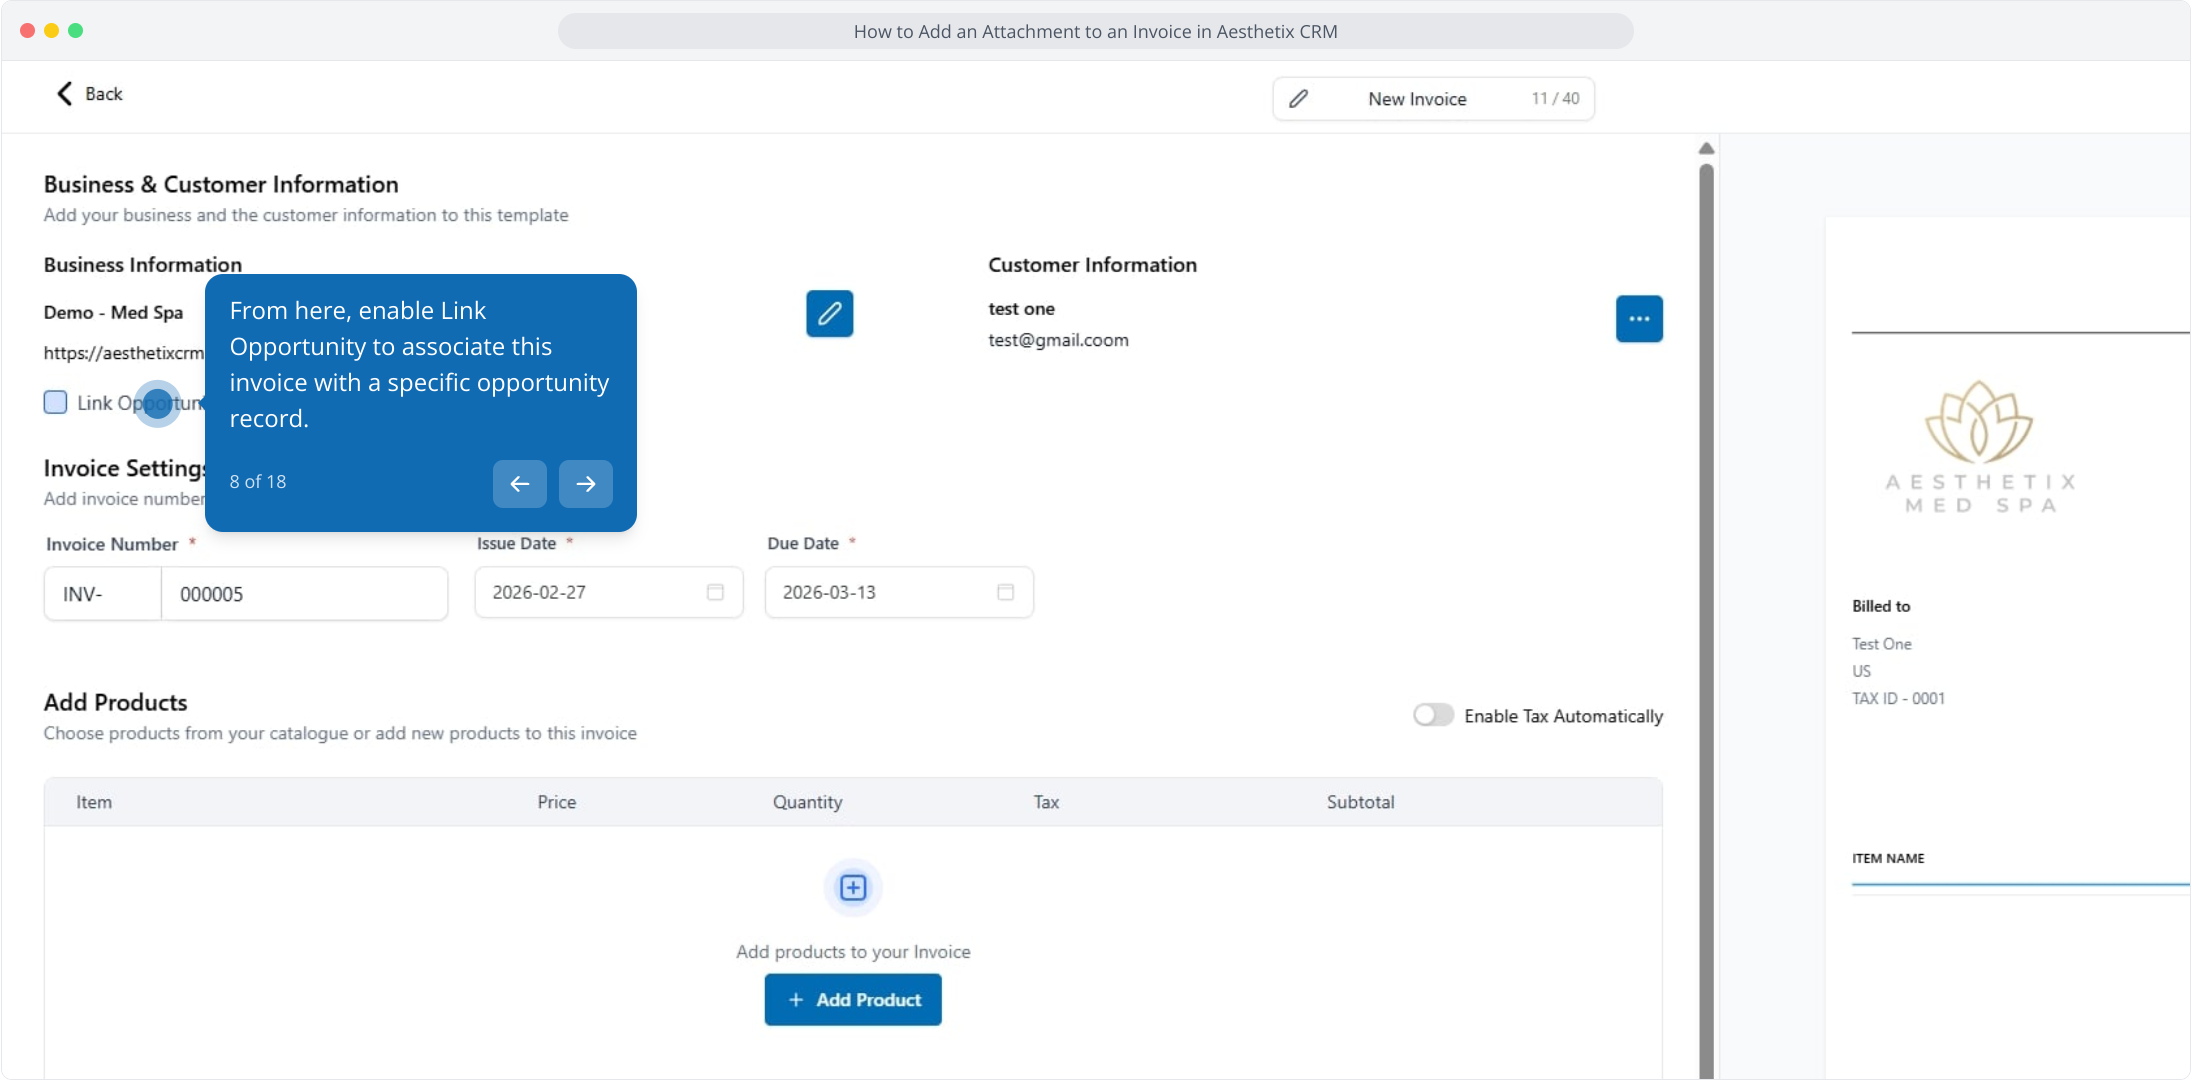
9. Search and select the opportunity you want to link to this invoice.

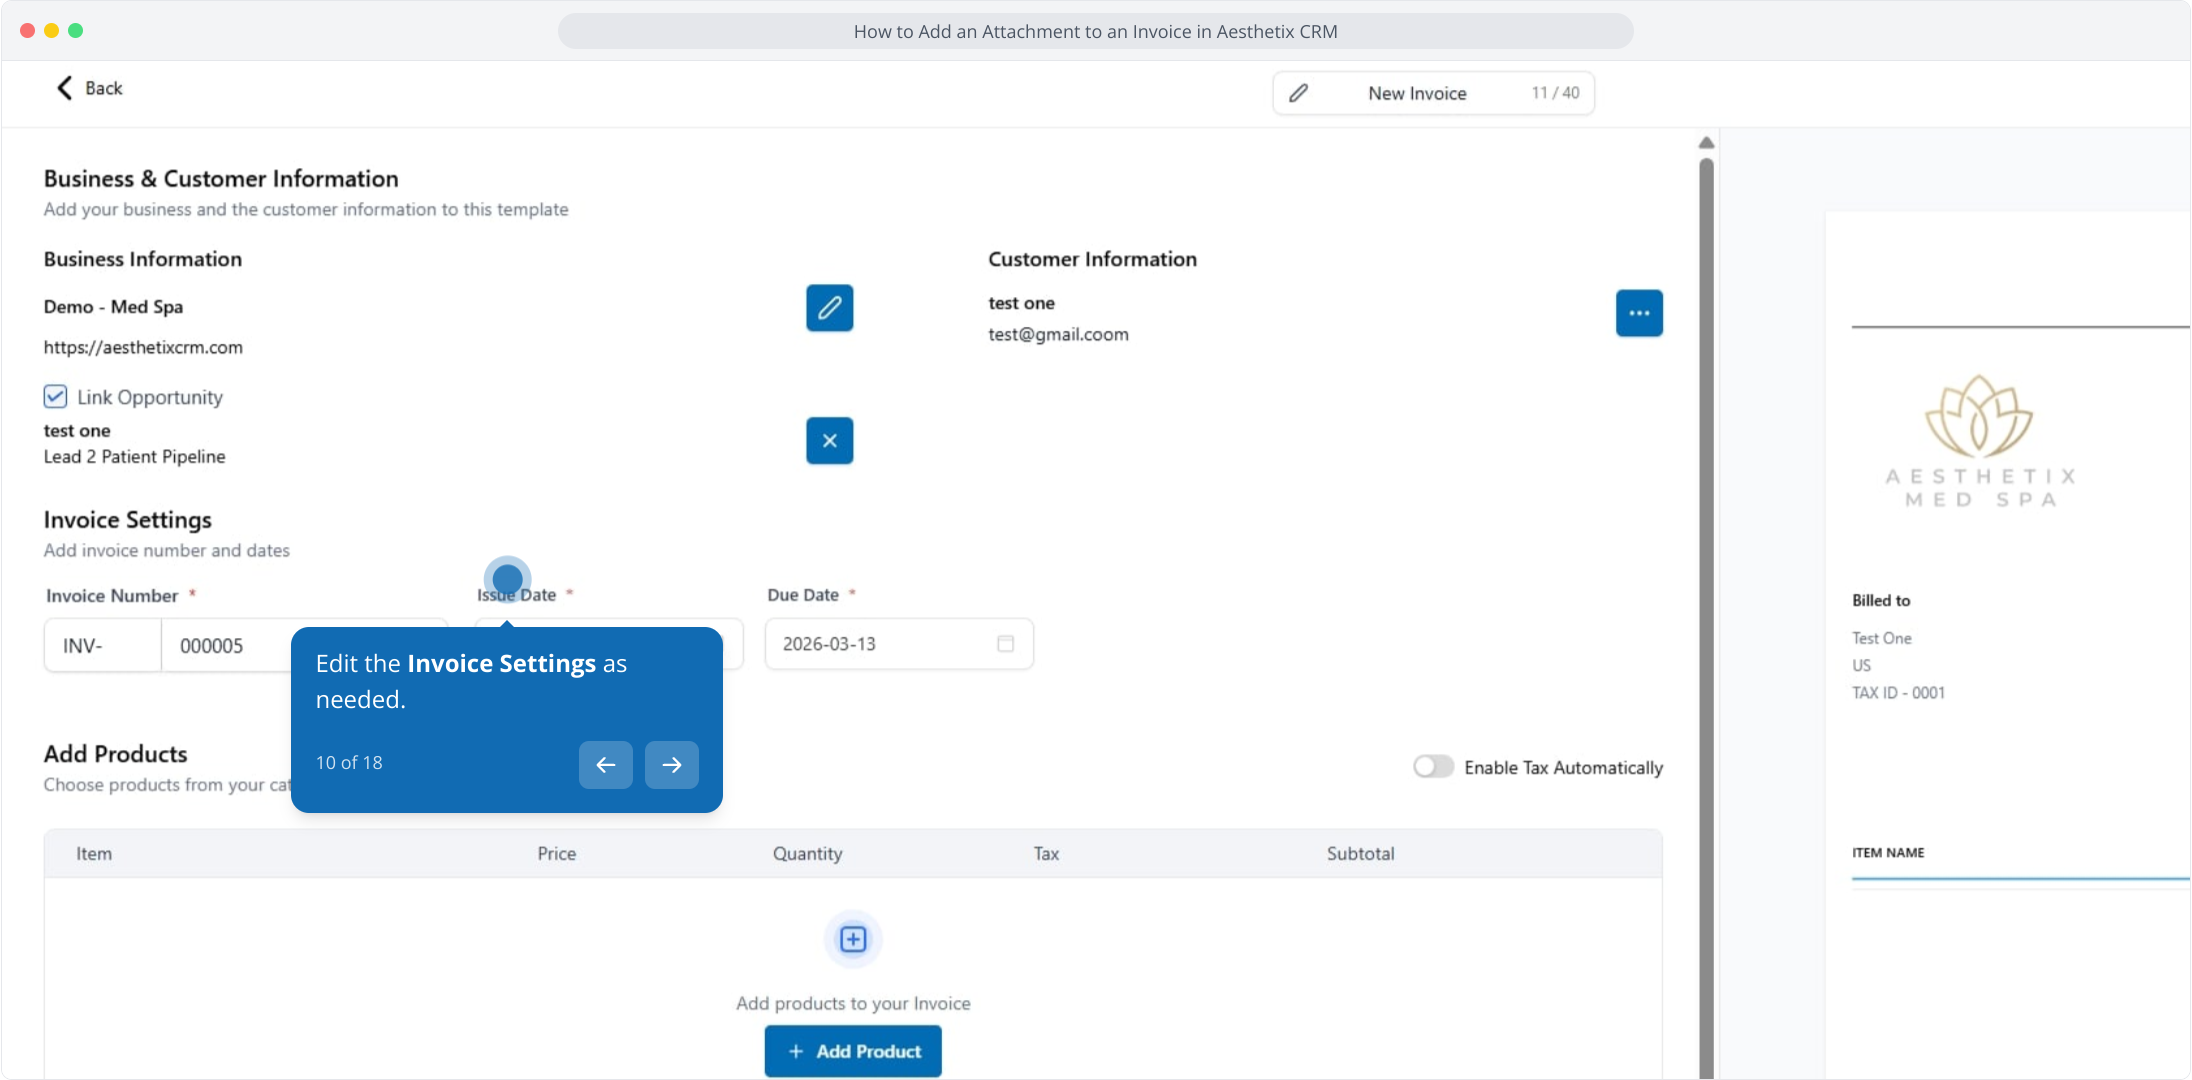
10. Edit the Invoice Settings as needed.
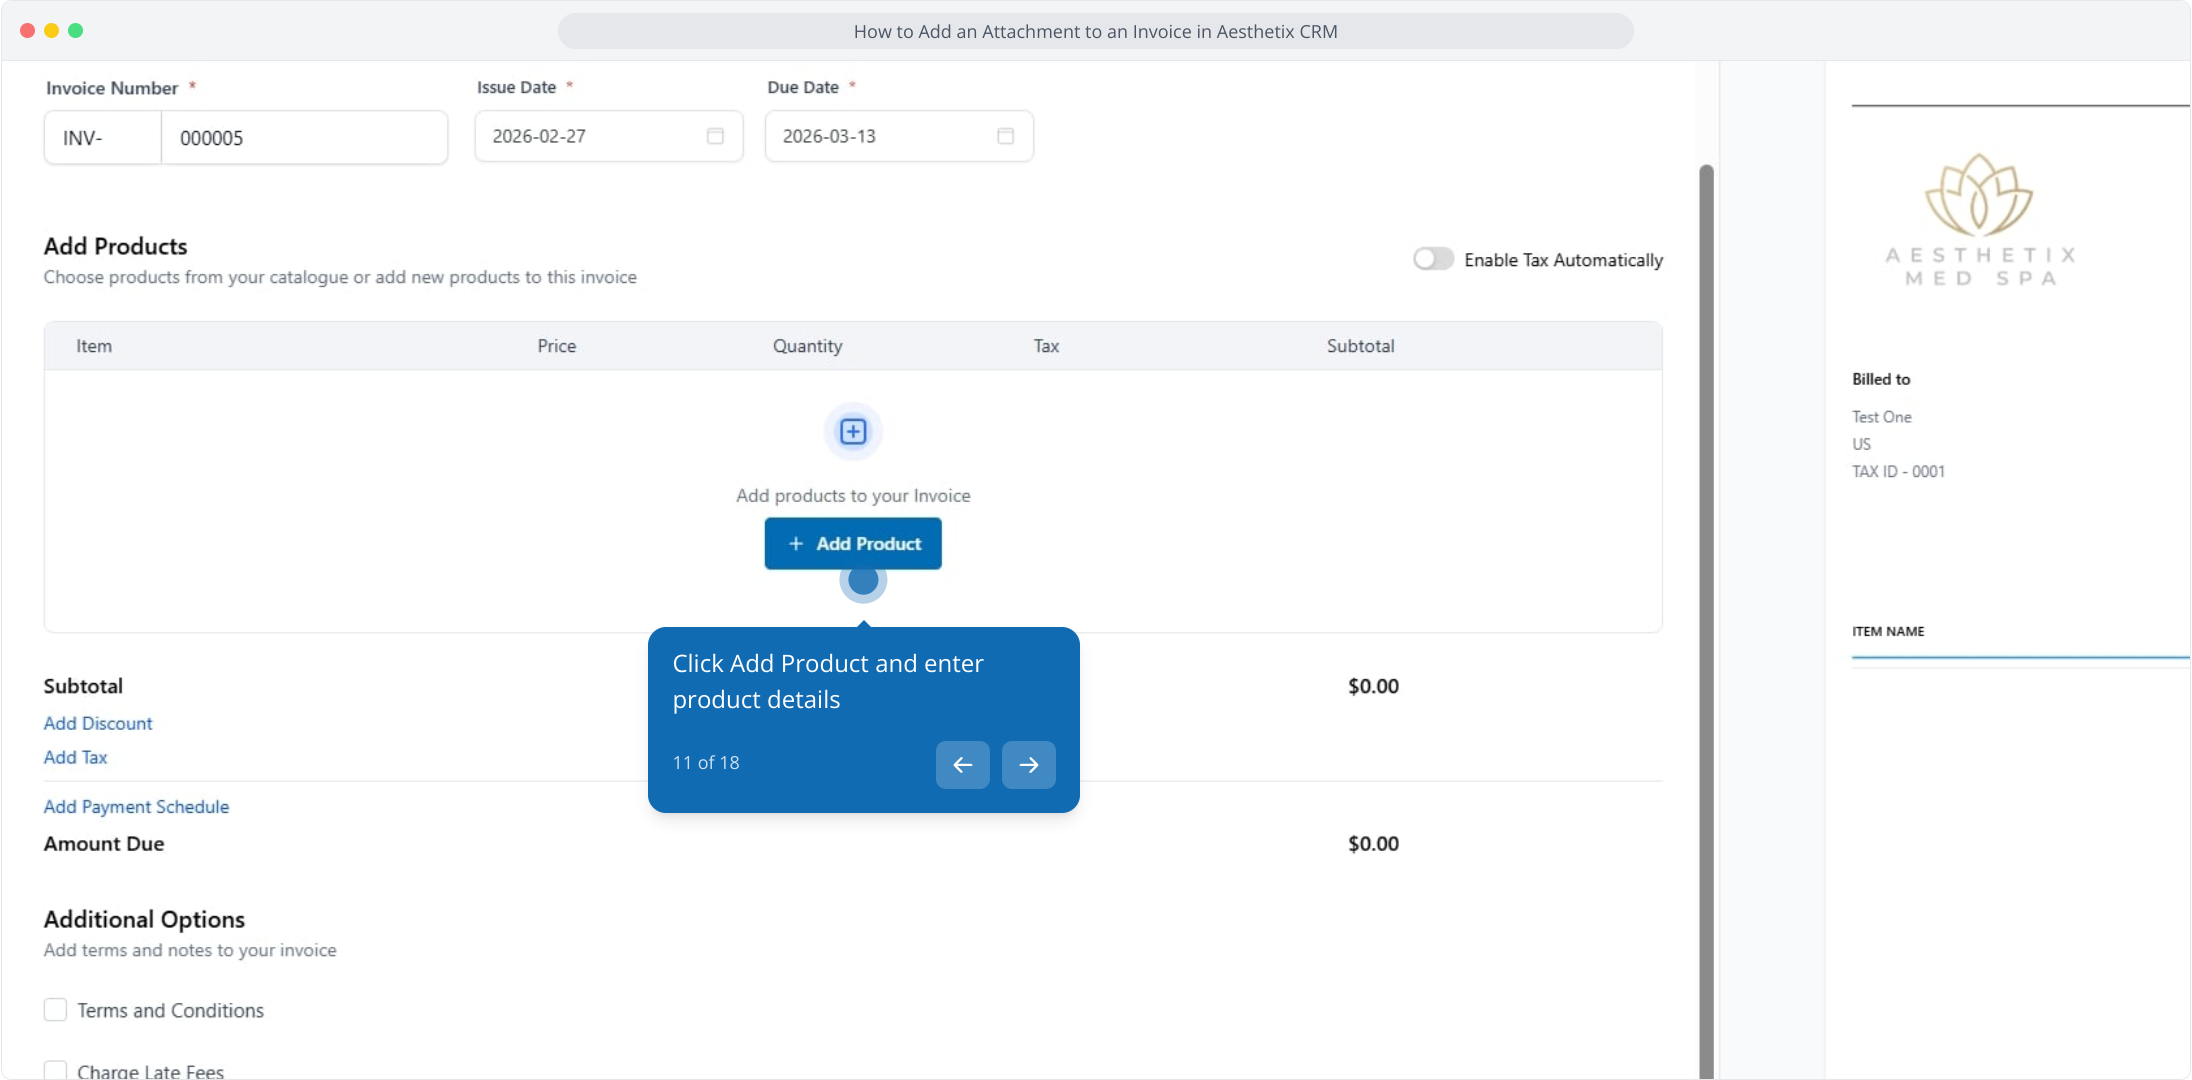
11. Click Add Product and enter product details
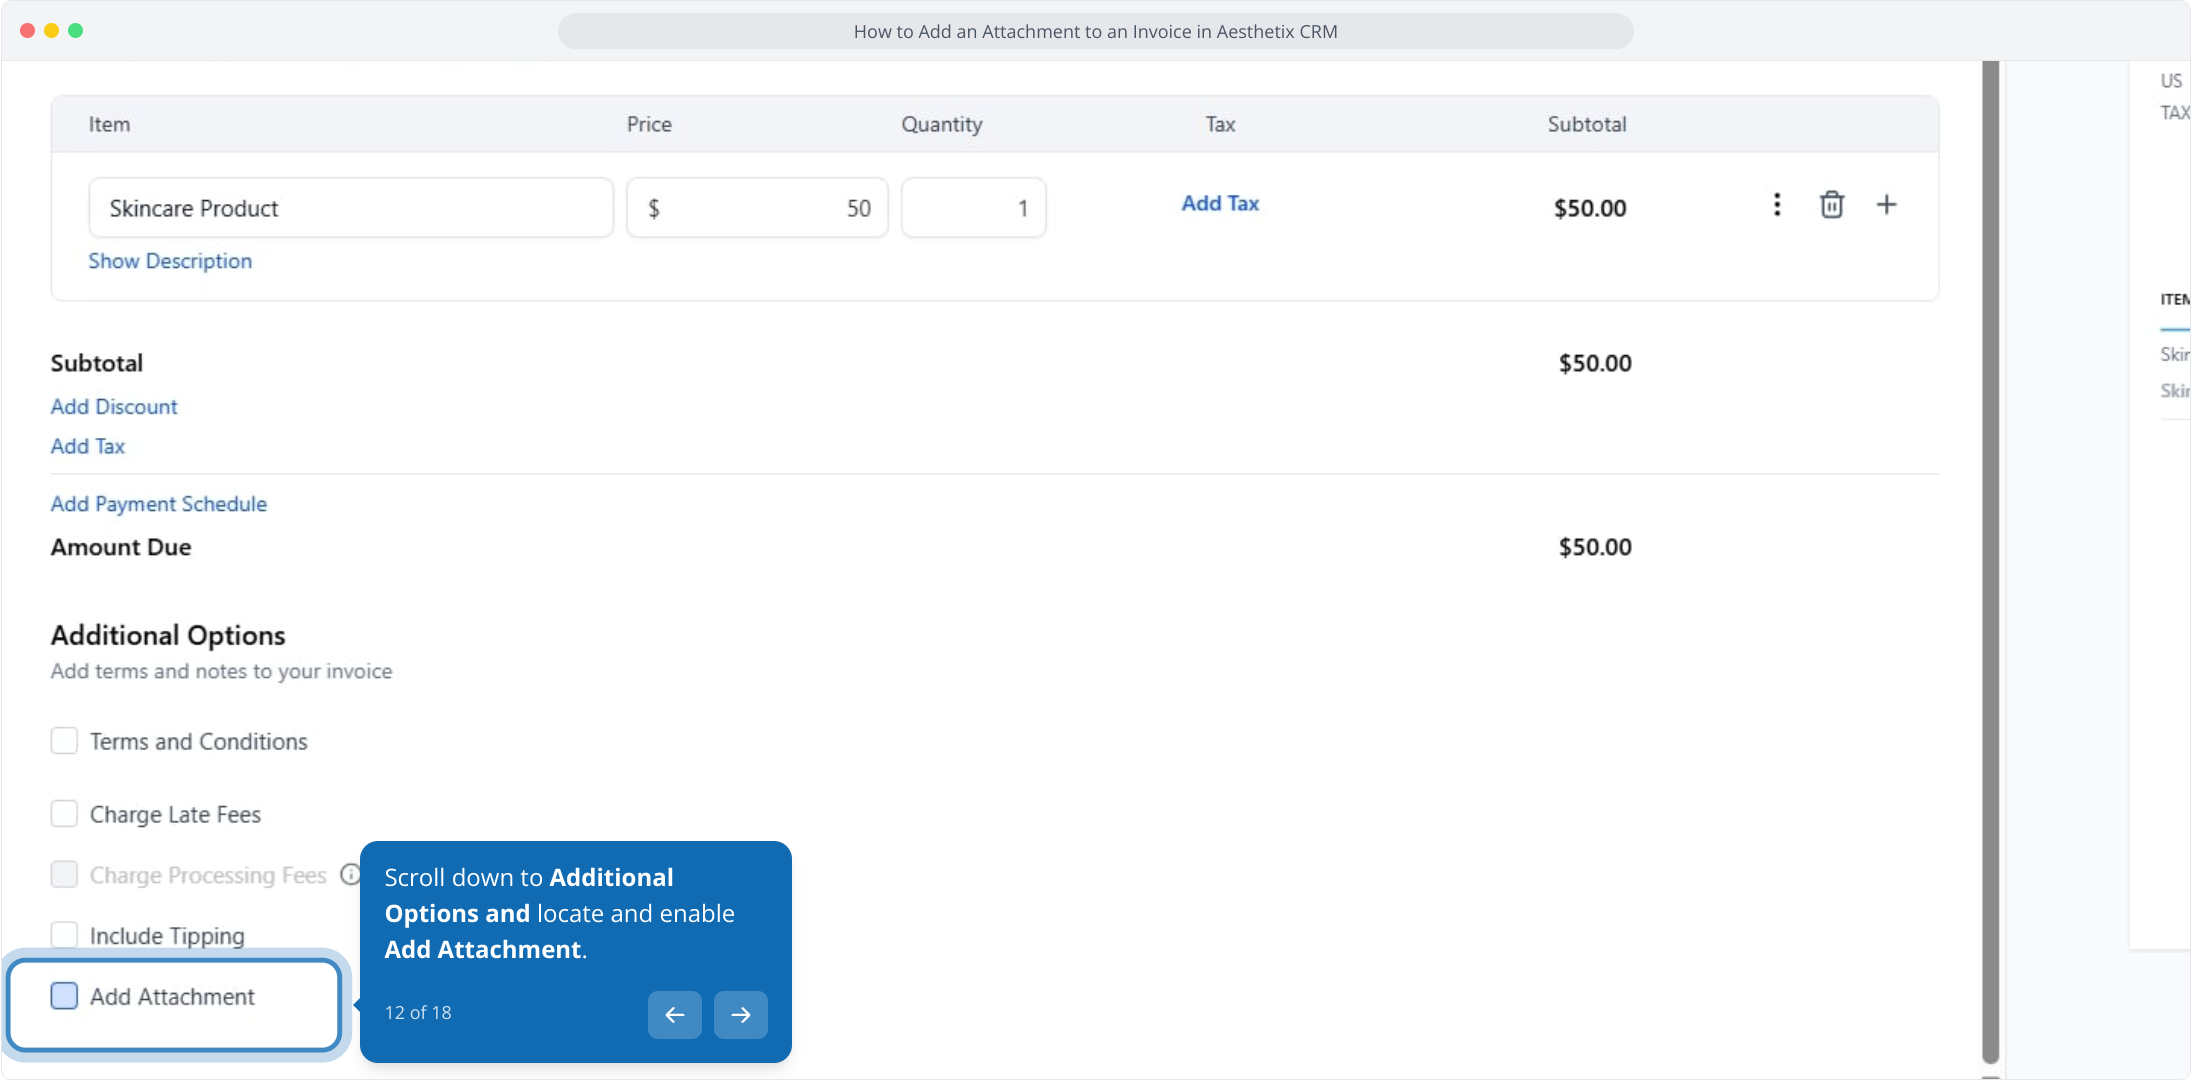
12. Scroll down to Additional Options and locate and enable Add Attachment.
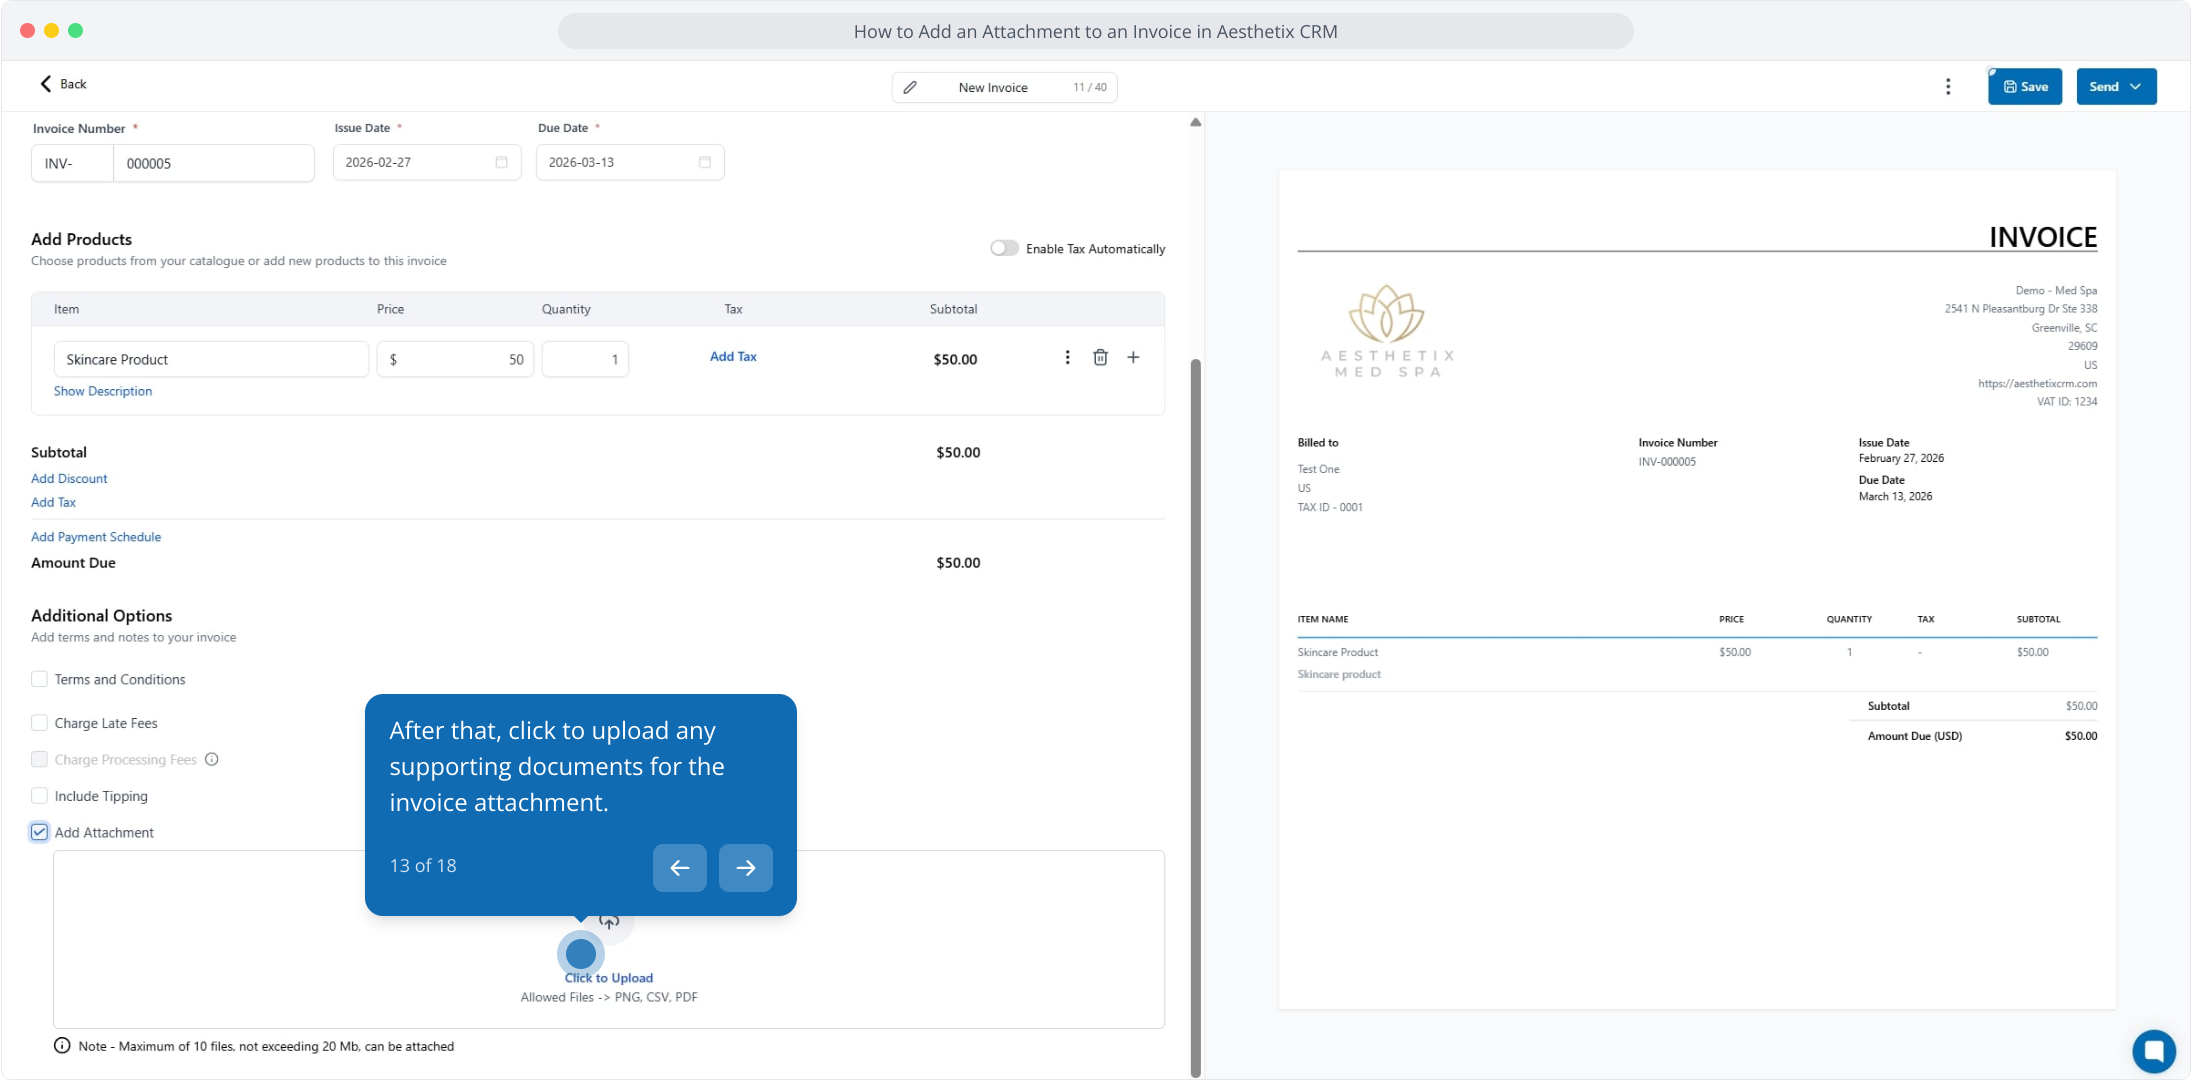
13. After that, click to upload any supporting documents for the invoice attachment.
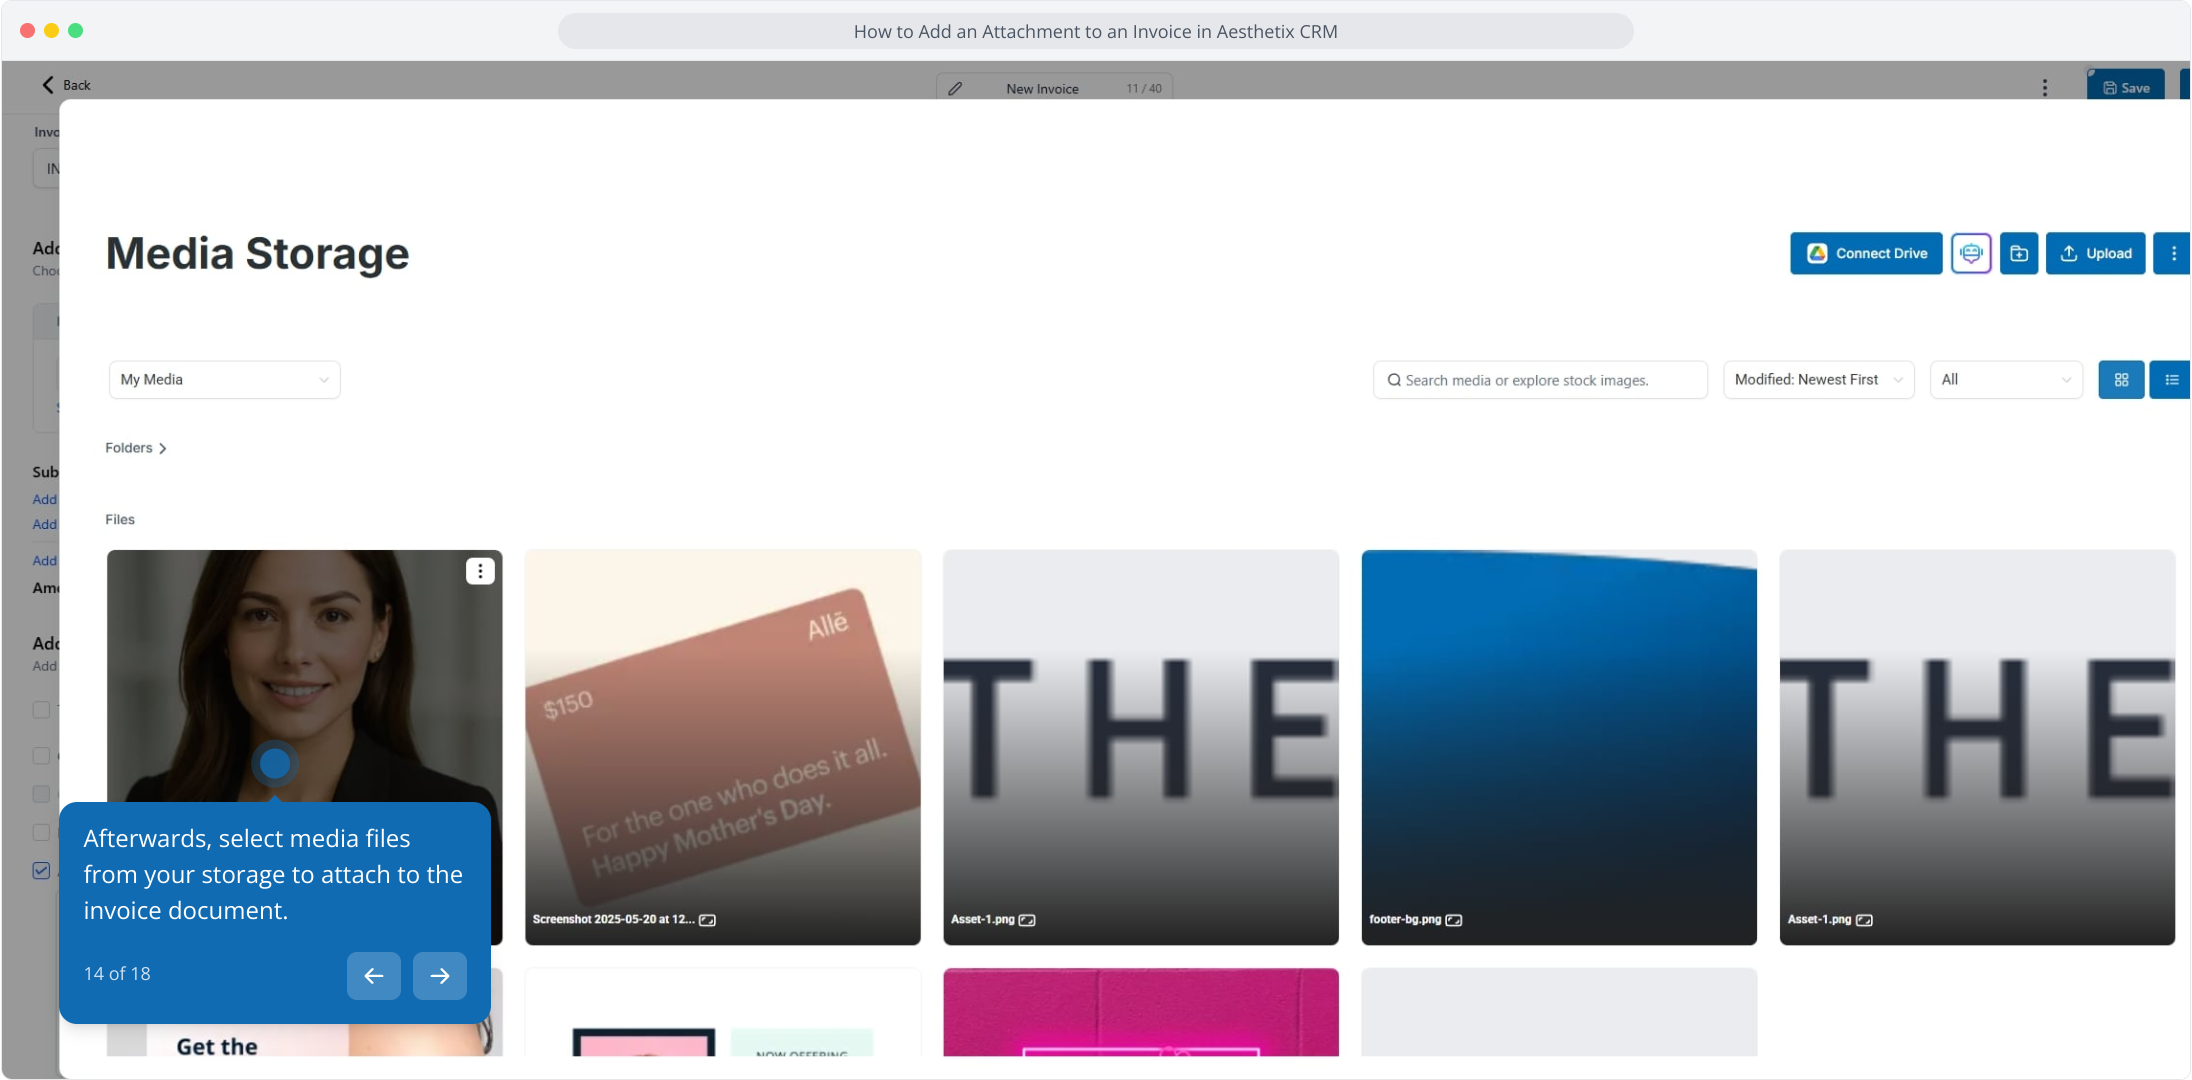
14. Afterwards, select media files from your storage to attach to the invoice document.
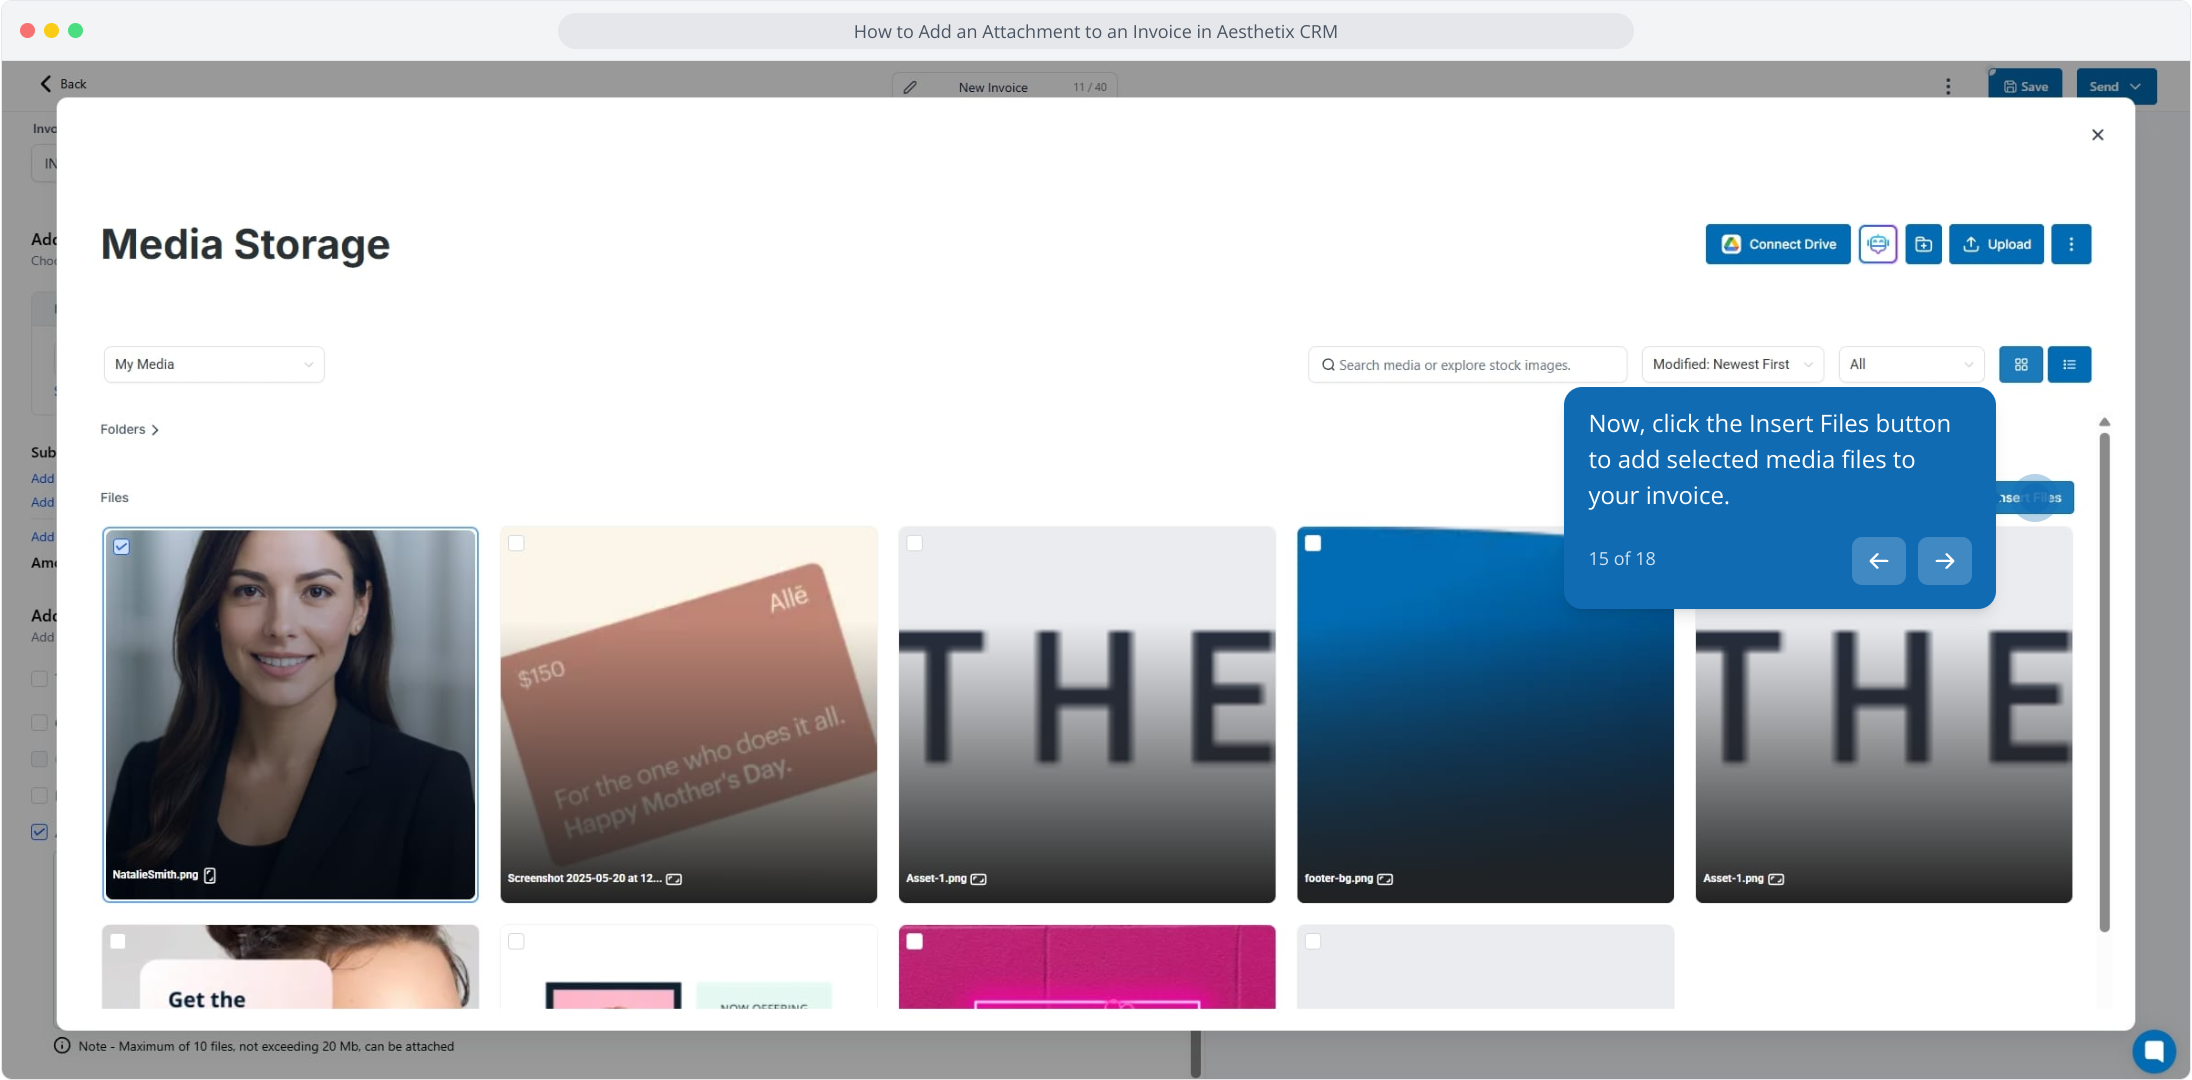
15. Now, click the Insert Files button to add selected media files to your invoice.
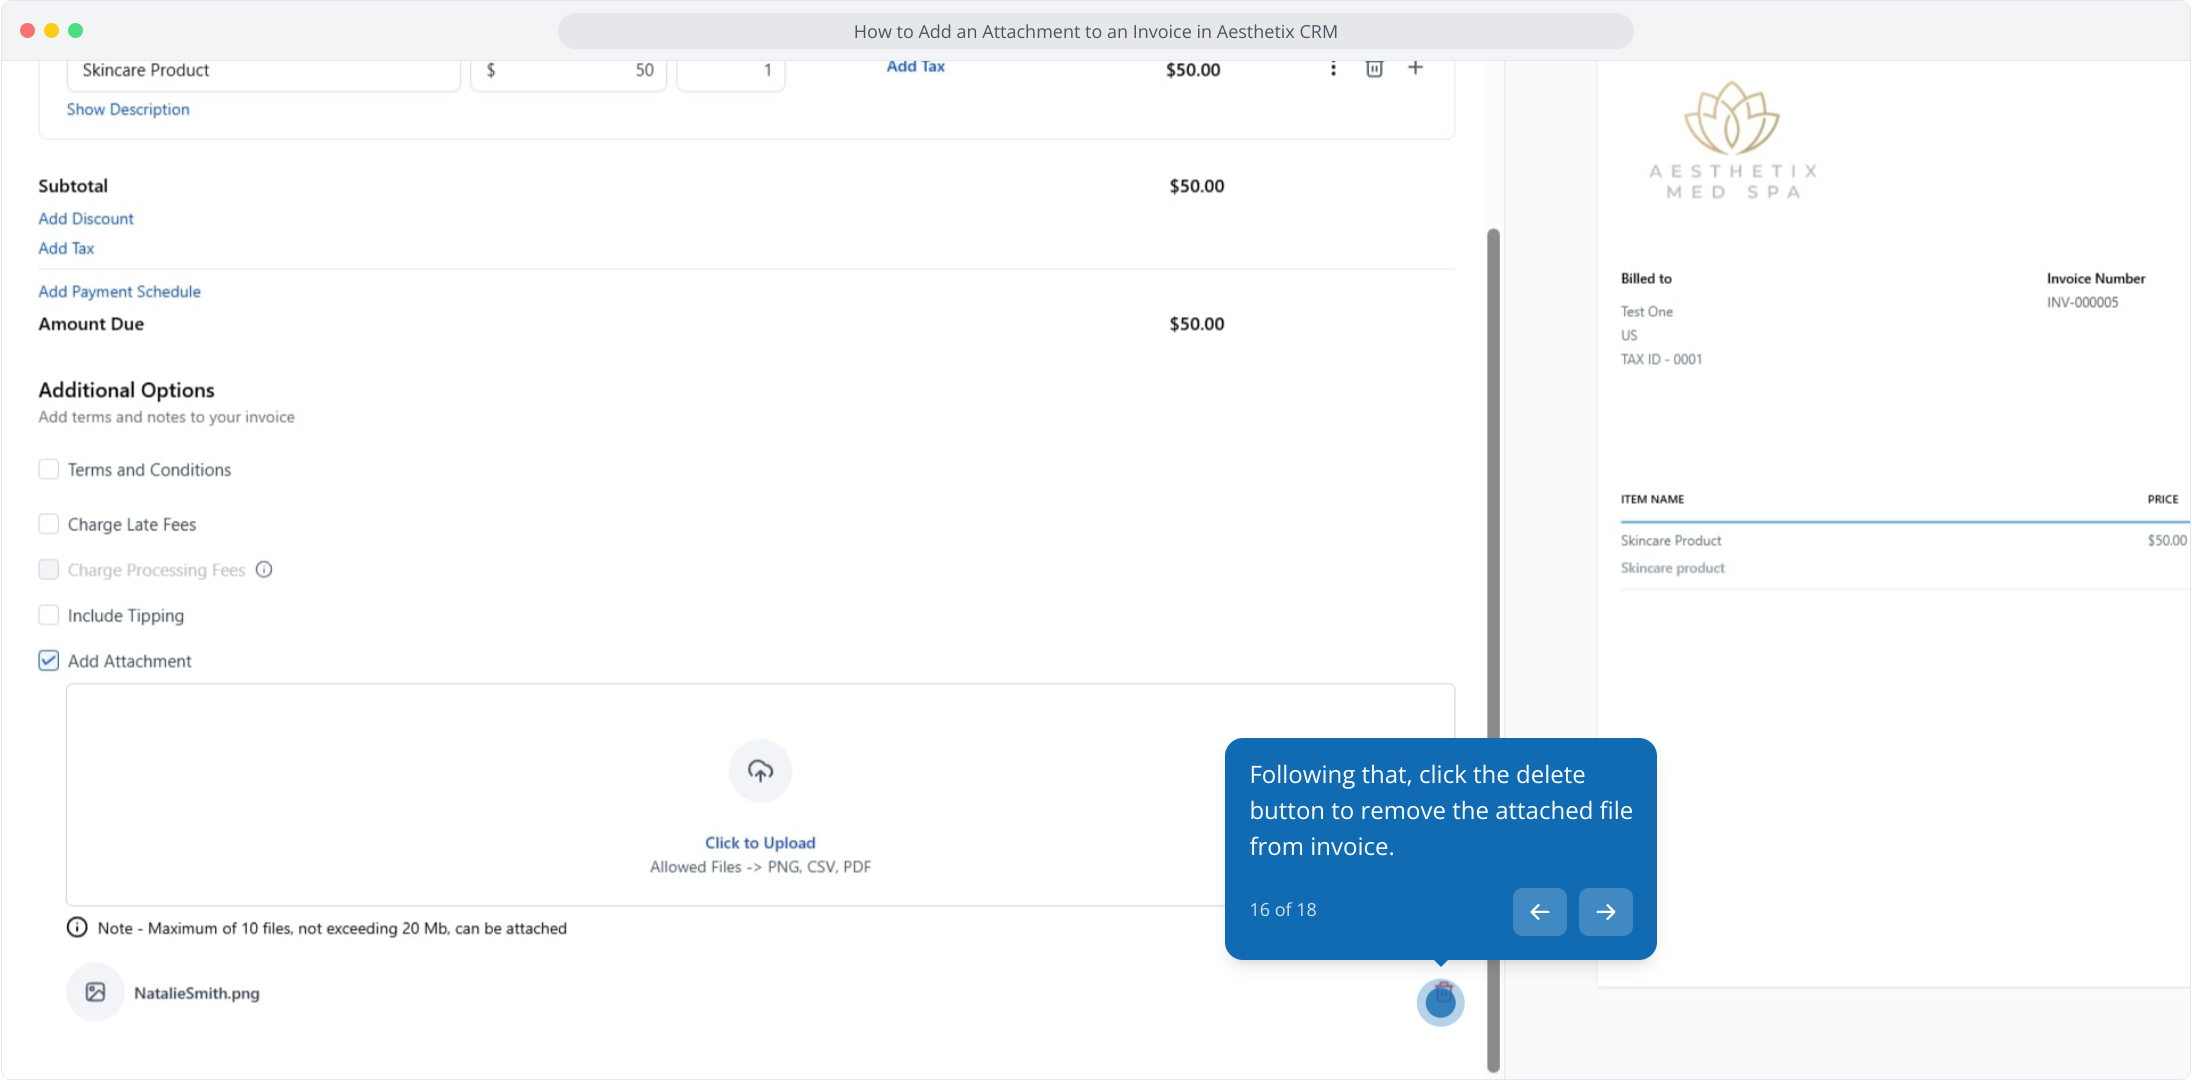
16. Following that, click the delete button to remove the attached file from invoice.
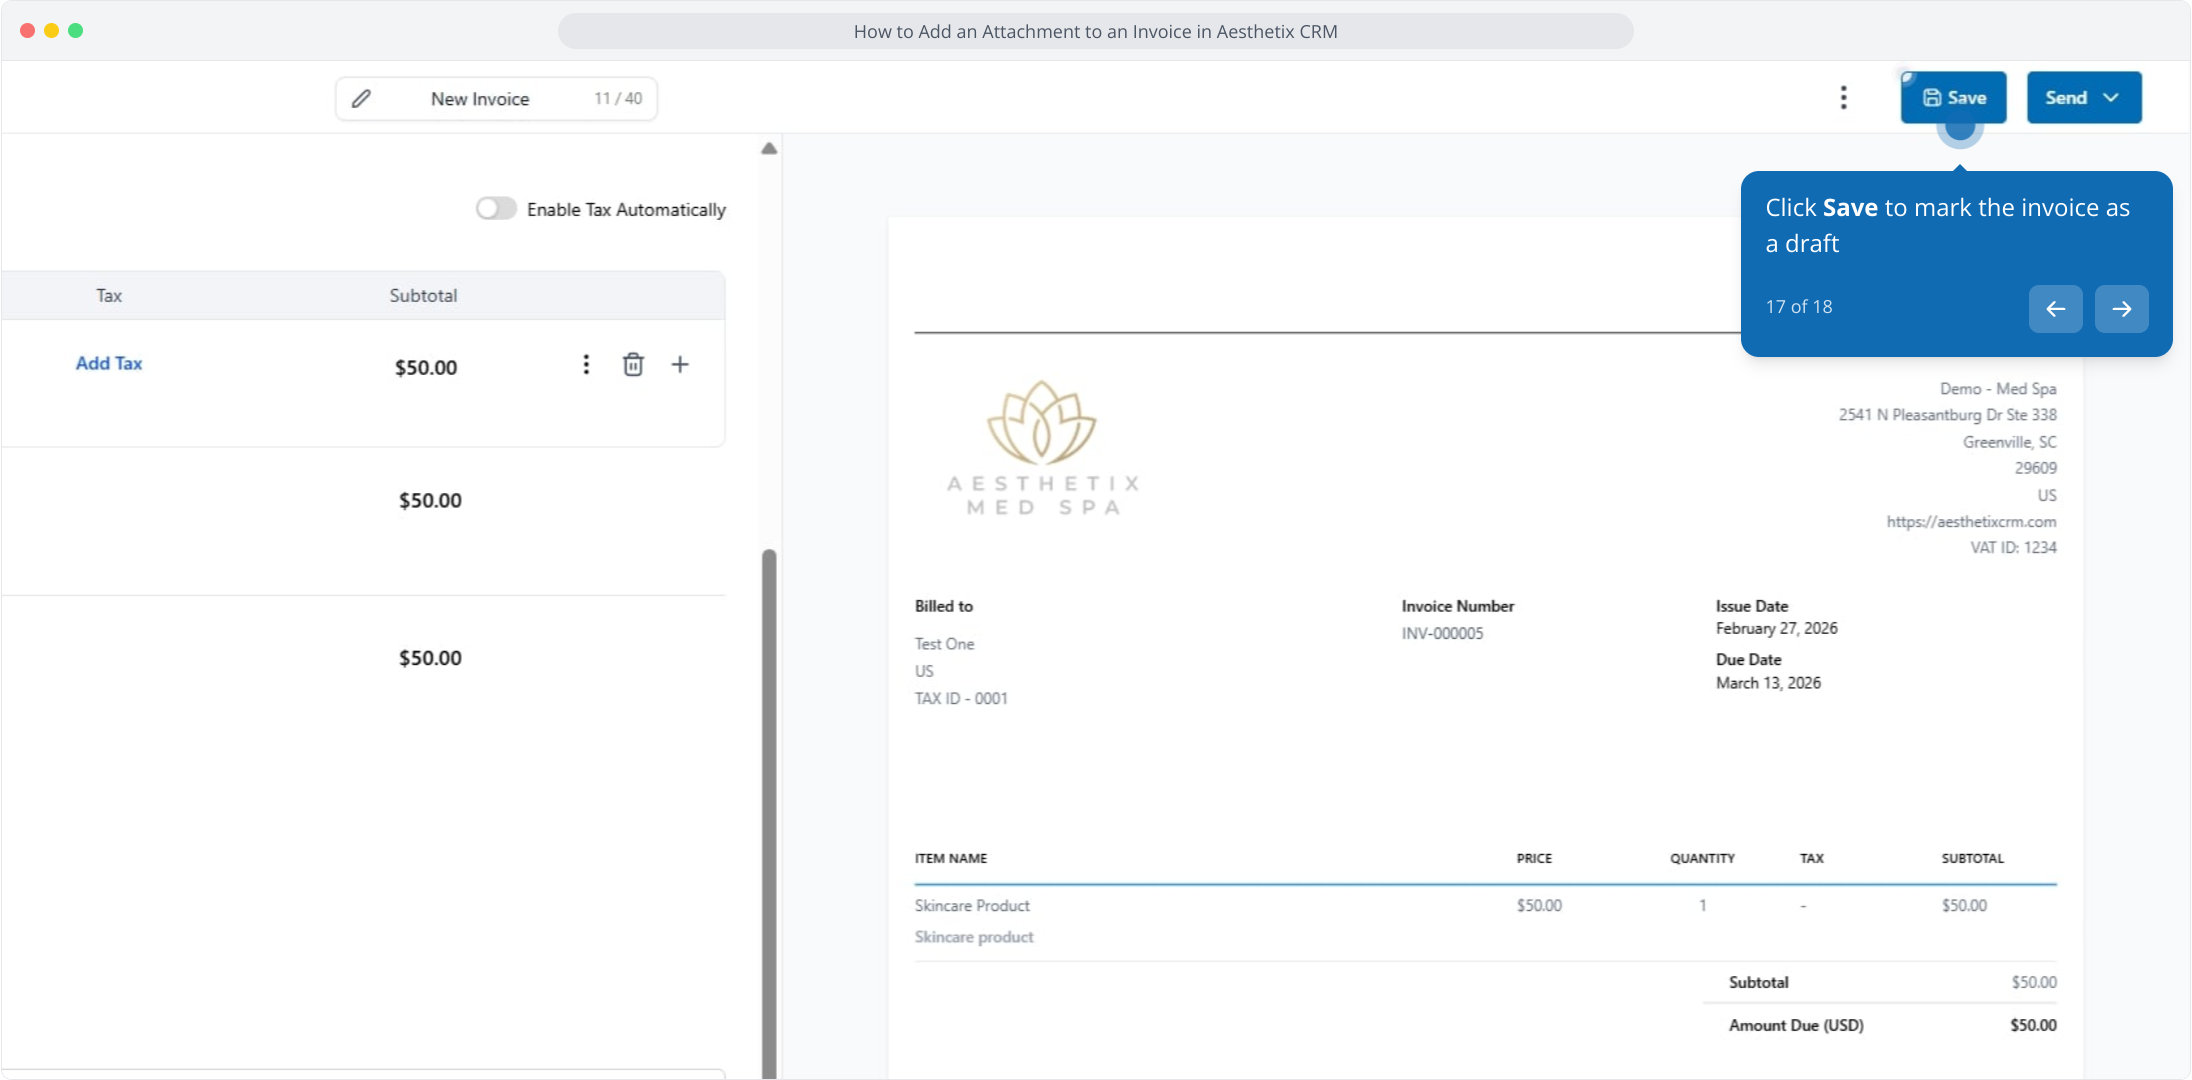
17. Click Save to mark the invoice as a draft
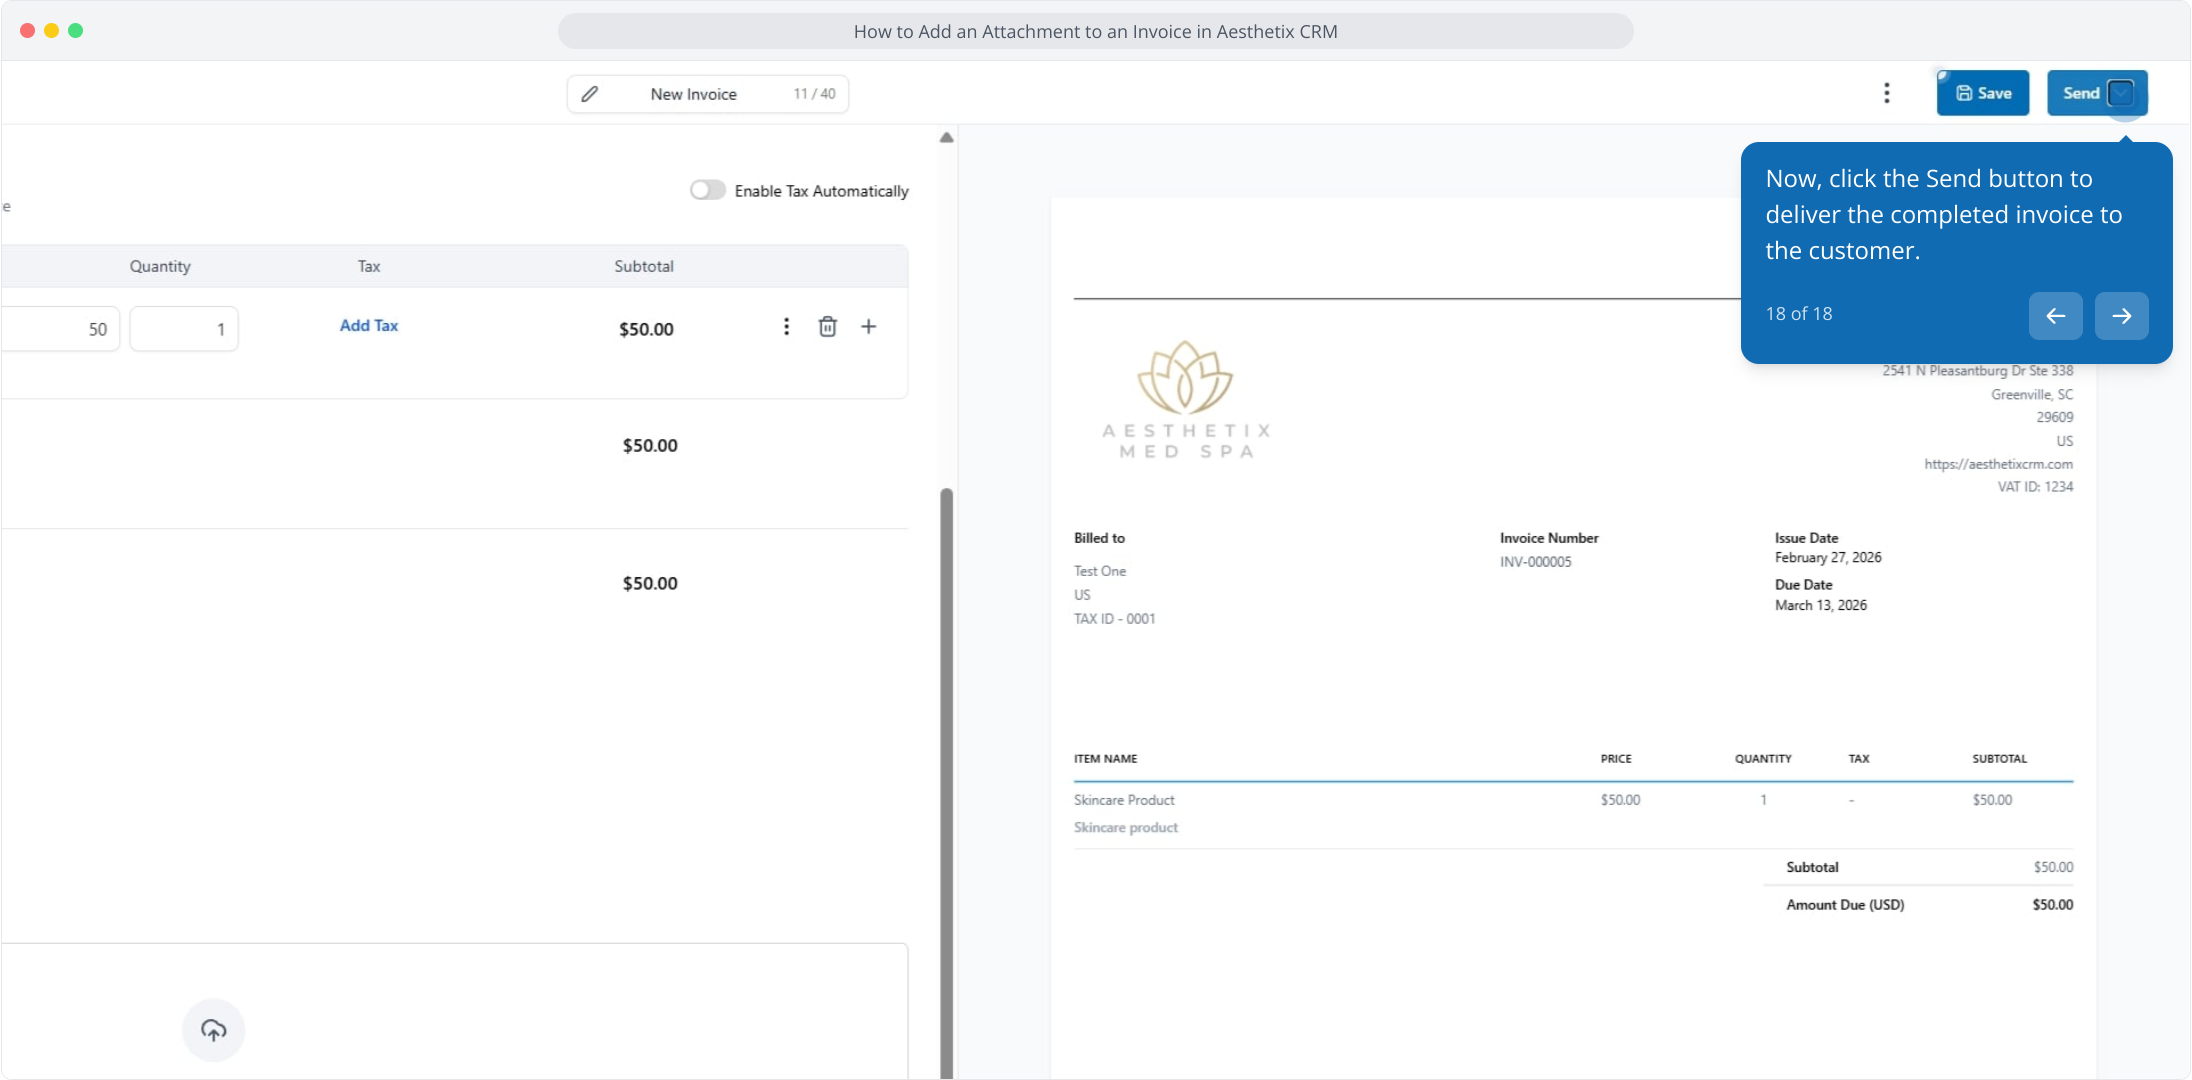
18. Now, click the Send button to deliver the completed invoice to the customer.