Quizzes in Aesthetix CRM allow you to capture leads, segment contacts, score intent, and automate follow-up based on a prospect’s answers.
1. Create a Quiz
1. Navigate to Web Tools → Quizzes.
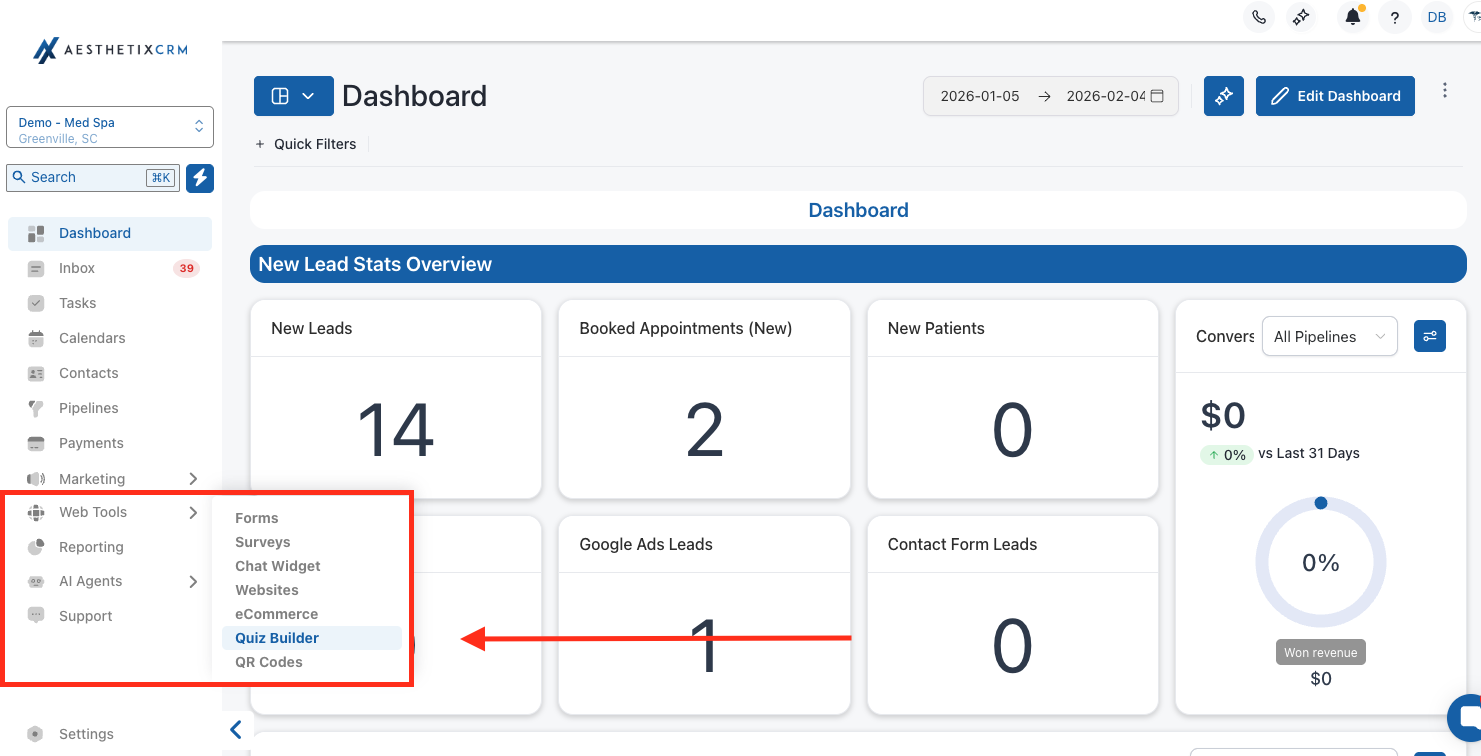
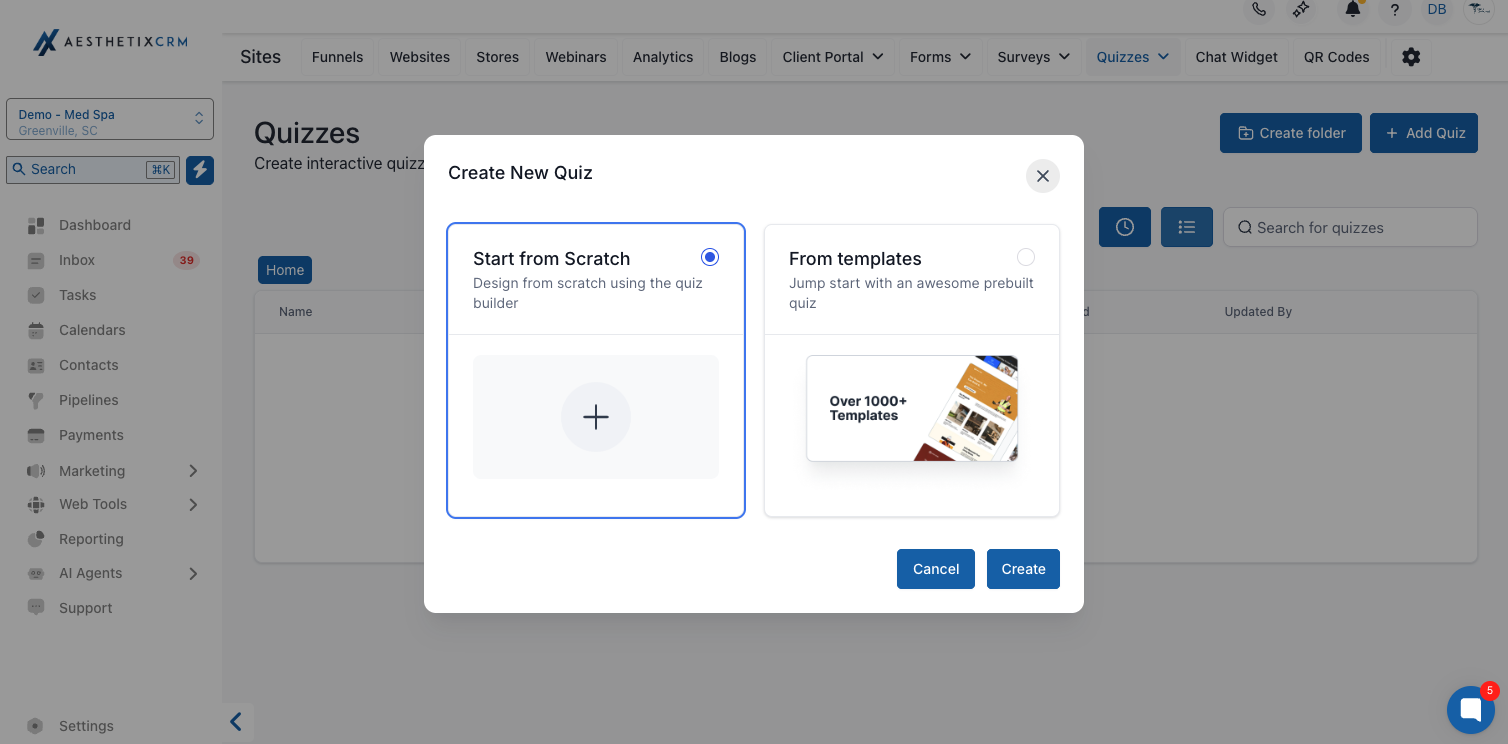
2. Click + Add Quiz.
3. Choose one of the following:
Start From Scratch to build a blank quiz.
Use a Template to start from a prebuilt layout.
4. Enter a Quiz Name (this will be used later for automation and reporting).
5. Click Save.
You will now enter the Quiz Builder.
• Top Bar
Back, Quiz Name, Preview, Integrate, Save
• Center Canvas
Quiz pages and the Result Template
• Left Panel
Quiz elements (questions, fields, content blocks)
• Right Panel
Settings for the selected page or element
Quizzes are built using pages. Each page can contain multiple questions or fields.
Recommended Structure
Page 1: Introductory questions (low friction)
Page 2: Qualification questions
Page 3: Contact information
Result Page: Recommendation and next steps
To Add or Manage Pages
Use the page controls in the builder to Add Page.
Drag pages to reorder them as needed.
Click a page to begin adding elements.
Add Questions and Fields
Select a page in the canvas.
Click Add Element and choose a question or field type.

Common Question Types
Single Choice
Multiple Choice
Yes / No
Short Answer
Long Answer
Number
Dropdown (single or multiple)
Contact & Compliance Fields
First Name / Last Name
Phone Number
Captcha
Terms & Conditions Checkbox
Configure Each Element
With the element selected, use the right panel to:
Edit the Label
Enable Required
Set a Query Key (optional, for prefilled data via URL)
Branching logic allows the quiz to adapt based on answers.
Select a multiple-choice or yes/no question.
In the element settings, locate Jump To or conditional navigation.
For each answer choice, select the page or step the quiz should jump to.
Save and preview to confirm the logic works as expected.
Categories and scoring allow you to evaluate intent and display dynamic results.
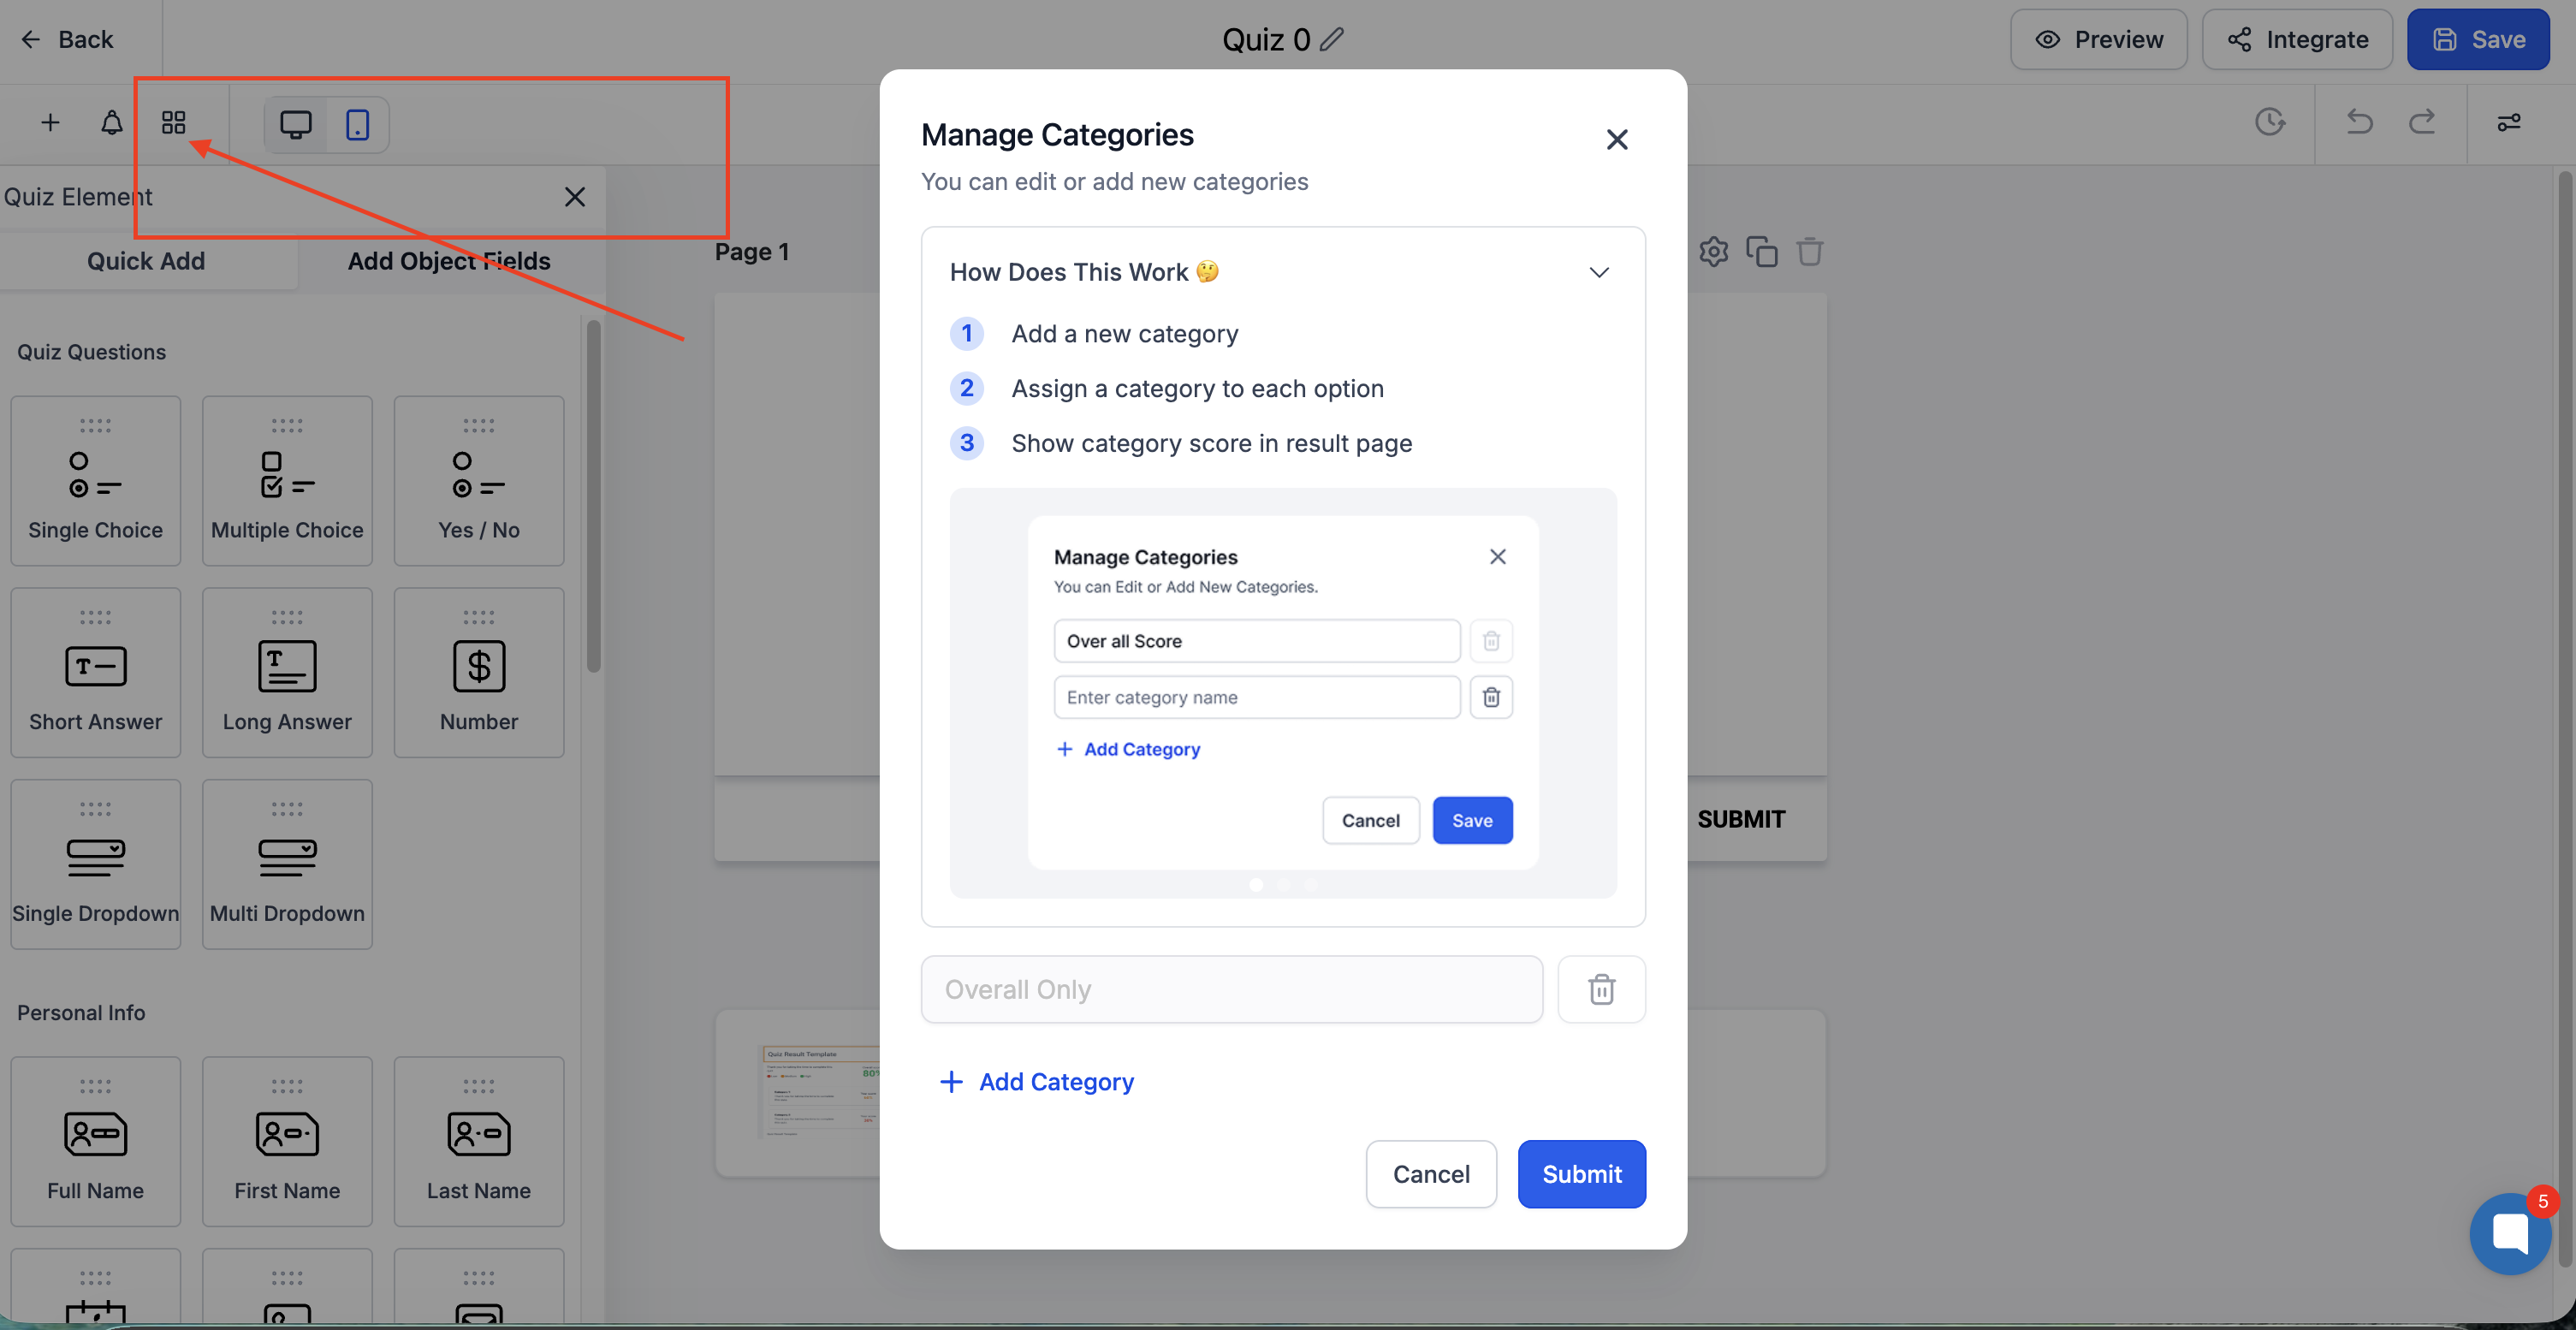
Create Categories
Open the Categories / Scoring section.
Add categories (for example: High Intent, Medium Intent, Nurture).
Assign Scores
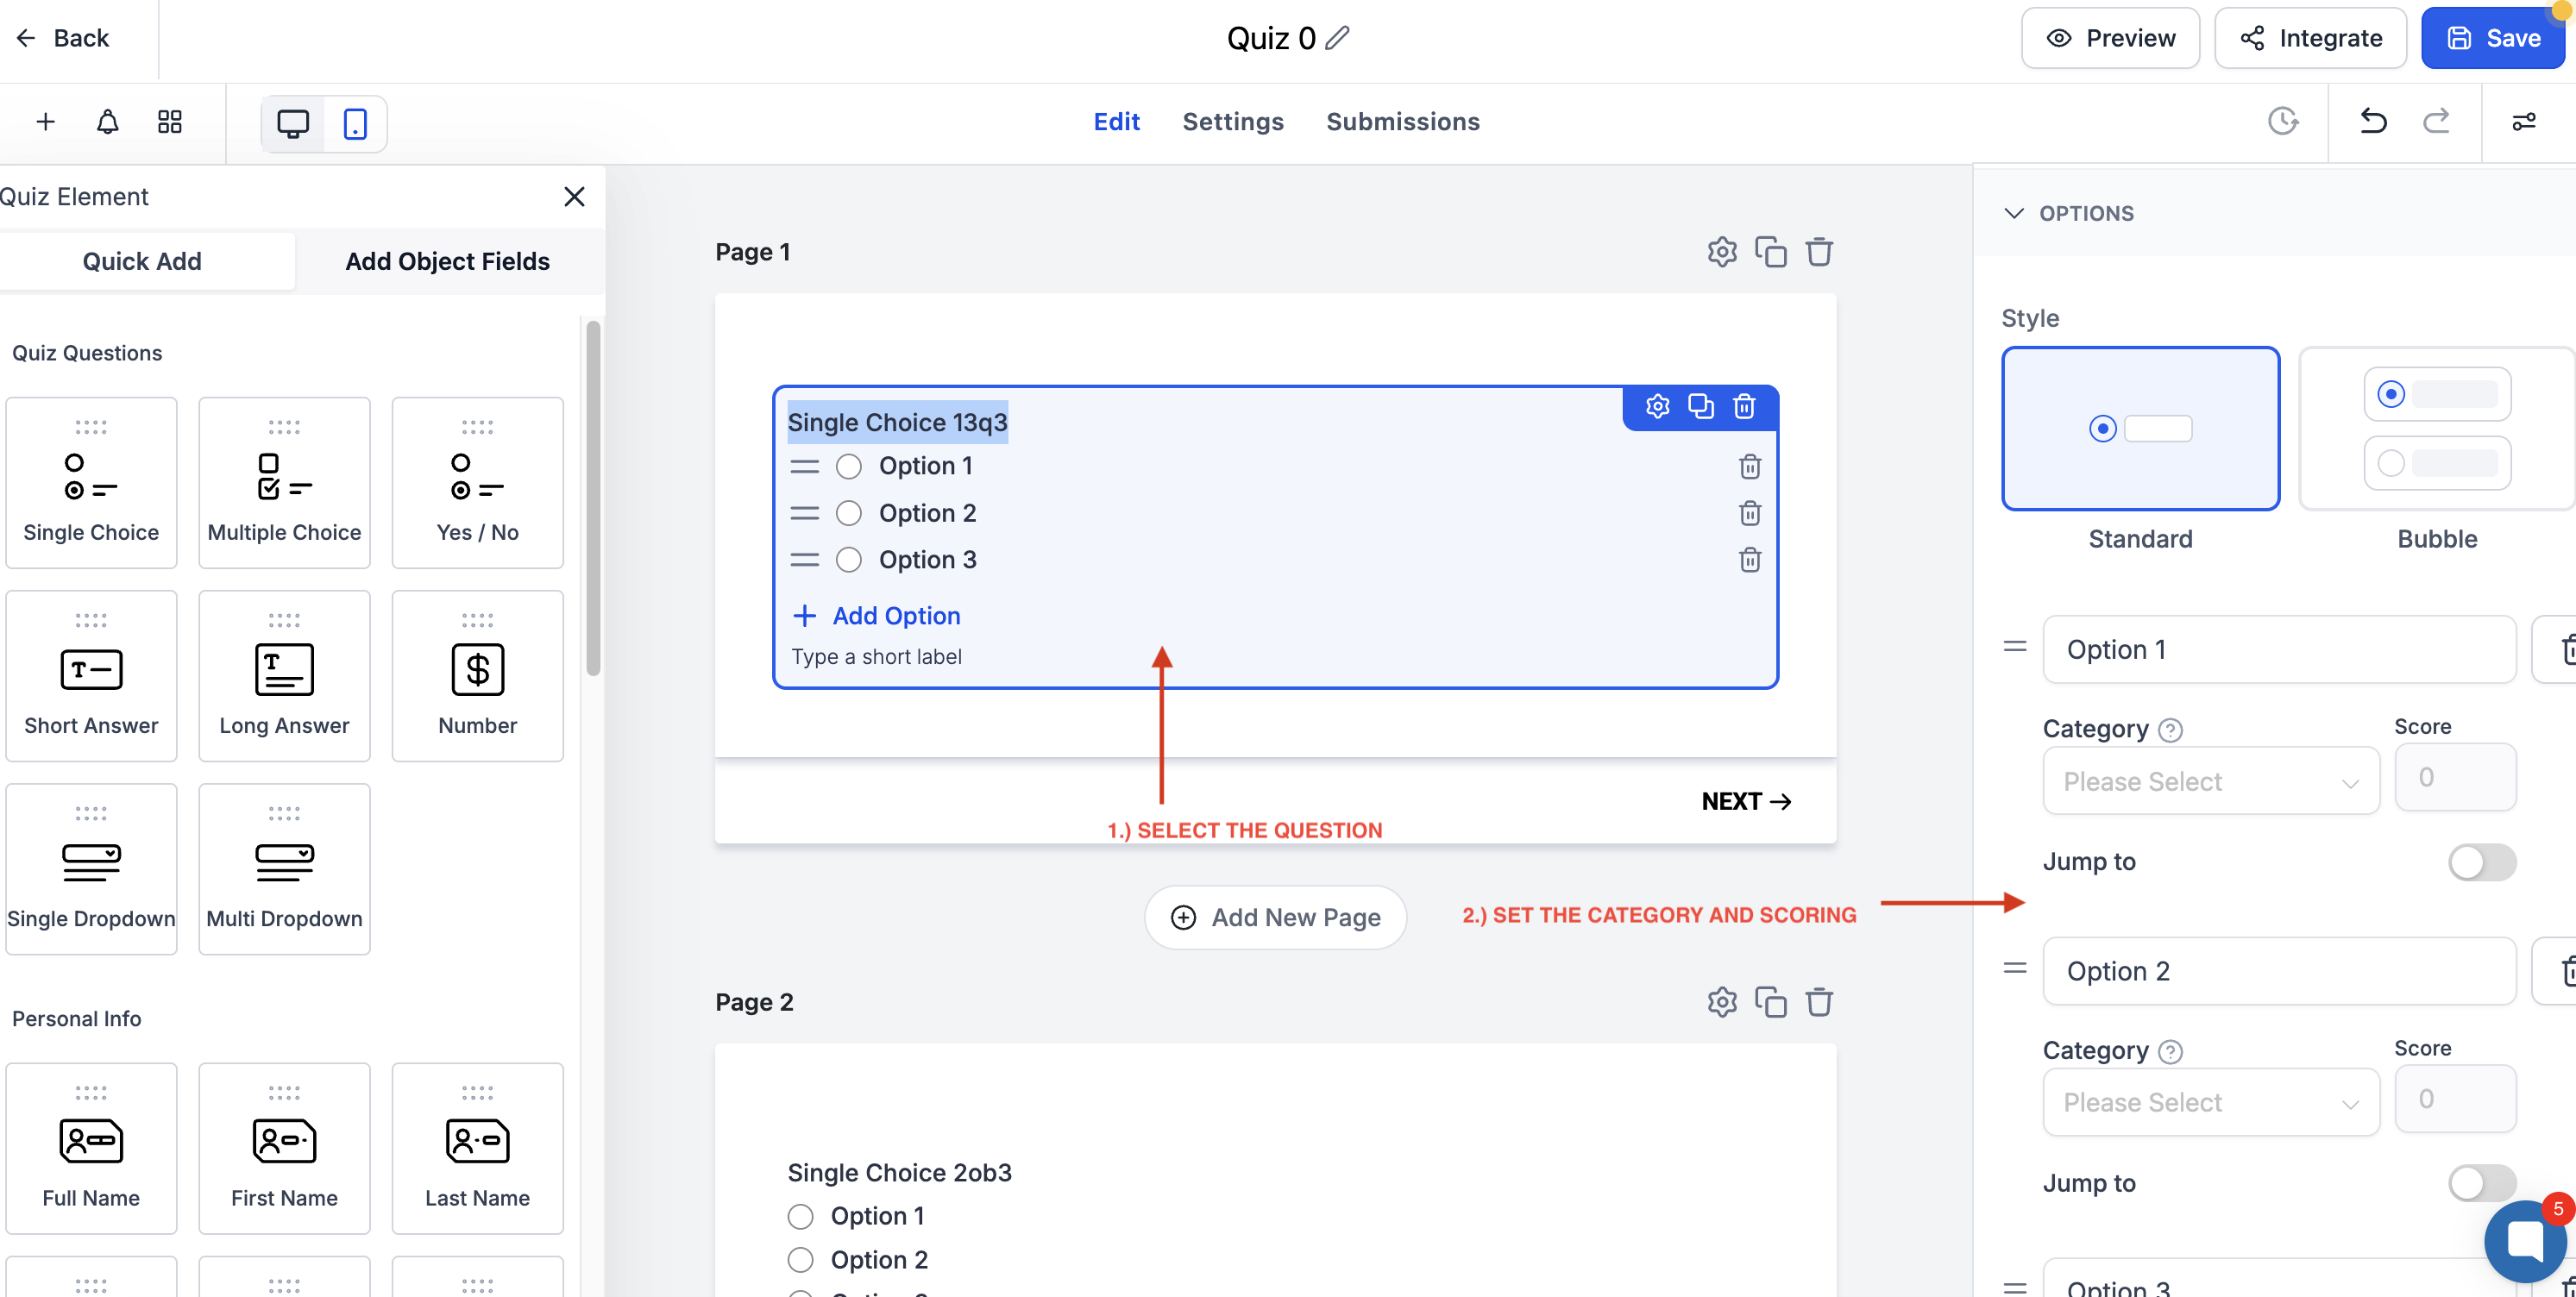
1. Select a question.
2. For each answer option:
Assign a Category
Assign a Score Value
3. Repeat for all scored questions.
4. Save the quiz.
7. Configure the Results Page
After submission, users are shown the Result Page.
Open the Result Template
Scroll to the Result Template section in the builder.
Click Edit Template.
Configure Score Tiers
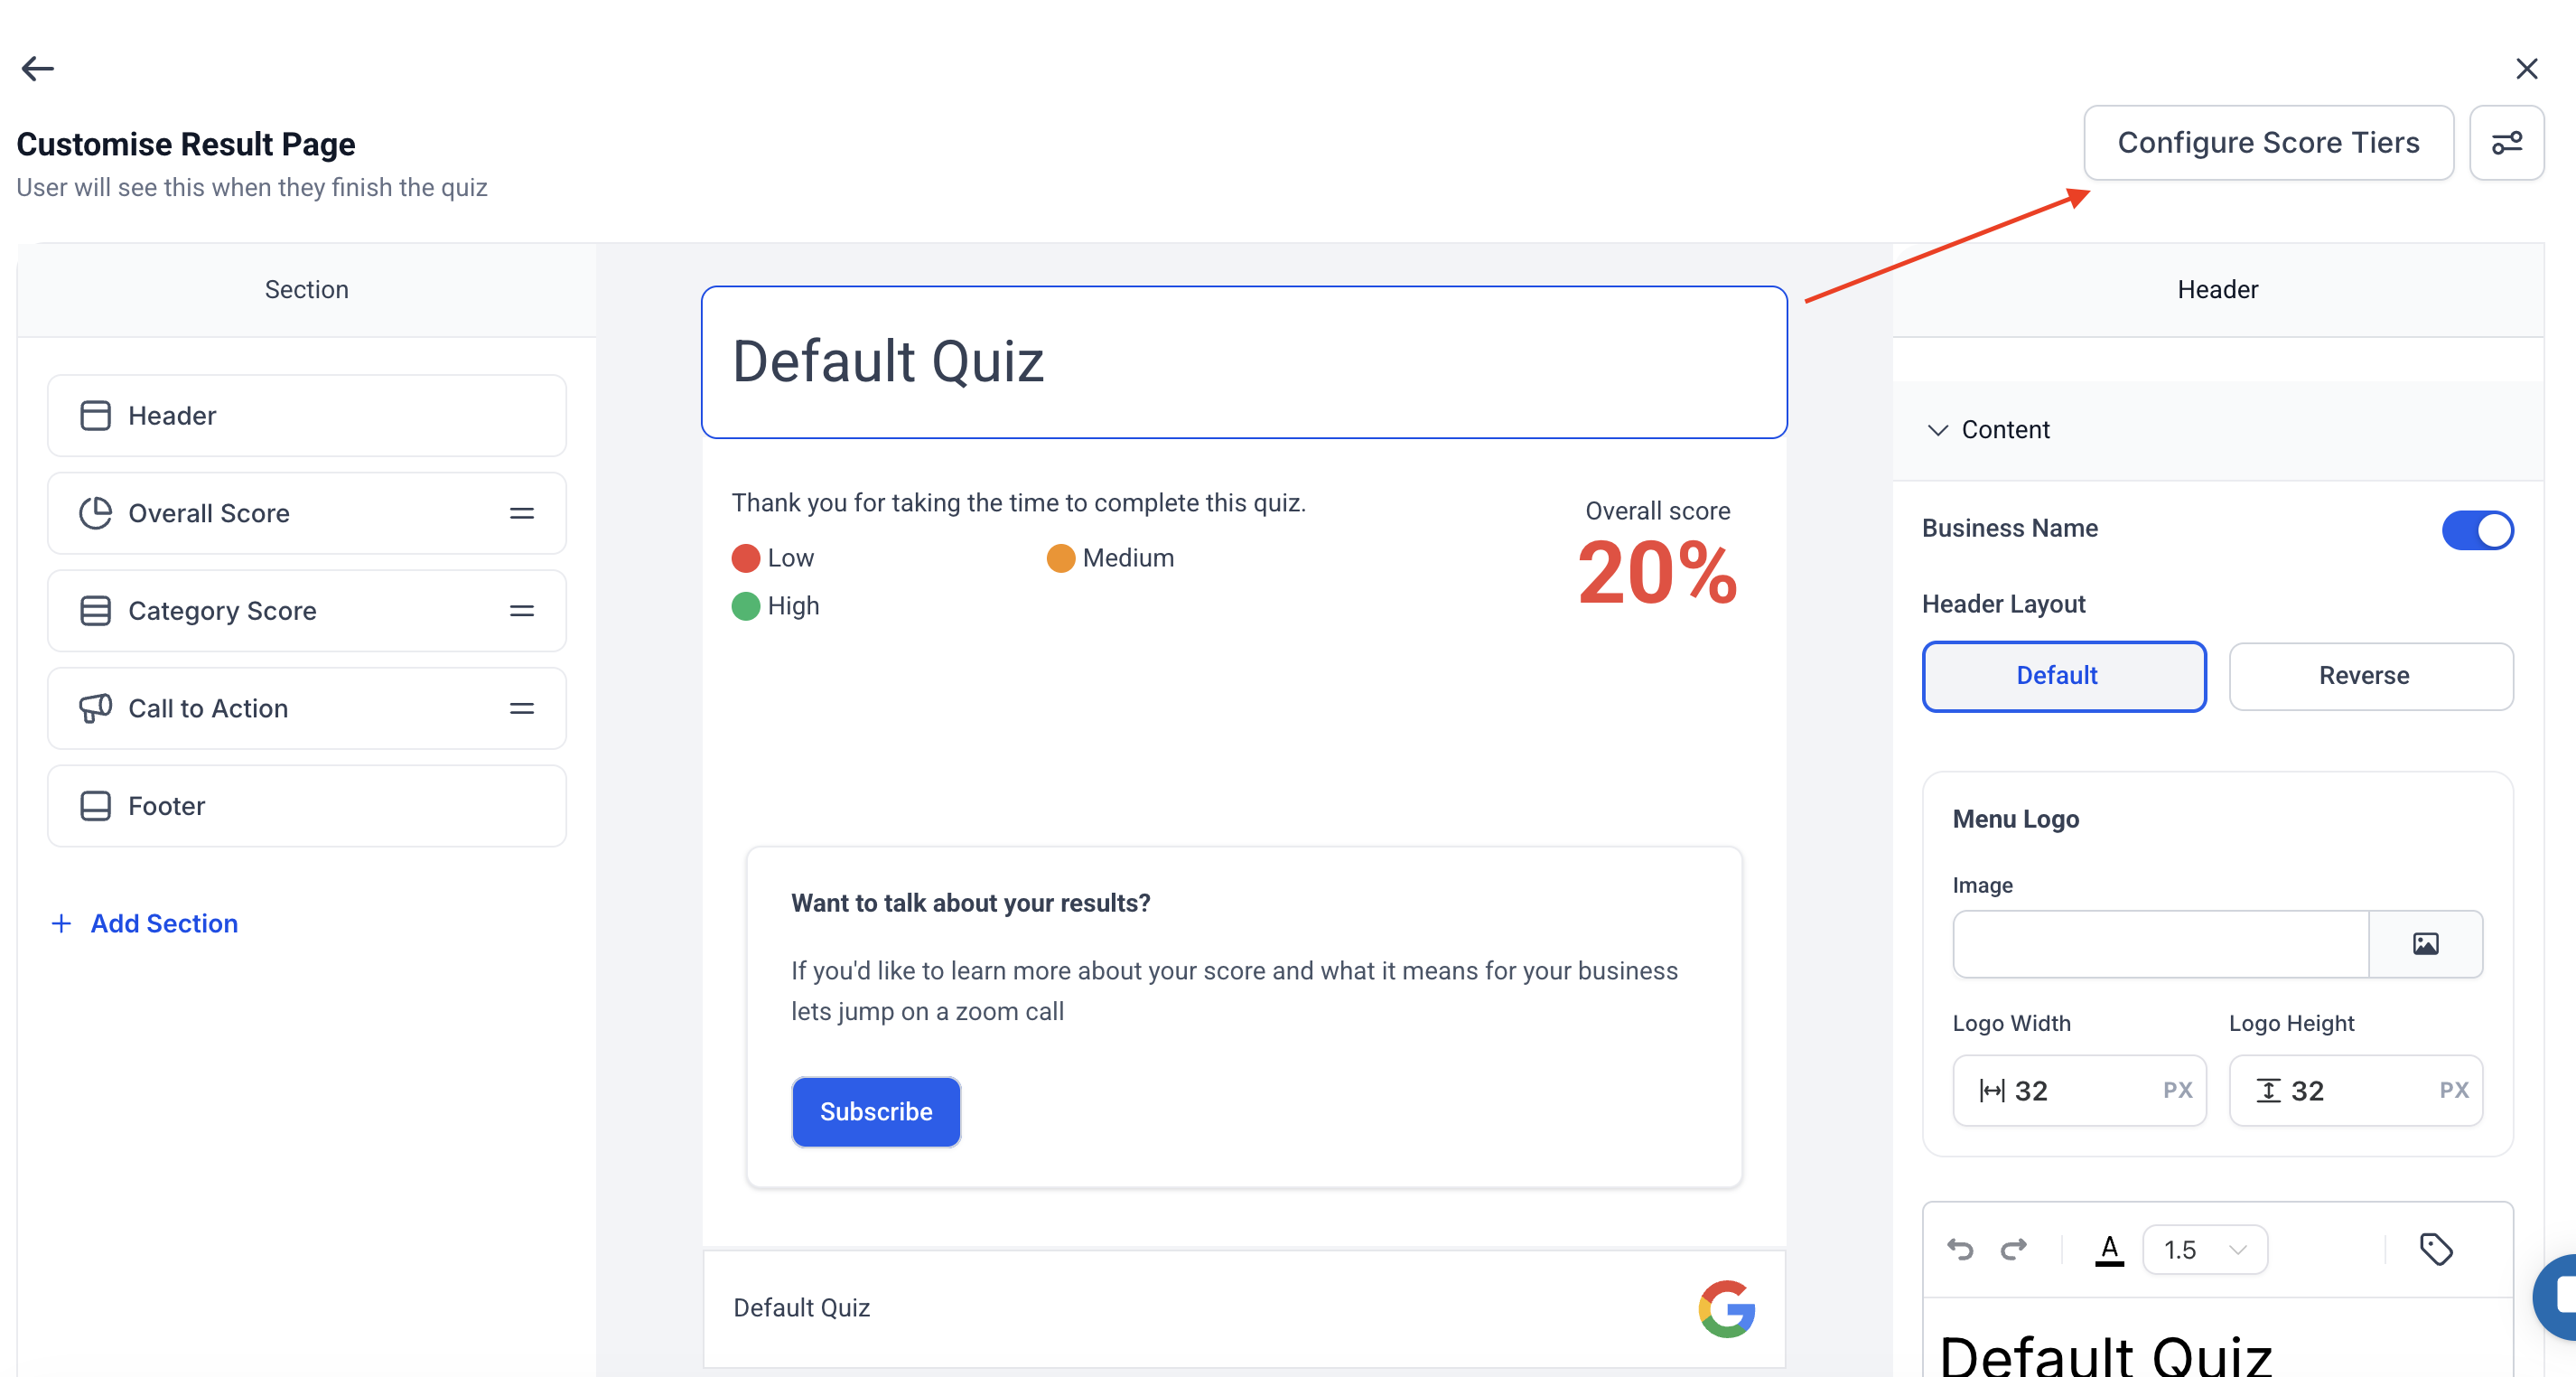
1. Open Score Tier Settings.
2. Define ranges (example):
Low: 0–39
Medium: 40–79
High: 80–100
3. Save changes.
For each tier, you may include:
Headline or summary message
Recommendation text
Call-to-action button (e.g., Book Consultation)
Optional disclaimers or next steps
Insert a CTA button.
Link it to a booking calendar, funnel step, or webpage.
Save the result template.
1. In the Quiz Builder, open Notifications.
2. Configure:
Internal Notification (email sent to your team)
Auto-Responder Email (sent to the quiz submitter)
3. Customize sender details and message content.
4. Save notifications.
9. Publish and Integrate the Quiz
1. Click Save.
2. Click Integrate.
3. Choose one of the following:
Embed Code – paste into a website or funnel page
Direct Link – share via email, SMS, ads, or social media
1. Navigate to Automation → Workflows.
2. Create a new workflow.
3. Add the trigger Quiz Submitted.
4. Apply filters if needed (quiz name, score, category).
5. Add actions such as:
Send SMS
Send Email
Create or Update Opportunity
Assign User
Create Task
6. Save and publish the workflow.
Before going live, confirm the following:
All pages and questions display correctly
Branching logic routes correctly
Scores and categories calculate as expected
Contact information is saved to the contact record
Workflows trigger correctly
Result page CTA links function properly
