This guide will walk you through the steps to use go to in the Conditions and Workflows feature.
The Go-To function in Workflows allows you to navigate contacts from one event to another. To utilize a Go-To step, simply incorporate a Go-To event and then draw a line to the desired destination of the contacts - that's all there is to it!
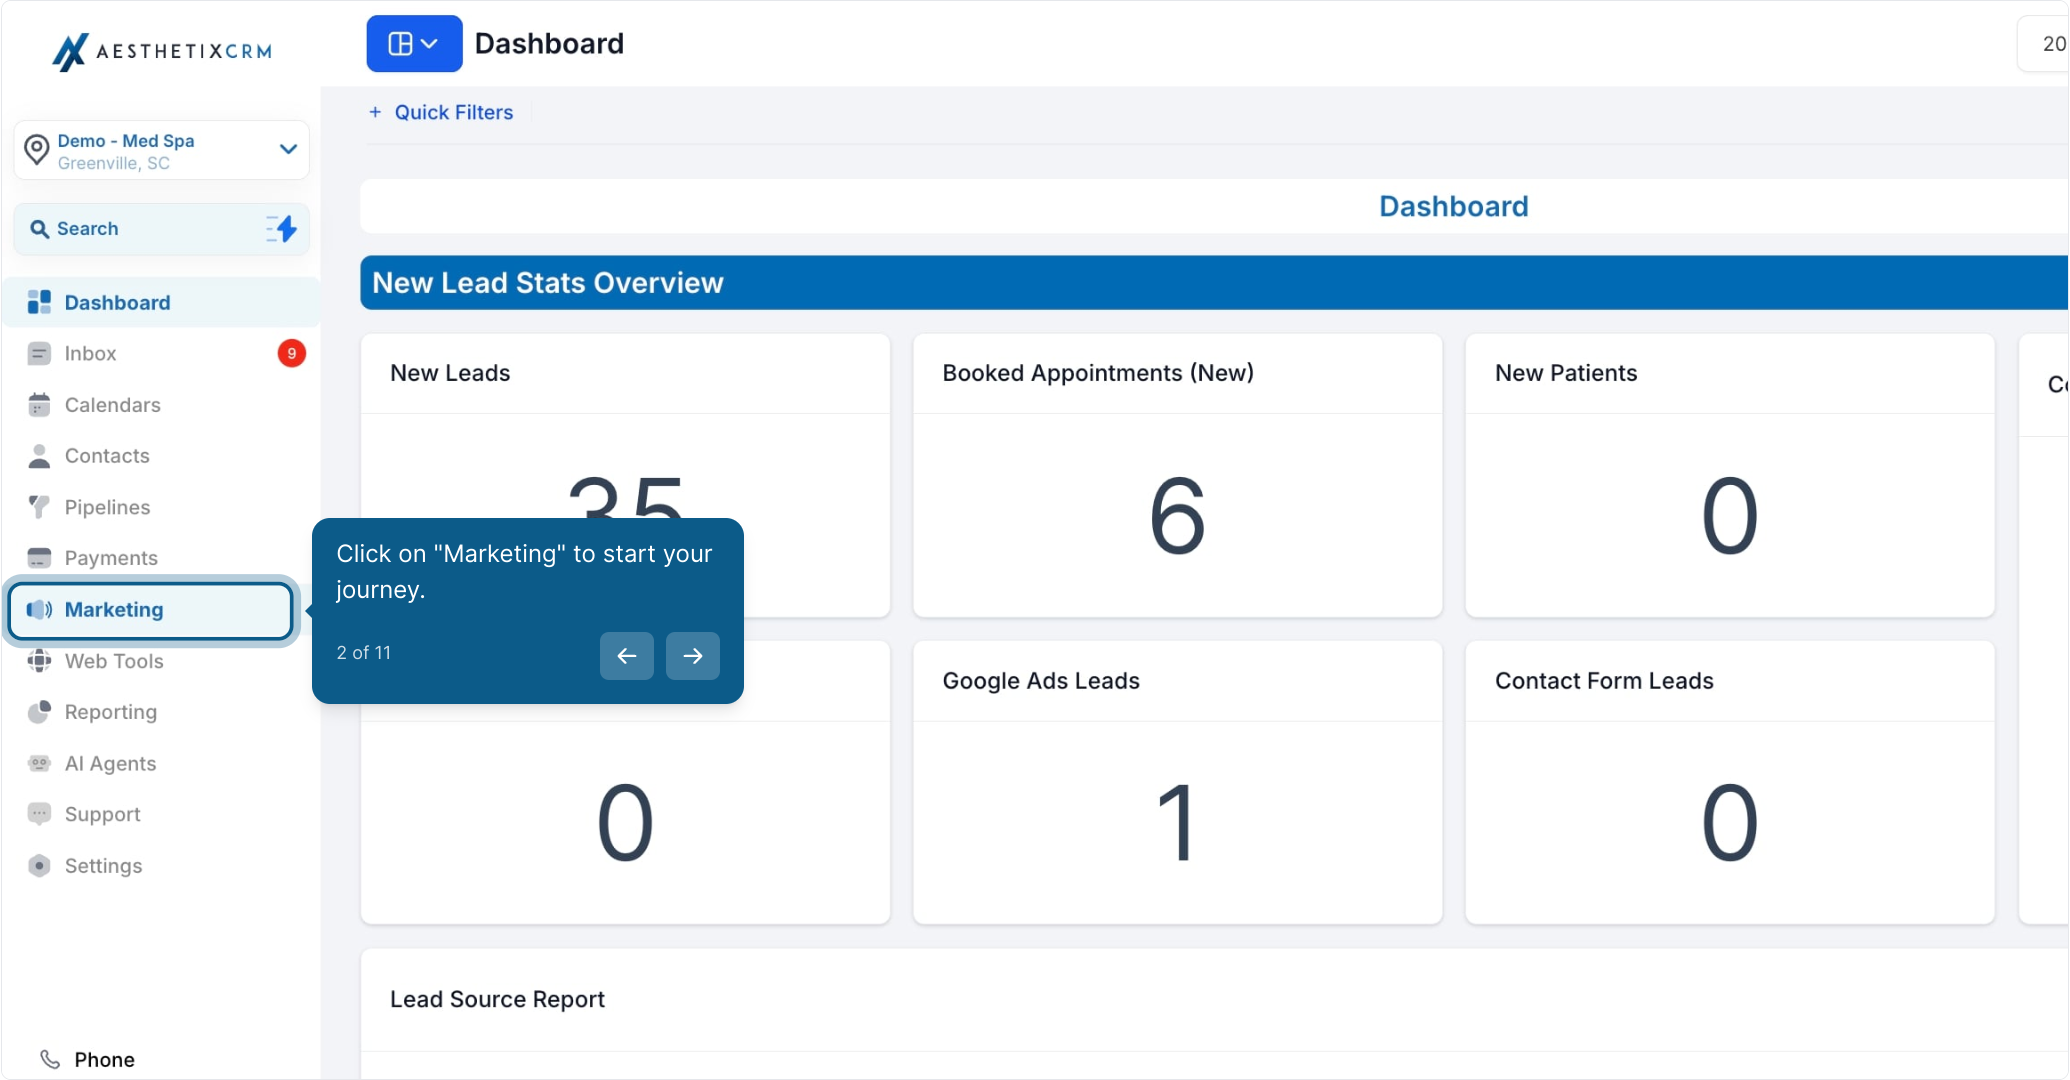
2. Click on "Marketing" to start your journey.
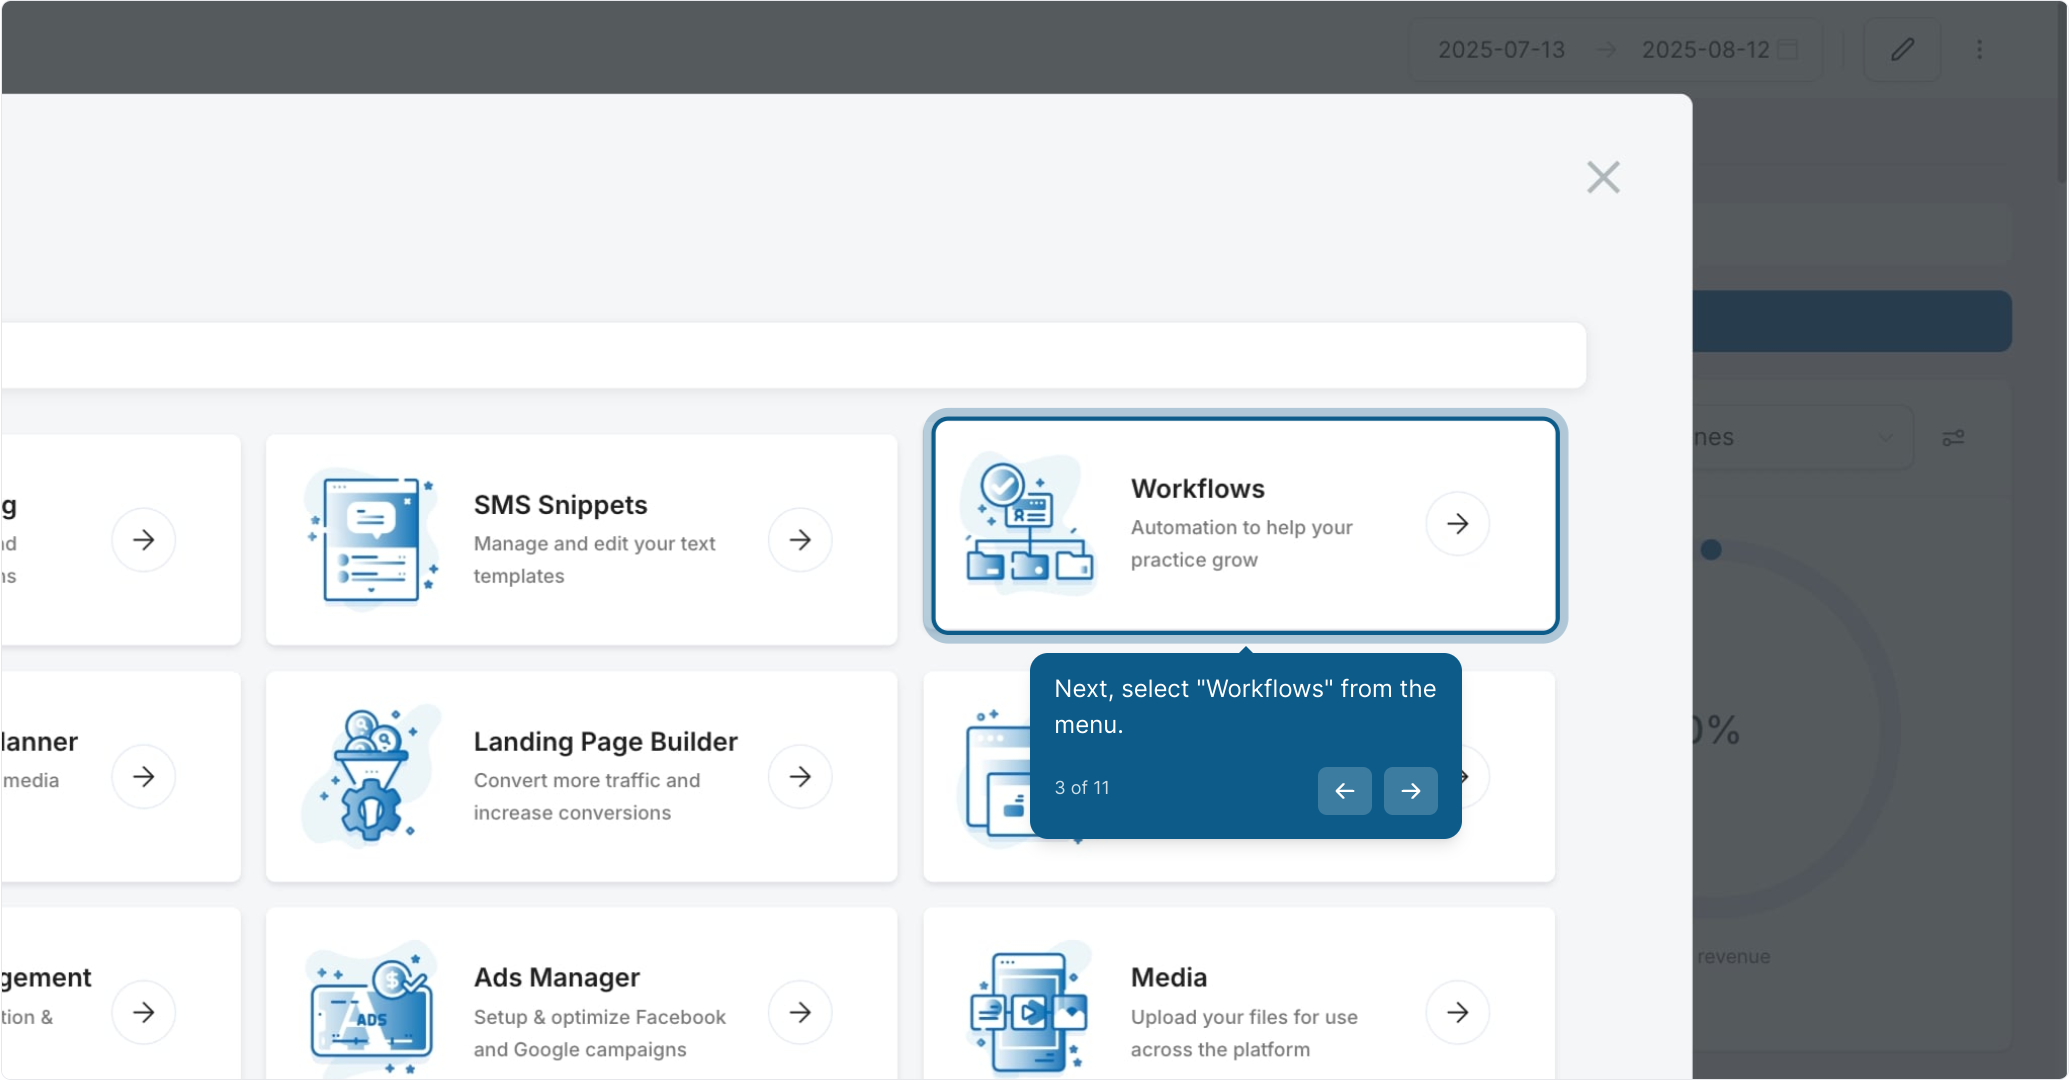
3. Next, select "Workflows" from the menu.
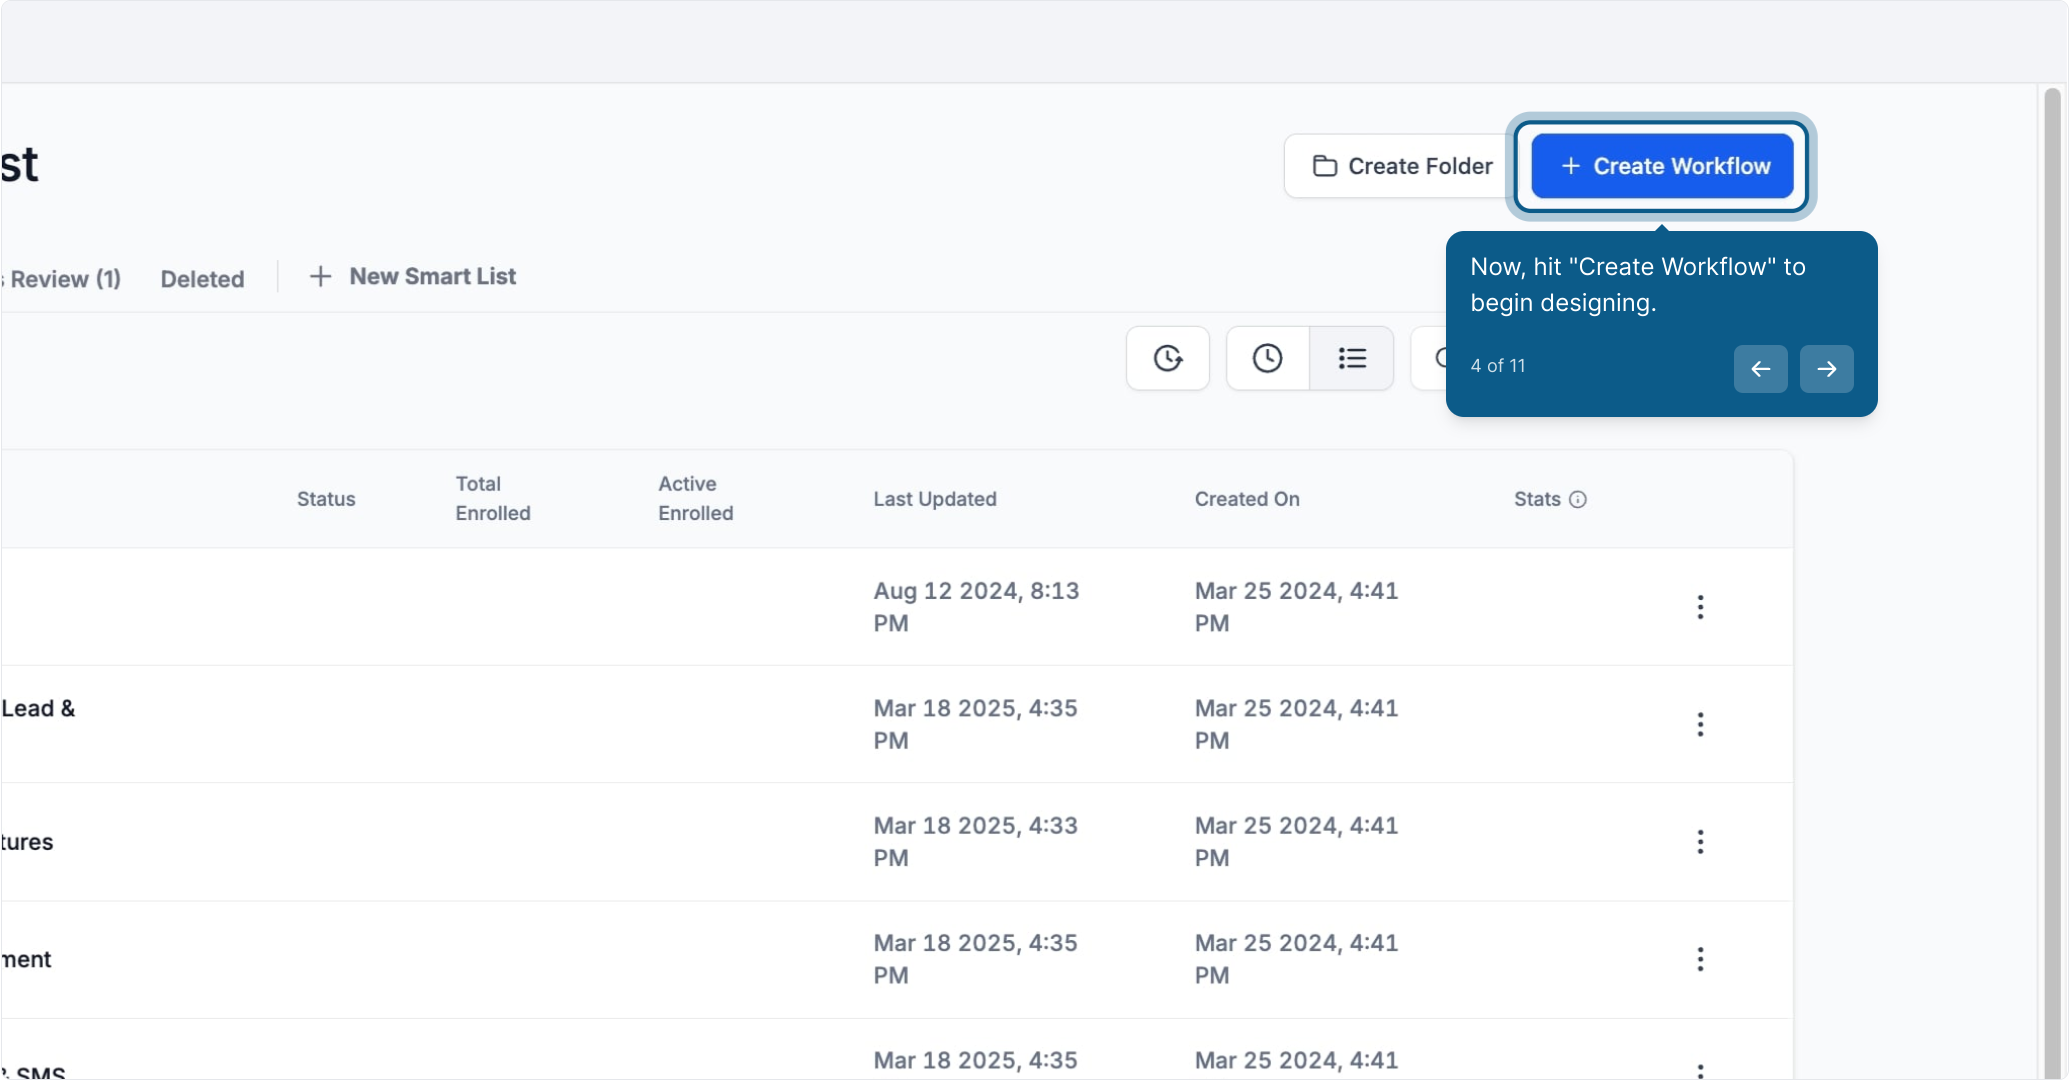
4. Now, hit "Create Workflow" to begin designing.
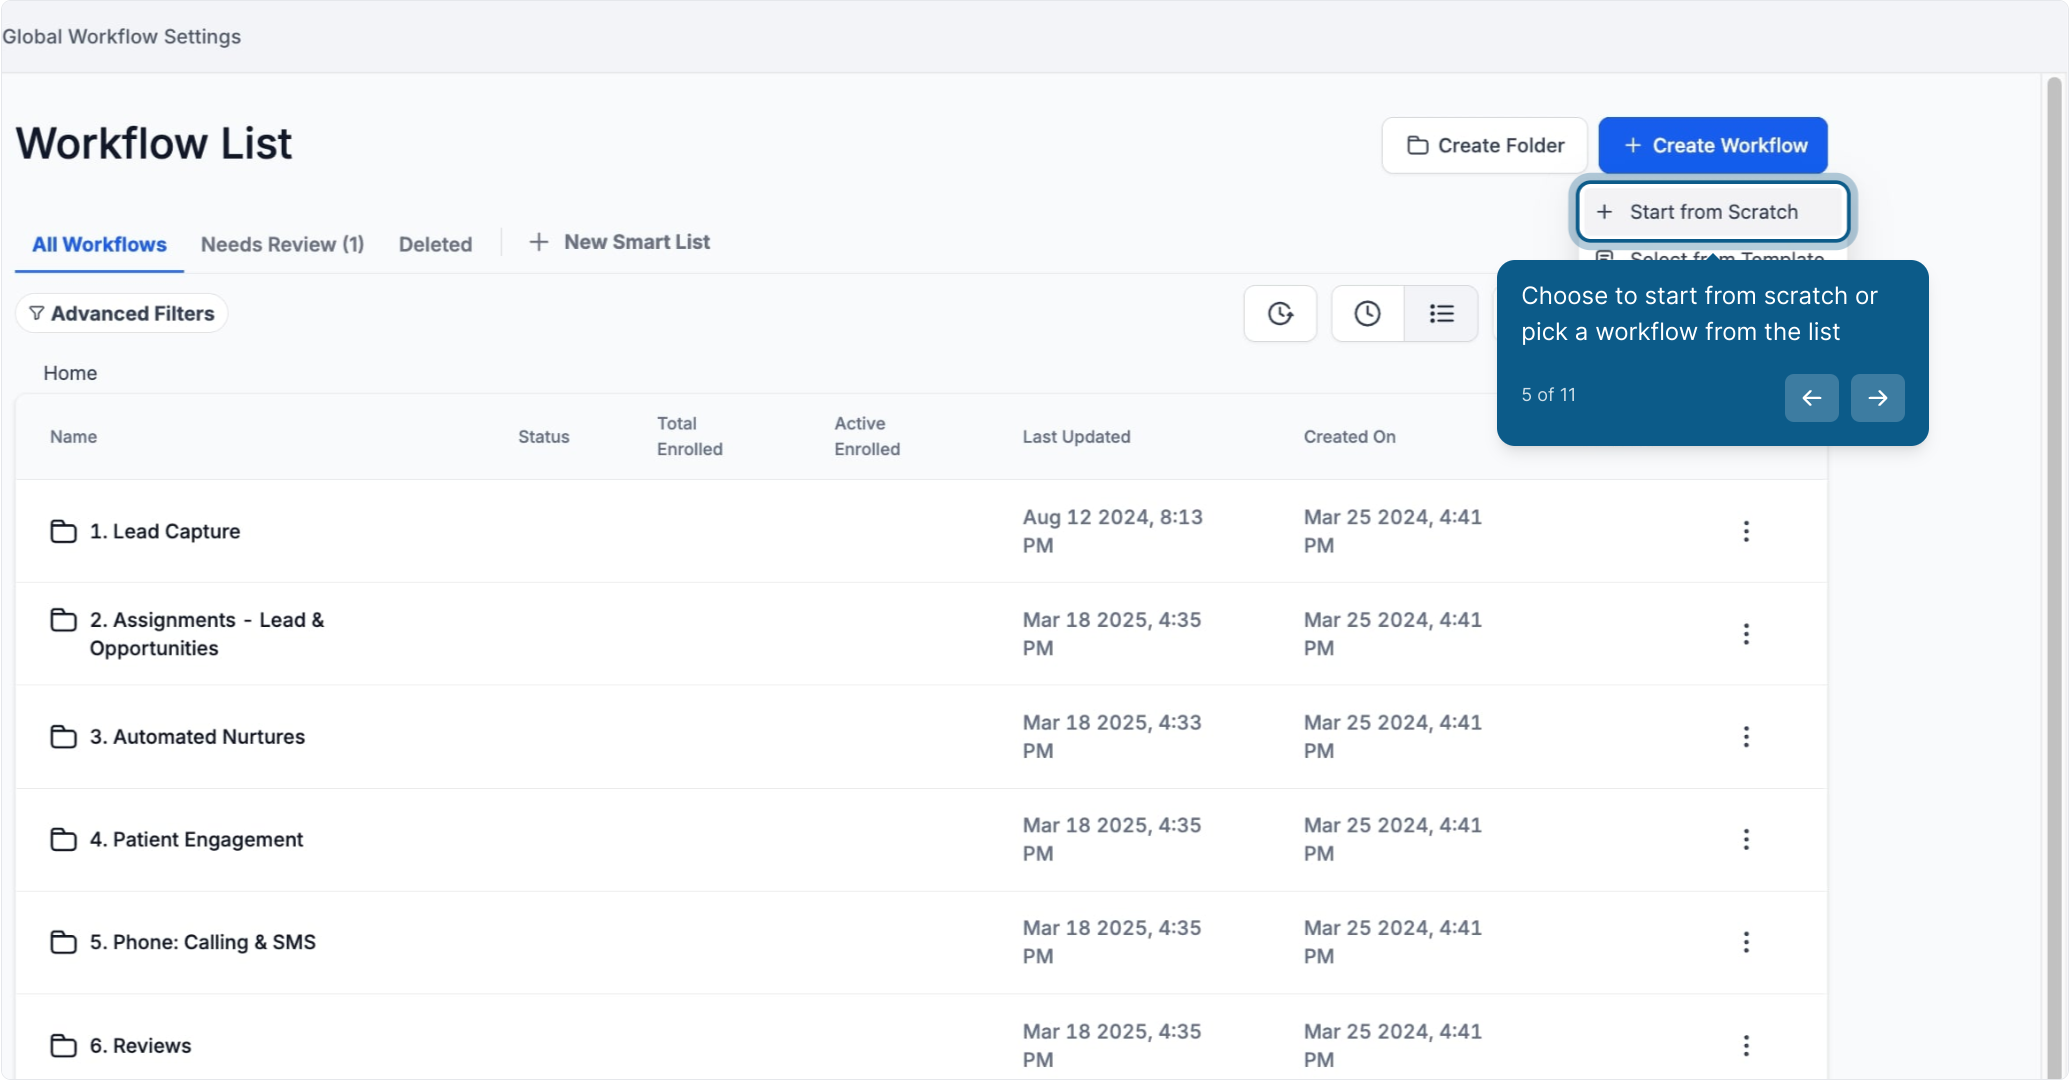
5. Choose to start from scratch or pick a workflow from the list
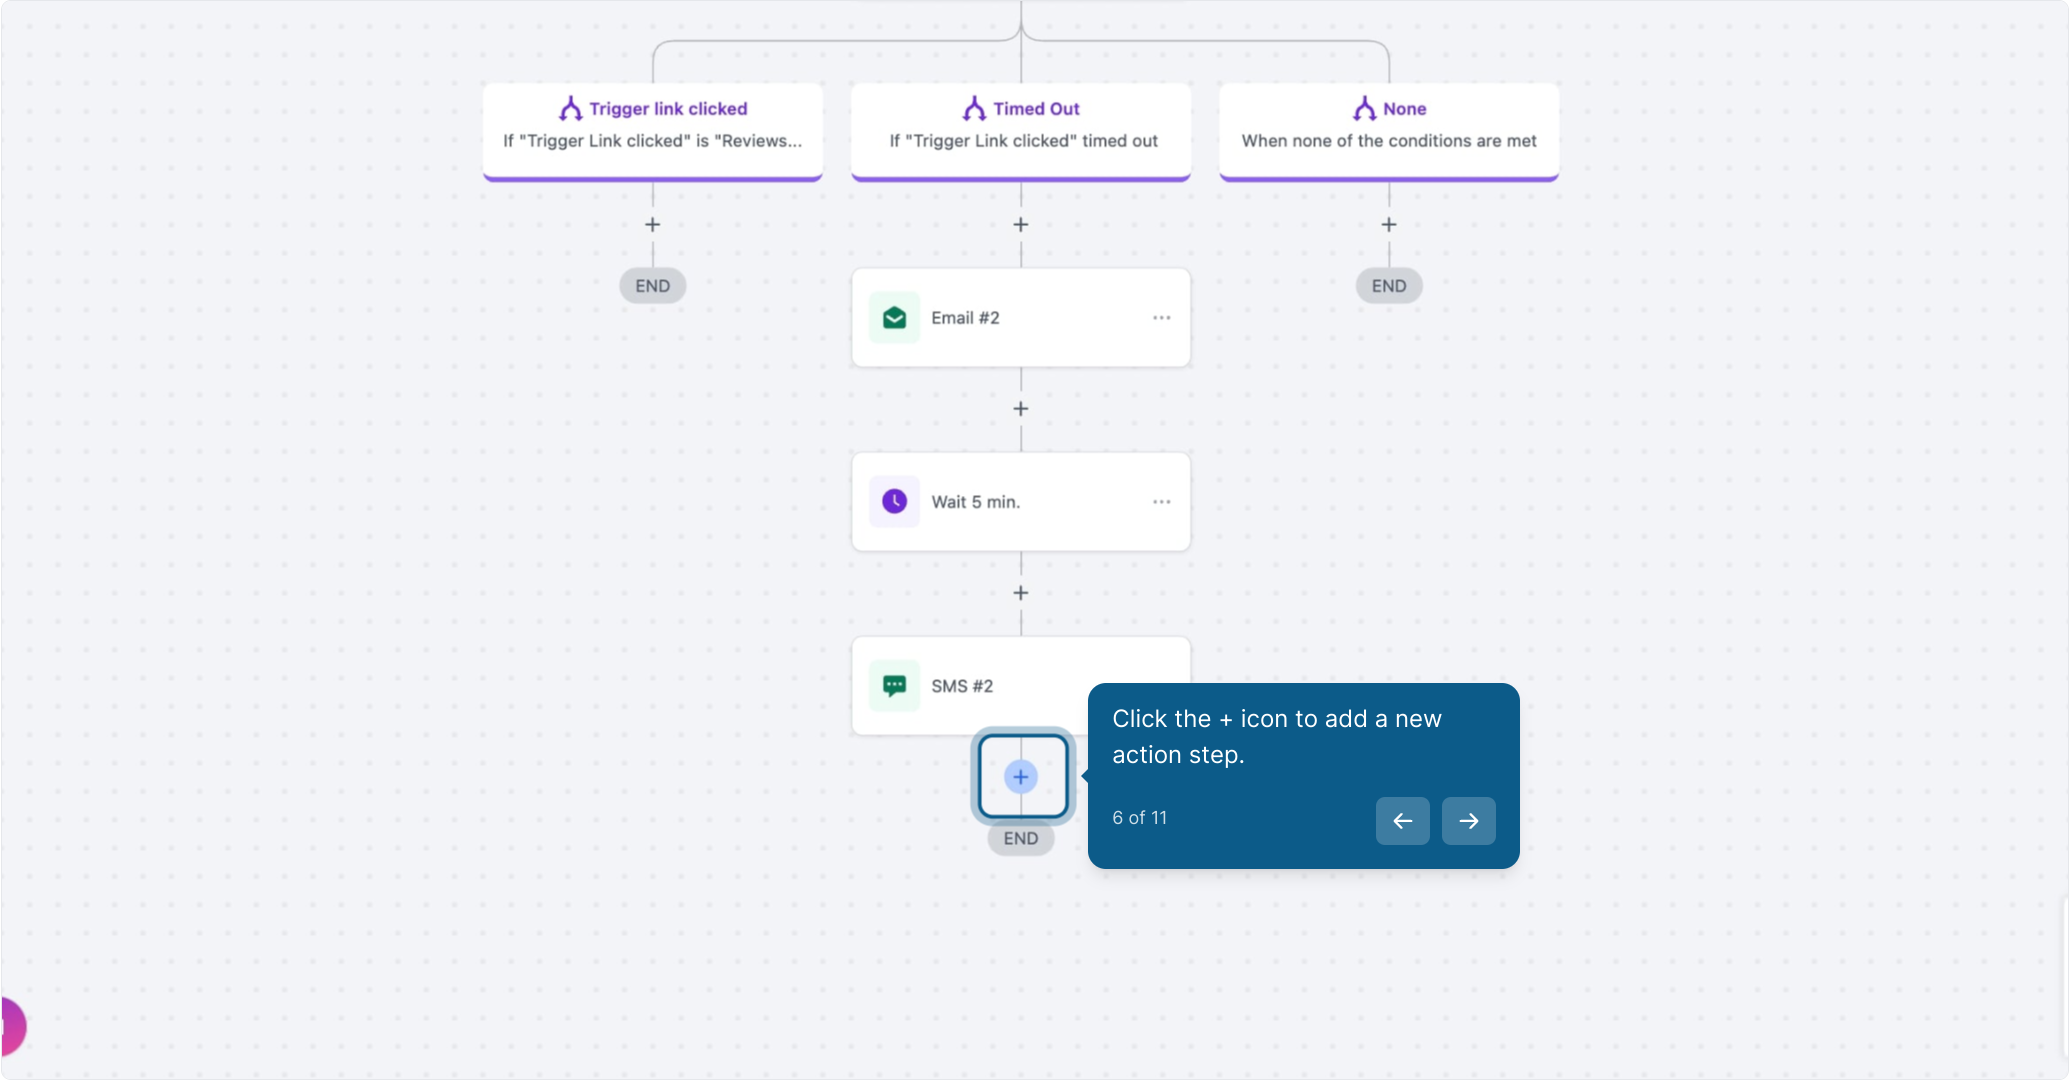
6. Click the + icon to add a new action step.
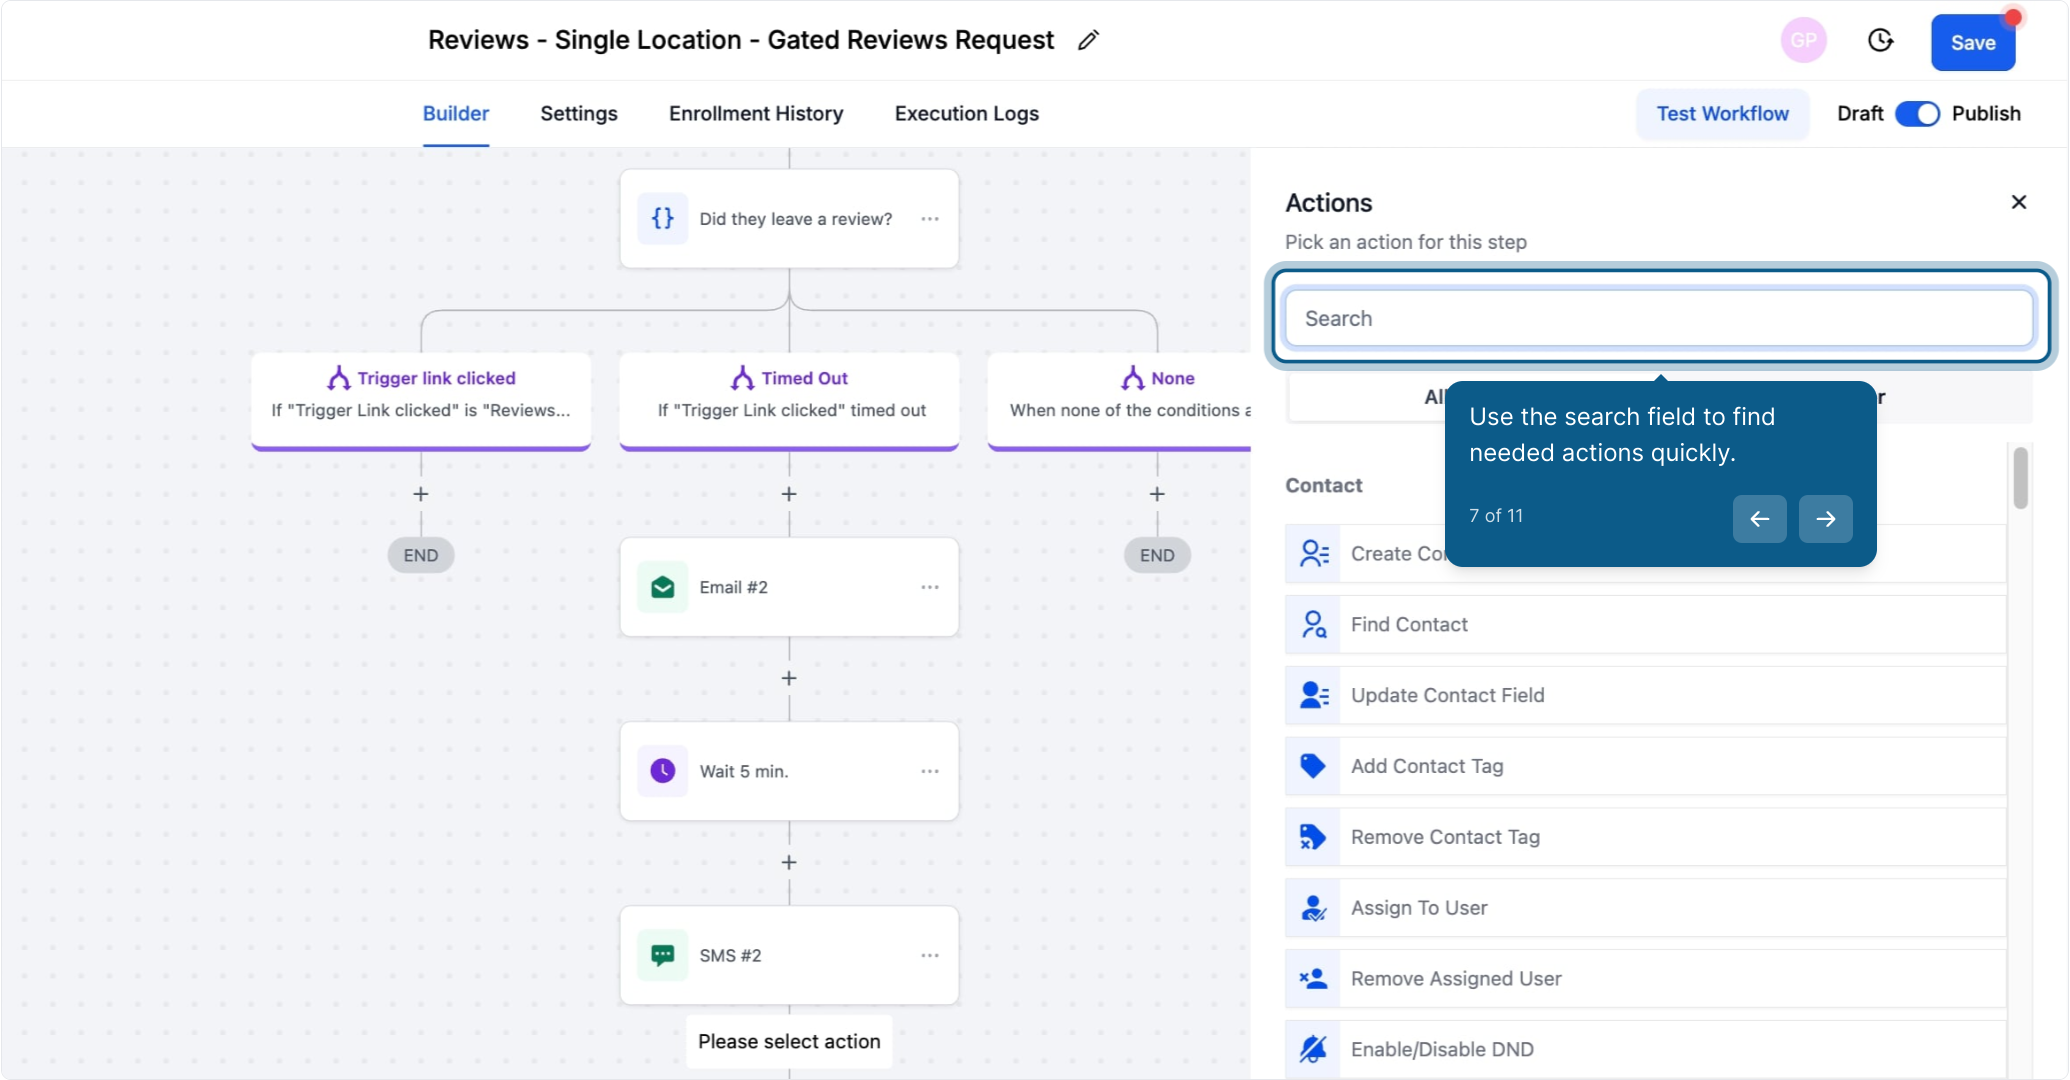
7. Use the search field to find needed actions quickly.
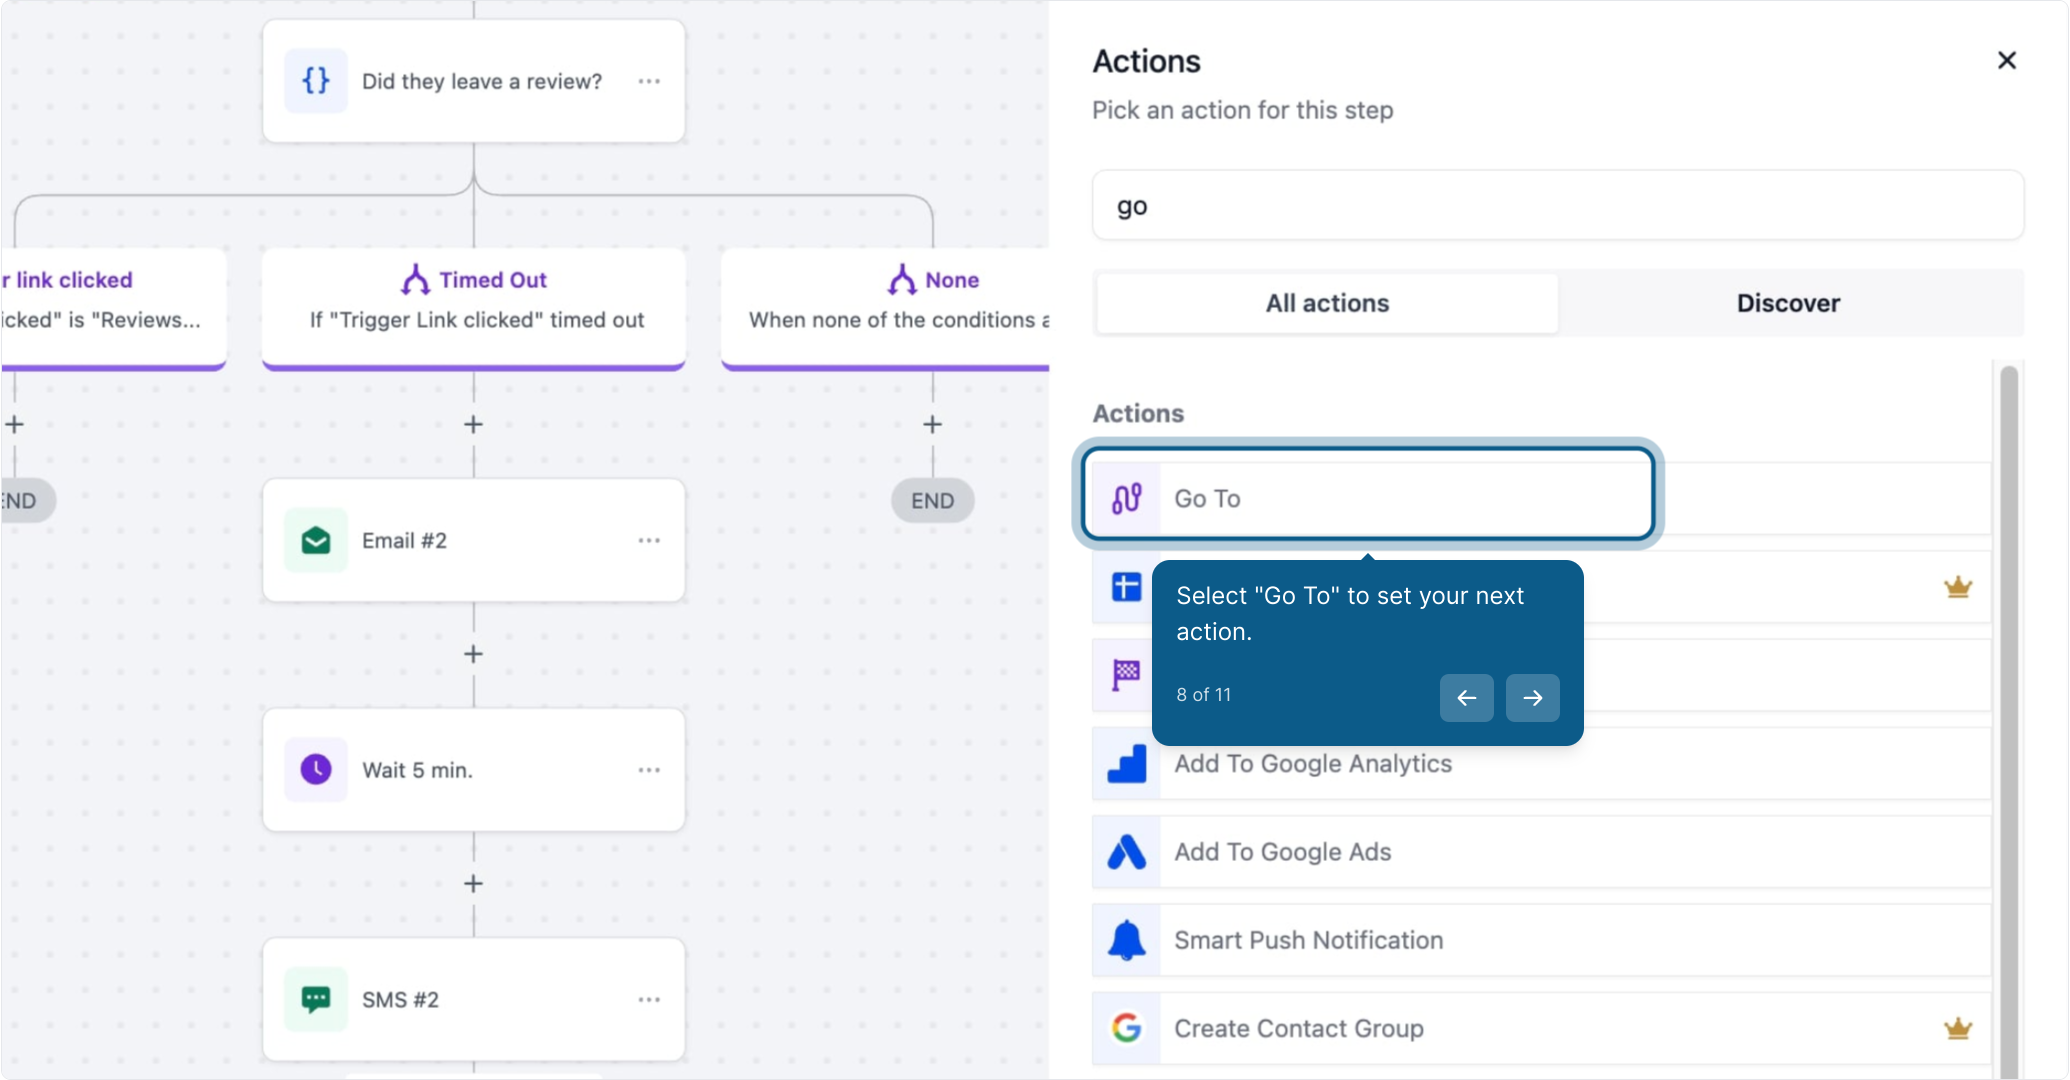
8. Select "Go To" to set your next action.
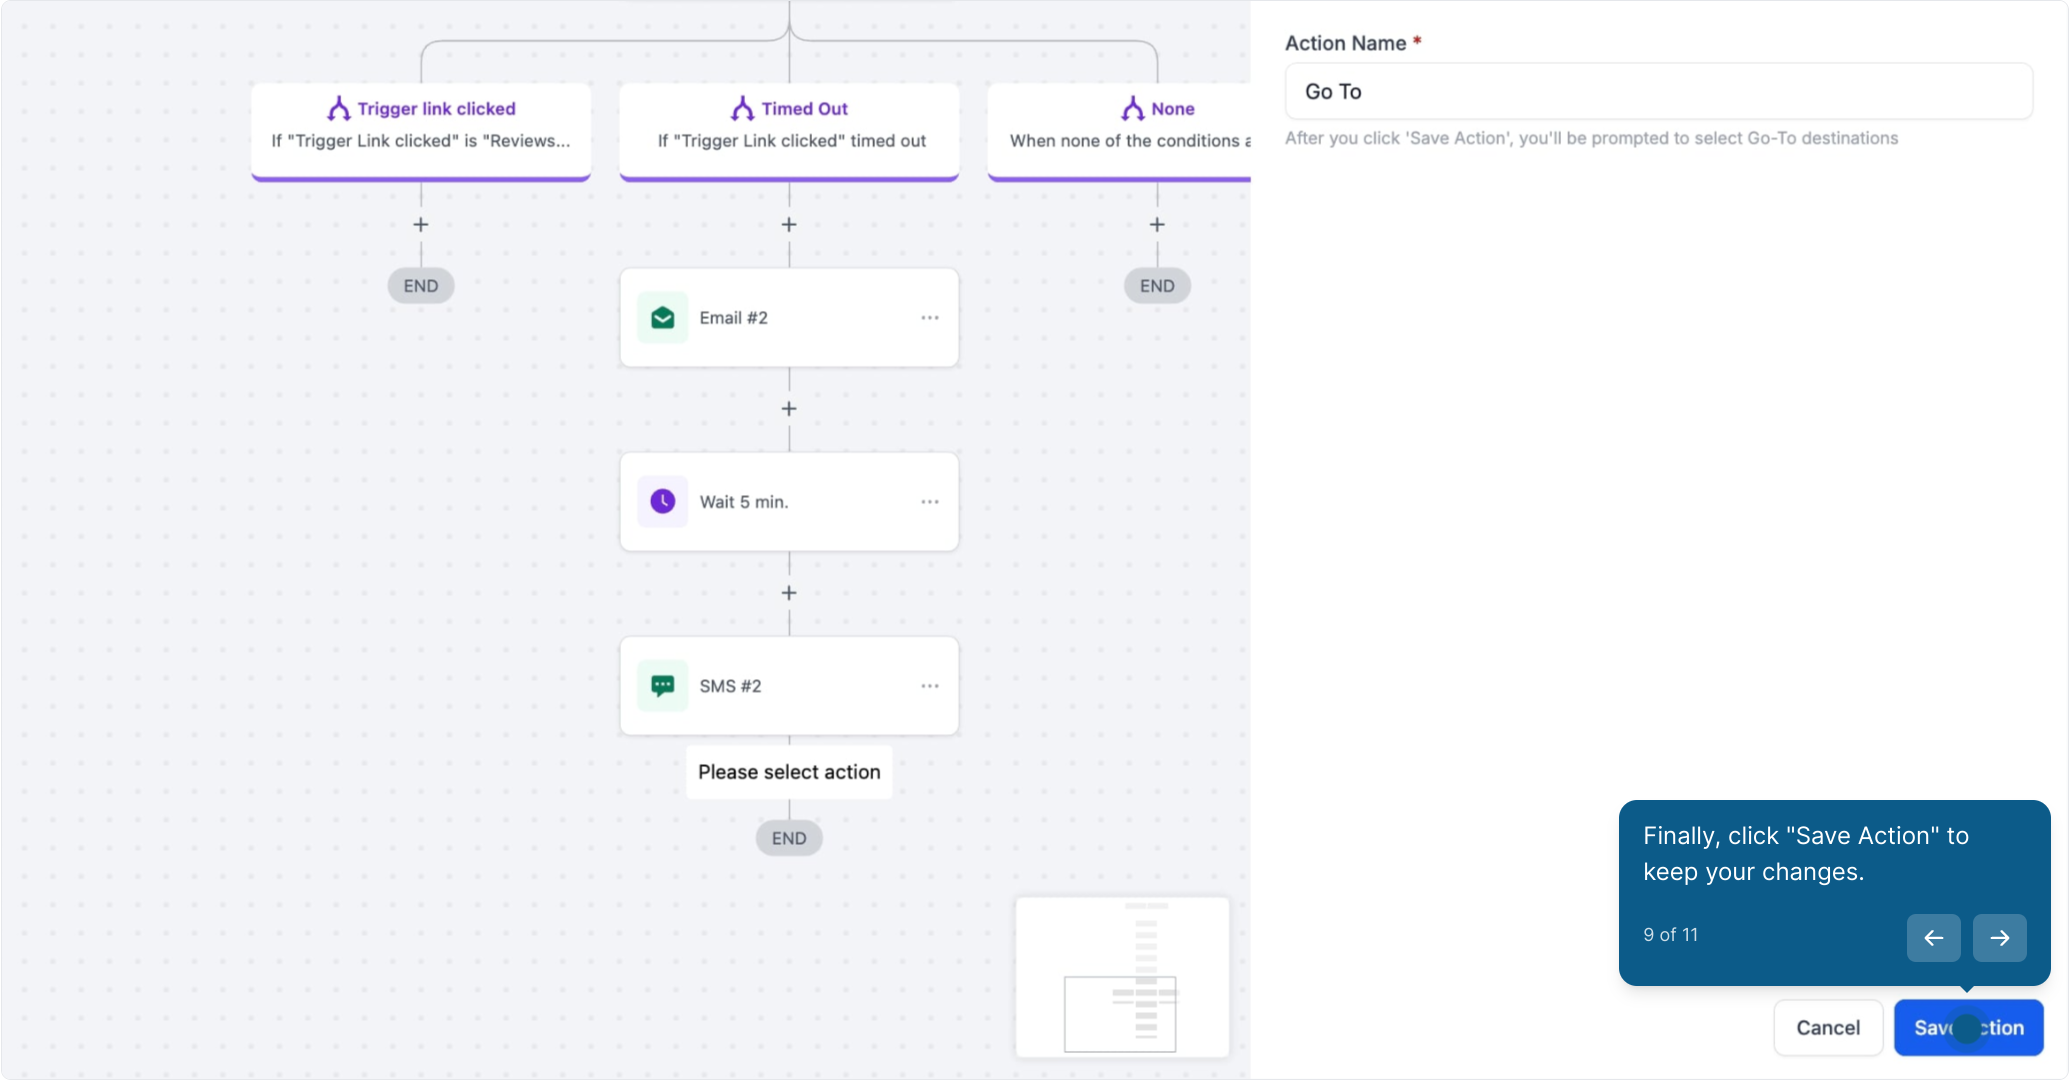
9. Finally, click "Save Action" to keep your changes.
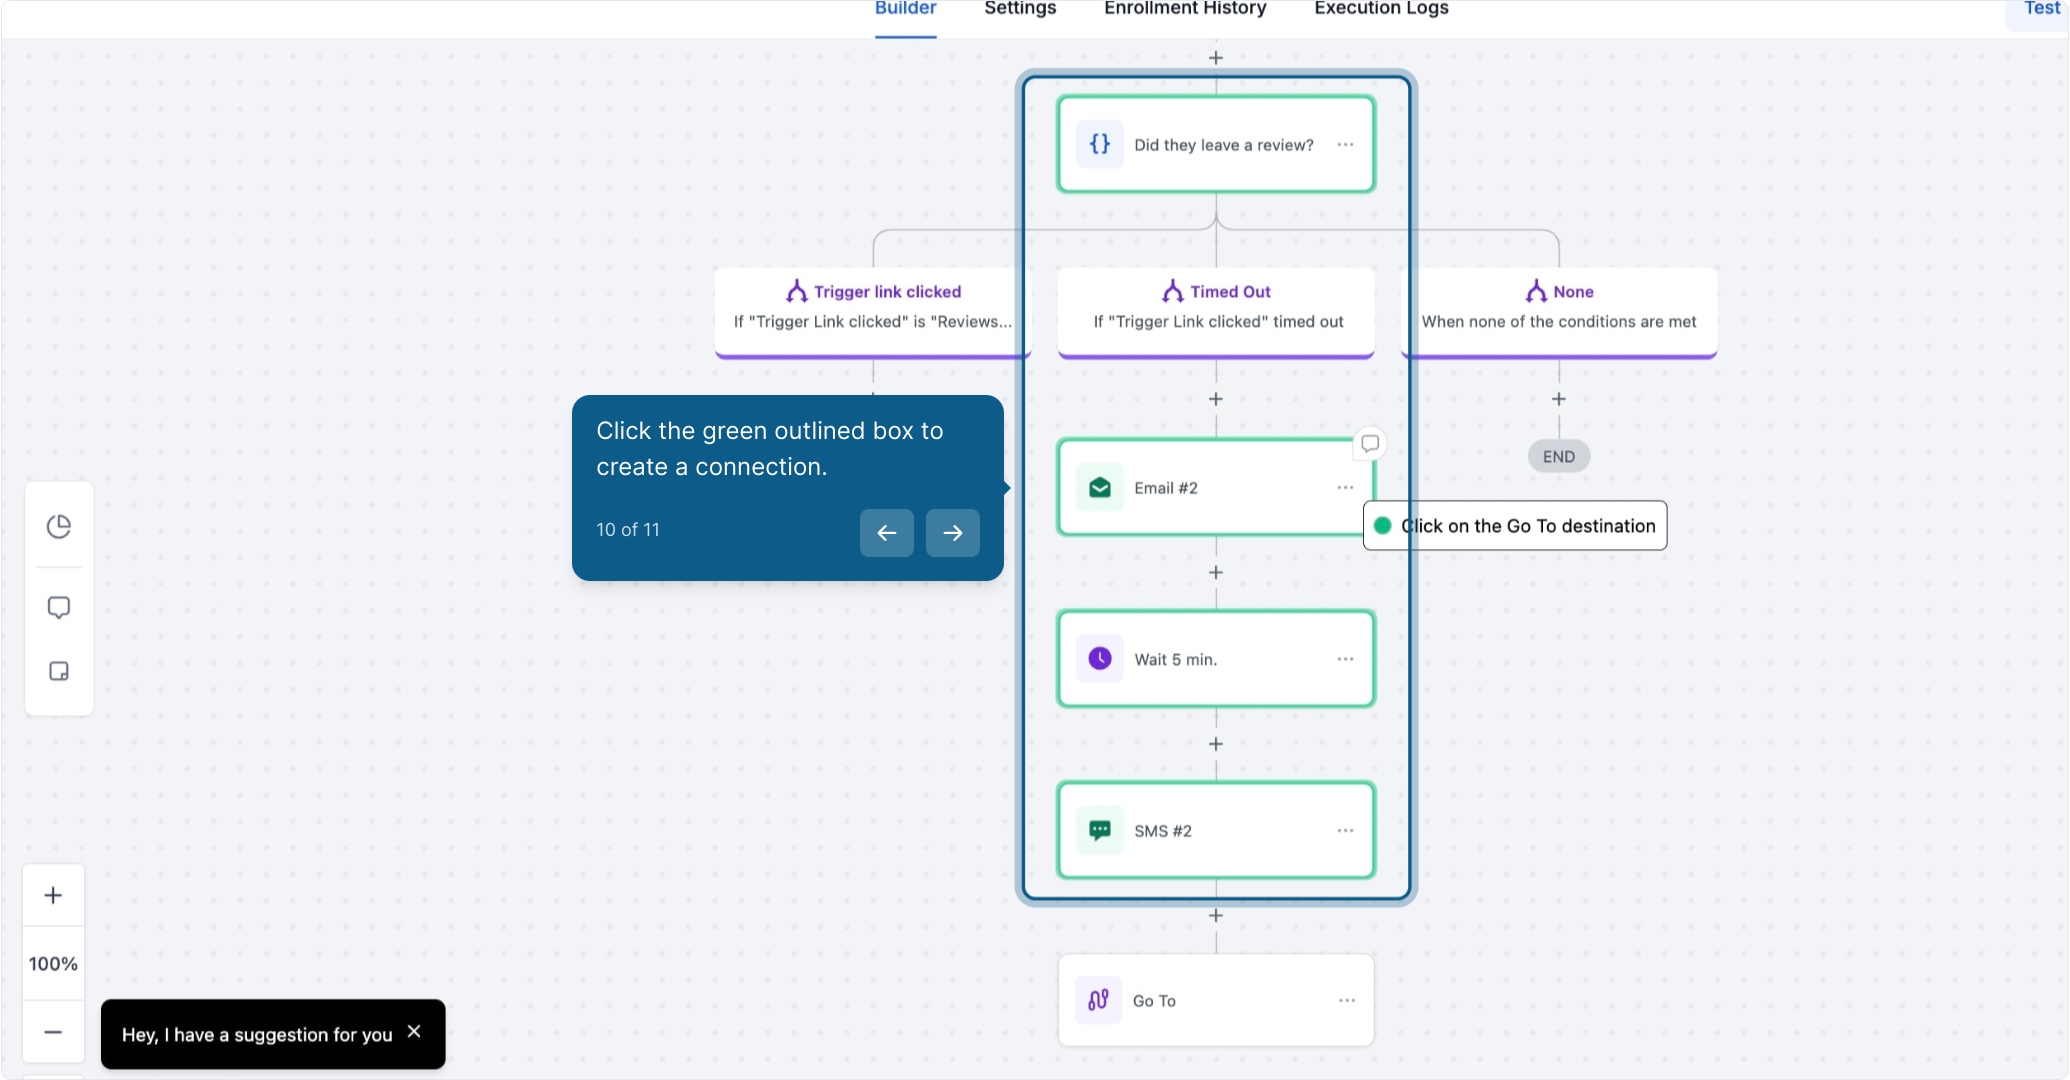
10. Click the green outlined box to create a connection.
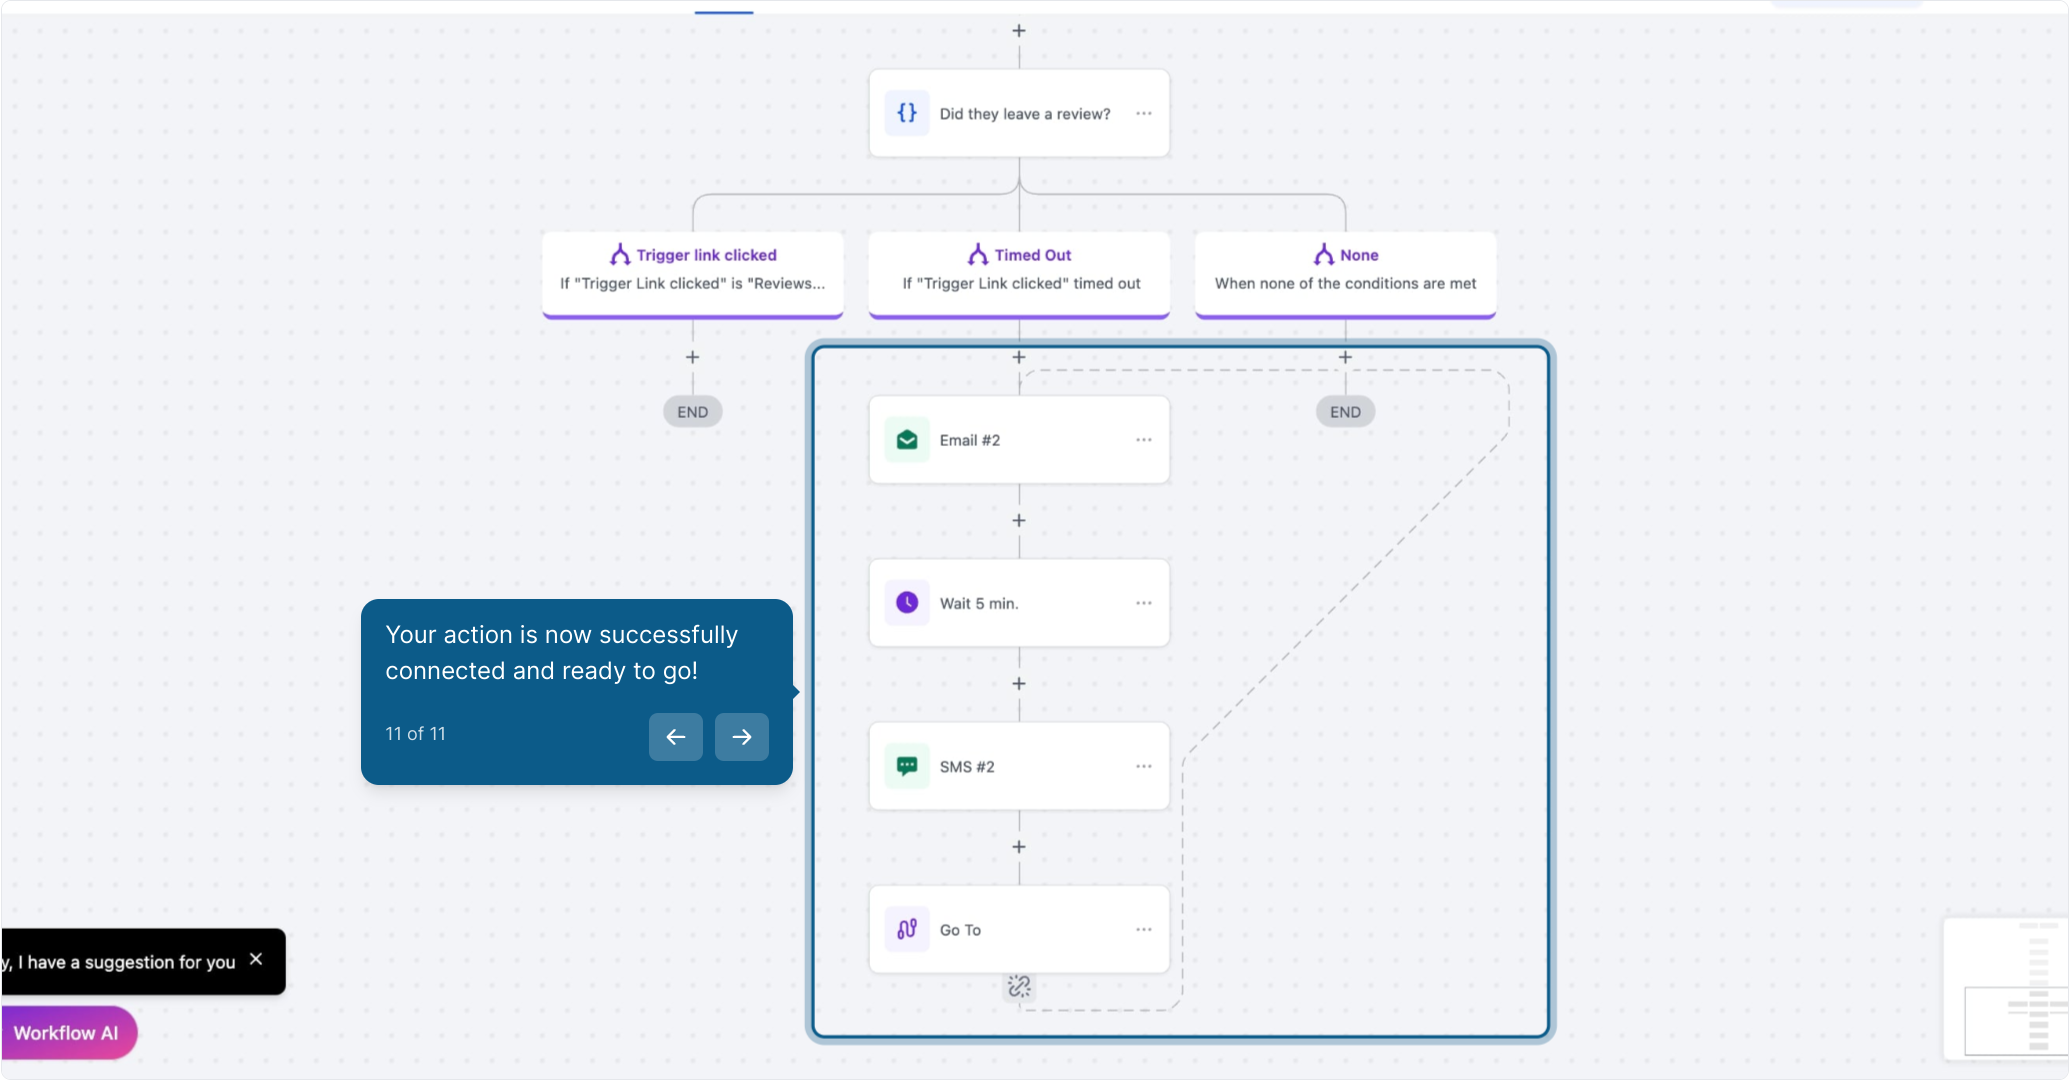
11. Your action is now successfully connected and ready to go!