2. Click on "Marketing" to start your journey.

3. Next, select "Email Marketing"

4. Navigate to the 'Affiliate Manager' section.

5. Click on "Dashboard"

6. Hit the "Add" button to create something new.

7. Select "Create Campaign" to begin

8. After filling in details, click "Next" for commissions setup.

9. Under the commission tab, click on "Commission Length."

10. Choose to "Set Commission Payment Duration" as per your preference.

11. Remember, commissions continue until the customer cancels.

12. Opt for "By Count" to limit the number of payments.
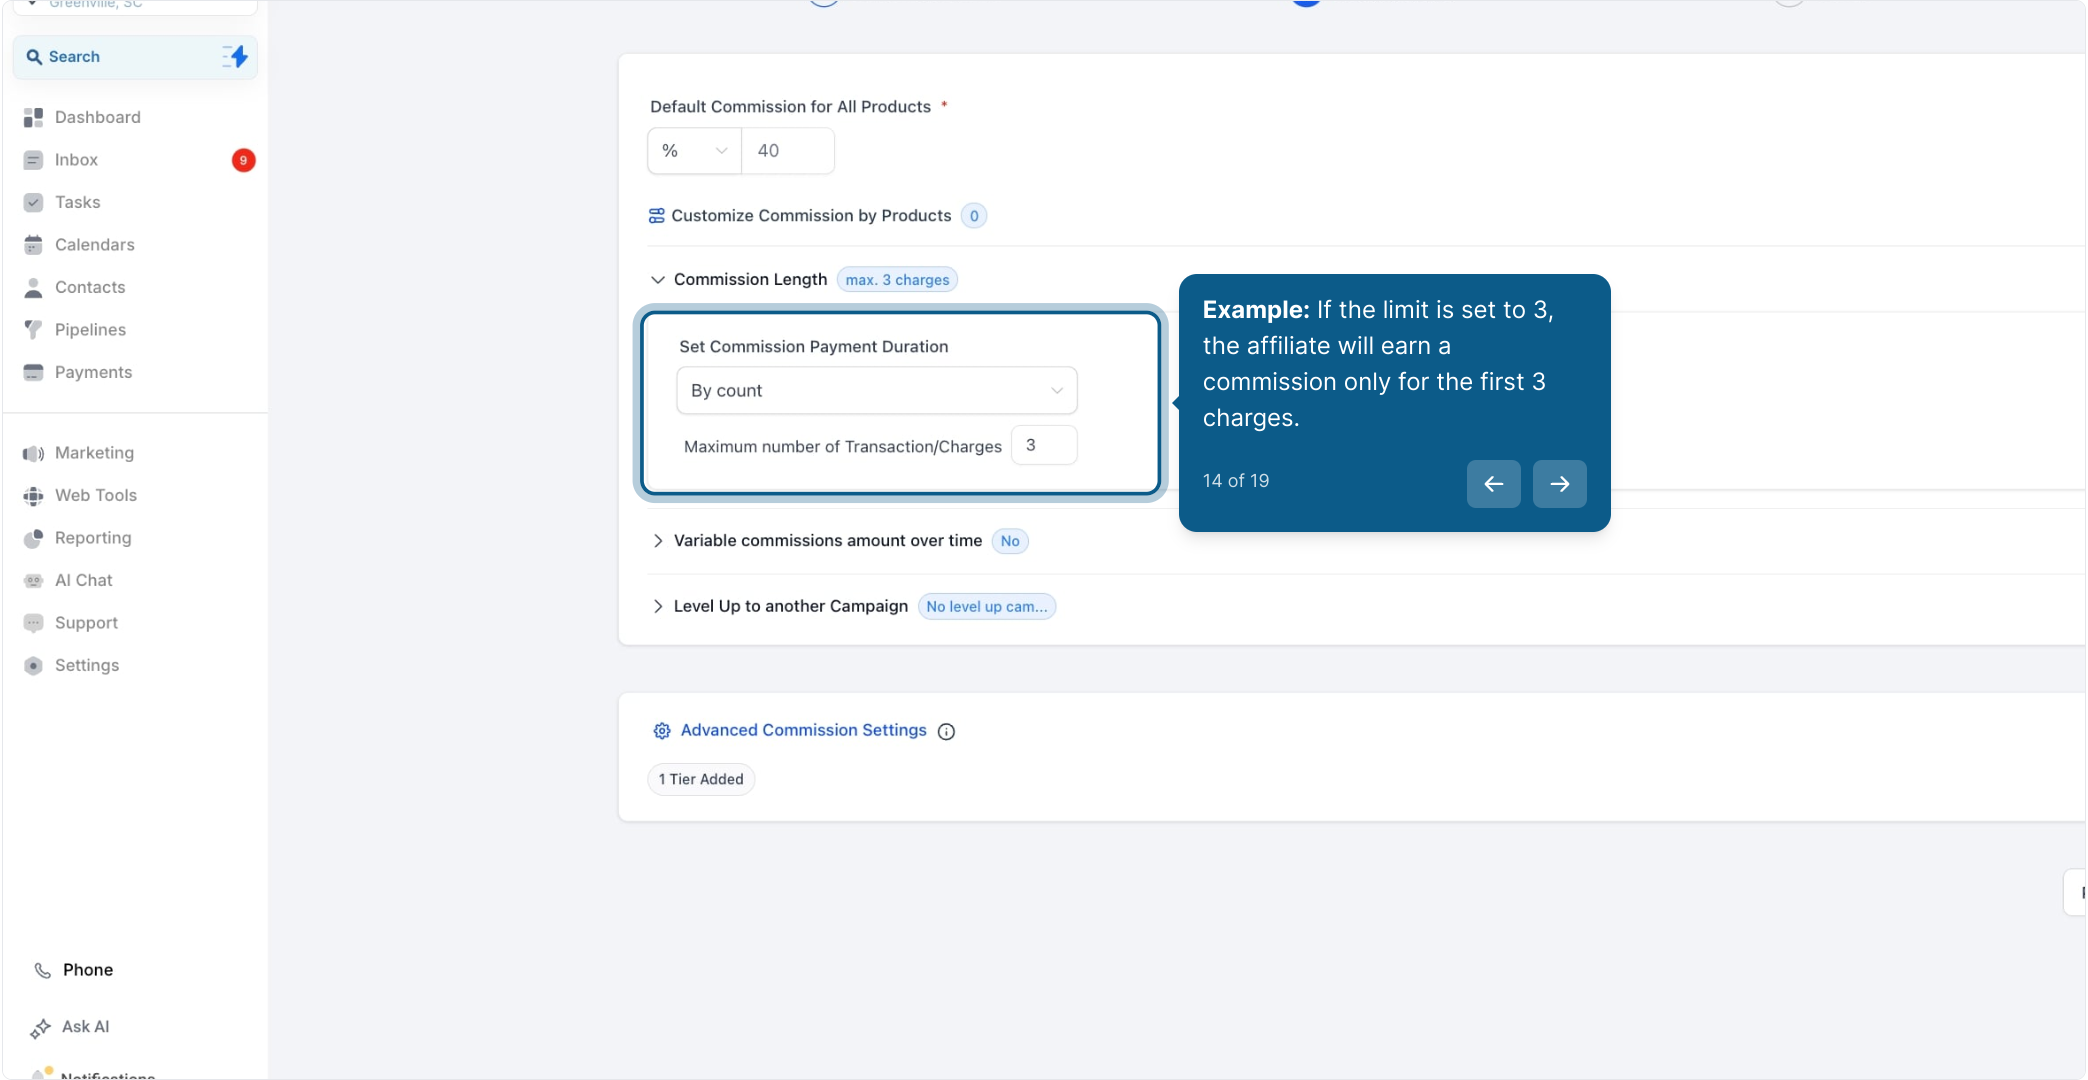
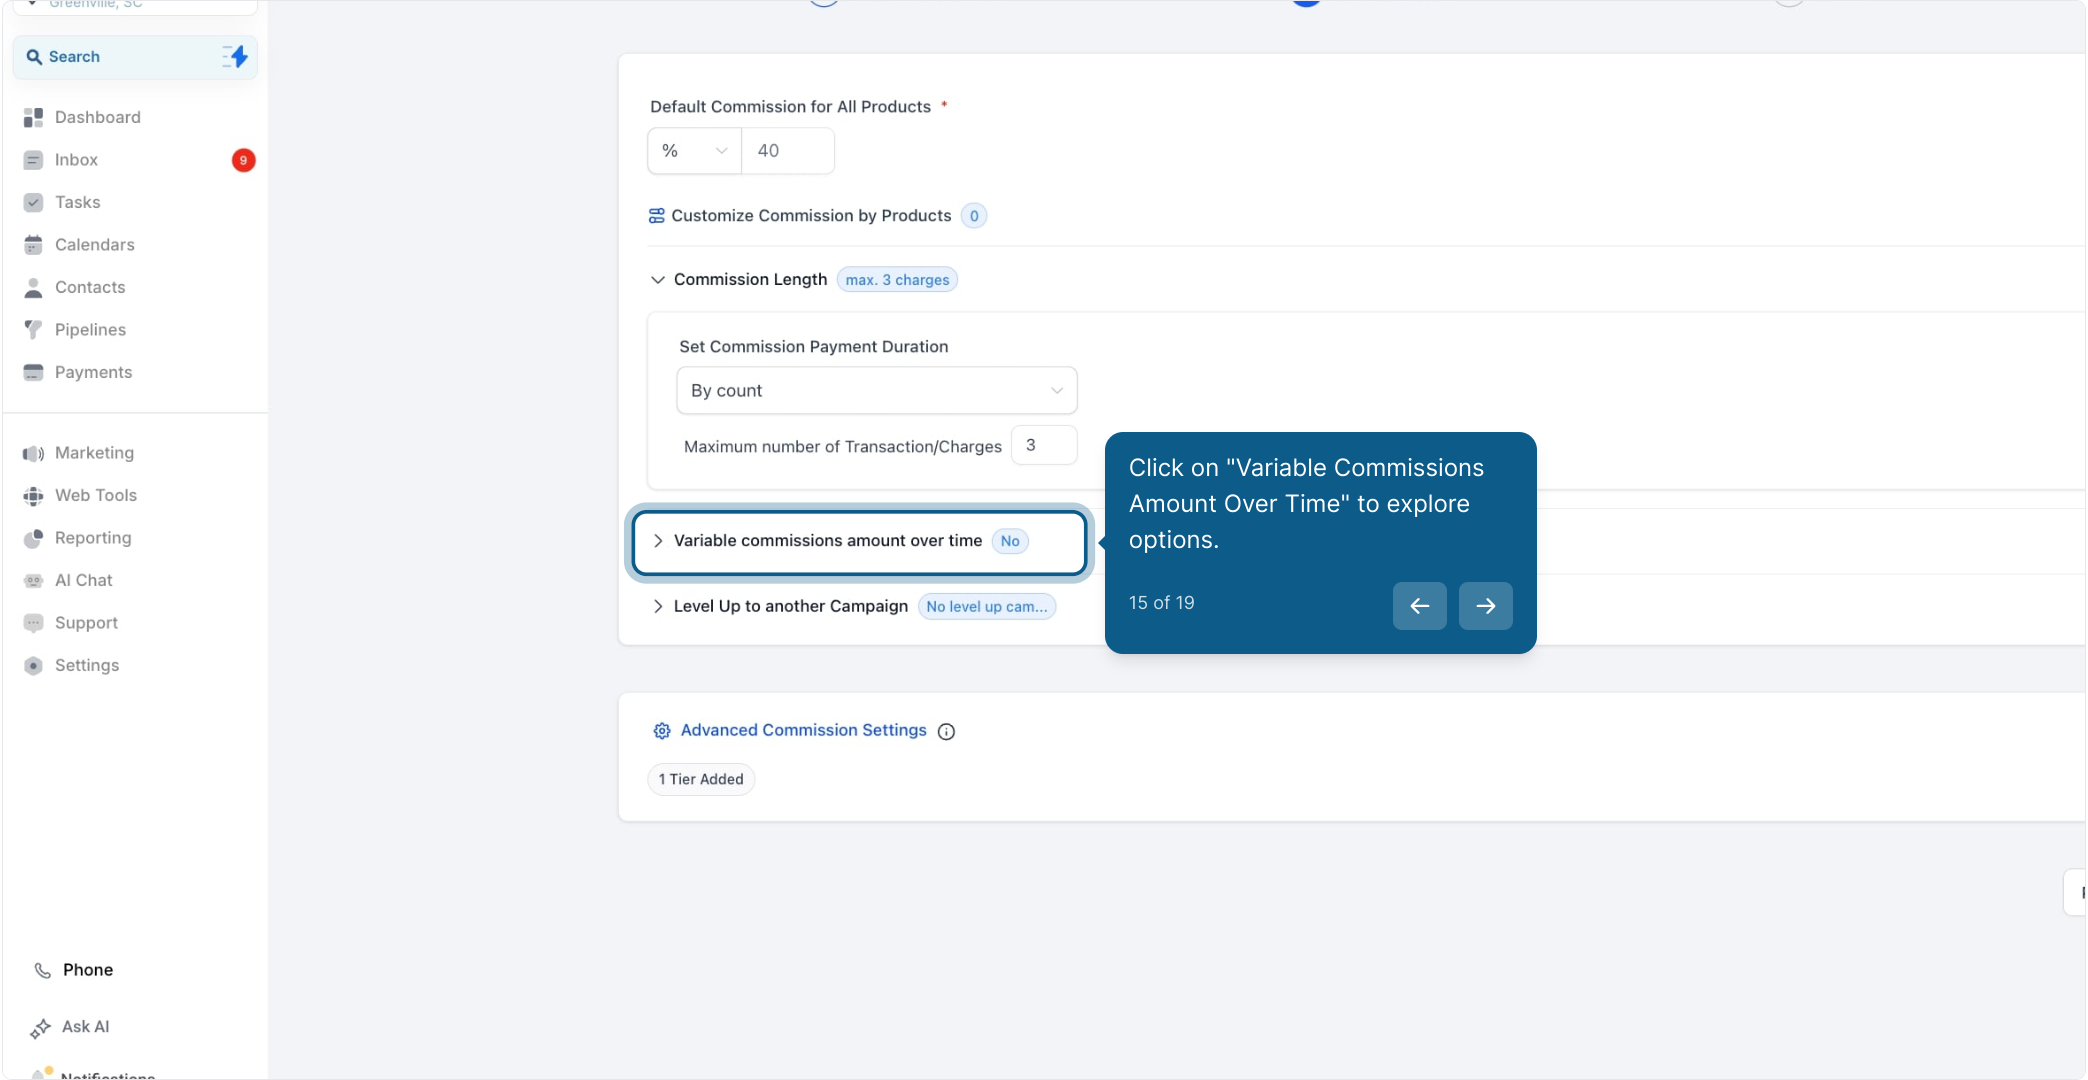
Note: The limit applies to charges, not time intervals. Whether the subscription is monthly or yearly, commissions are based on the number of successful charges.

13. Set the maximum number of transactions allowed for commissions.

14. Example: If the limit is set to 3, the affiliate will earn a commission only for the first 3 charges.

15. Click on "Variable Commissions Amount Over Time" to explore options.

16. Select "Set Variable Commission for an Affiliate" for tailored rates.

17. Choose "Two Levels" to specify different commission rates based on charges.

18. Example: "For the first 3[You can configure this number] charges, the commission is 33%[You can configure this number]; and 23%[This is the default commission] after.

19. Finally, save and publish your campaign with updated commission settings.

Please Note:
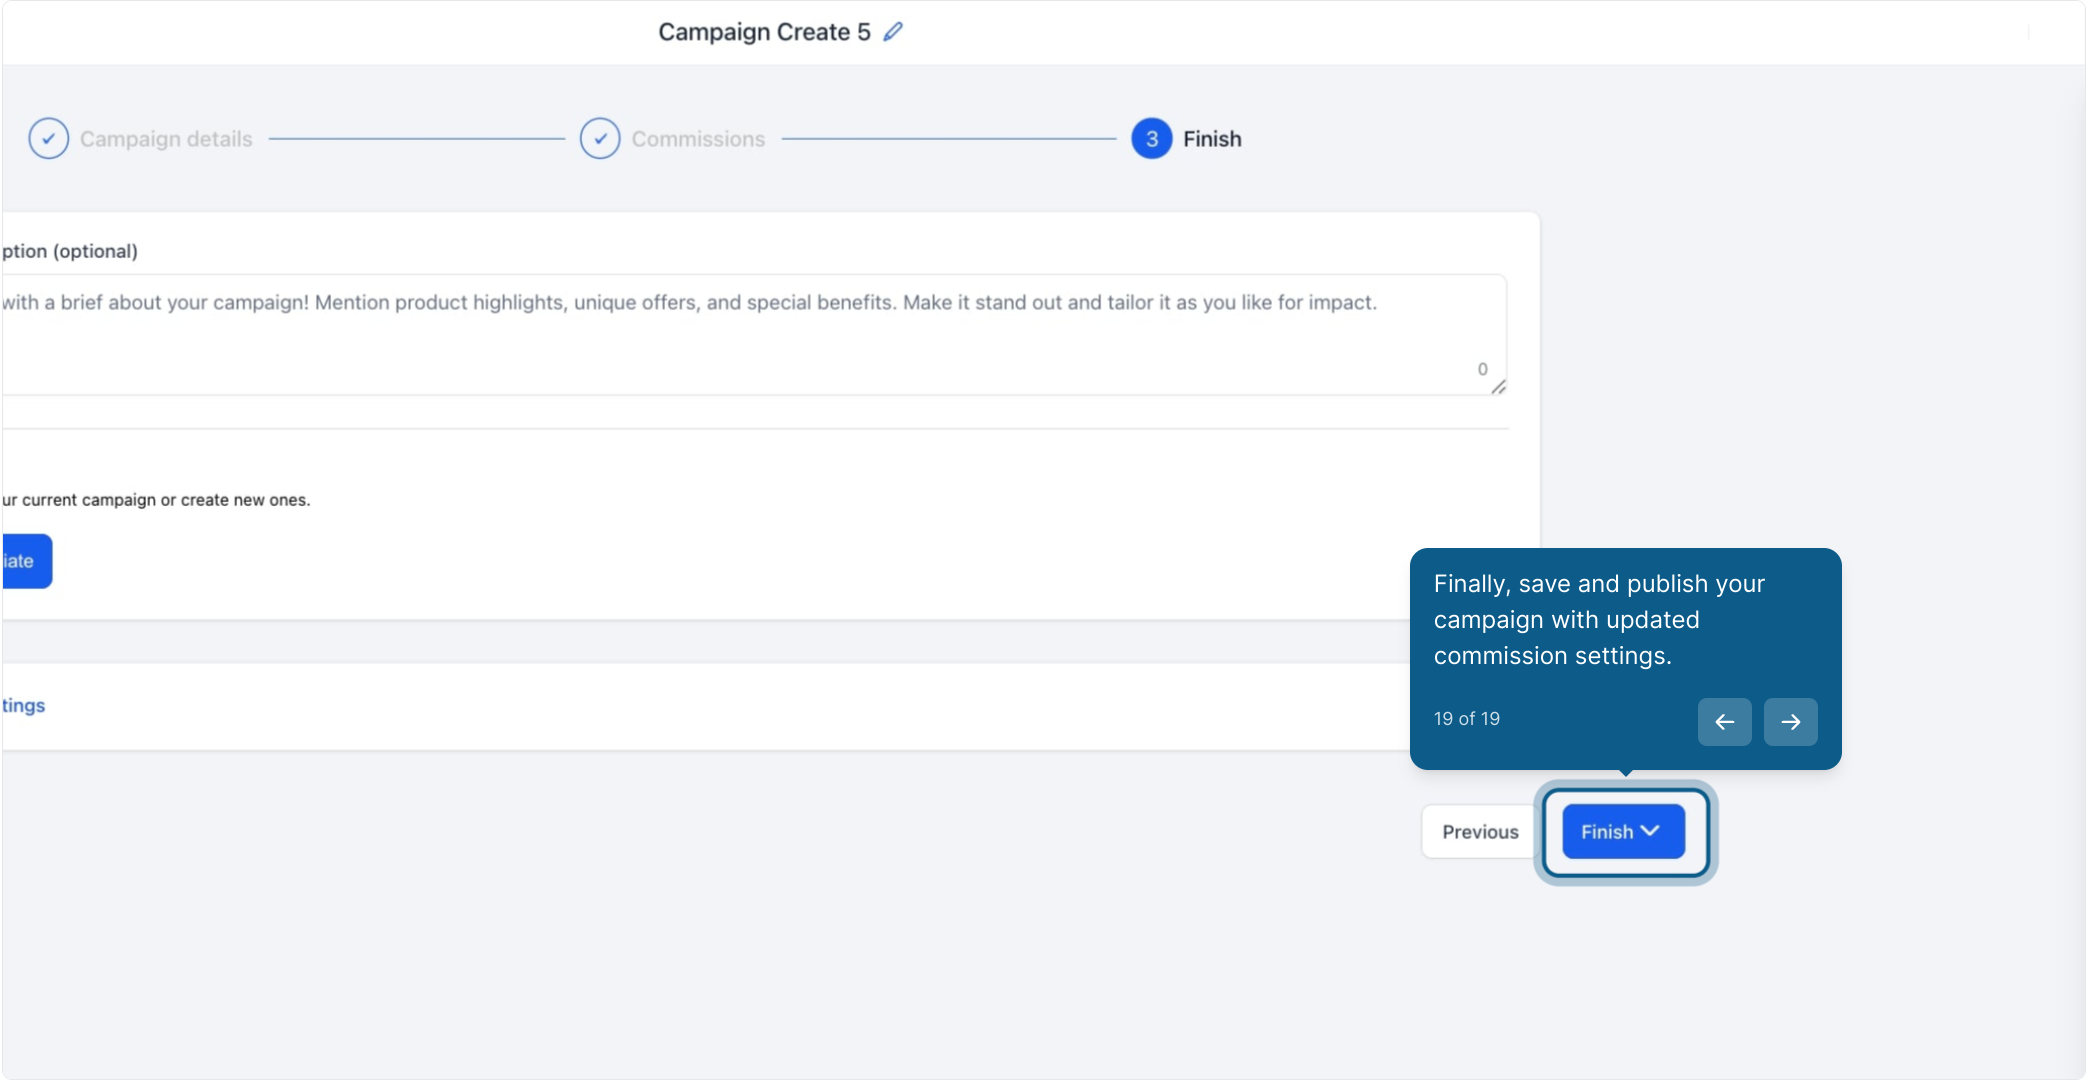
Commission Priority Order
1. Product-Based Commissions
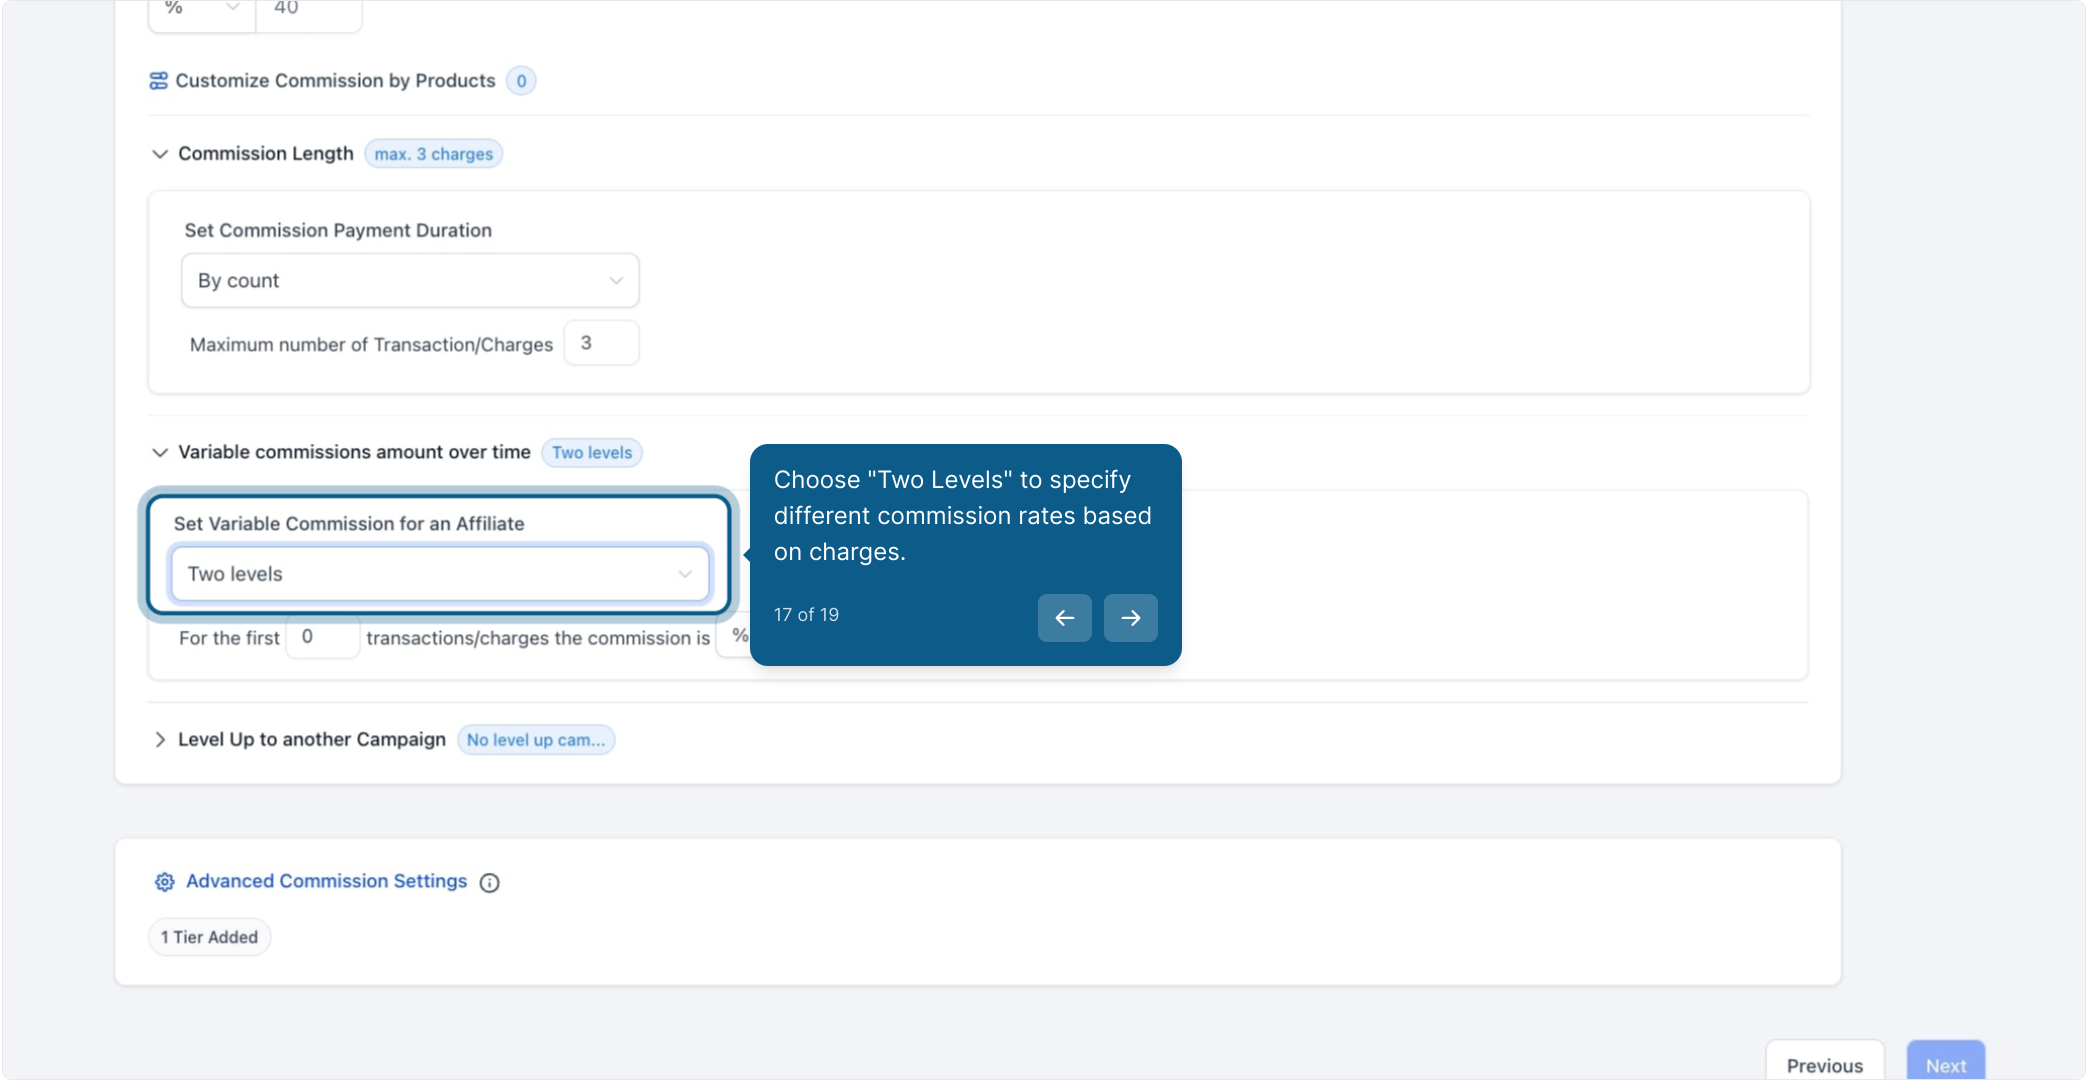
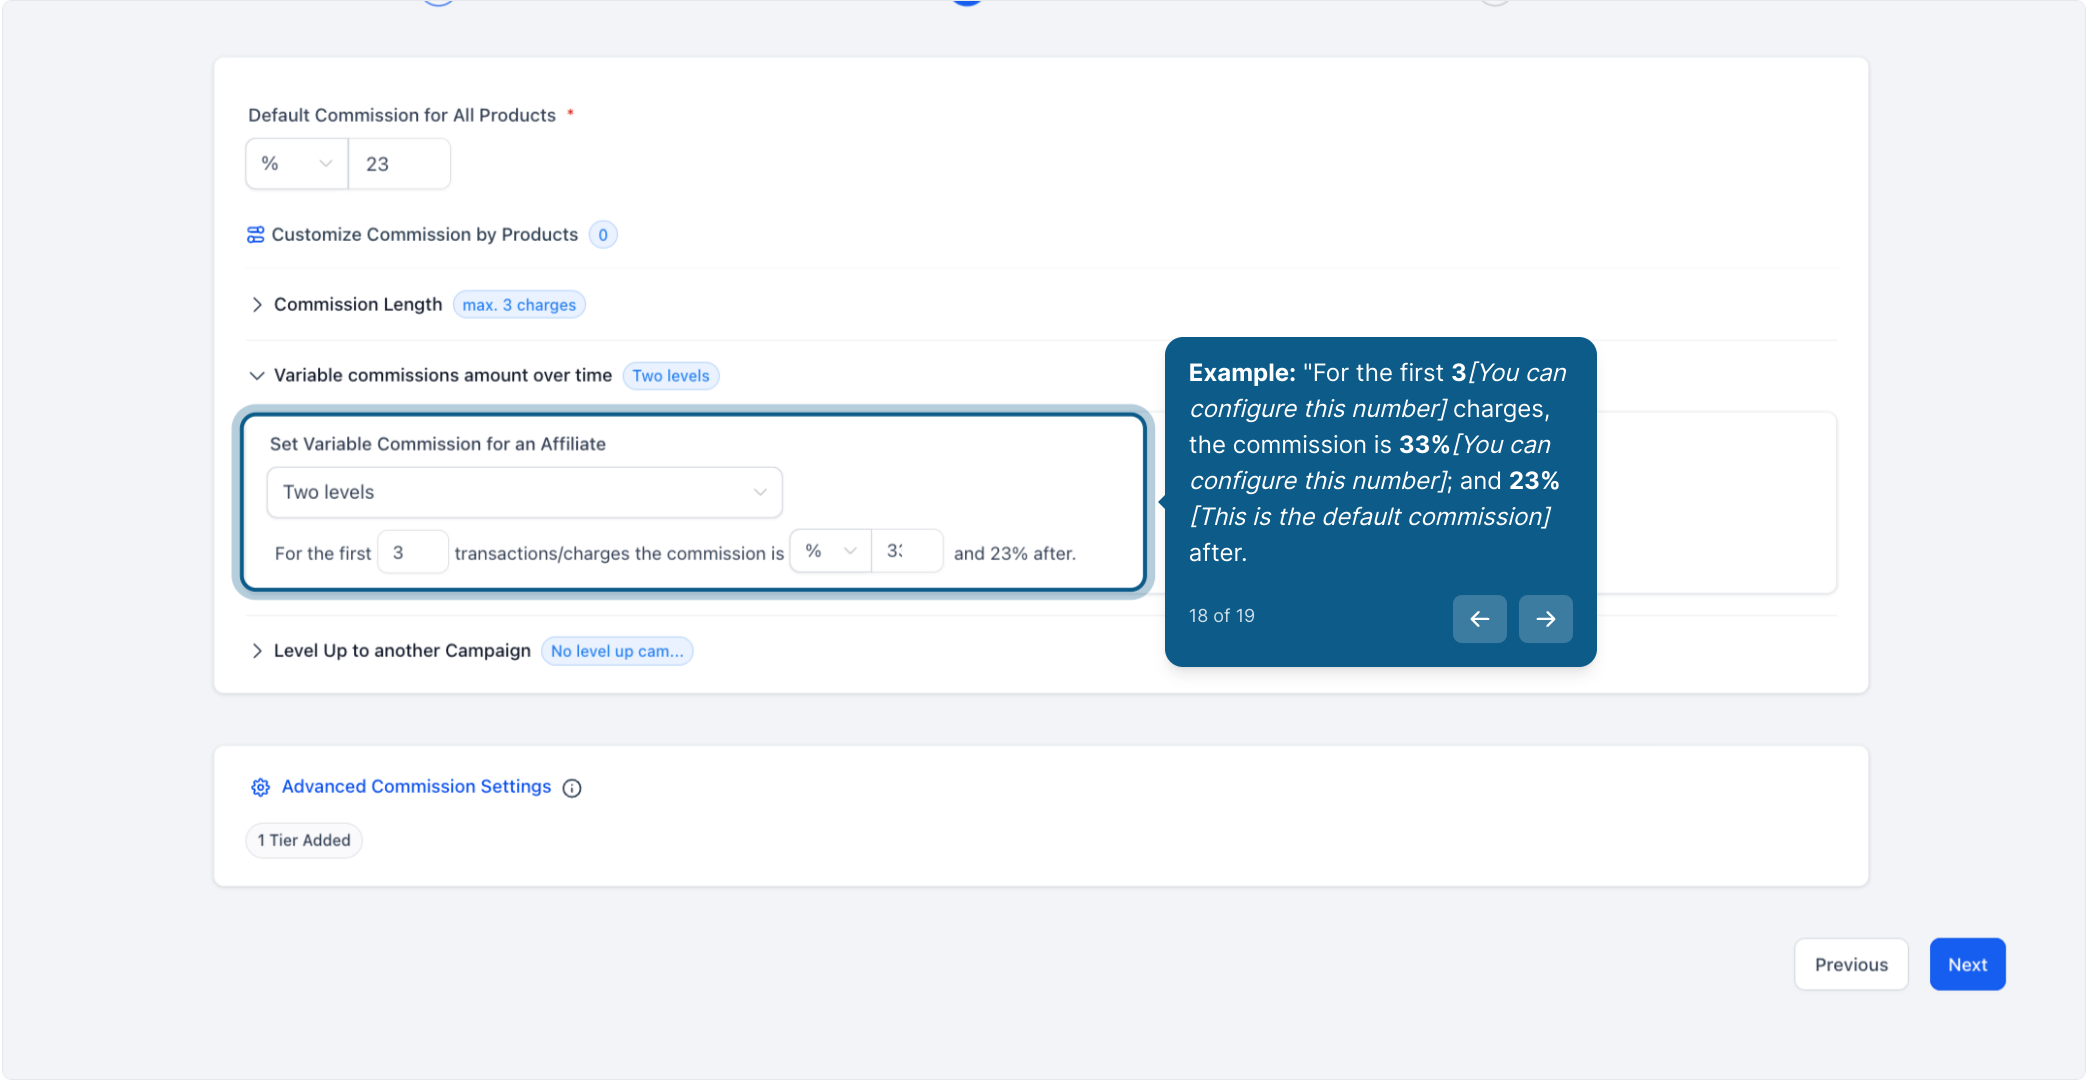
2. Variable Commissions
3. Default Commissions
This ensures that specific commission settings take precedence over general ones.